Writing your docs
Running Mkdocs
When you installed mkdocs, browse to the folder containing the file mkdocs.yml. Then use mkdocs serve to start the local server.
Mkdocs will start to generate your website and hopefully your site should be accessible on 127.0.0.1:8000 after a while.
Error
If the command didn’t work for you, try this :
python -m mkdocs serve
If this one does the job, pip installed mkdocs in a folder which isn’t in your path.
Consider adding %appdata%/Python/Python39/Scripts to your path. The previous command should work.
If the documentation is too long the build. You can alternatively use this command to increase performance :
mkdocs serve --dirtyreload
Publish your work
When your docs is updated, and you’re ready to post, use git add --all to add your changes to the next commit. A commit is basically a package containing all the changes you want to save. This is very practical because each commit as a name, and you can easily restore lost changes or track when a feature was added.
To create a commit containing all the changes you added type :
git commit -m "Your commit message"
Note : I personally use the commit convention from here to name my commits.
When you’re ready to send your changes (and sure of what you’re doing)
Type git push to send everything to your GitLab page. The pipeline will be executed and, the page should be updated after a few moments !
Customize you website
Now you can begin your documentation. But first let’s pimp the default look of Mkdocs !
At the root of the project you may find the mkdocs.yml file.
This is the config file of your website. This is the only file needed to pimp your website. But as mkdocs is a website generator, you can also modify the HTML and the CSS of your website. Actually, you will write your documentation into .md files which are markdown files. Markdown is a language which is both easy to read for human and easy to translate into HTML. But you can type HTML directly into .md files, and it will be rendered as final HTML code.
First, change the name of the website by changing the site_name value. Then do the same with site_description and site_author.
You can replace the repo_url value with the URL of your website repository URL.
One of the very important section is the nav variable. This is basically the organization of your website. You’ll be able the creation tabs, chapter, subsection and so on…
Here is how I customize my navigation structure :
nav:
    - Home : 'index.md'
    - About:
      - 'about/index.md'
      - 'about/agreement.md'
    - Project:
      - 'projects/final-project.md'
    - Assignements:
      - 'assignments/1a_ideas.md'
      - 'Project management' :
        - 'assignments/2_intro.md'
        - 'assignments/2a_git-win.md'
        - 'assignments/2b_git-wsl.md'
      - 'Computer-aided design':
        - 'assignments/3_intro.md'
        - 'assignments/3a_freecad.md'
        - 'assignments/3b_openscad.md'
        - 'assignments/3c_fusion.md'
        - 'assignments/3d_inkskape.md'
      - 'Computer-controlled cutting' :
        - 'assignments/4_intro.md'
        - 'assignments/4a_vinyl.md'
        - 'assignments/4b_laser.md'
      - 'assignments/5_pcb.md'
      - '3D Scanning and printing' :
        - "Introduction" : 'assignments/6_intro.md'
        - 'assignments/6a_fdm.md'
        - 'assignments/6b_sla.md'
        - 'assignments/6c_scan.md'
      - 'assignments/7_pcb_design.md'
      - 'assignments/8_cnc.md'
      - 'assignments/9_attiny.md'
      - 'assignments/10_mech.md'
      - 'assignments/11_input.md'
      - 'assignments/12_molding.md'
      - 'assignments/13_output.md'
      - 'assignments/14_networking.md'
      - 'assignments/15_gui.md'
      - 'assignments/16_wild.md'
      - 'assignments/17_implications.md'
      - 'assignments/18_licence.md'
      - 'assignments/19_project.md'
I have four main tabs :
- Home
- About
- Project
- Assignment
Each of those tabs contain multiple section linked to .md files. Feel free to adapt this structure to your needs.
After configuring the nav, you can customize your social media page. They will appear at the bottom of your website. Personally, I’m only using LinkedIn and Twitter, so I removed any other media.
Finally, the Theme is probably the most interesting part for customization. I spent a lot of time figuring out what match the best together. I was really happy until I saw the work of Chloe from Sorbone Fablab. Please check out how she did with customization. I think this is the right way to do it !
Anyway, I began by changing the font. Mkdocs embed all google fonts by default. You can see the whole list by clicking on the button below.
I personally love the Poppins font.
So I switched the font text value to Poppins. Then I would like to have a darkmode for my website. And fortunately, Mkdocs can handle darkmode too ! Please check the material mkdocs documentation to fully understand how it works. From my point of view, It uses two set of color. One for dark mode and the other for light mode. When you activate this option in the theme, it will automatically show a button on the top bar to switch between darkmode and light mode.
Additionally, you can synchronize the mode to the default OS mode.
For my light palette I used blue as my primary color and pink as my secondary color. For dark mode I just replaced blue by Cyan to create a smooth transition without changing things too much.
Finally, feel free to change the logo of the page. Mkdocs embed fontawesome and material icon. So you can use a ton of icon according to your needs. I used a book as my website logo but of course chose something corresponding to your needs.
Here is my whole Theme settings :
theme:
  name: material
  palette:
    - scheme: default
      toggle:
        icon: material/lightbulb
        name: Switch to dark mode
      primary: blue
      accent: pink
    - scheme: slate
      toggle:
        icon: material/lightbulb-outline
        name: Switch to light mode
      primary: cyan
      accent: pink
  font:
    # See available fonts at https://fonts.google.com/
    text: "Poppins"
    code: Ubuntu Mono
  icon:
    logo: material/book
    repo: fontawesome/brands/gitlab
  favicon: images/favicon.svg
  features:
    - navigation.tabs
    - navigation.instant
    - search.suggest
Mkdocs is highly, I probably forgot to explain little changes but the material mkdocs documentation contain everything you can do with the site generator.
Note that lots of customization need to install additionnal package. Most of the time you just add an entry to the markdown_extensions section of the config file. But sometimes, you need to install package using pip.
Documentation tools
In this section I would like to introduce some of the tools I’m using for my documentation.
Screen to GIF
First, you may wonder how I made animated GIF like the ones above. It is really easy thanks to ScreenToGif.
ScreenToGif is only available for Windows. This tiny software allows you to make screen capture, but it also contains a white board.
The white board can be used to make this kind of animation :

One very important things with Gif is the fact that they are very light compared to video. ScreenToGif allows you to compress the capture, edit the clip, remove frame… In other words perfect for Fabacademy documentation.
Screen to JPG
To make screen capture, I’m only using the capture tools of Windows 11. Just type capture in the search bar and Screen capture will be prompted. It is very useful because you can take a delayed capture. For instance, you may need to capture a hover menu (A menu which only appear when your mouse is above).
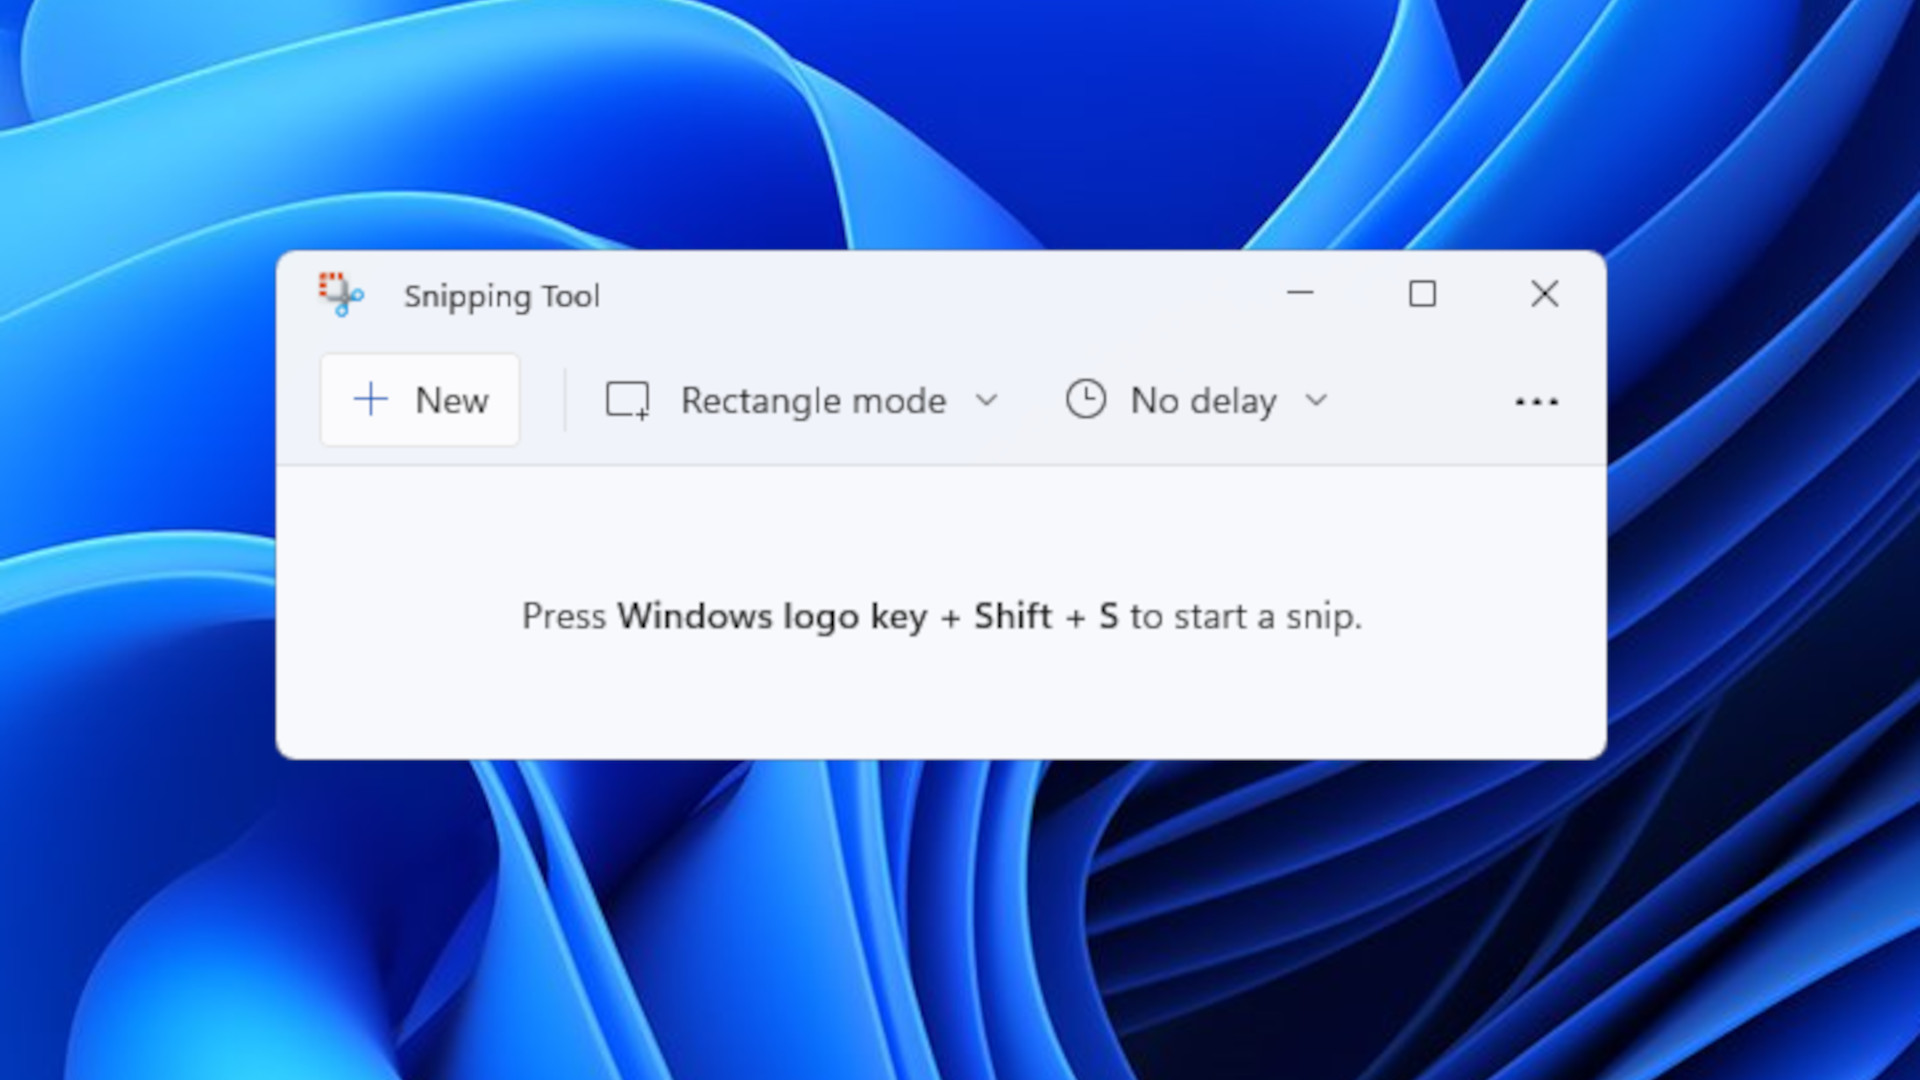
In English this tool is named Snipping tool.
Visual Studio code
I’m using Visual Studio Code to write my documentation. Visual Studio Code is a modular IDE (Integrated Development environment)
This software is modular because you can browse and install any community extension very quickly.
Big pictures
A lot of people are using ImageMagick to deal with pictures. ImageMagick is a tiny software used to create, edit, compose or convert digital images. It is very convenient since it is compatible with a very large variety of formats (over 200) including PNG, JPEG, GIF… You can download the Windows version I’m using here
In windows, you may use the graphical version of Imagemagick. But the real force behind imagemagick is when you use it with your terminal. You can basically create a script for compressing a picture.
But I was planning to automate the compression using gitlab CI. So I created this repository. After a while I realized that even it seems possible to automate completely the compression, I can’t upload large file to Gitlab without hiting the size limit. So I need to compress data before push to gitlab. Anyway I modify my script to compress every image present in the uncompressed folder into the compressed folder. It works like a charm !
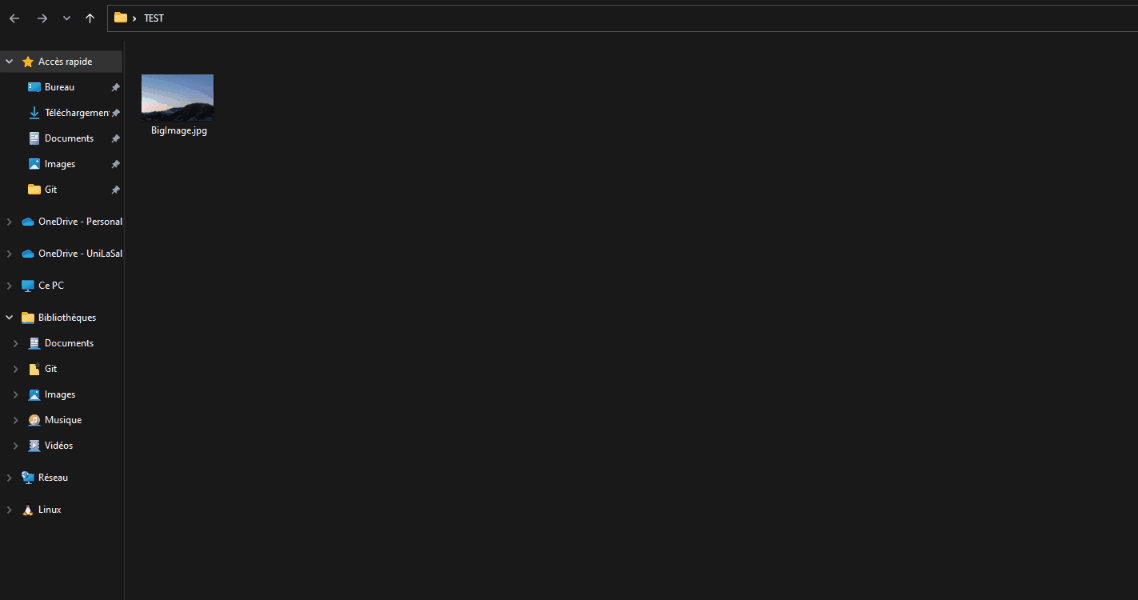
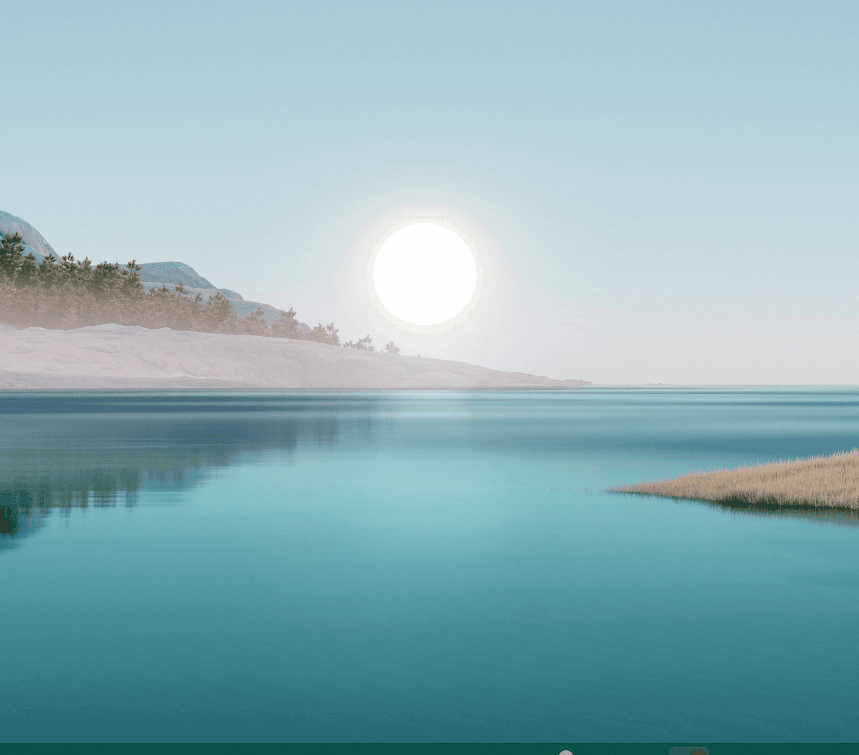
And I found a little trick on Windows to resize any image. Instead of opening a software (such as Photos on Windows) I simply open the pictures, use the zoom to resize the pics, and then I use the sniping tool to save the resized image. Seems not beautiful, but it is very efficient during my documentation process.
Here is an example :