Module 06 -- 3D scanning and printing
Class
3D Printing
3D printing seems to be the hype of the moment; it looks as if we’re at the peak of inflated expectation on this technology. There is a tremendous activity around the concept and many actors trying to unveil the potential of additive technologies, but I believe that the day that you’ll print your own liver at home –in your freshly extruded home that still smells of the ink of the printer—and serve it on a plate for diner hasn’t quite come yet.
Some limitations make this technology appear a bit oversold by the media:
- precision (in general not as precise as subtractive technologies)
- speed ( it can take a very long time to produce a shape)
- constraint need to be taken into consideration depending on the technology used
Although there are many limitations, we should focus some of the very interesting aspects of 3D printing with the technology available today:
- cost effective for small series and prototyping
- reduce waste compared to subtractive technologies
- possibility to create lightweight structure compared to parts that are extruded or casted
- possibility to fabricate intricate parts (with embedded subparts etc…)
- ?
3D File Formats
- STL → describes a shape with a series of triangles..
- facets can be inside-out (explain here)
- the solid is not watertight and therefore cannot be recognized by 3D printer software (explain here)
- AMF → Additive Manufacturing File format
- GIF → an animated GIF can be used to describe a 3D object (in this case each “layer” of the animation represents a print layer.)
- Marching Cube → as I understand it it’s a 3D bitmap where pixels are replaced by cubes to account for the 3rd dimention.
with a shape described in STL, one must pay attention to:
To edit or fix a mesh you can (or should) use Meshlab. It’s going to take a few weeks for the concept of mesh editing through a 3dr party software to sink in until then sorry for remaining vague and succinct…
3D Scanning
- X-ray thermography → the ONLY great way to perform a 3D scan, it’s got one downside though: the machine costs north of $1,000,000.
- Confocal →
- Triangulation → using a laser
- Photogrammetry → take a bunch of pictures from different angles and software will make it 3D. (i.e. 123D catch)
- Structured Light→Triangulation based on parallax offset analysis.
- Time of flight → ???
- Probe → mapping an object point by point with a physical probe (something like a geometer for objects)
In Class Tutorial
In FabLab Barcelona, there are four 3D printers available and 3 different technolgies:
- FDM (Fused Deposition Modeling) → [ 2 x Makerbots ]
- Binder Jet Printer → Z corporation
- Photopolymerization → ???
Makerbots
FDM (Fused Deposition Modeling), melts a plastic filament (ABS or PLA) at a temperature typically around 200ºC to 250ºC, and extrudes it through the head to deposit on object being built layer by layer.
Z corp
Z Corp. 3D printers use standard inkjet printing technology to create parts layer-by-layer by depositing a liquid binder onto thin layers of powder. Instead of feeding paper under the print heads like a 2D printer, a 3D printer moves the print heads over a bed of powder upon which it prints the cross-sectional data sent from the ZPrint software.
The result has great finish but the objects obtained from that machine are quite fragile, and the process is extremely slow: the files have been sent to the RIP --there has to be a proper term for 3D print-- on monday around 20:00 (8 PM) and the finished product where to be ready according to the processor's estimation at about 3:00 AM (However, due to a processing error the process stoped during the night, and was sent again on wednesday morning ang we finaly got our 3D objects at 5 PM wednesday)
A bamboozling fact to me is that this 3-decade-old technology can actually print an object in millions of colors. This is simply done by using colored glue: In this case the four colors of the process are not CMYK, but CMYW that is Cyan, Magenta, Yellow and Transparent glue I suppose the result will not allow for very deep colors and high contrast, but I find this amazing.
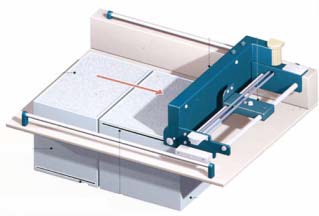
3D Systems - Projet 1500
This is presented to us as a SLA [Stereolithography], but looking up the 3D System website, they refer to FTI [Film Transfer Imaging] technology, which is a process by which a liquid polymer is hardened by projecting images slice-by-slice on a liquid to harden it.
The result is is much more precise than what we obtain with the FDM printer.
The Assignment
- * design and 3D print an object (small, few cm) that could not be made subtractively
- * 3D scan an object
- extra credit: print the object you scanned
- extra credit: make the scanner
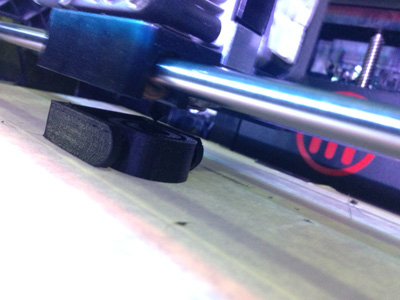
design and 3D print an object

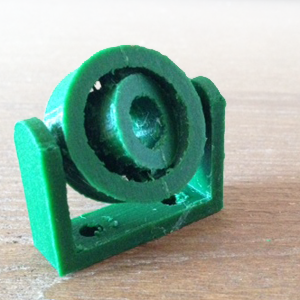
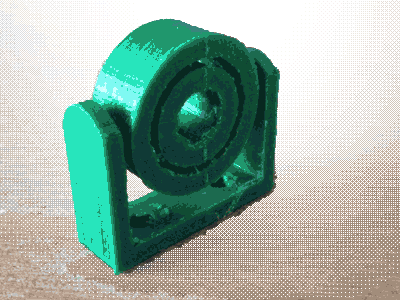
Trying to come up with a design that could not be made sustractively I opted for making an object with moving parts, which would be difficult to realize with subtractive machines. Here is the design:
I chose OpenSCAD [again...] to be able to play with parameters in case the initial result was disappointing...
disappointments

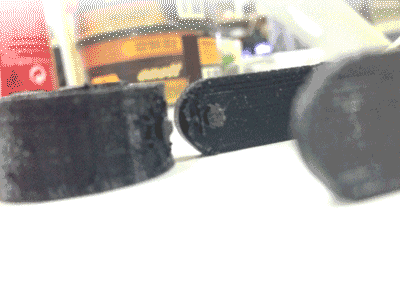
some kind of satisfaction...
Downloadables
[ download OpenSCAD file: "2axis_pencilHolder_v2.scad" ]
[ download STL file: "2axis_pencilHolder_v2_3.stl" ]
3D Scan
123D scan
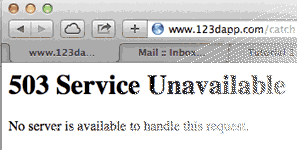
I did several attempt at using 123D scan, but I just couldn't get no satisfaction!
problems I encountered included:
- Server not available→ [503 ?]
- Strange result that I didn't deem acceptable...
- 503 again...→ ???
- I ended up loosing my scanned image because I did not share it right away and eventualy vanished.
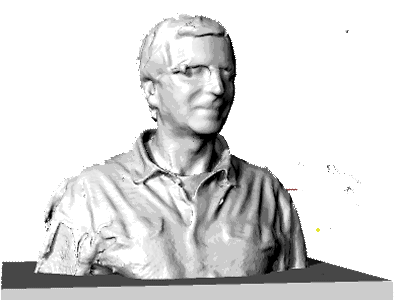
Kinnect
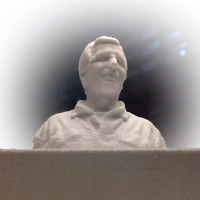
I tried both small and large object, and found it was much more difficult to have a good result with small object. Unlike most other experiences you should not do at home I suggest you first try it on a real human being...
I did several attempts at scanning a crumpled cup and could not get any exploitable result. I try to extract part of it to illustrate it here in a bit.
My self portrait gave better result, though there is "stardust" that needs to be cleaned, holes that need to be filled and hanging limbs that need to be cropped.

Printing Scanned object...
WIP: I sent myself to the "Z corp" and I'm still being printed...