This week's fun assignment was:
Group assignment:
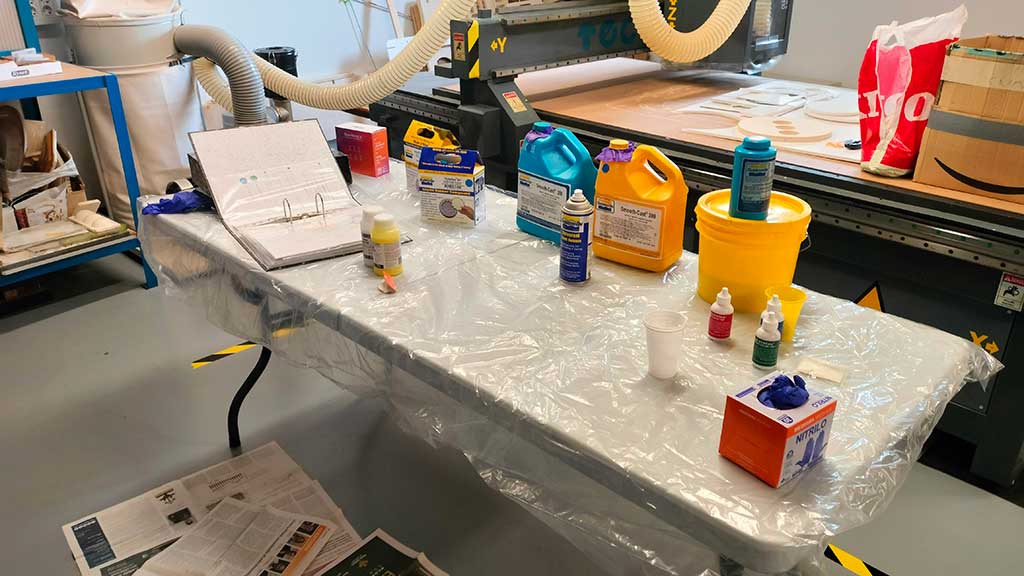
- Review the safety data sheets for each of your molding and casting materials
- Make and compare test casts with each of them
Individual assignment:
- Design a mold around the stock and tooling that you'll be using, mill it (rough cut + (at least) three-axis finish cut), and use it to cast parts.

Molding and casting
What I did this week
And so we got to the Moulding and Casting week. It's week 12 (actually 13) of the 18 week program and it really feels like we started the course only a couple of weeks ago!
The closest i've ever come to molding or casting something was using cookie molds or ice cube molds.
So let's get to it:
Group assignment
- Review the safety data sheet for each of your molding and casting materials
- Make and compare test casts with each of them
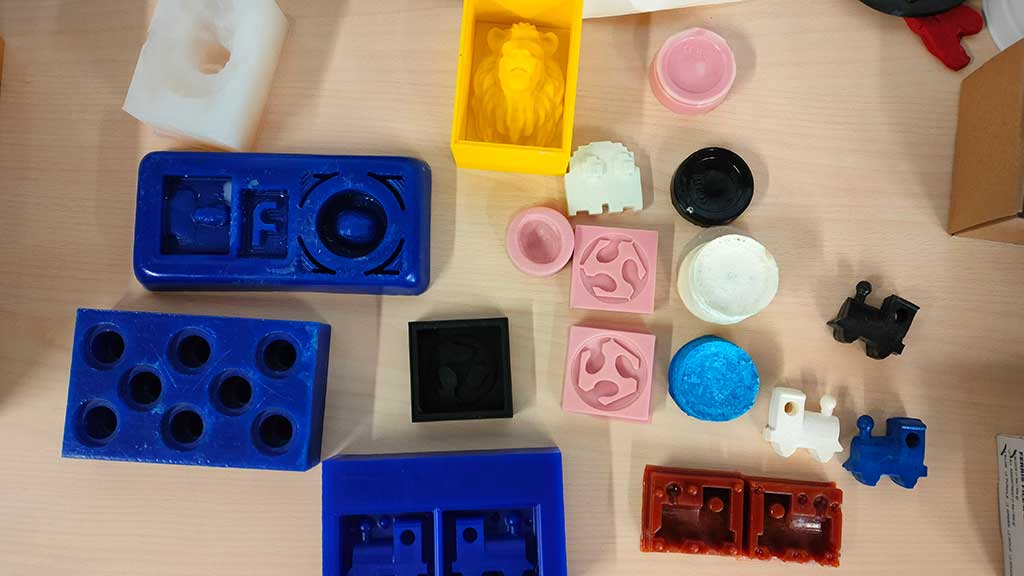
So I started by studying molds and casts with different materials from previous Fab Academy students.
In Fab Lab León there is a folder with a lot of Data Sheets of different molding and casting materials.
I also looked up the Data sheets online and the links are in the links sections.
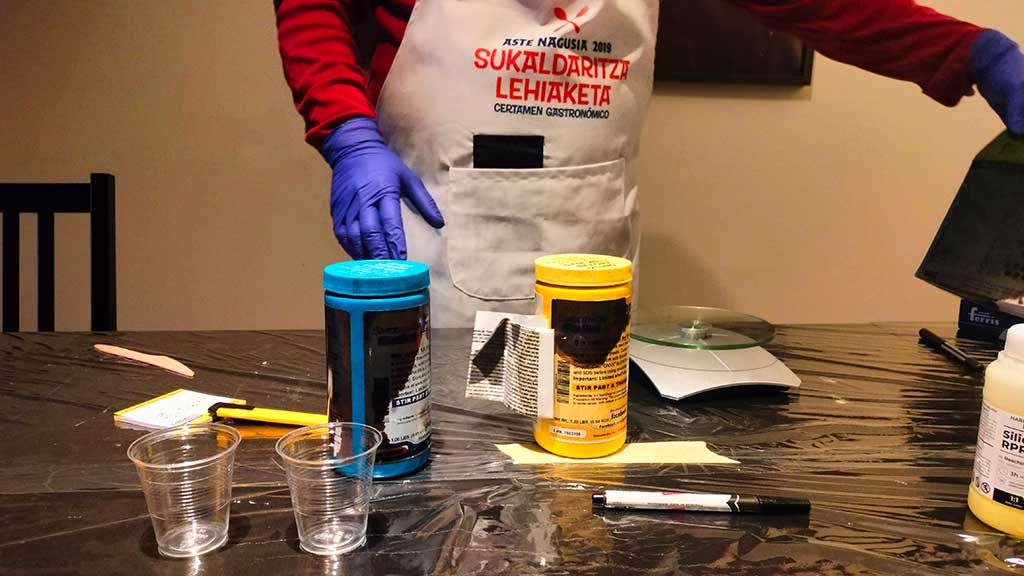
This are the materials I'm going to be reviewing and hopefully using to create the mold or for casting:
Reschimica R PRO 30
| Type: | Liquid silicone rubber |
| Mix Ratio By Volume: | 1A:1B |
| Mix Ratio By Weight: | 1A:1B |
| Pot Life: | 45 minutes |
| Mixing time: | 3 minutes |
| Cure Time: | 3 hours at room temperature of 23°C. Add 1 more hour to be safe. |
| Post curing: | No post curing needed |
| Shore Hardness: | 30 |
| Color: | Orange/Yellow |
| Temperature resistance: | Up to 120 degrees |
| Safety: | Non hazardous but better to use gloves, lab coat, ventilation |
| Site: | Reschimica R PRO 30 site |
| Safety Data sheet | Reschimica R PRO 30 Safety data sheet |

Safety:

VytaFlex® 40
| Type: | Liquid urethane silicone |
| Mix Ratio By Volume | 1A:1B |
| Mix Ratio By Weight | 1A:1B |
| Pot Life | 30 minutes |
| Mixing time | 3 minutes |
| Cure Time | 16 hours (24 hours to be sure) at room temperature of 23°C |
| Post curing | Optional... Following an overnight cure, heating the rubber to 65°C for 4 to 8 hours will increase physical properties and performance. |
| Shore Hardness | 40 A |
| Color | Off-White |
| Safety: | Safety glasses, gloves, lab coat, ventilation |
| Release agent | Recommended |
| Site: | Vytaflex 40 site |
| Safety Data sheet | Vytaflex 40 Safety data sheet |
Safety:


SILGOM 725 FOOD
| Type: | Poly-addition silicone |
| Mix Ratio By Weight: | 100A:10B |
| Pot Life: | 90 minutes |
| Mixing time: | 3 minutes |
| Cure Time: | 24 hours at room temperature of 23°C |
| Post curing: | No Post curing |
| Shore Hardness: | 25 |
| Color: | Translucent |
| Safety: | Mask, Safety glasses, gloves, lab coat, ventilation |
| Site: | SILGOM 725 FOOD site |
| Safety Data sheet: | SILGOM 725 FOOD Safety data sheet |
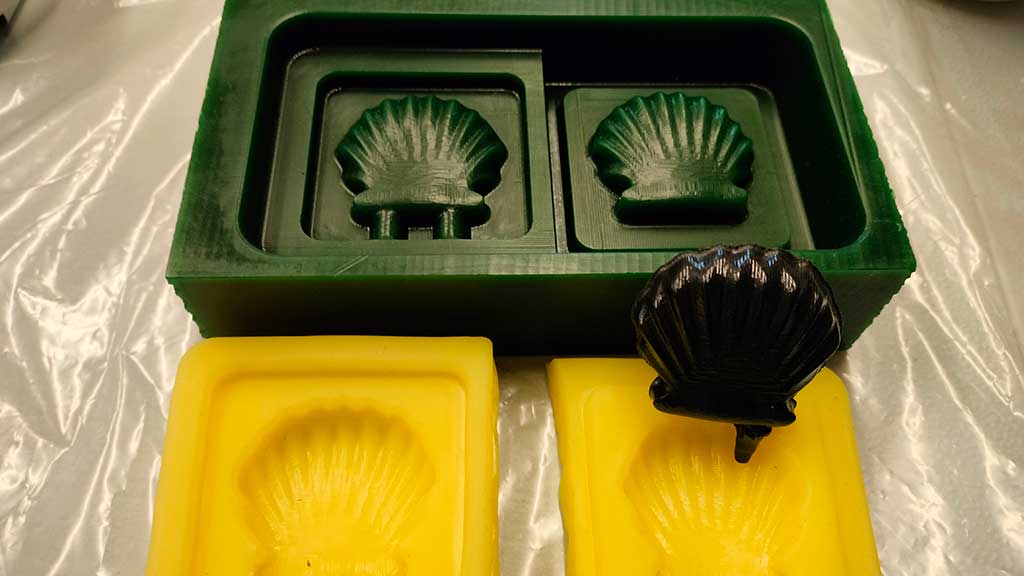
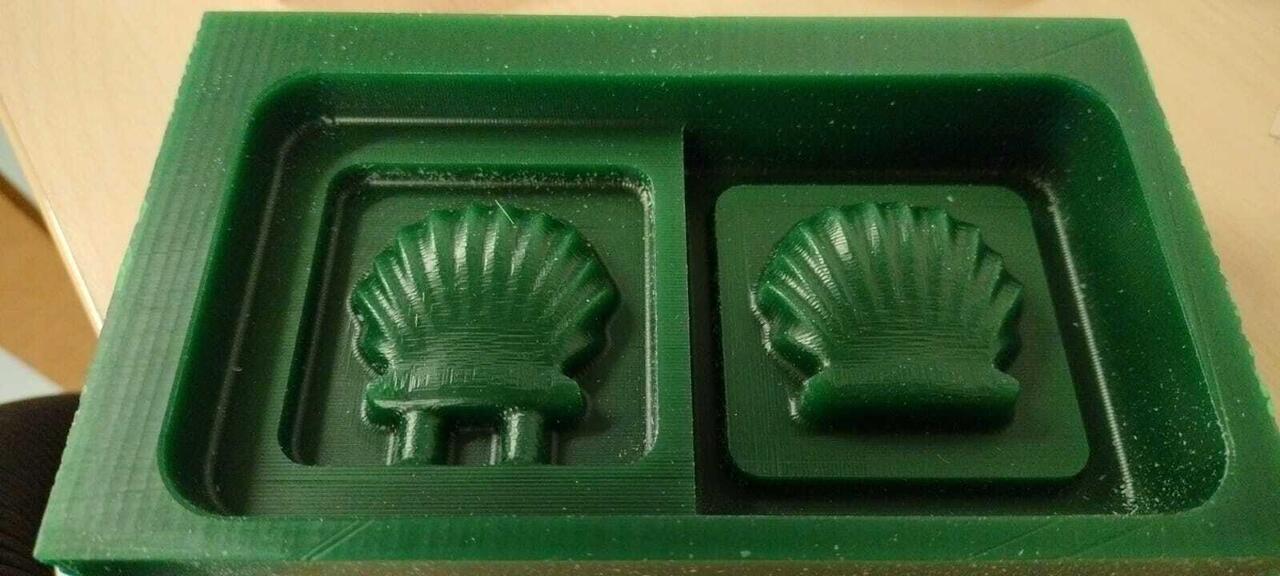
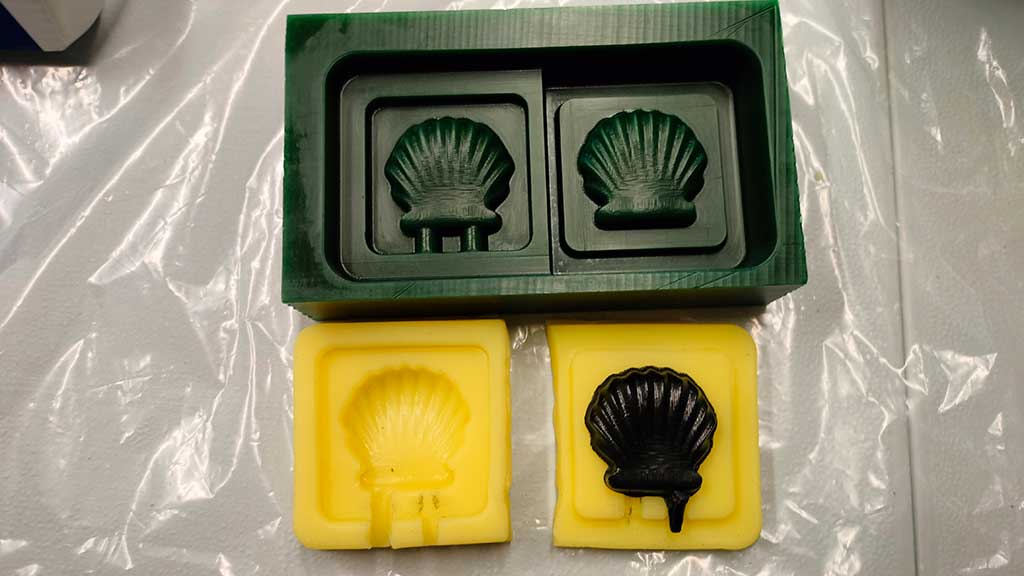
This was a later adition to the list so I don't have a picture of the test but here is a picture of the mold.
Safety:

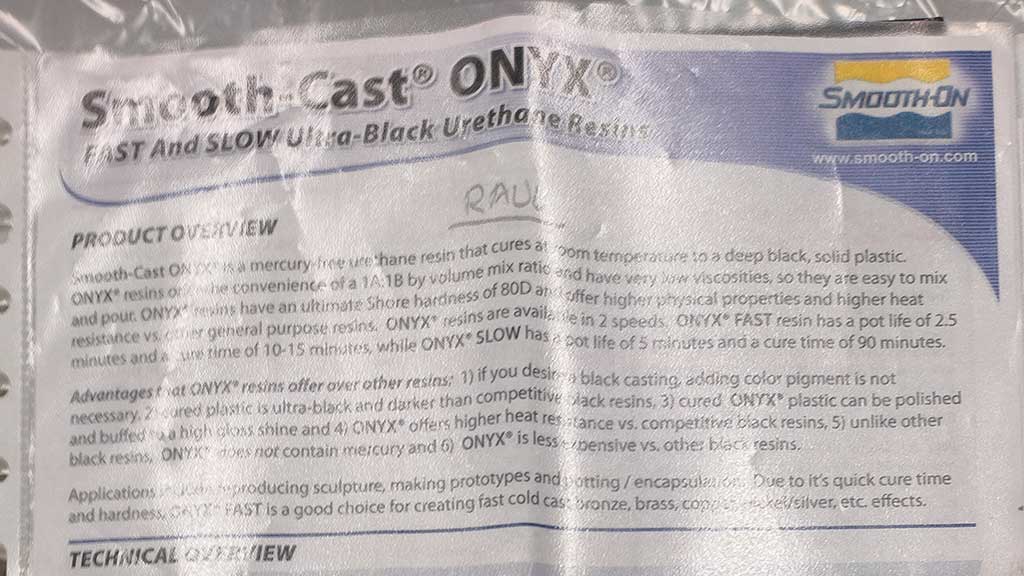
Smooth-Cast® ONYX™ FAST
| Type: | Mercury-free urethane resin |
| Mix Ratio By Volume | 1A:1B |
| Pot Life | 2 minutes 30 seconds |
| Mixing time | 60 seconds |
| Cure Time | 10 - 15 minutes at room temperature of 23°C |
| Shore Hardness | 80 D |
| Color | Black |
| Release Agent: | Needed |
| Safety: | Exothermic reaction can lead to burns. Use Safety glasses, gloves, lab coat, ventilation |
| Release agent | Recommended |
| Post curing | Although not necessary, post curing will increase physical properties, material
performance and heat resistance to 121°C. After curing at room temperature for 1 hour, expose material in the mold to 121°C for 4-6 hours. Let cool to room temperature before use. |
| Site: | Smooth Cast Onyx site |
| Safety Data sheet | Smooth Cast Onyx Safety data sheet |
Safety:
Smooth-Cast® 300
| Type: | Low viscosity polyurethane resin |
| Mix Ratio By Volume: | 1A:1B |
| Mix Ratio By Weight: | 1A:0.9B |
| Pot Life: | 3 minutes |
| Cure Time: | 10 minutes at room temperature of 23°C |
| Post curing: | Optional... Following an overnight cure, heating the rubber to 65°C for 4 to 8 hours will increase physical properties and performance. |
| Shore Hardness: | 70 D |
| Color: | White |
| Safety: | Exothermic reaction can lead to burns. Use Safety glasses, gloves, lab coat, ventilation |
| Release agent: | A release agent is necessary to facilitate demolding when casting into or over most surfaces. |
| Site: | Smooth-Cast® 300 site |
| Safety Data sheet | Smooth-Cast® 300 Safety data sheet |
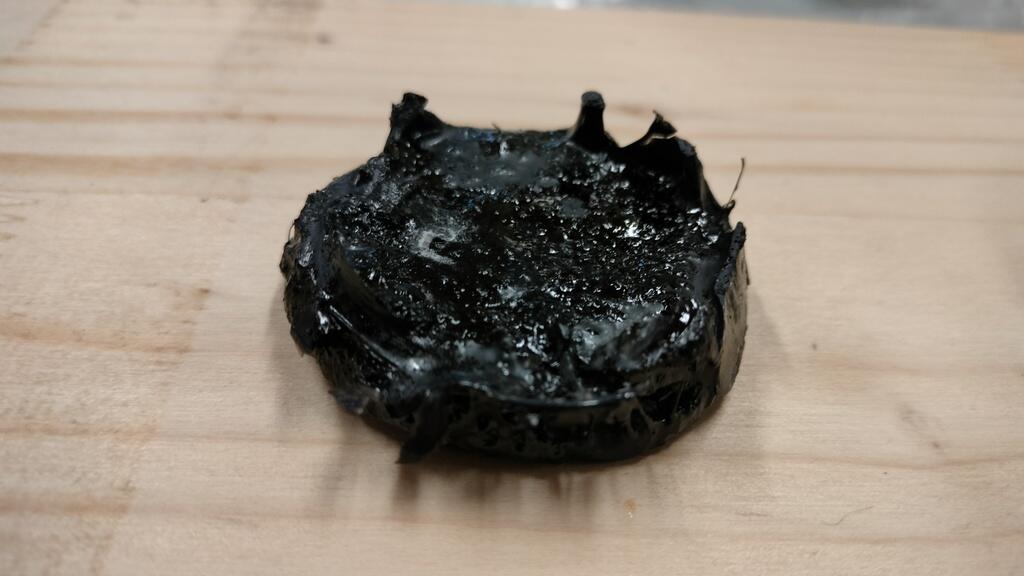
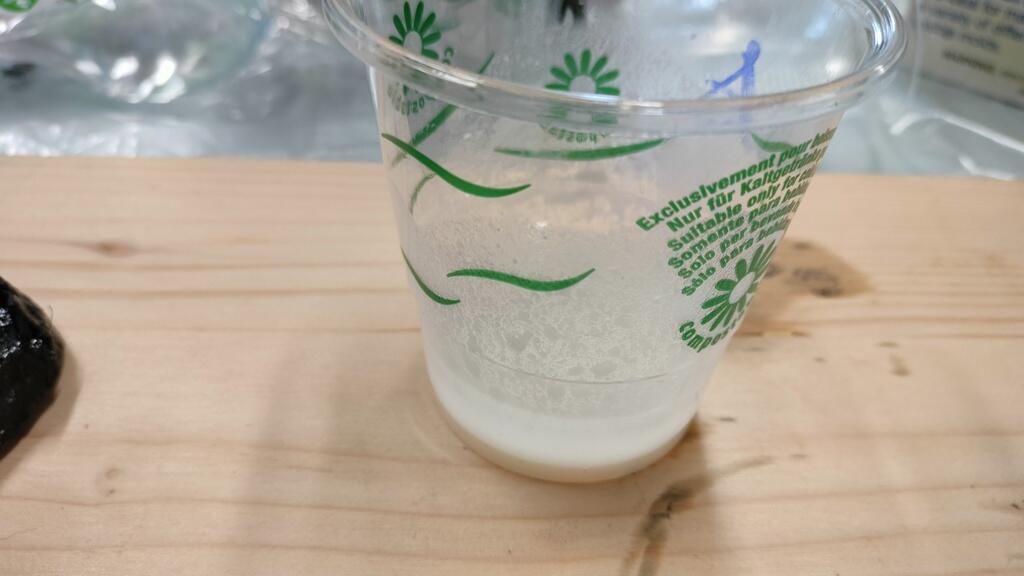
This material was way over it's expiry date (opened 2012) and some had already crystallized inside the container.
I did try to mix it and see if anything happened but it didn't solidify.
Safety:
Individual assignment
- Design a mold around the stock and tooling that you'll be using, mill it (rough cut + (at least) three-axis finish cut), and use it to cast parts.
The first thing I did was to measure the end mills available.
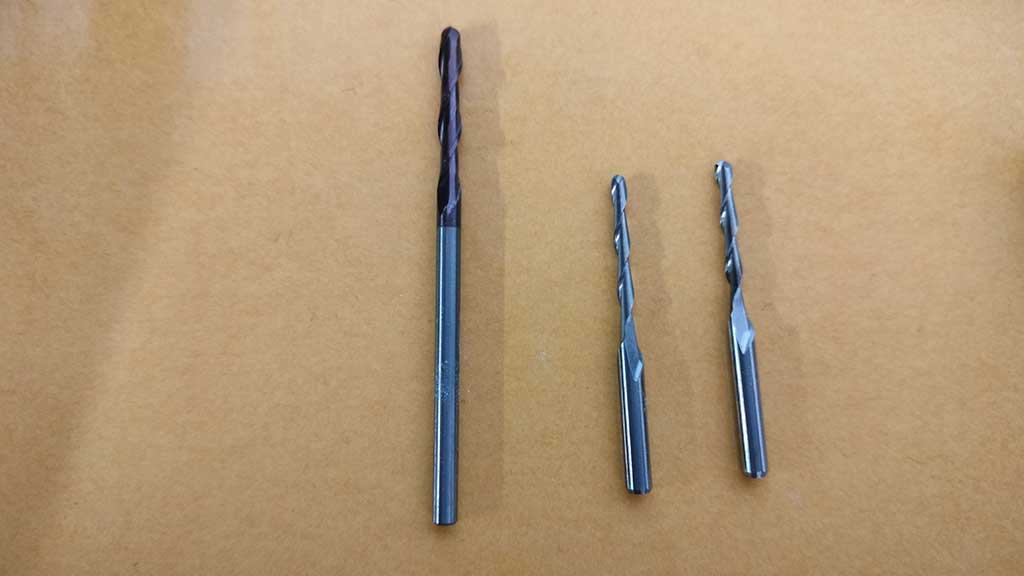
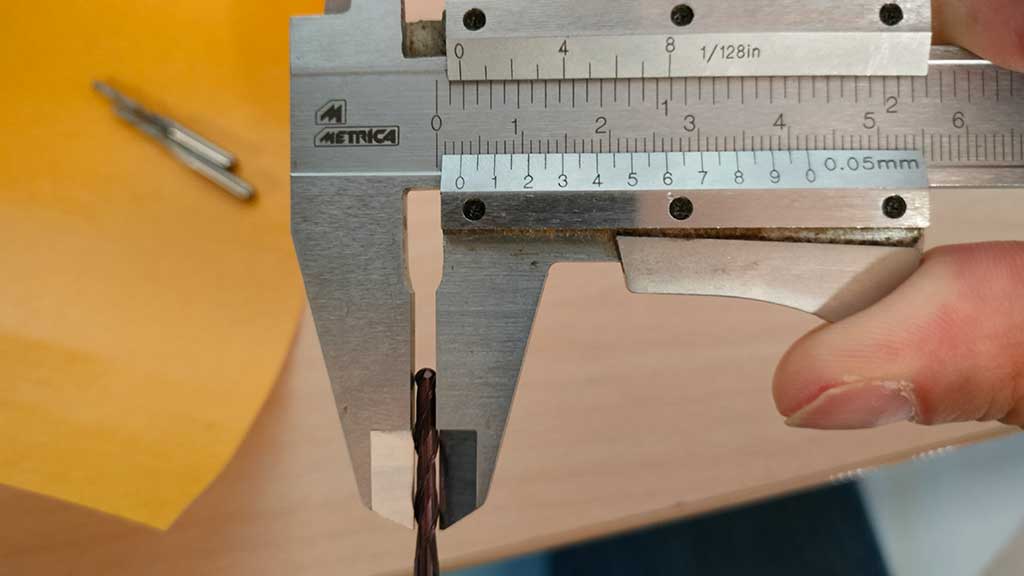
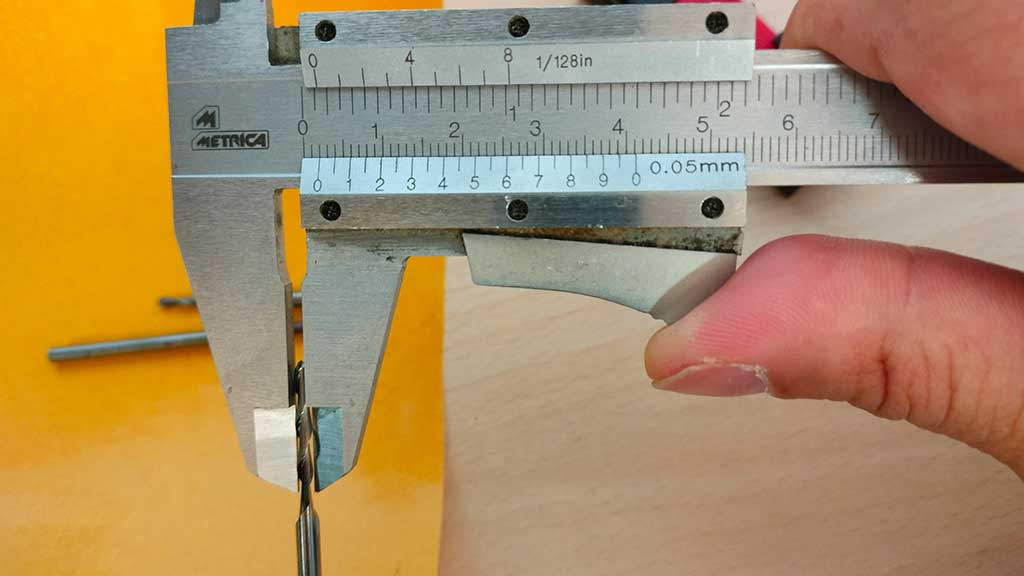
Both are mill ball end so the difference resides in the size: 3,175 mm and 2,00 mm.
I will be using the 3.175 one. It's faster.
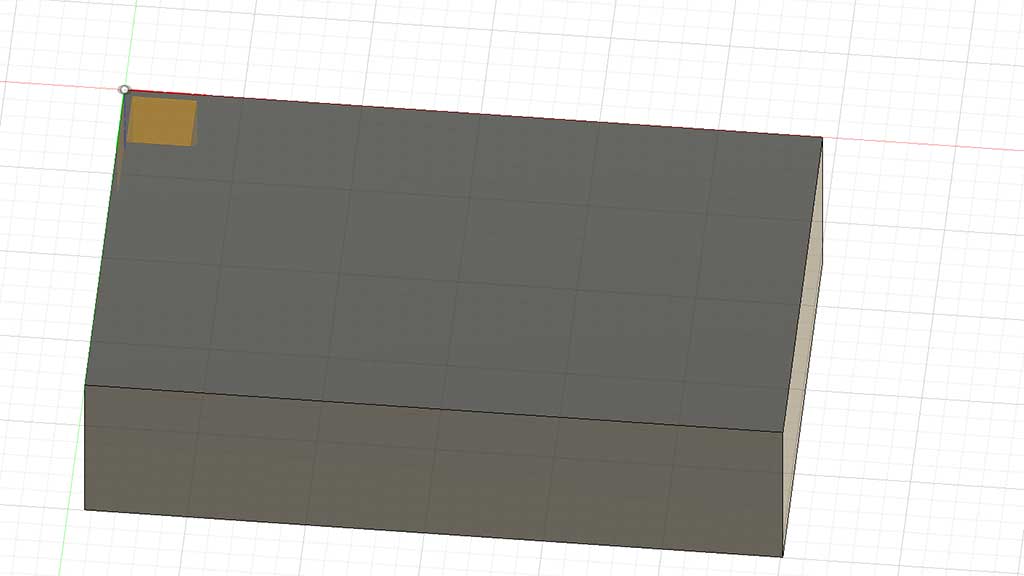
The next thing I did was to measure the wax block as I will need its size for the 3D model.
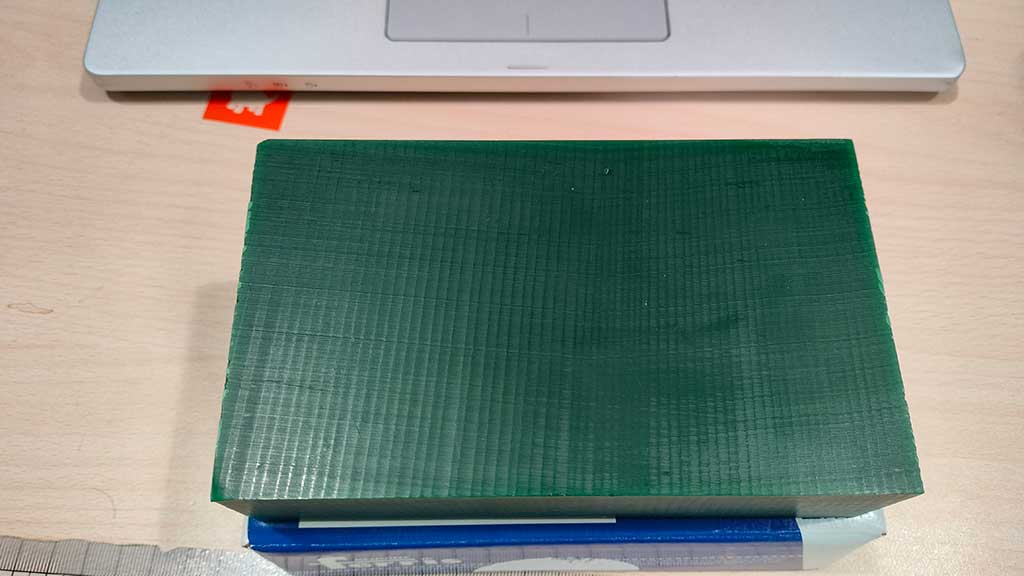
The size is approximately: 147mm X 88mm X 37mm
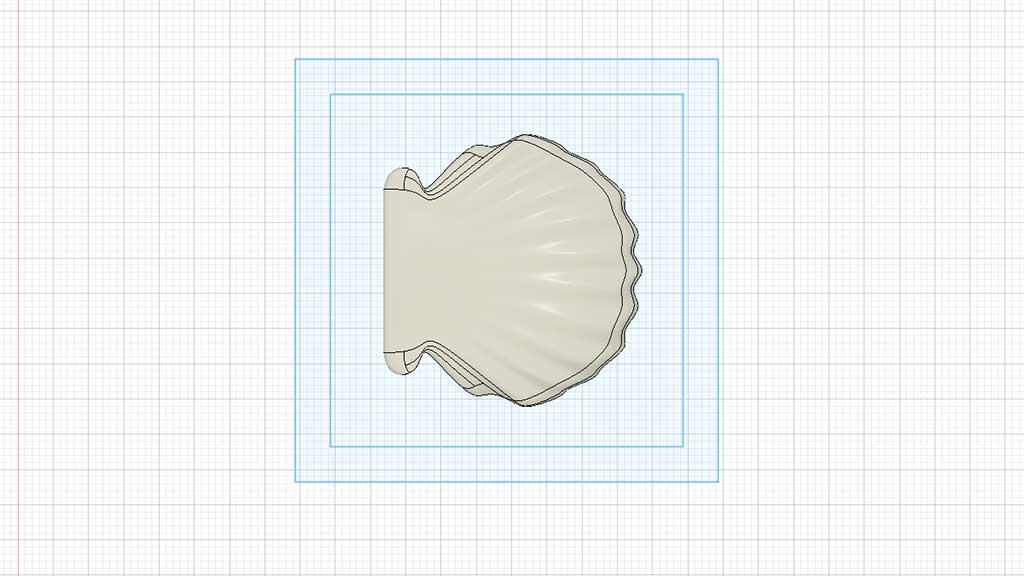
After measuring I made a 3D model of the mold.
I have to admit that it was not easy for me to understand how the mold was going to work. As soon as my brain understood how it worked, it forgot...
So here is the tutorial in Fusion 360:
Modeling the mold in Fusion 360:
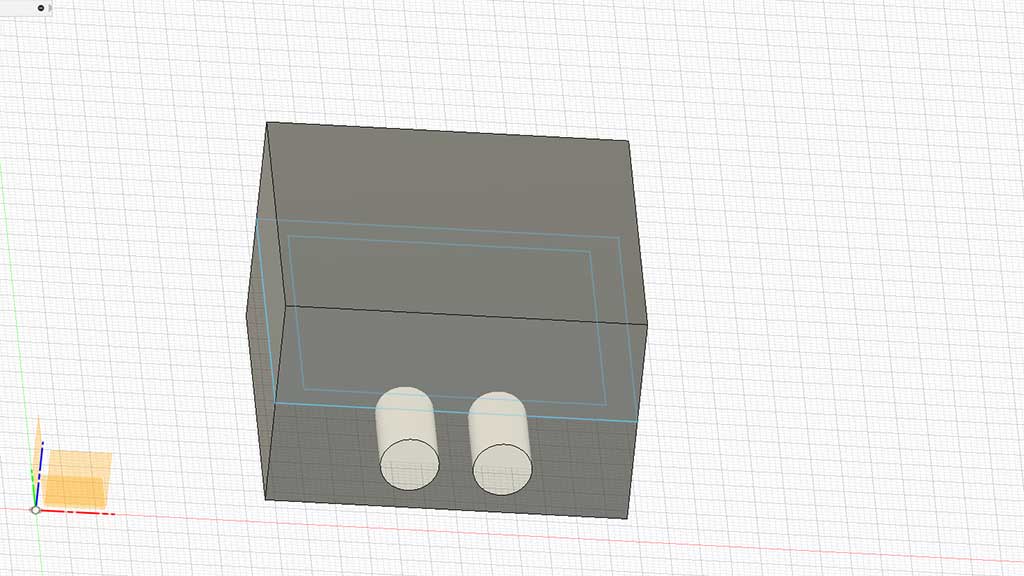
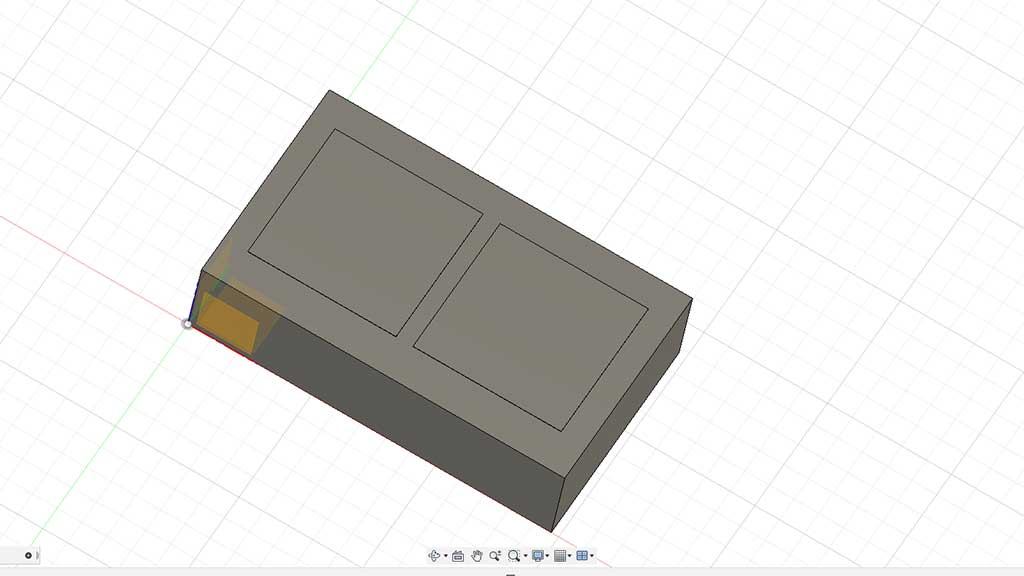
1. Start by making a sketch around the object that we want to mold. Make sure to leave at least 10 mm margin. After, and using the Offset tool, select the edge of the sketch and offset the perimeter inwards by 5 mm
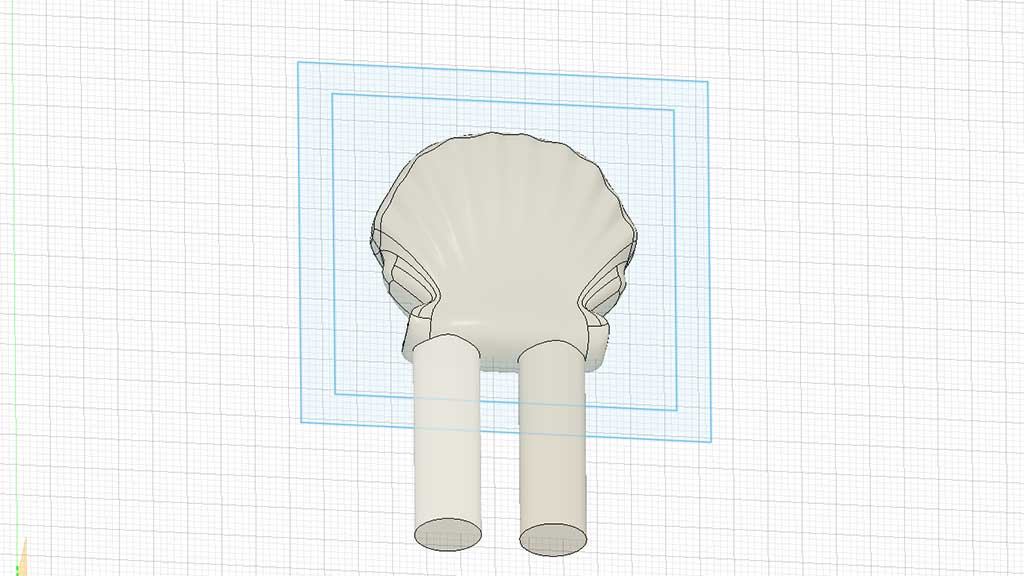
2. Create two sketches on the edge of the object and extrude them. These two extrusions will work as the tubes needed to fill the mold with material and to let the air escape to avoid air bubbles. So one will be a pour tube and the other a vent tube.
3. Using the sketch created in the first step, extrude symmetrically, upwards and downwards. Make sure to leave at least 10 mm from the object in both directions.
4. In "Modify" select "Combine" choosing the "box" as the "Target Body" and our "Final Object" as the "Tool Body". Select "Cut" from the "Operation" menu and make sure that the "Keep Tools" is selected.
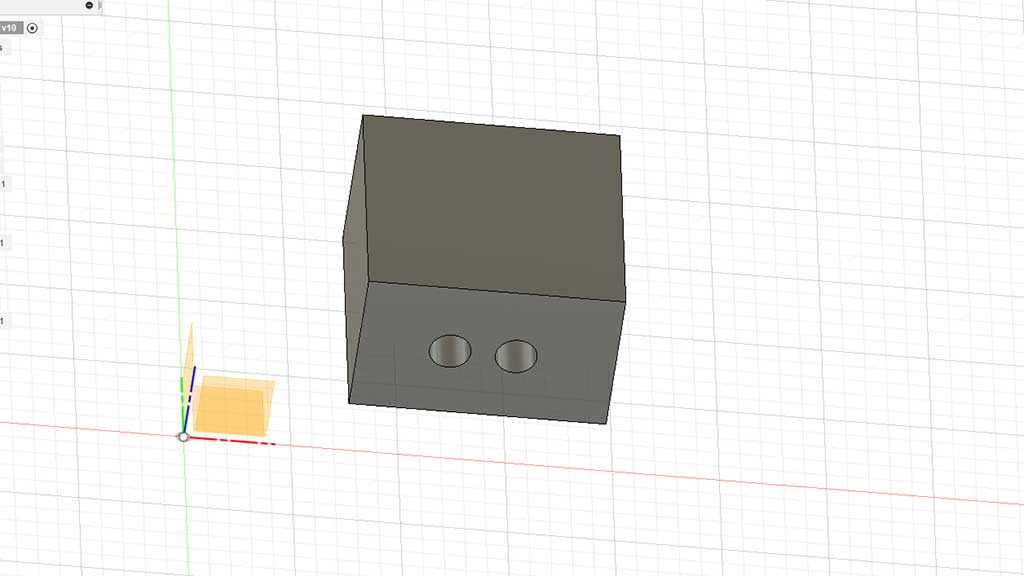
5. In the "Construct" menu, click on "offset plane" and select the top surface of the box and position the new offset plane in the middle of our final Object.
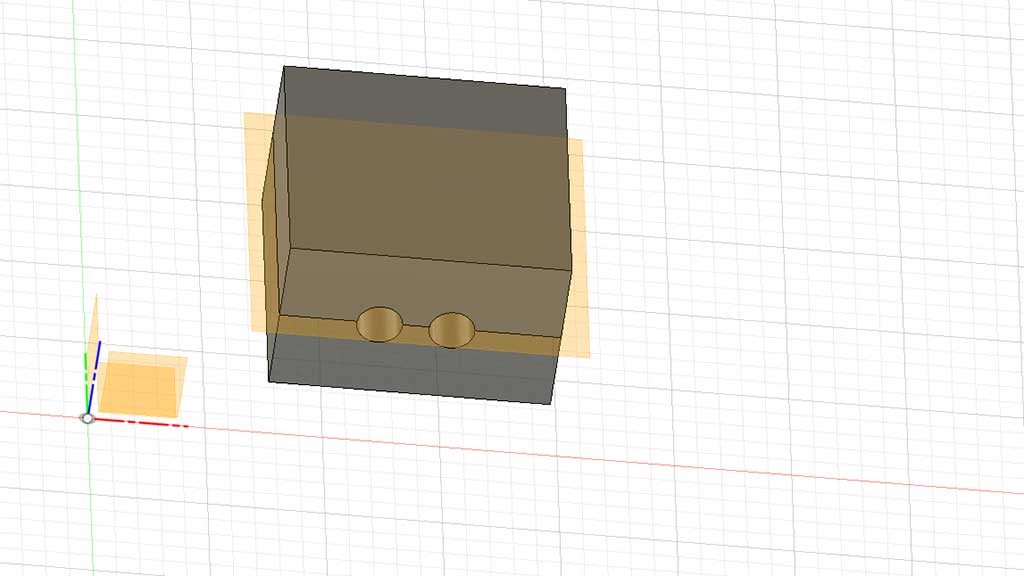
6. Hide one of the parts of the mold so that we can create the register.
7. Unhide the sketch that we used to create the box if it's hidden and select the outer border area and extrude it -5 mm.

8. Do the same for the other edge but extruding 5 mm. So, one of the slices has a positive edge and the other has a negative edge..
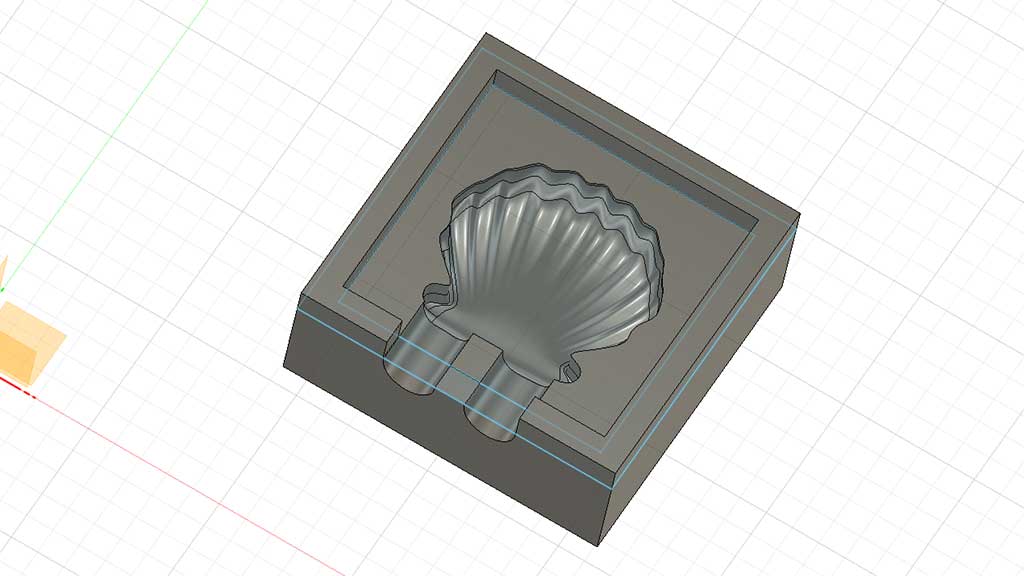
9. Let's create a Wax block.
10. Position both our sliced parts in the middle of the block making sure that there is a wall between them and rotate them 180 degrees so that the "cavity" if facing the block. Lower both parts until the both edges meet.
11. In "Modify" select "Combine" choosing the Wax block as the "Target Body" and our sliced objects as the "Tool Body". Select "Cut" from the "Operation" menu and make sure that the "Keep Tools" is selected.
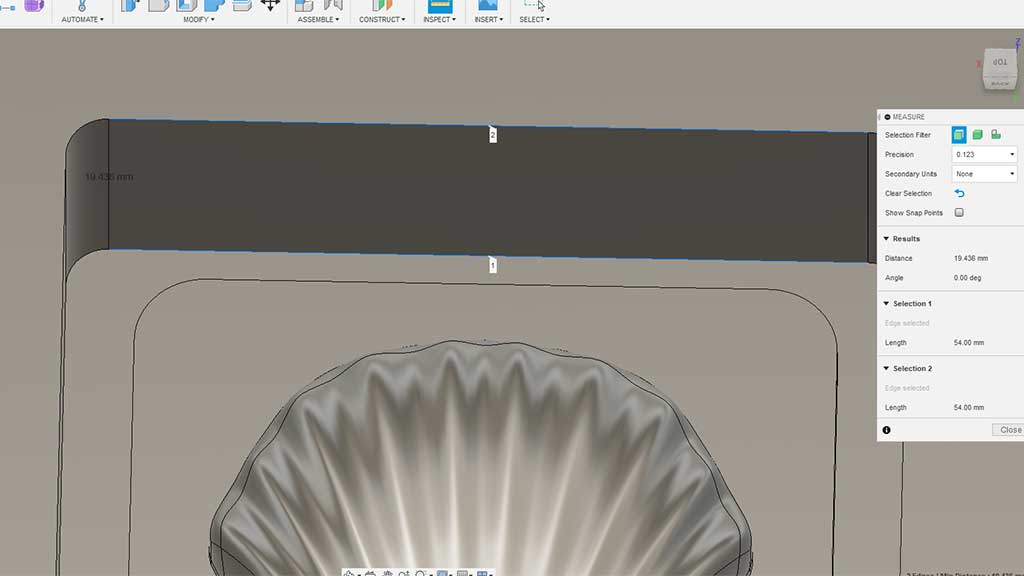
12. Using the chamfer tool, round the hard angles and after, measure from the lowest
point to the highest point. This will tell us if our end mill tool can reach all the parts of the
mold.
Also using the Draft tool, give some inclination to the inner walls of the mold to make sure
that the tool doesn't hit the wax block.
13. Mill it!
Milling the wax block:
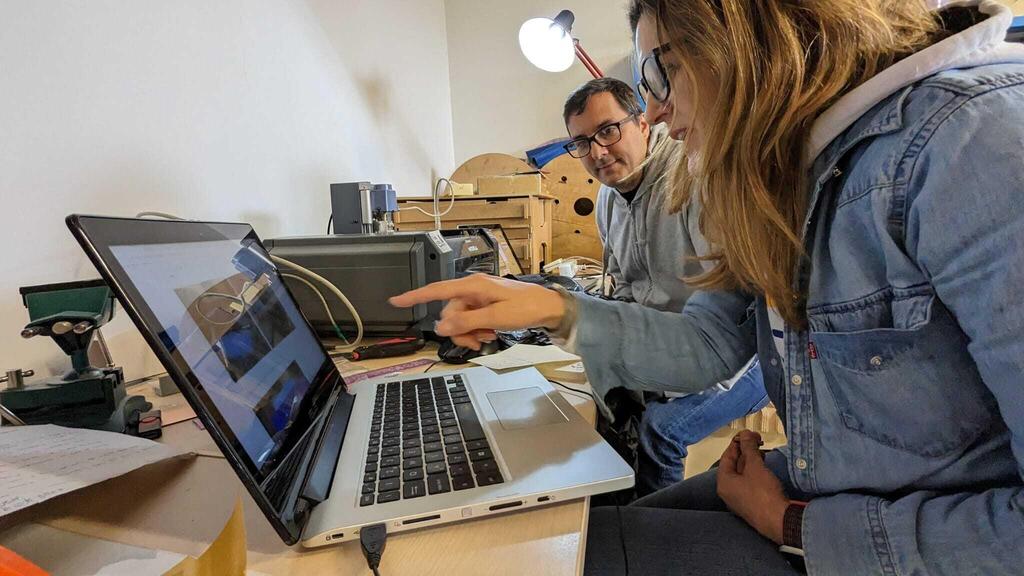
The first step for milling is Nuria explaining me how the milling process is going to be done as it's a bit different from all the other milling I have done:
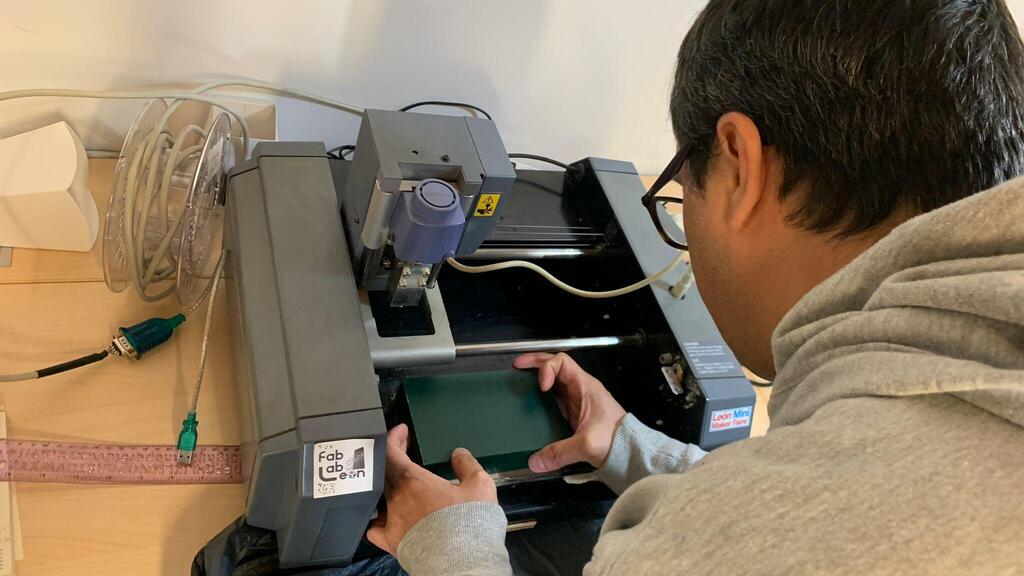
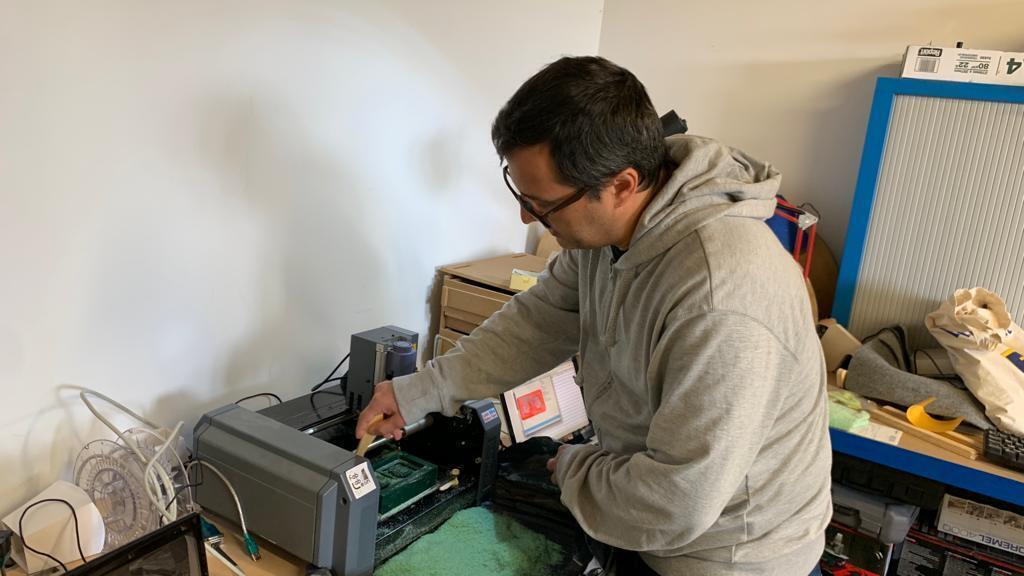
I start by preparing everything and that means adding a plastic bag under the Modela to recover the chips that are going to be produced by the milling process.

Next I add double sided tape to the Wax block and mount it on the Modela making sure that it's secure. The process is the same I documented in the electronic production week.

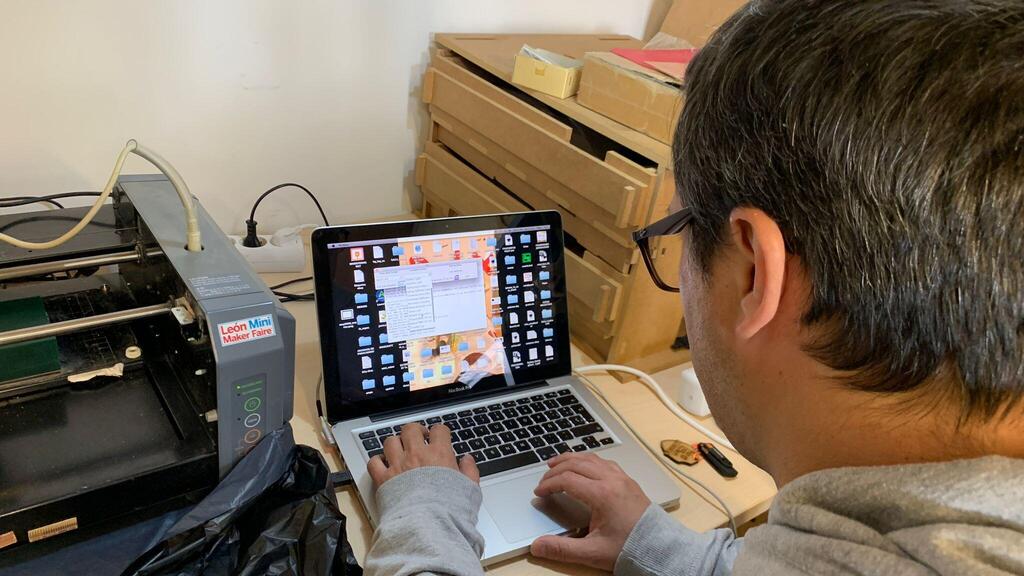
Because MODS CE doesn't support the 3D milling for Fab Lab's León Roland MDX-20A Modela I'm going to the Fab Modules.
1. Select input, output and workflow.
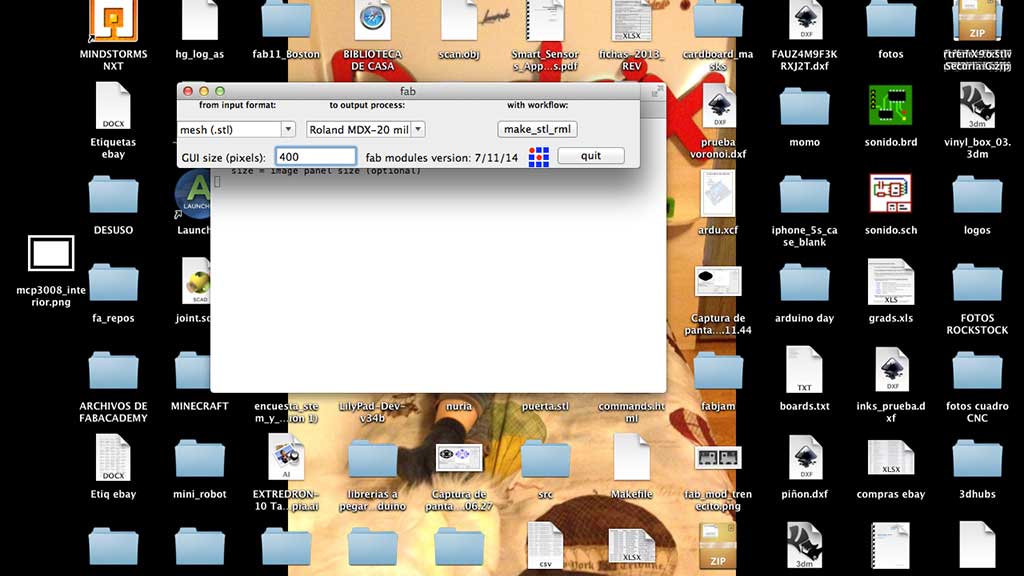
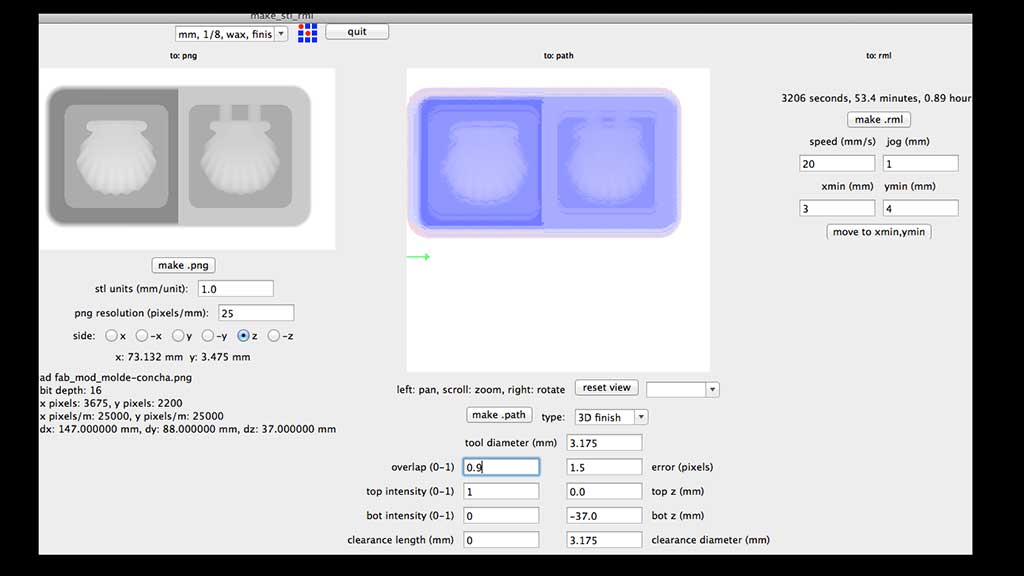
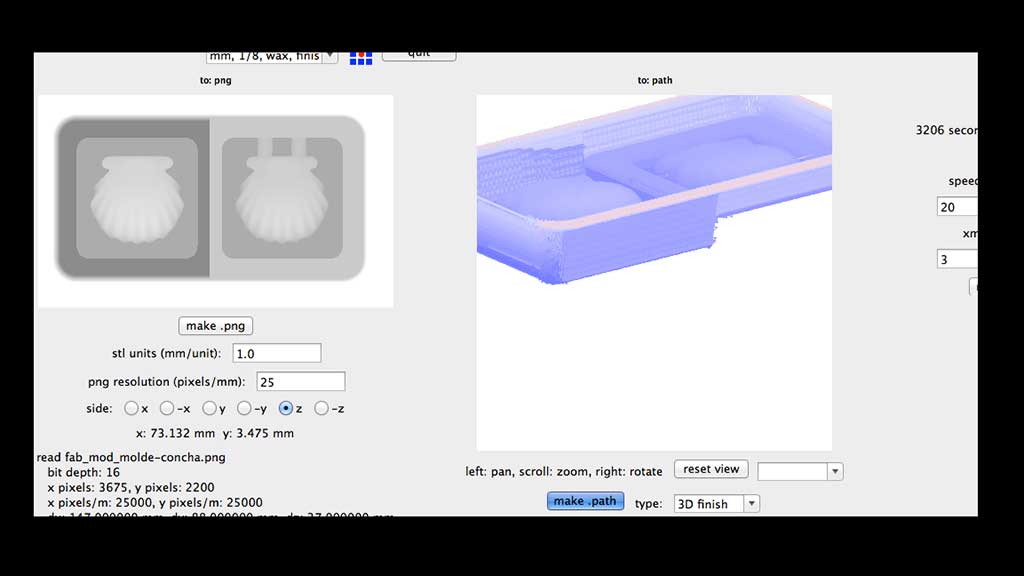
2. Select mm, 1/8 wax, rough and after that load the STL and click "make png"
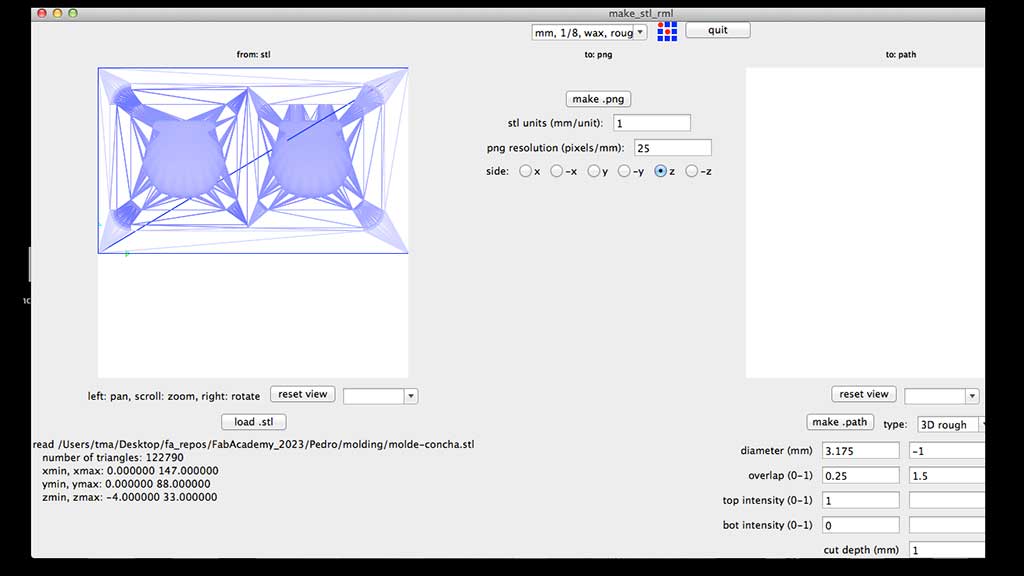
3. Check the values. The diameter (mm) in our case is 3.175 mm, that is the size of the end mill.
Also check the size to make sure it's the size of our model. Click make "path".
This is also the time to "zero" the machine. That means, putting the machine in the X=0, Y=0 and the End mill touching the Wax block. We can do that by changing the values in "move to xmin ymin"
Also this is the time to insert the end mill and make it touch the wax block. The process is the same described in the Electronic production documentation week.
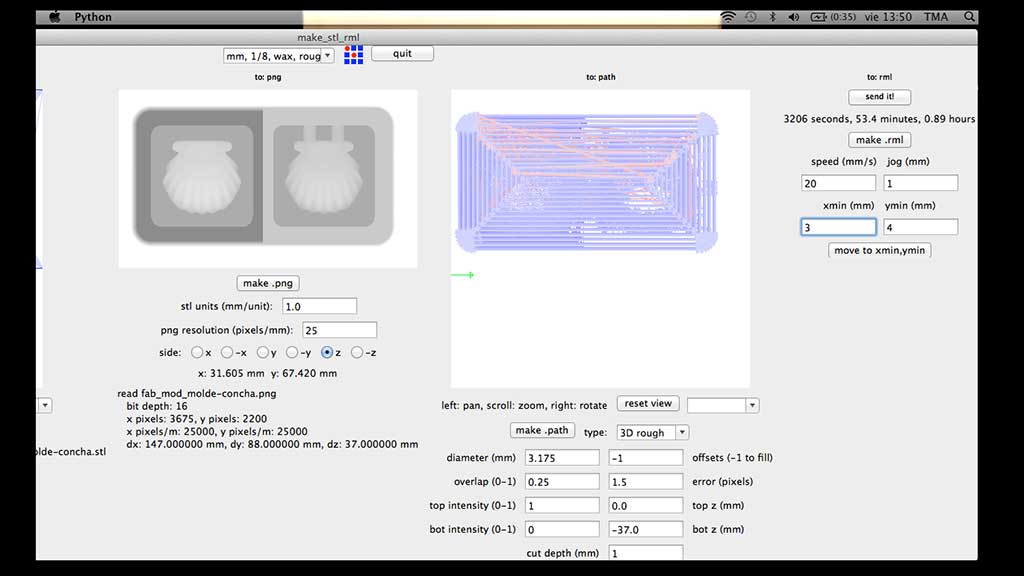
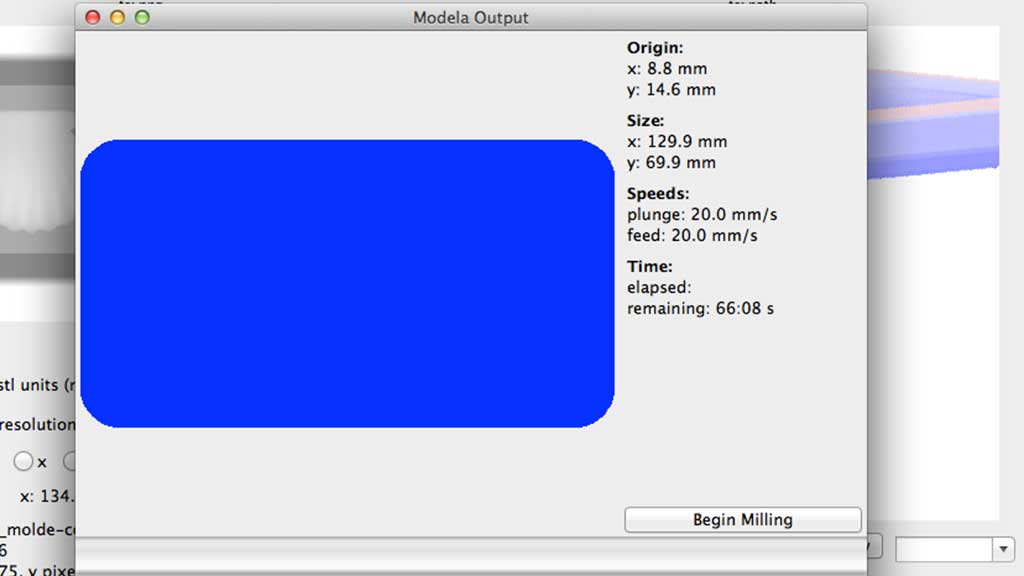
4. If everything is ready, click make .rml and start the process: "Send it!"
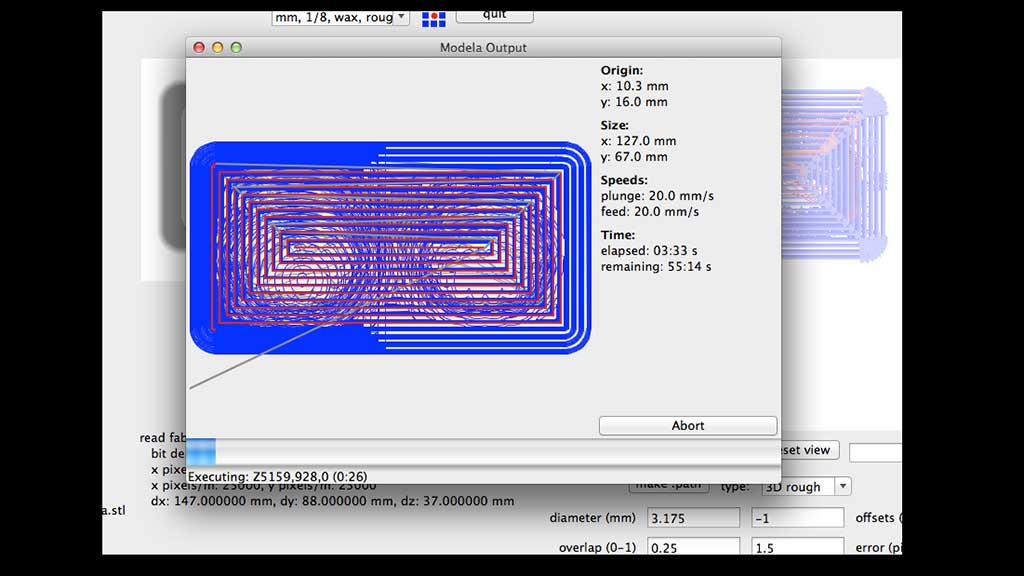
.5 We can clean the chips into the bag. That will help us see how the process is going.
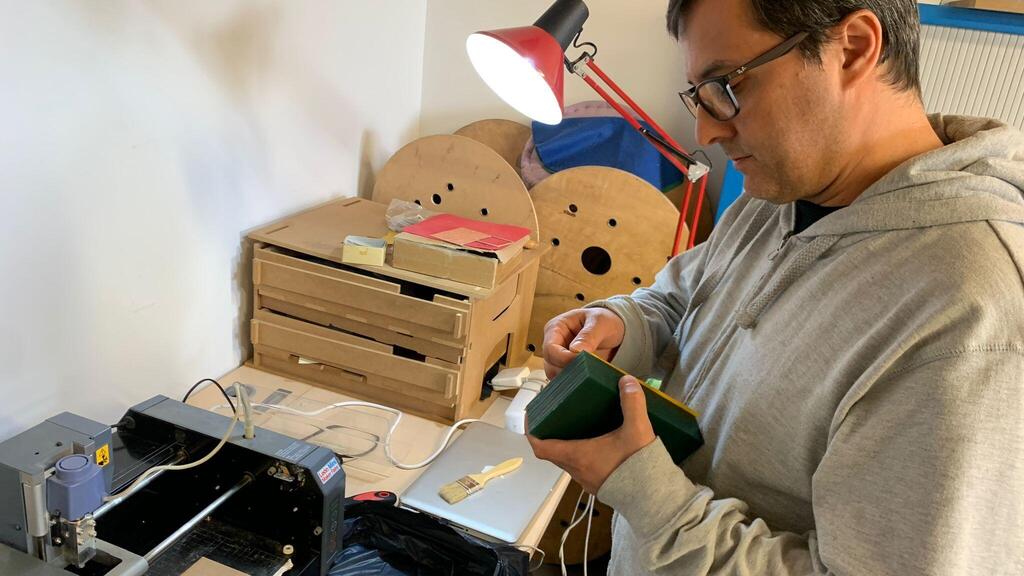
After finishing, clean the mold without removing it:
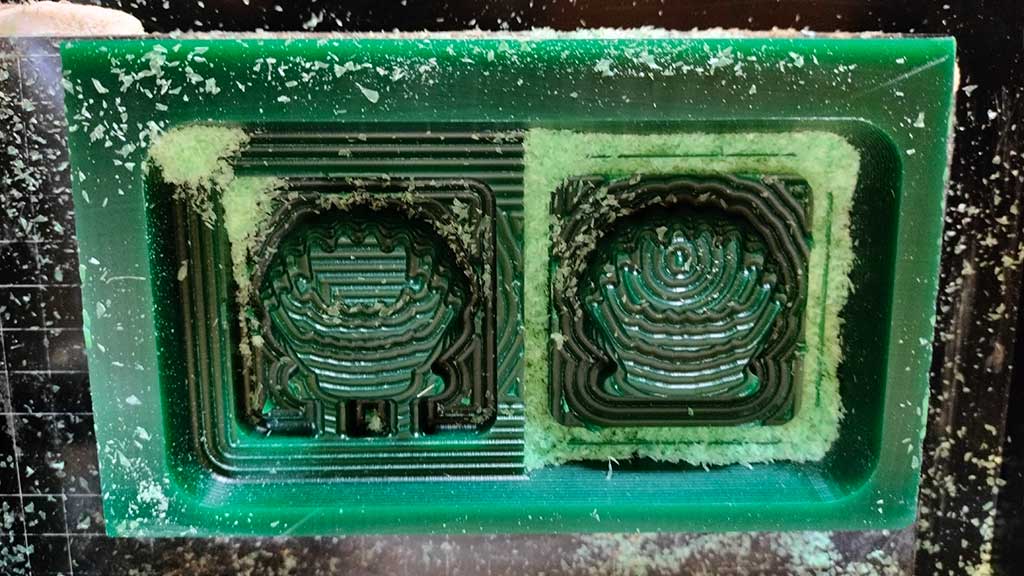
The rough milling details:
6. Setup the finish mill by going back to mods and selecting "mm 1/8 wax finish".
7. Check values and click make path and then "make .rml" and "send it".
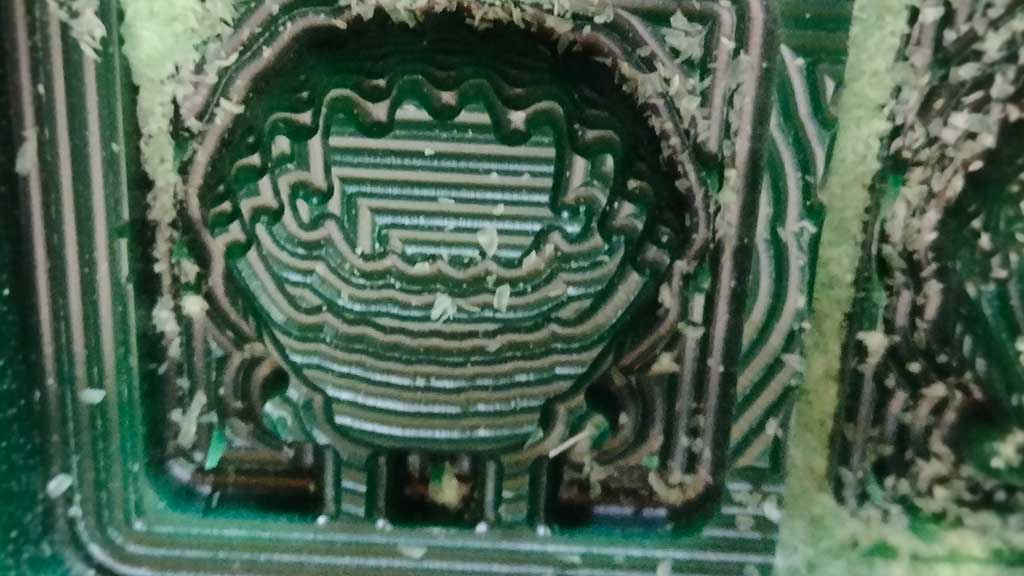
The details are so high that the tool path is everywhere.
The finish part:
Making the silicone mold:
1. First...safety
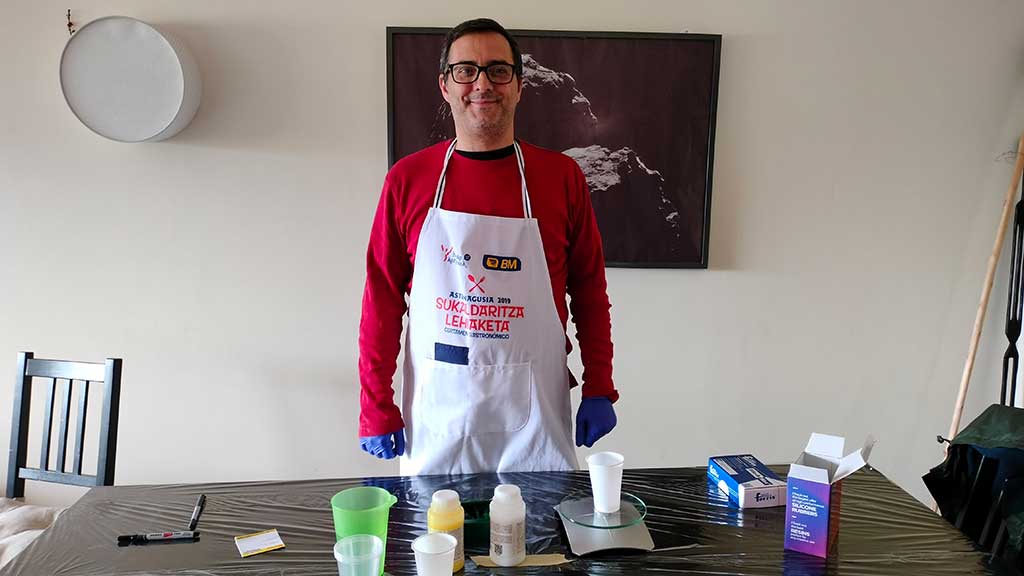
The second best gloves are Nitrile. Nitrile is very robust making it extremely resistant to punctures, tears and chemicals. But testing has been inconclusive about nitrile effect on curing or other interactions.
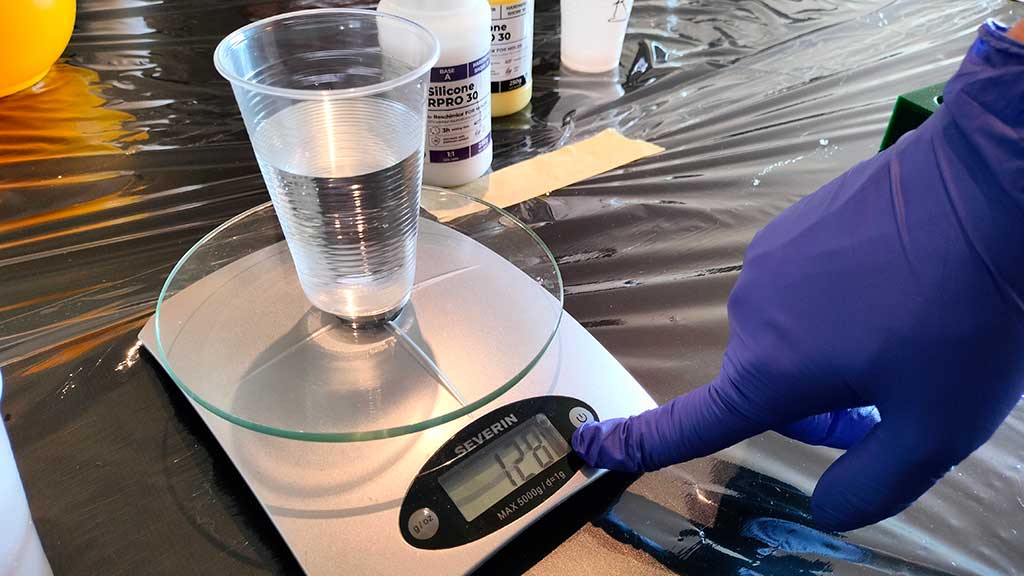
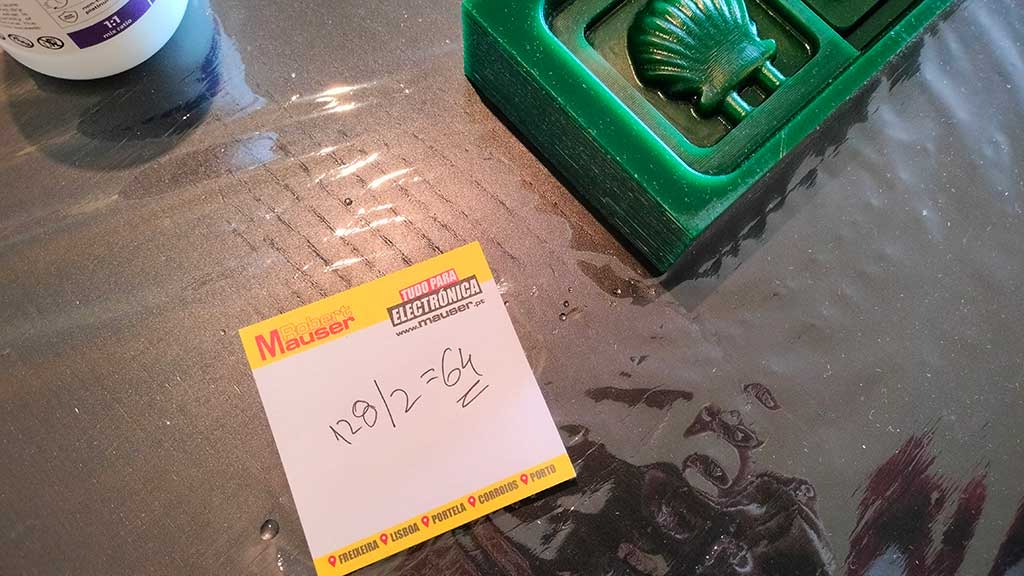
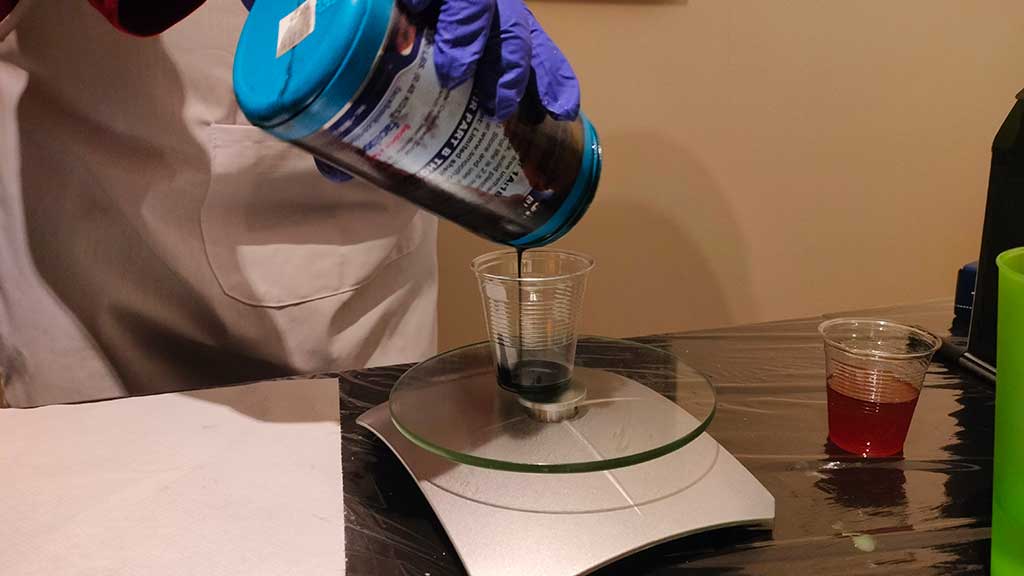
2. Measure the volume of the mold with water:
2. Mark the cup on the water line and weigh it.
3. Clean the mold.
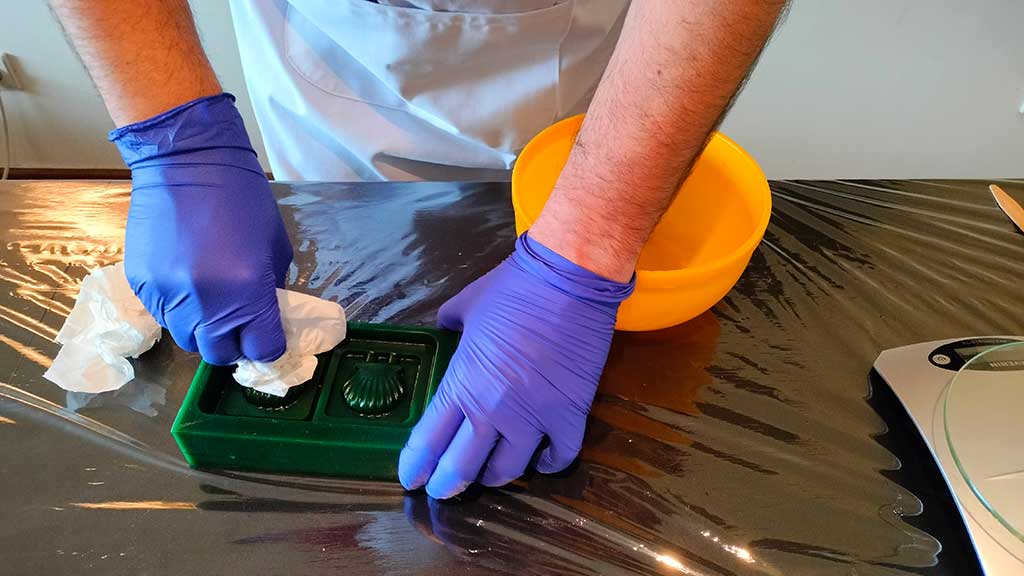
4. As the Reschimica R PRO 30 is 1:1 material, I divide the value. I will need 64g of part A and 64g of part B
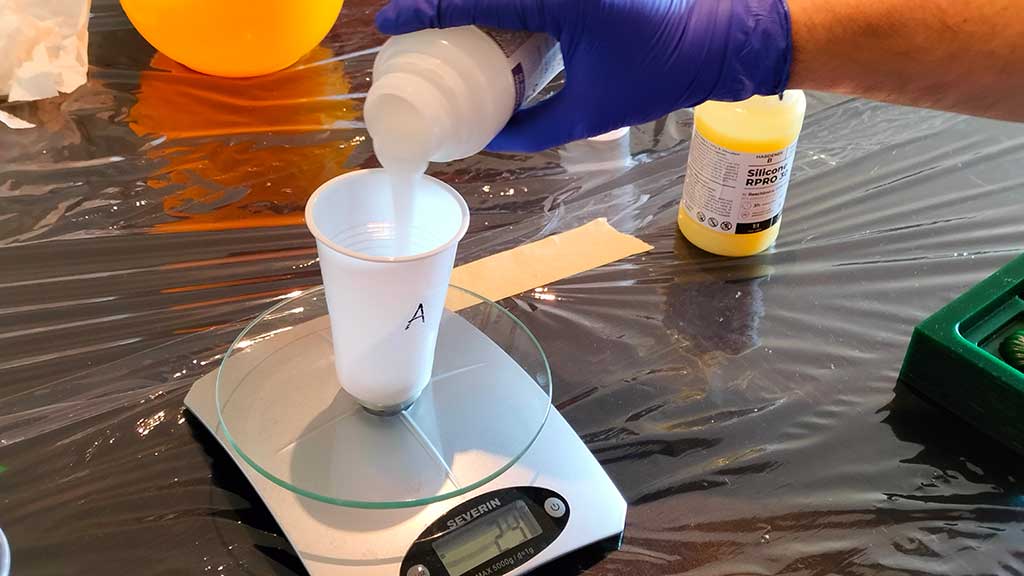
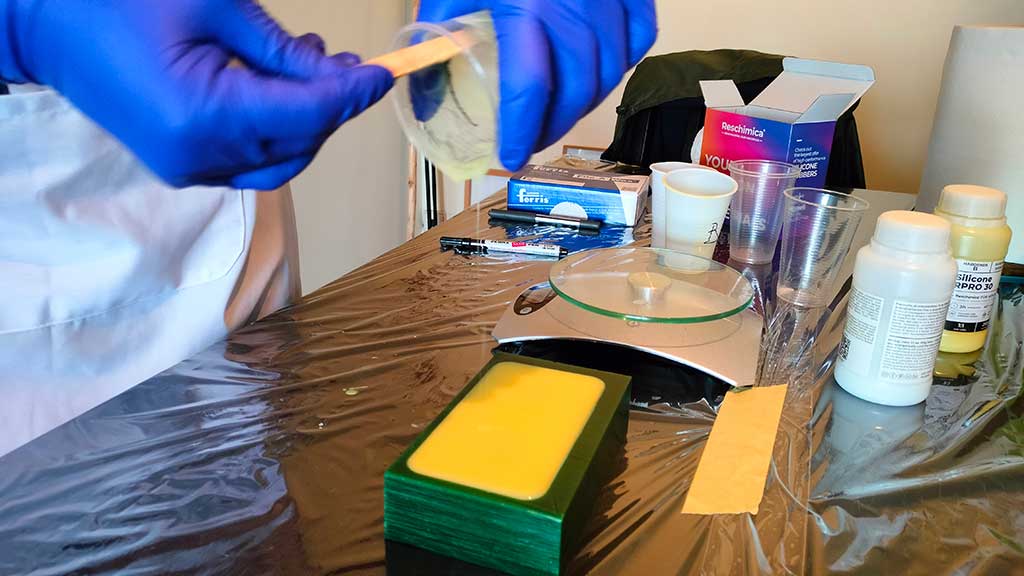
5. Labeled one cup A and added the part A.
6. Labeled another cup B and added the same weight of part B.
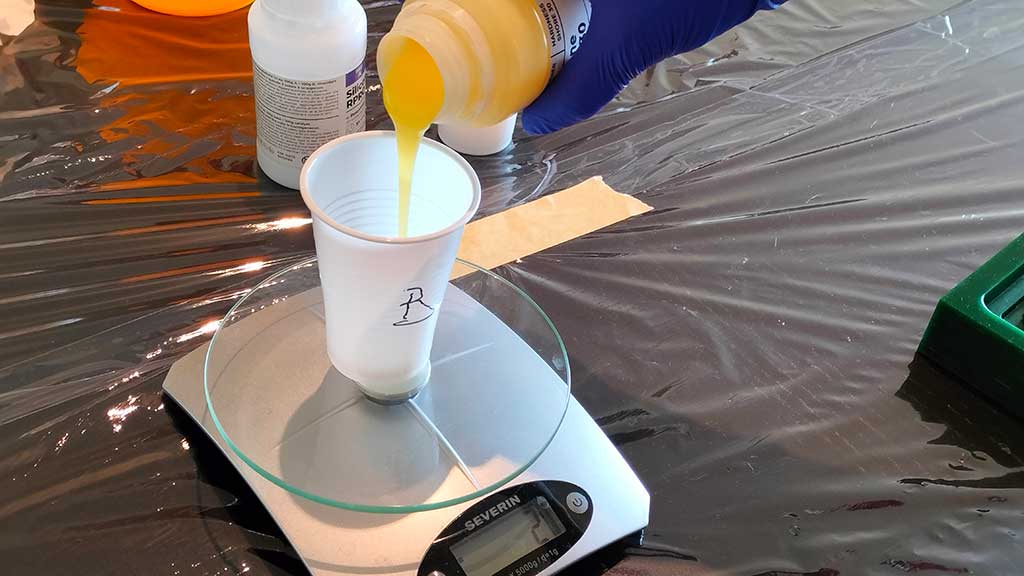
7. Mix it all in another cup.
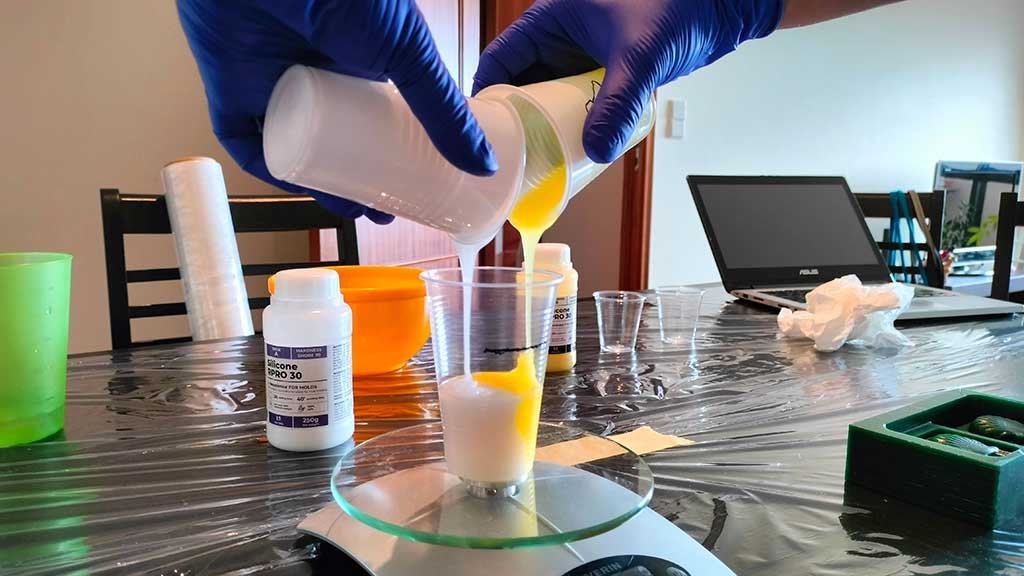
And scrape both cups very well to not leave any material behind.
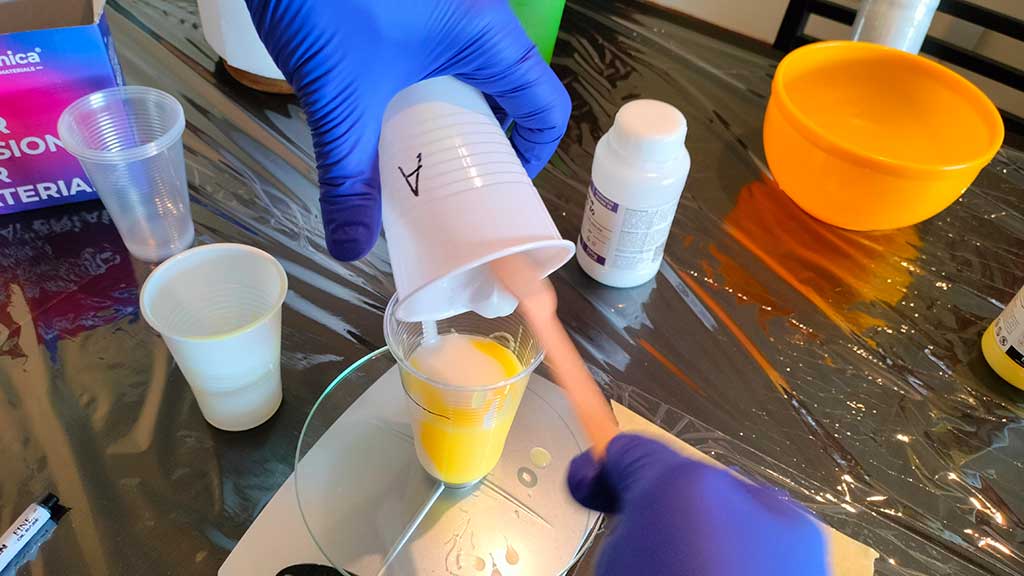
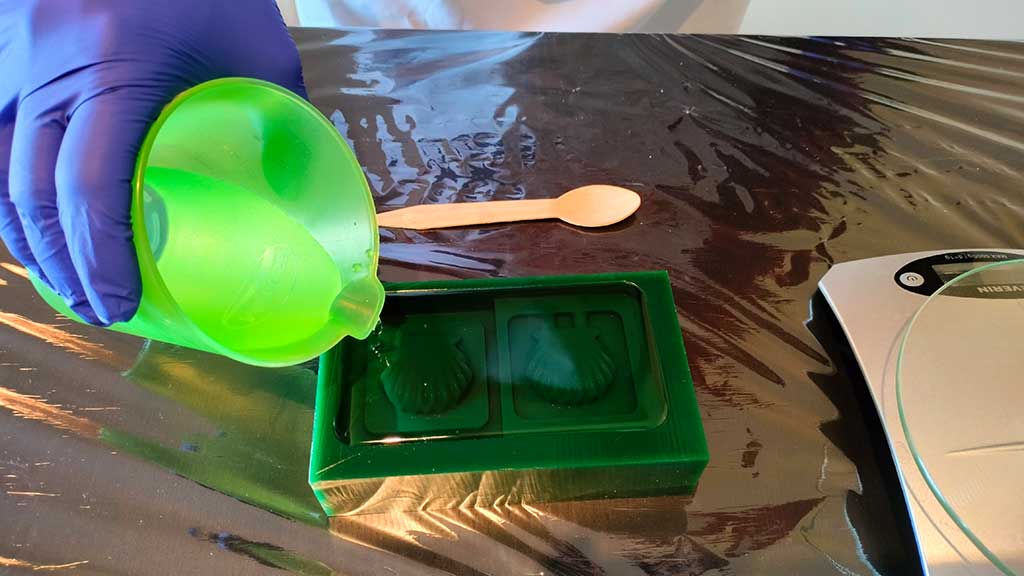
8. Mix both parts very well but take care not to introduce air or create air bubbles.
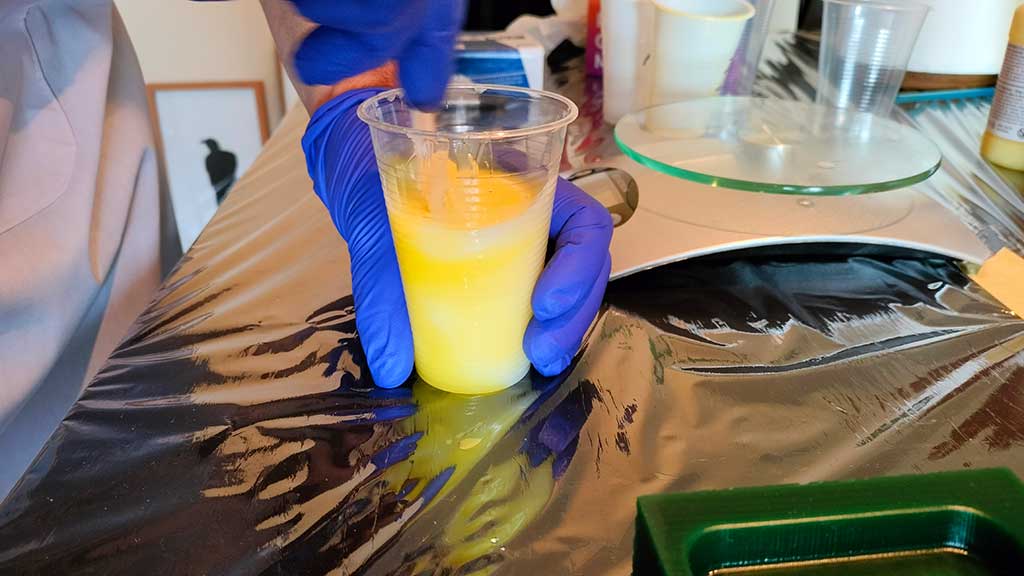
9. Slowly add the mixture to the mold from a height of 30 cm as recommended in the data sheet.
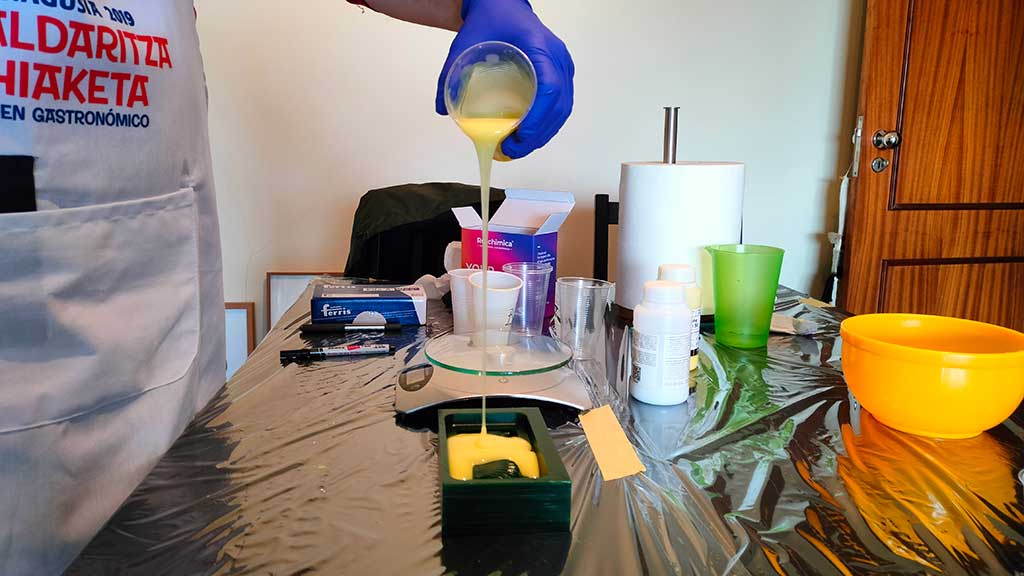
Scrape the cups very well so as to not to leave anything behind.
10. Tapping the table where the mold lies will help the trapped air bubbles get to the surface and not settle inside the mold.
11. Let the mold cure for the time defined in the technical sheet. In this case 3 hours + 40 minutes for the pot time.
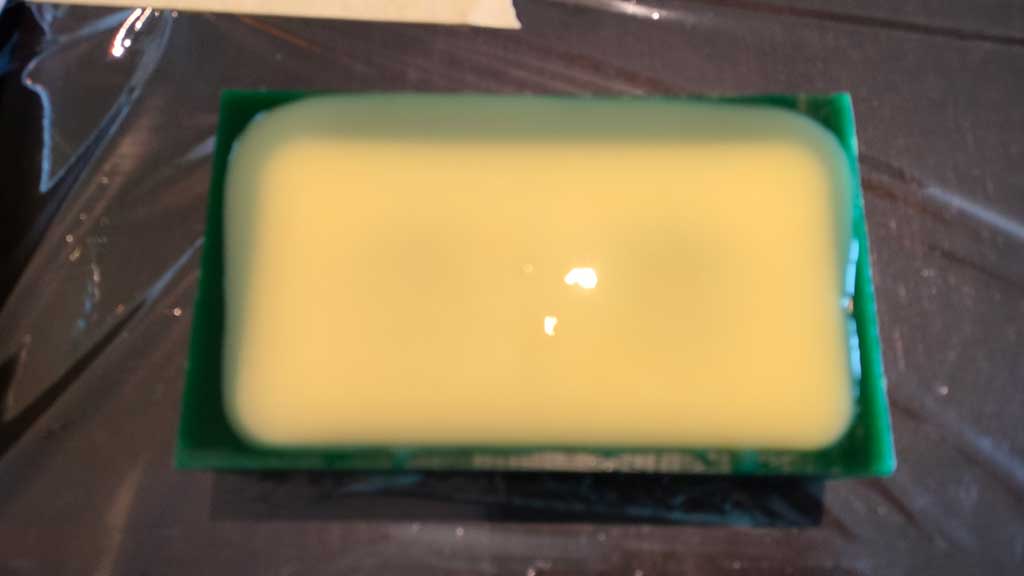
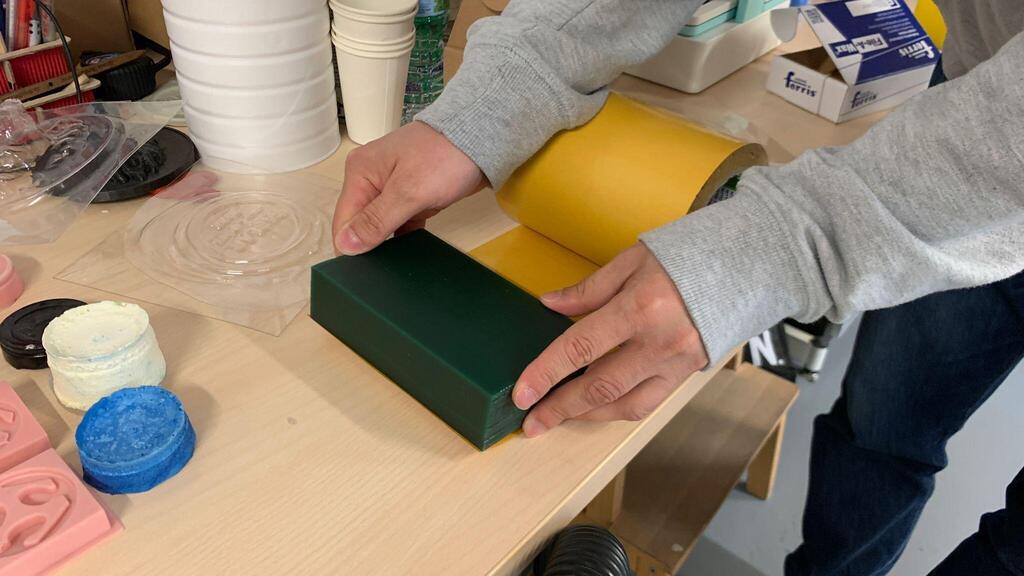
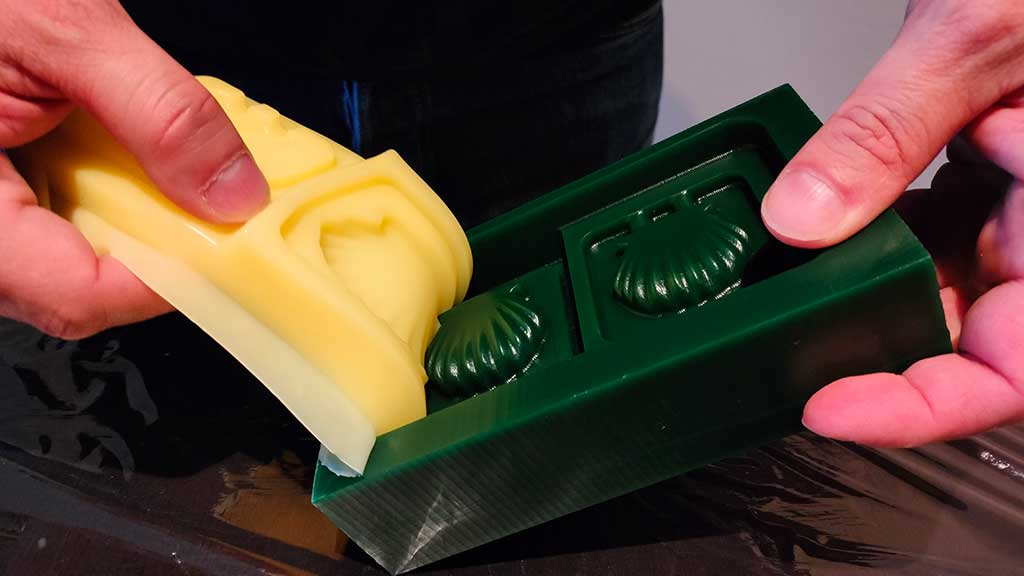
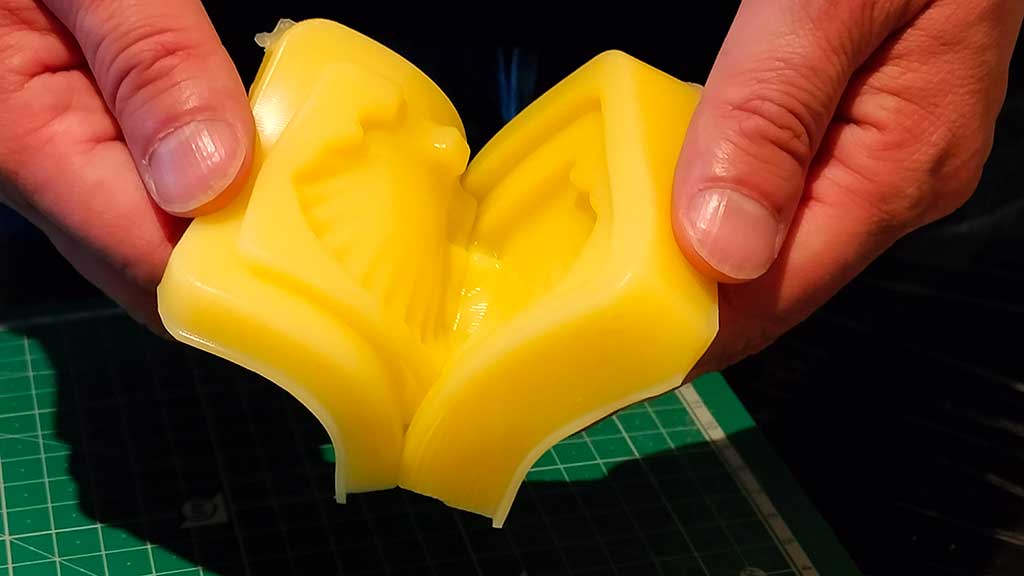
12. After curing, remove the silicone from the mold.
This is corrected in the Fusion 360 "tutorial" as well as the file.
Another thing that we can notice is that because I didn't make the tube on both parts, I will have to also cut a little part. This is also corrected in the model and tutorial.
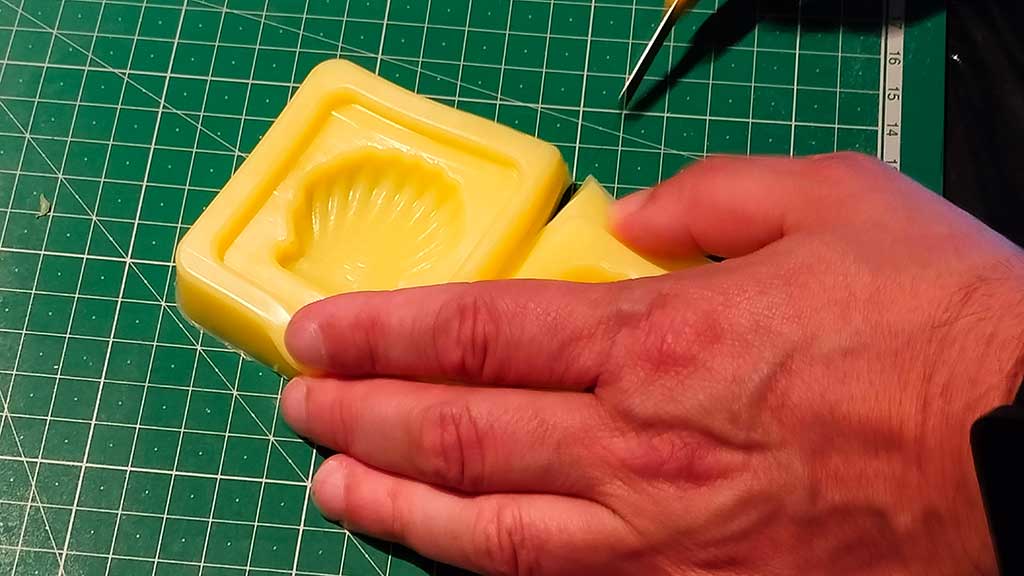
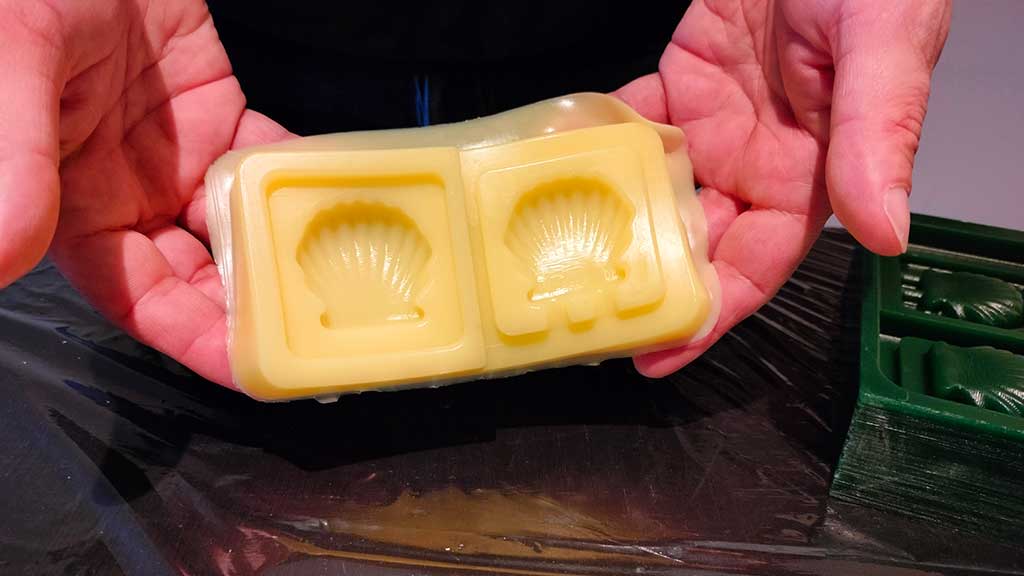
13. Check if it fits.
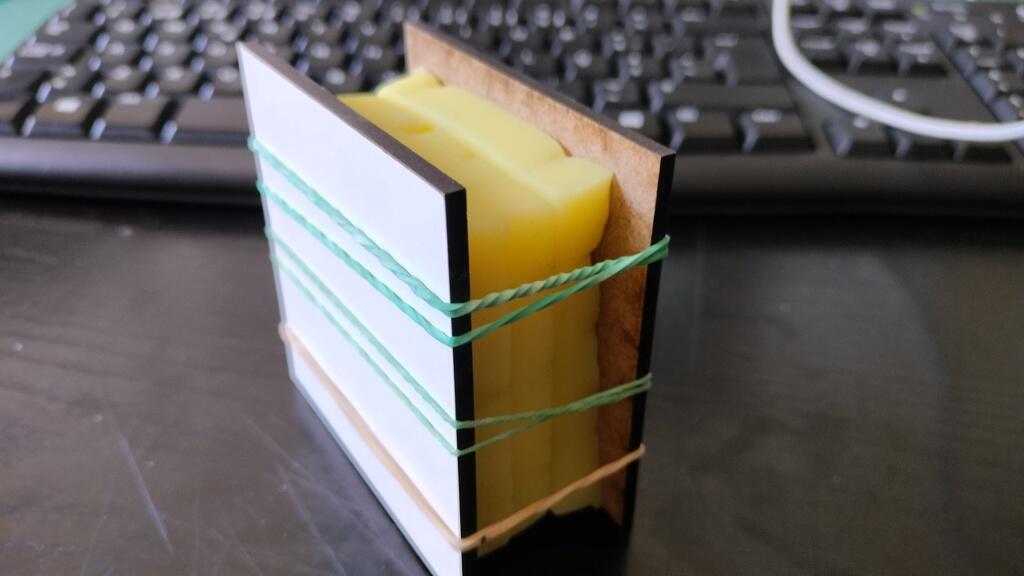
14. Add rubber bands to fix both parts together. Little pieces of wood should be used so that pressure is evenly distributed.
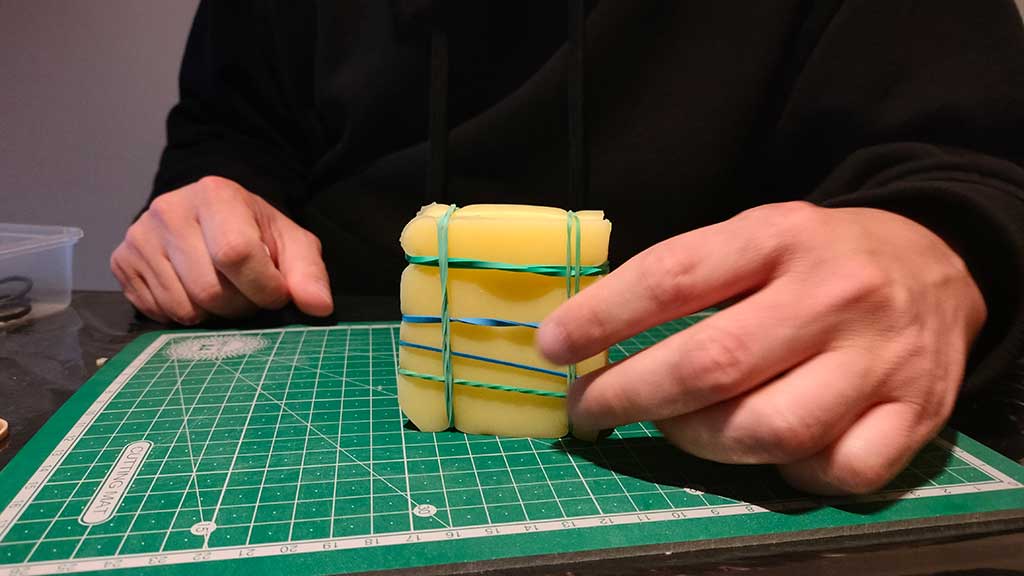
Like this:
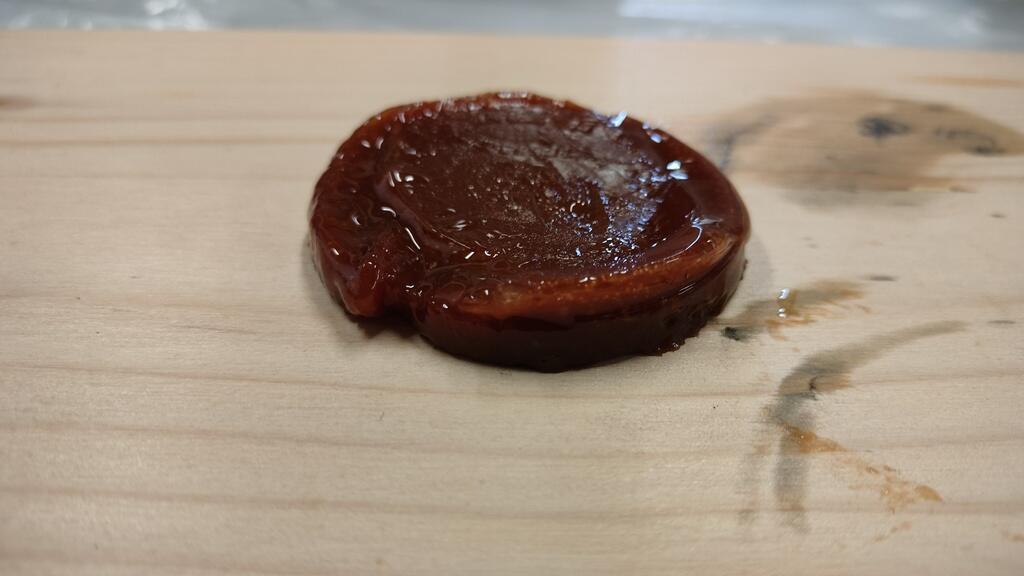
15. I will be using the Smooth-Cast® ONYX™ FAST. It's a 1:1 by volume material.
The
process is the same described above for the silicone mold.
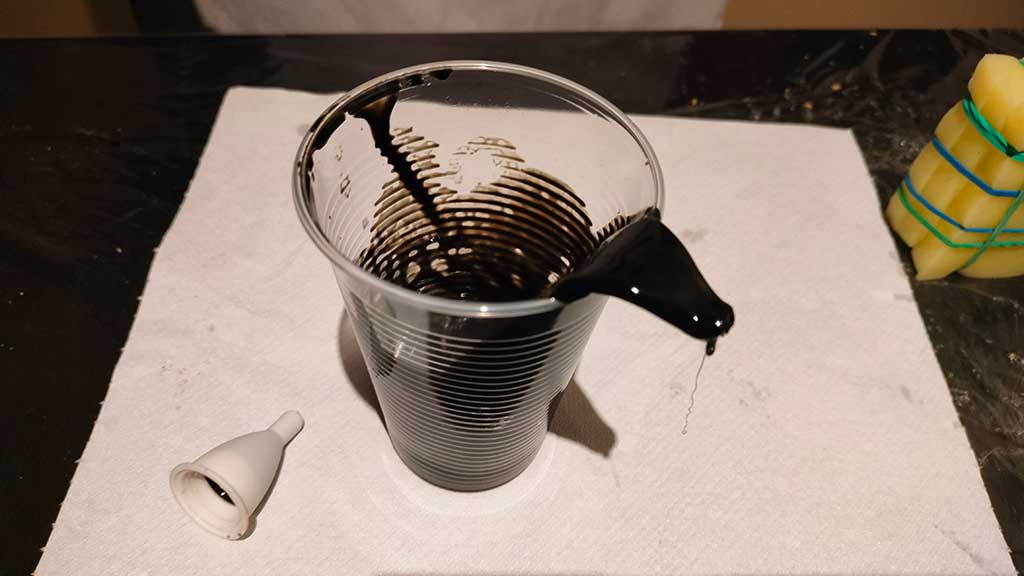
16. Not only does this material have a very short pot life but it also creates an exothermic reaction that gets very hot. I used a little funnel to help get the material in and not spill it.
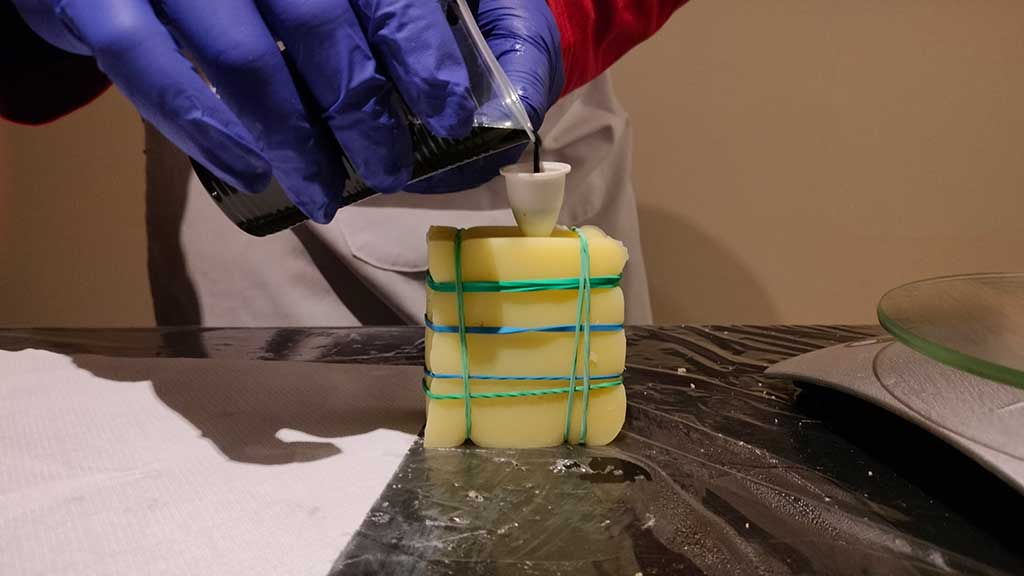
The pot life is so short that it hardened while I was still pouring.
17. Let the material cure. In this case 10 to 15 minutes.
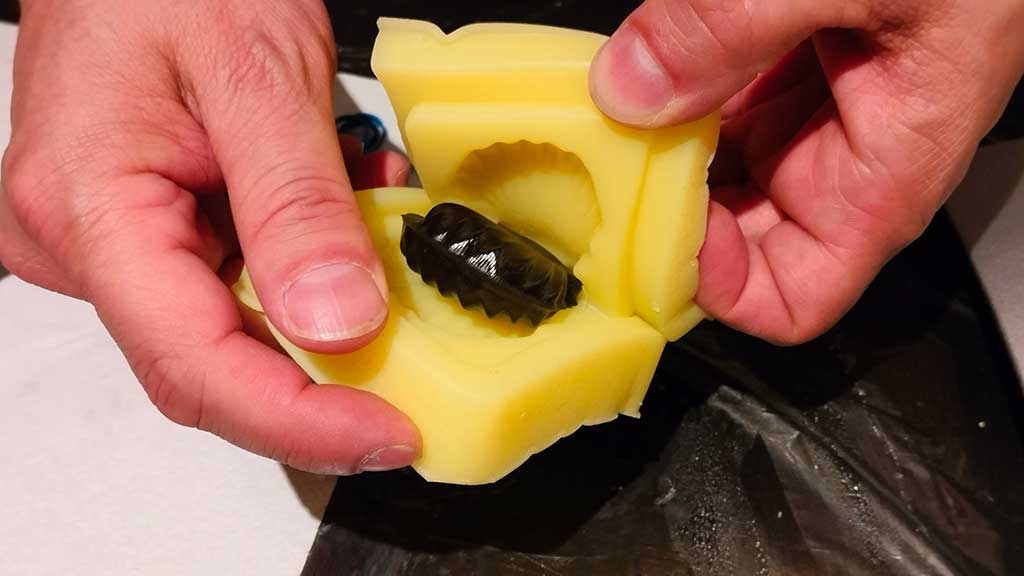
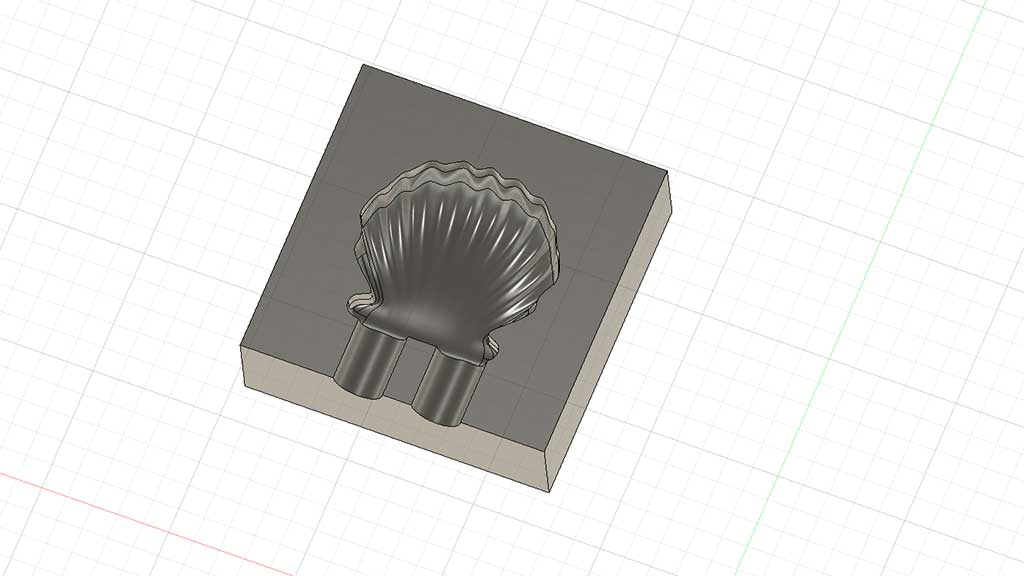
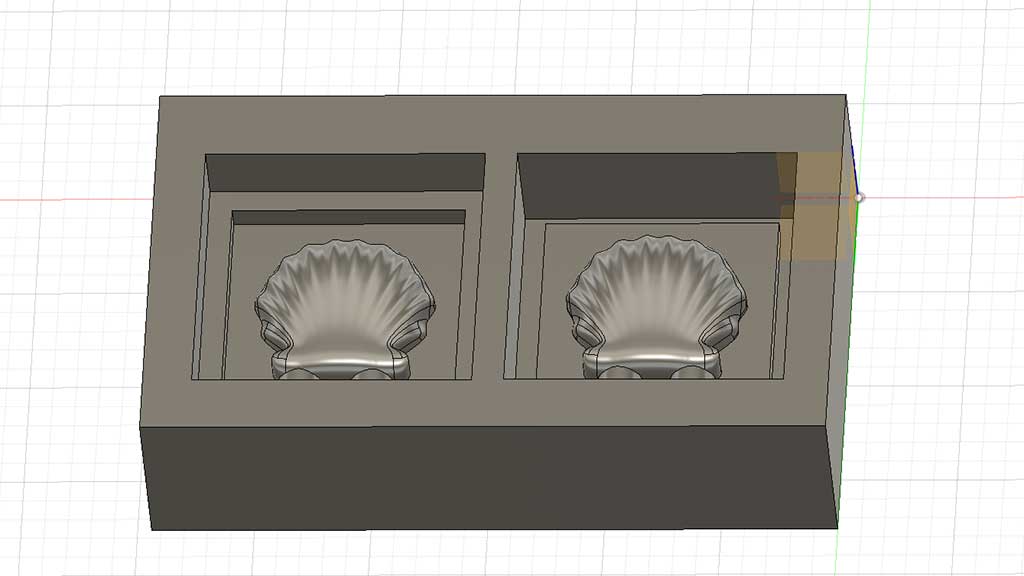
18. Final result
Food safe mold:
SILGOM 725 Food is a 100:10 material.
The process is the same as described above.
One last picture:
For the final project
Nothing this week.
Files
Learned this week (in no special order)
- I learned that I have some difficulty with spatial visualization.
- Chemicals have a very long shelf life.
- I made some mistakes during the week but they are correct now for the future. Nothing really serious and that's the way we learn, right?
Notes and Thoughts
- Although it's a fun week, I'm starting to feel some anxiety for the final project so I didn't get to really enjoy this week as much.
- I do understand how useful this technique can be, but for now I won't be using them very often.
Links
- Adrián Torres
- Vytaflex 40 site
- Vytaflex 40 Safety data sheet
- Hiroaki Kimura Documentation
- Manuel Corrales Documentation
- Fab Lab Kamakura Molding and Casting Tutorial
- Instructables: Molding and Casting
- About gloves
Glossary:
- Cure: The process of hardening of a material.
- Exothermic reaction: A reaction that releases energy.
- Endothermic reaction: A reaction that absorbs energy.
- Shrinkage: The process of becoming smaller or less.
- Thermoset: A polymer that changes its chemical structure during the curing process and cannot be remelted.
- Thermoplastic: A plastic that becomes soft and malleable when heated and hardens when cooled.
- Release agent: A substance that is applied to a mold to prevent the material from sticking to the mold.
- Cast: The process of pouring a liquid material into a mold to create a solid object.
- Mold: A hollow container that is used to create an object in a specific shape by pouring a liquid into it.
Some of these definitions were generated by AI using ChatGTP.