This week's fun assignment was:
Design and produce something with a digital fabrication process (incorporating computer-aided design and manufacturing) not covered in another assignment, documenting the requirements that your assignment meets, and including everything necessary to reproduce it.Possibilities include but are not limited to wildcard week examples.
Wildcard week
What I did this week
Individual assignment
- Design and produce something with a digital fabrication process (incorporating computer-aided design and manufacturing) not covered in another assignment, documenting the requirements that your assignment meets, and including everything necessary to reproduce it.
I think I will start this week's documentation by writing that the last few weeks were the hardest weeks of Fab Academy for me for now... And not because of the assignments.
I really didn't know what to do in Wild Card Week.
Although it sounds like a fun assignment, for me it's a bit frustrating as I want to do pretty much everything and time is very limited.
I want to grow mycelium, make bio materials, soft robots, inflatables, edible robots, if you name it, I want to try it!
But...time is limited and I have to focus on the final project, so this week, I did the minimum necessary.
But don't worry, you still get to read a very long and detailed documentation.
Wildcard Week: Embroidery Machine!
We see Embroidery everywhere and just take it for granted but it's a really complex job and it used to be even more complex and difficult.
It's in hats, patches, jeans, shirts, and pretty much everything that we usually wear.
It gives meaning as it displays logos and imagens and just as well gives power to simple clothing as a shirt.
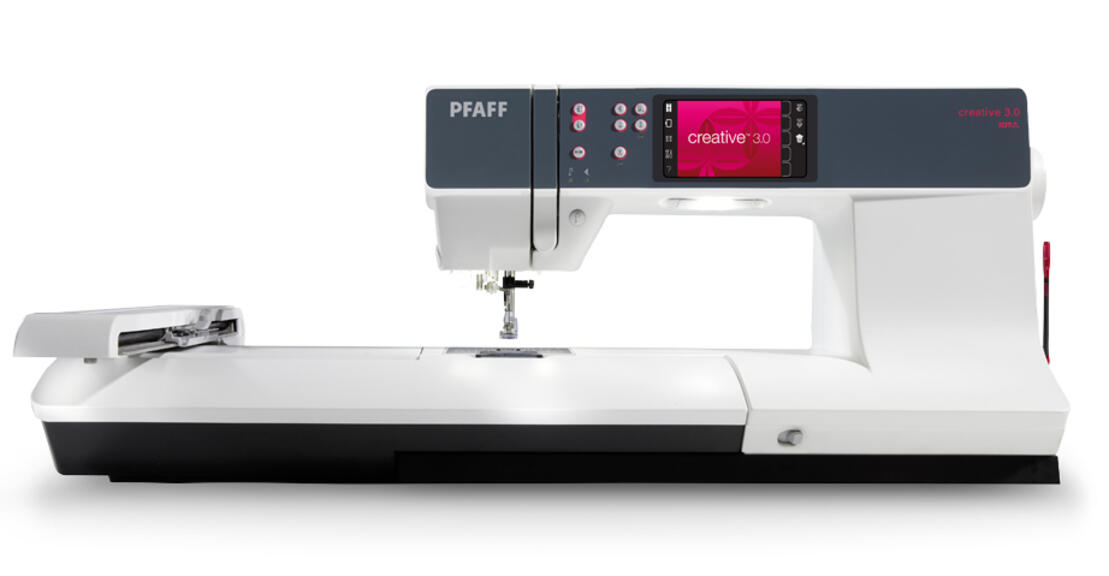
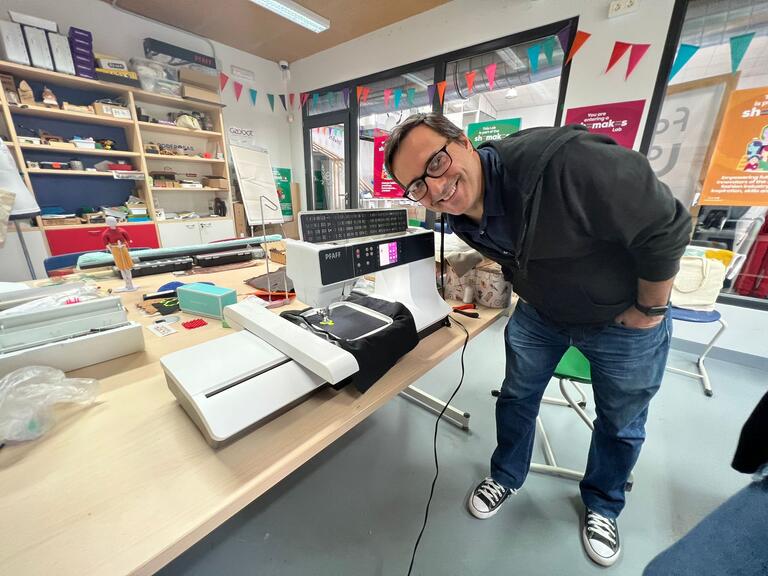
This week I am going to use the following machine:
Pfaff Creative™ 3.0 Sewing and Embroidery Machine
| Specifications | ||
|---|---|---|
| Stitches | 254 | |
| Max Stitch Width | 9mm | The distance the needle moves from side to side while creating a stitch. |
| Max Stitch Length | 6mm | How long each stitch is sewn by your sewing machine. |
| Sewing Fonts | 4 | |
| Sewing Space | 250mm | Needle to Tower |
| Screen Size | 3.5" diagonal | |
| Needle Threader | Built-In | Manual |
| Needle Up Down | Yes | |
| Thread Cutter | Auto Snip | |
| Speed Control | Digital | |
| Max Sewing Speed | 1,050 stitches/min | |
| IDT™ System | Original | |
| Max Embroidery Area | 10.2" x 7.9" (260 x 200 mm) | |
| Start Stop Button | Yes | |
| Automatic Presser Foot Lift | Yes | You can set the machine so that every time you stop stitching, the needle goes down into the fabric and the presser foot automatically lifts up by pressing this button on the display screen. The presser foot will automatically go down again when you start to stitch. |
| Automatic Feed Dog Drop | Automatic | |
| Bobbin Thread Sensor | Yes | |
| Thread Tension | Automatic | |
| Precise Stitch Positioning | Basic | |
| Stitch Sequencing | Yes | |
| Built-In Embroidery Designs | 157 | |
| Embroidery Fonts/strong> | 2 | |
| Auto-Cut Embroidery Jump Stitches | Yes | |
Preparing the graphics and files
For the first step I will install InkStitch;
Ink/Stitch is a free and open source Inkscape extension for designing machine embroidery patterns and files.
I will just need to set the parameters for the desired object(s) and use the extension to generate the necessary stitch file.
- Go to https://inkstitch.org/
- Download the Ink/Stitch installer;
- Run the installer file;
That's it!
The machine operation is well documented and with great detail in the owner's manual. You can find it in the links section.
Now I need a vectorized file.
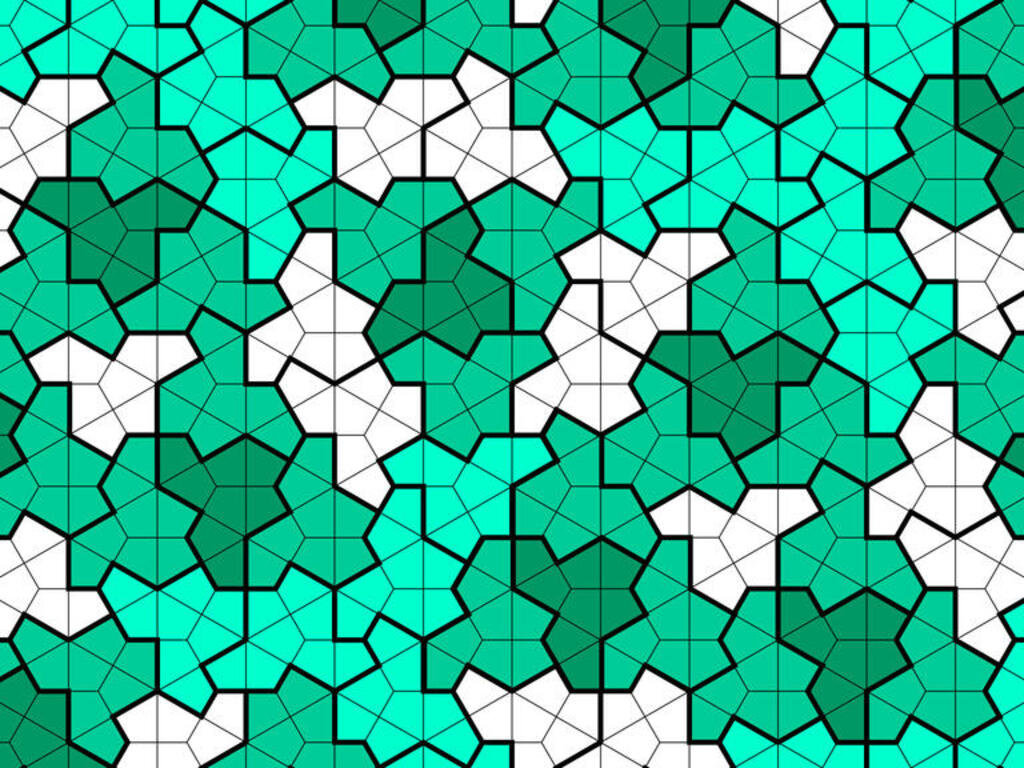
I will be using an "einstein". I learned about these shapes from Susana Passinha's molding and casting week. The link is in the links sections
An Einstein (German: ein Stein, one stone) is an aperiodic tiling that uses only a single shape.
The first such tile was discovered in 2013 - Socolar-Taylor tile, which is however not connected into one piece. In 2023 a connected tile was discovered, using a shape termed a "hat".
It is this shape I will be using:
As mentioned in the installation instructions for Ink/Stitch I will use Inkscape for this and these are the necessary steps:
1. Create a vector file, selected and go to Extensions > InkStitch > Params;
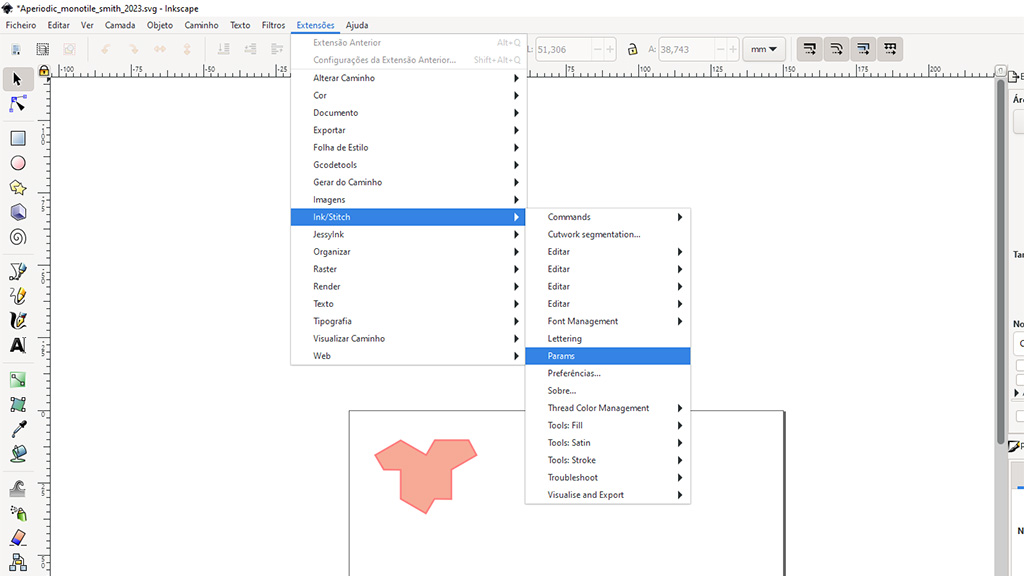
2.Select the settings you want for the embroidery: Stroke, fill, etc;
3. Save the file in .vp3 format. The .dst format is a also very used in different machines;

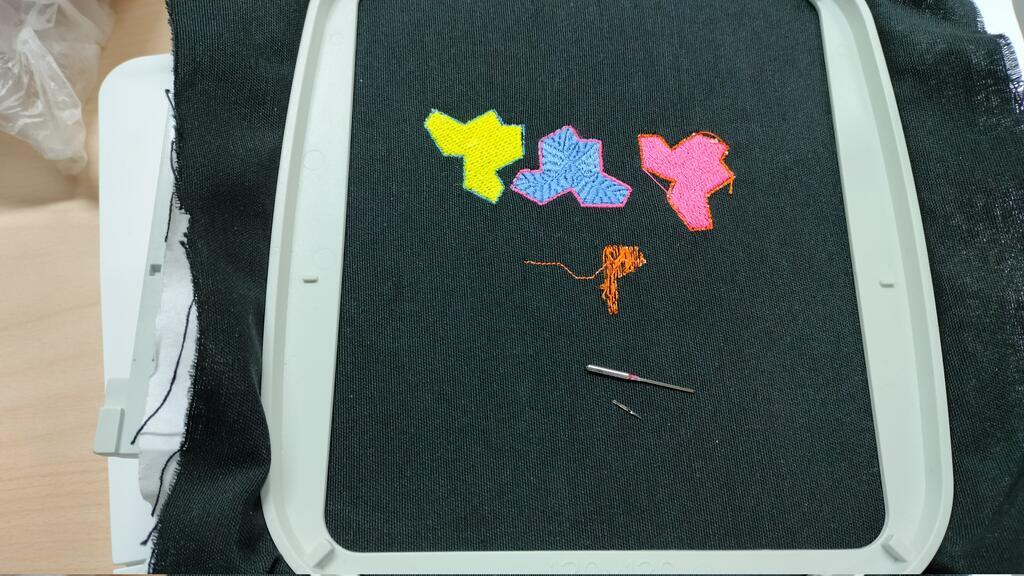
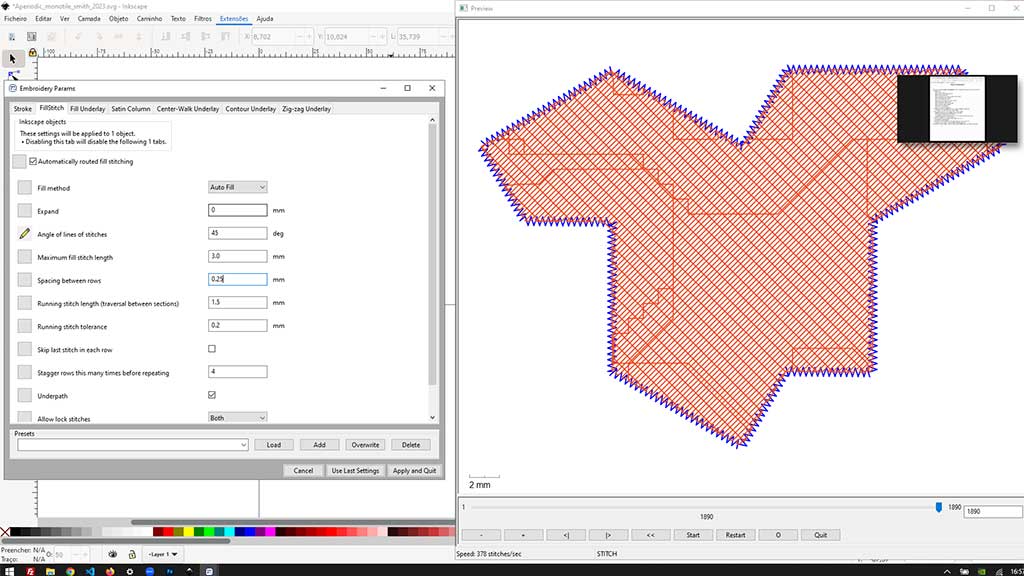
I created 3 shapes with different rotations and settings.
- With a one pass border and guided/autofill with a rotation of 45º;
- With a two pass border and a contour fill;
- With a two pass border and a legacy fill;
Now I just need to copy the saved files to a pen drive and insert it on the machine.
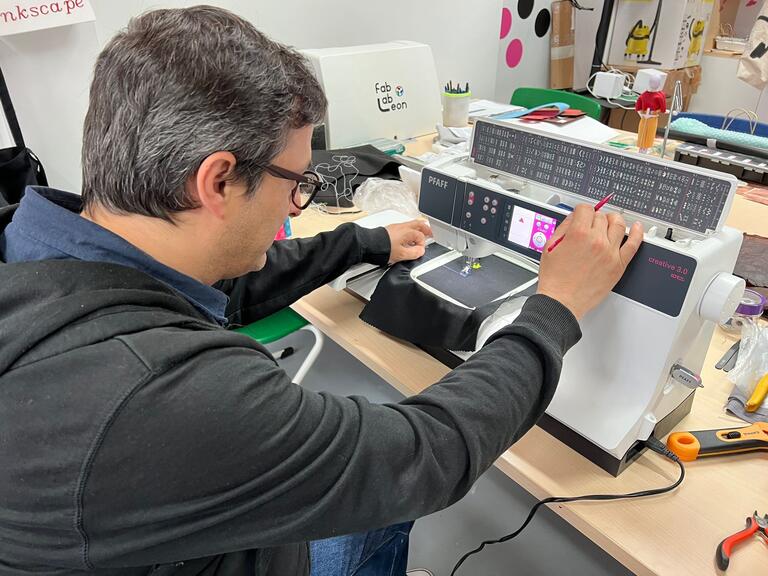
Preparing the machine.
Preparing the machine has a lot of steps but it is not overly complex.
Nuria has always given a thorough explanation of how the machine operates and tips and tricks that she has learned along the way.
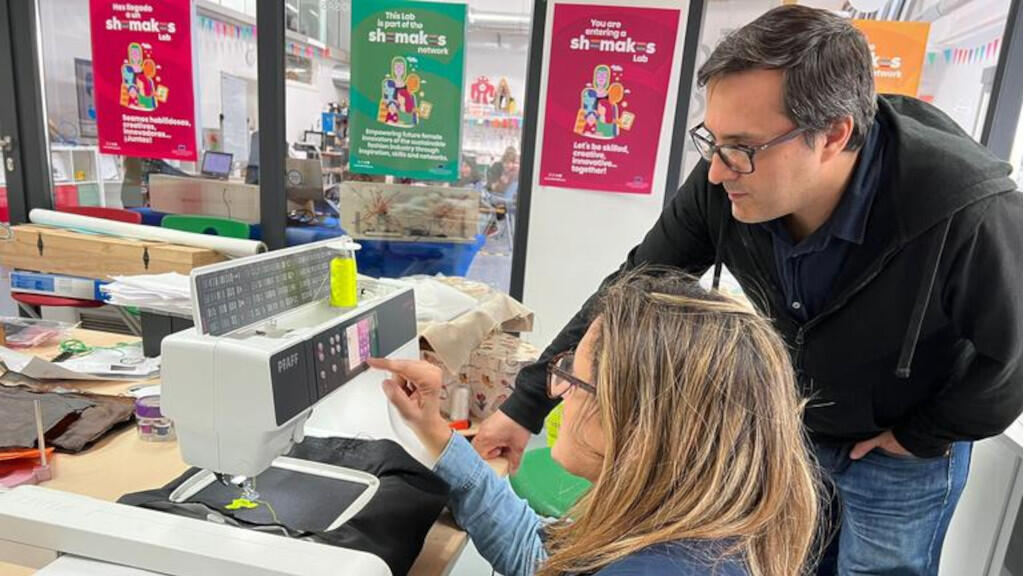
Nuria setup and embroidered a star with border:

She also explained how to set up the bobbin thread:
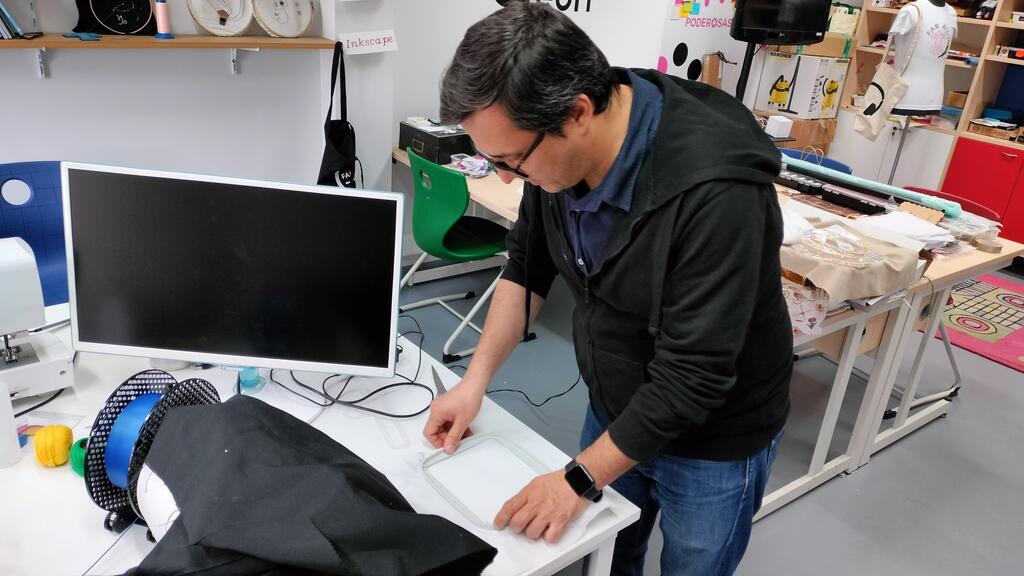
Before embroidering we need to set up the hoop.
The hoop is the frame that will hold the fabric in place while the machine embroiders it.
In the hoop the fabric needs to be stretched.
I'm using a 120x120 square hoop.
The hoop needs not only the material to be embroider but also a stabilizer.
There are different types of stabilizers:
- Tear-away stabilizers are used with stable woven fabrics. Place underneath fabric for decorative stitching or hoop with the fabric when embroidering. Tear away excess stabilizer after stitching.
- Iron-on tear-away is a totally stable stabilizer that has a slick side that will
iron on to fabric.
It is recommended for knits and all unstable fabrics. Fuse it to the wrong side of the fabric before decorative stitching or hooping.
Tear away excess stabilizer after stitching. - Cut-away stabilizer does not tear so the excess has to be cut away. It is recommended for knits and all unstable fabrics, especially for hoop embroidery.
- Water soluble stabilizer is placed on top of the fabric when embellishing/embroidering napped and looped fabrics such as terry cloth. When embroidering cutwork, use it underneath the fabric. Place your work in water to dissolve the excess stabilizer. It is available in different thicknesses.
- Disintegrating stabilizer is a stable, loosely woven fabric that is used for techniques such as cutwork and to crochet off the fabric edge. The stabilizer disappears with heat.
- Sticky stabilizer is used for hoop embroidery when the fabric is too delicate or too small to be hooped. Hoop the sticky stabilizer with the paper side up. Remove the paper and stick the fabric onto the sticky surface. Tear away sticky stabilizer after stitching
I will use a tear-away stabilizer.
The process to hoop the fabric is very well documented in the manual.
1. Put stabilizer in the hoop frame;
2. Add Fabric on top of the stabilizer;
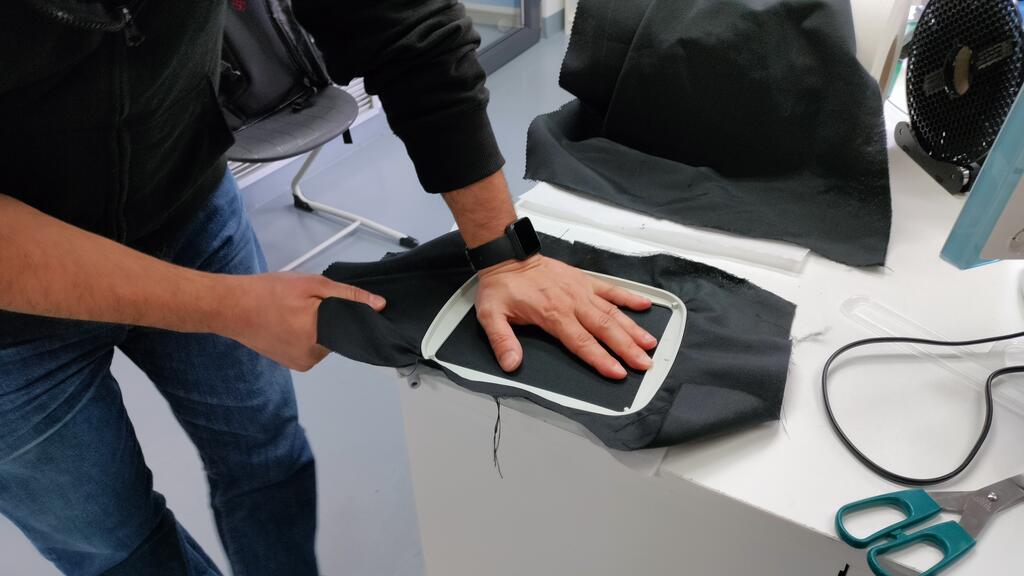
3. Both fabrics need to be stretched;
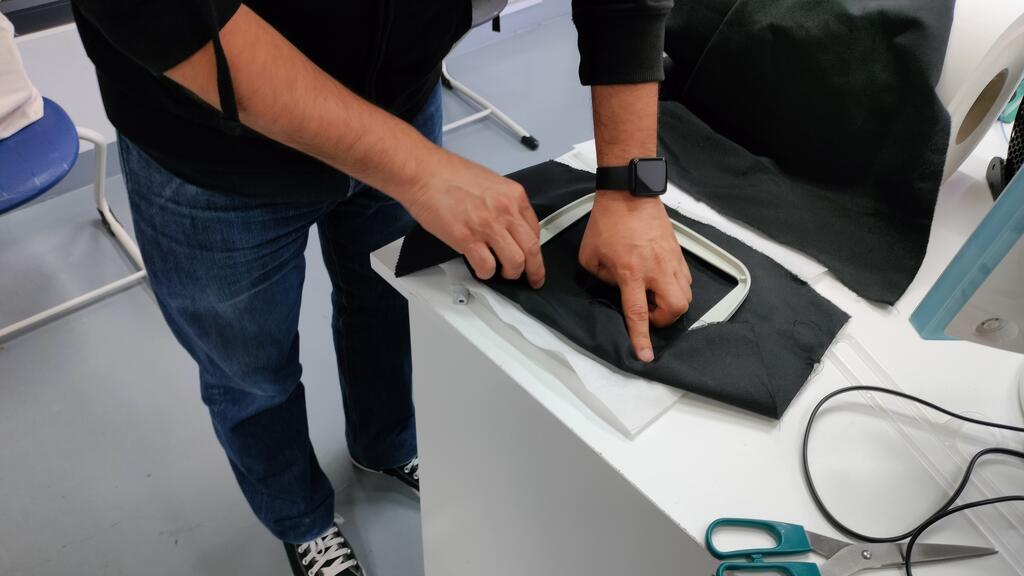
4. When correctly stretched the hoop should feel like banging on a drum;
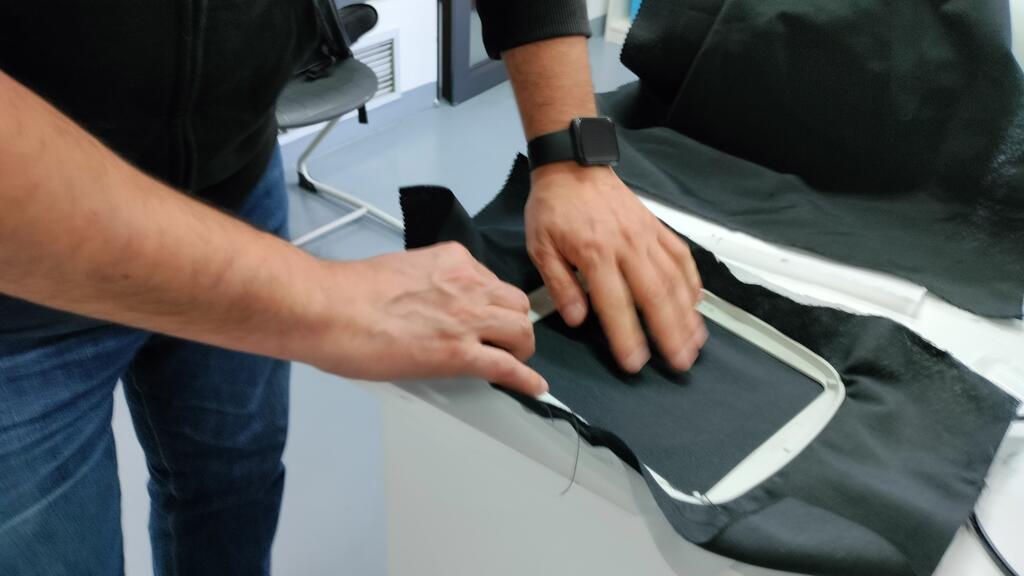
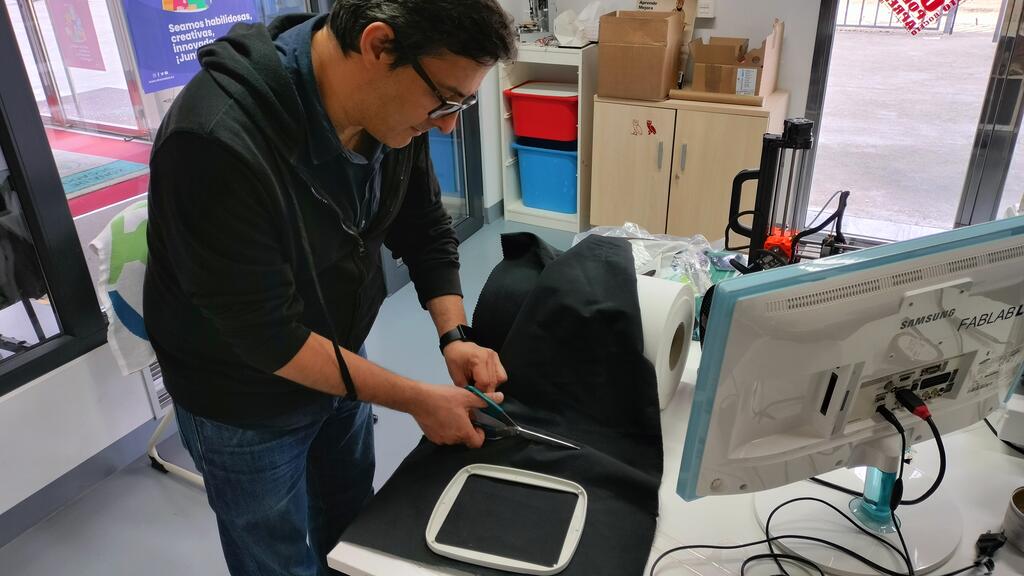
5. Cut the excess fabric (if needed);
6. Insert the hoop in the machine;
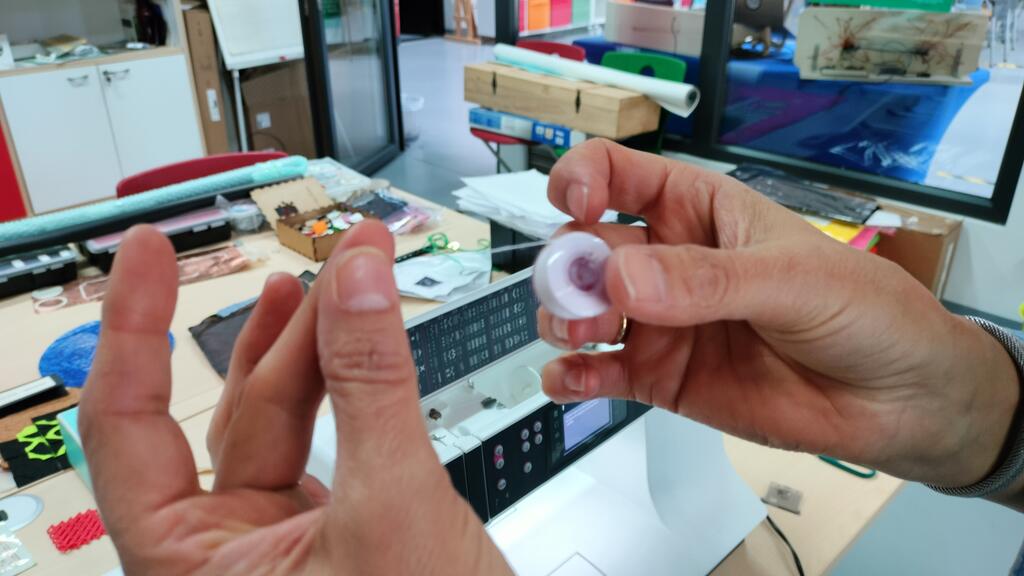
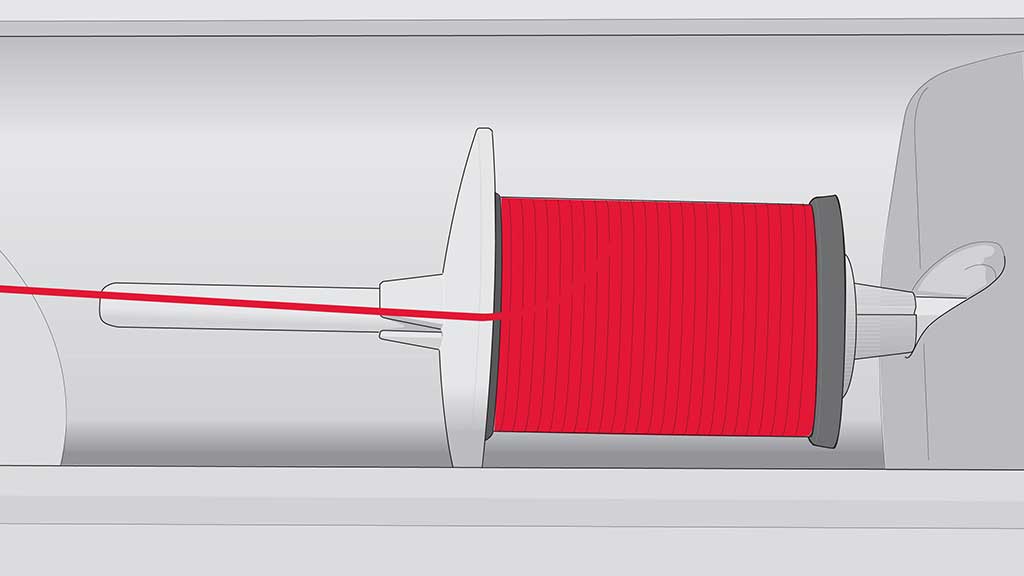
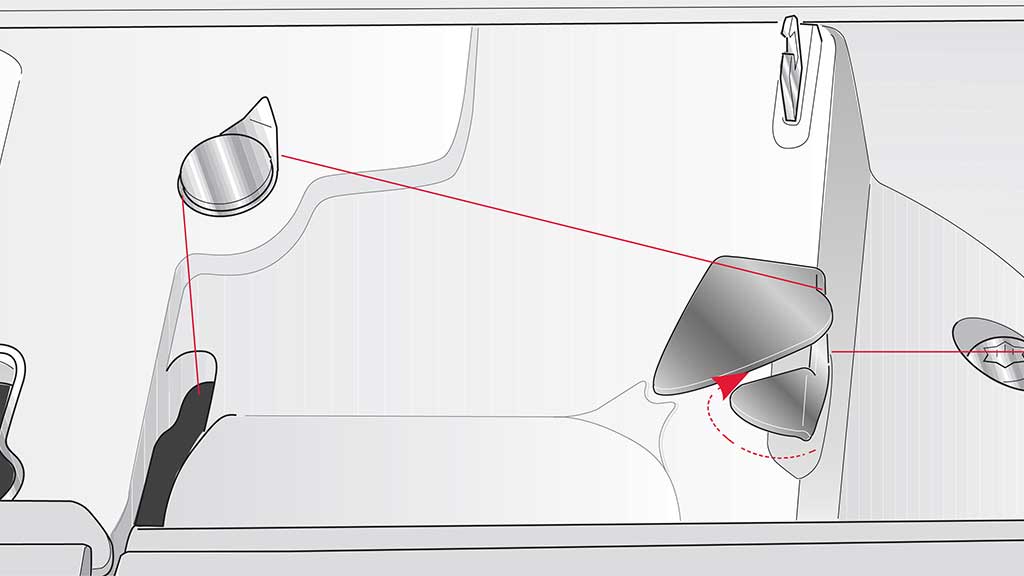
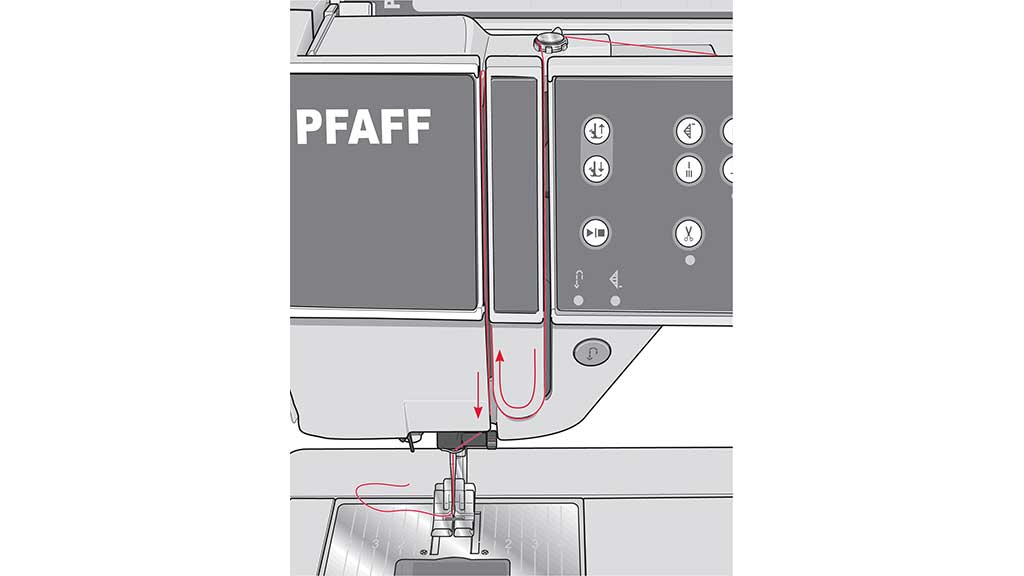
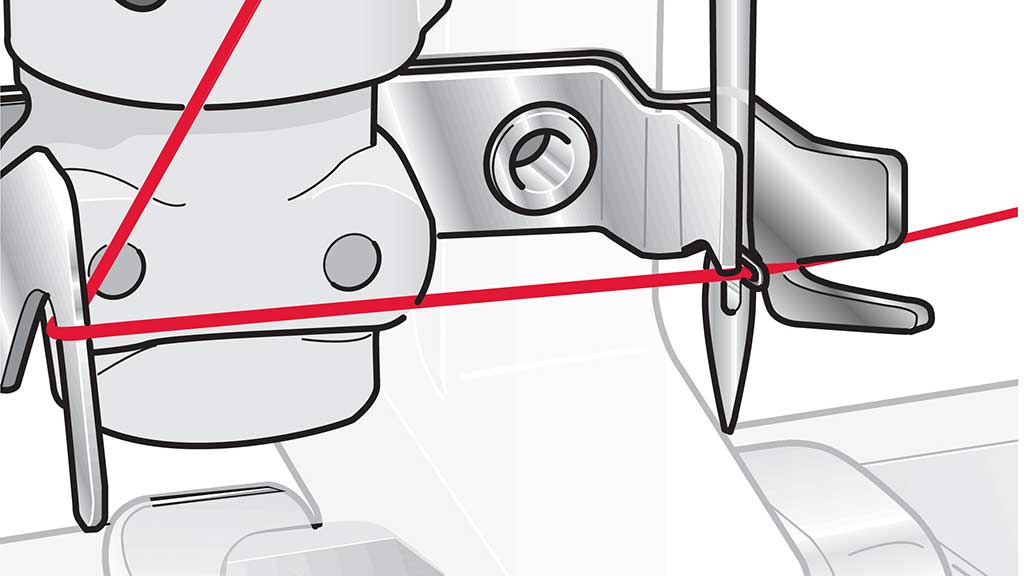
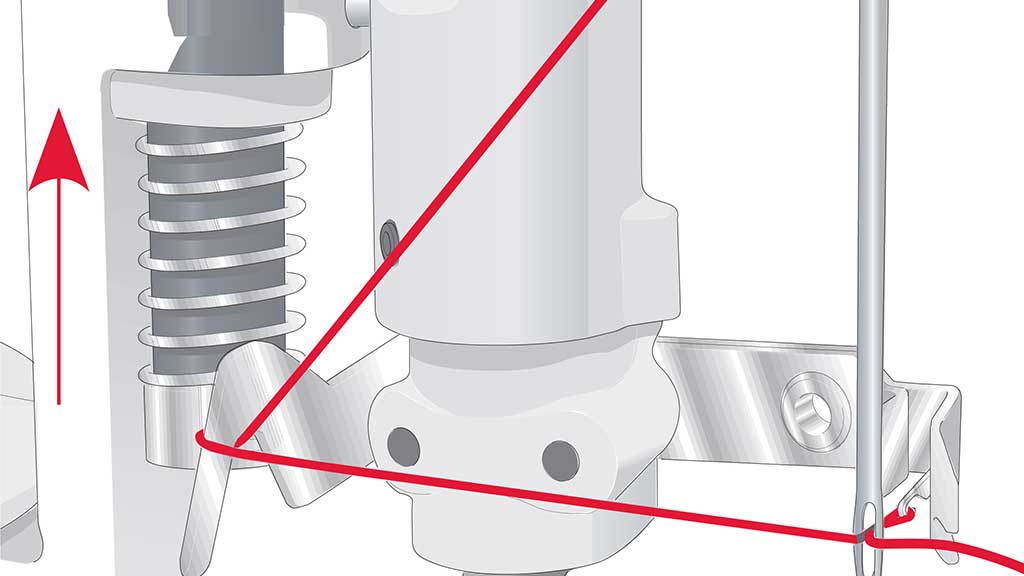
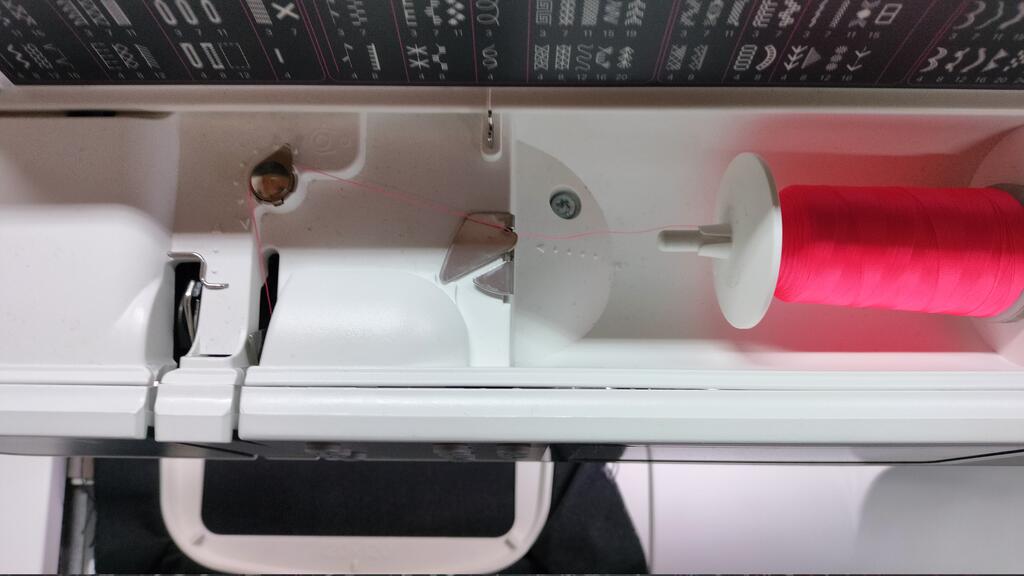
As the bobbin pin is already set, we add thread to the machine:
Threading the machine is explained in detail in the manual, but here is a visual explanation:


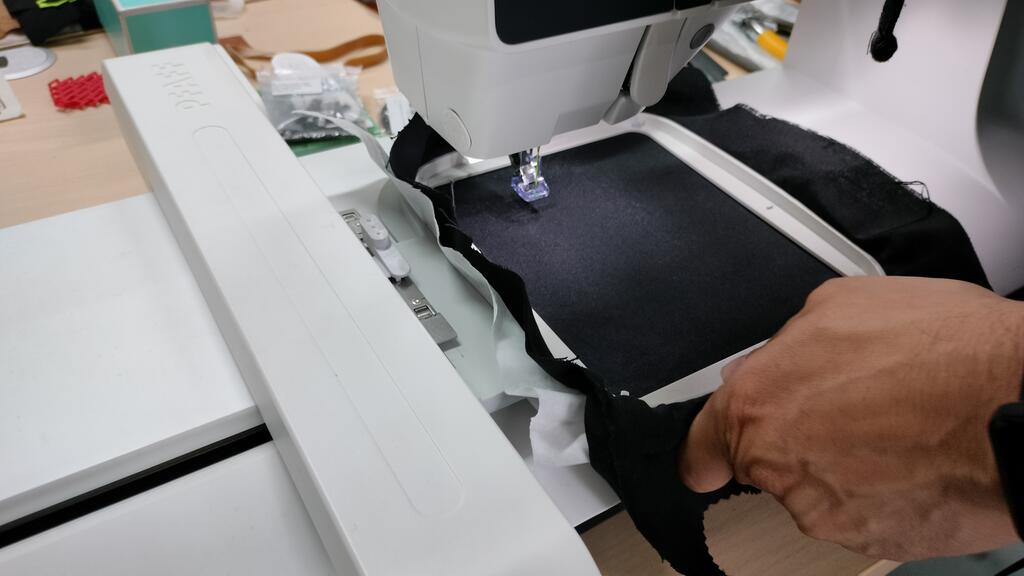
Embroidery
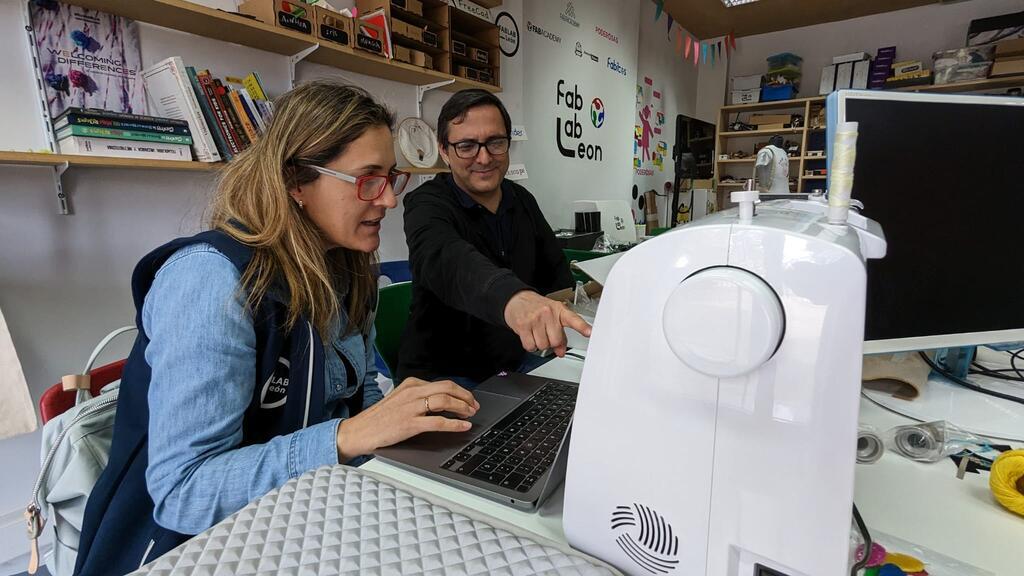
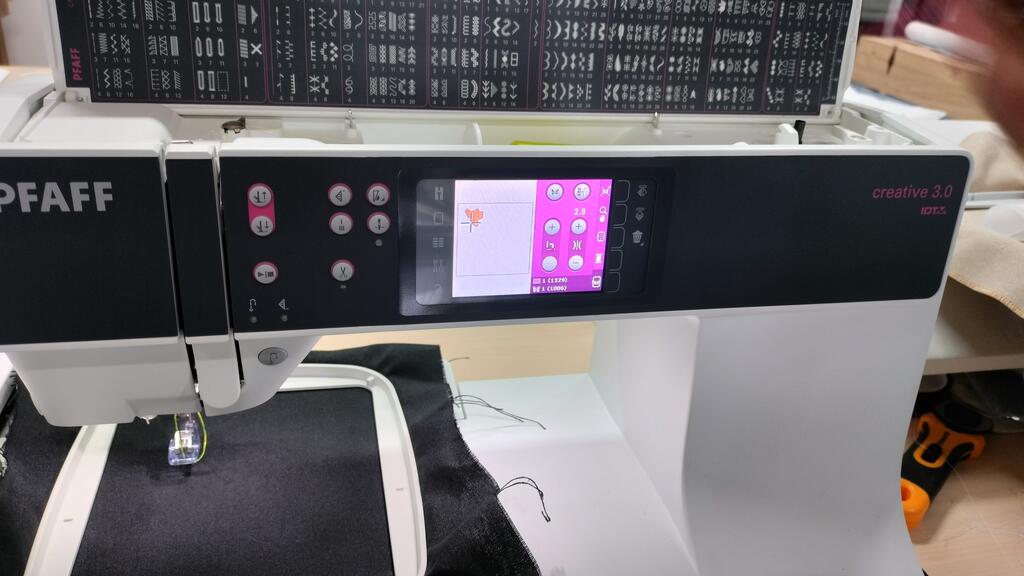
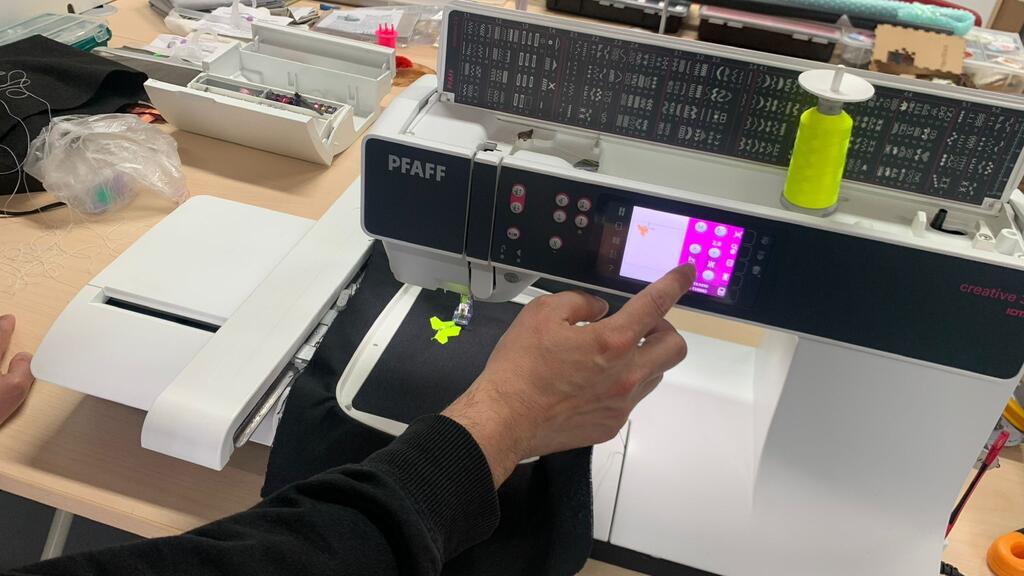
Now that everything is set, we need to pull up our file from the USB pen using the touch panel in the machine and position it where we would like it to go in the fabric.
When starting the machine, I holded the thread as it's going to be cut. Just gently pull.
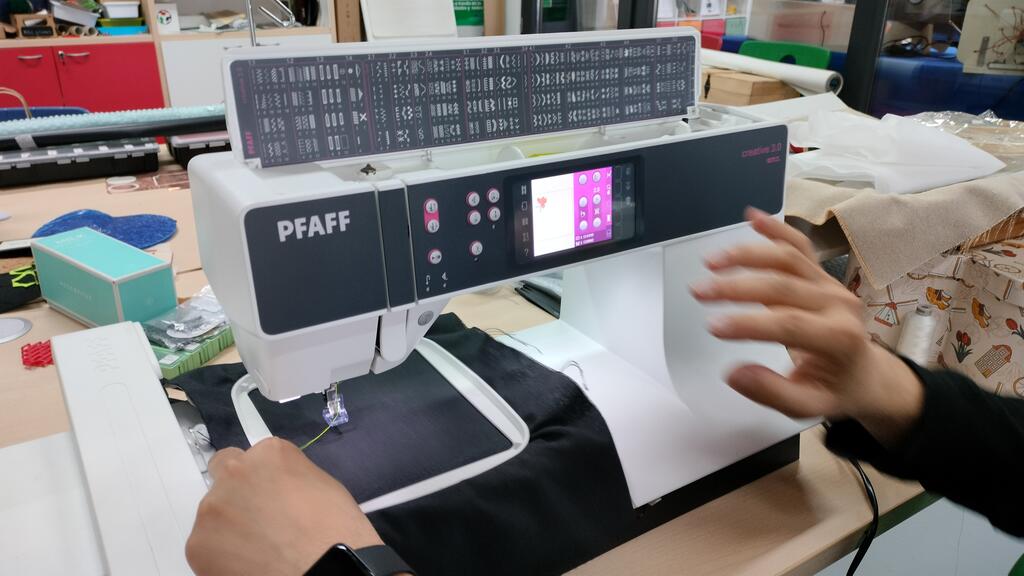
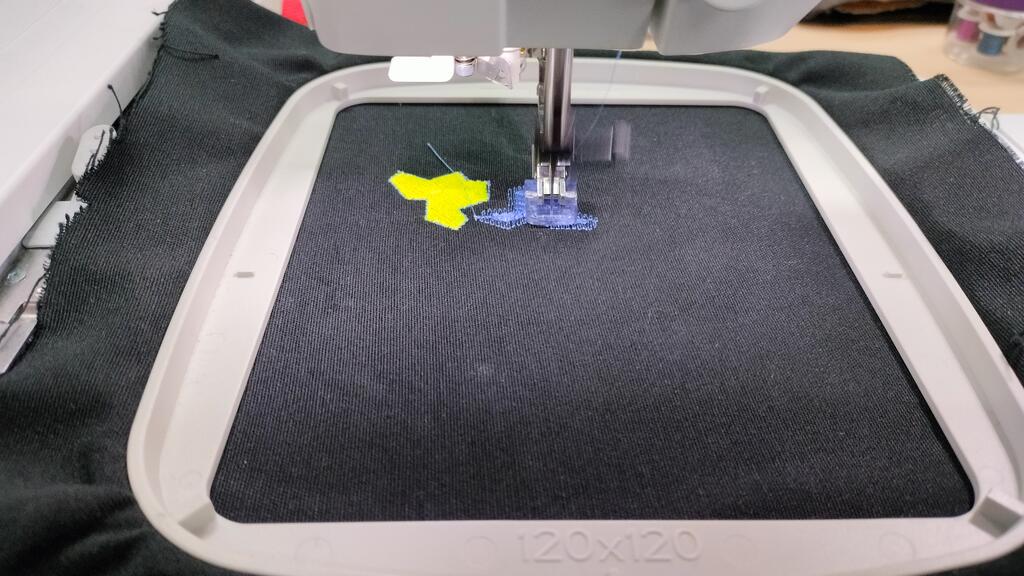
So this is it.... the machine is embroidering:
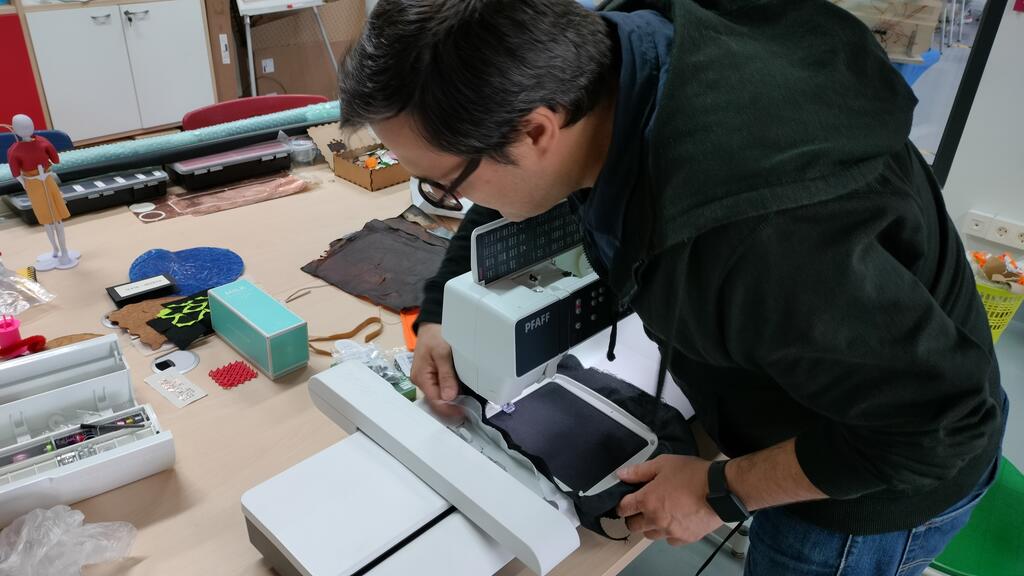
Unfortunately this first run didn't go as expected and the machine didn't get to fill the middle part of the shape.
The problem was with the bobbin thread that needed to be substituted.
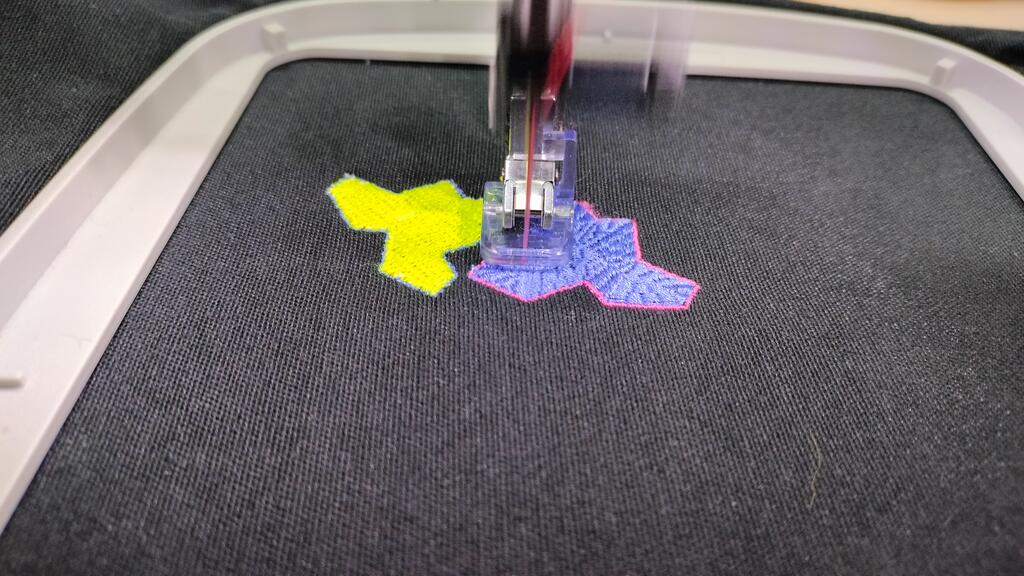
Fortunately there is a way to solve this, as the machine allows us to retrace steps and do them over again.
A cool trick is to see the number of steps in Inkscape-Ink/Stitch and just go to the number on the machine.
When the machine finishes a color it will indicate that the Thread needs to be replaced with another with the correct color.
I just needed to retrace the steps to load the thread.
As stated above, I am trying different Stitch patterns.
As well as different border passes
As stated above, I am trying different Stitch patterns, in this case, a border with a single pass followed by a double pass border.
Eventually the needle broke:
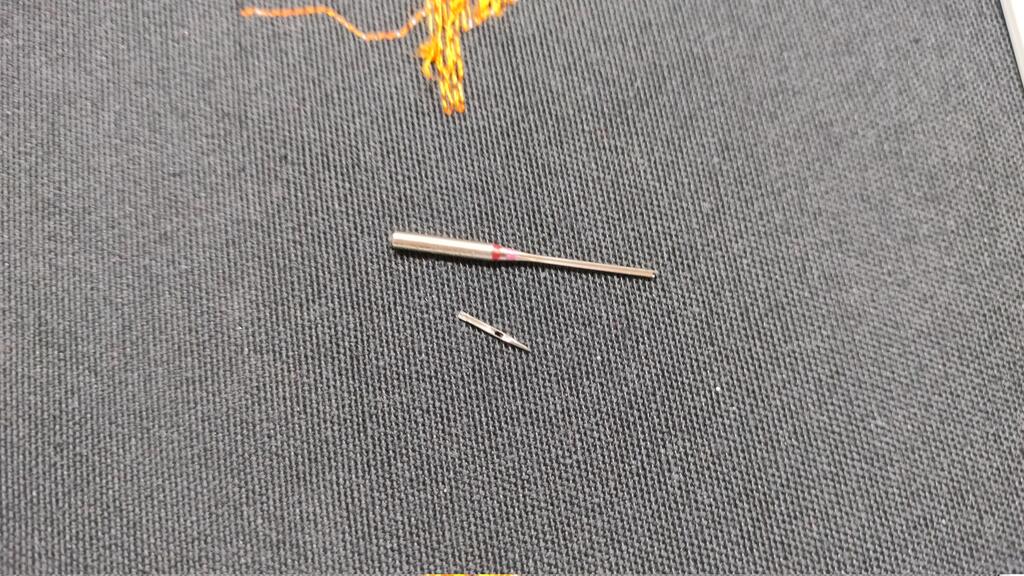
But that was not a problem as I had already done all the planned embroidering.
For the final project
Nothing this week
Files
- Einstein DST file
- contour DST file
- Auto fill DST file
- Guided fill VP3 file (same as autofill)
- Legagy fill VP3 file
- Einstein VP3 file
- Counter fill VP3 file
- Guided fill DST File (same as autofill)
- Legacy fill DST file
- Auto fill VP3 file
- Einstein Aperiodic Monotile Smith 2023 SVG file
Learned this week (in no special order)
- What was learned.
Notes and Thoughts
Along the course I have always tried not to waste the precious time of my instructors and I think that aside from some miscommunication I have always succeeded.
So this week, I have to thank Nuria for being supportive and giving me not just the opportunity but also the time to do this assignment on my own time.
Links
- InkStitch Tutorials
- Pfaff Creative 3.0 Sewing and Embroidery machine
- Susana Passinhas Fab Academy site
- Aperiodic tiling
Glossary:
- Bobbin Thread::The thread that goes in the bobbin of the sewing machine.
- Embroidery::The art of decorating fabric or other materials using a needle to apply thread or yarn.
- Embroidery Machine::A machine that can embroider a design or pattern on fabric using thread.
- Embroidery Software::A software that allows you to create embroidery designs.
- Fill Stitch::A stitch that fills an area with straight or zigzag stitches.
- Digitizing::The process of converting a graphic image into an embroidery machine file.
- Hooping::The process of putting fabric into an embroidery hoop.
- Needle::The part of the machine that holds the thread.
- Needle Plate::The part of the machine that holds the needle.
- Needle Thread::The thread that goes through the needle of the sewing machine.
- Outline Stitch::A stitch that outlines the design.
- Stabilizer::A material that is placed under the fabric to keep it from stretching.
- Stitch::A single loop of thread that is made by a sewing machine.
- Stitch Length::The length of the stitch.
- Stitch Width::The width of the stitch.
- Thread::A thin strand of cotton, silk, or other material, used in sewing.
- Thread Break::When the thread breaks.
- Thread Tension::The tightness of the thread.
- Thread Tension Dial::A dial that is used to adjust the tension of the thread.
- Thread Tension Gauge::A gauge that is used to measure the tension of the thread.
- Thread Tension Spring::A spring that is used to adjust the tension of the thread.
- Thread Tensioner::A device that is used to adjust the tension of the thread.
Some of these definitions were generated by AI using ChatGTP.