
Week 15. Molding and Casting
Like the previous week, there are two types of assignments, one group and one individual. In my case being alone in the Fab Lab, I do both.
- Review the safety data sheets for each of your molding and casting materials. ✔
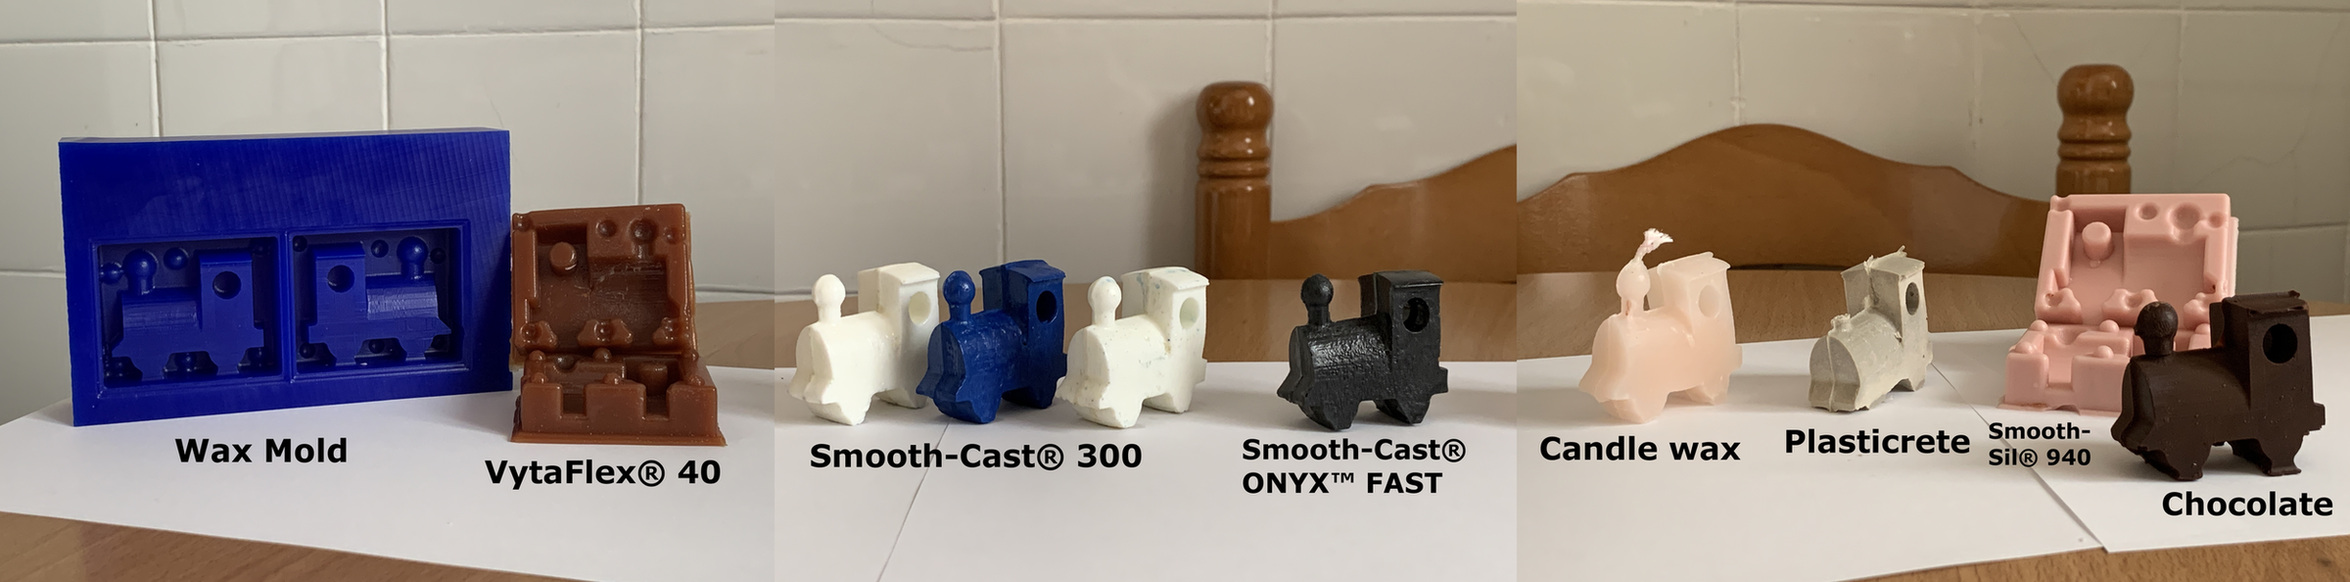
- Make and compare test casts with each of them. ✔
- Design a 3D mould around the stock and tooling that you'll be using, mill it (rough cut + (at least) three-axis finish cut), and use it to cast parts. ✔
- Linked to the group assignment page. ✔
- Reviewed the safety data sheets for each of your molding and casting materials, then made and compared test casts with each of them. ✔
- Documented how you designed your 3D mould and created your rough and finish toolpaths for machining, including machine settings. ✔
- Shown how you made your mould and cast the parts. ✔
- Described problems and how you fixed them. ✔
- Included your design files and ‘hero shot’ of the mould and the final object. ✔
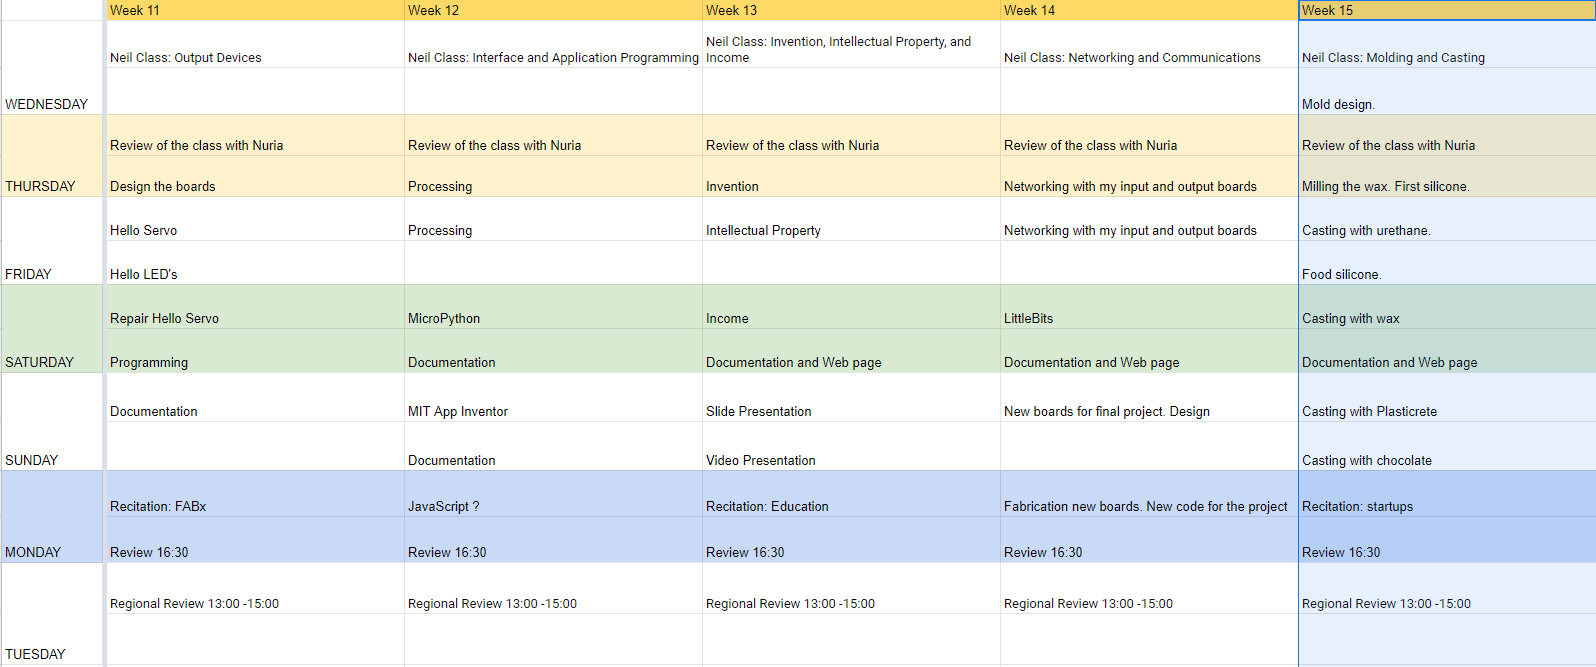
Like every week, my weekly schedule. 😊
This week is a fun week. Because you can replicate a 3D design, much faster than with a printer and in different materials. I'm going to try to create a two-part mold, shaped like a train. And I want to use food silicone to create chocolate in the shape of the train ... And something else that I can think of. 😊
Cubiko Update. 01/04/2026
Genmitsu Cubiko CNC Router milling wax
Group Assignment. Reviewing the safety data sheets for molding and casting materials.
The Group Assignment page is at the following link.
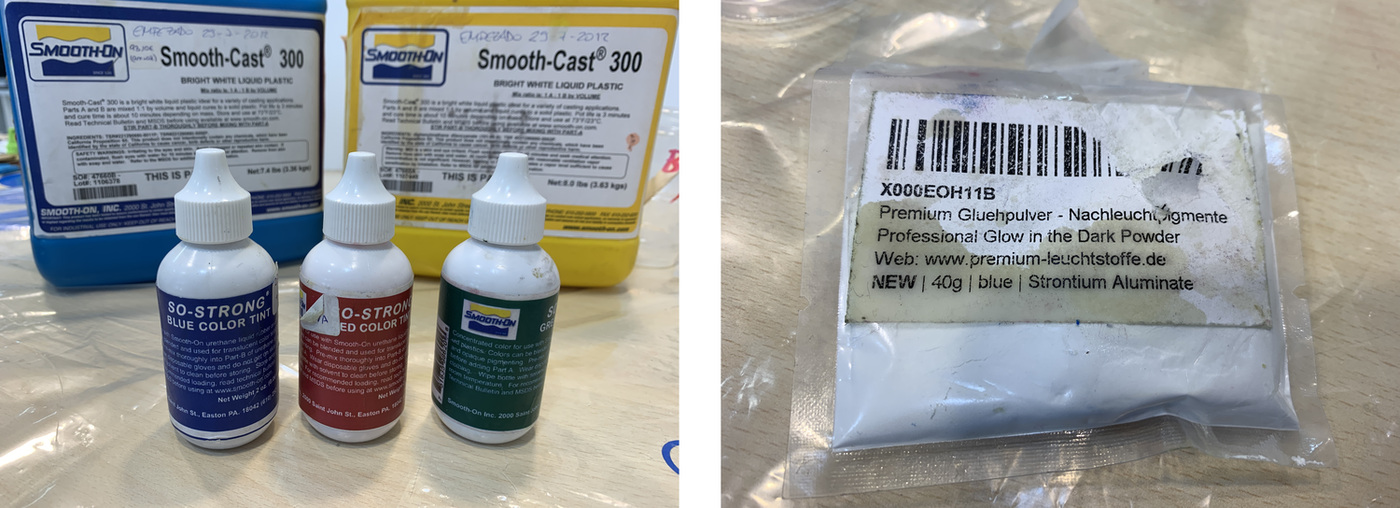
In the Fab Lab León there is a filing cabinet, where all the data sheets and safety data sheets of the different silicones and resins that I am going to use in this Assignment are kept.
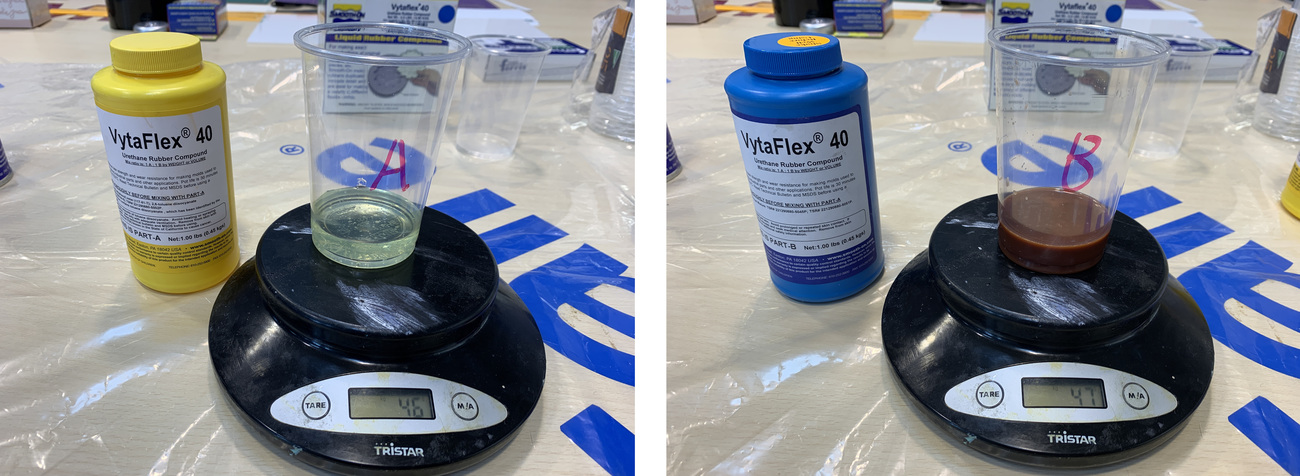
In the following photo you can see on the left the silicones that I am going to use and on the right the resin that I am going to use.
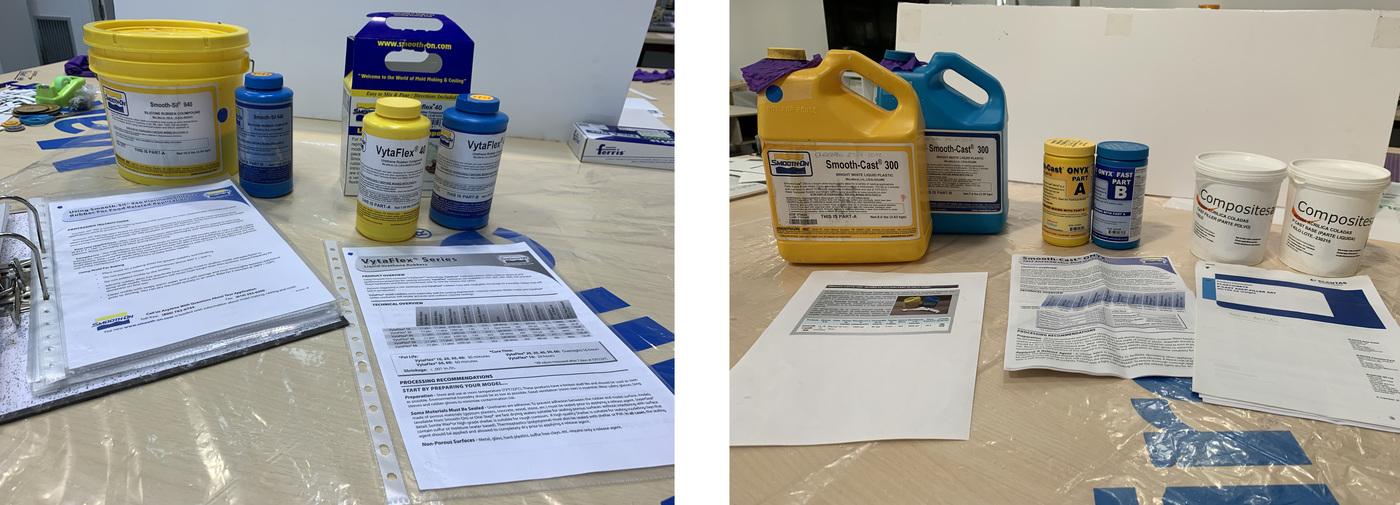
All the products are from the Smooth-On brand, where I can locate the safety data sheets, although it is always better to have it on paper, faster to search. 😃
The silicone models that I am going to use are the following:
VytaFlex® 40
- It is a liquid urethane silicone.
- It has a pot life of 30 minutes and a cure of 16 hours.
- It is recommended to use a release agent.
- Within the security aspect, good ventilation is recommended, wearing safety glasses, rubber gloves and long sleeves. As we are in COVID-19 period, I use the mask. 😷
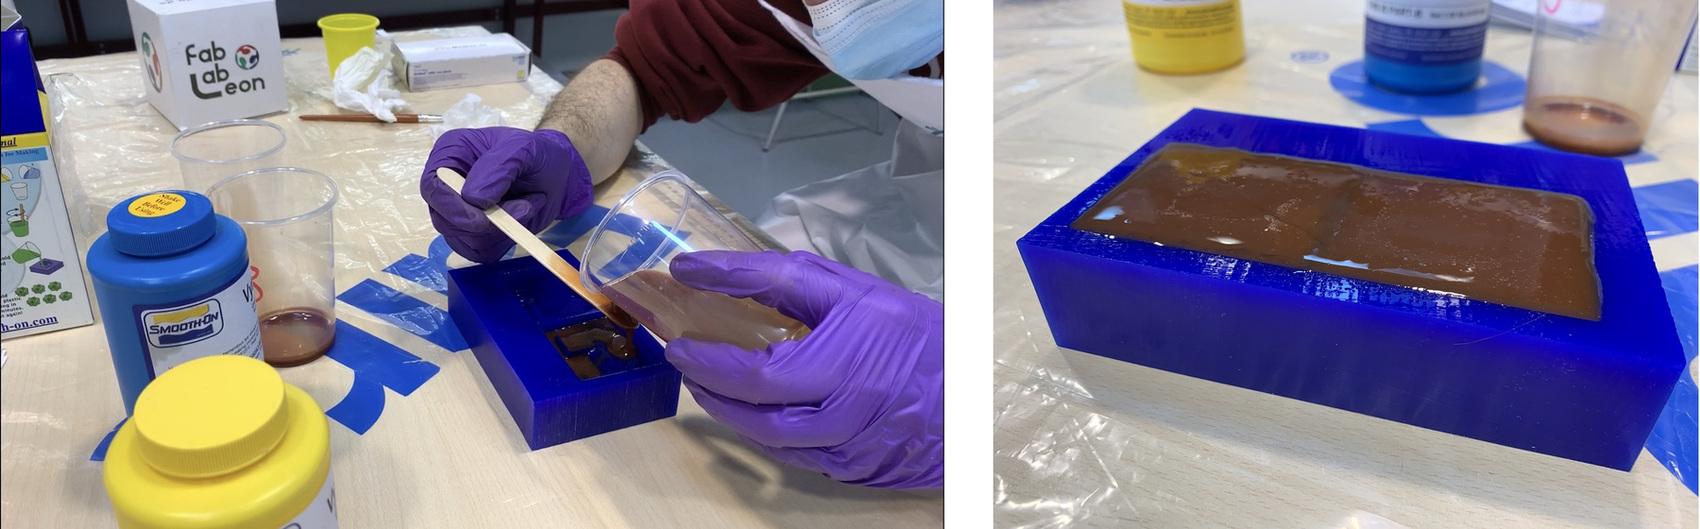
- Pre Mix the Part B before using. After dispensing equal amounts of Parts A and B into mixing container, mix thoroughly for at least 3 minutes making sure that you scrape the sides and bottom of the mixing container several times.
- Mix ratio is: 1 Part A : 1 Part B by weight or volume.
- Curing Allow rubber to cure a minimum of 16 – 24 hours at room temperature 23°C before demolding.
- Post Curing Optional... Following an overnight cure, heating the rubber to 65°C for 4 to 8 hours will increase physical properties and performance.
- More information, here.
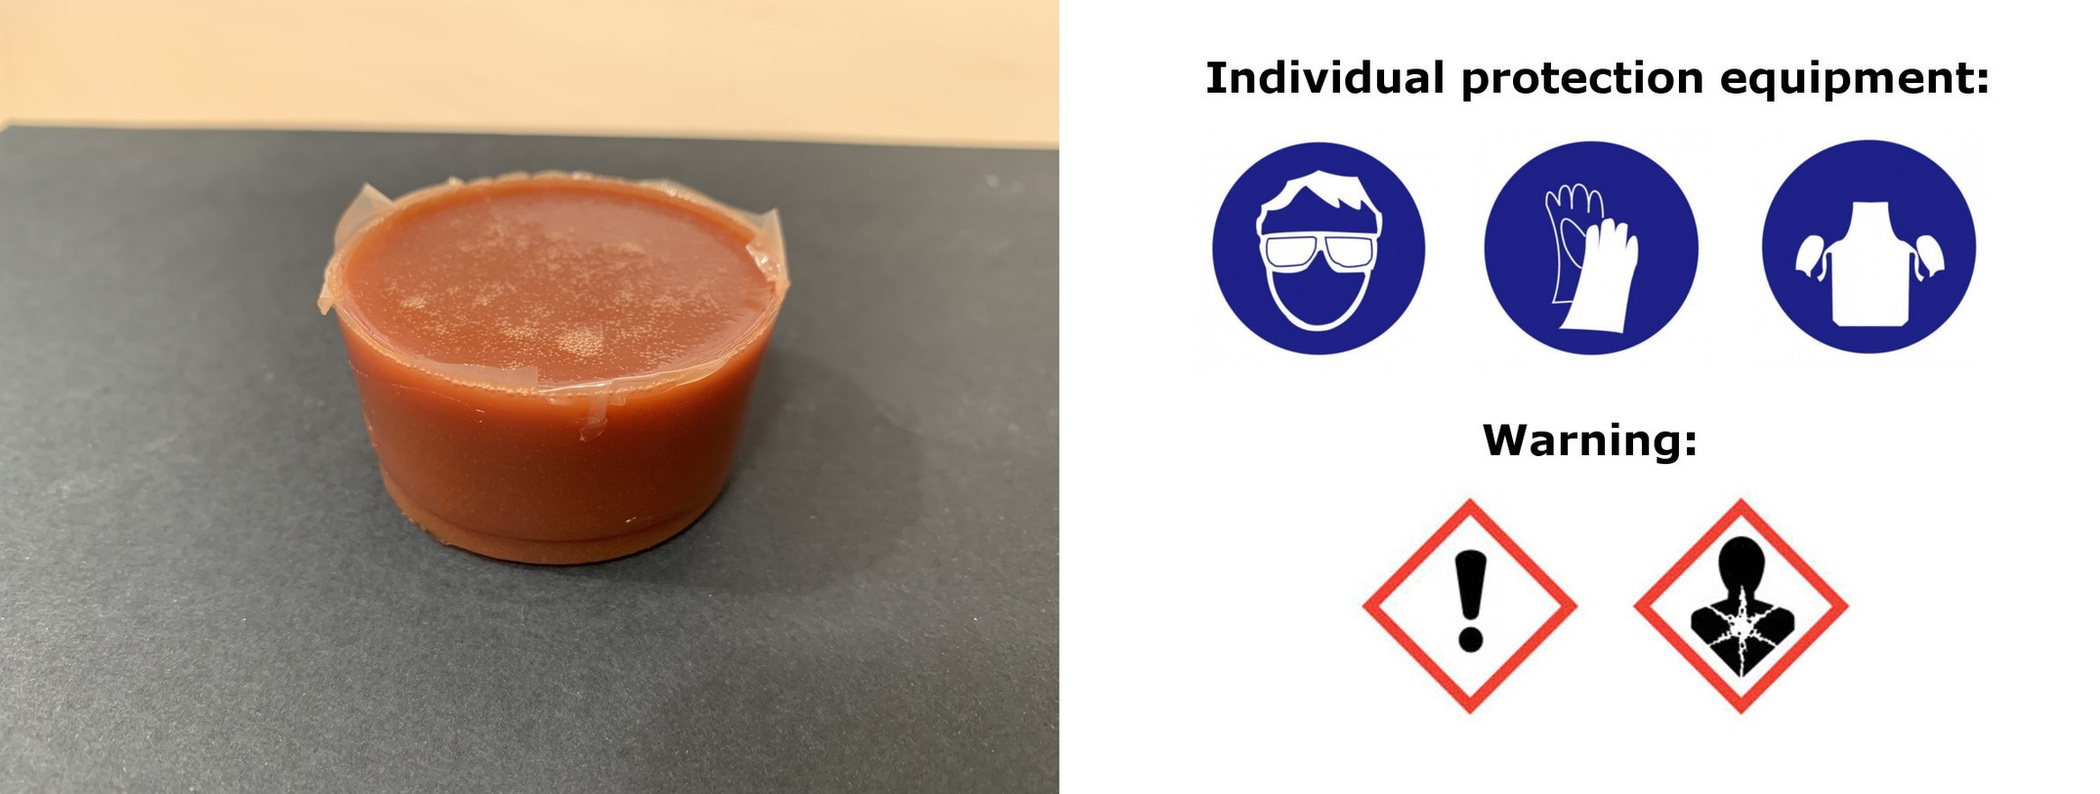
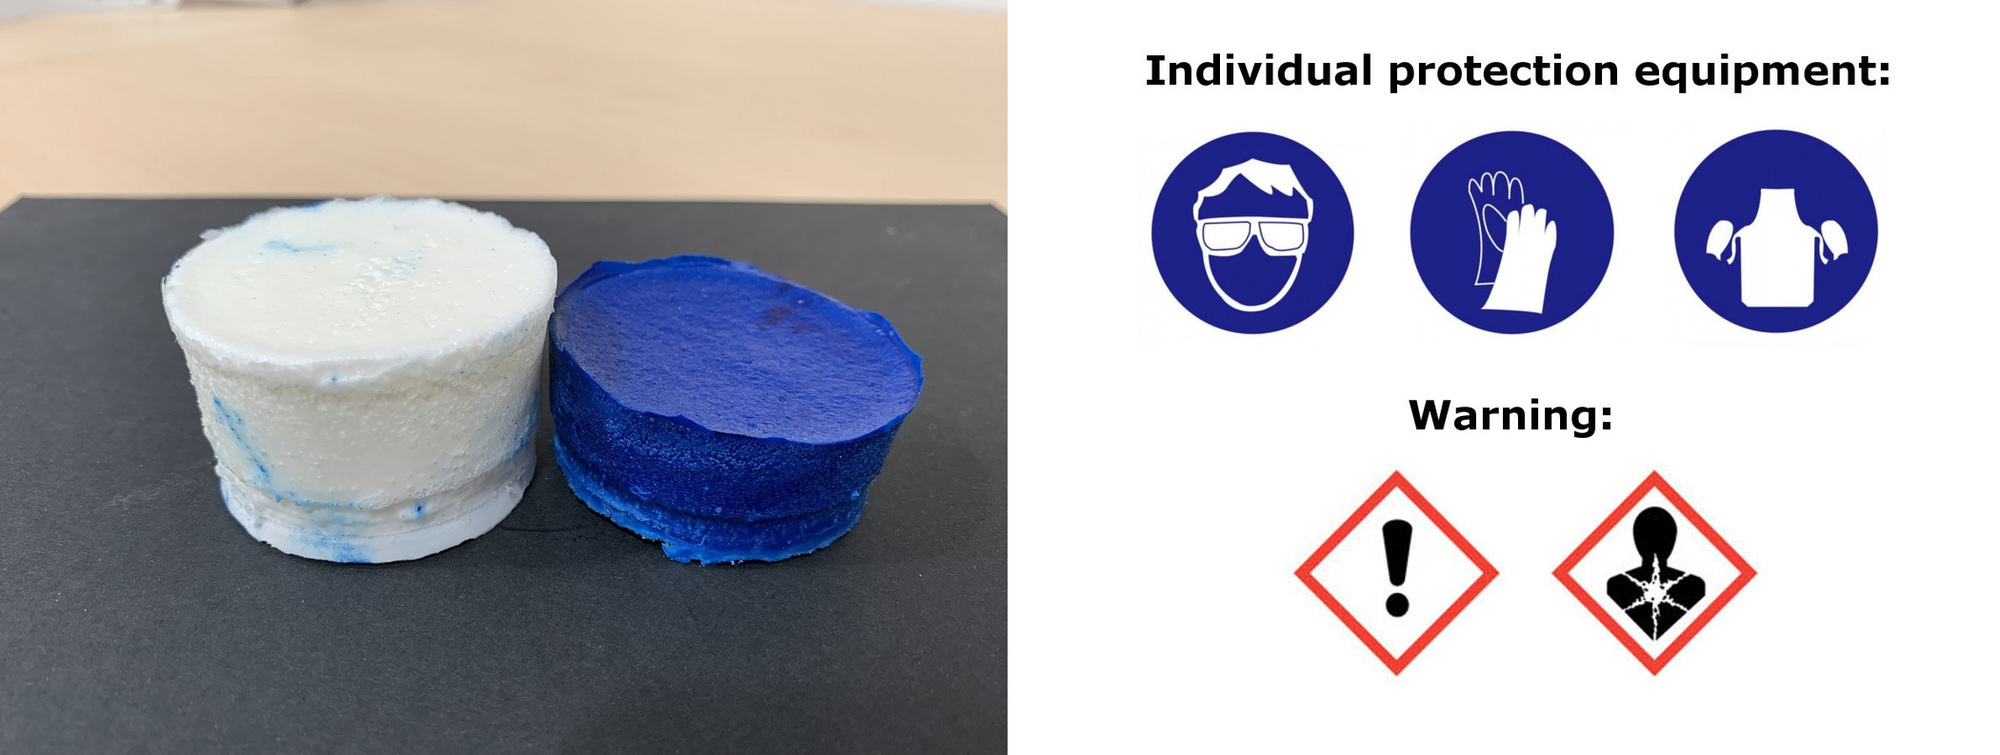
This is the result of mixing the two parts, it gives us a soft, caramel brown silicone. Next I make a summary with the safety pictograms. (Gloves, glasses, and an apron or long sleeve are mandatory. Causes skin irritation, causes serious eye irritation, may cause respiratory irritation.)
Smooth-Sil® 940
- It is a Platinum Silicone Rubber. For Food Related Applications
- It has a pot life of 30 minutes and a cure of 24 hours.
- Within the security aspect, good ventilation is recommended, wearing safety glasses, vynil gloves and long sleeves. Wear vinyl gloves only. Latex gloves will inhibit the cure of the rubber. As we are in COVID-19 period, I use the mask. 😷
- Mix ratio is: 100 Part A : 10 Part B by weight or volume.
- Curing Allow rubber to cure a minimum of 24 hours at room temperature 23°C before demolding.
- Post Curing Optional... Post curing the mold will aid in quickly attaining maximum physical and performance properties. After curing at room temperature, expose the rubber to 100°C for four hours.
- Let cool and wash mold cavity thoroughly with dishwashing detergent/water solution. Rinse thoroughly and allow drying before using.
- More information, here.
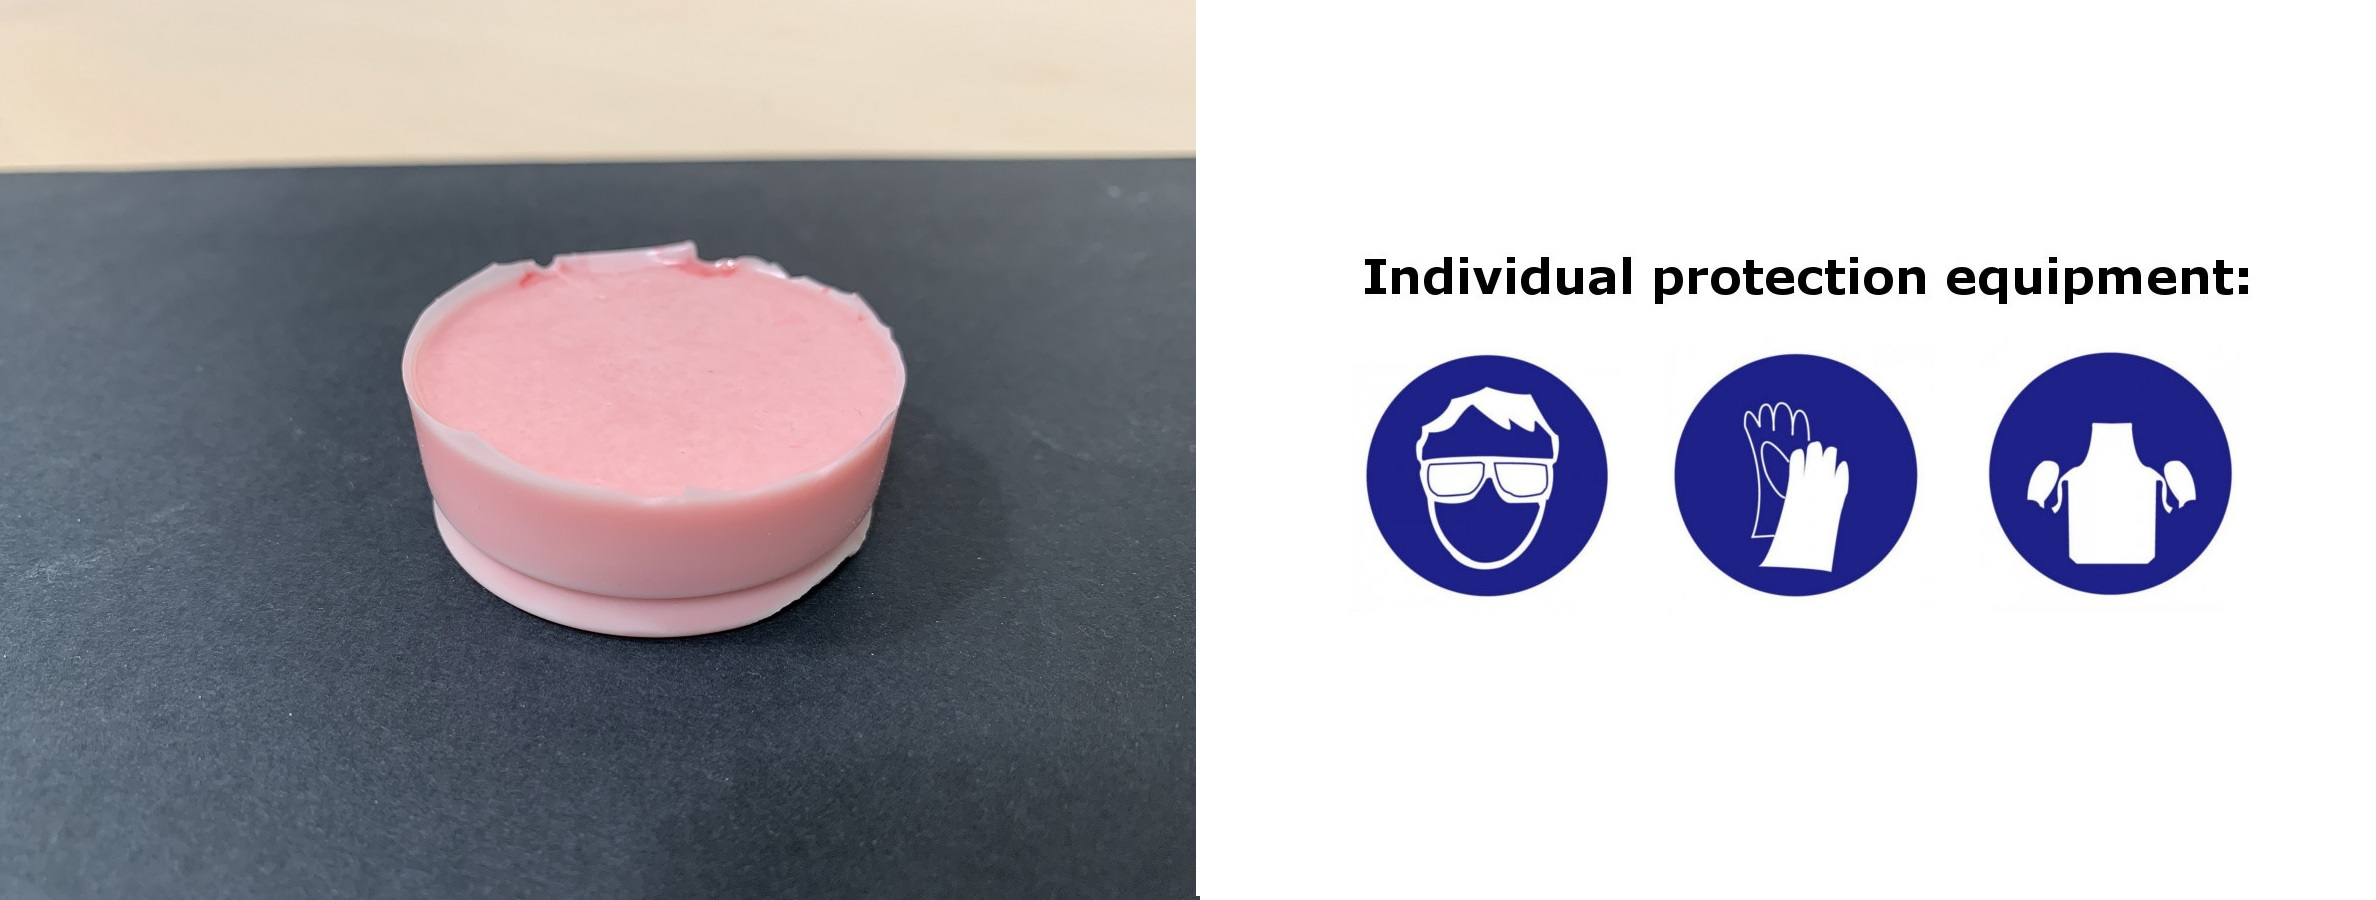
This is the result of mixing the two parts, it gives us a soft, light pink silicone. Next I make a summary with the safety pictograms. (Gloves, glasses, and an apron or long sleeve are mandatory.)
The resin models that I am going to use are the following:
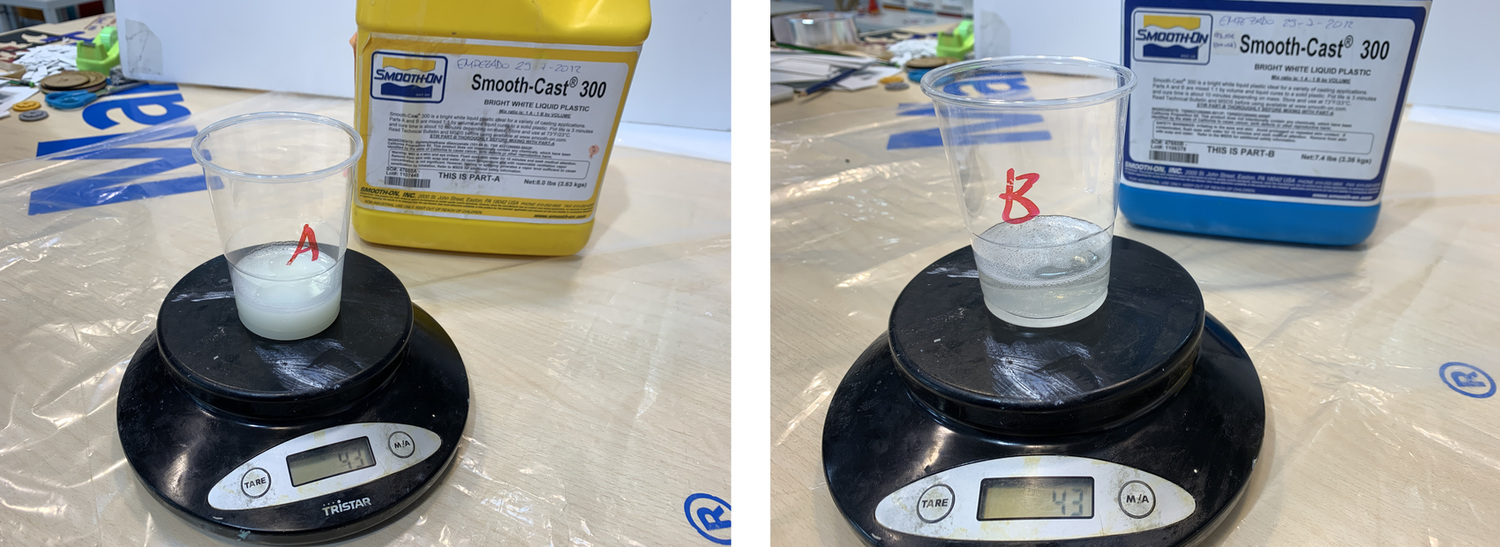
Smooth-Cast® 300
- Low viscosity polyurethane resin, which produces bright white pieces. Dyes can be used.
- It has a pot life of 3 minutes and a cure of 10 minutes.
- Within the security aspect, good ventilation is recommended, wearing safety glasses, rubber gloves and long sleeves. Beware of possible burns, since the mixture of the two parts generates an exothermic reaction. As we are in COVID-19 period, I use the mask. 😷
- Pre Mix both parts before using. After dispensing equal amounts of Parts A and B into mixing container, mix thoroughly for at least 1 minutes making sure that you scrape the sides and bottom of the mixing container several times.
- Mix ratio is: 1 Part A : 1 Part B by volume.
- More information, here.
This is the result of mixing the two parts, it gives us a hard white piece, which can be dyed. Next I make a summary with the safety pictograms. (Gloves, glasses, and an apron or long sleeve are mandatory. Causes skin irritation, causes serious eye irritation, may cause respiratory irritation.)
Smooth-Cast® ONYX™ FAST
- Mercury-free urethane resin, which produces deep black pieces.
- It has a pot life of 2.5 minutes and a cure of 10-15 minutes.
- Within the security aspect, good ventilation is recommended, wearing safety glasses, rubber gloves and long sleeves. Beware of possible burns, since the mixture of the two parts generates an exothermic reaction. As we are in COVID-19 period, I use the mask. 😷
- Pre Mix both parts before using. After dispensing equal amounts of Parts A and B into mixing container, mix thoroughly for at least 1 minutes making sure that you scrape the sides and bottom of the mixing container several times.
- Mix ratio is: 1 Part A : 1 Part B by volume.
- More information, here.
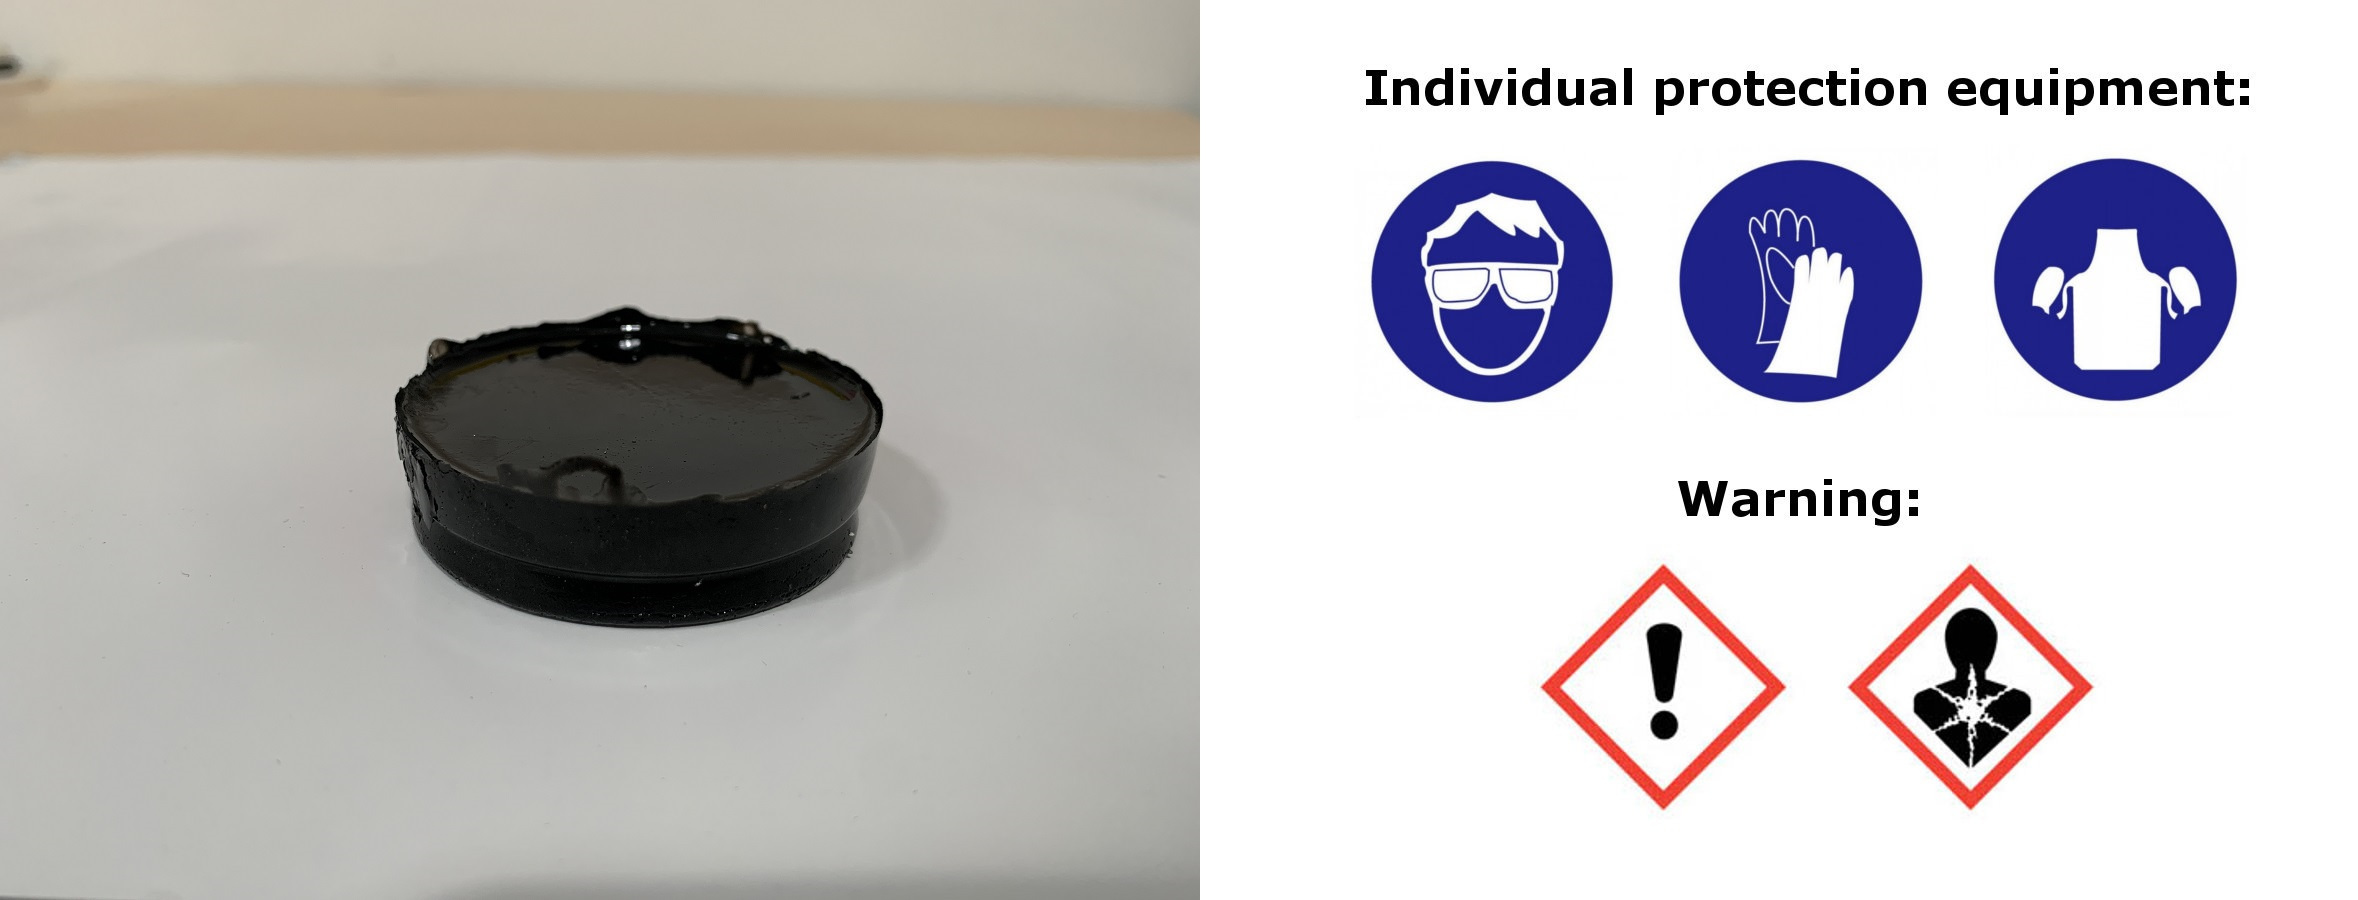
This is the result of mixing the two parts, it gives us a extra hard black piece. Next I make a summary with the safety pictograms. (Gloves, glasses, and an apron or long sleeve are mandatory. Causes skin irritation, causes serious eye irritation, may cause respiratory irritation.)
PLASTICRETE (STONE-LIKE FINISH)
- Two-component acrylic system based on ecological resin + mineral filler.
- It has a pot life of 30 minutes and a cure of 4-8 hours.
- Within the security aspect, wearing safety glasses, rubber gloves and long sleeves. As we are in COVID-19 period, I use the mask. 😷
- Mix ratio: Percentage of mixture in weight: 100 powder + 60 liquid. (45 liquid more viscous)
- More information, here.
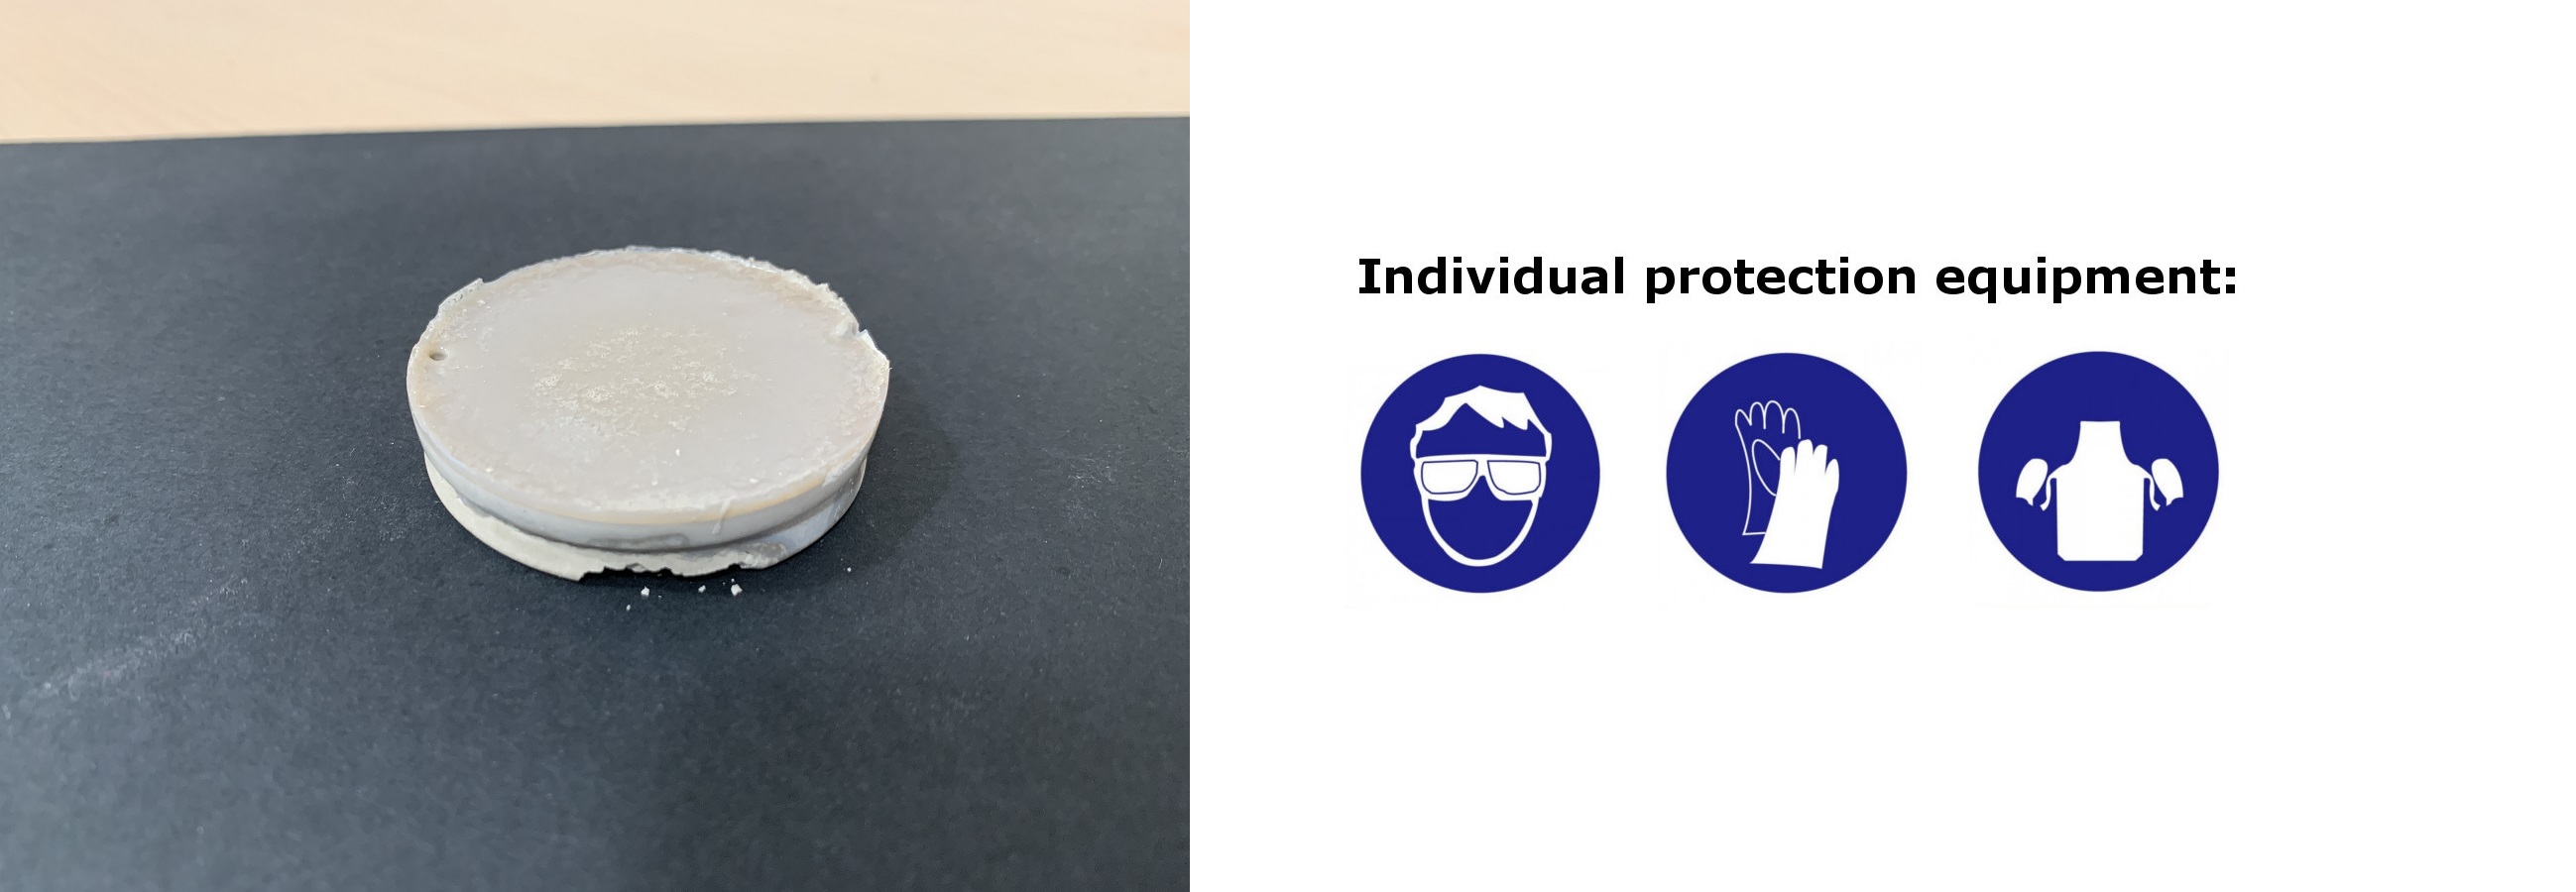
This is the result of mixing the two parts, it gives us a hard gray cement. Next I make a summary with the safety pictograms. (Gloves, glasses, and an apron or long sleeve are mandatory.)
Designing a mold
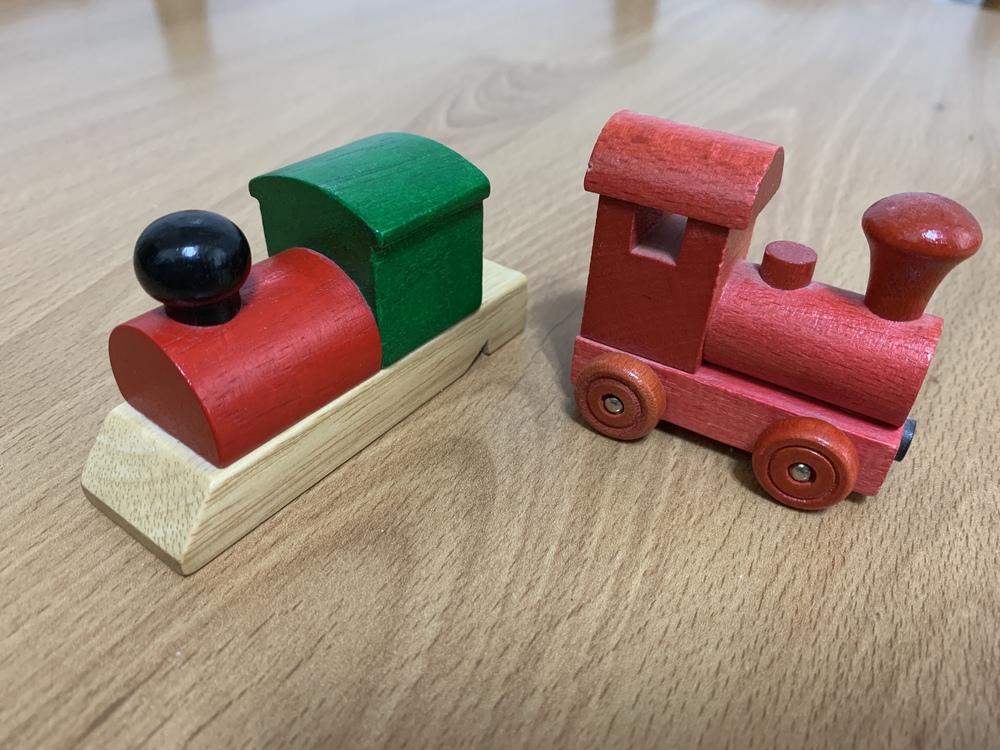
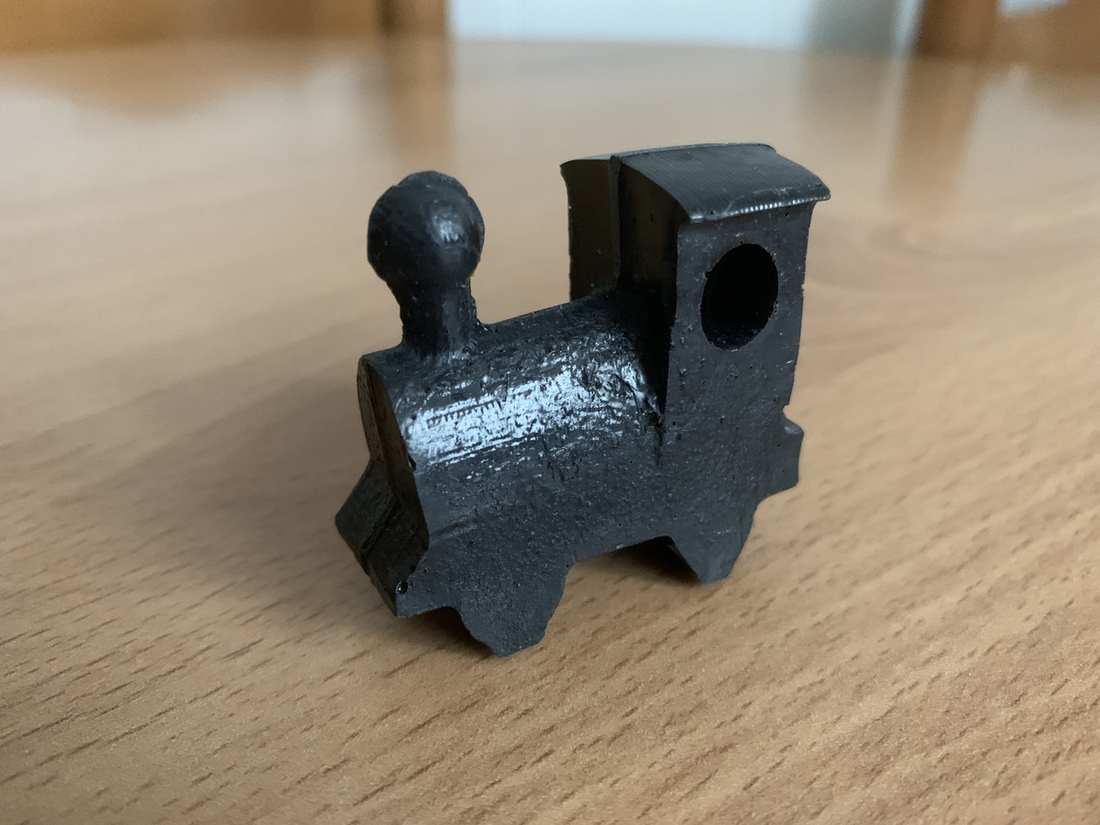
As you know and you will have seen in my documentation, I like trains. 😂 🚂 So in this assignment I'm going to try to make a two-piece mold and create a little train. To do this I am inspired by two small models made of wood that I have in my room.
To make the design of the mold I use Rhinoceros. I create the train, by extruding planes or using spheres. As it is going to be a mold in two parts, I cut the final shape of the train in half using a Boolean difference with a flat surface. Then I prepare the wax mold, that is, I empty a prism and add spheres that are the registration to join the two parts. It is through the wheels that I am going to introduce the resin; on both wheels I create a kind of funnel, one to fill and the other so that the air comes out.
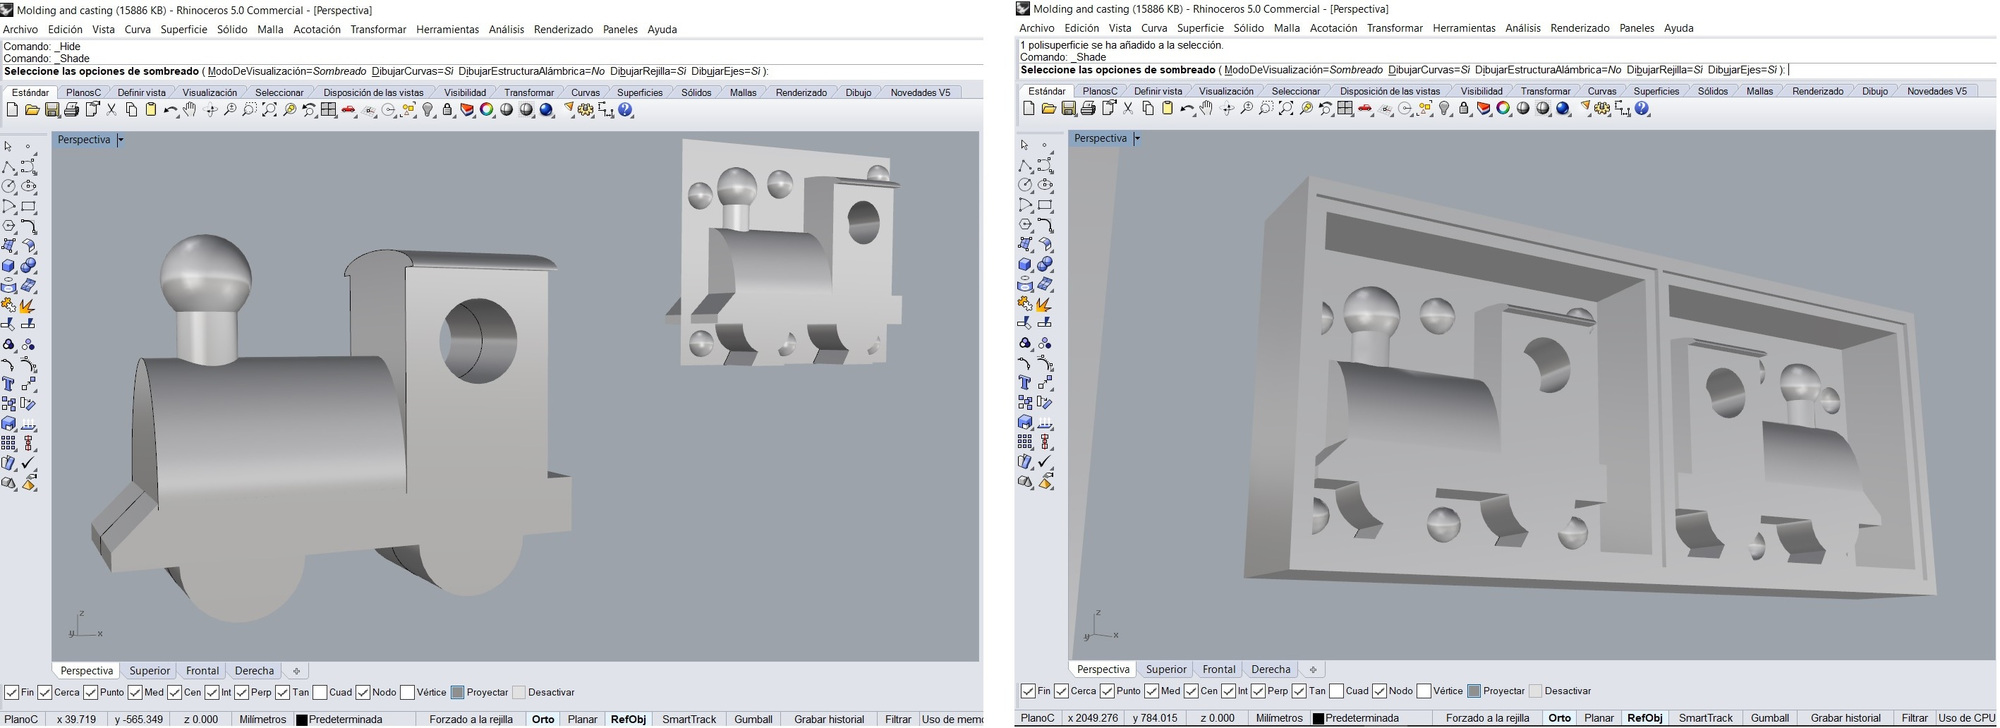
Important. My instructors Nuria and Pablo recommended that I create a small step surrounding the entire mold. This is to improve the extraction of the final silicone and not have to use a knife or something to pry and damage the mold.
And this is the result of the mold, below is the link to download the file.
3D Milling
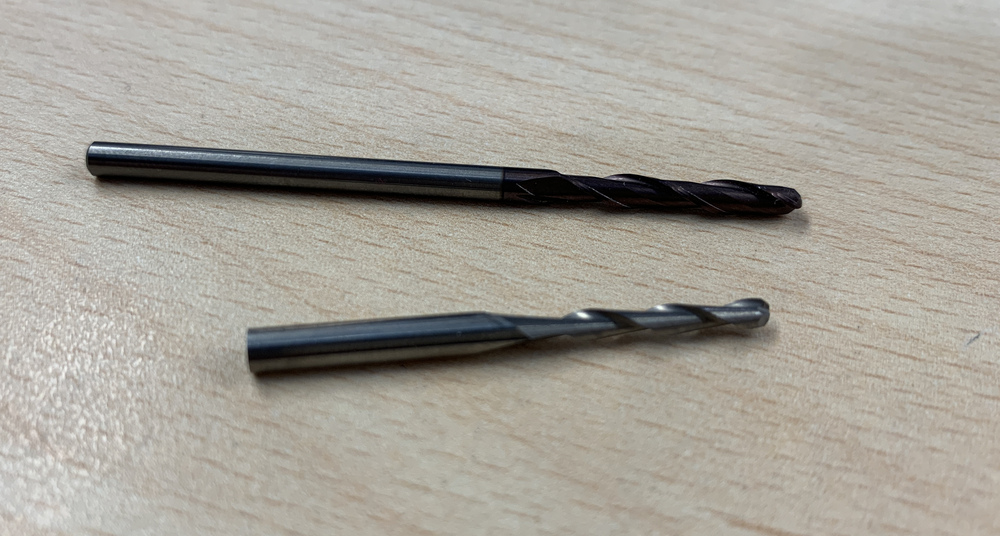
At the Fab Lab León we have two types of mill ball end, one of 3,175 mm and the other of 2 mm. The 2 mm one has the shortest cutting edge and also has a little conical shape. I'm going to use the 3,175mm bur because it has the longest shank, and I'm afraid it will collide the mandrel with the wax block, in addition to the conical shape of the mill.
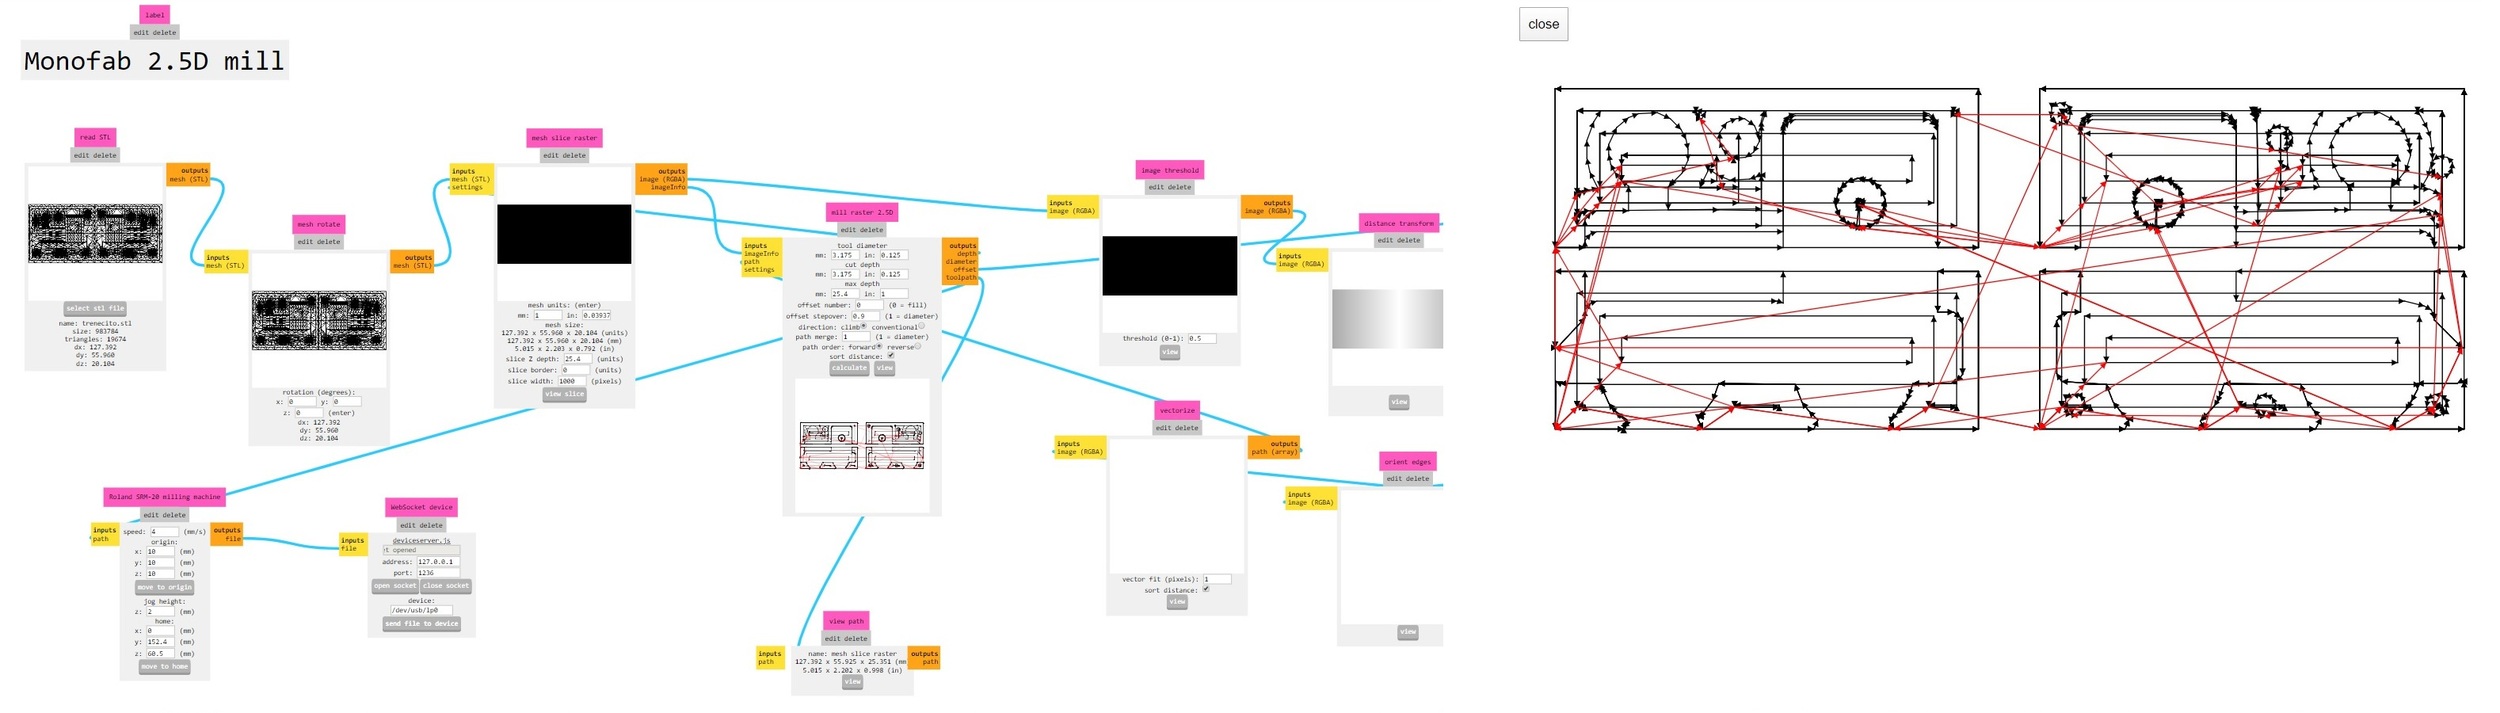
I'm going to use Mods CE 😎 to mill the mold, which is the program that I used to create the boards with the Roland MDX-20A that I explained in week 04. Fran has been working on updating the interface. Although there is currently no program available for the Roland MDX-20A. So I test the simulation on the Monofab SRM-20. I put that I use a mill of 3,175 mm.
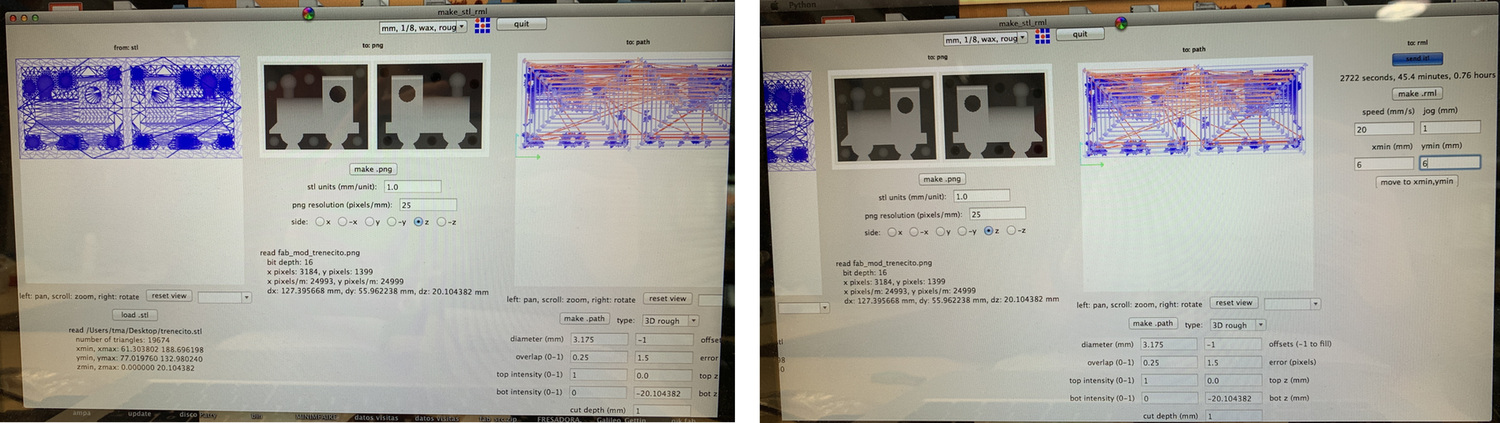
Before using Mods CE in the Fab Lab León, it was used Fab Modules. It is an old version of Mods, but it works for the Modela and also gives you the time of the works.
For this I open the terminal:
- Run fab
- In the panel I choose the piece in this case the .stl of the train, the Roland MDX-20 and 400 px machine.
- I open Make_STL_RML. At the top of the page there is a menu where I choose the 1/8 mill, wax, rough.
- I verify the diameter of the tool, in this case it is 3.175 mm. The wax milling speed is 20 mm / s (if we wanted to mill polystyrene it would be 30 mm / s).
- I choose the origin X = 6 Y = 6.
- And finally we click on Make PNG -> Make Path -> Make RML. If the simulation is correct, click on Send It! 🤞
With this we get a rough first milling, we remove more chips faster. And remember, all the shaving you get, save it because you can create a new block of wax if you melt it.
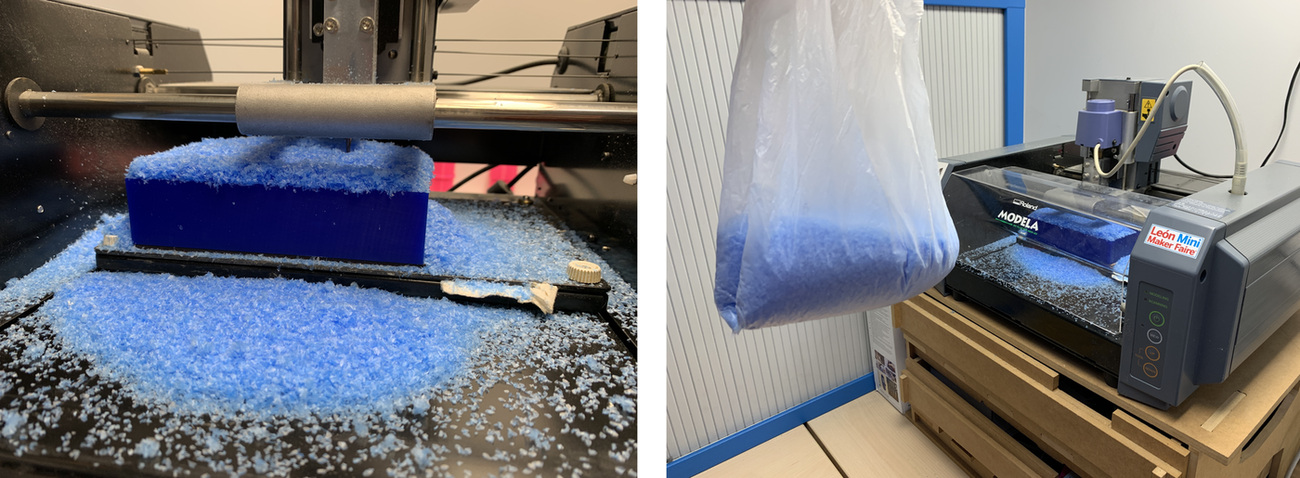
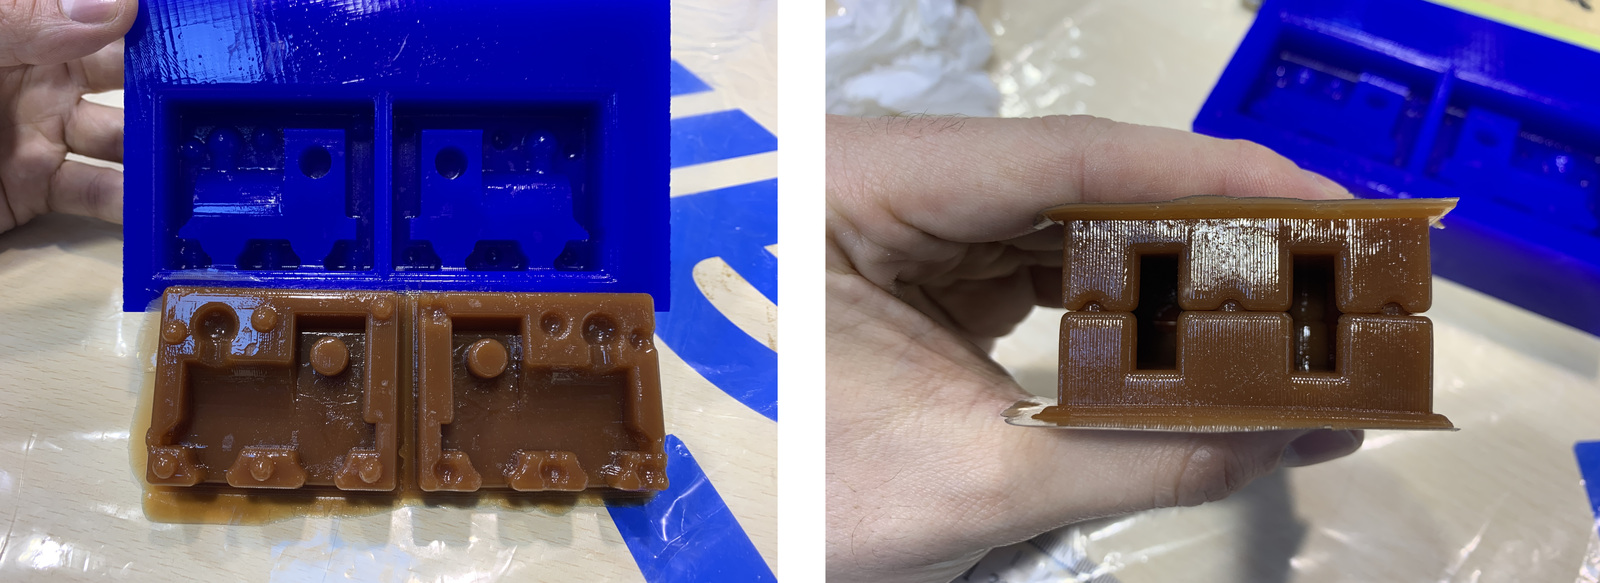
After 45 minutes and cleaning the wax mold, this is the result of rough milling.

Once the rough milling phase has finished, on the same screen we choose 1/8 wax finish. We check the tool diameter. We choose the type of ball end; and this is important in the overlap we put 0.9 to get a fine finish. We recalculate the simulation: Make PNG -> Make Path -> Make RML. If the simulation is correct, click on Send It!

After almost 2 hours of milling, this is the result. 😍
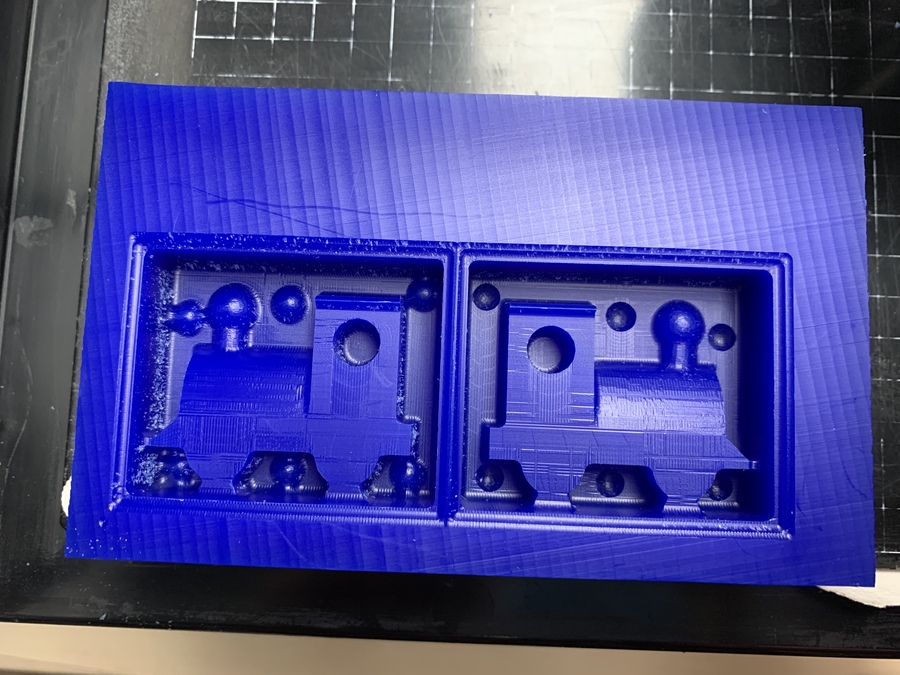
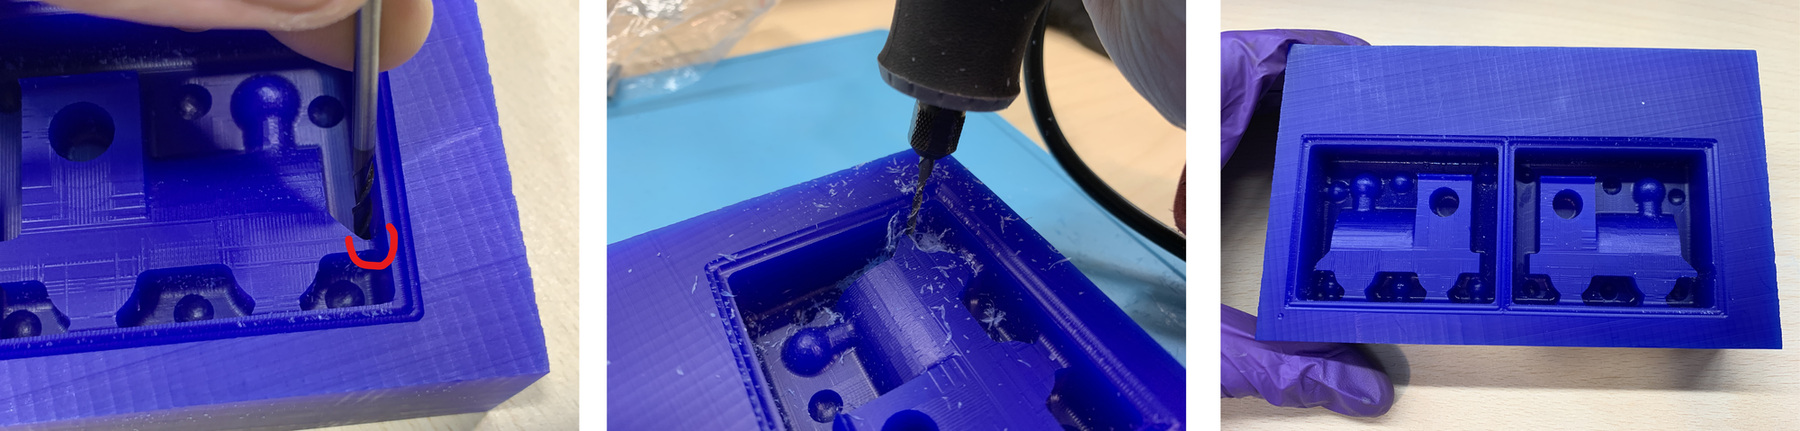
It was too late to start with silicones. The next day, I realize that the 3,175mm cutter did not fit into one part of the design. Excessively narrow the distance between the train and the mold wall. This reminds me, that you have to design for the machine or the tool. So the solution I plan to use to correct it is to use the Dremel with the 2mm mill. And works. 😅 Manual milling. 🤣
Calculate the volume of the mold.
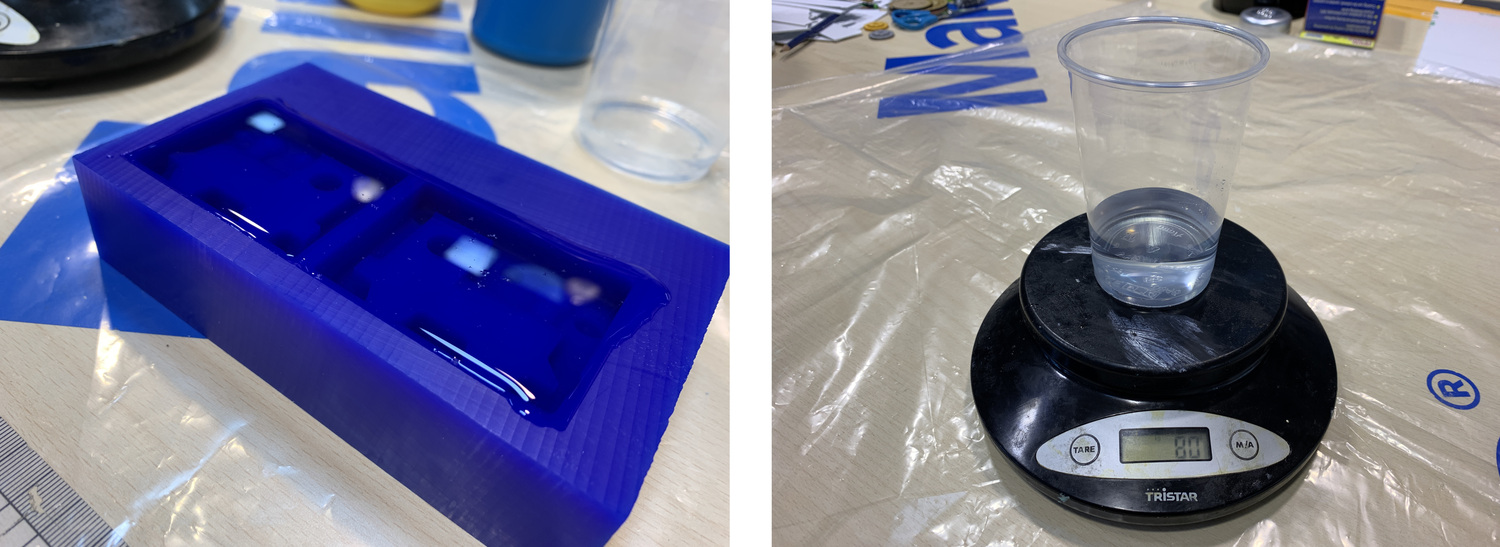
Once we have milled the wax mold, we have to calculate the volume of silicone that we are going to need. To do this by reviewing documentation from other students, there are two options. Use rice or use water.
If we use rice, following the documentation by Alejandro Ulecia, which is based on filling the molds with rice, emptying this rice in a plastic cup and marking this volume and then filling it. I mark the plastic cup and weigh its contents, it is 66 grams with the plastic cup (the cup weighs 6 grams).
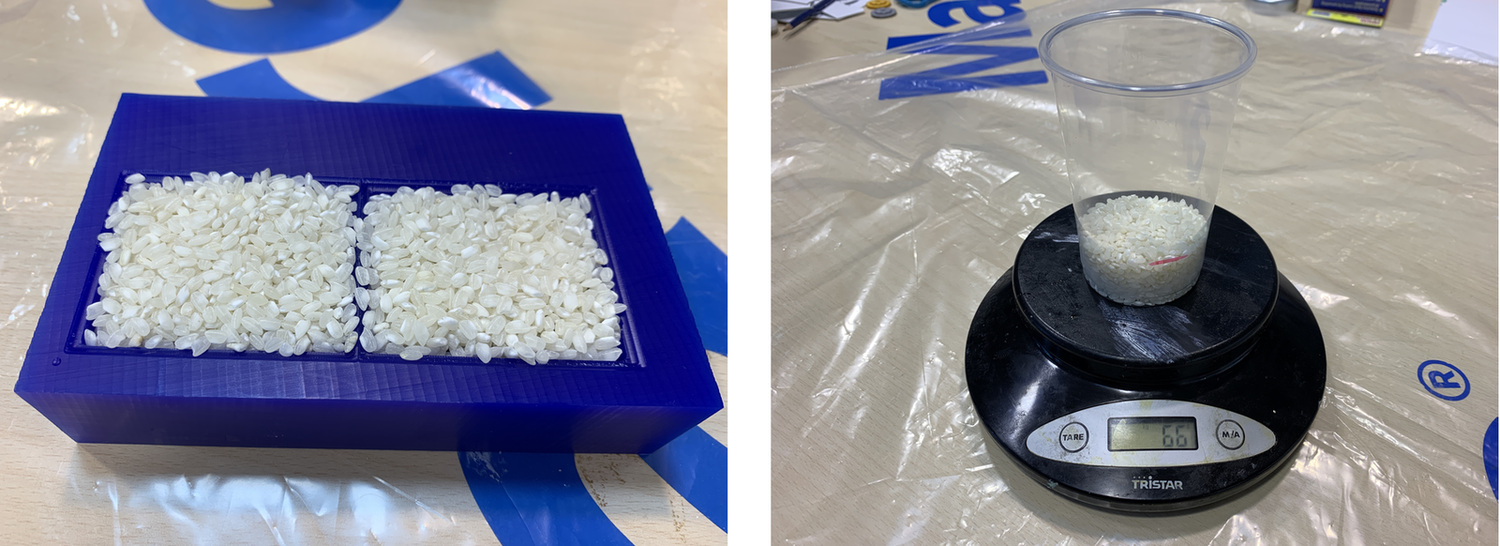
But this system doesn't convince me much because the rice grains do not enter all the holes in the wax mold, so I discard using it.
The other way is to use water, in this case I use Pablo Nuñez documentation. In which the mold is filled with water and that amount of water is weighed. In theory, the density of water and weight are the same. In my case it is 80 grams with the plastic cup, which is equivalent to 80 milliliters.
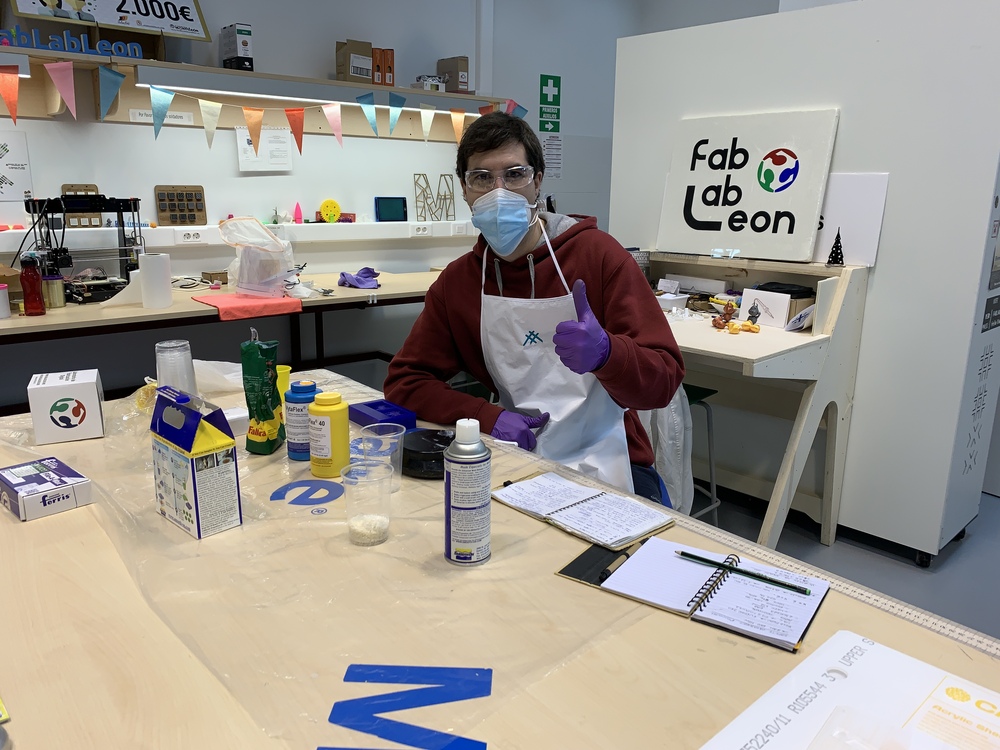
Once I have calculated the volume of the mold, protecting the work area and myself, I go to work with the silicones. The apron has the Fabricademy logo. 😍
Silicone mold.
VytaFlex® 40
As I have explained in the Group Assignment part and what the manufacturer tells us, this silicone should be mixed: 1 Part A: 1 Part B by weight or volume. So after measuring the volume of the mold and giving me 80 grams with the cup (5 grams), I decided to round and put 40 grams of Part A and 40 grams of Part B. This is the result, it is always difficult to adjust liquids with different viscosities. 😅
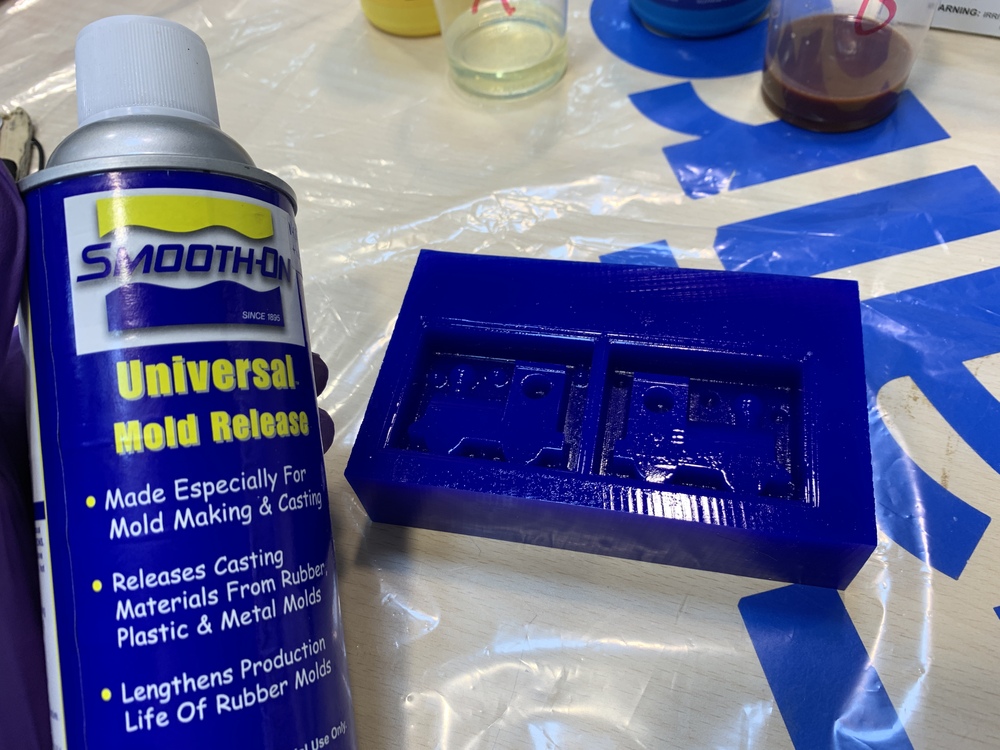
Before mixing the two parts, spray the wax mold with the Smooth On Universal Mold Release. A small layer is sufficient.
Once the release agent is done, I mix the two parts very carefully not to cause bubbles, for about 2 minutes. Then I pour it slowly with the help of the mixing stick. The next thing I do is tap around so that the bubbles are removed and rise upwards. I leave the mold like this for 16 hours.
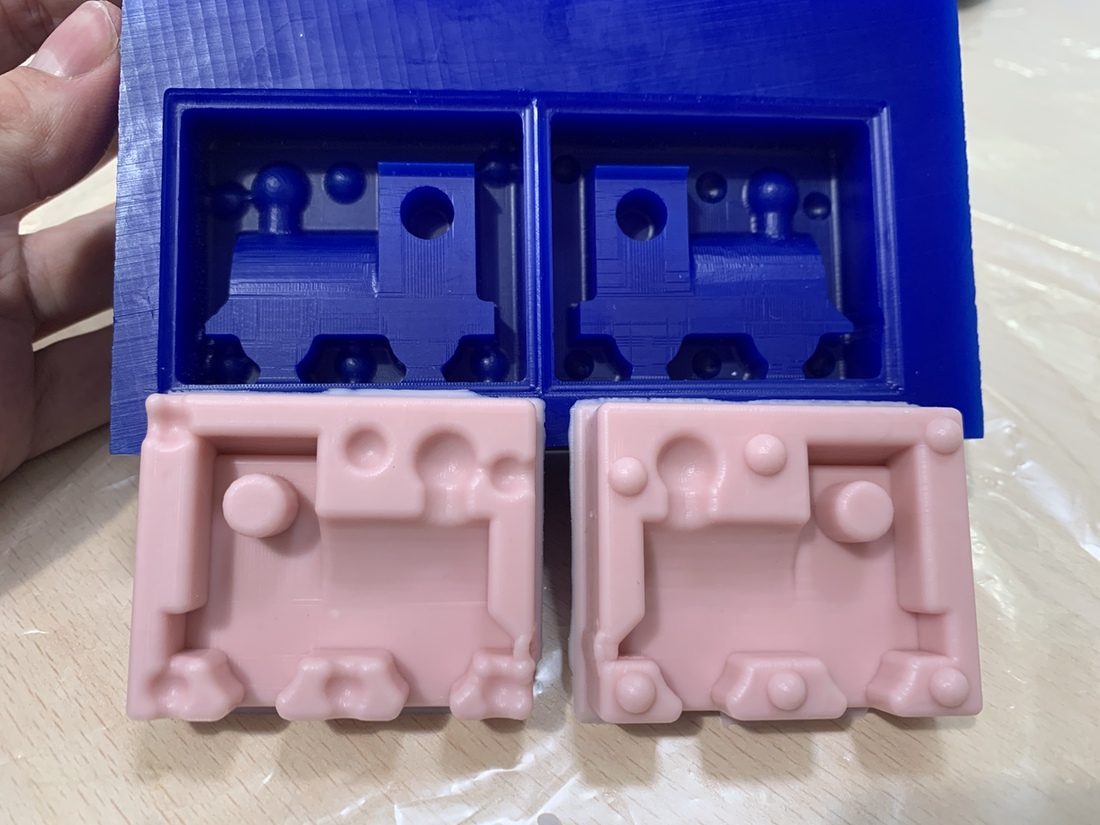
After more than 16 hours had passed, I removed the silicone from the wax mold. Thanks to the edge that you leave around, it is removed very well. There are no bubbles left, and the fit with the registrations is fine. I will need to use elastic bands to hold the two parts and the openings to pour the resin and let the air out will be enough.
This silicone is ready for use with the resins.
Smooth-Sil® 940
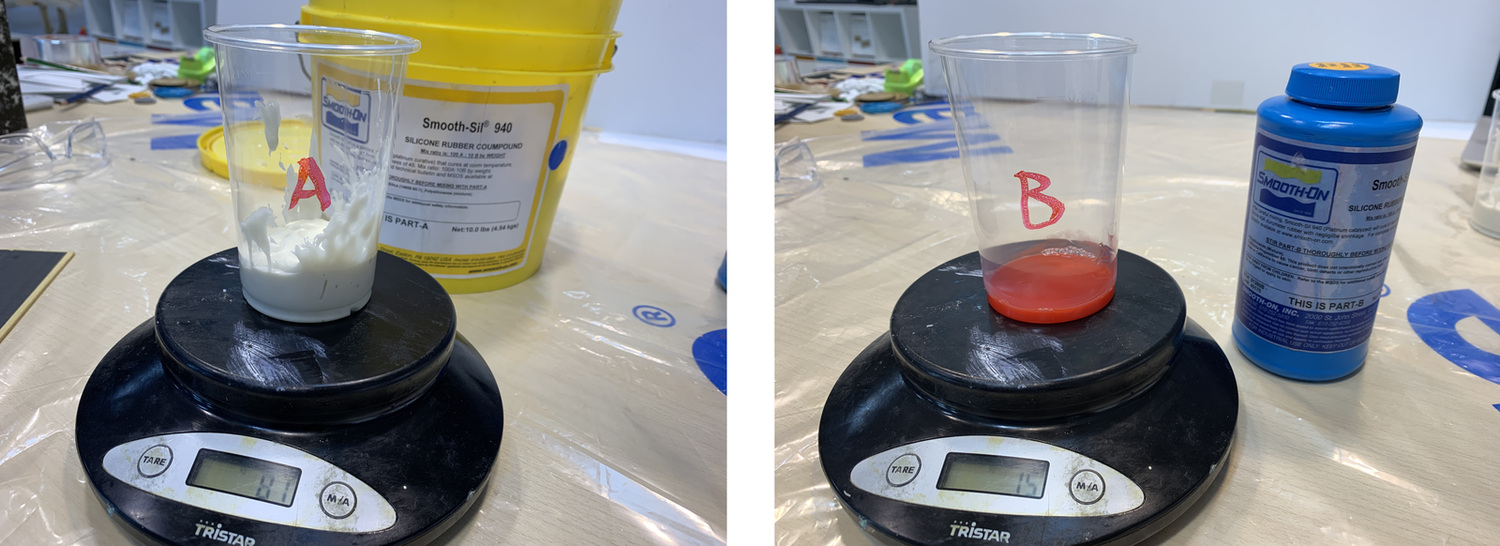
This silicone serves to be able to use as final casting foods, such as gum, ice or chocolate. As I have explained in the Group Assignment and as the manufacturer explains, this silicone should be mixed: 100 Part A: 10 Part B by weight or volume. So after measuring the volume of the mold and giving me 80 grams with the cup (5 grams), I decided to round and put 80 grams of Part A and 8 grams of Part B. Part A is very thick, and hard to get out of container. 💪
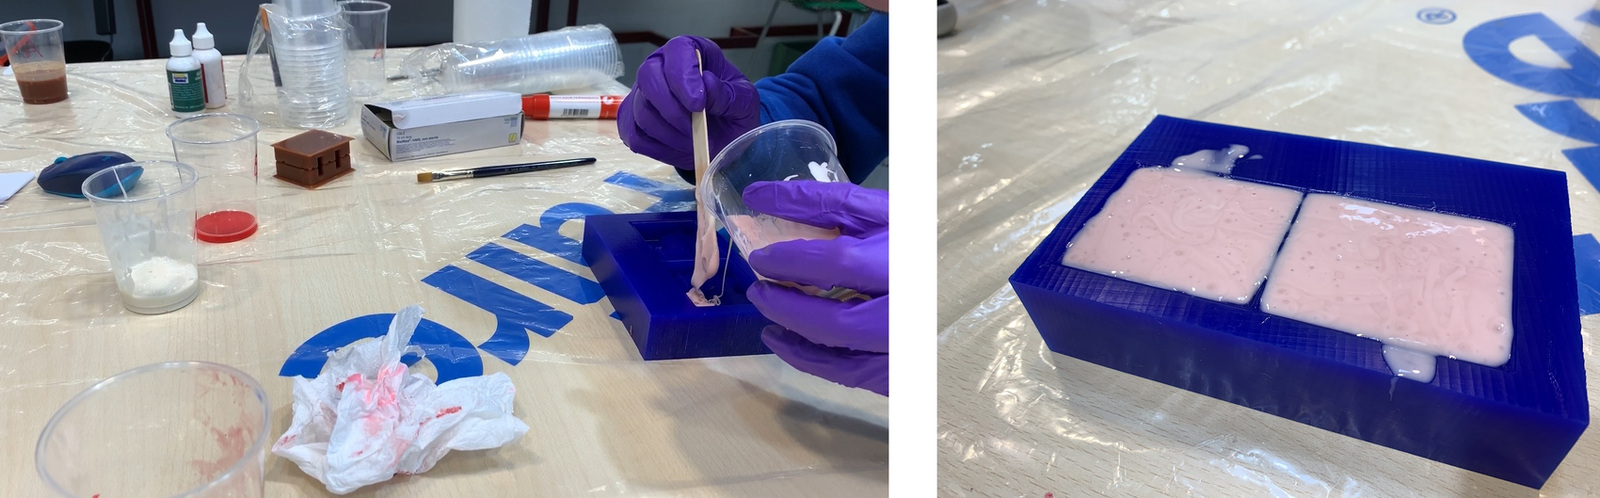
For this silicone, it is not necessary to use a release agent. I mix the two parts very carefully not to cause bubbles, for about 2 minutes. Then I pour it slowly with the help of the mixing stick and we can use a brush to paint the internal areas of the mold. This time I adjusted the quantities a lot, I should have added more, I hope the silicone comes out of the mold. 😬 The next thing I do is tap around so that the bubbles are removed and rise upwards. I leave the mold like this for 24 hours.
After more than 24 hours have passed, I remove the silicone from the wax mold. It was perfect, I want to make a little train of chocolate. 😋
Castings
Smooth-Cast® 300
The first casting that I am going to do is with VytaFlex® 40 silicone and low viscosity polyurethane resin. As I explained in the Group Assignment, this resin is very fast to cure and creates an exothermic reaction, so you have to be very careful.
As the manufacturer explains, this resin has a pot life of 3 minutes and a cure of 10 minutes. The mix ratio is: 1 Part A: 1 Part B by volume. The fact is that now I do not have to use the measure of 80 grams (this was to create the silicone). Since I want to leave a sample of the material and there are more silicones that I can fill, I make a mixture of 40 grams of each part, because the volume of this resin is similar. Important: As Neil explains in class, if we have leftover material from both parts, we must mix it and make the reaction, if we throw it without mixing it can be dangerous.
Before mixing the two parts, I prepare the silicone, joining the two parts with elastic bands.
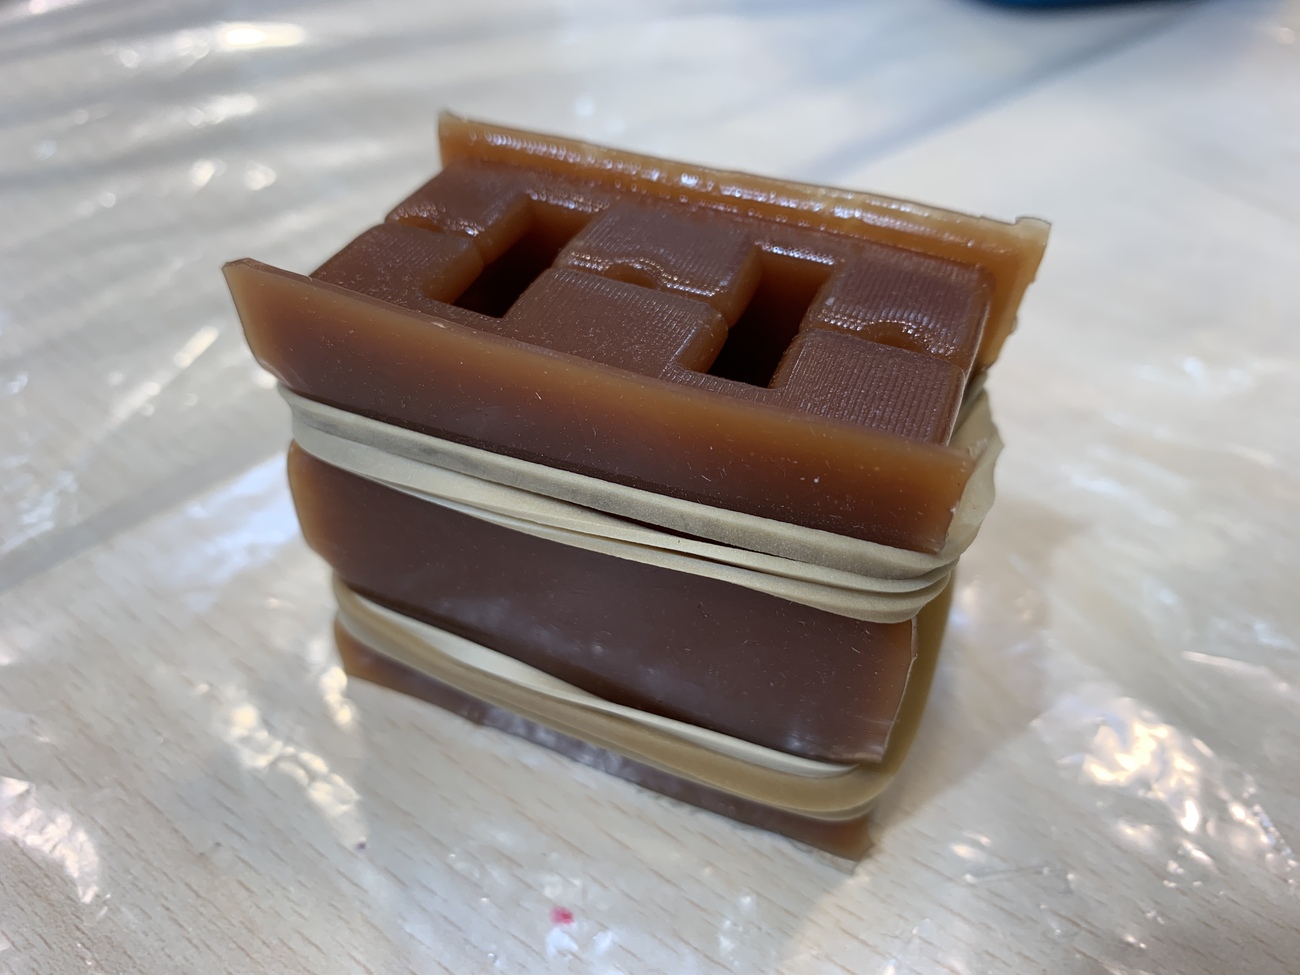
I mix the two parts in less than 2 minutes, and slowly pour it into the silicone. And the bubbles begin to rise outwards. What happens is that this resin is quite old and has not been well closed at some point and the reaction is not the same, more material comes out. Once 10 minutes have passed, I remove the silicone and the train has gone well. 🤗
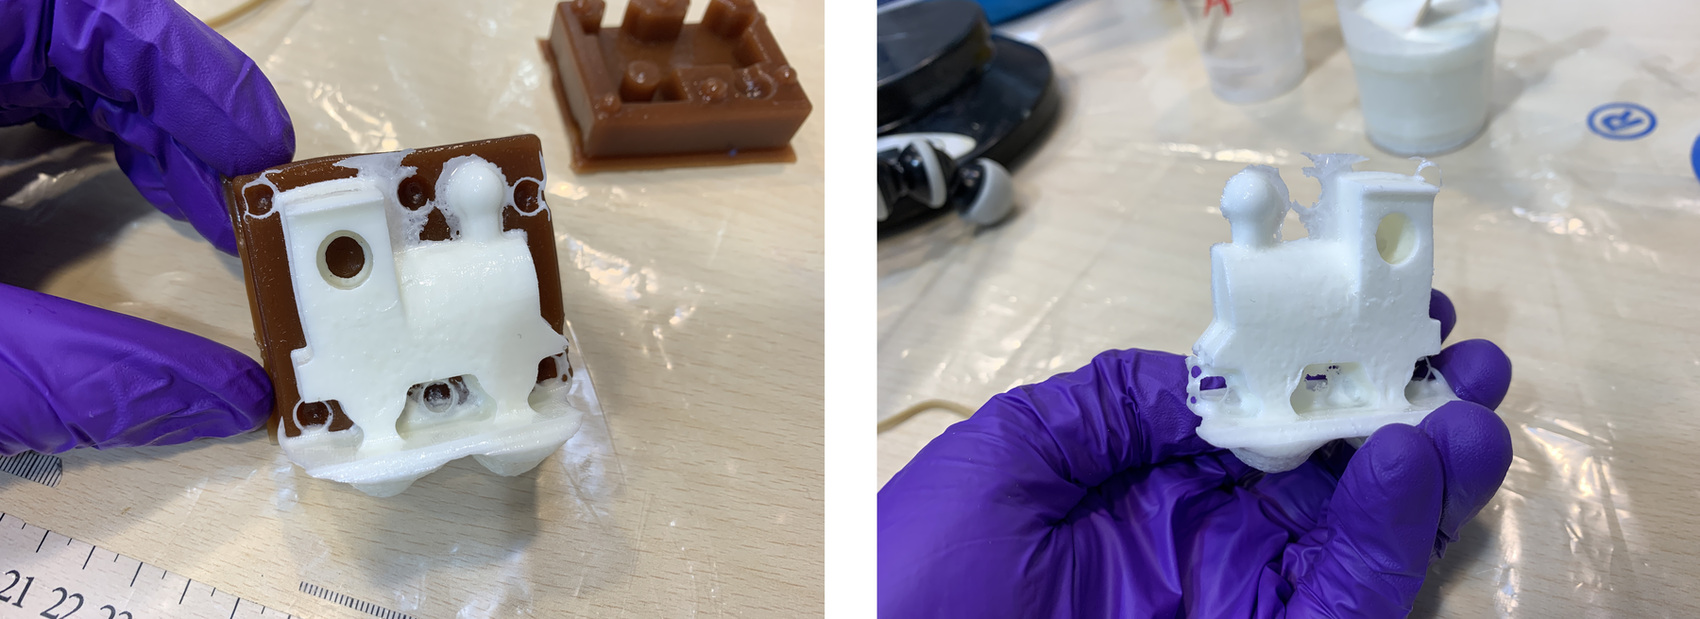
The train will need post-processing to remove the excess material.
At the Fab Lab León we also have dyes to dye the resin pieces, it is called SO-Strong™ and it is from the Smooth-on brand. And Pablo had blue fluorescent powders, it glows in the dark. I make two other 10 gram mixes of each part A and B again; one I dye blue and the other I put the fluorescent powders.
Once I have the three trains, the white, the blue and the one with the powders that glow in the dark, I start to remove the excess material with files and sandpaper.
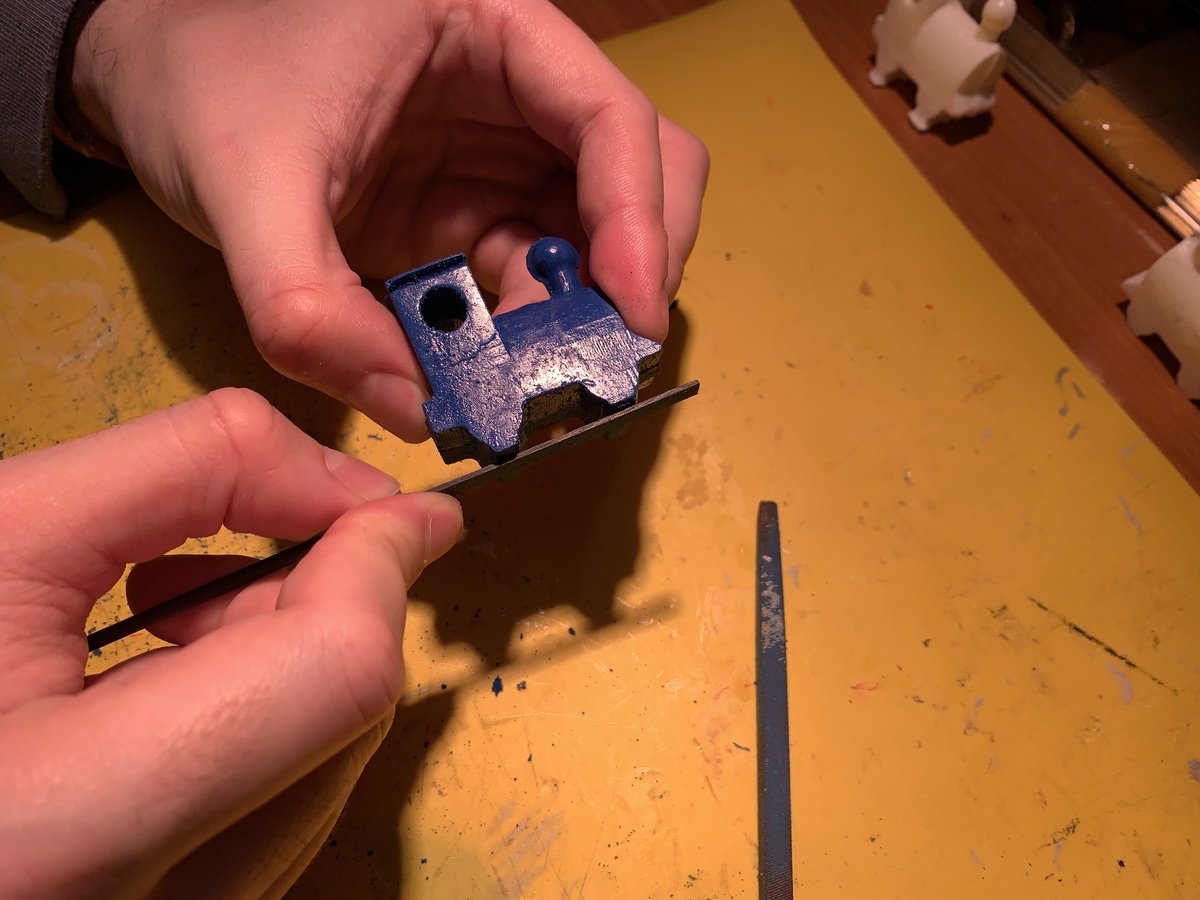
And this is the result of the three trains. I love the one that glows in the dark, it's incredible. 😍

Smooth-Cast® ONYX™ FAST
Thanks to Raul Diosdado (student of the Fab Academy in 2015), I can use this resin, because he sent it to us from Extremadura. Thank you very much Raul. 🤗
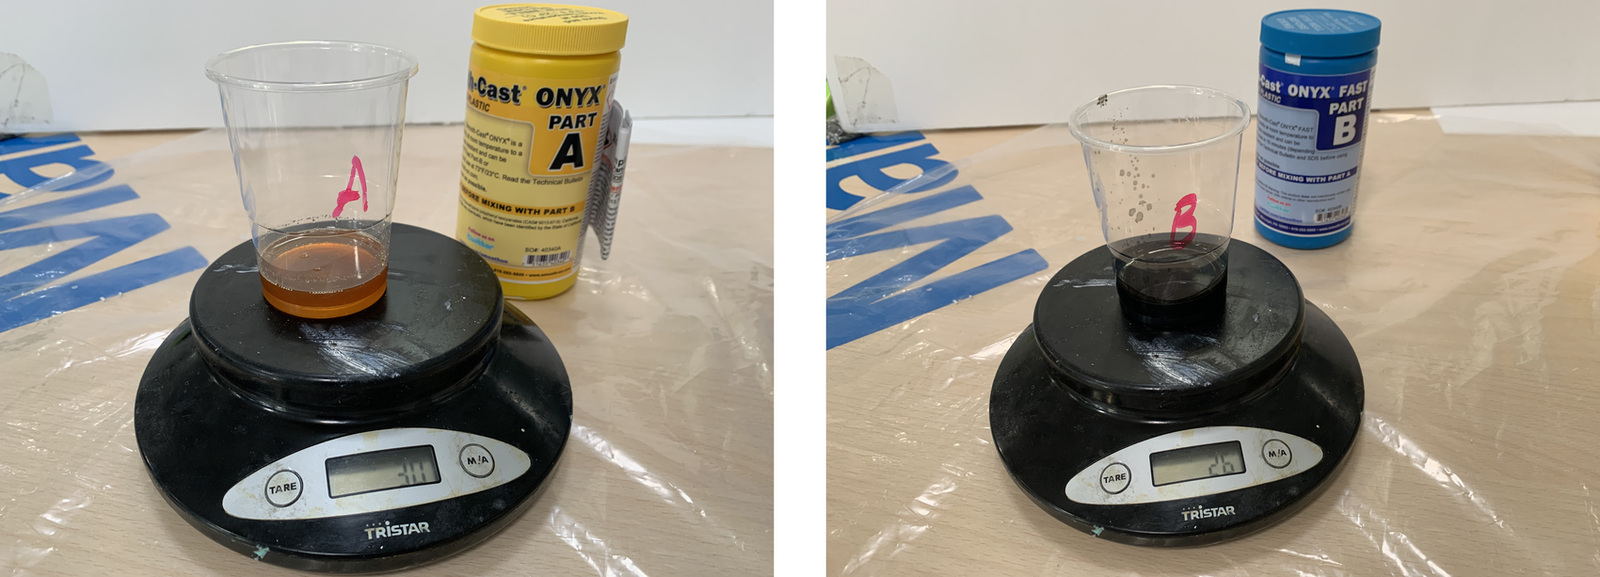
This resin is similar to Smooth-Cast® 300, although much faster, it has a pot life of 2.5 minutes and cures in 10 minutes. The pieces are black. The mix ratio is: 1 Part A: 1 Part B by volume. In this case, by weighing you can see that the volume is not equal to the weight, part A is more liquid and needs more quantity.
I mix the two parts in less than 1 minute, and slowly pour it into the silicone. The material that I have left is a sample for the Group Assignment. Like the other Smooth-Cast® 300 resin, it creates an exothermic reaction, so be careful. After 10 minutes, remove the silicone mold carefully, if we leave it much more we can damage the silicone because this resin is very hard. The result is perfect, you have to remove the excess material.
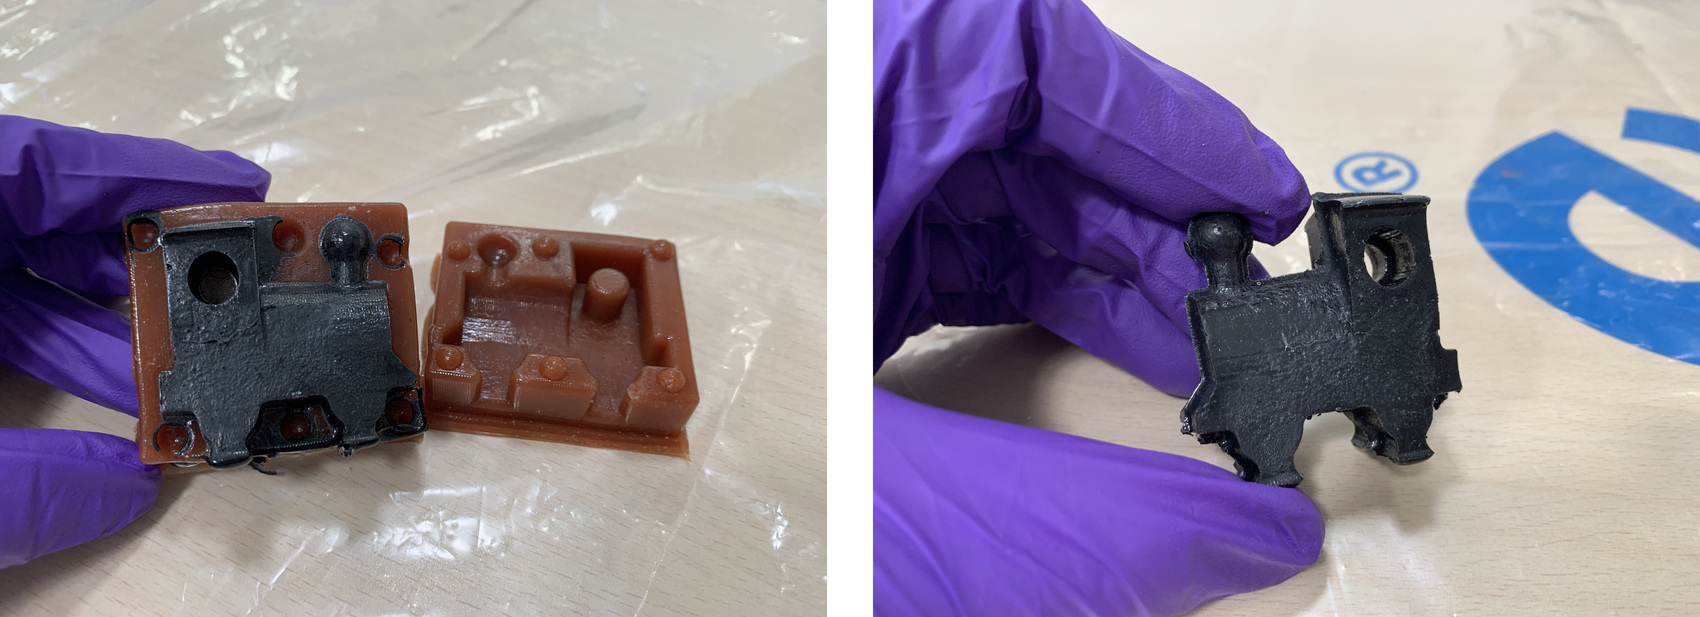
After filing and sanding the little train (I have to say it is a super hard material 😅), it is very cool in black.
Candle wax
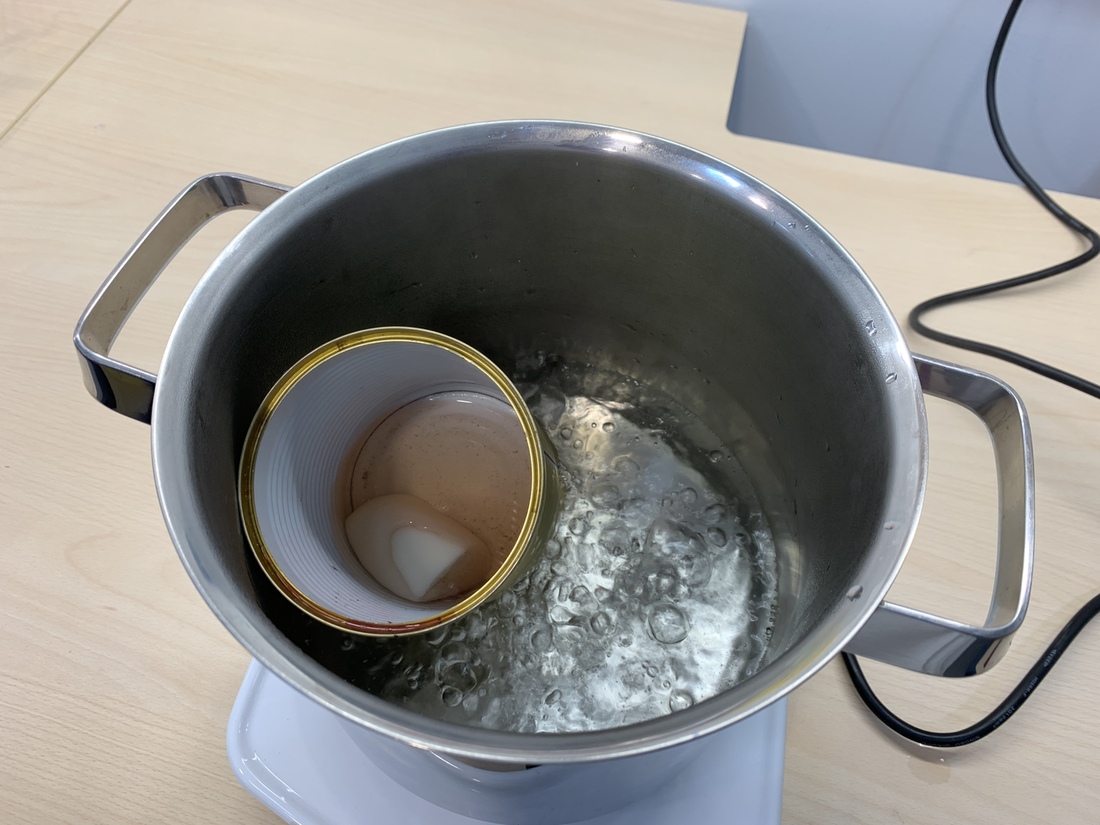
At the Fab Lab León we had scented candles, so I thought, I can make a candle in the shape of my little train. So I put to heat water in the pot and inside I put a container where the original candle will melt. In Spain this process is called "Baño Maria". Important: Be careful with hot water and melted wax. 🔥🔥
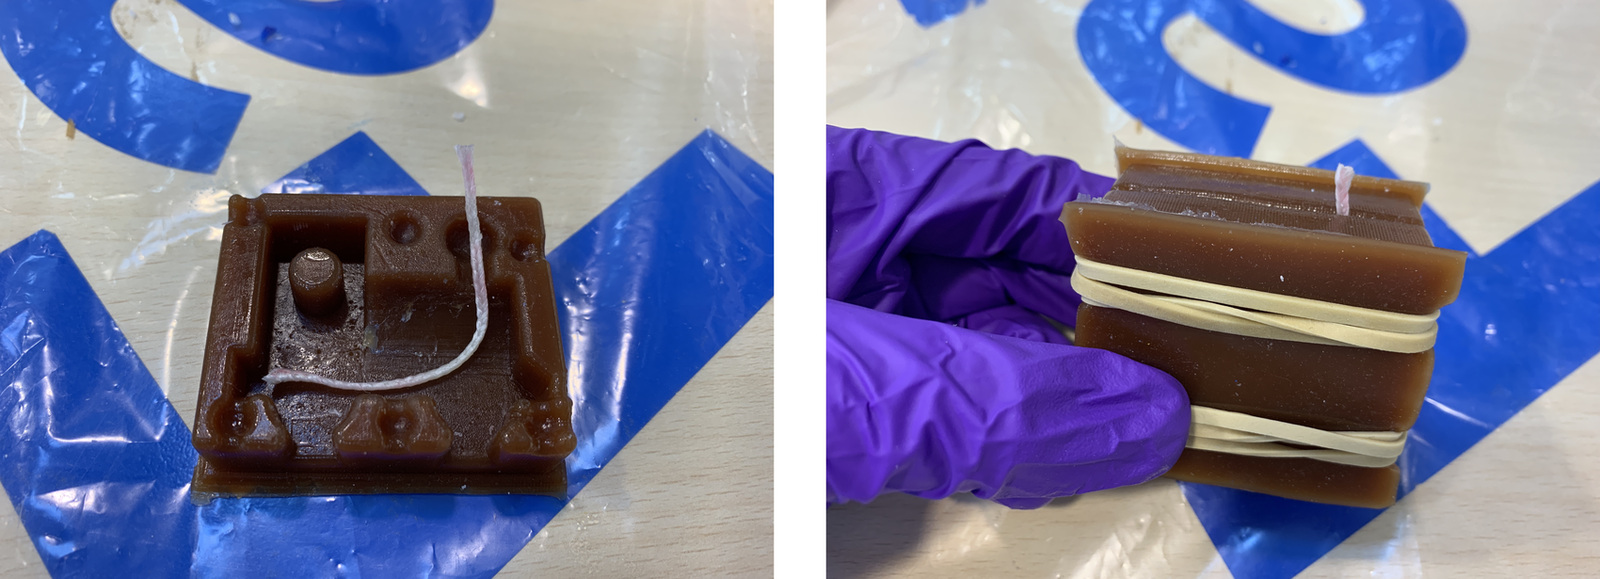
Since I have no wick, I reuse the one that came in the candle, and put it inside the silicone. I close the silicone with elastic bands and let the wick protrude from the chimney of the train.
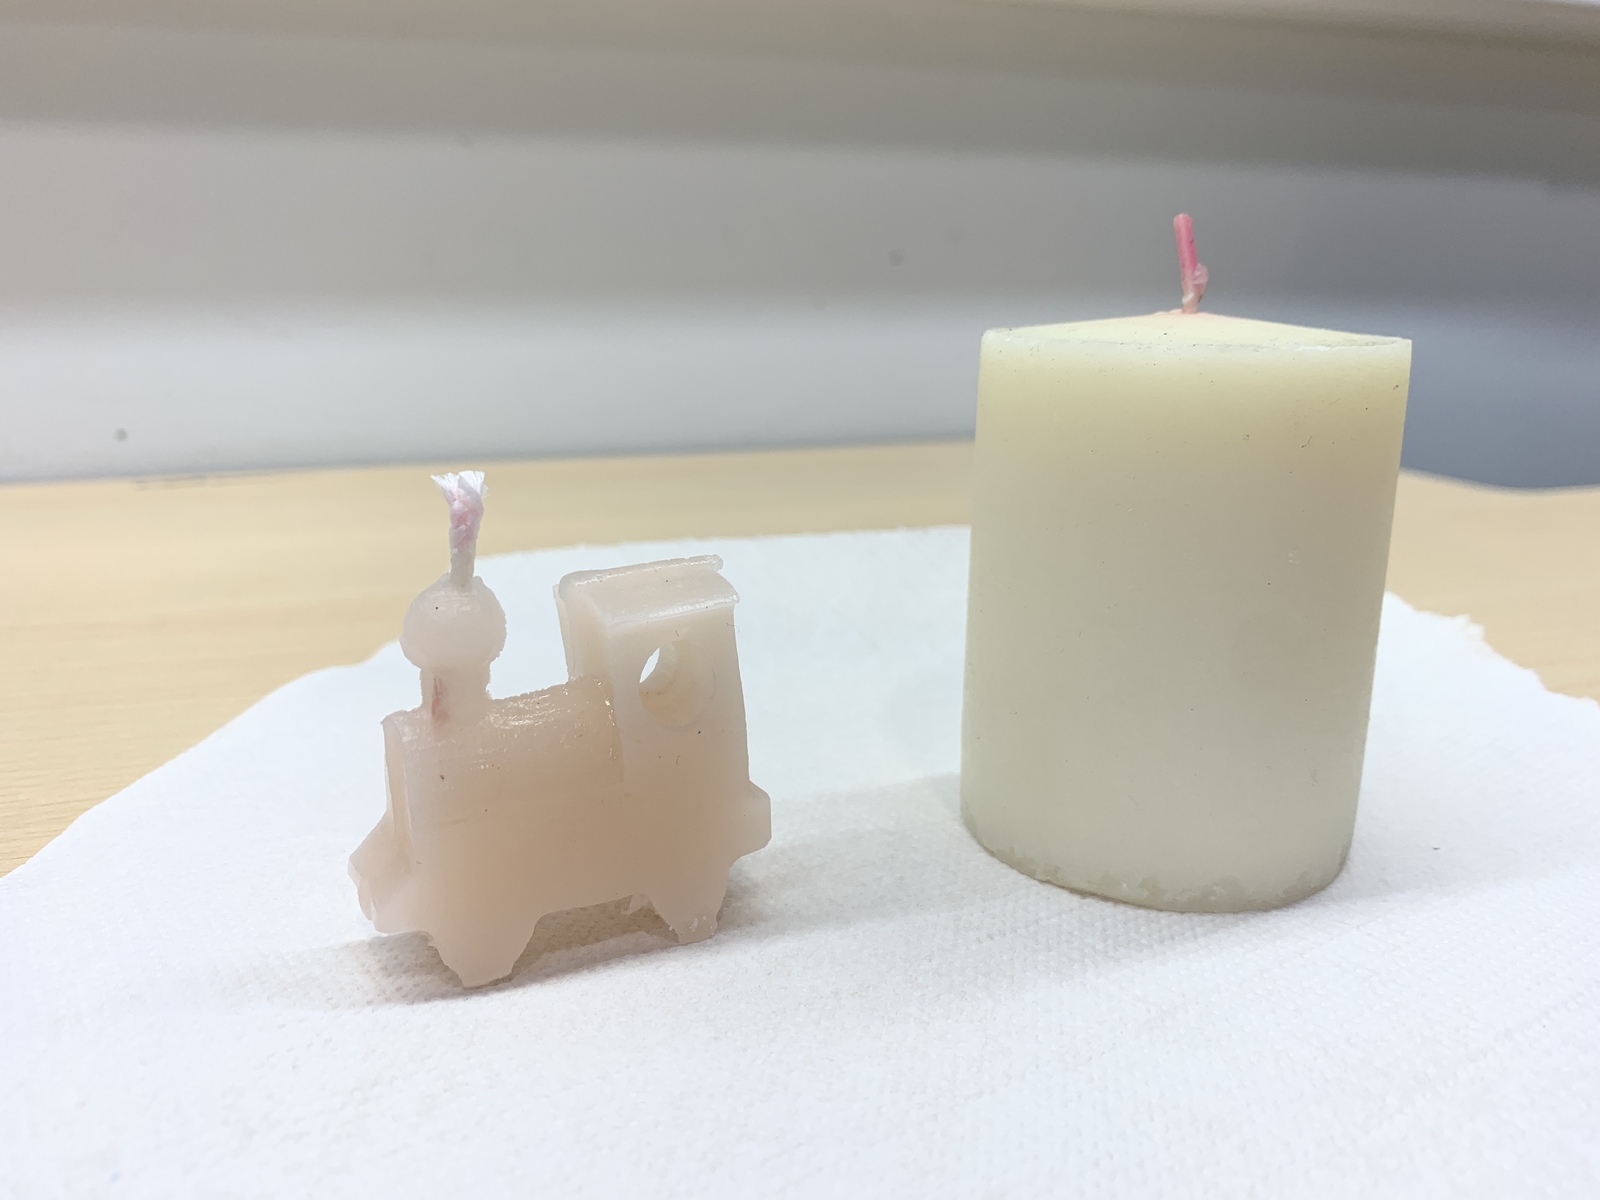
Once the liquid wax has been poured, I let it cool, and so that it finishes cooling completely, I put it in the refrigerator. This is the little candle on the little train. It is sad to light it hehe.
Chocolate
The coolest moment of this week has arrived. 😋 Create a chocolate in the shape of the little train. 🍫 🚂
The first thing to do is wash the food silicone with soap and water. Then, we will butter the mold so that the chocolate does not stick and we can not release it. While we bring water to a boil and in another saucepan, add the chocolate (just like the candle, to the "Baño Maria").
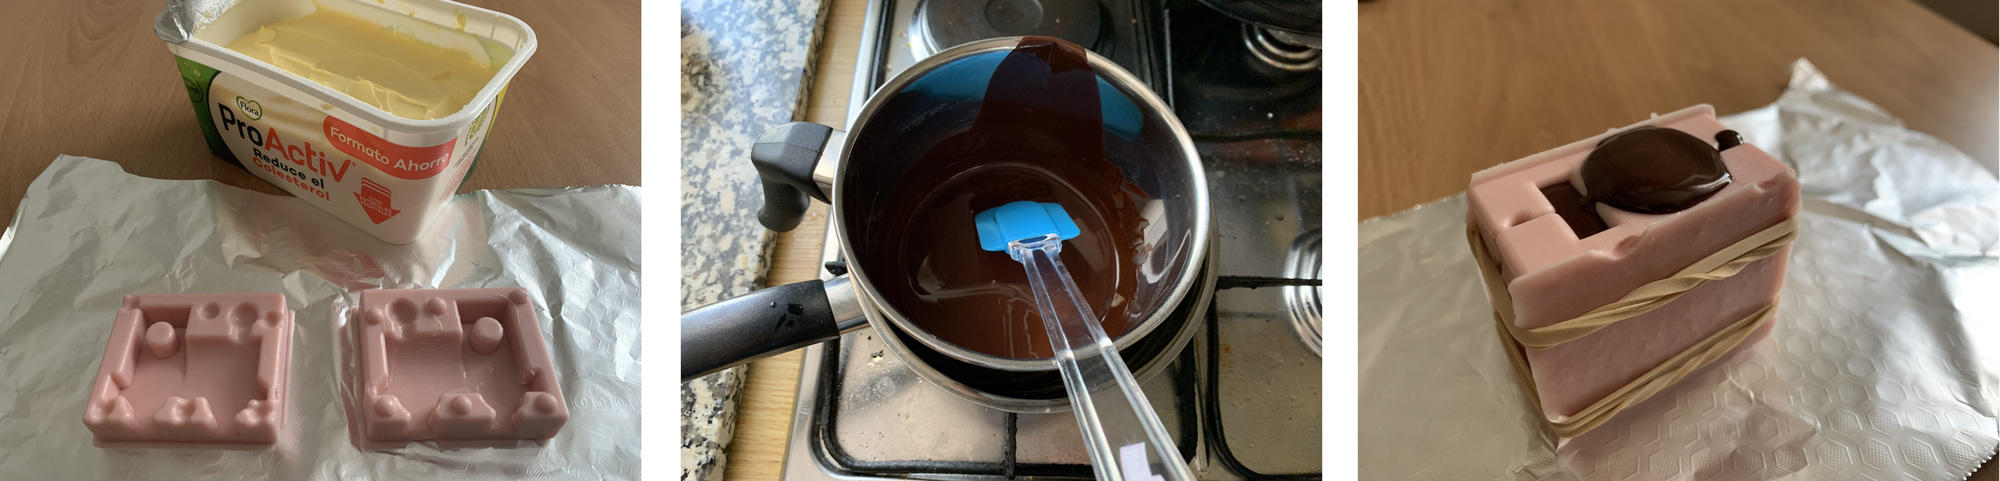
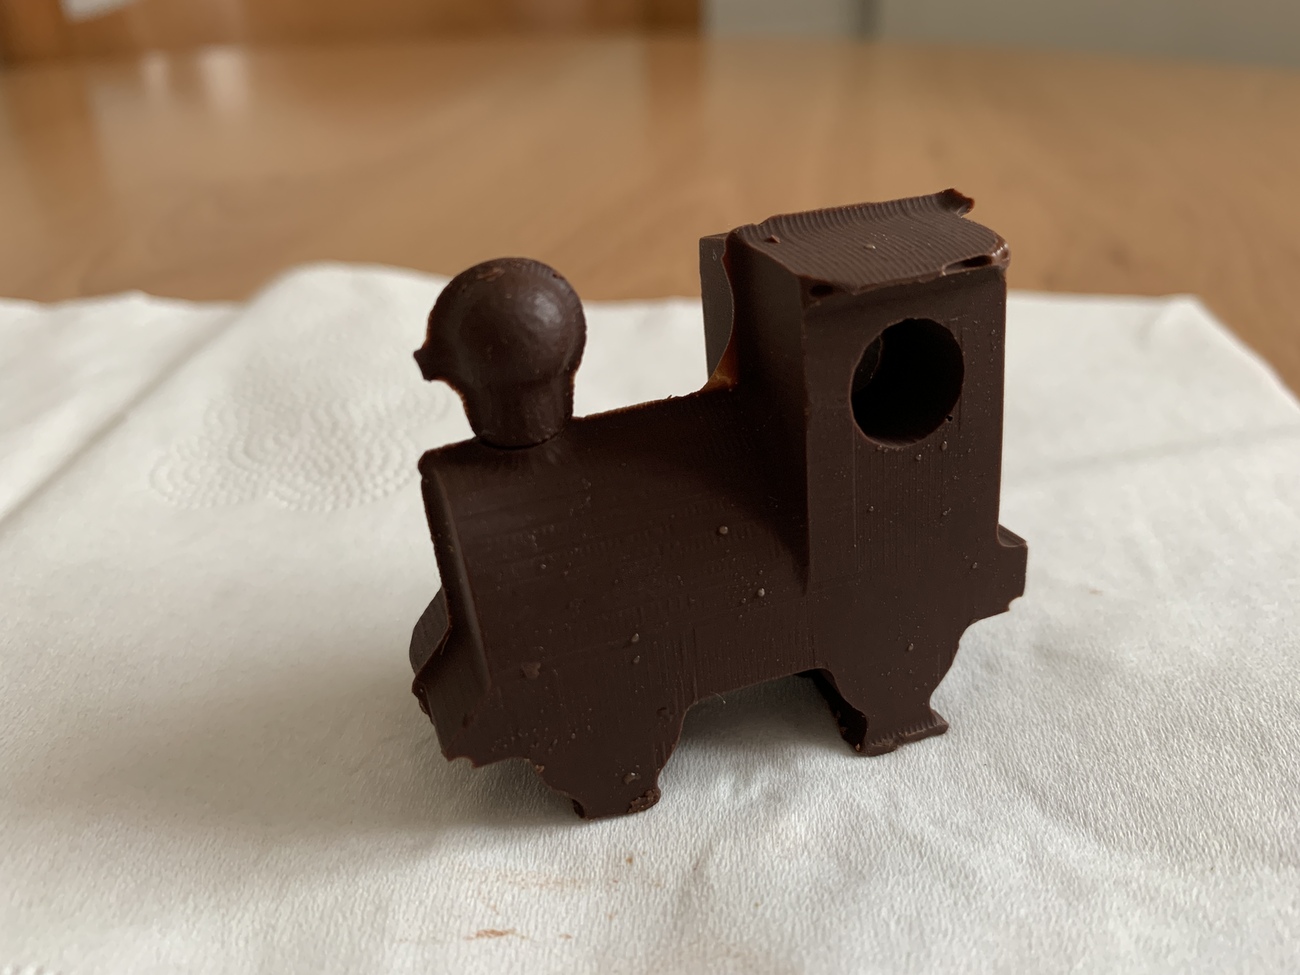
Then we will put it in the freezer for a couple of hours (the first test I did in the fridge and it does not work, the chocolate is still soft). And we already have our little chocolate train.😋 Be careful with the fireplace, which breaks easily.
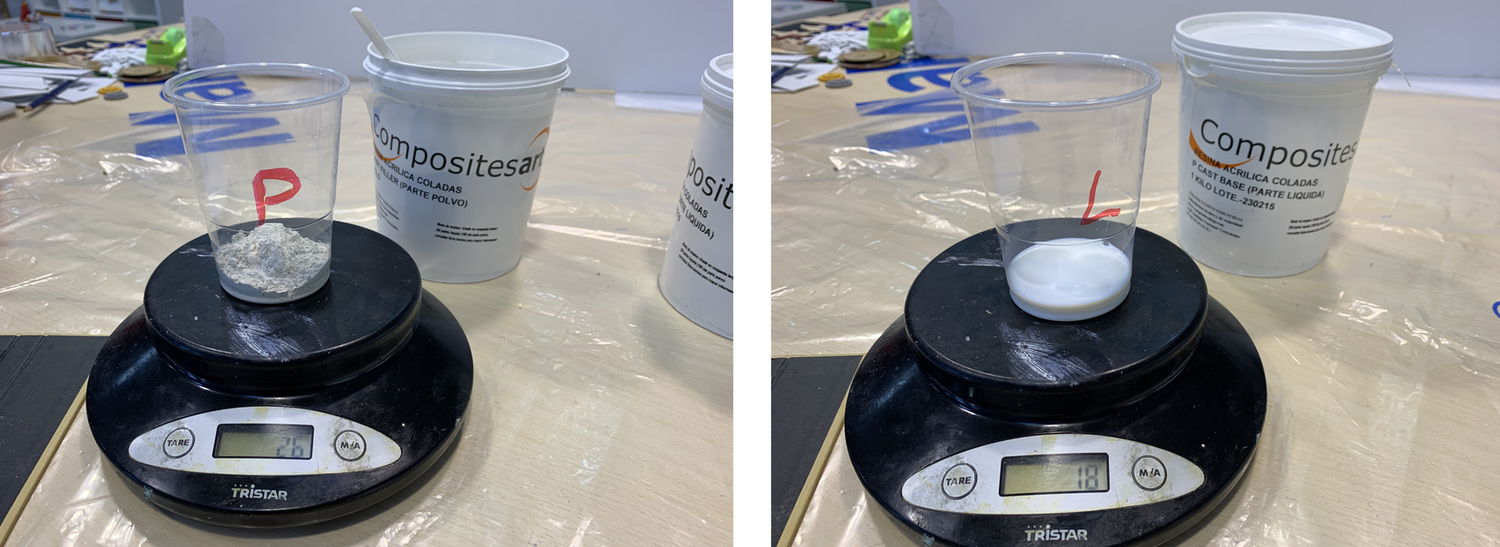
PLASTICRETE (STONE-LIKE FINISH)
The next resin I use is acrylic, which when it dries its finish imitates the stone of the sculptures. They are two components, one powder and the other in liquid. Percentage of mixture in weight: 100 powder + 60 liquid. I put 26 grams of powder and 18 grams of liquid.
I mix both components and pour it little by little into the silicone. After a curing of more than 8 hours, I notice that enough liquid has come out of the silicone, as if the piece had "sweat". I open the mold and see that the material has shrunk and that material is missing, that it is outside the mold. 🤯
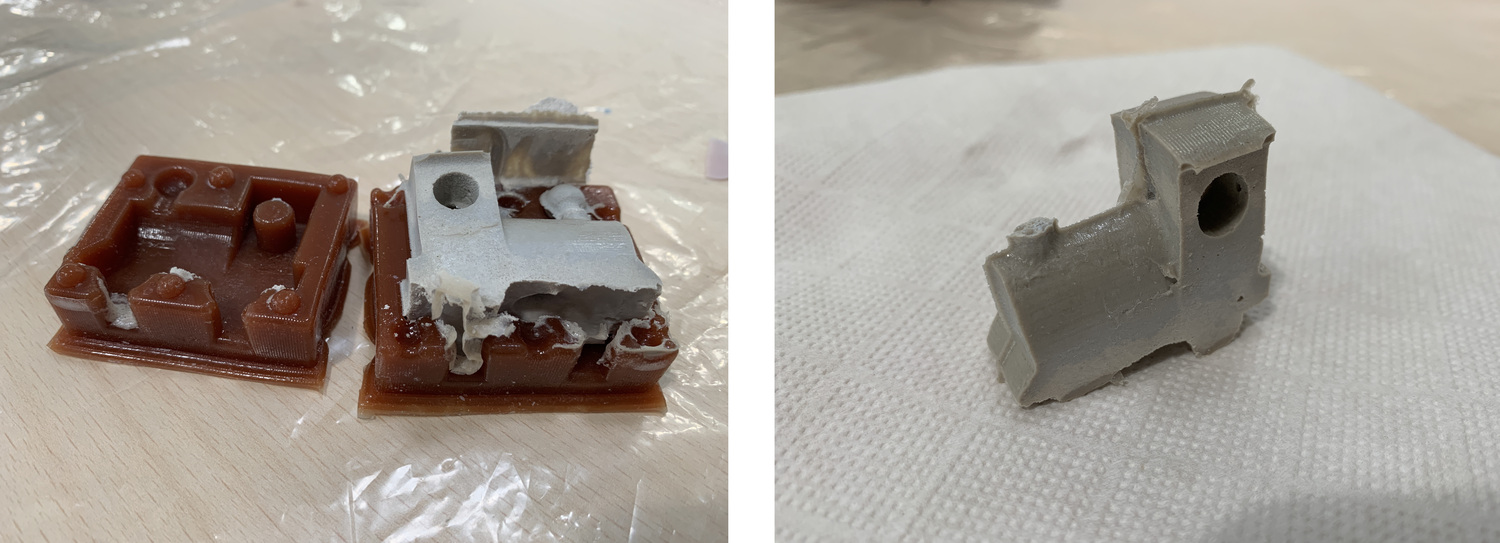
And this is the result. Material was missing and the chimney was broken. Reading further the manufacturer's instructions, he comments that the proportion of the liquid can be varied to 45 parts and obtain a more viscous resin where the time of use decreases, the drying time of the product accelerates, the piece will be less porous and valid for the outside. When the lock-down is over, I will try it again with more time.
Conclusions.
For me this is one of the most fun Fab Academy classes and that at the same time you do things with your hands, you investigate and you seem like a little scientist.
Surely in the not too distant future, I will apply this manufacturing process to the possibility of creating several model pieces, much faster and in greater detail than 3D printing.
This is the progress and result of everything I have applied this week. I am very proud and have had a lot of fun. 😊
Review of the class
During the review of this class I volunteered with the train glows in the dark in the minute 1:22:00. 😊
20200520 molding review from Academany on Vimeo.
Genmitsu Cubiko CNC Router milling wax
In this section of my documentation, I explain what the machine is like and the assembly process.
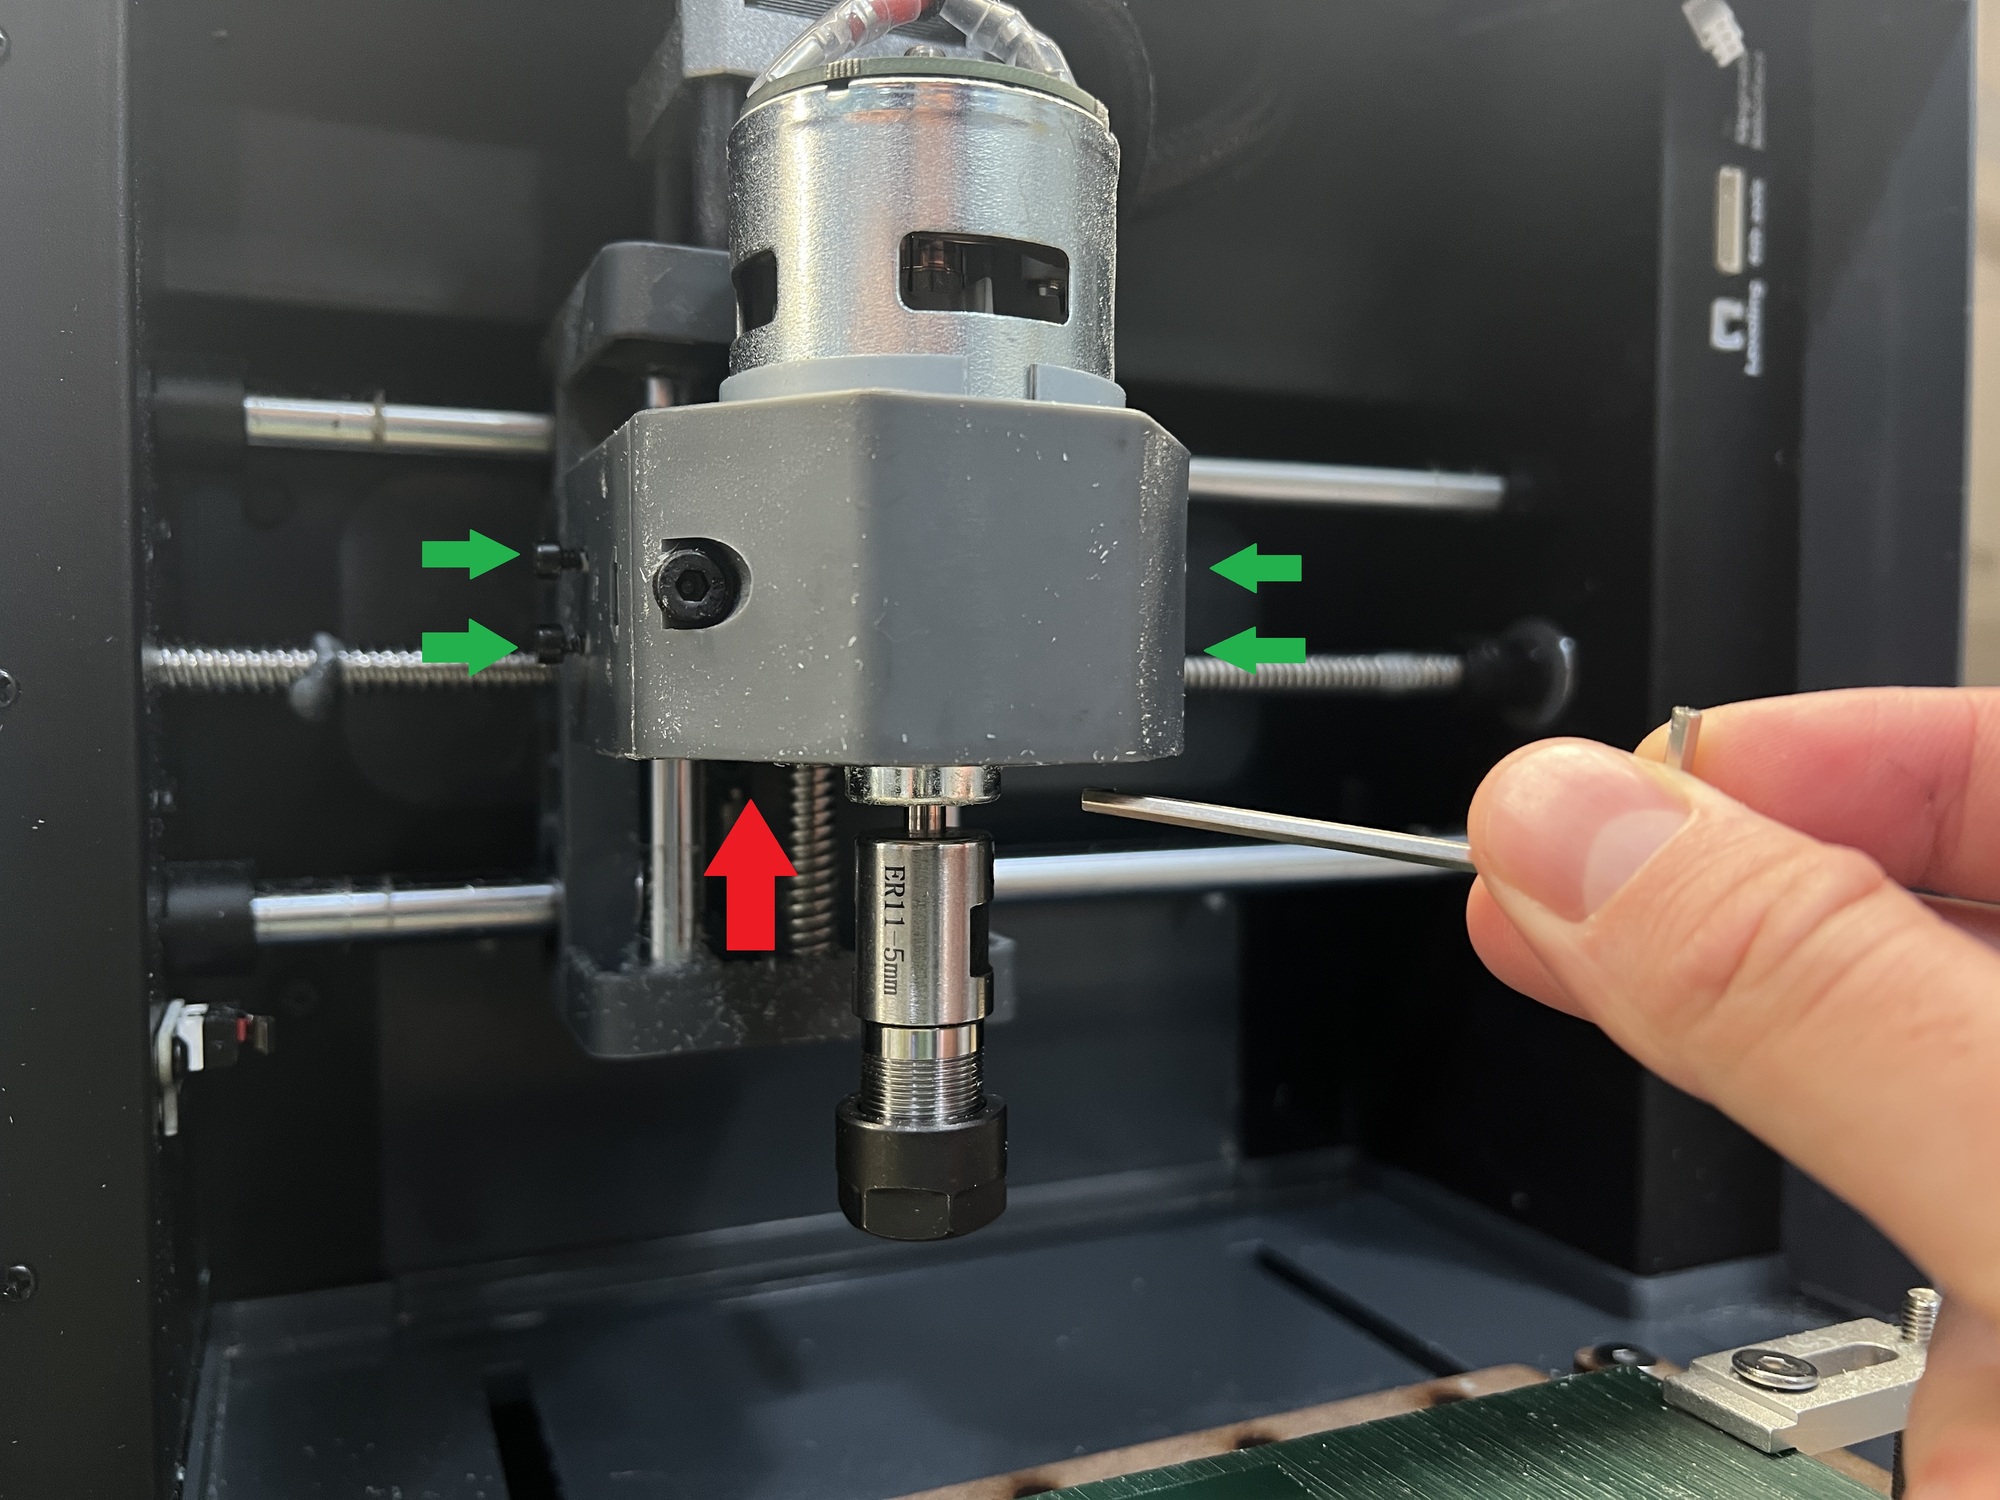
The first thing I do is remove the housing that protects the spindle (it's held in place by four Allen screws) and loosen the screw that secures the spindle. What I want to do is raise the spindle as high as possible to have enough Z-axis clearance to mill a wax block. One of the minor problems with the Cubiko is its limited Z-axis clearance.
In this case, I'm going to use this end mill Ball Nose Tapered End Mills, the model Cutting Edge Length: R0.50-15-D3.1-TiAlN.
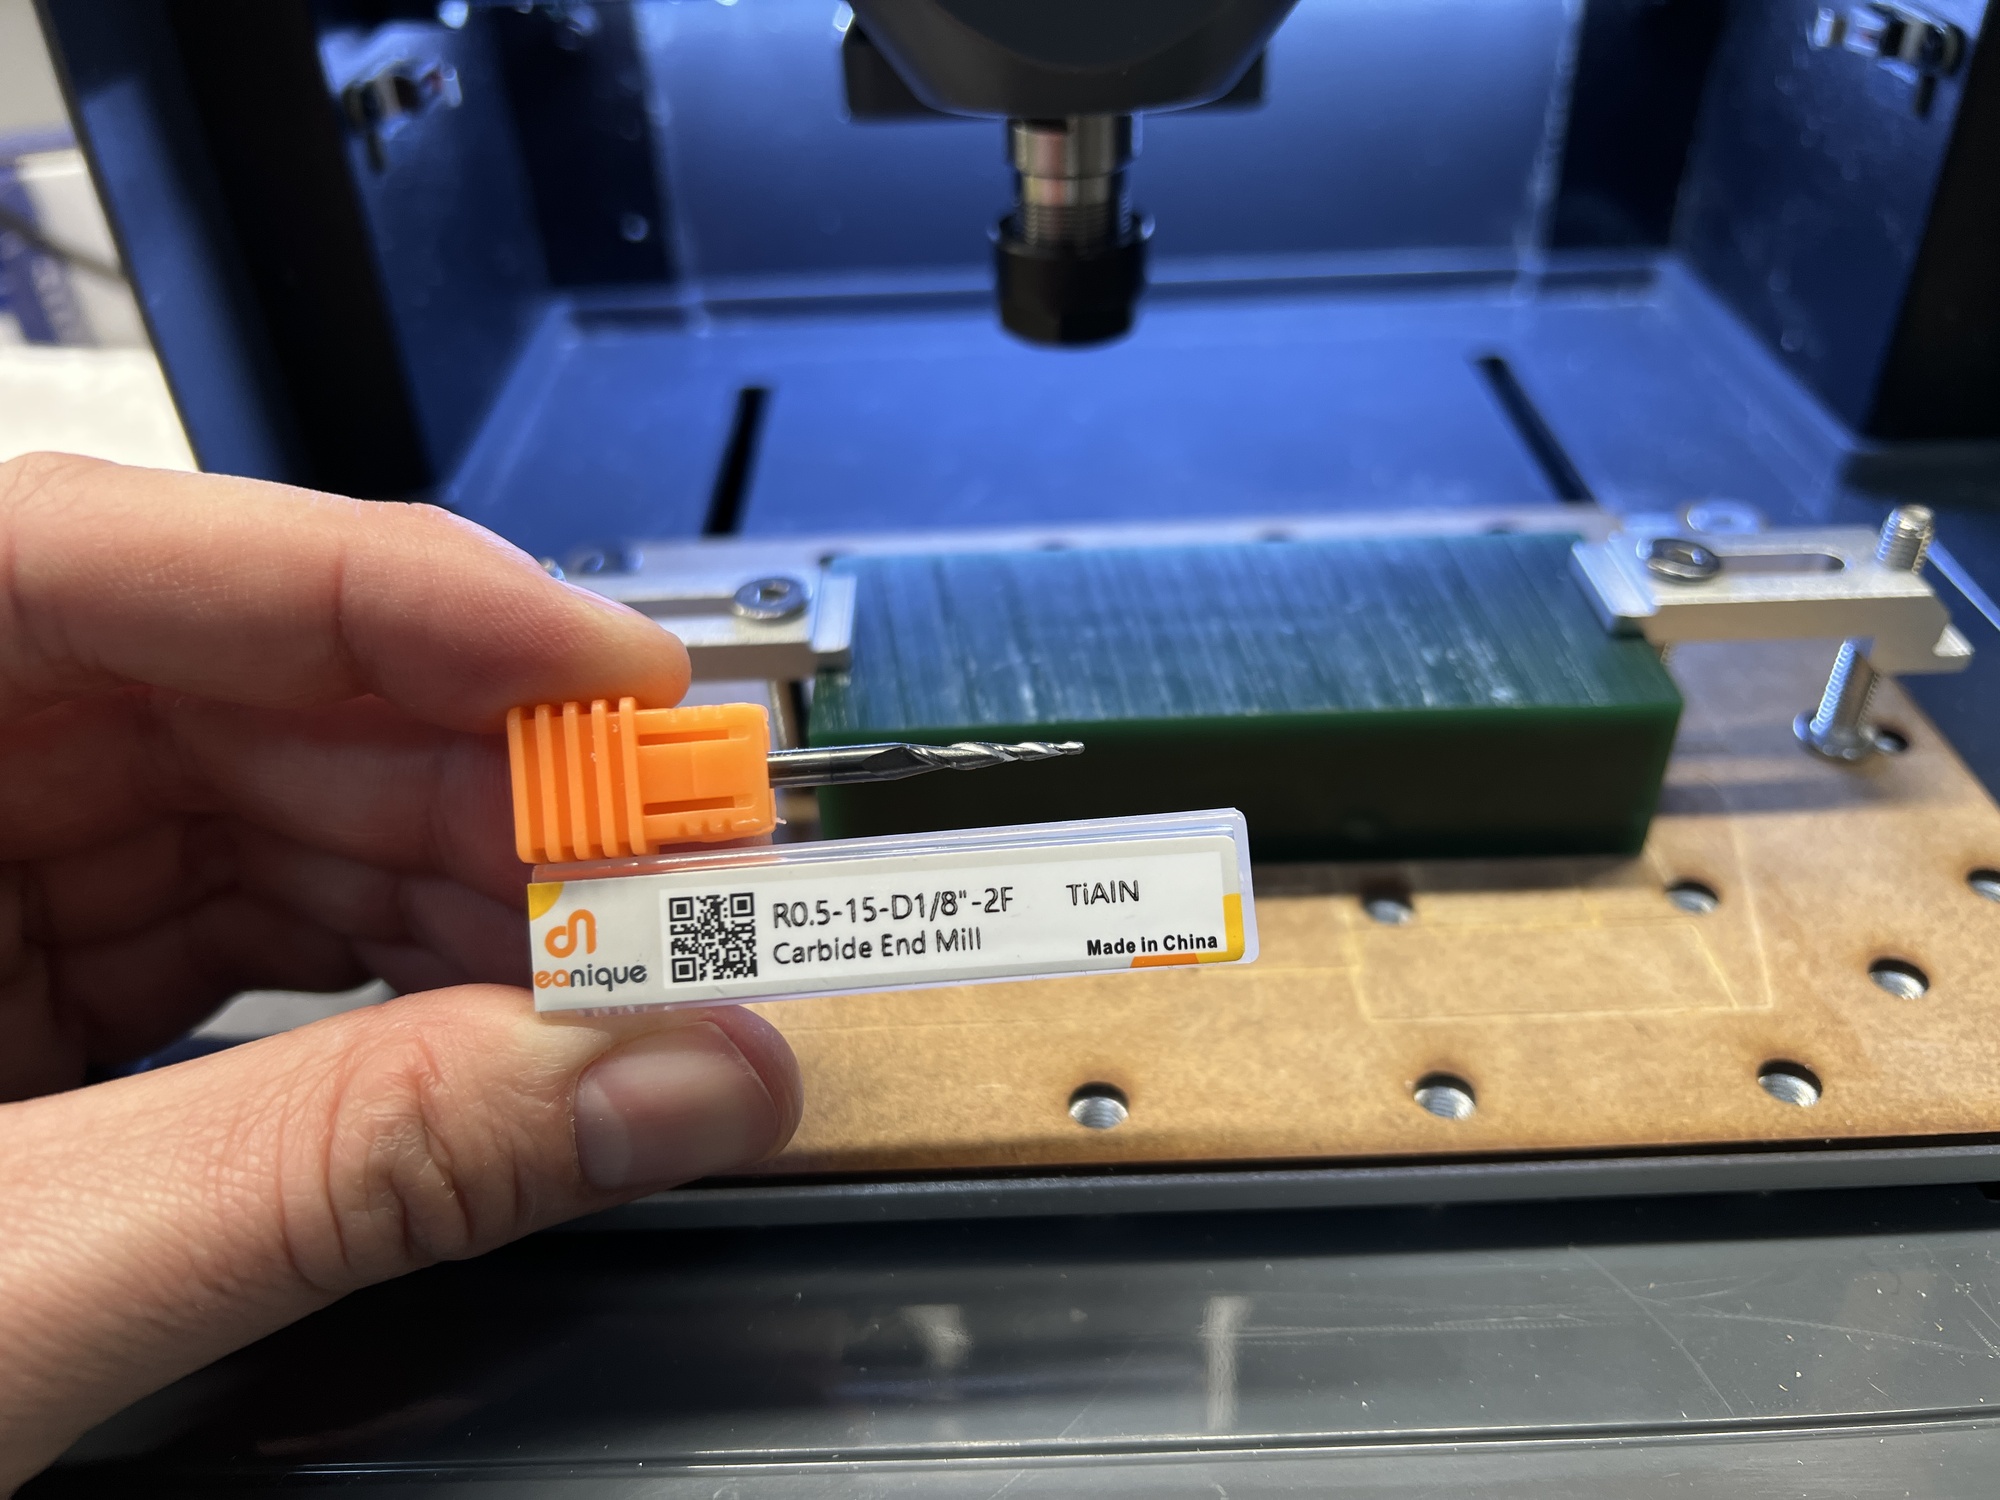
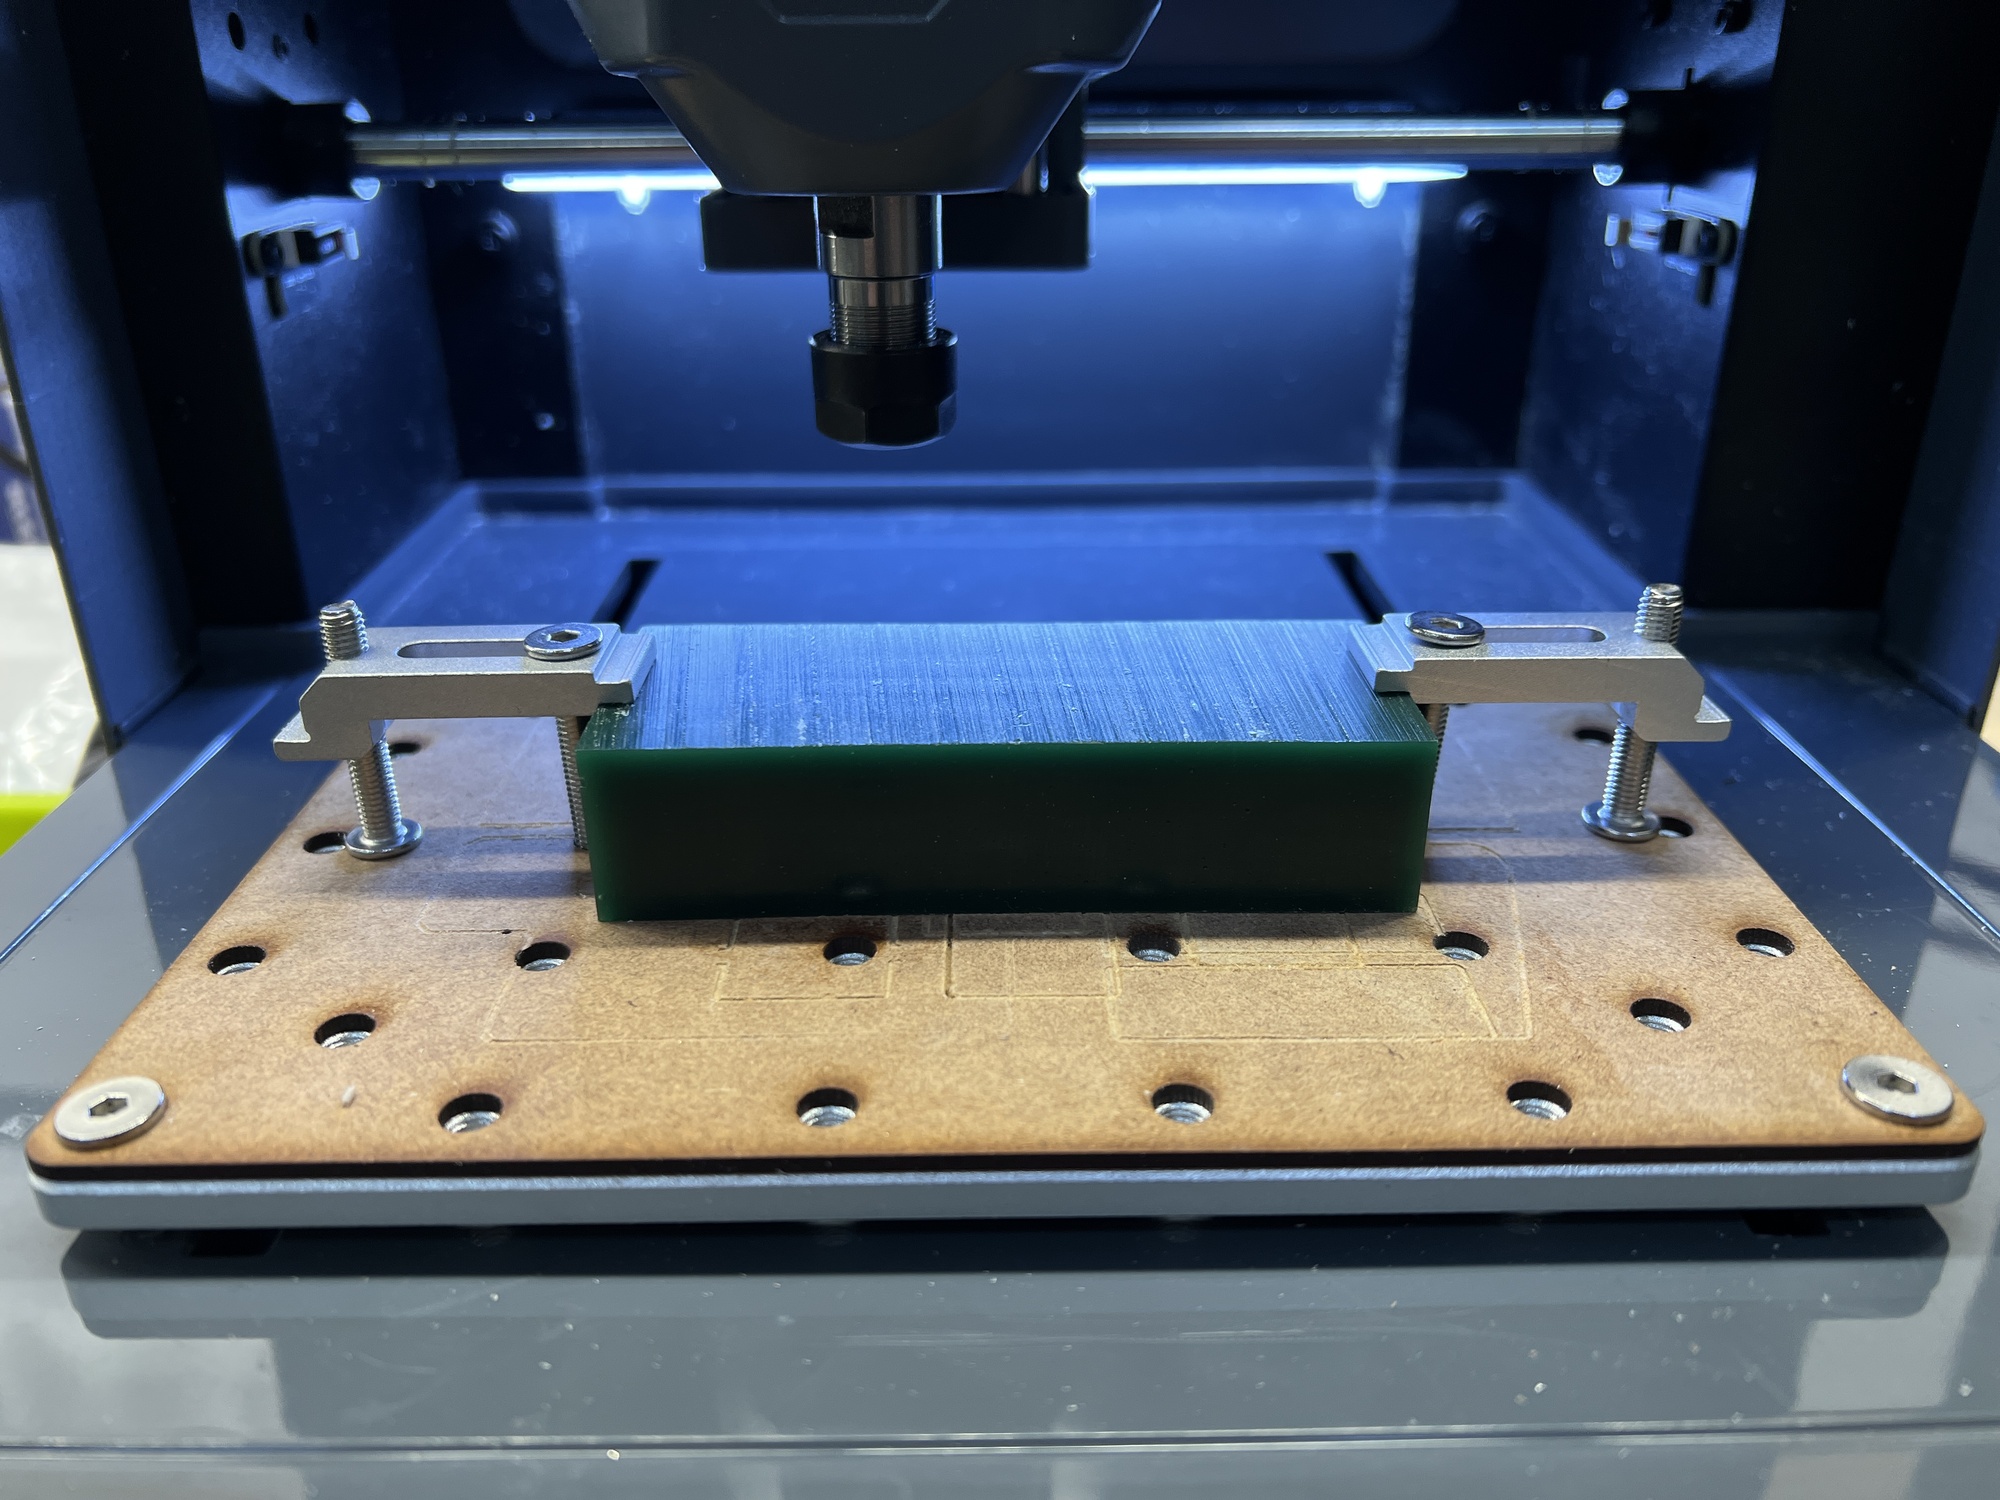
And for the wax, I use a Ferris kit that has different sizes. I use the clamps from the Cubiko kit to tighten the wax block to the base.
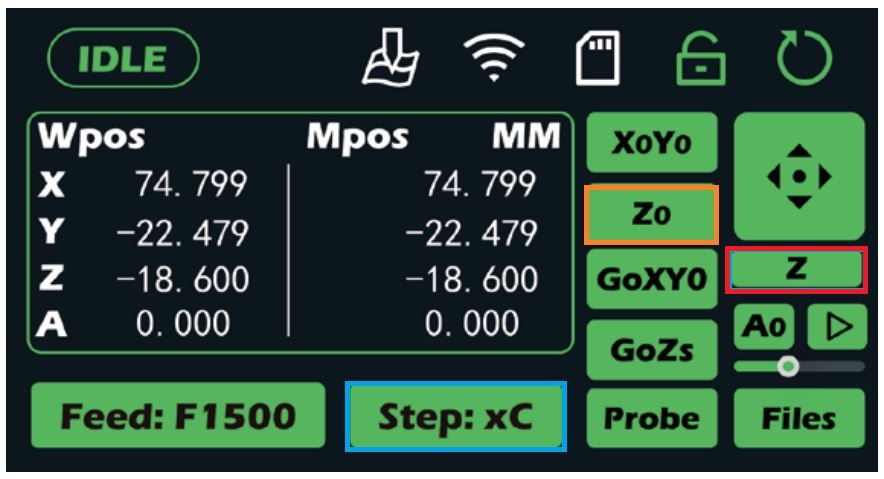
First we will set the X=0 Y=0 of our work. In the "Prepare" menu, you'll find the following arrangement of elements to move the machine (if this is your first time, I recommend doing it empty without the end mill). In the orange box, you can change the machine's movement speed from 0.01, 0.1, and 1. For some settings, it's advisable to change the speed. Once the speed is set, we'll move the machine using the dashed red buttons. When we have points X=0 and Y=0, we'll press the button I've marked in blue.

Next, we move on to establishing the Z. In the blue box, you can change the machine's movement speed from 0.01, 0.1, and 1. For some settings, it's advisable to change the speed. Once the speed is set, we'll move the machine using the dashed red button. When we have the point Z=0, we'll press the button I've marked in orange.
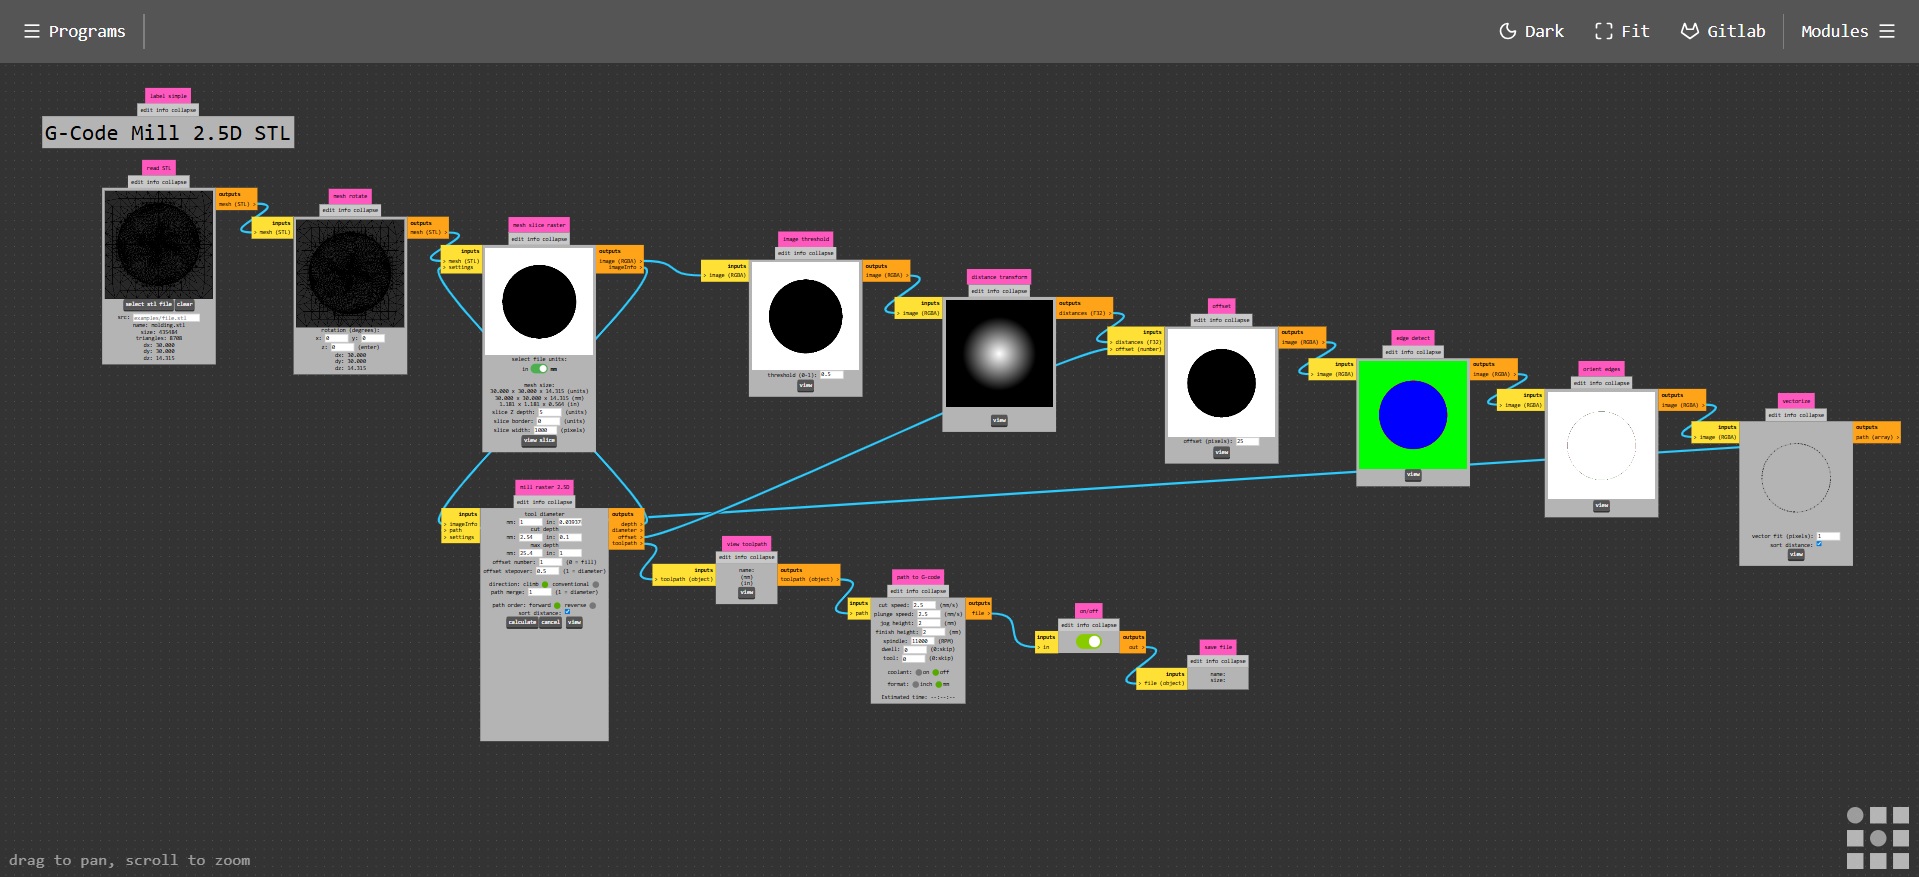
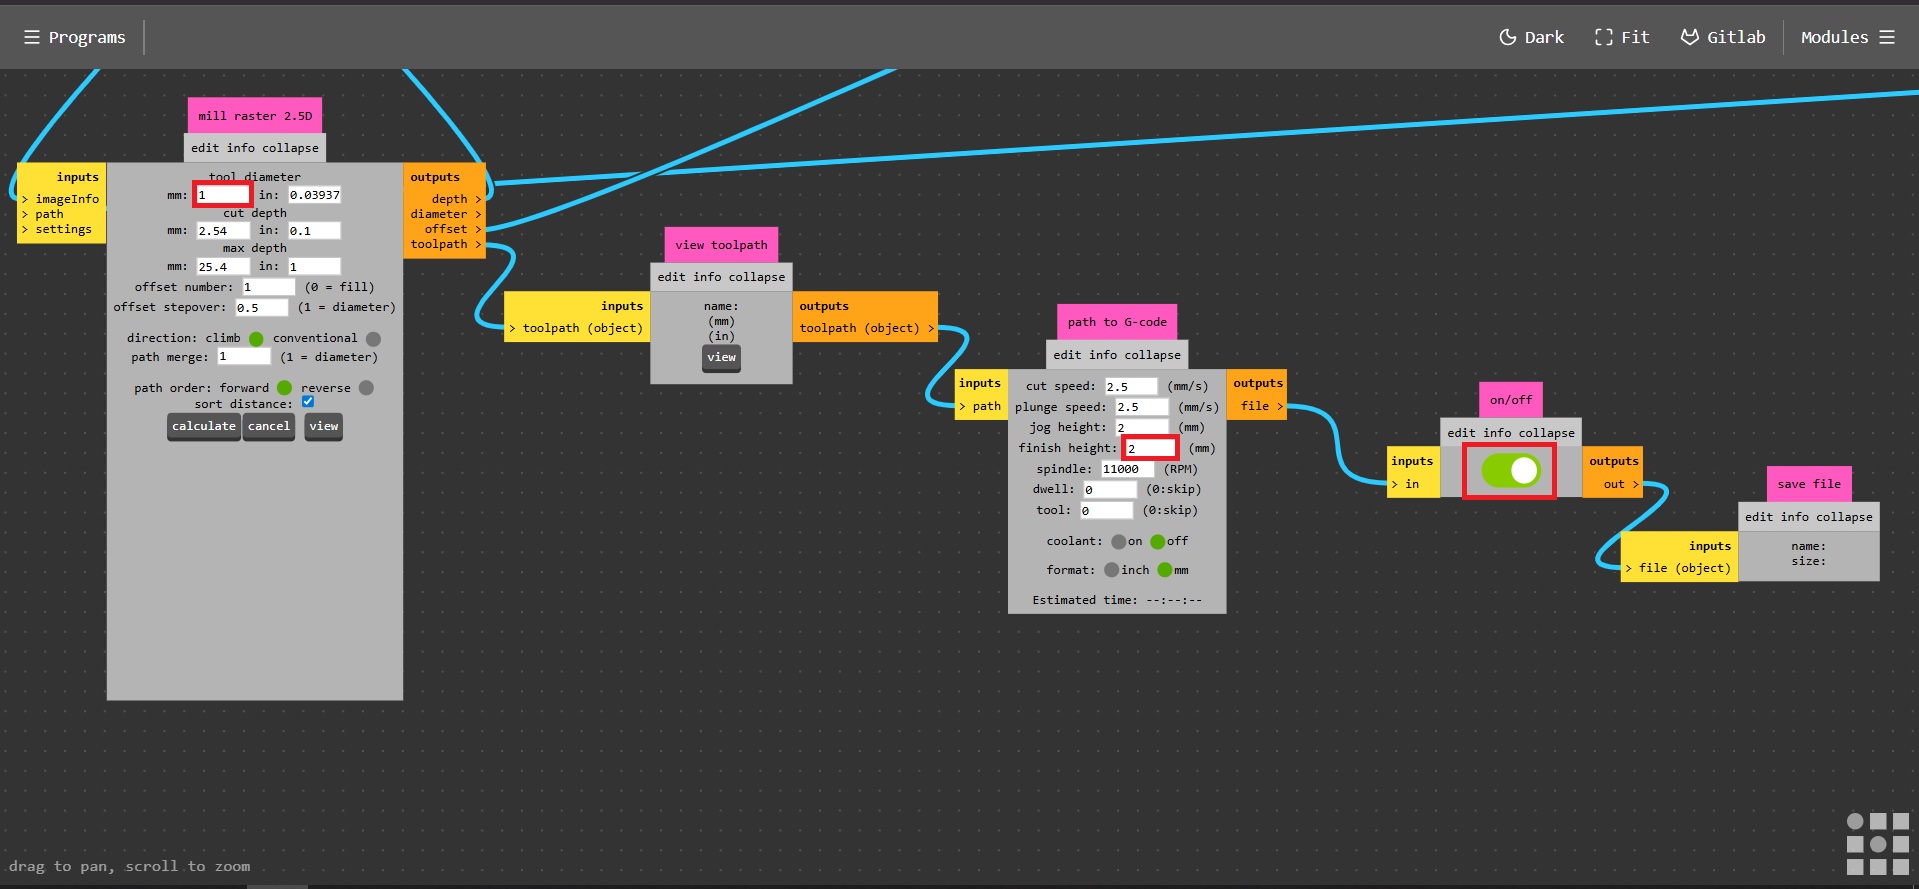
Now we move on to Mods CE. We'll select the G-Code Mill 2.5D STL program. First, we load the STL and then select the mill raster 2.5D module. I change two small values; in my case, the tool diameter to 1 mm, and in the path to G-code module, in the finish height 2mm section. Finally we select the ON/OFF button to save the GCODE is automatically on our computer.
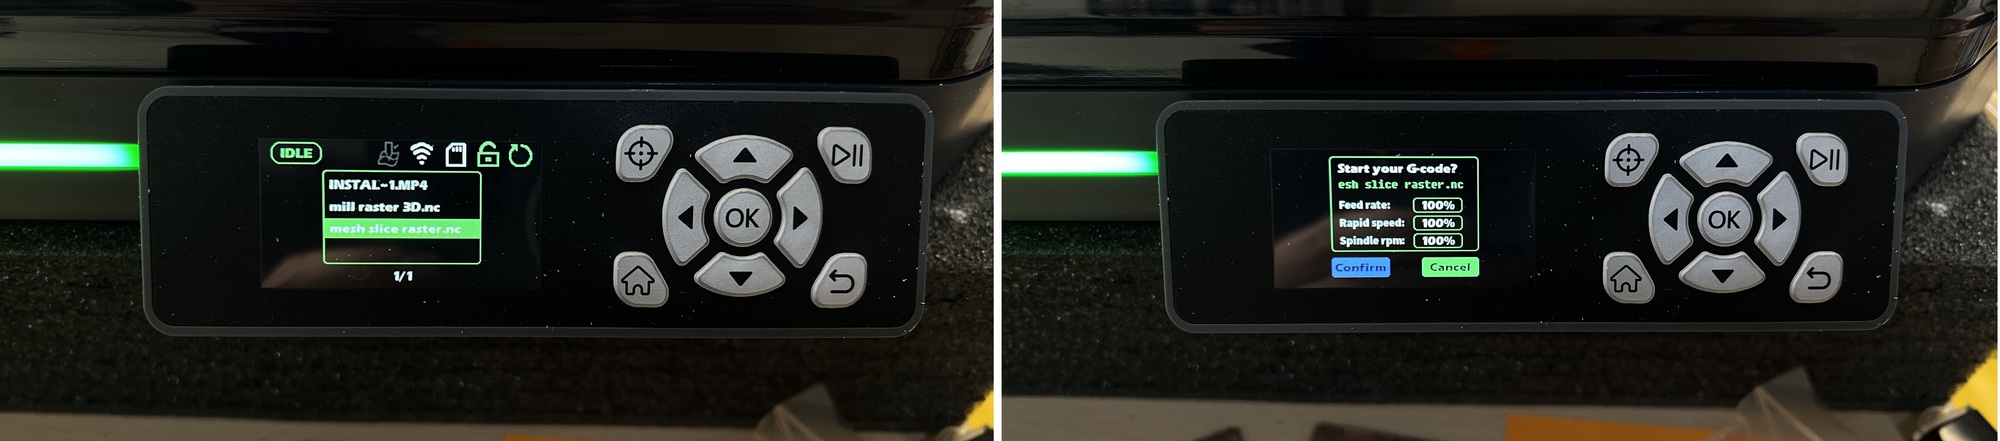
Well, now it's as simple as taking the file and saving it to the microSD card that comes with the machine. Now, in the "Prepare" menu, click Files and select the file. To start the file, we must place the casing and it will ask us for the speeds. Next is the Play button.
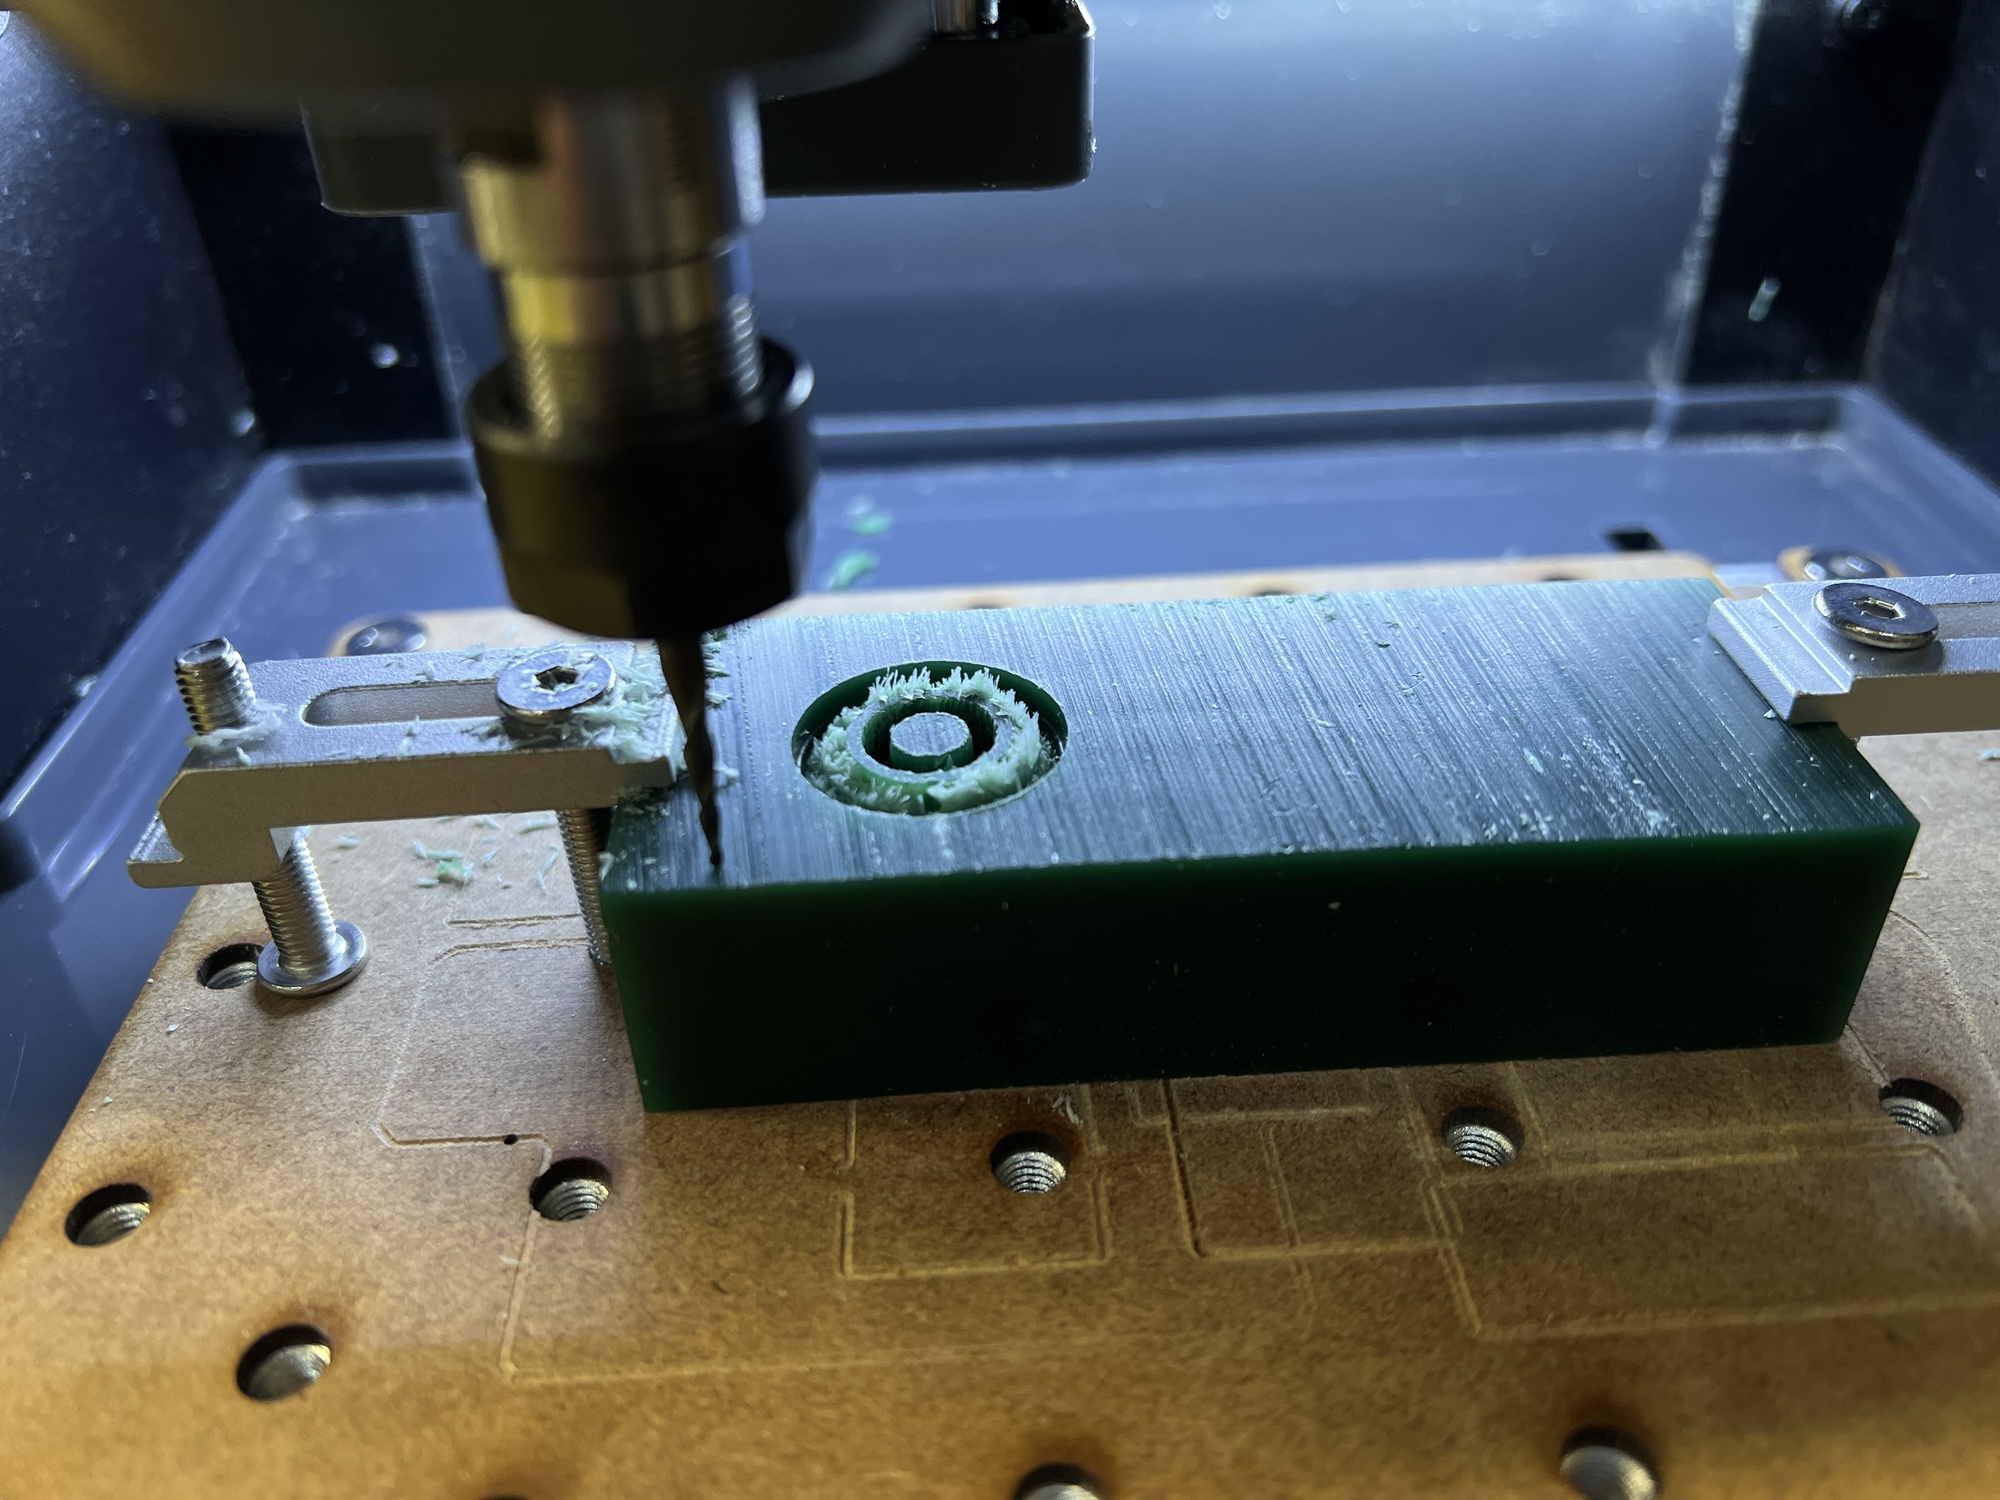
Here's a video of the rough milling process.
Once the rough milling is finished, the machine stops and is raised 2 mm (as shown in Mods CE). Now, using a vacuum cleaner, we remove the wax shavings generated.
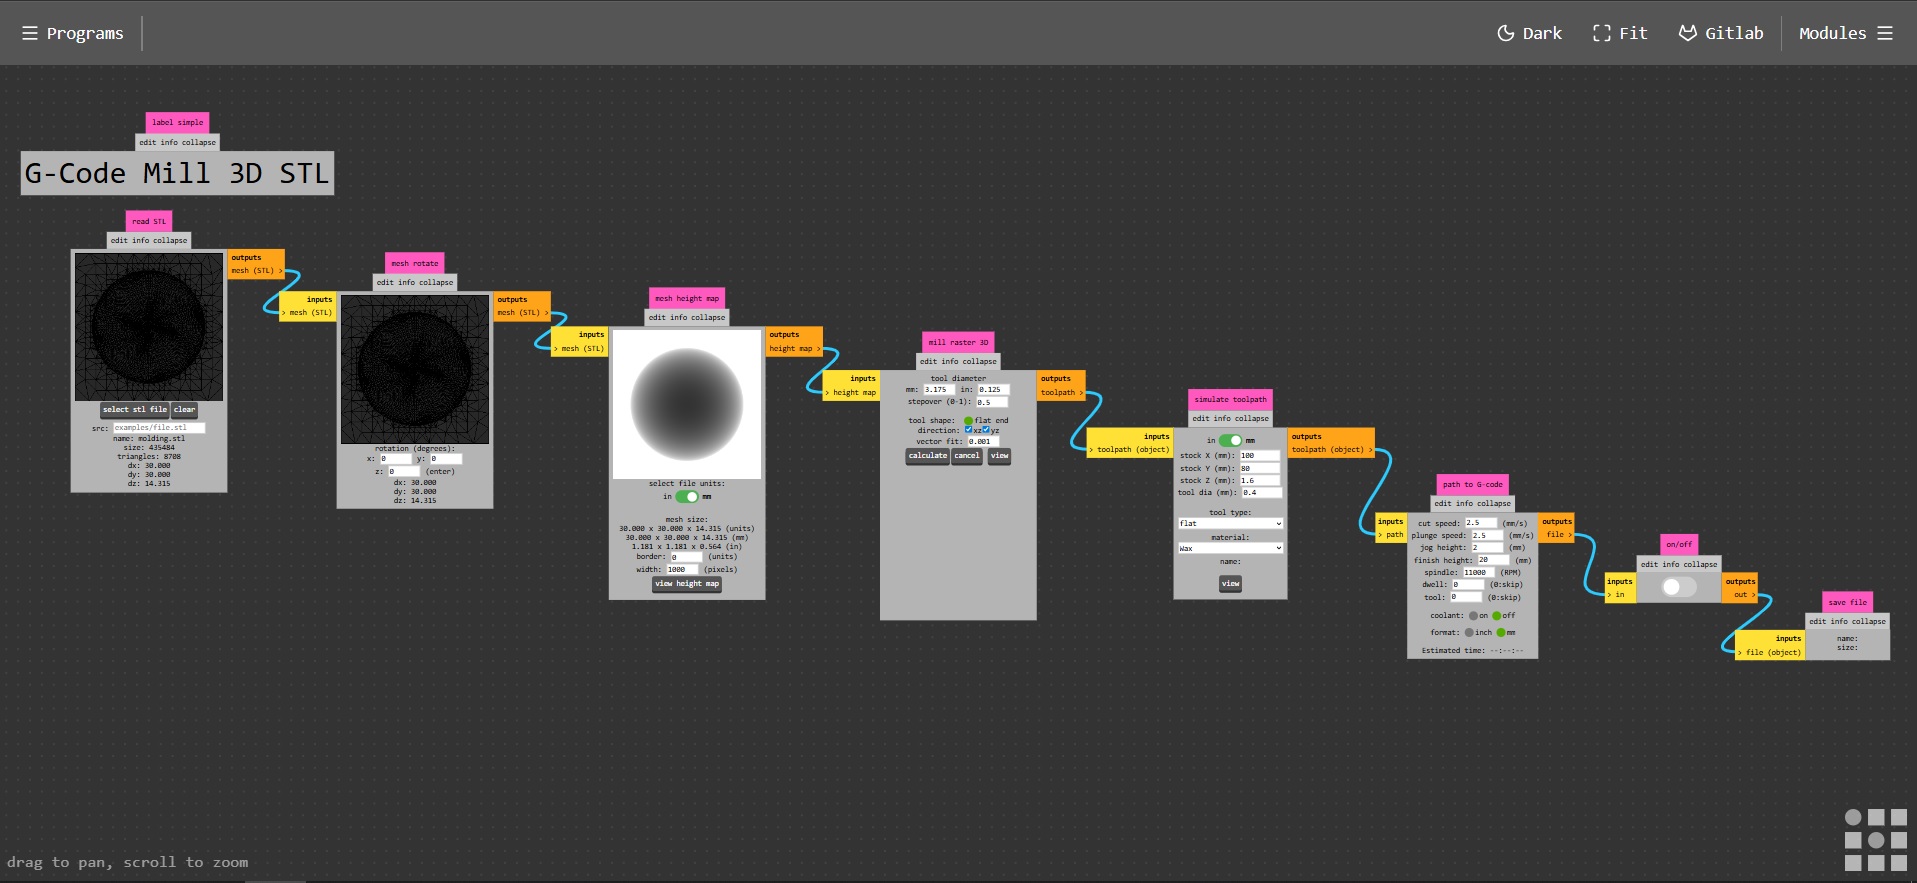
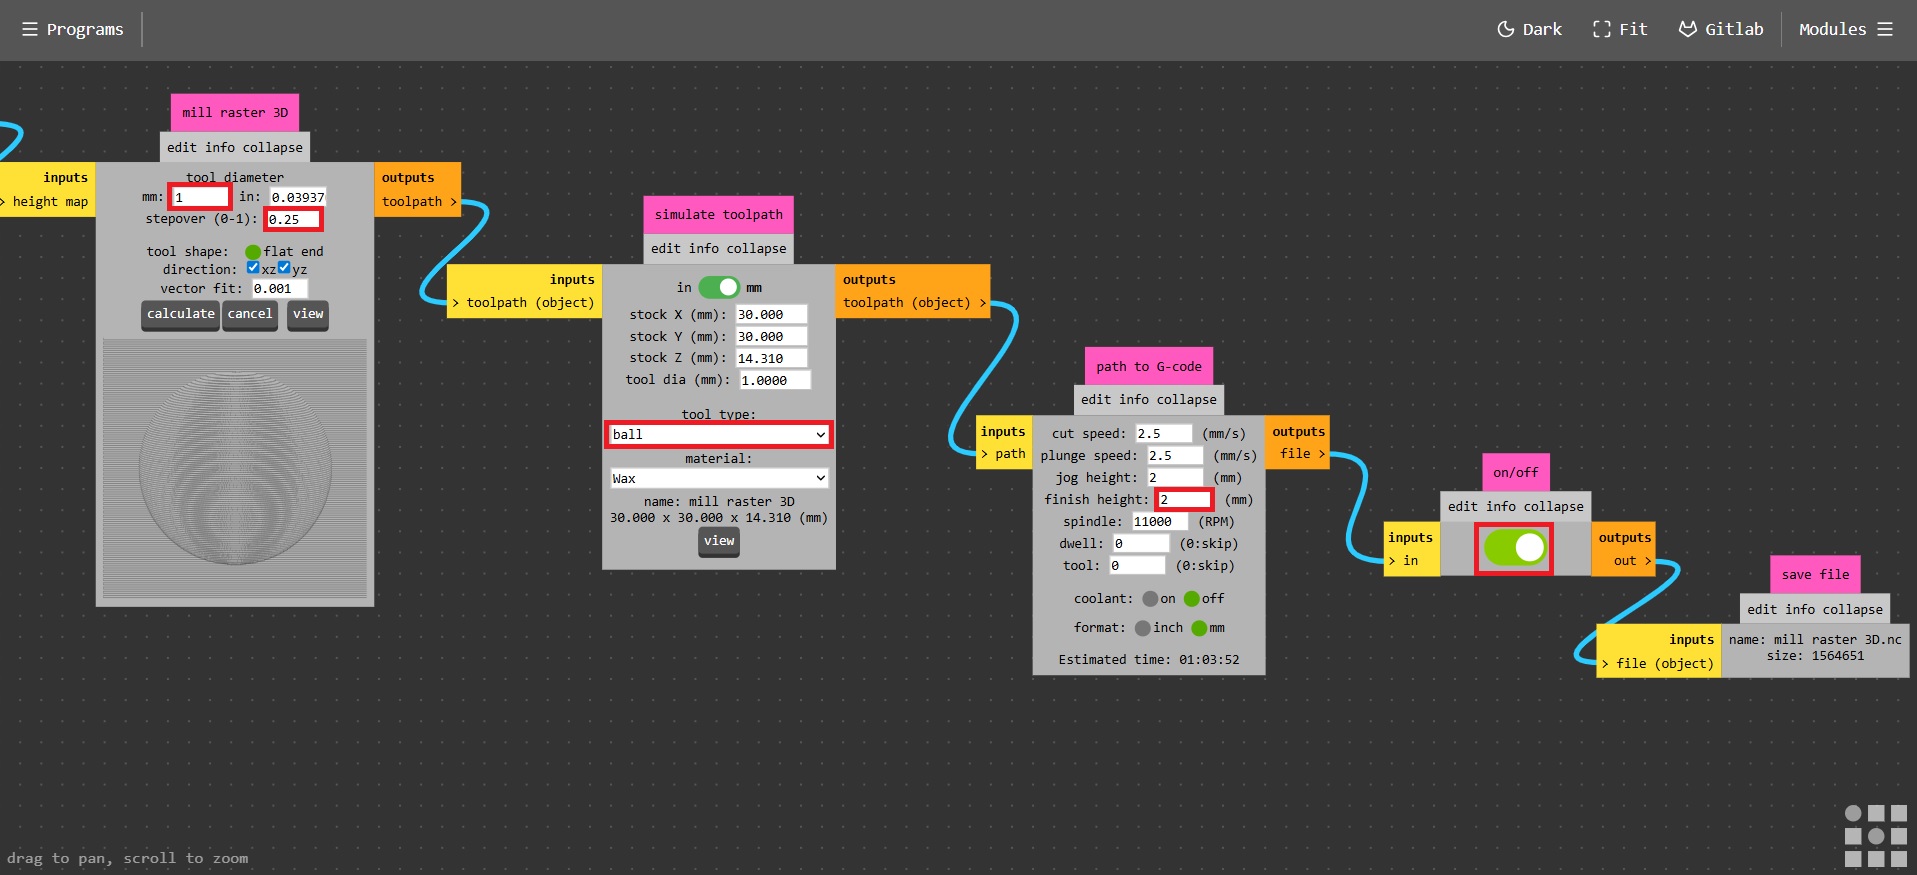
Now, using the same end mill, we'll go for the finish. For this, we'll return to Mods CE. Now, using the same end mill, let's proceed with the finish. For this, we'll return to Mods CE. We'll now use the G-Code Mill 3D STL program. We'll import the same STL file as before and make a couple of changes. In the mill raster 3D module, the tool diameter will be 1 mm, the stepover will be 0.25 mm; in the simulate toolpath module, the tool type will be ball; and in the path to the G-code module, in the finish height section, the 2 mm section. Finally, we select the ON/OFF button to save the G-code automatically to our computer.
Taking the file and saving it to the microSD card that comes with the machine. Now, in the "Prepare" menu, click Files and select the file. To start the file, we must place the casing and it will ask us for the speeds. Next is the Play button.
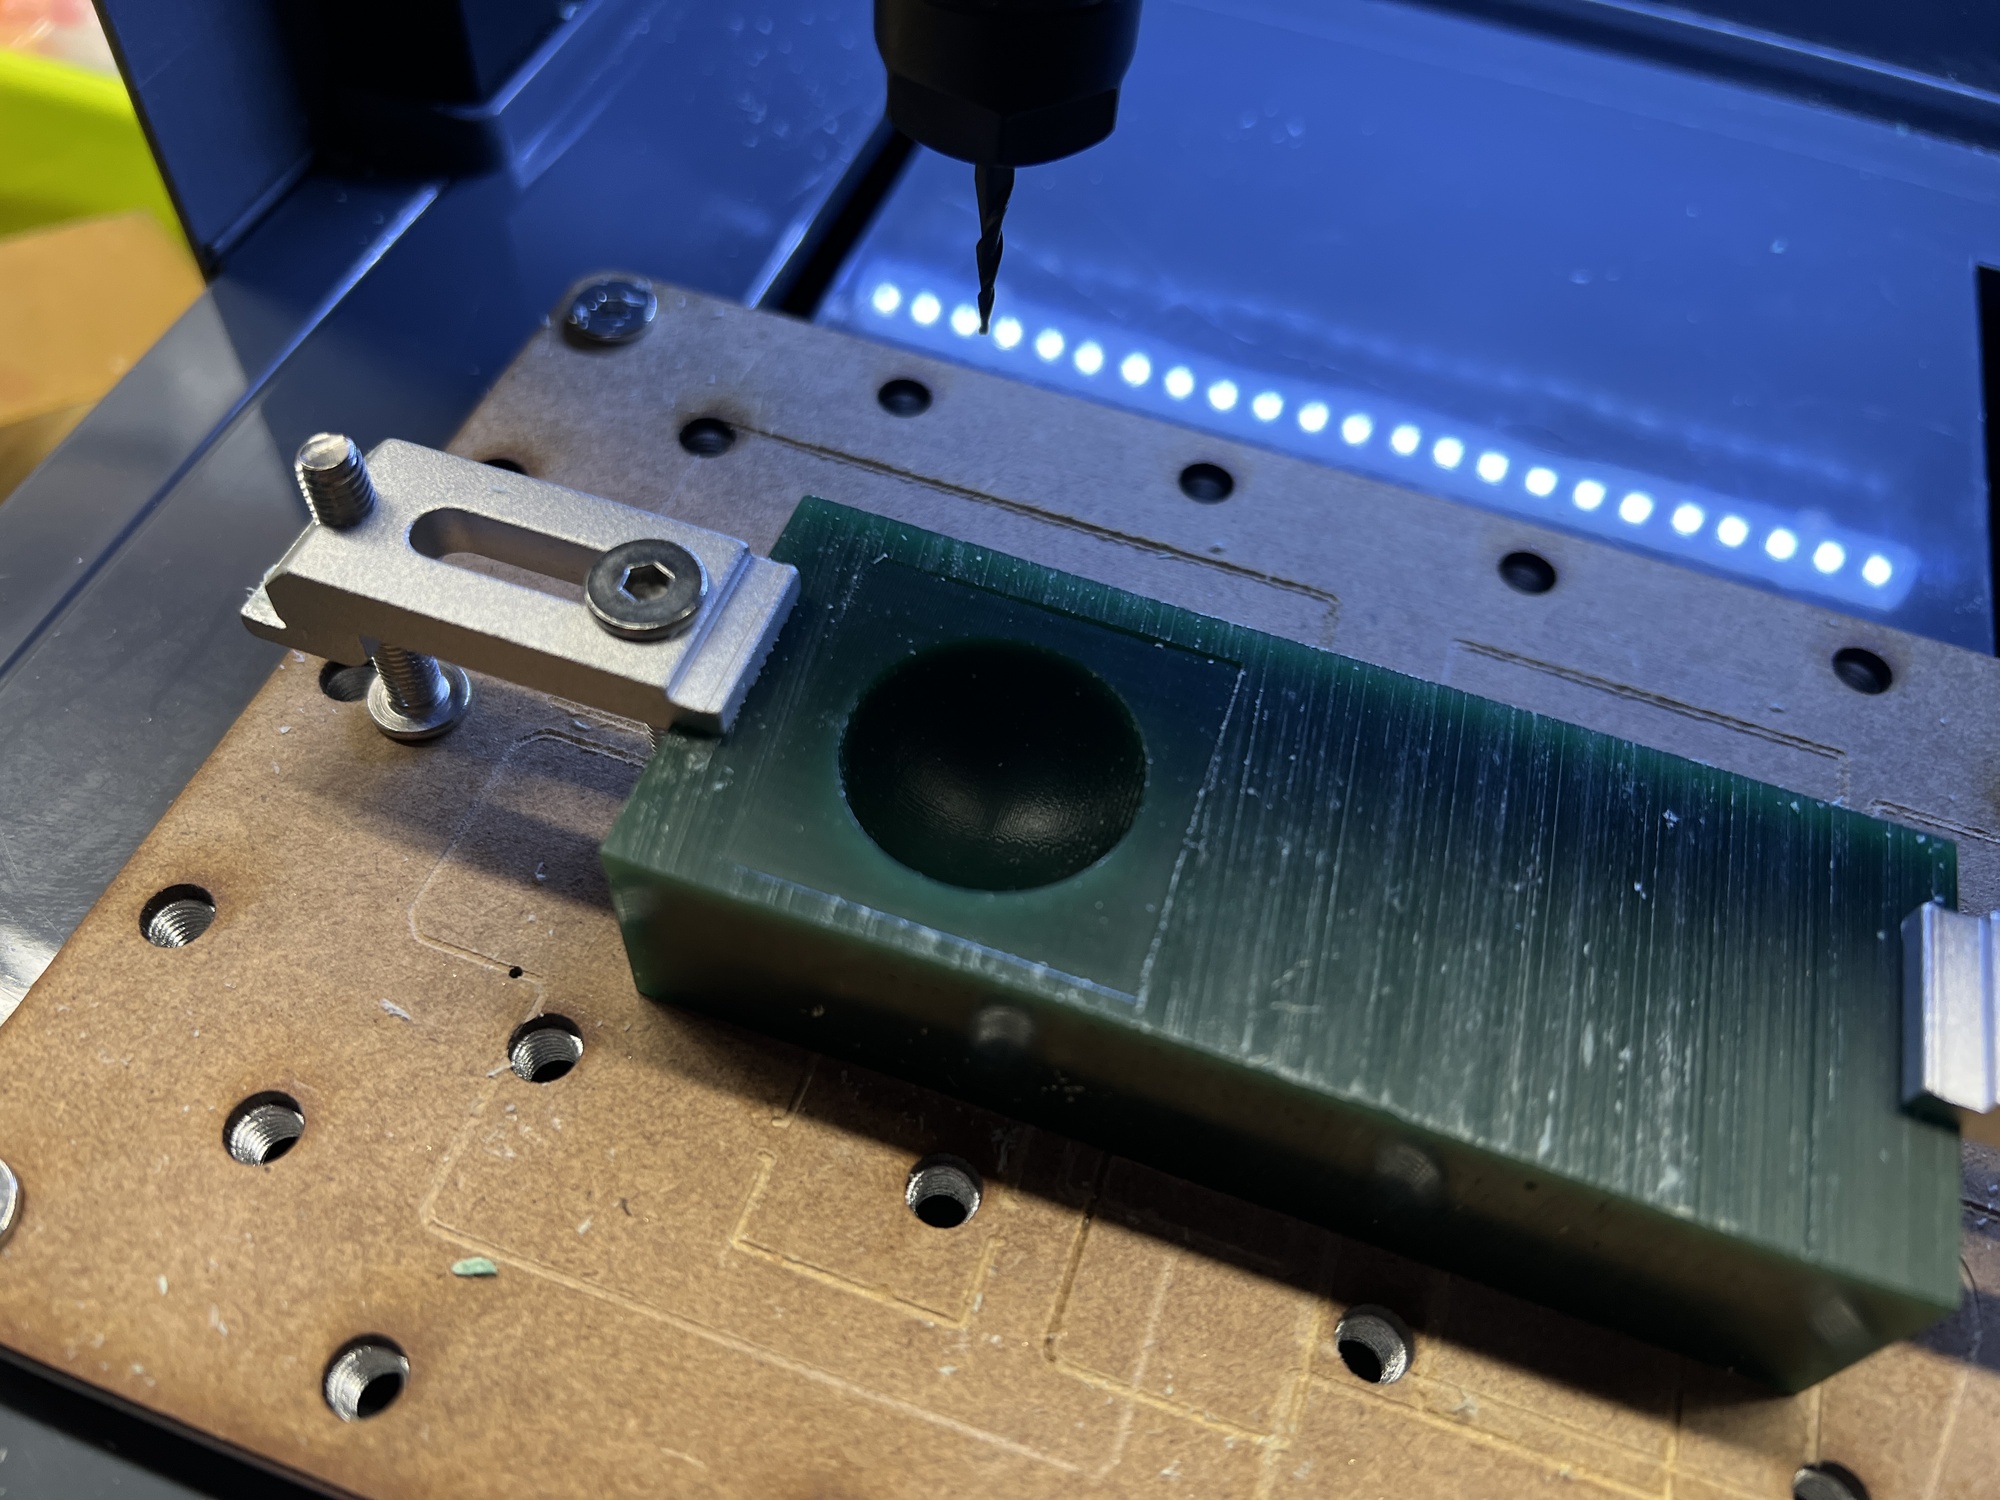
Here's a video of the finish milling process.
This is the result, a fine and smooth finish in the wax.
Files
Find below the files that I made for this assignment.