|
Week7: Molding and Casting
Neil
says this is the last week where we can be creative...ok, this time im
going to make a small proyect to get the rules of the molding and
casting, and then maybe take some risks.
Now, when i see the function of the fab modules in Neils computer,
i realize that fab modules dosent care if the file to send to the
milling machine is STL o PNG. It will always get a final png to process
the mold. So the first thing i thought was... was i able to think a 3D
mold from a 2D image? ok, lets take a look.
Looking at the
HELLO WORLD model that is in the schedule, the file PNG is very
similar to the final piece. The final piece has a lower part
surrounding the letters, and the letters are domed, so the center of it
is higher than the rest. If you can see in the file, the lower part is
painted in GREY, and the letters goes from GREY TO WHITE. So if i put
this colours in a 3D perpective:
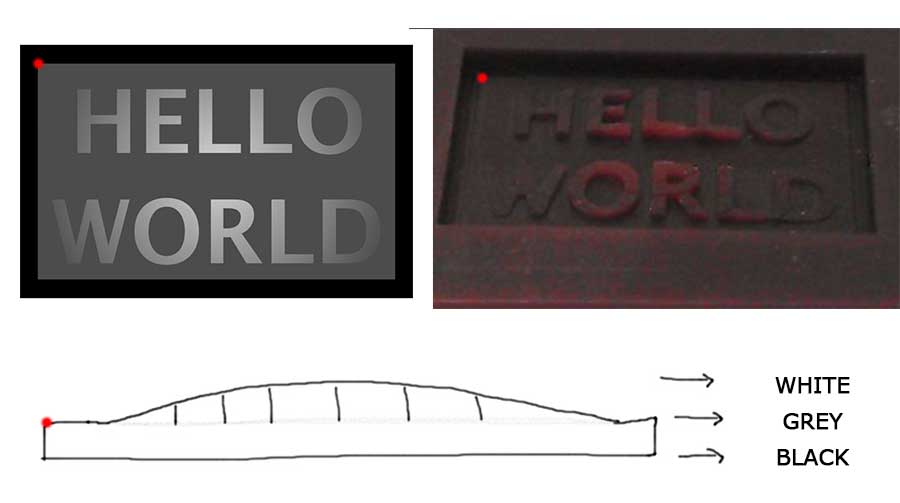
Use the red dot to get a reference. You must notice that the PNG is the positive Here are the request to start molding from PNG:
- Image must be in greyscales. The modela could not understand well colours.
- Image must have 500 ppp of resolution.- The final image must be save as .PNG
After
this previous considerations, lets see the process for my assignement.
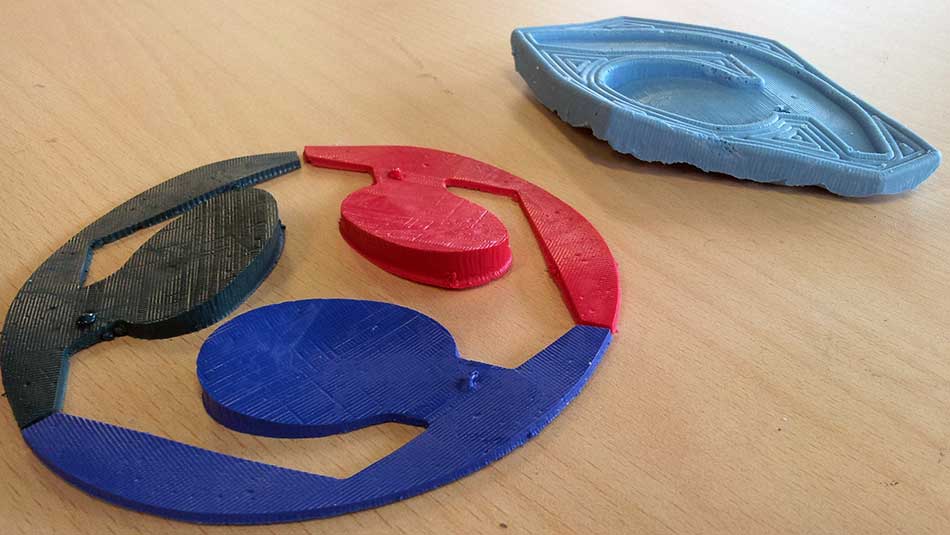
I want to make the Fab Lab Logo, because its formed by three identical
parts with diferent colours. So if i made a mold of one part, and cast
three parts with diferent colour plastics, i can have the final logo.
So i pick the logo from the Fab Academy page. I would prefered a .svg
file, so i decide to convert a jpg file to svg with Inkscape.
- Open the file with Inkscape.- Go to menu Path - Trace Bitmap- Press the Accept button. This give us a black and white logo, but with the vectors instead a raster image.
This process could change depending the photo you use, but with the fab lab logo its ok without touchin anything.
Now
we have the vector file. Eliminate the third par of it , paint it all
in dark grey with a degradate from dark grey to dark white. I want to
give the mold a 3D appareance, so the degradation from dark grey
(bottom) to dark white (upper) will make that Modela make the mold with
this shape.
- Add a full black edge around all the piece. This add a wall around the piece to fill with the oomoo.
- I add a light white edge, to help take out the mold off the wax.
Remember,
image must be flattern, without layers, in greyscale and 500ppp. I
check this in Photoshop before sen it to the modela.
IMPORTANT.
I
use a 3mm mill in the modela, BE SURE the mill can go all way and all
gaps in the wax. At my first attemp, i realize that one gap in the
design are less wide than 3mm, so the mill dont mill this place.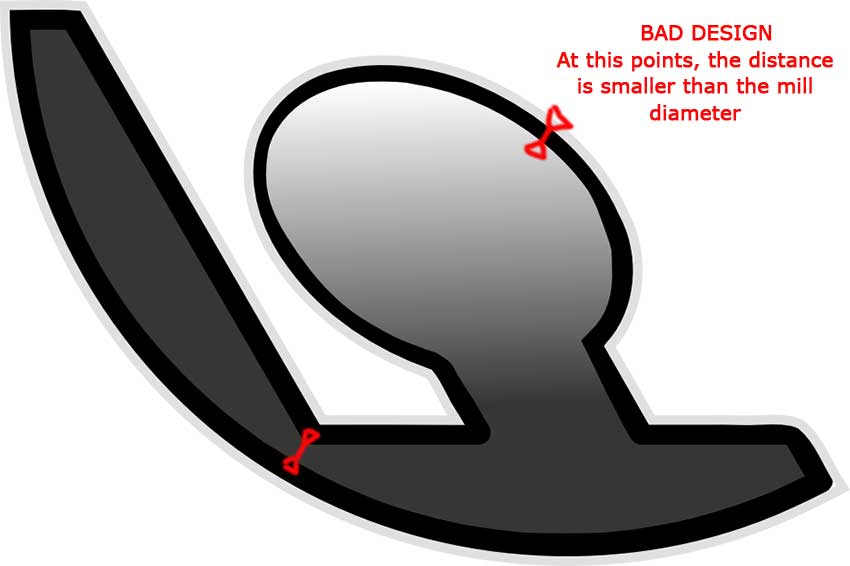
Milling the Wax
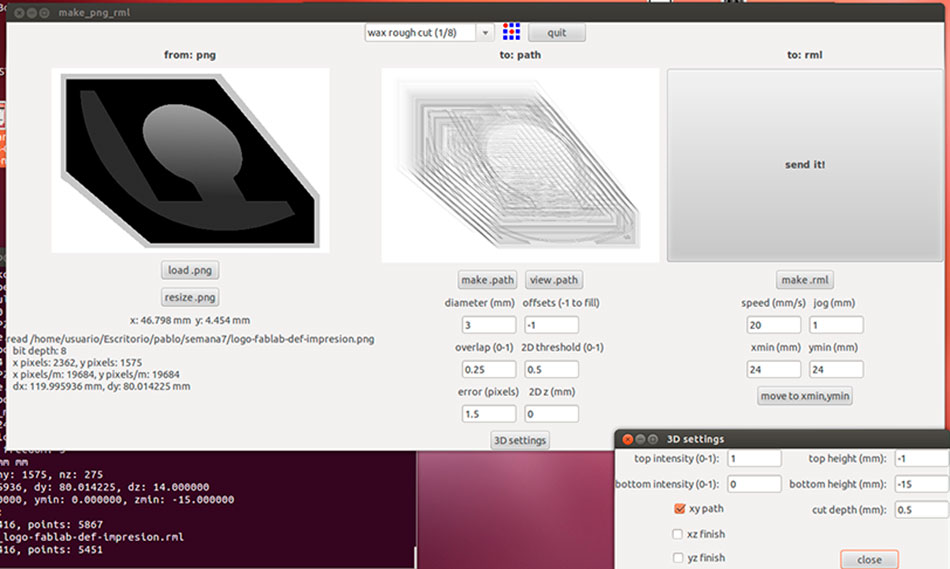
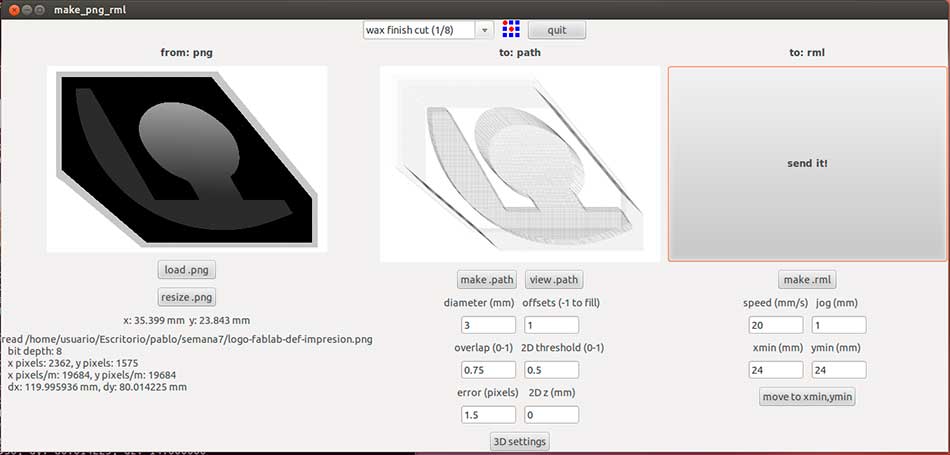
Once the file has been prepared, lets send it to the fab modules.
- Images (.png) to Roland Modela- Load .png- Select the 1/8 wax rough for the first pass- We have a 3/8 mill, so we need to change the diameter from 3,125mm to 3mm-
I did the piece in tha half of the height, so i determine the bottom
height of the piece in 1.5cm. This from a PNG file, so this parameters
arent filled by the fab modules (in an STL, the bottom heigh is the
height of the model)
IMPORTANT!!!!Whatch your design orientation. Remember the (0,0) point is at the bottom left, so if your design is in horizontal, the wax MUST be at the same orientation. (yeah, it happens to me at the first time).
To
cancel a job with Roland Modela, press view button and, when the light
is on, press UP and DOWN at the same time. The led will blink until the
memory are dump (for me took about 20 minutes).
After the rough cut pass, we selected the finish with the same
parameters, except the overlap where we use 0.75 to have a softer
finish in the piece.
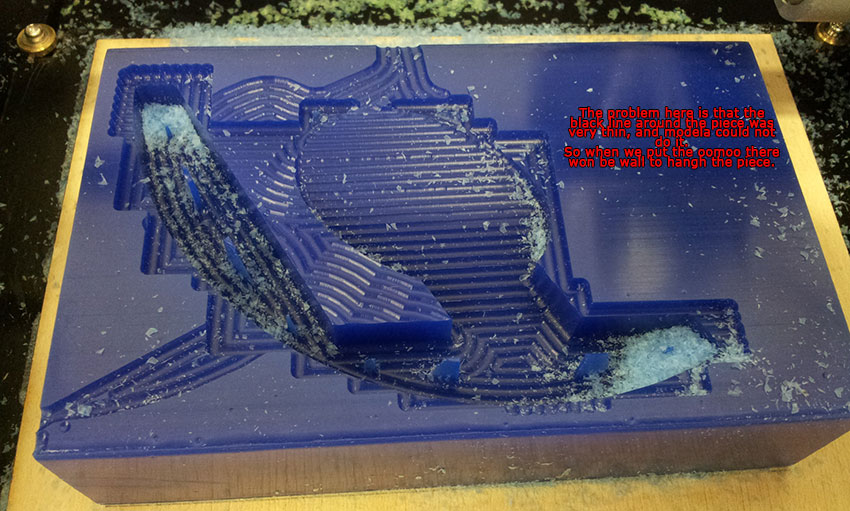
After milling all the pass, this is the result of the wax.
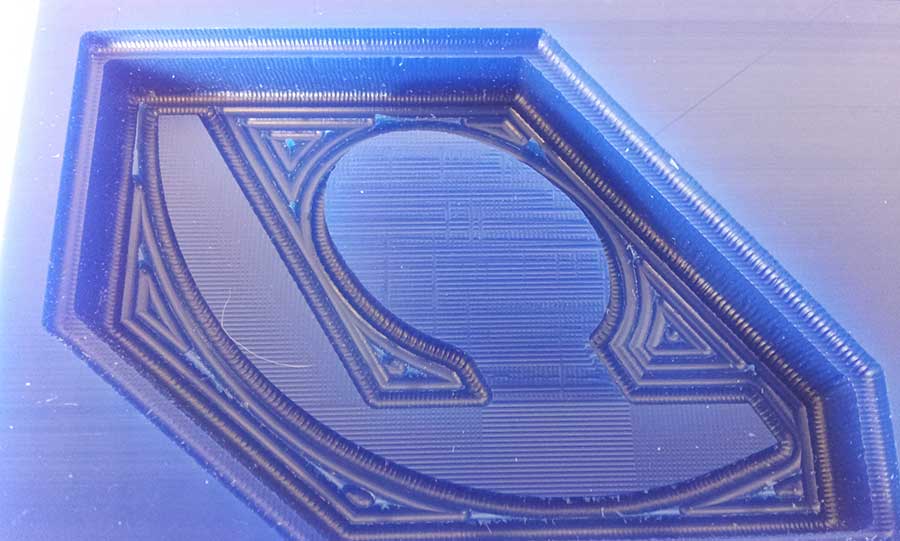
After
finish i reallize that the bottom of the piece wasnt finished with the
finish cut. I dont really know why this happened. I also reallize that
the Modela left some part unmilled....also dont know why this happen.Well,
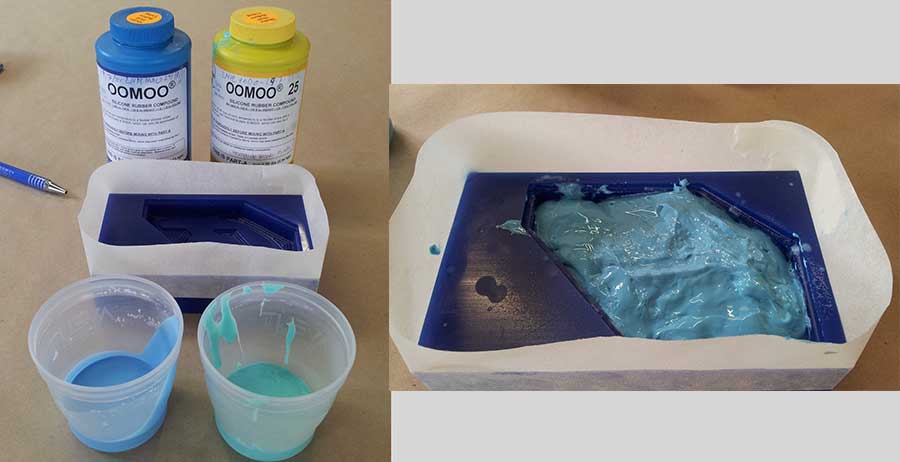
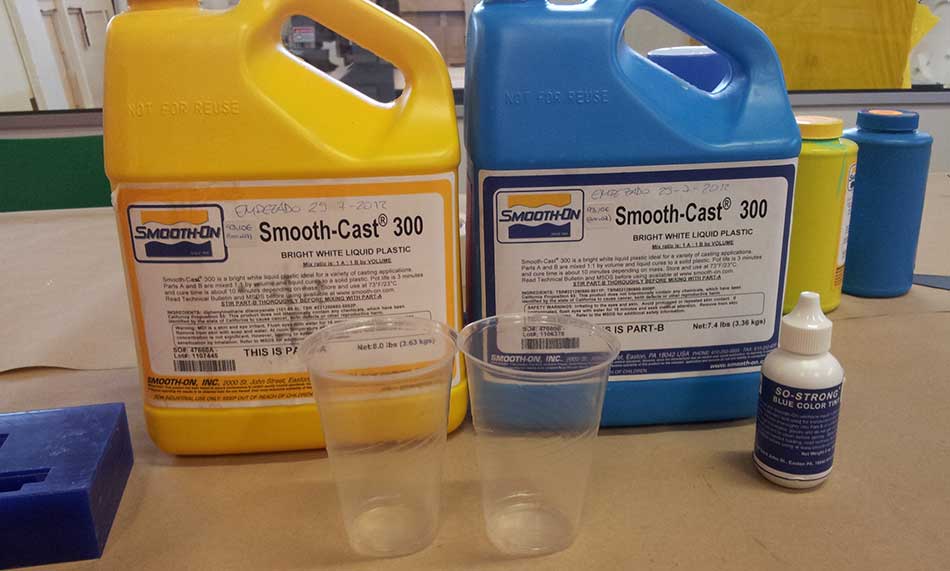
now i have the piece lets fill it with the mold. I will use OOMOO 25 to
make the mold, because its faster in demold time than other solution.
OOMOO comes in two parts (A and B), and must be mixed with a ratio of
weight 100 from part A and 130 from part B. So now i want to know how
many amount of each part must i mix to fill the wax exactly.CALCULATE THE MIX
-
Fill the mold with water to the edge. Then weight this water. In my
case 69gr of water, assuming the density of water in 1, its 69 cc in
volume.
- The density of the oomoo 25 is 1.34g/cc. So like desity=mass/volume , mass= 69 * 1.34= 92.46 gr of OOMOO i need.- Ratio: Part A is 100, Part B is 130, so Total is 230. So the Part A is the 43.47% of the total, and Part B is the 56.53%- The total of oomoo i need is 92.46gr, so PART A=40.2gr and PART B=52.26gr
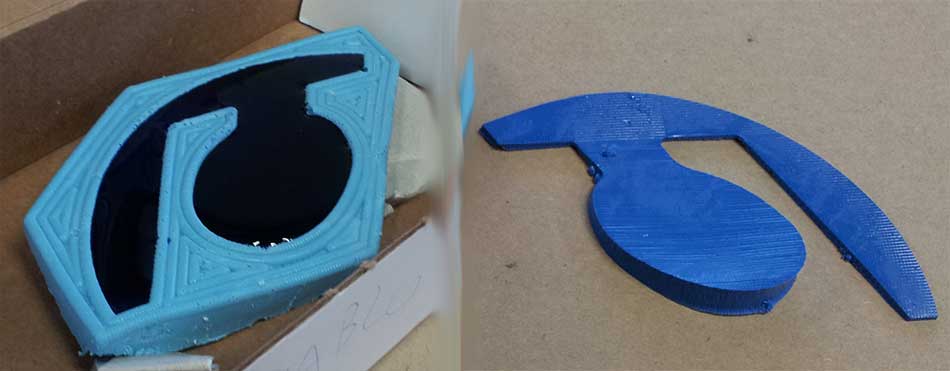
Now
lets make the mixture of the two components. The part B (blue) is
enough liquid to work easy with it, but the part A (yellow) its very
sticky, and its hard to work with it. I put some tape around the wax to
avoid spill the oomoo.
After
a bit time (75 minutes aprox), the mold was ready, and i decide to
unmold it. It was fresh and sticky, but i can manage it.
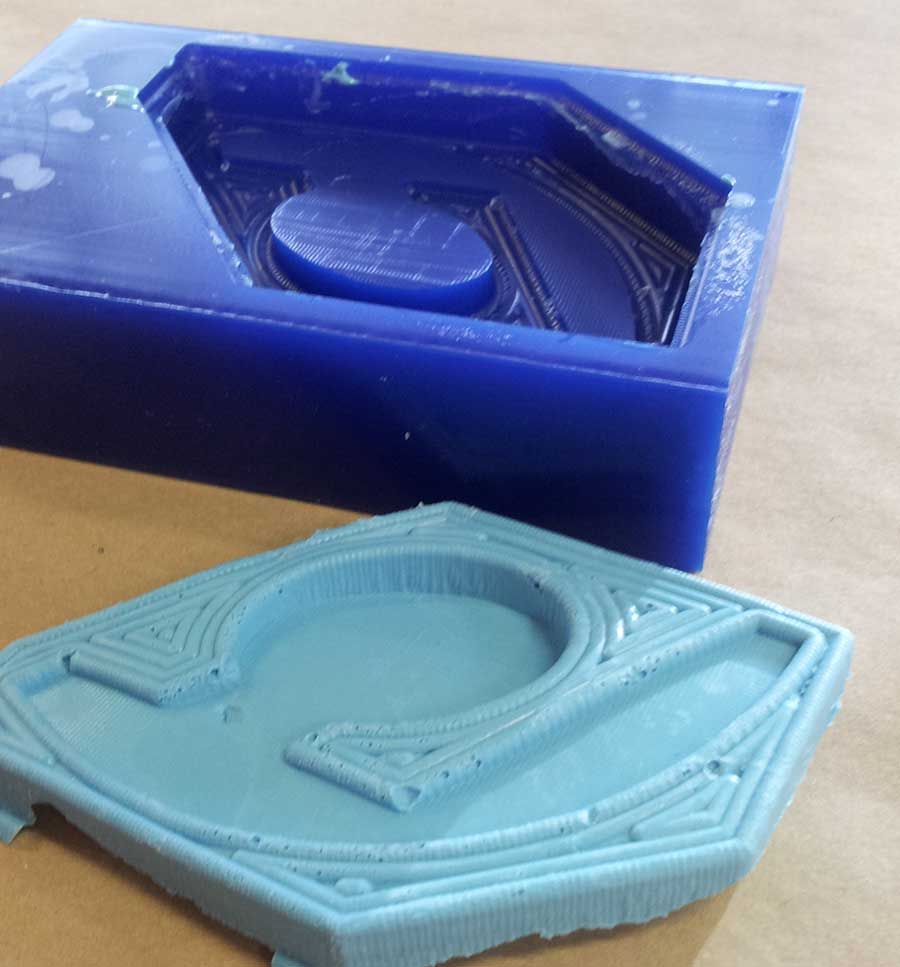
I
had a big bubble in the middle of the piece. Also a lot of bubbles
around the mold. This oomoo 25 its a sticky mold, and its very dificult
to have a perfect result (at laeast at the first time). After
this, i did the piece in plastic, with Smooth-Cast 300. The mix ratio
is 1:1, so you just have to mix equal quantity of part A and B. Also i
use colorant to add to the plastic. This colorant must be added to Part
B before mixing with part A.
And
the first final piece is ready in a few minutes. The i repeat the
process with other two colours, and finally i had the Fab Lab
logo.
|
