|
Week5: 3D Scanning and printing
At
this week the main objective is to learn about scan an object in the
Real Life and be able to transform it into a mesh, editable in a 3D
design program. After modify it, we can turn it "back to life" in a 3D
print machine.
Lets see what happen this week.
We
learn in the wednesday class that there are multiple options to scan an
object to convert it in a 3D model, editable by a 3D edition program. I
want to learn the more "user friendly" ways, so i started with the
software 123D Catch, by Autodesk.
The first thing i try is to use an iPad with this
software. The great thing with the 123D
Catch in iPad
is that the software allow to simply take some photos of the object,
then submit to the internet (123D Catch is a cloud computing software,
so the simulation takes place in the Autodesk servers) and finally
watch the result in the own iPad.
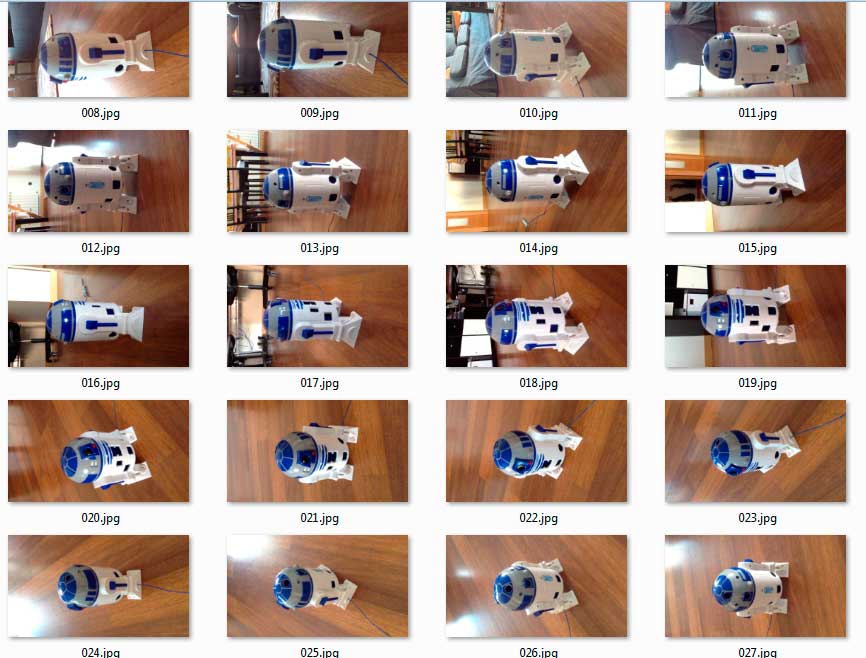
My model was a R2D2 toy. I took about 32 photos of
them, and the automatic result of the 123D Catch wasnt really realistic:
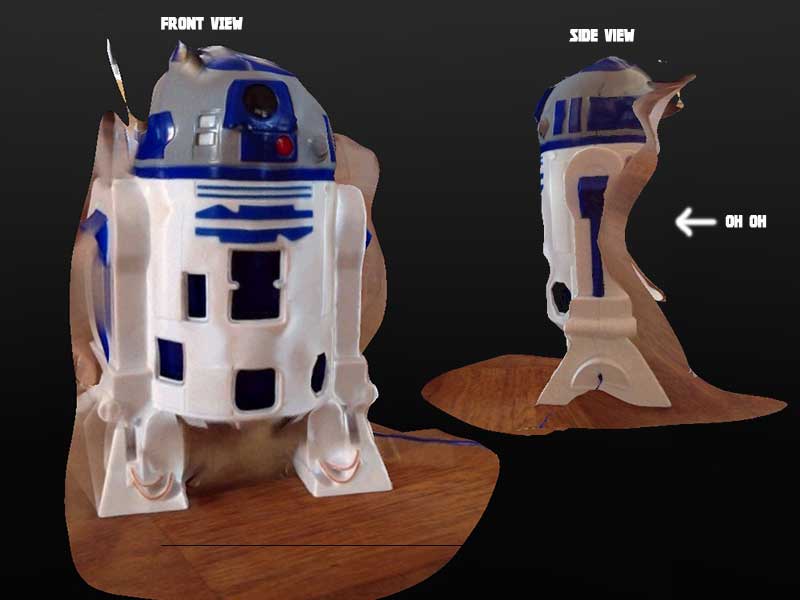
PROBLEM:
The 123D Catch software do really well the photos from 1 to 9, but then
the software dont know exactly what form does it have, so make really
bad the back of the piece.
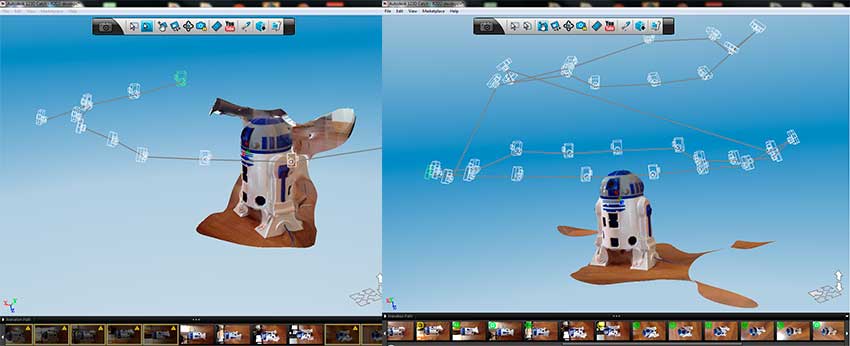
The app 123D Catch for iPad dont do nothing more than take photos,
upload it and download the finish job. But the desktop app 123D Catch
for Windows had a tool to correct the bad photos and put some control
points over the photos, to get a mos realistic mesh of the piece.
With
this tool you can adjust every photo and put some control points, so
the pictures can be processed with their real dimension. Here is the
before and after in 123D Catch. At the left the 9 or 10 photos the
software detects, adn
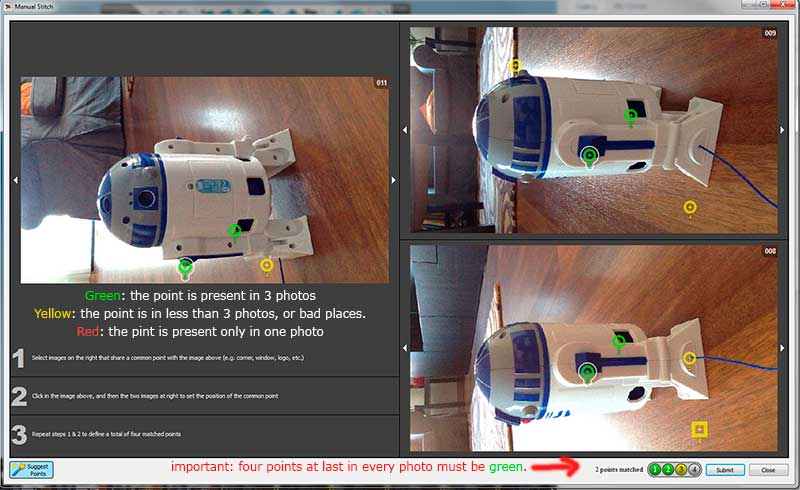
The
point definition process is very important to get a realistic mesh of
the object. Every photo must have at least 4 control points. Must go to
every photo you took to check it. When all points are defined, then
submit all the photos again and you will have a more defined mesh of
the object.
Download the OBJ files, the texture file and
the 123D Catch file HERE
Creating a Structured Light
Scanner
After watch the Fabscan
proyect, i investigate in the way than a laser can slice an object in
several layers. So i found a great web page of a software for
Laser and Structured light scanner. In the David Laserscanner web page (http://www.david-laserscanner.com/)
you can find an incredible software open to everyone. With this
software, the David-Laserscanner, a web cam, a proyector (or a laser
level) and a pattern you can scan an object and turn it in 3D
mesh.
The web page has precision
instructions
to construct your own "calibration set", needed for a laser scan or a
structure light scan. So here are a brief of the construction:
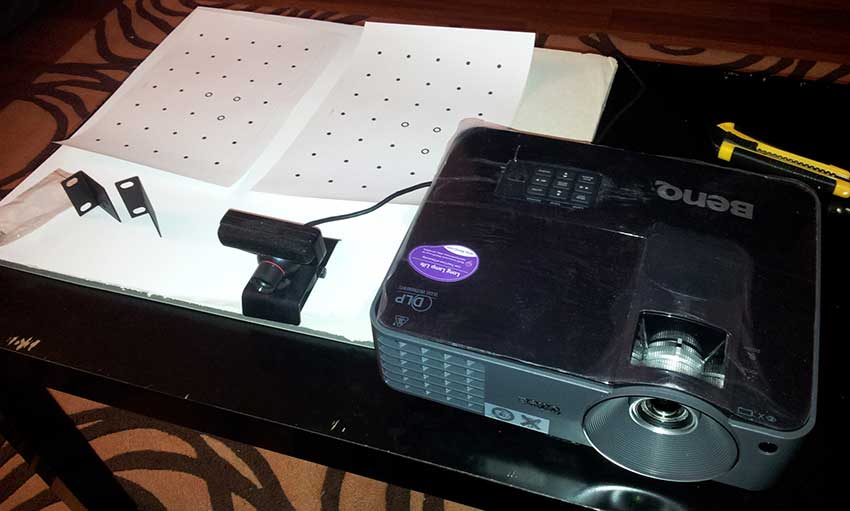
The
Materials are: foamboard, a pair of brackets, printed calibration sheet
(included in the software), a Playstation Eye web cam, a proyector and
a cutter.
I
use a PS Eye cam because can get a 60fps video, and i though this could
make a better finish in the capture. To make work the PS Eye cam in
Windows, you can download the drivers from http://codelaboratories.com/downloads/,
clicking at the bottom of the page in "Download Now! Single camera".
After some cuts here and there and a look at the
manual, here we have the capture set:
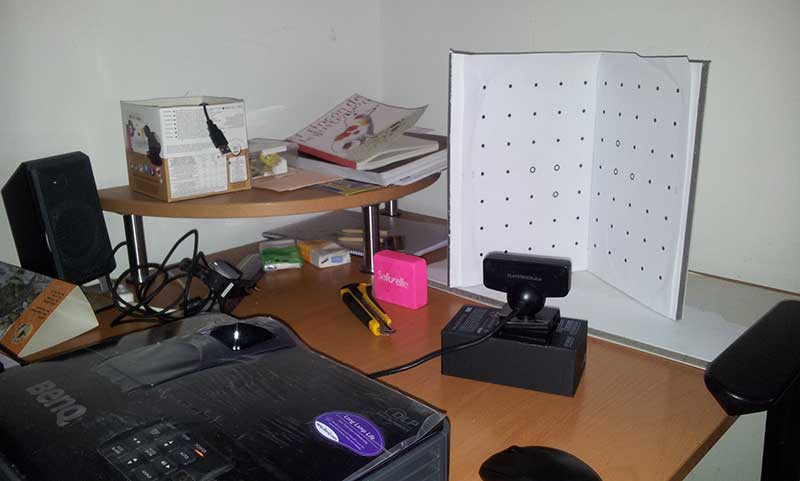
After
the set was building, we start to open the software
David-Laserscanner. Here we need to calibrate the web cam and the
proyector to get the best results in the scan. First we need to
calibrate the webcam without the object. Once the webcam is ready, the
proyector must set to proyect the pattern in the best way. The software
gives a great indicator to control the light needed to make a good
capture, and controls to modify the proyector light, the web cam gain
an exposure and all in one place...simply amazing. The software
calculate the degrees of difference between camera, proyector and
calibrator sheet.
Here is the result of the scan.
I did the capture in a light enviroment, maybe with a totally dark
enviroment and a little more adjust i can get a better result than this:

With this software is also possible to make a Laser
scanner, i think im going to give it a try.
3D Printing
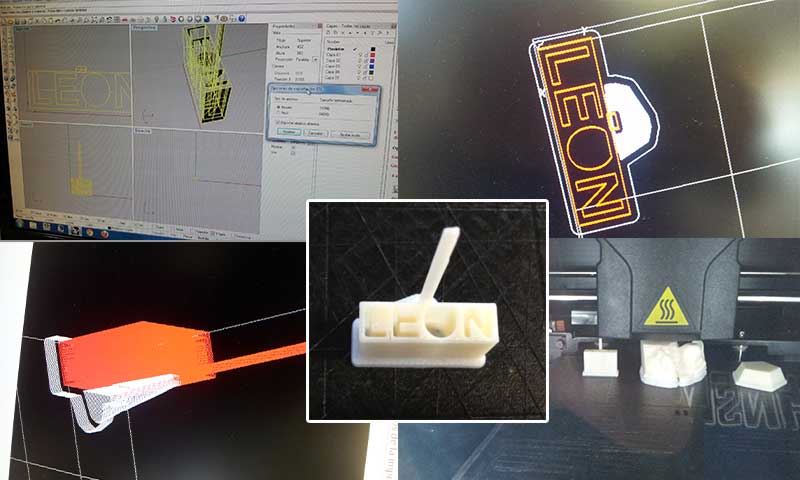
I
want to print a little attachment text to put in a webcam. So i design
a little poster with the text inside it, and a little stick to attach
it to the webcam.
I design it with Rhino 3D, and after confirm
that all the object is a solid, i exported it to a STL file. We use a
3D HP DesignJet (our makerbot is under repair), and the program that
controls the printer make a simulation of the piece, the time, the
amount of ABS used.... after all this was revised, we send the job to
the printer and...voila! a small piece with a small text is ready.
|
