Week3: Computer-controlled cuttingThis week we learn the cutting machine in a fab lab. Basicaly are the vinylcut and the lasercut machines. In Fab Lab Leon we have a Rolan for vinylcut and a Epilog for lasercut.VINYLCUT
For my first contact with a cutting machine, i decide to costumize a Nintendo DS for my niece. Her name is Iris.First i made a design with Inkscape, with a nice free font and some polilines, with some sweet hearts and a rounded rectangle. Here is the final design: Then i cut it in a adhesive vinyl with the Roland, and transfer it to the Nintendo. I realize that the lines below hearts are too thin to remove easily from the vinyl paper. So i use a masking tape over the vinyl, then i remove the plastic that comes with the vinyl, and then put the vinyl easily over the console.Here is the result: LASERCUT
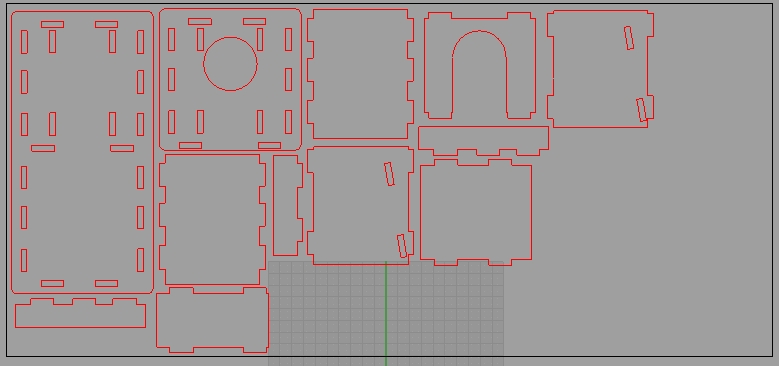
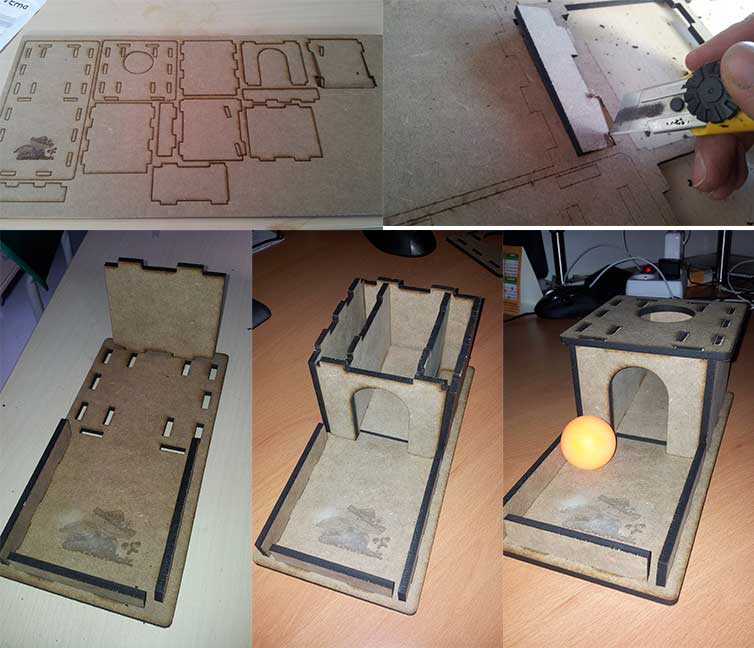
Here comes the hard part. In our fab lab we use Rhino to design in 2D to laser cut. I think its not the perfect software to do it, but after spend some weeks working on it, i think its not so bad. Finally i could design some press fit figure.I left aside my final proyect this week, to try some Montessori materials with press fit. I took this design as a model to reproduce in the fab lab: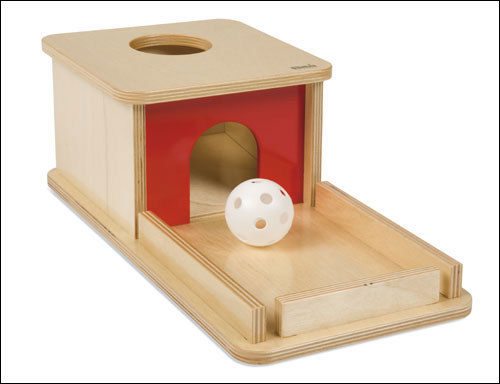 I liked a wide wood to make it. Finally our instructor in Fab Lab Leon, Nuria Robles advised me to do with Medium Density Fibreboard (MDF, or DM in spanish). The wide of the MDF is 5 mm, enough for me but a little bit wide for the Epilog laser cut.Once i had the wood, i begin to design the construction. I take some measure from other montessori materials, and design a 12x24 cm base.The Rhino design was hard enough for me. Without the parametric component, i need to do a exact fit of the pieces, so i decide to do the conections between pieces with a +0.6mm gap. The male connector is 0.6mm wider than the female connector. I think this will be wide enough to do the constrution without glue and hard enough to resist the use of a baby....after the design, i promise myself to learn some parametric tool :)Well, here is the final design, with some acotation: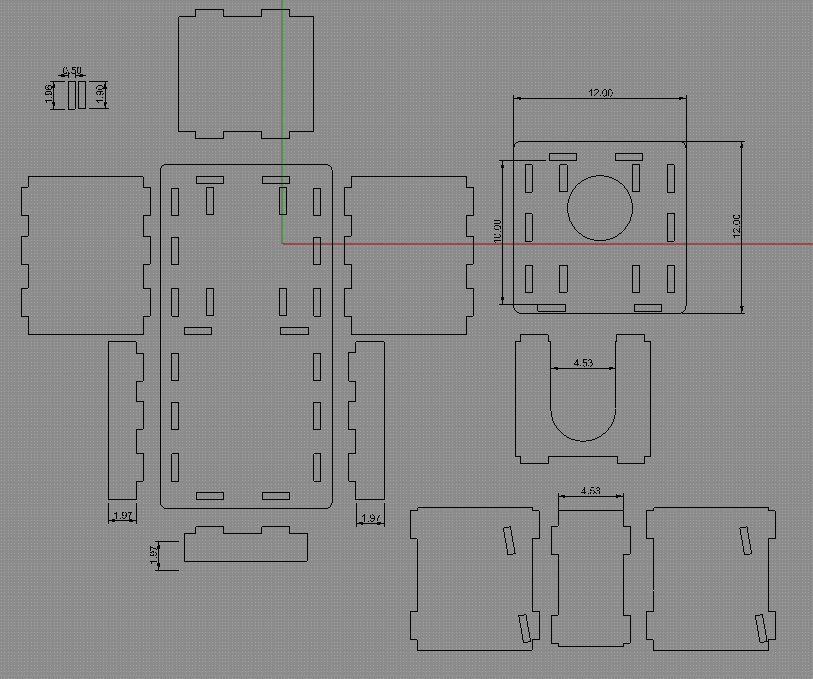 Download the .3DM fileThe, we try to fit this parts inside a 650x300mm rectangle, to optimize space and use the less material as possible. Here are the disposition and the file to download: |