The
goal for this week is to build and program a pcb that do something with
an output piece, like video, leds, speaker or something like
that...lets start!
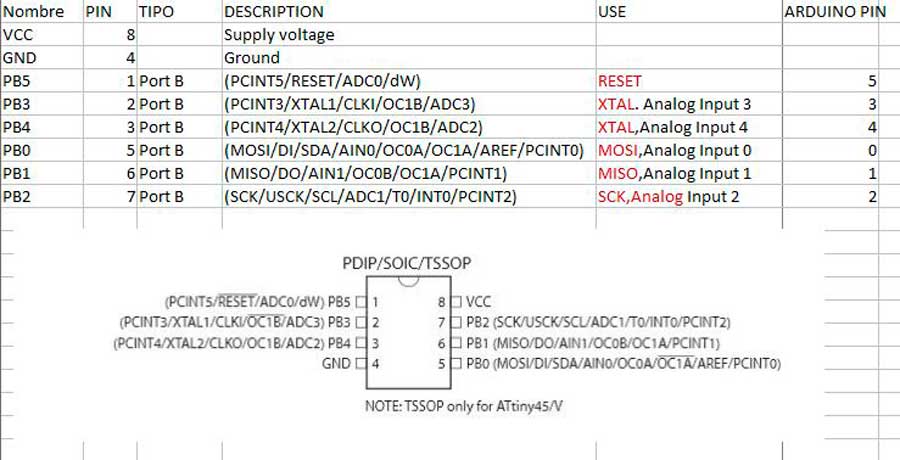
The Attiny45
The
microcontroller for this output devices are the Attiny45, wich we used
2 weeks ago in "Input Devices". Here is the resume ot the Attiny45:
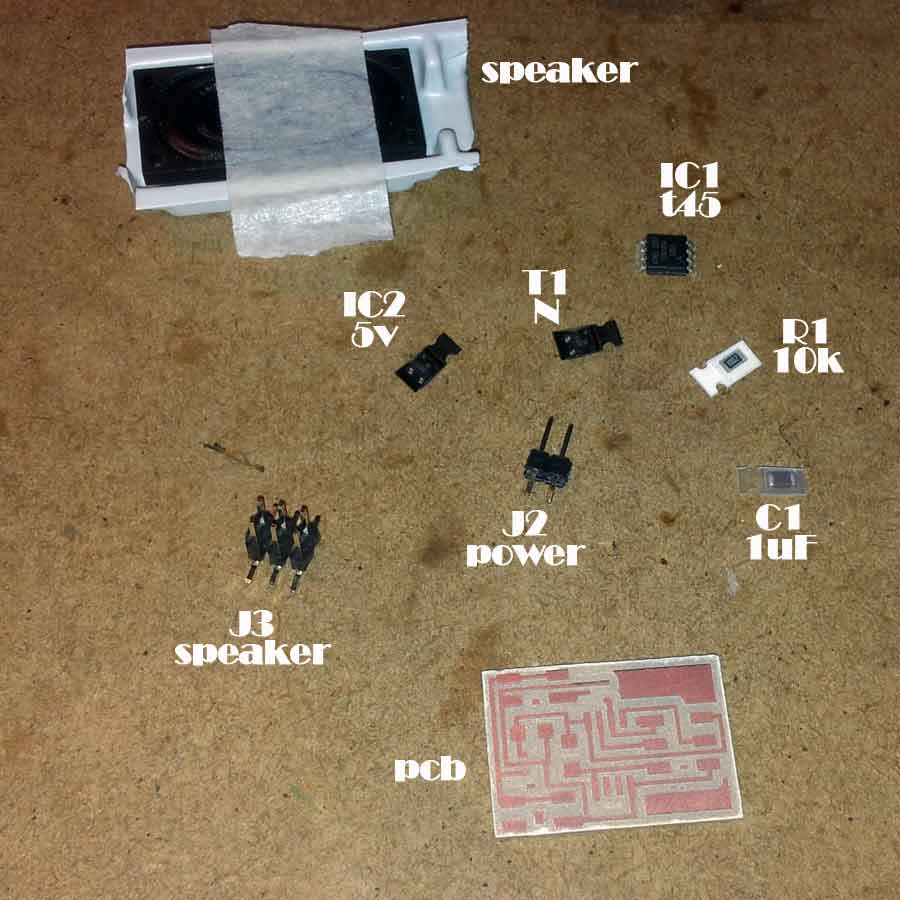
Building the Hello Speaker board
The
Roland modela is enough know for me, so i had no trouble in milling the
pcb. Normal parameters in the milling process, as you can see in the
Week4.
So now we had all the components
to build the hello.speaker.45:
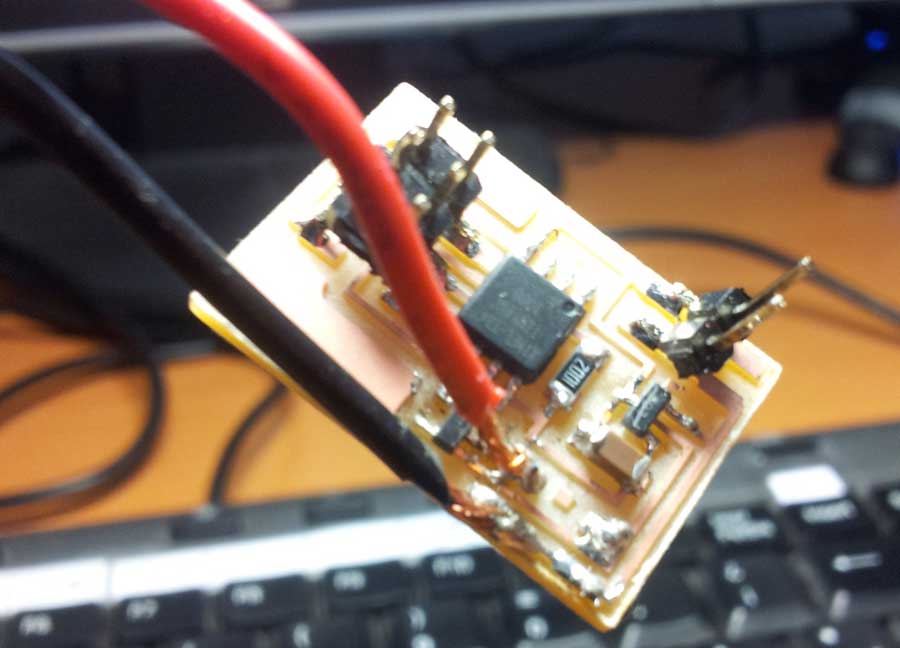
After soldering all the components to the pcb we had
this nice pcb:
Well, my skill in soldering is getting better day after
day, but i still need to improve :)
PROBLEM:
I had some confusion in distinguish the MOSFET N and the IC2 regulator.
Both have three pins , two in one side and other in the other side. Our
instructor says that the 5v regulator was the one with the "LOB"
letters over it. So, the other one is the MOSFET :)
Connecting the power and the
speaker to the pcb
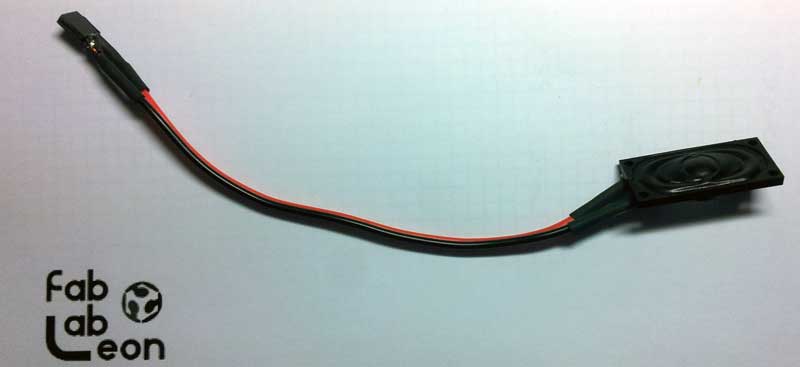
Now
we need a speaker to connect to the pcb. Initially I used the
speaker GC0351M-ND from Digikey, but after i reallize that i
had
some pc cases without use, where i found some pc speakers. After use
one and other, the pc speaker has more power and a clear sound than the
one from digikey.
Here is the digikey speaker:
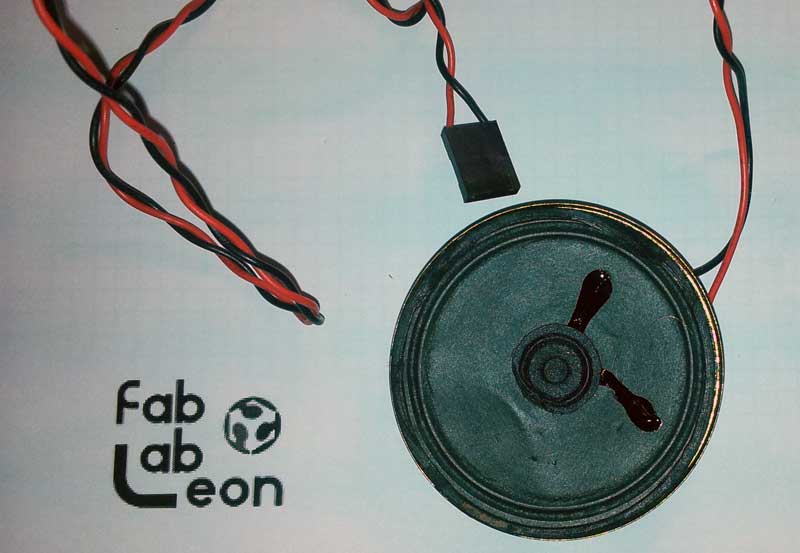
And here is my pc speaker, with cable included. I just
have to change the GND FASTON connect to put it beside the VCC:
PROBLEM:
The J3 jumper, where the speaker is connected, after some plugin and
unplugin the speaker, finally fall down. So i decidet to attach some
wire to the pin 1 and 3, GND and VCC, and then solder this wires to the
speaker cable:
I still dont know the utility of the pin 2 and 4 in the speaker jumper, it works without use it :/
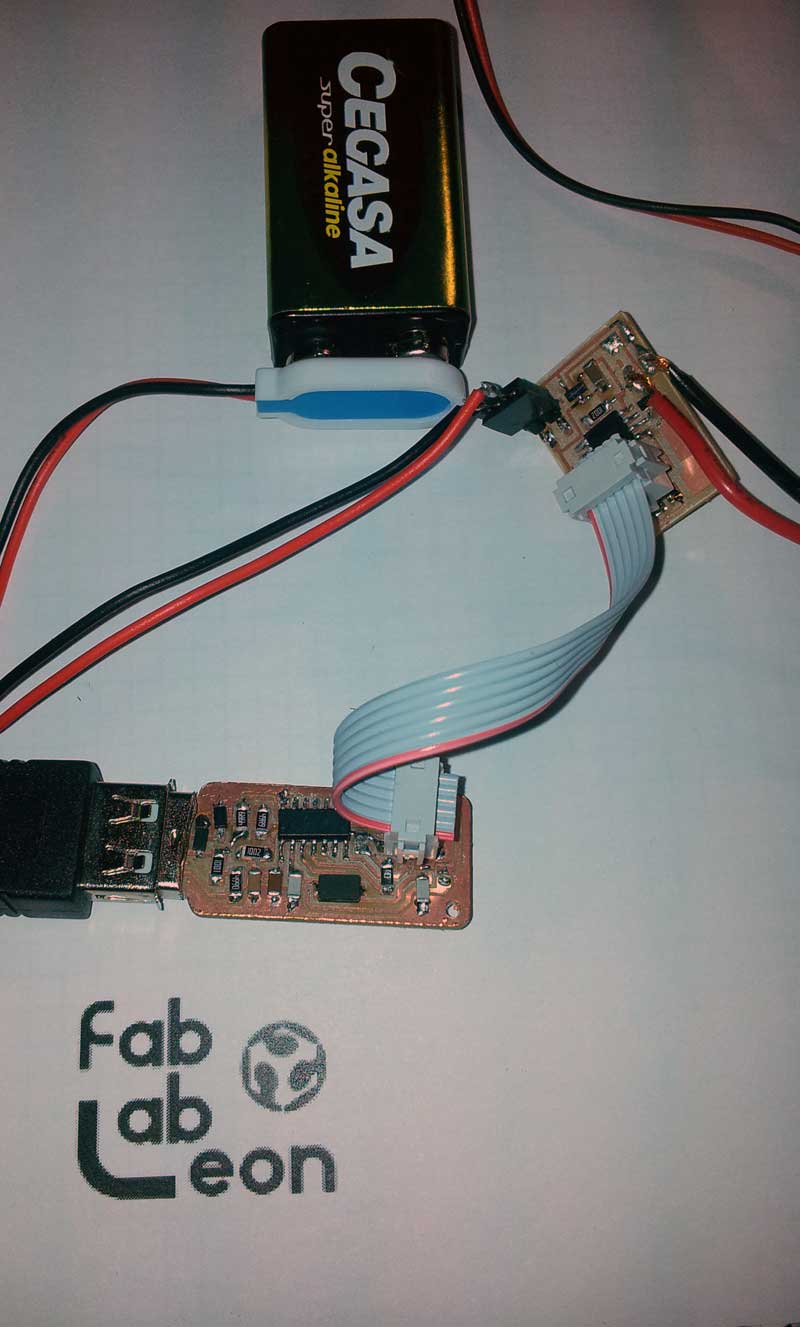
Programming the hello.speaker
Now
lets program the pcb. Here are the connections to program the board
with my FabISP. I need to power the board, so i use a 9v battery
attached to the pcb at the J2 jumper. The GND is at the edge of the
pcb, and VCC is the other.
After attaching all the connections, we need to flash
the board. We need to download the files to program it:
Aditionally
we have an ASM file, wich has some wave sound to play in our board. To
program our hello.speaker with this sounds, we need to compile this
.asm file into a .hex file. To do this we have a nice and small program
to do this: "GAVRASM"
This
small program (you can use in Linux, Windows and MAC) compile a
assembler file (.asm) into an hexadecimal file (.hex), which we can use
to program the board. So we download the program and put in a folder.
In
Ubuntu we must be placed in the folder where the program is (gavrasm
file), and execute the comand over th .asm file, where ever we have it.
The easy way is to copy the program in the same folder where we have
the .asm file we download before, and type:
$ sudo gavrasm hello.speaker.45.wave.asm
And we have an output like this:
+------------------------------------------------------------+
| gavrasm gerd's AVR assembler Version 2.1 (C)2006 by DG4FAC |
+------------------------------------------------------------+
Compiling Source file: hello.speaker.45.wave.asm
-------
Pass: 1
Line: 13
Warning 009: Include defs not necessary, using internal values!
File: hello.speaker.45.wave.asm, Line: 13
Source line: .include "tn45def.inc"
131 lines done.
Pass 1 ok.
-------
Pass: 2
Line: 13
Warning 009: Include defs not necessary, using internal values!
File: hello.speaker.45.wave.asm, Line: 13
Source line: .include "tn45def.inc"
Line: 54
Warning 004: Number of bytes on line is odd, added 00 to fit program
memory!
File: hello.speaker.45.wave.asm, Line: 54
Source line: .db
18,5,250,5,250,5,250,5,250,5,250,5,250,10,250,10,250,10,250,20,250,20,250,20,250,15,250,30,200,40,100,35,100,35,100,25,200
131 lines done.
Warning 001: 1 symbol(s) defined, but not used!
47 words code, 69 words constants, total=116 = 5.7%
avrdude: Device signature = 0x1e9206
avrdude: NOTE: FLASH memory has been specified, an erase cycle will be
performed
To disable this feature, specify the -D option.
avrdude: erasing chip
avrdude: reading input file "hello.speaker.45.wave.hex"
avrdude: input file hello.speaker.45.wave.hex auto detected as Intel Hex
avrdude: writing flash (232 bytes):
And now we have this sweet melody on out attiny45:
PROGRAMMING WITH
ARDUINO
Well, i want to have the control of the notes. I study
the C file of Neil (which have a random serial of notes instead a
melody) and the HEX file (wich has a melody, but nothing comprensible
to me inside). If you are curious about programming pc speaker with C,
should follow
this link.
So i investigate in internet about controlling a pc
speaker with Arduino, and some entries in google took me where i want
to go.
First of all, in the
LillyPad proyect i could find the code to use with my board.
Just have to change the pin of the speaker (in hello.speaker, the
speaker is in the Pin 1 of arduino) and the rest of the code is
perfect. Also had to change the seconds to each note, from 500 to 50.
(In this code 100 are about 1 sec.)
The original file only comes with the notes in the 7th Octave, but
thanks to this great page (must see, also explains really
well the HIGH bit and LOW bit) i could get the frecuency of all the
notes in all the octaves. Inside my code you could find this table, and
also the code for the 6th octave notes.
After having the code, just have to put it in the
board. Remember you must select a Attiny45 (8Mhz) from the hardware
list, and the USBTiny programmer in the programmer list.

