This week we are going to try
communicate several boards between them.
Hello BUS
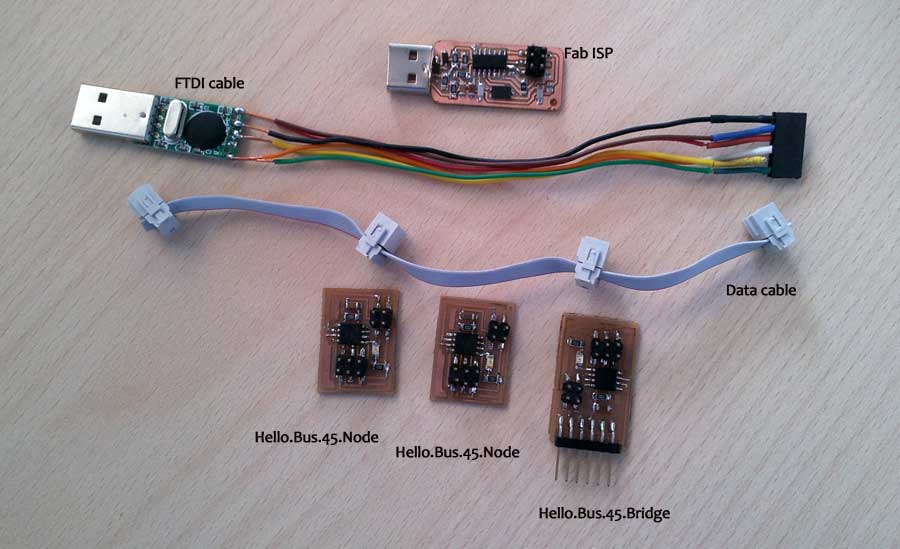
I started with the Hello.Bus board from the page in the Fab Academy. To
do this assignement we need two types of board:
- The Bridge board: We only need one board of this. This board will be
the only one that communicate with the rest of the boards. Is the
"controller" of the net.
- The Node board: You can make as much of this as you want. Each one of
this board will be the "line" in the communication.
First of all we need to download the .png files to mill it in the
modela:
Now i need to program it. First of all we need to get the code to
program the Attiny45. I download all from fab academy page, and put
together in one file:
Now we have the code, the first one to program is the Bridge board.
Lets attach it to the FabISP and the FTDI cable
Now
lets program the board. In Ubuntu lets go inside the code
folder and type:
$ sudo make -f hello.bus.45.make program-usbtiny
After this the board is programmed. Now we need to program the Node
boards. First of all we need to change the code, to program the next
board as the 1 node (the 0 node is the bridge board, we had yet
programmed).
Open the hello.bus.45.c file and find this code:
#define node_id '0'
and change it to program the fist Node board, and put 1 instead 0:
#define node_id '1'
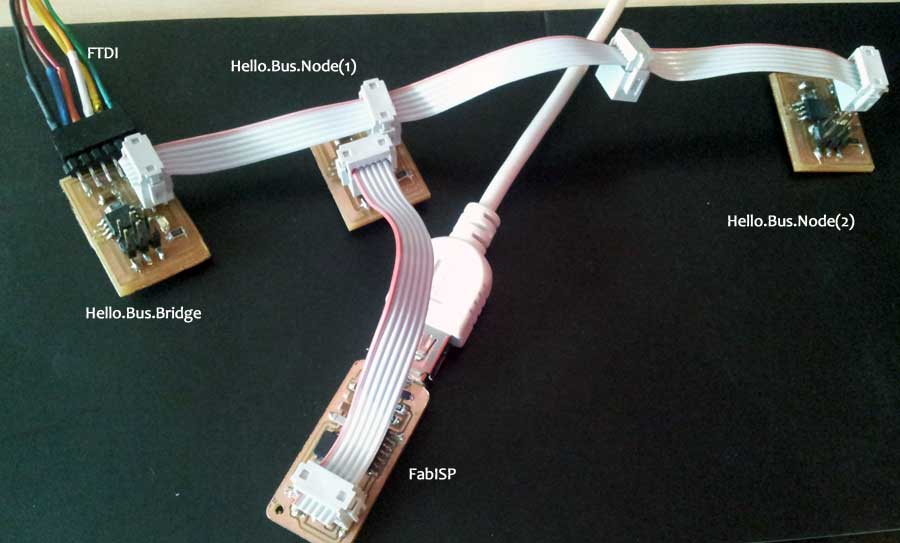
close the file and save it. Now plug the second board. The problem with
the node boards is that we need to power it through the data cable, so
before programming the node boards we need to add it to the BUS. Here
is my composition to program the Node(1) board:
The Hello.Bridge needs to be plugged to the FTDI cable, to get power.
The Hello.Bridge send power to the Hello.Bus.Node(1) through the ribbon
cable (which have VCC and GND). And the FabISP is programming the
Node(1) board.
The Node(2) board here could be out, no need to program the Node(1)
board.
So to program the Node(1) board, type:
$ sudo make -f hello.bus.45.make program-usbtiny
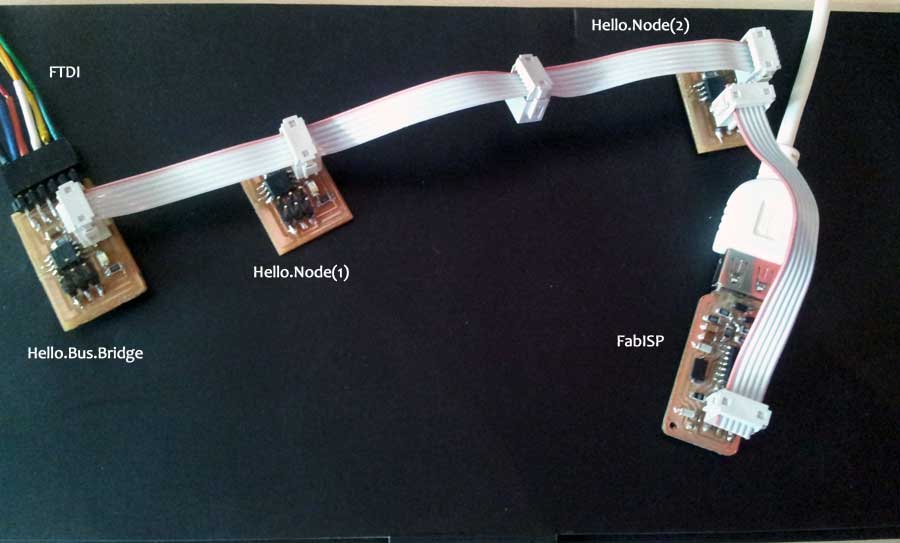
Now we have the Node(1) programmed, we need to program the Node(2)
board. First of all we need to change the code to program the Node(2)
board with the node_id 2.
Open the hello.bus.45.c file and find this code:
#define node_id '1'
and change it to program the second Node board, and put 2 instead 1:
#define node_id '2'
Save and exit.
Now plug the boards to can program the Node(2) board, like this:
And program the board typing:
$ sudo make -f hello.bus.45.make program-usbtiny
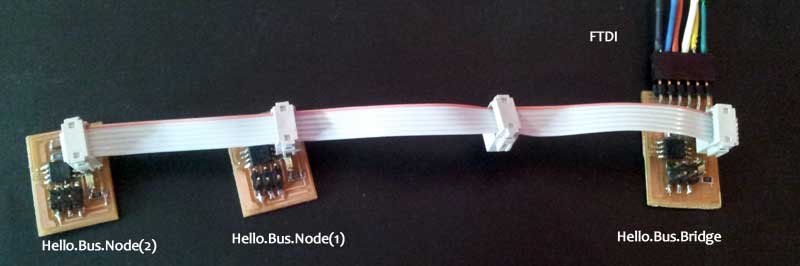
And thats it! we have a Bridge board and two nodes programmed. Lets see
how it works.
Now plug the boards in the same ribbon cable like this:
Now lets check if it works. If we send a number of the id boards
through the FTDI cable, all the boards mus blink, and then only the one
with this ID should blink again.
Open Arduino IDEand go to Tools -> Serial monitor
The transfer rate must be 9600baud.
So now put a number inside the box and press SEND, to communicate with
the board you want. Here is a video to show how it works:

