In
last weeks , the Fab Lab Leon students have been searching a machine
that has some documentation and seems a nice proyect to build it.
Finally we decide to make a Rostock 3D printer.
I do this proyect with my "fabmates" in Fab Lab Leon:
Rostock is a 3D Printer based on a Delta robot arms. A delta robot is a type of parallel robot wich consists of three arms connected to universal joints at the base. The key design feature is the use of parallelograms in the arms, which maintains the orientation of the end effector.
In this 3D Printer the extrusor
Like says in the RepRap wiki main page of this 3D printer, the main goal of this 3D printer is:
Build volume: 200x200x400 mm (8x8x16 inches).
Footprint: 300x350 mm (12x14 inches).
Print surface: 200x200 mm heated glass which never moves.
Mass of end effector with hotend: less than 50 grams.
Positioning speed: up to 800 mm/s in all 3 directions.
Positioning accuracy: at least 30 steps/mm in all 3 directions.
Simplicity: fewer than 200 parts.
Hardware cost: less than $500 USD.
My knowledge in the 3D printer construction are really poor,
and i had to search some basic information about all the additive
machines. I must make a simple schematic about "what a 3d printer had":
STRUCTURE:
Is where all the rest of the parts going to be assembled. Depending on
which kind of 3d printer you have, this part are going to me different.
In our case the Rostock is very high, about 670mm, and has tree arms
that supports the hot end of the machine. In this delta printer, the
motors controls the x, y and z axis.
EXTRUDER: A group of parts which handles feeding and extruding of the build
material. Consists of two assemblies: a cold end to pull and feed the
thermoplastic from the spool, and a hot end that melts and extrudes the
thermoplastic. The extruder is formed by two parts: the HOT END, and the PULLER
HOT
END: The parts of the extruder that get hot enough to melt plastic, or
potentially other materials. Hot end parts use materials that can stand
up to ~240 C heat (for current thermoplastic extrusion). The hot end
usually refers to the tip of the extruder as it should be hottest
there.. In our Rostock the Hot End will be a
LulzBot/Budaschnozzle 1.2 (Budas) made in Spain.
PULLER: a NEMA motor pulls the PLA or ABS to the hot end.
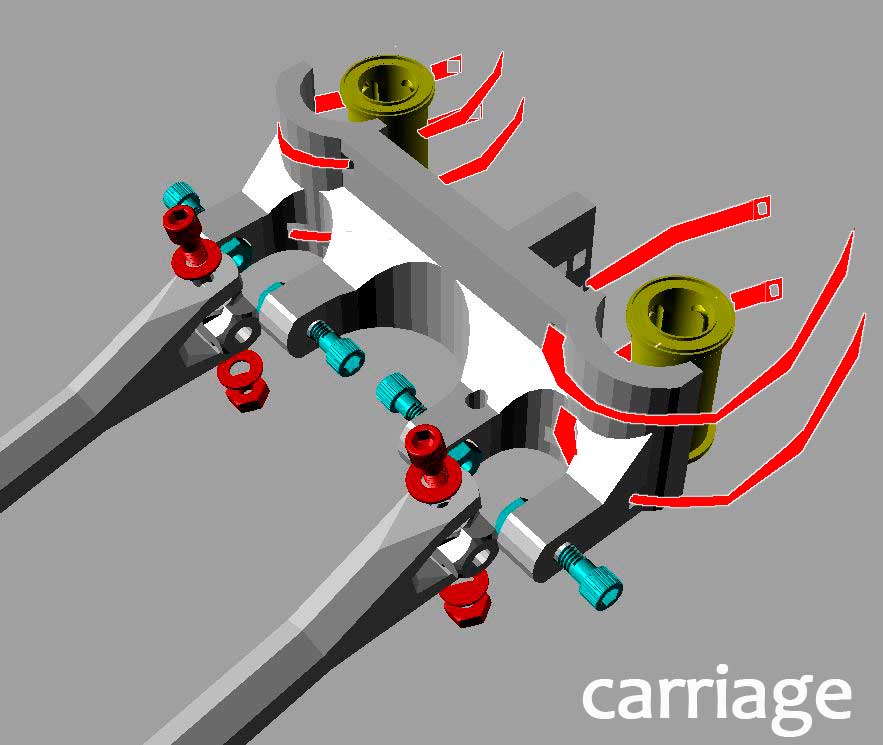
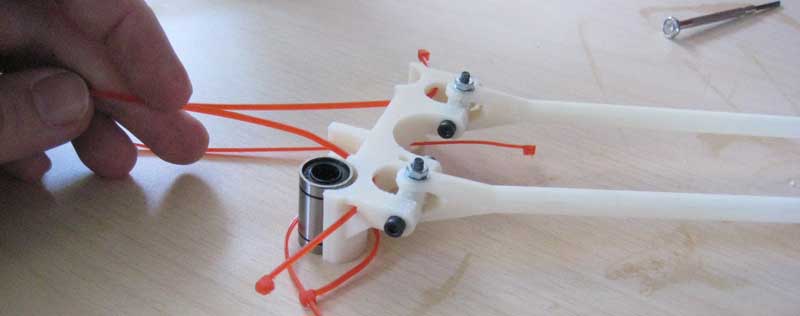
CARRIAGE:
this is the parts that goes along the rods, and move the extrusor to
the exact part where the plastic must go in each moment. Here in the
Rostock is different from the Prusa or Mendel ,because it had three
carriage in vertical way. With the combination of this three movements,
can move the extrusor in X, Y and Z axis.
HEATER BED: A build
surface that is warmed in order to keep the base of an extruded part
from cooling (and shrinking) too quickly. Such shrinking leads to
warping internal stresses in RP parts.
Innovations
Our
goal in this proyect is to get a completely documented Rostock 3D
printer ,and our goal to the end of this "assignement" is to have
all the electronic components documented and made by ourself.
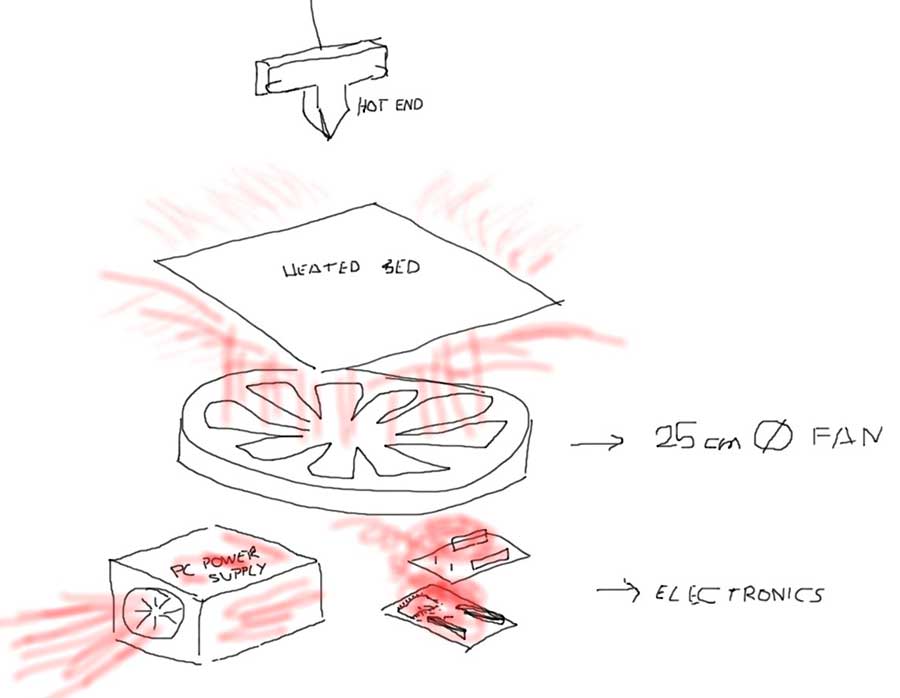
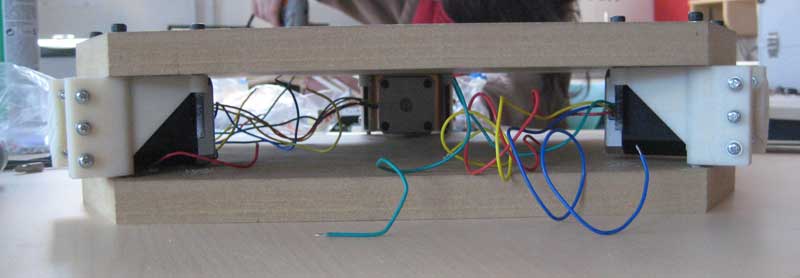
In
our machine design we will try to recicle the heat that comes from the
electronic components of the printer. In this printer, the electronic
components will be under the heated bed, and we will try to reuse this
heat to direct it to the heater bed. Placing a fan under the heated
bed, that will throw the hot air directly under the bed, we expect to
have a more energy efficient printer, using the electronic heat to heat
the bed:
Assembling the Rostock
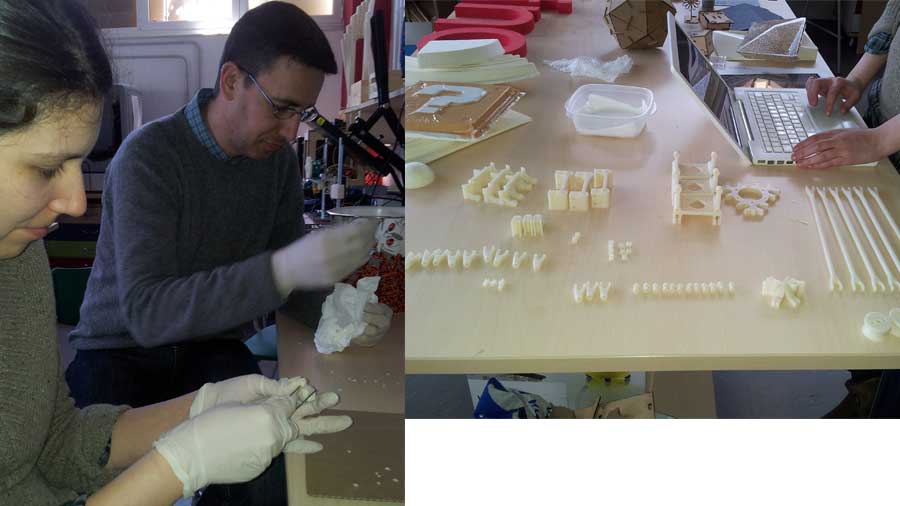
My mates do a great job printing the components in the 3d printer of the Fab Lab, and i helped them to assembly the Rostock.
First
of all we need to have the printer parts as clean as we can, removing
the support plastic that our HP printer put. So after Covadonga finds a
way to boild the parts of the rostock to make them clean alone, some
pieces are cleaning faster doing "by hand":
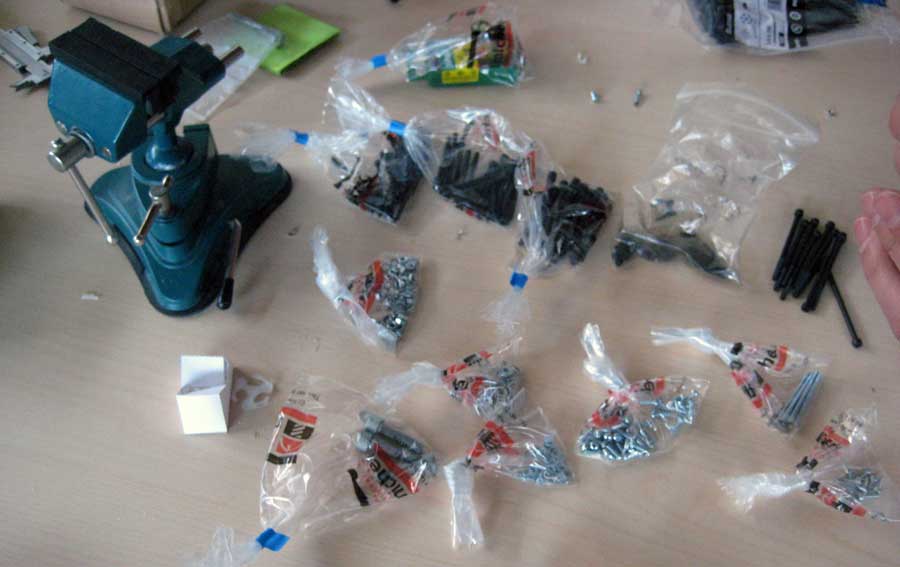
After
having all the parts clean and ready to use, i went to the local supply
to get all the screw, nuts etc... we need to build the printer. Thanks
to Cesar we know exactly which kind of metric we need to assembly the
structure:
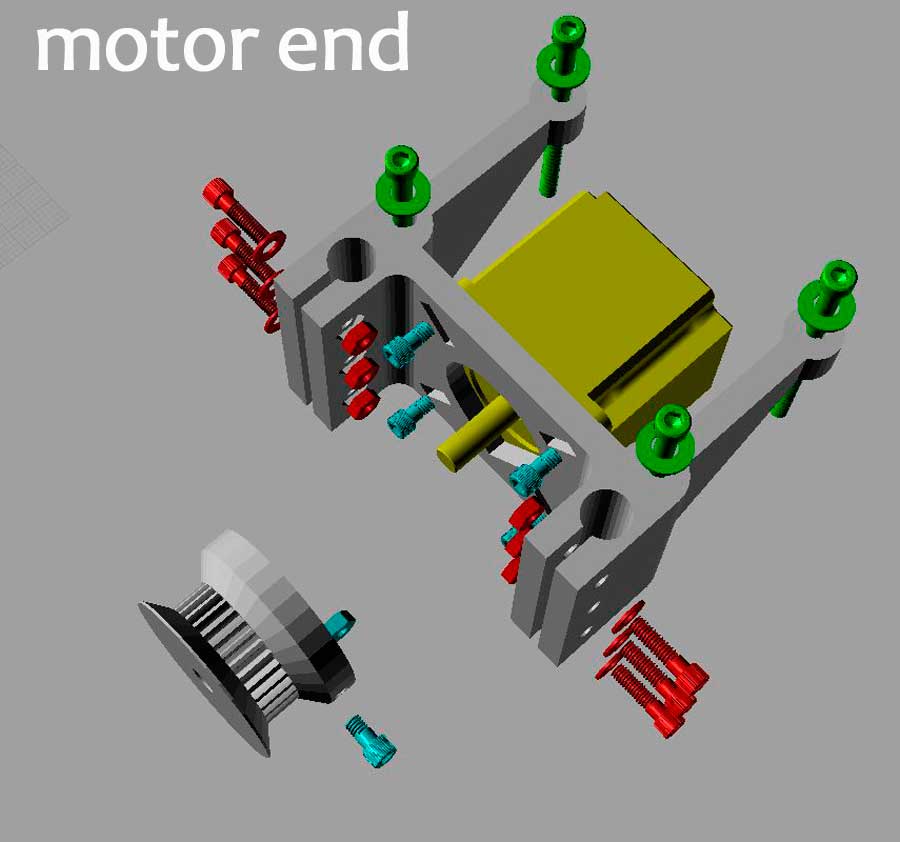
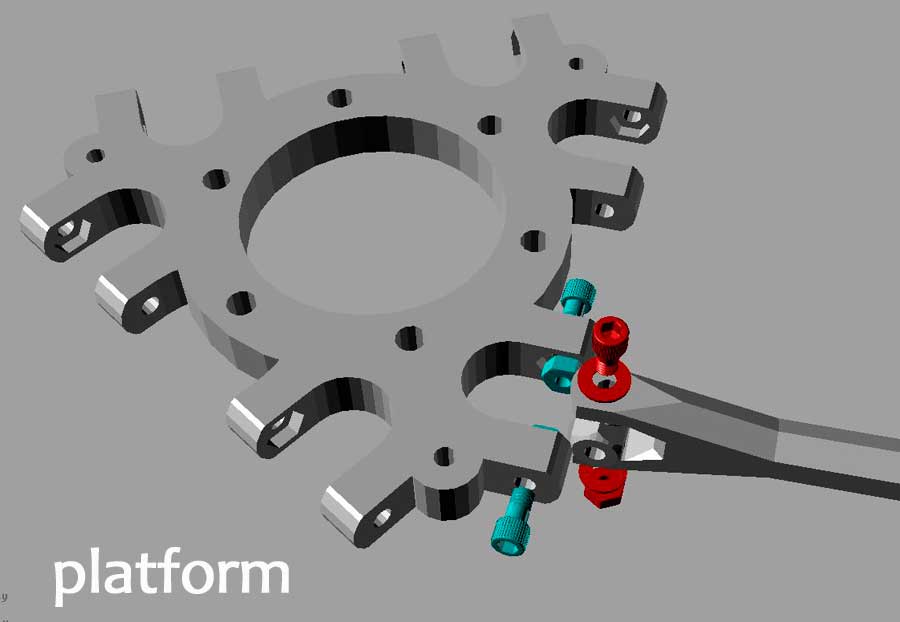
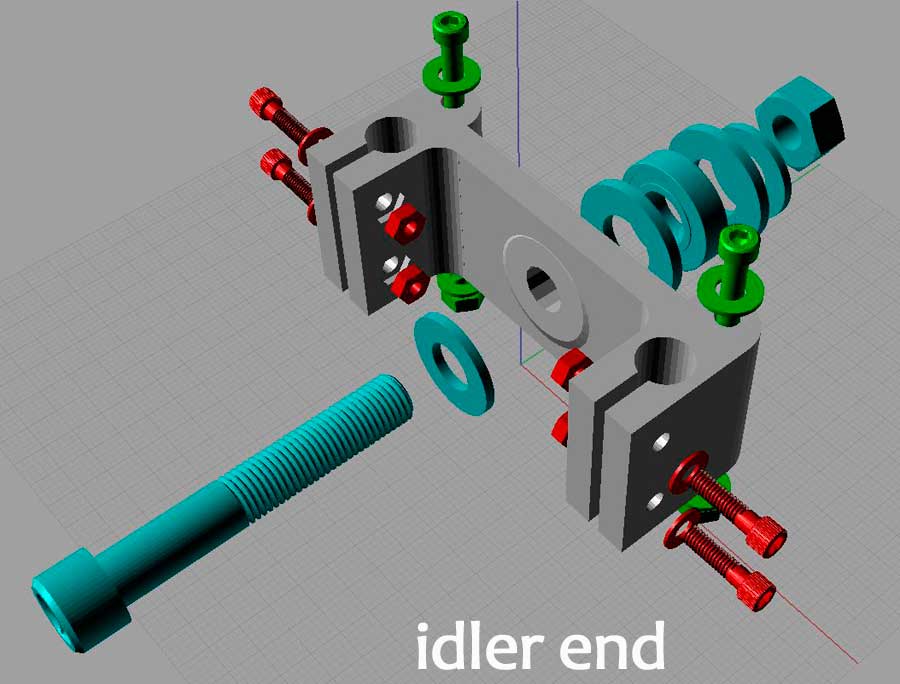
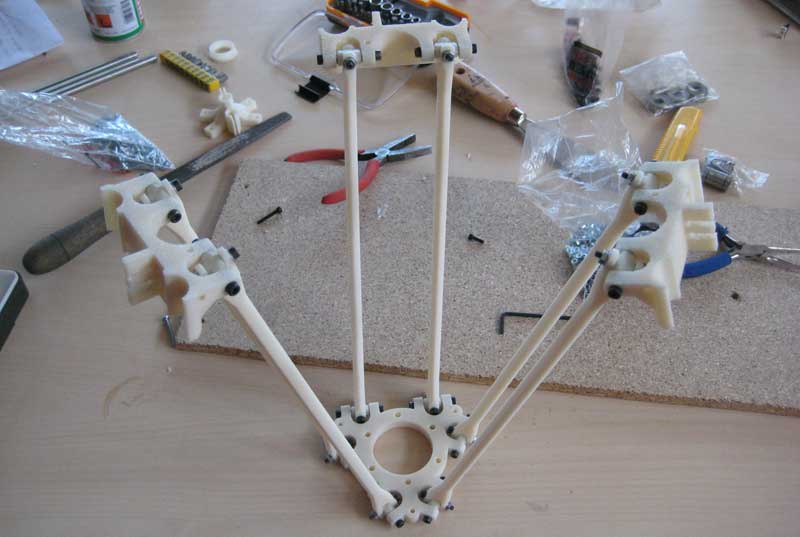
I
do a 3D model assembling schematic, with the exact parts in the precise
position. Was made with Rhinoceros and try to be a visual guide to the
assembly of a Rostock 3d printer:
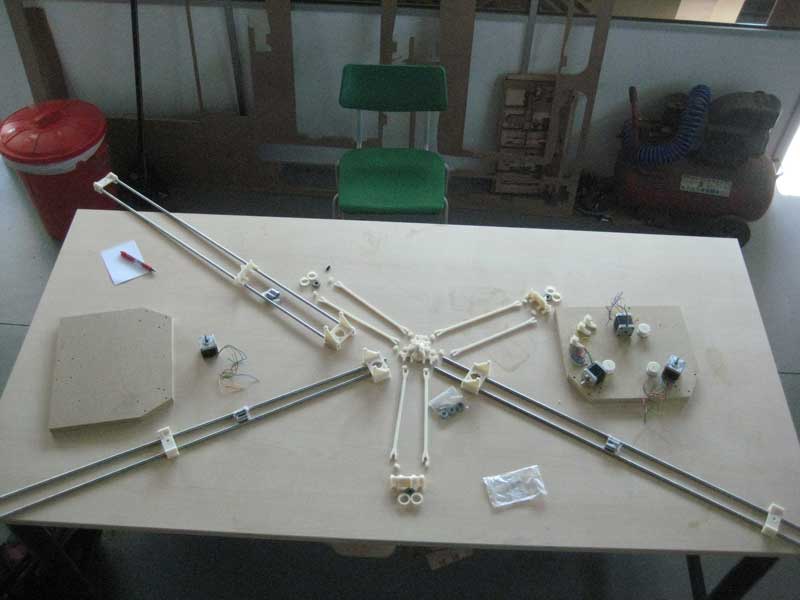
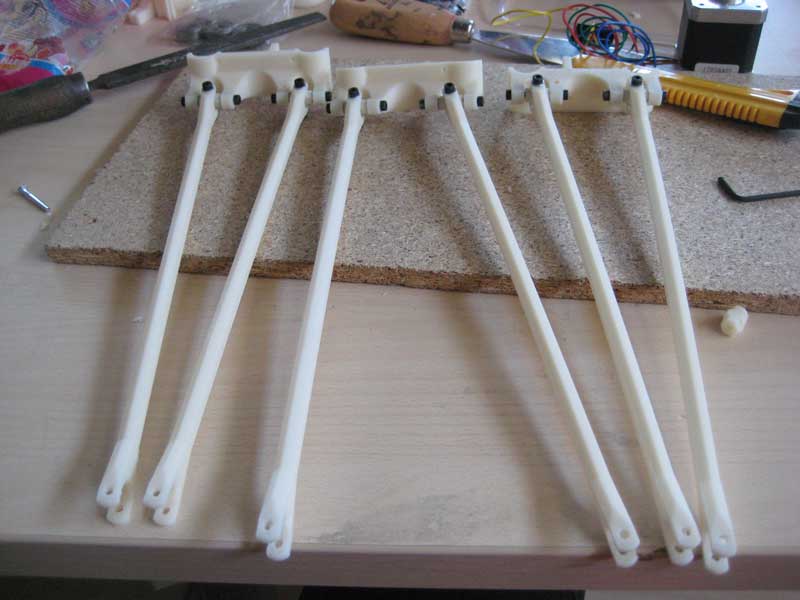
When all
the components are ready, we start to build this "great" printer. We
dont realize how big this printer was until we put the rods and see
that it goes really high: