|
Week8: Embedded Programing
Here
comes the programming week. I want to learn several programming
enviroments, so i will try as much as i can. Lets start coding...
Reading Datasheet
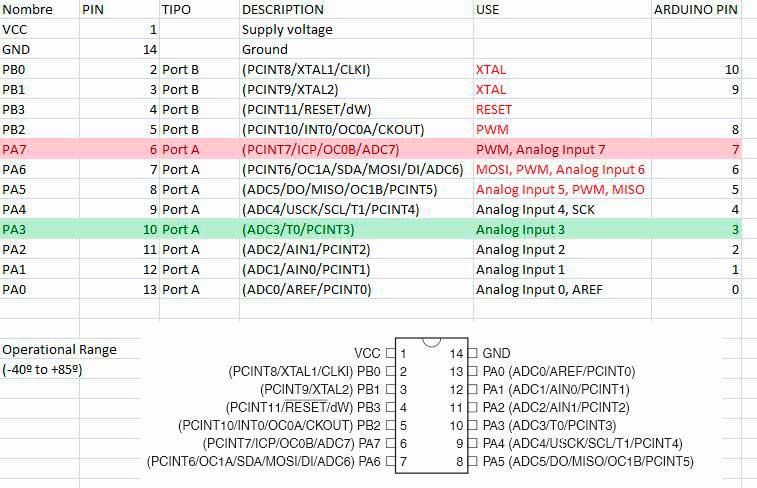
After
reading the datasheet of the Attiny44 microcontroller, i can make
little chart to show the components of the micro. In red is the pin of
the led and in green is the pin of the button:
Components needed
To do this week assignement, we need several things:

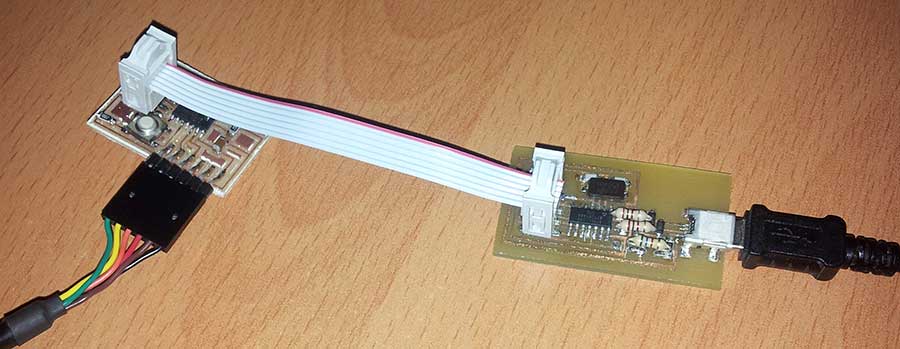
Build an FTDI cable.
To
get an FTDI cable, there are some USB cables from Nokia Mobile Phones
that can be converted into a FTDI cable. This USB cable has inside the
C-42 chipset. You can search in eBay this kind of cable, and check this
website to know how to do it (in spanish):
Installing Arduino
First
of all we need a IDE to program the chipsets. The most versatil IDE to
program is the Arduino. Its very portable (can run in Linux, Mac and
Windows) and is very escalable. A big community is working with it, so
lets take a look.
UBUNTU
First of all we need to know wich version of Ubuntu we are running, 32 or 64 bit. $ uname -ain
the result of this command, if you see a text with "x86_64" you are
running a 64bit system. Else (ixxx or x86 only) you are running a 32
bits.Now
lets install Java in Ubuntu. Open the Software Center in Ubuntu (main
menu) and search for the word "Java". Generally the first result is the
better or the most official.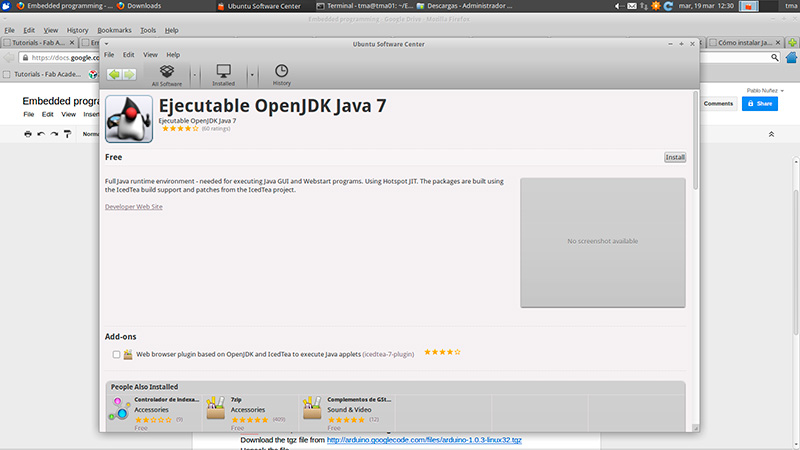
This is the ONLY package you need to install Java.If you have a lower version of Ubuntu than 12.04 Try with these command:$ sudo apt-get install sun-java6-jdk sun-java6-jre sun-java6-plugin sun-java6-fontsPut it at the Desktop, and descompress it:$ tar xvzf arduino-1.0.3-linux32.tgzMove to the extracted directory$ cd arduino-1.0.3
Run the shell script in that directory$ ./arduinoIf
you want to start Arduino from terminal in anywhere of the system, you
must add the Path of the Arduino directory to the system PATH:Open the file .bashrc from your personal folder:$ sudo nano ~/.bashrcAnd add at the botton of the file this line:PATH=$PATH:~/Desktop/arduino-1.0.3or the directory where you had uncompress the Arduino.And then uncompress inside the "hardware" folder in the Arduino folder.
Install FTDI drivers. If
you had a Linux with a kernel 3.0.0-19 or better, dont need to install
it. Else, you can download and install from the official site:If you are running Ubuntu 12.04, AVRdude needs sudo access to the program. So lets do this:
$ sudo apt-get install uisp
After this, we need a config file.Download the config file here.
Copy this file in /etc/udev/rules.d with this command$ sudo mv 10-usbtinyisp.rules /etc/udev/rules.d
Now lets restart the uisp server:
$ sudo service udev restart
WINDOWS
In
my case i installed it on a Windows 7 64 bits. From a 32 bits and a 64
bits there arent a lot of differences, only the FDTI drivers are
different.1) Ok, first thing we need is Arduino files for Windows. You can download it from here
Search
the 1.0.4 version for windows (no matter 64 or 32 bits). After download
just have to uncompress it where you want to have it. Dont need to
install, just unzip.
Now go inside
the folder and doble click in the "arduino.exe" file ....does it open a
green windows? ok, thats all, you can go to the next point.
Arduino dont open? maybe you need to install the Java on your machine. You can download from here:
after
download, double click on it and follow the instructions. After
install, try to open now the "arduino" executable, and now the green
window must appear.
2) Now we need the Hardware database (the same in all operative system):
After download, unzip it and move the attiny folder into the Hardware folder of the arduino. Thats it.
3)And
now we need the FTDI software for windows. You need to go to this page
and download the 32 or 64bits format, depending of your SO:
Its a executable file, just need to press "next" every time and finally you have the drivers installed.
MACINTOSHIts the easier way to install arduino.After
download, just unzip it. Now you will have just one file, named
arduino. Double click on it to open Arduino. This file is the whole
program, so no matter where you store it.
2) Now we need the hardware list for Arduino. You can download from here:
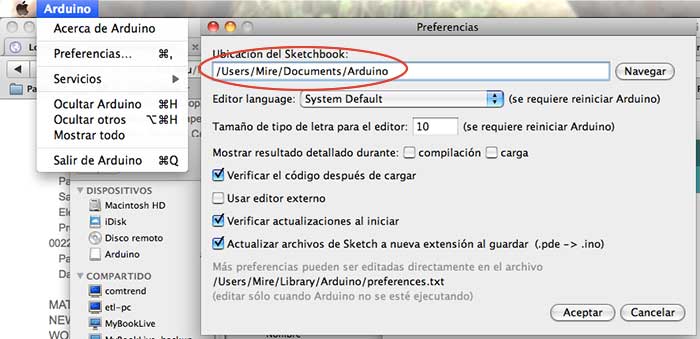
Now
unzip and put it on the hardware folder. Commonly it will be on
<USER>/DOCUMENTS/ARDUINO, but if you want to know exactly where
it is, open Arduino and, in the up menu, go to ARDUINO->PREFERENCES.
There you will have the place of the Sketchbook path.
3) Install the FTDI drivers: Download from here http://www.ftdichip.com/Drivers/VCP.htmAfter , doble click on it and slide the FTDI icon as usual on MAC.
CONFIGURING ARDUINO TO WORK WITH ATTINY44
There area a few things to tweak in Arduino to work it properly with Attiny44:1º Define the model of the Tiny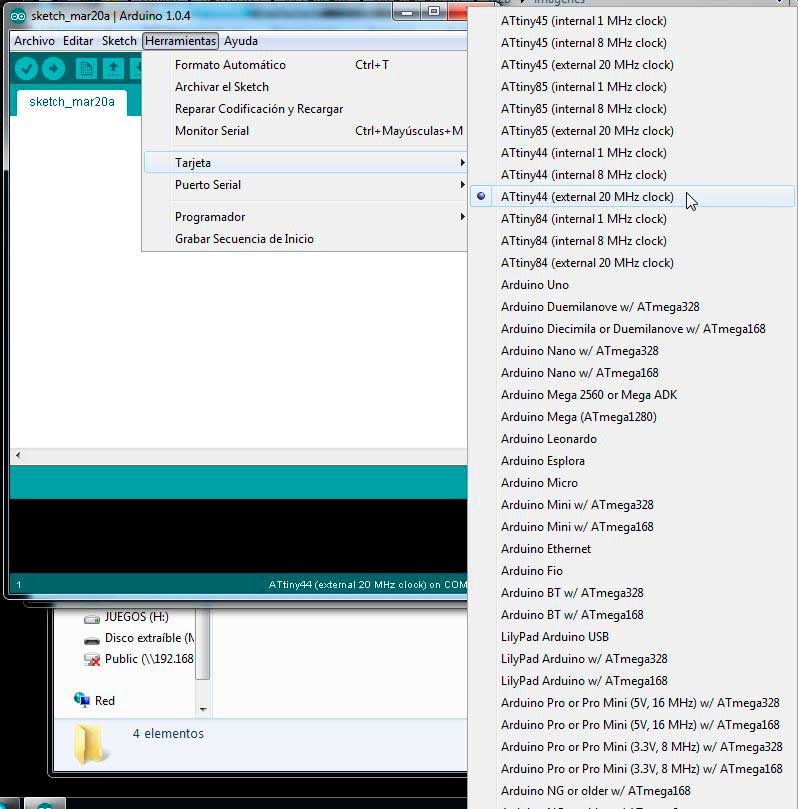
2º Change the programmer type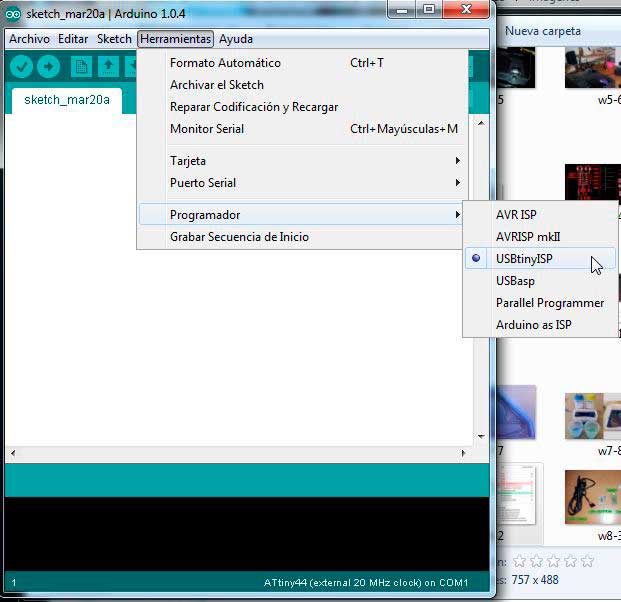
3º If this is the first time you plug the board and need to load with the bootloader, you can do in.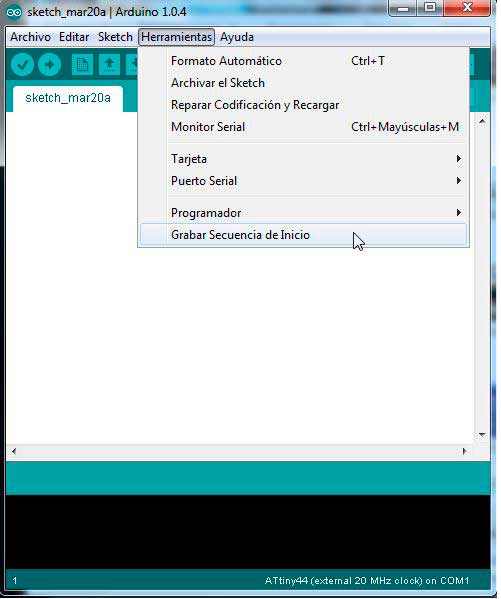
Now we can load the button example of the Arduino to check that the board are working good. Go to FILE -> EXAMPLES -> DIGITAL ->BUTTON. Now we must change some parameters in this example. The line with this text:
const int buttonPin = 2;
const int ledPin = 13;
Must
be changed with the pin of your component . In my case i had the
led in PA7 and the button in PA3. Now we go to the datasheet (at the
top of the site) and check which pins are this in Arduino. We check
that the led is in pin 7 and button is in the pin 3.
const int buttonPin = 3;
const int ledPin = 7;
After we change this, plug all your cables and go to compile and download the program to the board.
|
