Week Task
group assignment:review the safety data sheets for each of your molding and casting materials,
then make and compare test casts with each of them
individual assignment: design a mold around the stock and tooling that you'll be using, mill it (rough cut + (at least) three-axis finish cut),
and use it to cast parts
Introduction
Pattern is the principal tool during the casting process. It may be defined as a model of anything, so constructed that it may be
used for forming an impression called mould in damp sand or other suitable material. When this mould is filled with molten metal, and the metal is allowed to solidify, it forms
a reproduction of the pattern and is known as casting. The process of making a pattern is known as pattern making.
The casting have five stages: (1)pattern making (2) moulding and coremaking (3) melting and casting (4) fettling and (5) testing and inspection.
Pattern Material
Following are the some basic pattern material available in market
1. Wood
2. Metal (CI, Brass, Al, White metal )
3.Plastics
4. Rubbers
5. Plasters
6. Waxes
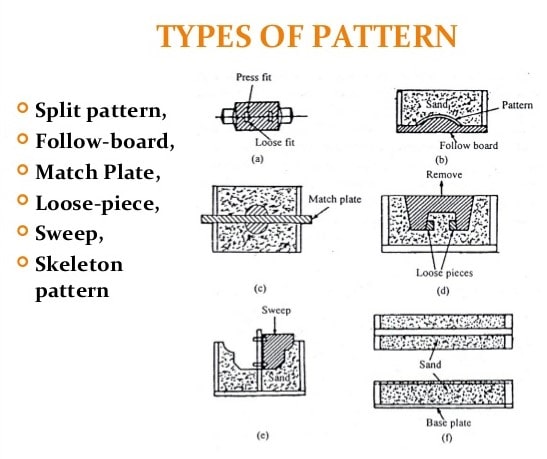
Types of Patterns
Following are the some basic pattern material available in market
1. Single-piece Patteran
2. Split Pattern
3. Match plate Pattern
4. Cope and drag Pattern
5. Gated Pattern
6. Loose-piece Pattern
7. Sweep Pattern
8. Skeleton Pattern
9. Segmental Pattern
10. Shell Pattern
11. Built-up Pattern
12. Boxed-up Pattern
13. Lagged-up Pattern
14. Left and right hand pattern
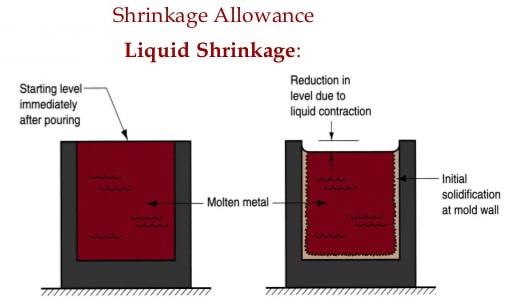
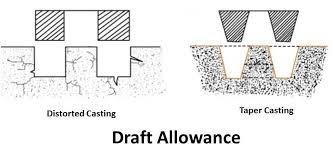
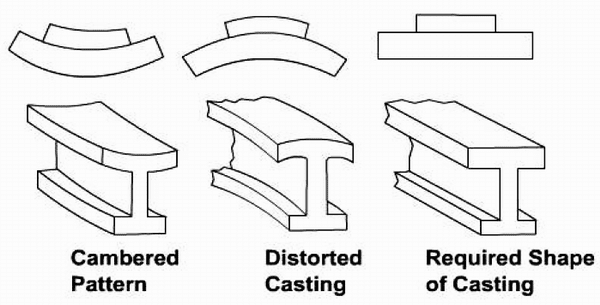
Pattern Making Allowances
Pattern are not made the exact same size as the desired casting for several reasons. Such a pattern would produce castings which are undersize, allowance must therefore be allowed for shrinkage, draft, finish, distortion and rapping.
Following are the allowance need to consider during patterna making
1. Shrinkage Allowance
2. Draft Allowance
3. Distortion or camber Allowance
Difference between 3D printing and molding
3D printing is an additive process. It manufactures objects by building them up layer by layer. We can watch this build process as it happens, which is useful when we’re testing a new design.
Injection molding makes use of molds. First, an object’s inverse is carved out of a material that is safe to handle the molten build material (the material the finished object is made of. Then, the molten build material is poured into the mold.
Once the material has cooled in the mold, the finished object is ready.
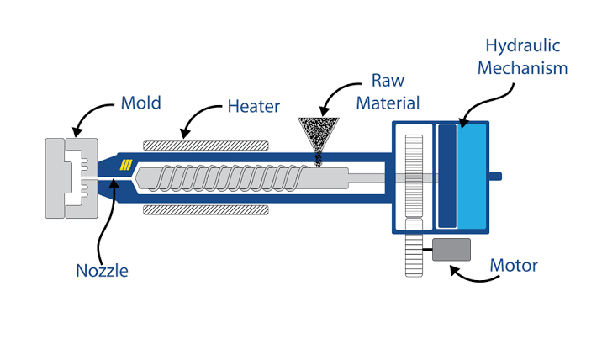
Another difference in them is the way of material is put into the machines, in injection moulding small piece of plastic called “Pellets” are used while in 3D printing “filament” is used.
Group Assignment
The group task for the week is to review the safety data sheets for each of our molding and casting materials,then make and compare test casts with each of them. In Vigyan Ashram we have different material like Hydrostone,Instamold,Epoxy,machine wax,Moldsil for molding and casting. So we study this material. For more details click here
Individual Assignment
The task for the week is to design a mold , mill it and use it to cast parts. So I am decided to crate the design our project i.e. smart kitchen chimeny and paste this casted part on the body of chimeny.
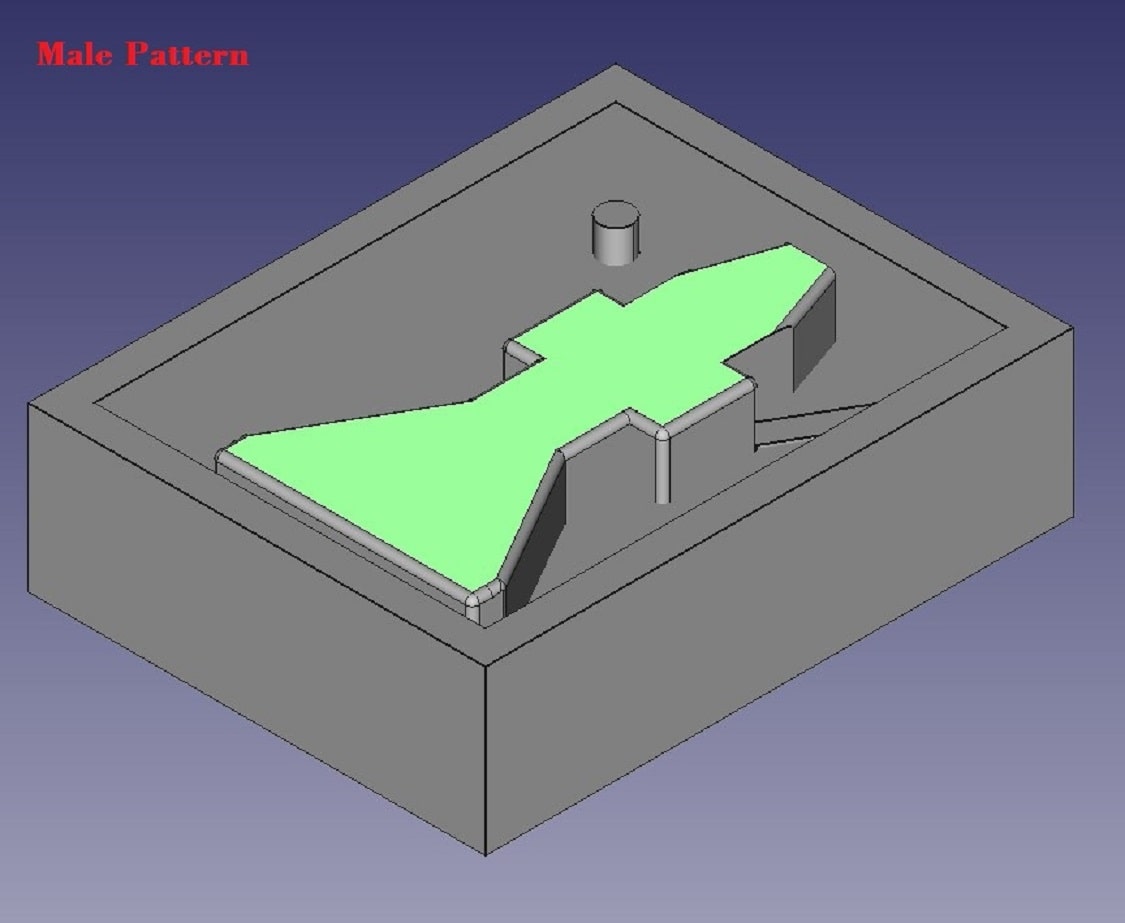
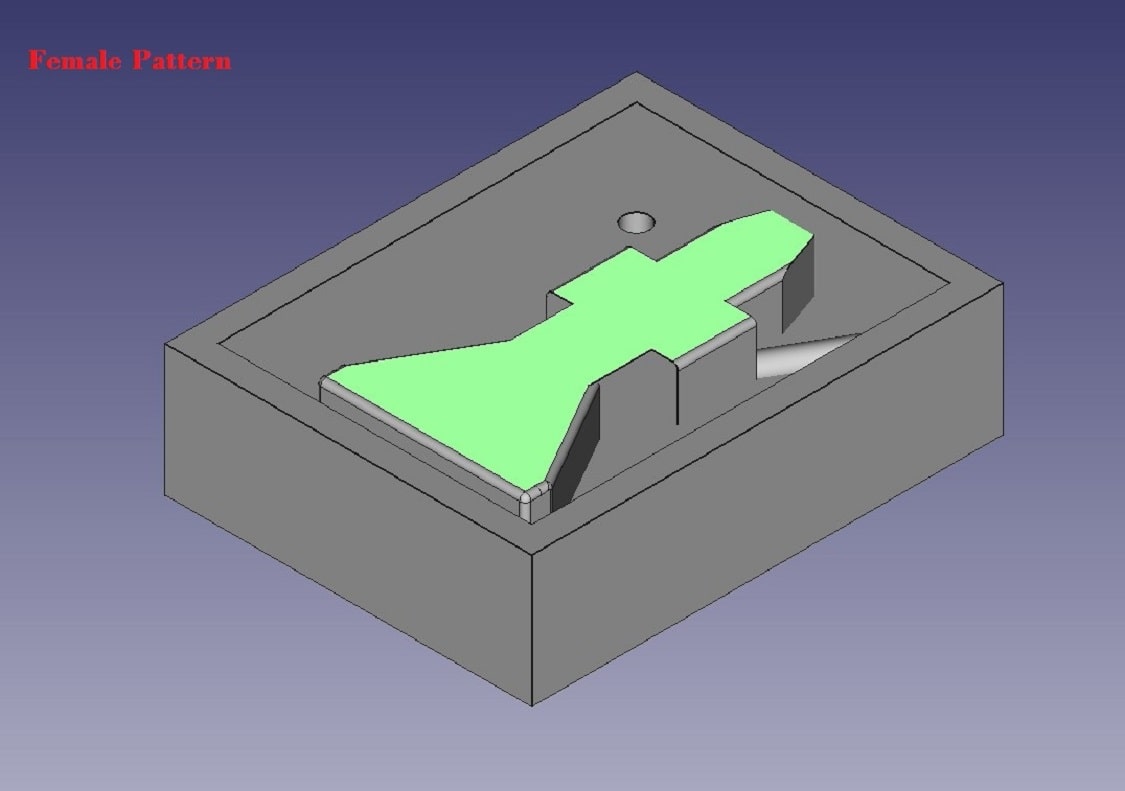
I am using FreeCAD software for the design. Basically in Fab Academy, split pattern are used to create the cast. So that why we need to split item in two parts, one is female part and second is male part. Then assemble is to create the cast.
Here is my design of male and female part.
Creating a Mold from the Machinable Wax
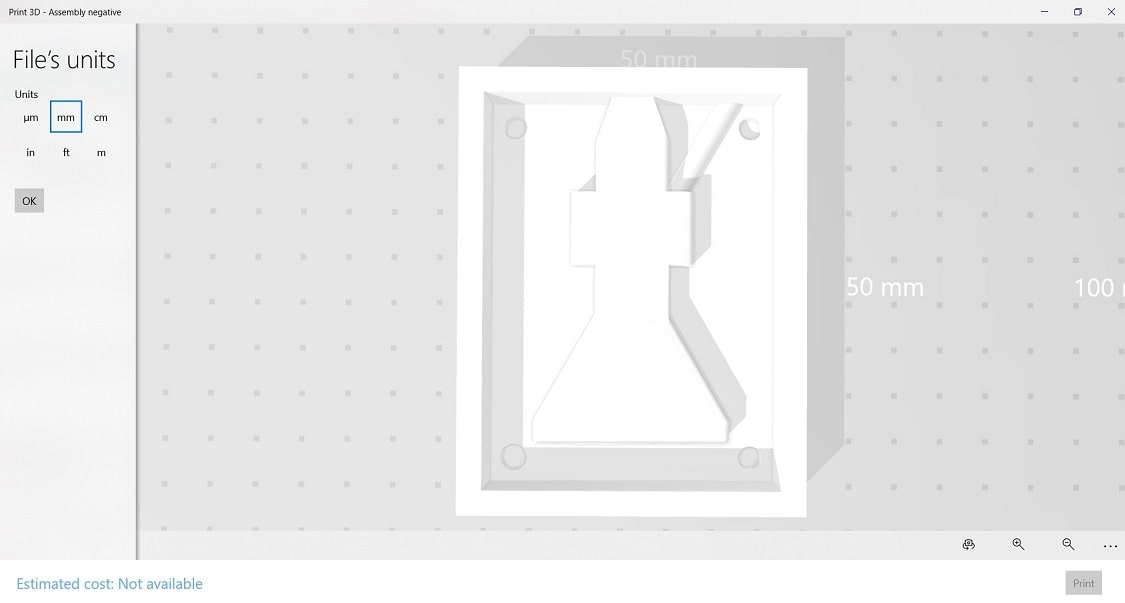
After design. I started to prepare the design for milling on SRM-20 Milling machine. Now this design is exported as a .stl file from the design software.This type we are used during 3D printing.
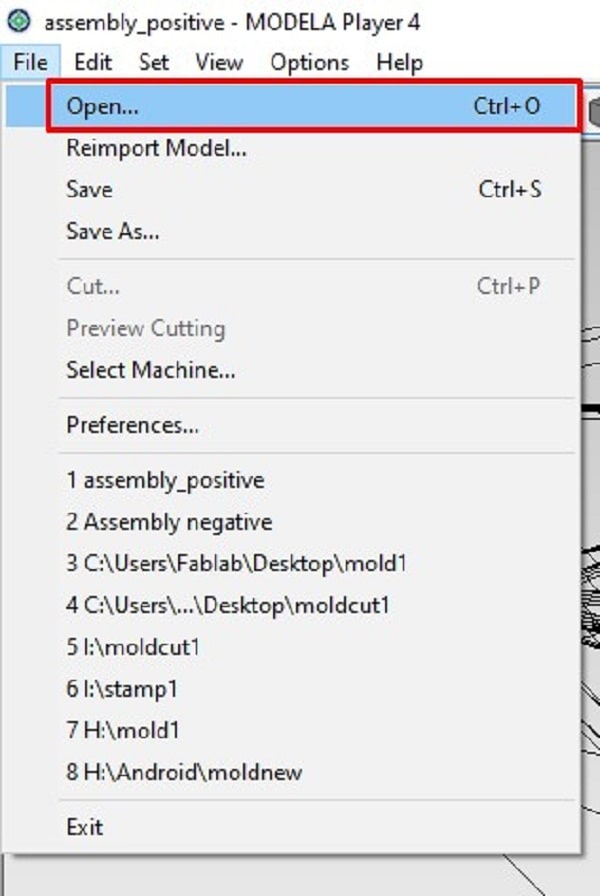
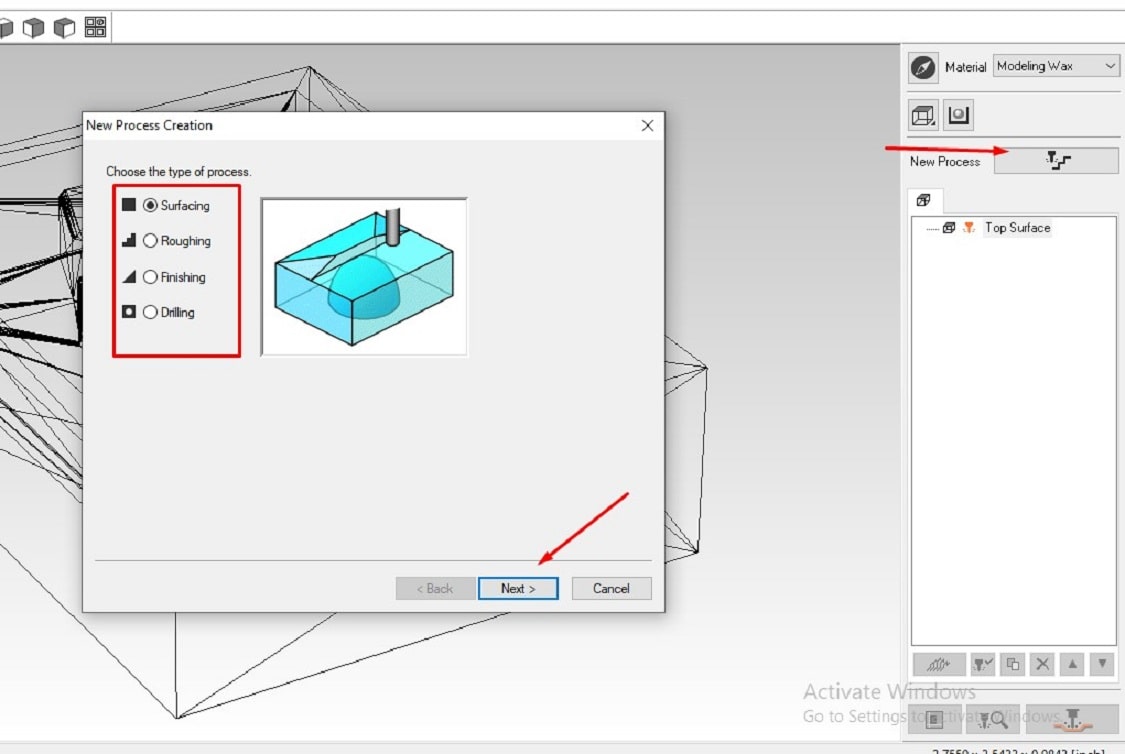
There are the three process during milling 1. Surfacing 2. Roughing 3. Finishing. For to create toolpath for miiling we have used Modella 4 software.let us see the stepwise procedure.
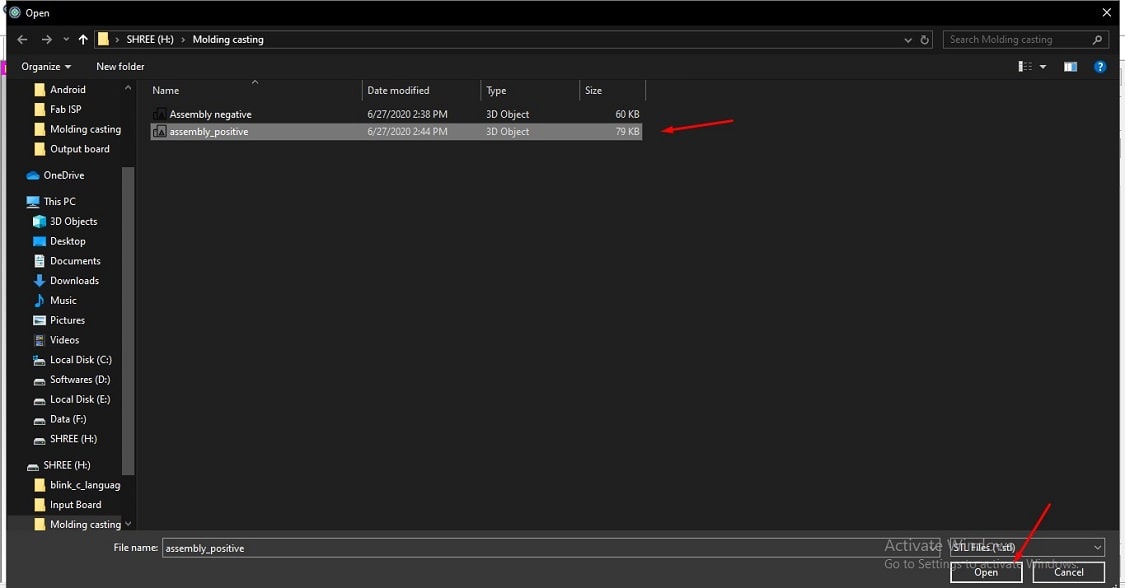
Firslty open the software>open the file (saved in .stl formatt)
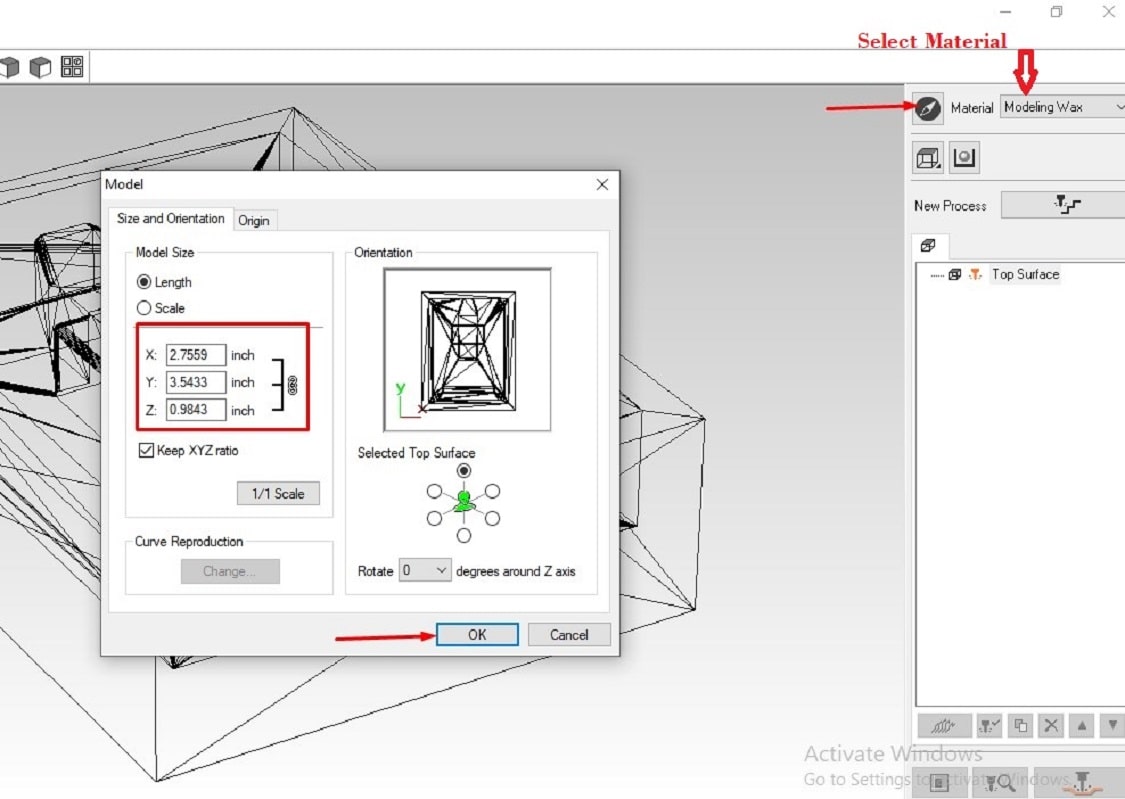
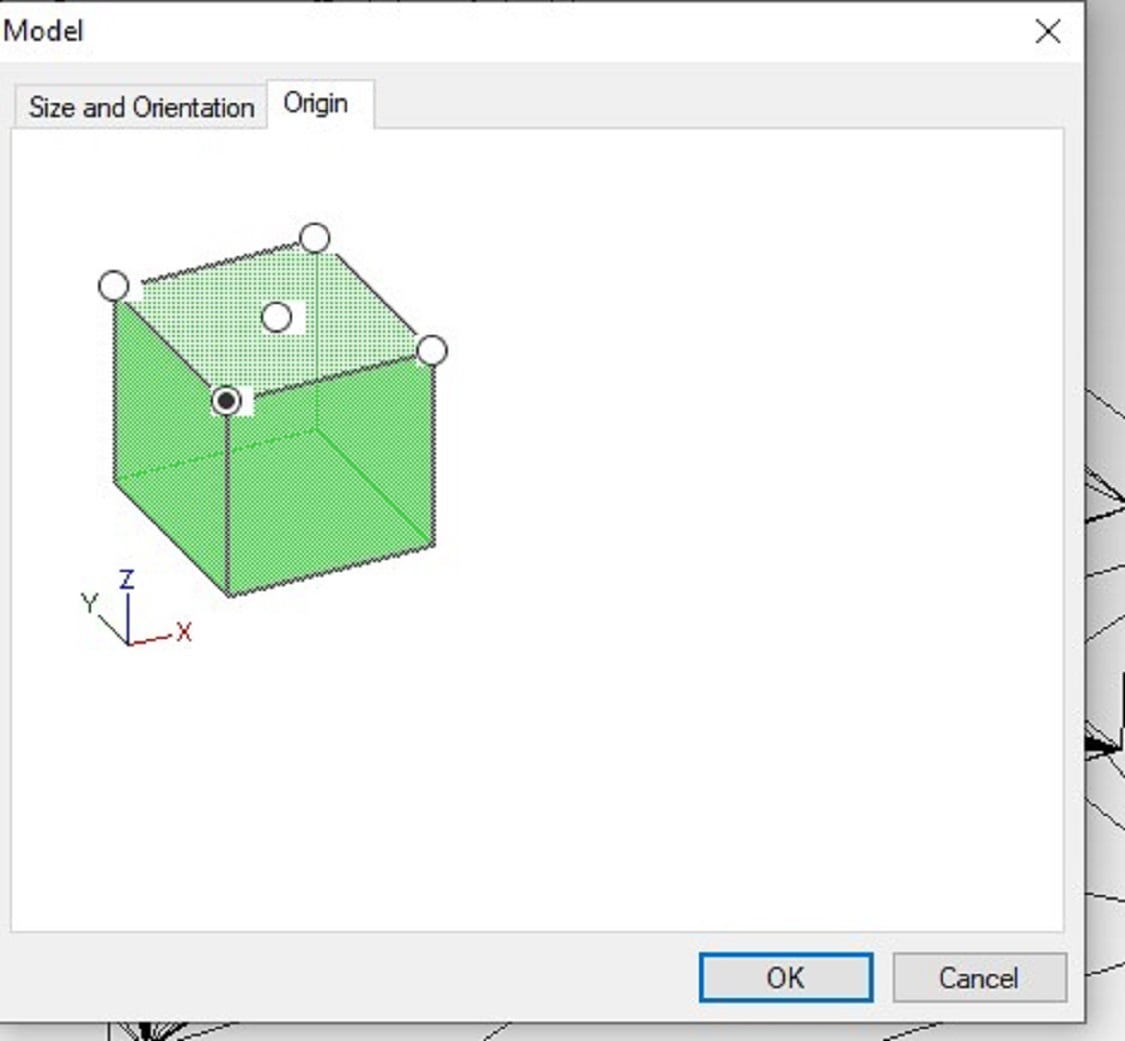
Open the model option (on right top corner)>select the size and orientation and origin of the model>then select the material for milling (here we are using Modeling Wax)
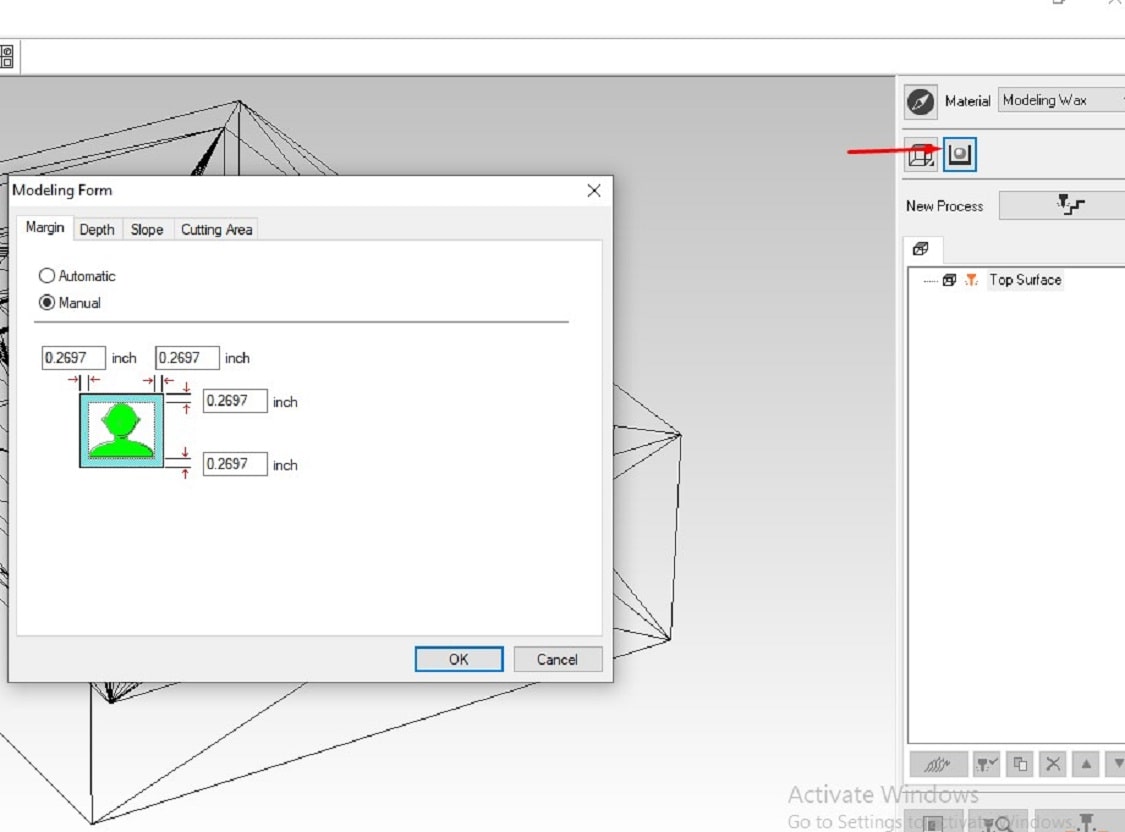
Then click on Modeling Form option and check the parameter
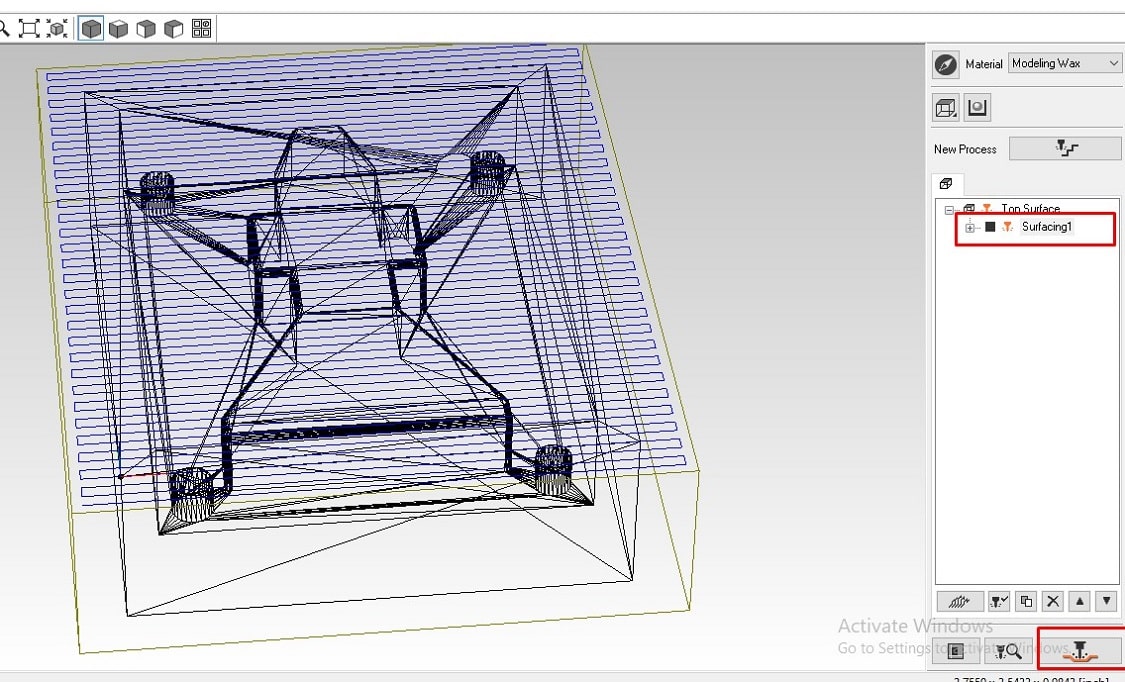
Now click on New Process Creation> select the process we required>firstly we are going for surfacing so surfacing is selected> create the process
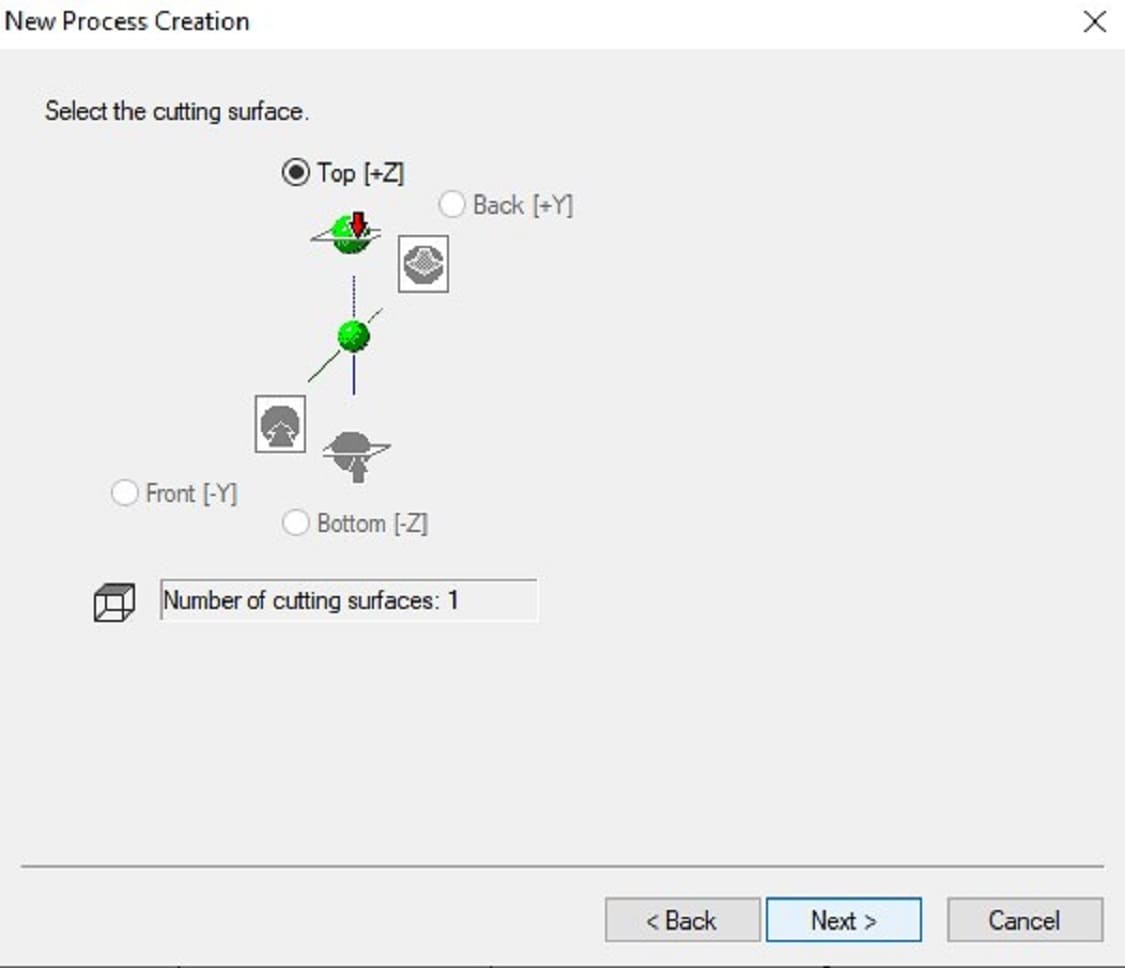
Select the cutting surface>then click on next
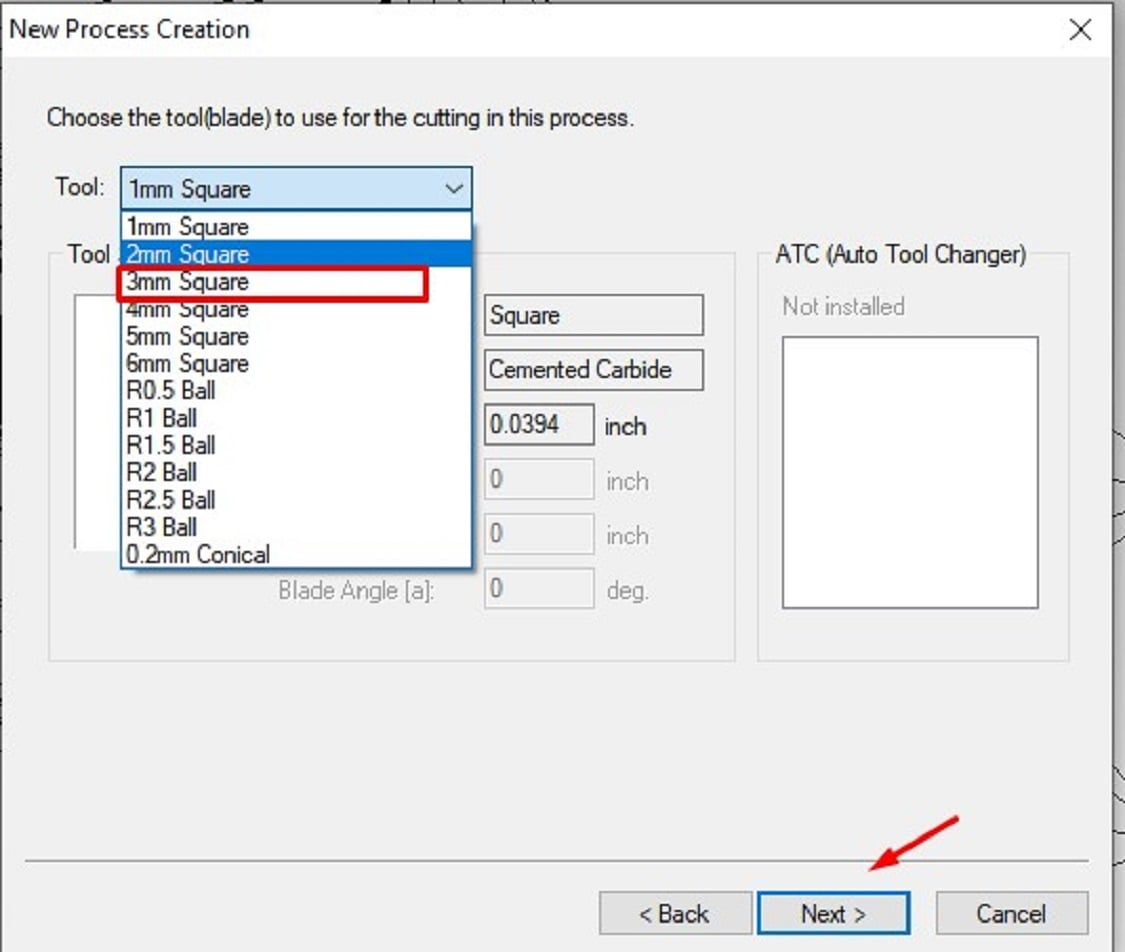
Select the tool > here we are using 3 mm diameter tool
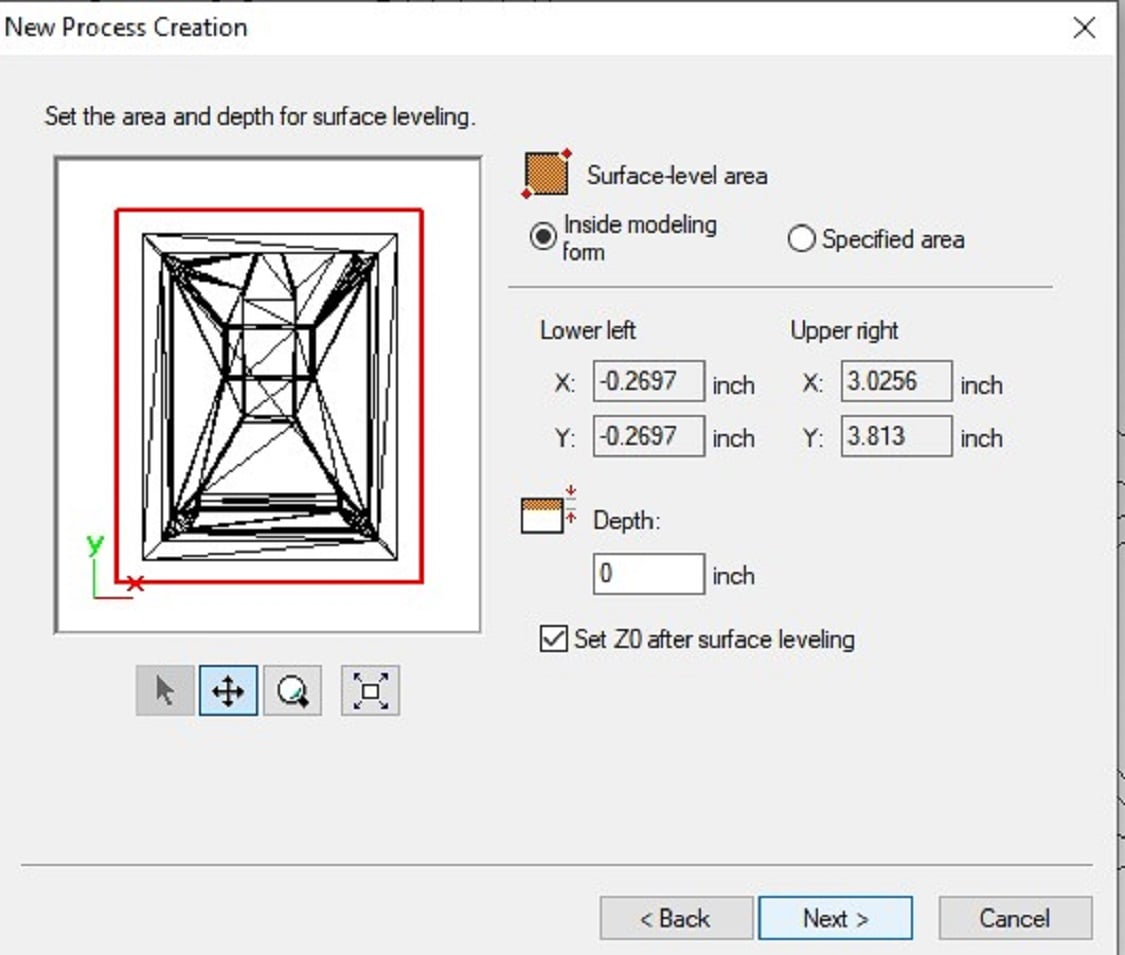
Then set the area and depth for surface leveling
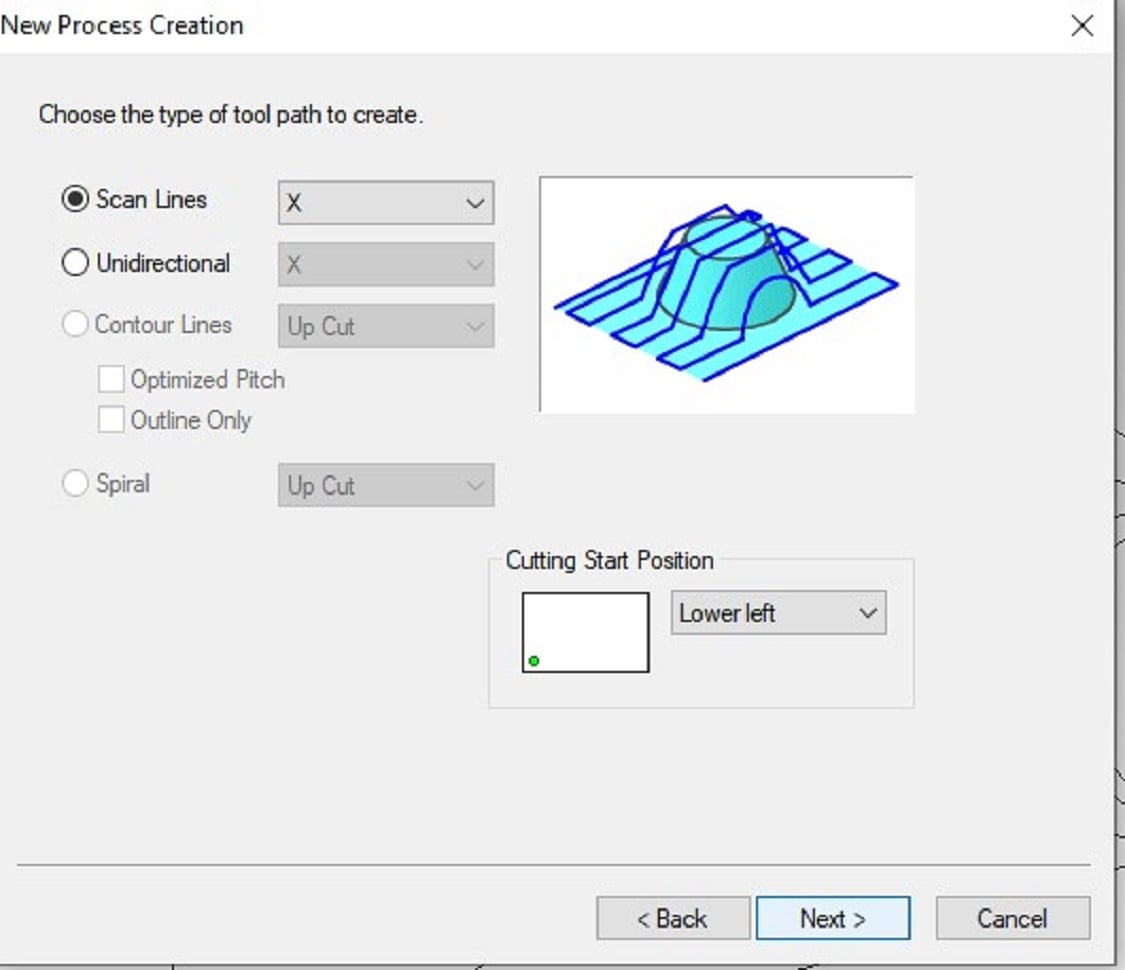
Then select the type of toolpath to create> here I am selecting X-direction
The set the cutting parameter> here only we have to check it and click on "Next"
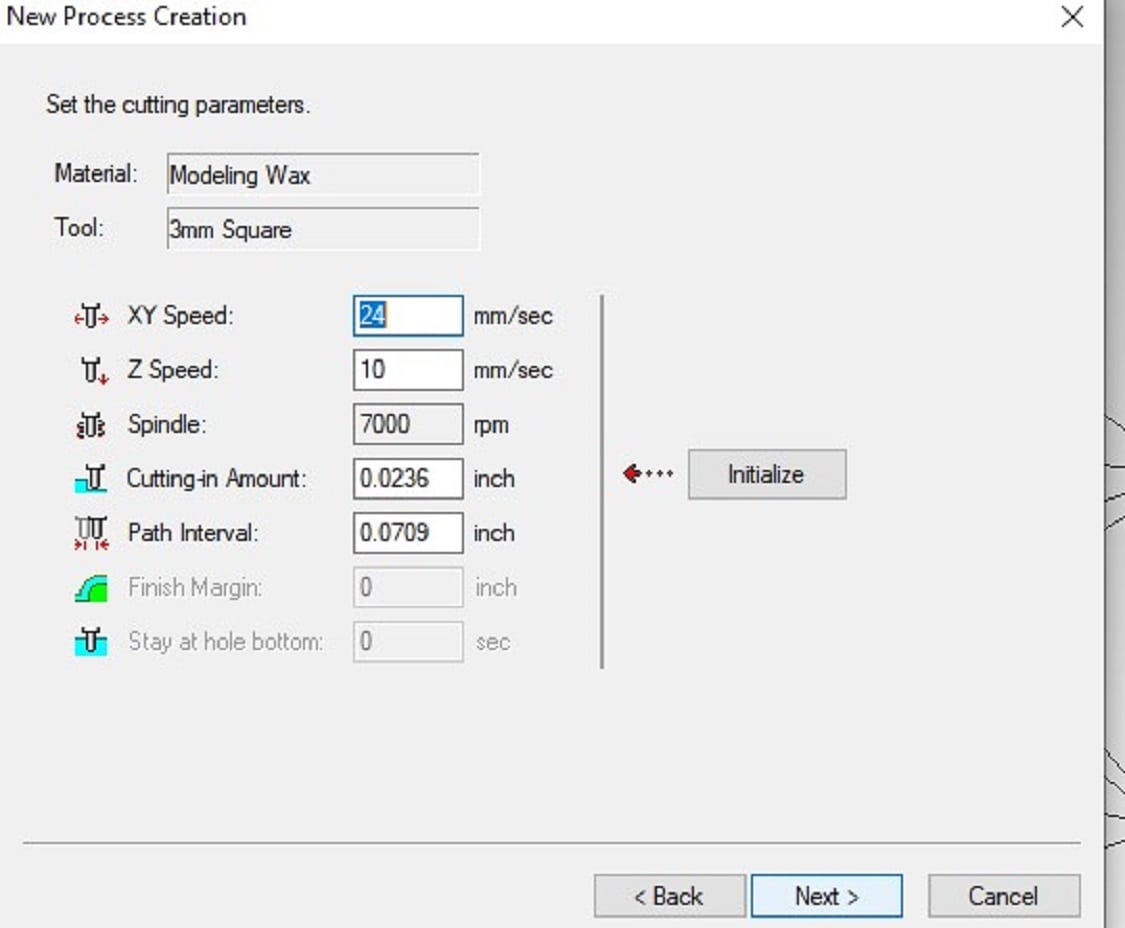
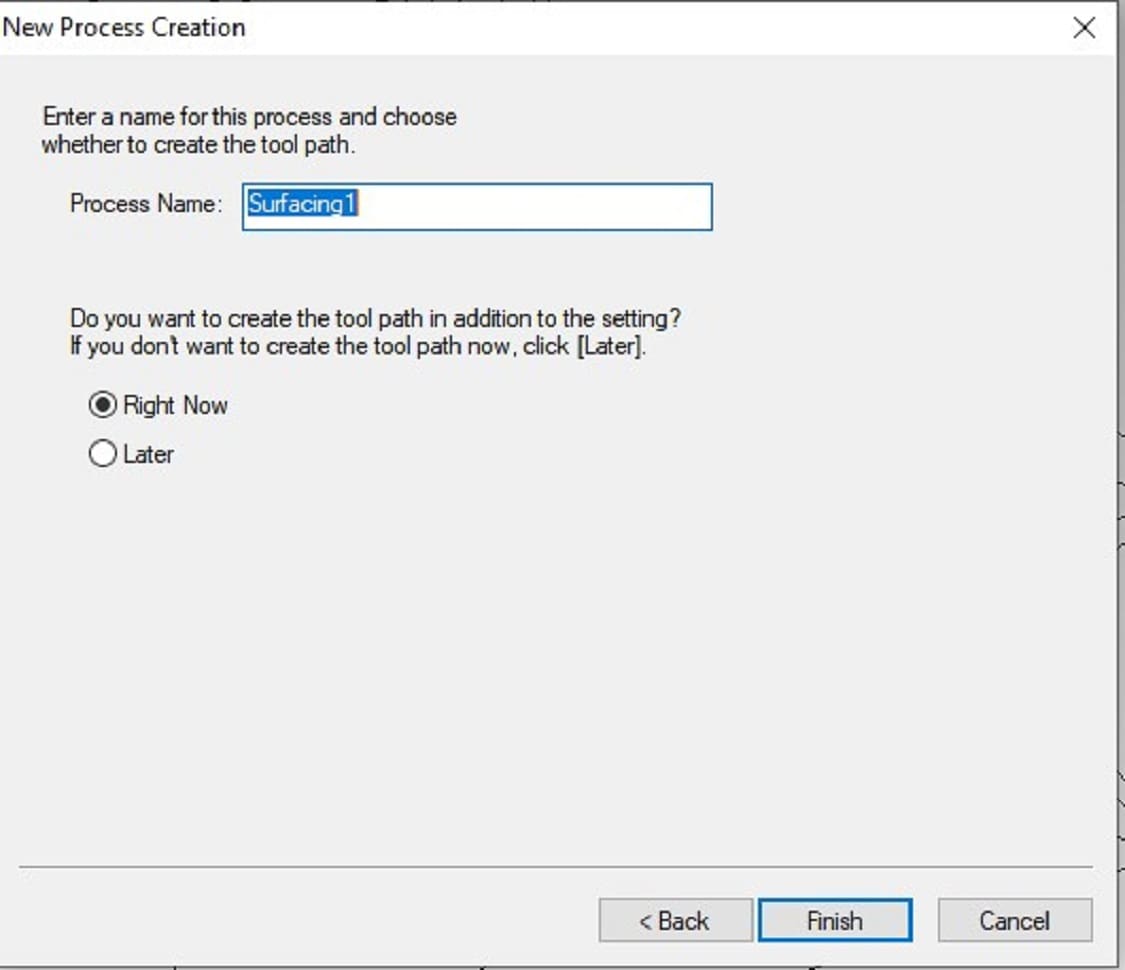
Now enter the name of the process and when to create it
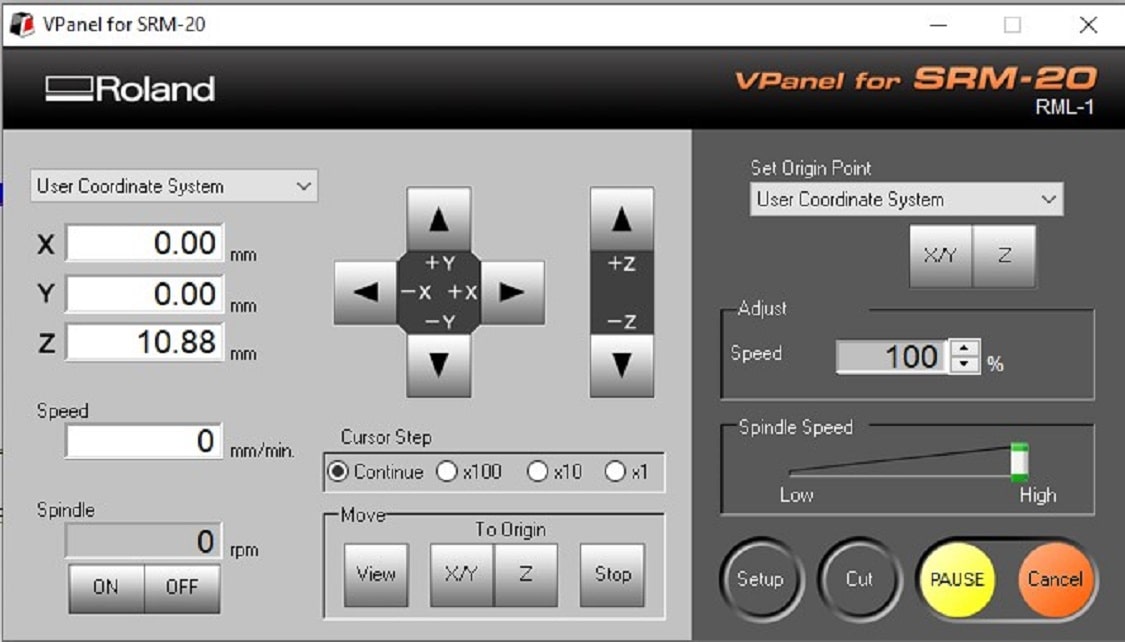
In the same way I am creating the three process> the software shows you the cuttting path on the material. Now set the X, Y and Z point for the tool on the material using SRM-20 V pannel.
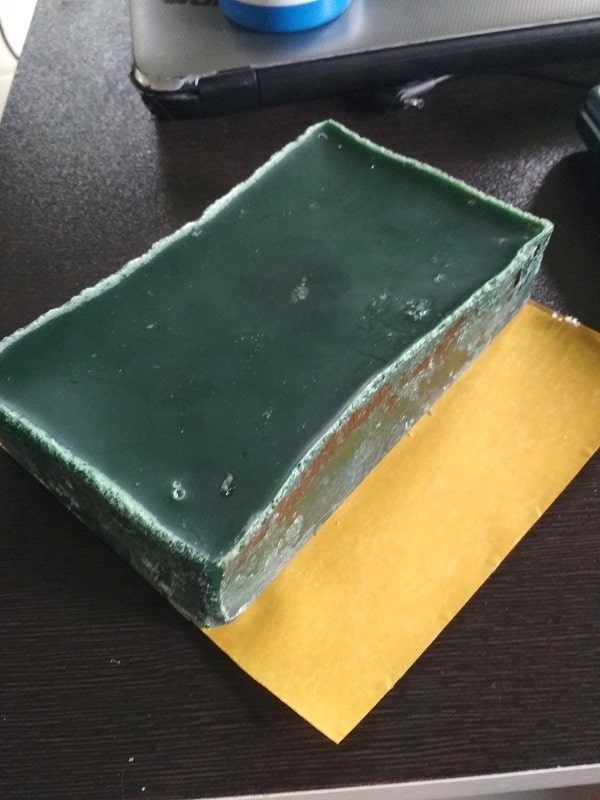
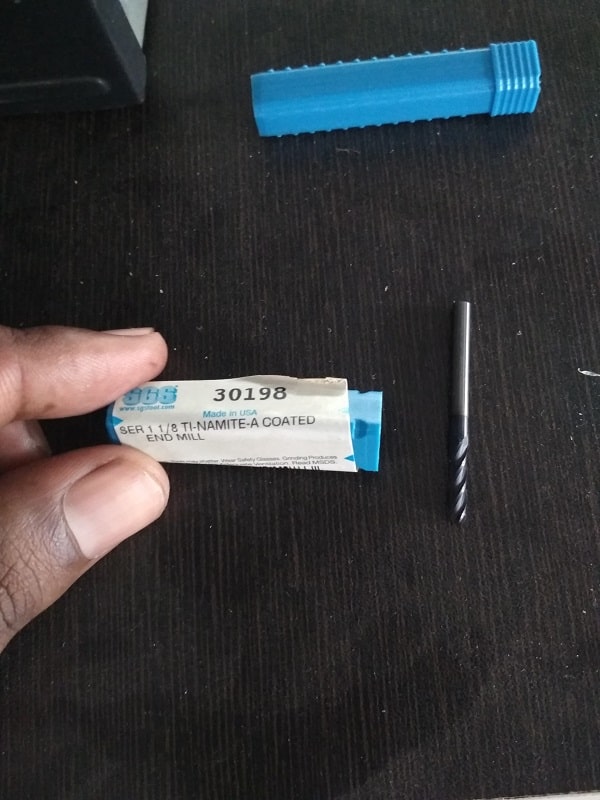
Before this I have to paste the wax block on the bed of the machine and attach the drill bit. The first image shows the available wax for milling, second shown drill bit specification i.e. 1/8 inch Ti-Namite Coated End Mill is used.
and third image shown the hows the wax is pasted on bed so for pasting I am using extra glue, it has pasted with help of glue gun.

Now X,Y and Z axis of the tool is set on this material for milling using below SRM-20 V pannel
Now back to our Modella software>select the process>click on cut option> Following image shows the path for surfacing
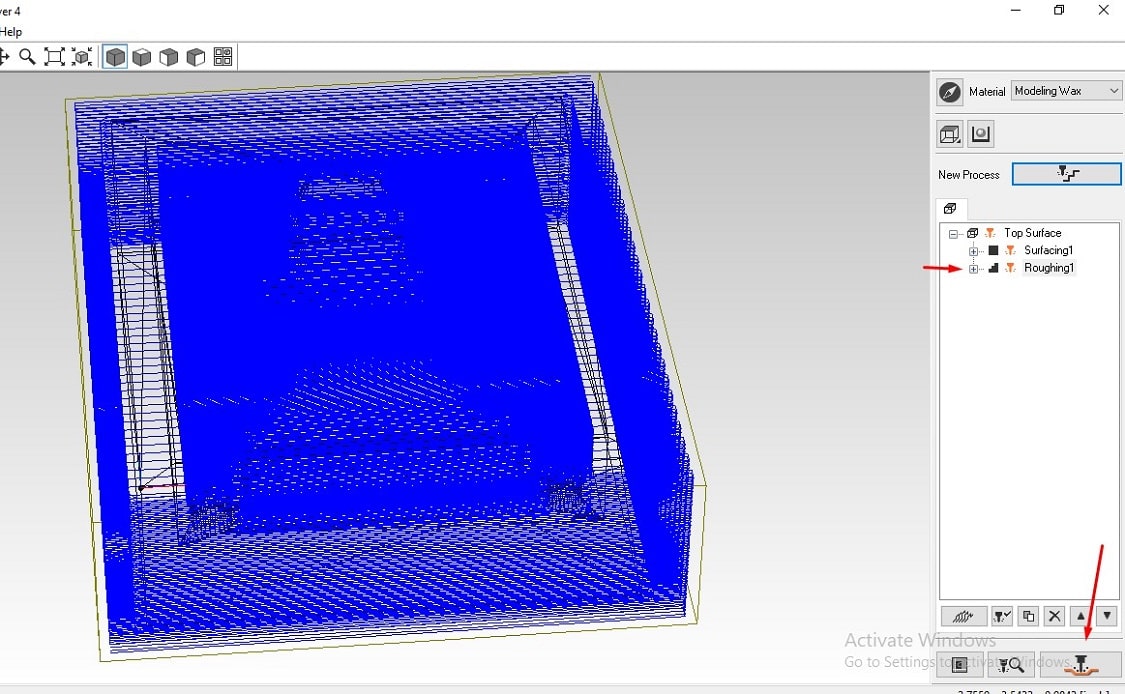
The next image shows the path for Roughing operation.
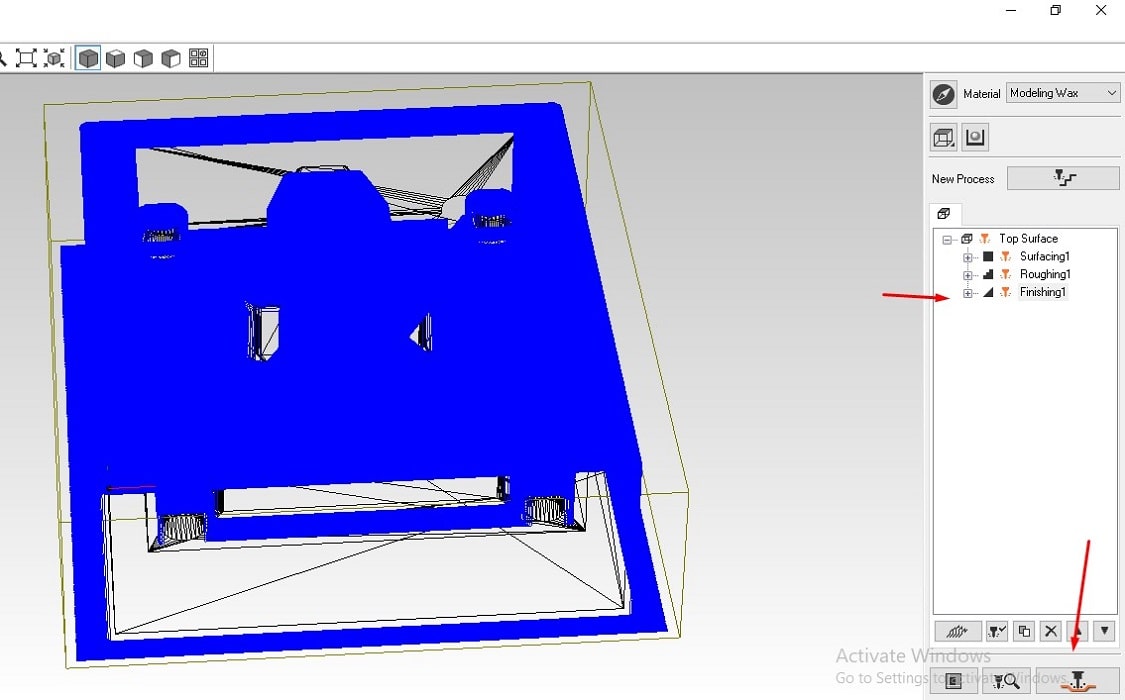
The last image is shows the path for finishing operation
Now starting milling, one by one I am giving the operation as stated above

Around 8 hour I have required for milling and the wax after milling is here
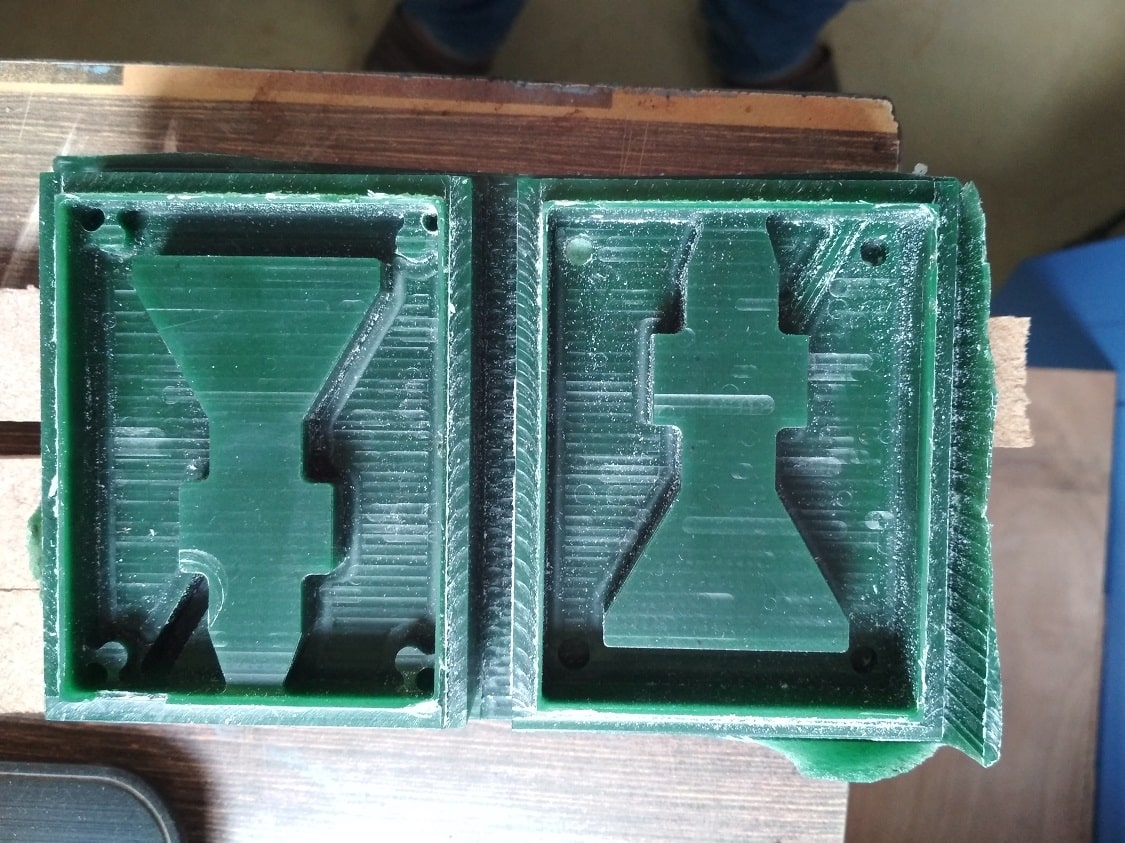
Ohh..but there is two issue in male pattern. one is in air vent, the machine make the slot there and second one is the at the extruded circle, the material will not get properly remove, because the space available for drill bit is less than its diameter so it will not travel at there.
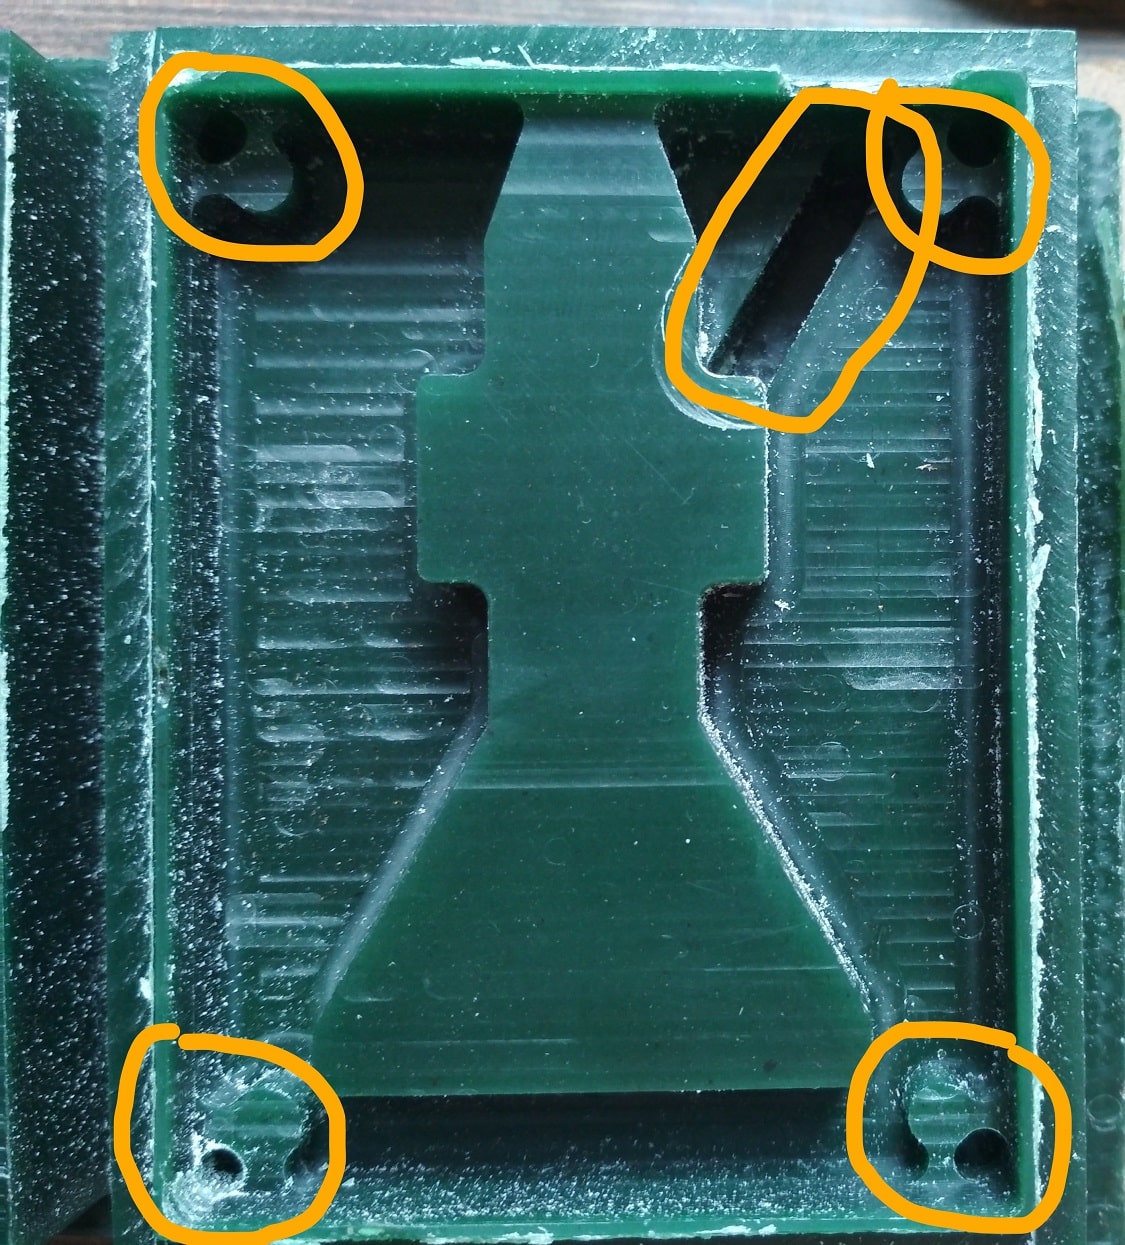
But the time required is too much so I decided to solve this here without new part milling. So I have mold some wax and fill it into the slot at air vent and for second issue I have the hot tool and remove the extra material from there. Now the pattern is ready

Rubber Pattern Making
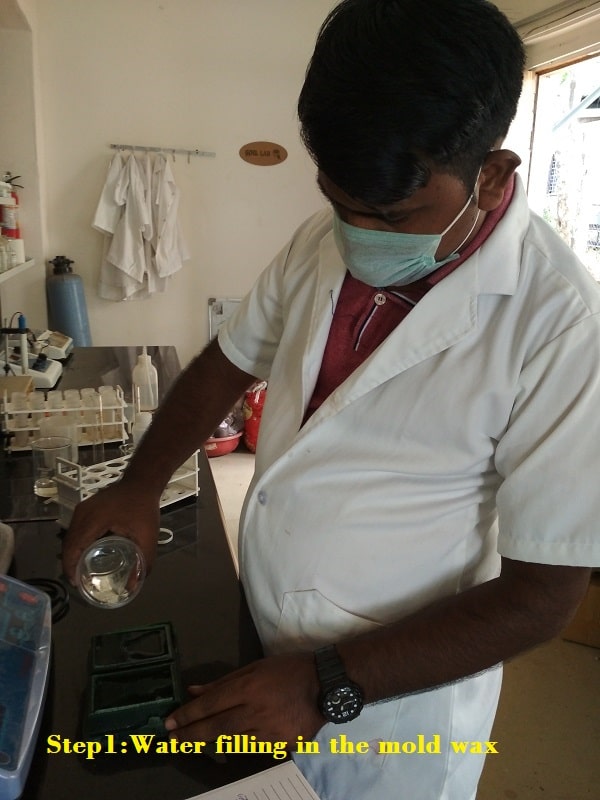
Silicon flexible rubber is used for the pattern making from the wax mold.The liquid material of the rubber is fill in the mold box of the wax, according to the shape of the wax, the pattern of the rubber will get form. so lets discuss step by step procedure:
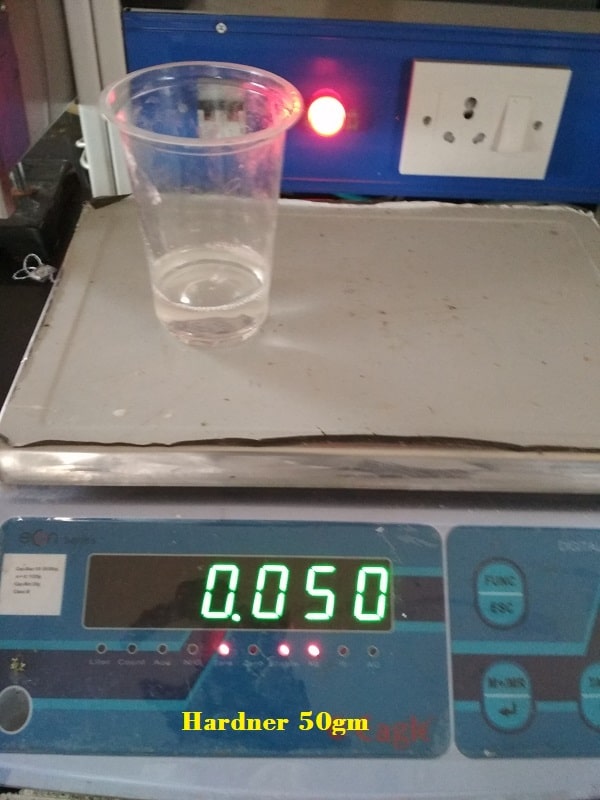
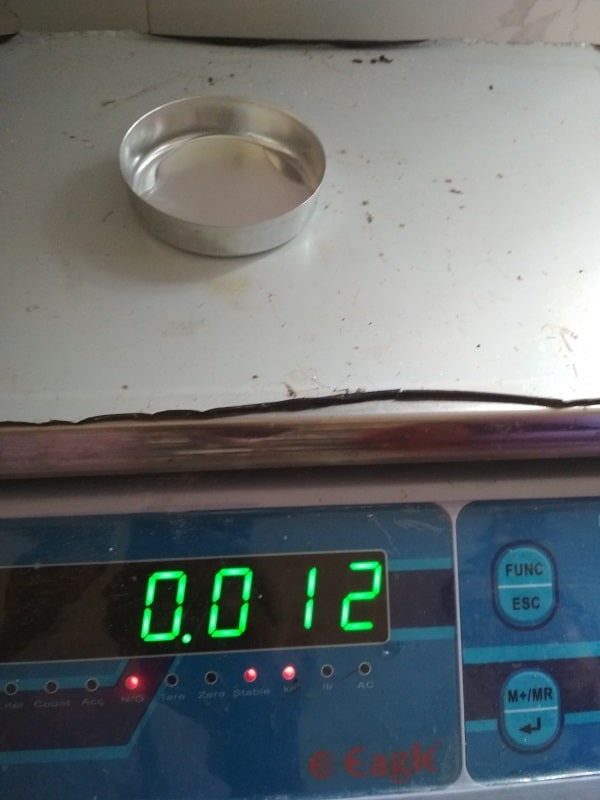
Step 1: Firstly we will measure the amount of liquid is required, with the help of water. Here I am filling the water is mold wax, then i will measure the amount of water is reqired. The water is reuired around 110 gm that means I have 110gm liquied to pour in the wax box.
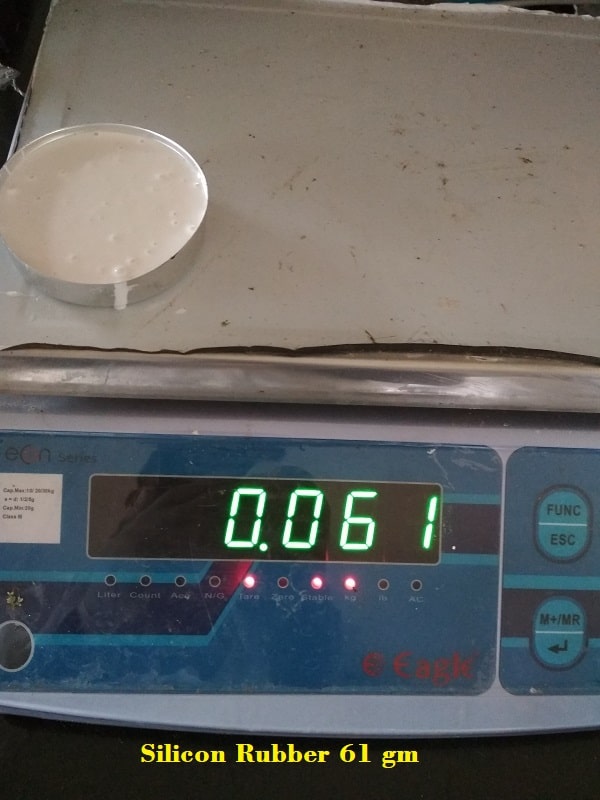
Step 2: Out of this 110 gm total liquid, take 55 % silicon rubber i.e. 60 gm and 45 % hardner i.e. 50 gm.
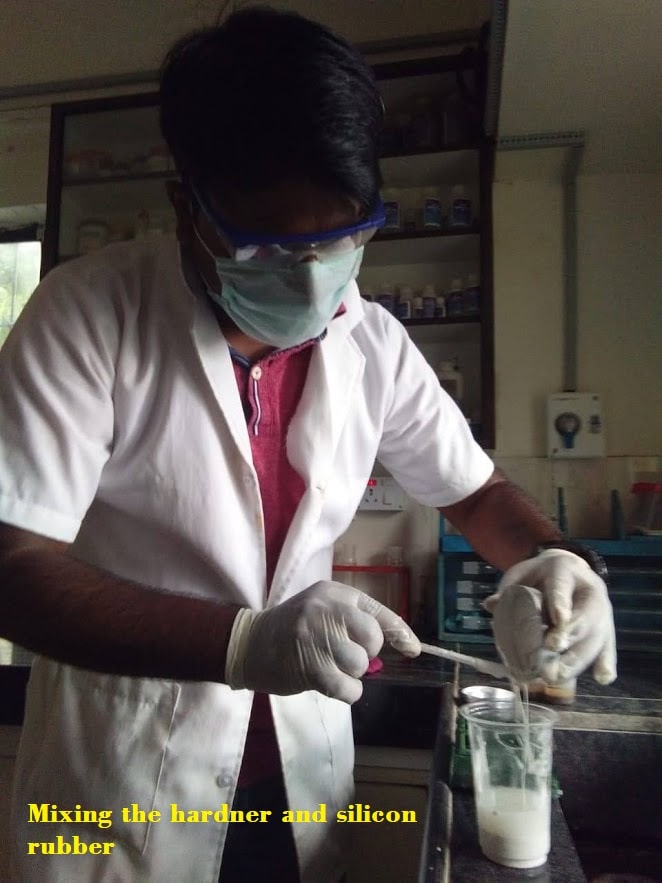
Step 3: Mix this two liquid properly for 5 minutes and pour it in the box wax. Wait for 24 to 48 Hr. to hard the mixture.
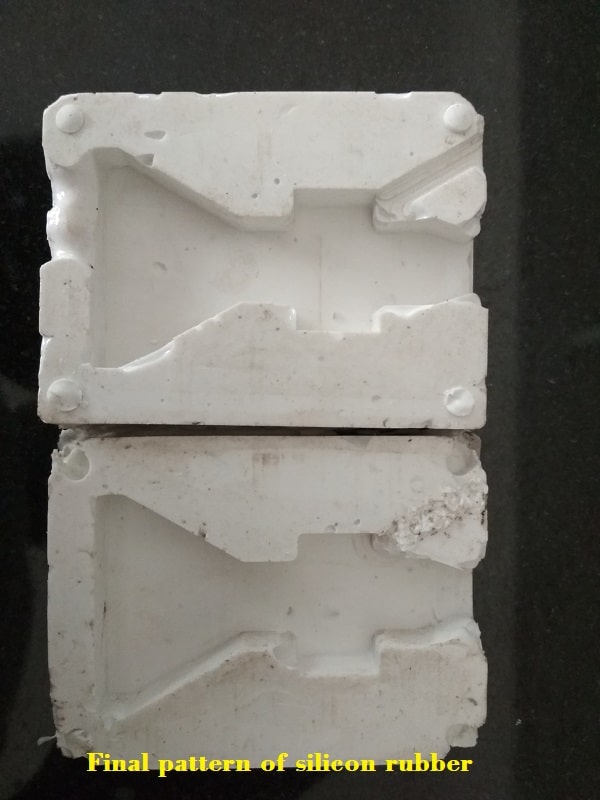
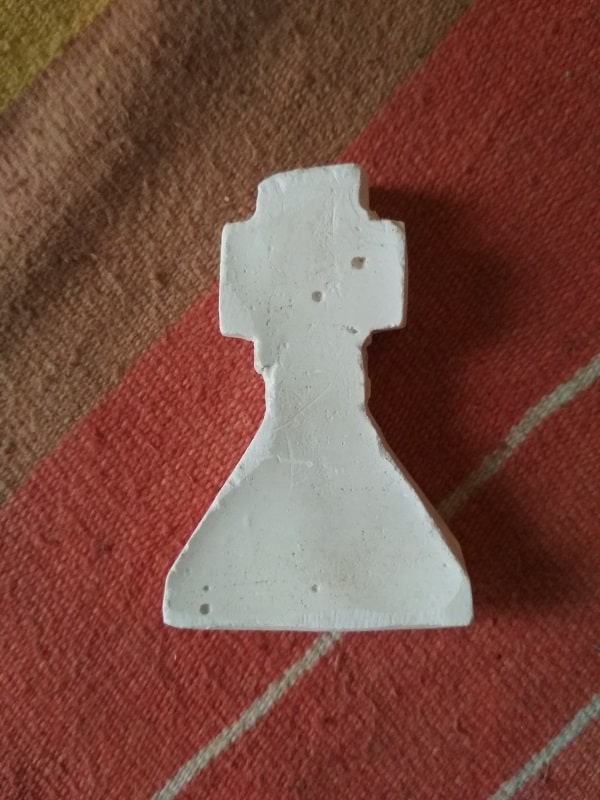
Step 4: After 24 to 48 hr, then check whether the mixture hard or not. If not then wait somewhat more time, because due to atmospheric condition it will take less or more time. If it is hard, then remove it. Here is the created pattern of silicon rubber

Casting using Hydro-Stone material
Now the pattern is ready for casting. We can use different material for casting the pattern will remain same. In my lab two material is available 1. Hydrostone and 2. Epoxy material . Firstly we will try Hydro-Stone. Lets discuss step by step procedure

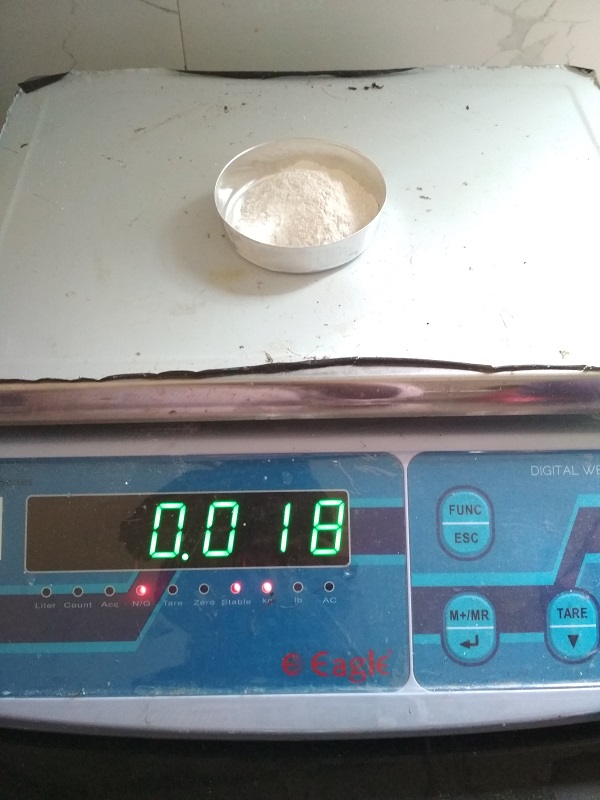
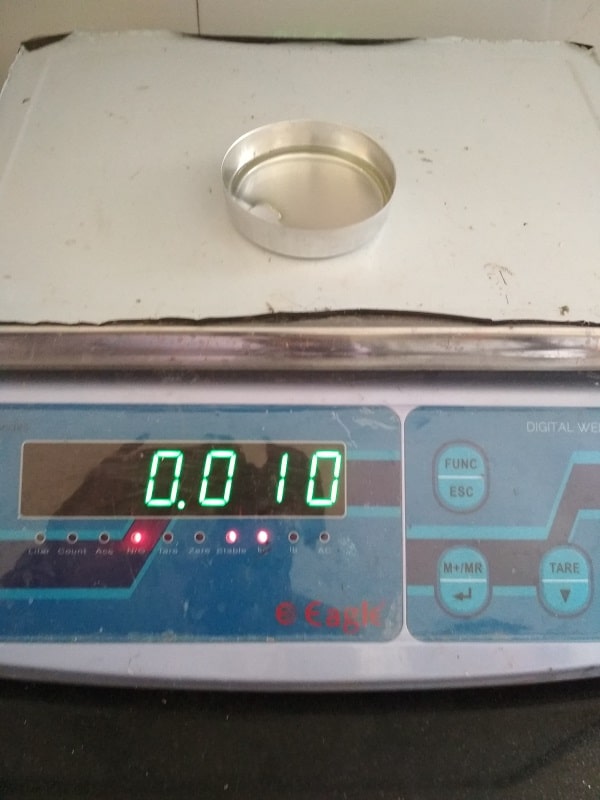
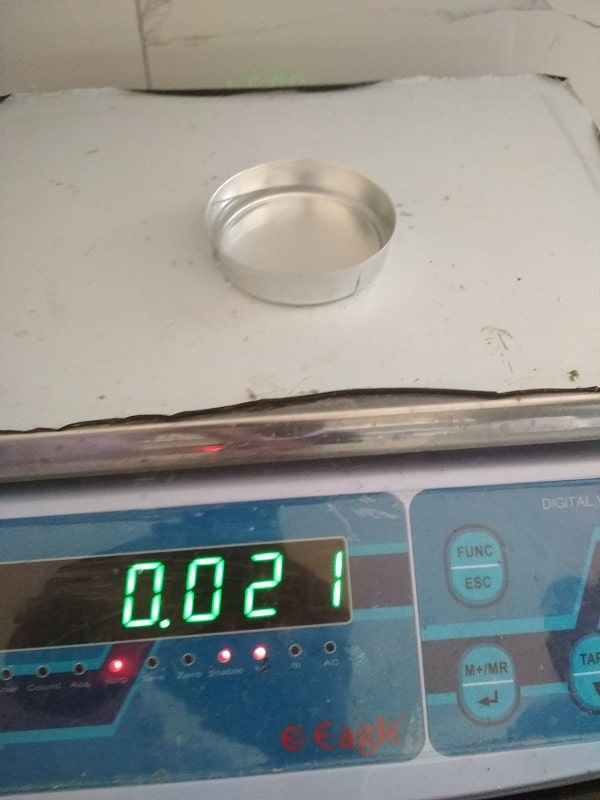
Step 1: The hydrostone is available in powder form. For pouring into the mold, it will need to mix it into the water. For 100gm of powder, take 65gm of water. Read all the given instruction on the box. With the given ratio, I have required
30gm total mixture, so I have taken 18 gm powder and 12 gm water.
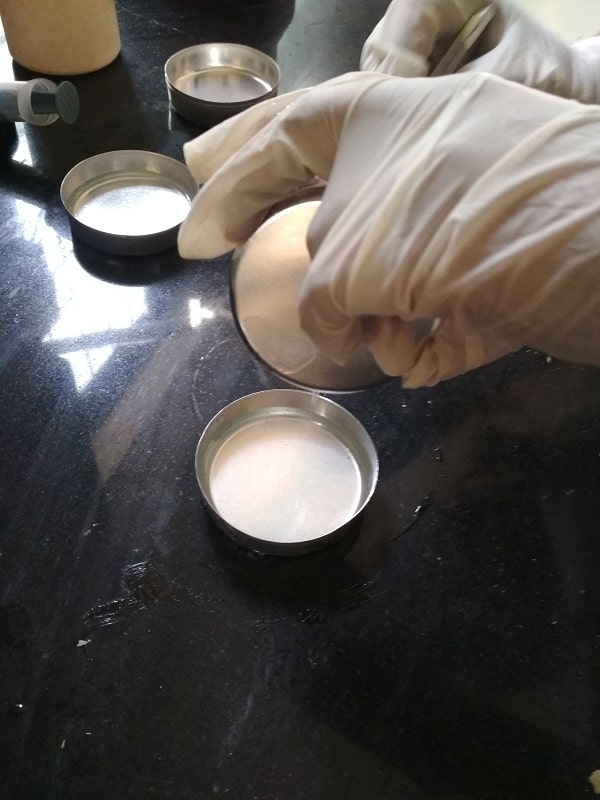
Step 2: Then add the powder into the water. Do not reverse it. Mix it properly
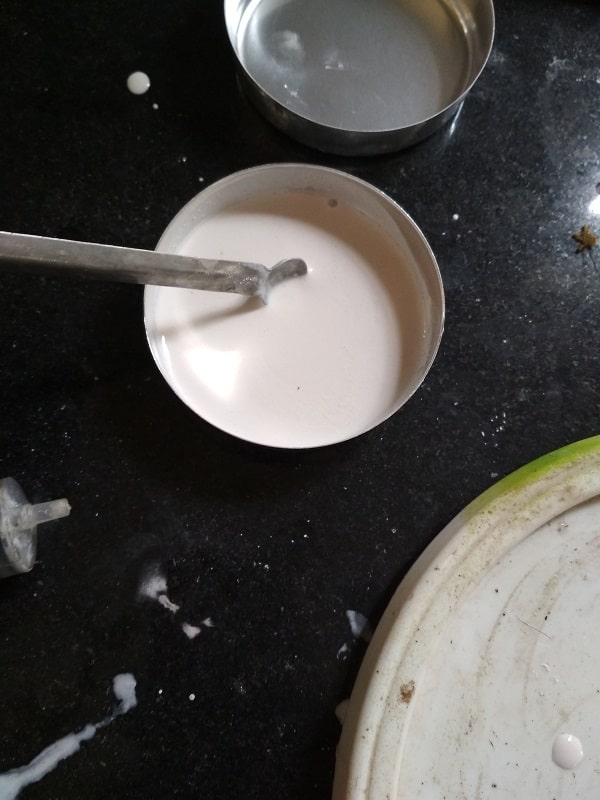
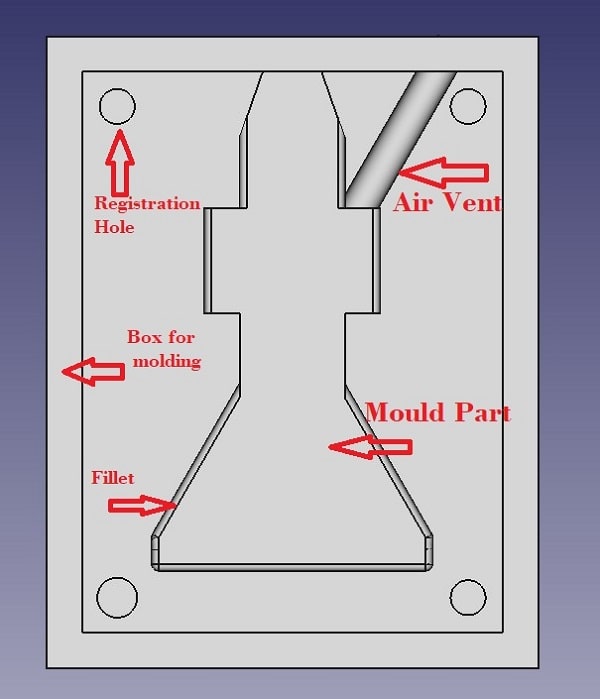
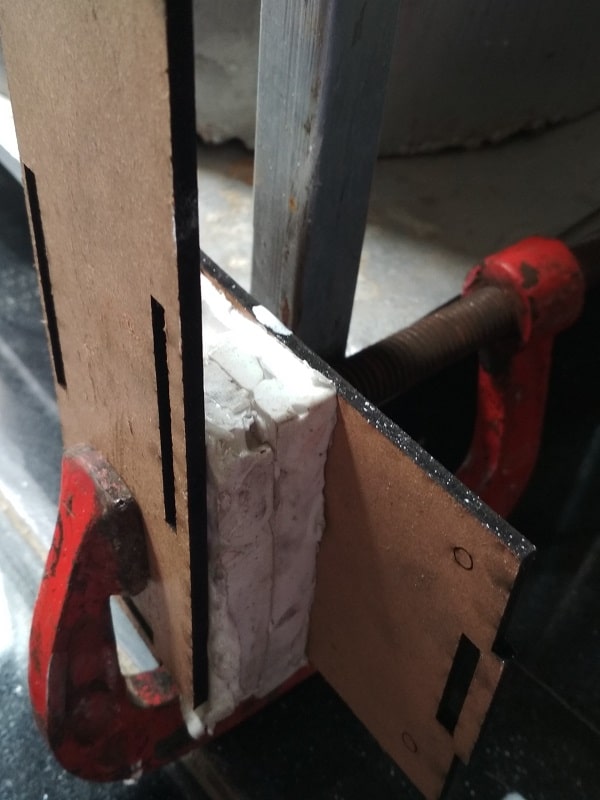
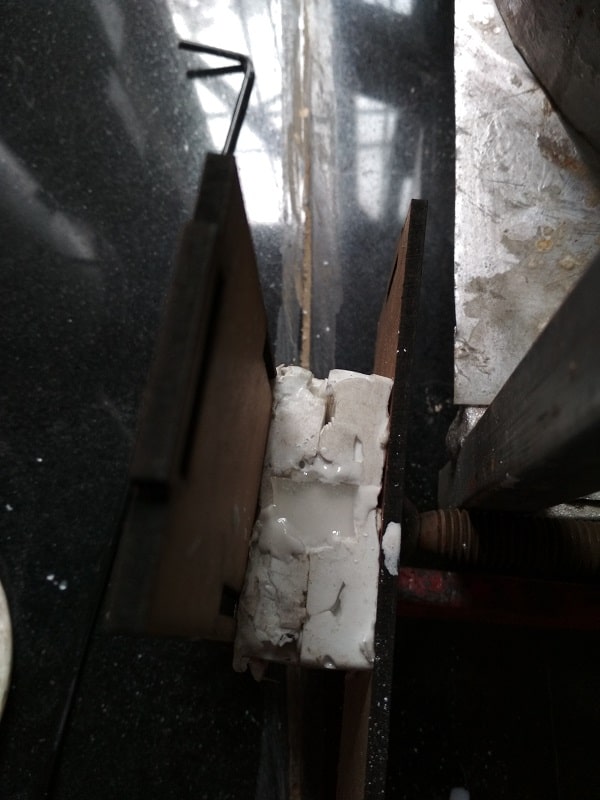
Step 3:The split pattern is fix into each other, they will be hold with the help of vice. Now the mixture of the hydro-stone is poured into it.Air vent is provided to the pattern to remove the air from the pattern during pouring.
Step 4: Wait for 3 to 4 hour to hard it, then remove the pattern the casting is ready. If there is some extra material on the side of casting, with the help of sand paper remove it.
Casting using Epoxy Resin material
Casting resin is a low-viscosity epoxy resin, which consists of two components: the actual resin and the matching hardener. When these two components are mixed, a chemical reaction occurs, which causes the mass to harden for some time.
The epoxy resin will take 2 to 3 hr for curing and around 24 hour for complete hard. The epoxy resin and hardner is taken with the praportion of 2:1 resp. So lets discuss the procedure of casting
Step 1: Total mixture required is 30 gm so I have taken 20 gm epoxy and 10 gm hardner.The epoxy resin is a transparent material.Then mix the material properly
Step 2: Now with the help of injection we pour it into the mould which is hold again in the C-vice.
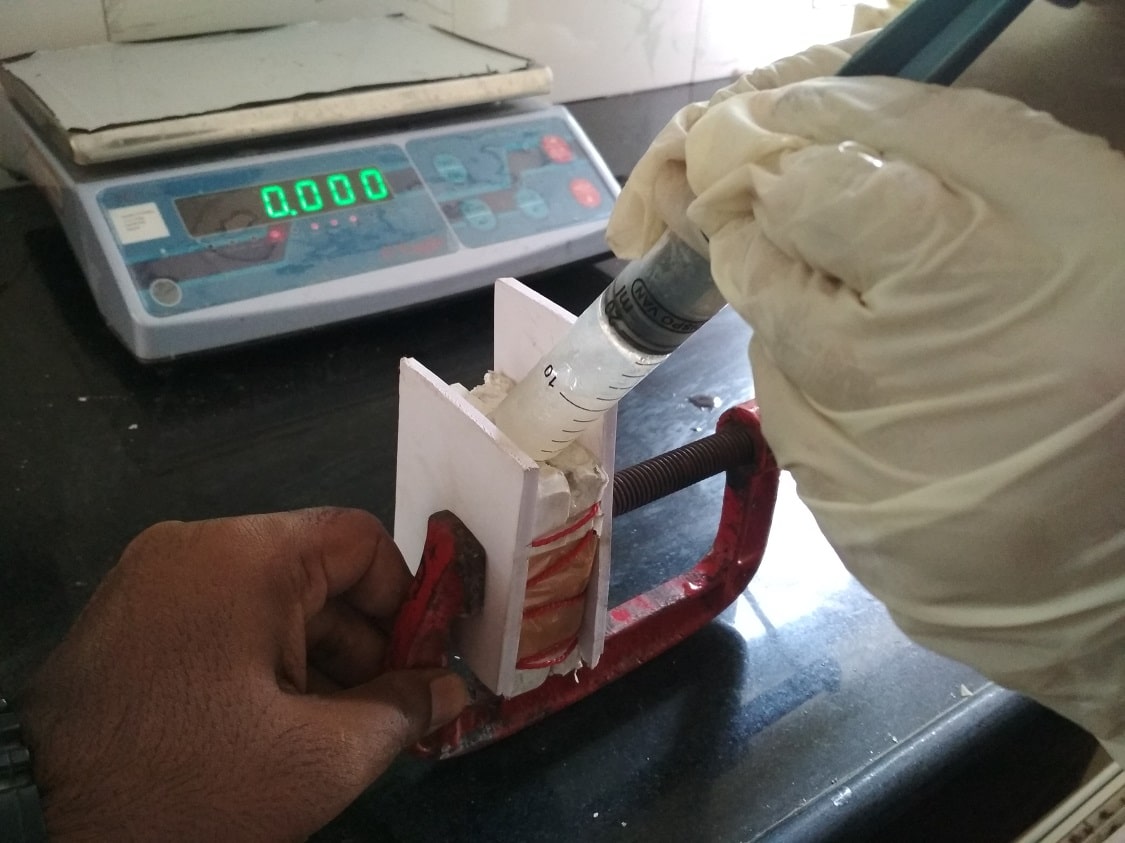
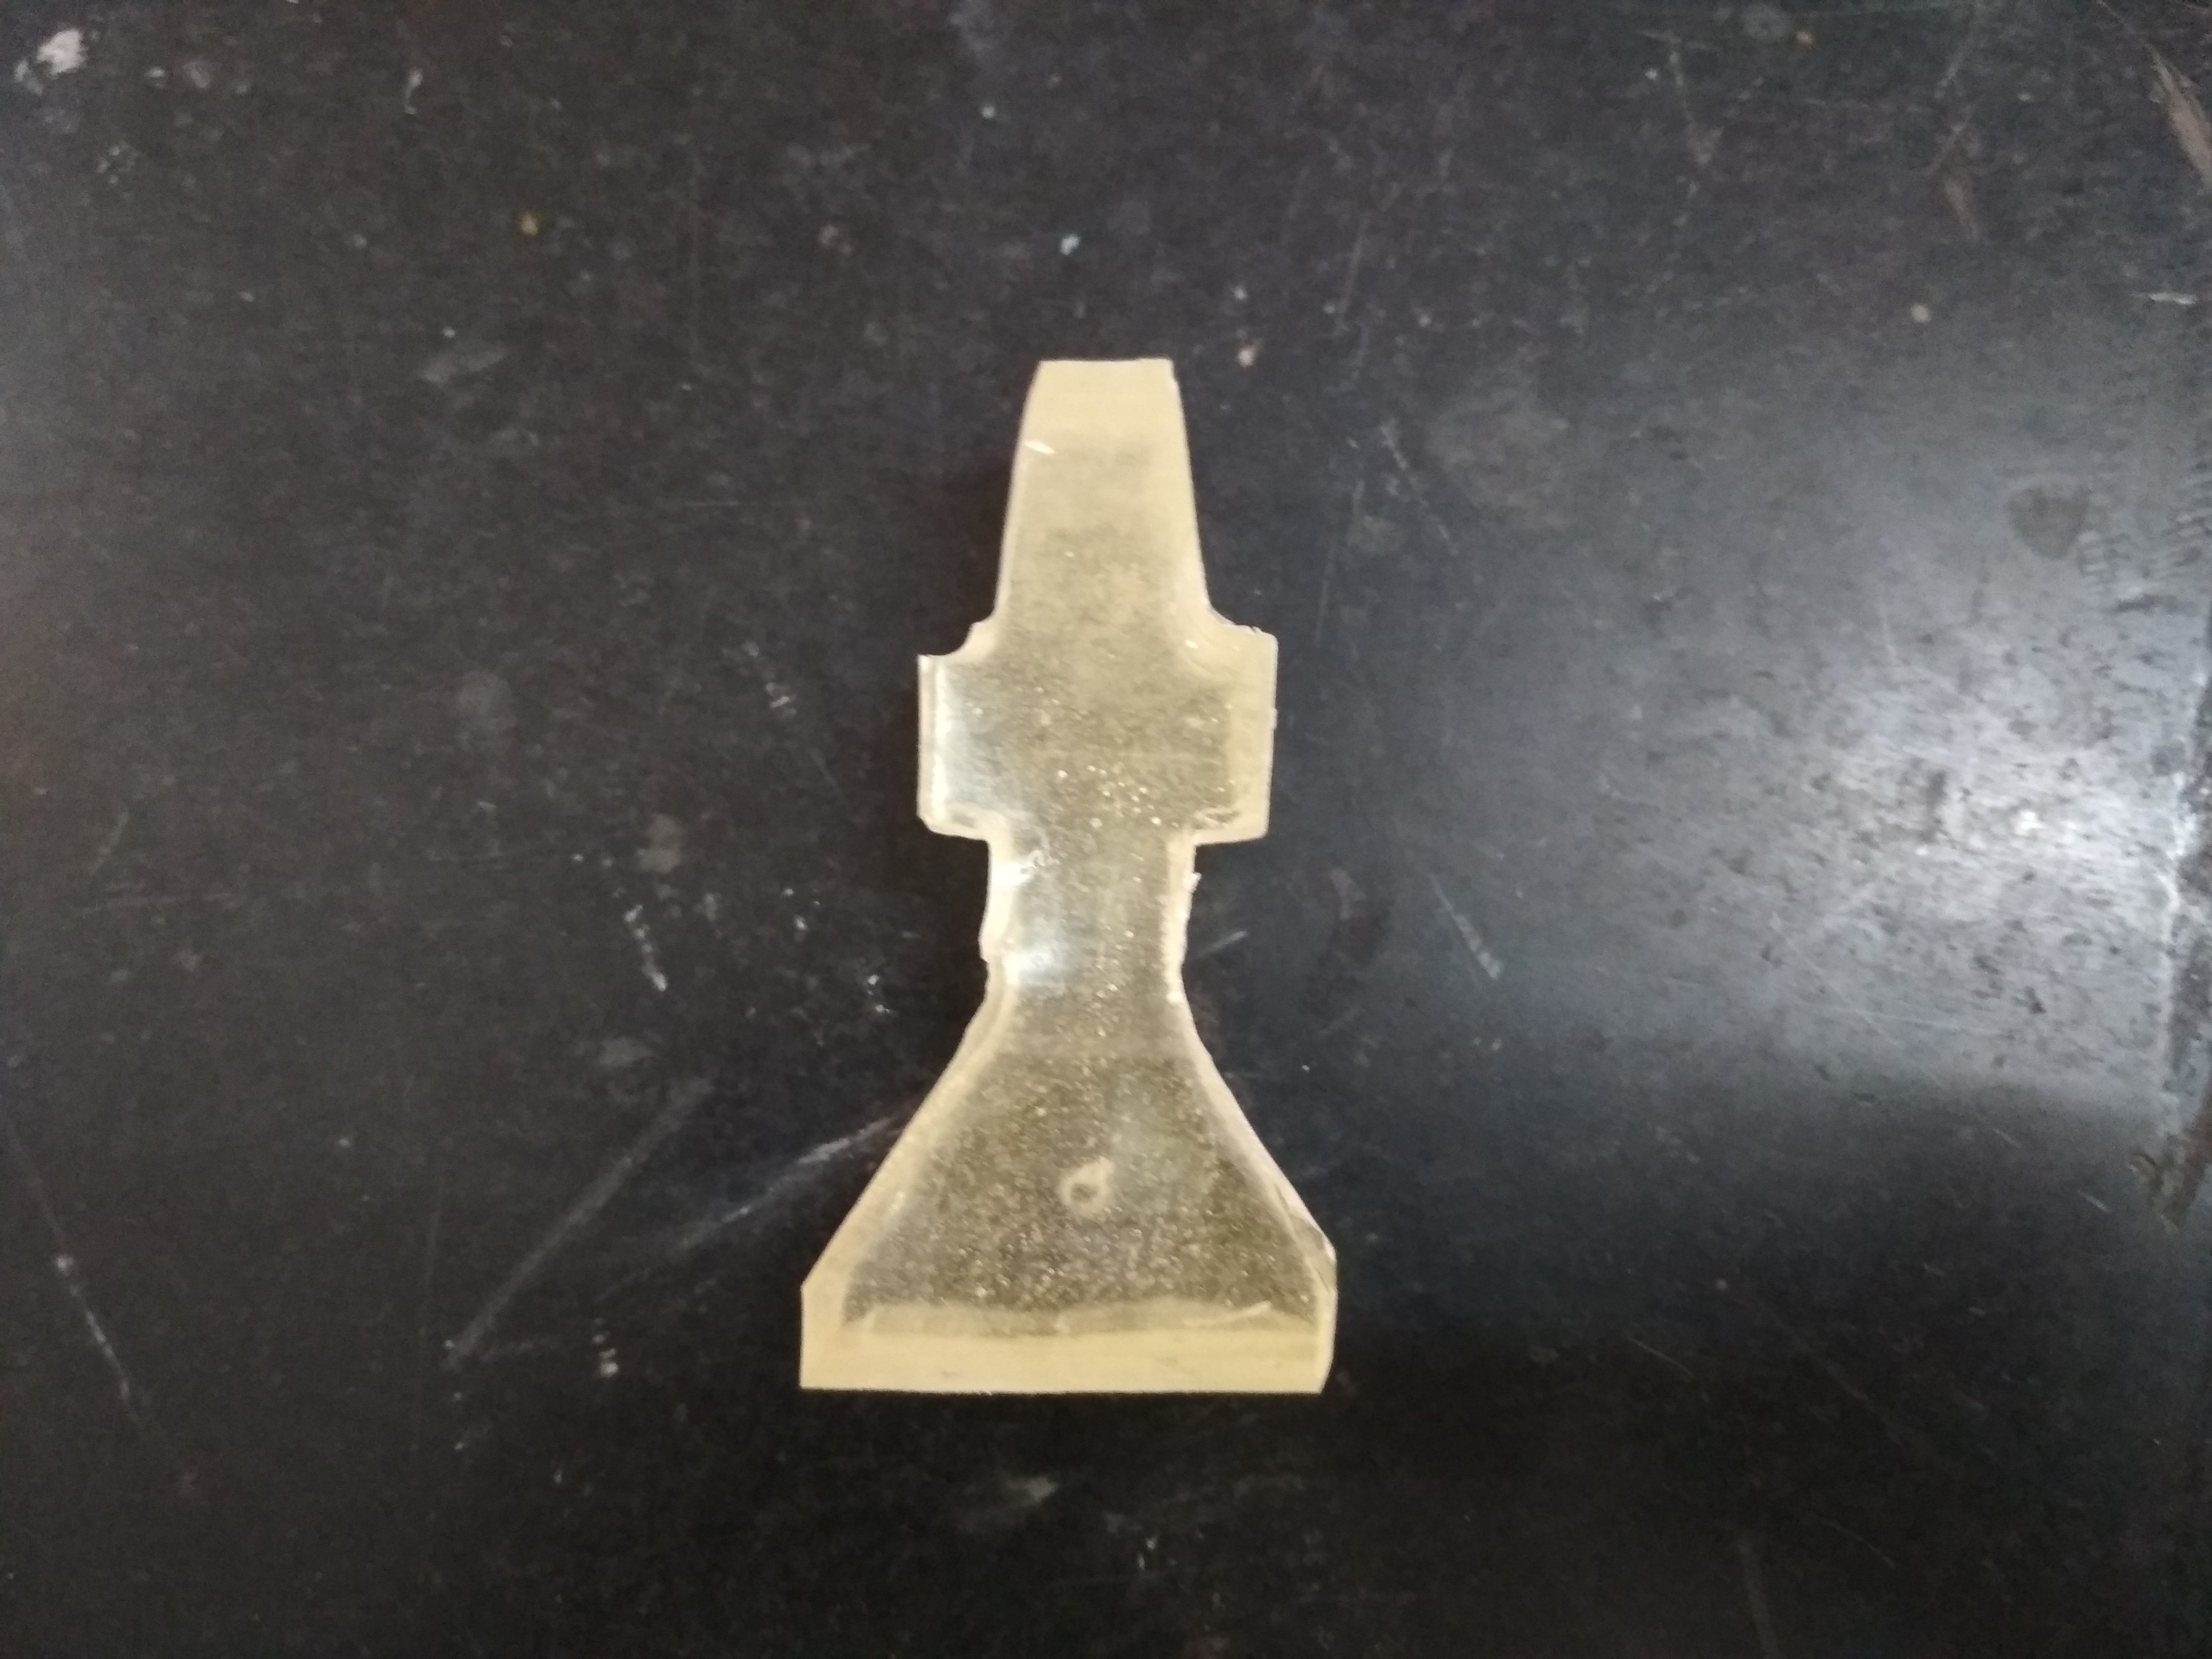
Step 3: Now wait for 24 hr to hard the mixture and then remove the cast. The cast is ready now.
What i learn?
I am learn about
1) Pattern, its material, type and allowances.
2) Mold design and creation using Machinable Wax
3) Pattern Making using Rubber
4) Casting using hydrostone and epoxy resin
Go to the top
Download original file hereBack
Assignment 17: Wildcard Week
The task for the week is to design and produce something with a digital fabrication process

Fab Academy Course on Digital Fabrication by Nikhilkumar More is licensed under a Creative Commons Attribution-NonCommercial 4.0 International License.
Based on a work at http://fabacademy.org/2020/labs/vigyanashram/students/nikhilkumar-more/.
Permissions beyond the scope of this license may be available at http://fabacademy.org/2020/labs/vigyanashram/students/nikhilkumar-more//contact.html