Interface and Application Programming
Week Task
Individual assignment:write an application that interfaces a user with an input &/or output device that you made
Group assignment:compare as many tool options as possible
Introduction
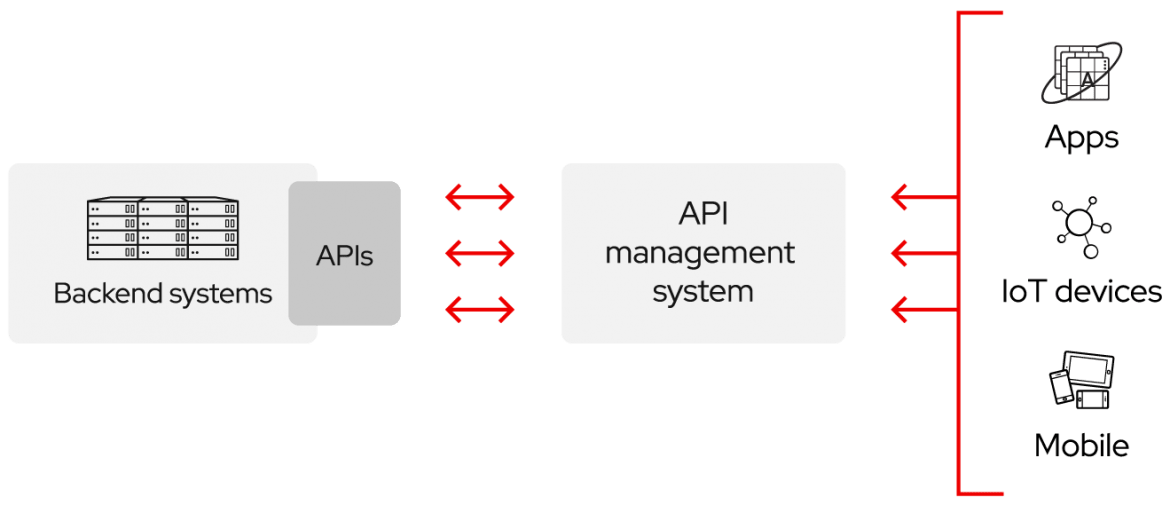
It is a software intermediary that allows two applications to talk to each other. An application program interface (API) is a set of routines, protocols, and tools for building software applications. Basically, an API specifies how software components should interact. Additionally, APIs are used when programming graphical user interface (GUI) components. A good API makes it easier to develop a program by providing all the building blocks. A programmer then puts the blocks together
Group Assignment
The task for the week is to compare as many tool options as possible. Here we tried MIT App Inventor, Processing and Scratch. For more details please click here.
Individual Assignment
The task for the week is to write an application that interfaces a user with an input &/or output device that we made. For this week I have tried to develop the app for ON and OFF the Inner and Outer Fan use in my final project. The app is developed usign MIT App Inventor. So lets discuss how the app developed.
App Development
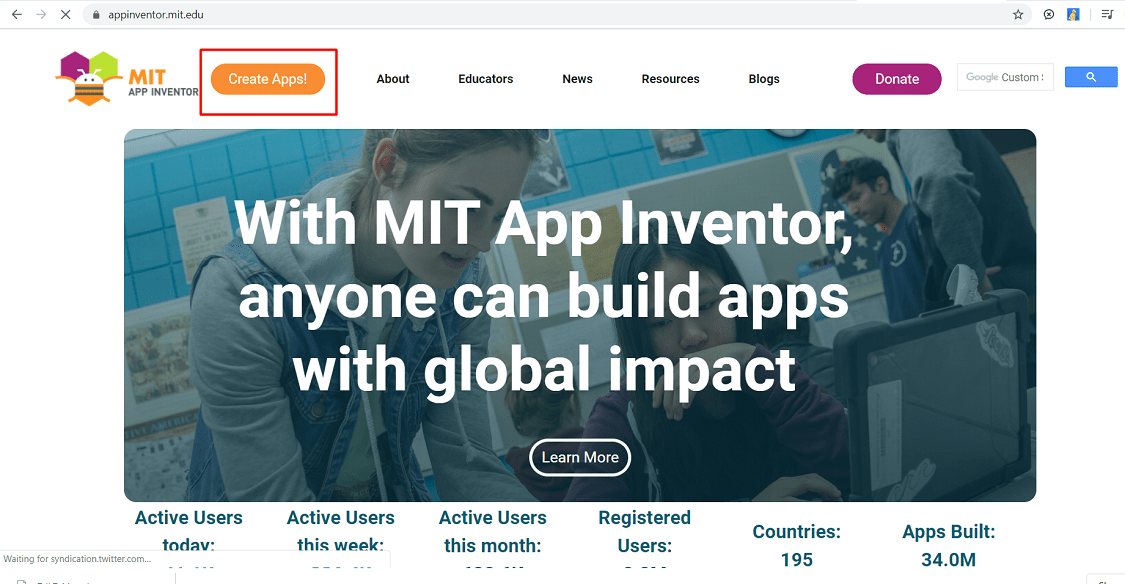
The app is developed using MIT App Inventor. MIT App Inventor is an intuitive, visual programming environment that allows everyone to build fully functional apps for smartphones and tablets.
Those new to MIT App Inventor can have a simple first app up and running in less than 30 minutes. And what's more, there is a blocks-based tool facilitates the creation of complex, high-impact apps in significantly less time than traditional
programming environments. The MIT App Inventor project seeks to democratize software development by empowering all people, especially young people, to move from technology consumption to technology creation.
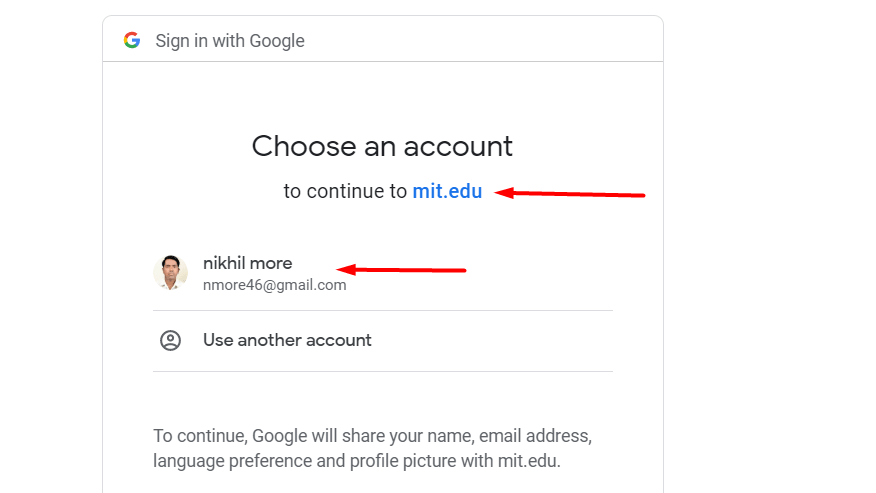
Let's browse the MIT app inventor on google and open it website. For App creation its need to sign in using Google Account.
For App creation its need to sign in using Google Account.So here I am using my google account to sign in.
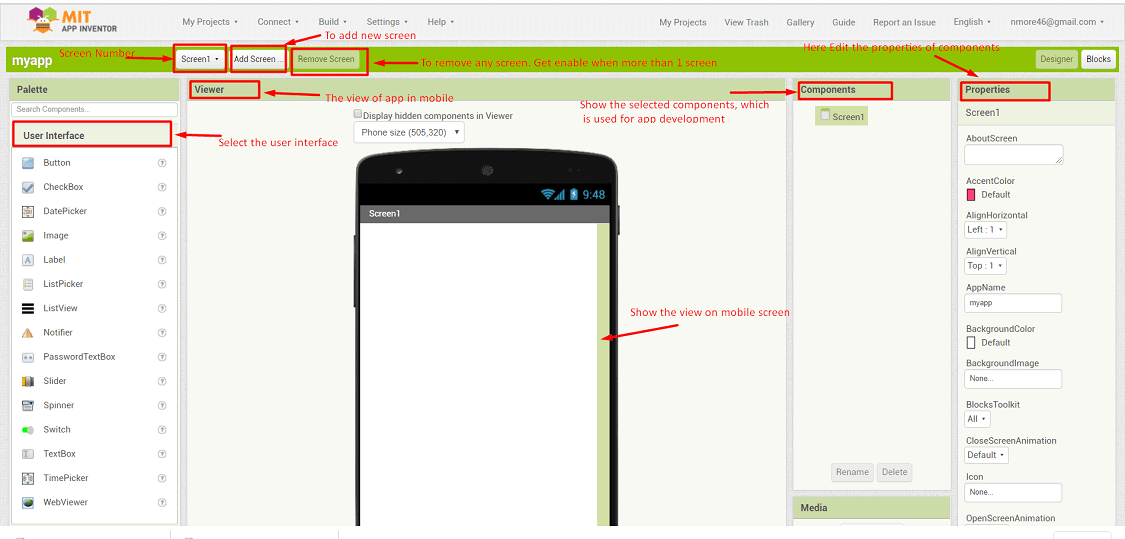
After login, the following windows will get open. The section available in the windows are as follows:
1. Palette(At left side): This can provides the different range of shapes, user interface, layput, media, drawing and animation, maps, sensor, social etc.
which can work as css like in website development.
2. Viewer (At center): Will show the screen mobile, which can show the view of app on mobile screen.
3. Component (At right side):It can shows the palette used for apps means whatever lables buttons and component we are picked for building the app.
4. Properties (At right side): Here we can specify the properties of the components such as the font, height and width, background colour or image etc.
5. Screen (At top): There is a button for to show the screen number, to add new screen or to remove any screen.
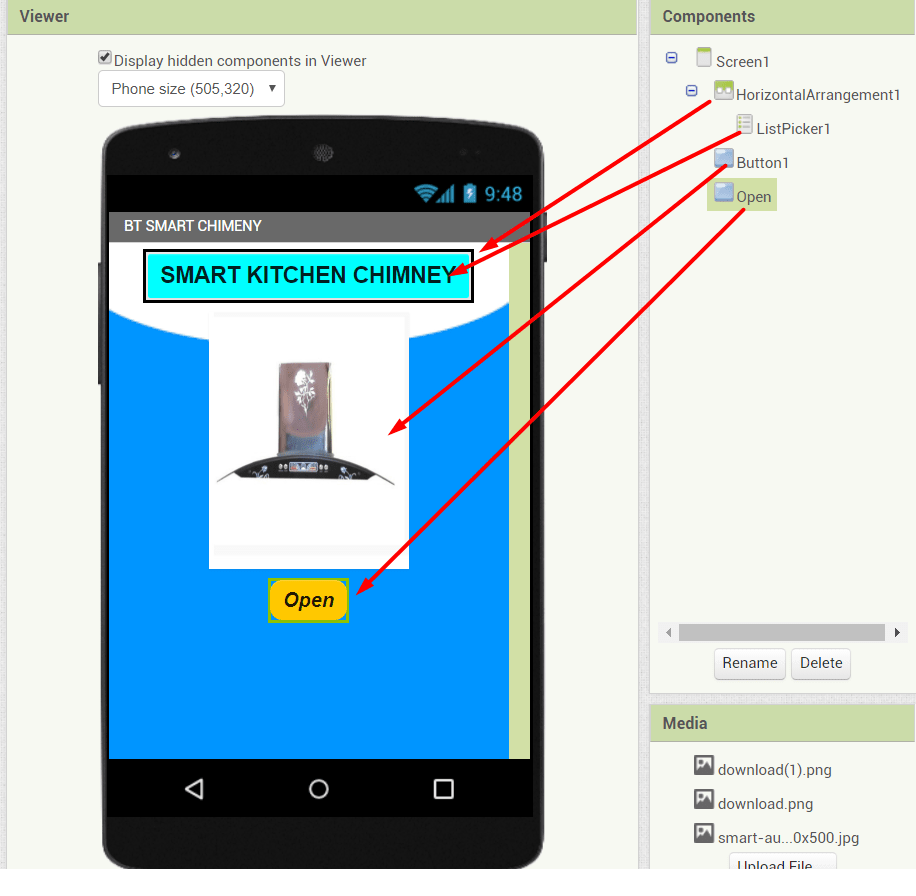
Here I am selecting following components for the screen one. This is the first screen, so here i will only the name of the project, one image is added to the background, second is added in button i.e. of chimney, open button is added to open the next screen. So here only open button is active, when we click it, next screen i.e. screen 2 will get open. So during coding we have to code it as like this.
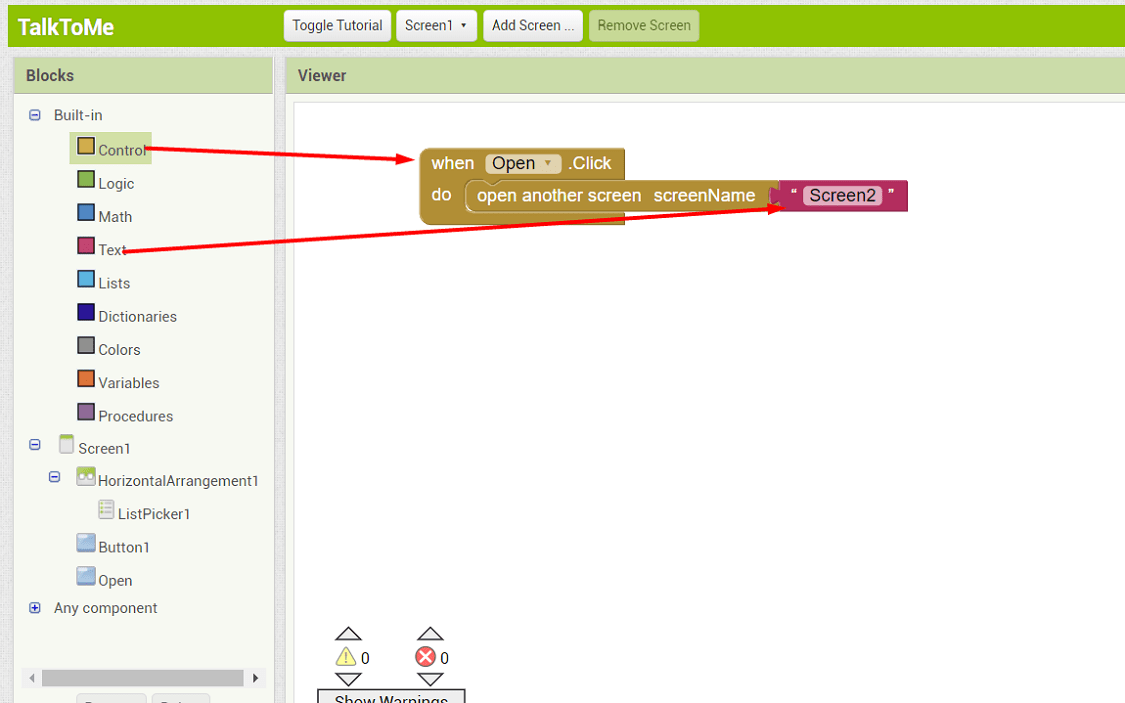
Now, we have to put a code for this screen, i.e. when we click open button, screen 2 will get open. So click on the "Block" button, which is at the right top, programm screen will get open, here we have to write the code,using this different block. Here i have selected the two command of "when and do" and "open another screen screeName" from control block. and selected also one next command from Text block. In this block i have write name "Screen 2" to open this screen.
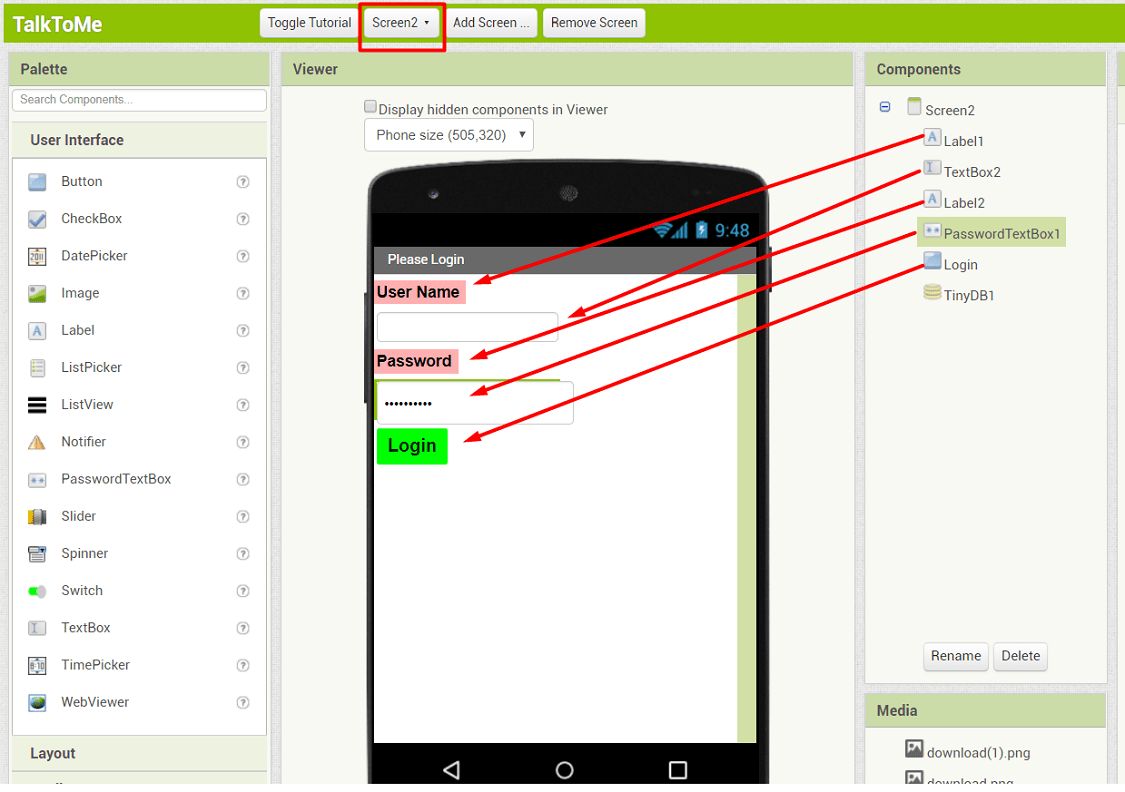
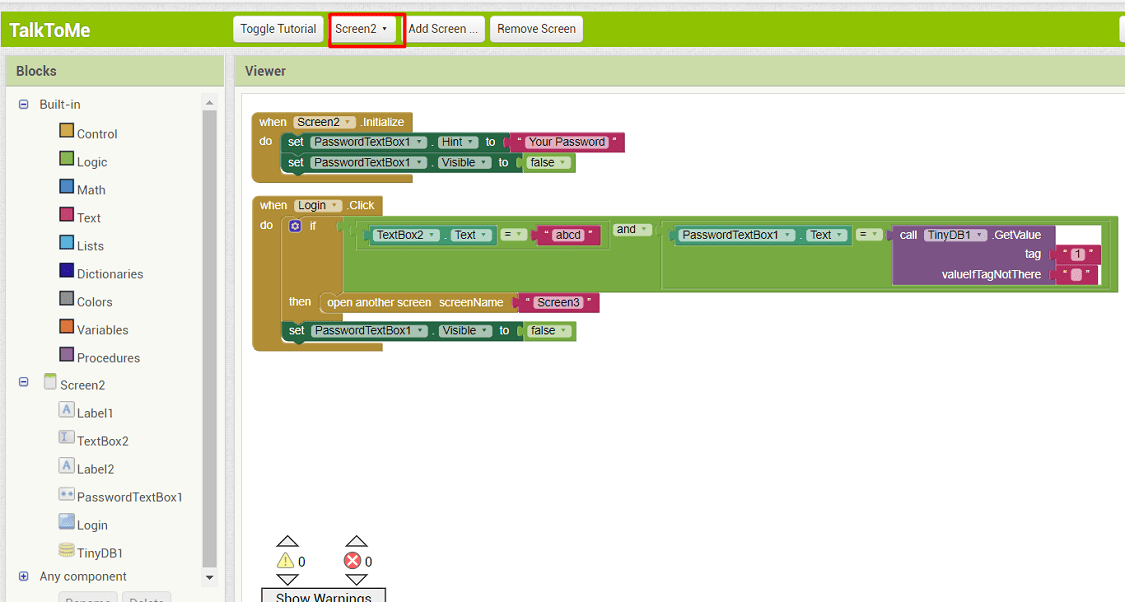
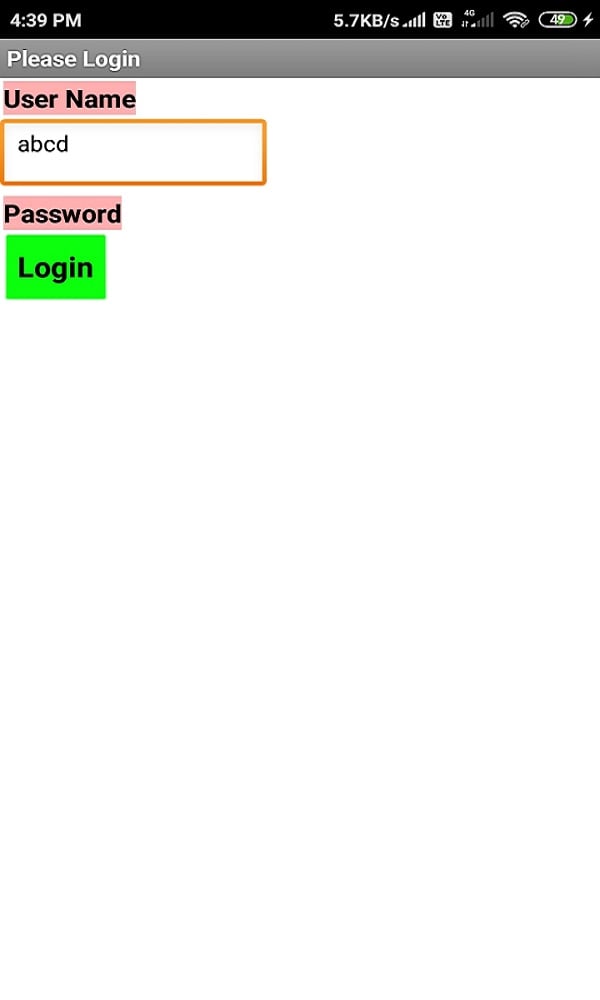
The Screen 2, is for Login in the app. so here I have use the block for UserName and Password. The following block used for this screen and put the title of the screen is "Please Login" which is at the top.
After putting the userName and Password,then click the login Button.
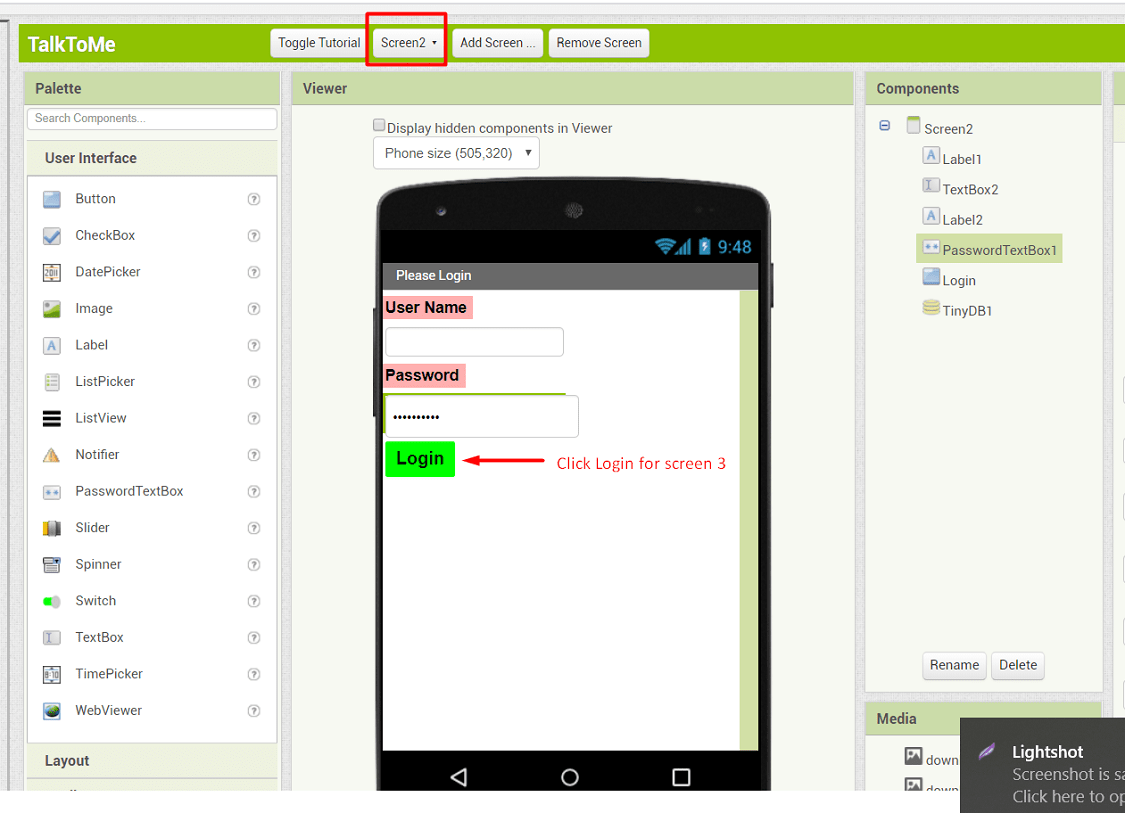
Now click on the Block to write the code for this screen.When screen 2 will get open, textbox will provided to write userName, the userName is "abcd" and password box is give to write password. Then click on Login, to open the next screen, i.e. Screen 3. For this function written as belows
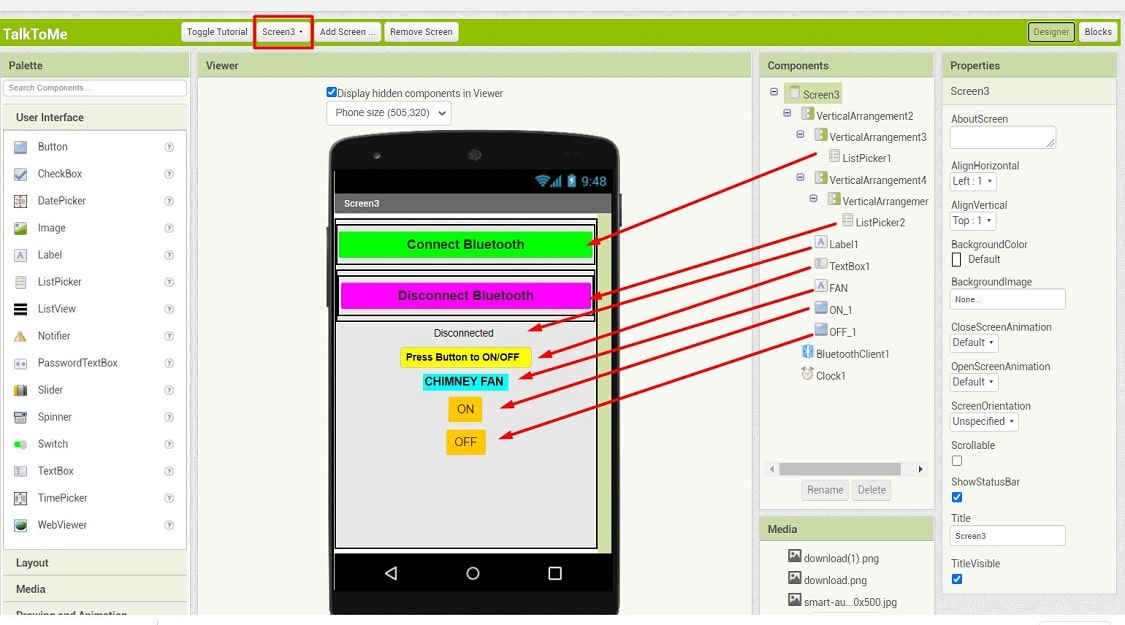
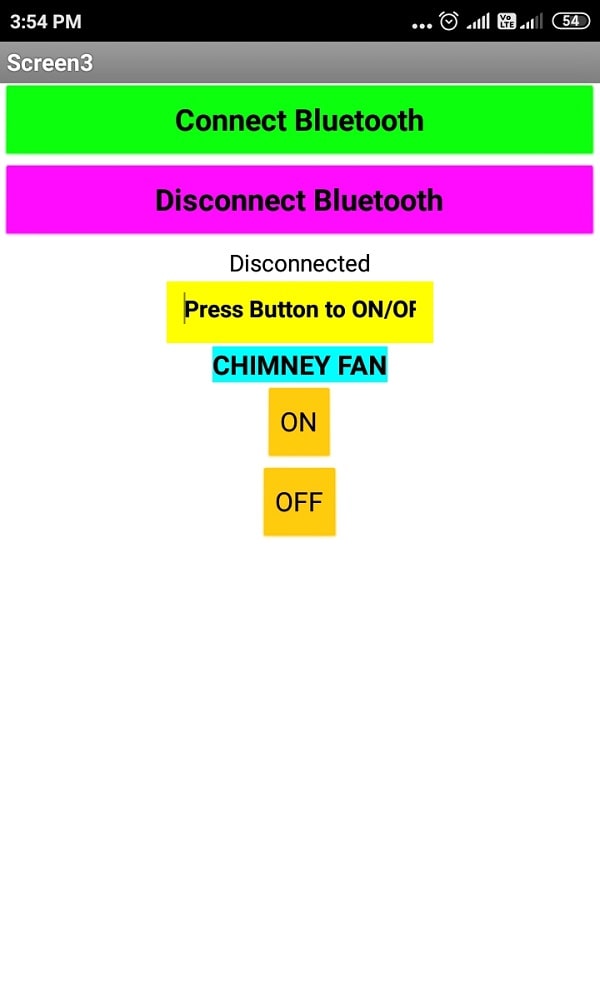
After Login,Screen 3 will get open, here firstly we have to connect with hardware through Bluetooth.
In case of my project I have to ON and OFF the fan of smart kitchen chimeny through the app. So here I have provide the button to ON/OFF the Inner and Outer Fan.
So firstly click on the bluetooth, it will get connect to the Bluetooth model of hardware. Will get the alert at the top whether connected or disconnected.
Then click the button to ON and OFF the Inner and Outer fan.
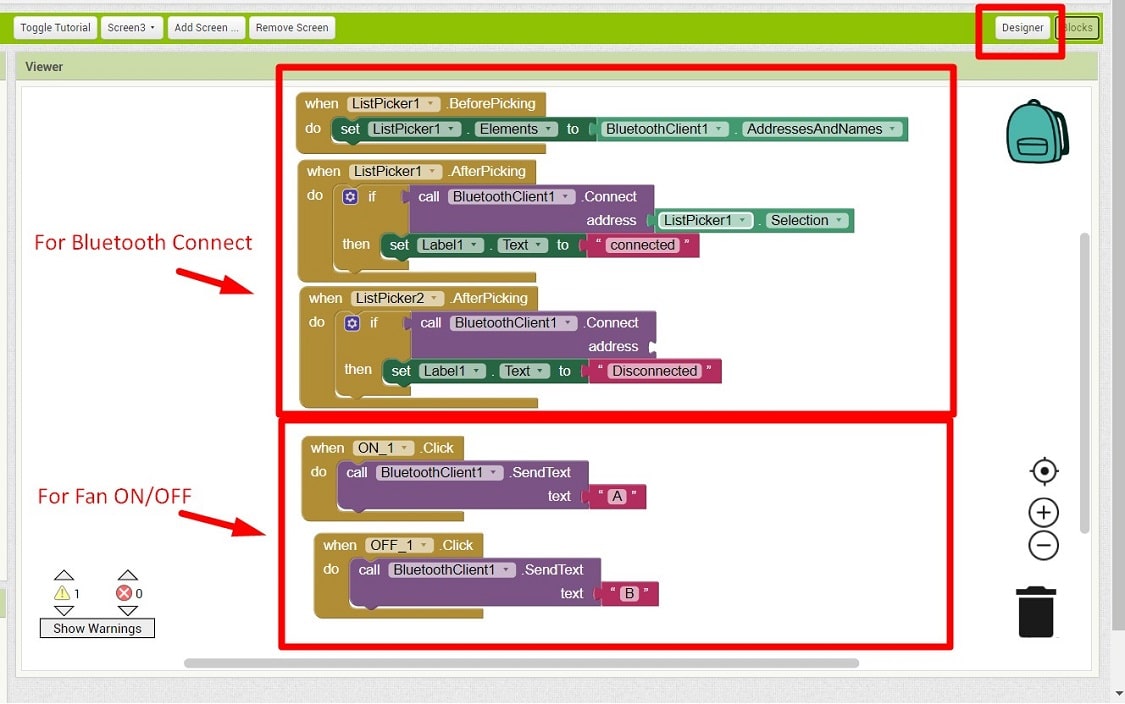
Then click on Block to write the code for this function.
There is a three in this code, first one to connect with bluetooth, then ON/OFF Inner Fan and ON/OFF Outer Fan.
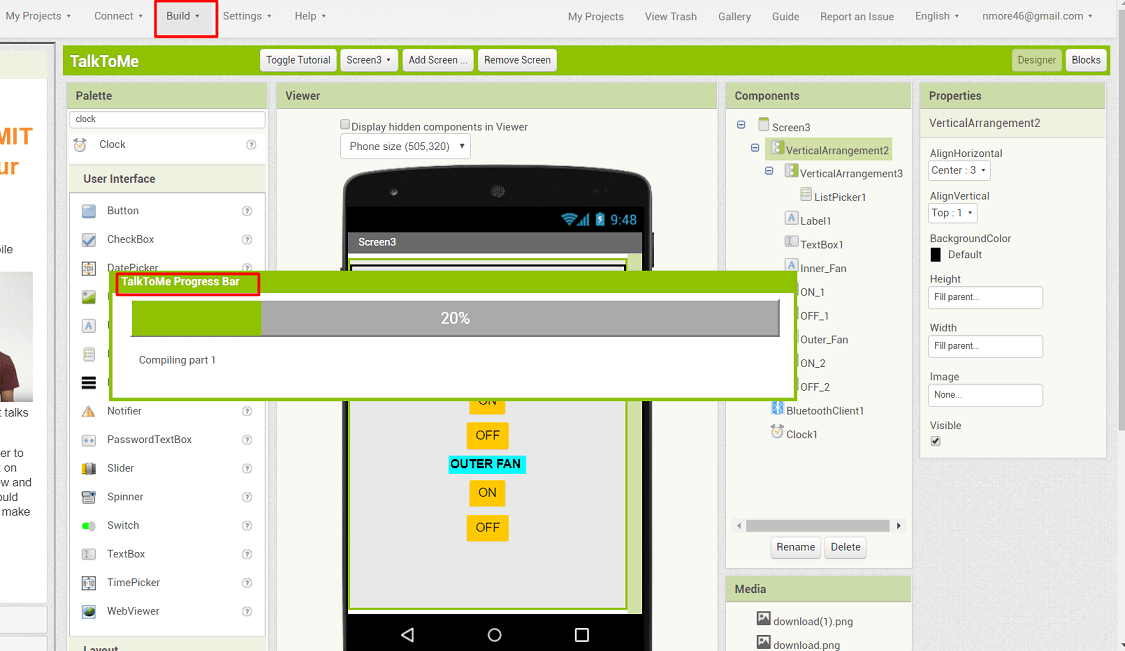
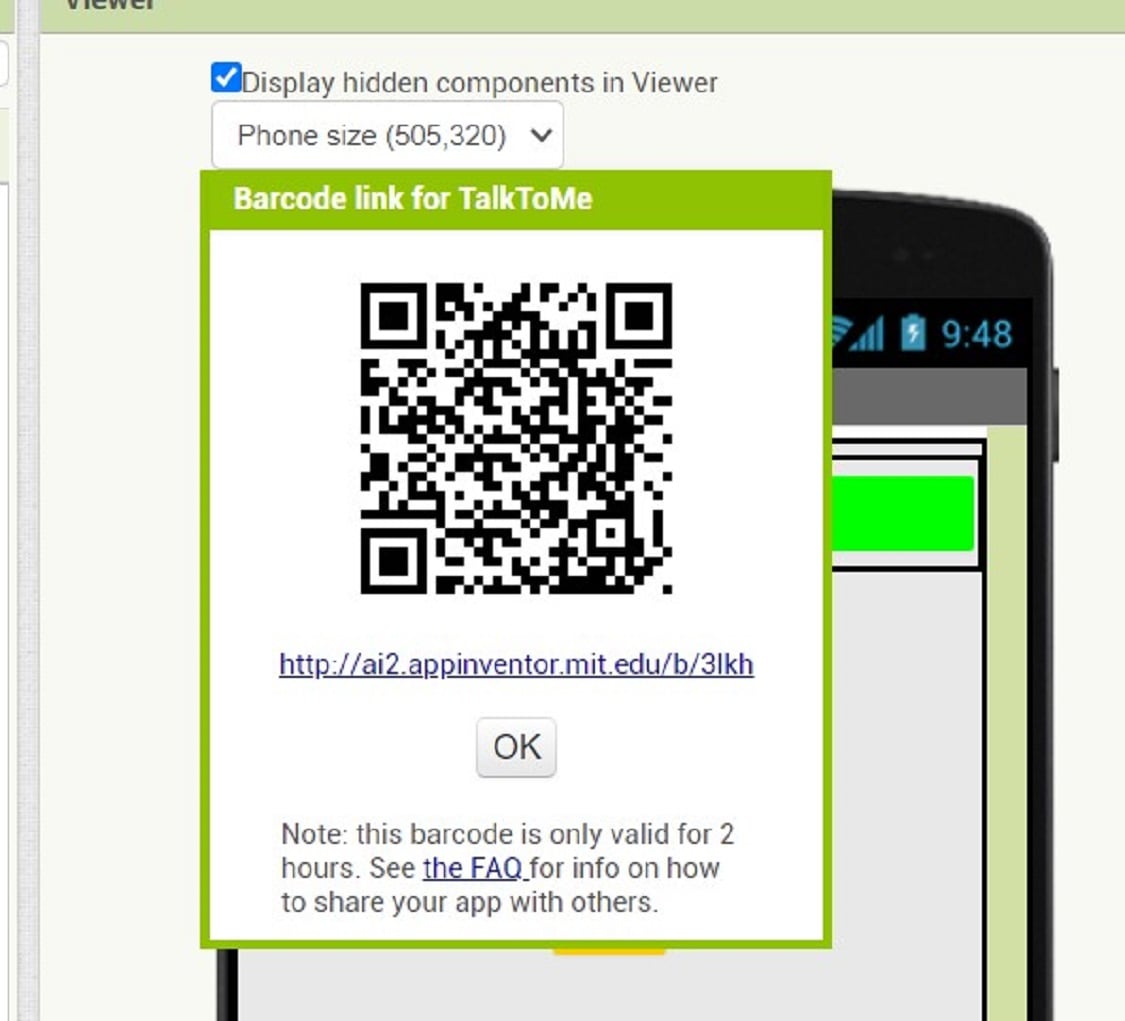
Now the apps is ready to use. So click on "Build">create the QR code and save the .apk file in computer.
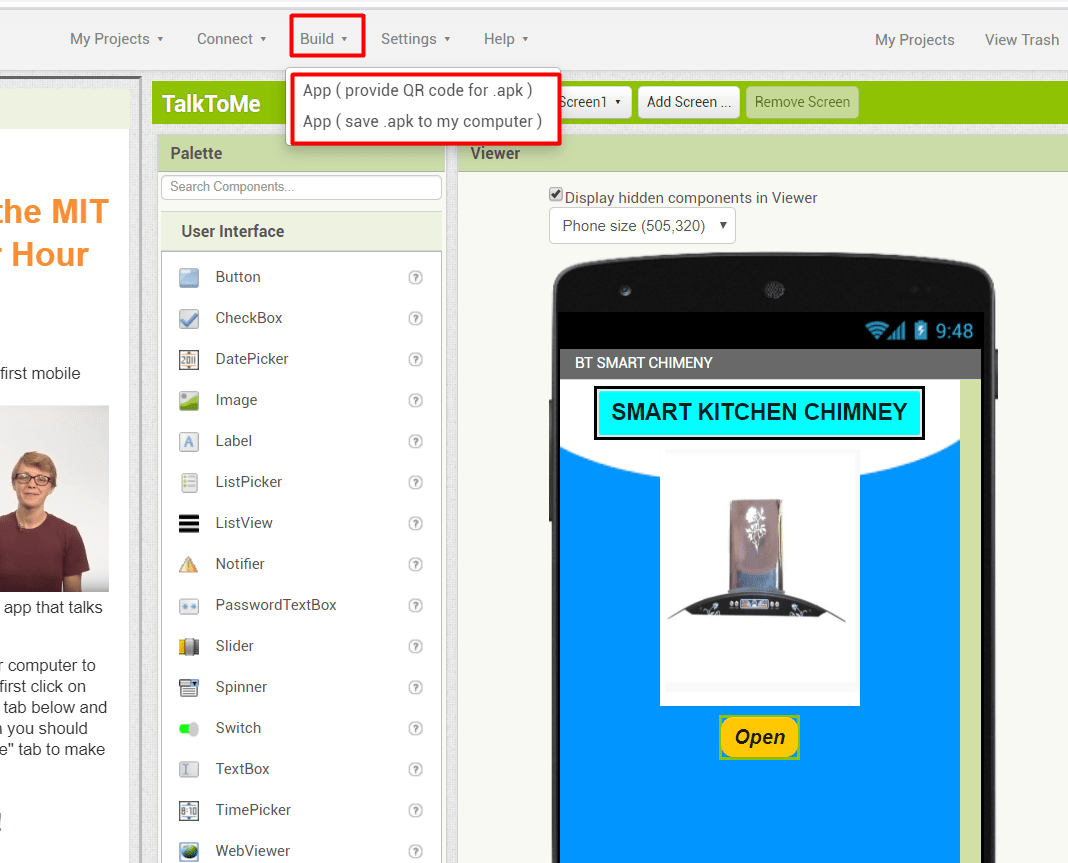
The QR code is generation for the app.
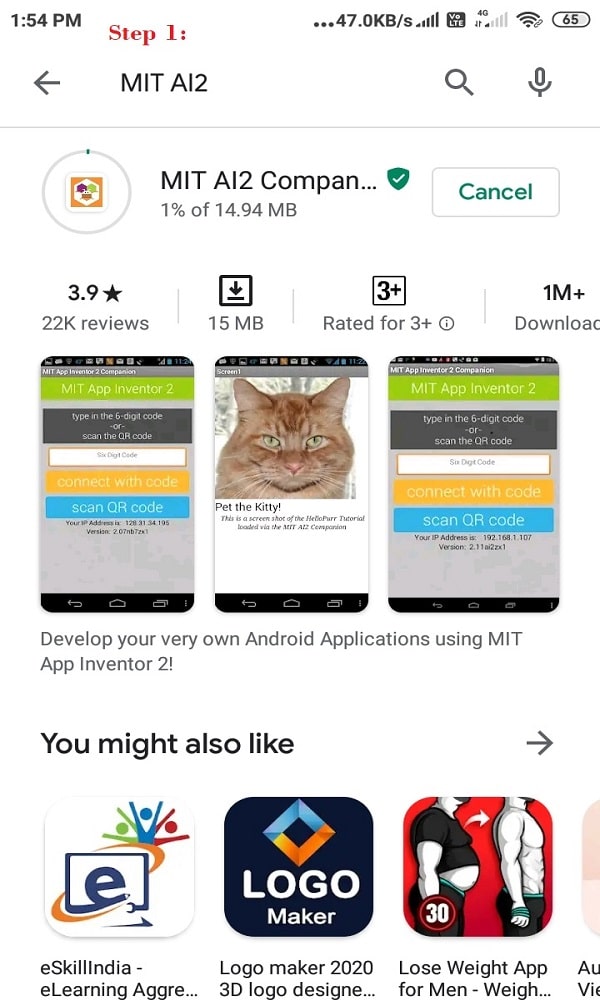
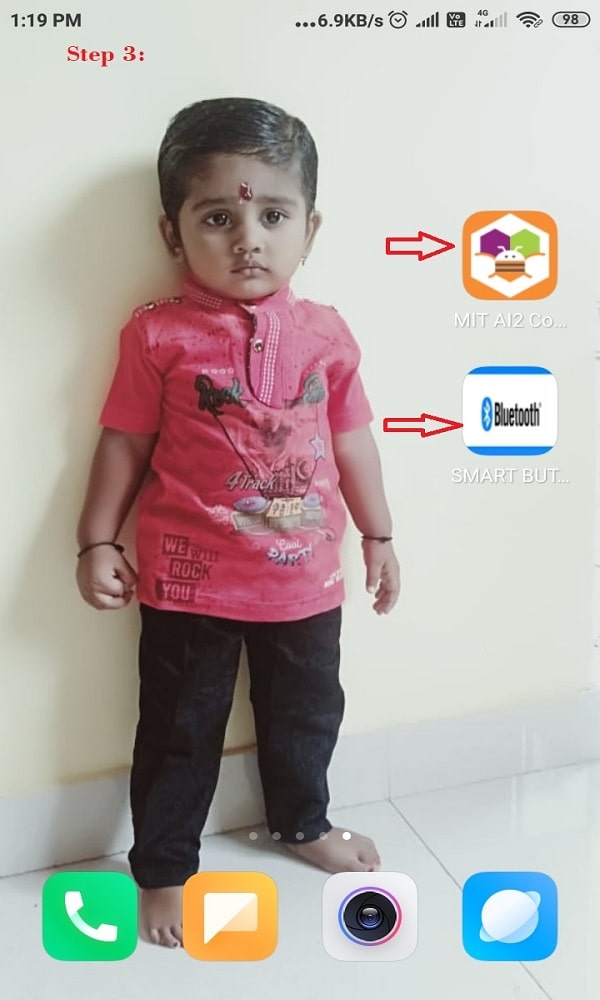
To download the apps in mobile i have followed the following steps
Step 1: Open the andriod mobile. Downloaded and installed the MIT AI2 Companion App on phone.
Step 2: On your device, launch the MIT App Companion app just as you would do any app. Then click the “Scan QR code” button on the Companion, and scan the code in the App Inventor window
Step 3: The app start download. The developed app will get download in mobile, it will ready to use.

Open the app in android mobile, here is the three screen of the app will get open .

Connection
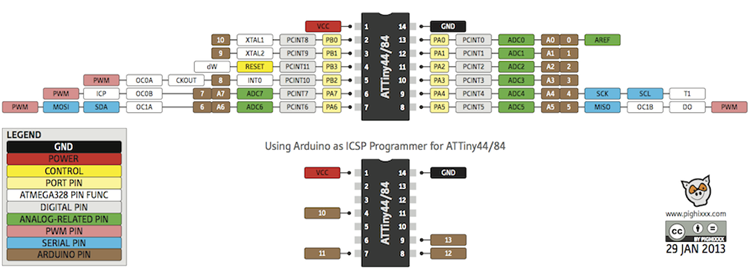
Here I am using ATTINY 44 microcontroller board to connect with HC-05 Bluetooth Model. The MCU board is developed in the week of Input Device, The board has rx and tx pin and also the pin is provided to connect the output device. The pin number 12 (PA1) and 13 (PA0) of the ATtiny 44 is the rx and tx pin for the board. I have soldered the pin header with this pin for connection with another module. For more details about the developemnt of Attiny 44 MCU board, click on Assignment 10
The bluetooth model has the following pin for connection.
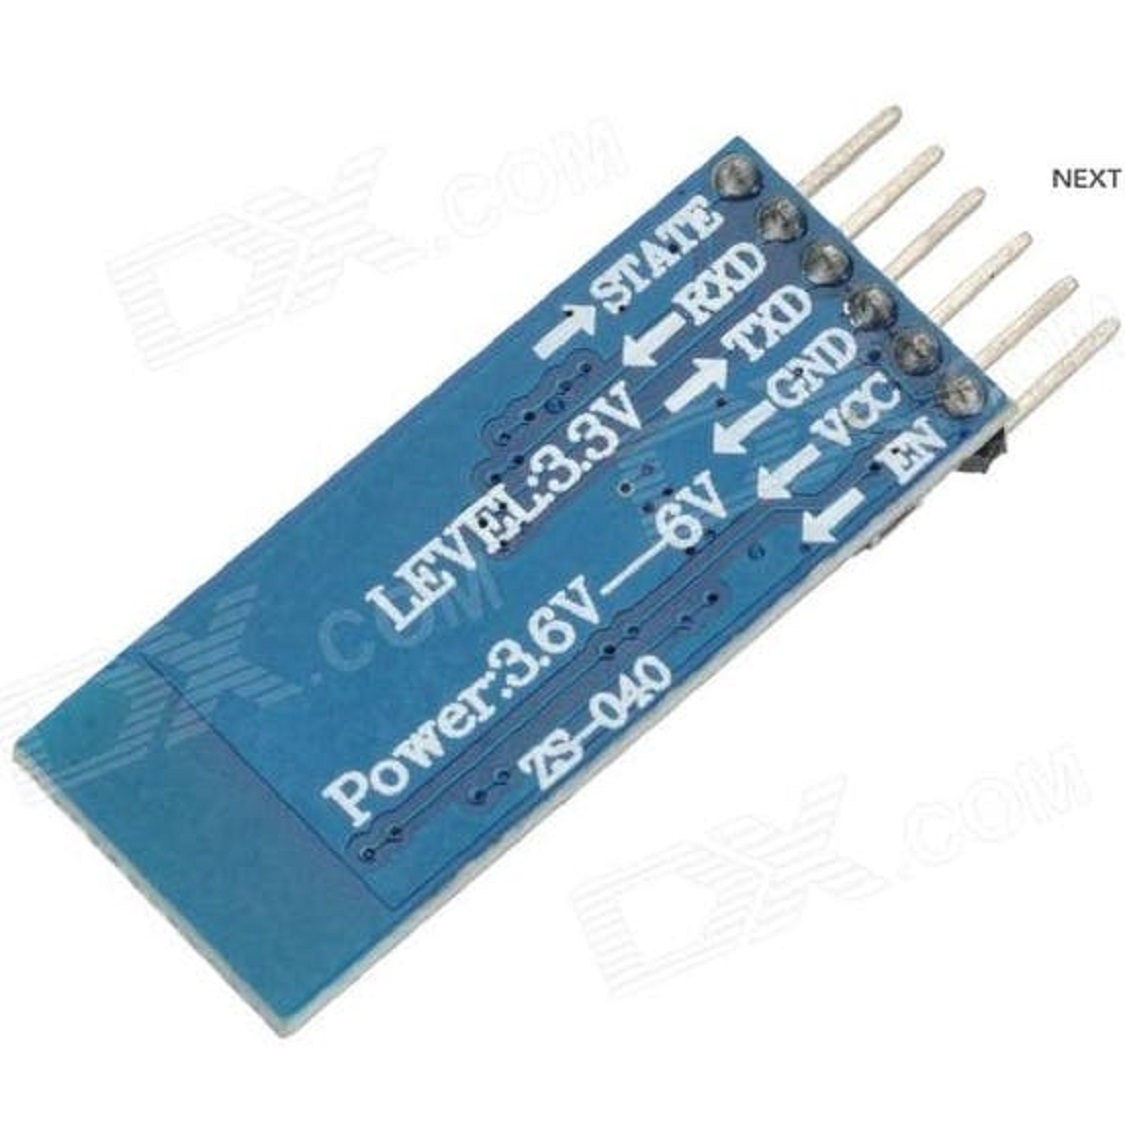
I have made the connection as belows:
• Bluetooth model Rx --> Tx pin i.e. pin number 13 (PA0) of ATTINY 44
• Bluetooth model Tx --> Rx pin i.e. pin number 12 (PA1) of ATTINY 44
• Bluetooth Module Gnd --> GND pin of ATTINY 44
• Bluetooth Module VCC --> VCC pin of ATTINY 44
Programming
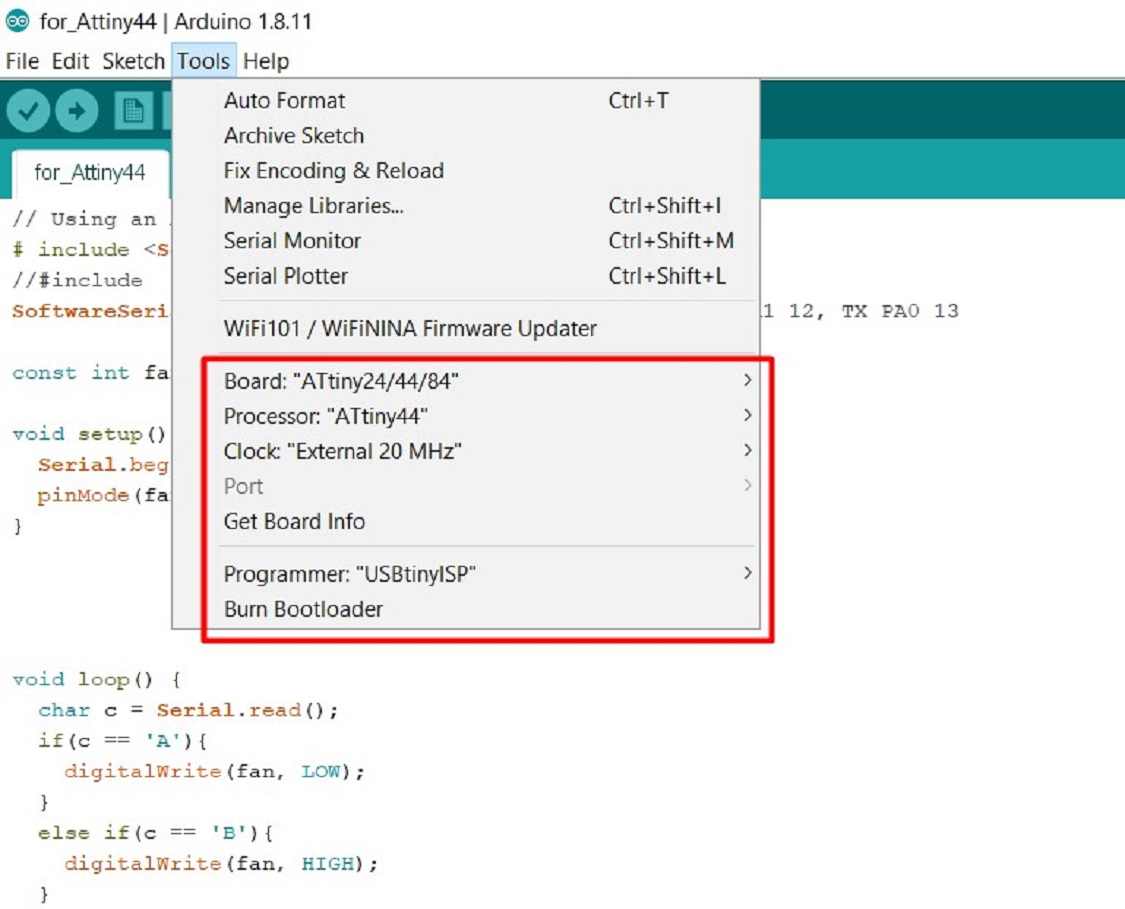
I am using ARDUINO IDE for programming. I have creted the code by refering some turorial and old Fab Academy Assignment. Then selected the given parameter in tool menu.
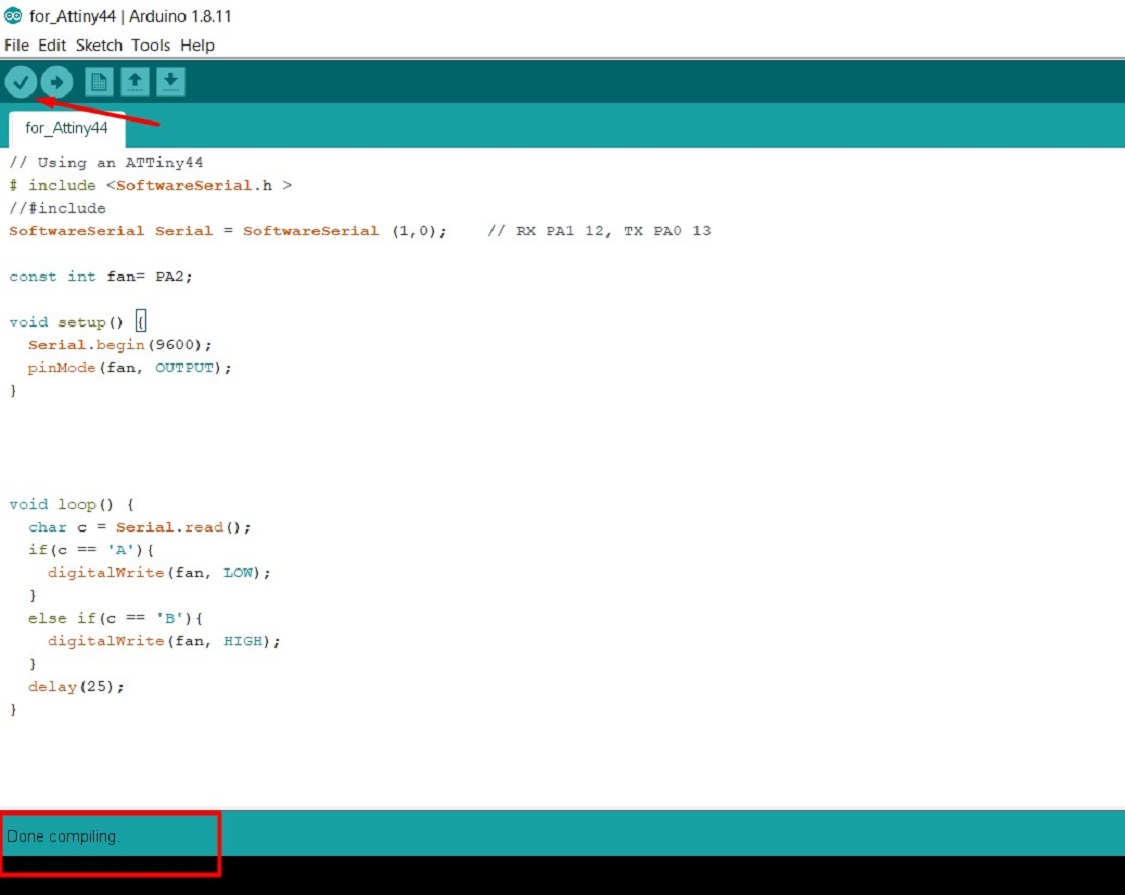
The compiling the code using compile option on left top. The code is getting compile
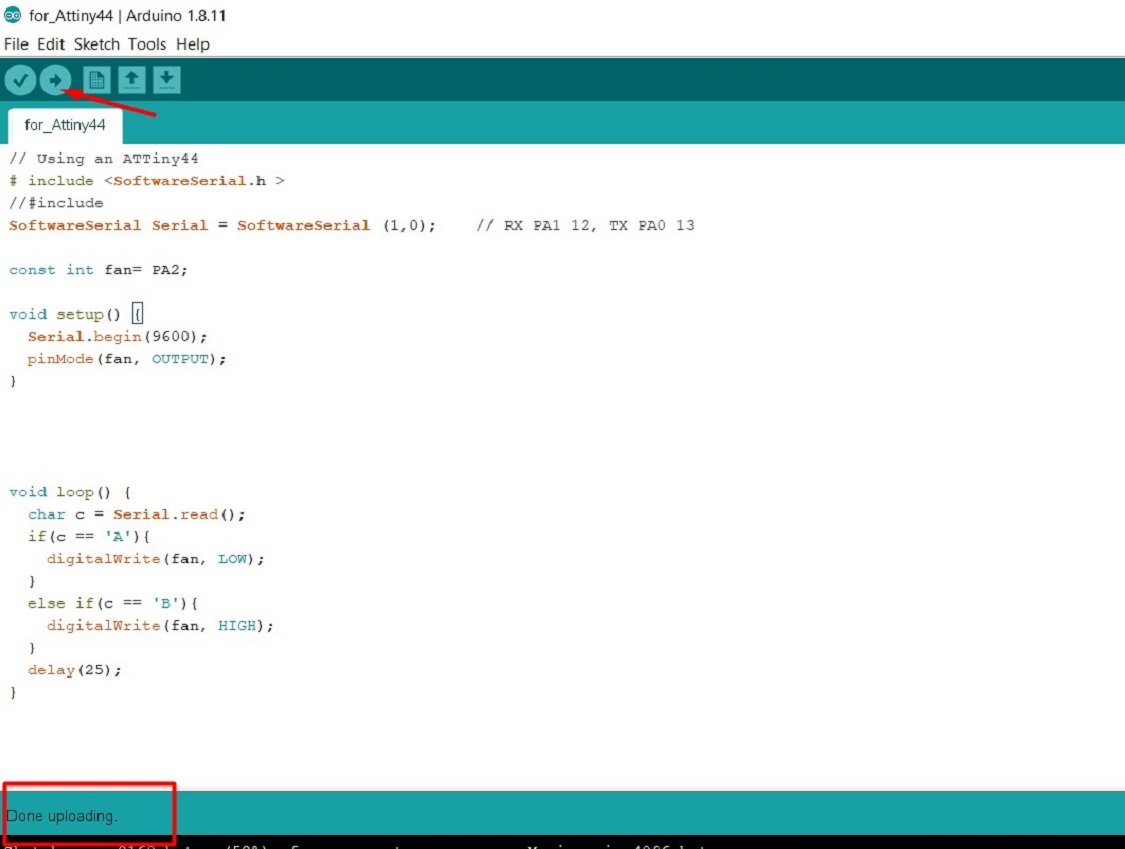
Now uploading the code, by clicking on upload
Testing
The app is successfully working. Here I am putting the final video with step of programming
What i learn?
I am learn about
1. App developemnt using MIT App Inventor
2. About Interface and Application programming
3. Different tool, languages used for Developing Interface.
4. Connection between Bluetooth model and Microcontroller board
5. Programming and Testing
Go to the top
Back
Assignment 14:Invention, Intellectual Property and Income
Invention means a new product or process involving an inventive step and capable of industrial application

Fab Academy Course on Digital Fabrication by Nikhilkumar More is licensed under a Creative Commons Attribution-NonCommercial 4.0 International License.
Based on a work at http://fabacademy.org/2020/labs/vigyanashram/students/nikhilkumar-more/.
Permissions beyond the scope of this license may be available at http://fabacademy.org/2020/labs/vigyanashram/students/nikhilkumar-more//contact.html