Week Task
Work through a git tutorial build a personal site in the class archive describing you and your final project
Website Development
1. HTML and CSS
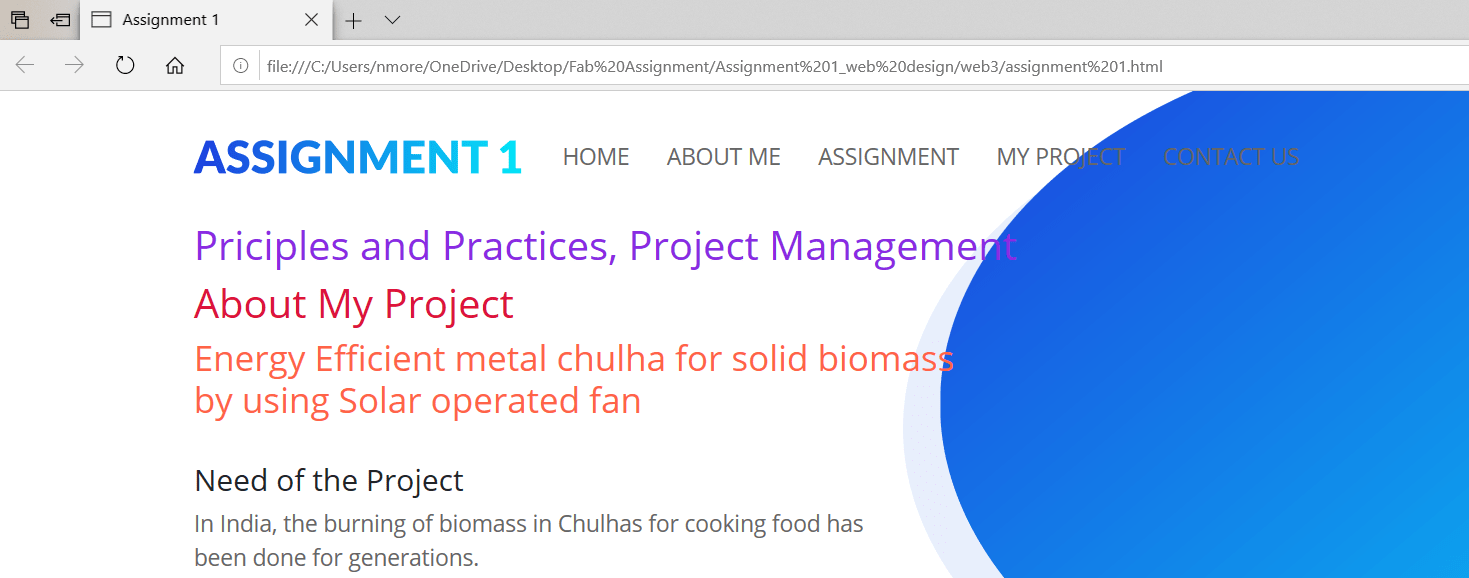
HTML: The HTML is used to create web pages. I have seen that by writing down the words i want to appear on my page. I have then added tags or elements to the words so that the browser knows what is a heading, where a paragraph begins and ends, and so on. The rest of this section introduces the tags I have at my disposal to create web pages, grouped chapters on: text, lists, links, images, tables, forms, video audio and flash, and miscellaneous elements. To describe the structure of a web page, I have been added code to the words i want to appear on the page. I can see the HTML code for this page below.
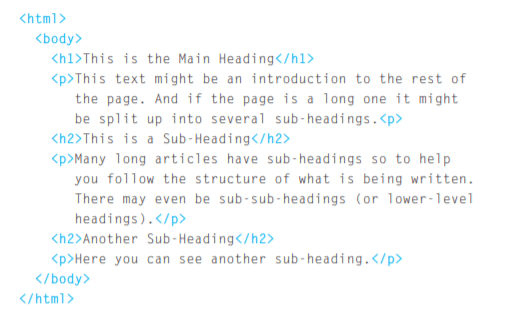
The HTML code (in blue) is made up of characters that live inside angled brackets —
these are called HTML elements. Elements are usually made up of two tags: an opening tag and a closing tag. (The closing tag has
an extra forward slash in it.) Each HTML element tells the browser something about the information that sits between its opening
and closing tags.
CSS: The CSS uses rules to enable to control the styling and layout of web pages. I have then go on to look at the wide variety
of CSS properties i can use in my CSS rules. These properties generally fall into one of two categories:
Presentation: How to control things like the color of text, the fonts you want to use and the size of those fonts, how to add
background colors to pages (or parts of a page), and how to add background images.
Layout: How to control where the different elements are positioned on the screen. I will also learn several techniques that
professionals use to make their pages more attractive.
2. Attributes
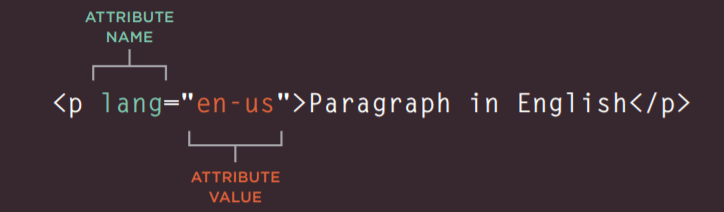
Attributes Tell Us More About Elements. Attributes provide additional information
about the contents of an element. They appear on the opening tag of the element and are made up of two parts: a name and a value,
separated by an equals sign.
The attribute name indicates what kind of extra information you are supplying about the element's content. It should be written in lowercase.
The value is the information or setting for the attribute. It should be placed in double quotes. Different attributes can have different values.
Here an attribute called lang is used to indicate the language used in this element. The value of this attribute on this page specifies it is
in US English.
3.Body, Head & Title
a. < body > I met the element in the first example what I created. Everything inside this element
is shown inside the main browser window.
b. Before the element I have been seen a element. This contains information about the
page (rather than information that is shown within the main part of the browser window that is highlighted in blue on the opposite page).
You will usually find a < title > element inside the < head > element.
c. < title > The contents of the < title > element are either shown in the top of the browser, above where you usually type in the URL
of the page you want to visit, or on the tab for that page (if your browser uses tabs to allow you to view multiple pages at the same time).

4. Creating a First Web Page on my Laptop
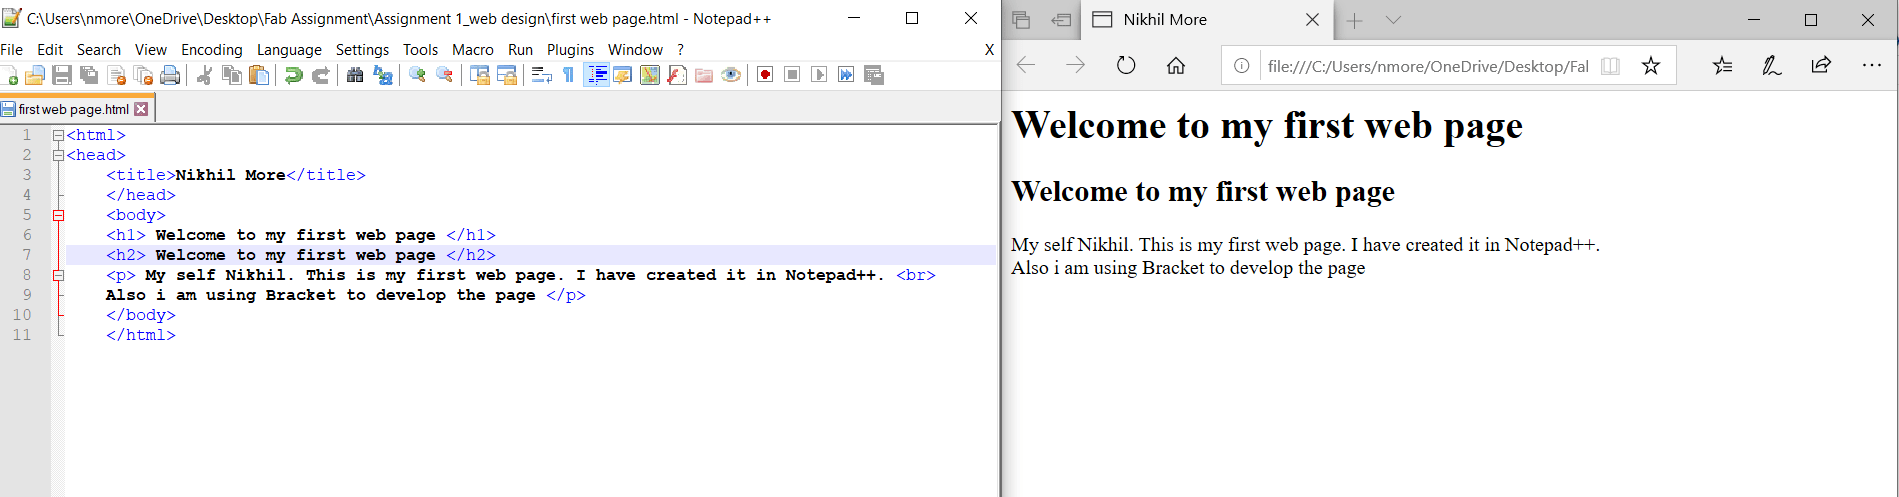
a. To create first web page on a my laptop, I have start a Notepad and Bracket.
b. Typed the code.
c. Save this file as first-test. html.
d. I have Started my web browser. Then I have go to the File menu and select Open. I browse the file that I have just created,
selected it and click on the Open button. The result should look something like the screen shot to the below.
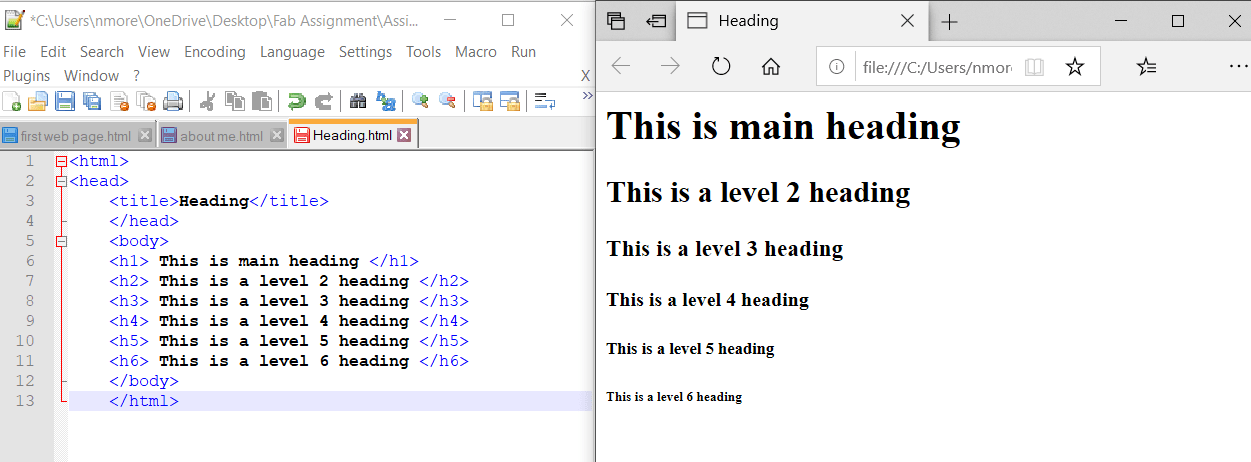
5. Heading
HTML has six "levels" of headings:
6. Paragraph
To create a paragraph, surround the words that make up the paragraph with an opening < p > tag and closing < / p > tag.
7. Link
Links are the defining feature of the web because they allow me to move from one
web page to another — enabling the very idea of browsing or surfing.
I will commonly come across the following types of links:
● Links from one website to another ● Links from one page to another on the same website ● Links from one part of a web page to
another part of the same page ● Links that open in a new browser window ● Links that start up your email program and address a
new email to someone.
8. Adding Images Link
To add an image into the page you need to use an < img> element.
This is an empty element (which means there is no closing tag). It must carry the following two attributes:
src -This tells the browser where it can find the image file. This will usually be a relative URL pointing to
an image on your own site.
alt -This provides a text description of the image which describes the image if you cannot see it.
9. CSS
CSS allows us to create rules that specify how the content of an
element should appear. It will specify the background of the page, color of all paragraphs, type of heading ex.
blue, italic, Times typeface.
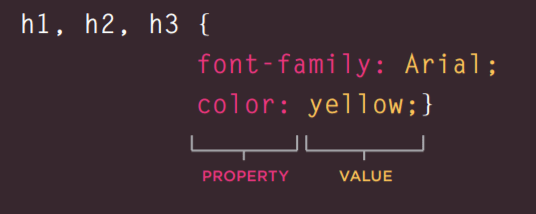
CSS works by associating rules with HTML elements. These rules govern how the content of specified elements
should be displayed. A CSS rule contains two parts: a selector and a declaration.
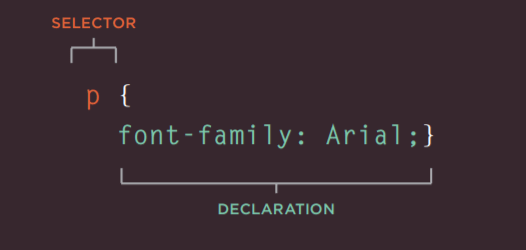
CSS declarations sit inside curly brackets and each is made up of two parts: a property and a value, separated by a colon.
Here you can see a my web page that is styled using CSS
10. Color
The color property allows us to specify the color of text inside an element.
We can specify any color in CSS in one of three ways:
RGB VALUES: These express colors in terms of how much red, green and blue are used to make it up. For example: rgb(100,100,90)
HEX CODES: These are six-digit codes that represent the amount of red, green and blue in a color, preceded by a pound or hash # sign. For example: #ee3e80
COLOR NAMES: There are 147 predefined color names that are recognized by browsers. For example: DarkCyan
CSS treats each HTML element as if it appears in a box, and the background-color property sets the color of the background for that box.
If you do not specify a background color, then the background is transparent.
Version Control-Git Lab
Git is a distributed version control system (DVCS). "Distributed" means that all developers within
a team have a complete version of the project. A version control system is simply software that lets you effectively manage application versions.
Thanks to Git, you'll be able to do the following:
• Keep track of all files in a project
• Record any changes to project files
• Restore previous versions of files
• Compare and analyze code
• Merge code from different computers and different team members.
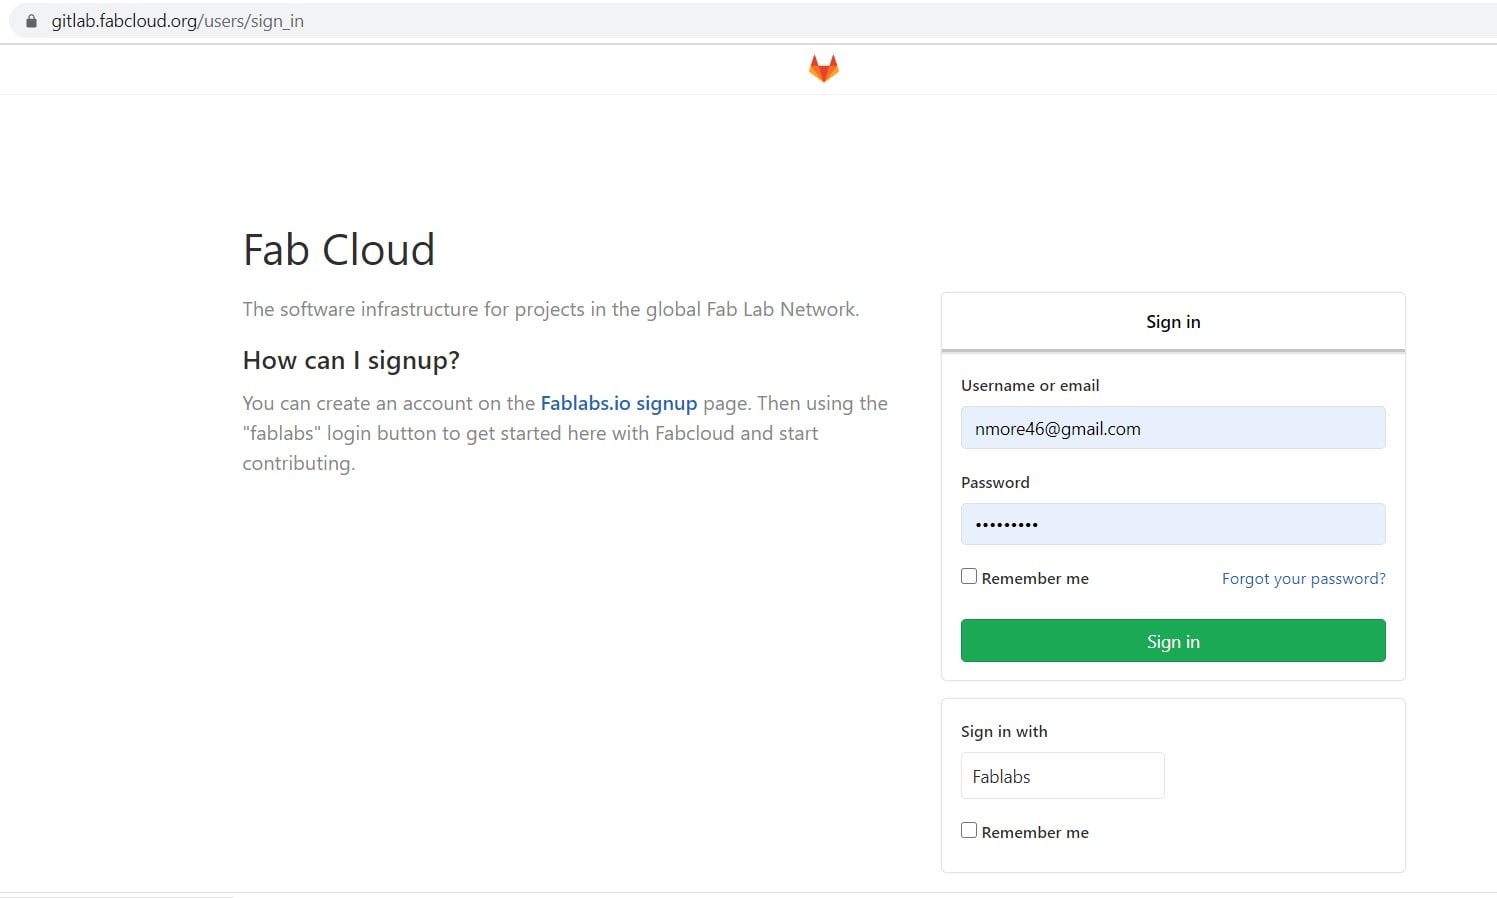
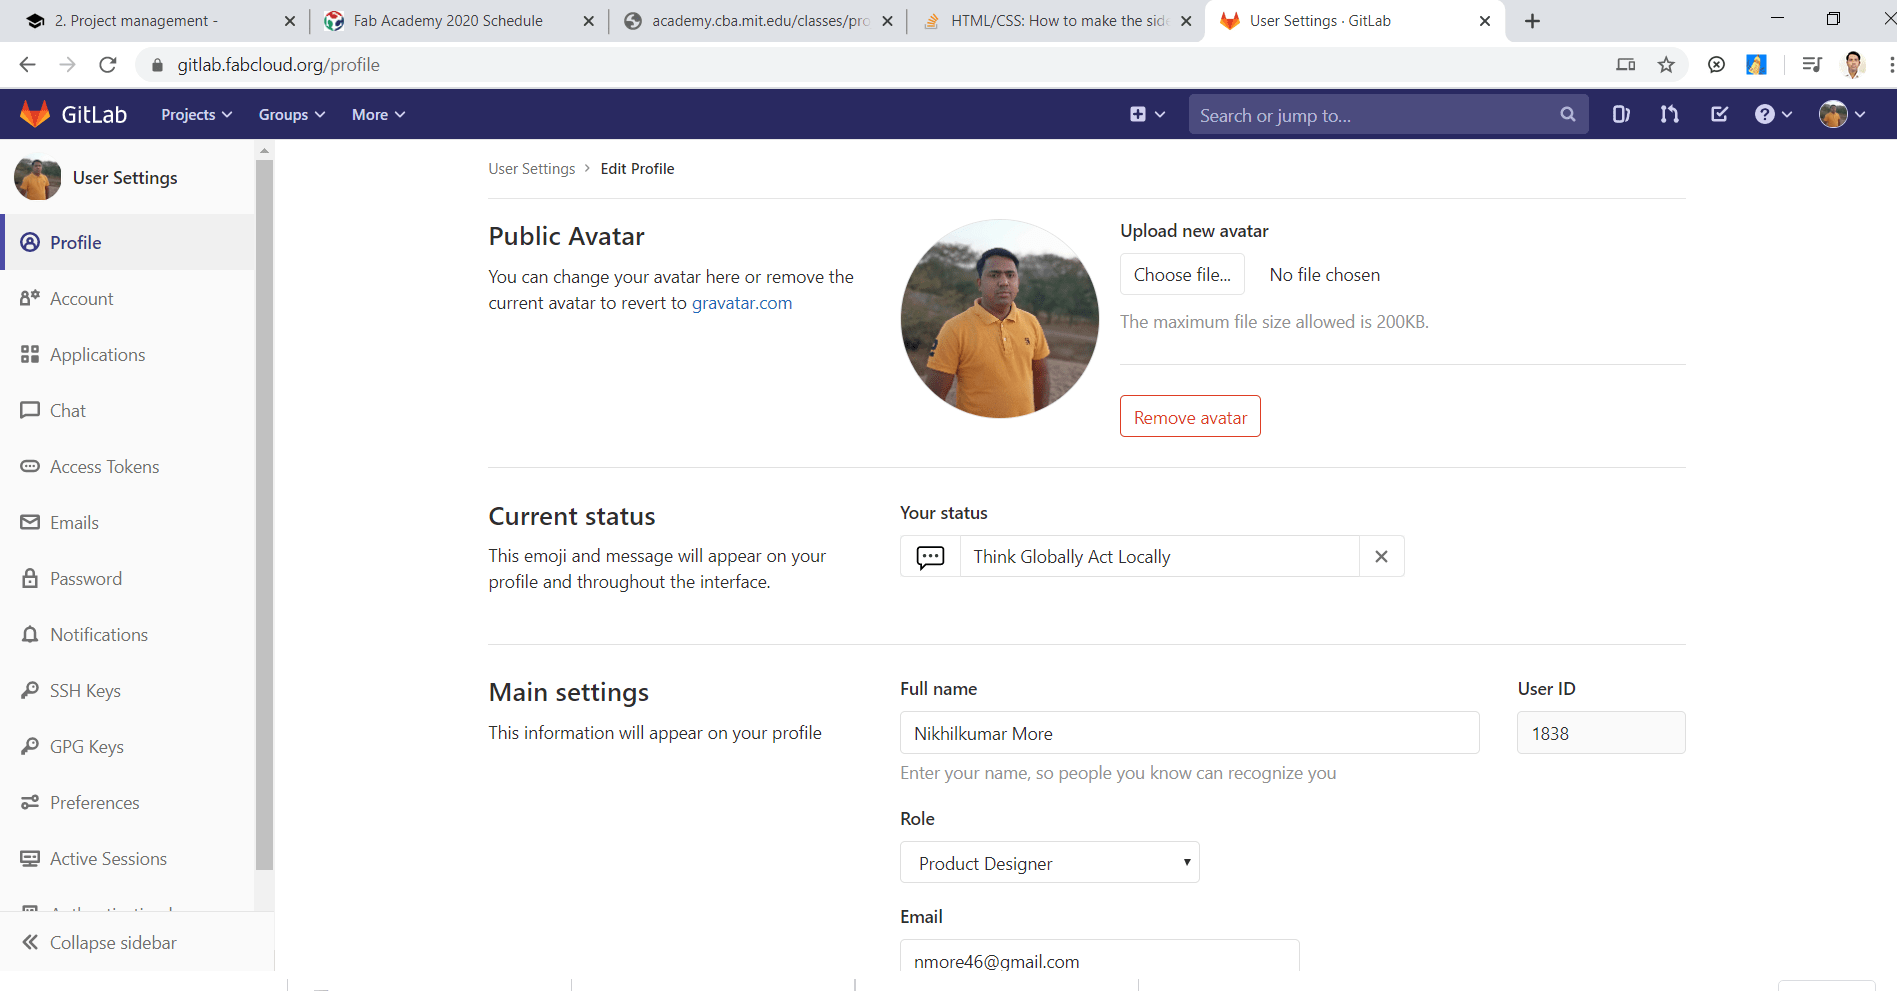
1.Account
Made an account on GitLab, signed in to the account and updated the profile:
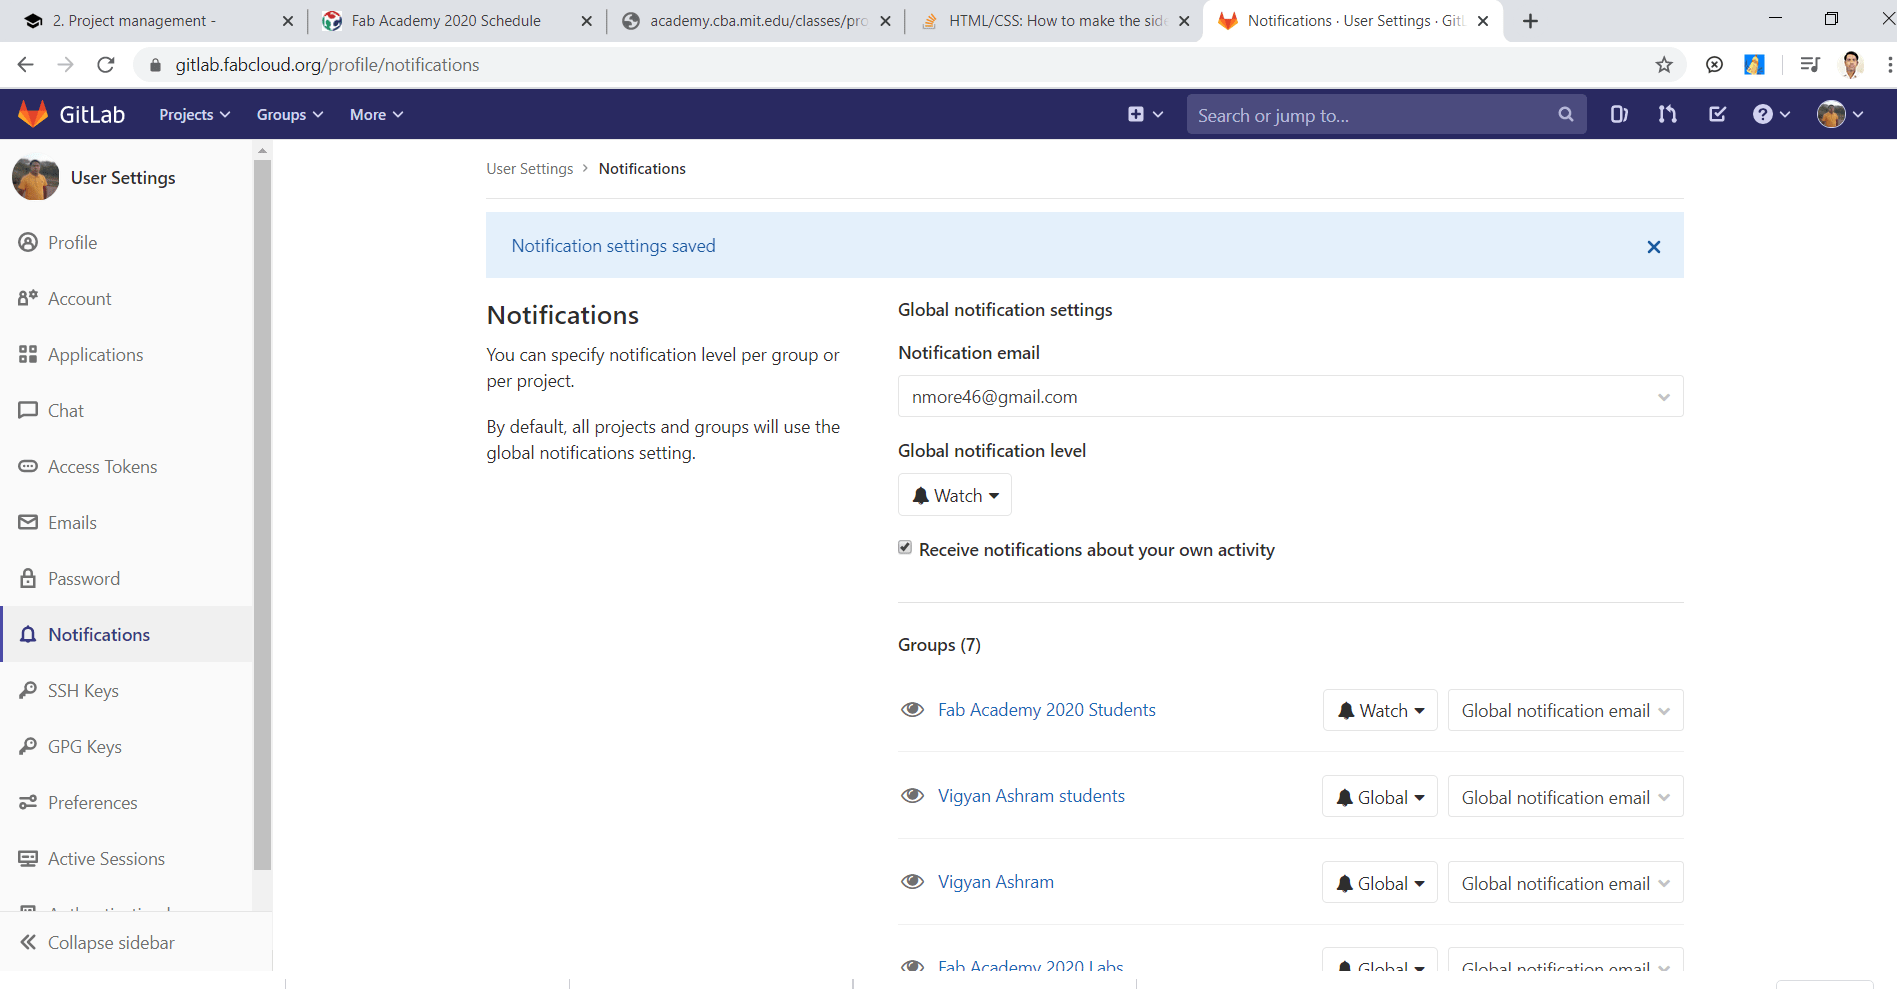
2. Notification Setting
In notification setting, I turned the Global notification level to Watch by doing this
I will receive all the notifications about my acitivity on GitLab.
3. SSH Key Generation
Under user settings, found the option to generate SSH keys. Used Git to
create keys and paste it on fabcloud. SSH keys were added for authentication.
SSH Keys: SSH keys allow us to establish a secure connection between your computer and GitLab. Firstly downloaded the Git.exe from Gitbash and then installed it .
Now Open the gitbash and run the following command for generation of SSH Key.
ssh-keygen -t rsa -C "nmore46@gmail.com" -b 4096
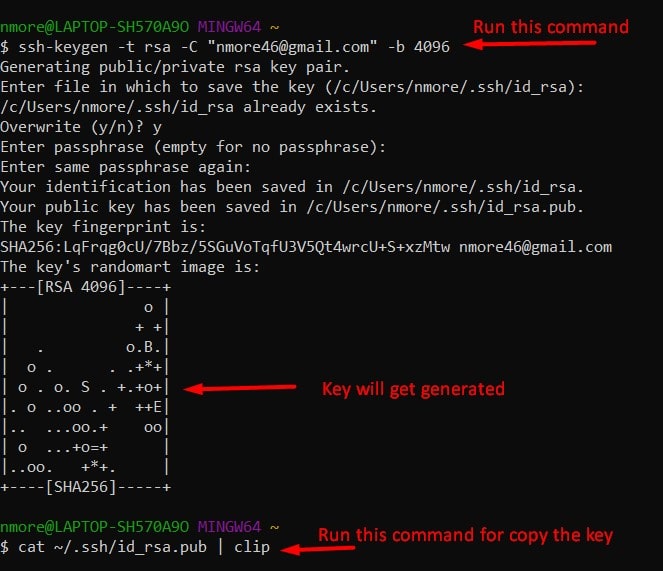
Then run the next command for copy the generated key
cat ~/.ssh/id_rsa.pub | clip
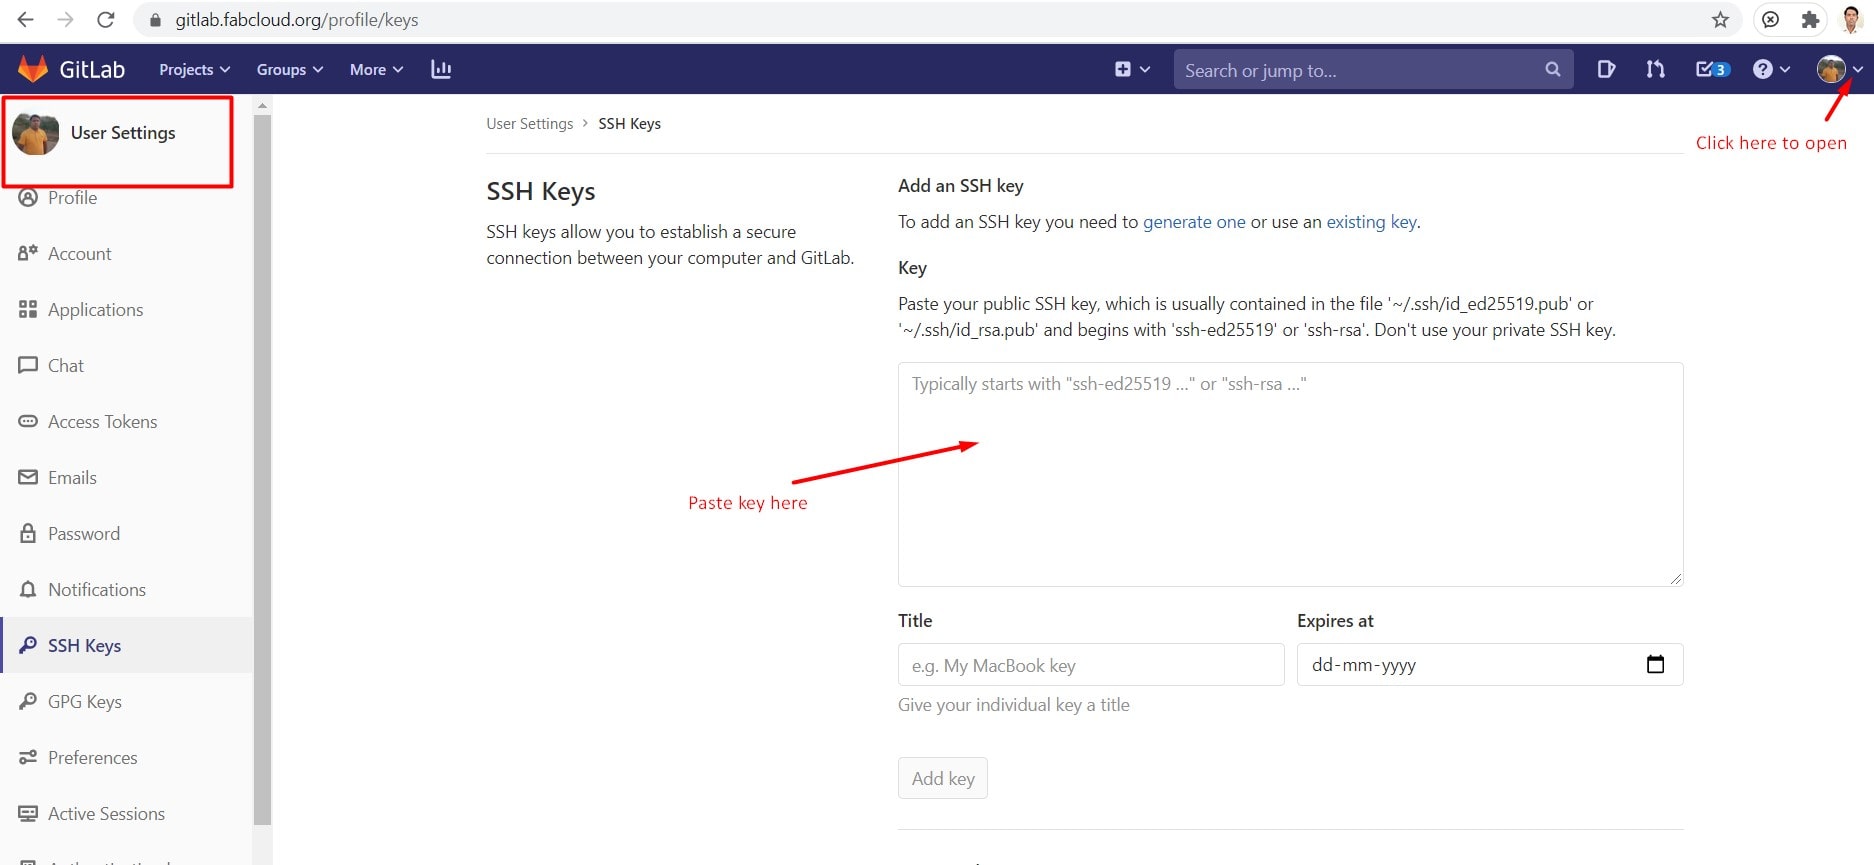
Then open the user setting in your git lab account> in the left side we will find SSH Key menu>open it> paste the key at the mention location and proceed it
Run the next following command to check the account is created or not.
ssh -T git@gitlab.fabcloud.org
Now I have to run the next this two command before to use git with gitlab
$ git config --global user.name "nikhilkumar.more"
$ git config --global user.email"nmore46@gmail.com"

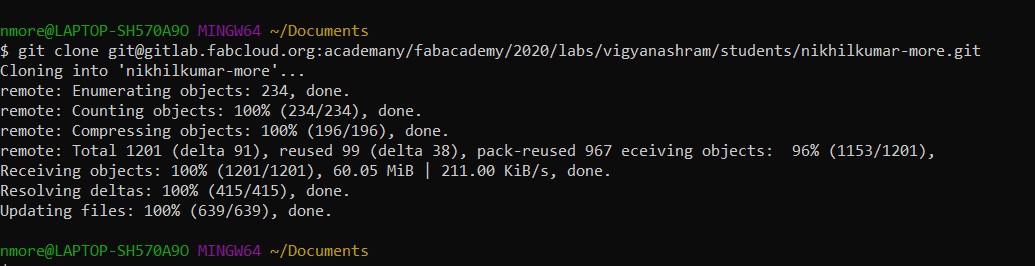
After confirmation run the next command for git clone. It is used for pull data in our directory
https://gitlab.fabcloud.org/academany/fabacademy/2020/labs/vigyanashram/students/nikhilkumar-more.git
Now I have run the following command for push my data on git cloud
4. Git Pull
git pull is a Git command used to update the local version of a repository from a remote.
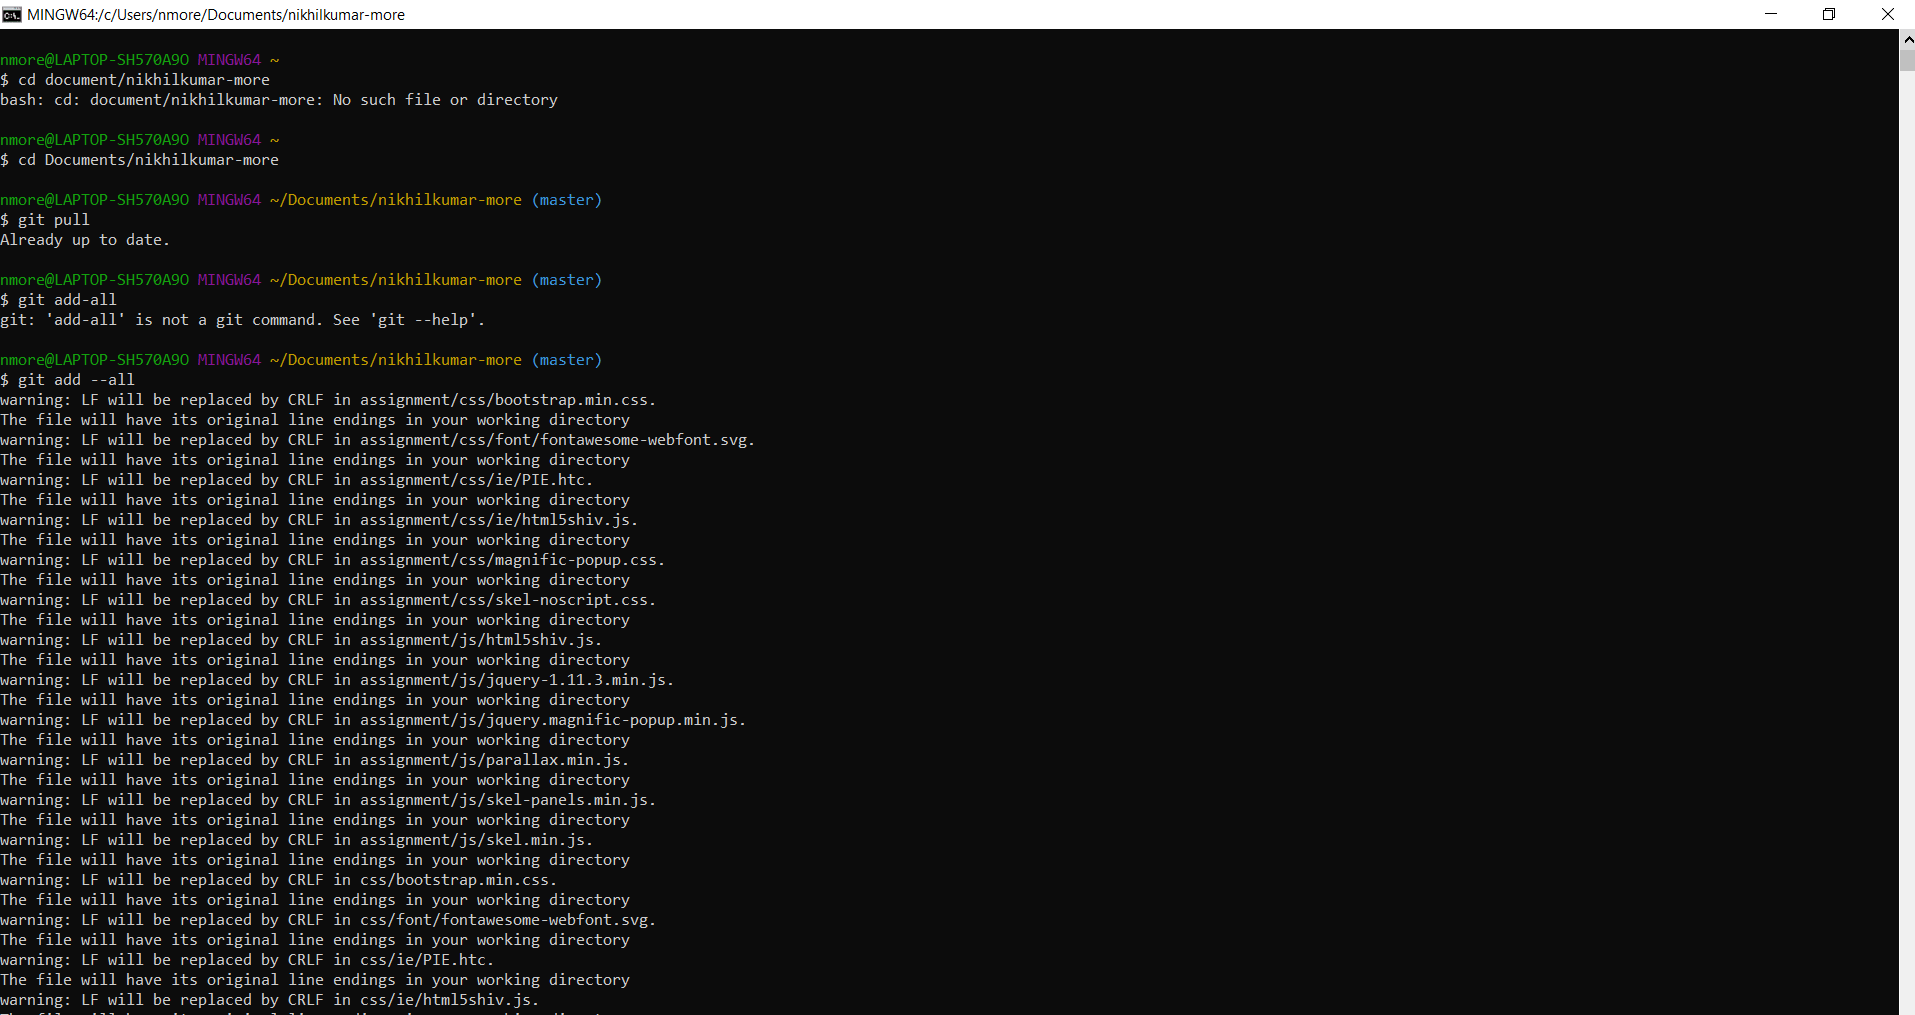
5. Git add --all
Add files to the staging area by using the "git add" command and passing necessary options.
6. Git Commit
The git commit command will save all staged changes, along with a brief description from the user, in a “commit” to the local repository.
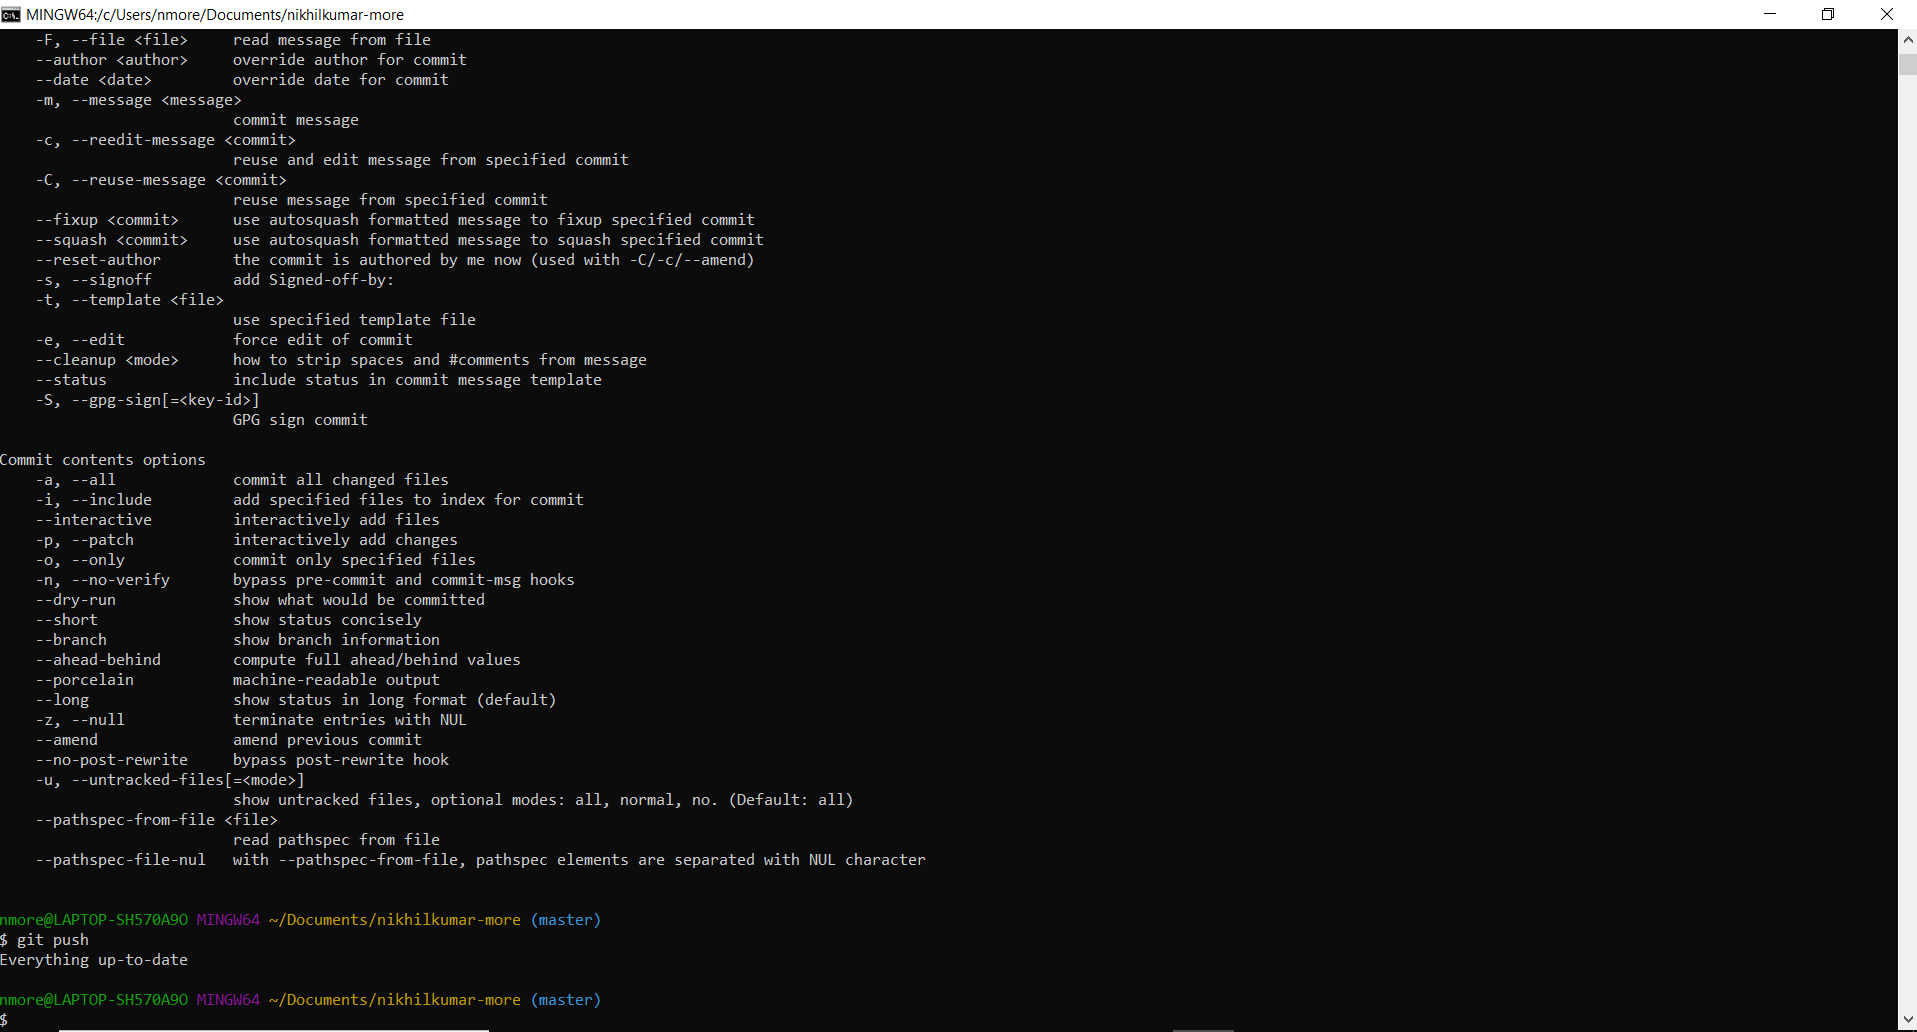
7. Git Push
The git push command allows me to send (or push) the commits from your local branch in my local Git repository to the remote repository. I am able to push to my remote repository, that I must ensure that all my changes to the local repository are committed.
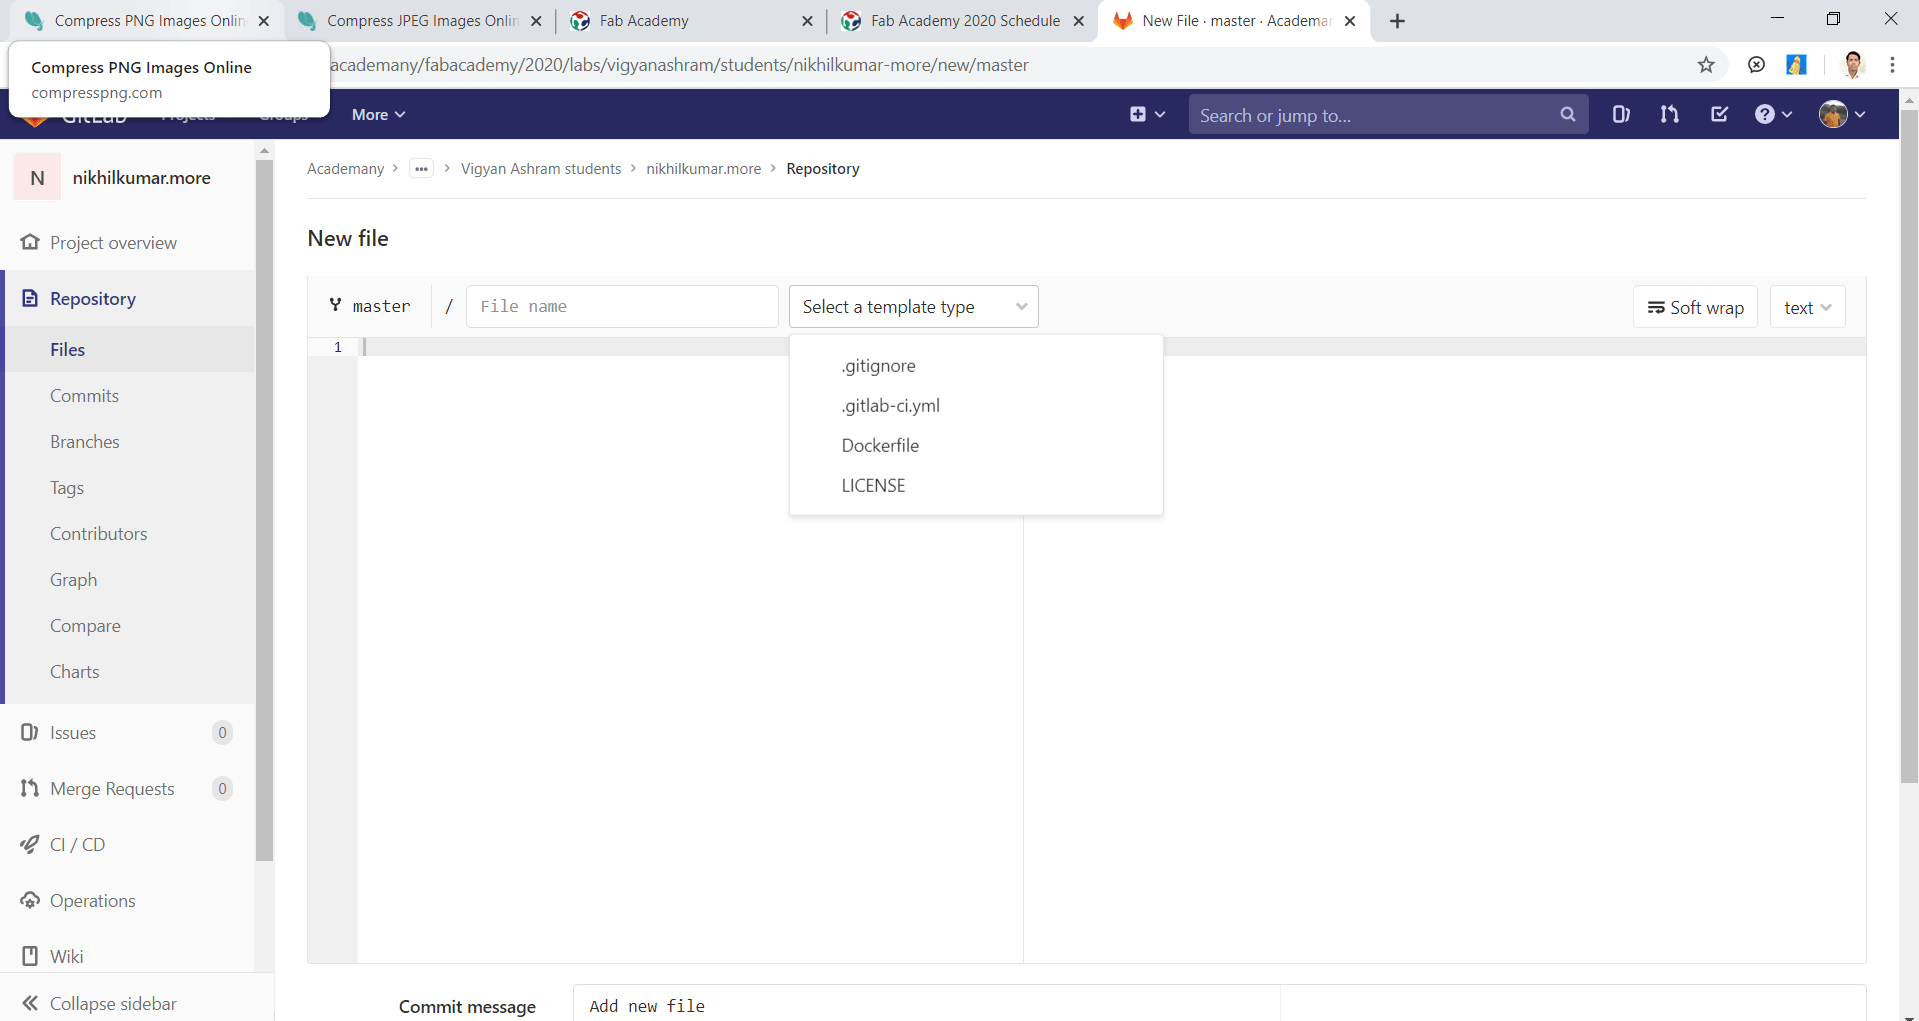
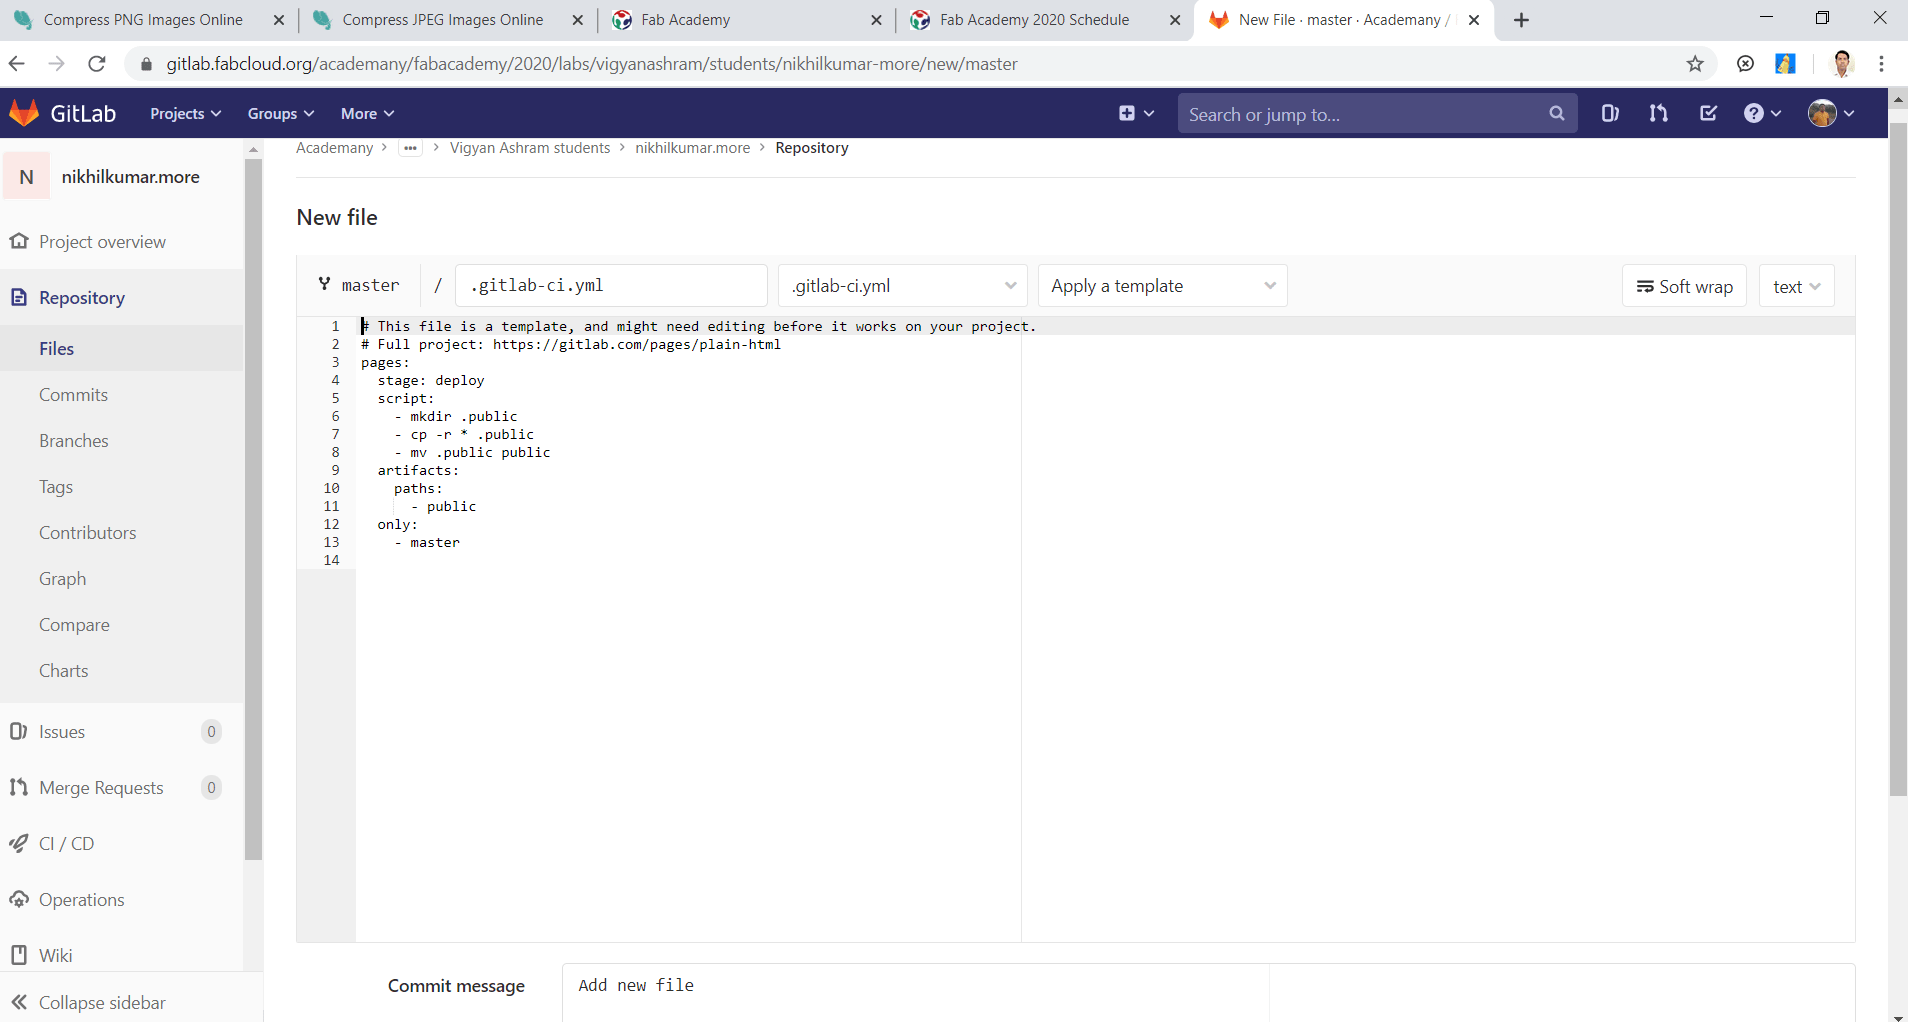
8. Gitlab yml file
gitlab-ci. yml file is a YAML file that I create on my project's root. This file automatically runs whenever I push a commit to the server. This triggers a notification to the runner me specified in #3, and then it processes the series of tasks that I specified.
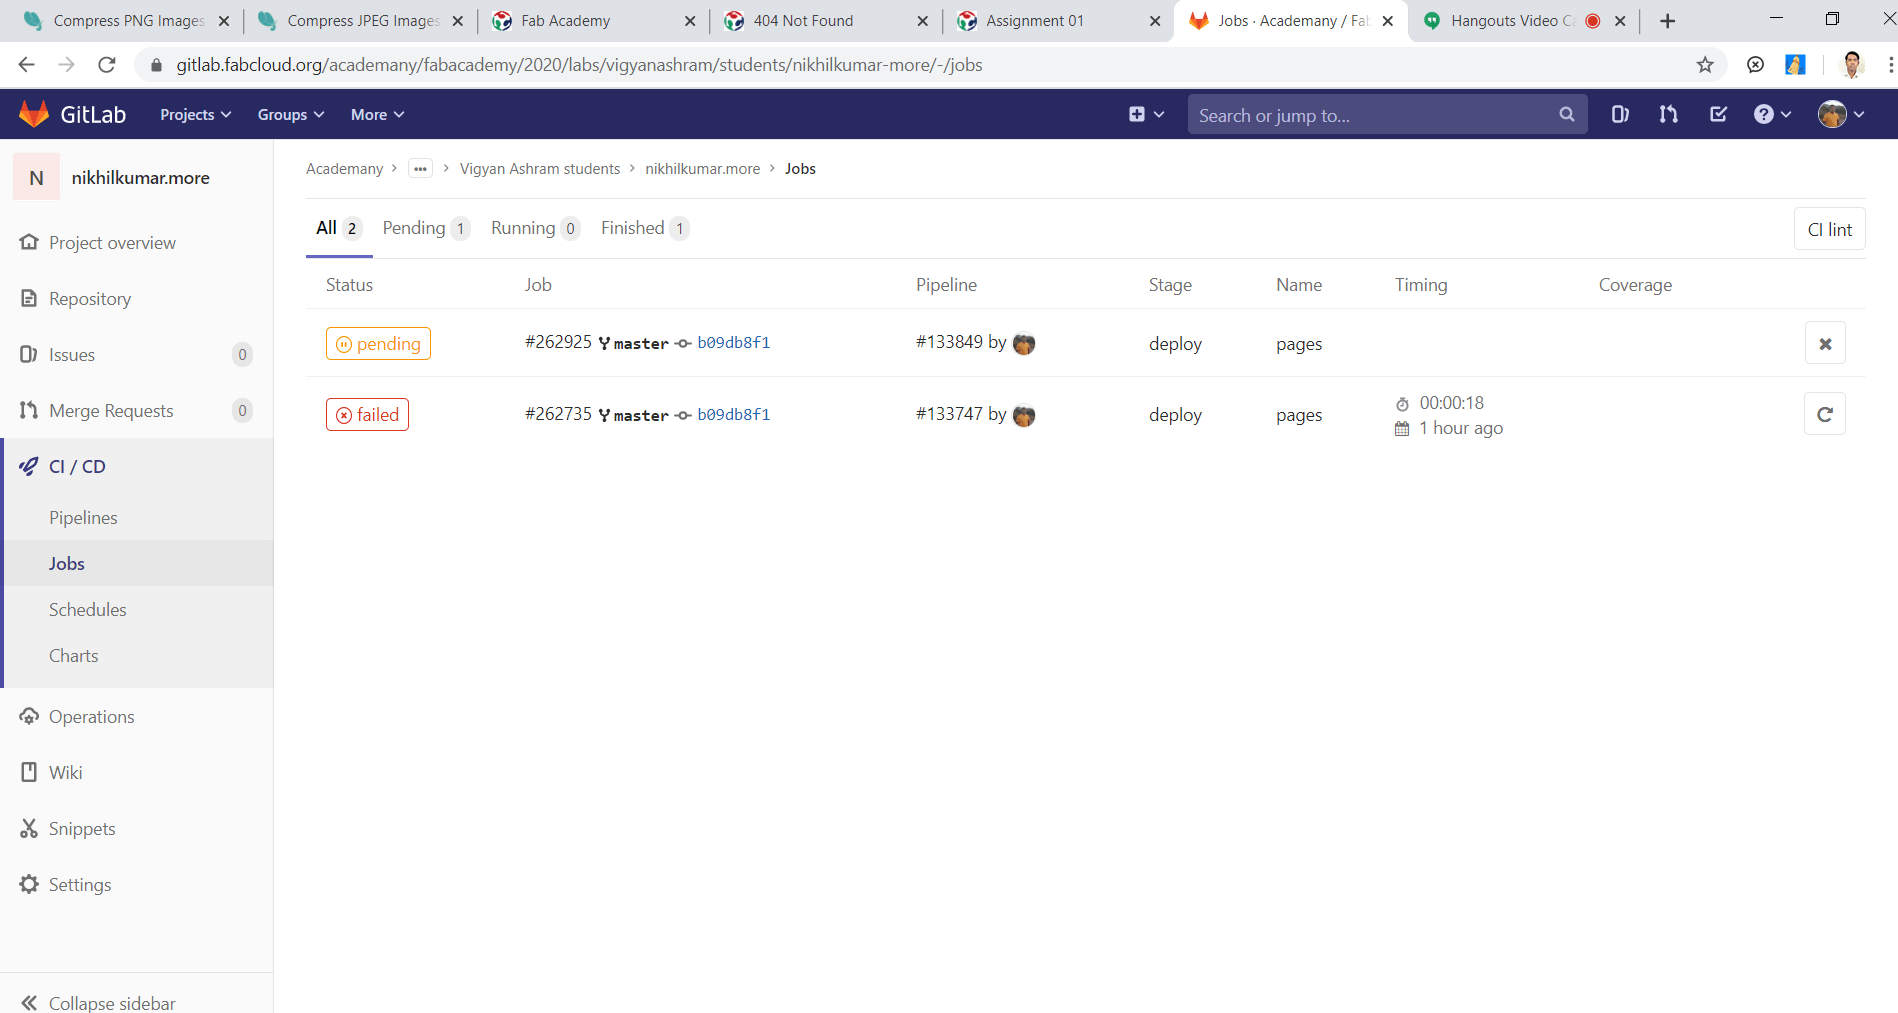
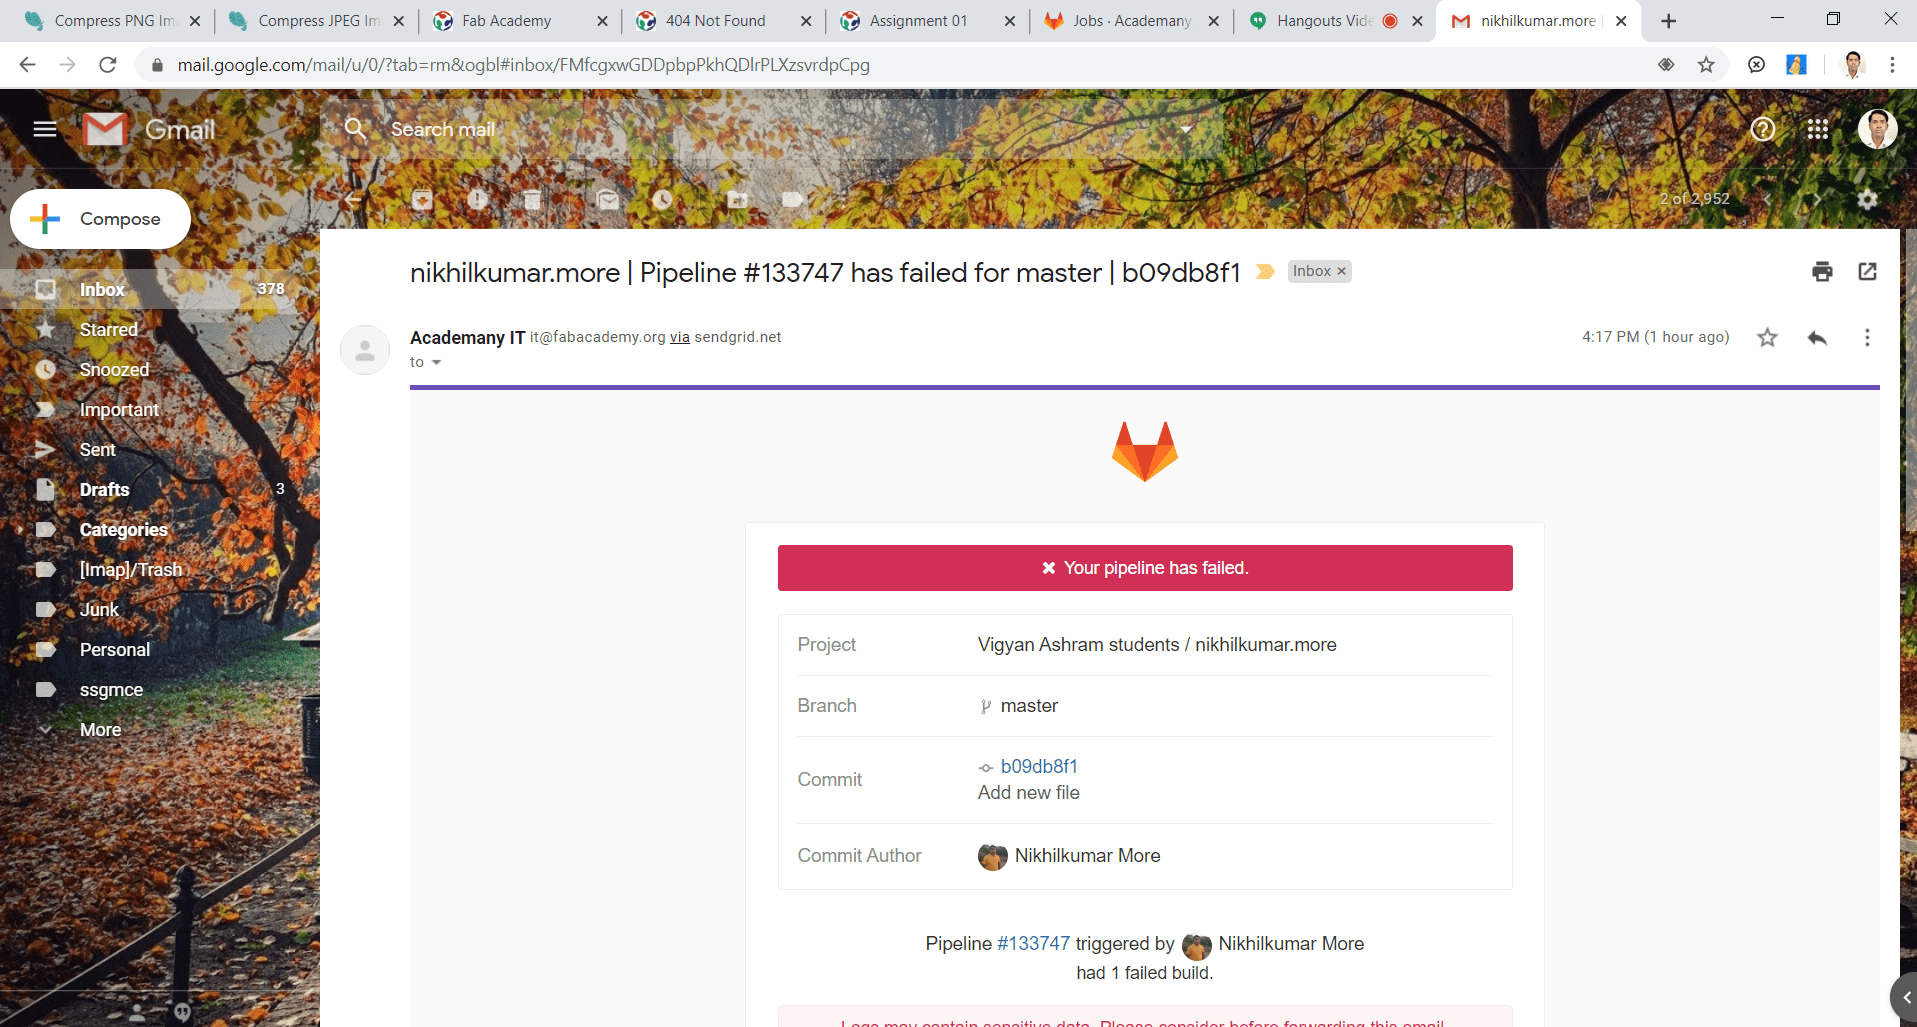
9. Git Project Pipeline status
In the pipelines settings page i can find pipeline status and test coverage badges for my project.
The latest successful pipeline will be used to read the pipeline status and test coverage values.
But unfortunately my fist try is failed and I got mail also. Now again I will try. My status is pending now. I am waiting
Video Conference
Global lectures happen on Wednesdays at 9:00 on the US East Coast (ranging from 6:00 on the West Coast to 23:00 in Japan). In India, it will be in between 6.30pm to 9.30 pm. Prof. Neil used the zoom app for the lectures. There is ID and Password of the mmeting, by putting this we can join the meeting and also the recorded video also available after two days of lectures for references. Recitations happen on Mondays at the same hour for one hour, and global lab sections and regional reviews are scheduled on every Tuesday 4 pm of the week scheduled by the regional reviewer .
What i learn?
• HTML pages are text documents.
• X HTML uses tags (characters that sit inside angled brackets) to give the information they surround special meaning.
• X Tags are often referred to as elements.
• X Tags usually come in pairs.
• The opening tag denotes the start of a piece of content; the closing tag denotes the end.
X Opening tags can carry attributes, which tell us more about the content of that element. X Attributes require a name and a value.
• X To learn HTML you need to know what tags are available for you to use, what they do, and where they can go.
• HTML elements are used to describe the structure of the page (e.g. headings, subheadings, paragraphs).
X They also provide semantic information (e.g. where emphasis should be placed, the definition of any acronyms used,
when given text is a quotation).
• X Links are created using the element. X The element uses the href attribute to indicate the page you are linking to.
• The element is used to add images to a web page. X You must always specify a src attribute to indicate the source
of an image and an alt attribute to describe the content of an image. X You should save images at the size you will be using
them on the web page and in the appropriate format.
• CSS treats each HTML element as if it appears inside its own box and uses rules to indicate how that element should look.
• X Rules are made up of selectors (that specify the elements the rule applies to) and declarations (that indicate what these
elements should look like).
• X Different types of selectors allow you to target your rules at different elements.
• X Declarations are made up of two parts: the properties of the element that you want to change,
and the values of those properties.
• For example, the font-family property sets the choice of font, and the value arial specifies
Arial as the preferred typeface. X CSS rules usually appear in a separate document, although they may appear within an HTML page.
• Color not only brings my site to life, but also helps convey the mood and evokes reactions. X There are three ways to specify
colors in CSS: RGB values, hex codes, and color names. X Color pickers can help you find the color what I want.
X It is important to ensure that there is enough contrast between any text and the background color.
• There are properties to control the choice of font, size, weight, style, and spacing.
• We can control the space between lines of text, individual letters, and words.
Text can also be aligned to the left, right, center, or justified. It can also be indented.
• I understand the working Git Lab version control and. How to Push website on Git Lab by using Git Pull, Git add --all, Git commit and Git push command.
Go to the top
Back
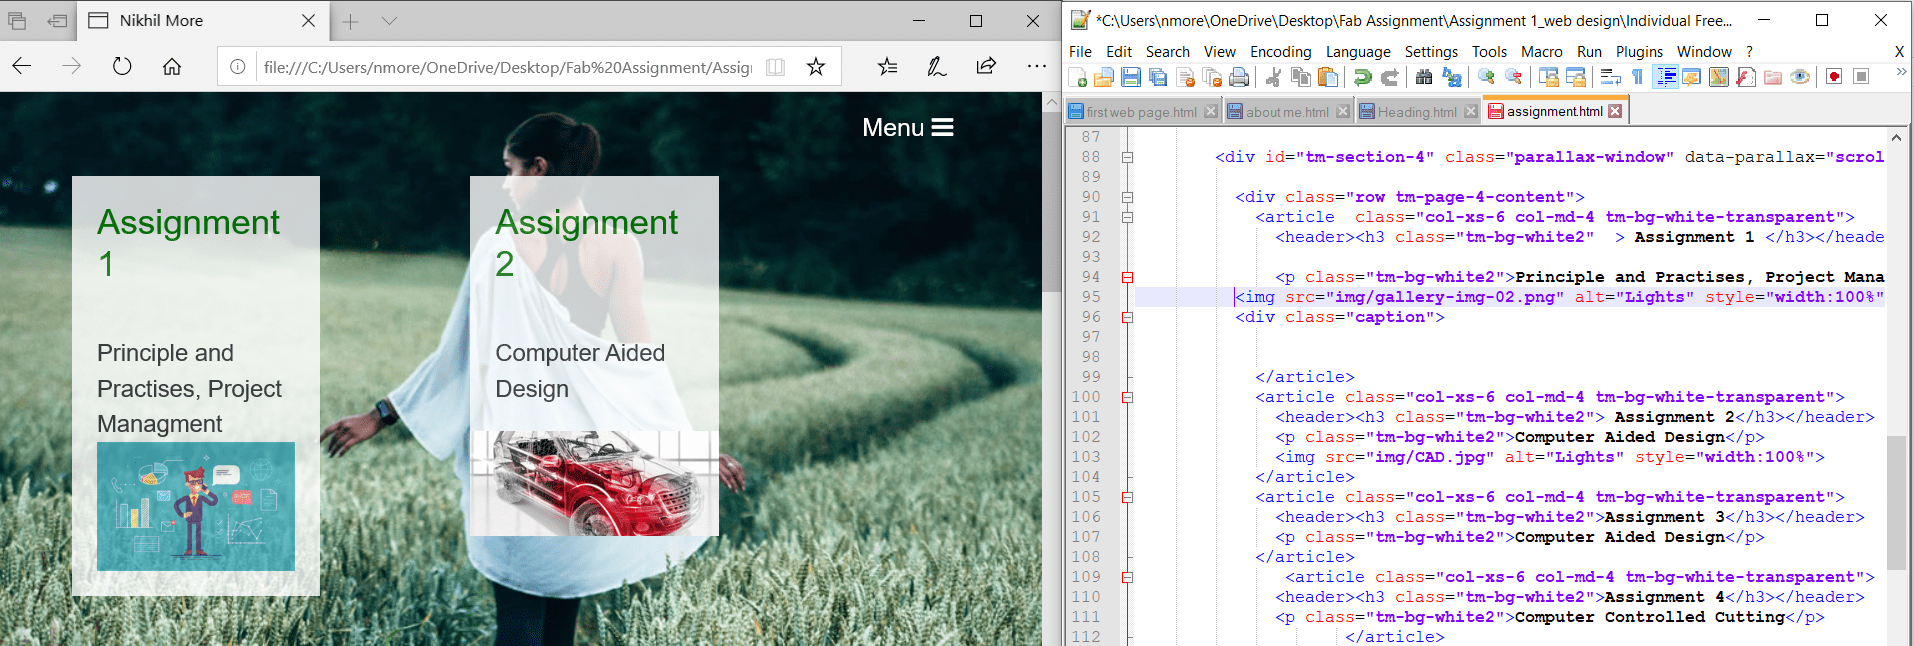
Assignment 3: Computer Aided Design
CAD (Computer Aided Design) is the use of computer software to design and document a product’s design process.

Fab Academy Course on Digital Fabrication by Nikhilkumar More is licensed under a Creative Commons Attribution-NonCommercial 4.0 International License.
Based on a work at http://fabacademy.org/2020/labs/vigyanashram/students/nikhilkumar-more/.
Permissions beyond the scope of this license may be available at http://fabacademy.org/2020/labs/vigyanashram/students/nikhilkumar-more//contact.html