Website Development
Tutorial
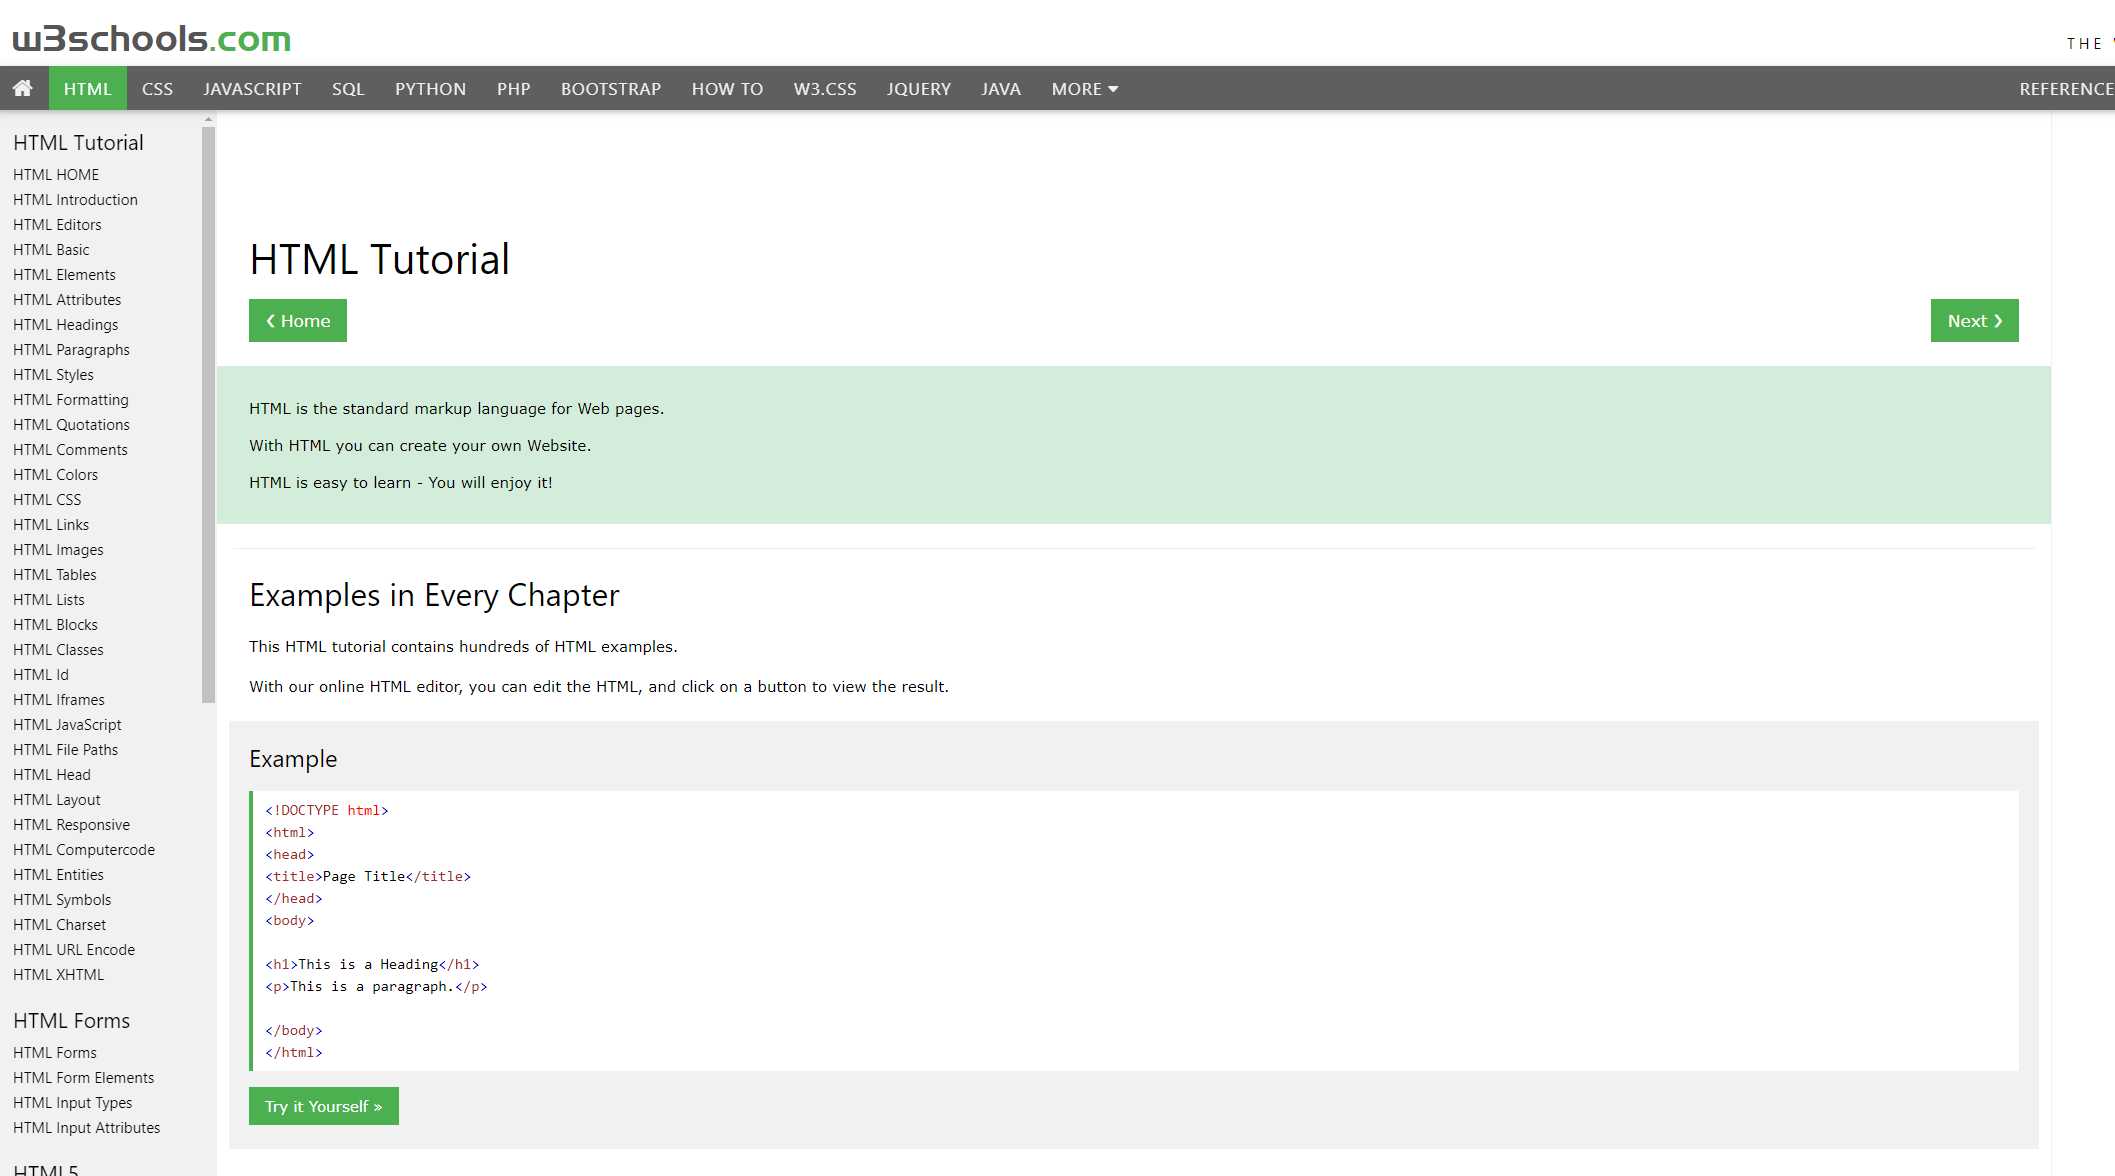
The website development starts with the exploration. The first step for me is to go through the tutorials of website development. I had experiences in both XML and Rmarkdown in the past, which share many commons with HTML and Markdown files. Therefore, I explored the guidance for both HTML and Markdown files. After reading through the resources on the Project Management page on Fab Academy website and W3school HTML Tutorial. After experiencing the website developing process with both HTML and Markdown, I decided to construct the website based on HTML templates as it provides a more intuitive and flexible control to me than Markdown. The files are synchronized by Microsoft Onedrive so they can be accessed from multiple devices.
From the tutorial, I learned that the basic HTML syntax.
HTML
HTML elements are enclosed by pairs of angle brackets, like <>content</>. The starting and ending brackets should have identical tags, the ending bracket should have a "/" sign before the tag.
As a HTML beginner, the most useful tags for me in building the website are as follow:
- <p></p>
The paragraph elements is my favorite container for plain text and paragraphs.
One noteworthy thing is that additional space will be automatically omitted here. Thus, when I want to add more space, I use " " in the syntax to create the blank.
- <pre></pre>
This element can retain the origanal format of the text. I usually use it to present long external text, like code. Otherwise, the breaks between lines will disappear.
-<a href="[link]"></a>
This elements for links.
-<code></code>
I like to use the code tags to differentiate the format between plain text and code. In most templates, the code elements has a special format that is very different from the plain text.
- <b></b>&<i></i>
These are the elements for making text bold and italic, I usually use them in informing the start of a new section or for signify important content.
-<figure></figure>
My favorite way of including the image is like this:
            <figure>

            <img alt="..." src="img/xxx.jpg" style="width:100%">

            <figcaption> Caption</figcaption>

            </figure>
-<small></small>
Sometimes, when I want to demonstrate the hierarchical structure of the content, I will use the <small>tag to make some text visually smaller. I personally feel this is a more convenient way than adjusting the font feature.
-<br>
The <br> tag create a single line break. I frequently use this tag to adjust the text format, especially the space between paragraphs.
There are also some special cases that I did not know how to handle at first, which I think is worth to be mentioned.
-Some signs have special functions in HTML syntax and hence will not be directly displayed in the webpage:
& = &
<> = </>
blank =
These special cases usually occur when I try to paste the code inside the syntax.
Another special case for myself is using ● (●) to work as the unordered list, becuase the line space between each item in the list is quite large.
-Using ●:
●...
●...
●...
-Using unordered list:
- ...
- ...
- ...
When I want a more compact layout, I usually use "●" instead of unordered list. However, users can change the character that appears in an unordered using CSS. Check the list-style property in CSS, more information can be found at CSS list-style.
Template
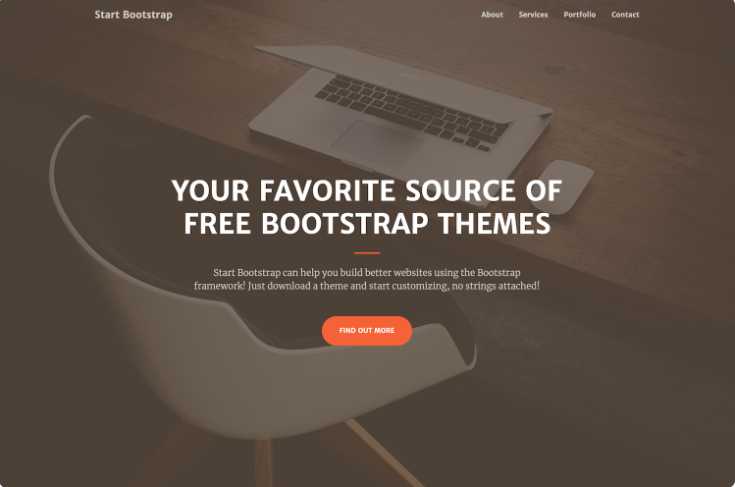
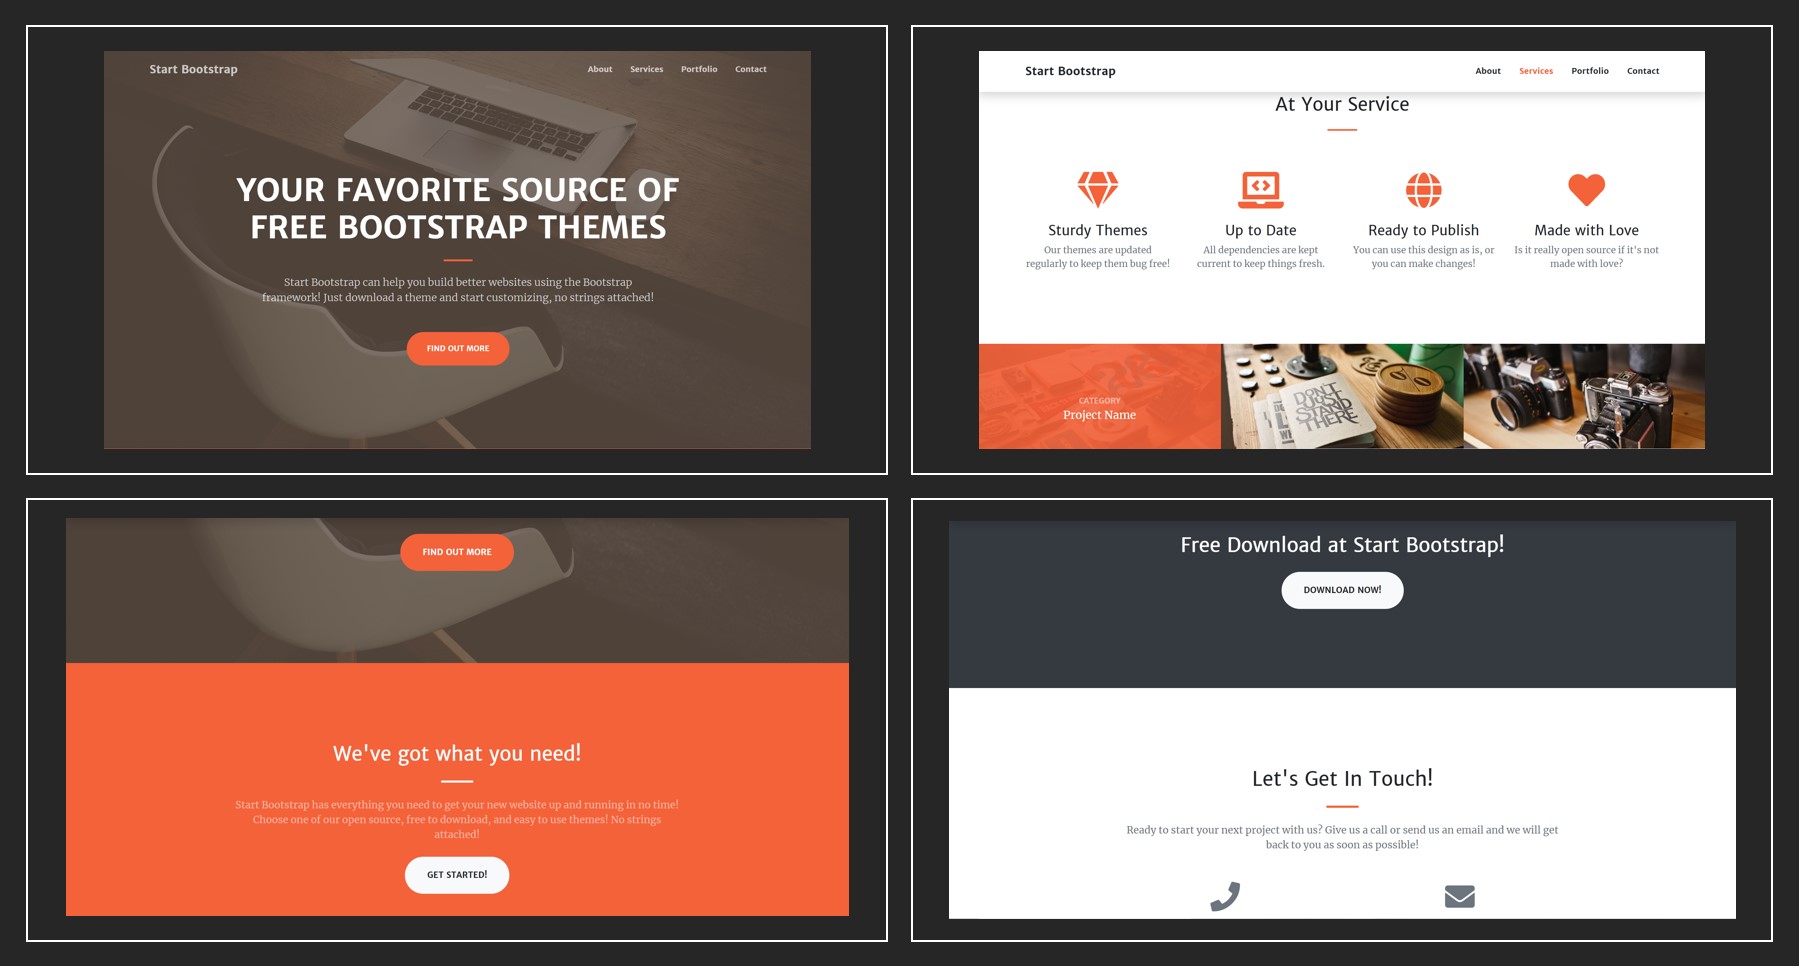
Because my knolwedge about HTML is very basic, I choose to make edition on a template instead of constructing a new website frame from blank. Templated.co and Bootstrap Templates and Themes have been two great sources for HTML templaces. After downloading and testing several different templates, I decided to use the Creative template for the website construction, mainly because its great User Interface Design and elegant color palette.
Webpage Building
After experiencing the user interfaces of several text editors, such as Atom, Notepad++, Webstorm, and Brackets, I found that Brackets is the best option for me. As a beginner, I need to see the instant change on the webpage after making edition so I can make sense of the codes and debug. Brackets is a open-sourced powerful text editor with user-friendly interfaces that supports Live Preview of the website. The Live Preview function establishes a real-time connection to the browser, which allows the changes to CSS and HTML files to be instantly seen on the screen. This function is extremely beneficial for new beginners like me.
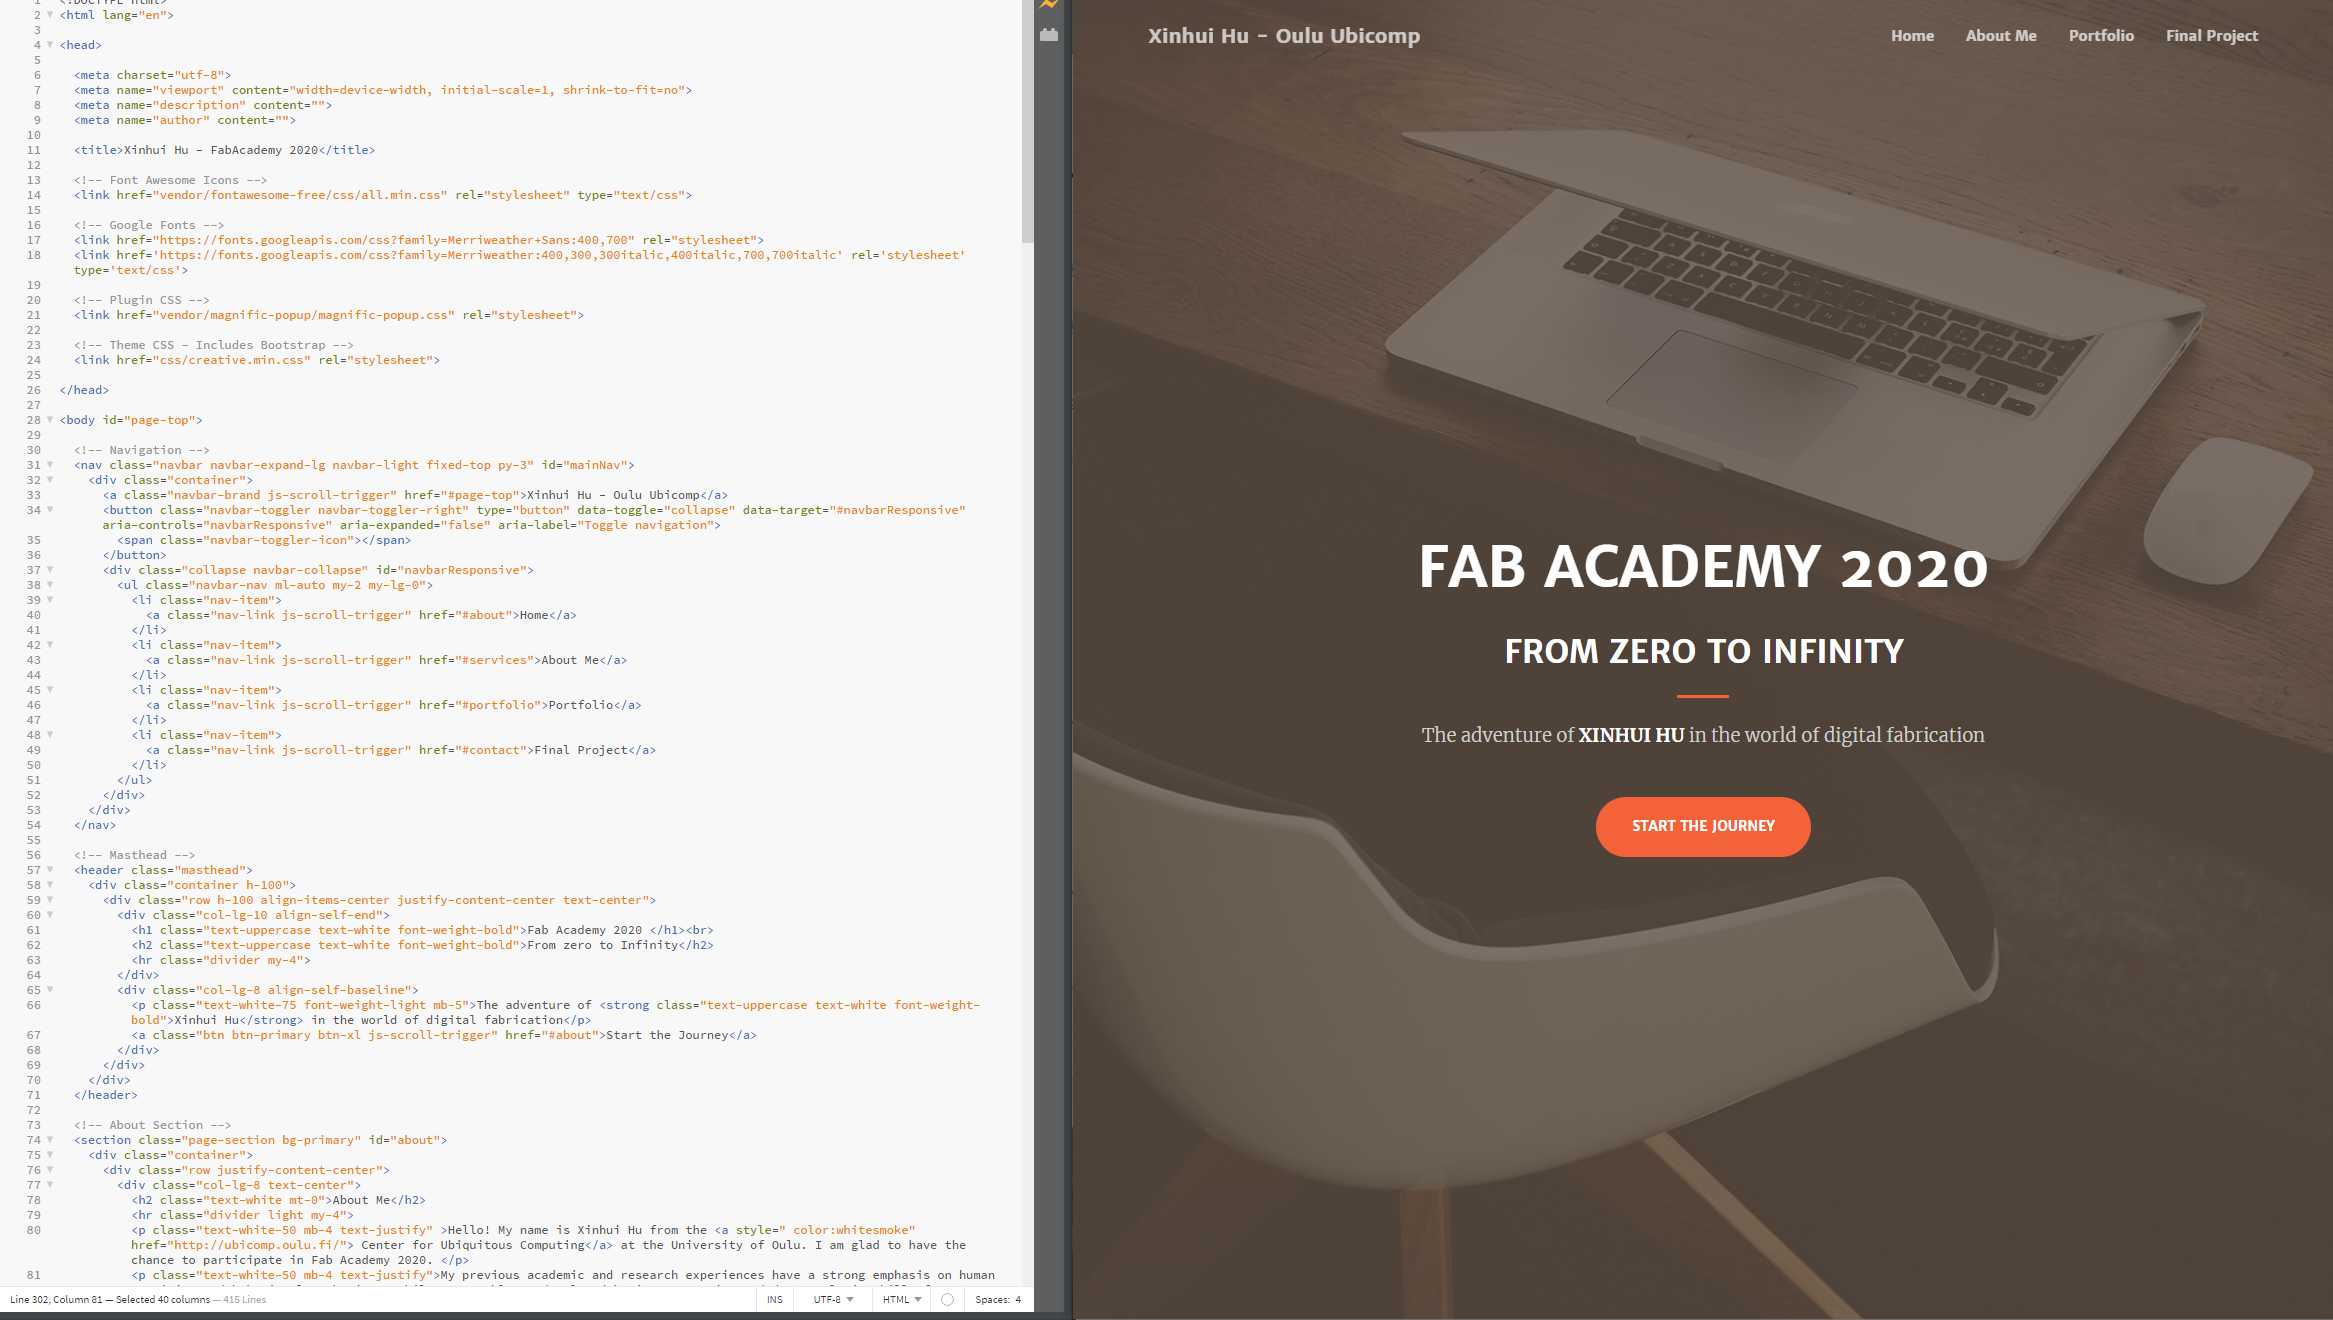
The first step for me get familiar with the template, especially its style, its structure, and the different different elements it contained.
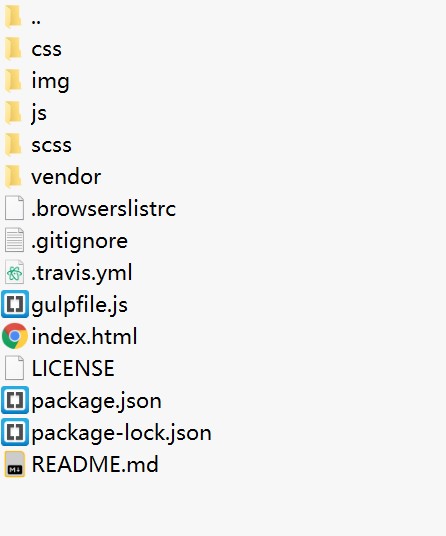
As shown above, inside the zip file of the template, all the directories and files have been equipped along with the template HTML file. Thus, when replacing the default markdown files in my repository, I can directly delete the default files and upload everything in the folder to the repository.
The template only provides the HTML file for the index page. Fortunately, this sample index page contains rich elements and details that will help users to develop other page with a matching style.
Based on my needs for the website, I made the following changes.
1. Removing unnecessary elements
The target user of this template seems to be start-up businesses, as it contains many blocks for services and projects. In my case, I will only need:
- A welcome section
- A self-introduction section
- Portfolio gallery
- Final Project section
- Contact information
Thus, I retained these elements and removed all other blocks.
2. Revising the layout
The portfolio gallery is well-structured, so I just need to make tiny revisions such as extending the portfolio gallery slots from 6 to 18 and changing the font and line-height.
3. Revising Navigation bar
I have referred to previous years' student's website and found Arash's design of the navigation bar, especially the "Jump to" Section are very user friendly. So I managed to make a similar design as he did.
The code to realize this function is :
                <!-- Navigation -->

                <nav class="navbar navbar-expand-lg navbar-light fixed-top py-3" id="mainNav">

                    <div class="container">

                      <a class="navbar-brand js-scroll-trigger" href="index.html">Xinhui Hu - Oulu Ubicomp</a>

                      <button class="navbar-toggler navbar-toggler-right" type="button" data-toggle="collapse" data-target="#navbarResponsive" aria-controls="navbarResponsive" aria-expanded="false" aria-label="Toggle navigation">

                        <span class="navbar-toggler-icon"></span>

                      </button>

                      <div class="collapse navbar-collapse" id="navbarResponsive">

                        <ul class="navbar-nav ml-auto my-2 my-lg-0">

                          <li class="nav-item">

                            <a class="nav-link js-scroll-trigger" href="index.html">Home</a>

                          </li>

                          <li class="nav-item">

                            <a class="nav-link js-scroll-trigger" href="About_Me.html">About Me</a>
                          </li>

                          <li class="nav-item">

                            <a class="nav-link js-scroll-trigger" href="index.html#portfolio">Portfolio
                              <li class="nav-item dropdown">

                                  <a class="nav-link dropdown-toggle" href="category.html" id="dropdown04" data-toggle="dropdown" aria-haspopup="true" aria-expanded="false">Jump to</a>

                                  <div class="dropdown-menu" style="background-color: #6c757d;  ">

                                    <a class="dropdown-item" href="Week0_Principles-and-Practices.html" style="color:#fff" >Week 0 Principles and Practices </a>

                                    <a class="dropdown-item" href="Week1_ProjectManagement.html" style="color:#fff">Week 1 Project Management </a>

                     </div>

The most difficult issue I have encountered in the website building process may be creating a new template for the content pages from scratch
As mention above, the Creative template is a one-page theme for website homepage. For the content page, I need a template that aligns with the design style, which requires some CSS knowledge. Therefore, I have went through the W3school CSS Tutorial and gained the basic understanding of CSS syntax, with which I was able to create a page that adequately similar to the home page style.
Building Page Template
Step 1: Determine color palette
The main theme of the bootstrap template was in orange (#f4623a). Thus, I select the same color to be the major tone of my page. More specially, (1) background of the title block, (2)links, (3) section divider line, and some of the emphasized texts are labelled in orange.
I have also selected several major colors from the color list of the template CSS file and use them as my major color palette.
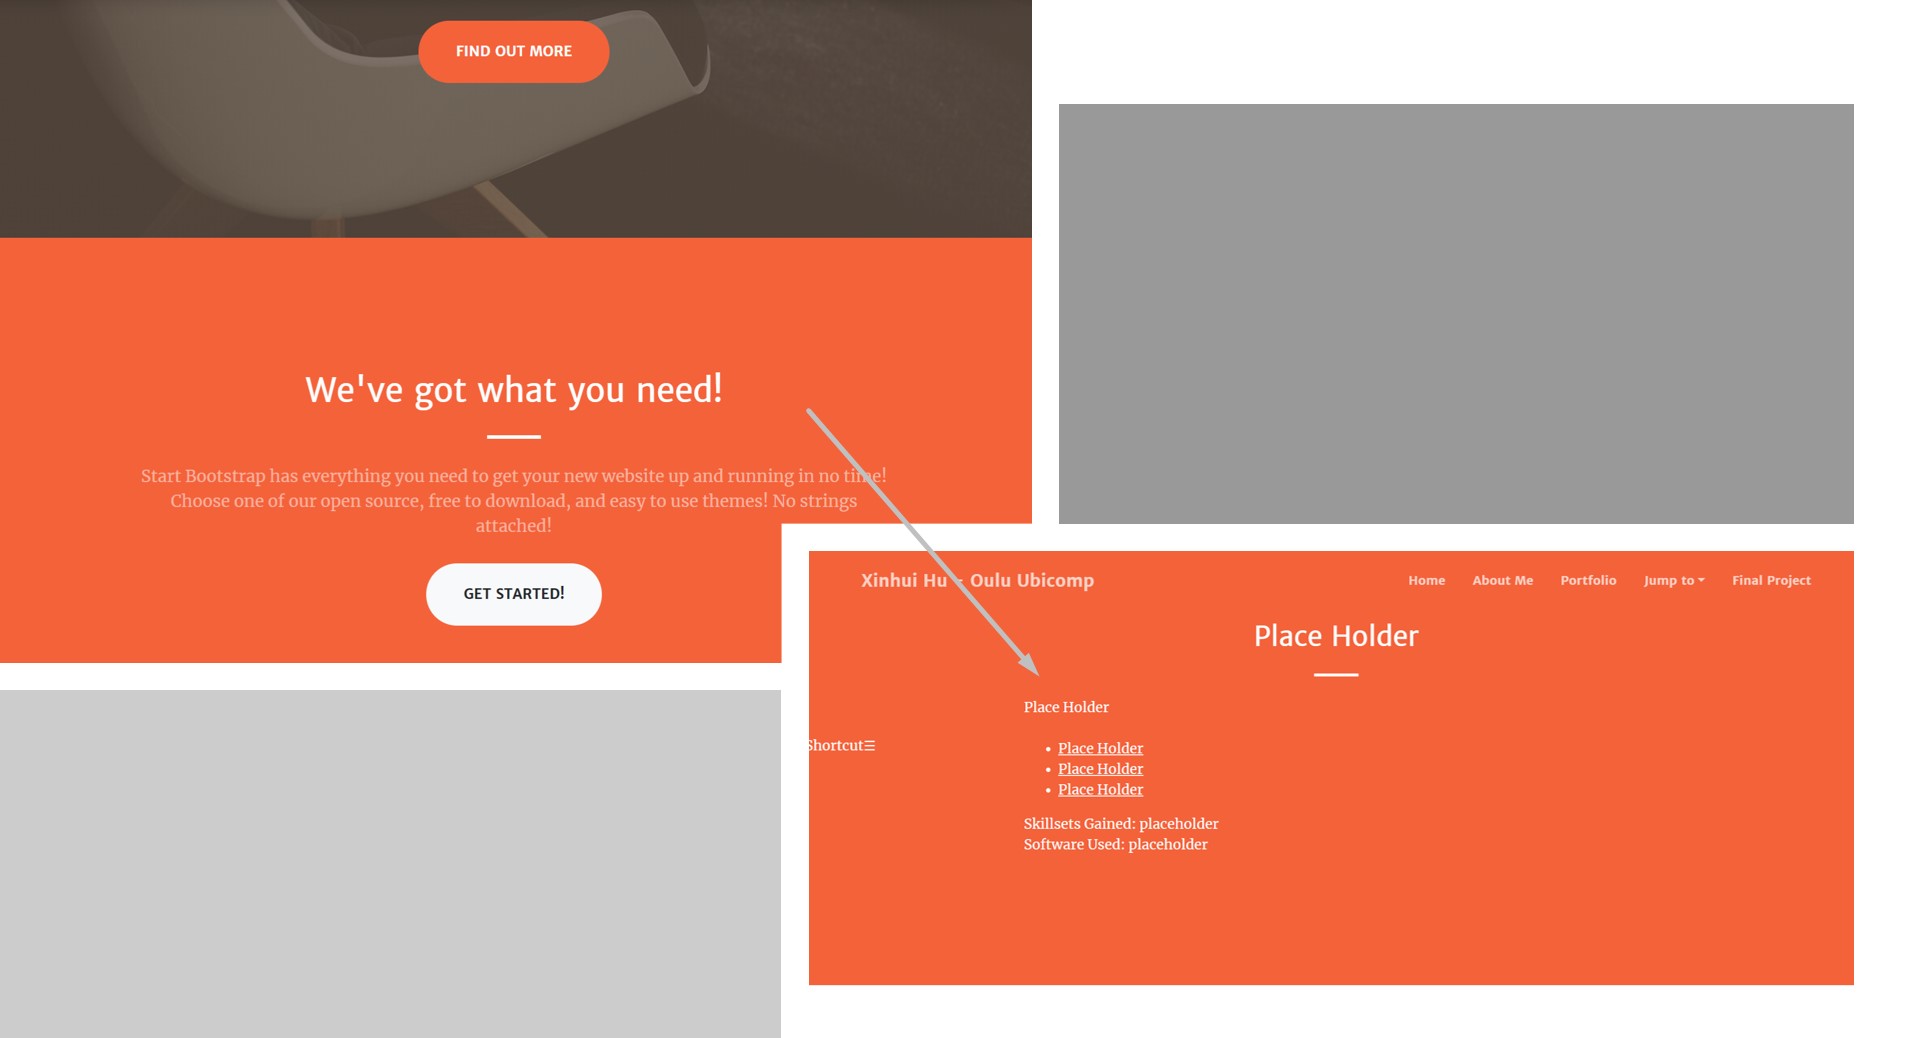
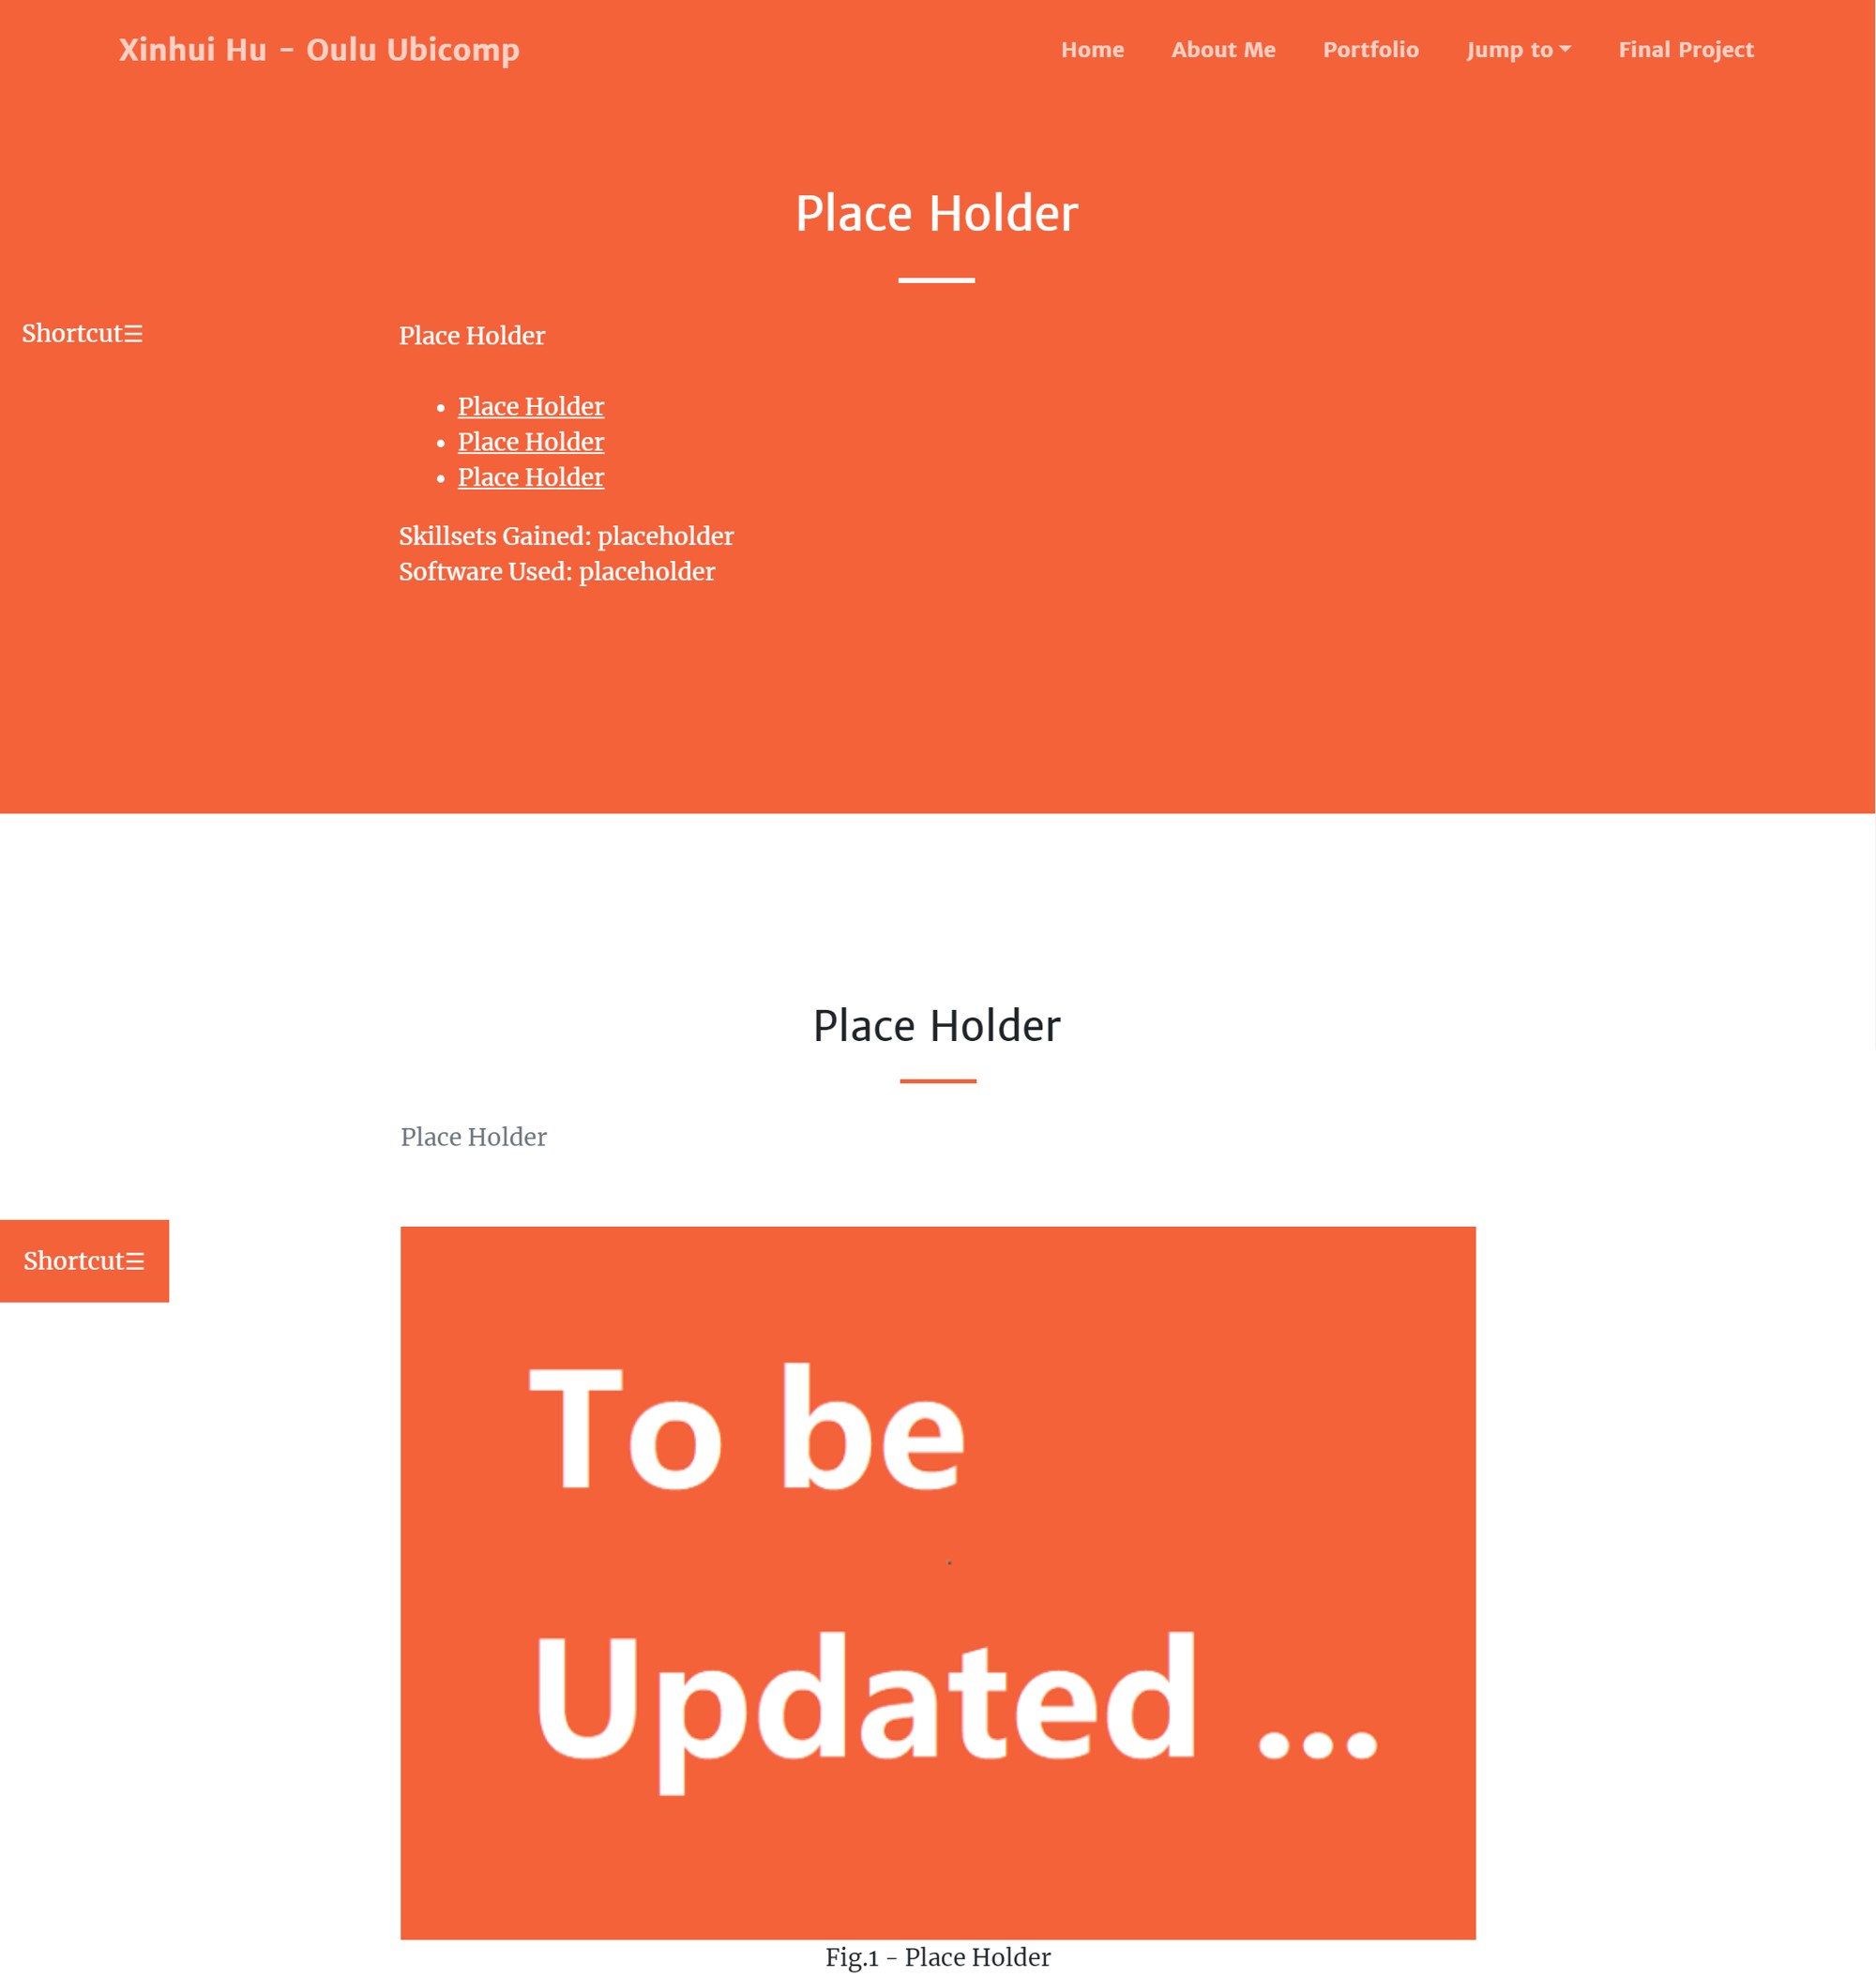
Step2: Determine the page layout
I would like a menu block at the top of each content page that shows the links to the major sections of the project. For convenience, I directly reused the orange block on the homepage and modified its size and container features, such as the overflow settings.
Step 3: Determine the content hierarchy
In order to better demonstrate the hierarchical structure of the content, I used different levels of headings and dividing lines as indicators.
For headings, I majorly use h3 to h5 tags while using a short line underneath the headings to visually separate the contents, for example:
Sample Heading 1
Sample Heading 2
Sample Heading 3
Step4: Shortcut Navigation Bar
Considering the length of the content, I decided to create a collapsible side navigation bar that can be fold and unfold by clicking. The code used are as follow:
CSS code
(Paste in the <head> element)
              <base target="_blank">

                <style>

                  /* The sidebar menu */

                    .newdropbtn {

                      background-color: #f4623a;

                      color: white;

                      padding: 16px;

                      font-size: 16px;

                      border: none;

                      cursor: pointer;


                    }


                    .newdropbtn:hover, .newdropbtn:focus {

                      background-color:#f4623a;

                    }


                    .newdropdown {

                      position: fixed;

                      top:200px;

                      display: inline-block;

                    }


                    .newdropdown-content {

                      display: none;

                      position:fixed;

                      background-color: "white";

                      min-width: 160px;

                      overflow: 20px;

                      box-shadow: 0px 8px 16px 0px rgba(0,0,0,0.2);

                      z-index: 1;

                    }


                    .newdropdown-content a {

                      color: black;

                      padding: 12px 16px;

                      text-decoration: none;

                      display: block;

                    }


                    .newdropdown a:hover {background-color: #ffc107;}


                    .show {display: block;}

                  </style>
HTML code
                    <div class="newdropdown ">

                      <button onclick="myFunction()" class="newdropbtn ">Shortcut☰</button>

                      <div id="myDropdown" class="newdropdown-content">

                        <a href="#" target="_self">placeholder</a>

                        <a href="#" target="_self">placeholder</a>

                        <a href="#" target="_self">placeholder</a>

                        <a href="#" target="_self">placeholder</a>

                      </div>

                    </div>
JavaScript code
(Attach after the HTML code)
              <script>

                    /* When the user clicks on the button,

                    toggle between hiding and showing the dropdown content */

                    function myFunction() {

                      document.getElementById("myDropdown").classList.toggle("show");

                    }


                    // Close the dropdown if the user clicks outside of it

                    window.onclick = function(event) {

                      if (!event.target.matches('.newdropbtn')) {

                        var dropdowns = document.getElementsByClassName("newdropdown-content");

                        var i;

                        for (i = 0; i < dropdowns.length; i++) {

                          var openDropdown = dropdowns[i];

                          if (openDropdown.classList.contains('show')) {

                            openDropdown.classList.remove('show');

                          }

                        }

                      }

                    }

                    </script>
The final appearance of the template are shown below, the template and corresponding CSS file can be found in the File section.
Resizing
After adding the texts in the content sections, a final step for me is to double check if all requirements are met, especially the file size. Files over 10 MB cannot be pushed to the repository. Thus, due to the concern of file sizes, all images and videos are recommended to be compressed before uploading.
I have chosen to resize the images withFast Stone.
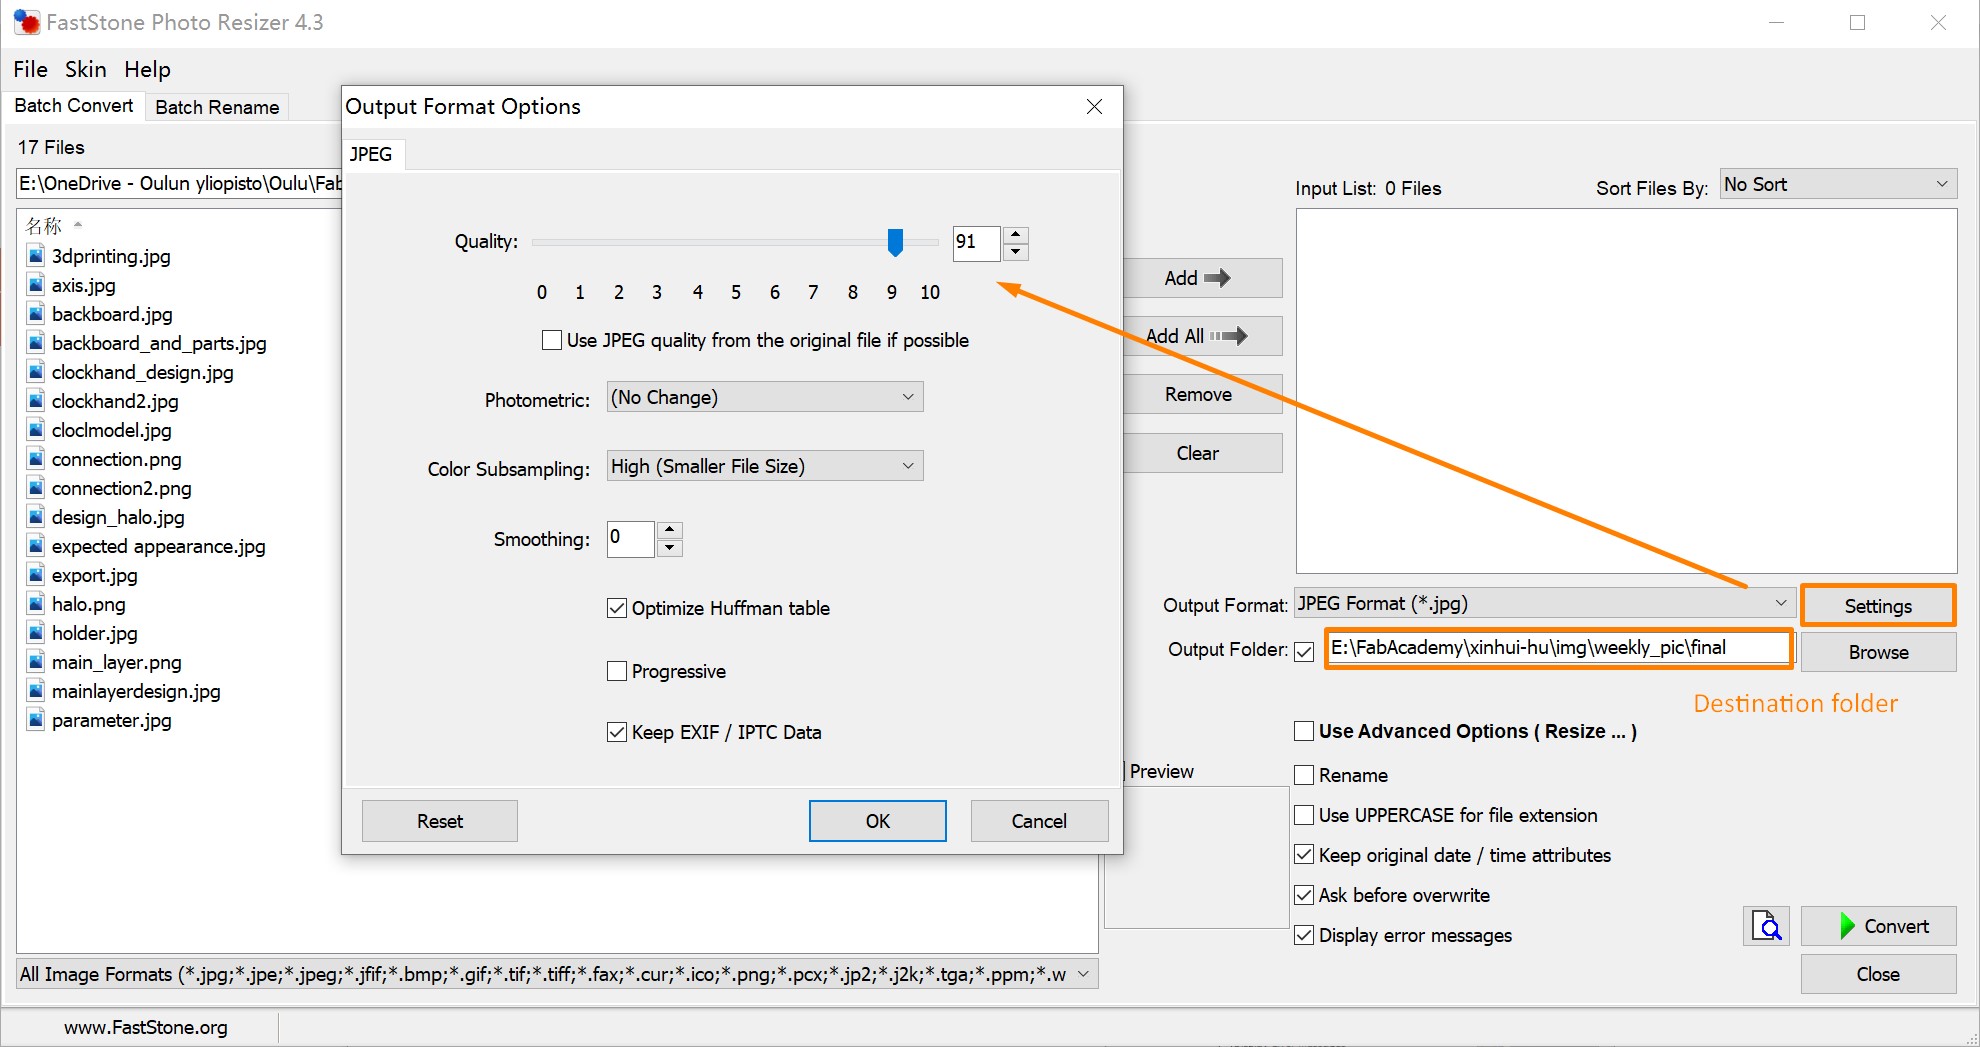
Fast Stone is a free software that allows the images to be compressed in batch. The degree of compression are shown in percentage, so I am not sure the exact resolution of the compressed images. Depends on the different sources of the image, the reduced quality various significantly. The goad is to make the size of the image file around 100 KB.
When the HTML file has been edited, the files are ready to be added to the repository.
Because I want to use HTML to document my project, I need to substitute the initial markdown files existing in the repository. Since the template I used has provided most necessary files along with the HTML page, I do not need to retain any of the preexisting files. So I have deleted all the existing files and uploaded all files in my local folder.
One additional step is to create the .gitlab-ci.yml file for my HTML file.
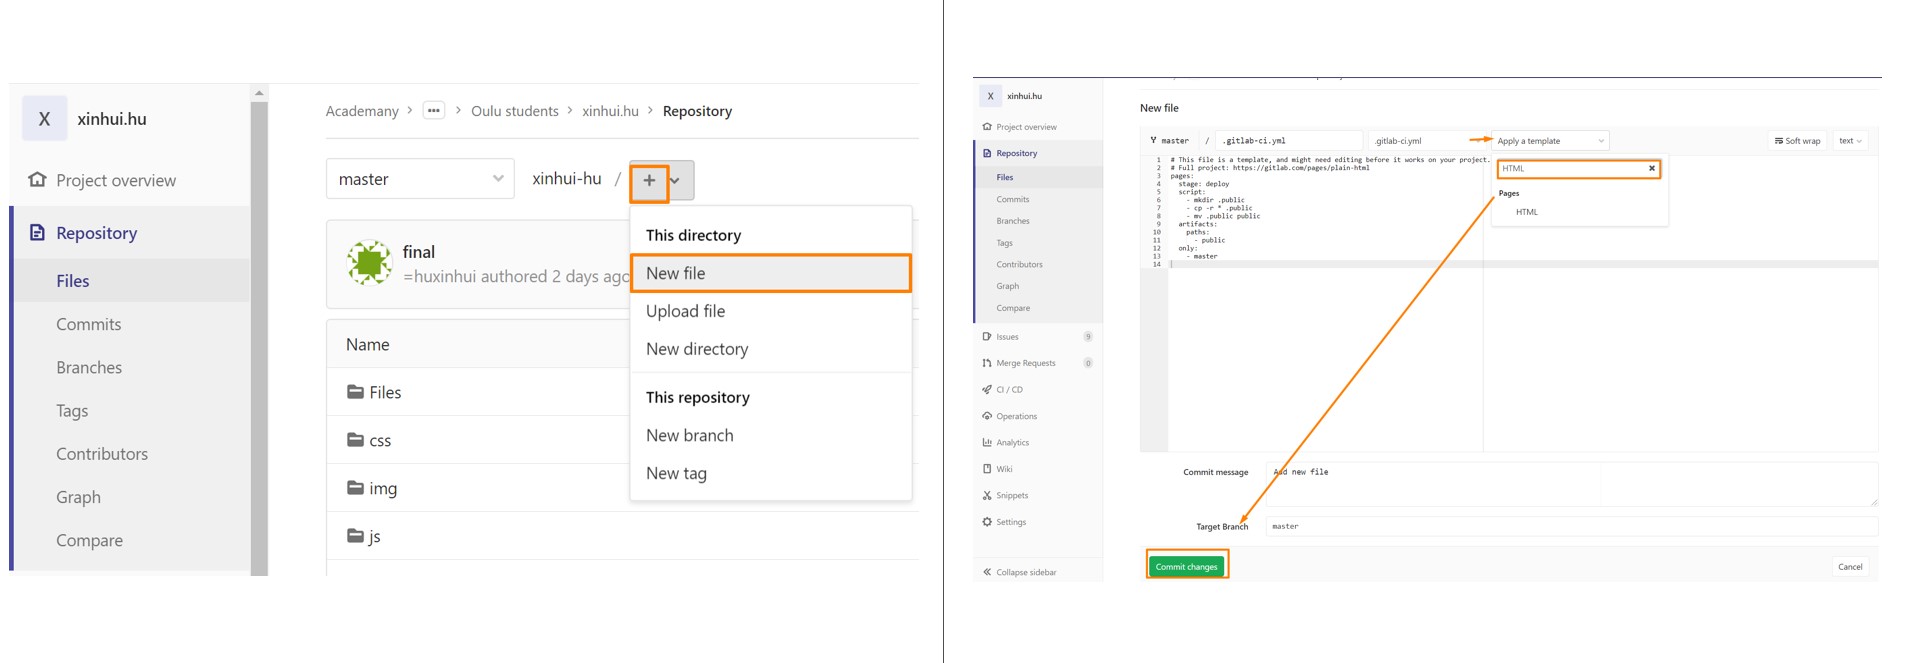
Repository >> Files >>"+" >>New File>>Choose ".gitlab-ci.yml>>Apply a template >> HTML >>Commit changes
Local to Repository
A well-explained slide show from our instructor Ivan have provided us with the necessary basic knowledge about GIT. The remote repository is located on the GITLab Repository. Git Bash has been used to push and pull the files between local repository and remote repository.
The major steps in git configuration include:
● Generating SSH keys
● Clone the Repository URL
● Update Repository
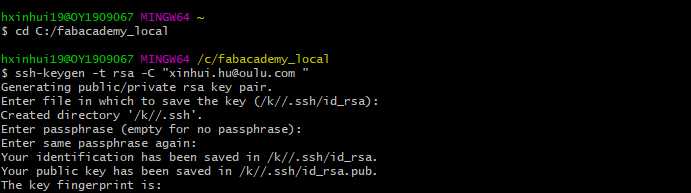
Generating SSH keys
The remote repository is located on the GITLab Repository. The SSH keys are generated in the .ssh folder in my personal folder.
1. Open Git Bash and change to the target file destination
cd C:/fabacademy_local
2. Generate the SSH with the following command:
ssh-keygen -t rsa -C "[your.email]@[example].com "
P.S: replace "your.email" and "example" with the actual information
Then the generated .ssh folder can be found in the target directory
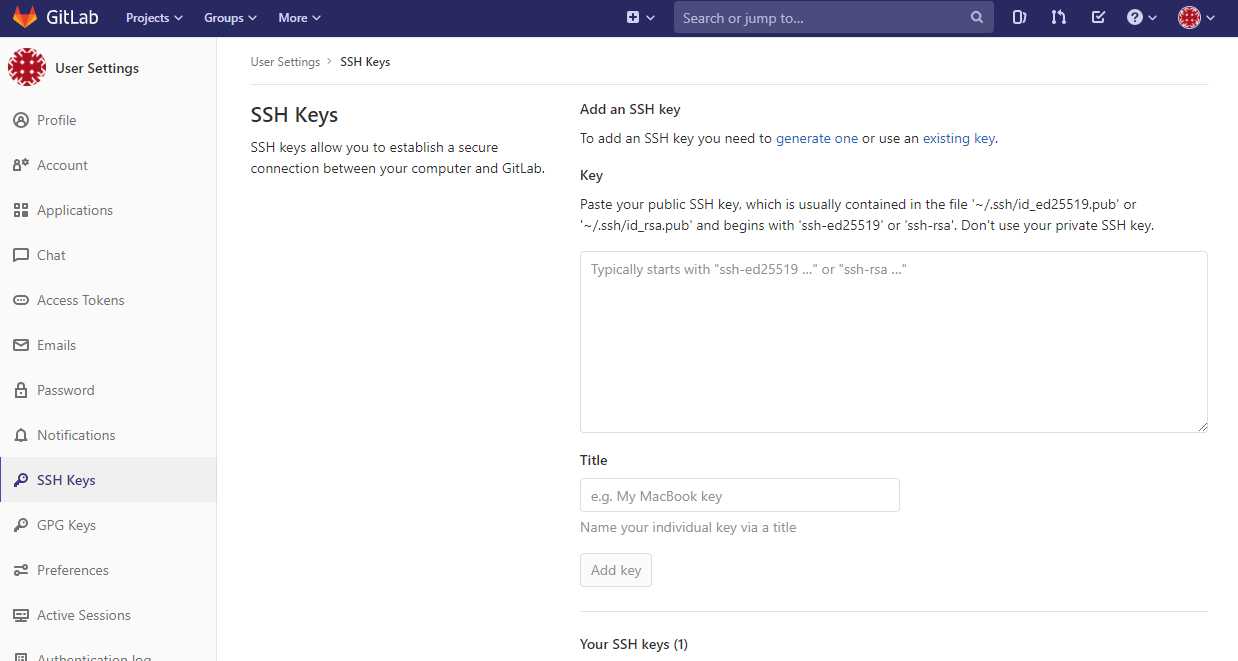
3. Find the keys in the .ssh folder and paste the SSH Keys to the GitLab Fabcloud via User Settings >> SSH Keys.
* The .ssh folder contains public and private key, user should only copt the public one, which is in .pub fotmat.
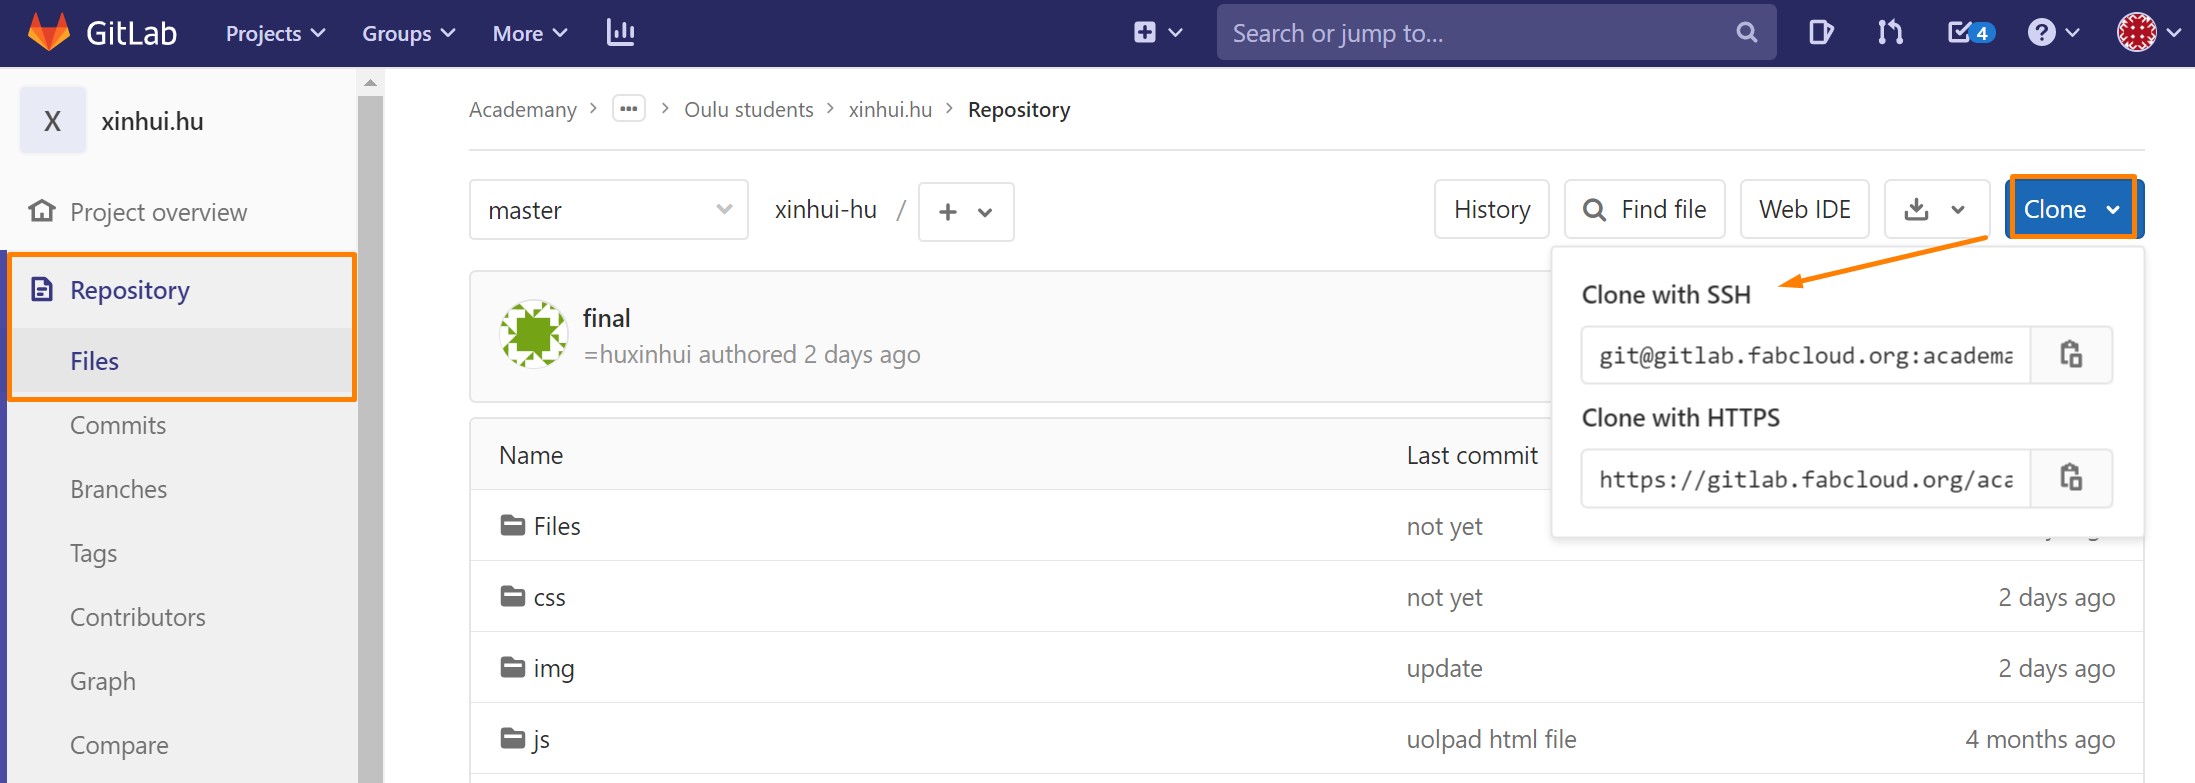
Cloning the Repository URL
Run the following code in Git Bash :
git clone [cloned repository address]
P.S: replace " repository address" with the actual cloned address
Git Commands Cycle
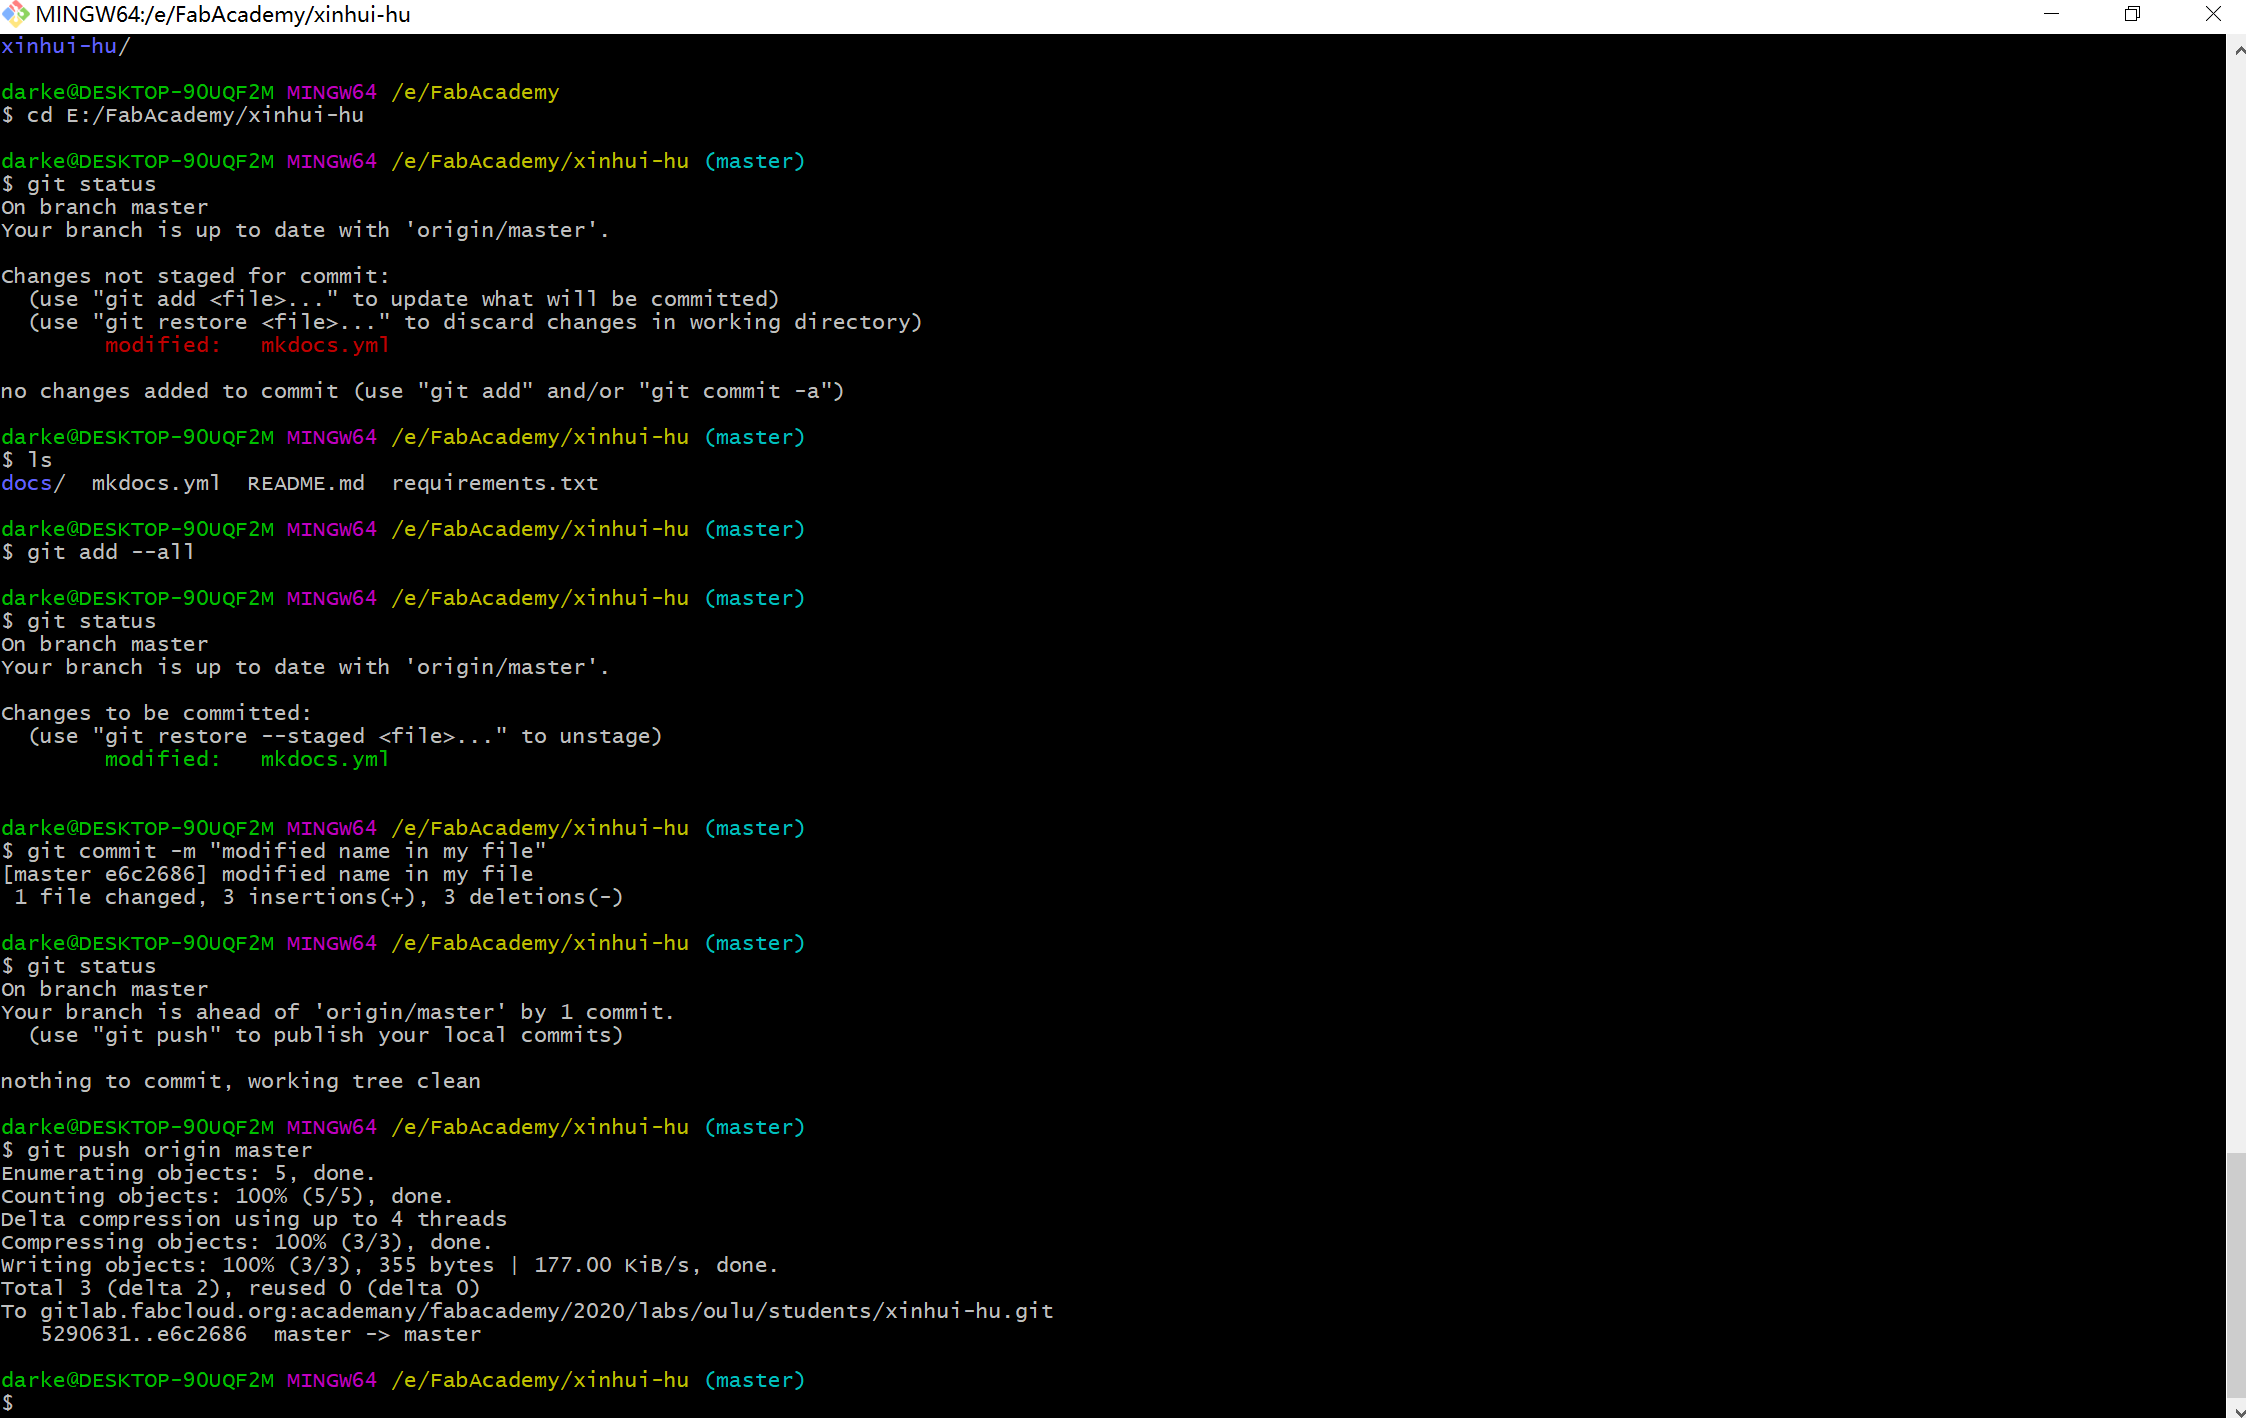
For each cycle of repository synchronization, I will repeat most of these following git commands.
1. git pull : Synchronize local repository with the remote repository
git pull command is necessary when the remote repository record is newer than the local repository. For example, if I upload a new file directly to the repository instead of pushing from local via Git Bash, the remote repository is newer than local. In this case, the remote repository must be pulled to local first.
2. git add : Add files to the stage area
git add must received parameters either in the form of list of files or -- all(add all modified fiels)
3. git commit" : Add the files in stage area to the repository
I usually only use git commit -m"[updated content]" to commit
4. git push :Upload the repository to the server
The last step of synchronizing the local and remote repository. There are two things to be noted:
- There is an upper limit in file size per push: 10 MB
- If the repository are modified in ways other than local push, git pull must be conducted before git push in order to avoid error.
5. git status : Check the modification status
This command will show the changes of files, which can be conducted at any stage in the command cycle
File
Template:
● Template.html ● CSS