WEEK 4 - Electronics Production
INTRODUCTION
For me, I am very happy to finally do SMD soldering, This has been a goal for me for a long time.
Assignment Description
- characterize the design rules for your PCB production process
- please click here to go to our group assignment
- make an in-circuit programmer by milling and stuffing the PCB, test it.
group assignment:
individual assignment:
Let's Start with FABISP
tools and components
Note: This week, we didn't have all the SMD components.
- 1 x monofab SRM-20 (More about SRM-20 here)
- 1 x FR1 (Copper PCB Board)
- 1 x 1/64 inch end mill bit
- 1 x V bit 30'/.2
- 1 x double tape
- 1 x Soldering Station.
- soldering wire
- AVO multimeter
- flux
- Magnifying Glass
- Electronic Components: ATiny44 microcontroller, USB Connector, crystal 20.000 mhz, pin header.
Now! let's go with PCB fabrication process
- Download PCB traces PNG fromhere and outline from here
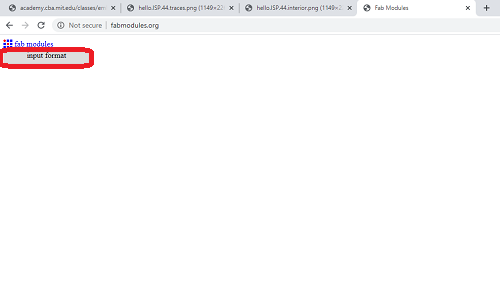
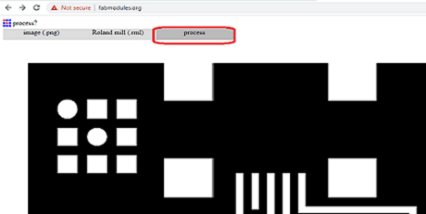
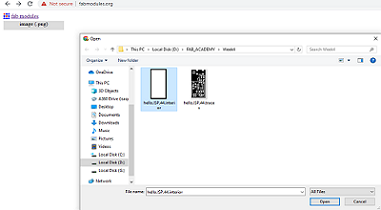
- open fab modules from here
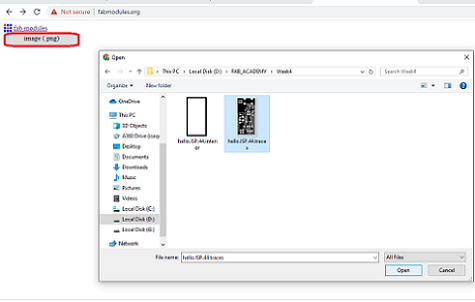
- click on input format, then choose image
- upload your trace png file
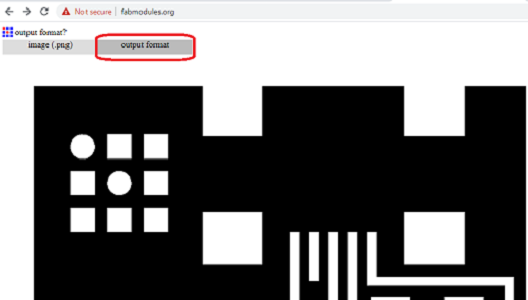
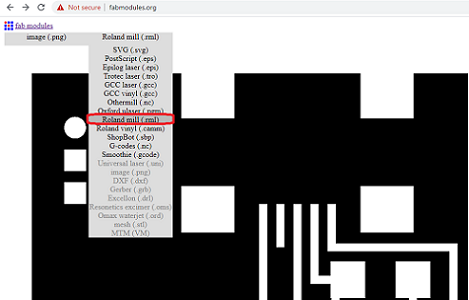
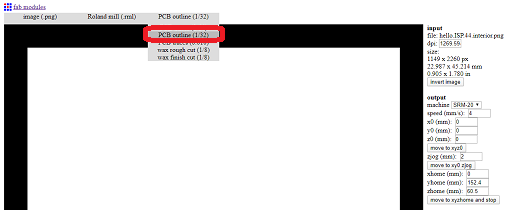
- click on output format, then Roland mill (rml)
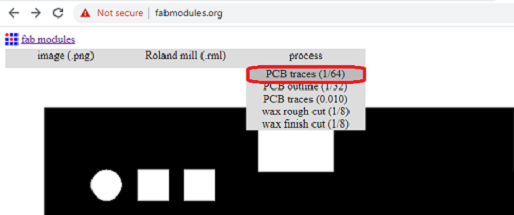
- press on process, then PCB traces (1/64)
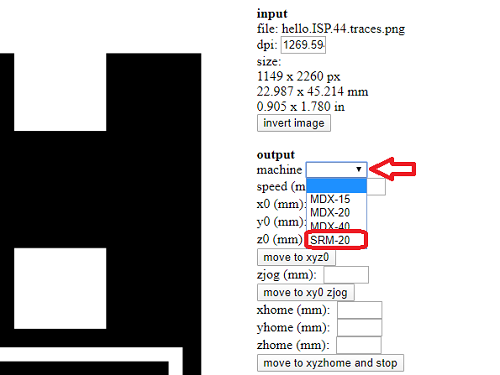
- On the right side choose your machine brand, for me it was SRM-20
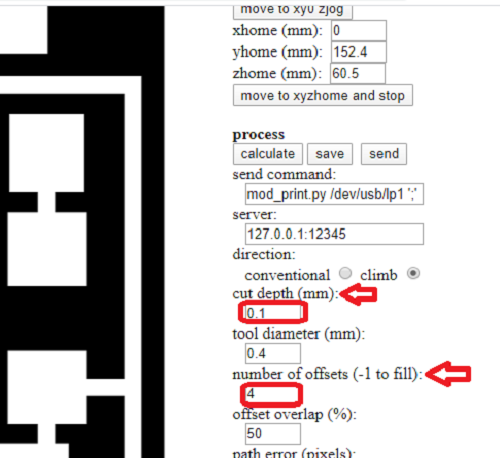
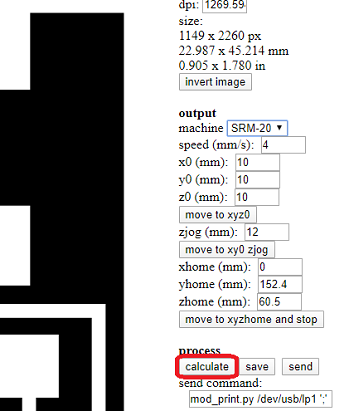
- Scroll down, set the cut depth to 0.1, and number of offsets 4(to remove all copper)
- Set the initial position to zero
- Click on calculate and wait for all tracks to appear
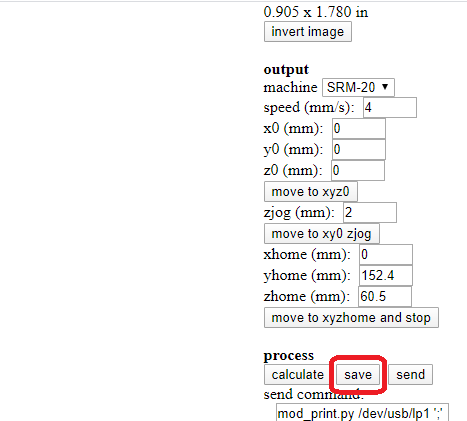
- finally press on save
- Repeat all steps with the outline file, but choose outline (1/32)


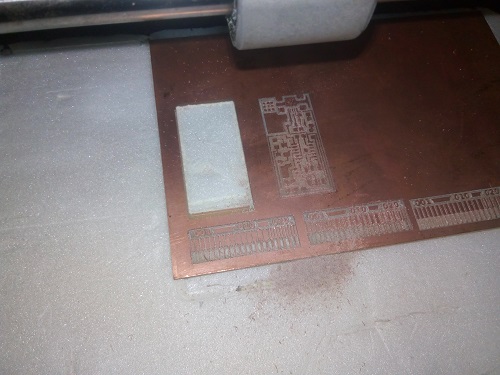
Machining process
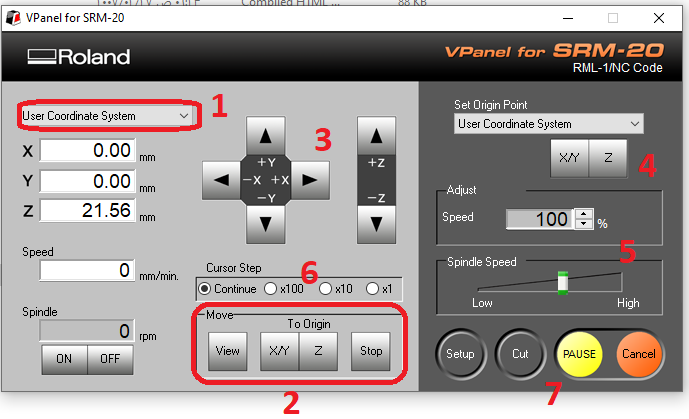
I used Roland Vpanel for SRM-20
- download the Vpanel from here
- open it
- (3)you can move all axes from
- (2) to go to your origin
- (4) to set your new origin
- (7)click on cut to add rml file, then click on output
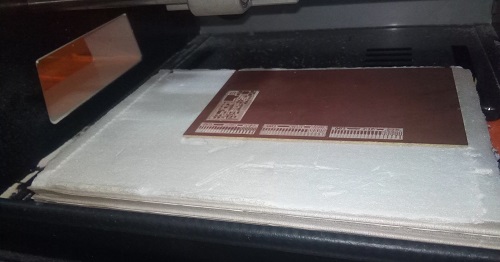
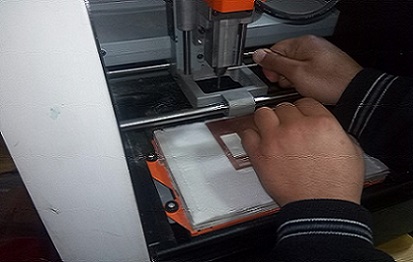
- Fix the PCB on the bed, and install V_bet
- set your Zeros
- close the door and press on outline
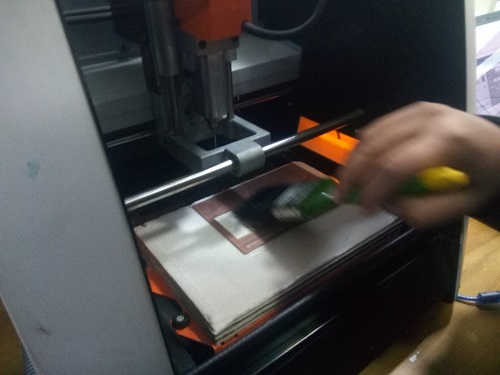
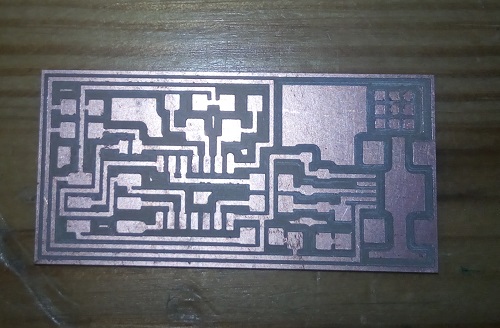
- Clean it then get it
Note: you need to install the driver, and the program does not work without communication with the machine
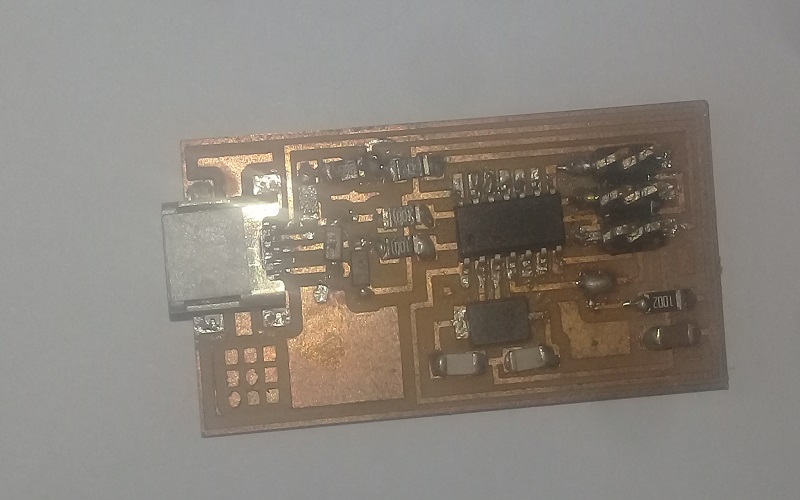
Soldering

Programming
there are two ways to program ATtiny44
- (1)USING FAB ISP AND WINAVR
- (2)Using Arduino
- I used Arduino you can download it from here
- I followed these two tutorials Arduino as an ISP and FabIsp tutorial.
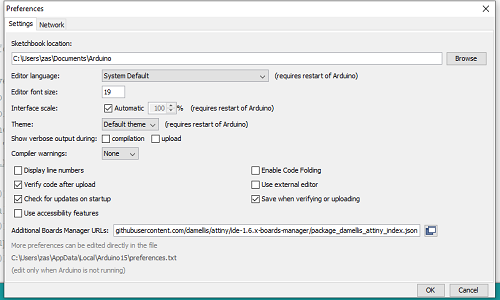
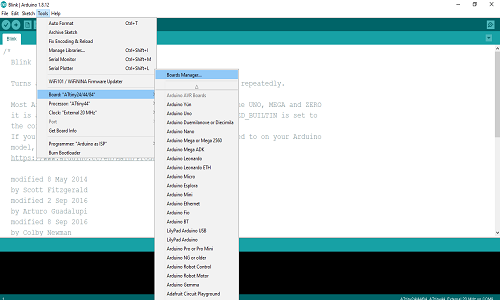
- Go to preferences
- Add this link
https://raw.githubusercontent.com/damellis/attiny/ide-1.6.x-boards-manager/package_damellis_attiny_index.json
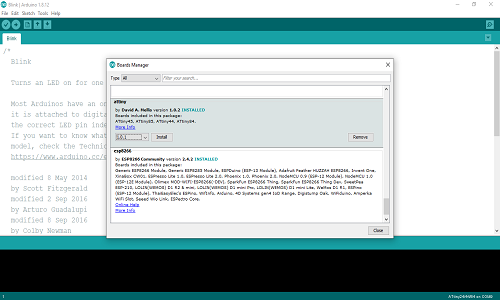
, then click OK - GO to Tools and Board>> choos Boards Manager
- scroldown ATtiny board should be added>> click on install
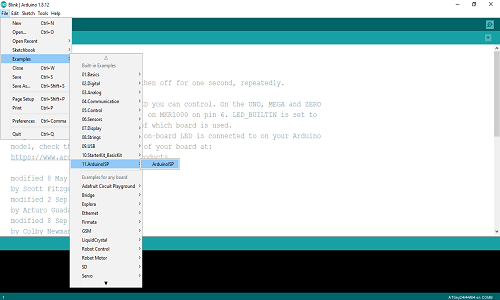
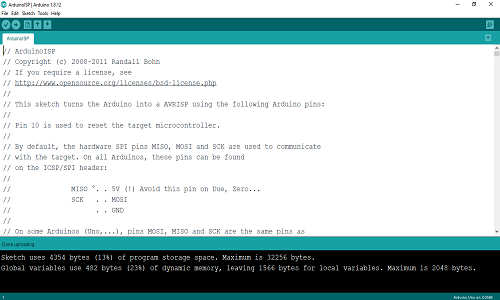
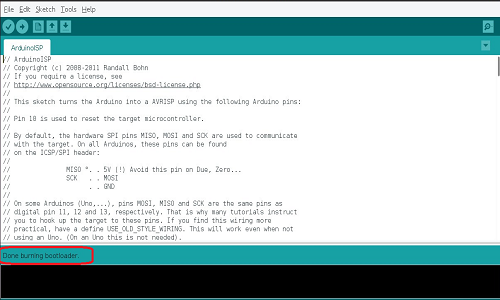
- then go to Examples choose ArduinoISP, then upload it to your Arduino
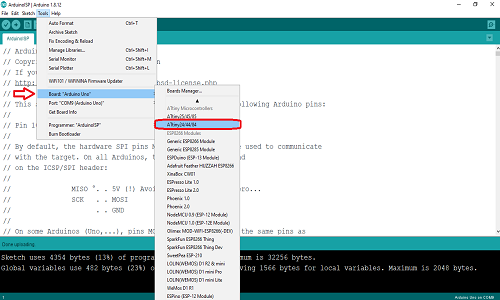
- follow the next instructions:
- From borad,Choose Attiny24,44,84 Board
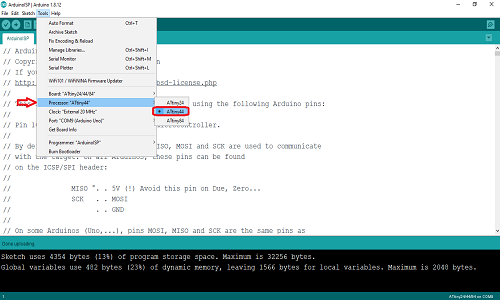
- From Processor, choose ATtiny44
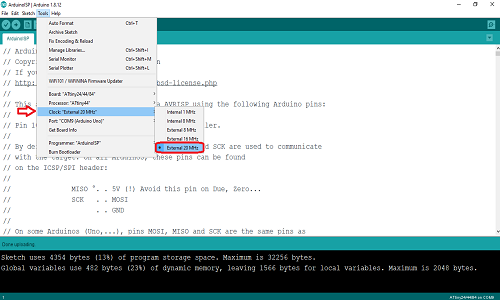
- From Clock, choose 20MHz, or use internal clock
- choose your port
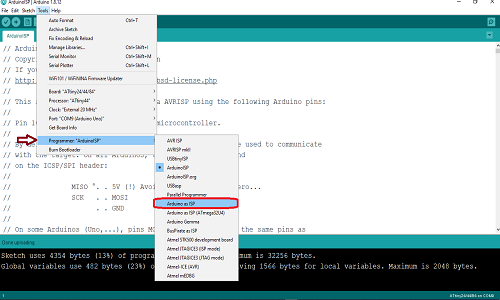
- Arduino as ISP, then burn bootloader
- Then we need to prepare our operating system (In my case the operating system was Ubuntu)

Open Terminal and type:
sudo apt-get install flex byacc bison gcc libusb-dev avrdude
Then type:
sudo apt-get install gcc-avr
Then type:
sudo apt-get install avr-libc
Then type (may already be installed):
sudo apt-get install libc6-dev
Download and Unzip the Firmware:
Move to the desktop
cd ~/Desktop
Download the firmware from the Fab Academy Electronics Production page.
wget http://academy.cba.mit.edu/classes/embedded_programming/firmware.zip
Unzip the firmware
unzip firmware.zip
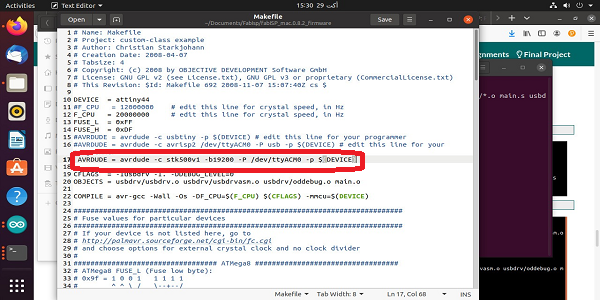
AVRDUDE = avrdude -c avrisp2 -P usb -p $(DEVICE) # edit this line for your programmer
To
AVRDUDE = avrdude -c stk500v1 -b19200 -P /dev/ttyACM0 -p $(DEVICE)
Note that the /dev/ttyACM0 is my Arduino Port
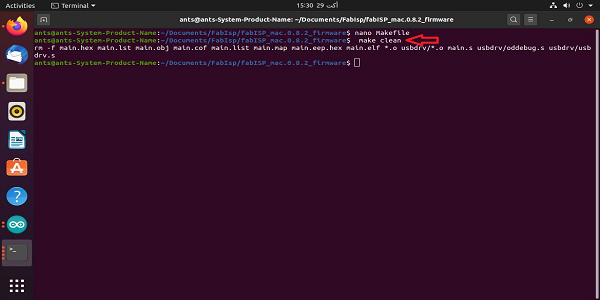
make clean
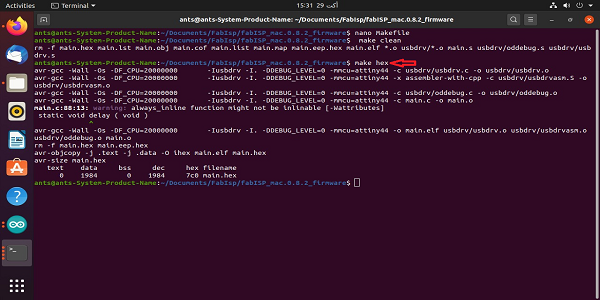
make hex
make fuse
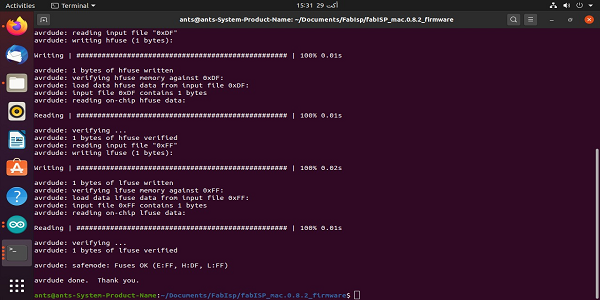
make program
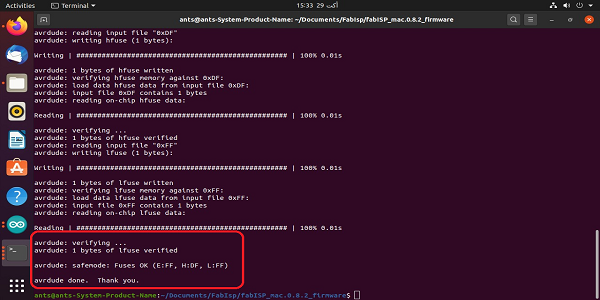
congratulations :)
Now Just remove the Jumper (0 Ohm resistor), and Here You Go!