WEEK 11 - Output Devices
INTRODUCTION
I think these weeks will never be forgotten, we are in the third month and the world is still under pandemic, but we are trying to help with digital fabrication, and i think we have done a good job so far.
Assignment Description
- add an output device to a microcontroller board you've designed, and program it to do something
individual assignment:
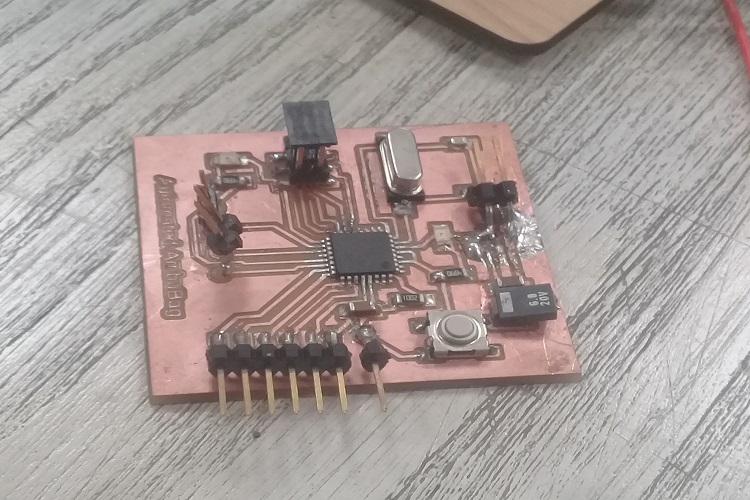
components
- Servo Motor
- Attiny 44
- 1 R 10kohm
- 1 capacacitor 1uf
- 3 AvrISP pin head
- 1 Resonator 20MHz
- POT 20K
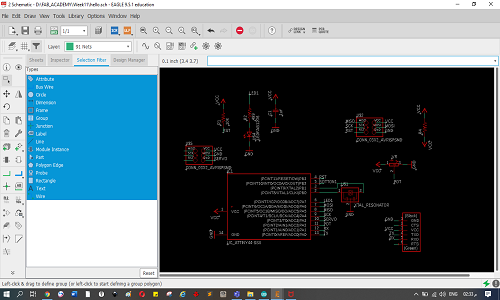
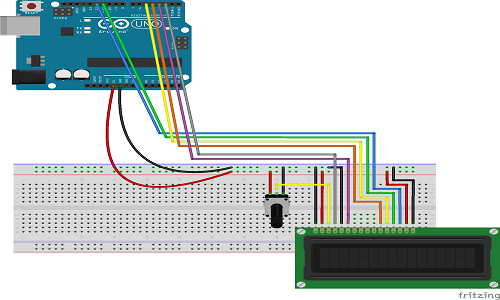
Circuit
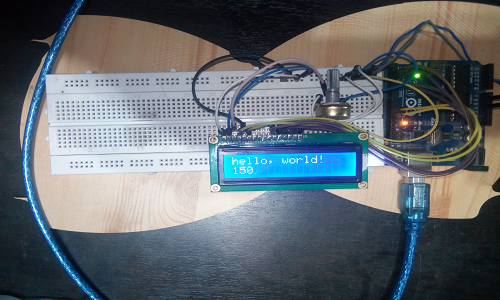
The Idea: I need to control my servo with 90 dgree by using the Arduino, and i need to adjust the speed
I used Eagle to design my board
you can learn more about Eagle here
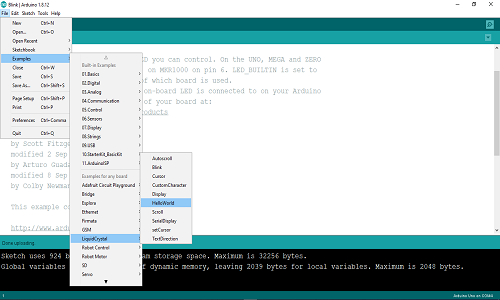
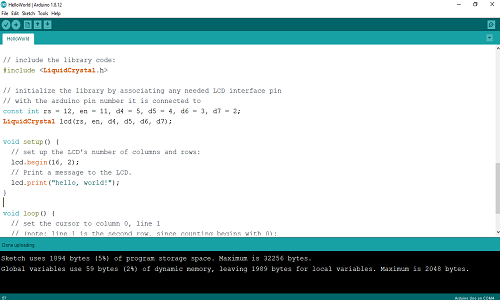
and I used Hello echo, after I modified it
Circuit with Arduino
- its very easy, you can open Arduino IDE
- and go to the examples and choose the liquid crystal
- just follow the instructions
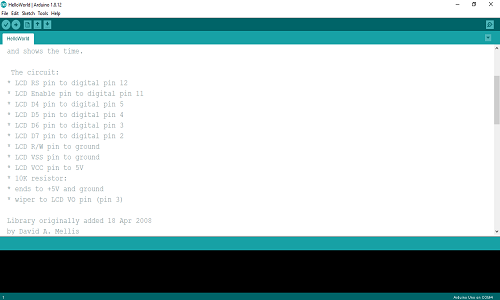
Programming
- I built my code on the Hellow world example, and sweep for servo
- based on my idea, I devided the movement of servo to tow sections with 90 degree:Inhaling for Right moving, Exhaling for left moving
- to simplify my code, i built tow VOID functions for Inh and Exh
Code
// include the library code:
//#include
#include
LiquidCrystal_I2C lcd(0x27,20,4);  // set the LCD address to 0x27 for a 16 chars and 2 line display
#include
//const int rs = 12, en = 11, d4 = 5, d5 = 4, d6 = 3, d7 = 2;
//LiquidCrystal lcd(rs, en, d4, d5, d6, d7);

Servo myservo;  // create servo object to control a servo
int pos = 0;  // analog pin used to connect the potentiometer
int val=0;    // variable to read the value from the analog pin
int potpin = 0;
int a=0;
int value=0;
int T=0;
int dn=0;
int val2=0;
int hold=0;

void setup() {
    lcd.init();                      // initialize the lcd
  // Print a message to the LCD.
  lcd.backlight();
  myservo.attach(9);  // attaches the servo on pin 9 to the servo object
  // set up the LCD's number of columns and rows:
  //lcd.begin(16, 2);
  Serial.begin(9600);
  // Print a message to the LCD.
  lcd.print("Breathing");
  T=millis();
}

void loop() {
  val=analogRead(A0);
  val = map(val, 0, 1023, 0, 25);
  value=val+9;
  Serial.println(value);
        lcd.setCursor(0, 1);
       lcd.print(value);
   val2=analogRead(A1);
   hold= map(val2, 0, 1023, 0, 500);
   lcd.setCursor(11, 0);
   lcd.print("Hold");
   lcd.setCursor(12, 1);
   lcd.print(hold);
  INH();
  delay(hold/2);
  EXH();
    delay(hold);
     lcd.setCursor(3, 1);
    lcd.print(millis() / 1000);
    dn=((millis()-T)/1000);
   if(dn>=60){
    a=0;
    millis();
    T=millis();
    dn=0;
   }else{
        a++;
    lcd.setCursor(7, 1);
    lcd.print(a);}

  }
 void INH(){

    for (pos = 0; pos <= 90; pos += 1) { // goes from 0 degrees to 90 degrees
    // in steps of 1 degree
    myservo.write(pos);               // tell servo to go to position in variable 'pos'
    delay(val-4);                    // waits (val value)for the servo to reach the position
  }
}
void EXH(){
    for (pos = 90; pos >= 0; pos -= 1) { // goes from 90 degrees to 0 degrees
    myservo.write(pos);              // tell servo to go to position in variable 'pos'
    delay(val+5);                       // waits (val value)for the servo to reach the position
//   lcd.setCursor(0, 1);
//   lcd.print(pos);
}
}
Servo motor test for final project
all documents here