WEEK 9 - Input Devices
INTRODUCTION
I think these weeks will never be forgotten, we are in the third month and the world is still under pandemic, but we are trying to help with digital fabrication, and i think we have done a good job so far.
Assignment Description
- measure something: add a sensor to a microcontroller board that you have designed and read it
individual assignment:
components
- Servo Motor
- Attiny 44
- 1 R 10kohm
- 1 capacacitor 1uf
- 3 AvrISP pin head
- 1 Resonator 20MHz
- POT 20K
- push button
Circuit
The Idea: I need to make a start/stop button for the code, and control my servo with 90 dgree by using POT
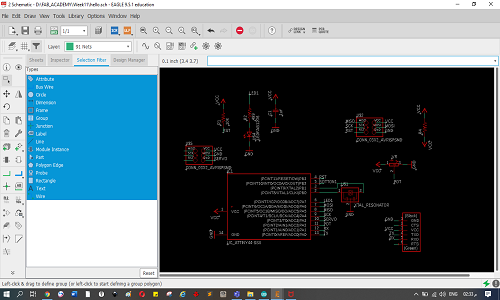
I used Eagle to design my board
you can learn more about Eagle here
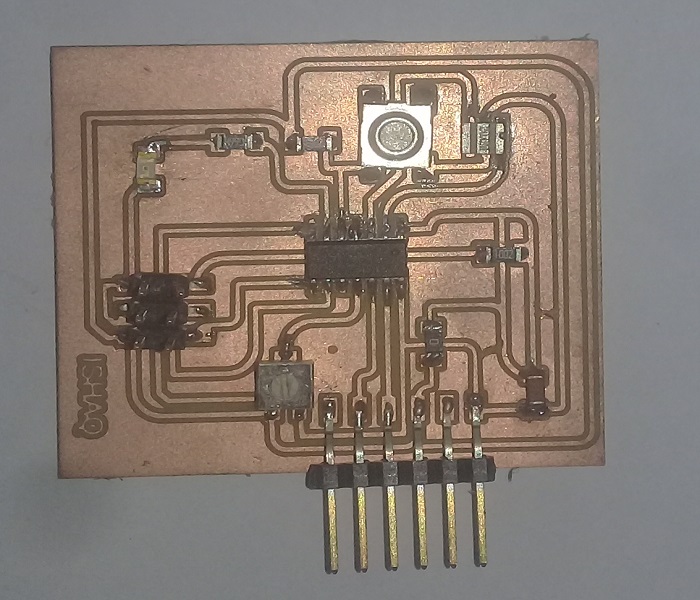
and I used Hello echo board
Hello Echo board
- I started with Hello Echo board
- Now we need to make an action with POT
- we can consider the POT is an analog sensor
- so, we can read the analog with arduino via analog ports
- this syntax to read it
int sensorValue = analogRead(A0);
- this the simple code to proof that
                  // the setup function runs once when you press reset or power the board
                  void setup() {
                  // initialize digital pin LED_BUILTIN as an output.
                  pinMode(LED_BUILTIN, OUTPUT);
                 }

                // the loop function runs over and over again forever
                void loop() {
                    int sensorValue = analogRead(A0);
                  digitalWrite(LED_BUILTIN, HIGH);   // turn the LED on (HIGH is the voltage level)
                  delay(sensorValue);                       // wait for a second
                  digitalWrite(LED_BUILTIN, LOW);    // turn the LED off by making the voltage LOW
                  delay(sensorValue);                       // wait for a second
                }
                #define pb 2
                #define pb1 3
                #define buz 11
                int count=0;
                void setup()
                {
                  pinMode(pb,INPUT_PULLUP);
                  pinMode(pb1,INPUT_PULLUP);
                  pinMode(buz,OUTPUT);
                }

                void loop()
                {
                  if(digitalRead(pb)==LOW)
                  {
                    delay(10);
                    while(digitalRead(pb)==LOW);
                    count++;
                    if(count==2) count=0;
                  }

                  if(digitalRead(pb1)==LOW&&count==true)
                  {
                    delay(10);
                    digitalWrite(buz,HIGH);
                  }else digitalWrite(buz,LOW);

                }
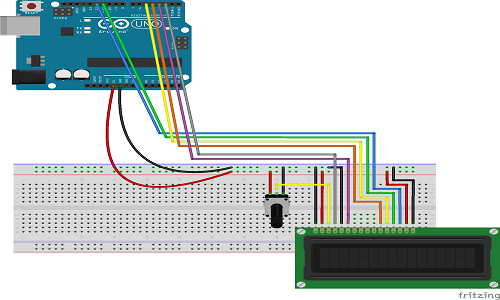
Circuit with Arduino
- the same idea here, we need control the duration of motion for servo motor
Note
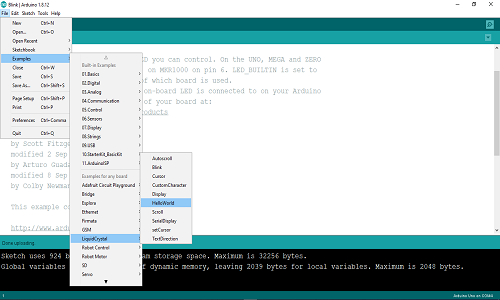
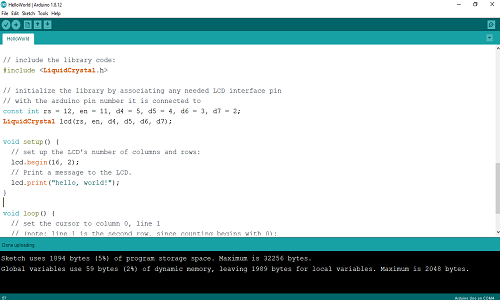
: This circuit is for both input and output, but what interests us here is the input, which is represented here by the POT- its very easy, you can open Arduino IDE
- and go to the examples and choose the liquid crystal
- just follow the instructions
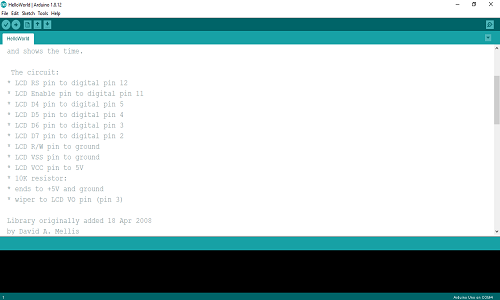
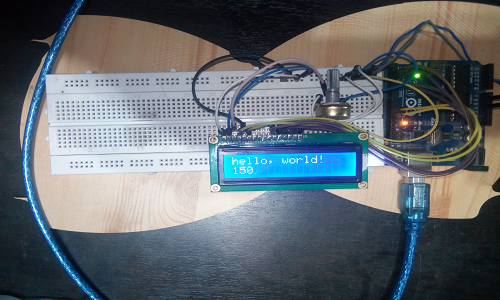
Programming
- I built my code on the Hellow world example, and sweep for servo
- based on my idea, I devided the movement of servo to tow sections with 90 degree:Inhaling for Right moving, Exhaling for left moving
- to simplify my code, i built tow VOID functions for Inh and Exh
all documents here