Electronics Production
In this week we have a group assignment that characterize the design rules for our PCB production process. After that our individual assignment was about to make an in-circuit programmer by milling the PCB.
mechanically supports and electrically connects electrical or electronic components using conductive tracks, pads and other features etched from one or more sheet layers of copper laminated onto and/or between sheet layers of a non-conductive substrate.
I downloaded the test file from the FabAcademy schedule page
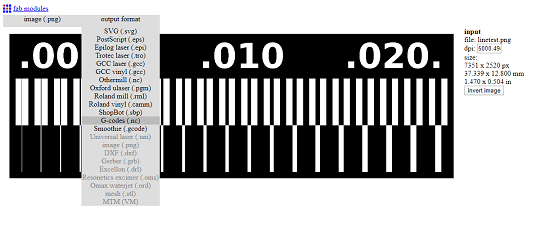
Then used fabmodules to generating the Gcode(nc) file that for my cnc machine.
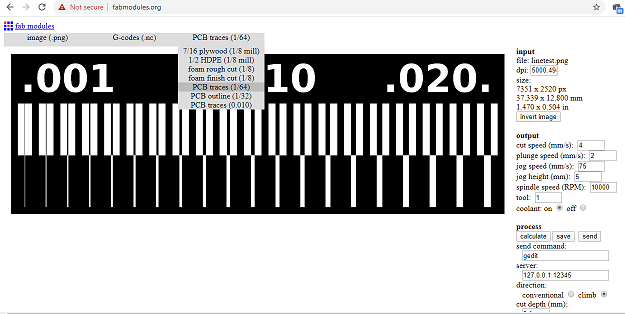
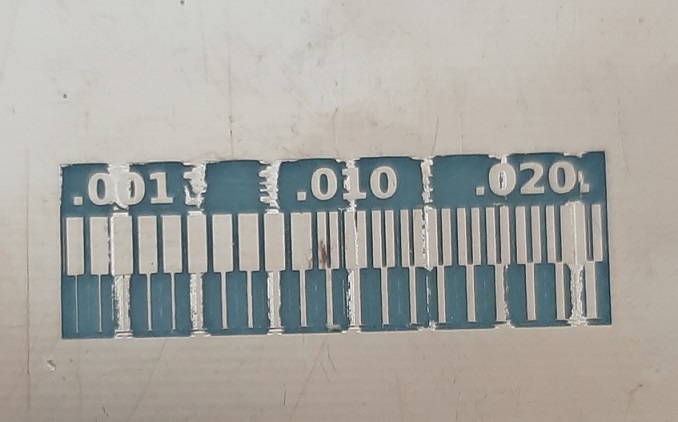
*In the setting in right side don't forget to put the number of offsets (-1) to engrave all copper
We have some mistakes while milling . Our traces were not coming properly as you seen in figure below. We figured out that our bed was leveled.
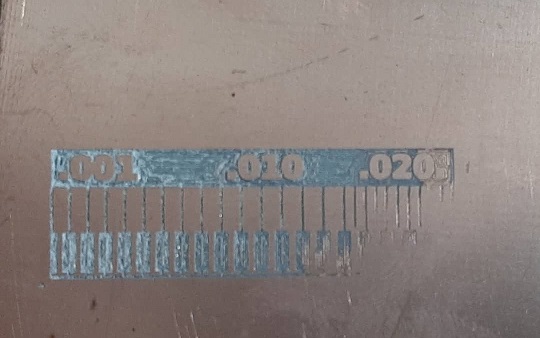
We resolve this issue by creat sacrificial layer 2mm, after surfacing which took almost 2 hours the result of engraving is more better which you you can see in figure bellow, don't forget to justify the Z axes
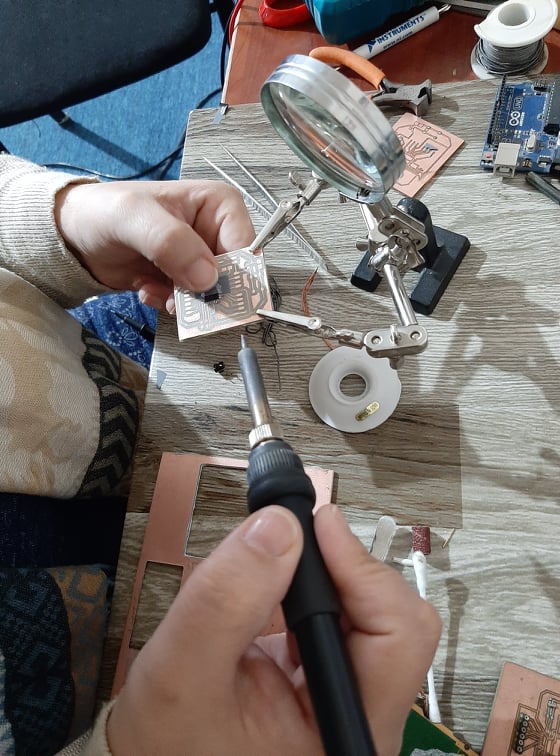
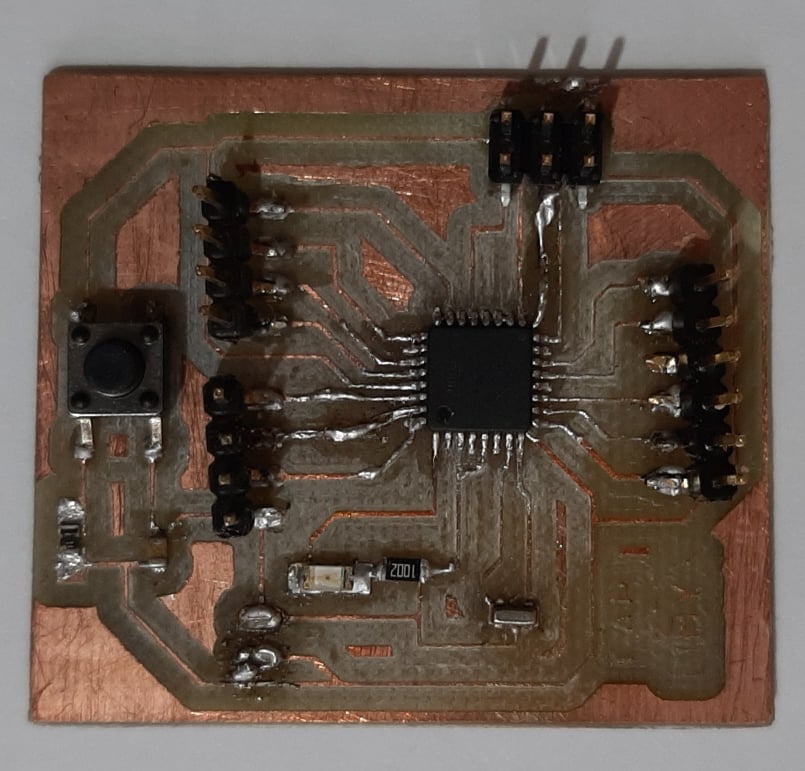
This assigment We will use the machine to mill the FabISP board and we will then solder it and test it. in this week I faced some problem that I didn't have SMD components and I had difficulty to provide SMD electronic components, first because of Covid 19, the closure of the country, the suspension of import movement and airports, and then the situation of my country, which posed a great challenge due to the ongoing war in the center of the country. In this time, I would like to thank my supervisor Khalid who made his effort from Egypt to deliver electronic components to me in Libya. This week we will Make an in-circuit programmer by milling and stuffing the PCB, test it, then optionally try other PCB fabrication process. to produce electronics circuit PCB we need to :
 milling
testing
soldering
de-bugging
programming
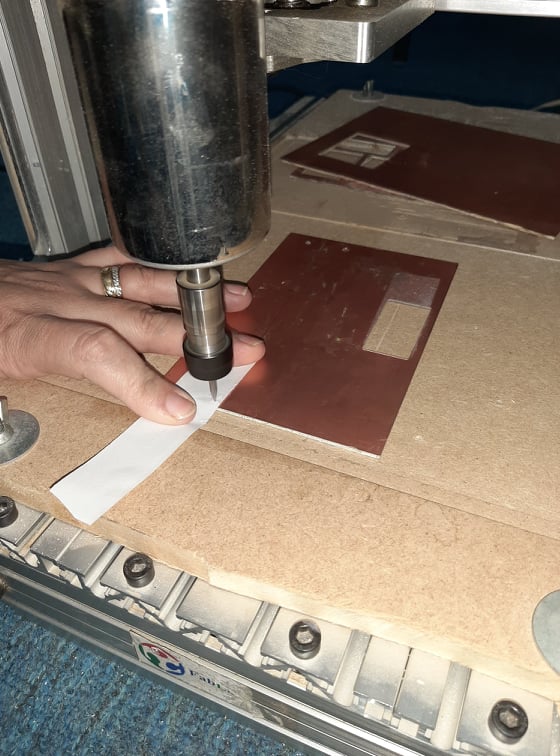
1-Milling

2-Soldering
By covid19 effect the SMD electronics didn't shipping to me, and I study remotly with fablab new cairo, i would thank My instructor and My Global evaluation who appreciated my circumstances and accepts this assignment using my board.
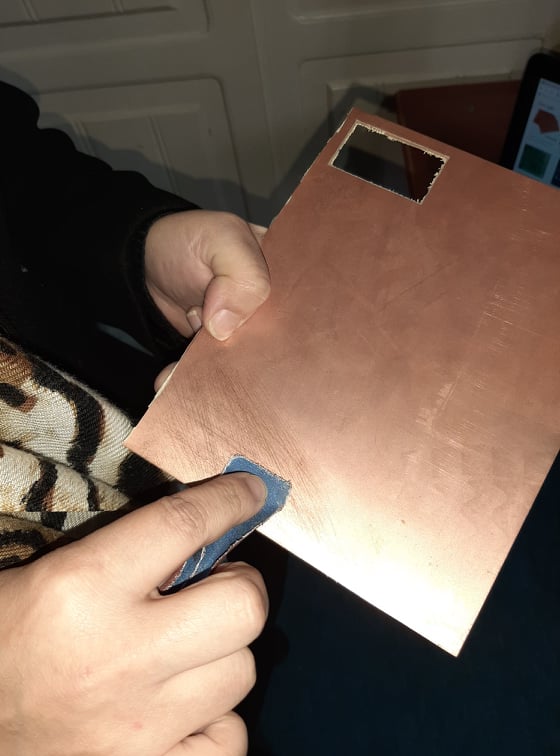
Here I will share my Experience : 1- Don't forget to clean your PCB board blank Before you have soldering. 2- Scrub the printed circuit board with the scrub pad to remove any grime and oxidation that may be present on the board. 3- The key to getting a good solder joint is in using a chemical cleaning agent known as flux before and during the soldering process. 4- after research what is the Flux? why we need it? and what is the solder? then I get the answer Flux is made up of a base material and an activator which is the chemical that promotes better wetting of the soldier by removing oxides from the metal. While solder is used to assemble components onto your circuit board, the flux is used prior to assembly to prepare and help your board through the soldering process. 5- If oxidization is a problem, before soldering you can take fine-grained sandpaper and gently rub off any oxidized material so that connections made with solder are secure as shown in figure below.

3- de-bugging
Programming
In this section we need to programming my circuit here I create a simple programmed using Arduino IDE to open and close LED and DC Motor I follow the same steps with My "Emmbedded programming week" by using Arduino as ISP , this circuit below consist of a fan (DC motor ) and power supply model to feed myboard with 5v dc