13. Molding and Casting
Group Assignment
- Review the safety data sheets for each of your molding and casting materials
- Make and compare test casts with each of them
To see our group assignment, click here.
Individual Assignment
- Design a mold around the stock and tooling that you'll be using, mill it (rough cut + at least three-axis finish cut), and use it to cast parts.
Overview
For this week's assignment, I decided to create a mold for an hourglass. The workflow was divided into four main stages:
- 3D design of the hourglass
- Splitting the model into machinable parts for 2.5D milling with the Roland SRM-20
- Fabrication of the negative molds using silicone rubber
- Casting the final part using polyurethane resin
1. Hourglass Design
I designed the hourglass using SolidWorks.
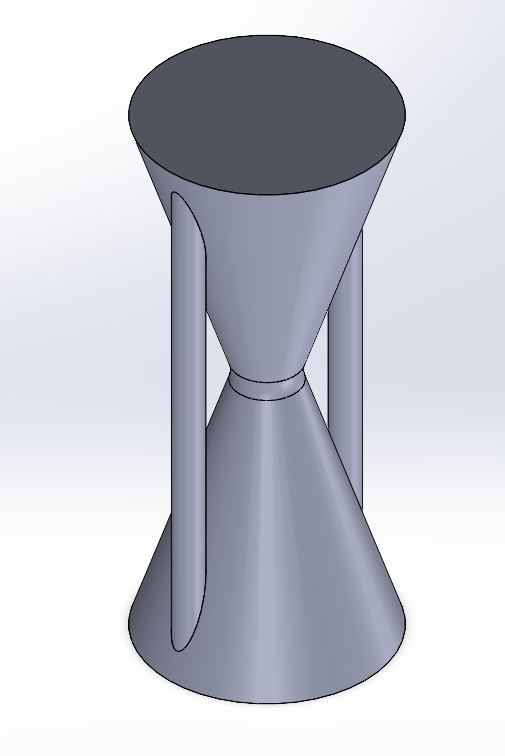
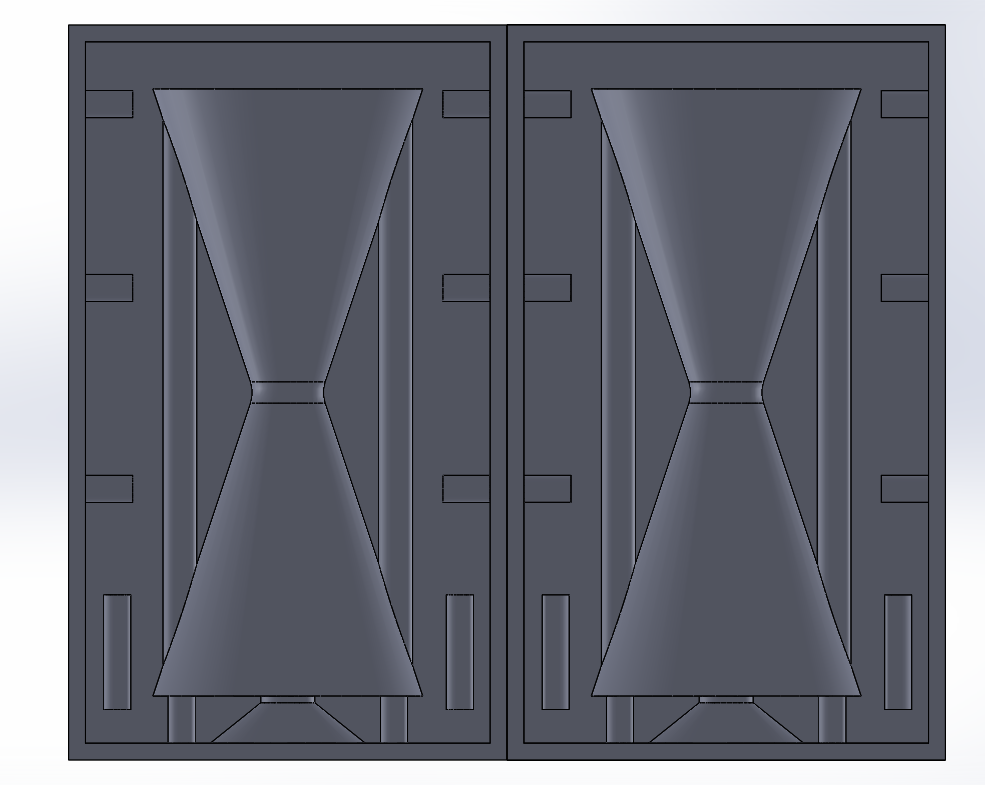
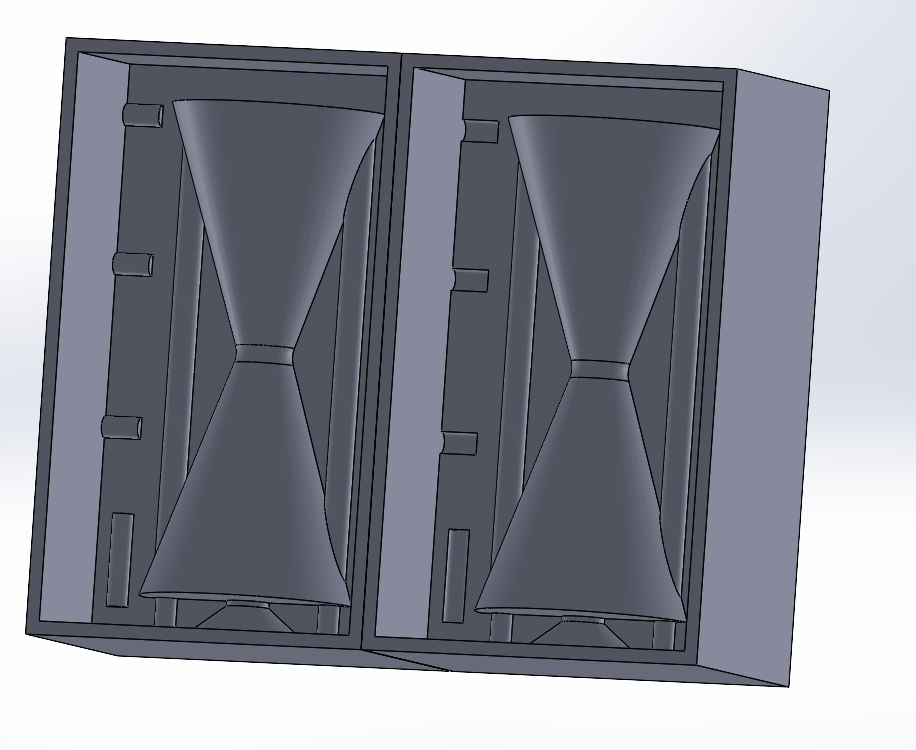
After analyzing the 3D model, I determined that the geometry needed to be split into two separate halves to:
-
Make it compatible with 2.5D machining on the Roland SRM-20
-
Avoid undercuts that would prevent clean demolding
Both halves were modeled individually in SolidWorks and exported as STL files for toolpath generation.
2. Milling the Mold Halves
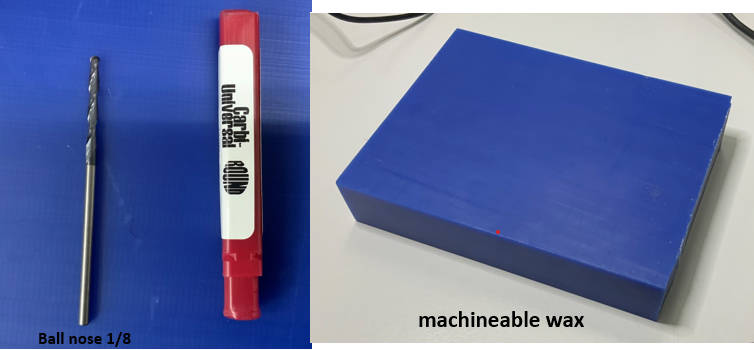
Materials & Tools
- Machine: Roland SRM-20
- Material: Machinable wax
- End mill: ⅛" flat end mill
Process
After finalizing the design in SolidWorks, I exported both mold halves as .STL files.
I then used Vcarve to generate the toolpaths, applying:
- A rough cut pass to remove bulk material
- A finish cut pass for surface quality and detail
For the full milling procedure with the Roland SRM-20, refer to Week 8 – Electronics Production.
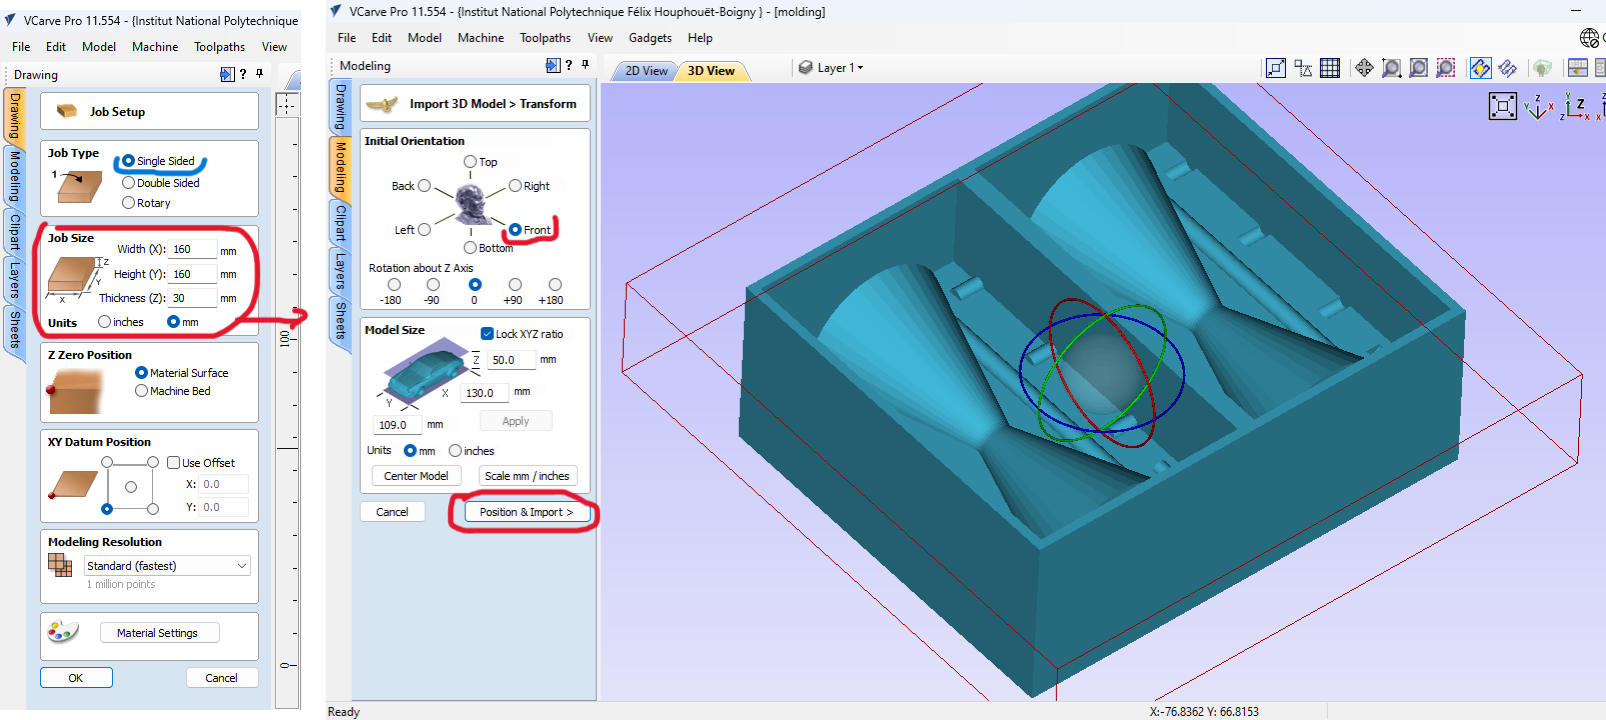
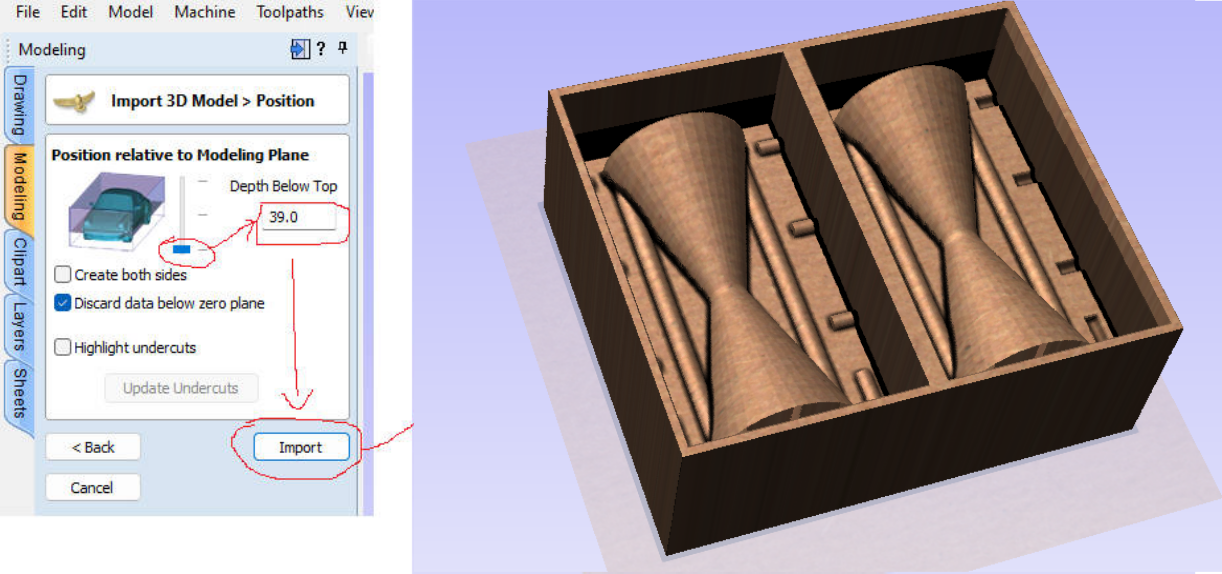
- We opened the stl file of our mold with v-carve and set the import parameters as shown below
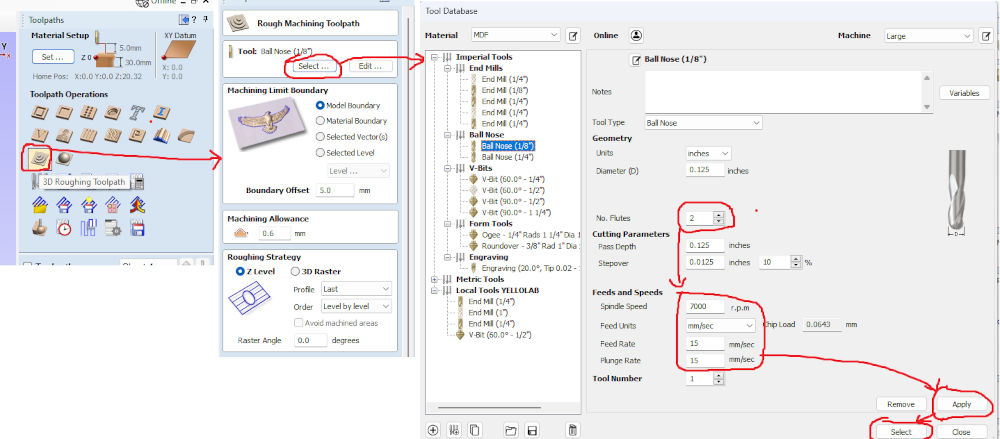
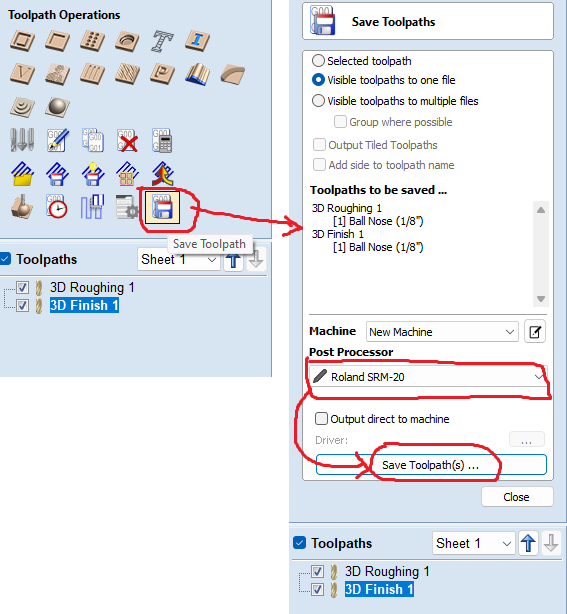
- Once the import is finished, we proceeded to the generation of the toolpaths. To do this we used the “3D Roughing Toolpath” option for the roughing and the “3D finishing Toolpath” option for the finishing. To generate the roughing toolpath we proceeded as follows.
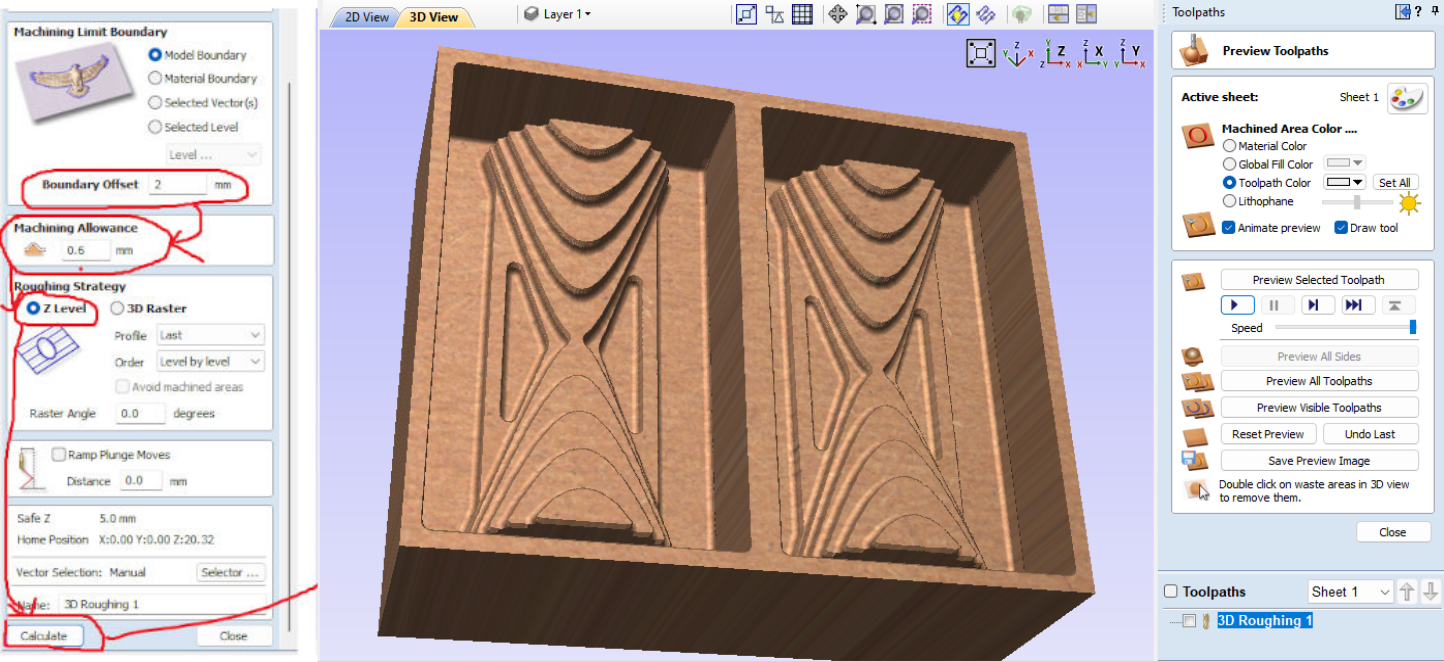
- We proceeded in the same way as below to generate the finishing toolpaths. Once the toolpaths were generated we proceeded to their registration as indicated below.
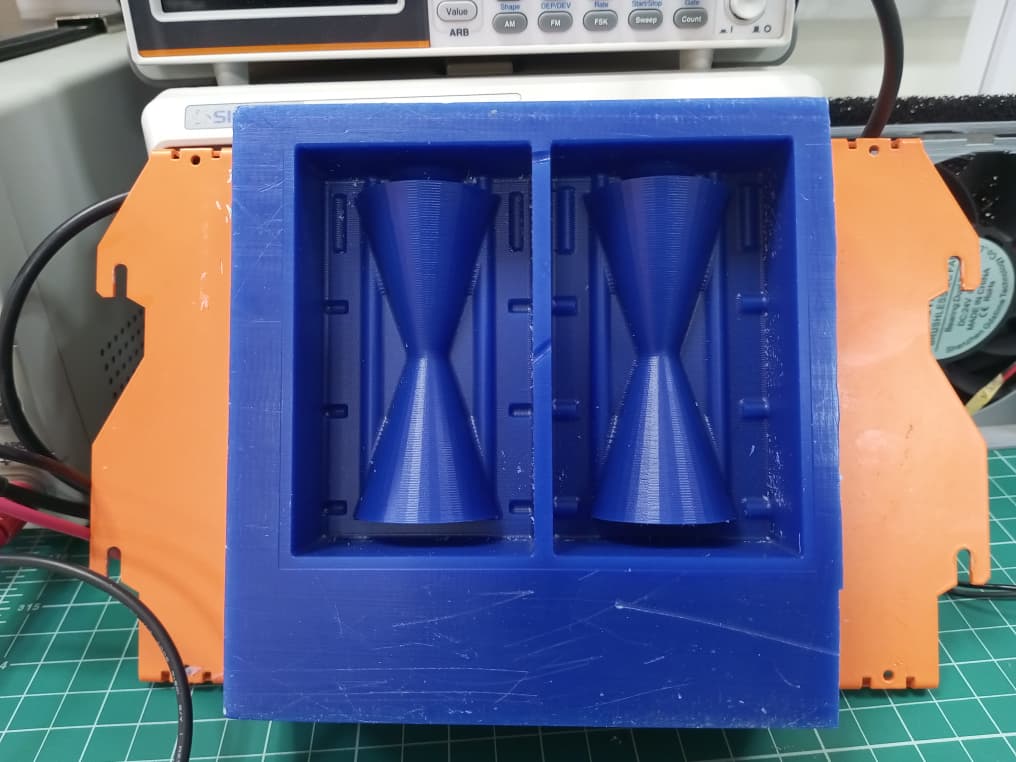
After approximately 8 hours of machining, I obtained the two wax mold positives shown below.
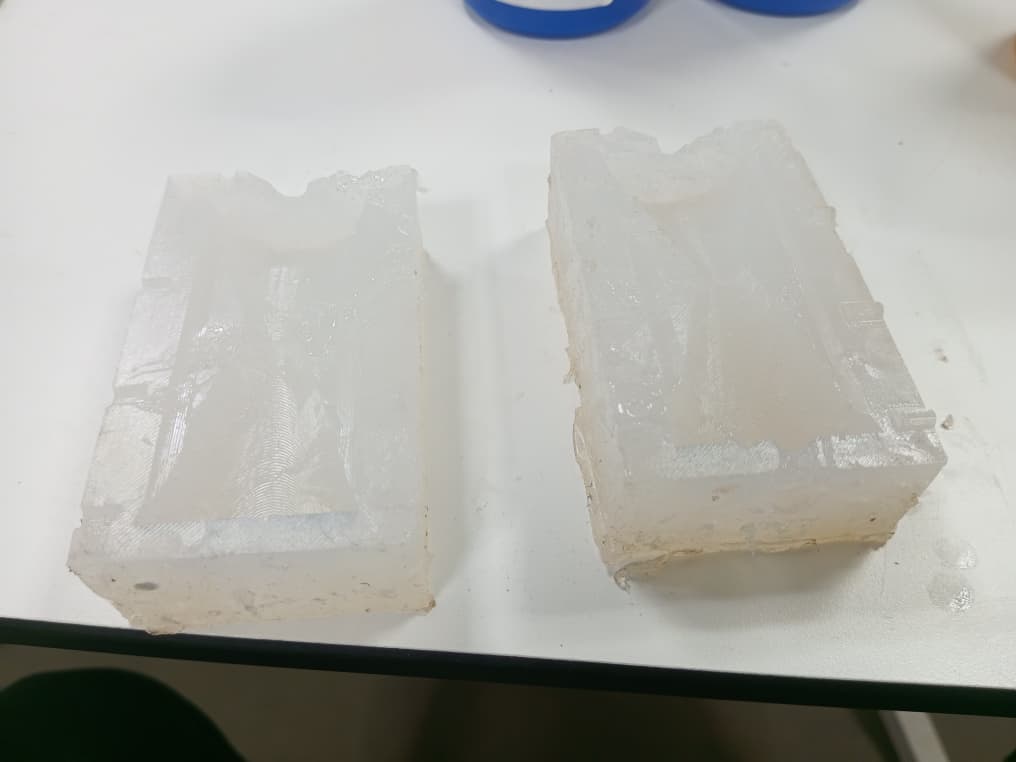
3. Making the Negative Molds (Silicone)
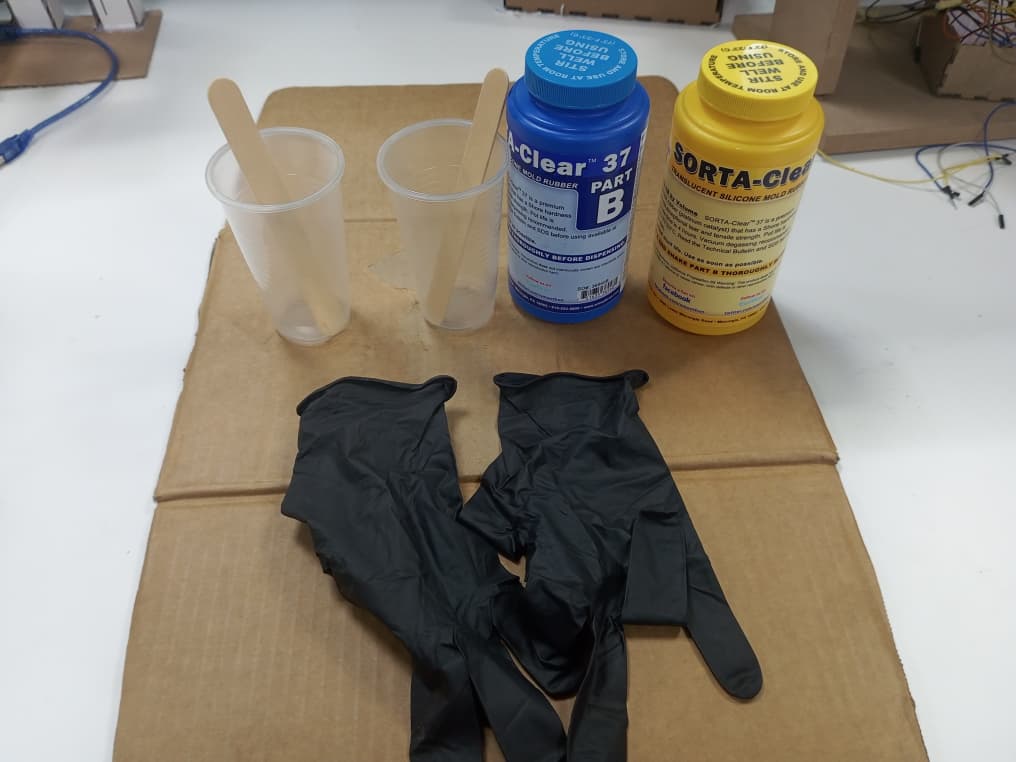
To create the negative molds, I used SORTA-Clear 37 silicone rubber from Smooth-On.
Safety
Safety Rules
- Keep out of reach of children.
- Use in a properly ventilated area ("room-size" ventilation).
- Wear safety glasses, long sleeves, and rubber gloves to minimize contamination risk.
- Use only vinyl gloves — latex gloves will inhibit rubber curing.
Technical Data
I referred to the official SORTA-Clear 37 Technical Data Sheet for mixing ratios, pot life, and cure time.
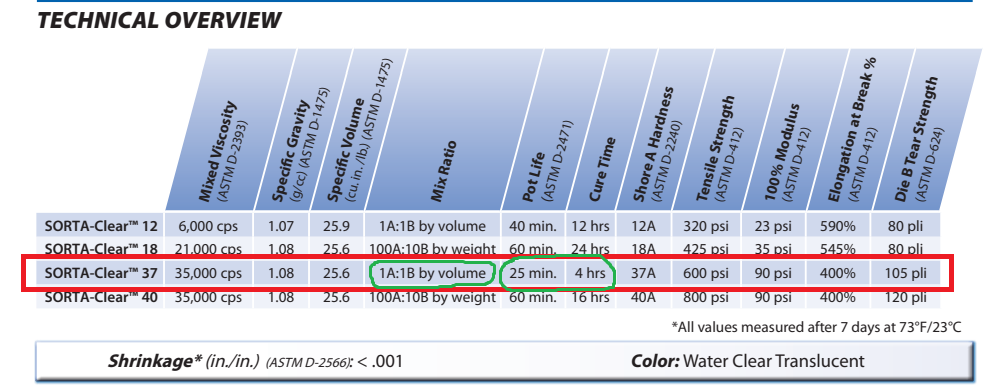
Key Properties (from datasheet)
| Property | Value |
|---|---|
| Mix Ratio by Volume | 1A : 1B |
| Pot Life | ~25 minutes |
| Cure Time | 4 hours @ 23°C |
| Shore Hardness | 37A |
Results
After carefully mixing and pouring the silicone according to the instructions, I obtained the following negative molds:
4. Casting the Final Part (Polyurethane Resin)
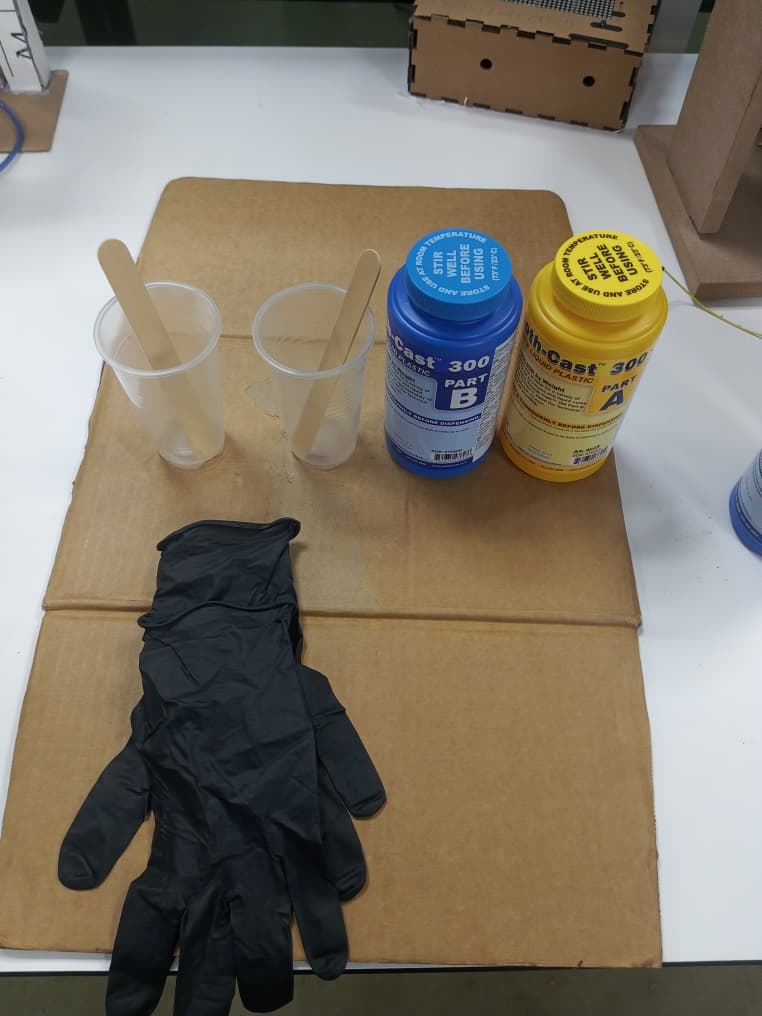
To produce the final cast part, I used Smooth-Cast 300 Series polyurethane resin.
Technical Data
I referred to the official Smooth-Cast 300 Technical Data Sheet for mixing and handling instructions.
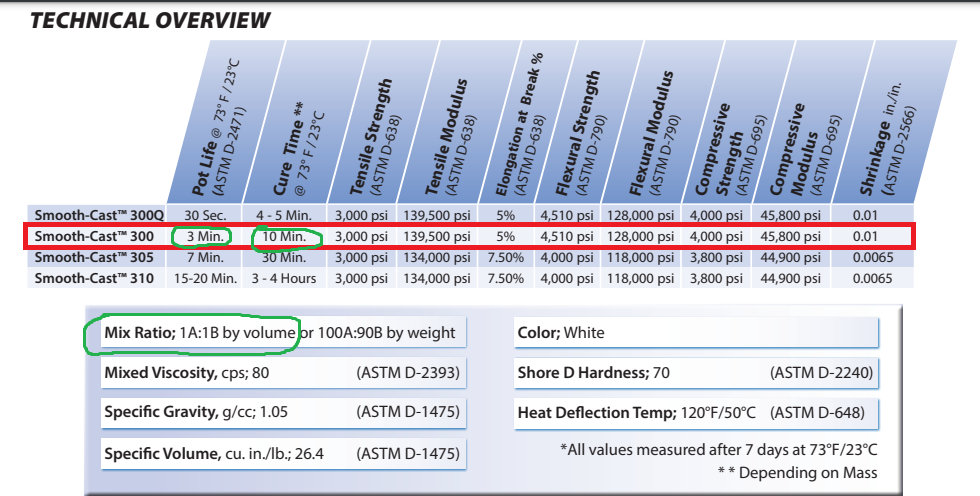
Key Properties (from datasheet)
| Property | Value |
|---|---|
| Mix Ratio by Volume | 1A : 1B |
| Pot Life | ~3 minutes |
| Cure Time | ~10 minutes |
| Shore Hardness | ~70D |
| Color (cured) | Bright white |
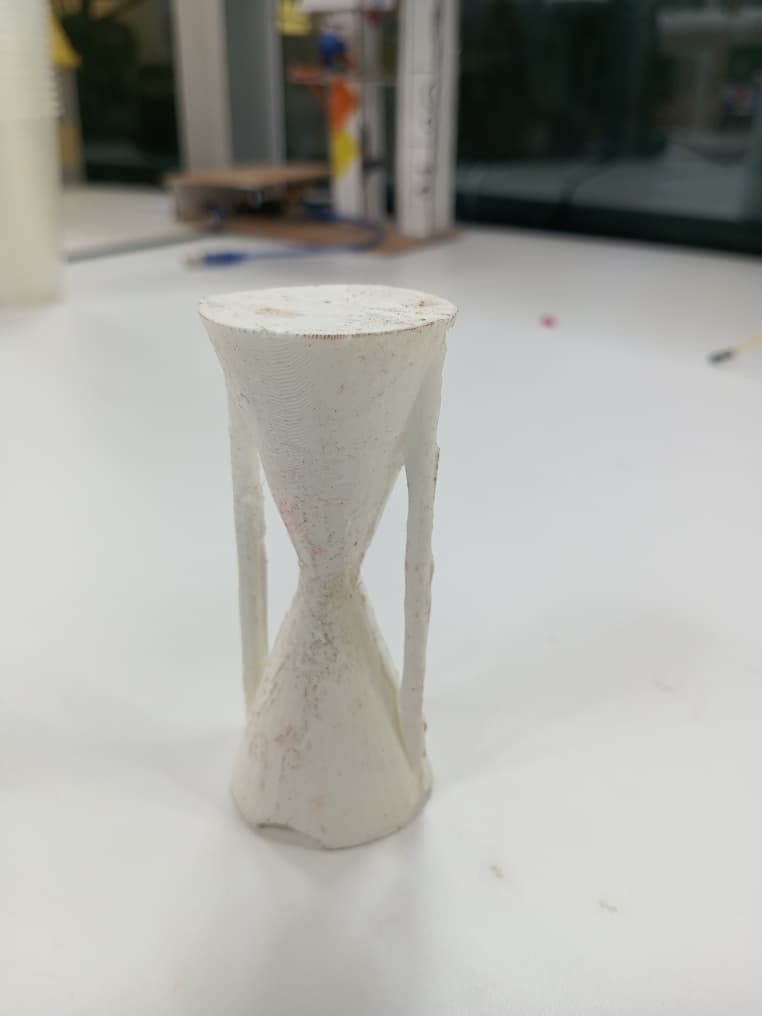
Results
After mixing and pouring the resin into the silicone molds and allowing it to cure, I obtained the final cast hourglass parts shown below:

Hero shots 😊😊😊
Reflections
- Splitting the hourglass into two halves was essential to avoid undercuts during 2.5D milling.
- The SORTA-Clear 37 silicone captured fine surface details from the wax mold very well.
- The Smooth-Cast 300 cures very quickly (~10 min), so precise and fast mixing is critical.
- Alignment between the two mold halves is a key challenge for achieving a clean final part.