16. Wildcard week
Group assignment:
None
Individual assignment:
Design and produce something with a digital fabrication process (incorporating computer-aided design and manufacturing) not covered in another assignment, documenting the requirements that your assignment meets, and including everything necessary to reproduce it.
Overview
This week's project focuses on 3D crystal laser engraving. The workflow is organized into four parts:
- Introduction to the 3D laser engraver
- Designing the 3D model
- Generating the engraving file
- Engraving the crystal
1. Introduction to the 3D Laser Engraver
A 3D laser engraver is a device that uses a focused laser beam to engrave three-dimensional patterns into various materials. These machines combine laser precision with the ability to work on curved or irregular surfaces, delivering high-quality results across a wide range of materials.
Our Fab Lab is equipped with the Perfect Laser model.
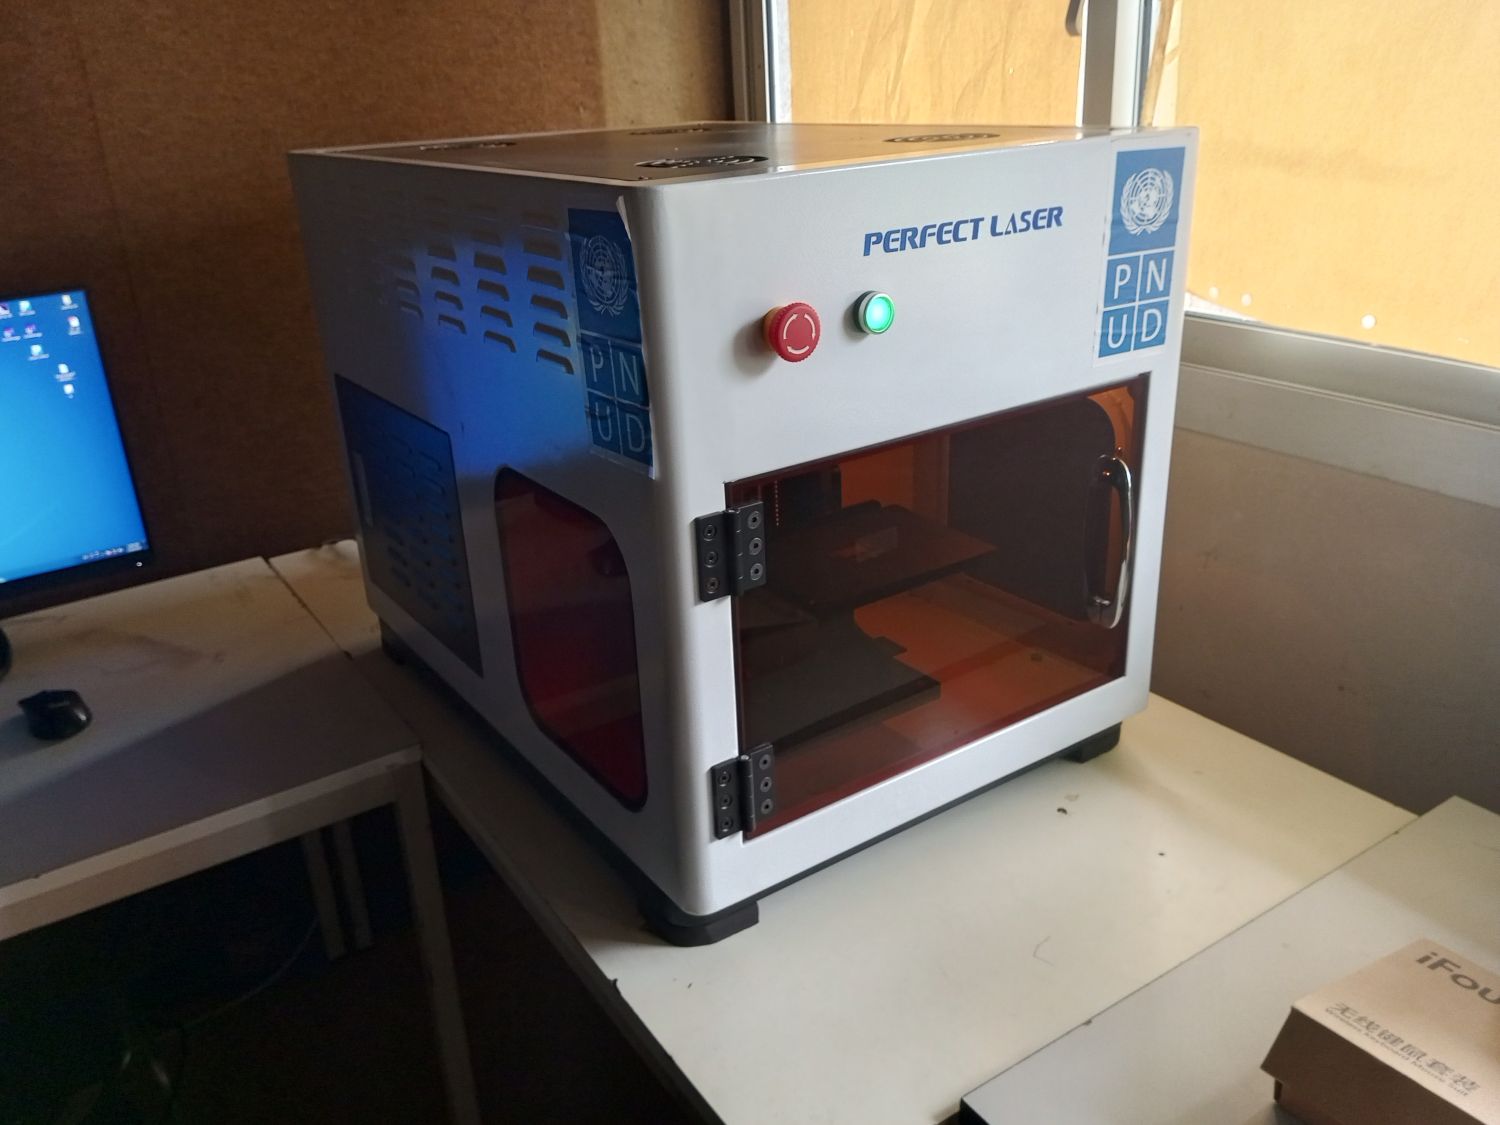
Specifications
| Parameter | Value |
|---|---|
| Model | PE-DP-A2 |
| Maximum Frequency | 5,000 Hz |
| Maximum Engraving Area | 400 mm × 320 mm × 120 mm |
| Focal Length (standard) | 120 mm |
| Precision | 20 μm – 40 μm |
| Maximum Speed | 300,000 points/minute |
| Power | < 350 W — 220 V / 60 Hz |
| Net Weight | 185 kg |
| Supported File Formats | BMP, JPG, DXF, OBJ, WRL, 3DS, STL |
| Compatible Materials | Crystal, glass, acrylic, and other internal and surface engravings |
| Machine Dimensions | 1,060 mm × 1,060 mm × 1,460 mm |
2. Designing the Model & Generating the Engraving File
Two software tools are used in this workflow:
- 3D Crystal — Converts 2D/3D models into a Point Cloud and exports them in
.cadformat. - Laser Control — Interfaces with the machine to engrave the
.cadfile into the crystal.
Step-by-Step Workflow
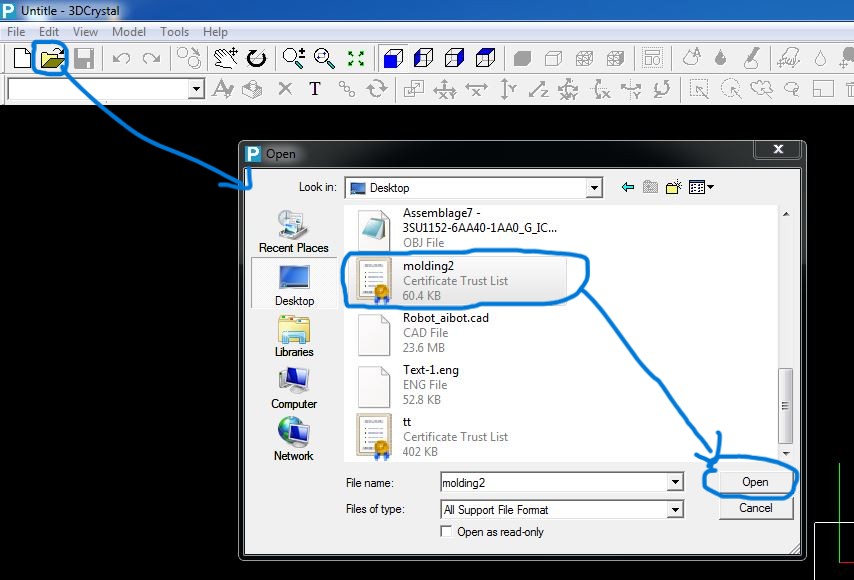
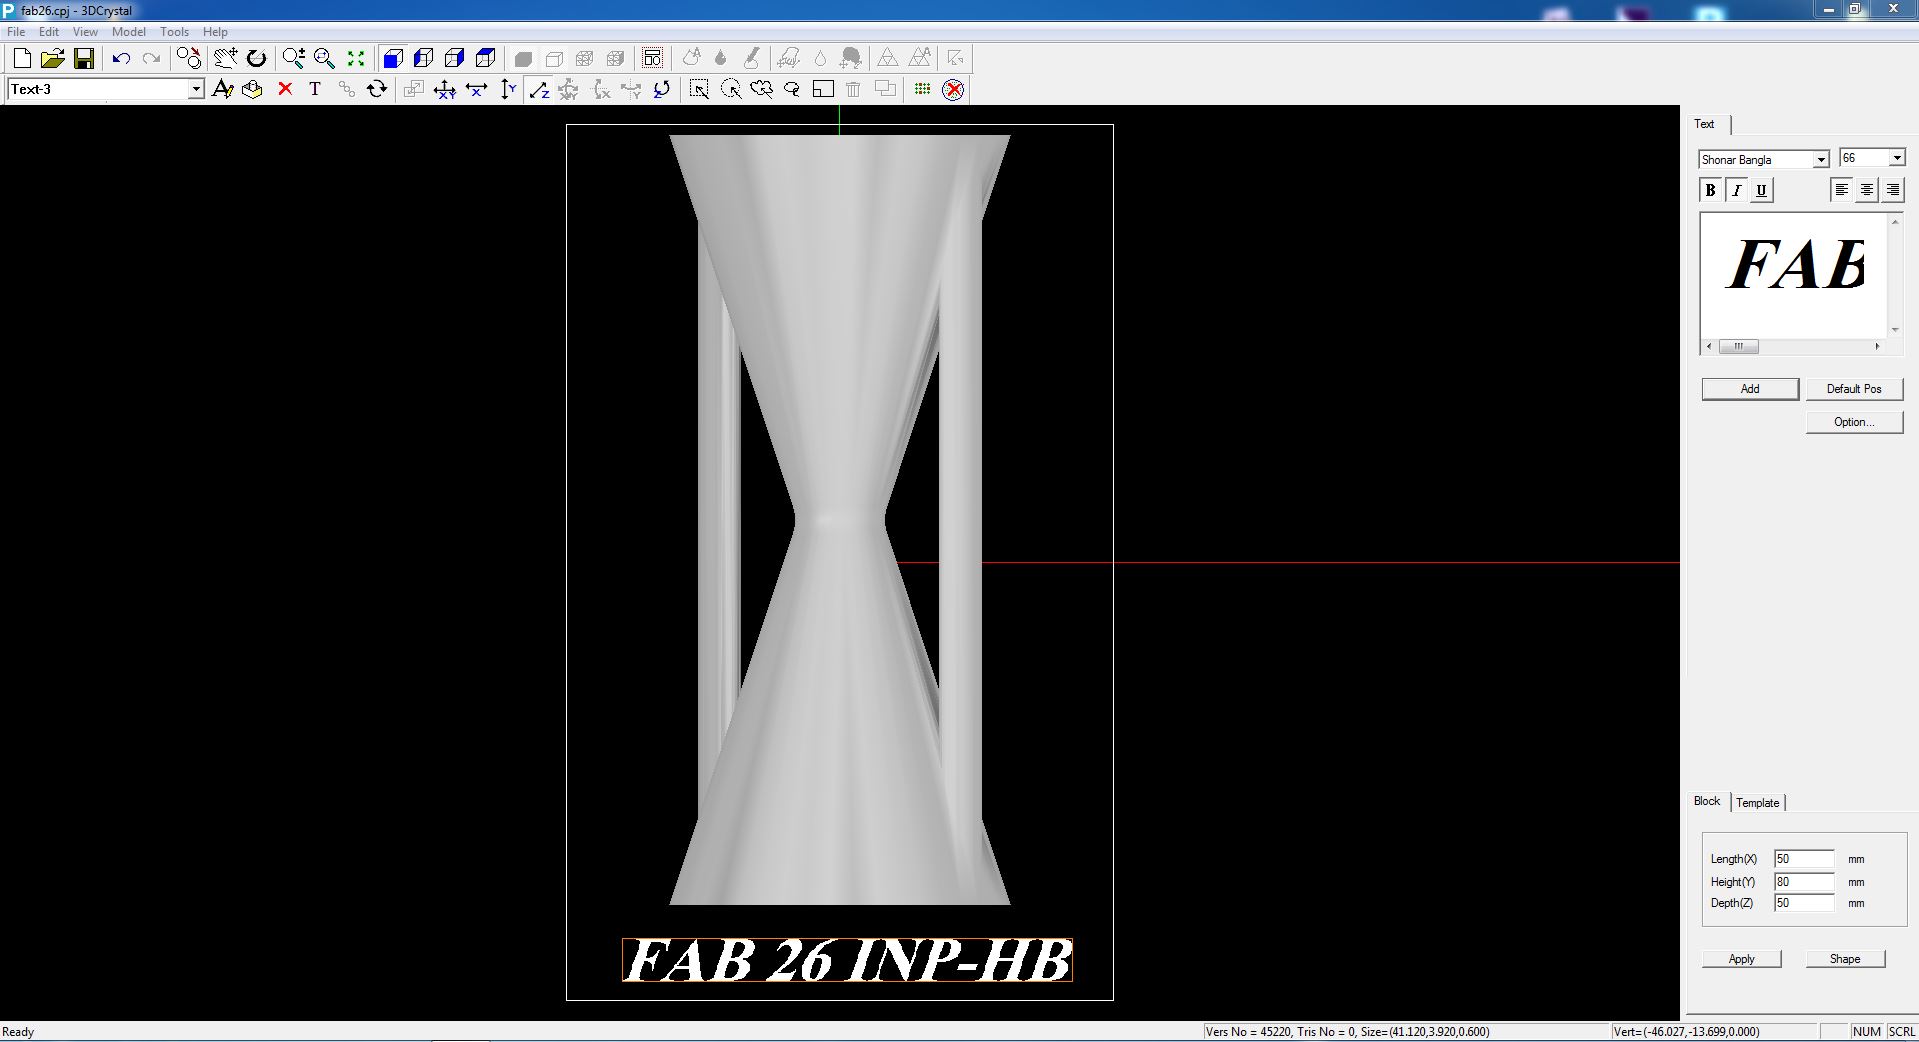
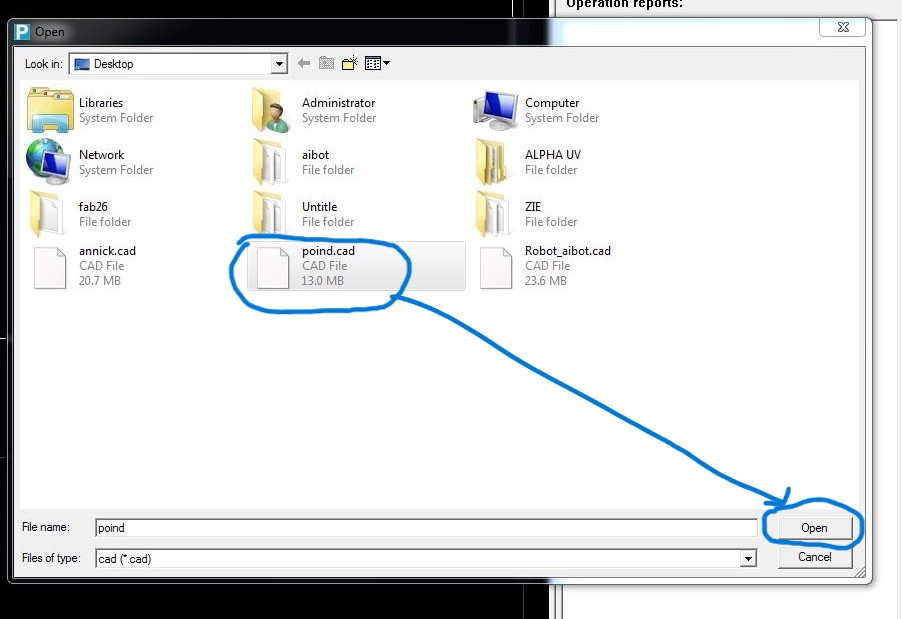
Opening the 3D Model File
- Launch the 3D Crystal software.
- Go to File > Open, select your 3D model file, and click Open.
Note: If the model appears too large and extends outside the crystal boundary, right-click and select Fit to Crystal Size.
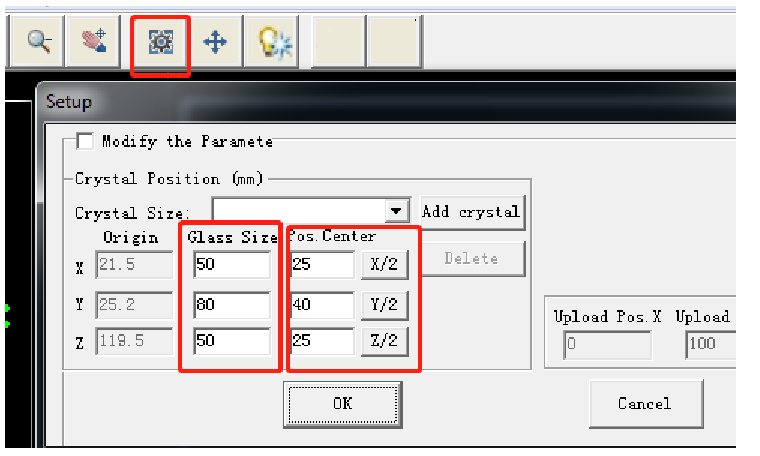
Setting the Crystal Size
- Adjust the crystal size by modifying the Size field 50x80x50.
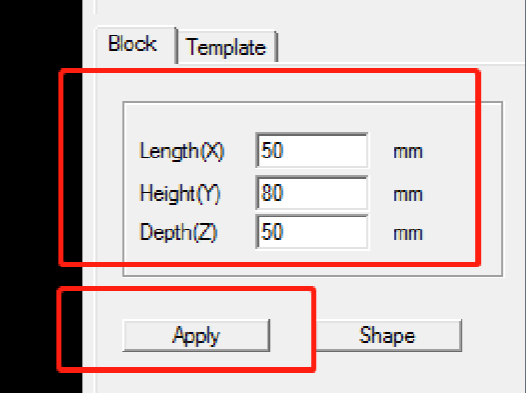
- You can adjust the view orientation using the directional buttons in the interface.

- We can also resize the model to adjust the whole size of the model.
- It is better to resize the model to 90% size of the crystal, so the model will be inside.
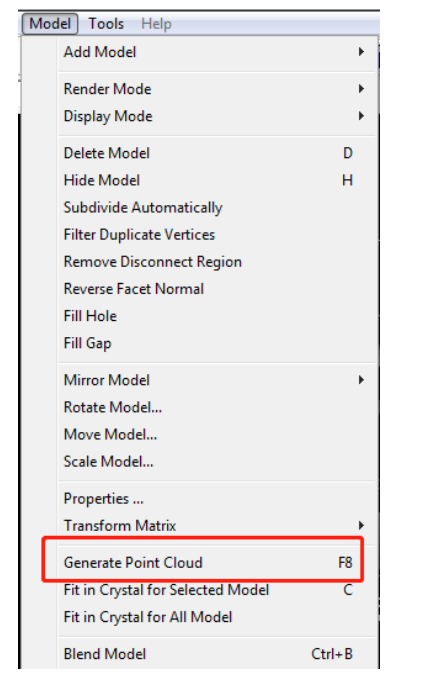
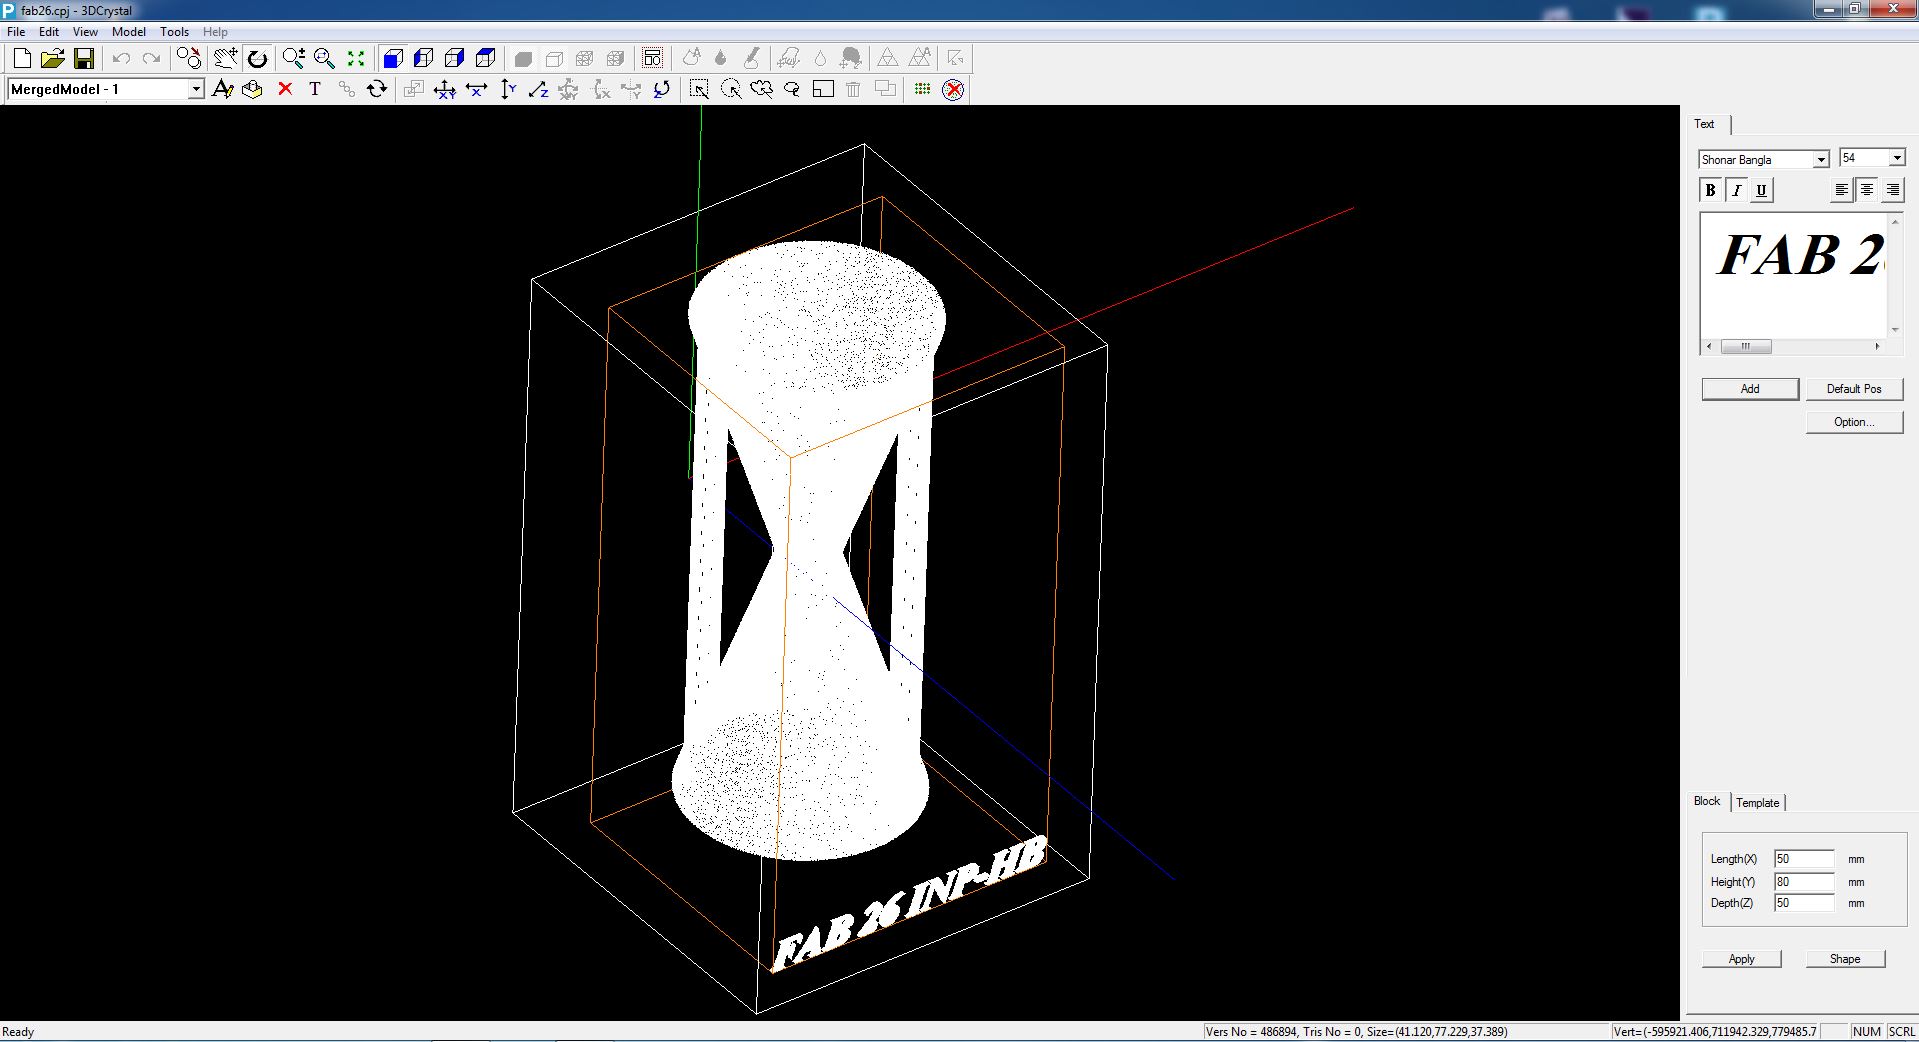
Generating the Point Cloud
- Right-click on the model and select Generate Point Cloud.
- Configure the parameters as follows:
| Parameter | Range | Value Used |
|---|---|---|
| Hori | 0.08 – 0.12 | 0.1 |
| Layer Num | 3 – 5 | 5 |
| Distance | 0.15 – 0.45 | 0.2 |
We use 360-degree points for full 3D coverage of the model.
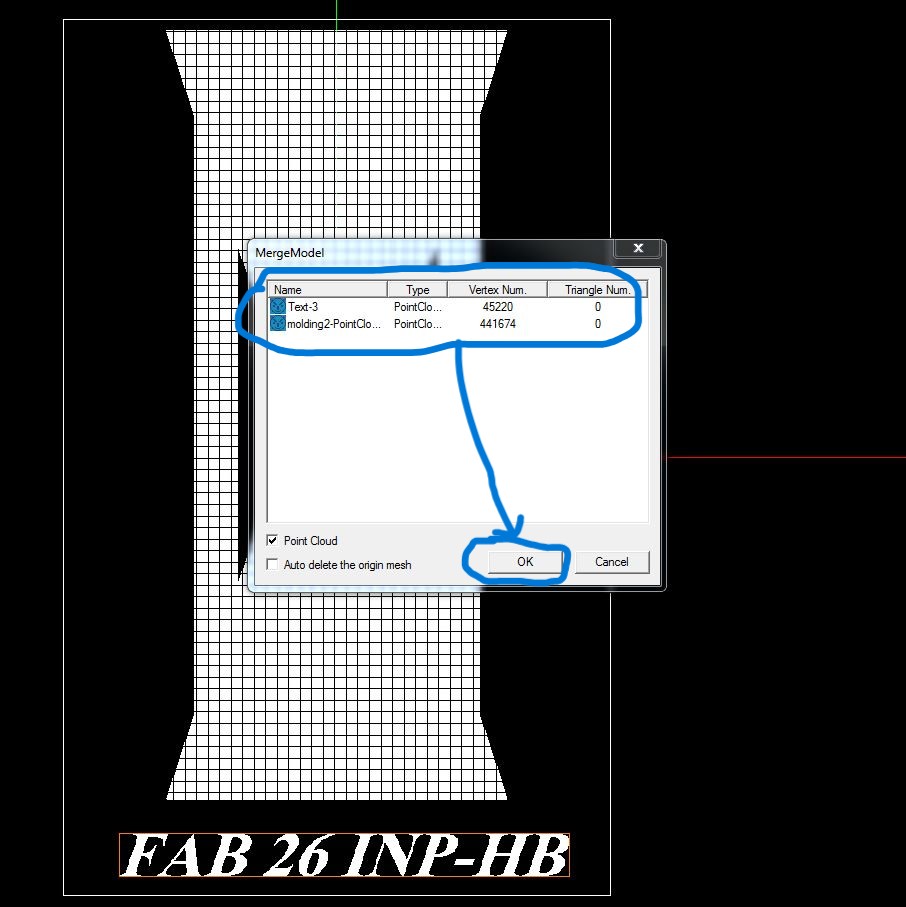
- Once generated, combine the model points with any text points if needed.
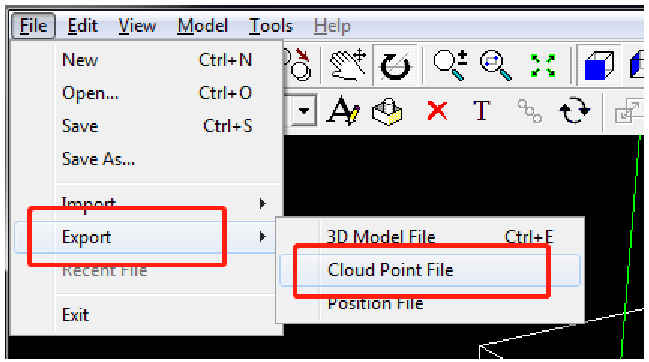
Exporting the File
- Go to File > Export.
- Name your file and save it in
.cadformat.

3. Engraving the Crystal
Opening the File in Laser Control Software
- Launch the Laser Control software.
- Go to File > Open, select your
.cadfile, and click Open.

Setting Up the Machine
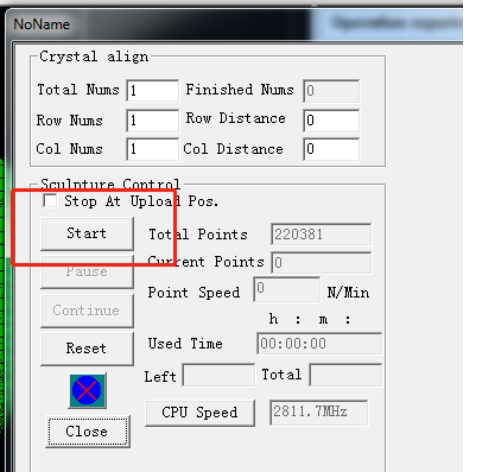
- Since we are using a size 558 crystal, press X/2, Y/2, and Z/2 to set the center position.
- Click the Light button to preview the laser alignment.
- Press the Start button to begin engraving.
Hero shots 😊😊😊
