Week 17 Wildcard Week
Individual assignment
Tiny ML AI vision with Seeed XIAO ESP32S3 Sense for classification and recognition
Tiny ML
TinyML means running machine learning models on very small, low-power devices such as microcontrollers.
Traditional AI usually runs on powerful computers, GPUs, or cloud servers. TinyML is different because it allows AI models to run directly on small embedded hardware with limited memory, limited processing power, and low energy consumption.
TinyML is useful for:
| Application | Example |
|---|---|
| Smart sensors | Detecting sound, motion, or objects |
| Wearable devices | Gesture or activity recognition |
| Industrial monitoring | Detecting abnormal machine behavior |
| Smart homes | Local object or person detection |
| Fab Lab projects | Interactive tools and intelligent devices |
In this project, TinyML is used for image classification.
AI vision
AI Vision is a technology that allows a machine to understand image content using artificial intelligence.
In this project, the camera captures an image, and the model predicts which category the image belongs to.
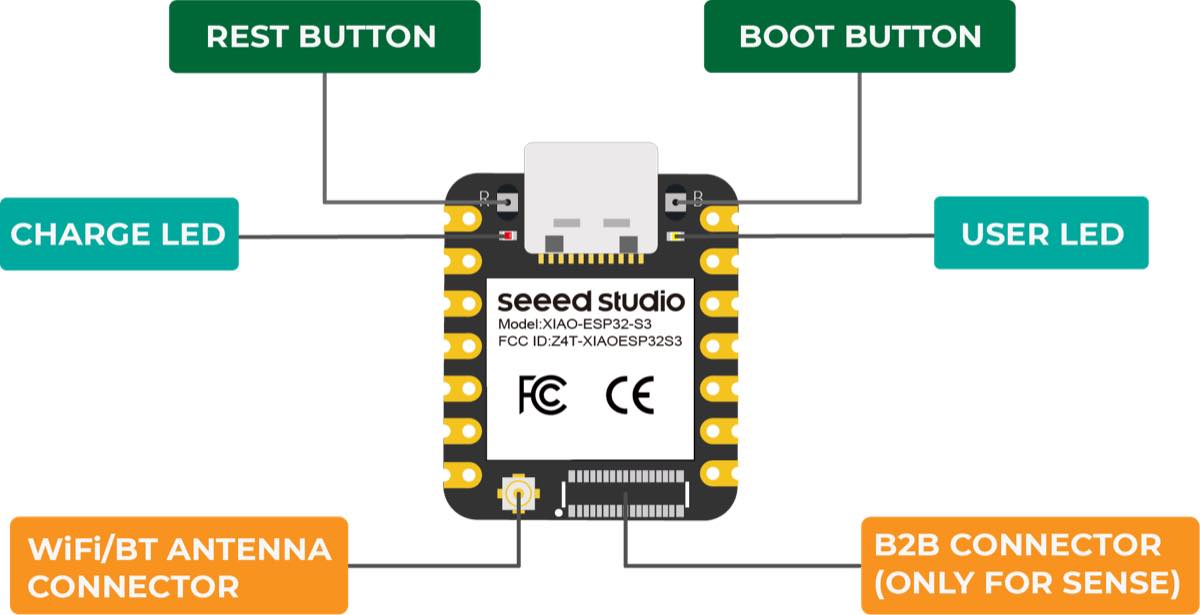
Seeed XIAO ESP32S3 Sense
I chose the XIAO ESP32S3 Sense because it is small, powerful, and suitable for TinyML vision applications.
It includes:
| Feature | Description |
|---|---|
| Microcontroller | ESP32-S3 |
| Camera | Onboard camera module |
| Wireless | Wi-Fi and Bluetooth Low Energy |
| Memory | PSRAM and Flash memory |
| Size | Very compact |
| Extra sensor | Digital microphone |
| Power | USB-C or battery |
The XIAO ESP32S3 Sense is a good platform for this project because it combines a camera, wireless communication, and enough processing capability for simple embedded AI tasks.
Application: Image processing, speech recognition, video monitoring, wearable devices, smart homes, health monitoring, education, low-power (LP) networking, and rapid prototyping.
Comparison: XIAO ESP32-C3 vs XIAO ESP32S3 Sense
| Feature | XIAO ESP32-C3 | XIAO ESP32S3 Sense | Key difference |
|---|---|---|---|
| Processor | Single-core RISC-V processor | Dual-core Xtensa LX7 processor | ESP32-S3 has more processing power and is better for complex tasks. |
| Clock speed | Up to 160 MHz | Up to 240 MHz | ESP32-S3 runs faster than ESP32-C3. |
| Flash memory | 4 MB Flash | 8 MB Flash | ESP32-S3 provides more storage for firmware, libraries, and model files. |
| PSRAM | No external PSRAM | 8 MB PSRAM | ESP32-S3 Sense can handle larger buffers, camera images, and AI models. |
| Wireless connectivity | Wi-Fi 4 and Bluetooth 5 | Wi-Fi 4 and Bluetooth 5 | Both support wireless communication, but ESP32-S3 can handle heavier wireless and processing tasks more efficiently. |
| AI capability | Suitable for simple IoT logic and lightweight tasks | More suitable for TinyML and AI vision applications | ESP32-S3 Sense is better for embedded AI projects. |
| Built-in sensors | No built-in camera, microphone, or IMU | Includes camera module and microphone | ESP32-S3 Sense has more integrated sensing capabilities. |
| Camera support | Not designed as a camera-based AI board | Includes camera module | ESP32-S3 Sense is much better for AI vision projects. |
| Audio support | Limited; external hardware needed | Built-in digital microphone | ESP32-S3 Sense can be used for voice, sound, or audio recognition projects. |
| Power consumption | Better for low-power and simple applications | Higher performance, but may consume more power | ESP32-C3 is better when low power is the main priority. |
| Typical use cases | Simple IoT devices, sensors, wireless control, low-power nodes | AI vision, TinyML, image classification, audio recognition, advanced IoT | ESP32-C3 is simpler and lower-power; ESP32-S3 Sense is more powerful and sensor-rich. |
| Best for | Lightweight IoT and cost-sensitive projects | AI, camera-based projects, motion/audio sensing, advanced connected devices | Choose based on whether the project needs AI and camera processing. |
Summary
The XIAO ESP32-C3 is suitable for simple, low-power IoT applications such as sensor nodes, wireless switches, and basic connected devices.
The XIAO ESP32S3 Sense is better suited for more demanding projects, especially those involving TinyML, AI vision, image classification, audio processing, and sensor-based interaction. Its dual-core processor, higher clock speed, larger memory, PSRAM, camera, and microphone make it a stronger choice for AI and interactive projects.
Edge Impulse
Edge Impulse is an end-to-end development platform for Edge AI and TinyML. It helps developers build machine learning models and deploy them to edge devices such as microcontrollers, sensors, cameras, gateways, CPUs, GPUs, and NPUs.
A typical Edge Impulse workflow includes:
- Collecting and labeling data
- Designing a machine learning pipeline
- Extracting features from sensor or image data
- Training and testing a model
- Optimizing it for constrained hardware
- Deploying it to real embedded devices
Its main concept is called an Impulse, which is basically a machine learning pipeline:
data input → signal processing / feature extraction → model training → testing → deployment
Edge Impulse is commonly used for:
- Sensor AI, such as gesture recognition, vibration monitoring, anomaly detection, and audio classification.
- Computer vision, such as image classification and object detection.
- Industrial and IoT applications, such as predictive maintenance, smart agriculture, smart devices, and on-device monitoring.
For embedded developers, its biggest value is that it simplifies the TinyML workflow. Instead of manually handling data collection, model training, quantization, conversion, and deployment, Edge Impulse provides a more integrated process.
In one sentence: Edge Impulse makes it easier to build and deploy machine learning models on real-world edge devices.
Vision AI with XIAO ESP32S3 Sense for face recognition
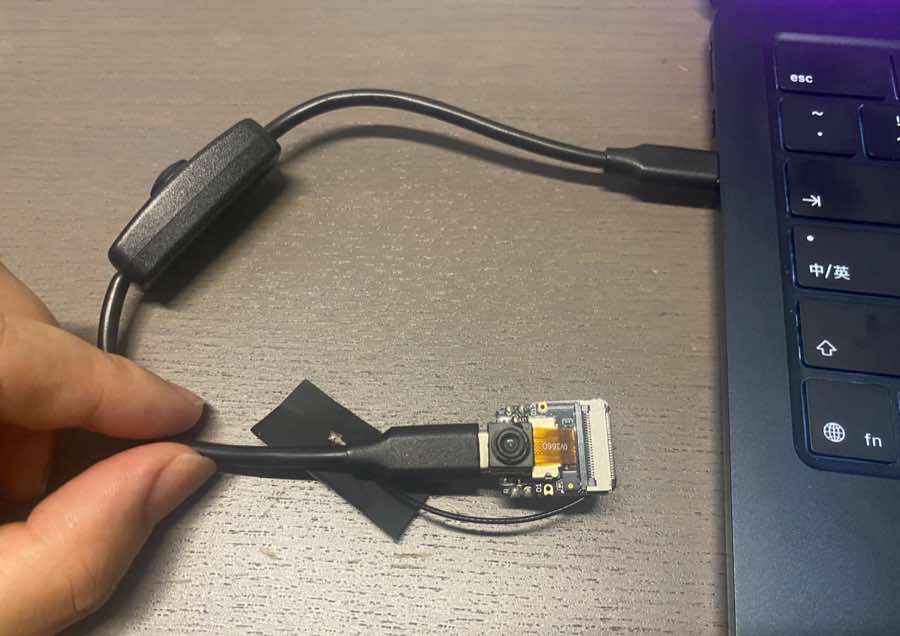
Step 1 — Connect XIAO ESP32S3 with a laptop
Step 2 — Log in to Edge Impulse and select vision training

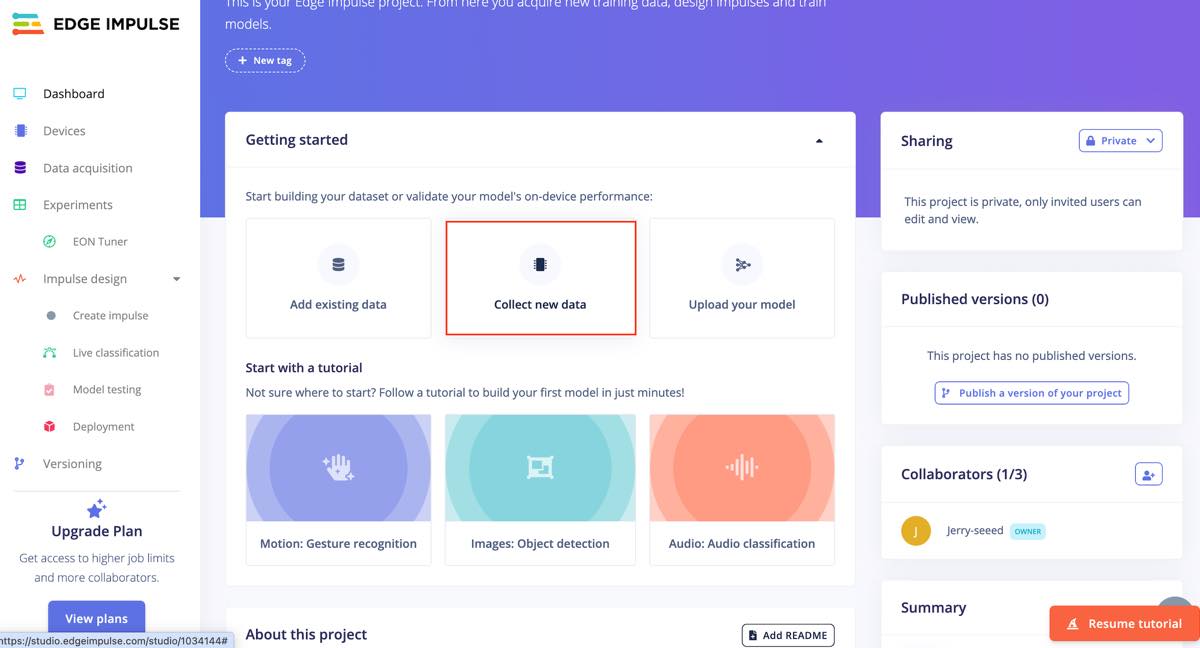
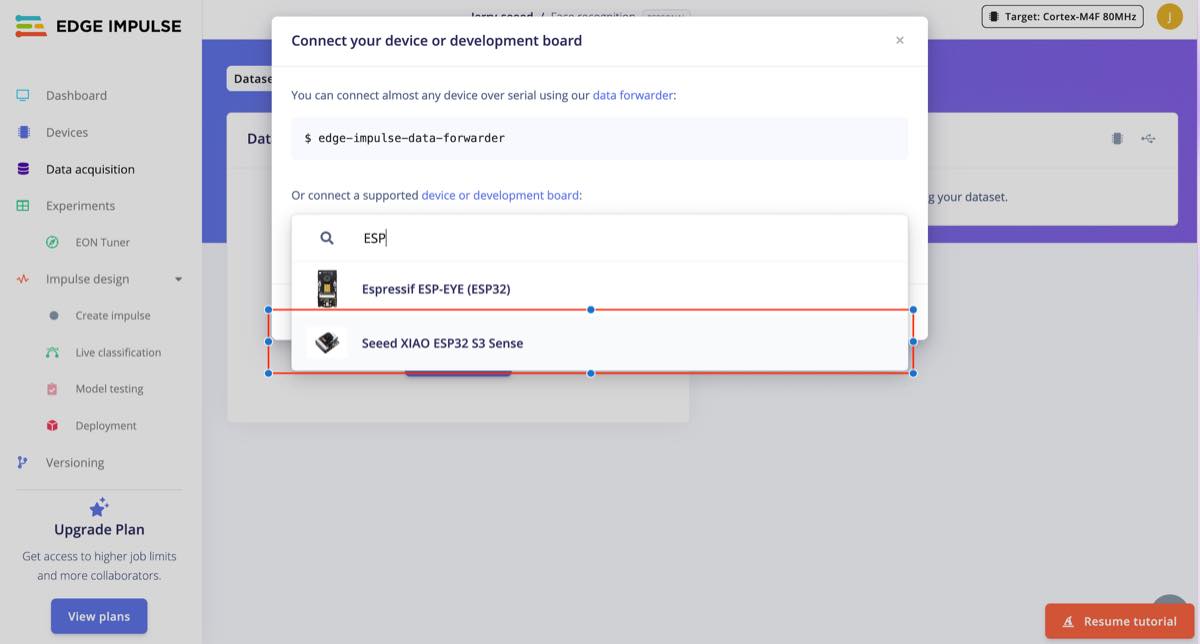
Step 3 — Collect raw data and connect the board
Collect raw data for training, select XIAO ESP32S3 Sense, and connect the board to Edge Impulse.
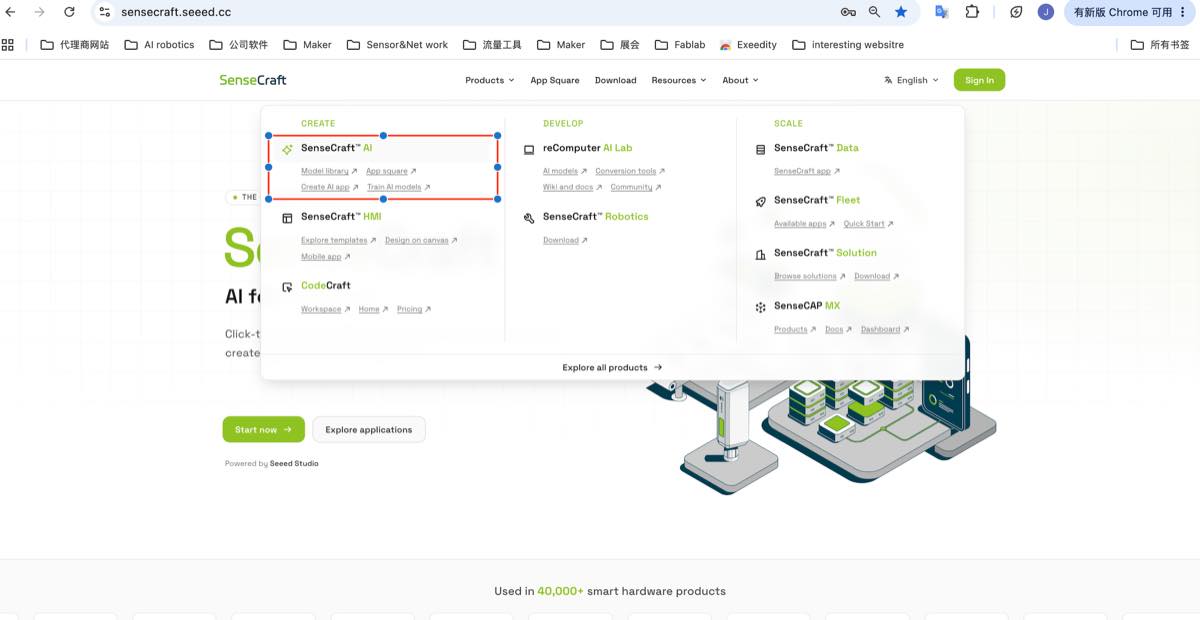
To set up the Seeed XIAO ESP32S3 Sense, follow this guide: Seeed XIAO ESP32S3 Sense. I used Cursor to help install the Edge Impulse CLI and configure Arduino IDE, but Cursor took around 30 minutes and did not finish the environment configuration. Then I switched to the SenseCraft platform for training directly, because the SenseCraft platform already had the configuration completed and I could connect the device directly.

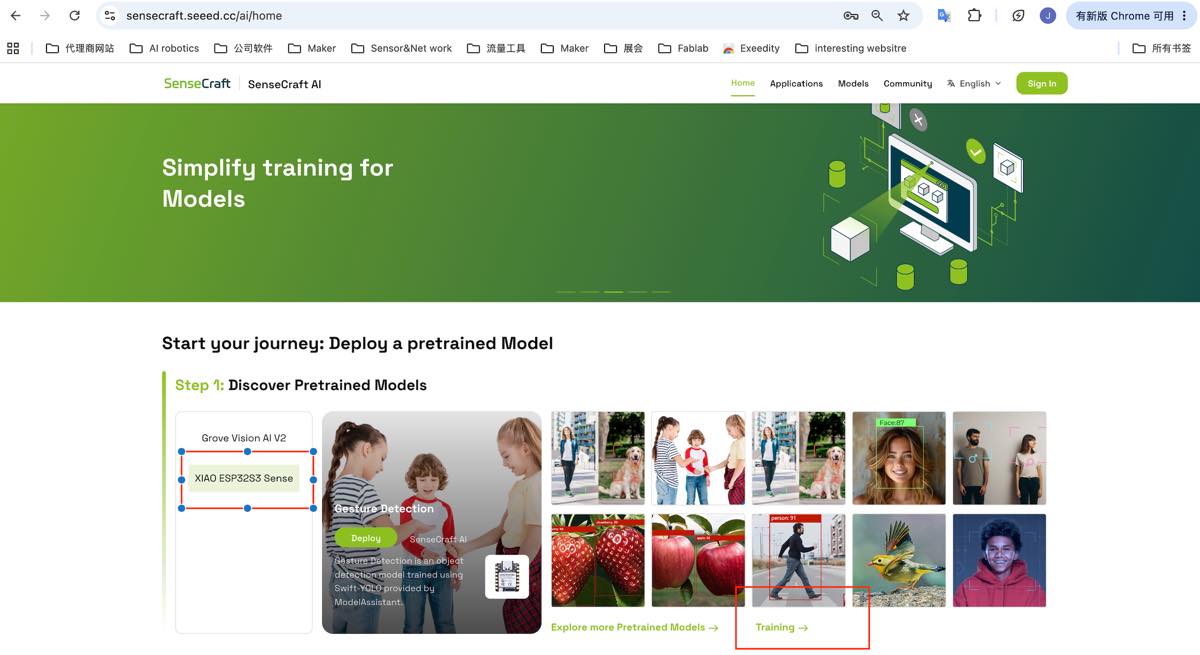
Open SenseCraft, select SenseCraft AI, and start AI training.
Step 4 — Log in and set up the category
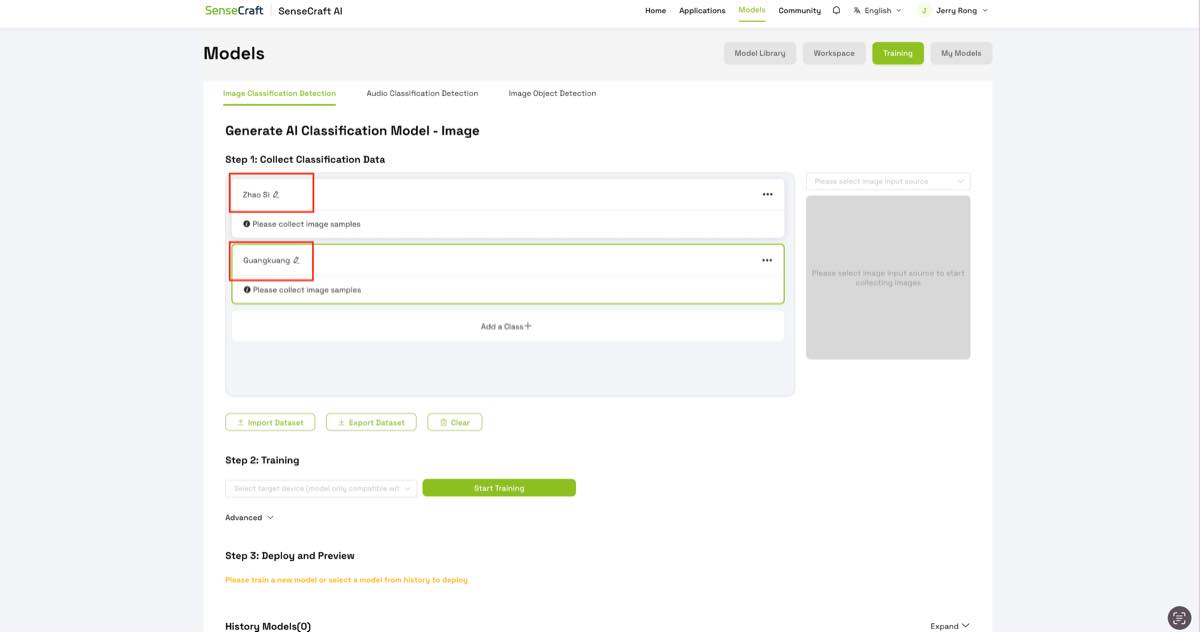
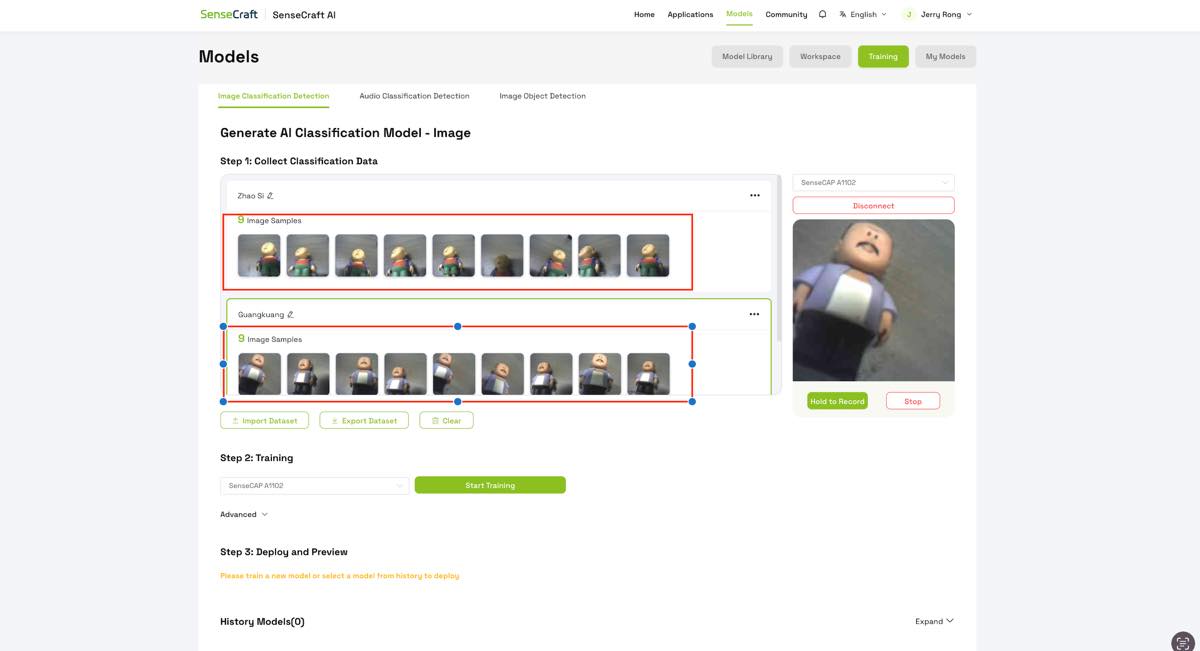
Step 5 — Collect raw data for each type
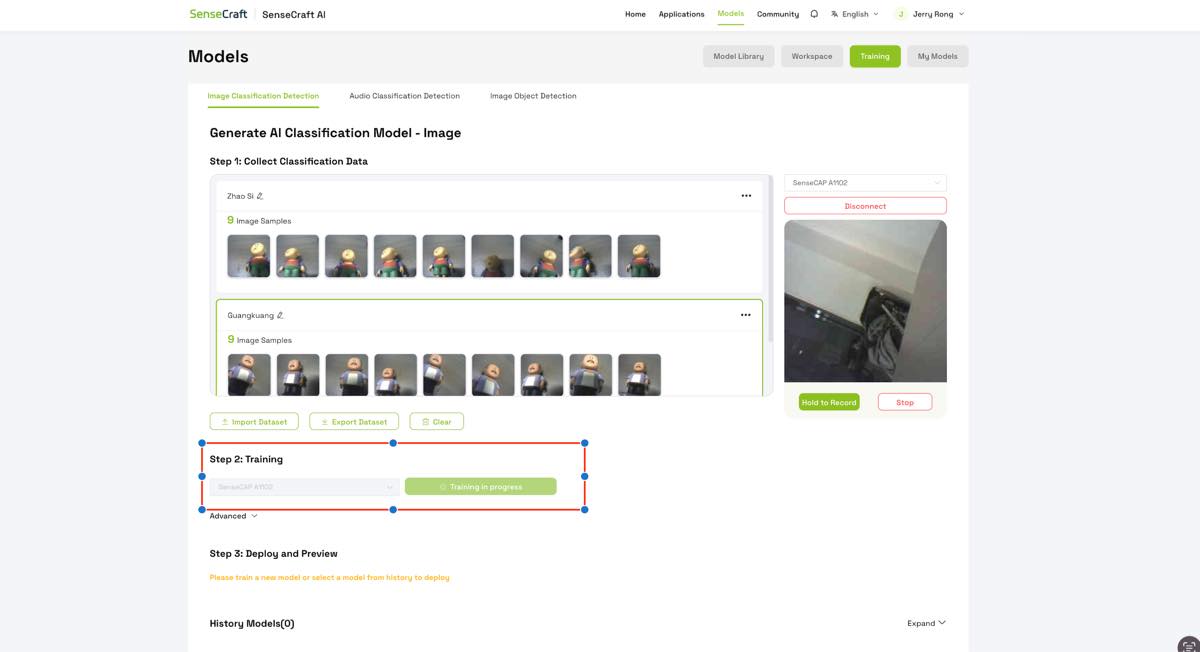
Step 6 — Training
Click training. After around 2 minutes, the training finished.
Step 7 — Testing
See the video below. The TinyML classification model appears to have high accuracy.
Step 8 — Deploy the trained AI classification model to ESP32-S3 Sense
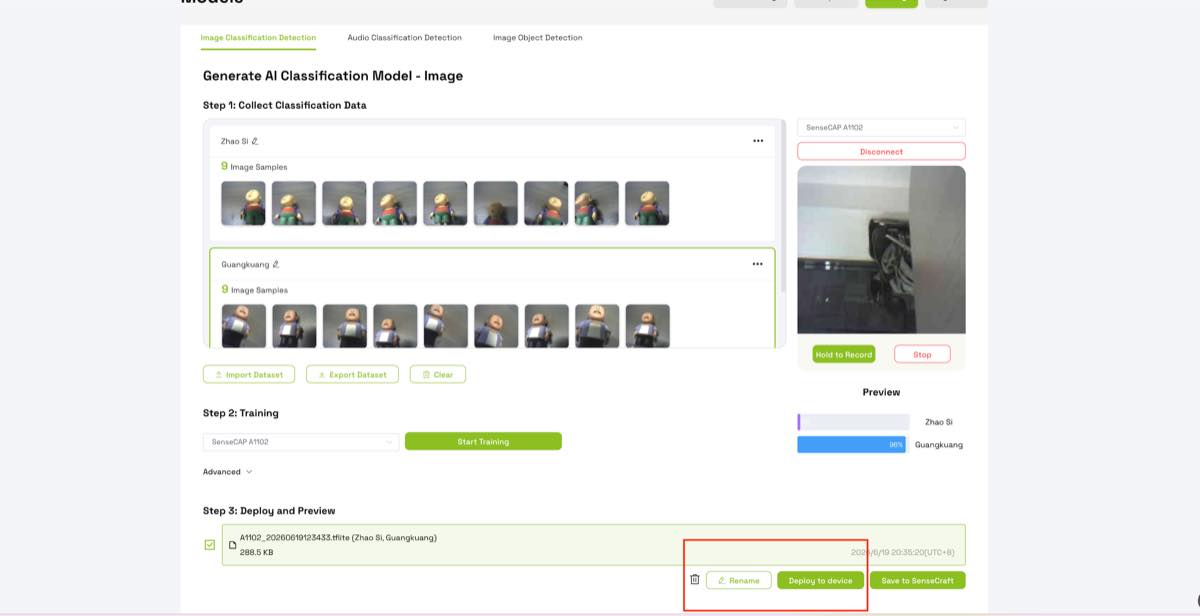
Then I got an AI camera that can help me recognize different statues or characters.