Week 10 Output Devices
Group assignment
Week 10 Chaihuo group assignment.
Individual assignment
For my final project, when voice has been collected and sent to the LLM, the LLM replies and the UI on the display changes accordingly. Therefore, there are three outputs: display on the web, display on the device, and TTS through the laptop.
Web UI
Basic functions, and the same content sent to Cursor as a prompt:
- Need a switch to enable the Mac server at once (Cursor suggested whether this is necessary)
- Need a status bar to display the Wi-Fi connection status of the ESP32 and the laptop
- Need a box to display the text content as mentioned, and another box to display the response
- Need a status bar: speaking (display when a person is speaking), thinking (display when the AI bot is thinking)
- Overall page style: Apple style
Gemini gave me the diagram:
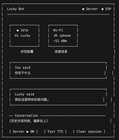
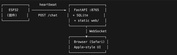
The first version
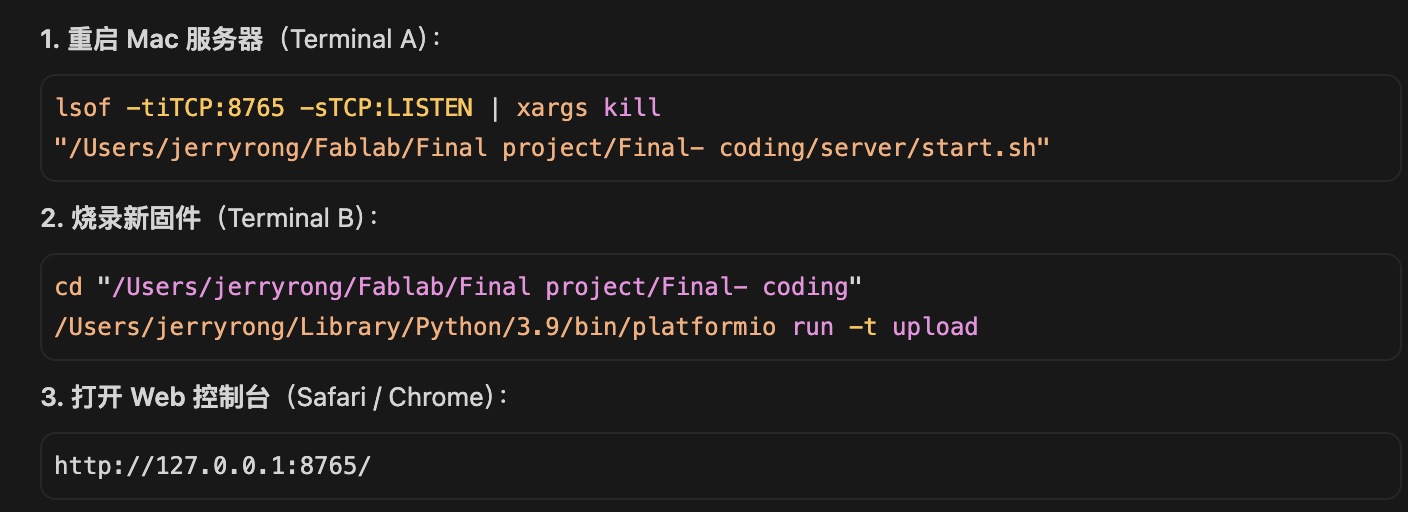
Open Mac server again:
lsof -tiTCP:8765 -sTCP:LISTEN | xargs kill
"/Users/jerryrong/Fablab/Final project/Final- coding/server/start.sh"
Flash new firmware:
cd "/Users/jerryrong/Fablab/Final project/Final- coding"
/Users/jerryrong/Library/Python/3.9/bin/platformio run -t upload
Web to check:
- Launching website: http://127.0.0.1:8764/
- Web: http://127.0.0.1:8765/
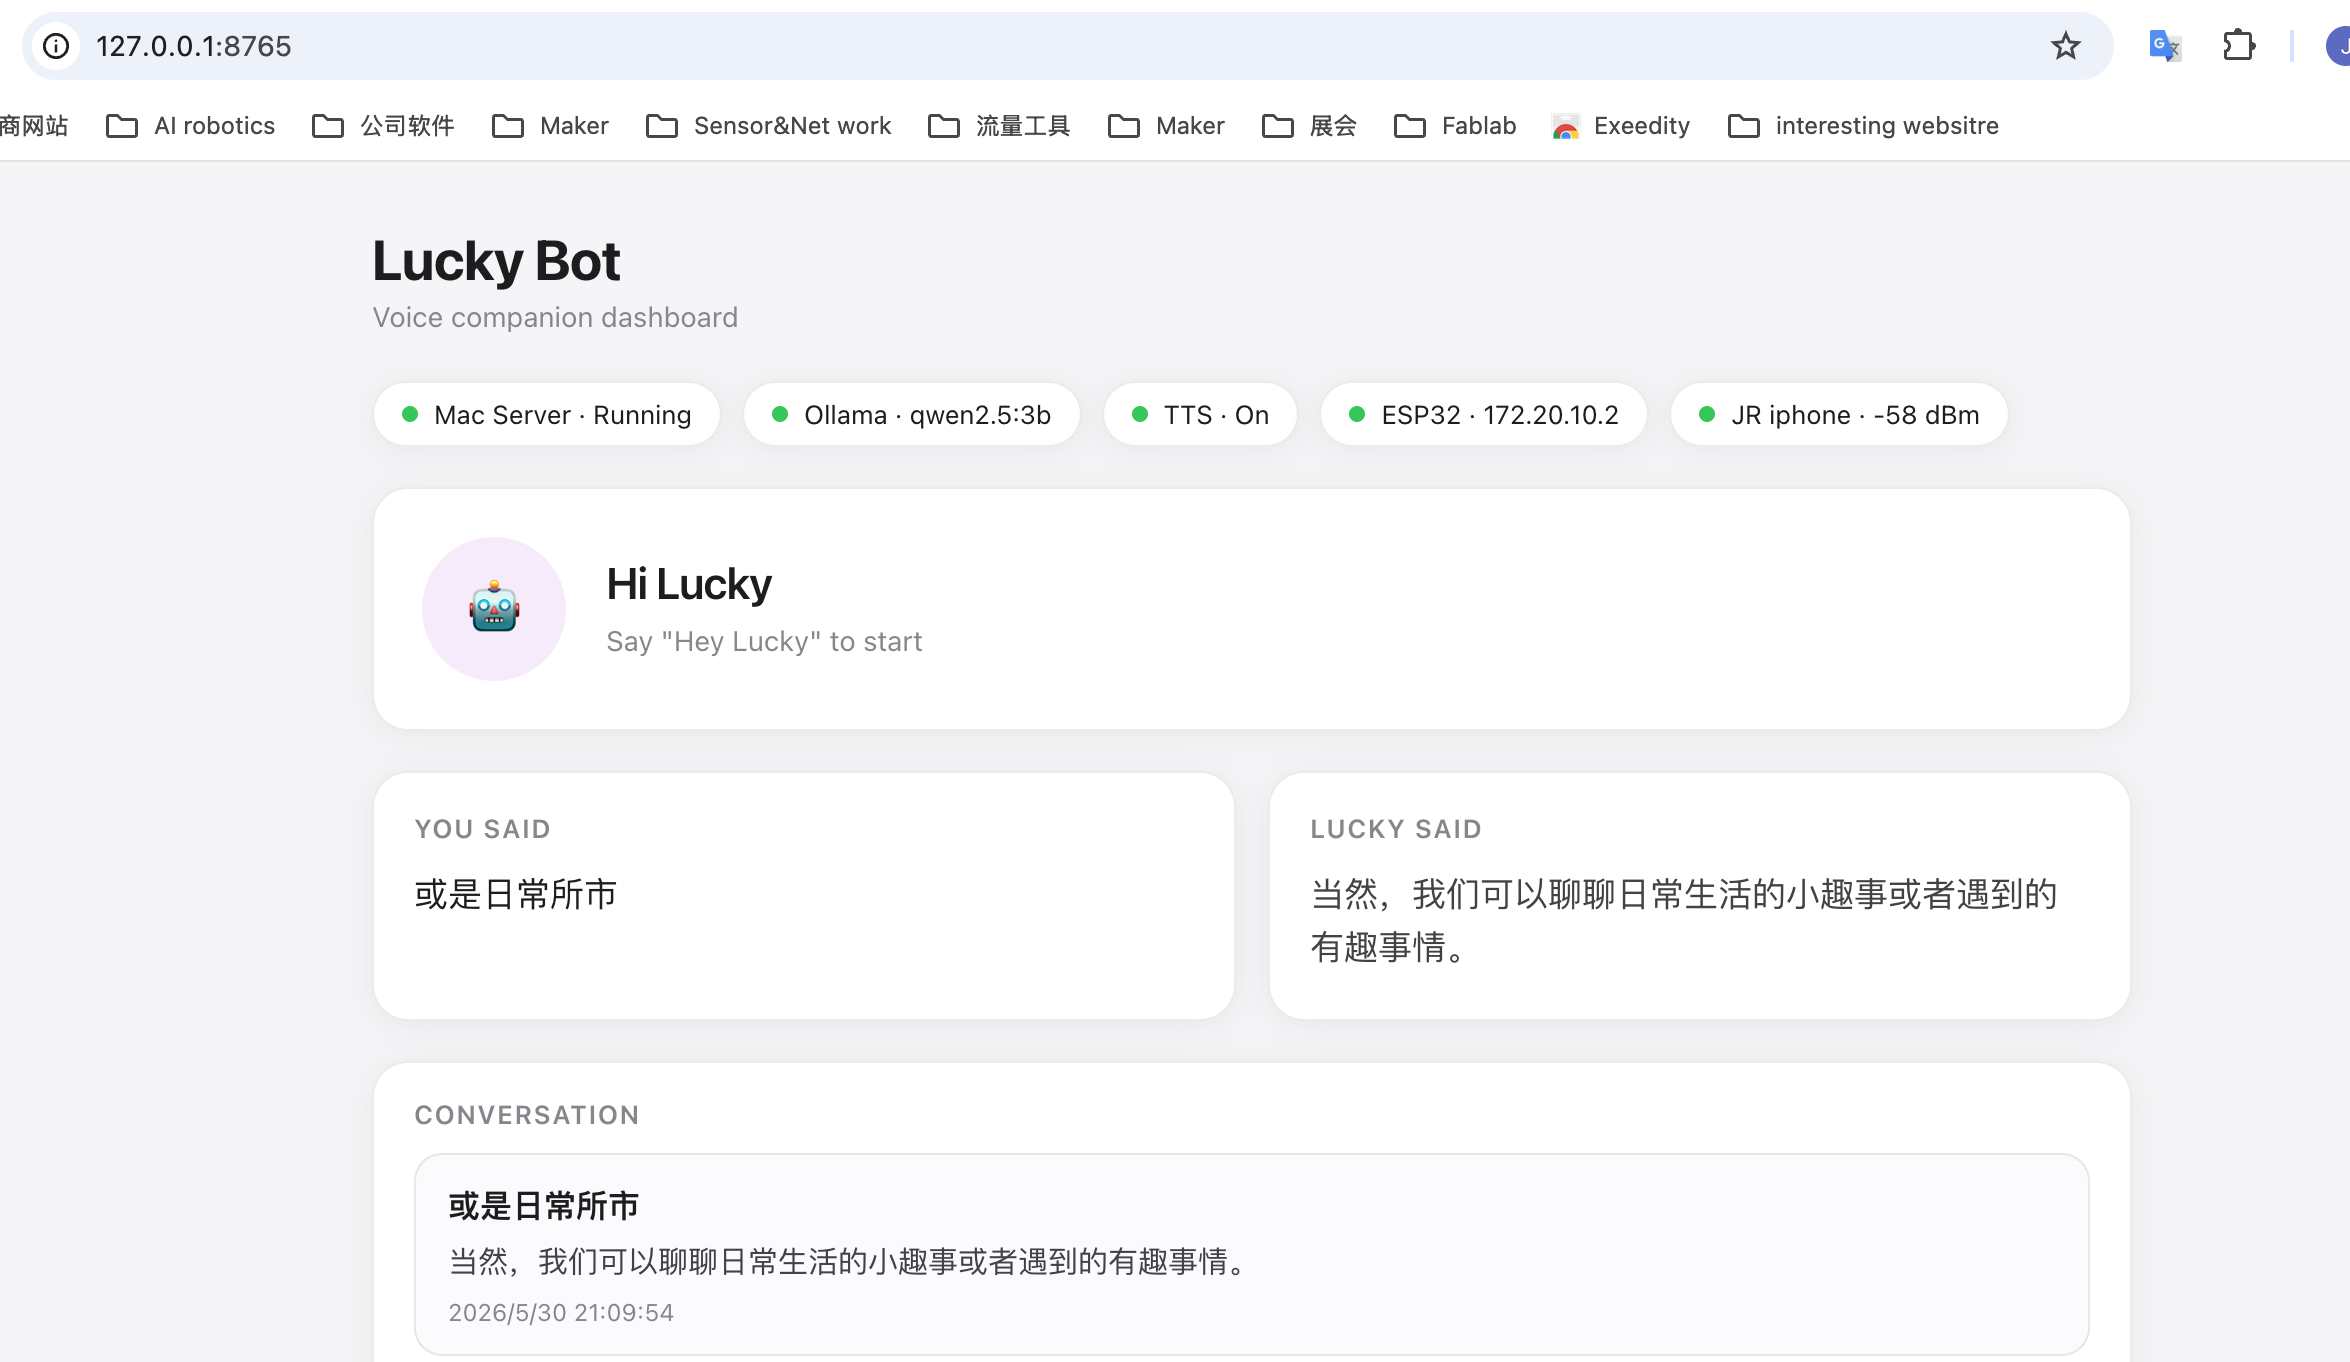
Optimization
- I need a button to turn on the Mac server
- Change the icon of the robot
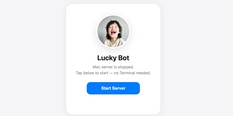
Key source code — Web UI (Lucky Bot dashboard)
Browser dashboard on Mac: Start Server button (no Terminal), custom Lucky avatar, live ESP32 status, conversation history.
Project files: server/web/control.html, server/web/index.html, server/launcher.py, server/app.py, server/hub.py
1. Start page + Start Server button (server/web/control.html):
<div class="card">
  <div class="avatar-wrap">
    <img src="/avatar.png" alt="Lucky" />
  </div>
  <h1>Lucky Bot</h1>
  <p>Mac server is stopped. Tap below to start — no Terminal needed.</p>
  <button id="btn-start" type="button">Start Server</button>
</div>
<script>
  btn.addEventListener("click", async () => {
    const r = await fetch("/server/start", { method: "POST" });
    const j = await r.json();
    if (j.running) location.href = "http://127.0.0.1:8765/";
  });
</script>
Replace server/web/avatar.png with your own photo to change the robot icon.
2. Launcher — start/stop Mac server on :8764 (server/launcher.py):
MAIN_PORT = 8765  # main FastAPI app (dashboard + ASR)

@app.get("/")
def root():
    if _main_healthy():
        return RedirectResponse(f"http://127.0.0.1:{MAIN_PORT}/")
    return FileResponse(WEB_DIR / "control.html")  # Start Server page

@app.post("/server/start")
def server_start() -> dict:
    if _main_healthy():
        return {"ok": True, "running": True}
    _ensure_ollama()
    subprocess.Popen(["uvicorn", "app:app", "--host", "0.0.0.0", "--port", str(MAIN_PORT)], ...)
    # poll /health until ready
    return {"ok": True, "running": True}

@app.get("/avatar.png")
def avatar():
    return FileResponse(WEB_DIR / "avatar.png")
Run once: ./launcher.sh → open http://127.0.0.1:8764/
3. Dashboard layout (server/web/index.html):
<div class="pill-row">
  <div class="pill"><span class="dot" id="dot-server"></span><span id="lbl-server">Lucky</span></div>
  <div class="pill"><span class="dot" id="dot-llm"></span><span id="lbl-llm">LLM</span></div>
  <div class="pill"><span class="dot" id="dot-tts"></span><span id="lbl-tts">TTS</span></div>
  <div class="pill"><span class="dot" id="dot-esp"></span><span id="lbl-esp">ESP32</span></div>
  <div class="pill"><span class="dot" id="dot-wifi"></span><span id="lbl-wifi">Wi-Fi</span></div>
</div>

<section class="status-hero">
  <div class="status-ring" id="status-ring">
    <img src="/avatar.png" alt="Lucky" class="avatar" />
  </div>
  <div class="status-label" id="status-label">Offline</div>
</section>

<div class="grid-2">
  <div class="card user"><h2>You said</h2><div id="you-said">—</div></div>
  <div class="card bot"><h2>Lucky said</h2><div id="lucky-said">—</div></div>
</div>

<button id="btn-server">Start Talking</button>
4. Live status rendering (JavaScript in index.html):
const STATE_LABELS = {
  offline: "Offline", ready: "Ready", wake_listen: "Hi Lucky",
  listening: "Listening", thinking: "Thinking", speaking: "Speaking",
};

function renderDashboard(data) {
  const server = data.server || {};
  const dev = data.device || {};
  const state = dev.online ? dev.state : "offline";

  setDot($("dot-server"), !!server.ok);
  setDot($("dot-esp"), !!dev.online);
  setDot($("dot-wifi"), dev.online && dev.wifi_connected);

  $("status-label").textContent = STATE_LABELS[state] || state;
  $("status-ring").className = "status-ring " + state;

  const chat = data.latest_chat;
  if (chat) {
    $("you-said").textContent = chat.user;
    $("lucky-said").textContent = chat.reply;
  }
  renderHistory(data.history);
}
5. Start/Stop server from dashboard:
async function toggleServer() {
  const st = await fetch("http://127.0.0.1:8764/server/status").then(r => r.json());
  const path = st.running ? "/server/stop" : "/server/start";
  await fetch("http://127.0.0.1:8764" + path, { method: "POST" });
  fetchDashboard();
}
6. Real-time updates — WebSocket:
function connectWs() {
  const ws = new WebSocket(`ws://${location.host}/ws`);
  ws.onmessage = (ev) => {
    const msg = JSON.parse(ev.data);
    if (msg.type === "init") renderDashboard(msg.data);
    if (msg.type === "device" || msg.type === "chat") fetchDashboard();
  };
  ws.onclose = () => setTimeout(connectWs, 2000);
}
7. Backend API (server/app.py):
@app.get("/")
def dashboard():
    return FileResponse(WEB_DIR / "index.html")

@app.get("/api/dashboard")
def api_dashboard(limit: int = 20):
    return {"server": health(), **dashboard_snapshot(), "history": chat_history(limit)}

@app.post("/device/status")
async def post_device_status(request: Request):
    update_device(await request.json())  # ESP32 heartbeat
    schedule_broadcast({"type": "device", "data": device_snapshot()})

@app.websocket("/ws")
async def websocket_endpoint(ws: WebSocket):
    await ws.accept()
    await ws.send_json({"type": "init", "data": {...dashboard_snapshot()...}})
8. Device state hub (server/hub.py):
def update_device(payload: dict) -> DeviceStatus:
    dev.state = str(payload.get("state") or "offline")  # listening, thinking, ...
    dev.ssid = str(payload.get("ssid") or "")
    dev.ip = str(payload.get("ip") or "")
    dev.updated_at = time.time()
    return dev

def device_snapshot() -> dict:
    online = (time.time() - dev.updated_at) < DEVICE_OFFLINE_SEC
    return {"online": online, "state": dev.state, "ssid": dev.ssid, "ip": dev.ip}
Expected behaviour: open http://127.0.0.1:8764/ → tap Start Server → dashboard at :8765 shows Lucky avatar, status pills, and conversation; ESP32 POSTs /device/status → Web UI updates in real time.
Display UI
My idea:
- Use my own image
- The text will be displayed on the screen, in Chinese cursive script style
- For images, I will use three images to cover all 9 states
The current setting with some images generated by code, as below:
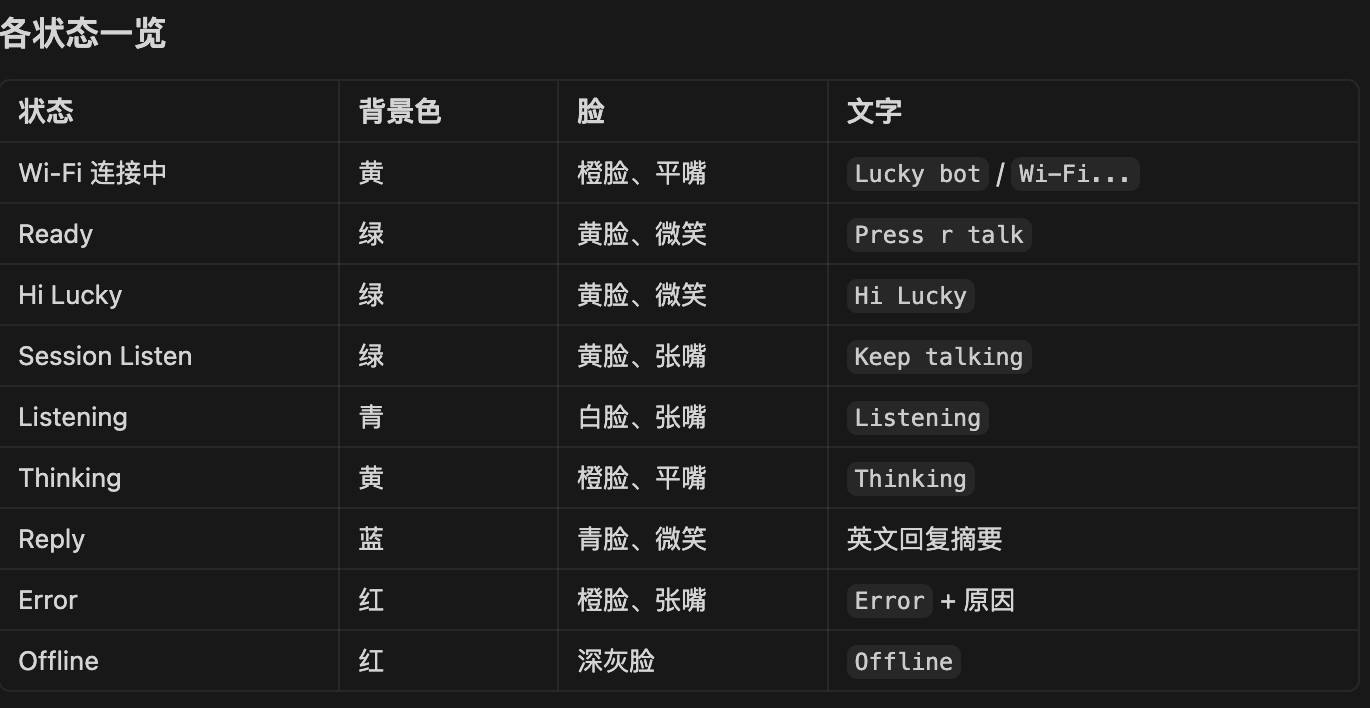
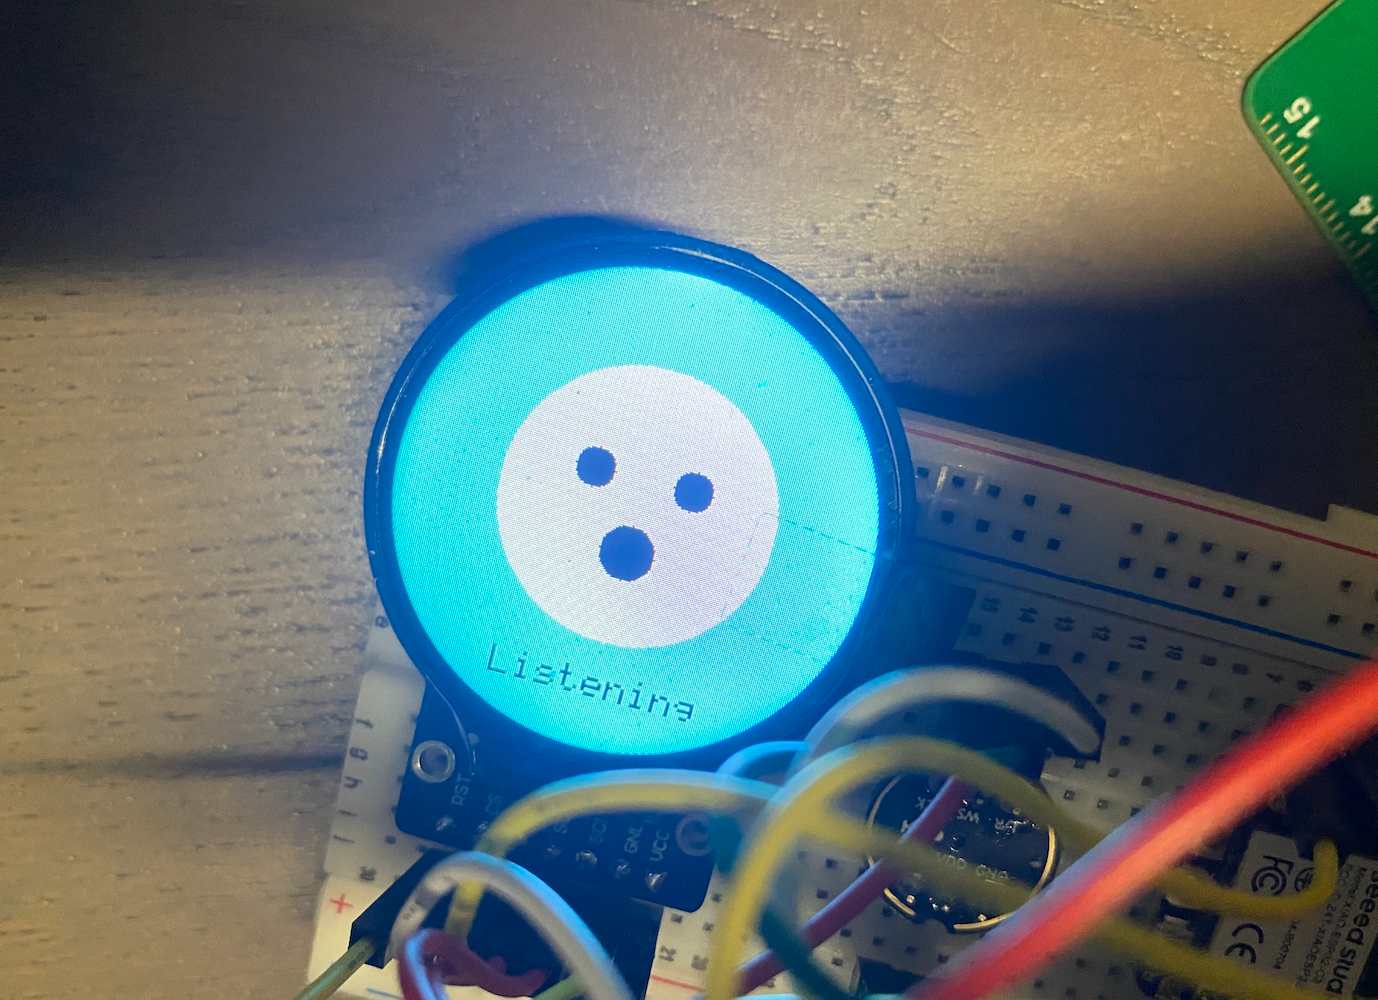
I sent the images to Cursor and required the status and images — different status with different image:

I got the initial firmware and burned it to the ESP32:
cd "/Users/jerryrong/Fablab/Final project/Final- coding"
/Users/jerryrong/Library/Python/3.9/bin/platformio run -t upload
The UI has been updated. Testing as the video (file "UI"):
I did some other optimization on the UI to make sure the status is closer to daily use. For example, show Wi-Fi disconnection status and maintain that UI for a long time until connected again.
For the text showing on the display, it is very hard for the Xiao ESP32-C3, as there is no SRAM like the Xiao S3. I had to give up this function.
Key source code — Display UI (GC9A01 round LCD)
240×240 round LCD on Seeed Xiao ESP32-C3: three pre-rendered background images + cursive-style label bitmaps for 9 states.
Chinese reply glyphs on screen (display_anim) are disabled on C3 — not enough SRAM vs Xiao S3.
Project files: src/lucky_ui.cpp, src/gc9a01_hsd.cpp, src/generated/display_bitmaps.h, tools/gen_display_assets.py
1. Screen states (src/lucky_ui.h):
enum class LuckyScreen {
  kWifiConnect,   // connecting Wi-Fi
  kReady,         // idle — "Press r talk"
  kWakeListen,    // "Hi Lucky"
  kWakeAck,       // wake acknowledged
  kSessionListen, // continuous session
  kListening,
  kReplying,
  kThinking,
  kReply,
  kError,
  kOffline,       // Wi-Fi lost — held until reconnect
};

class LuckyUI {
 public:
  void show(LuckyScreen screen, const char* line1 = "", const char* line2 = "");
};
2. Three backgrounds + label overlays (src/lucky_ui.cpp):
#include "generated/display_bitmaps.h"

void LuckyUI::show(LuckyScreen screen, const char* line1, const char* line2) {
  switch (screen) {
    case LuckyScreen::kWifiConnect:
      lcd_.drawRGB565Bitmap(0, 0, 240, 240, BMP_IDLE_WAKE_DATA);
      drawLabelPair(LBL_LUCKY_BOT, LBL_WIFI);          // "Lucky bot" + "Wi-Fi…"
      break;

    case LuckyScreen::kReady:
    case LuckyScreen::kWakeListen:
      lcd_.drawRGB565Bitmap(0, 0, 240, 240, BMP_IDLE_WAKE_DATA);
      drawLabelPair(LBL_LUCKY_BOT, LBL_HI_LUCKY);      // idle / wake listen
      break;

    case LuckyScreen::kListening:
    case LuckyScreen::kThinking:
    case LuckyScreen::kReplying:
      lcd_.drawRGB565Bitmap(0, 0, 240, 240, BMP_ACTIVE_TALK_DATA);
      drawLabel(LBL_LISTENING);                        // or THINKING / REPLYING
      break;

    case LuckyScreen::kOffline:
    case LuckyScreen::kError:
      lcd_.drawRGB565Bitmap(0, 0, 240, 240, BMP_ERROR_OFFLINE_DATA);
      drawLabel(LBL_OFFLINE);                          // held until Wi-Fi returns
      break;
  }
}
3. Generate bitmap assets from photos + cursive labels (tools/gen_display_assets.py):
LABELS = {
    "lucky_bot": "Lucky bot", "wifi": "Wi-Fi…", "hi_lucky": "Hi Lucky",
    "listening": "Listening", "thinking": "Thinking", "offline": "Offline",
}
BACKGROUNDS = {
    "bmp_idle_wake": "state_idle_wake.png",       # states 1–3
    "bmp_active_talk": "state_active_talk.png",   # states 4–8
    "bmp_error_offline": "state_error_offline.png",
}
# Renders 240×240 RGB565 → src/generated/display_bitmaps.h (PROGMEM)
Run: python3 tools/gen_display_assets.py
4. LCD driver — blit full-screen bitmap (src/gc9a01_hsd.cpp):
bool GC9A01_HSD::begin() {
  // SPI pins D0/D4/D5/D8/D10, HSD vendor init sequence
  spi_.begin(PIN_LCD_SCK, -1, PIN_LCD_MOSI, -1);
  runHsdInit();
  return true;
}

void GC9A01_HSD::drawRGB565Bitmap(int x, int y, int w, int h,
                                  const uint16_t* data, uint16_t transparent) {
  setAddrWindow(x, y, x + w - 1, y + h - 1);
  for (int i = 0; i < w * h; i++) {
    if (data[i] != transparent) pushColor(data[i], 1);
  }
}
5. Wi-Fi disconnect — keep Offline UI until reconnect (src/main.cpp):
if (!wifiIsLinked()) {
  if (screenState != LuckyScreen::kOffline) {
    ui.show(LuckyScreen::kOffline);
    screenState = LuckyScreen::kOffline;
  }
  connectWiFi(WIFI_SSID, WIFI_PASS);   // retry in loop
  return;
}
6. State changes during voice chat:
ui.show(LuckyScreen::kListening);
// ... micRecordUntilSilence + upload ...
ui.show(LuckyScreen::kThinking);
// ... wait for Mac reply + TTS ...
ui.show(LuckyScreen::kReplying);
ui.show(LuckyScreen::kWakeListen);     // back to standby
7. Chinese cursive reply on screen — disabled on C3 (include/lucky_config.h):
constexpr bool kEnableReplyDisplay = false; // Scheme A off — ESP32-C3 RAM too small
When enabled, Mac renders glyphs (server/display_text.py) and ESP downloads via display_anim.cpp — needs ~116 KB buffer; C3 has no PSRAM, so pre-rendered label bitmaps only.
Expected behaviour: power on → idle photo + "Wi-Fi…" → ready → "Hi Lucky" → active photo + "Listening/Thinking" → Wi-Fi drops → offline photo stays until reconnect.
A video showing the UI and Web:
Output on voice
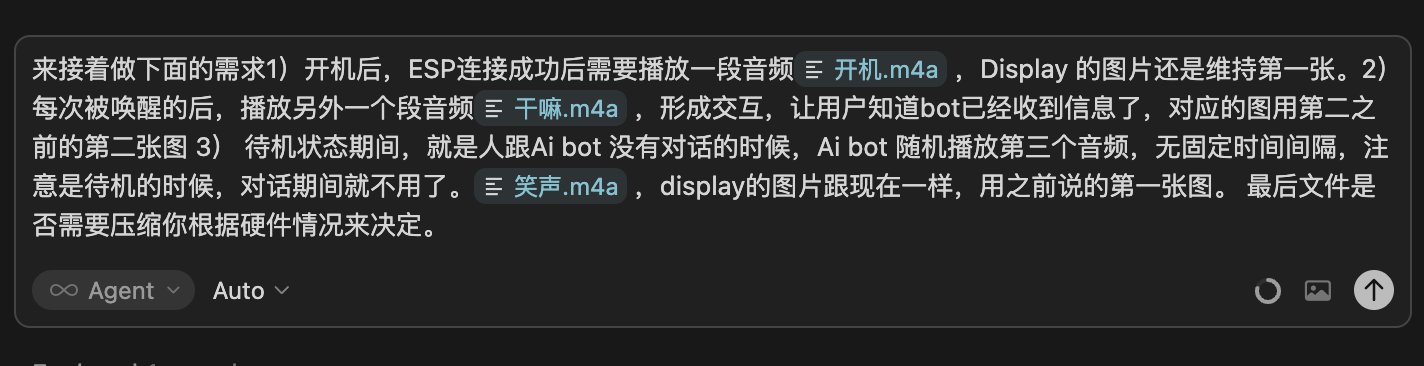
I am using Cursor for software design. My idea (logic of software) and output are as below:
- After powering on, once the ESP successfully connects, play an audio file located at
/Users/jerryrong/Fablab/Final project/音频/开机.m4a. The display image should remain as the first one. - Each time the device is awakened, play another audio file
/Users/jerryrong/Fablab/Final project/音频/干嘛.m4ato create interaction, letting users know the bot has received their input. Use the second image during this playback. - During standby mode — when there is no conversation between the user and the AI bot — the AI bot should randomly play a third audio file
/Users/jerryrong/Fablab/Final project/音频/笑声.m4awithout a fixed interval. Note: this audio plays only when in standby; it should not play during active conversations. The display image remains unchanged, using the first image as before.
Finally, whether to compress the files depends on the hardware specifications.
I sent the same prompt to Cursor but in Chinese:
Got the initial firmware.
Updated Mac server:
"/Users/jerryrong/Fablab/Final project/Final- coding/server/launcher.sh"
New firmware:
cd "/Users/jerryrong/Fablab/Final project/Final- coding"
/Users/jerryrong/Library/Python/3.9/bin/platformio run -t upload
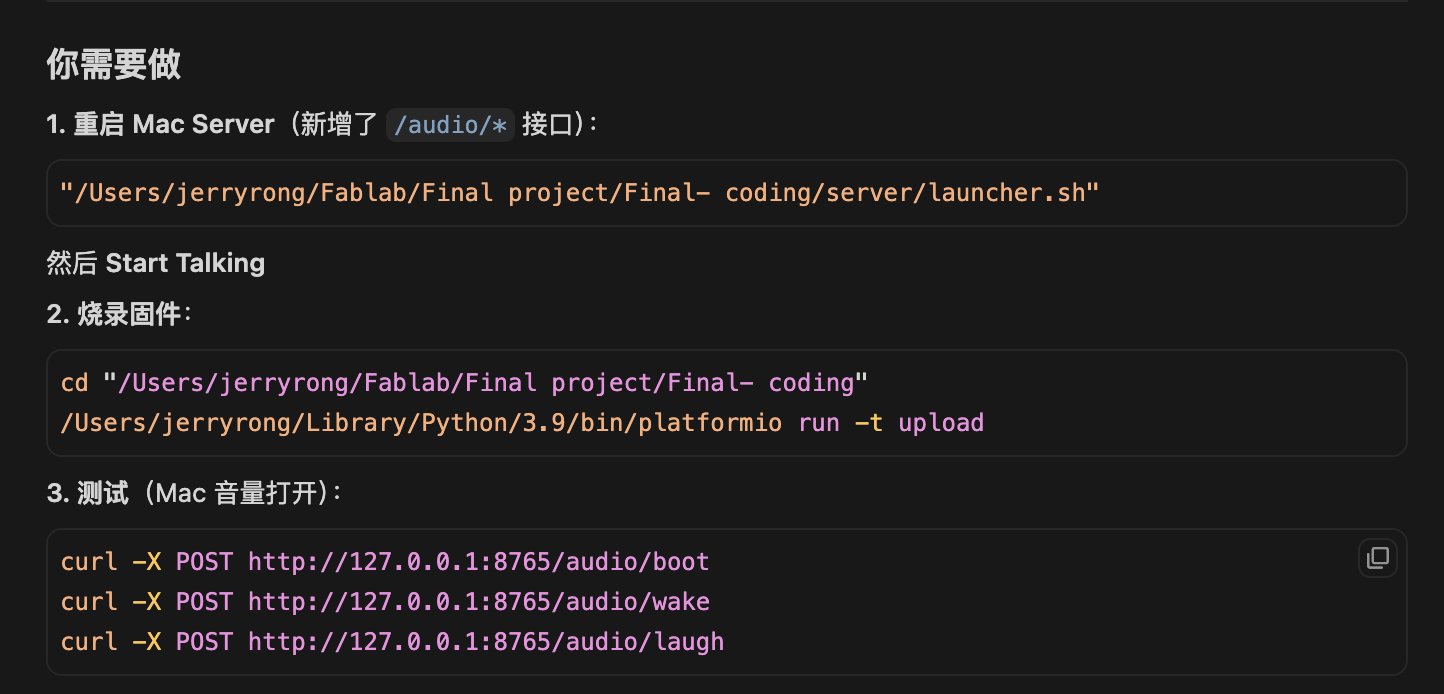
With it, it runs well, as shown in the video (+voice interaction/file):
Update on 27th, Jun.
Group assignment
Output device
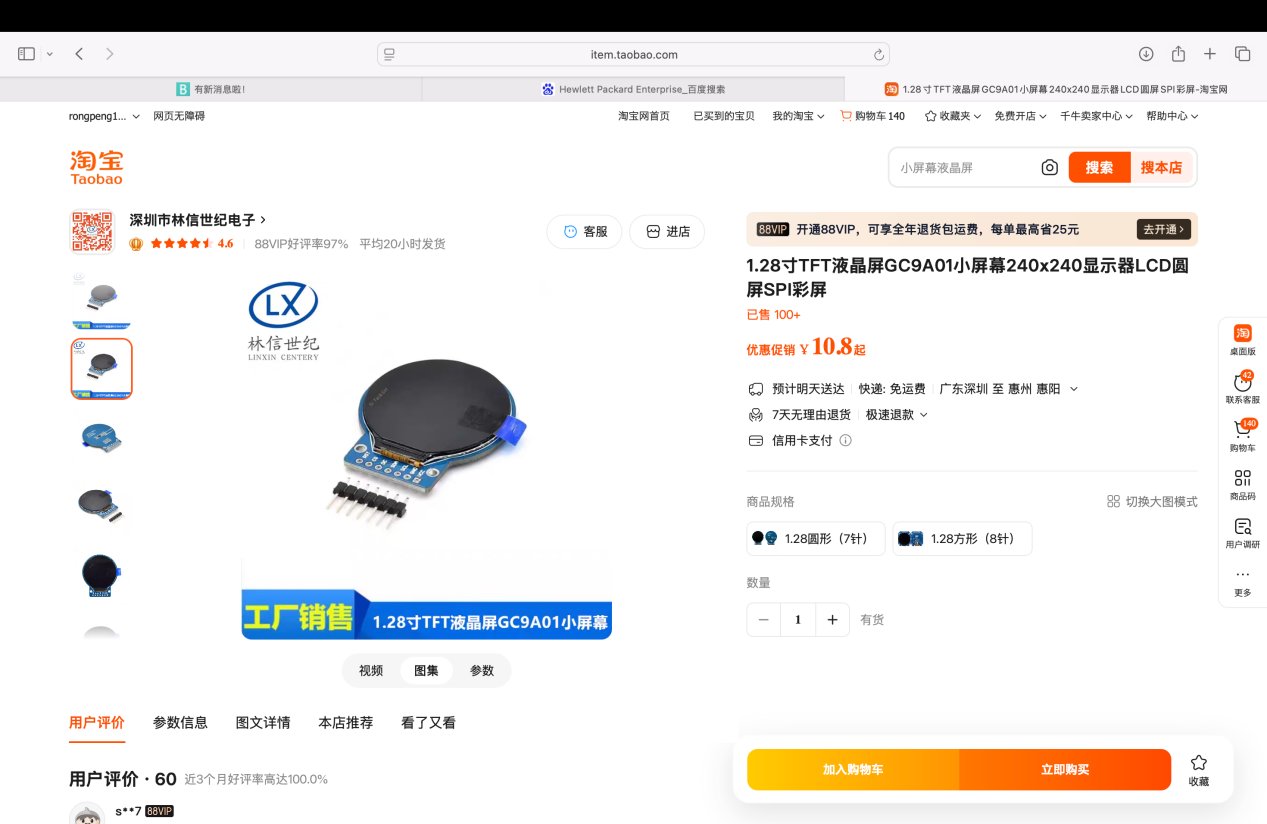
The output device I will use in my final project is a screen, bought from Taobao:
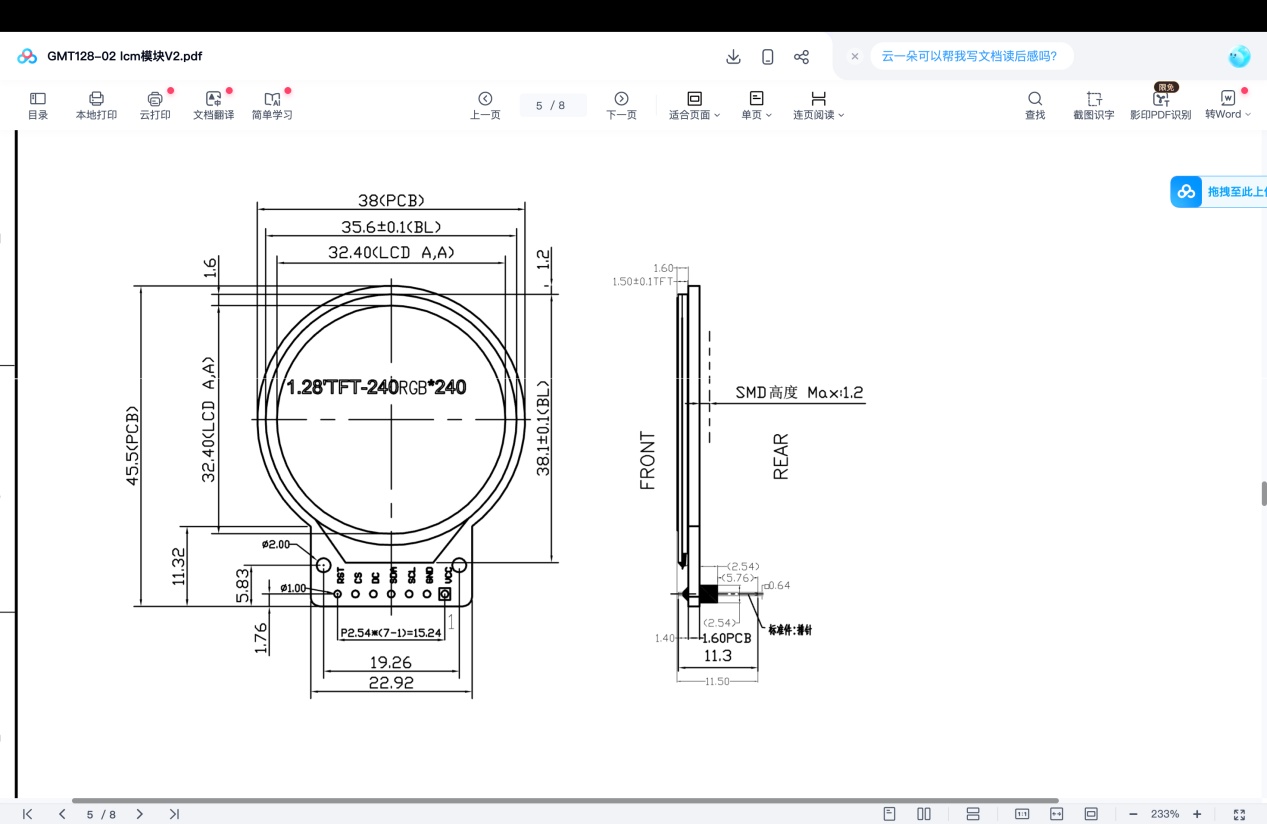
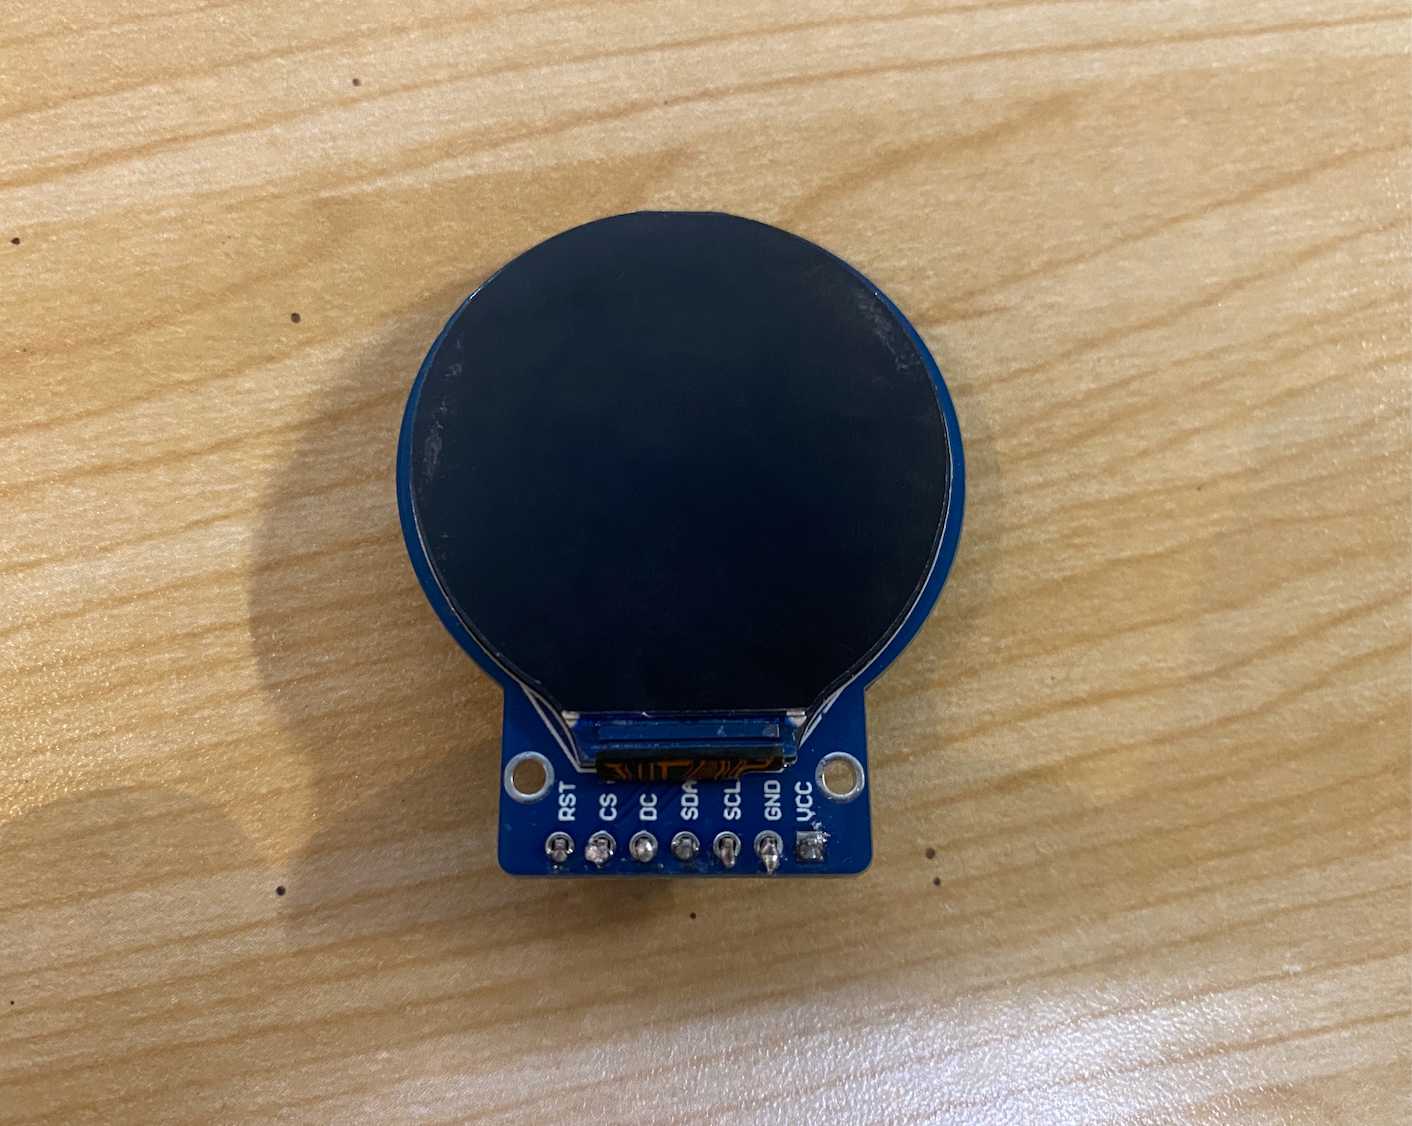
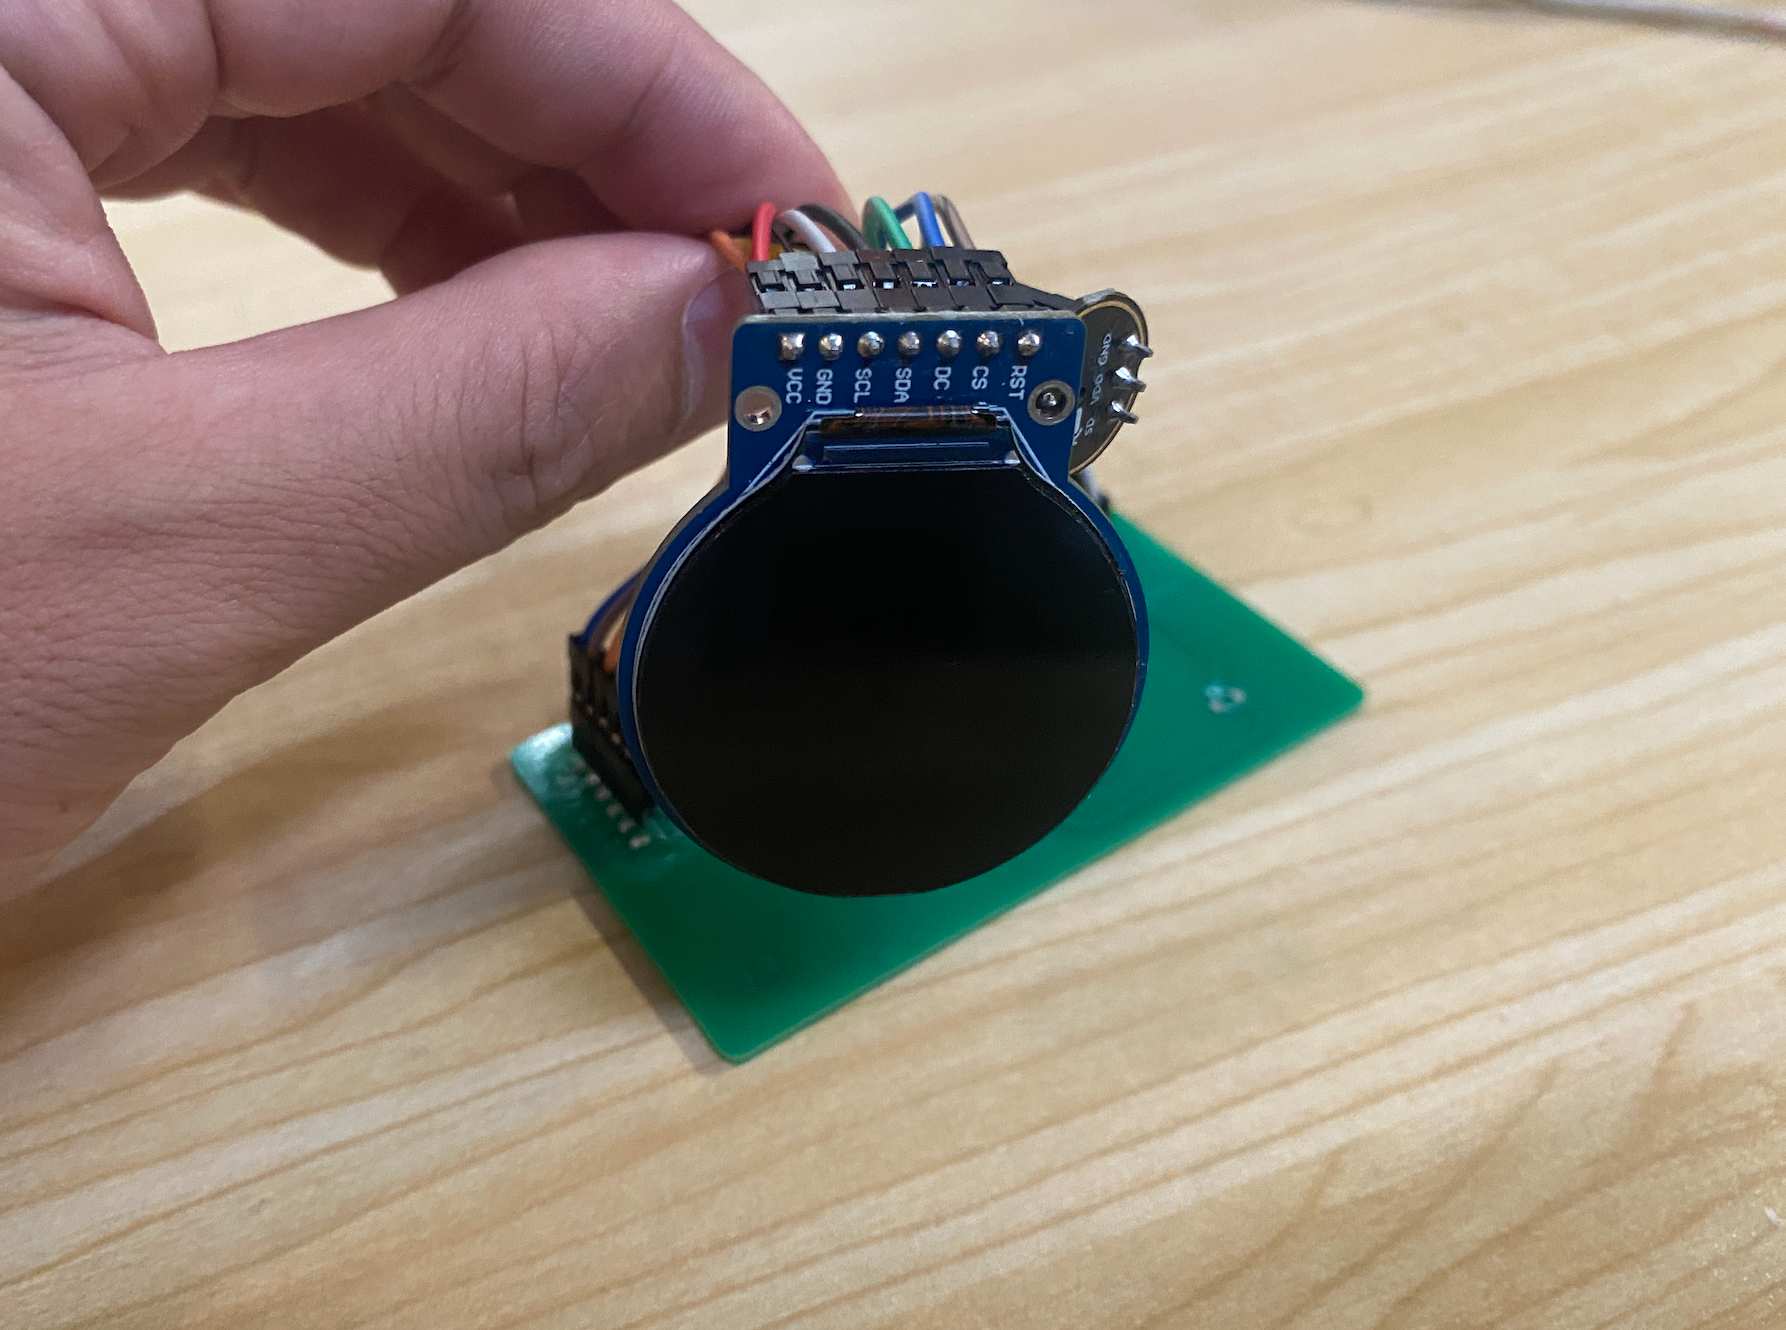
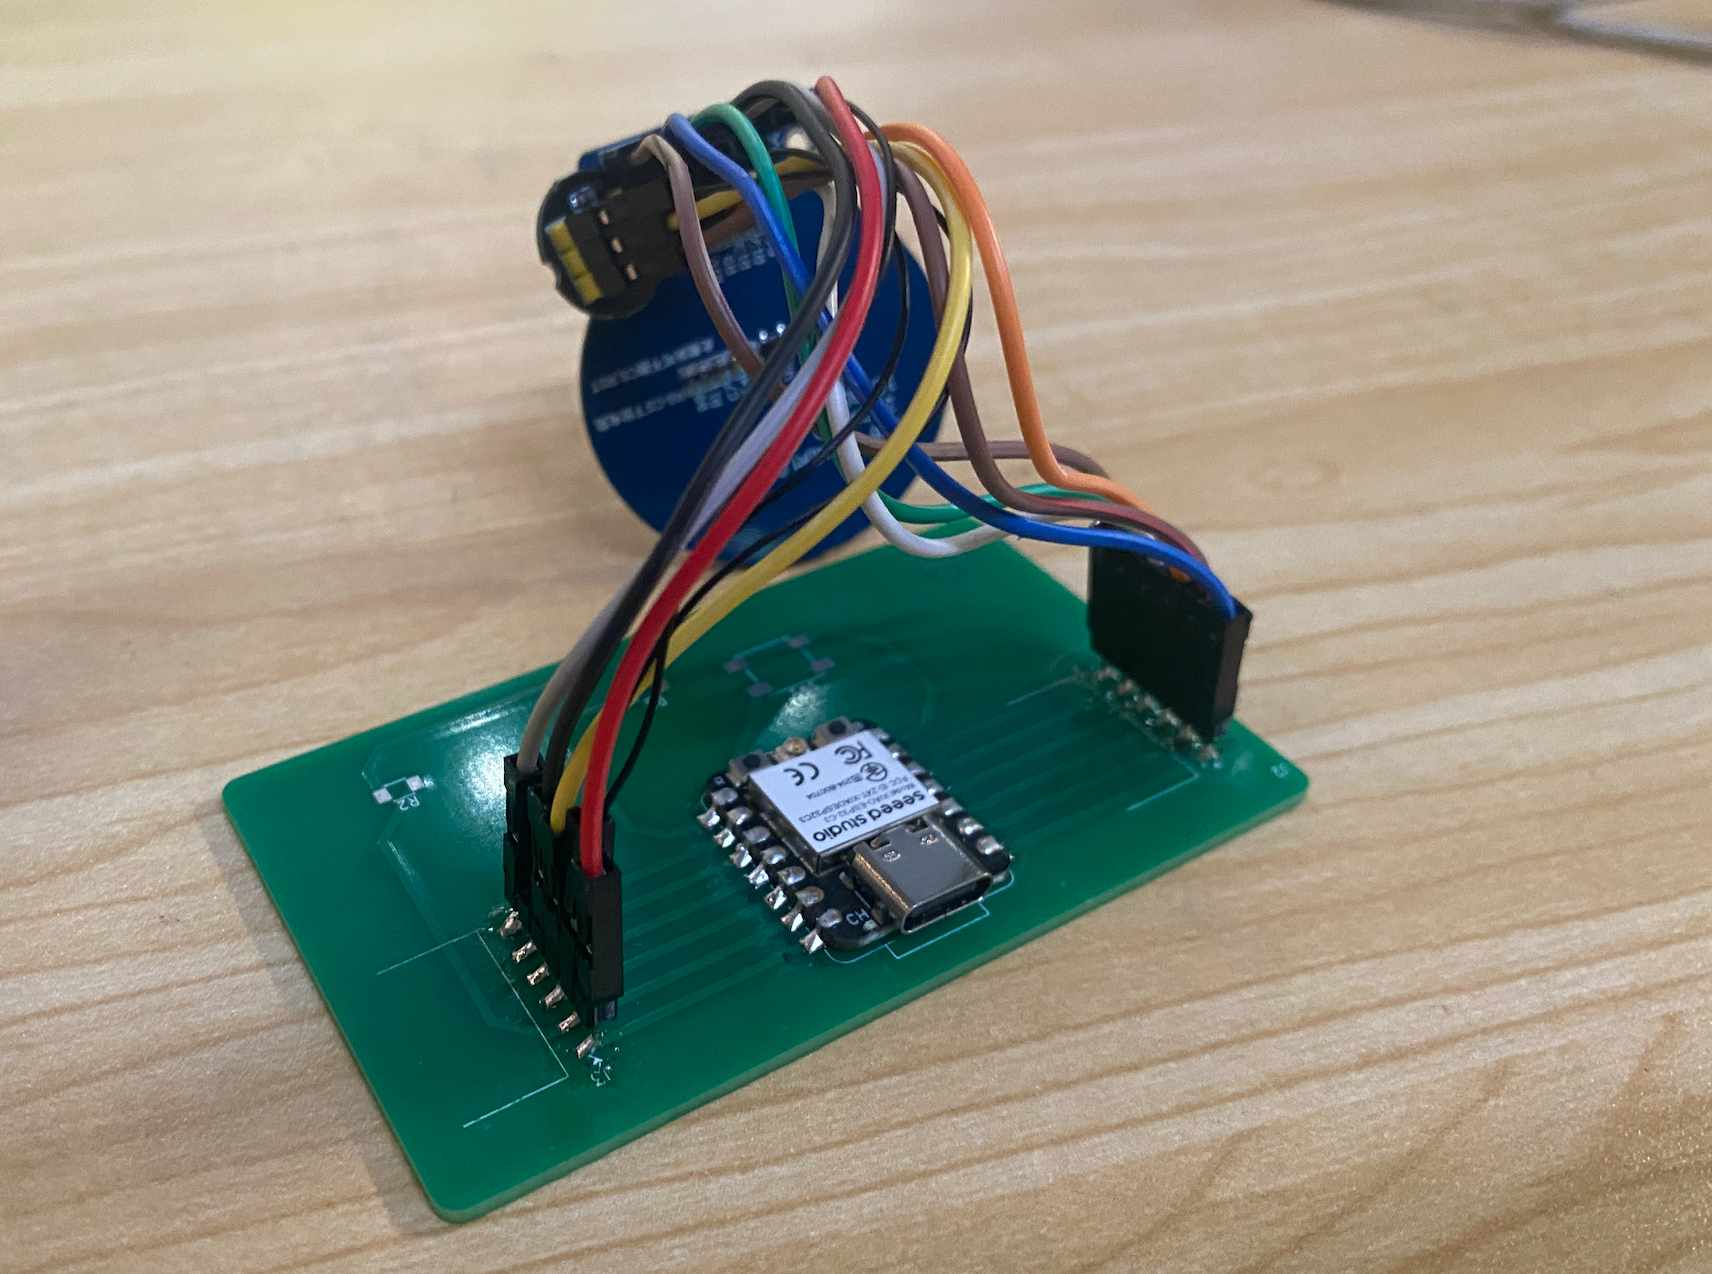
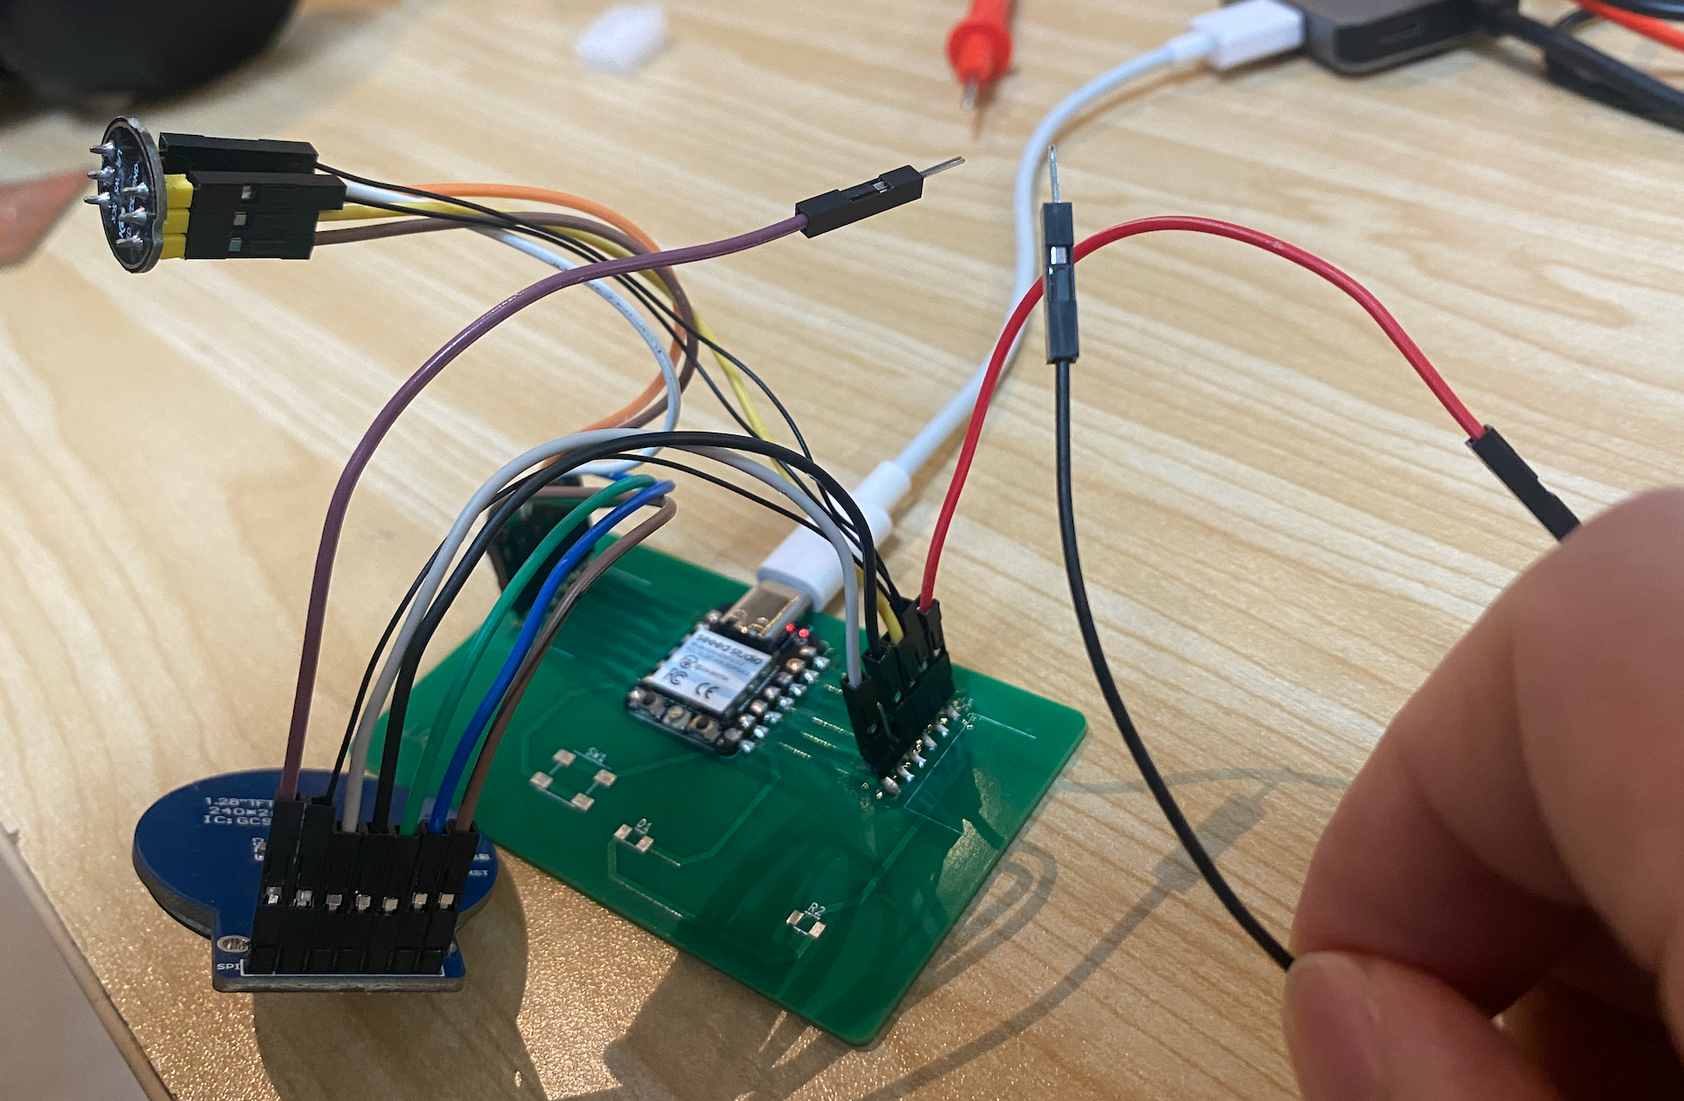
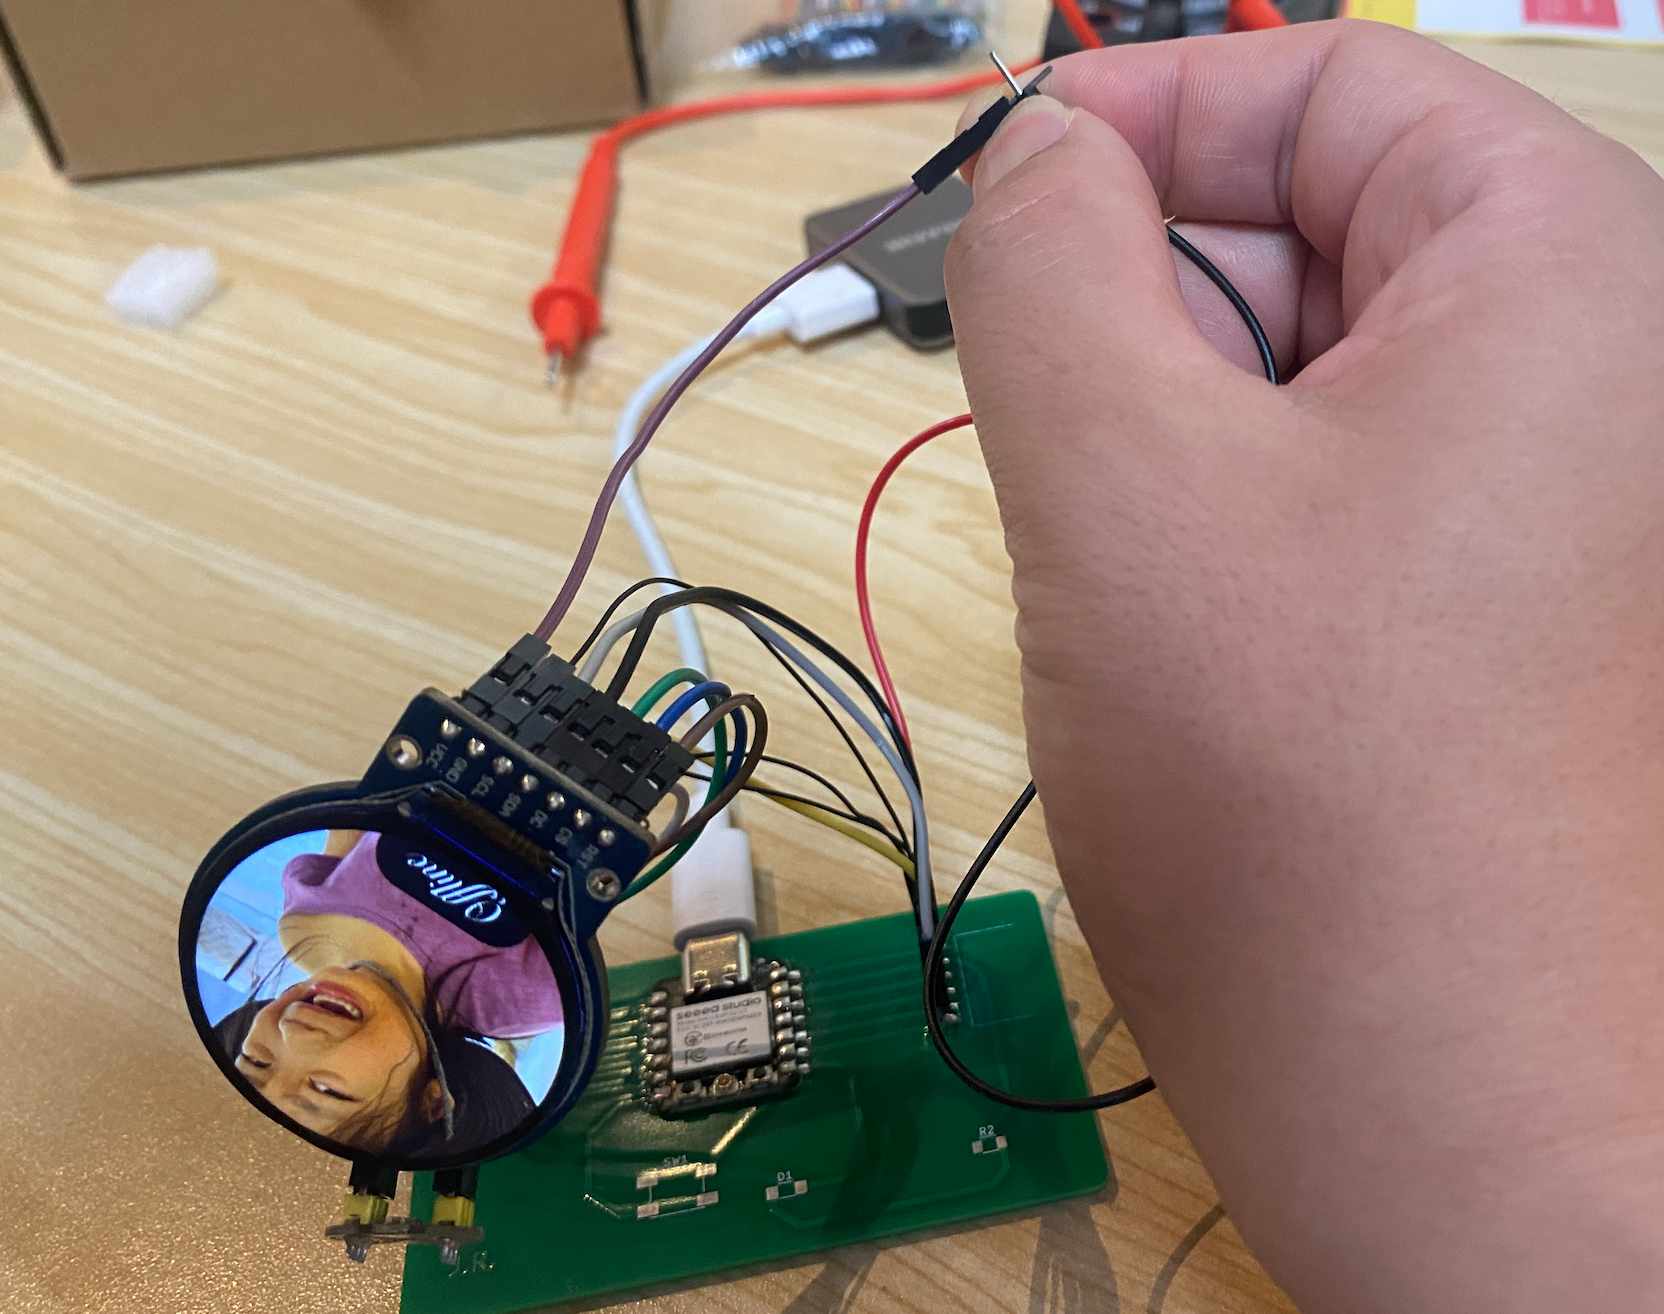
Connect the screen with Xiao ESP32-C3 and the board.
Round screen (GMT128-02 / GC9A01) ➔ Seeed XIAO ESP32-C3 Wiring
4-line SPI serial bus connection:
| Screen Pin (GMT128-02) | Seeed XIAO ESP32-C3 Physical Pin | Corresponding Pin in Code (GPIO) | Adjustment & Advantage Description |
|---|---|---|---|
| 1. VCC | 5V | 5V | Connects to the stable 5V rail to ensure enough power for the backlight. |
| 2. GND | GND | GND | Power ground (must share a common ground with the microphone). |
| 3. SCL | D8 | GPIO 8 | Hardware Fixed: SPI Serial Clock line (SCK). |
| 4. SDA | D10 | GPIO 10 | Hardware Fixed: SPI Serial Data Out line (MOSI). |
| 5. DC | D4 | GPIO 6 | Data/Command selection pin. |
| 6. CS | D0 | GPIO 2 | Strapping Pin Warning: Please check the crucial boot note below. |
| 7. RST | D5 | GPIO 7 | Hardware reset pin (active low). |
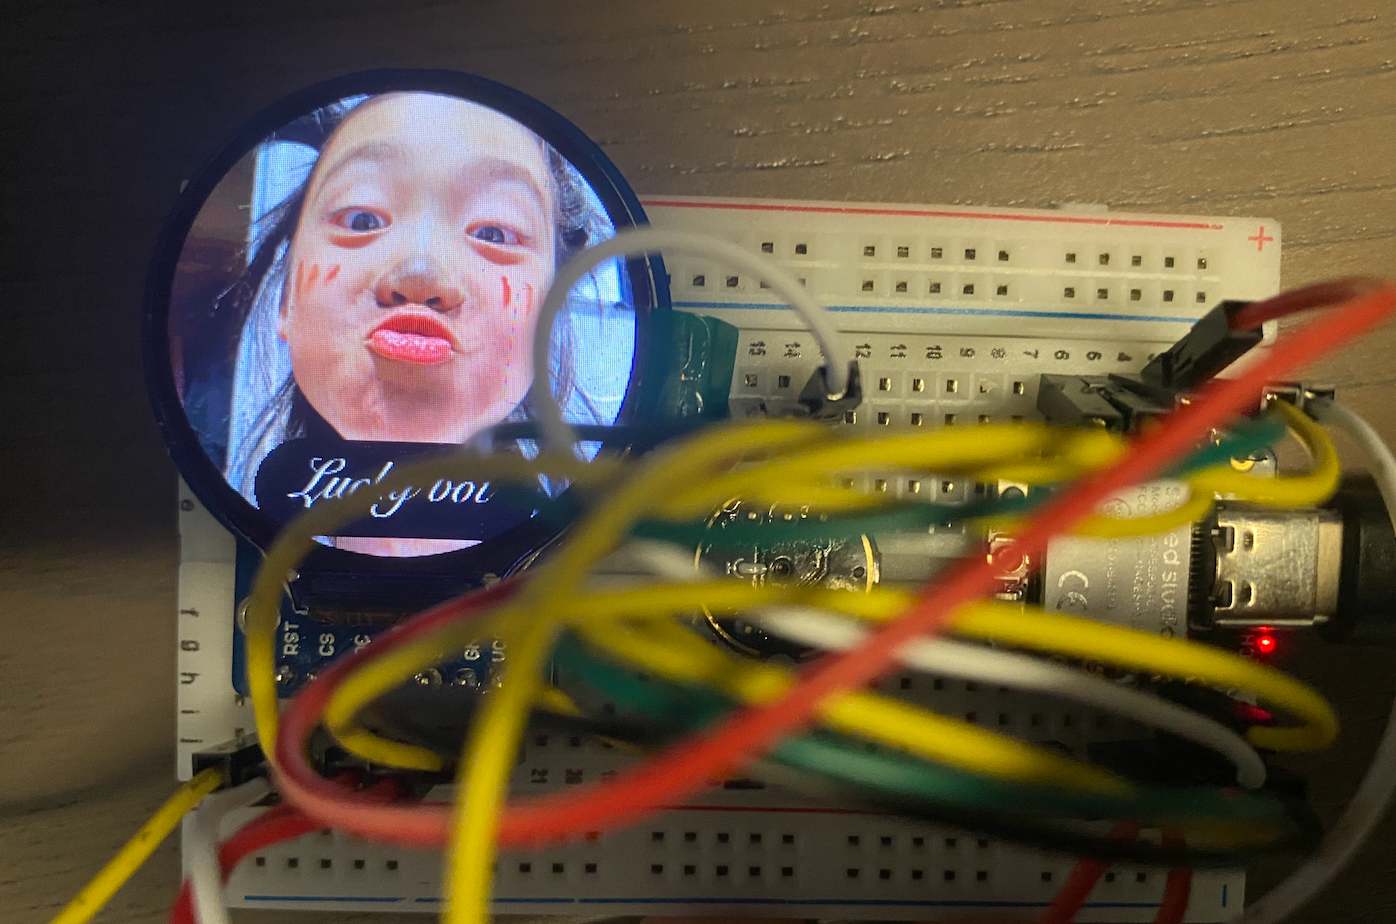
As below:
Power consumption of the output device
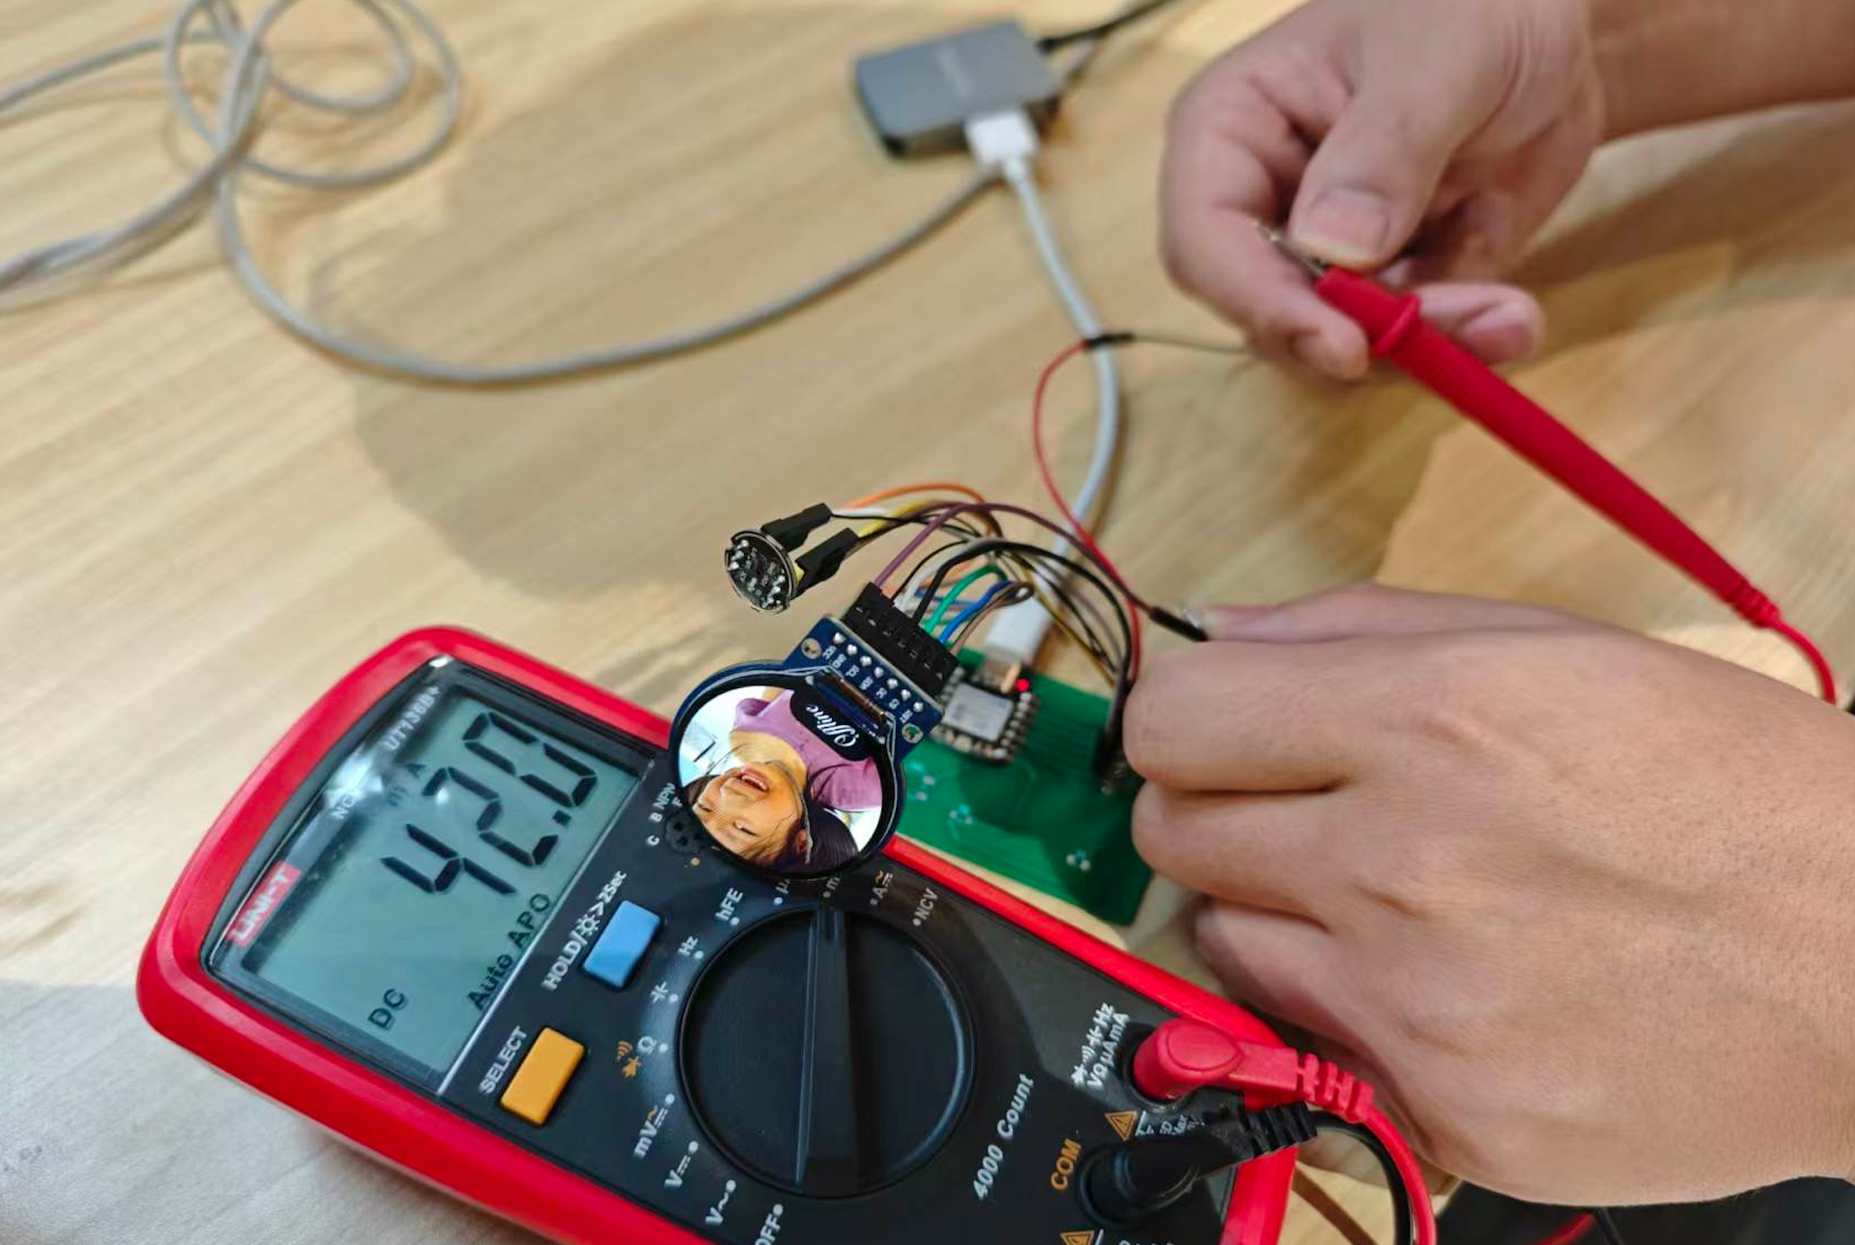
I measured the power consumption of my output device, the round LCD display.
The multimeter was connected in series with the VCC line of the display.
The display was powered by 5 V from the XIAO ESP32-C3.
Measured current: 42.0 mA (see picture below)
Voltage: 5 V
Power consumption:
P = V × I = 5 V × 0.042 A = 0.21 W
I use a cable to extend and make it easy to connect with the black/red pins from the multimeter.
Output device is running
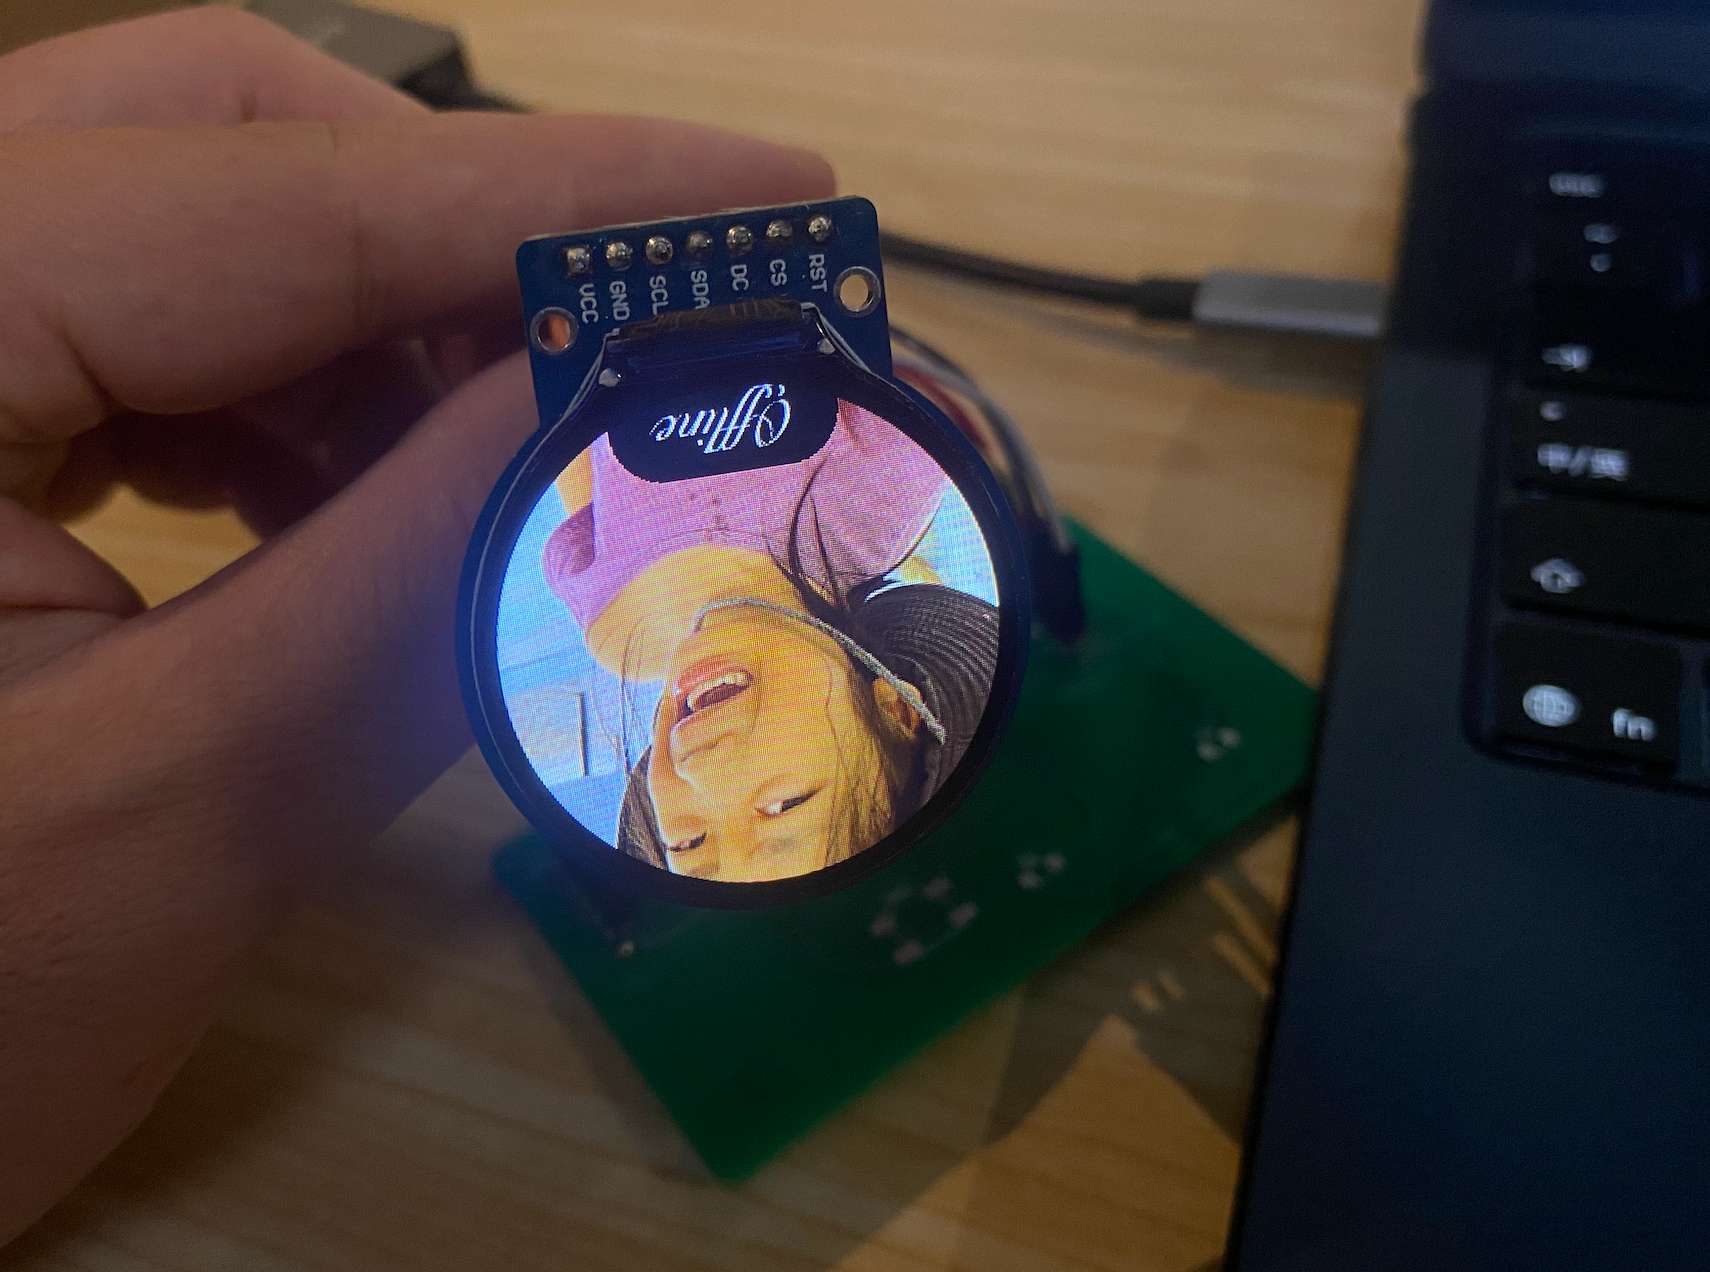
The display is the interface of my chatting bot. It will show the UI and status of the chatting bot, like Offline, thinking, and replying. As below, when the device didn't connect with Wi-Fi, it will show an image of crying and the text "Offline":