Voice Keeper — Final Project Masterpiece
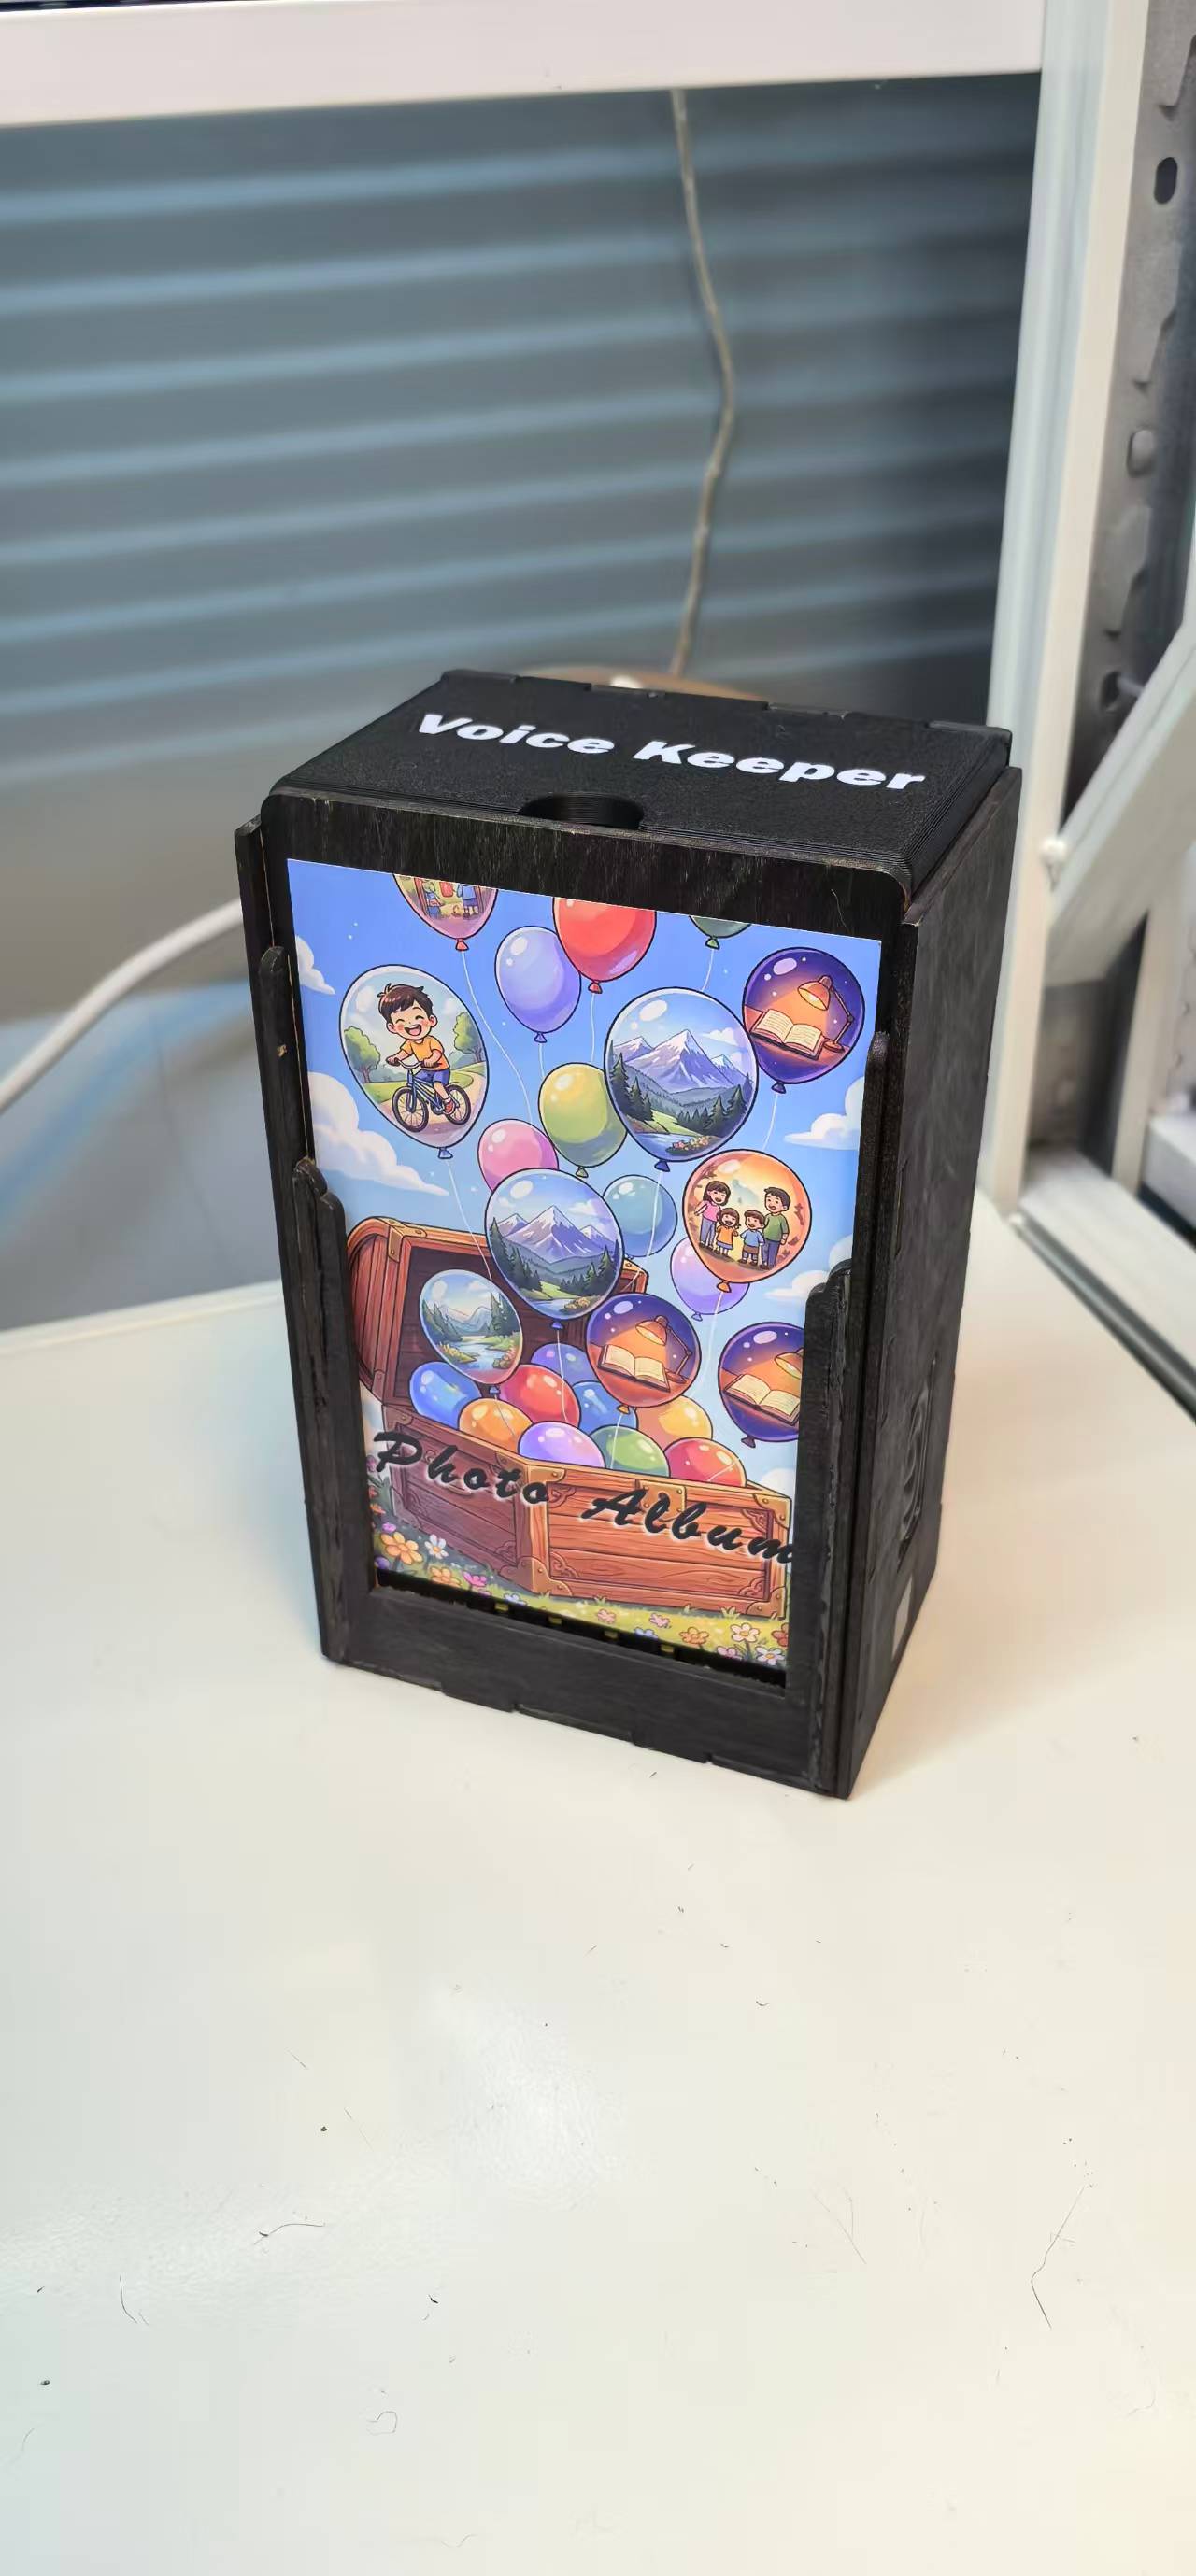
Voice Keeper is an offline audio playback station for physical printed photographs — a synthesis of Fab Academy skills from Weeks 01–19. Place a photo on the tray, touch the play sensor, and the device reads a colour-encoded strip on the photo edge and plays the linked MP3 from a microSD card. No screen, no cloud, no recording UI — only paper, sound, and a domestic object on the shelf.
“Every photo has a voice, every voice tells a story.”
Fab Academy final project requirements
This page documents the masterpiece required by Fab Academy 2026 — integrating the range of units covered and answering each checklist question below. The project is independently operable (runs without a laptop once programmed) and demonstrates individual mastery of design, fabrication, and programming.
- ✓ Integrated design — multiple digital fabrication processes in one product
- ✓ 2D & 3D modelling applied to my own designs
- ✓ Additive (FDM) and subtractive (laser cut, PCB mill) fabrication
- ✓ Custom fabbed microcontroller PCB with input & output
- ✓ System integration and packaging
- ✓ Summary slide and ~one-minute video (conception → construction → operation)
- ✓ Make rather than buy where practical (enclosure, PCB, firmware, encoding workflow)
What Does It Do?
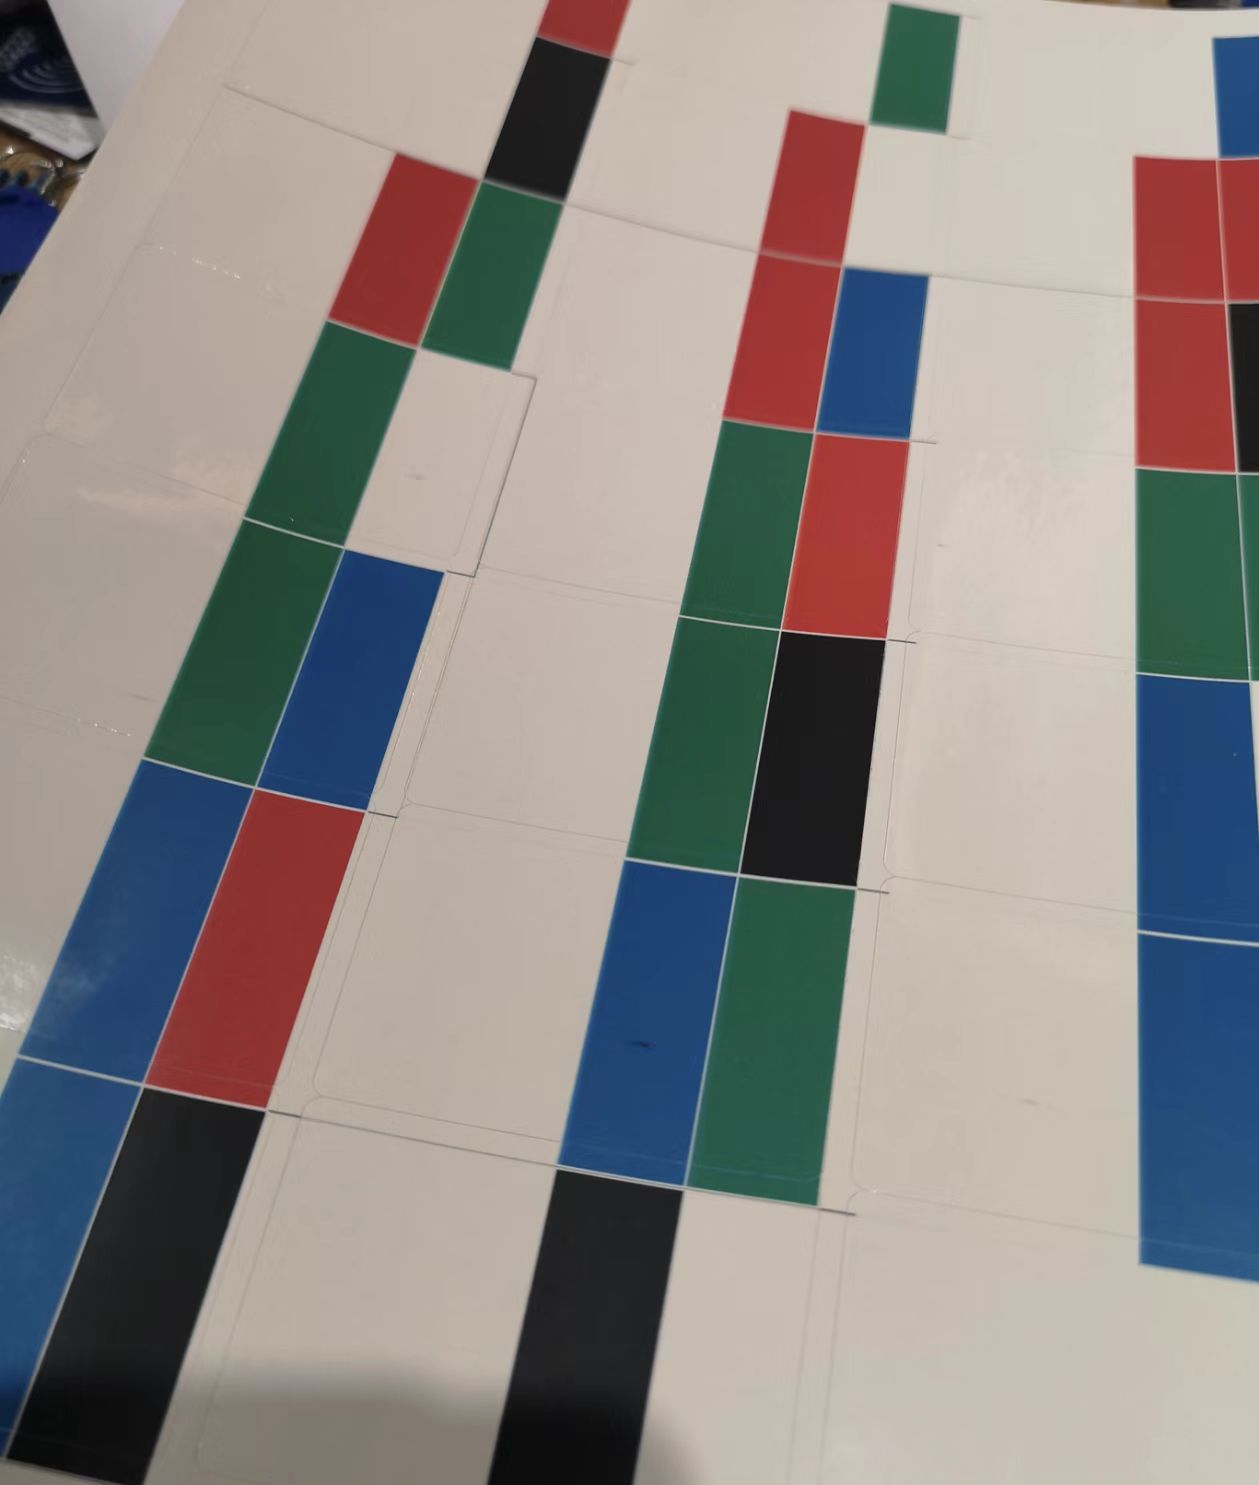
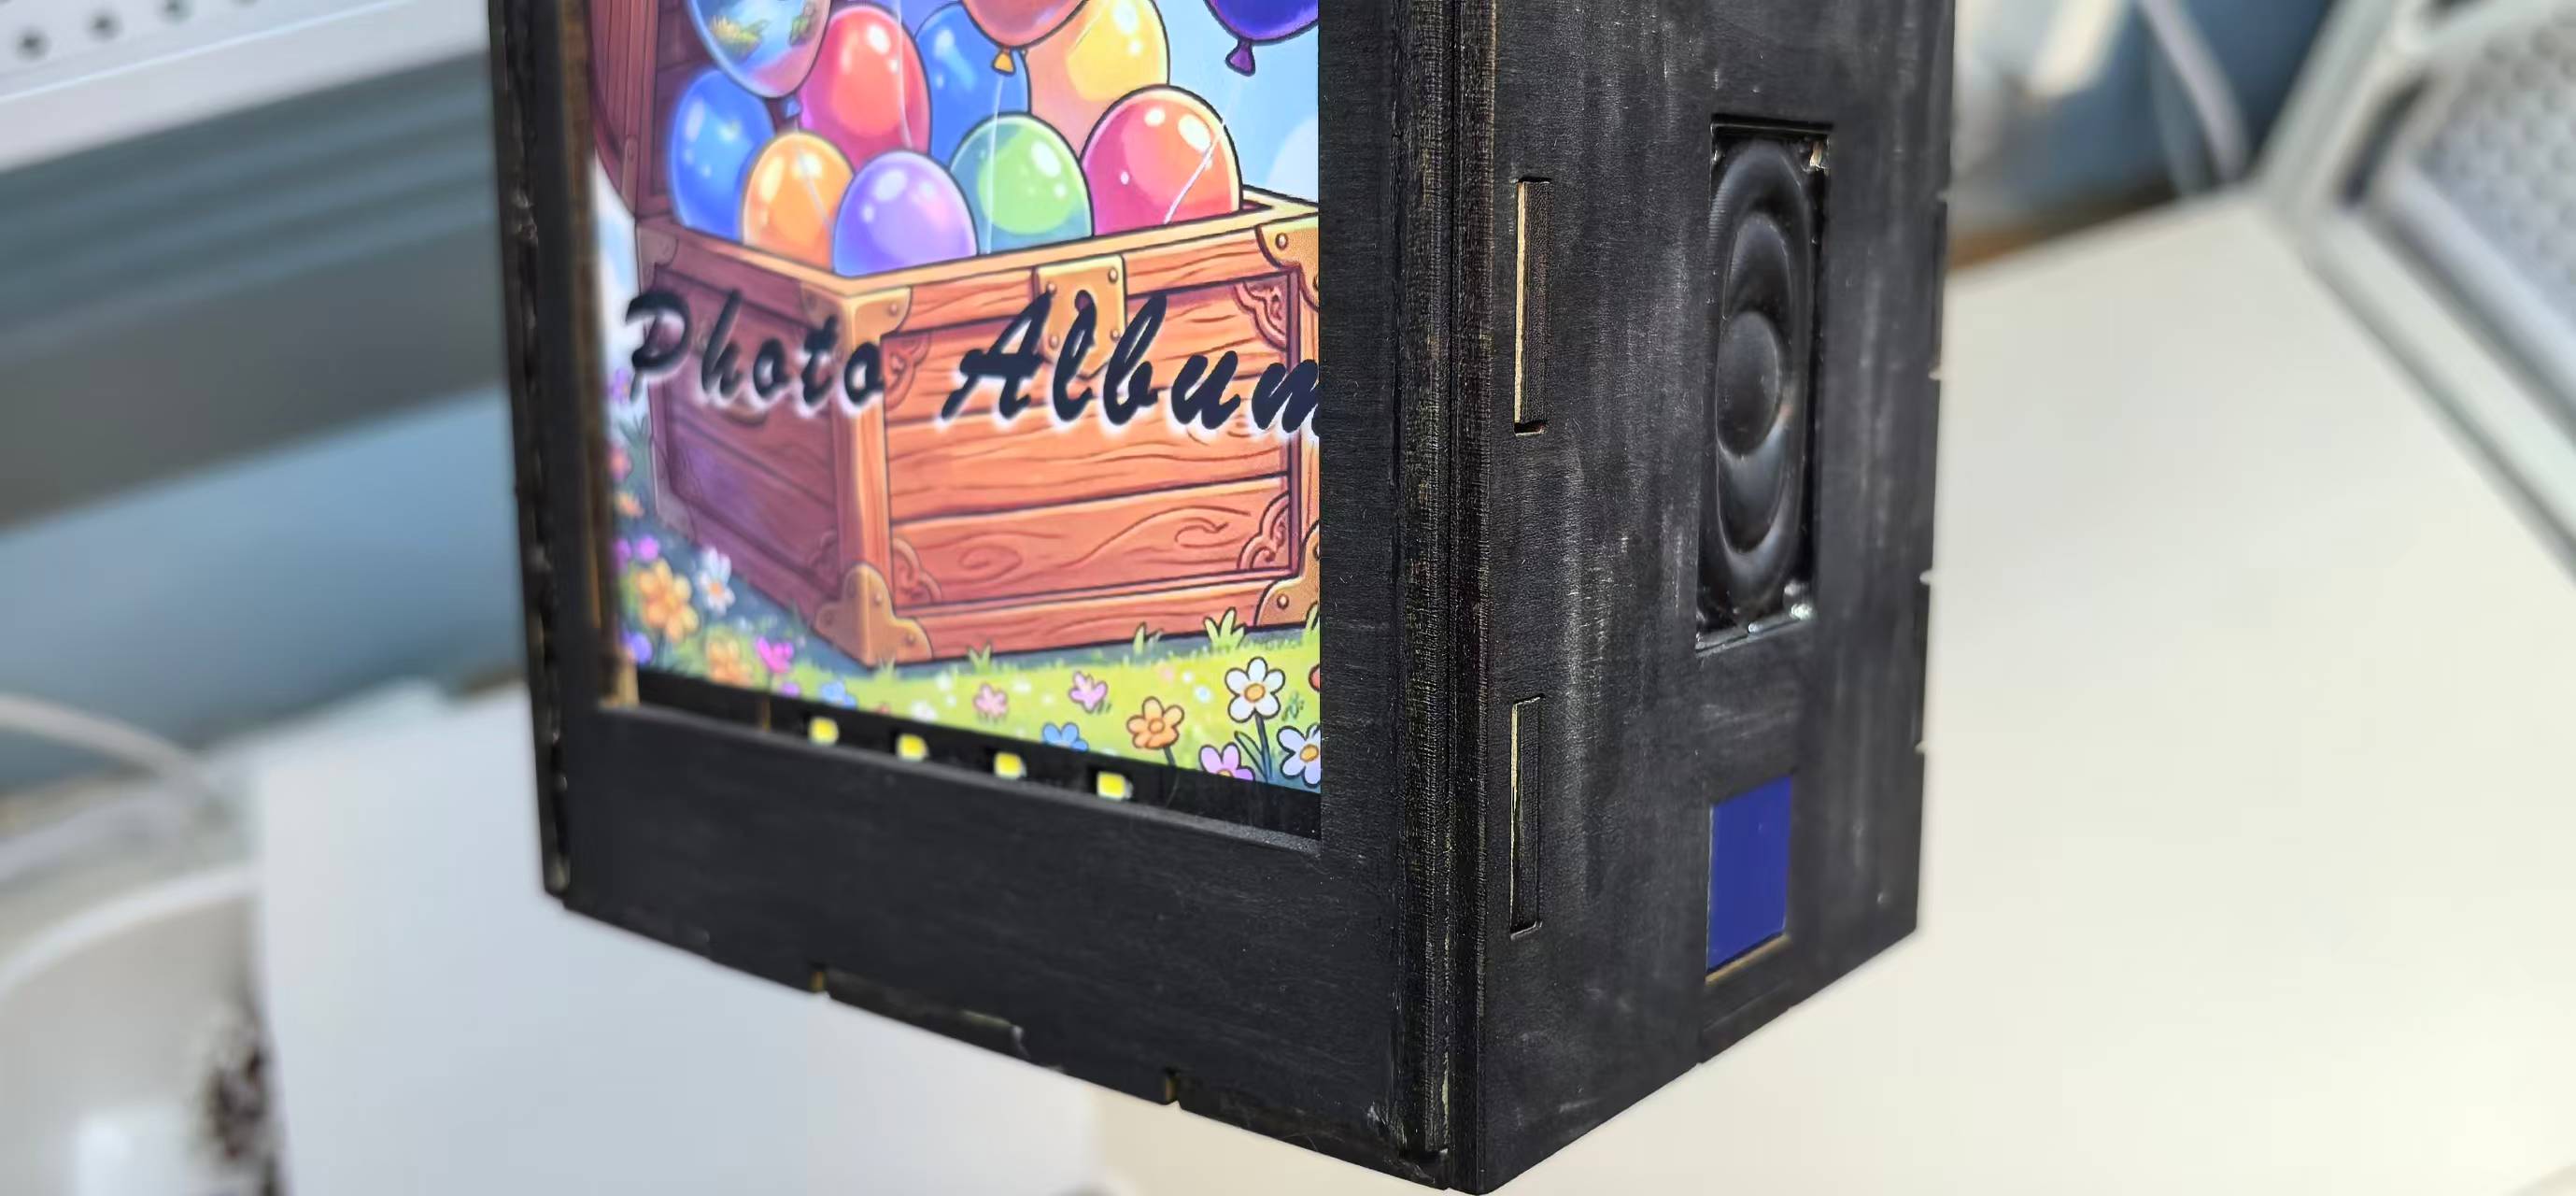
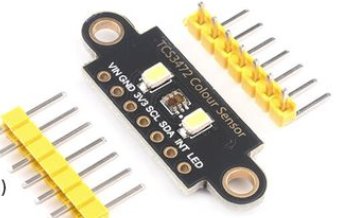
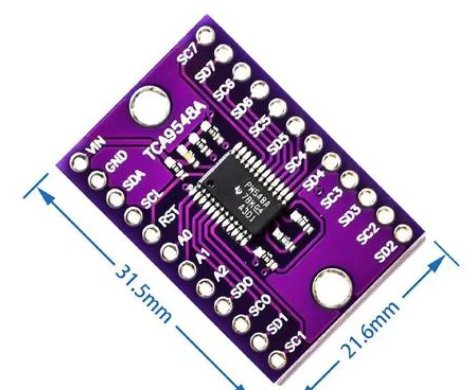
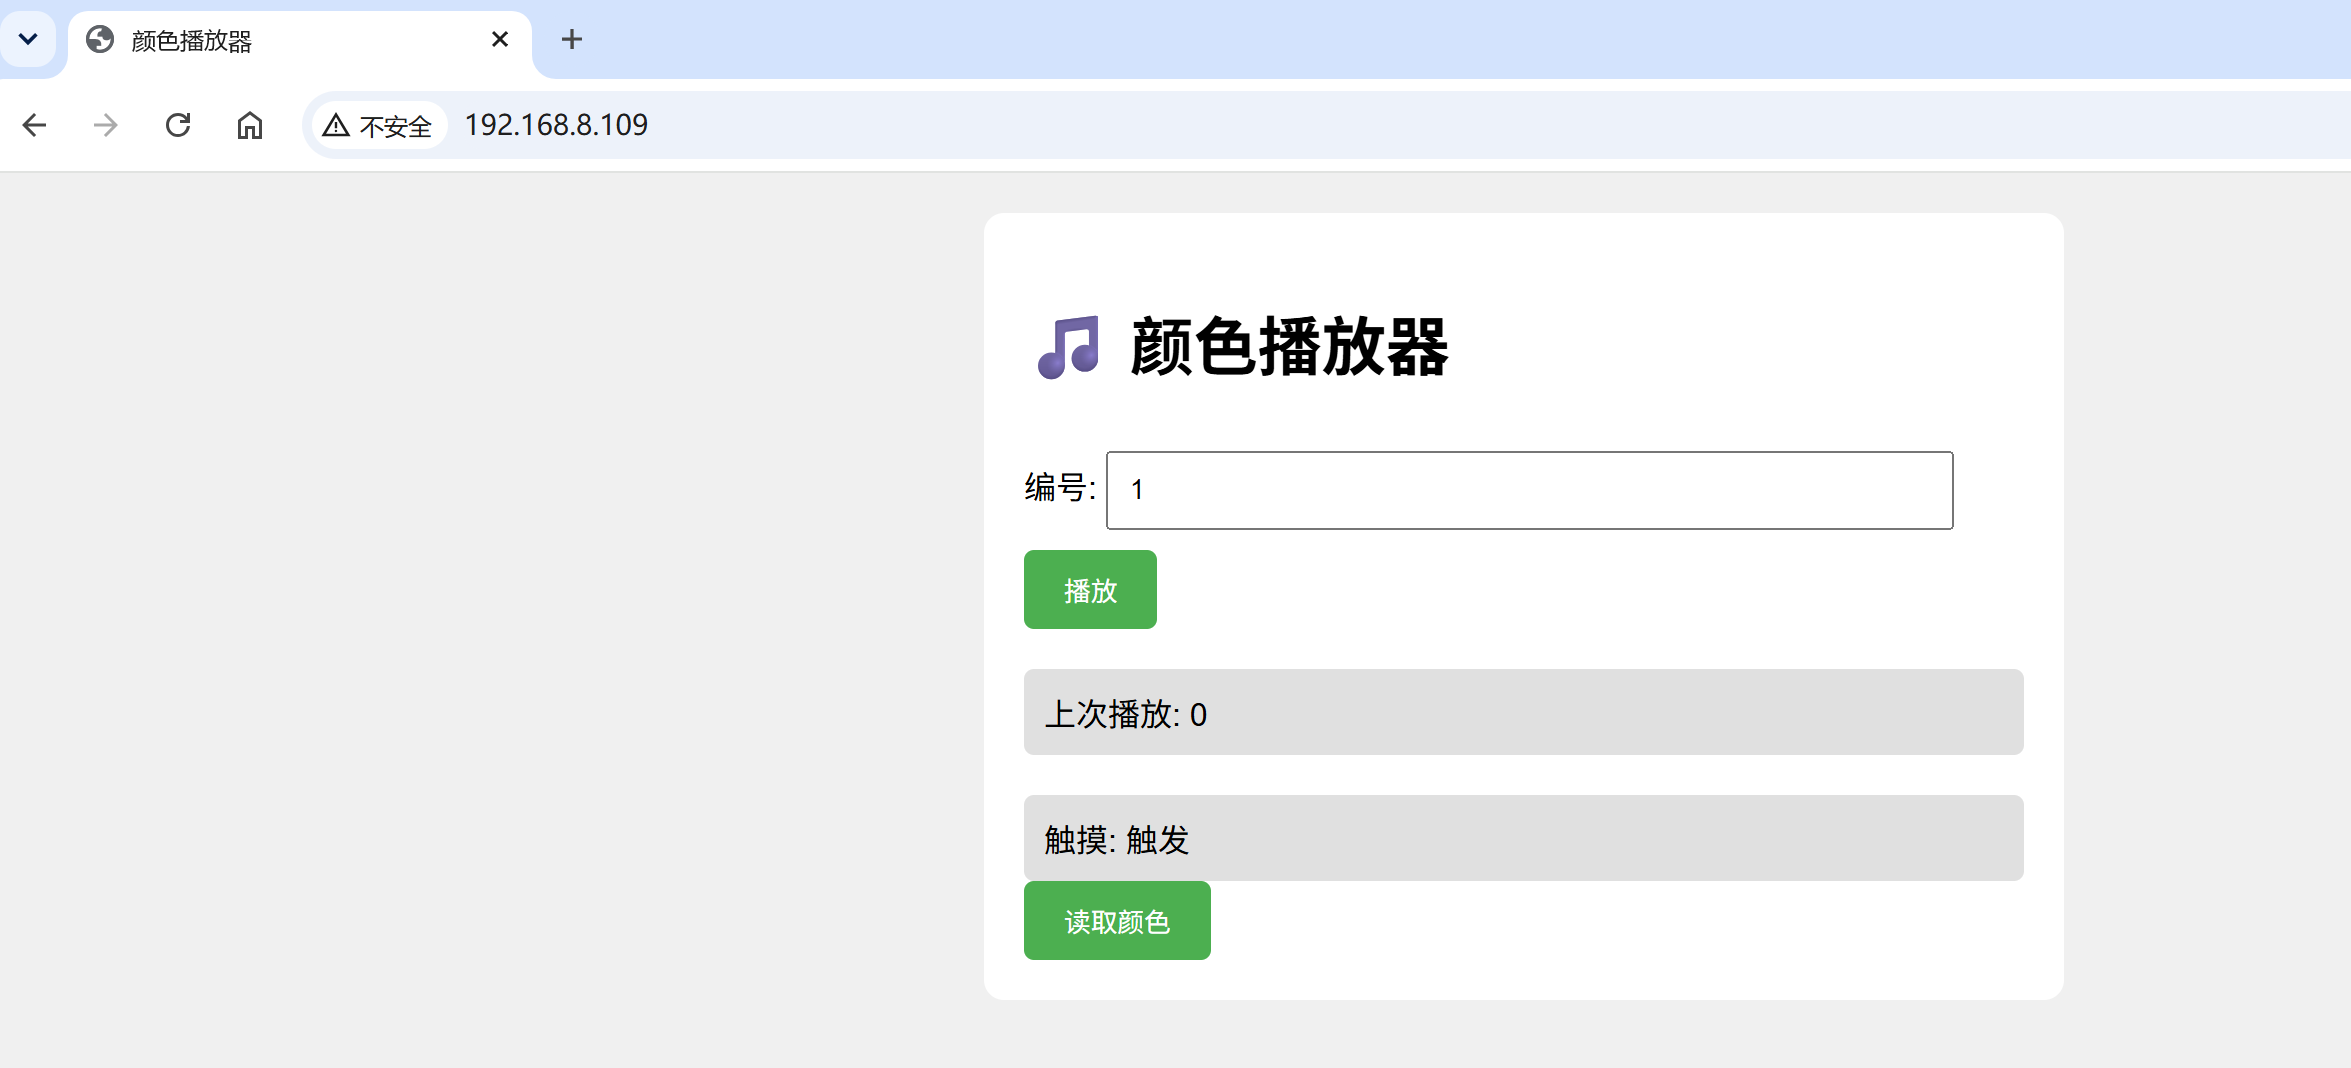
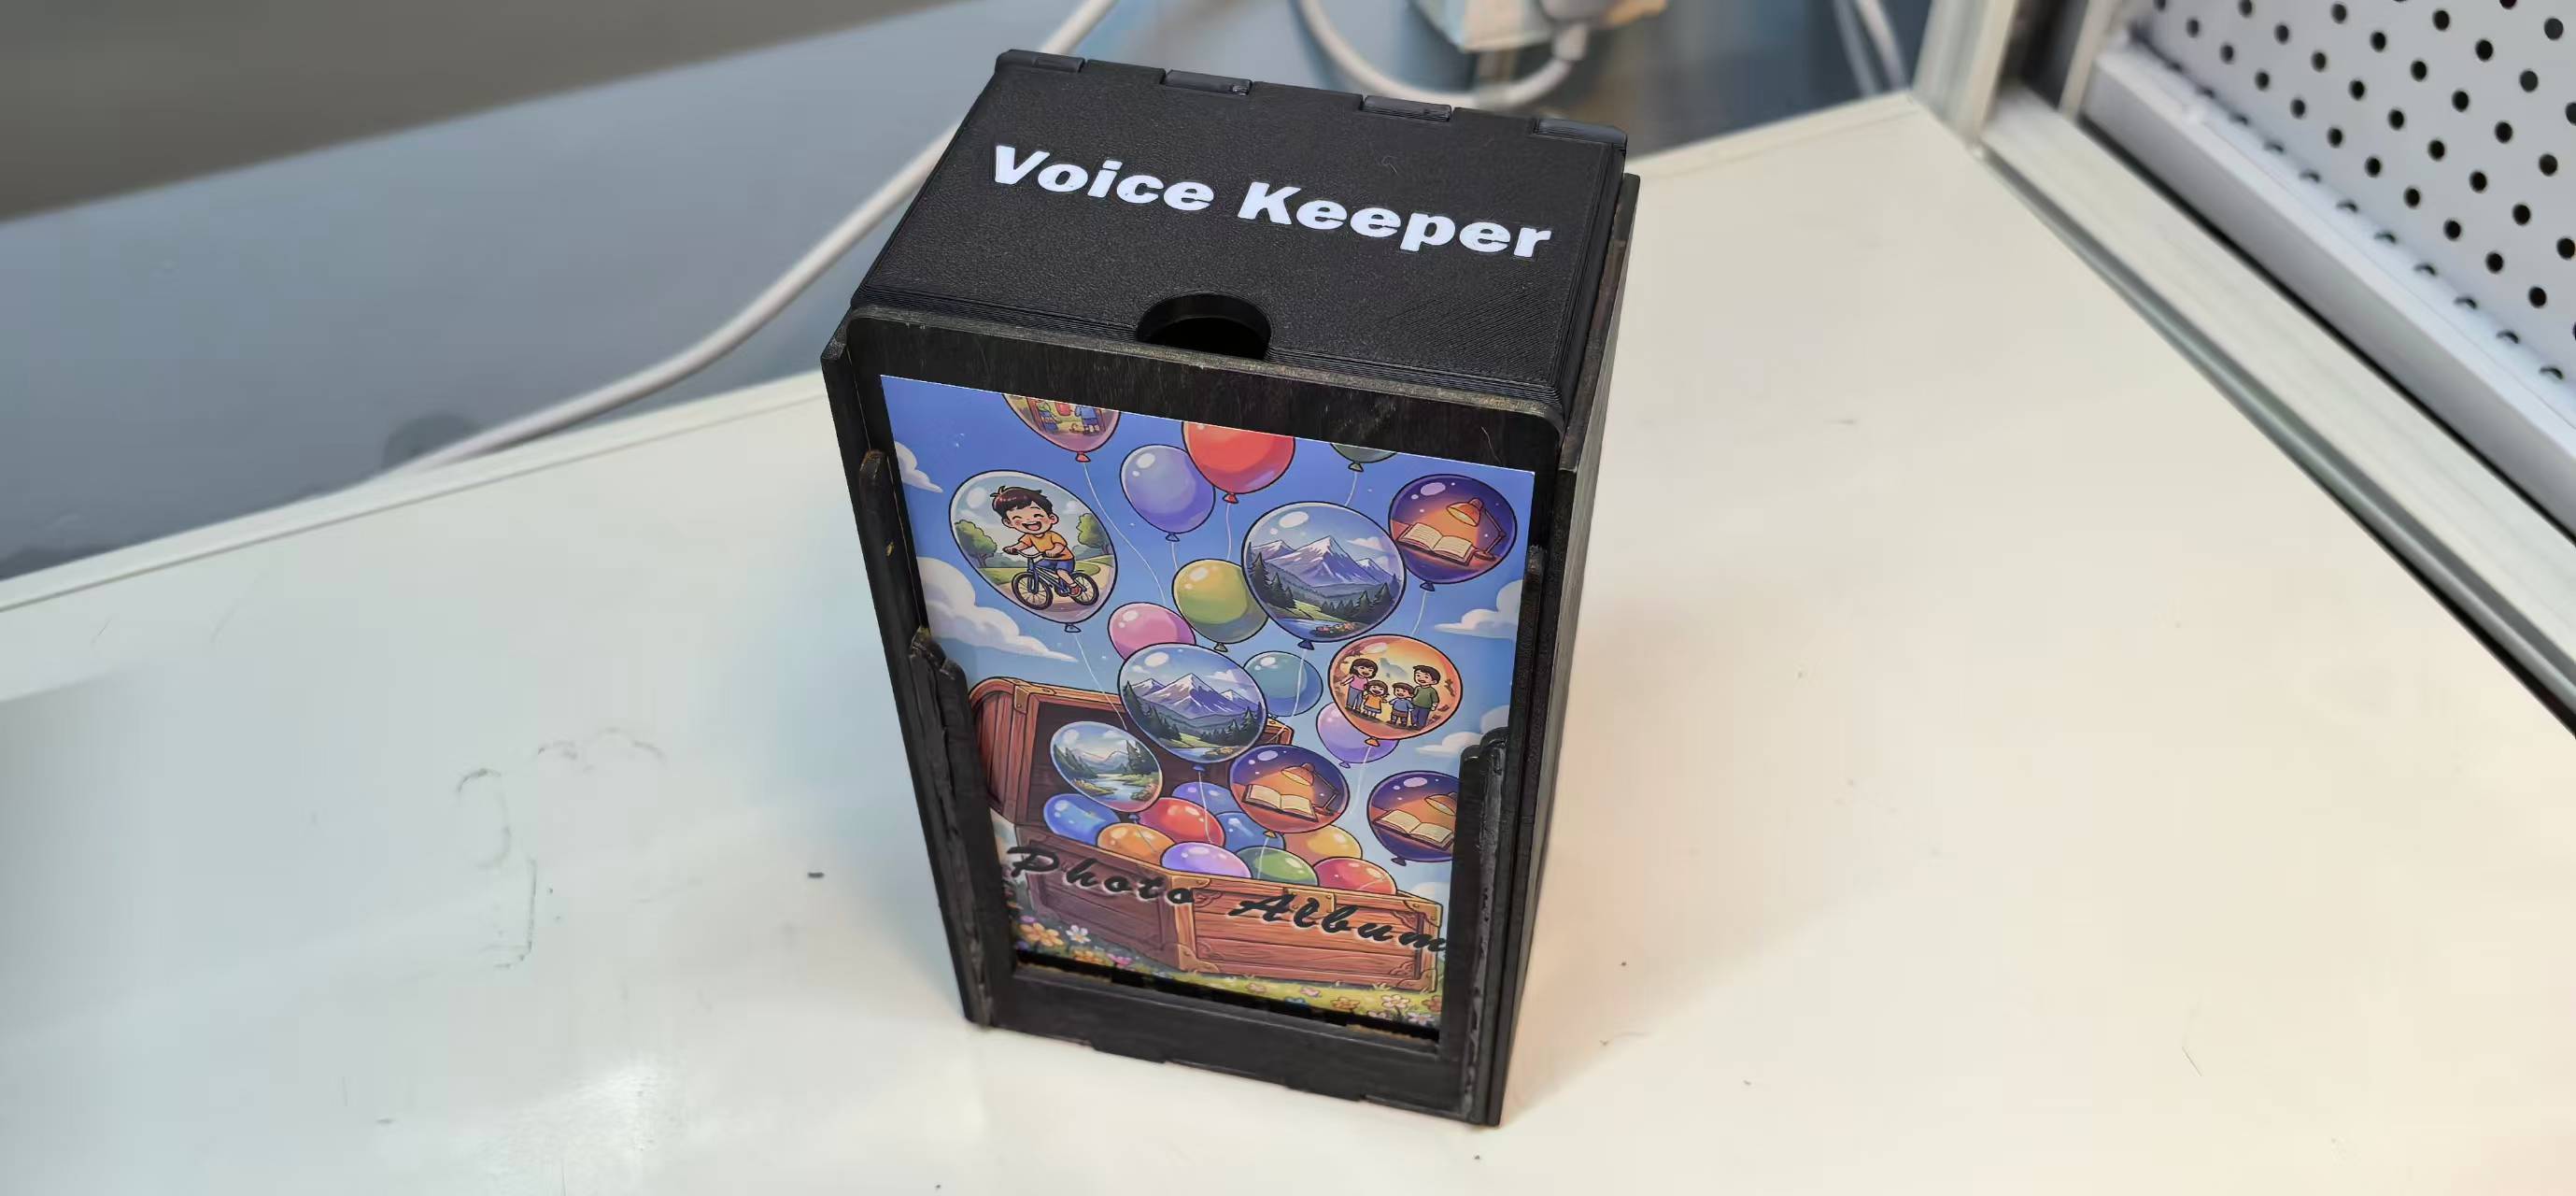
Voice Keeper links printed photographs to audio memories. Each photo carries a 1 cm quinary (base-5) colour strip on its bottom edge — four blocks in Black / Blue / Green / Red / White, encoding an ID from 0 to 624 (5⁴ combinations). The user slides the photo into the front tray so the strip covers four sensor windows, then touches the play sensor (TTP223B). The XIAO ESP32-C3 reads four TCS34725 colour sensors via a TCA9548A I2C multiplexer, computes the ID, and commands a DFPlayer Mini to play the matching xxx.mp3 through an 8 Ω speaker.
A simplified Web UI on the ESP32 (adapted from Week 15) can trigger playback by ID for setup and testing. The product stores photos inside the box (≈120+ capacity) and audio on the microSD card. Target users: new parents, families preserving elders’ voices, and anyone who prefers physical albums over phone galleries.
Who Has Done What Beforehand?
Voice Keeper builds on existing ideas but combines them differently:
- Talking photo frames / RFID albums — link images to audio via hidden tags; Voice Keeper uses a visible colour strip on the print (human-readable, no chip embedded in the photo). Early ideation (January) considered RFID; March–April evolved to colour encoding for cost and transparency.
- Digital picture frames with audio — usually screen- and cloud-centric; Voice Keeper is offline and tactile.
- Colour-as-data projects — multicolour encoding in maker art; this project uses a defined quinary alphabet sized for TCS34725 sensors and family-scale albums (~100 photos, 625 ID capacity).
- Fab Academy weekly prototypes — Week 8 PCB, Week 11 sensor/audio tests, Week 15 interface patterns, and Week 16 integration de-risked the final merge.
Full prior-art, applications, and dissemination discussion: Week 18 — Applications and Implications, Week 19 — Invention, IP and Income.
What Did I Design?
- Product concept — Voice Keeper philosophy, interaction flow, target users (see Product Philosophy below).
- Encoding system — 4 × base-5 colour blocks; read the ID as a four-digit number:"C4 C3 C2 C1"; every digit is from 0 to 4, strip layout template for printed photos.
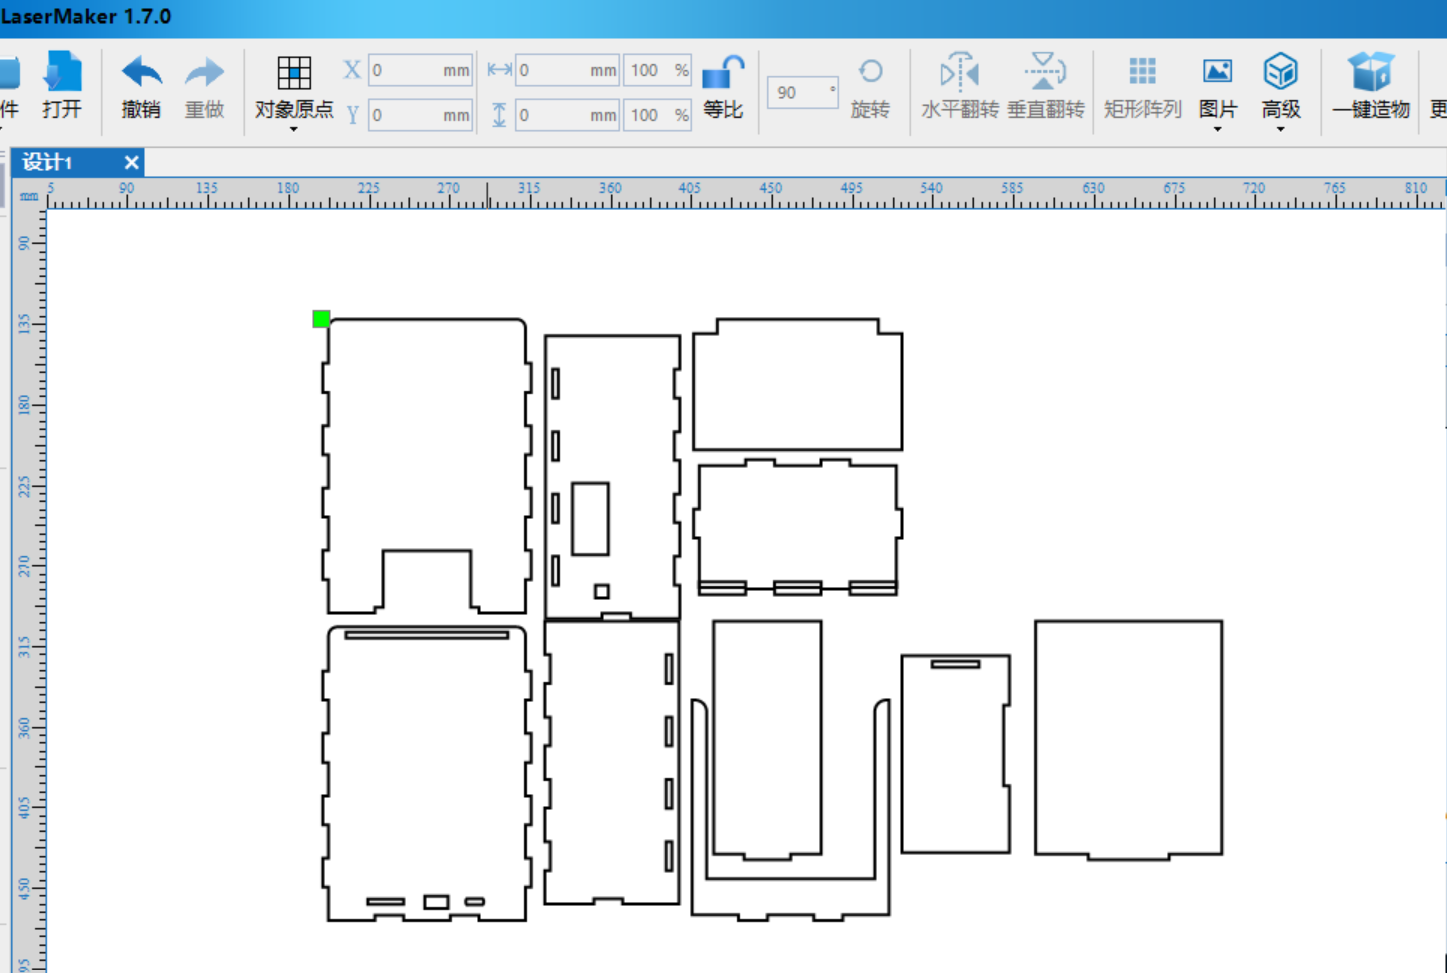
- 2D mechanical — laser-cut plywood panels (Laser Maker + DXF: box_design_v2.dxf).
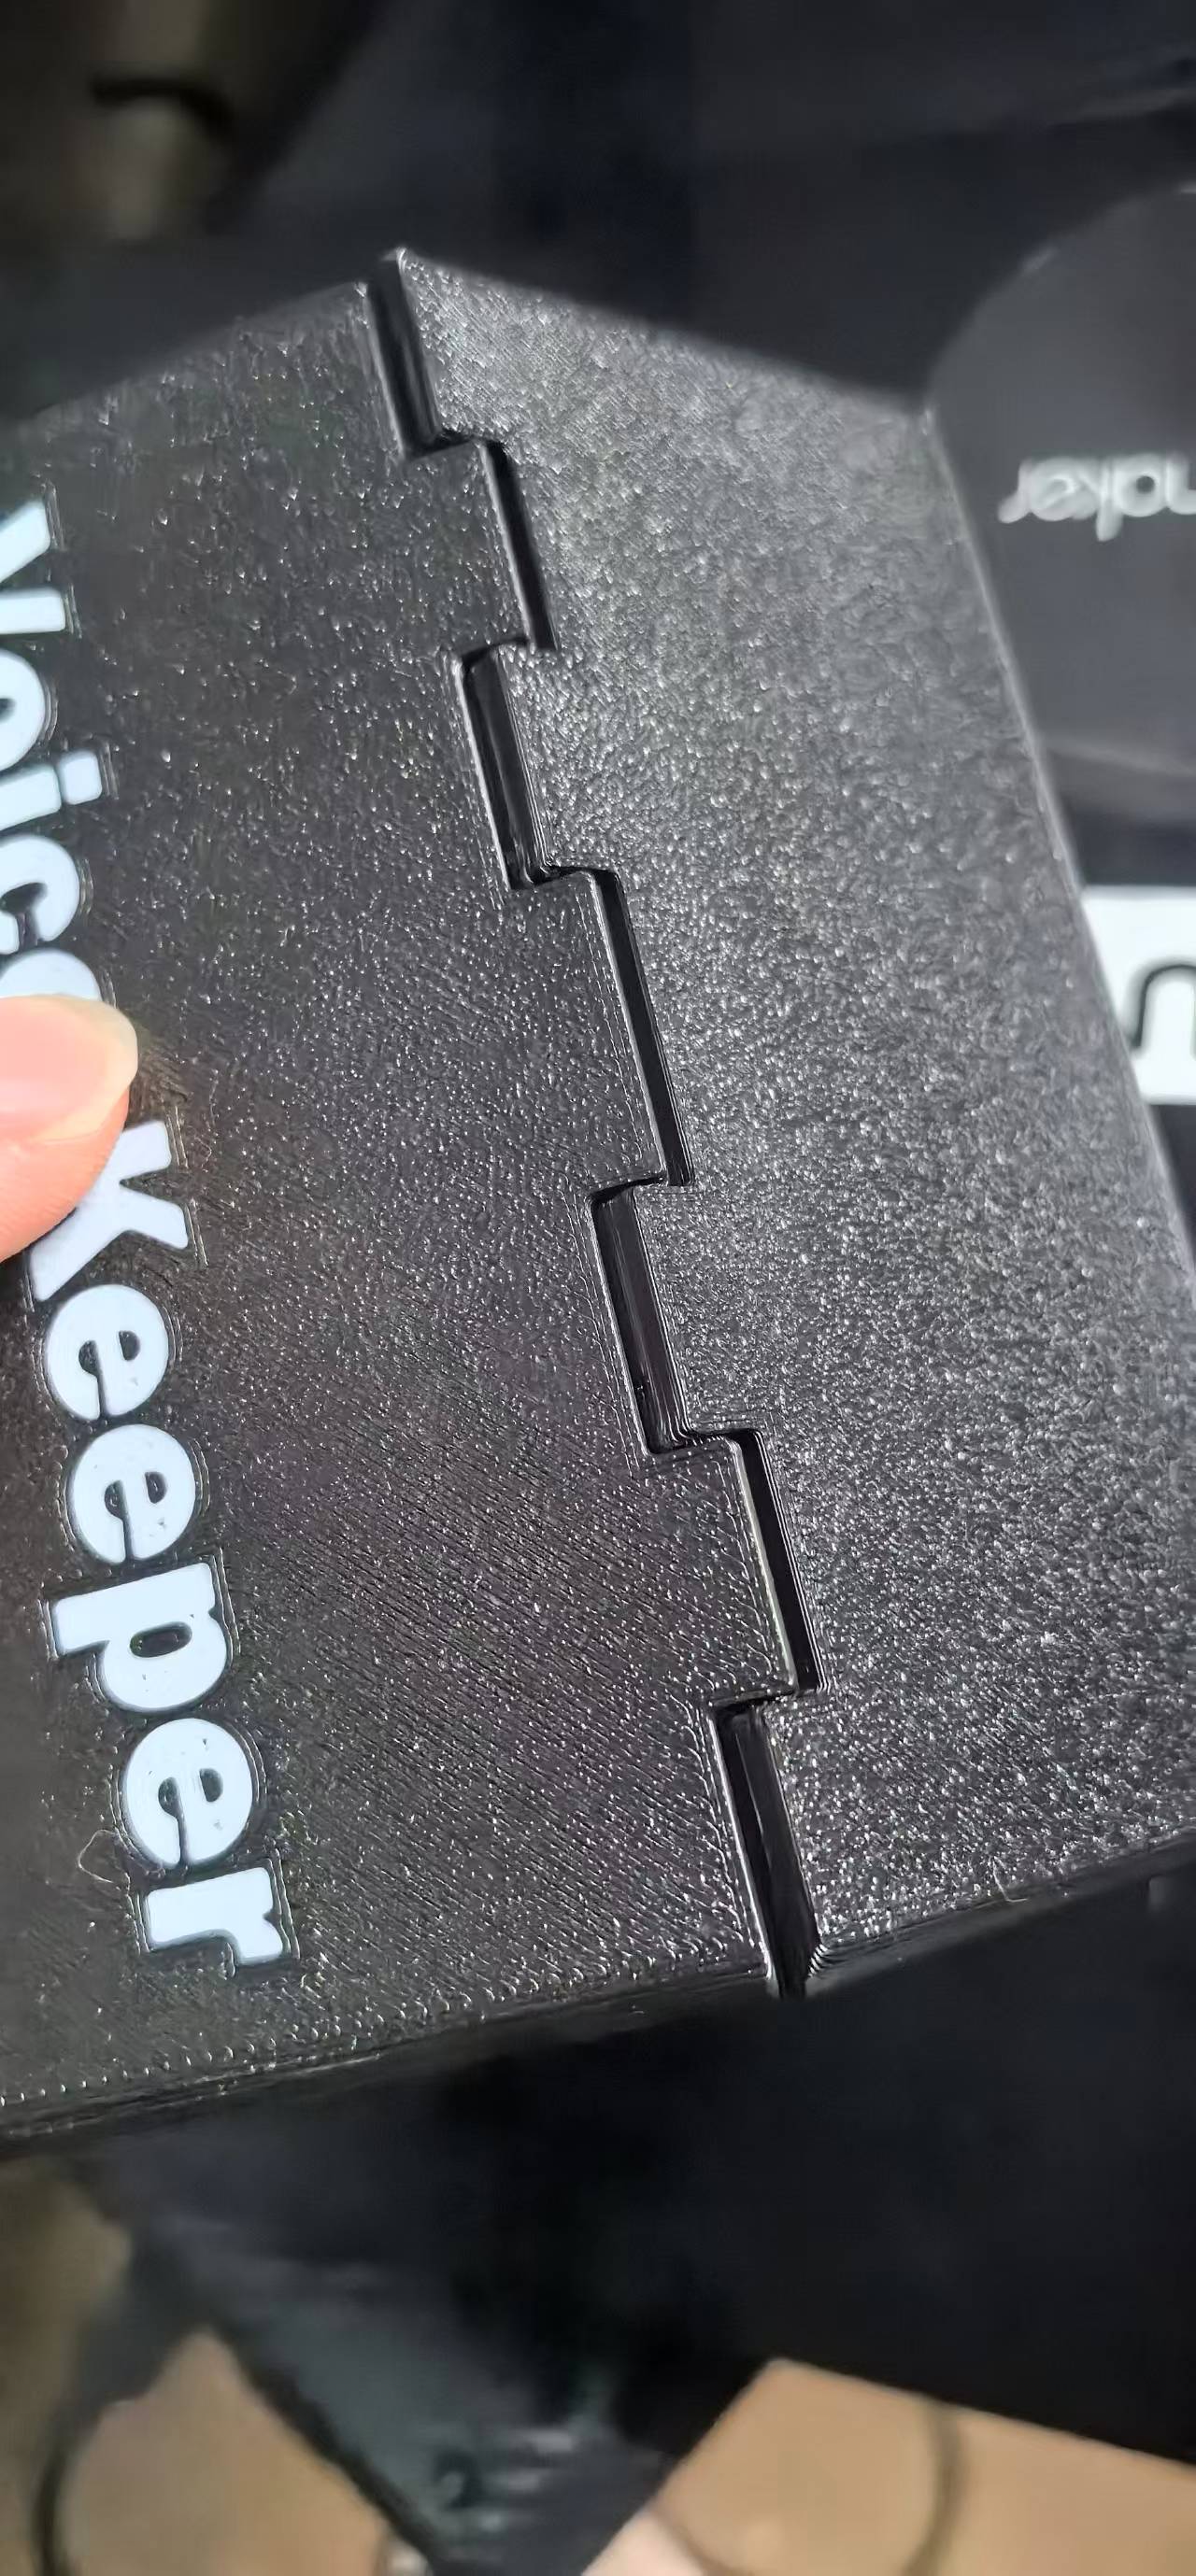
- 3D mechanical — FDM rotary top cover, colour-sensor window frame (Top_cover v2.stl, color_sensors_frame.stl); skills from Week 02 and Week 05.
- Electronics — custom milled PCB from Week 08 (XIAO ESP32-C3, button D0, LEDs D1/D2); carrier for I2C, UART, power in the integrated unit.
- Embedded firmware — TCS34725 polling via TCA9548A, quinary decode, DFPlayer UART control, touch input, optional Web UI (subsystems tested in Week 11; merged in final loop).
- Content workflow — assign ID → record MP3 (e.g. TTSMaker) → print photo with encoded strip → store in box.
- Documentation — this GitLab Pages site; photo prep via SmallerPic; wildcard fabric×3D-print experiments in Week 17.
What Sources Did I Use?
- Fab Academy 2026 curriculum, regional reviews, and Chaihuo instructor feedback
- Component datasheets: TCS34725, TCA9548A, DFPlayer Mini, Seeed XIAO ESP32-C3, TTP223B
- Adafruit / DFRobot libraries (TCS34725, NeoPixel where used)
- Chaihuo lab equipment: laser cutter, PCB milling machine, 3D printer, multimeter
- Fab community tools: Gerber2PNG, Mods PCB mill workflow (Week 08)
- Peer documentation and group assignments
- My weekly assignment logs — indexed at the bottom of this page
Materials, Components, Sources, and Cost
| Item | Qty | Source | Est. cost (USD) |
|---|---|---|---|
| Seeed XIAO ESP32-C3 | 1 | Seeed / Taobao | 4 |
| TCS34725 colour sensor board | 4 | Taobao | 1 |
| TCA9548A I2C multiplexer | 1 | Taobao | 0.5 |
| DFPlayer Mini + micro-SD | 1 | Taobao | 2 |
| 2 W speaker, 8 Ω | 1 | Taobao | 0.5 |
| TTP223B touch sensor (play) | 1 | Taobao | 0.5 |
| Li-ion 3.7 V + USB charge board | 1 set | Taobao | 1 |
| FR-1 PCB blank + passives | 1 | Fab lab | 1 |
| 3 mm plywood + PLA filament | 1 batch | Fab lab | 5 |
| Photo paper, printed colour strips | batch | Print shop / DIY | 5 |
| Paint, wire, hot glue, switch | assorted | Fab Lab / local | 3 |
| Total (approx.) | ~24 |
What Parts and Systems Were Made?
Made in the Fab lab (individual mastery):
- Milled custom PCB (Week 08)
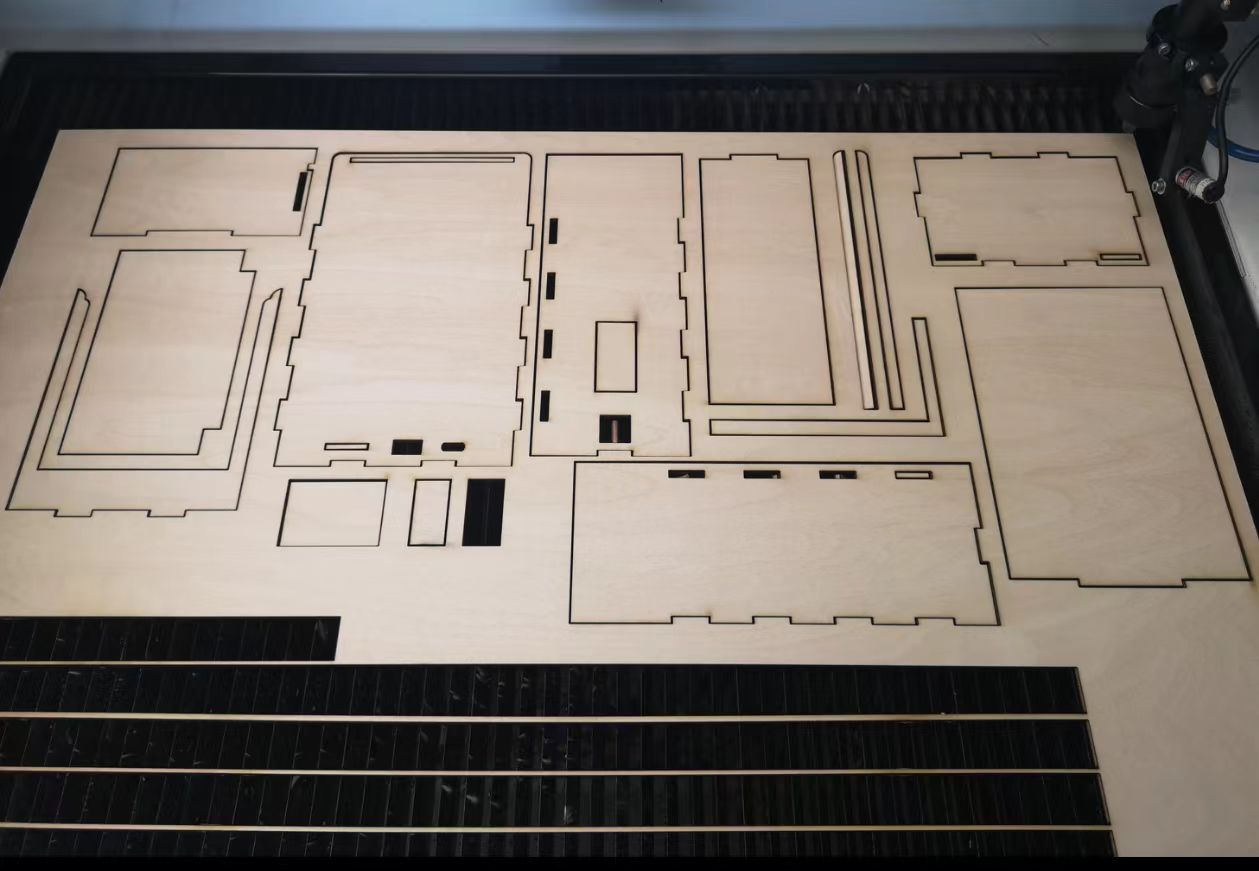
- Laser-cut plywood enclosure and internal structure (Week 03)
- 3D-printed rotary cover and colour-sensor frame (Week 05)
- Embedded firmware — sensor, audio, touch, Web UI subsystems
- Colour calibration workflow and encoded photo strips
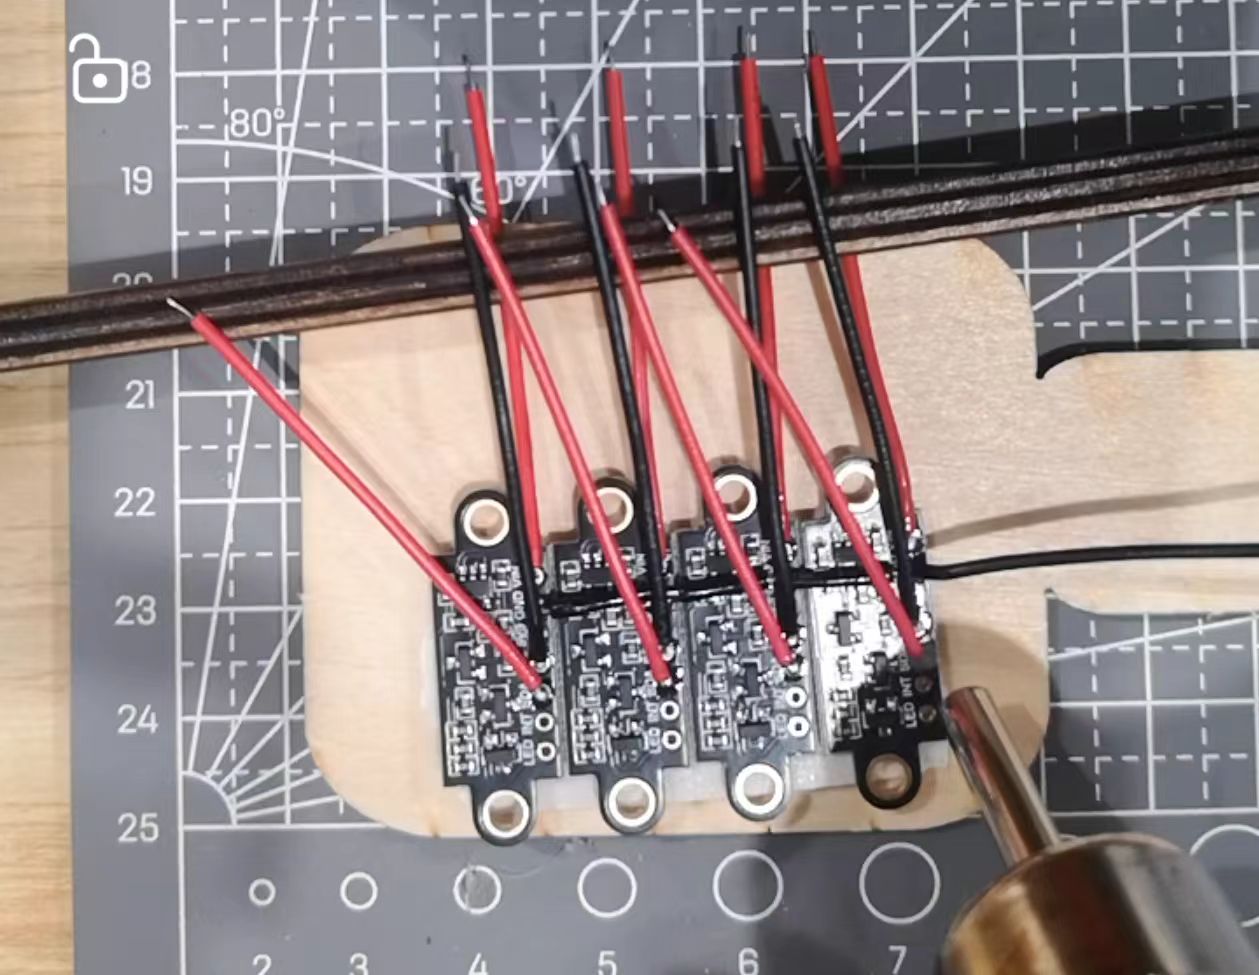
- Internal wiring harness and integrated assembly (Week 16)
- Documentation website and SmallerPic tool (SmallerPic)
Bought modules (integrated and documented, not used as opaque black boxes):
- TCS34725 boards, TCA9548A, DFPlayer Mini, speaker, XIAO ESP32-C3, touch sensor, battery/charge boards
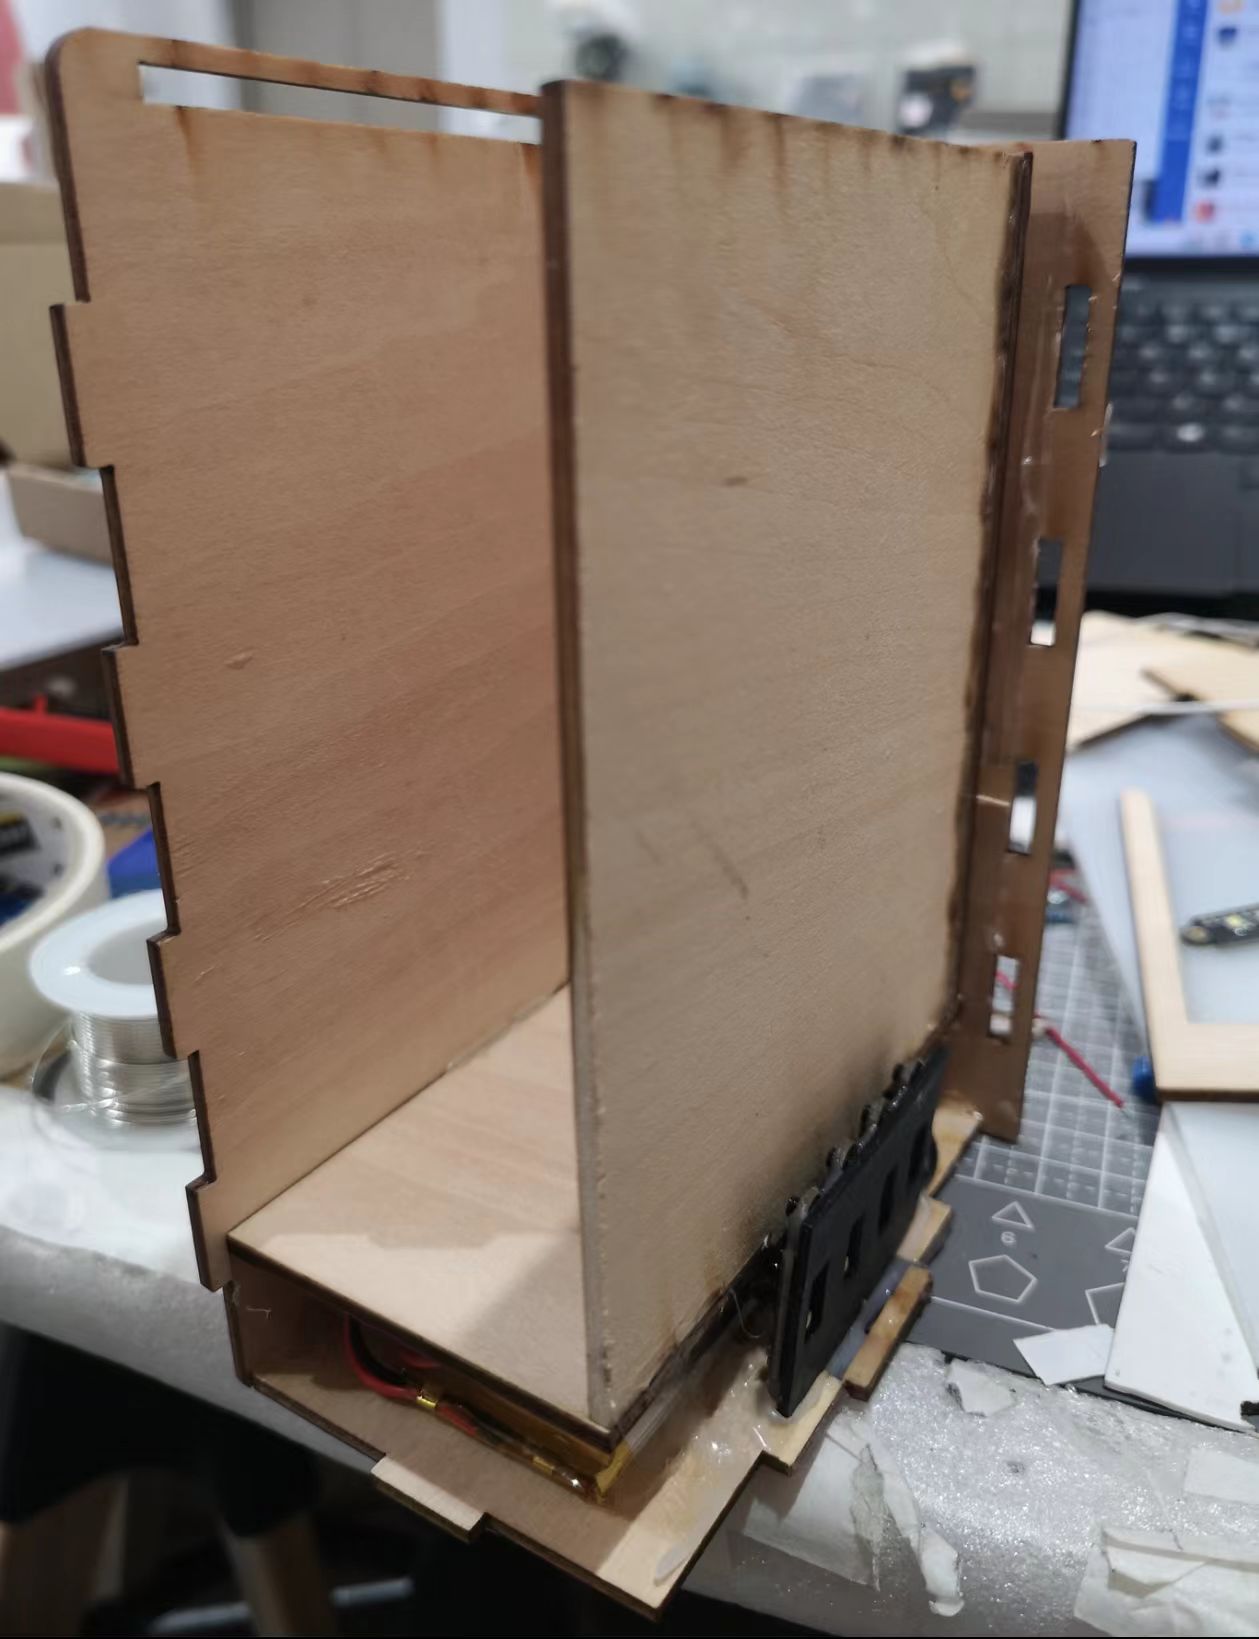
Integrated systems: optical ID (4× sensor + mux), audio playback (UART + SD), human input (touch sensor), power (Li-ion + USB), mechanical packaging (laser + print + paint). Full assembly plan in Week 16.
What Processes Were Used?
Voice Keeper integrates the full Fab Academy range. Each row links to weekly documentation:
| Required skill | Process | Voice Keeper application | Week |
|---|---|---|---|
| 2D design | Parametric CAD, DXF/SVG, laser templates | Box panels, sensor frame, strip layout | Week 02, Week 03 |
| 3D design | Fusion 360 / CAD assemblies | Rotary cover, sensor window, STL exports | Week 02, Week 05 |
| Additive fabrication | FDM 3D printing | Rotary top cover, colour-sensor frame | Week 05 |
| Subtractive fabrication | Laser cutting; PCB milling (CNC) | Plywood shell; custom controller PCB | Week 03, Week 07, Week 08 |
| Electronics design | Schematic, PCB layout, EDA | XIAO carrier board | Week 06 |
| Electronics production | Milling, soldering, bring-up | Week 8 board tested and reused | Week 08 |
| Embedded programming | Arduino/C++ on ESP32-C3 | Sensor decode, DFPlayer, touch, Web UI | Week 04 |
| Input devices | Touch sensor, colour sensing | TTP223B play button; 4× TCS34725 input | Week 09, Week 11 |
| Output devices | Speaker, WS2812B, DFPlayer | Audio output; LED feedback on sensors | Week 10, Week 11 |
| Networking | I2C, UART, Wi-Fi AP | Sensor bus, DFPlayer serial, Web UI | Week 11, Week 15 |
| System integration | Assembly, packaging, test plan | Closed-box Voice Keeper | Week 16 |
Note: Week 12 (group vending machine) and Week 14 (molding/casting of VK logo) are documented separately; they informed mechanical thinking but are not core Voice Keeper subsystems.
Demonstrating Fab Academy Competencies
| Official requirement | How Voice Keeper demonstrates it | Evidence |
|---|---|---|
| Integrated design — multiple fab processes in one product | Laser-cut plywood shell + FDM covers + milled PCB + soldered electronics + firmware, assembled as one operable box | Week 16 |
| 2D & 3D modelling competencies | DXF box design, Fusion/Laser Maker CAD, STL rotary cover and sensor frame | logo_design.jpg, box_design_v2.dxf, Top_cover v2.stl |
| Additive & subtractive fabrication | FDM print (cover, frame); laser-cut plywood; CNC-milled PCB | Week 03, Week 05, Week 08 |
| Fabbed microcontroller PCB + input & output | Custom Week 8 board hosts XIAO; touch input (D0) + LED output (D1/D2); extended with I2C sensors and UART audio in integration | Week 08, Week 09, Week 10 |
| System integration & packaging | Power → electronics → sensors → acoustics → painted closure; finished domestic aesthetic | Week 16, final_firmware.ino |
| Make rather than buy | Enclosure, PCB, firmware, encoding workflow made in lab; commercial breakouts only where re-fabrication is impractical | Make vs buy section |
| Independently operable | Touch play + SD card content; USB-C charge; no laptop required in normal use | demo_test_play.mp4 |
Product Philosophy and Technical Architecture
Voice Keeper emerged from a simple observation: we store thousands of photos in cloud albums but lose the sounds tied to them — a grandparent’s voice, a child’s first words, ambient noise from a trip. The device is a physical vessel for emotional memory: tactile photos, invisible digital encoding, privacy-respecting offline operation.
Colour encoding: quinary (base-5) mechanical computing — Black(0), Blue(1), Green(2), Red(3), White(4). Four sensor positions → 5⁴ = 625 IDs. Strip: 1 cm at photo bottom edge, four 8 mm × 8 mm blocks.
Electronics block diagram:
XIAO ESP32-C3 → I2C → TCA9548A → 4× TCS34725 (colour ID); UART → DFPlayer Mini → speaker; GPIO → TTP223B touch (play); 5 V rail → logic + audio + sensors; Li-ion + USB-C charge.
Interaction: place photo in tray → touch play sensor → read colours → play MP3. Optional Web UI for ID-based playback during setup.
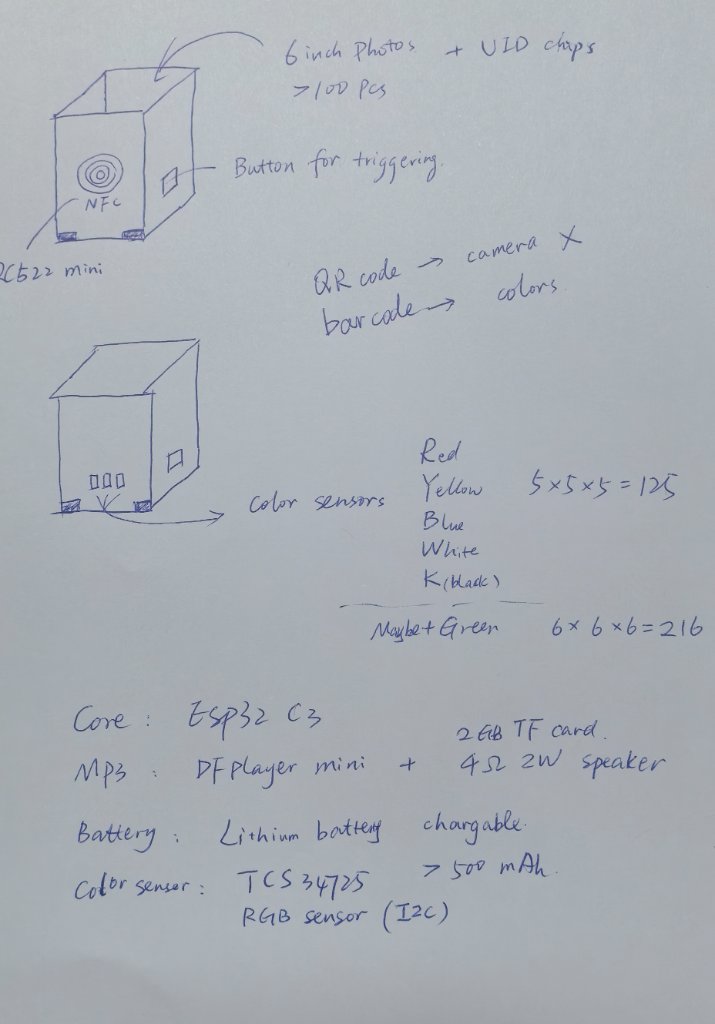
Early ideation sketches (January–March):
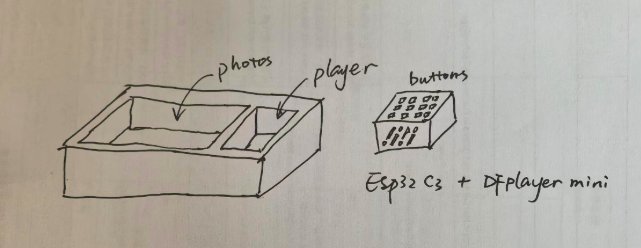
The second idea was to make a keypad to enter the ID for playback, but it was not implemented because I did not have enough time.
Neil provided a suggestion when I first time present my idea during the lecture. I actually tried the following version by using 8 light sensors.
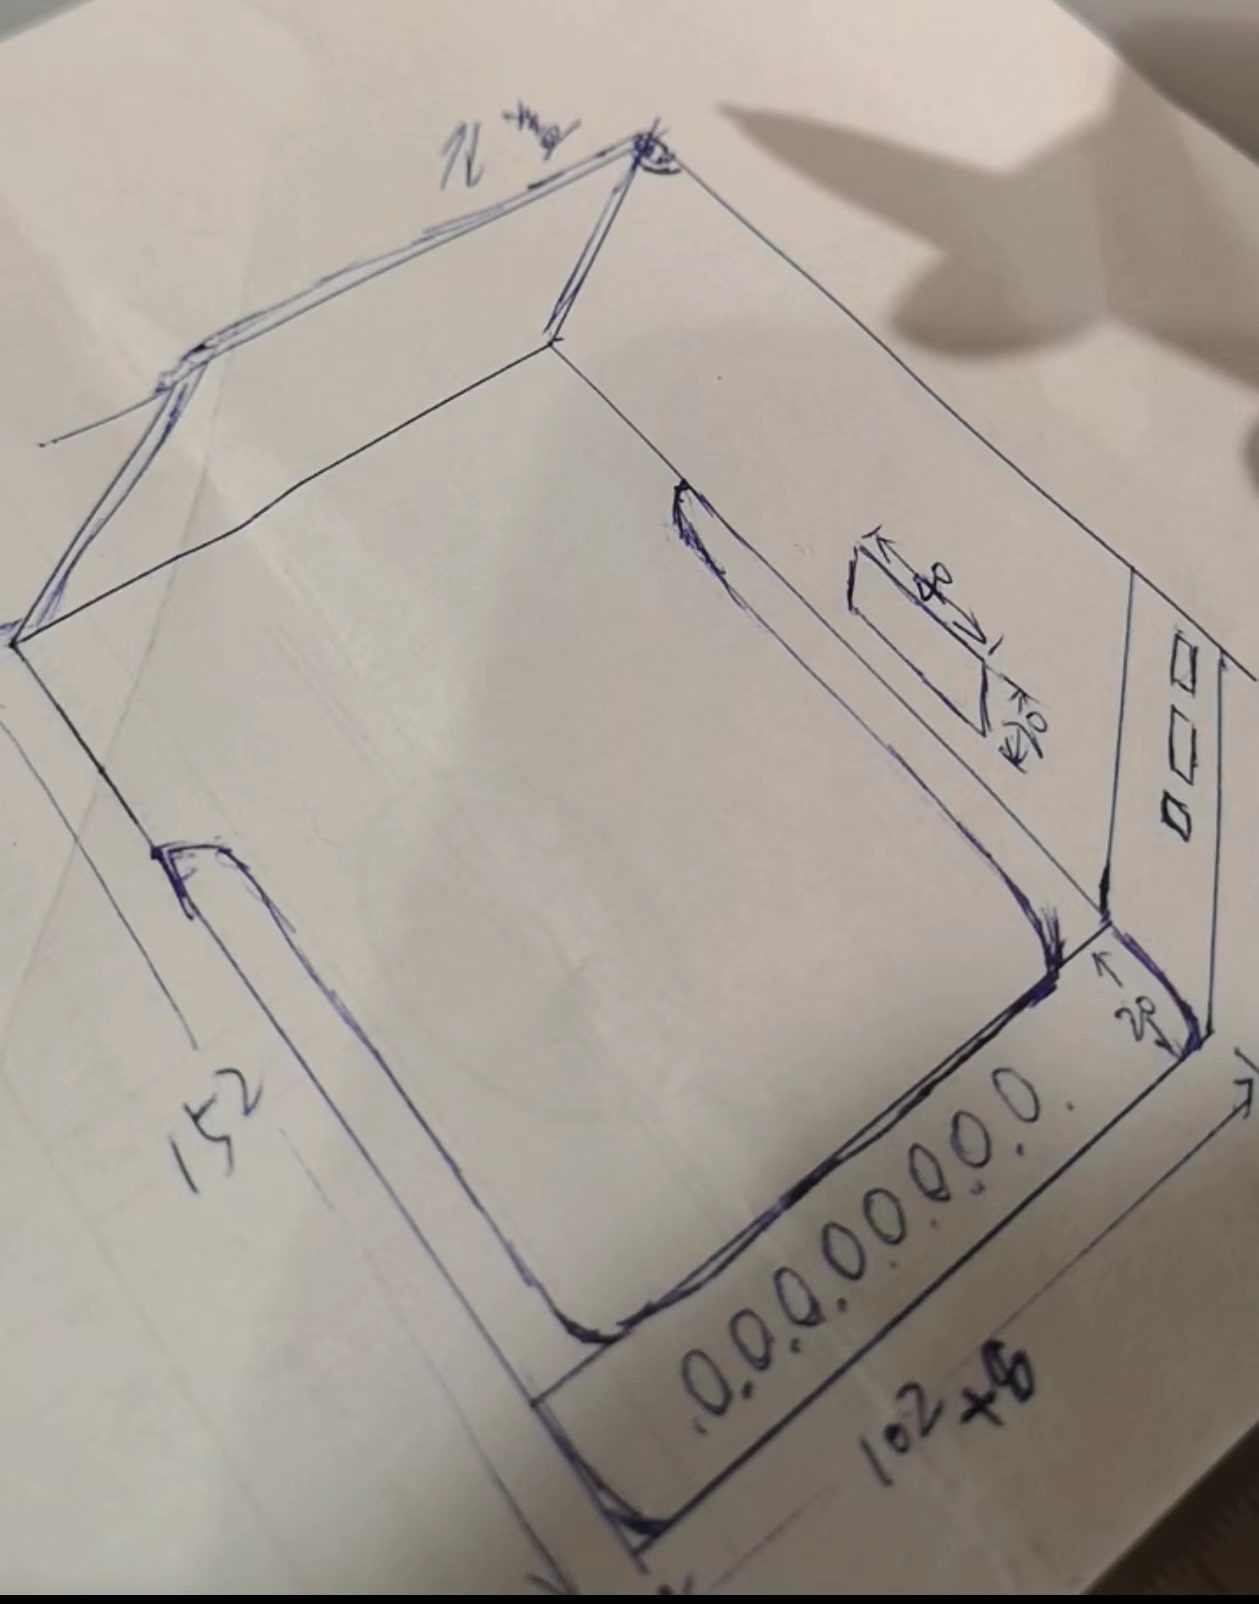
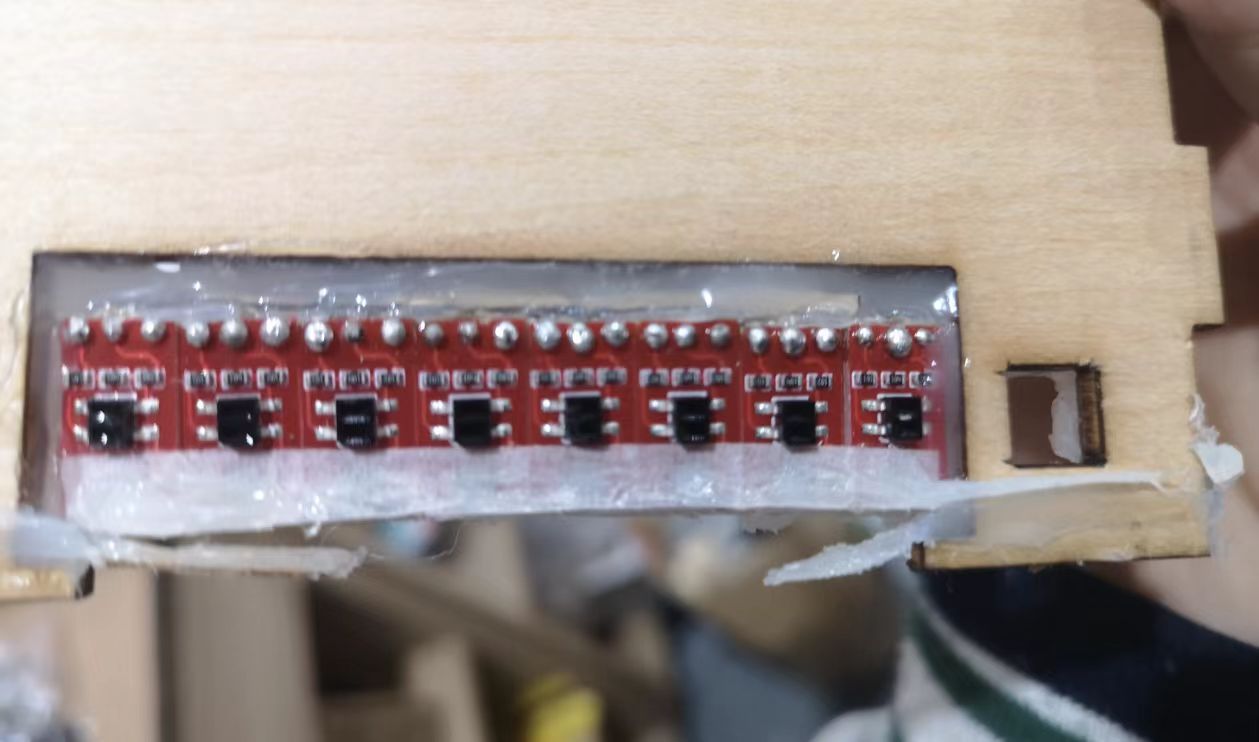
As I decided to keep using XIAO, and there were not enough pins to connect 8 light sensors, I finally decided to use the color sensors instead.
System Integration
Week 16 documents how mechanical, electronic, and software subsystems come together — integration plan, CAD/sketches, packaging, and finished-product design.
Full documentation: Week 16 — System Integration
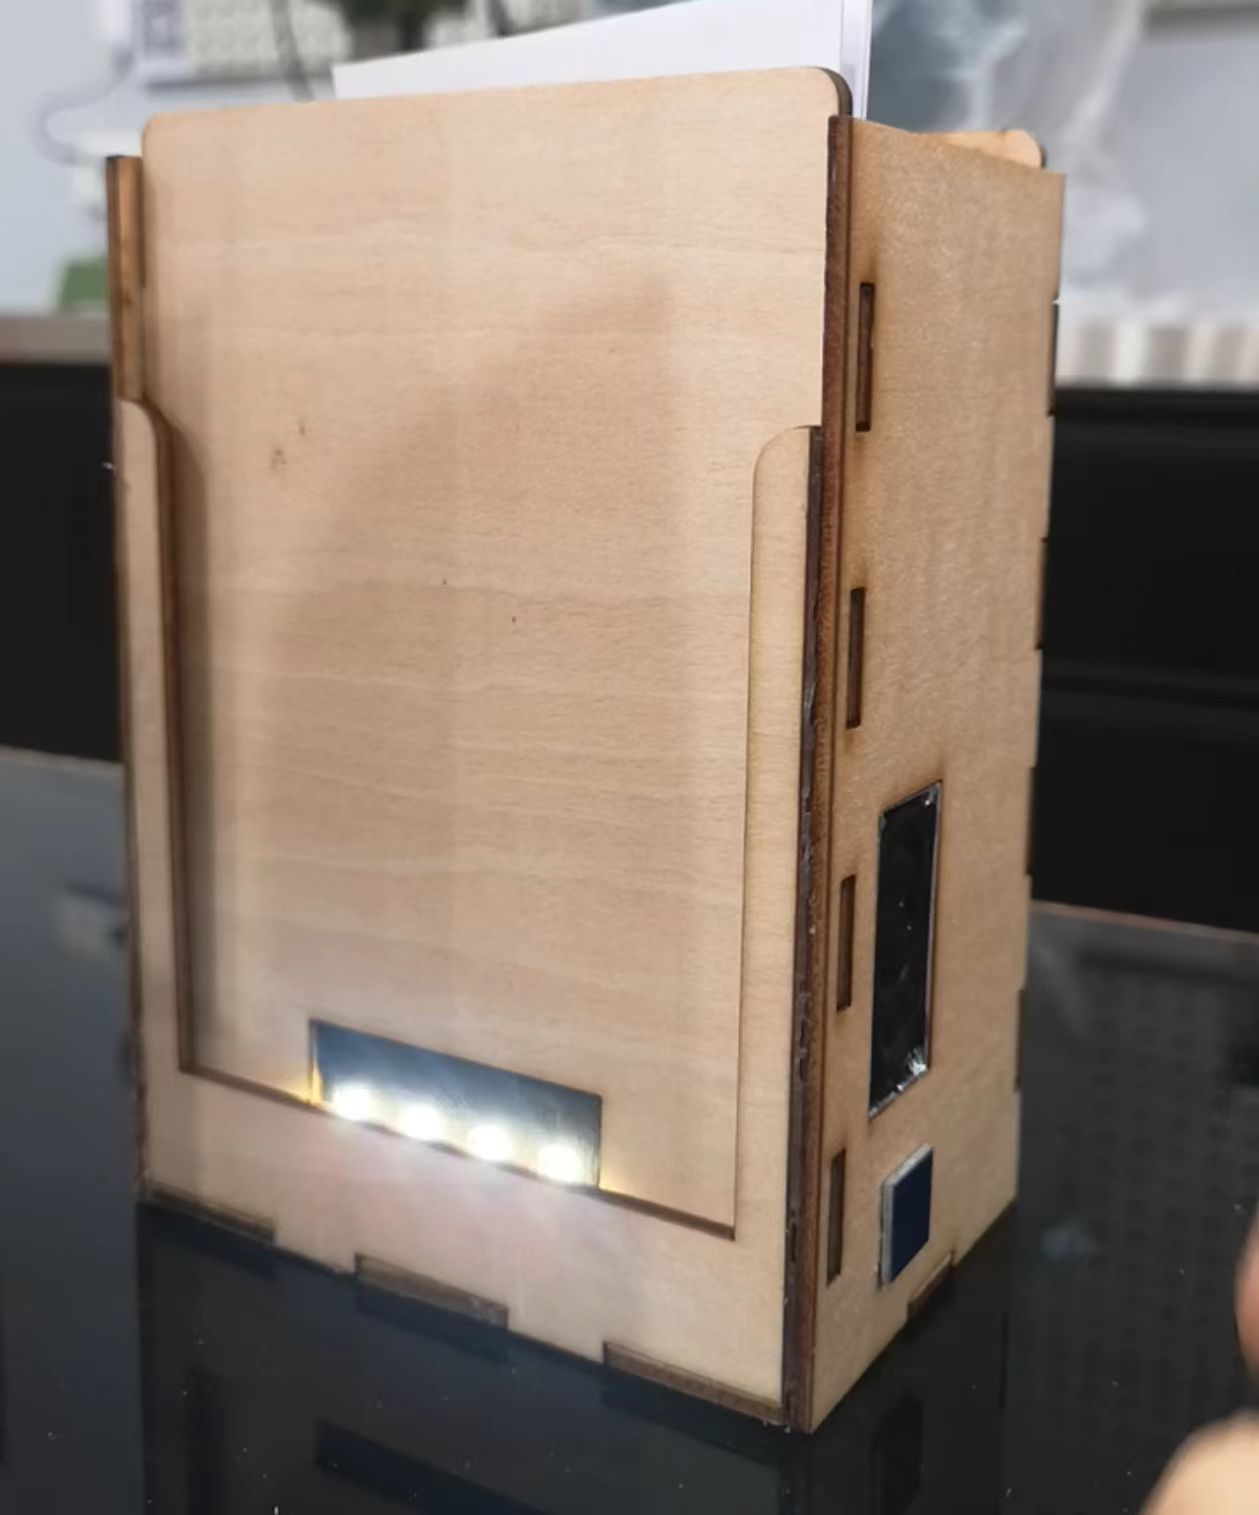
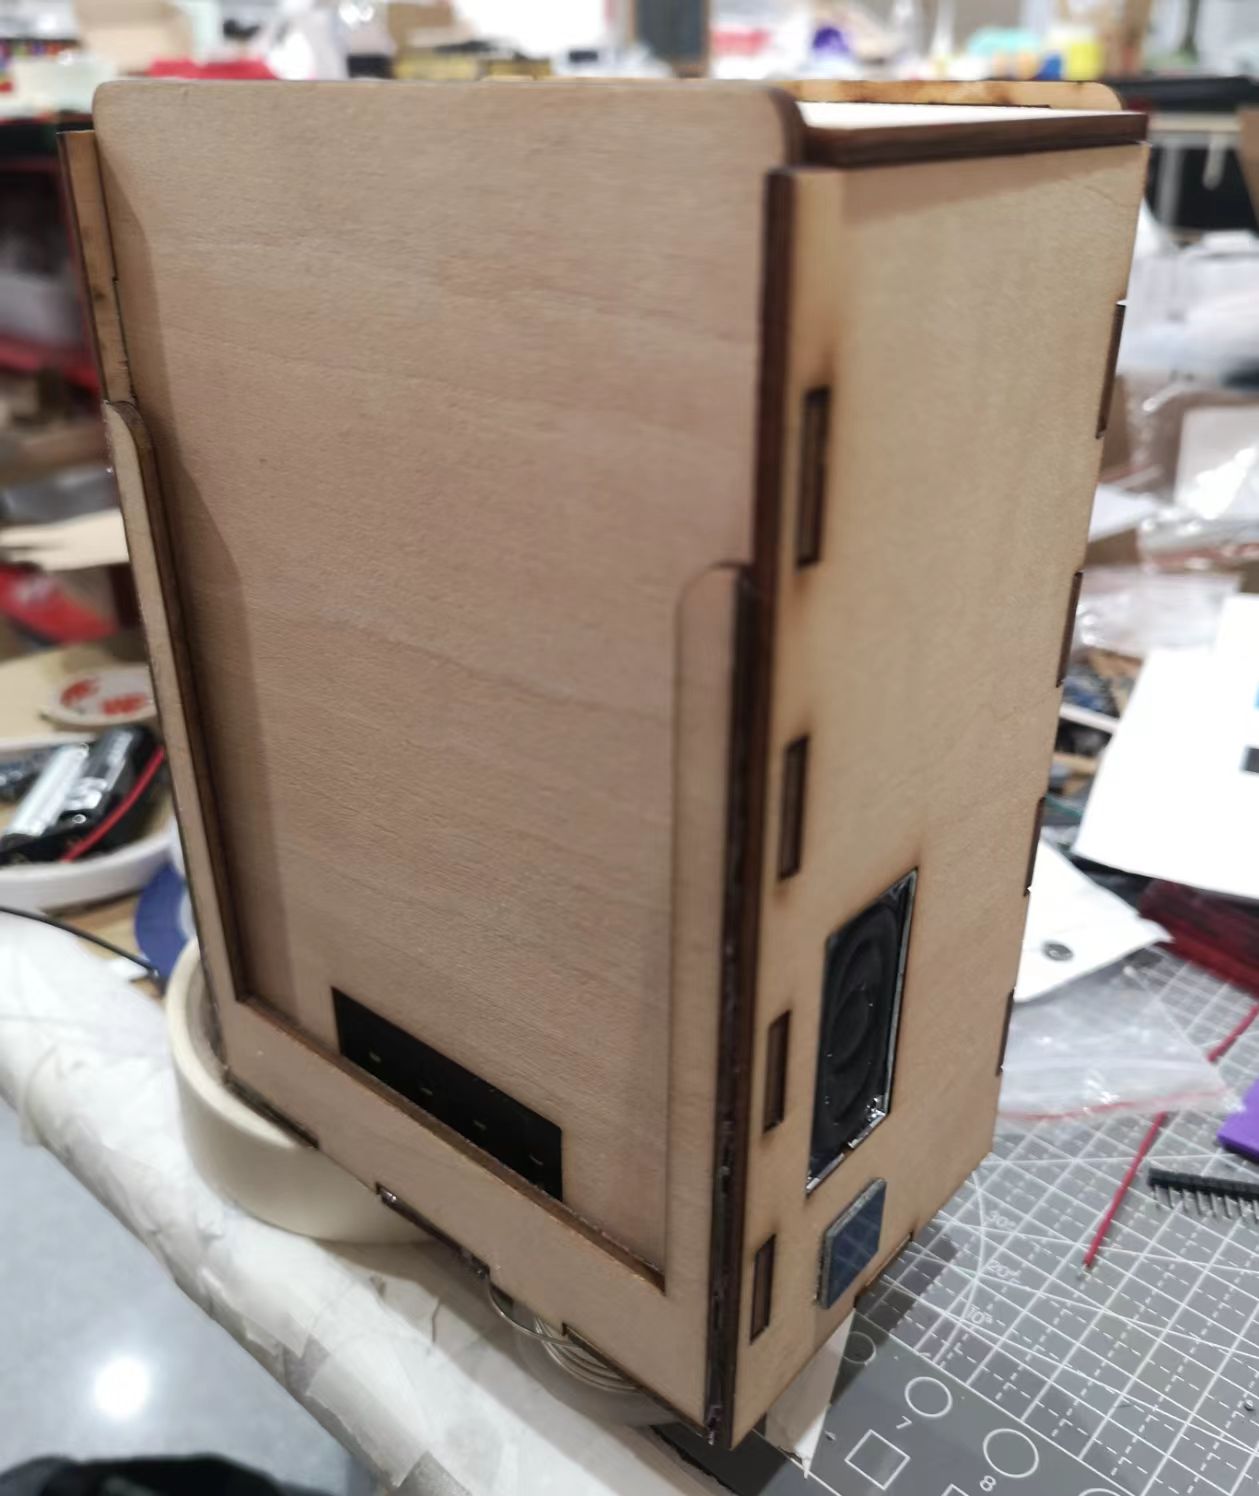
- Footprint ≈ 164 mm × 120 mm × 75 mm; laser-cut plywood + 3D-printed rotary cover
- Integration sequence: power → electronics tray → touch panel → sensor deck → speaker → closure
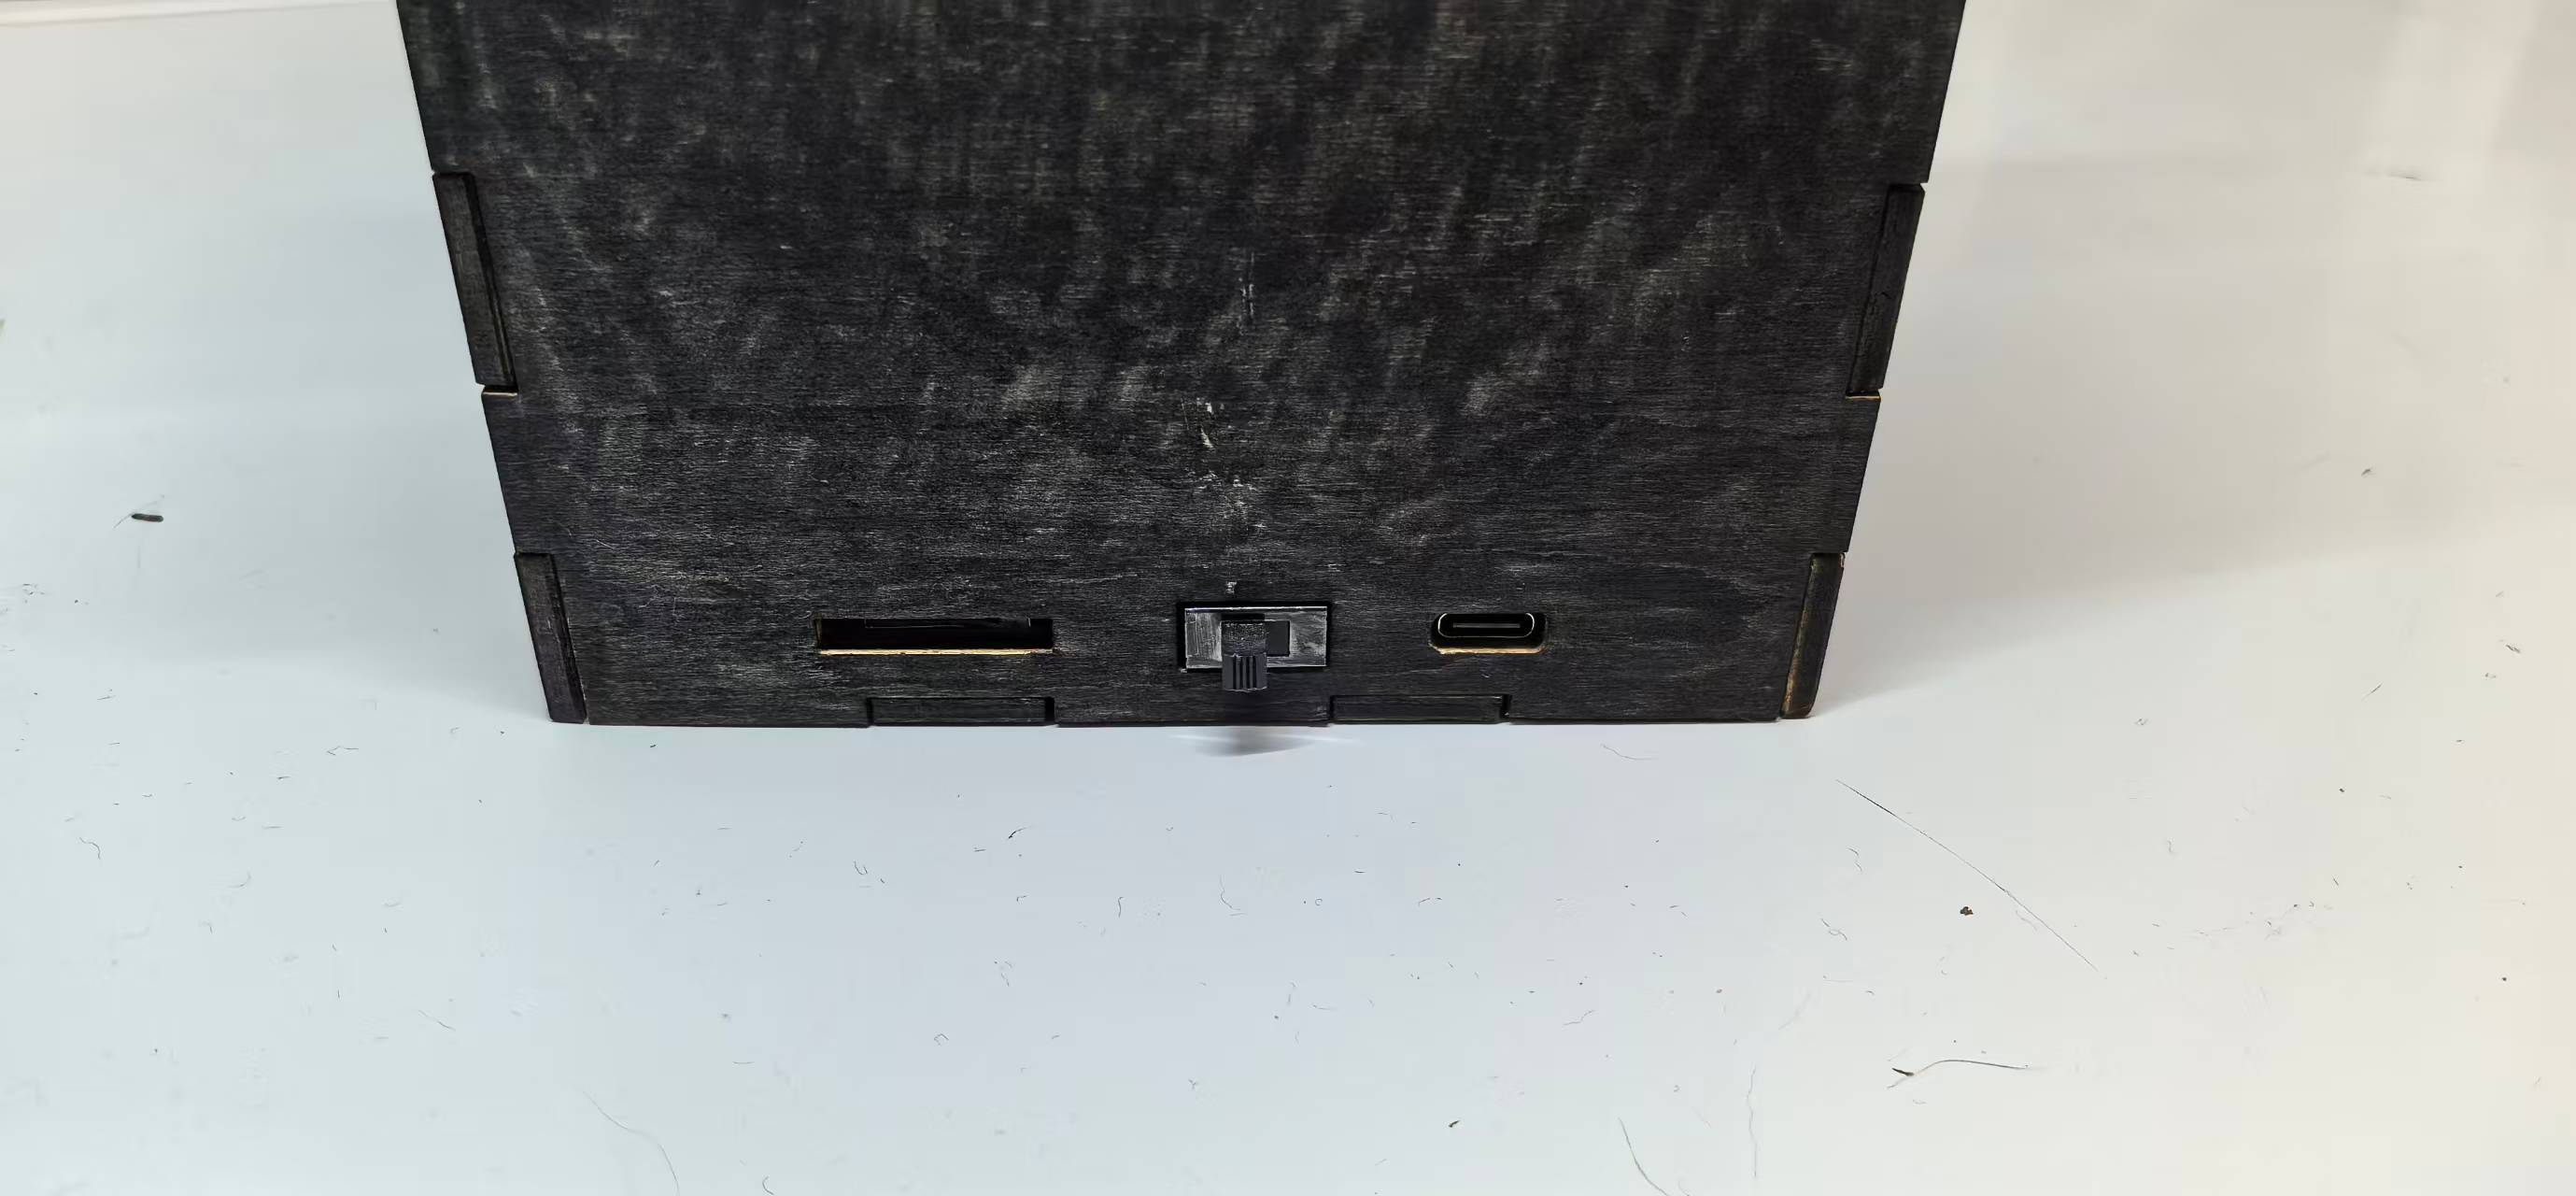
- Finished look: painted shell, hidden wiring, USB-C on back, photo tray with groove rail
What Questions Were Answered?
- Can a Fab lab student build a custom PCB that boots and runs peripherals? Yes — Week 8 board + Weeks 9–11 tests on the same pin map.
- Can TCS34725 sensors read distinct colours over I2C with a mux? Yes on the bench — stable values per swatch (Week 11); in-box calibration ongoing.
- Can DFPlayer play reliably from XIAO UART? Yes — 9600 baud, track trigger works (Week 11).
- Laser-cut plywood vs pure 3D print for enclosure? Plywood chosen for rapid prototyping and tray geometry; 3D print used where plywood failed (rotary cover).
- Can ESP32 serve a useful control UI? Yes — WS2812B web controller (Week 15) adapted for DFPlayer setup.
- How do subsystems fit in one box? Integration sequence and risks documented (Week 16).
Still open: colour reliability under ambient room light without extra LEDs; full calibration table for blue vs green; battery runtime under speaker load at volume 28/30. See Week 19.
What Worked? What Didn't?
Working:
- Integrated physical product — painted box, rotary cover, sensor deck, speaker, touch play
- Individual subsystems on bench — colour sensors, DFPlayer, touch sensor, Web UI
- Week 8 PCB as reusable platform through input/output/networking weeks
- Laser-cut + 3D-print hybrid packaging; plywood cover replaced by printed part when it broke
- Clear product story, encoding spec, and documentation pipeline (site + slide + video)
Not working yet / risky:
- Colour discrimination under warm indoor light — calibration incomplete for production reliability
- TCA9548A multiplexer needs more in-box testing under full assembly
- Speaker and touch sensor exposed in v1 — planned covers for v2
- Power under speaker load — bulk capacitance and routing need verification on integrated unit
How Was It Evaluated?
Evaluation criteria (from Week 18):
- Functional: demo photos — correct audio within ~2 s of touch play; Web UI triggers correct track by ID
- Technical: all subsystems present (sense, compute, play, input, power); firmware and PCB files in repo
- Integration: single enclosed unit; USB-C charge; microSD accessible for content updates
- Design: reads as finished product, not breadboard — painted shell, hidden cables
- Documentation: this page, weekly assignments, summary slide, ~60 s video, BOM, make-vs-buy explicit
- Individual mastery: I design, build, and program the unit myself; it runs standalone
What Are the Implications?
Applications: offline memory objects for families — grandparents hear voices without apps or accounts; new parents link lullabies to printed milestones.
Dissemination: open documentation on GitLab (CC BY-NC); final presentation slide and video; optional post-Fab workshop at Chaihuo. See Week 19 — dissemination plan.
Intellectual property: no patent planned; quinary strip encoding and design files shared openly for remix; third-party libraries credited.
Income (optional): custom commissions or maker workshops — realistic only after family beta proves colour-read reliability. See Week 18 and Week 19.
Broader implication: the Fab Academy skills chain (2D/3D → subtractive/additive fab → electronics → embed → integrate) turns a personal idea into a reproducible open-hardware artifact, not just a slide deck.
Summary Slide and One-Minute Video
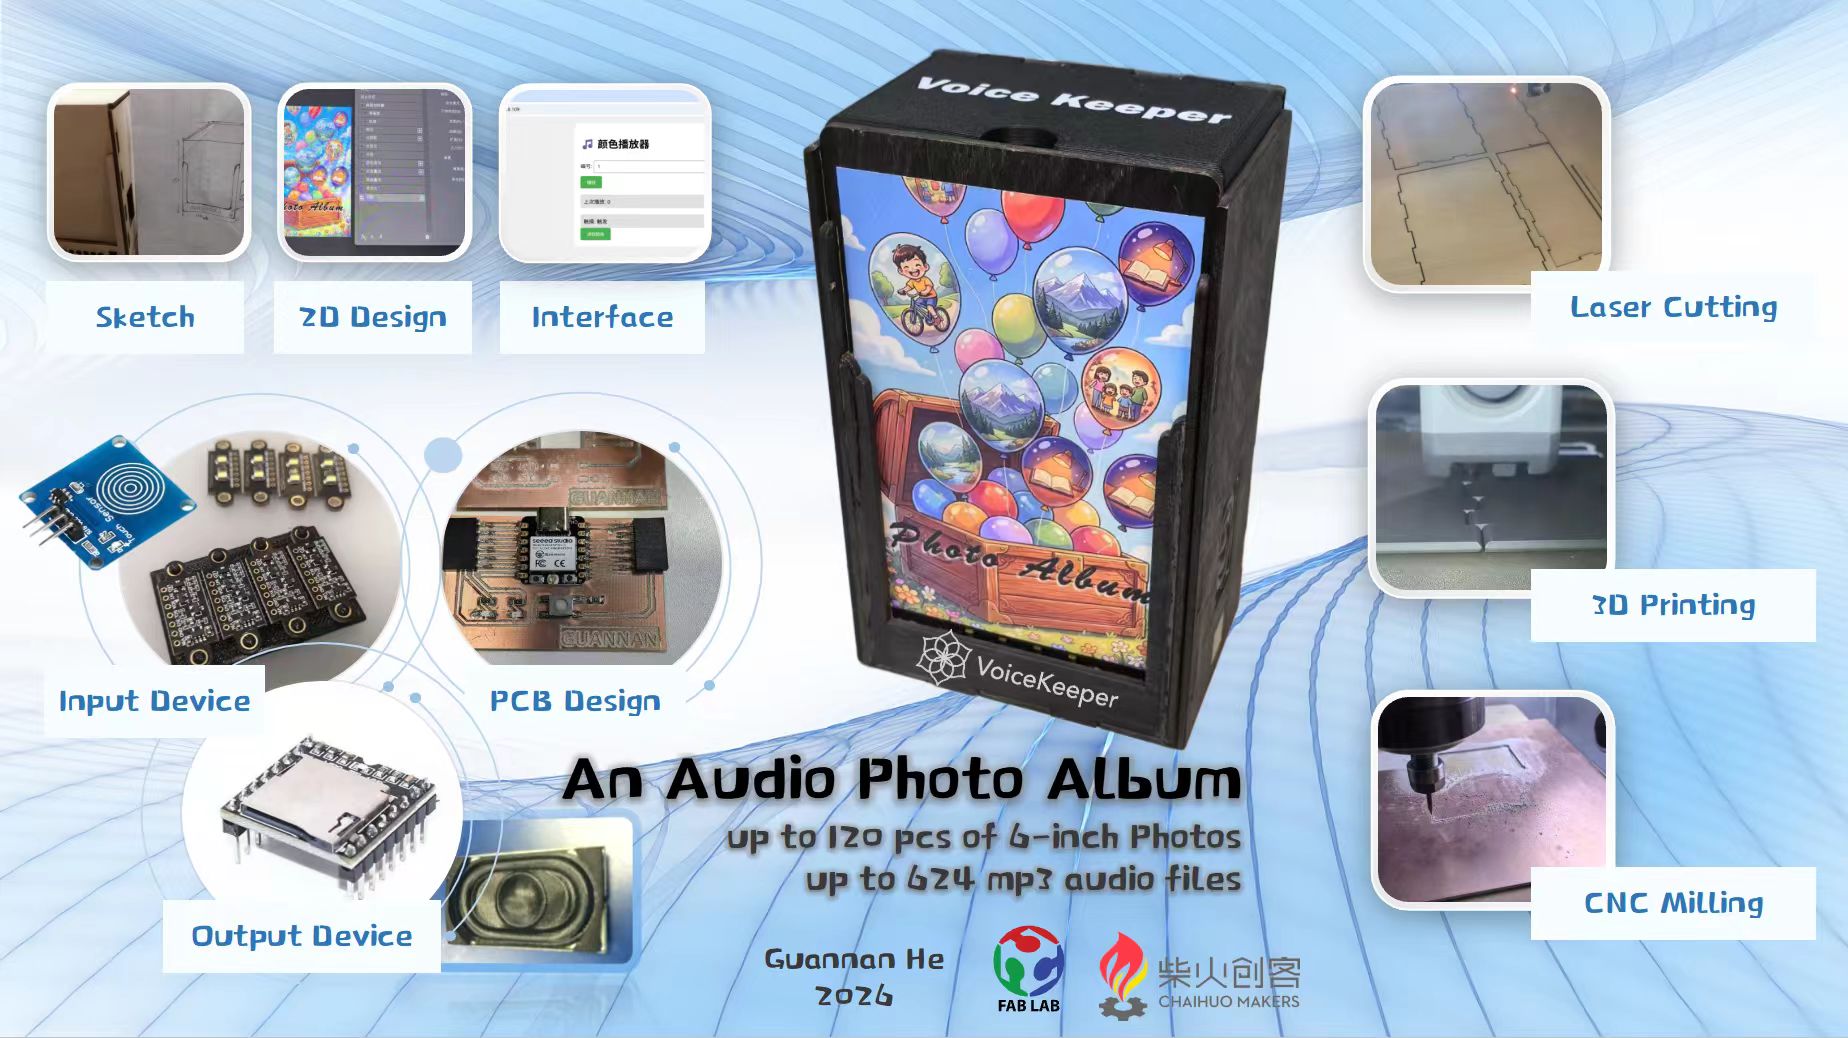
Fab Academy requires a one-page summary slide and a ~one-minute video showing conception, construction, and operation.
Summary slide:
presentation.png
Video (~60 s):
presentation.mp4
Video storyboard: title + power on → place photo → touch play → audio → design sketches → laser cut / mill / solder / program / assemble / 3D print → paint & decorate → Web UI demo → final hero shot → power off.
Presentation schedule:
Chaihuo — Final Presentation
Weekly Assignments — Contribution to Final Project
| Week | Topic | Link to final project |
|---|---|---|
| 01 | Principles & practices | Initial final project idea; documentation site plan |
| 02 | Computer-aided design | 2D/3D CAD skills for enclosure and strip templates |
| 03 | Laser cutting | Plywood box panels; parametric DXF workflow |
| 04 | Embedded programming | XIAO ESP32-C3, Arduino, early exploration |
| 05 | 3D scanning & printing | FDM rotary cover and sensor frame |
| 06 | Electronics design | EDA workflow before Week 8 PCB |
| 07 | Computer-controlled machining | CNC experience; PCB milling workflow |
| 08 | Electronics production | Core PCB — XIAO, button D0, LEDs D1/D2 |
| 09 | Input devices | Button/touch input on Week 8 board |
| 10 | Output devices | WS2812B; output power measurement |
| 11 | Networking | TCS34725, DFPlayer, I2C/UART |
| 12 | Machine design | Group vending machine (parallel skill) |
| — | Mid Term Review | |
| 14 | Molding & casting | VK logo cast — branding experiment |
| 15 | Interface programming | Web UI patterns → DFPlayer control |
| 16 | System integration | Voice Keeper integration & packaging |
| 17 | Wildcard | Fabric × 3D print (parallel exploration) |
| 18 | Applications & implications | Masterpiece plan, evaluation, slide/video |
| 19 | Invention, IP & income | Dissemination, timeline, implications |
License and Repository
Documentation and design files: Creative Commons Attribution–NonCommercial (CC BY-NC). Source code, firmware sketches, SmallerPic, STL/DXF exports, and weekly assignments live in gitlab.fabcloud.org. Voice Keeper demonstrates individual mastery of Fab Academy skills integrated into one independently operable masterpiece.