Applications and Implications
Week 17 has two parts: (1) plan a final project masterpiece that integrates the full range of Fab Academy skills, and (2) prepare project development materials — a summary slide and video draft — for the final presentation. My project is Voice Keeper, an offline audio photo album. Full technical detail lives on my final project page; system integration is documented in Week 16.
Checklist
- ✓ What will it do?
- ✓ Who has done what beforehand?
- ✓ What sources will you use?
- ✓ What will you design?
- ✓ What materials and components will be used?
- ✓ Where will they come from?
- ✓ How much will they cost?
- ✓ What parts and systems will be made?
- ✓ What processes will be used?
- ✓ What questions need to be answered?
- ✓ How will it be evaluated?
- ✓ Uploaded summary slide (placeholder)
- ✓ Uploaded video clip (placeholder)
- ✓ Checked they are linked in the final presentation schedule
Part 1 — Final Project Plan (Voice Keeper)
Voice Keeper integrates 2D and 3D design, additive and subtractive fabrication, electronics design and production, embedded interfacing and programming, and system integration and packaging into one independently operable product. Where practical I make rather than buy — custom PCB, 3D-printed enclosure, firmware, and photo encoding workflow — while using commercial breakouts only where fabrication is impractical (colour sensors, audio module, sensors).
What will it do?
Voice Keeper plays audio memories linked to physical printed photos. The user places a photo in the front tray; a quinary (base-5) colour strip on the photo edge is read by four TCS34725 sensors; the MCU computes an ID and plays the matching MP3 from an SD card through a speaker. There is no screen, no cloud, and no recording — only tactile photos and sound. Target users: new parents, families preserving elders’ voices, and anyone who prefers physical albums over phone galleries.
Who has done what beforehand?
Prior art and inspiration (not copied — different encoding and offline industrial design):
- Talking photo frames / “talking albums” — often with recording function (limited pieces of audio files); Voice Keeper uses visible colour encoding on the print itself (human-readable, no hidden chip in the photo).
- Digital picture frames with audio — usually screen-centric and cloud-linked; Voice Keeper deliberately avoids screens.
- Colour-as-data art (e.g. multicolour strip encoding) — quinary 4-digit codes are tuned for TCS34725 resolution and family-scale capacity (625 IDs).
- My own Fab weeks — Week 8 PCB + button/LED, Week 11 I2C/UART/ESP-NOW, Week 14 web UI thinking, Week 15 packaging plan; these de-risk the final integration.
What sources will you use?
- Fab Academy community and regional review feedback
- Component datasheets: TCS34725, TCA9548A, DFPlayer Mini, XIAO ESP32-C3
- Adafruit / DFRobot libraries and example code (TCS34725, NeoPixel, DFPlayer Mini)
- Lab equipment: Laser cutter, PCB mill, 3D printer, oscilloscope/multimeter for power debug
- My documentation site and SmallerPic tool for photo prep
What will you design?
- Mechanical: laser-cutted plywood enclosure — base (electronics, battery, speaker) + main box (photo tray), 3D-printed top (color sensor window, rotary top cover)
- 2D: templates for colour-strip layout on photos; DXF for laser-cut design of the box
- Electronics: custom PCB (evolved from Week 8) routing XIAO, I2C bus, UART to DFPlayer, power input
- Software: embedded firmware — sensor polling, quinary decode, DFPlayer control, Web UI for DFplayer mini
- Content workflow: assign ID → record MP3 → print photo with encoded strip → place in album
- Documentation: final project page, weekly logs, slide, and video
Materials and components
| Item | Qty | Source | Est. cost (USD) |
|---|---|---|---|
| Seeed XIAO ESP32-C3 | 1 | Seeed / lab stock | 4 |
| TCS34725 colour sensor | 4 | Taobao | 1 |
| TCA9548A I2C multiplexer | 1 | Taobao | 0.5 |
| DFPlayer Mini + micro-SD | 1 | Taobao | 2 |
| 2 W speaker, 8 Ω | 1 | Taobao | 0.5 |
| Tact switch (play) | 1 | Taobao | 0.5 |
| Li-ion 3.7V battery + charge board | 1 set | Taobao | 1 |
| FR-1 PCB blank, components | 1 board | Fab lab / JLC PCB | 1 |
| PLA filament (~100 g) | 1 roll use | Fab Lab | 5 |
| Photo paper, printed strips | batch | Taobao / DIY | 5 |
| Total (approx.) | ~23.5 |
What parts and systems will be made?
- Made in Fab lab: milled PCB; laser-cutted and 3D-printed enclosure and internal mounts; firmware; encoded photo strips (print + colour blocks); integrated wiring harness
- Bought modules: sensors, multiplexer, DFPlayer mini, speaker, XIAO ESP32-C3, battery/charge boards — assembled;
- Systems: optical ID subsystem, audio playback subsystem, human input subsystem, power subsystem, mechanical packaging — integrated per Week 16 plan
Processes used (mapped to Fab Academy)
| Skill area | Process | Voice Keeper application | Documented in |
|---|---|---|---|
| 2D design | Parametric CAD, DXF export, poster design | Sensor frame (jig), strip layout template, poster design | Week 02, Week 03 |
| Subtractive | PCB milling (CNC), Laser cutting | Custom controller board, laser-cutted enclosure and internal mounts | Week 03, Week 08 |
| Additive | FDM 3D printing | Color sensor window, rotary top cover | Week 05 |
| Electronics | Schematic, PCB layout, SMD/reflow or hand solder | XIAO carrier + connectors | Week 06Week 08 |
| Embedded | Arduino, I2C/UART/GPIO | color sensor read, touch sensor, DFPlayer control | Week 09, Week 10 |
| Interface | Physical UX (no GUI screen) | Tray ritual, button, touch sensor | Week 15 (related) |
| Integration | Assembly, test plan, packaging | Closed-box product | Week 16 |
Questions that need to be answered
- Can quinary colours be read reliably under typical indoor light without extra LEDs?
- What calibration table and tolerance margins separate adjacent colours (e.g. blue vs green)?
- Is 625 ID capacity sufficient with mis-read rate < 5% for demo albums?
- Does the tray give repeatable photo placement for elders and children?
- Is battery life acceptable for a “living room” object (~30 min active play/session target)?
How will it be evaluated?
- Functional: 10 demo photos — correct audio within 2 s of pressing play, ≥ 9/10 correct by colour; Web UI for DFPlayer mini works for any ID 0001–4444
- Technical: all subsystems present (sense, compute, play, input, power); firmware readable; schematic/PCB files in repo
- Integration: single enclosed unit, no breadboard; USB-C charge; SD accessible for content updates
- Design: reads as finished product (Week 15 criteria); clear story for non-technical users
- Documentation: final page, weekly assignments, slide, video, bill of materials, make-vs-buy explicit
- Individual mastery: I design, build, and program the unit independently; it runs standalone without a laptop connected
Part 2 — Project Development (Slide and Video)
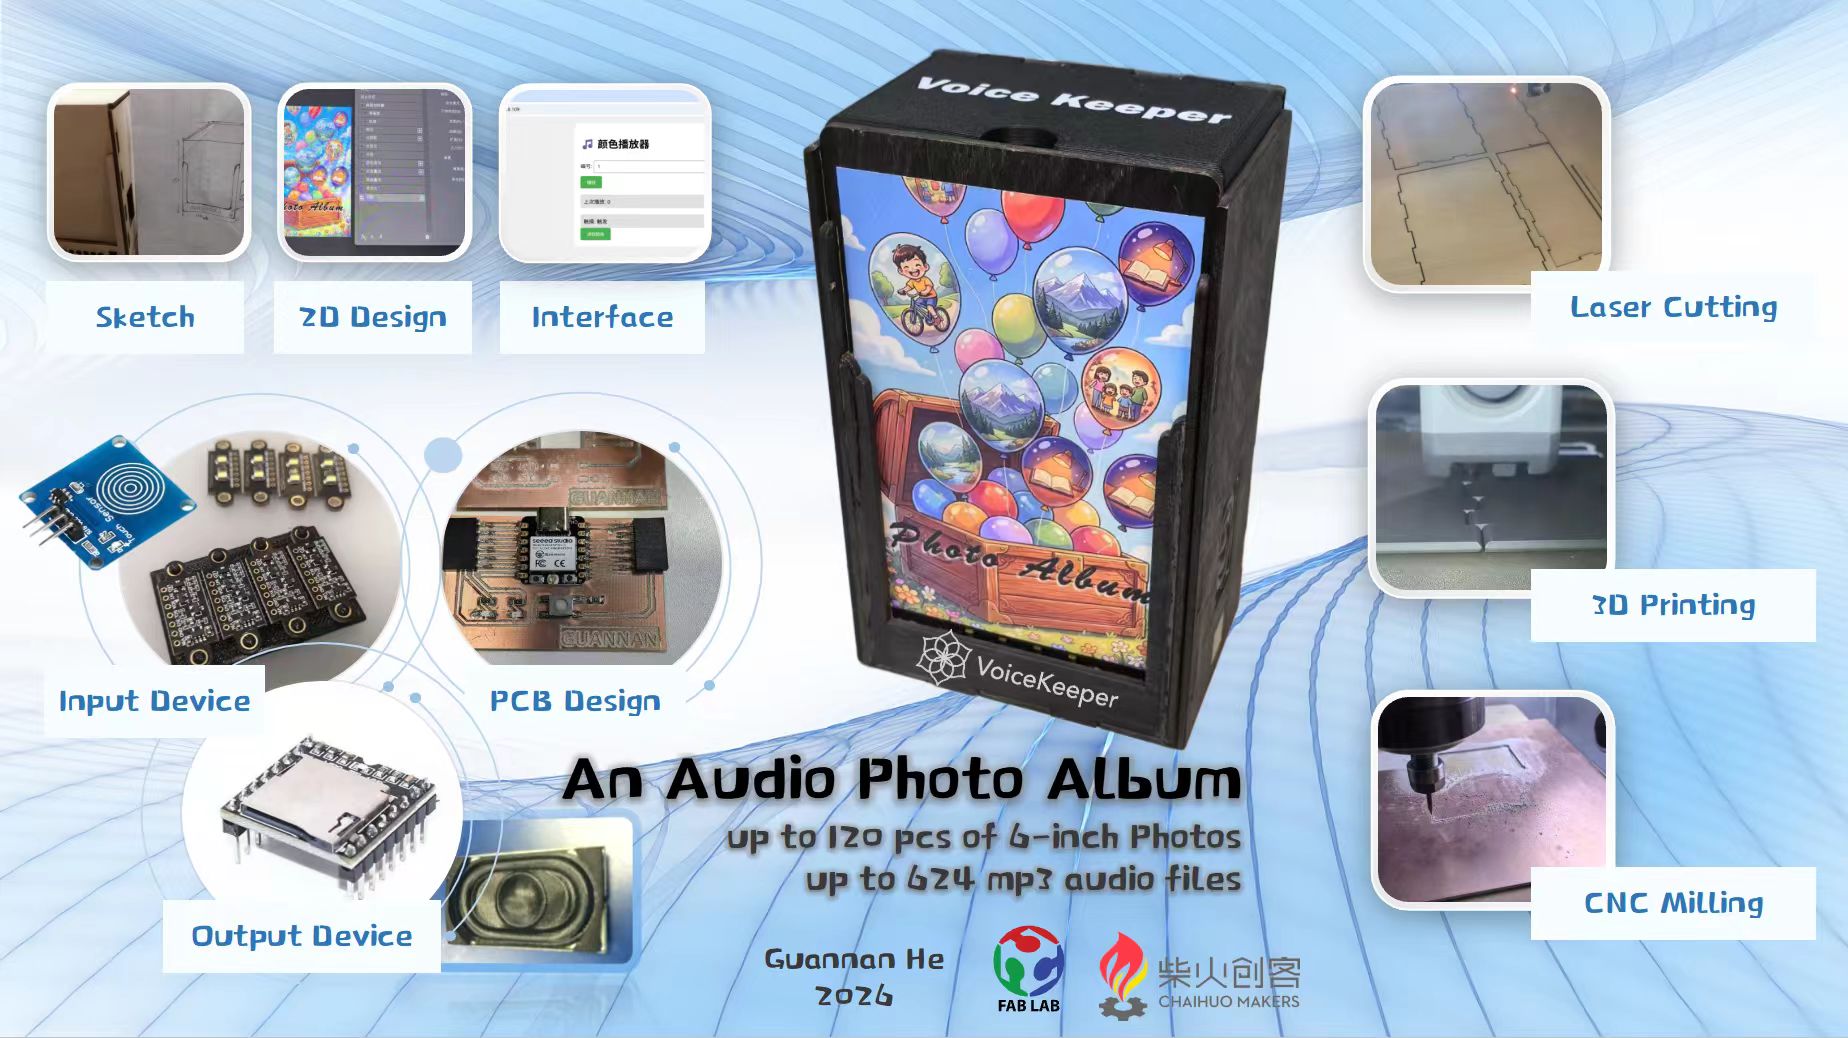
Final summary slide and ~one-minute video are committed in the repository under public/:
-
Summary slide (final):
presentation.png
-
Video (~60 s, final):
presentation.mp4
- Presentation schedule: Chaihuo — Final Presentation
Video storyboard (~60 s)
- 0–2 s — Title card + turn on the device
- 3–17 s — Place photo, press play, voice/audio plays
- 18–24 s — Sketching and designing
- 25–44 s — laser cutting, CNC milling, soldering, programming, testing, assembling, 3D printing
- 45–56 s — decarating, Web UI, testing again
- 57–60 s — Put the photo back and turn off the device + end card
What I Learned
Applications and implications forced me to justify Voice Keeper as a whole system, not a collection of weekly demos. The checklist questions (cost, sources, evaluation) expose gaps early — e.g. colour reliability is still an open research question tied to real users (grandparents in a living room, not a lab bench).
Make vs buy is a design choice: I make enclosure and PCB to show mastery; I buy sensors and DFPlayer because we could not re-fabricate them. JLC PCB could produce the same board in 5 days and ensure the stability. Documenting that split satisfies instructors that the project is feasible in the remaining weeks.
Slide and video are final versions in public/presentation.png and public/presentation.mp4 — conception, construction, and operation as required for Fab Academy final presentation.