Week 13 Moulding and casting
learning new methods of creating parts
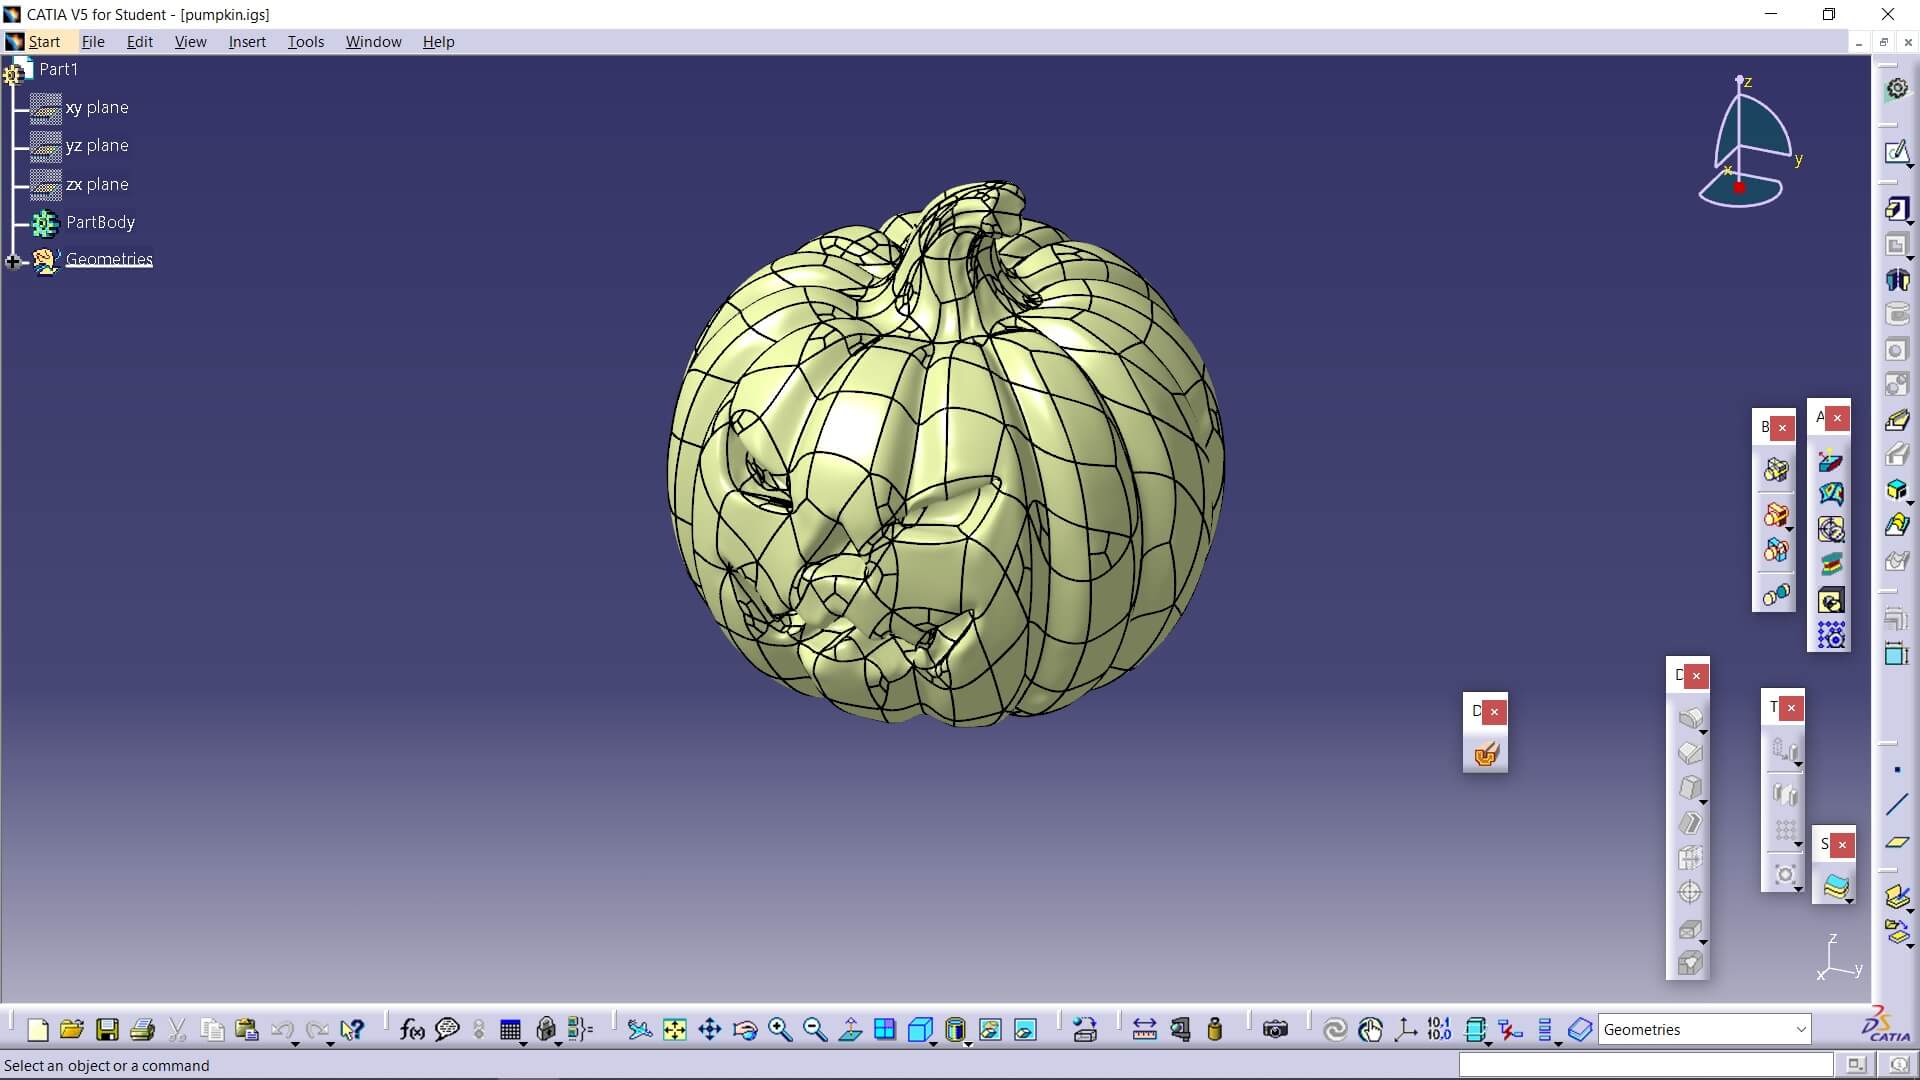
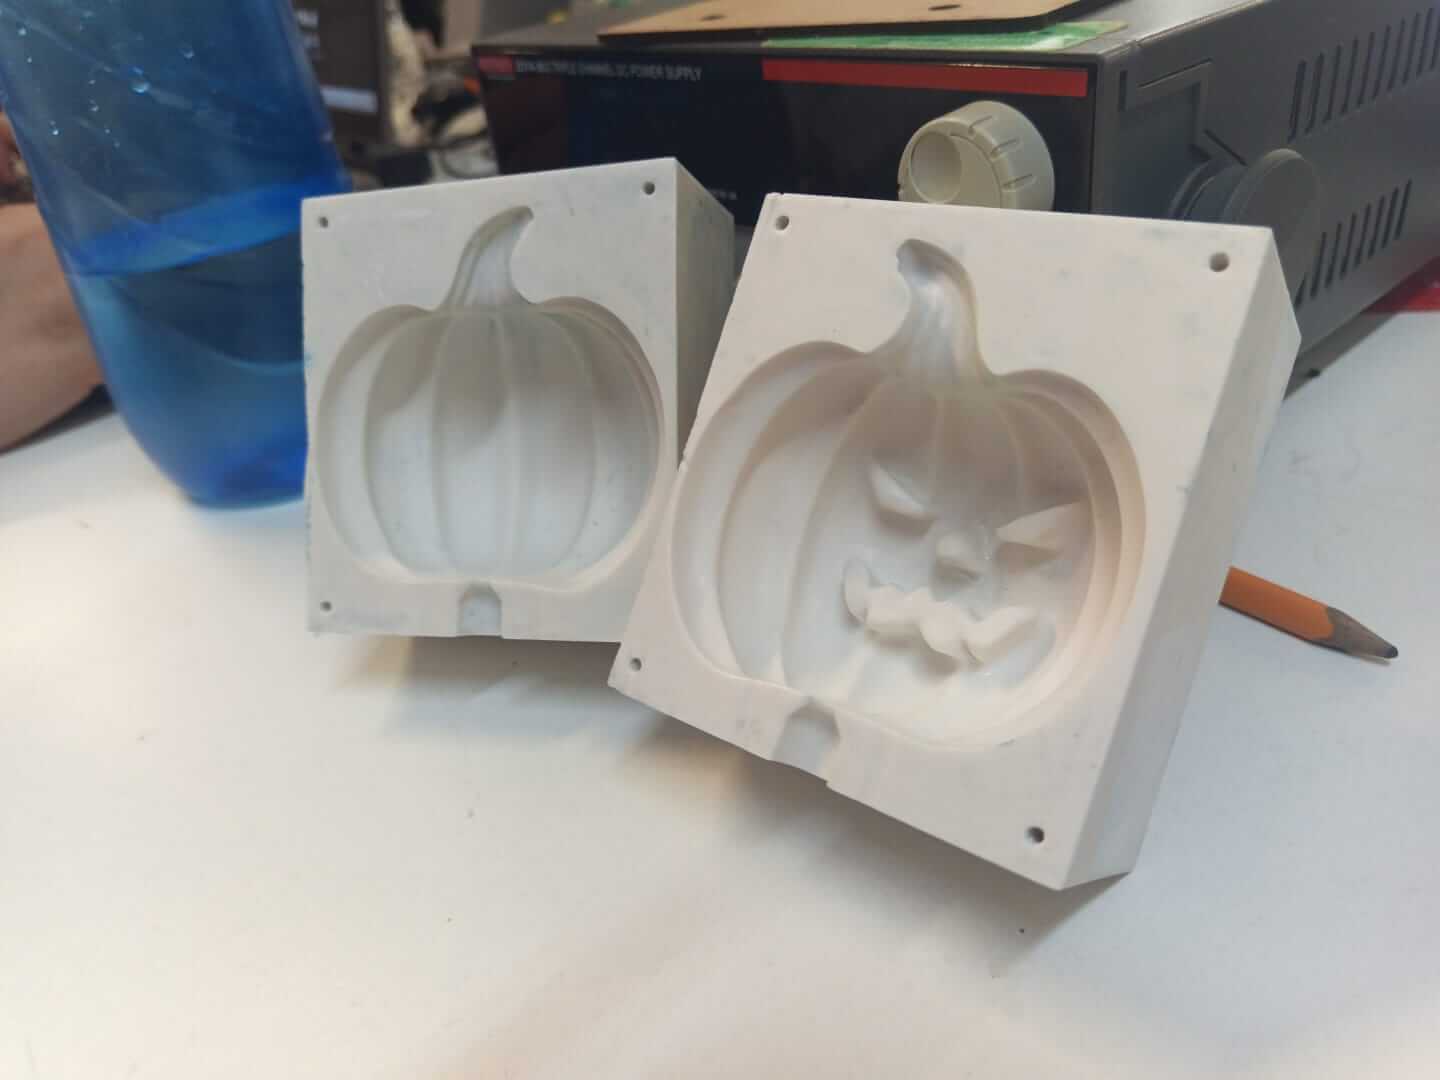
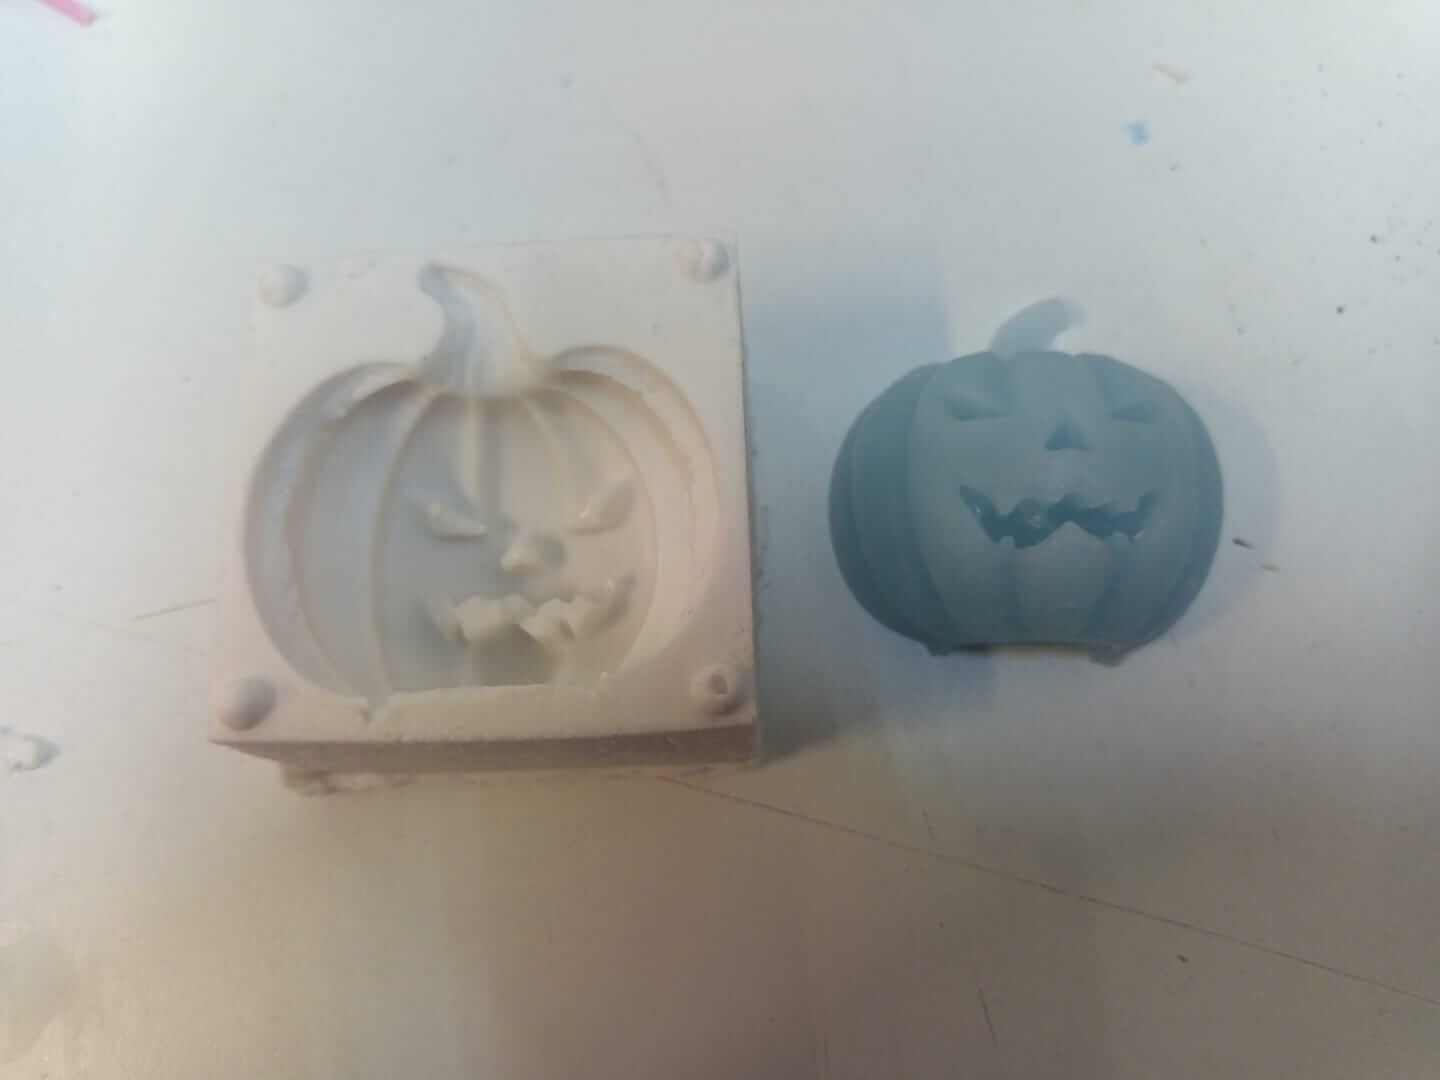
I wanted to take advantage of this week to make a mold for my final project, so I wanted to make a good mold, so I decided to print it in resin, and this mold would be intended for solid plastic instead of silicone. For this, I took a 3D model with STL extension from this website, which is a pumpkin
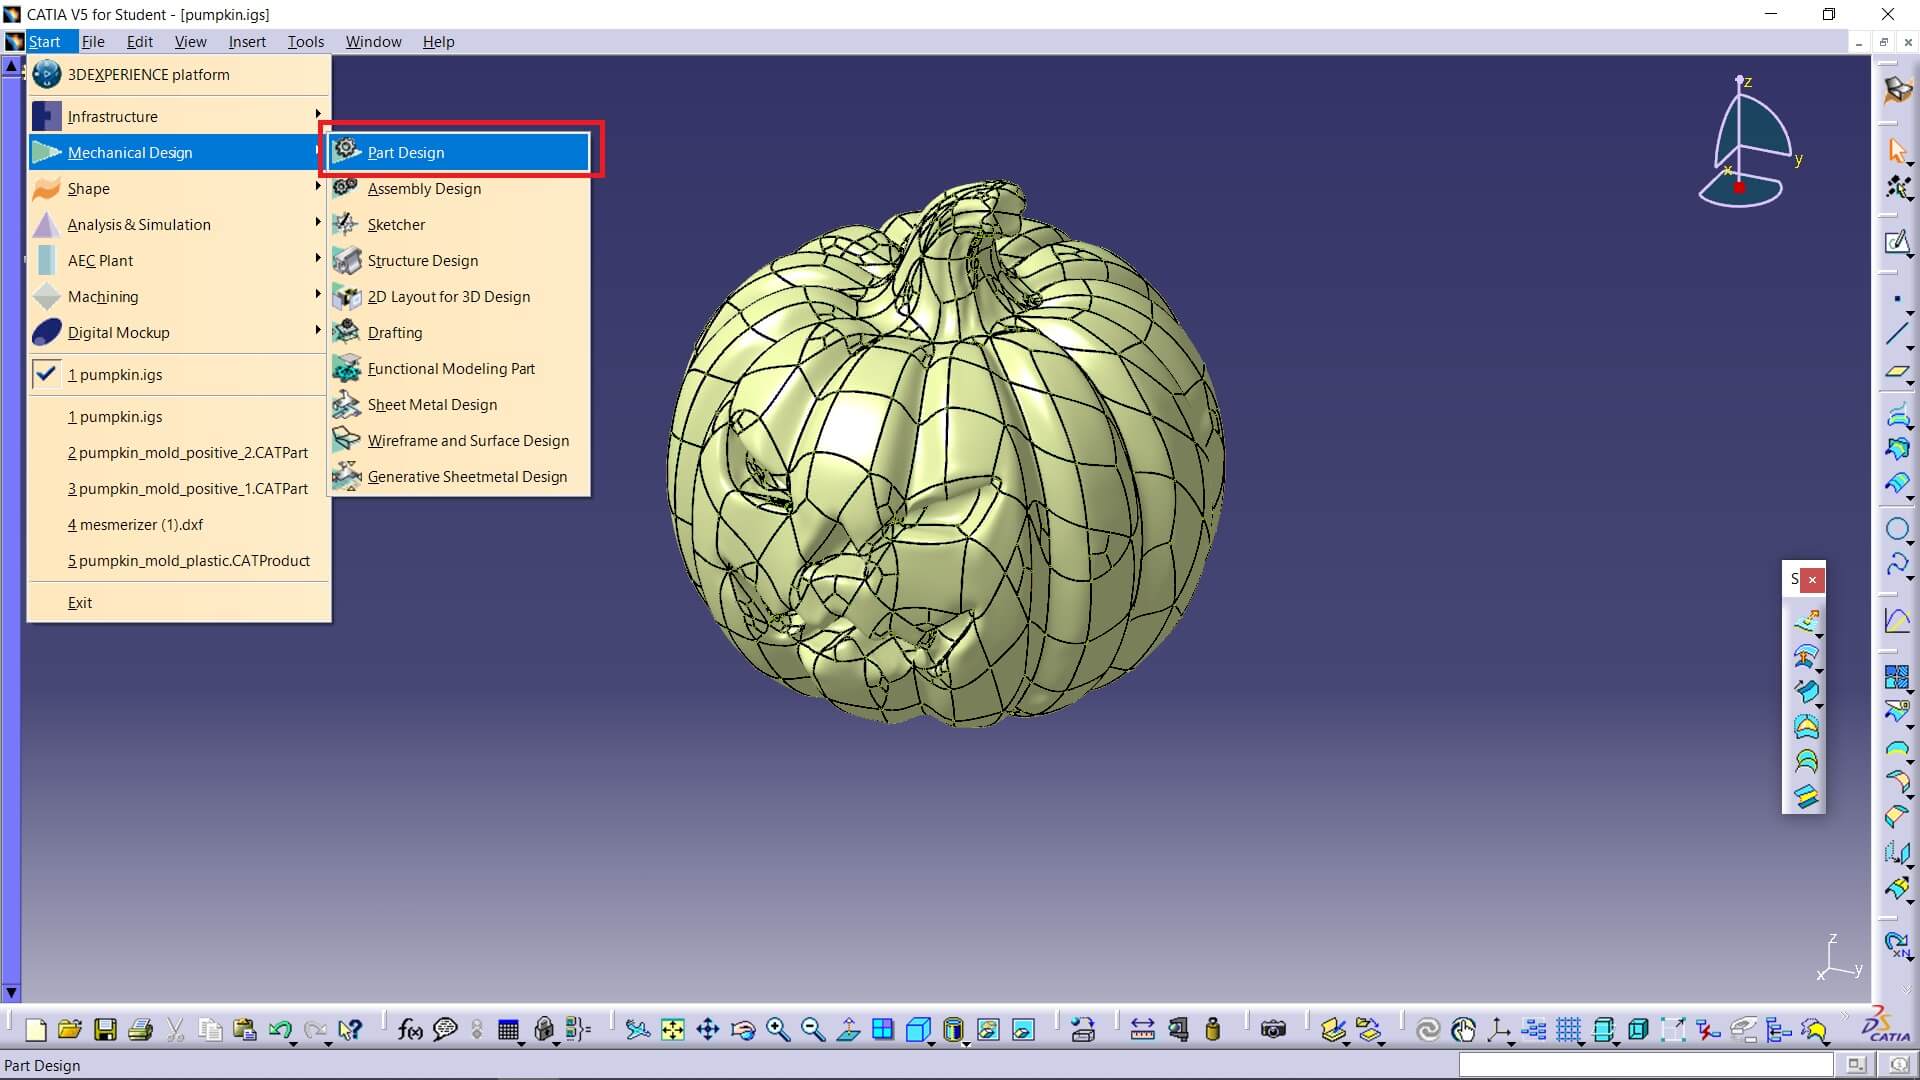
Since I work in Catia Student, I do not have the tools to transform an STL into a solid that I can work with, so I followed the instructions in this video to convert the STL file to IGS, as it is the easiest way I found to use different STL models.
A small clarification before continuing is that I did not use tolerances, since the measurements handled by resin printing machines are so small that it is better to disregard them as the result will be almost the same.
Similarly, here is the process with which each and every mold was made:
Designing
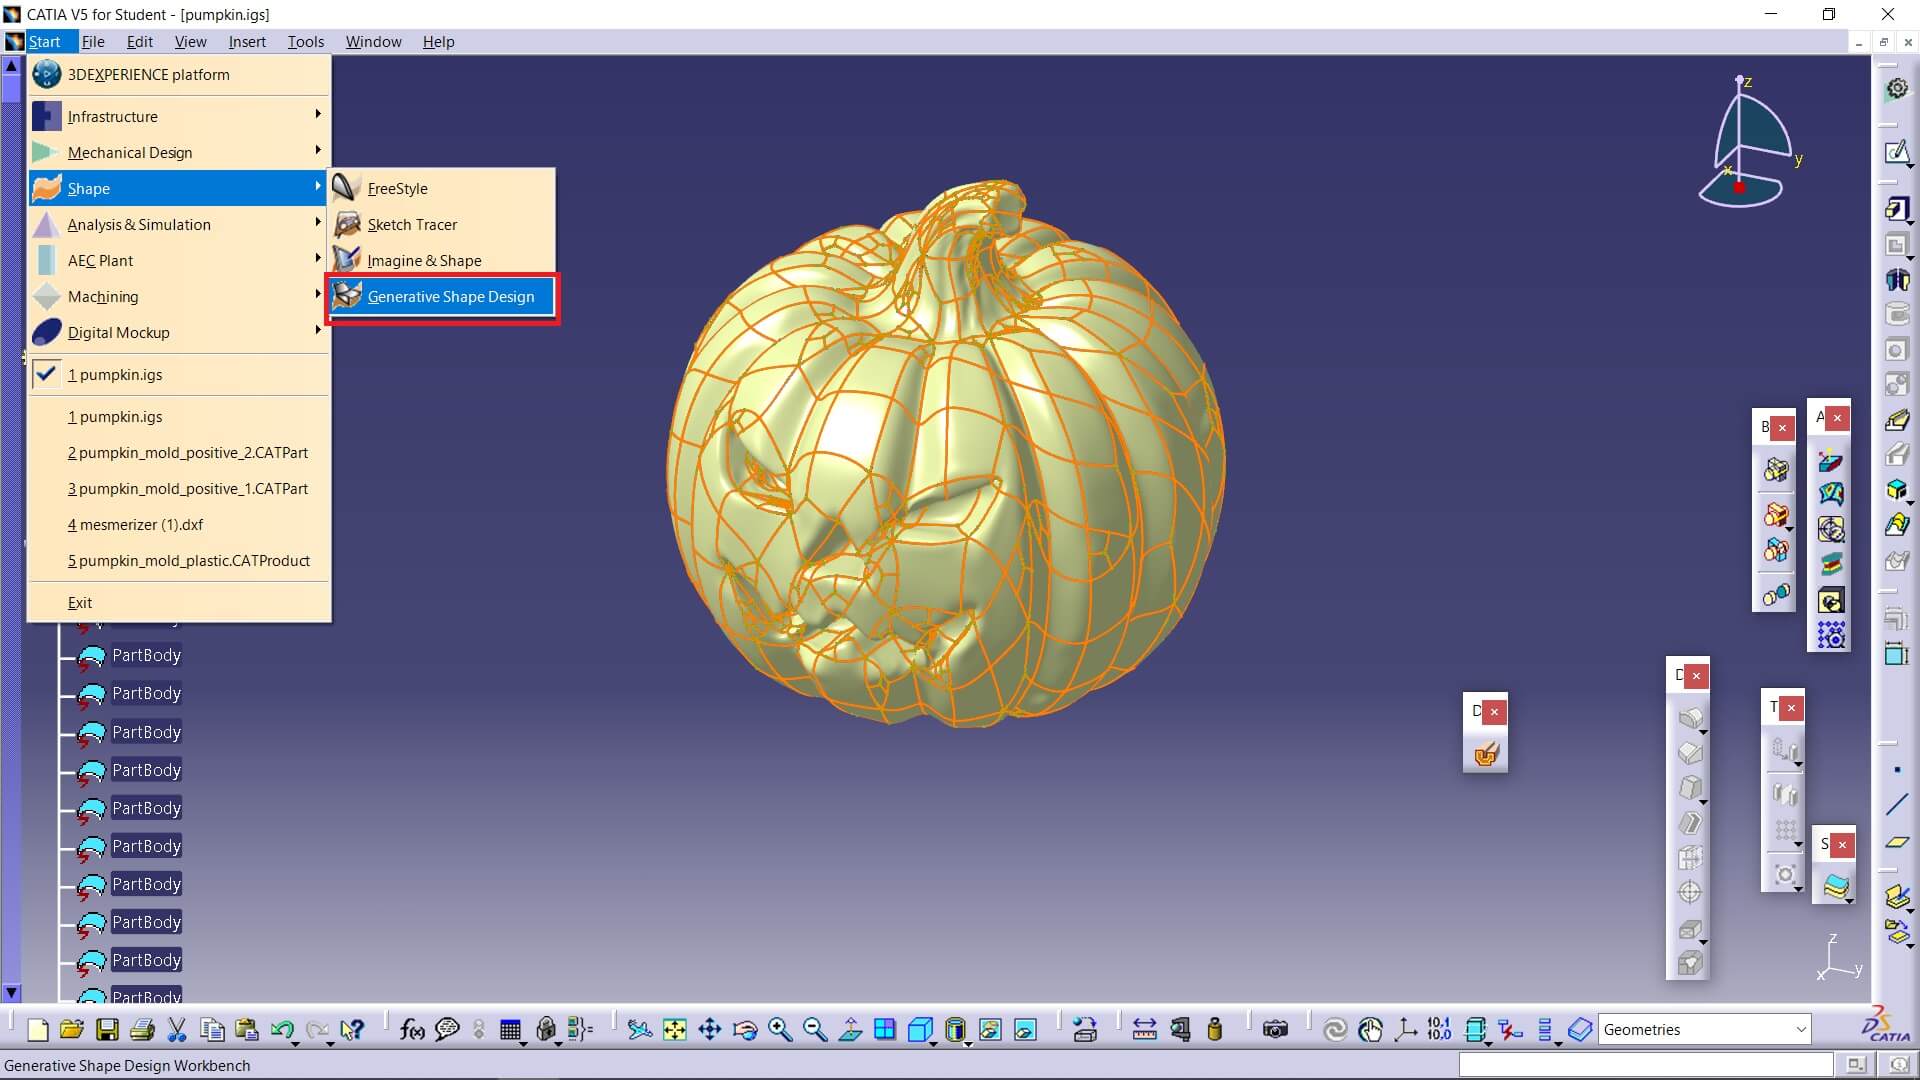
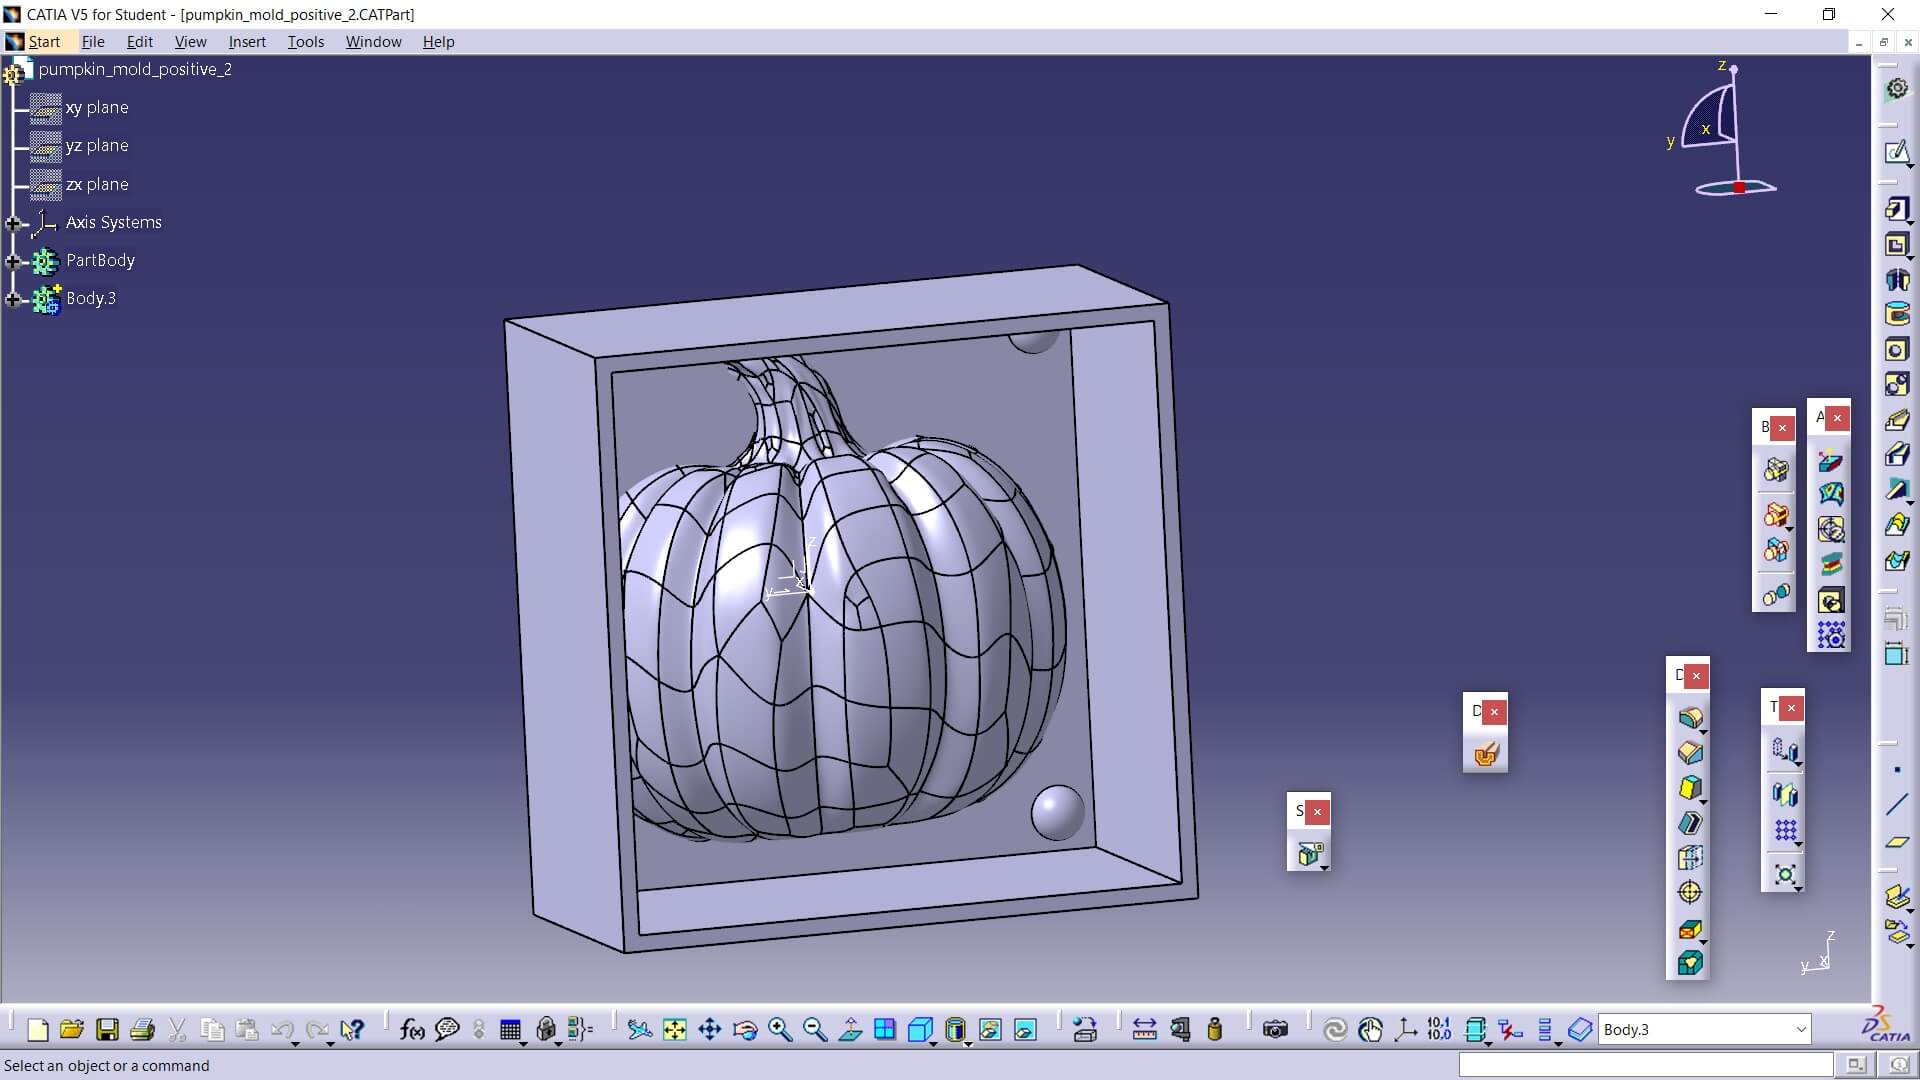
Import the IGS file into Catia
Open “Generative Shape Design”
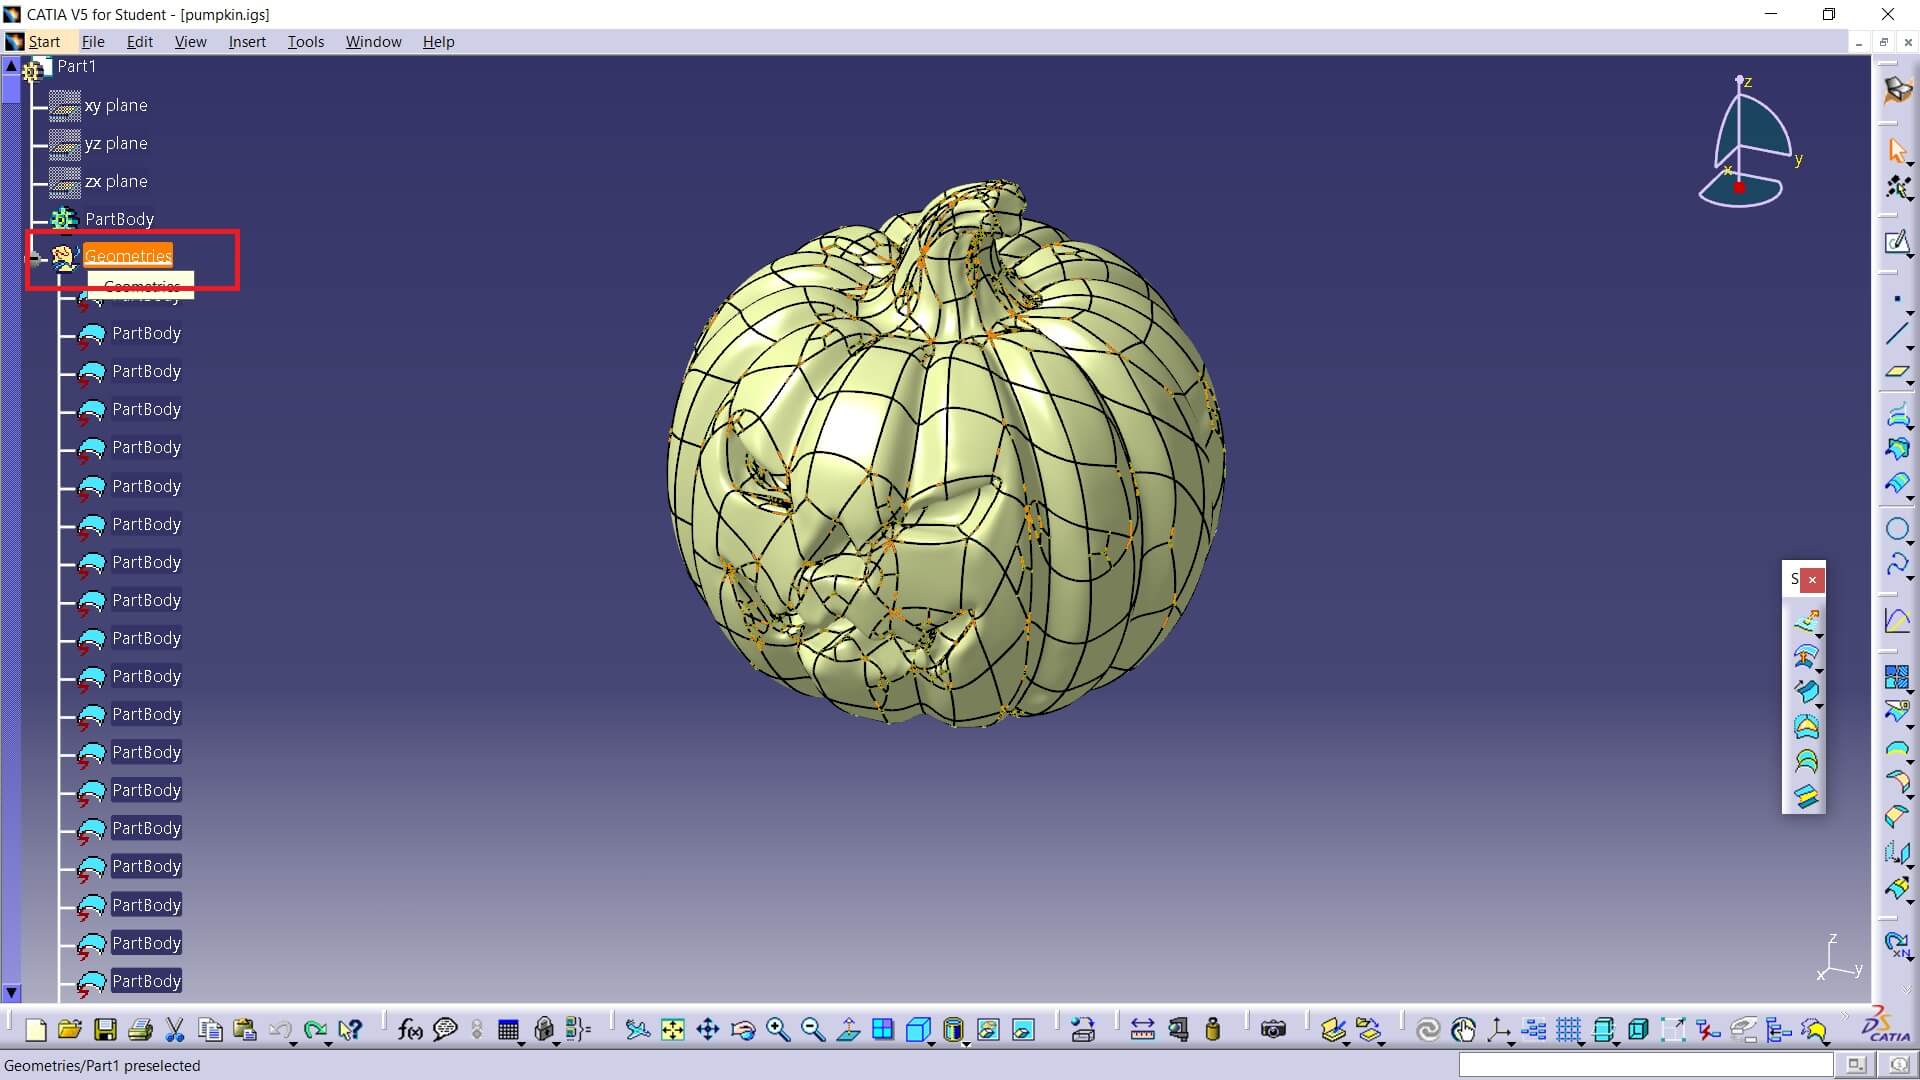
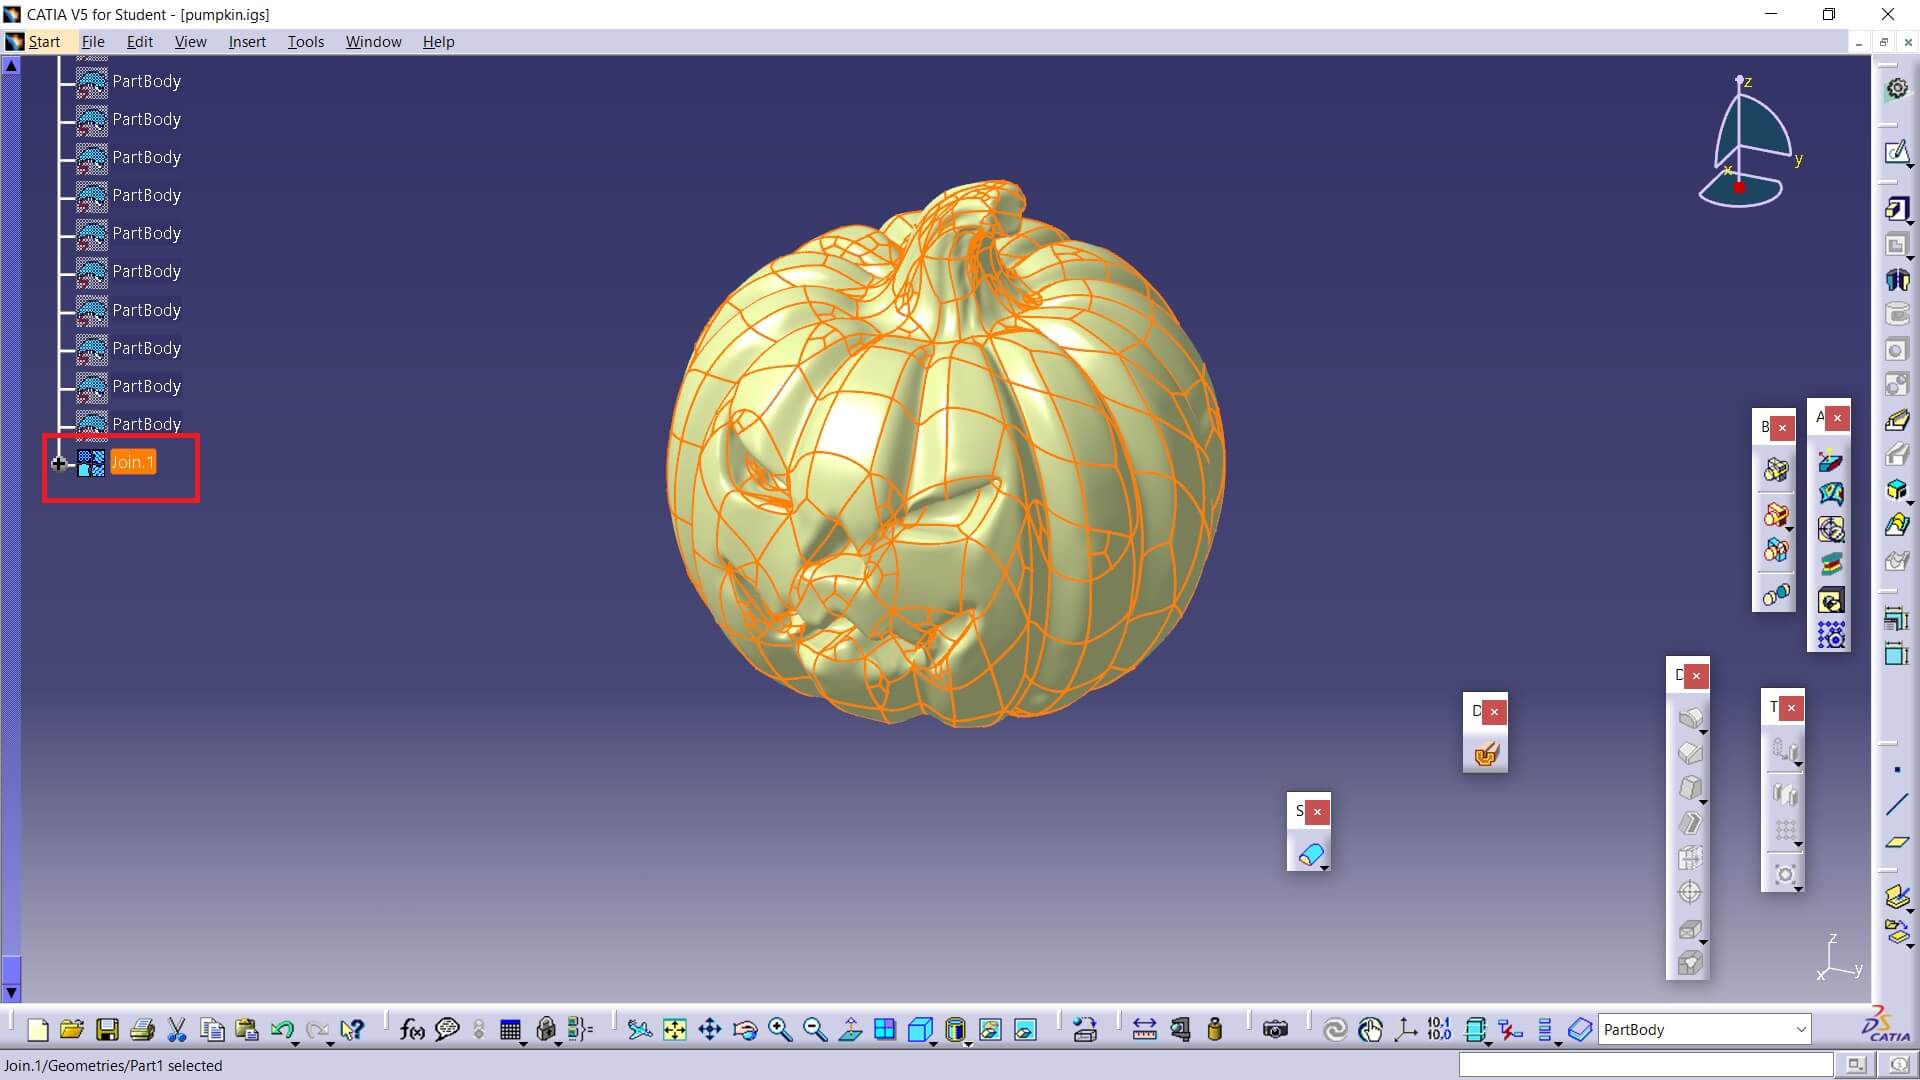
Select the existing planes by only touching “geometries”
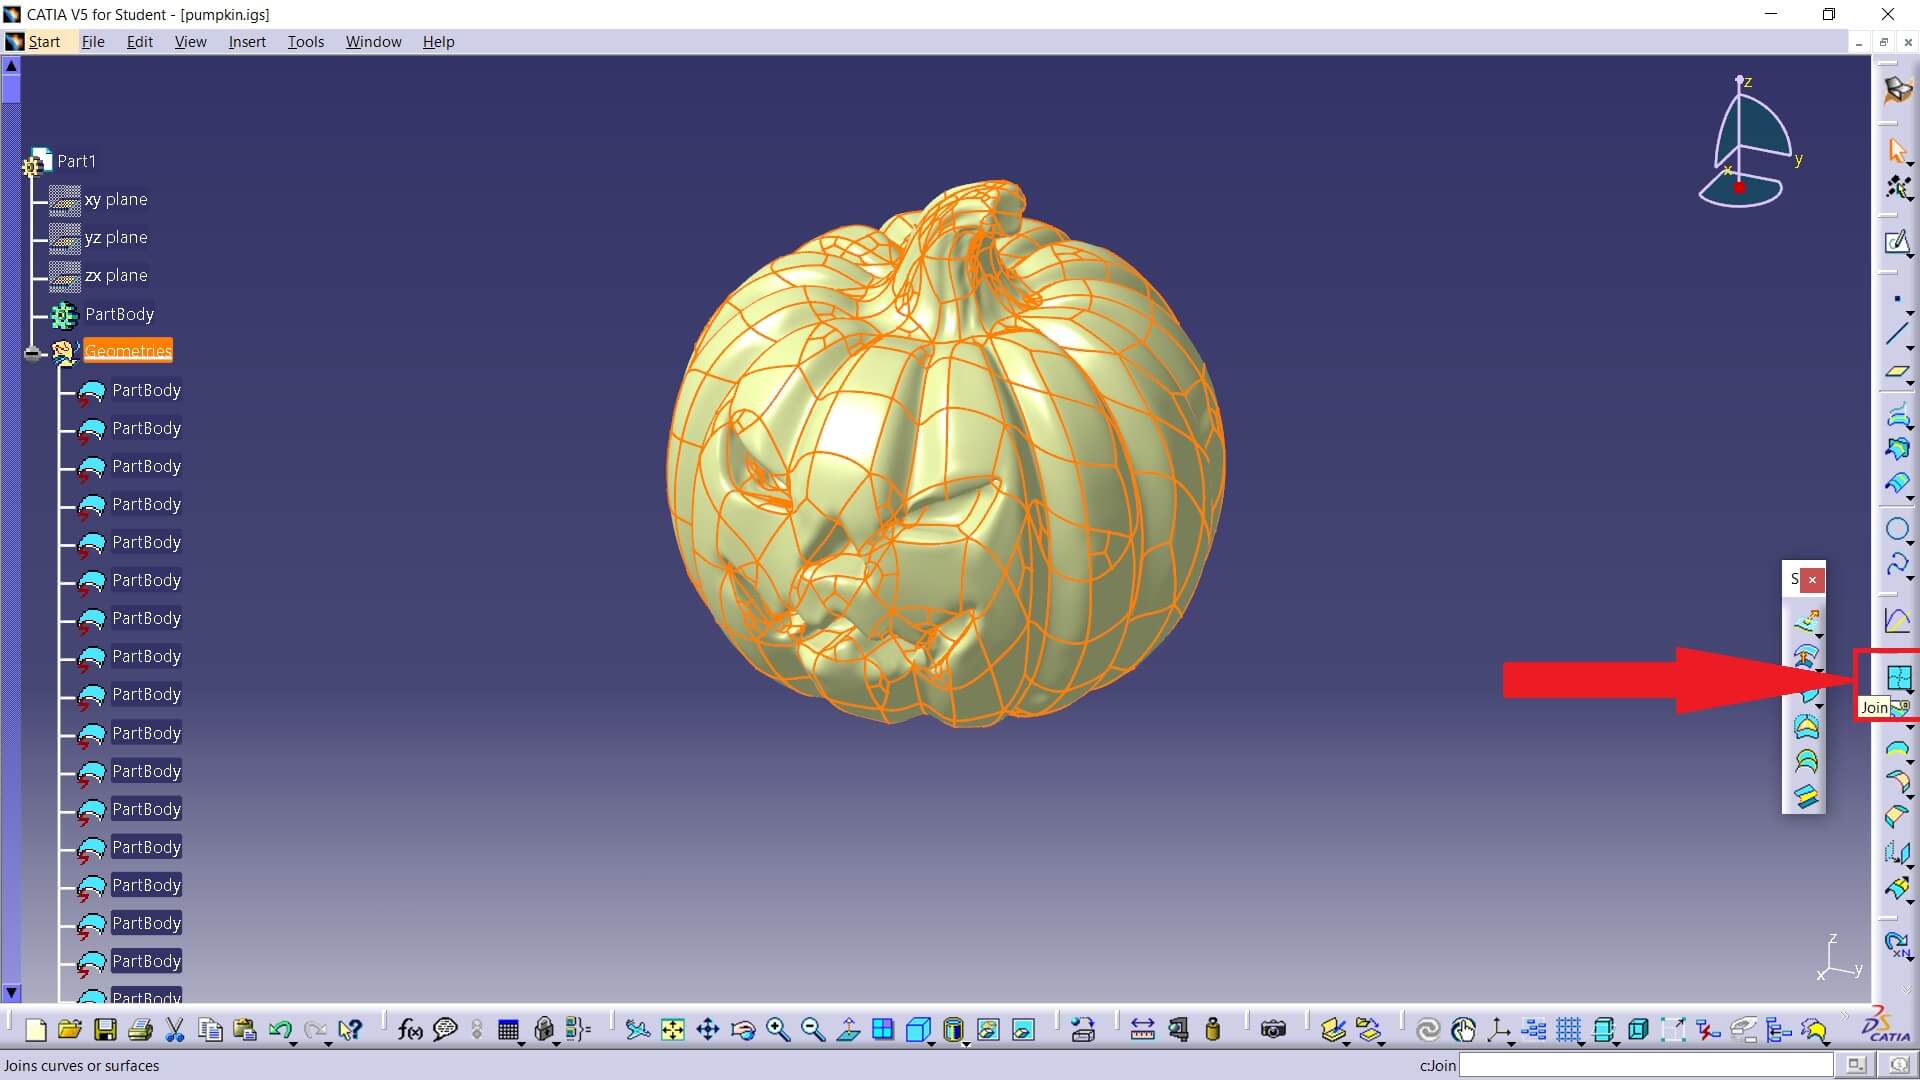
Use the “Join” tool to unify all the planes
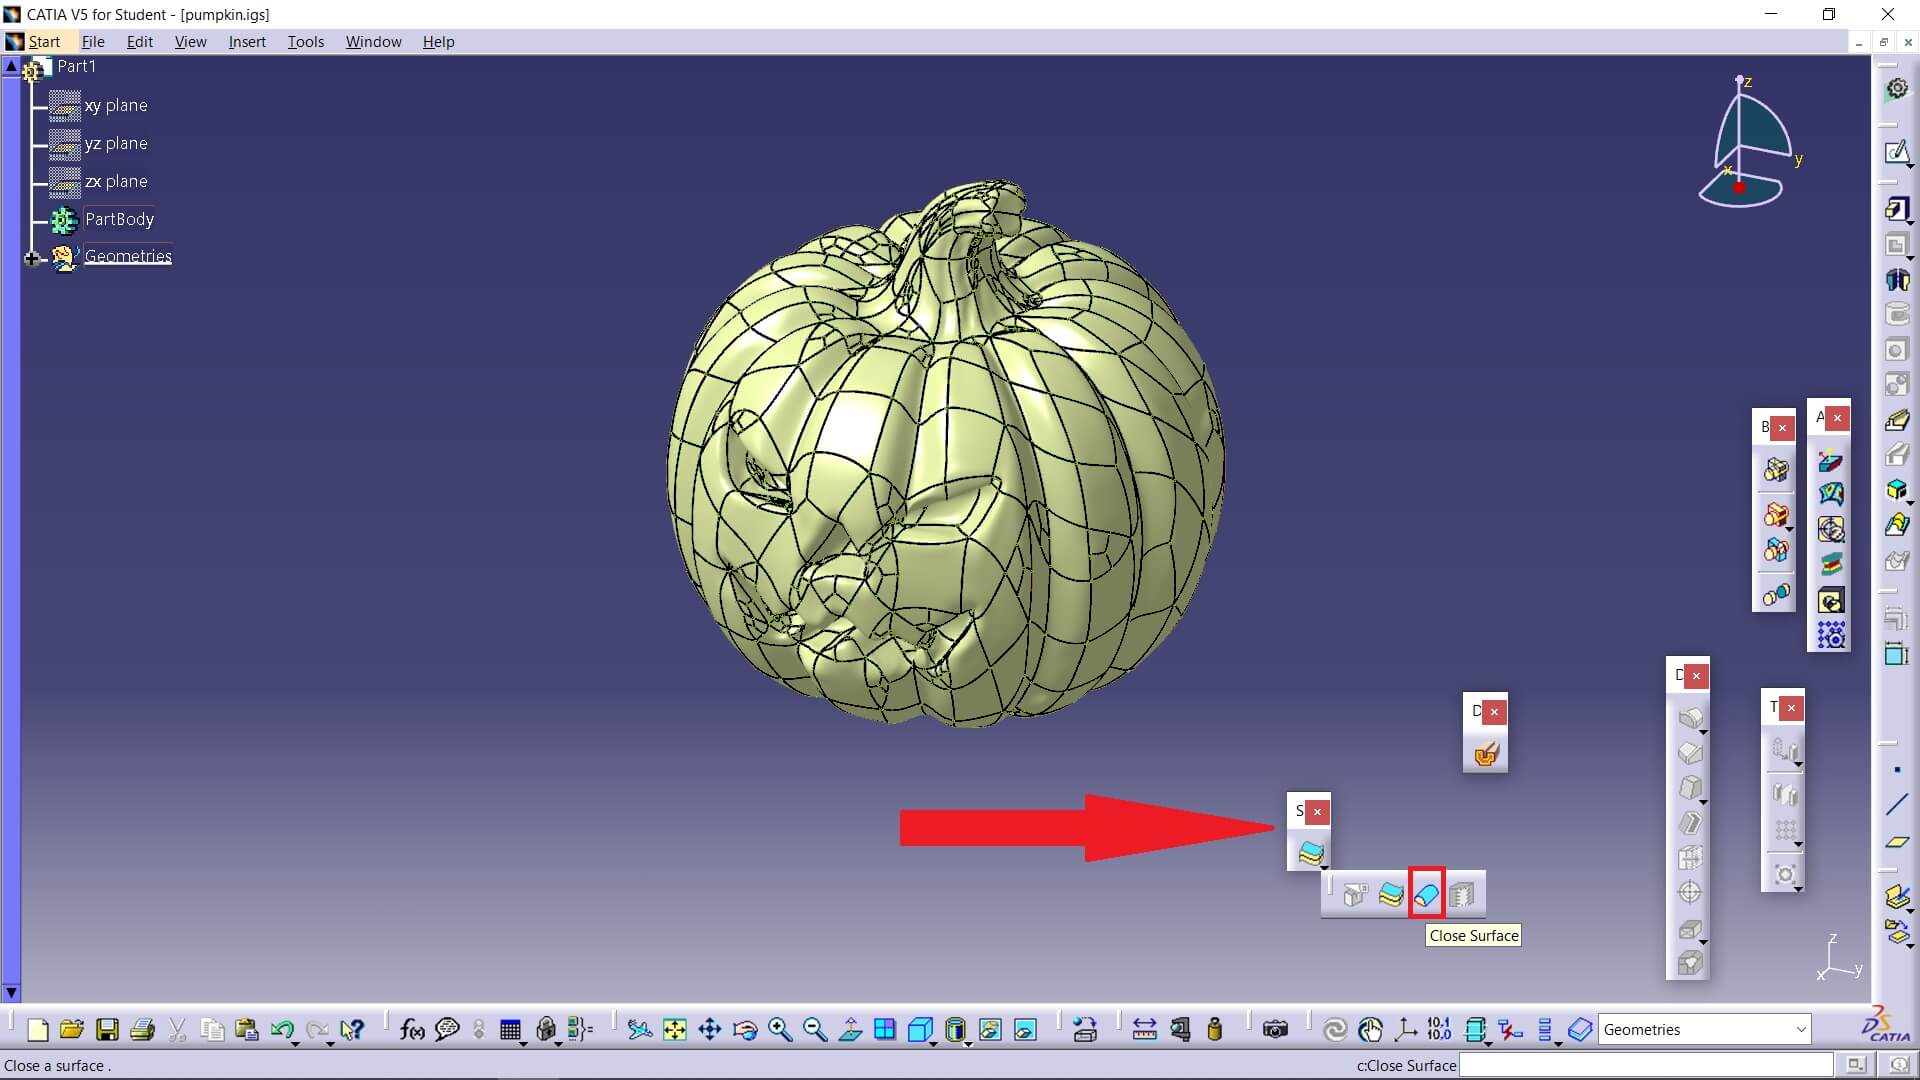
Return to Part Design
Select the created Join
And use the “Close Surface” tool to make it solid
Then we hide the planes to verify that the solid has indeed been created
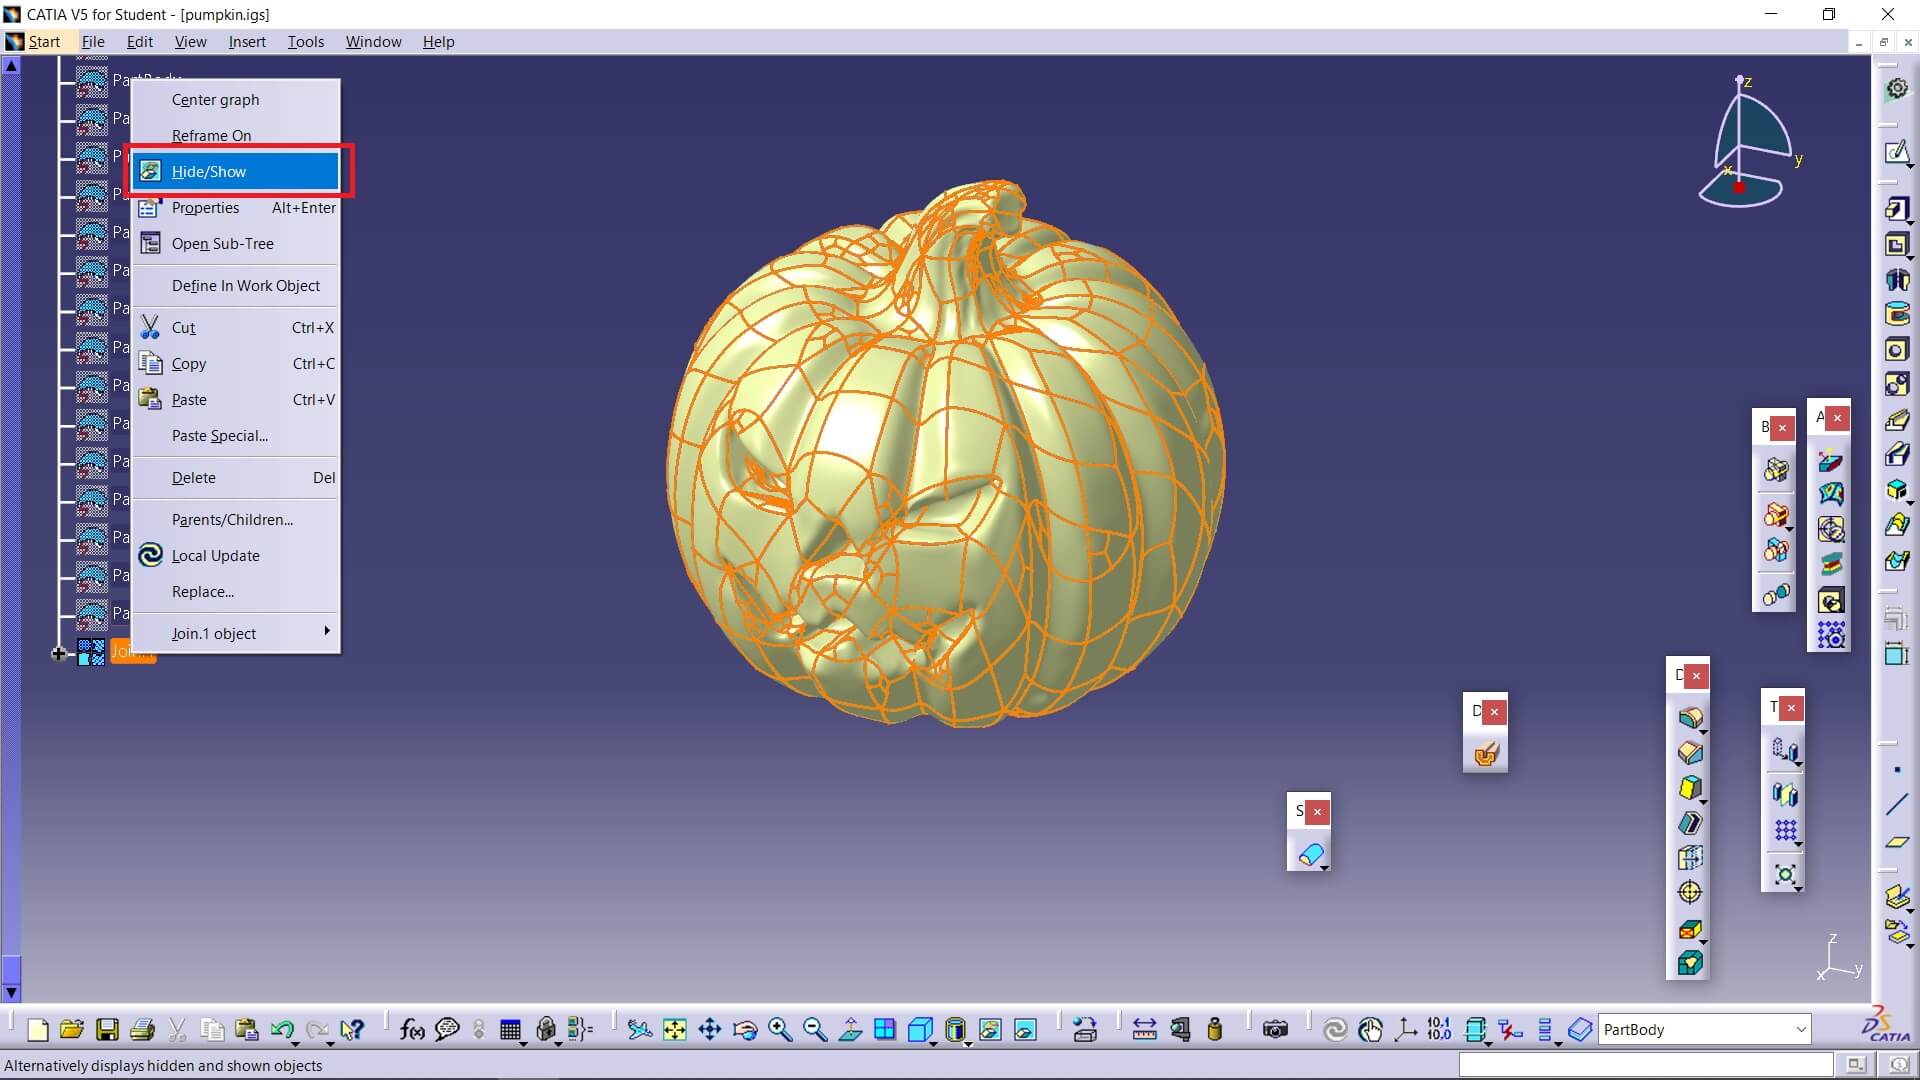
Indeed, it has been created

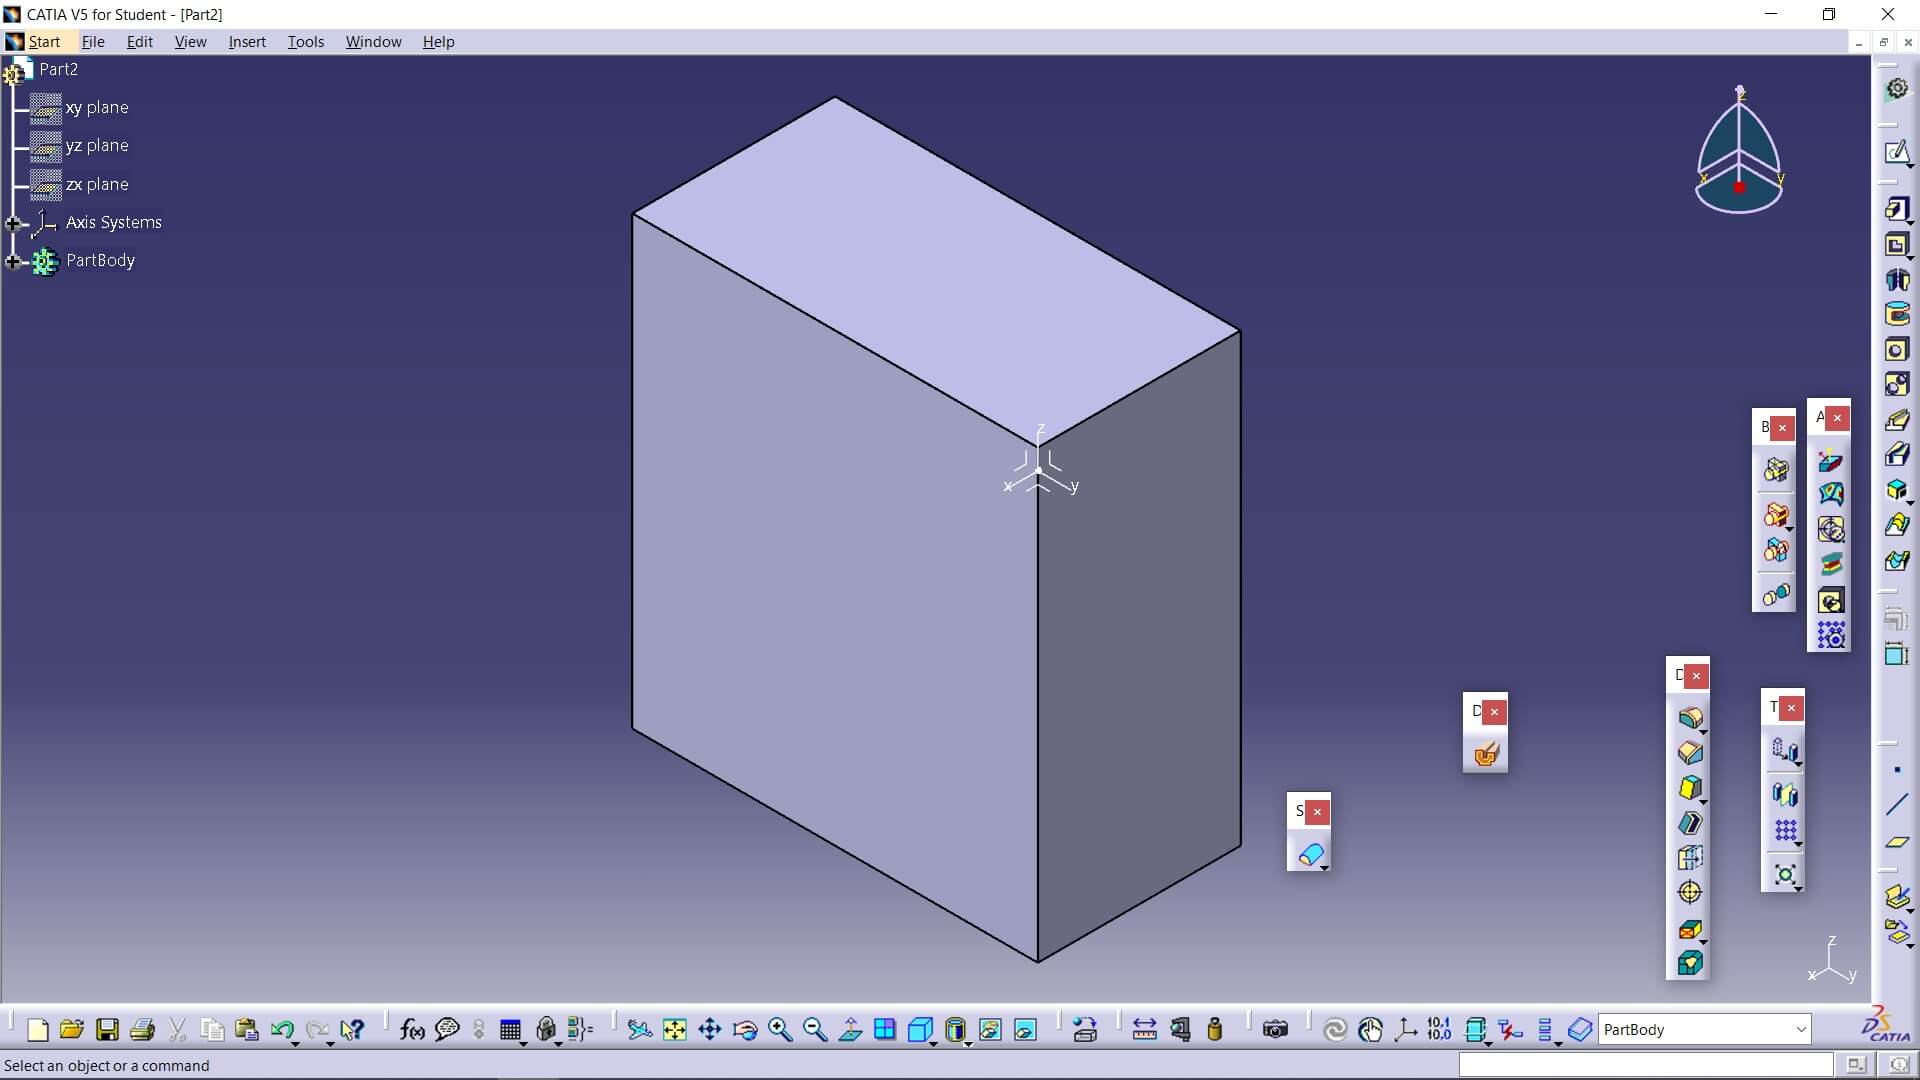
Then we open a new file and make our block according to the coordinates arrangement of the solid in the previously created file
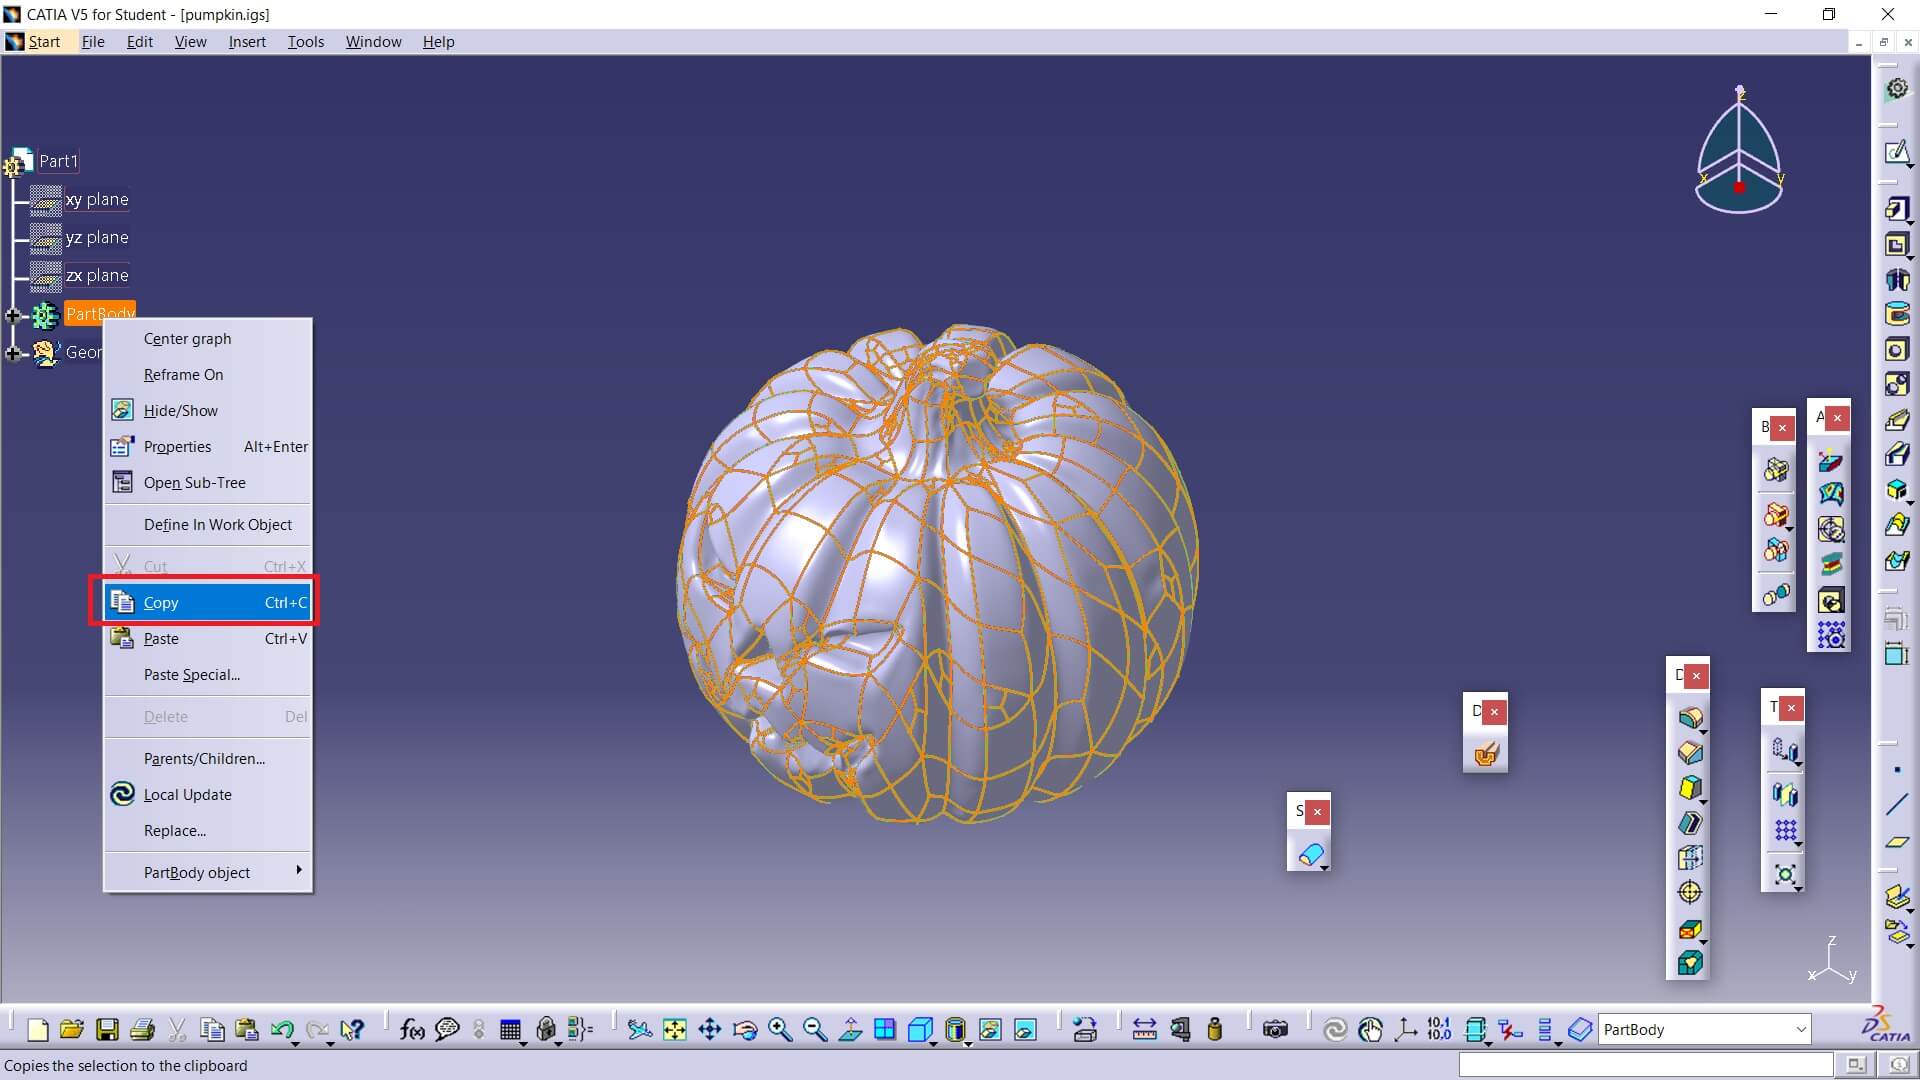
Now we return to our figure and by selecting the complete body, we copy it
We return again to the file where we have the block and by selecting the body, we choose the option “paste special...”
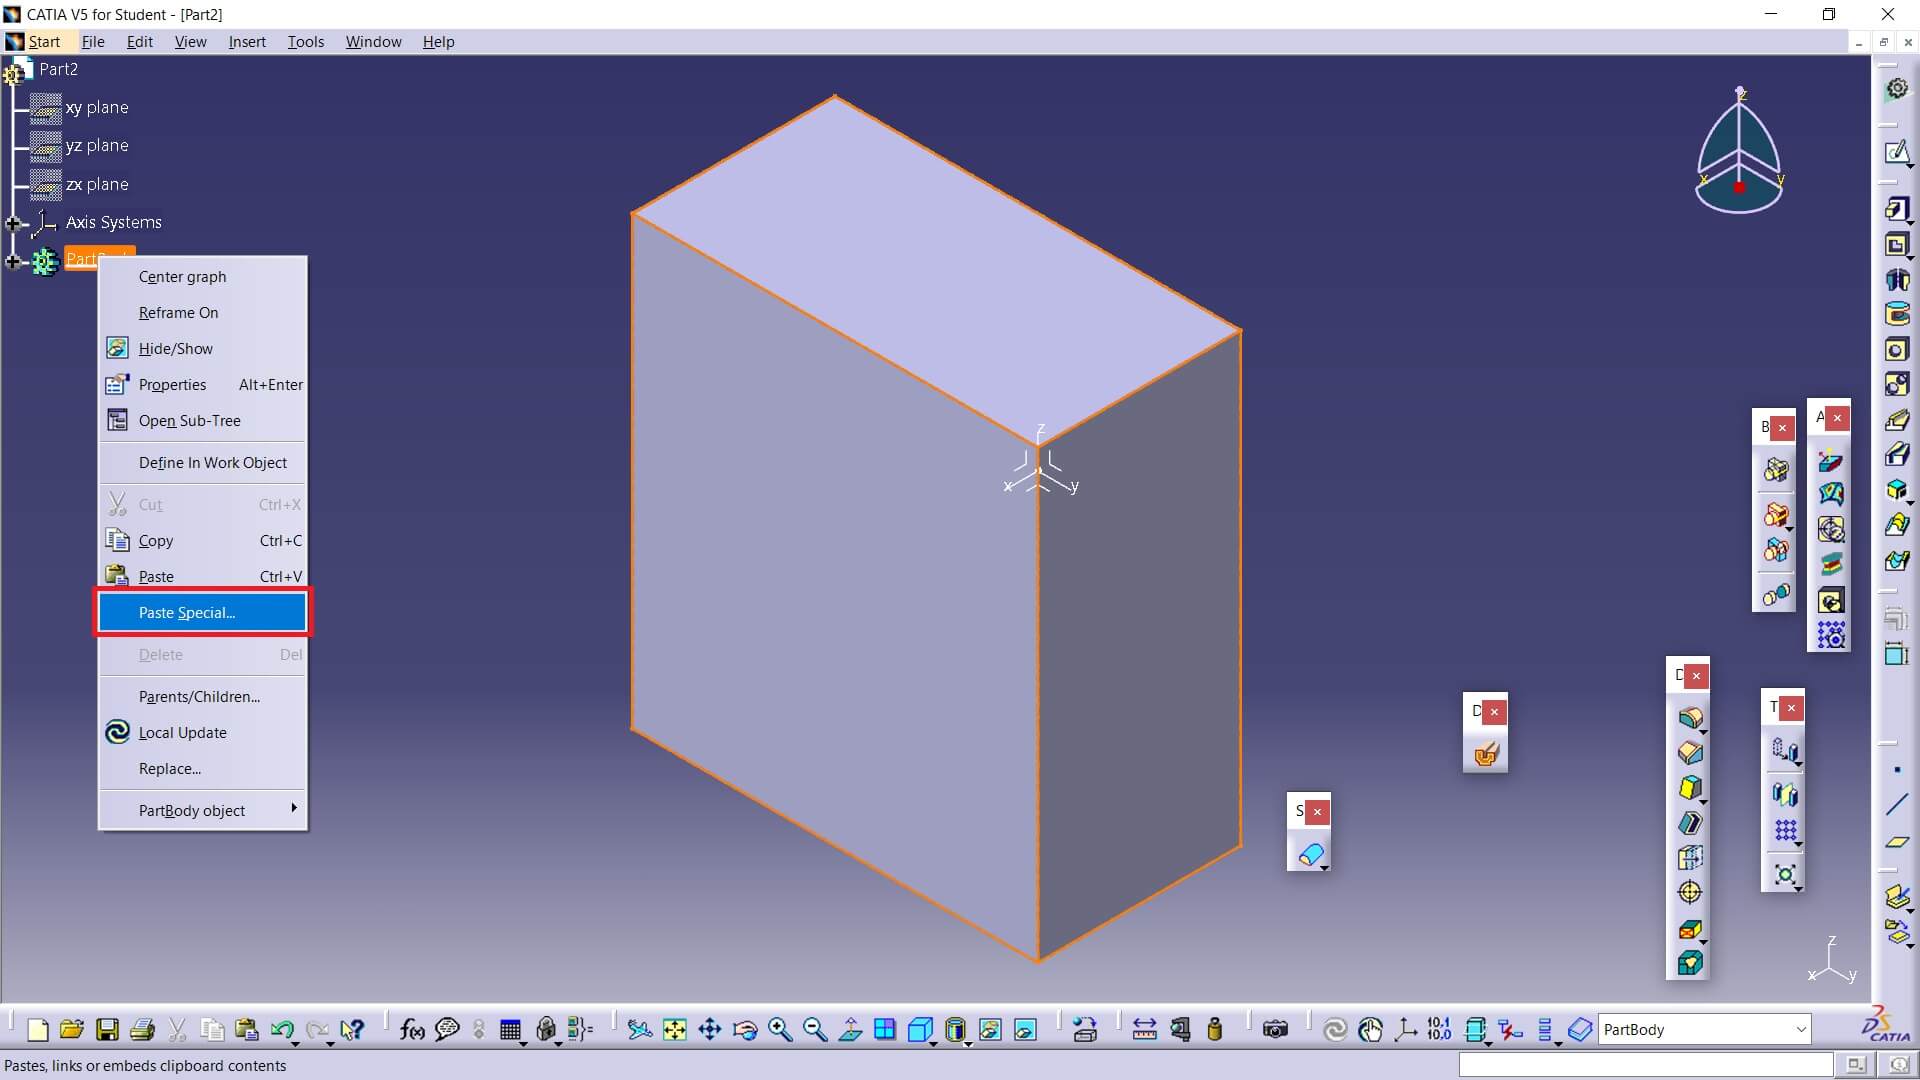
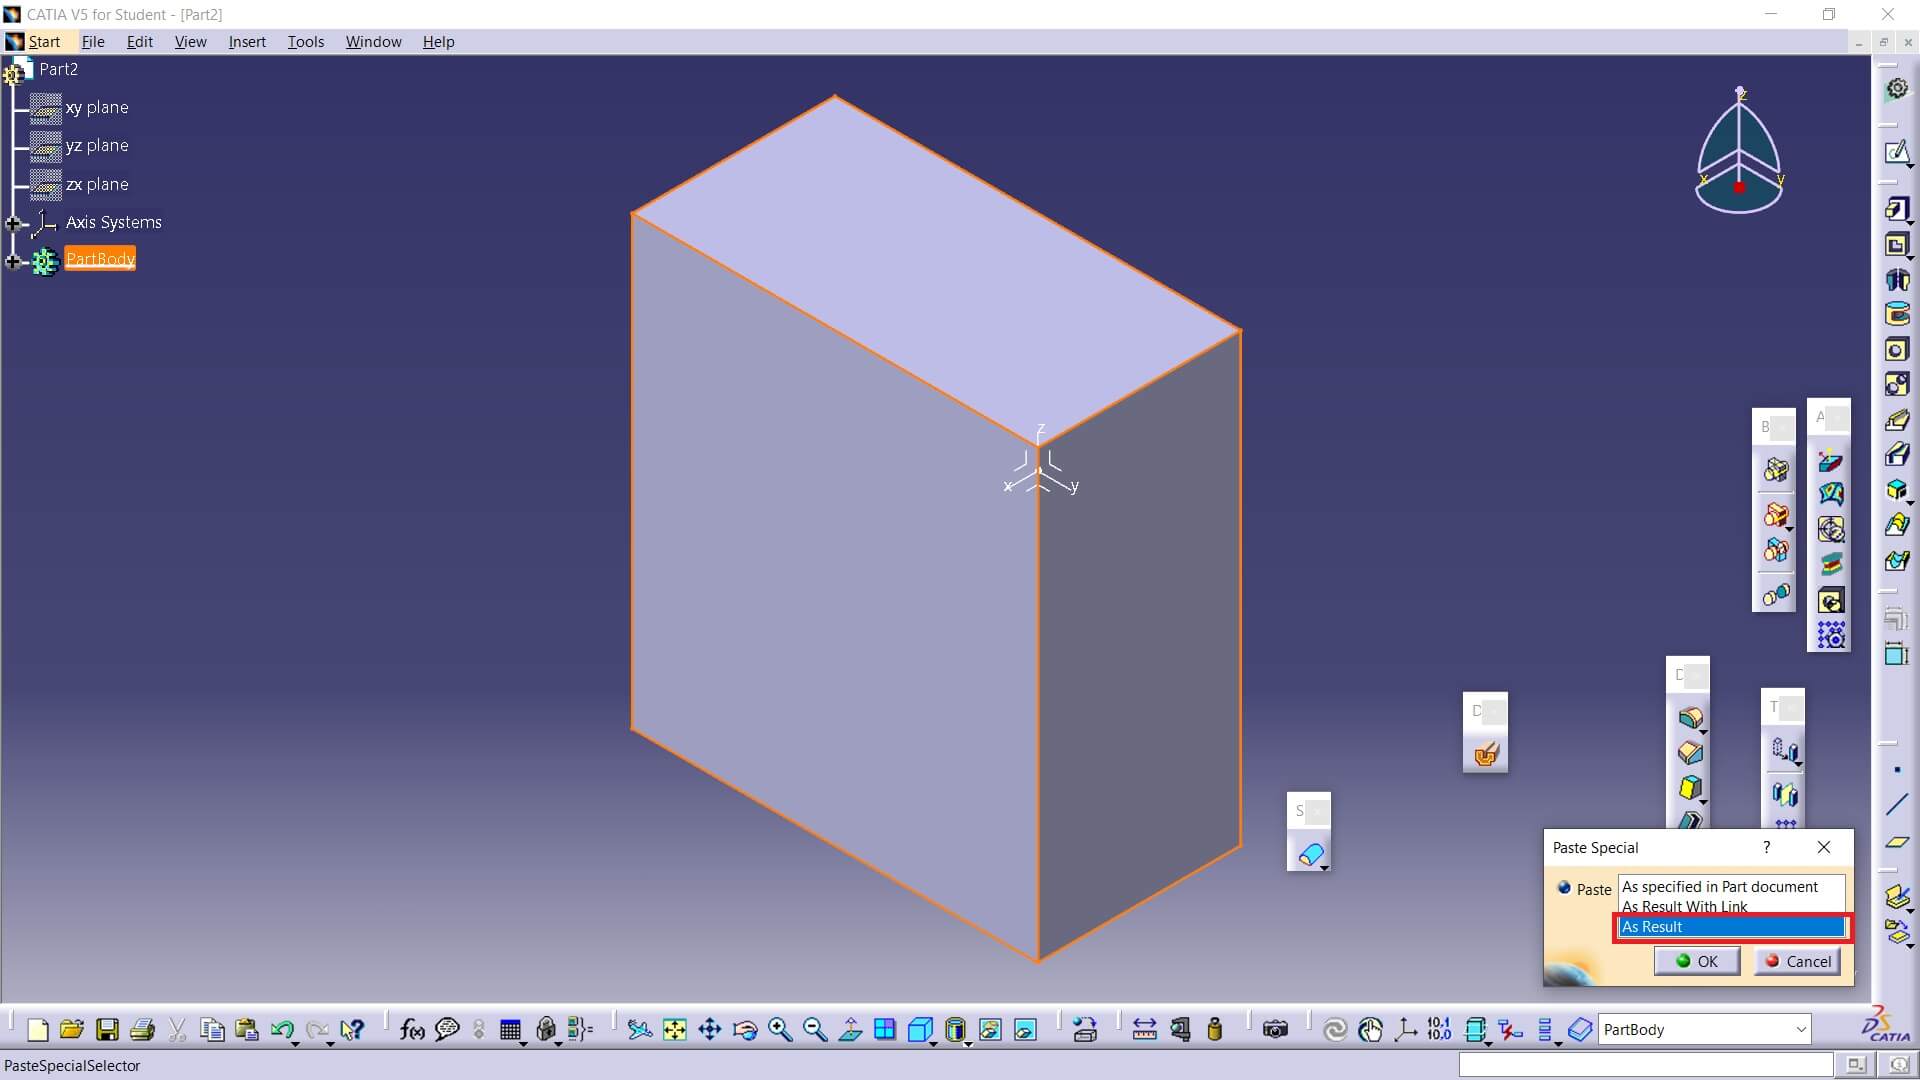
Another dialog box will appear offering us 3 options to paste, we will use “as result”, in this way, if we modify the file where we transformed the IGS file to solid, the files created from that will not be modified.
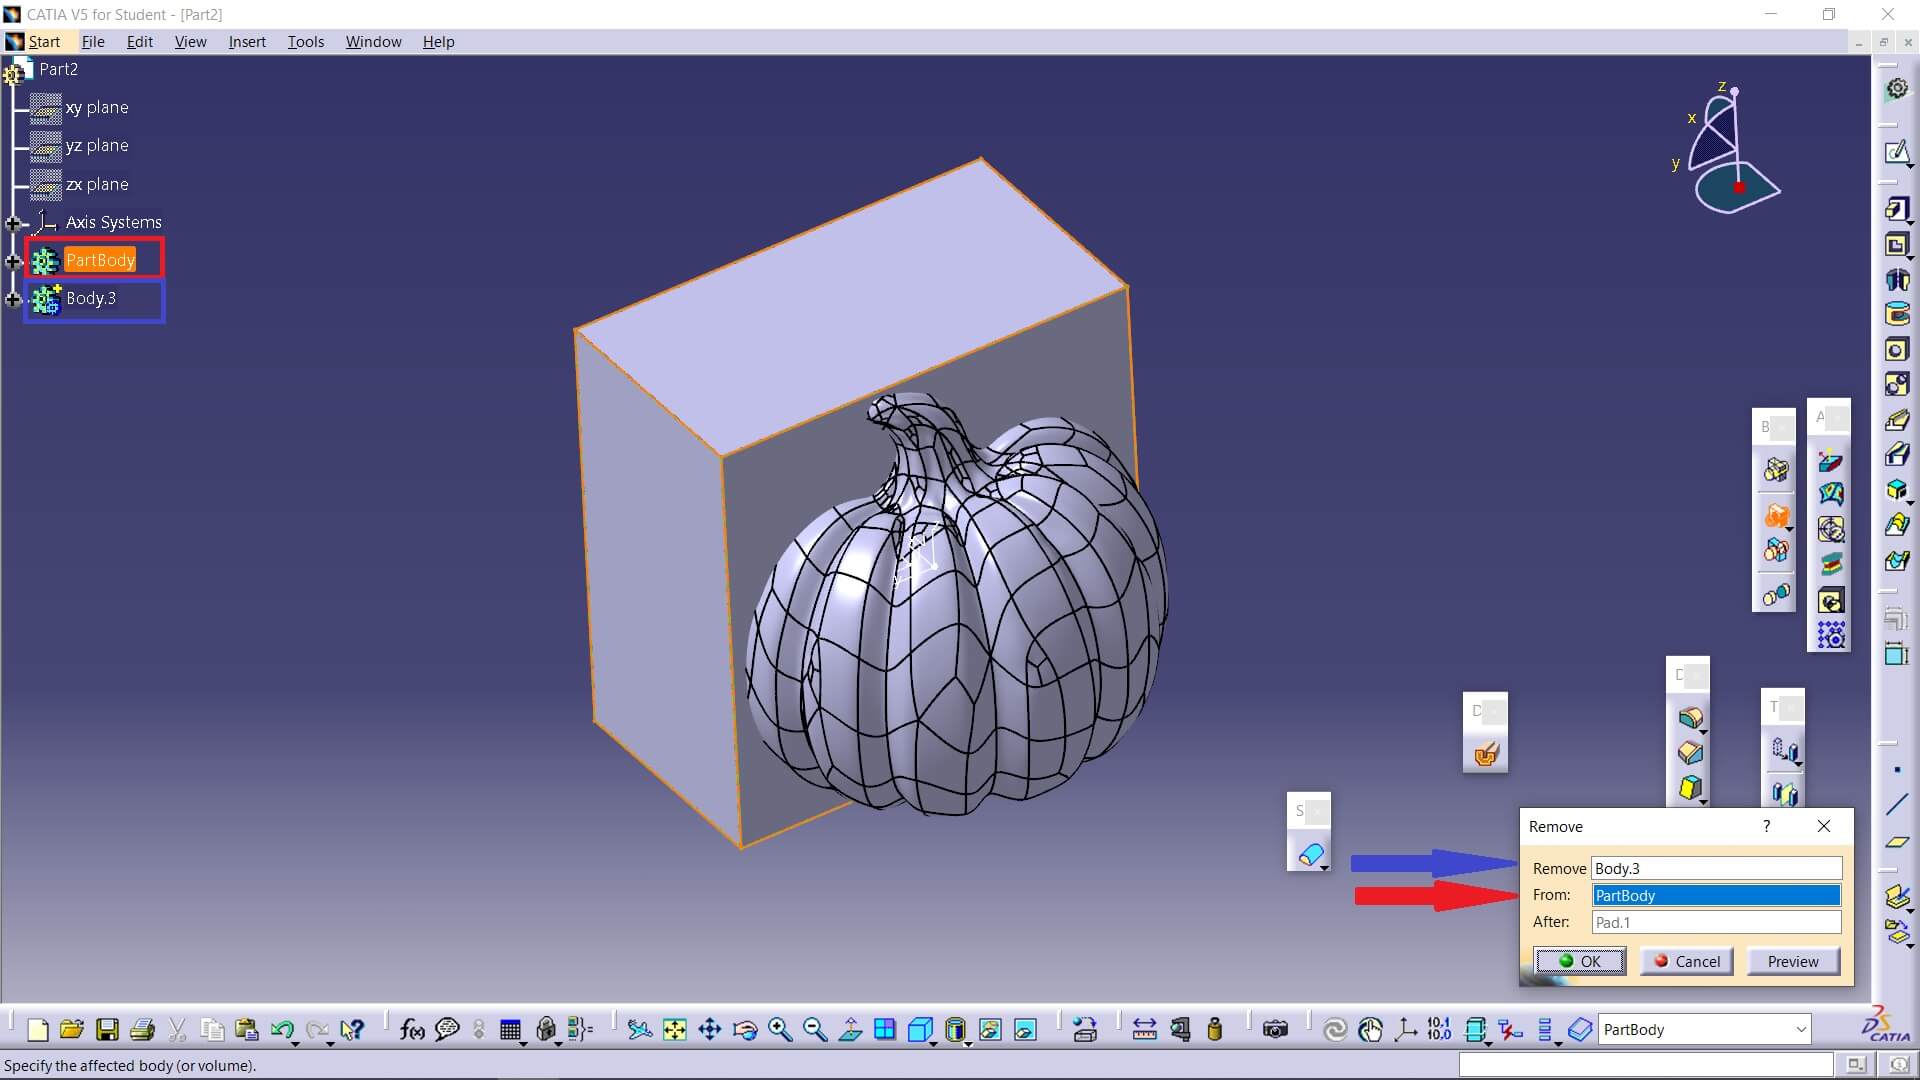
Now we will use the “remove” tool
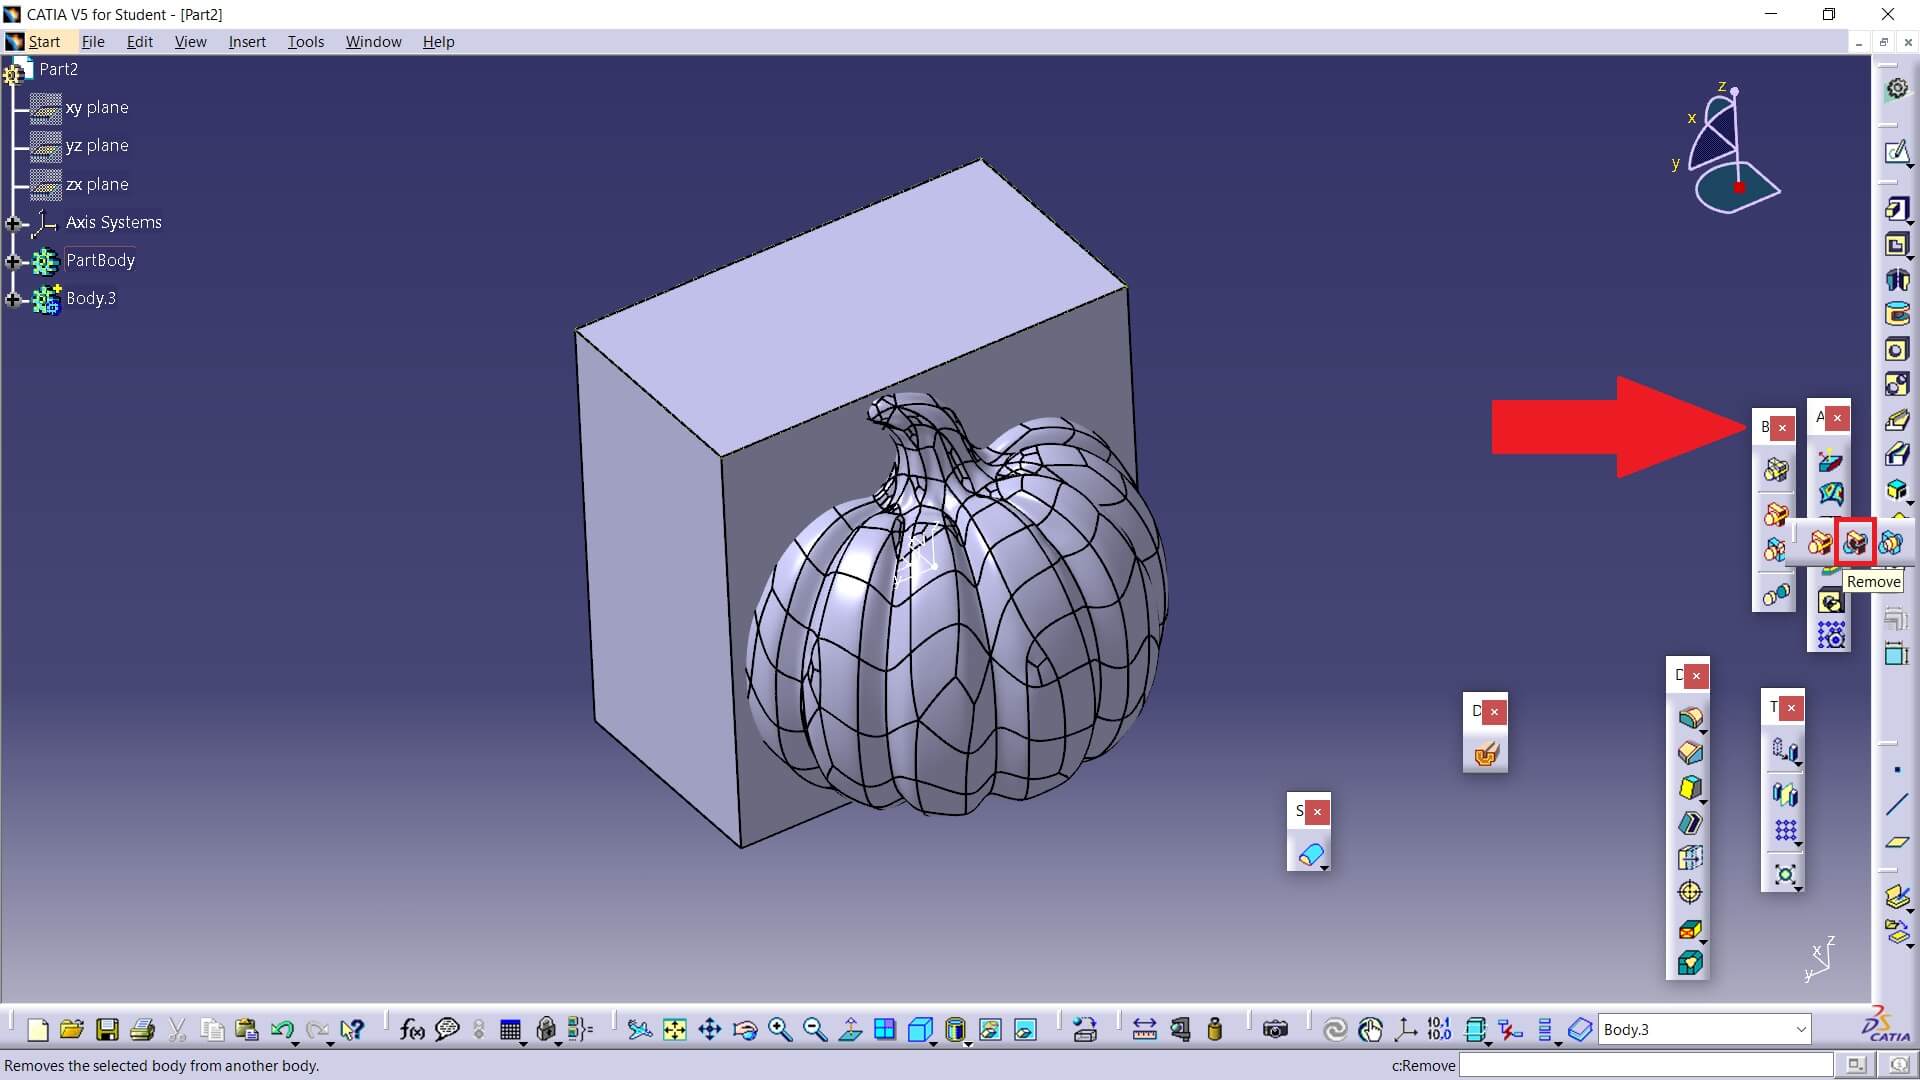
In this case we will remove “body.3” (the pumpkin) from “PartBody” (the block)
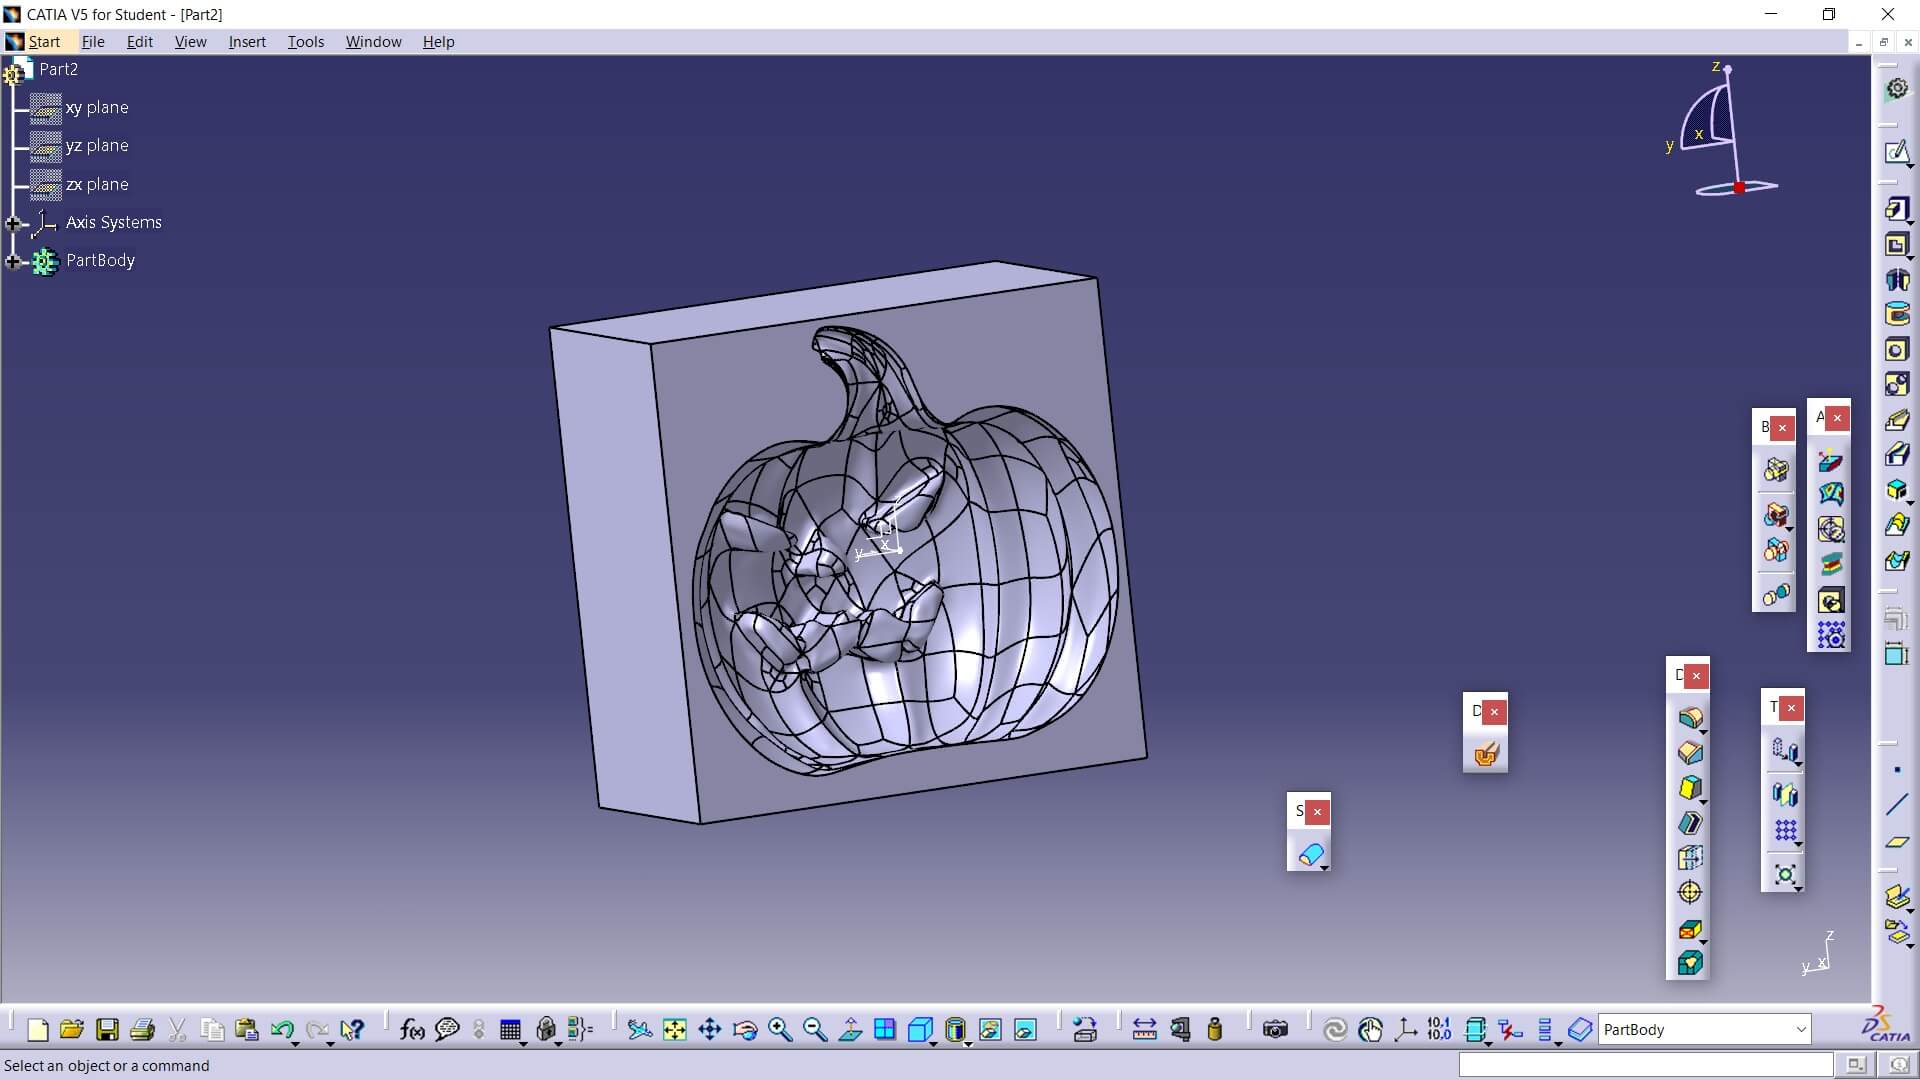
This is how it looks after the operation
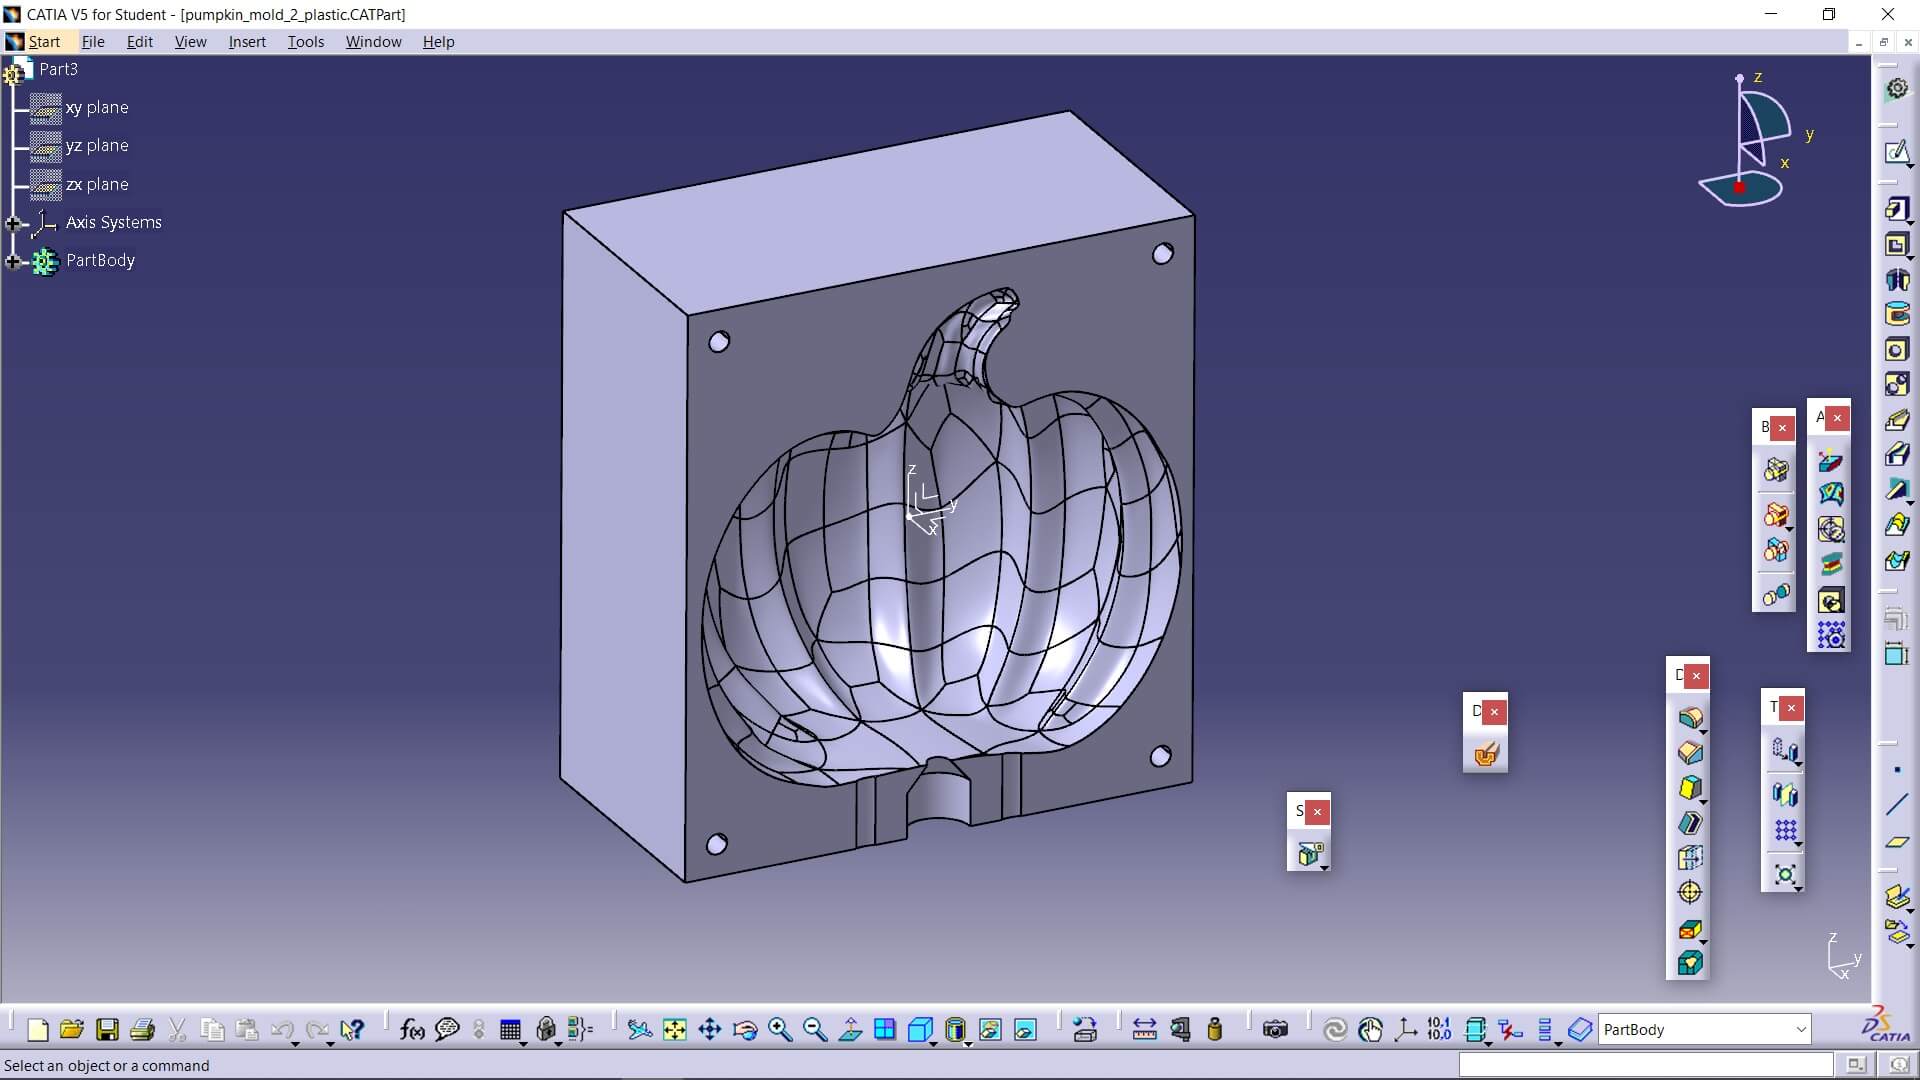
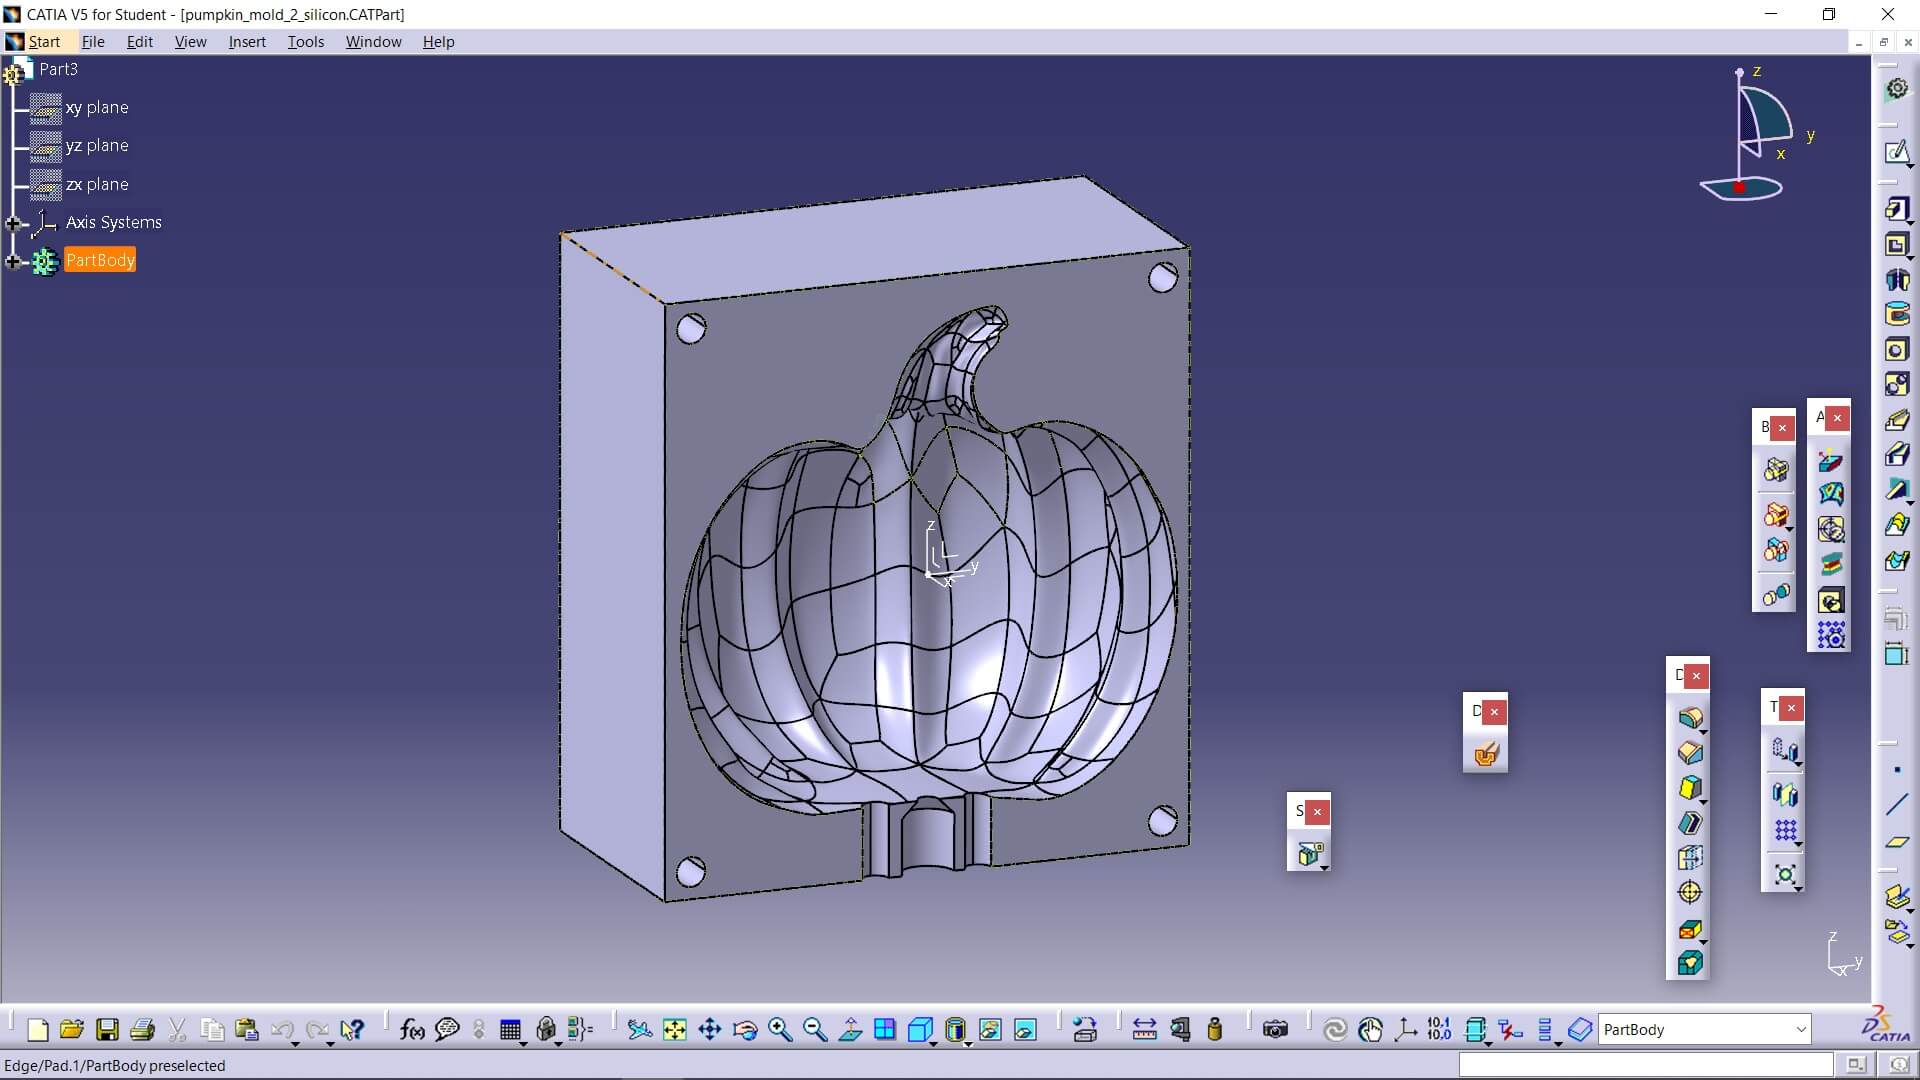
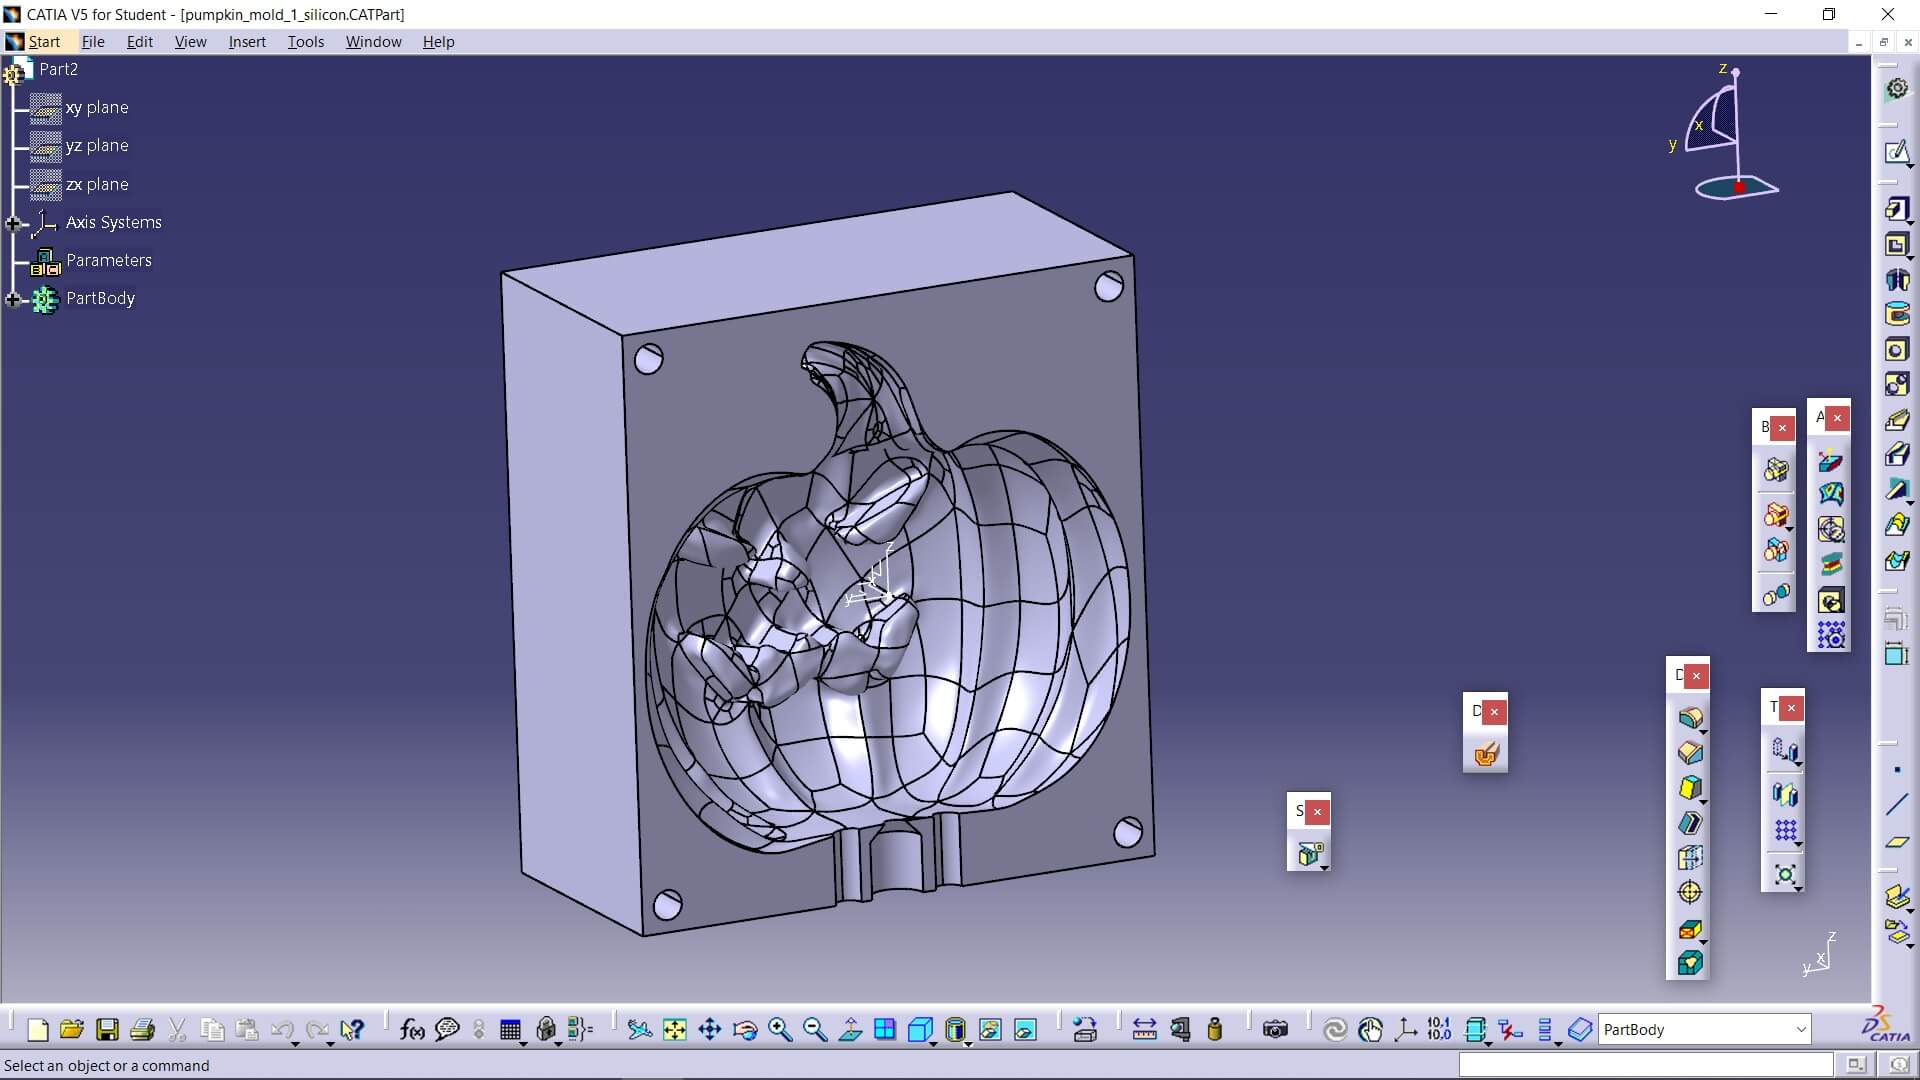
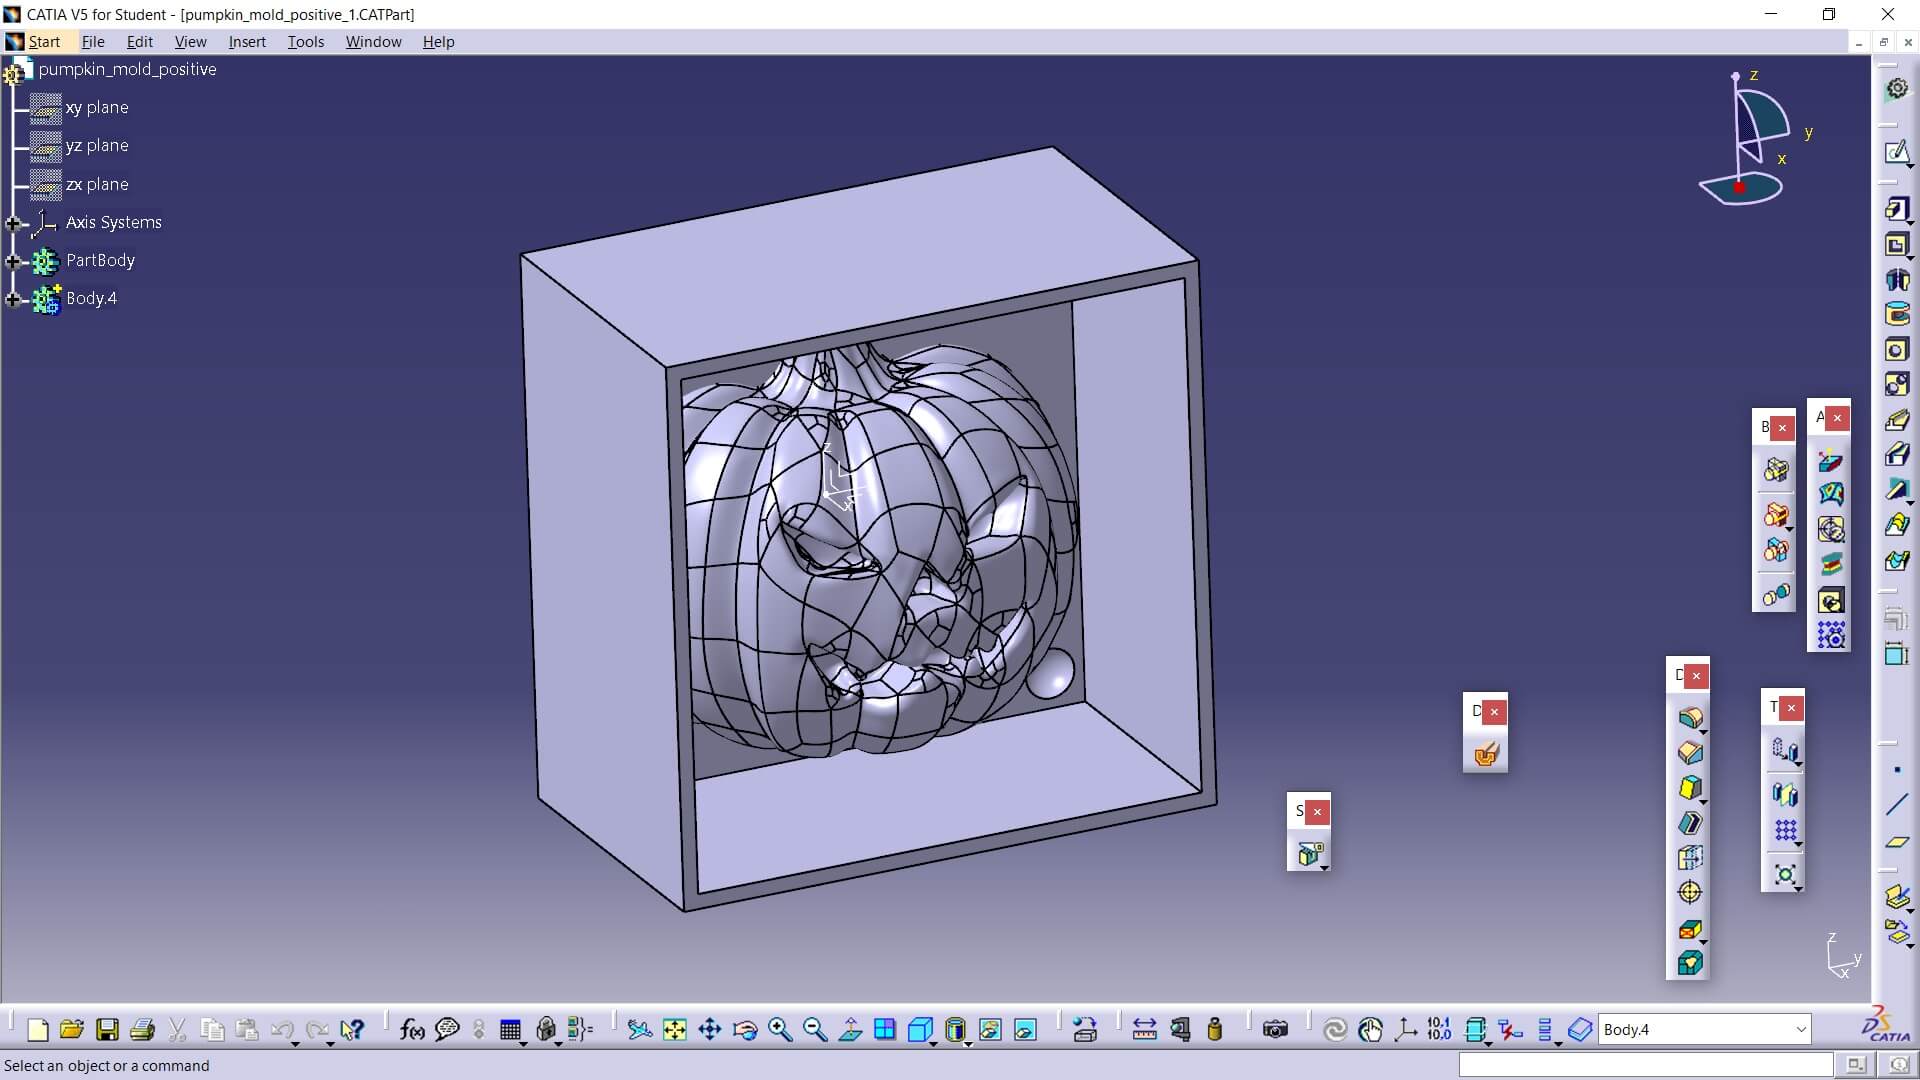
Then I made some relevant modifications since it is intended to be used for plastic
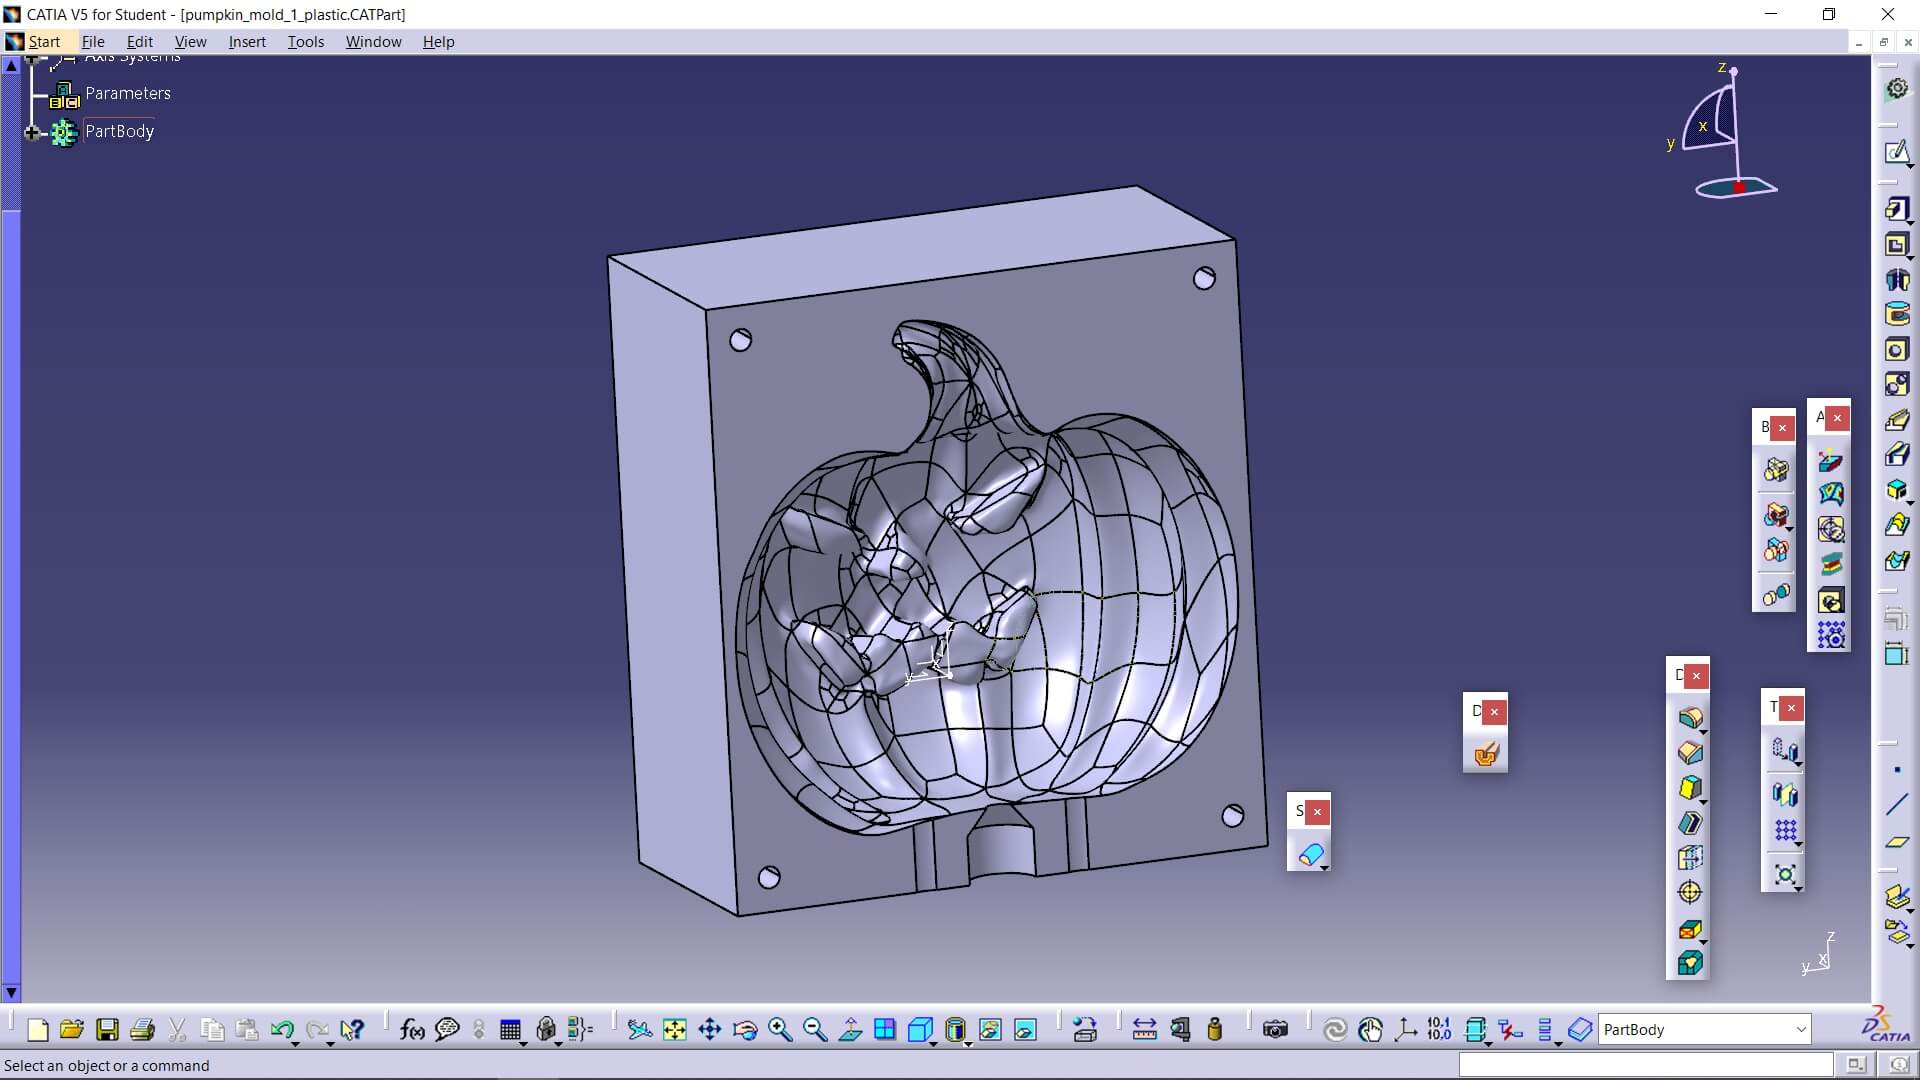
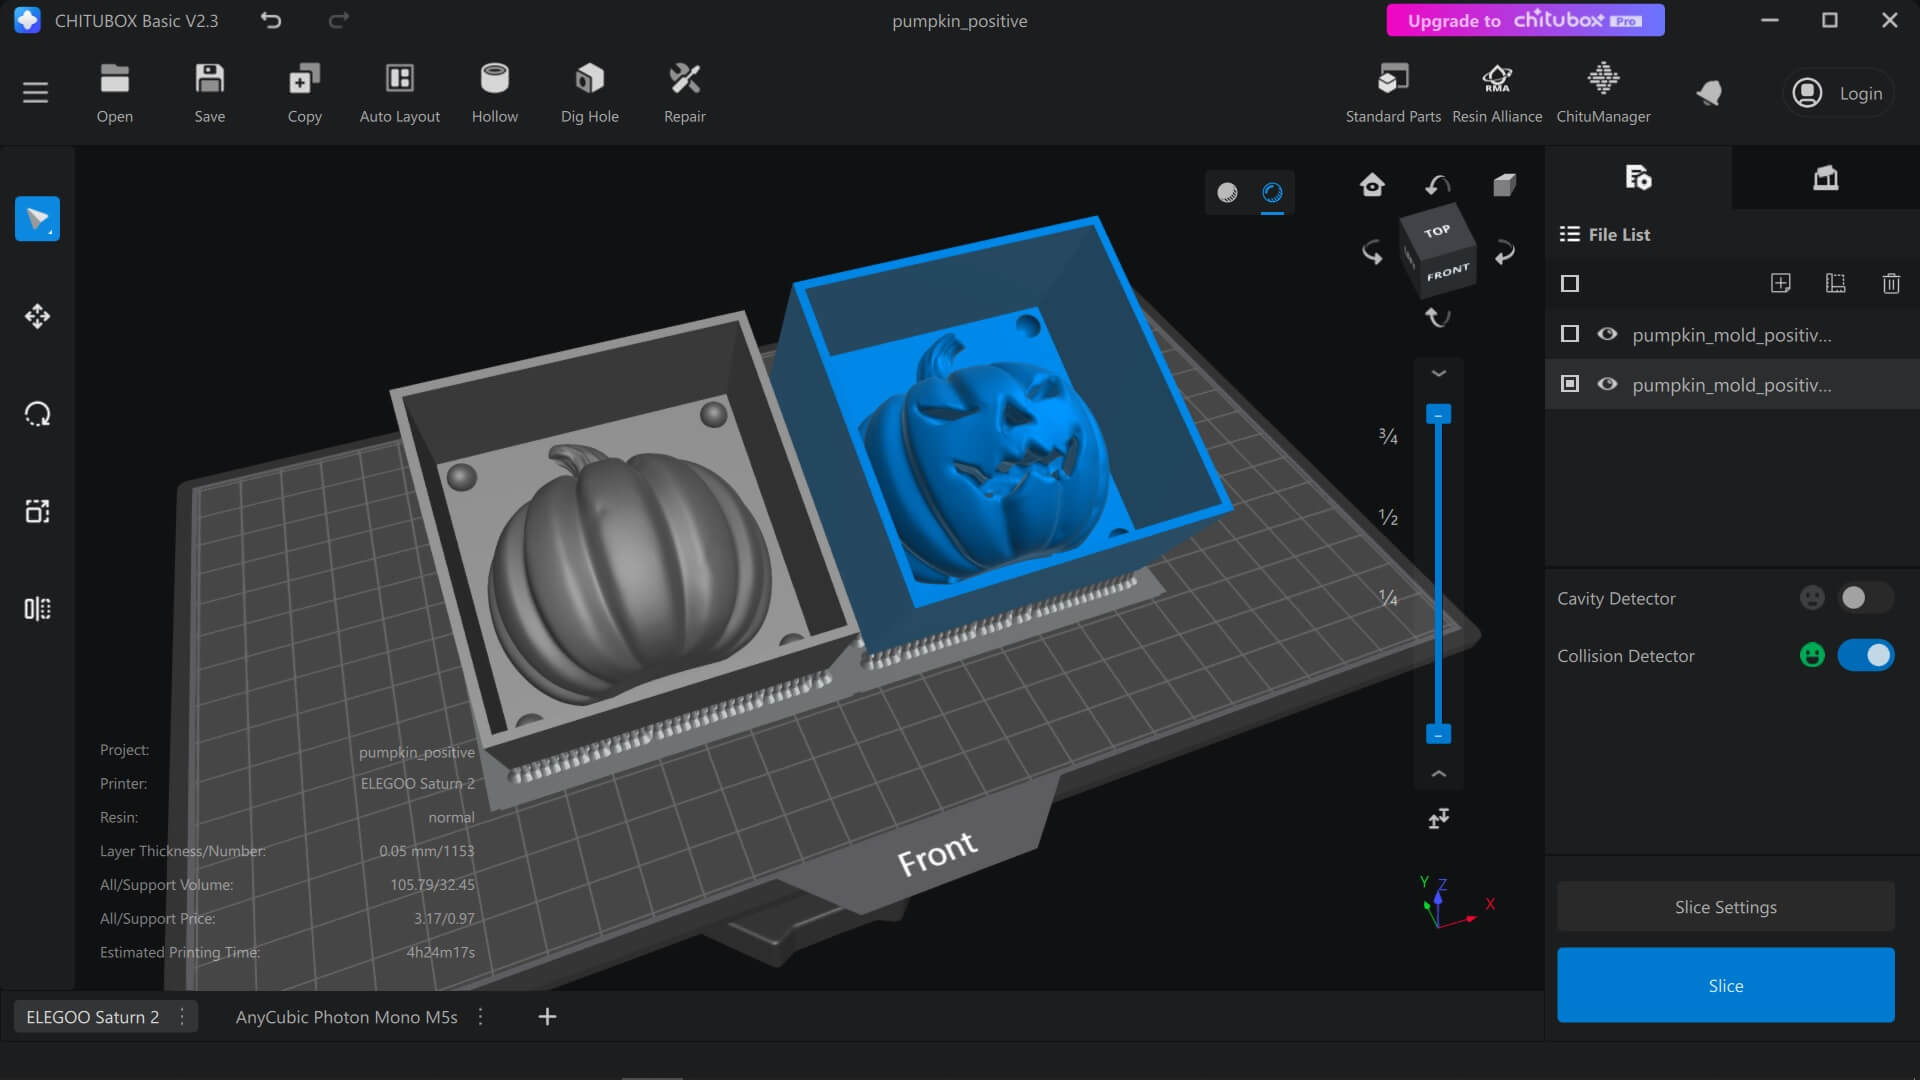
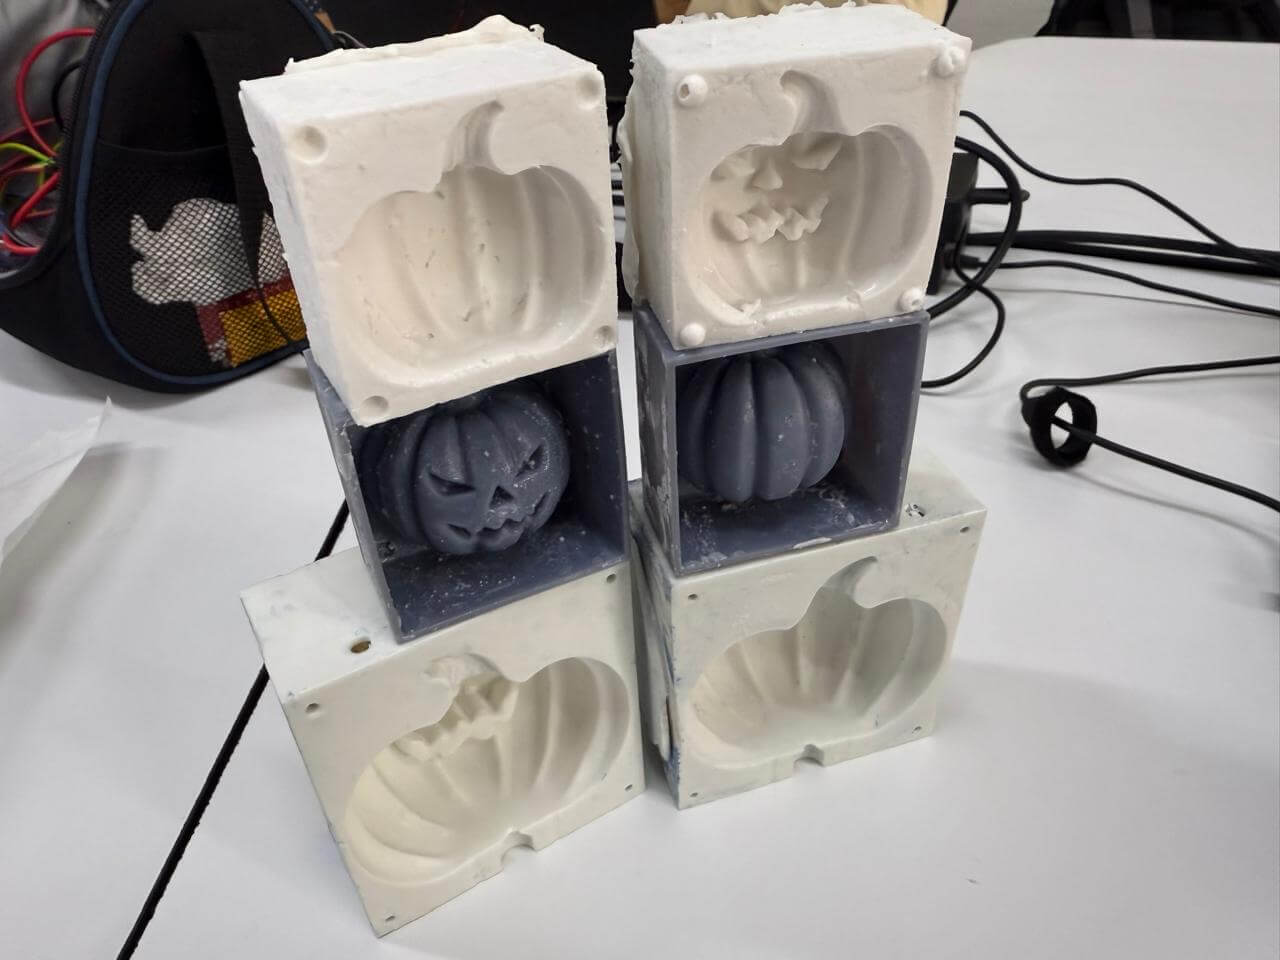
Here are some images of how the rest of the molds I made look:
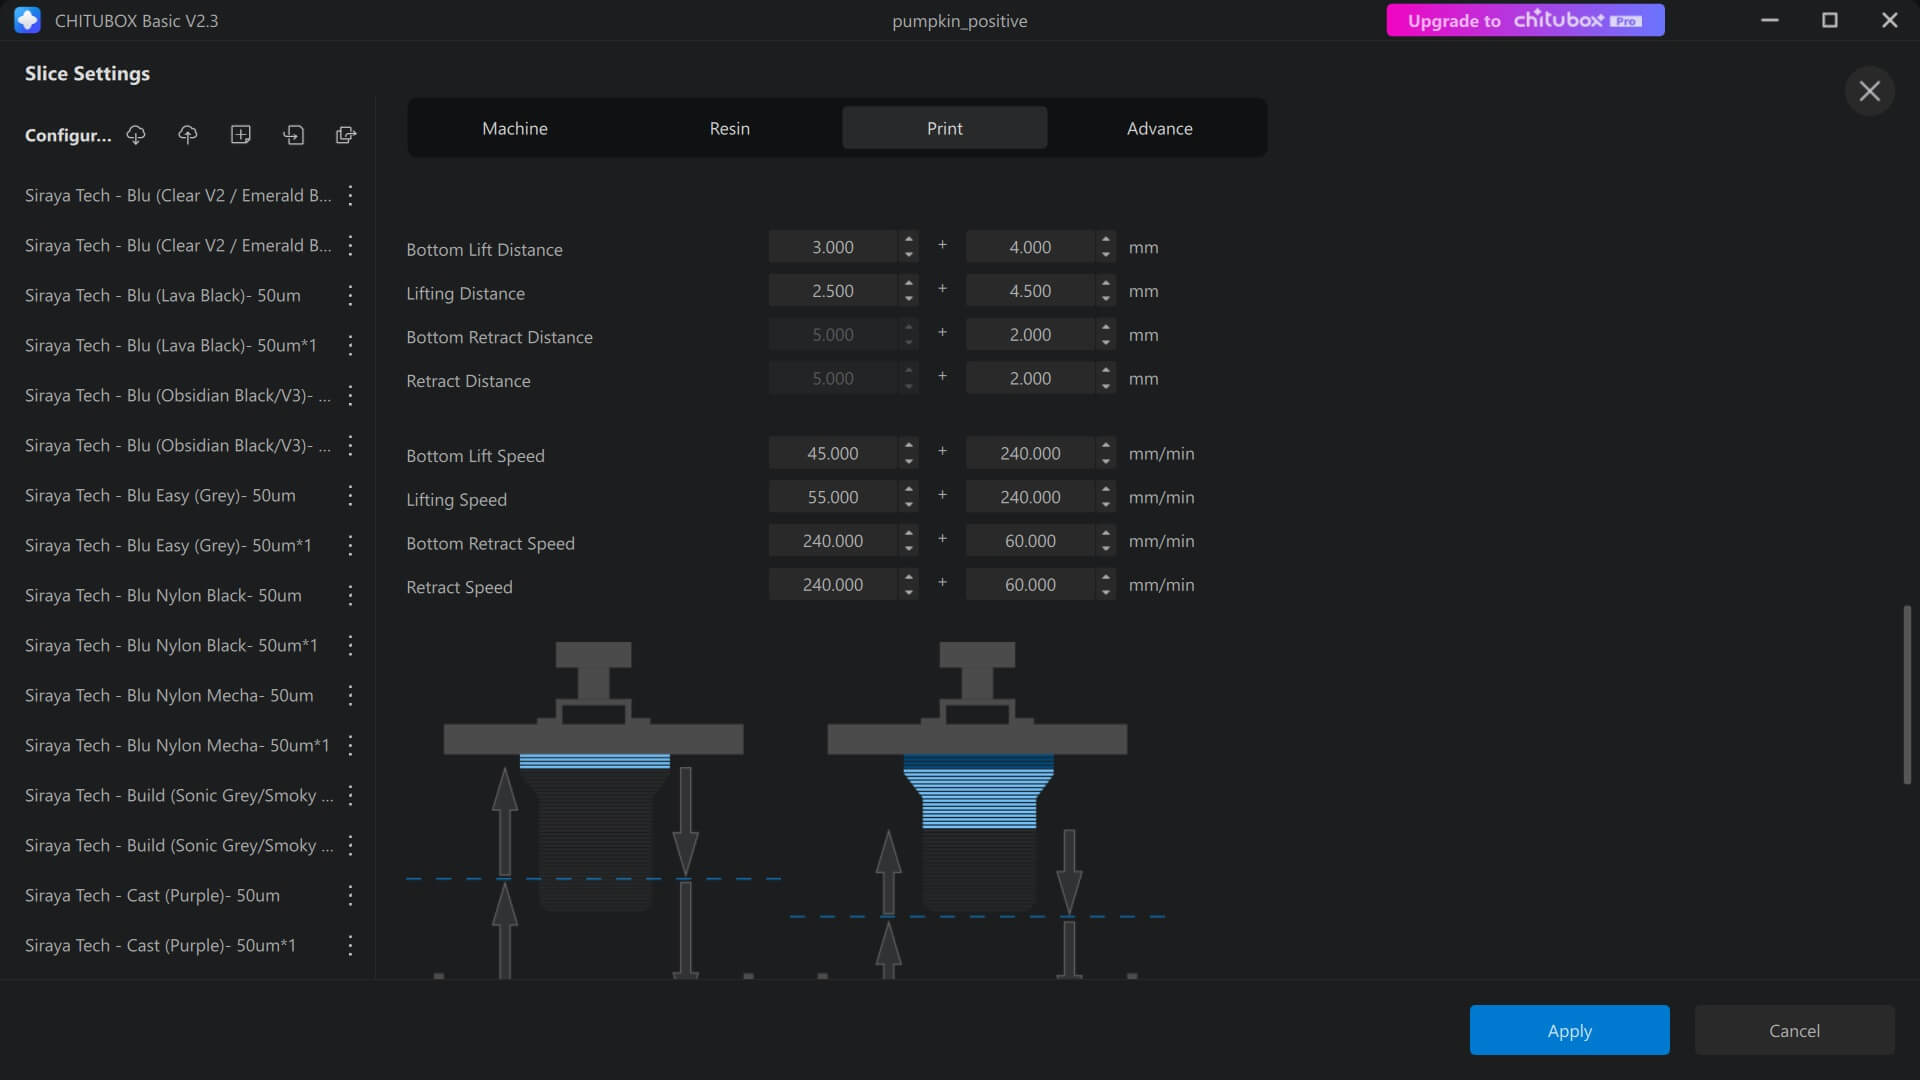
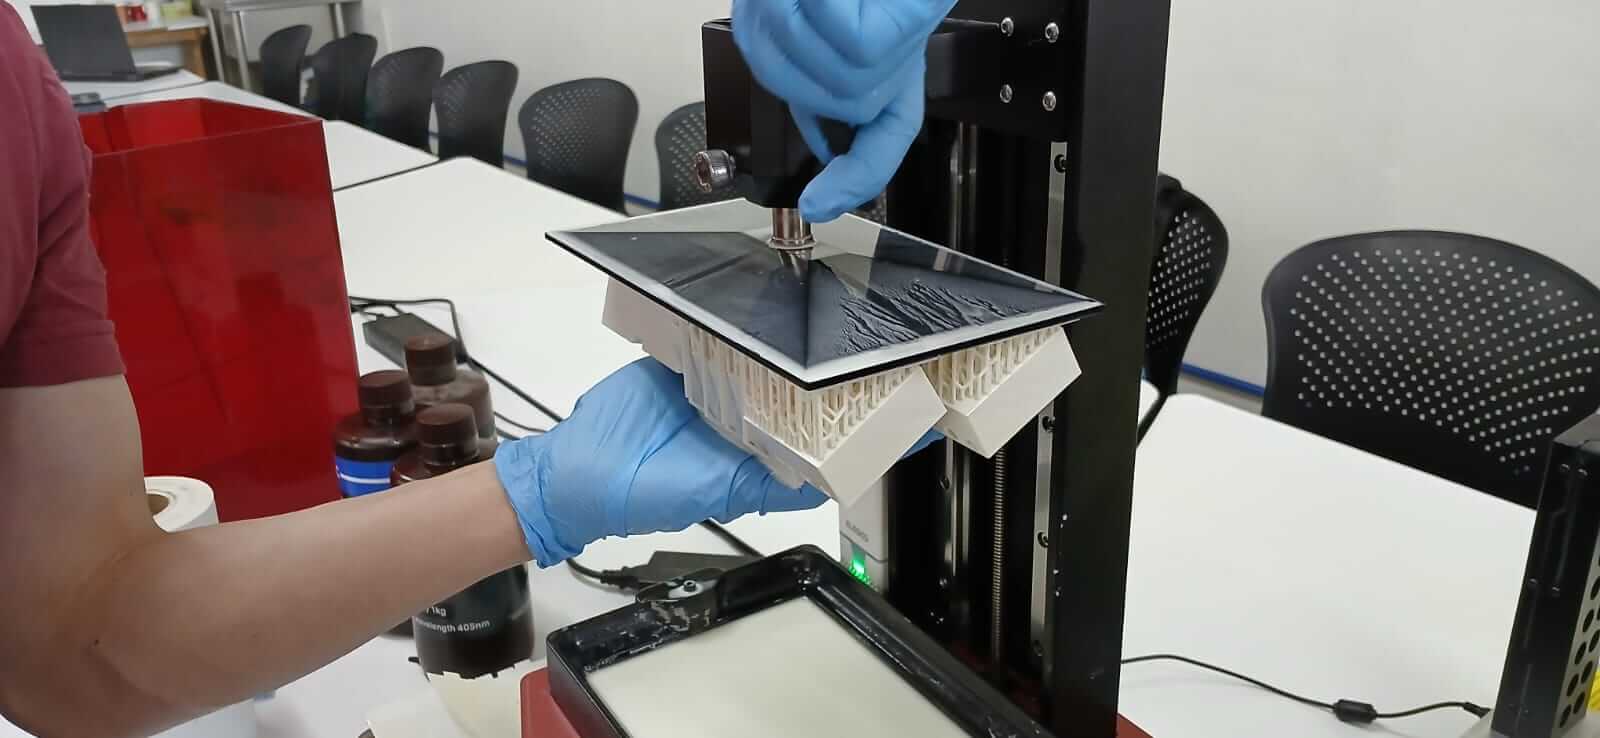
Printing
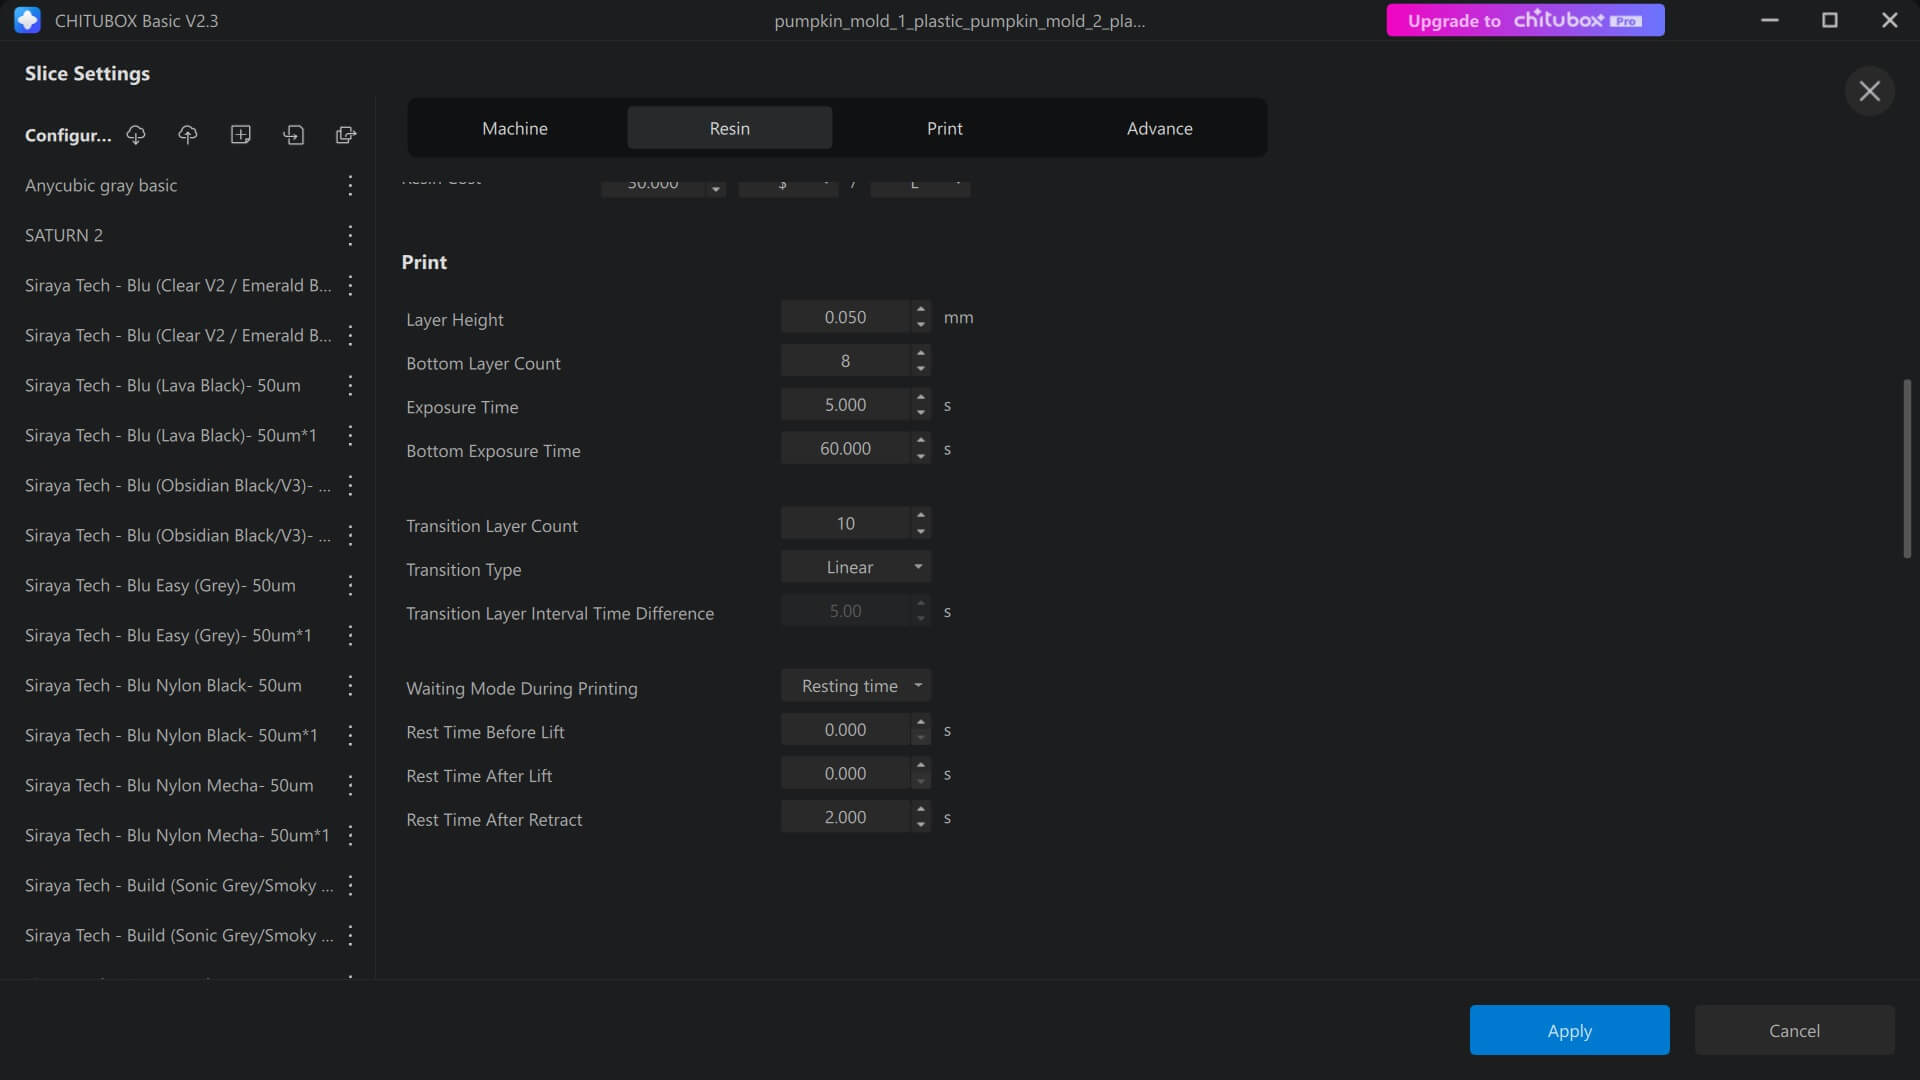
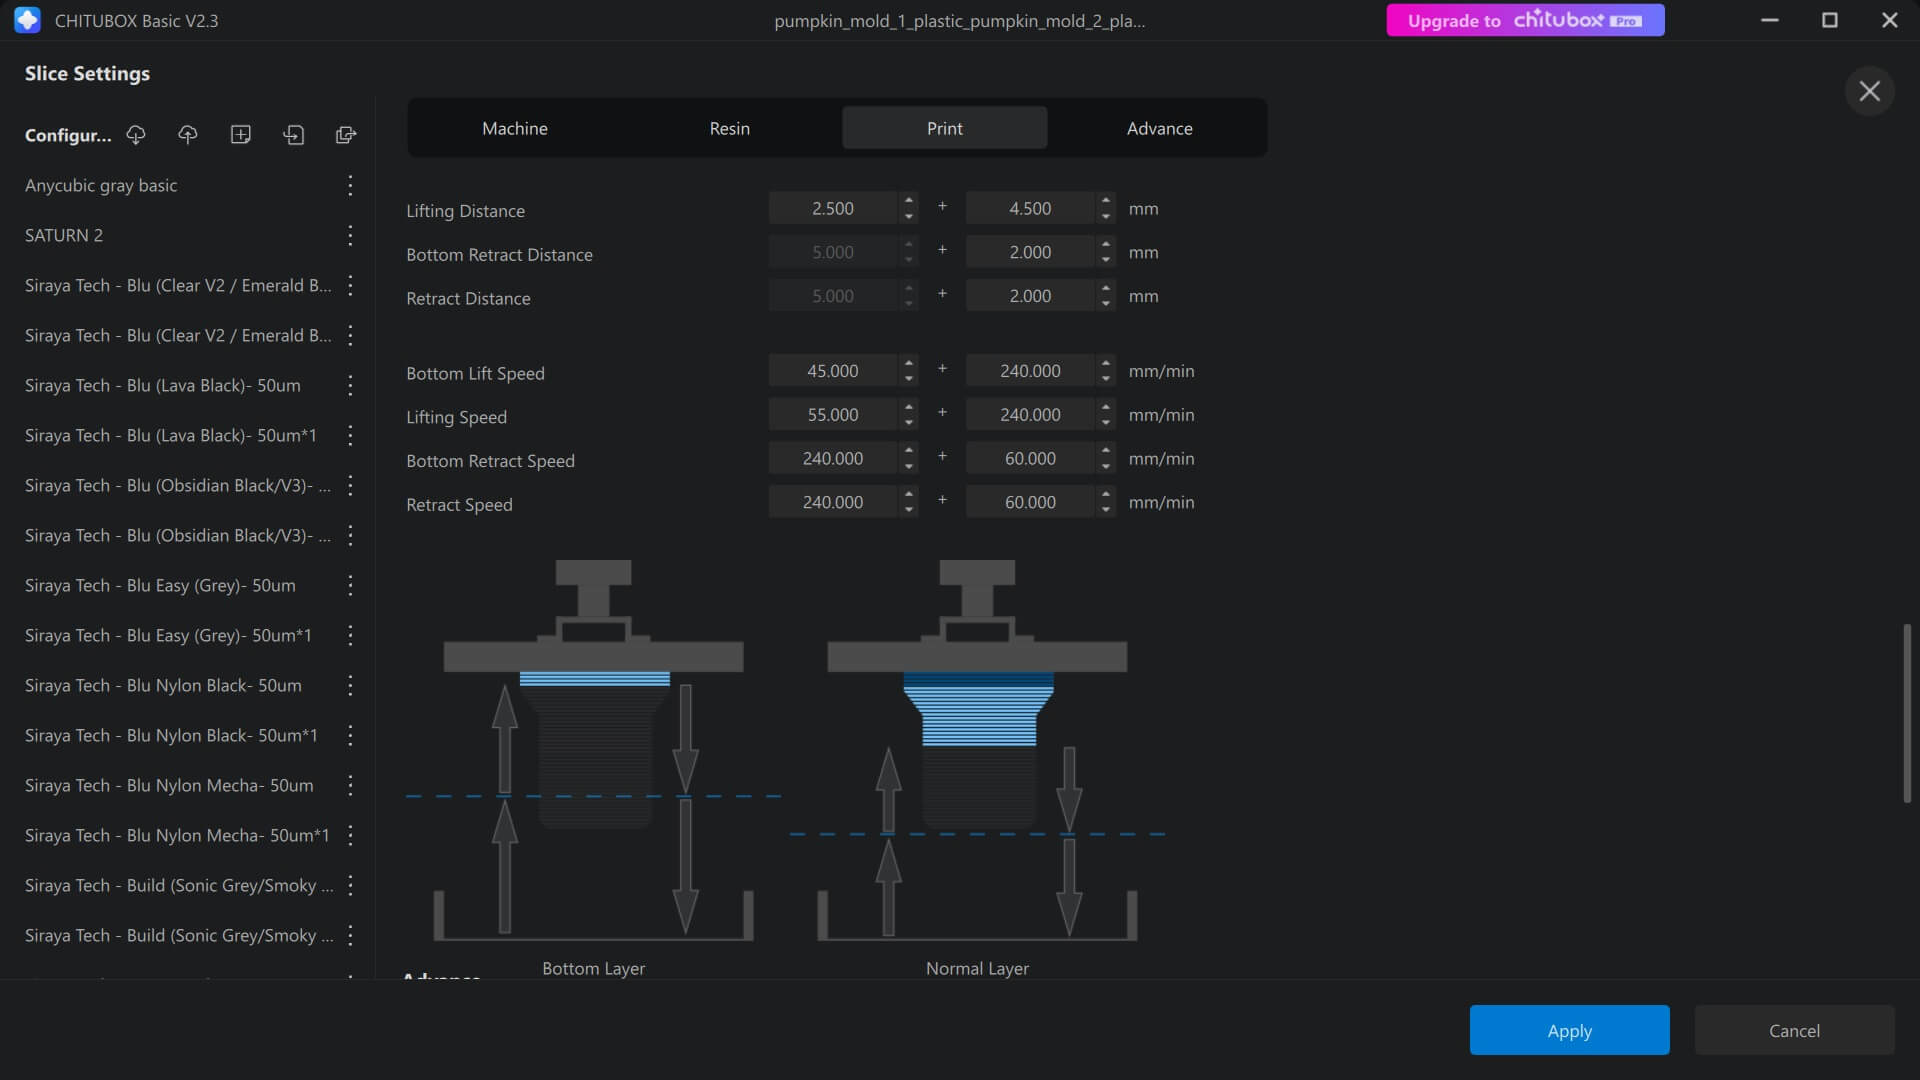
To print, I am using an Elegoo Saturn 2 with the slicer CHITUBOX Basic, I also used two different resins: a Siraya Tech Ultra White and an Anycubic Gray Basic. and I made 4 prints which I will show in images along with the parameters used.
For the Siraya Tech Ultra White resin, it is important to always wear nitrile gloves to avoid direct contact with the skin. Eye protection is also necessary to prevent splashes from reaching the eyes. This resin should be used in well-ventilated areas or with an air extraction system, as prolonged exposure to its vapors can cause respiratory irritation. It should not be ingested or inhaled directly, and liquid resin should be protected from direct UV exposure since it begins to cure when exposed. Storage should be in a cool, dry, and dark place, keeping the container tightly sealed. In case of skin contact, it is recommended to wash immediately with plenty of water and soap, avoiding the use of alcohol. For spills, absorb the liquid with paper towels and then clean the surface thoroughly with water and soap. Liquid resin should never be poured into drains; it must be fully cured before disposal as regular waste.
Regarding the Anycubic Gray Basic resin, the same basic protections apply, but extra caution should be taken as it tends to be more irritating than other common resins. Nitrile gloves are mandatory, along with eye protection and preferably a light mask if the area is not sufficiently ventilated. Good ventilation is highly recommended, and the use of carbon filter air purifiers is beneficial. Direct and prolonged contact with the skin should be avoided, as it can cause dermatitis. While working with this resin, it must be kept away from direct sunlight. Storage should be in a cool, dry place, away from sunlight exposure. If contact with the skin or eyes occurs, it is important to rinse thoroughly with clean water for at least 15 minutes and seek medical attention if irritation persists. As with the Siraya resin, the Anycubic resin must be fully cured before disposal, and uncured resin should never be poured into the drainage system.
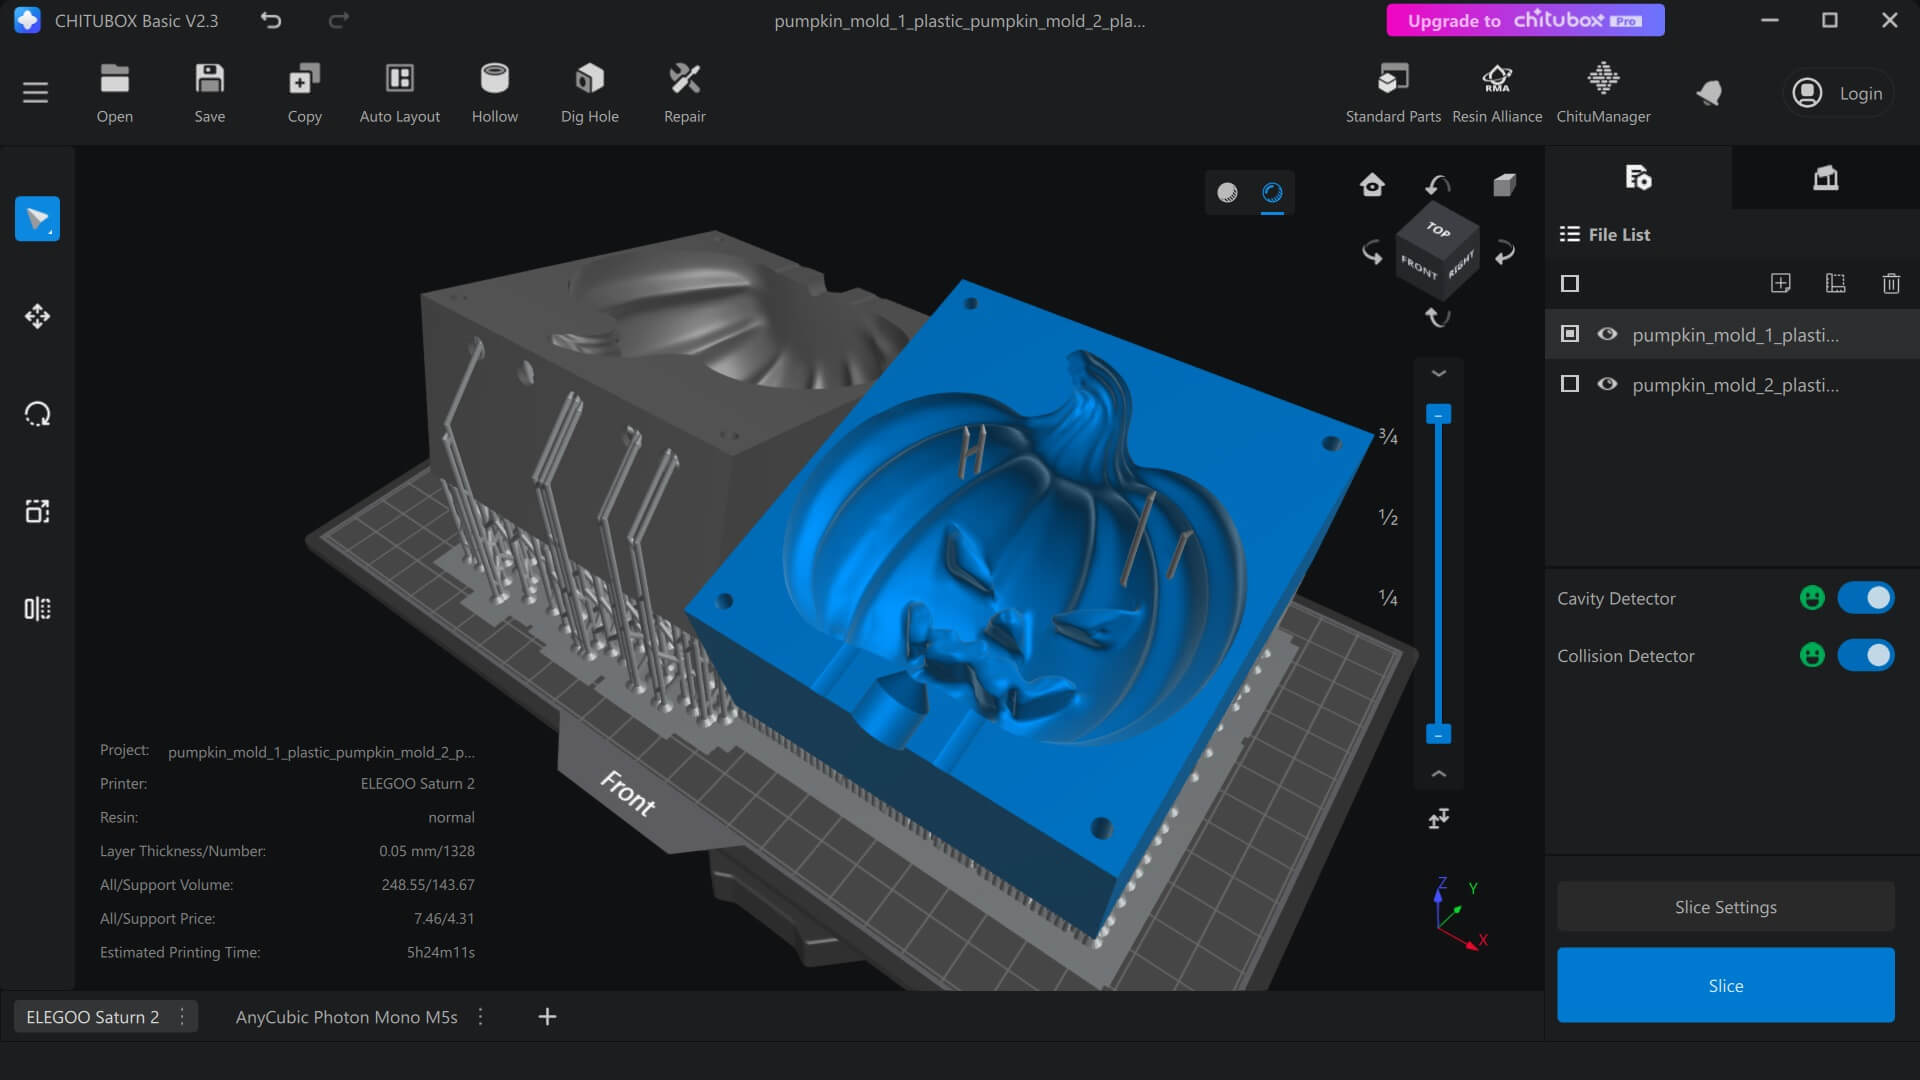

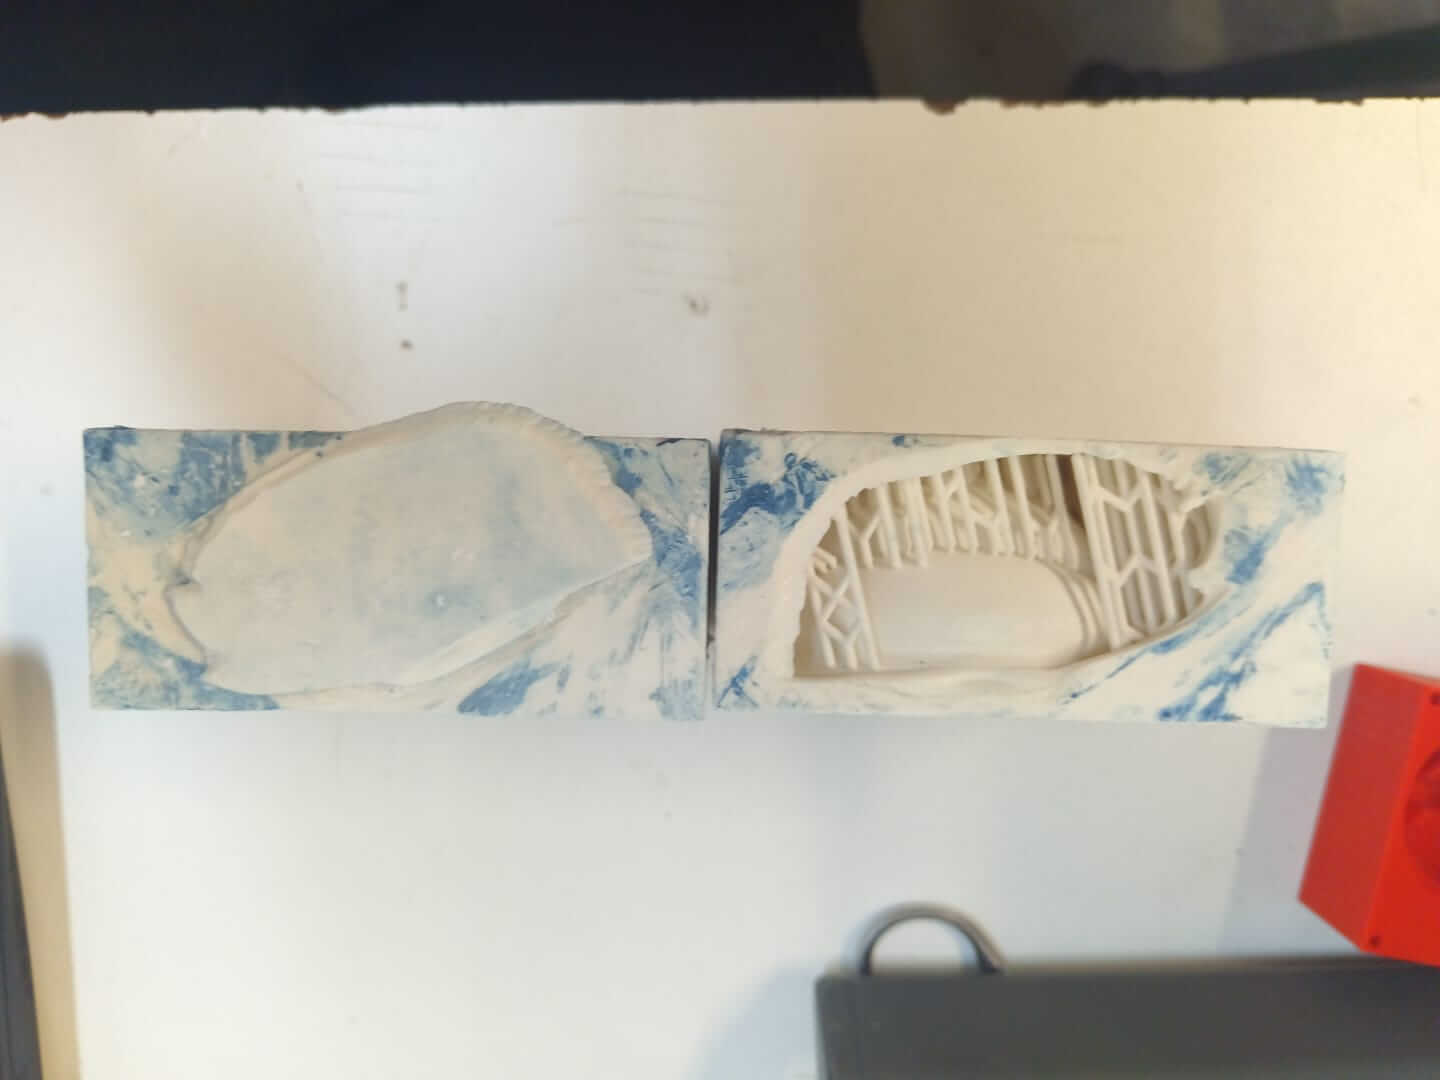
Here are the results for each one:
For the first one, I had a slight mishap because I placed the pieces too close together, so I had to cut them at their intersections, but this helped demonstrate that they were indeed printed hollow.
On the second occasion everything went smoothly.
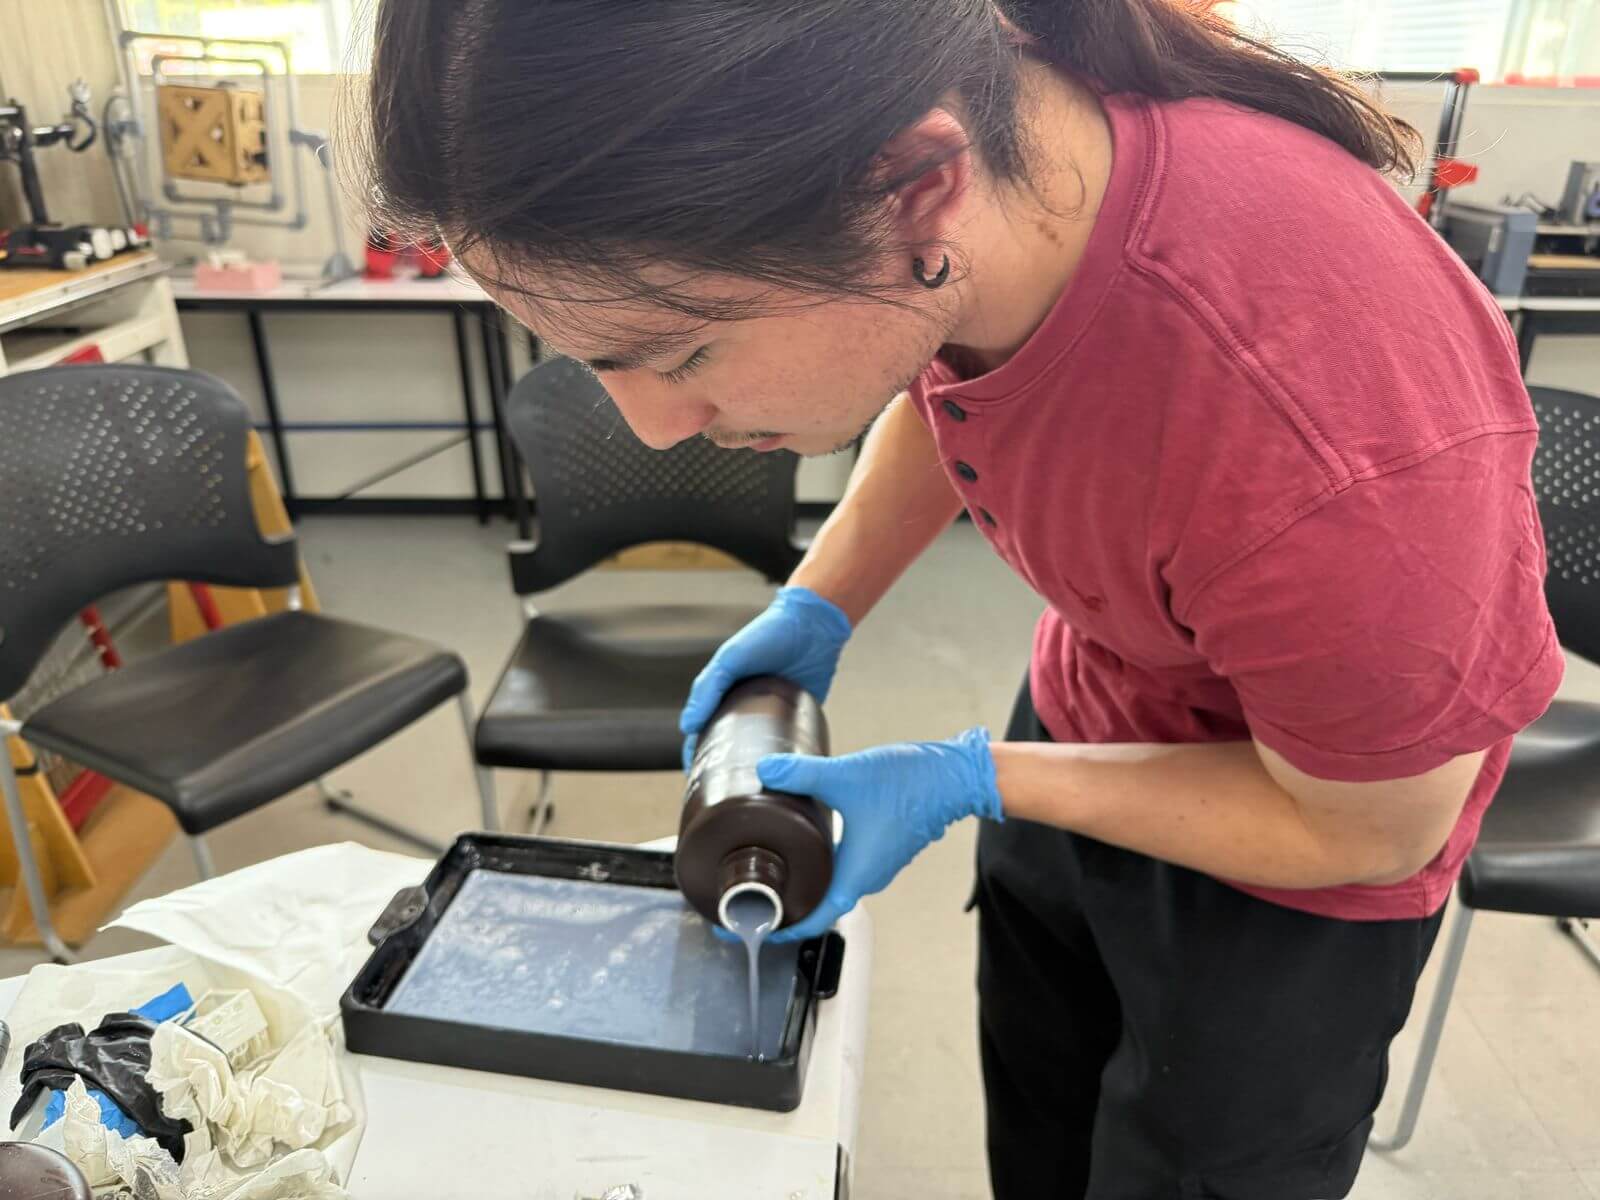

Casting
It's worth mentioning that I didn't use the white mold for casting, as it was intended for use in my final project, so its usefulness will be discussed later.
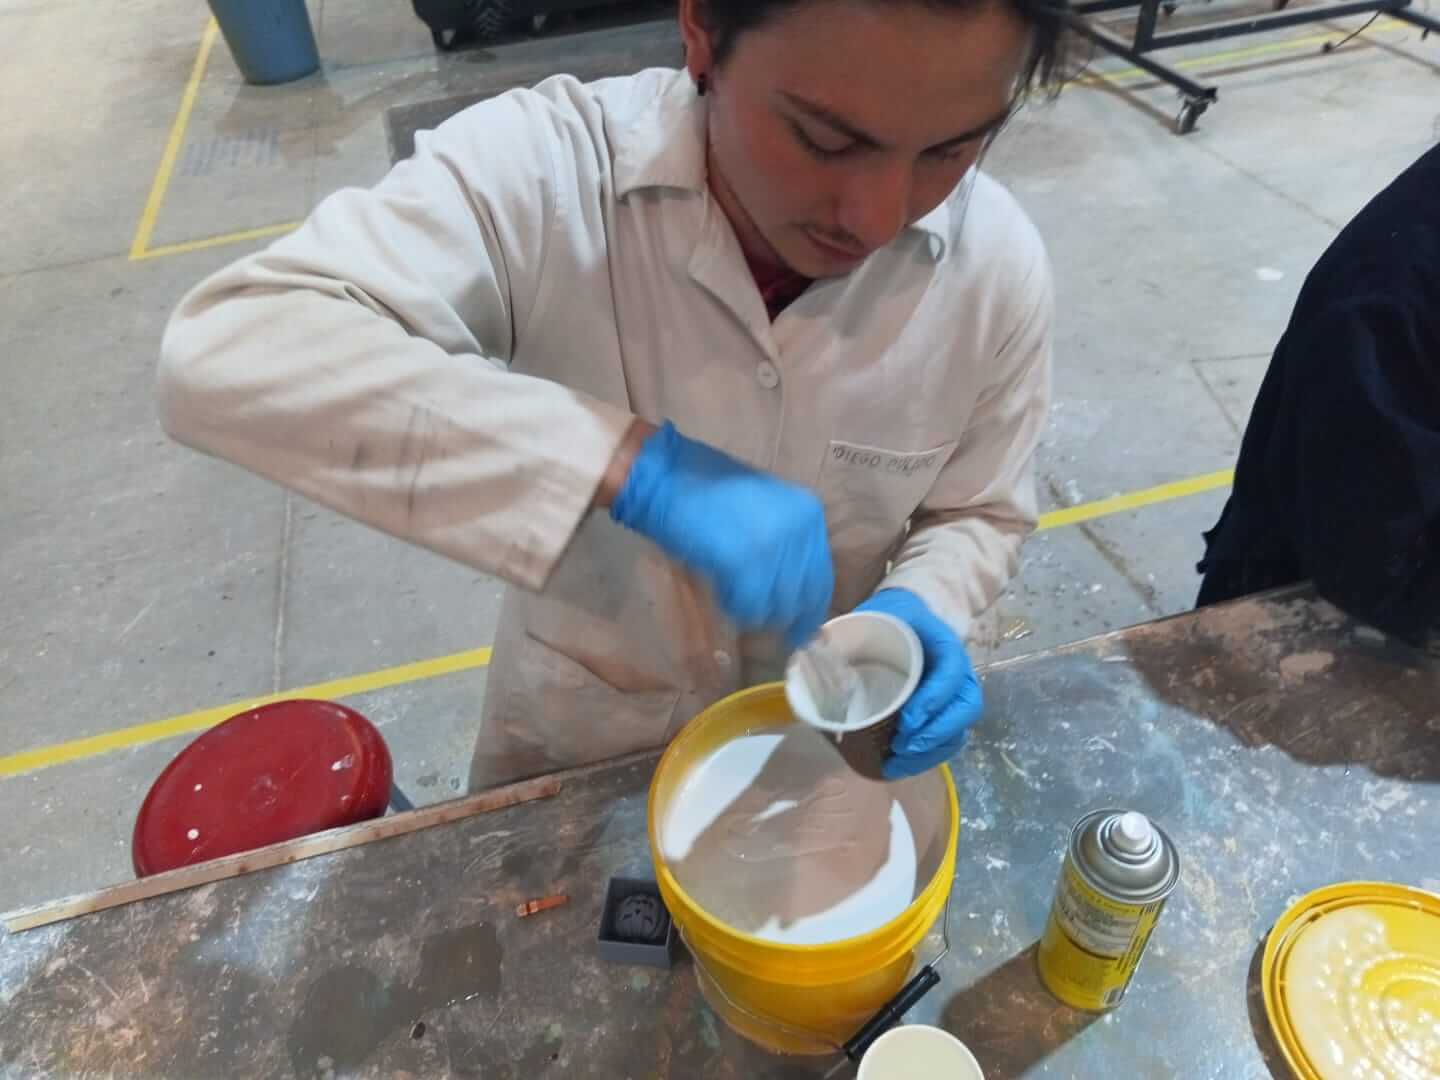
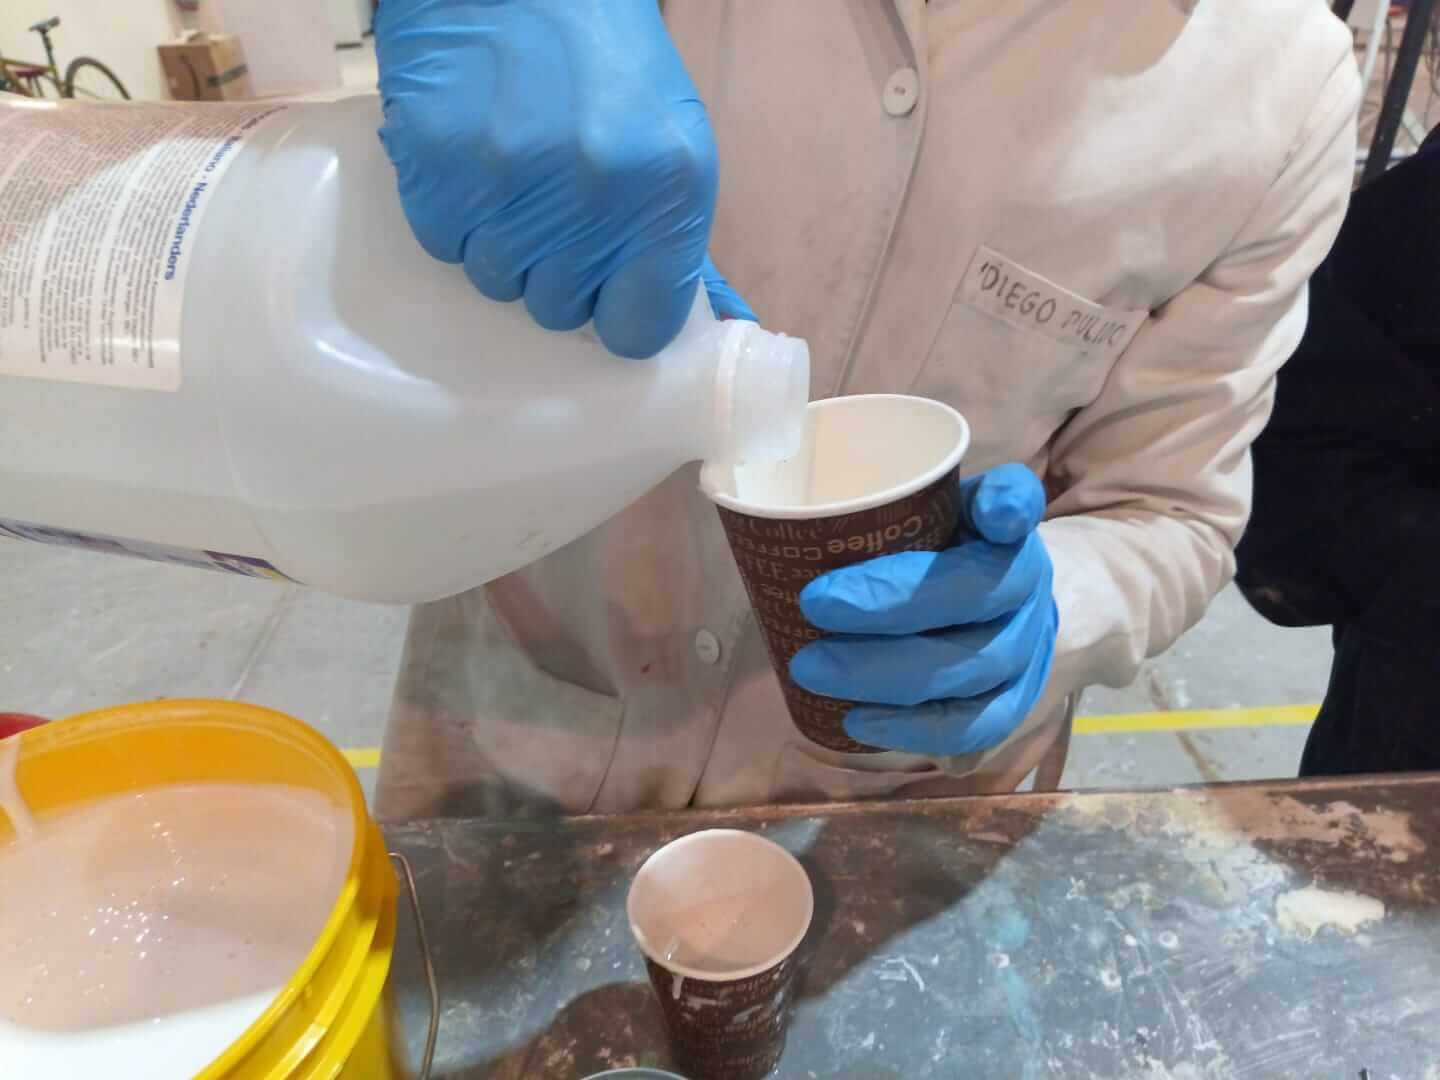
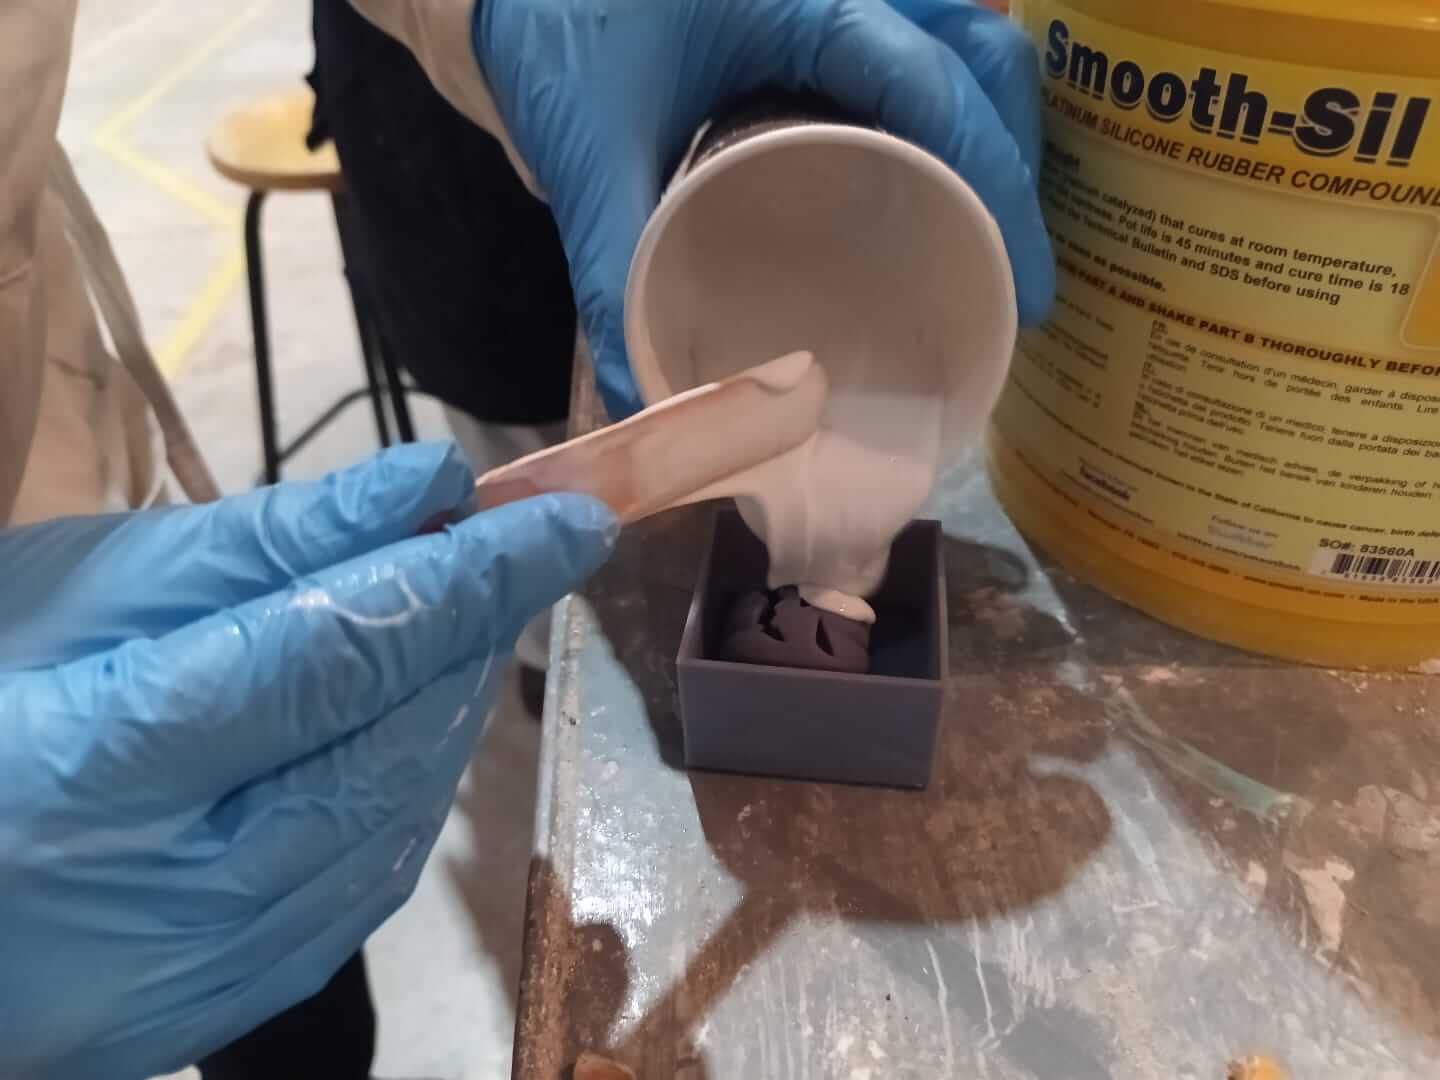
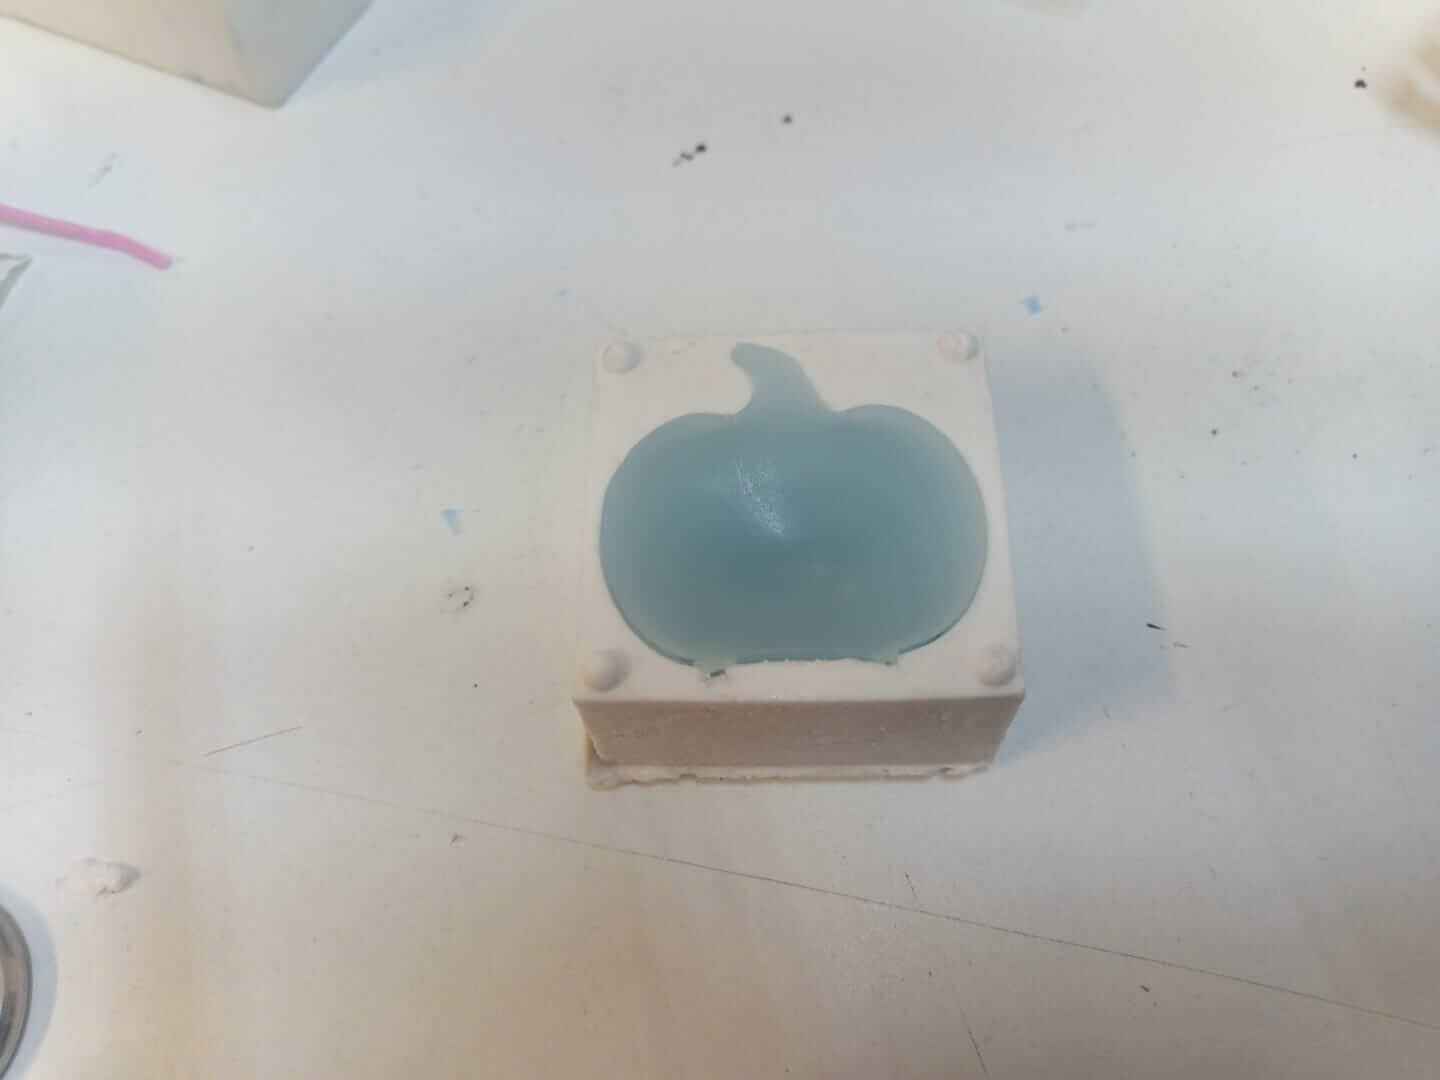
I measured the volume of water my mold could hold, and then I filled it up to that same point with component A. This weighed 120 grams. I then divided 120 by 11, since the mixture requires 10 parts of component A and 1 part of component B. The result was 10.90 grams, which is the amount of component B I added.
Now, based on a value close to the total volume for component A, which was 120, I divided it by 10, since you add one part of B for every 10 parts of A. This gave me 12. I then divided this value by 1.3, since component B is 1.3 times denser than water. This gave me a result of 9.2307, which is the number of grams I will add of component B to the 120 grams of component A.
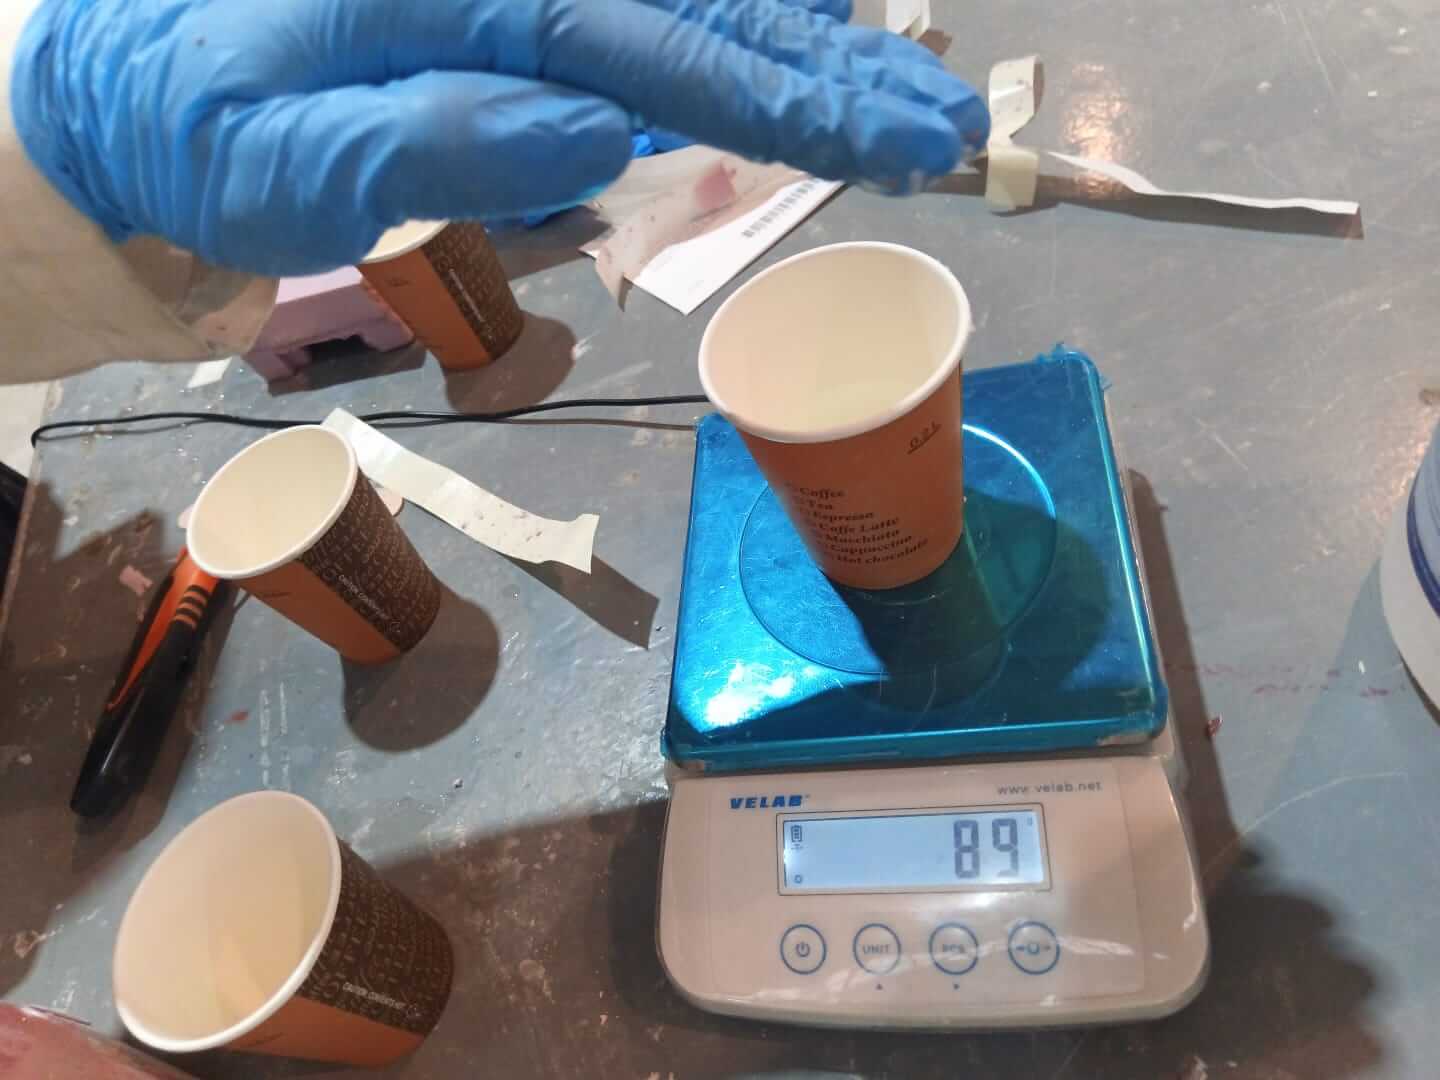
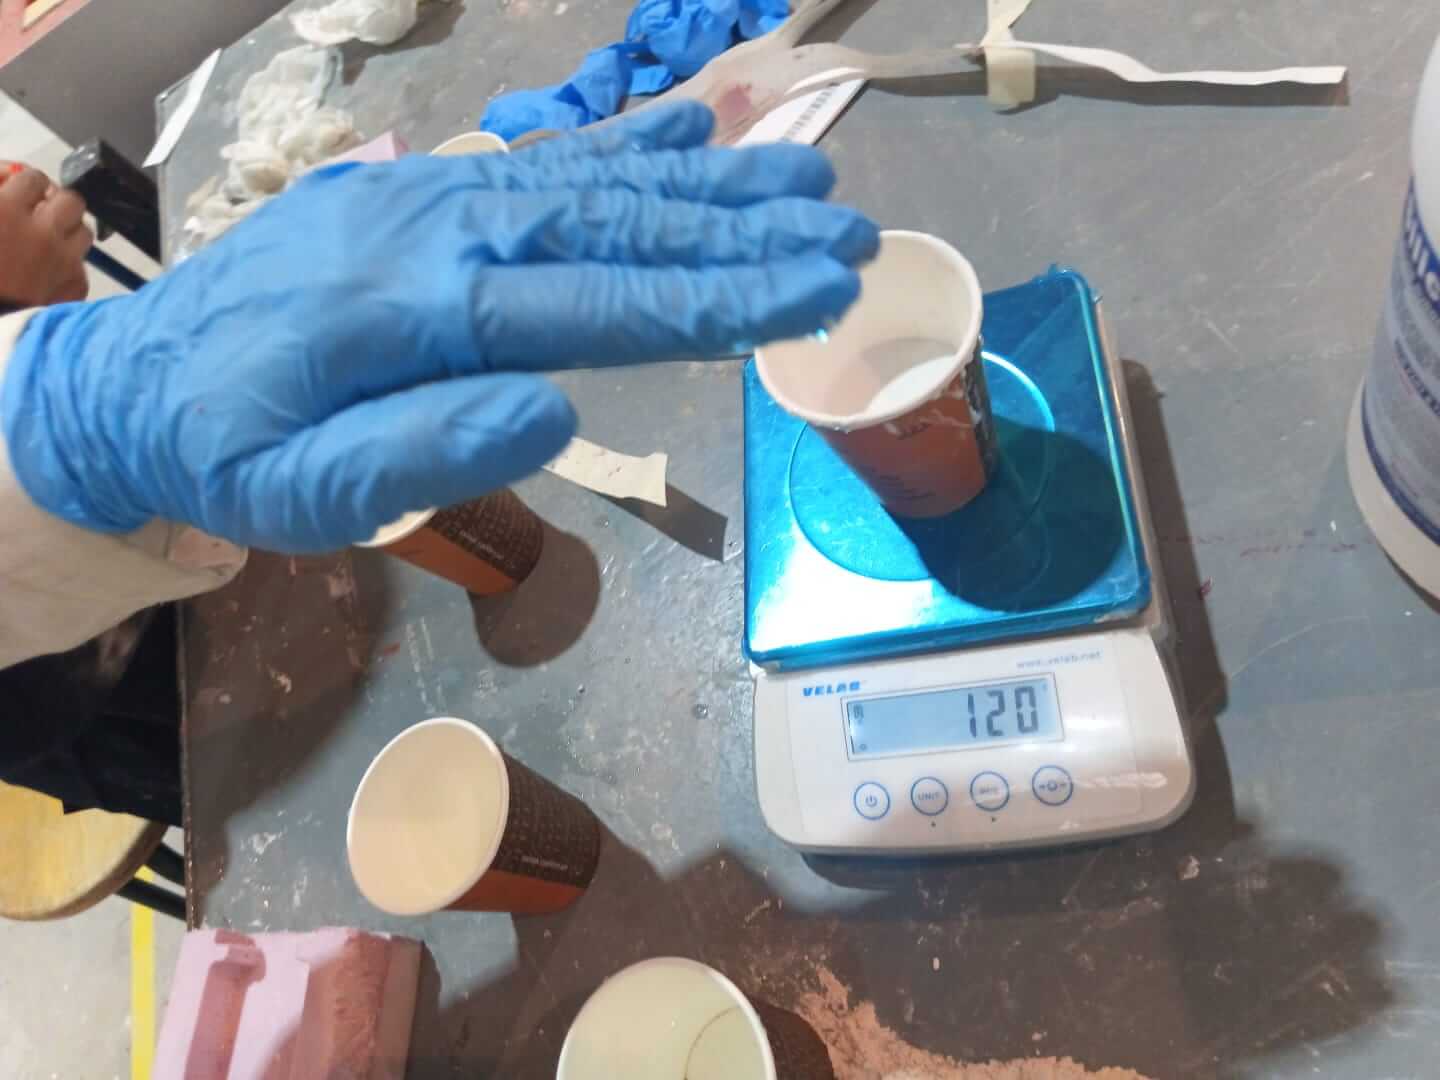
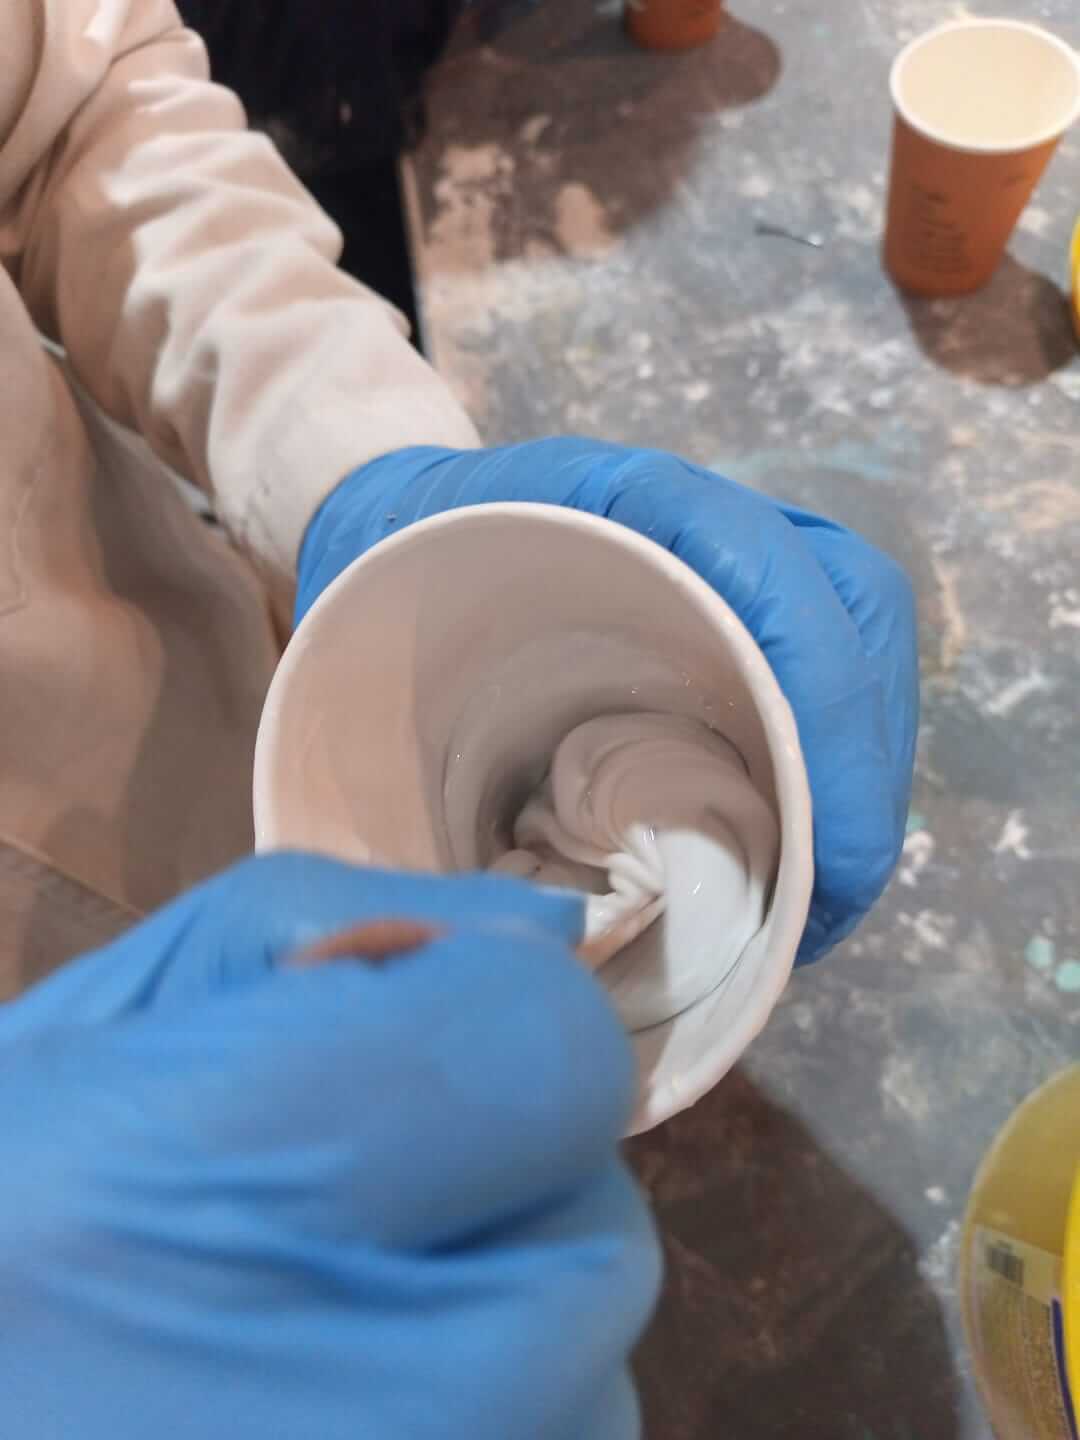
Here are the photos of my process as I mentioned before.
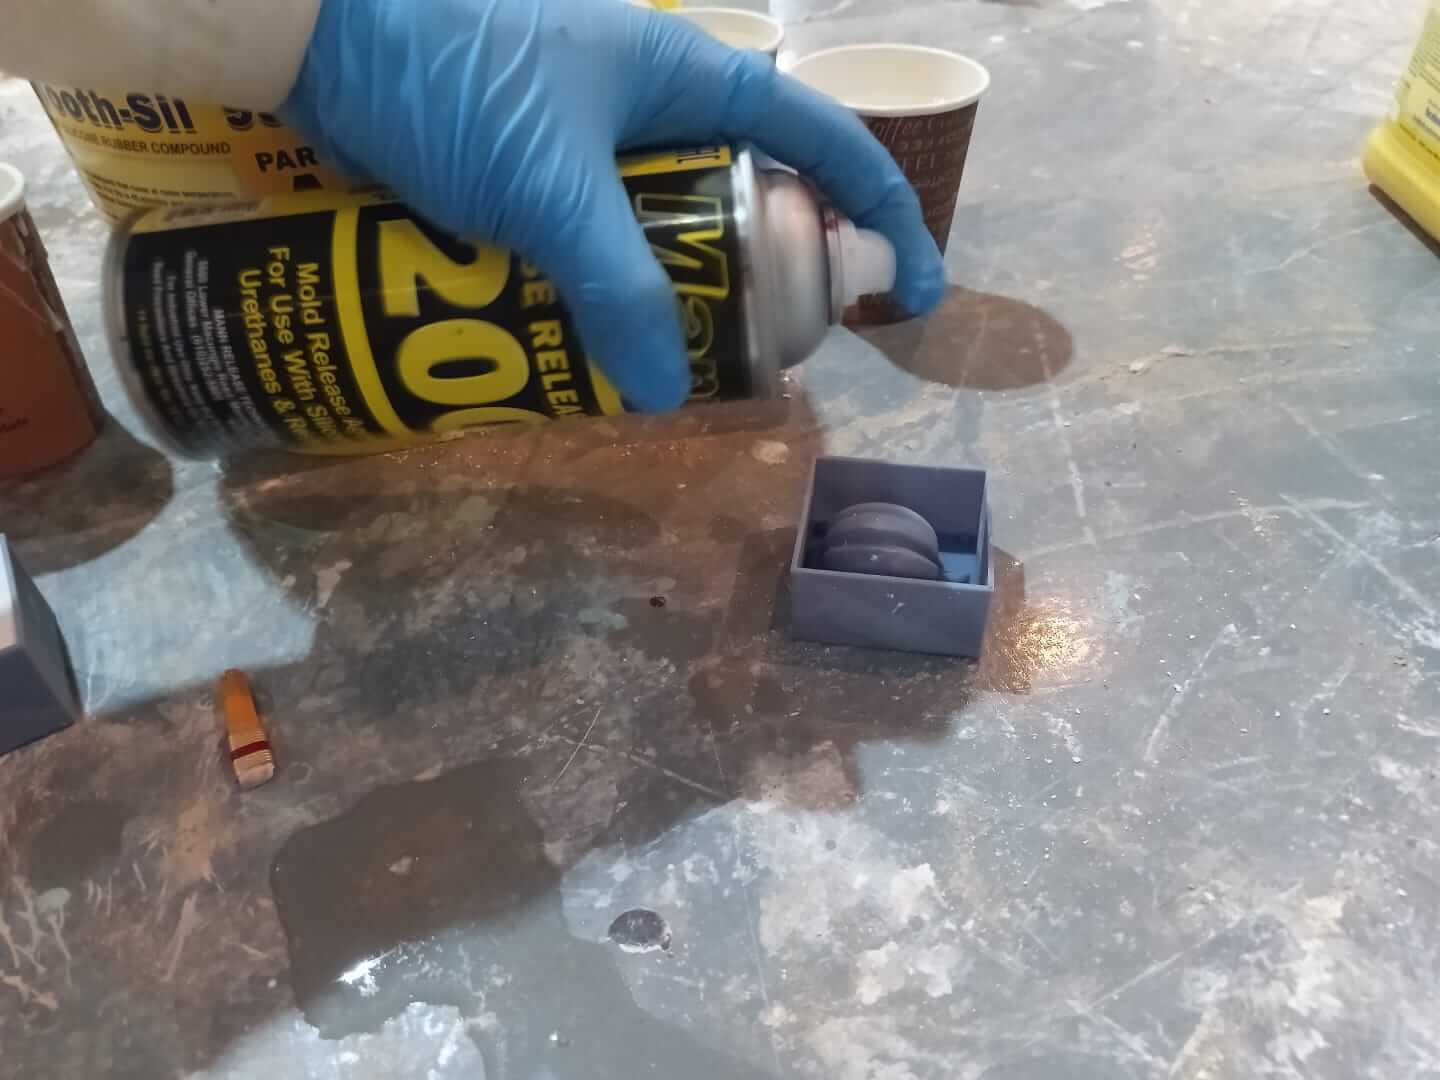
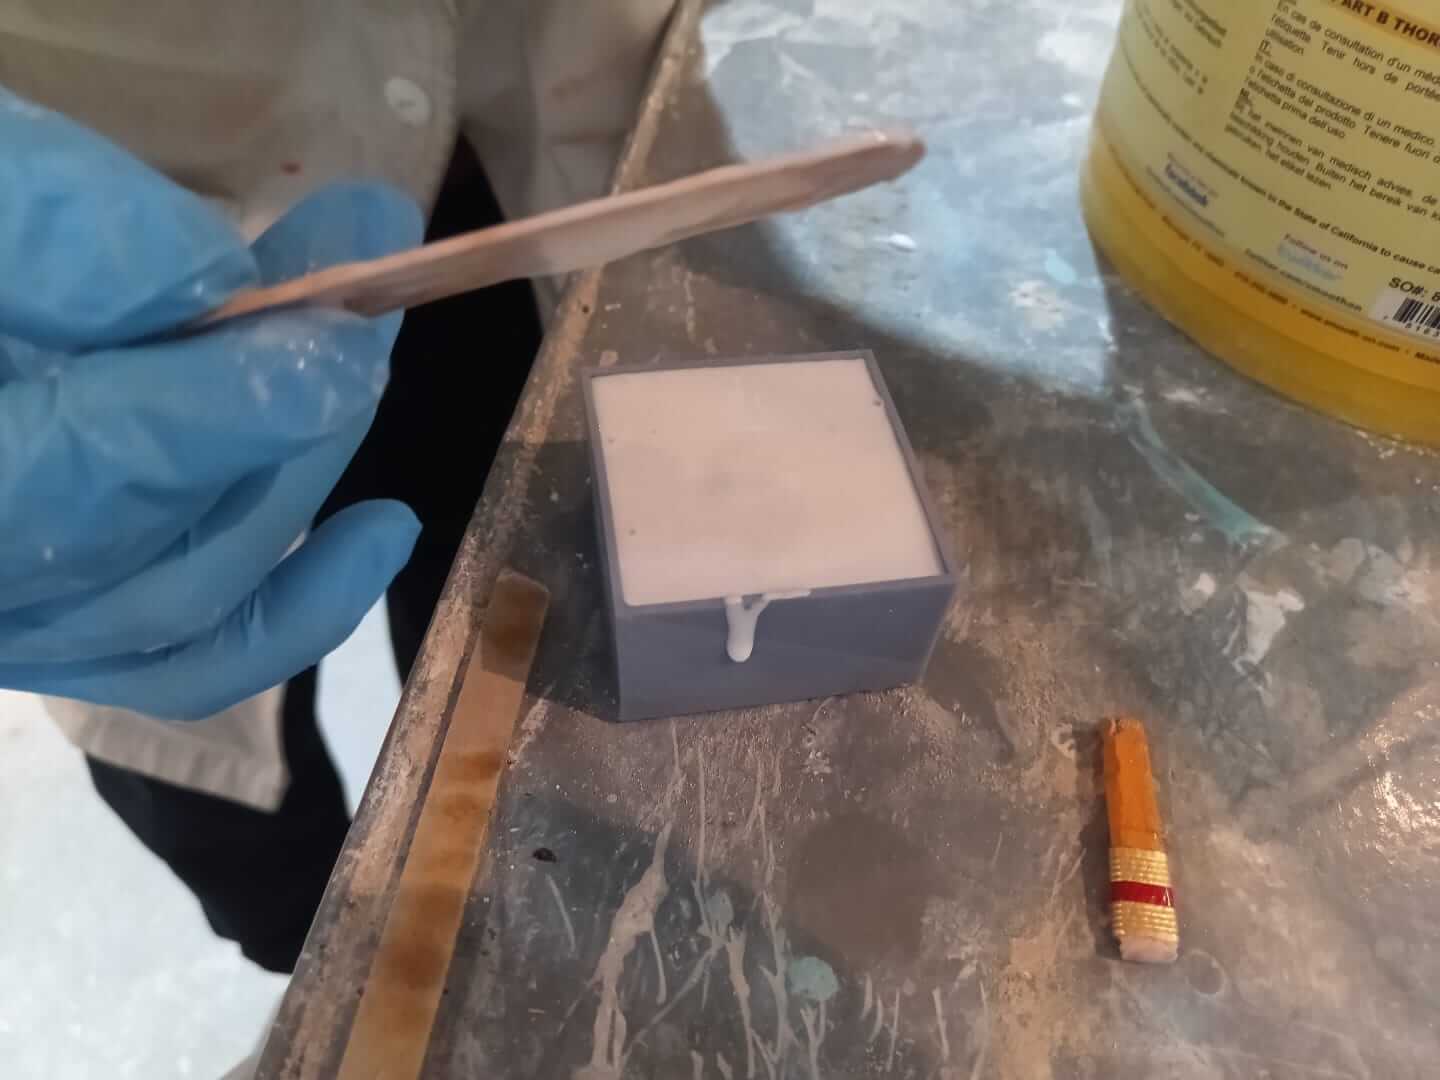
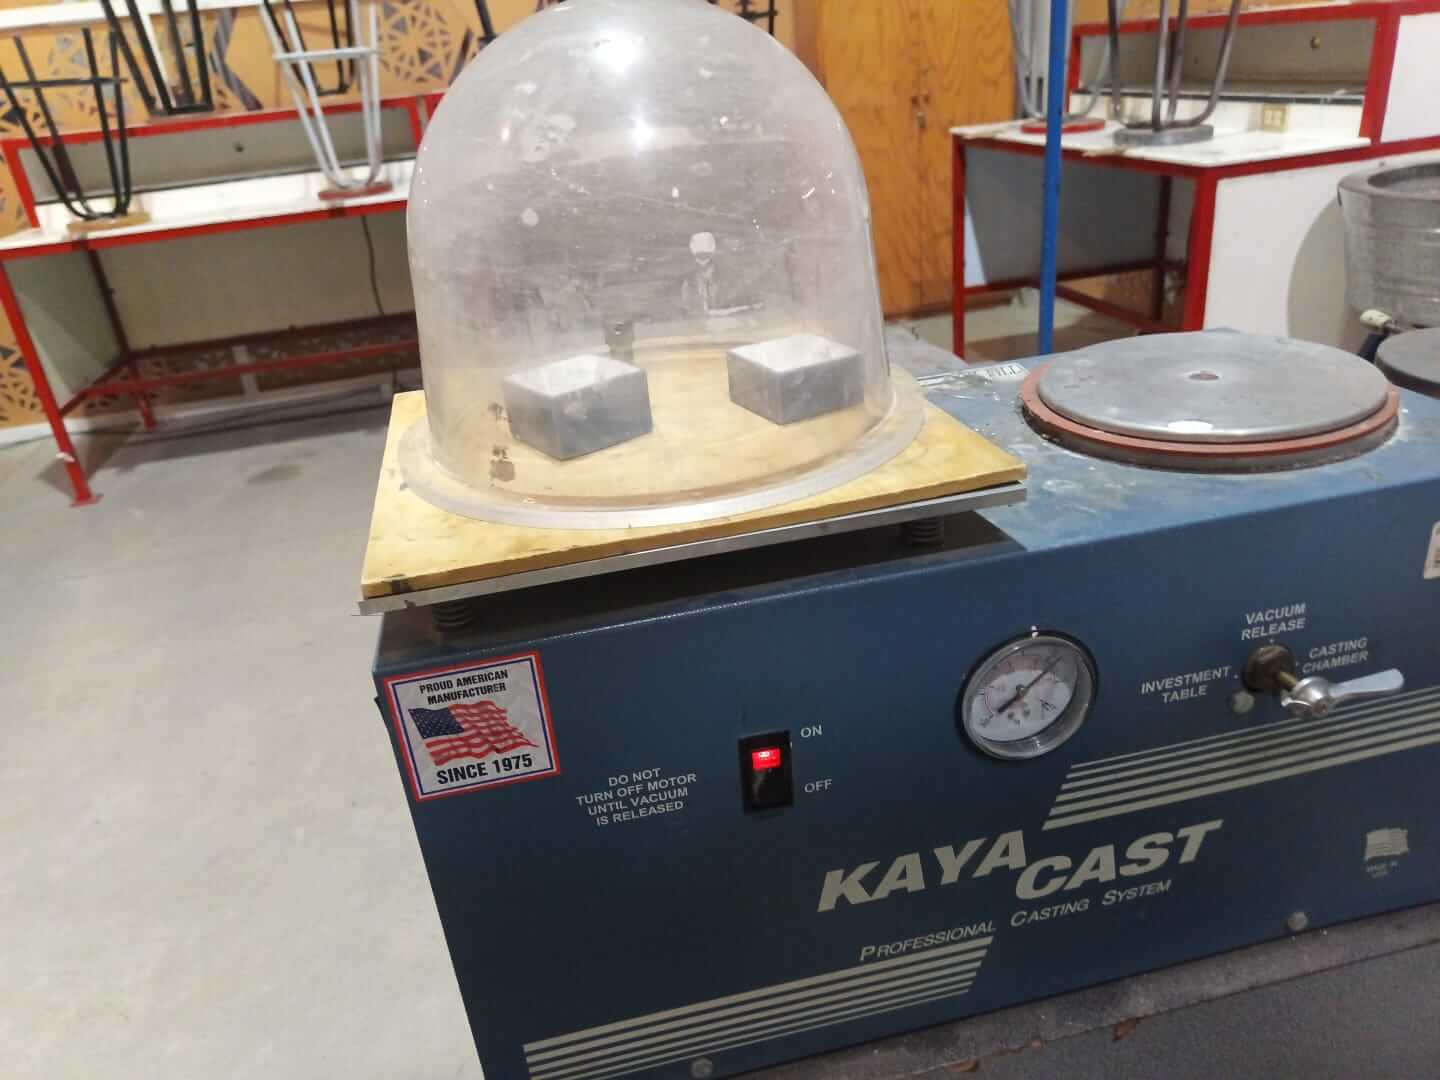
I decided to put it in the vaccum chamber.
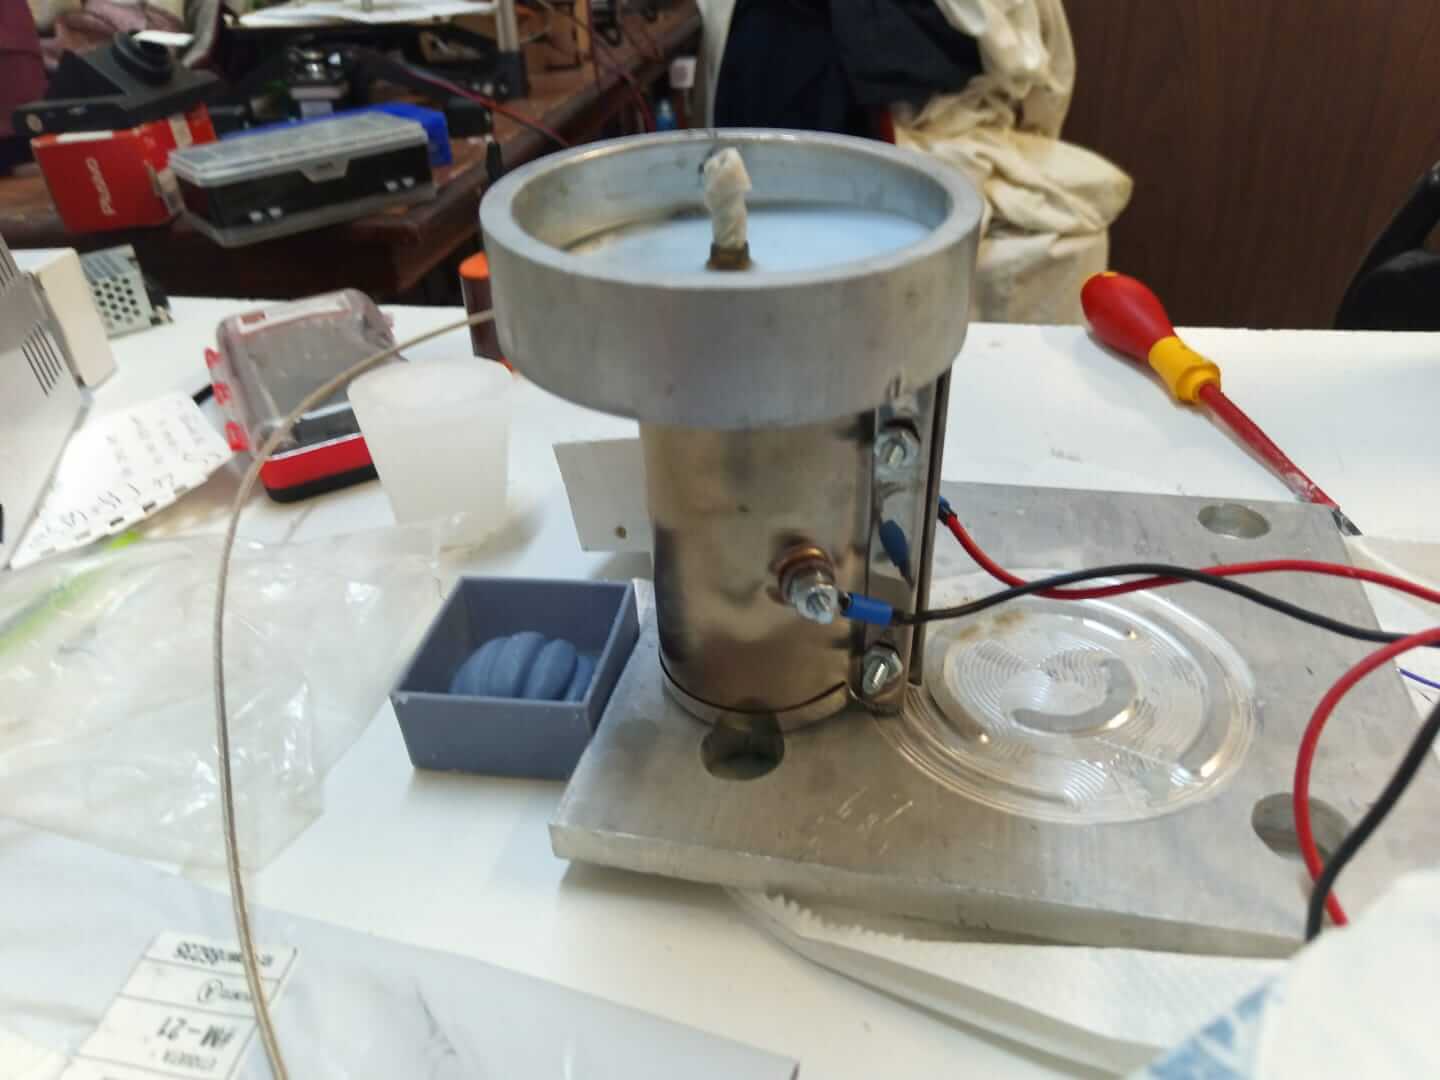
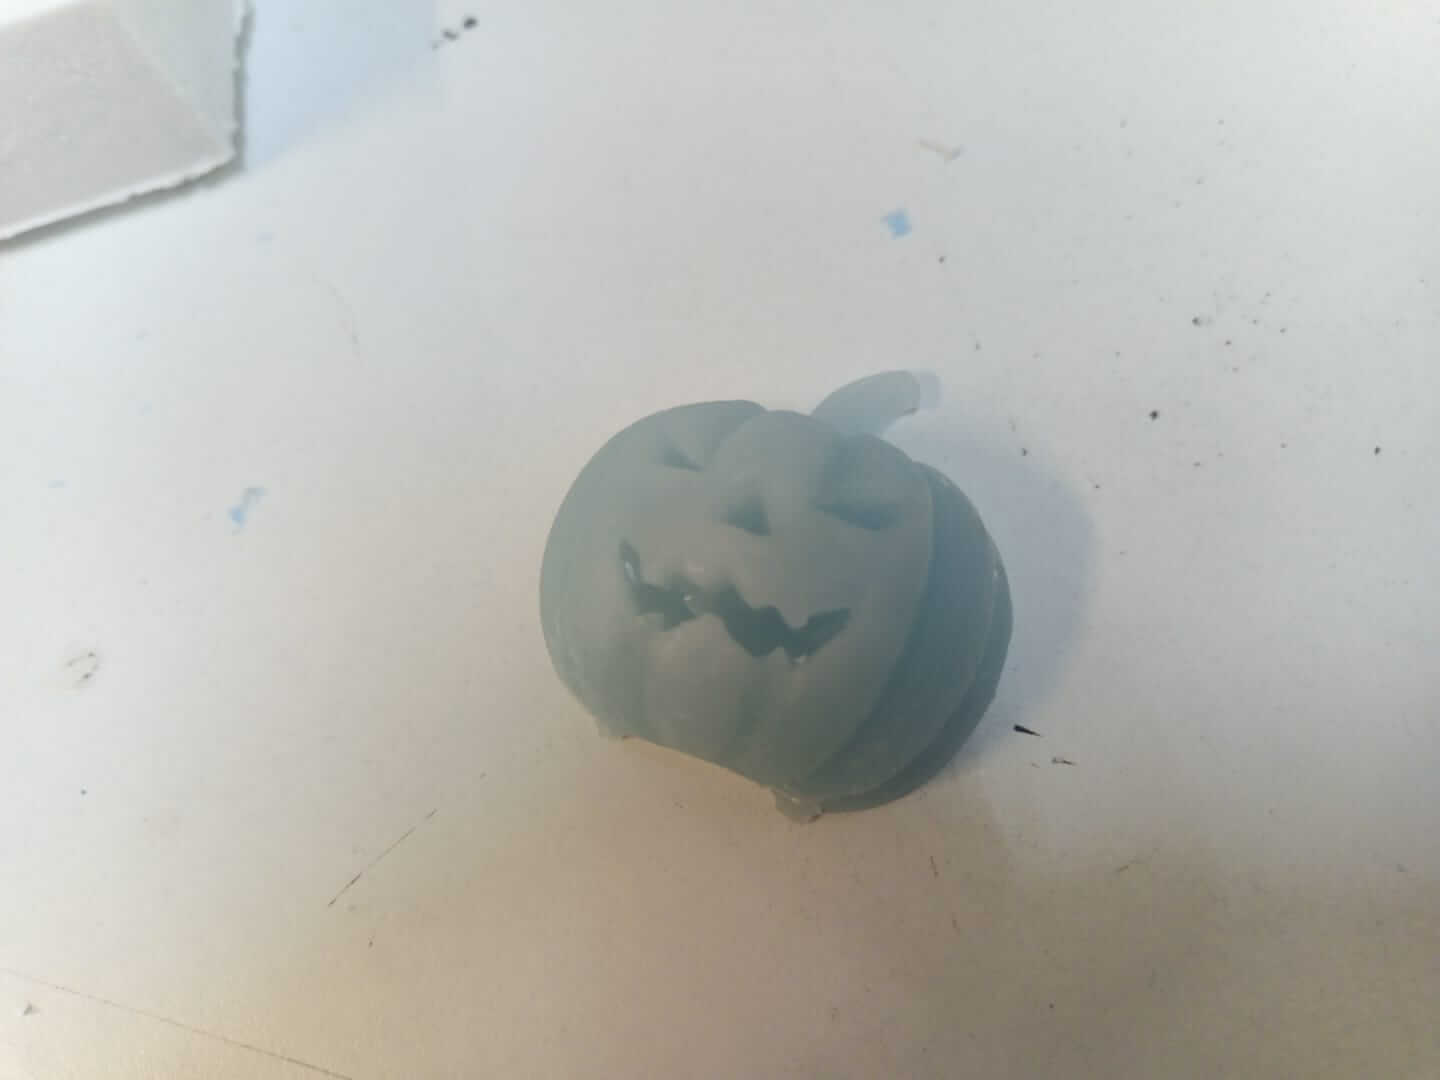
To finish, I did the casting into the soft mold using wax. The wax was heated with a band heater to 120°C, which I will use for my final project, in an aluminum tray I found nearby. Basically, I made an improvised electric stove. Then I placed a strand of wick where I wanted it to go. I slightly removed the base, then joined the molds using a clamp and string. Once I finished filling the mold with wax, I pulled the wick to make sure it was properly positioned.

Here are the final results:
I must say that during this week I learned a lot. I had never printed with resin before, so I had to learn how they work and what each of their parameters is for, which, truth be told, are described by their own names. On the other hand, I had a few problems. First, my white print would not stick to the build plate and failed three times, but after doing some research, I found that all I needed to do was increase the exposure time, which worked perfectly. However, I increased the exposure too much, and that caused the second problem: the prints stuck to each other, and I had to cut them apart. From that point on, I didn't have any other problems.
Here you have the link to our group page
Regarding the files, I can't upload any since they all weigh a little less than 10 or more than 10 MB.
So at my evaluator's request, I uploaded them to Google Drive and here is the link to the folder.