Week 03 Computer Controlled Cutting
Doing the first practical work
For all laser cuts, I used a difference of -0.2 mm. In other words, if I wanted a moderately tight fit for a "female-female" slot, a 5 mm measurement was reduced to 4.8 mm in both slots.
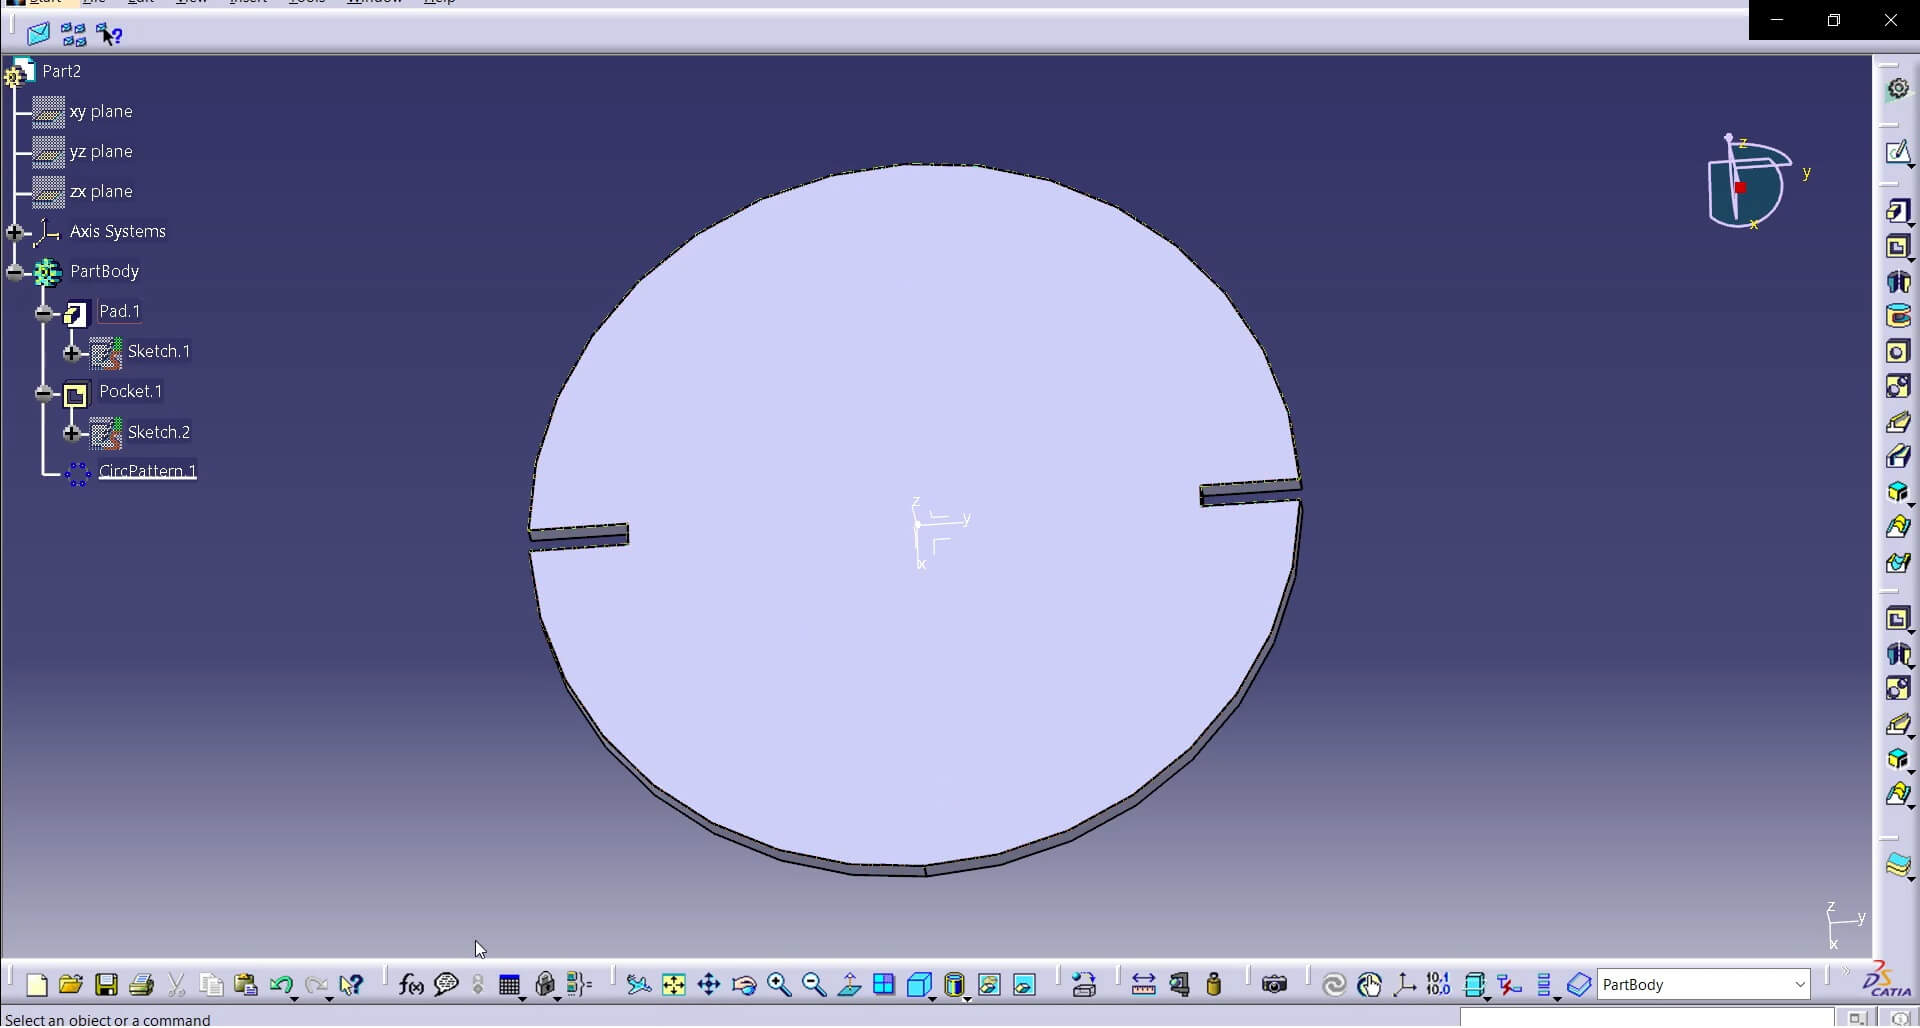
To achieve a parametric design, I first thought about how I wanted my interlocking pieces to be. I created a simple design consisting of a pad with a radius of xx, which is cut by a rectangle at one edge measuring 10 mm in length and 2.3 mm in width. Since the MDF boards I’ll be using are 2.5 mm thick, this ensures a snug fit—tight enough to hold securely but still easy to assemble and disassemble without difficulty.
To finalize the construction process, a full circular pattern was applied to create the slot cuts.
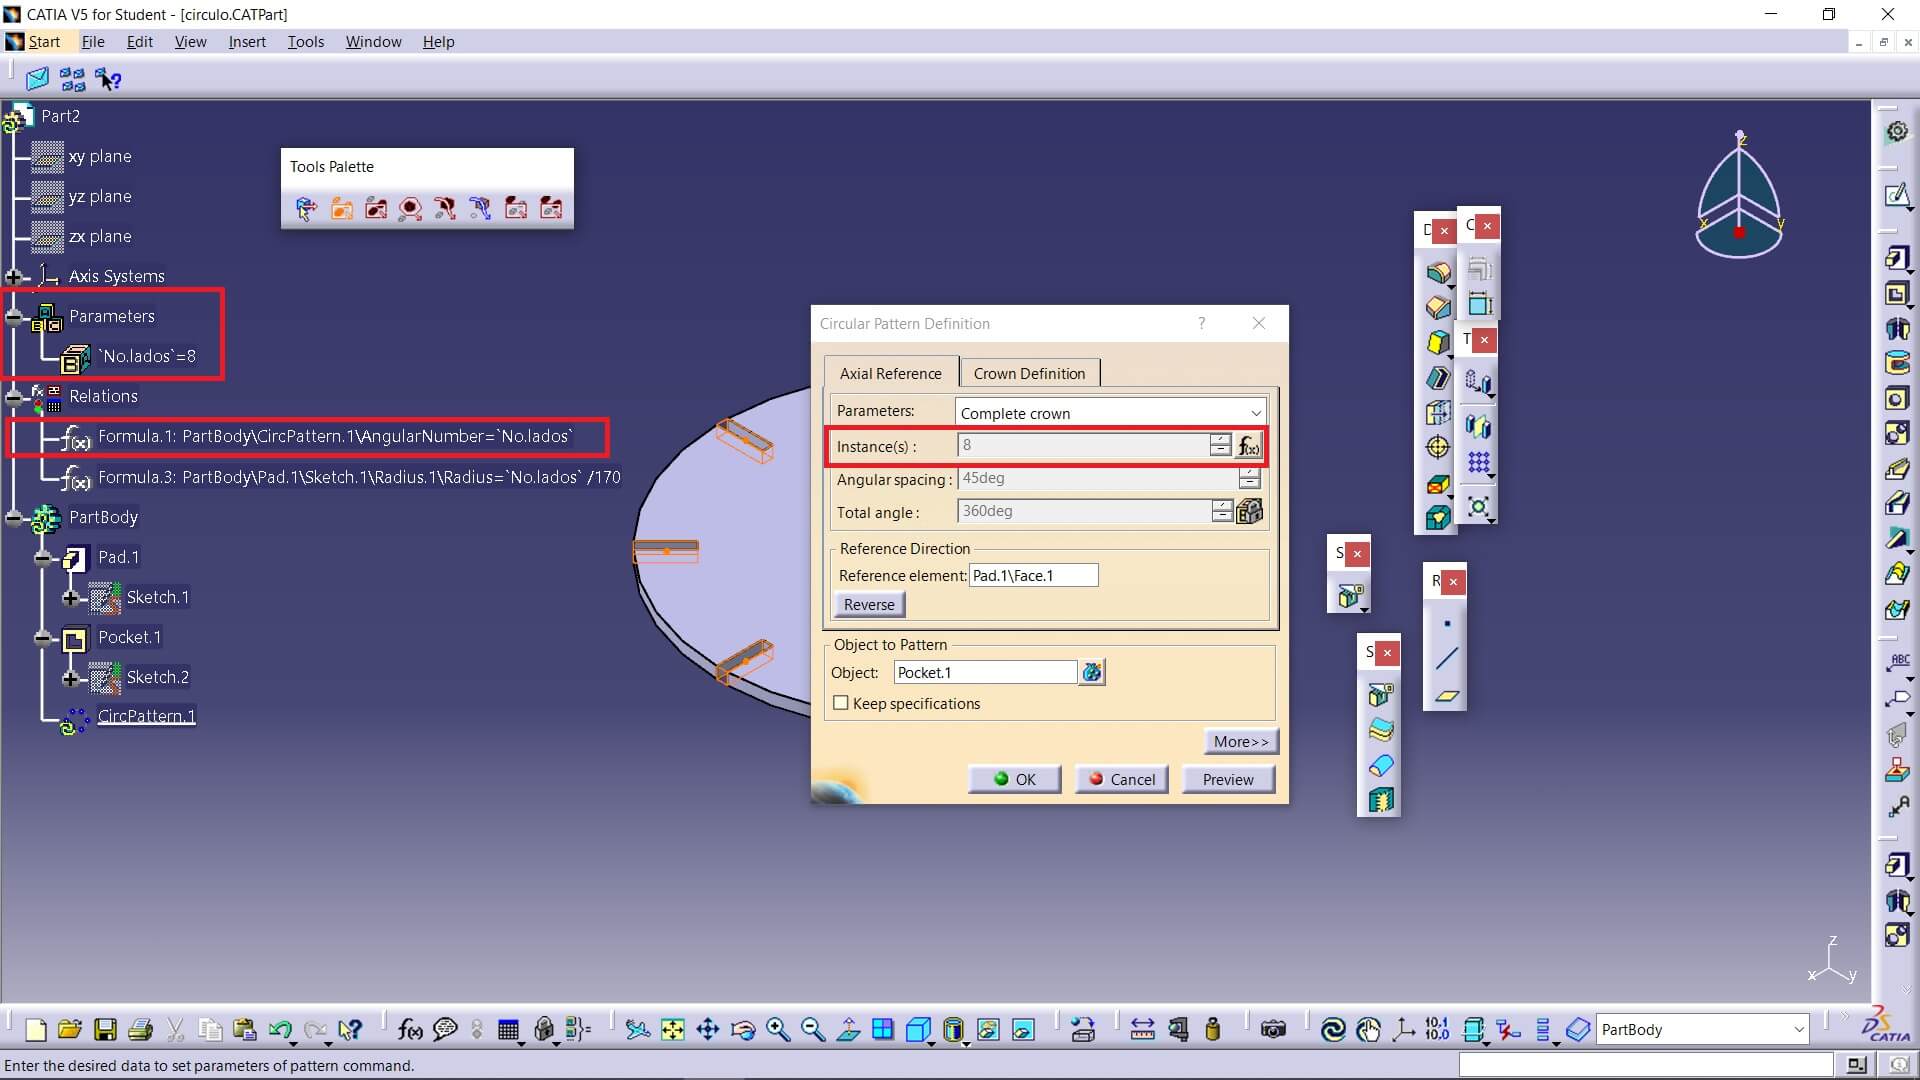
Then I defined a parameter for the number of slots, created a variable for real numbers, and linked it to the circular pattern.
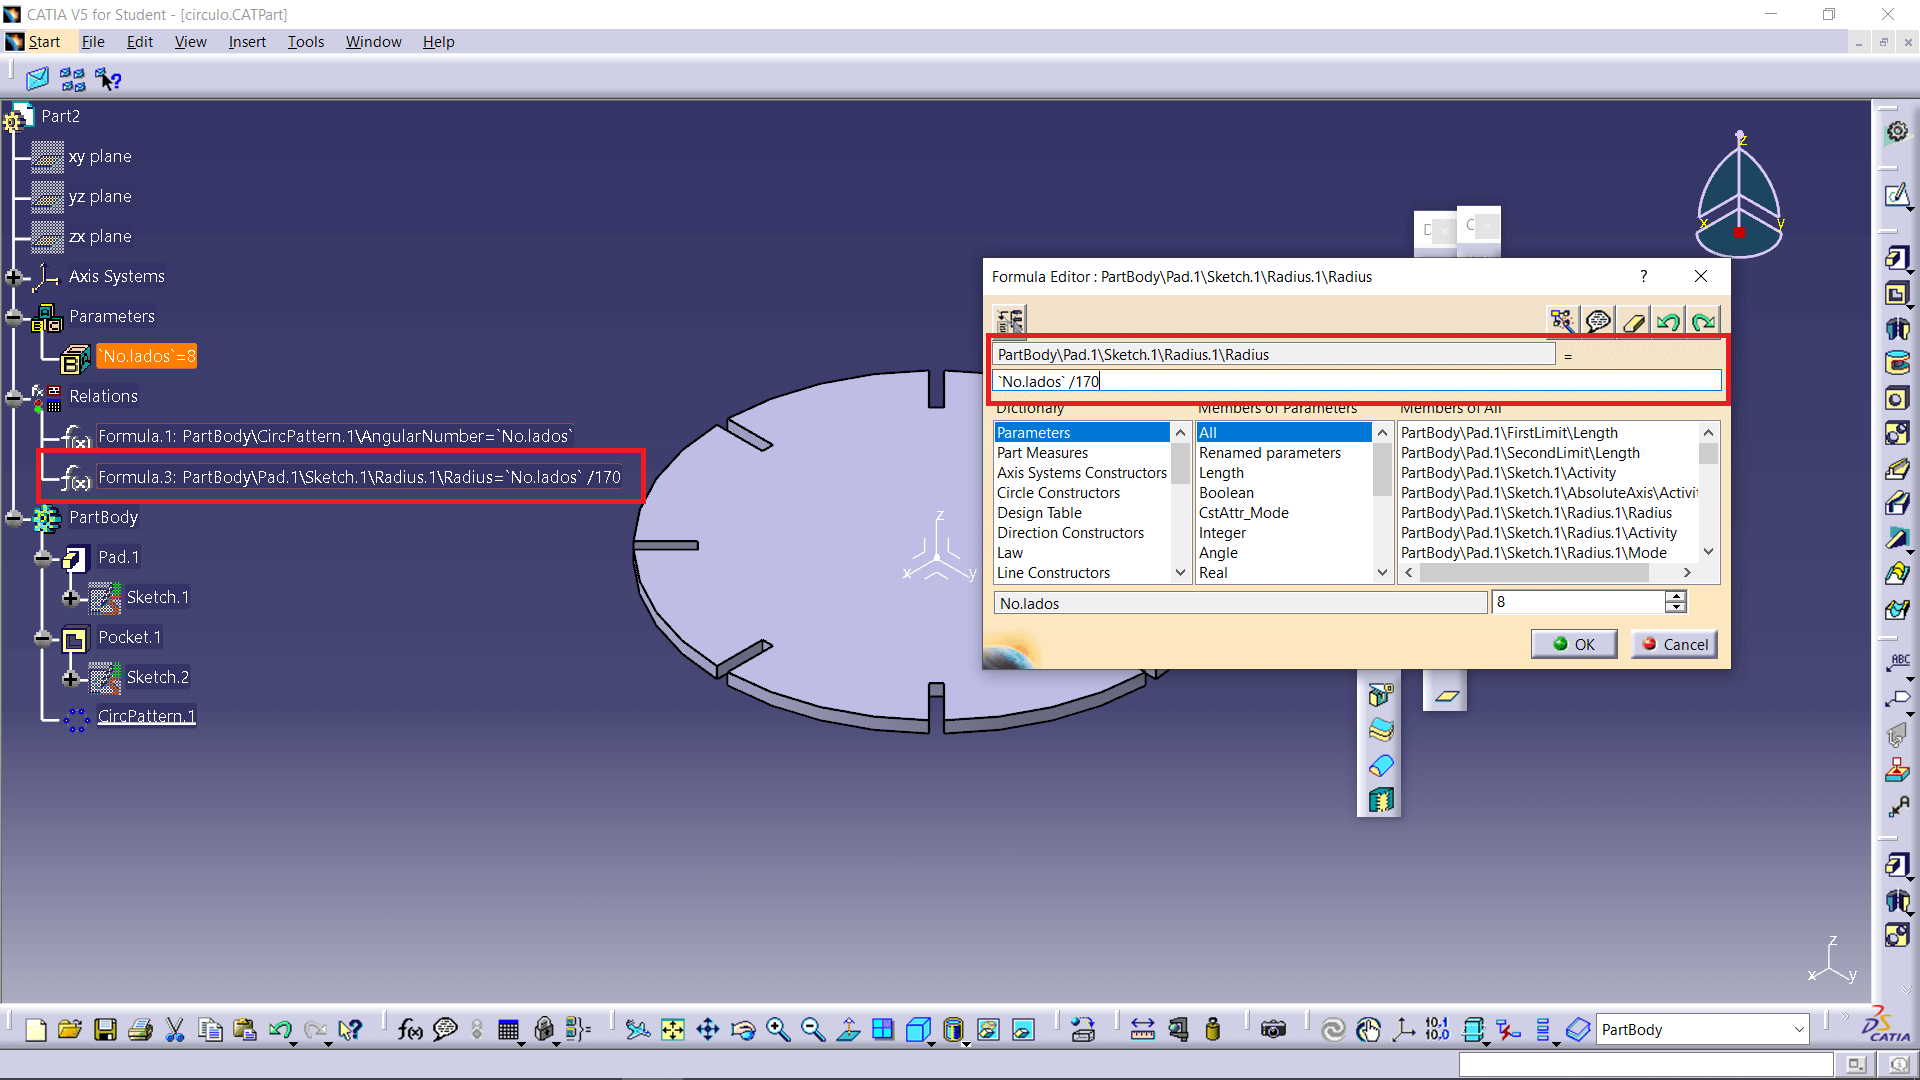
After that I made the diameter of the circle depend on the number of slots in the piece. Here, I noticed an issue with CATIA that SolidWorks doesn’t have. SolidWorks handles numbers as absolutes, without distinguishing between them, whereas CATIA separates real numbers from lengths, angles, and others. Because of this, I couldn’t directly input a “clean” formula. When entering formulas, the program multiplied the radius value by the number of slots times a thousand. For example: 30(4*100) =12000 mm. To address this, you can see that I included a division by a more convenient number to ensure the pieces were made correctly.
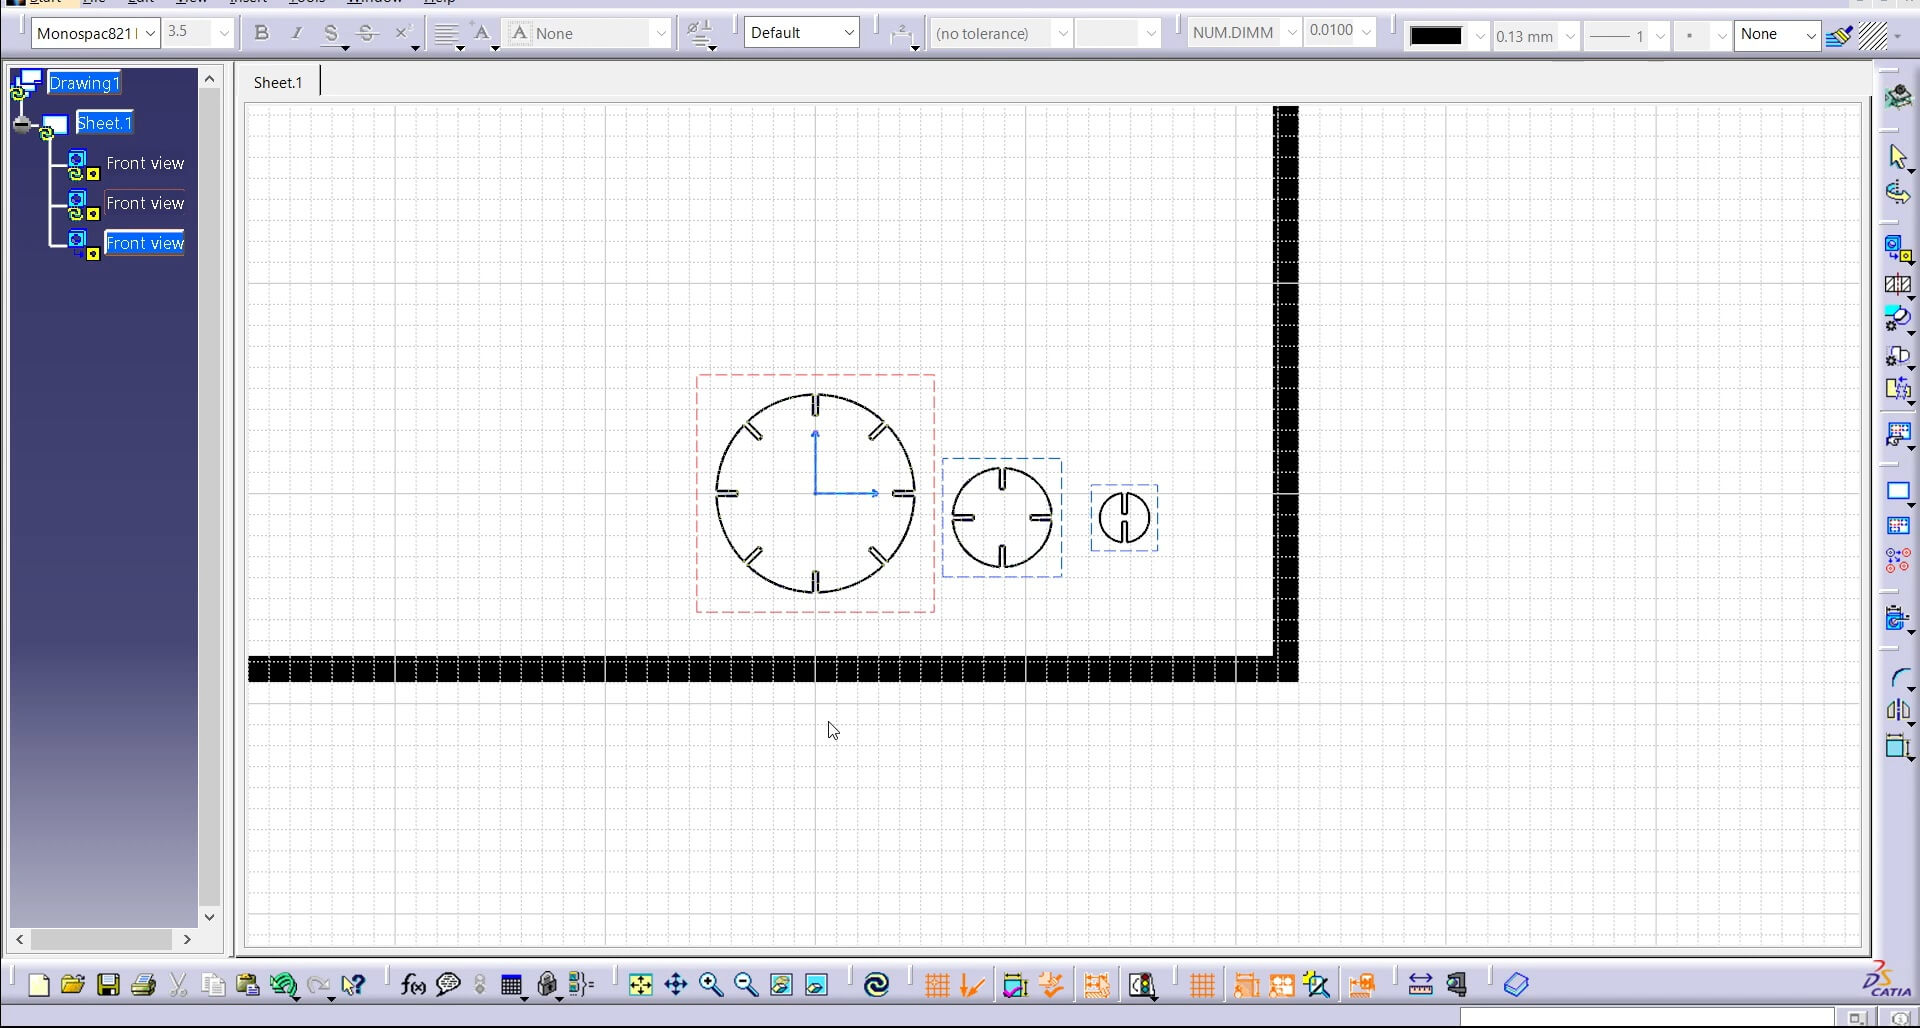
After solving the formula issues, I created pieces with slots in exponential multiples of 2, meaning 2, 4, and 8.
Next, I imported the DXF file into the laser cutter program and arranged the pieces, as I hadn't assigned them a specific order beforehand.
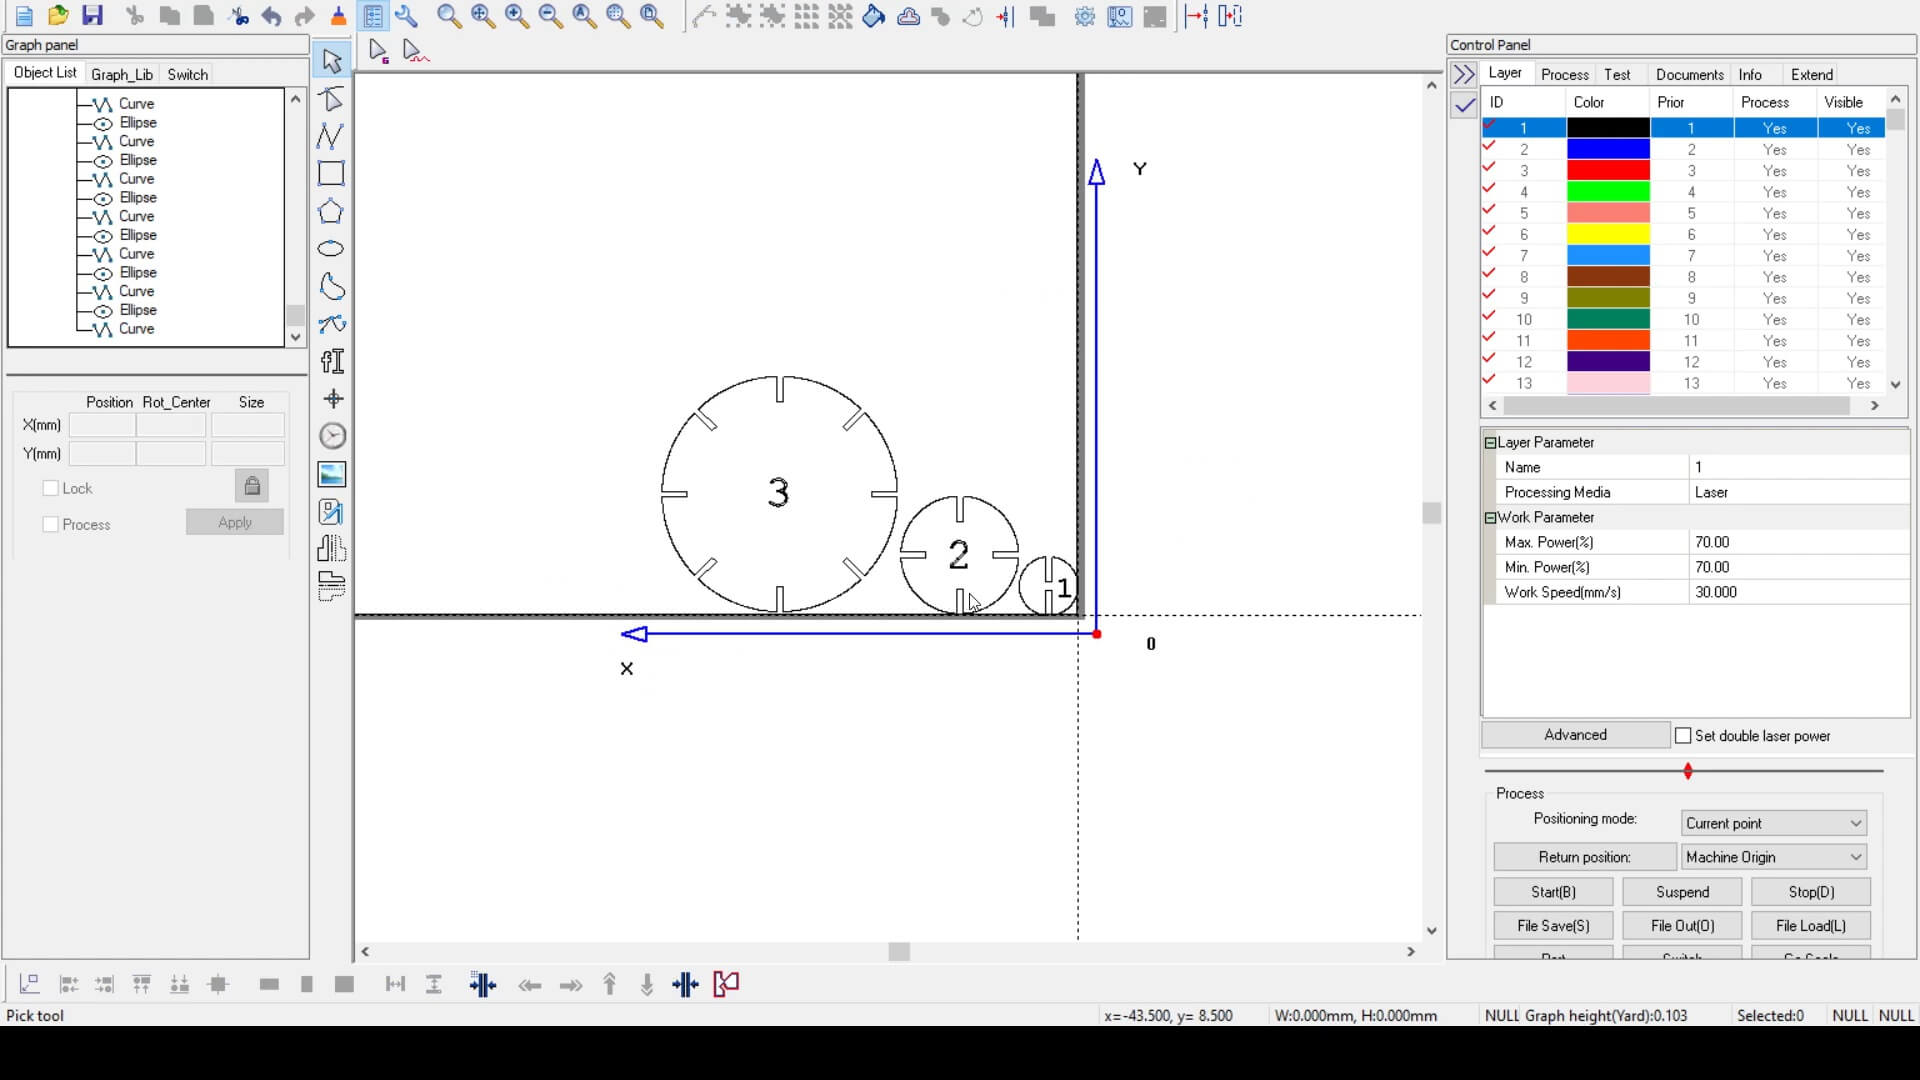
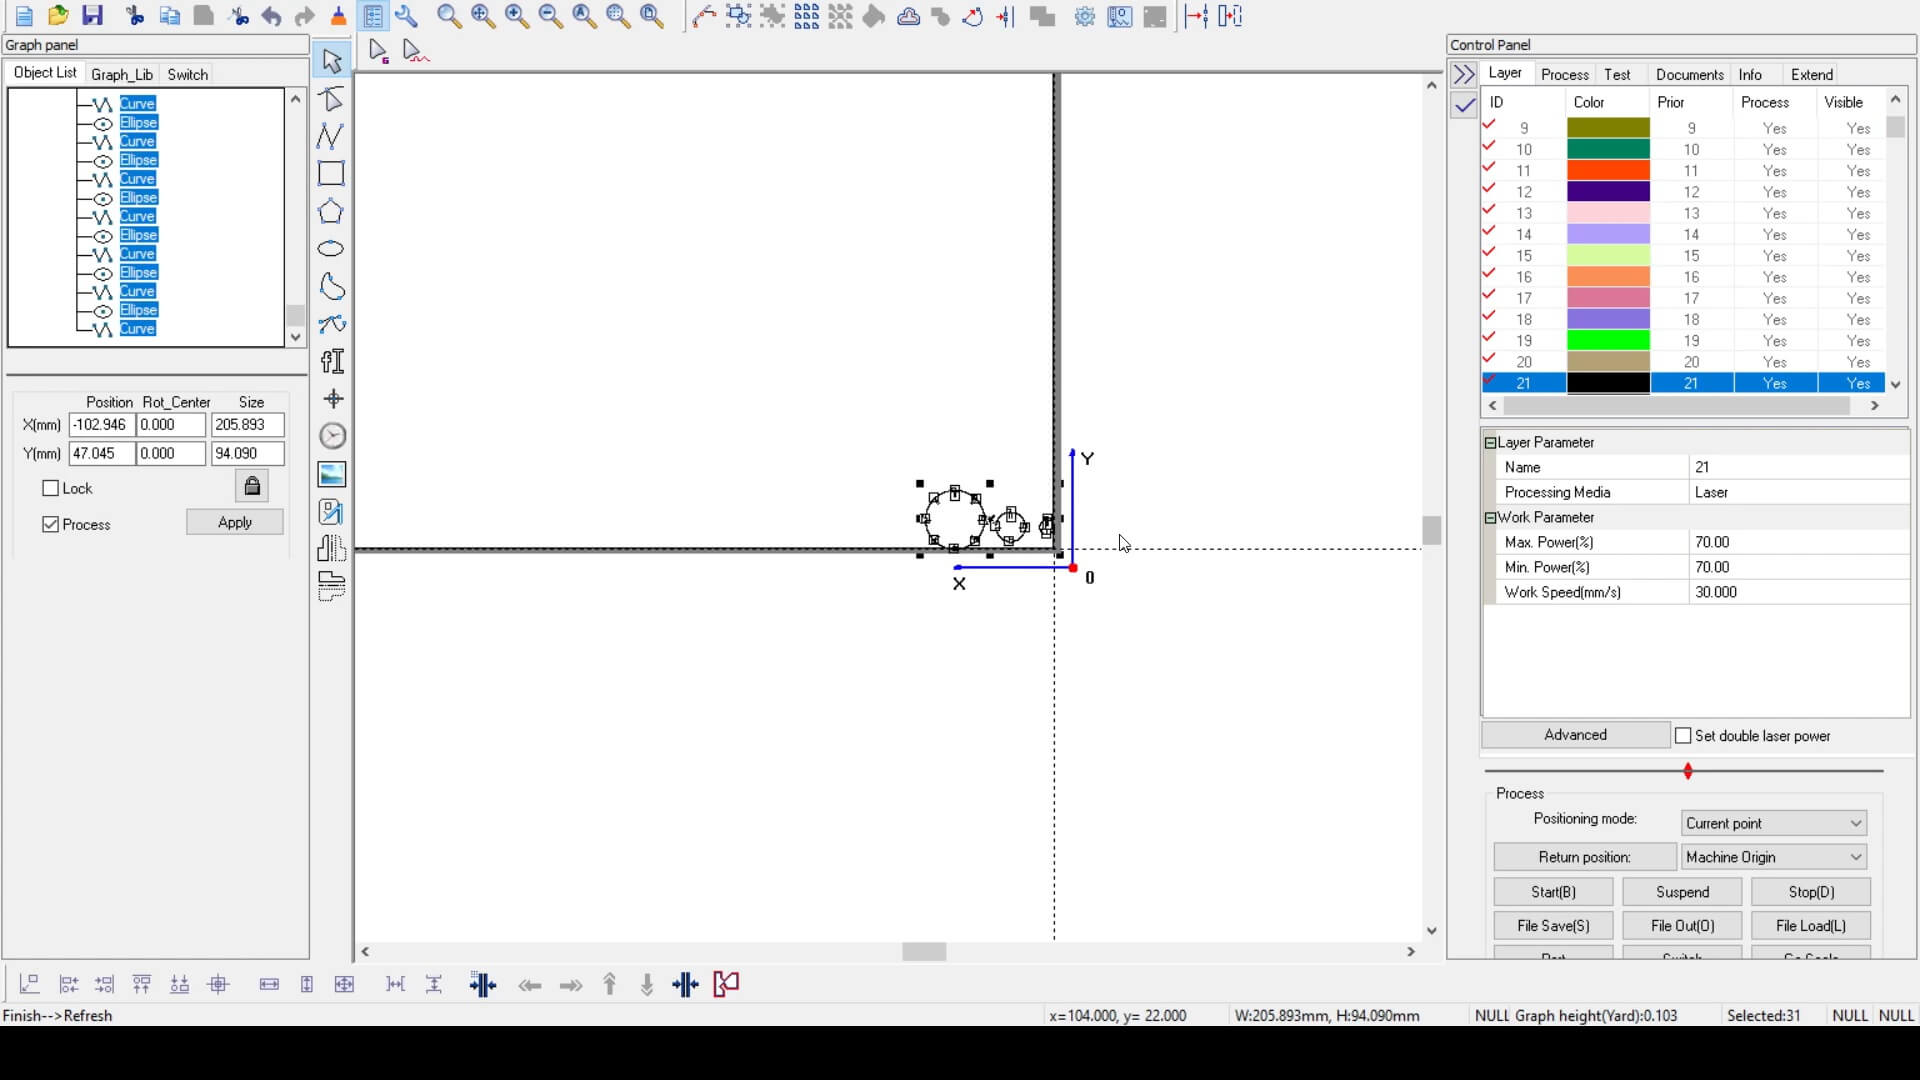
I assigned a number to each piece to differentiate their respective distribution (clearly not necessarily due to their size, but I wanted to engrave something on them).
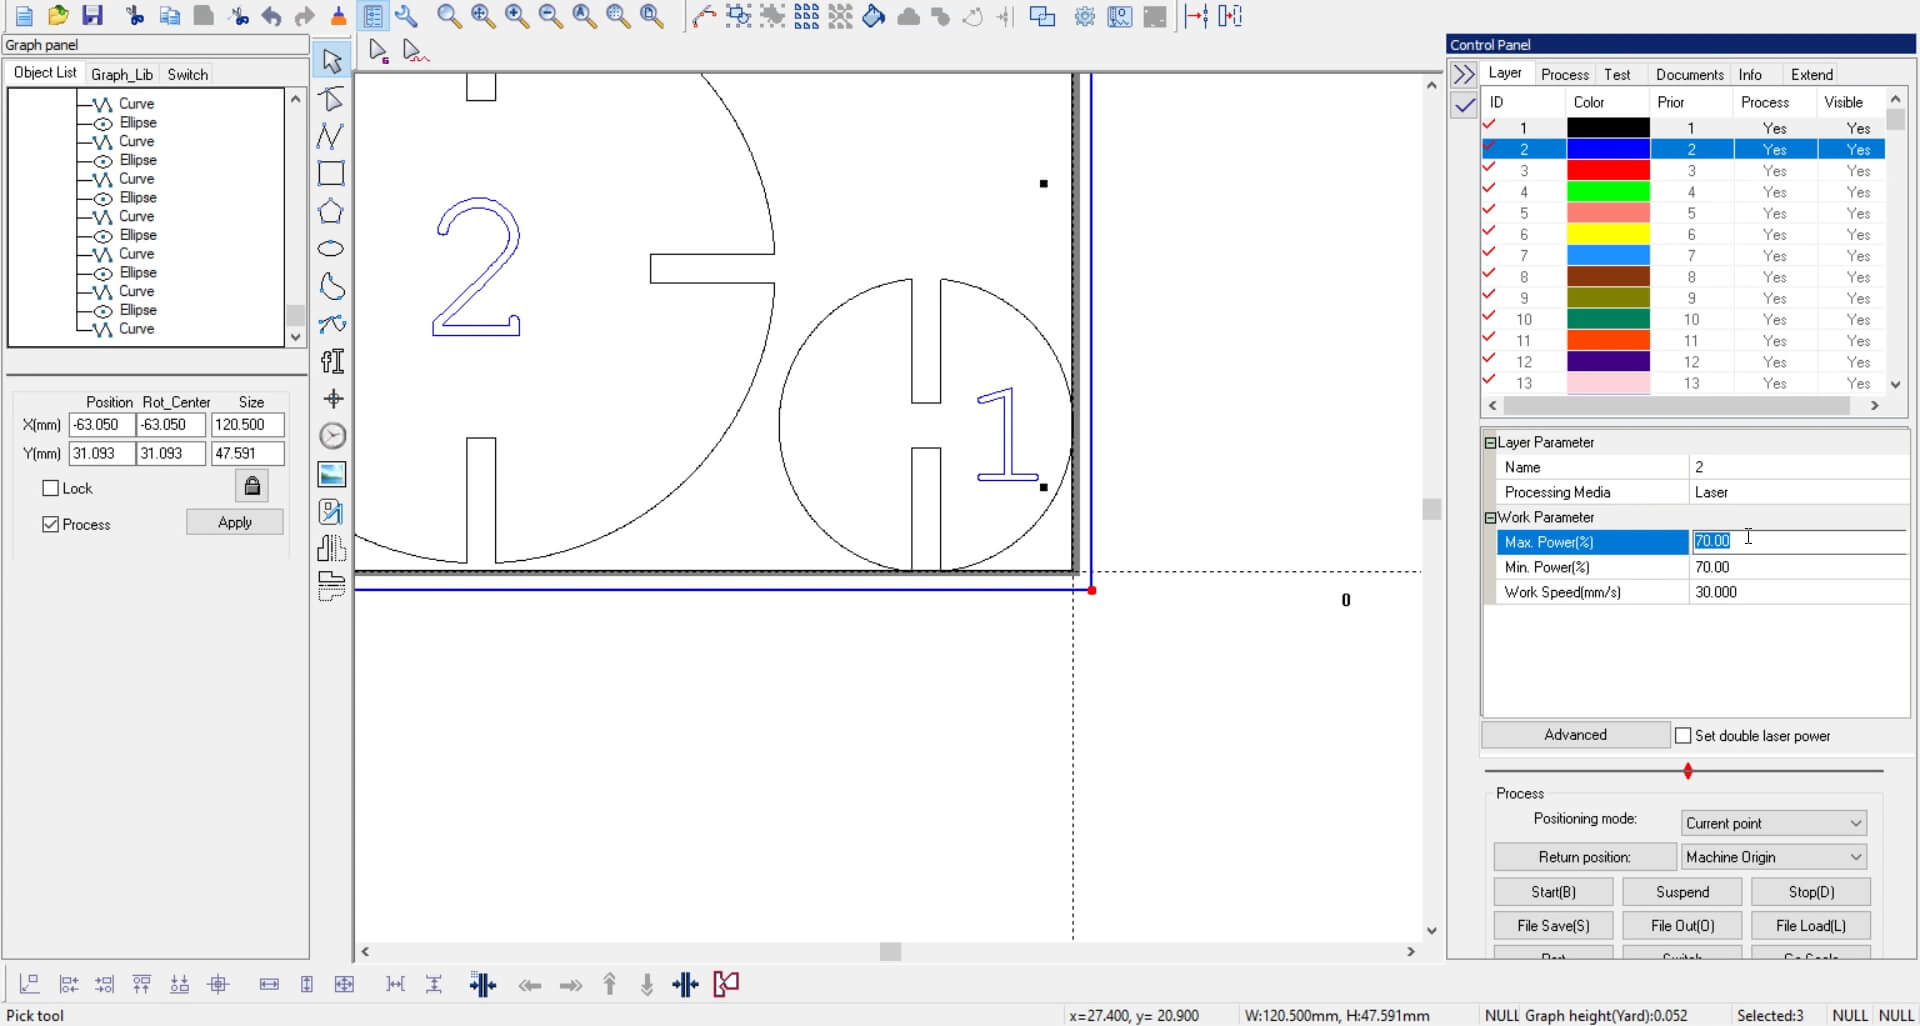
I used only the numbers, and for the engraving parameters, I set 10% power and 200 mm/s engraving speed, while for cutting, I used 60% power and 30 mm/s cutting speed.
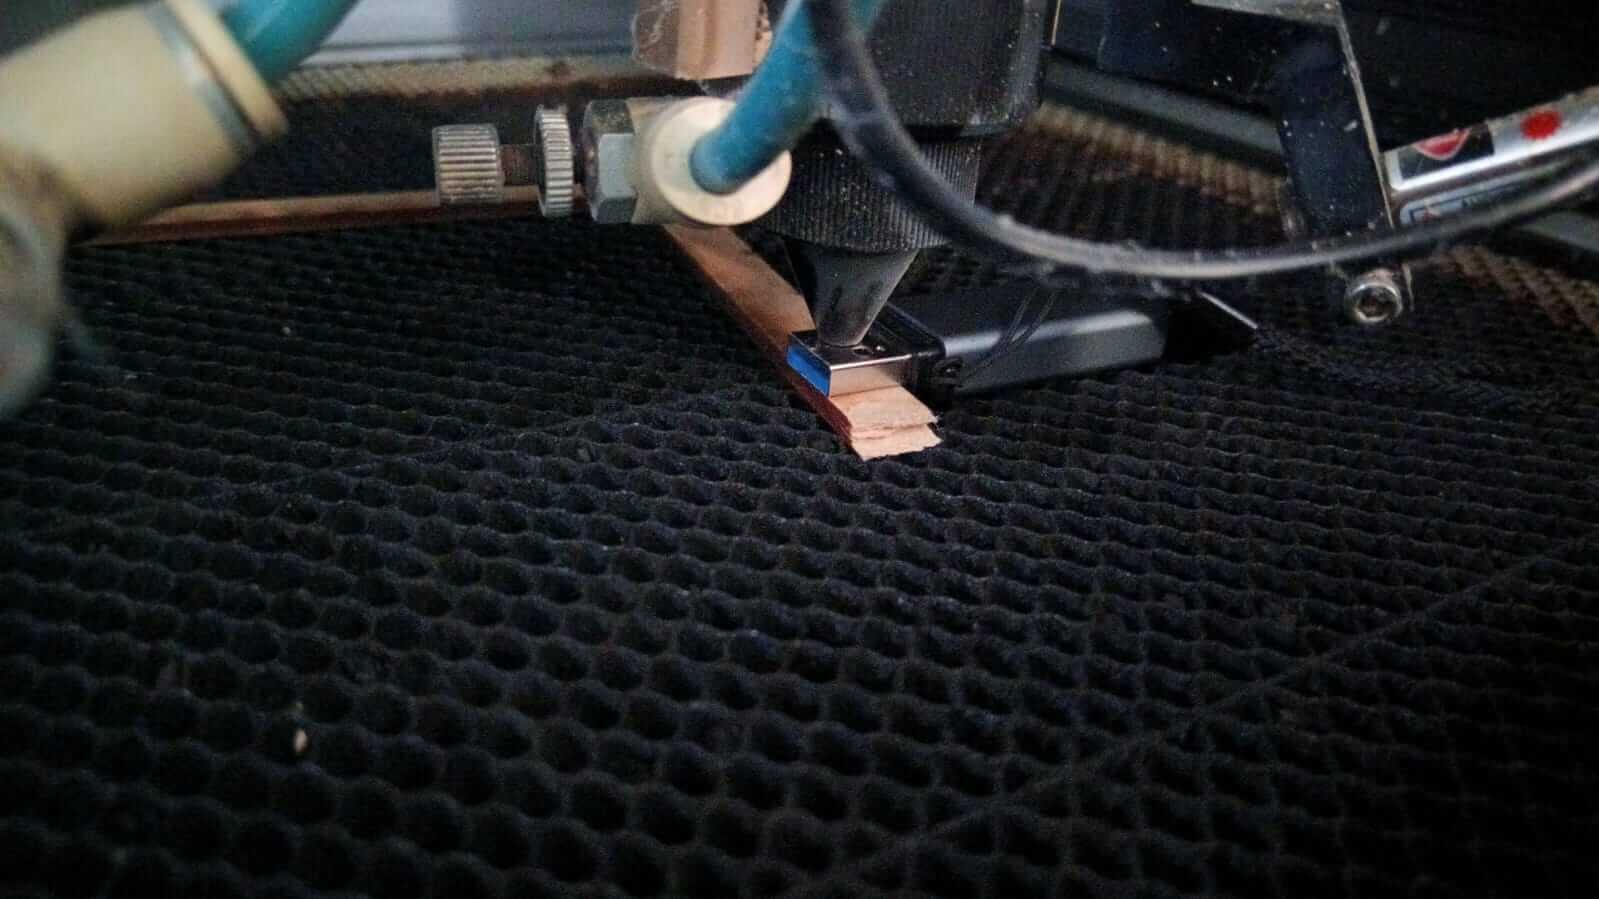
The way we focus the CNC laser is to place the USB flash drive's socket on the table and place the laser over the socket. This maintains a 5-millimeter tolerance between the laser and the MDF.
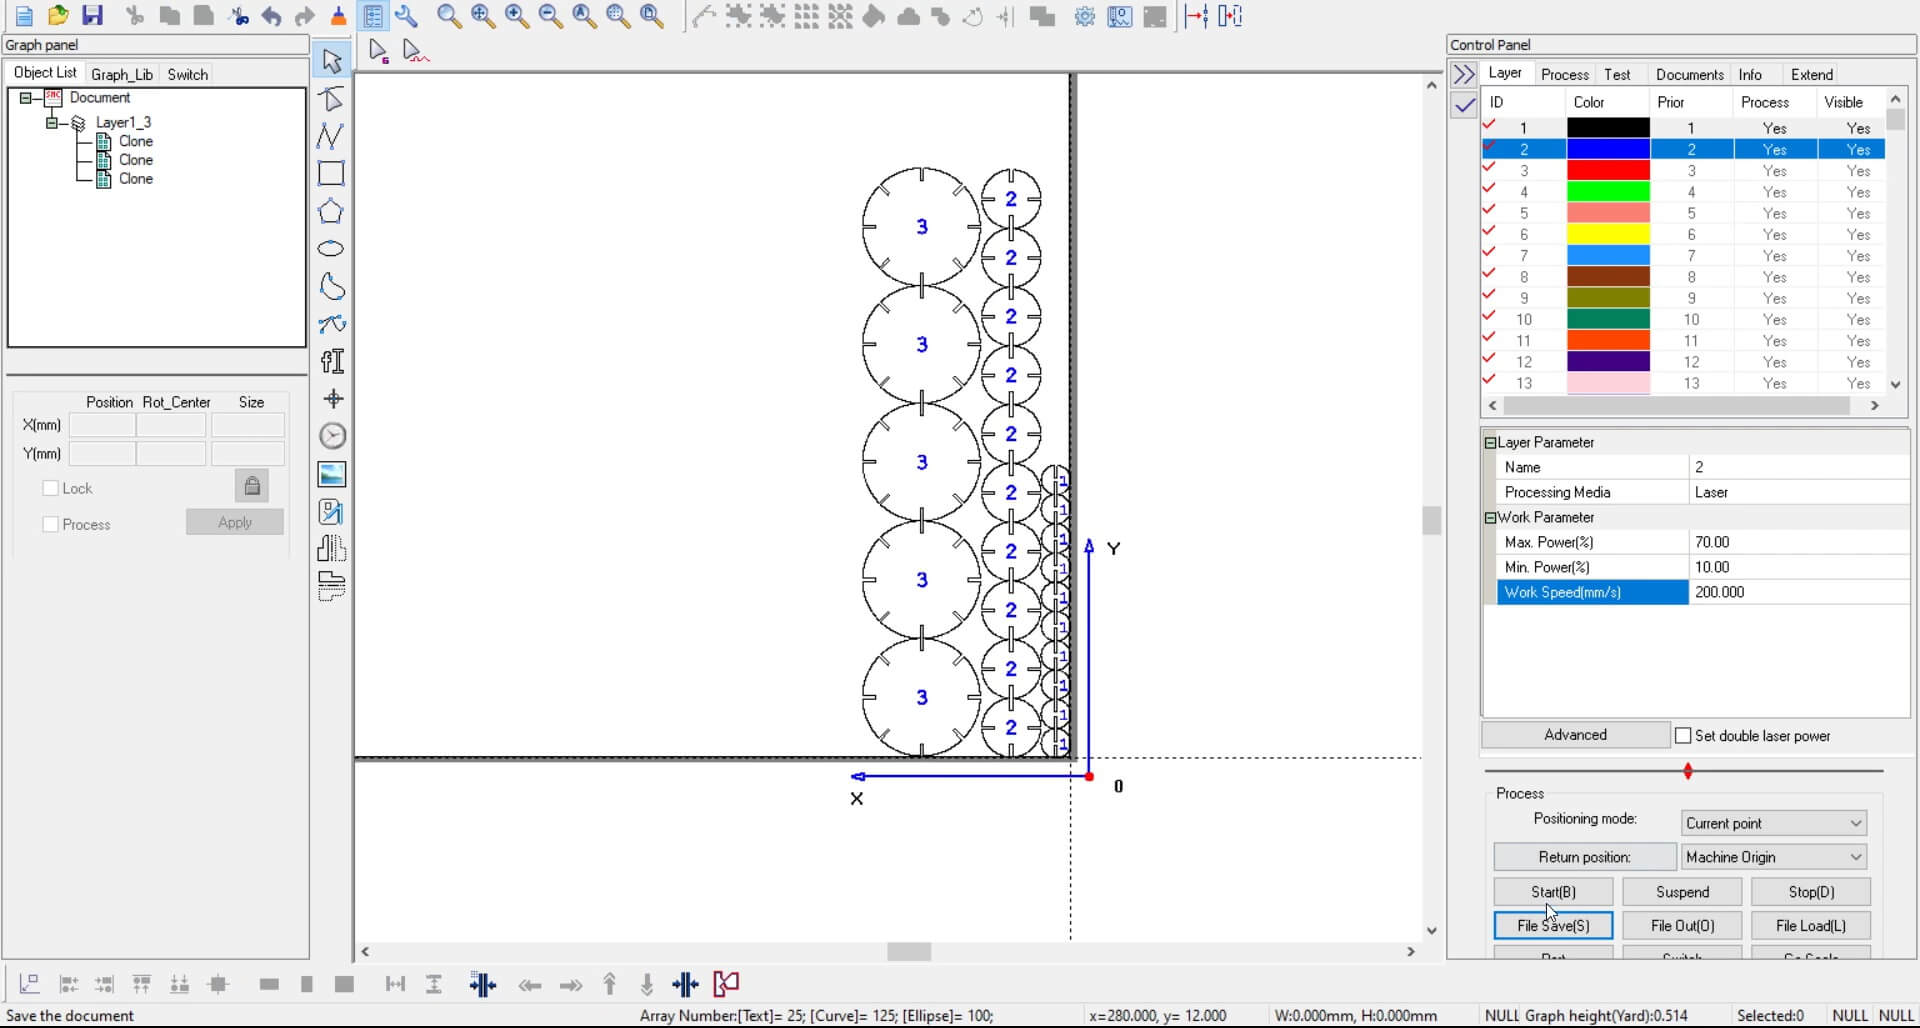
Since, for obvious reasons, not much can be done with just one piece of each, I used the "Create Array" function to make 10 of number 1 and 2, while for number 3, I only made 5 due to its size. I also used the "Find Overlap Line" function to prevent the machine from cutting the same line twice, and finally, the "Optimize" function, which ensures the machine cuts gradually from one side to the other instead of going top to bottom without finishing the cuts.
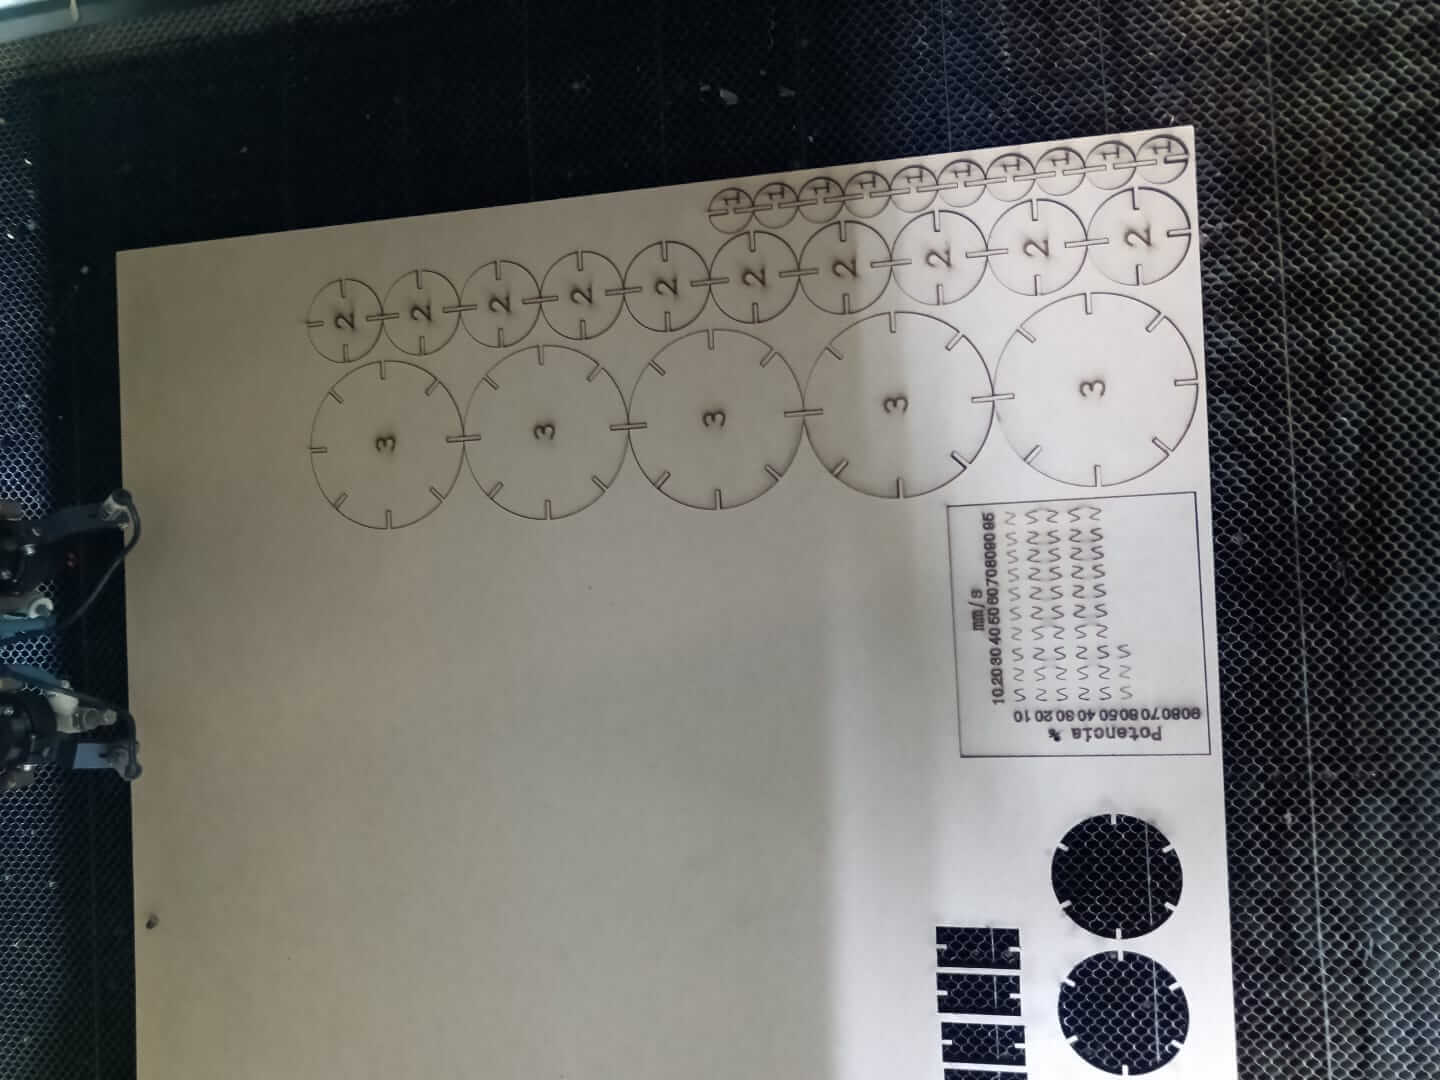
This is how they look right after being cut.
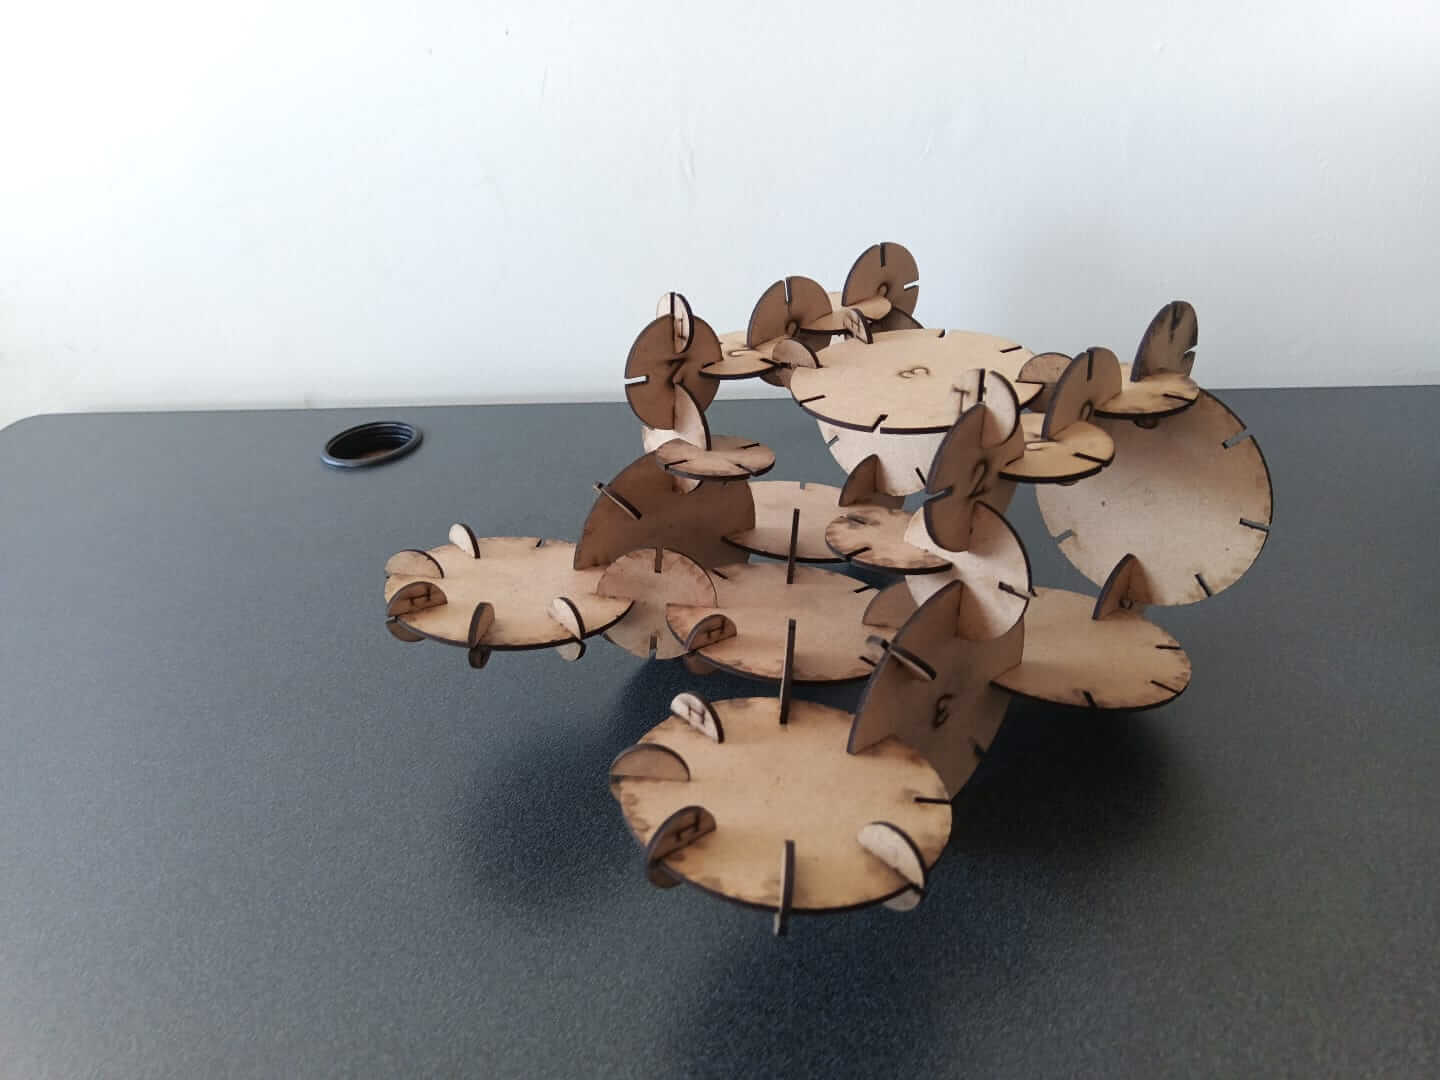
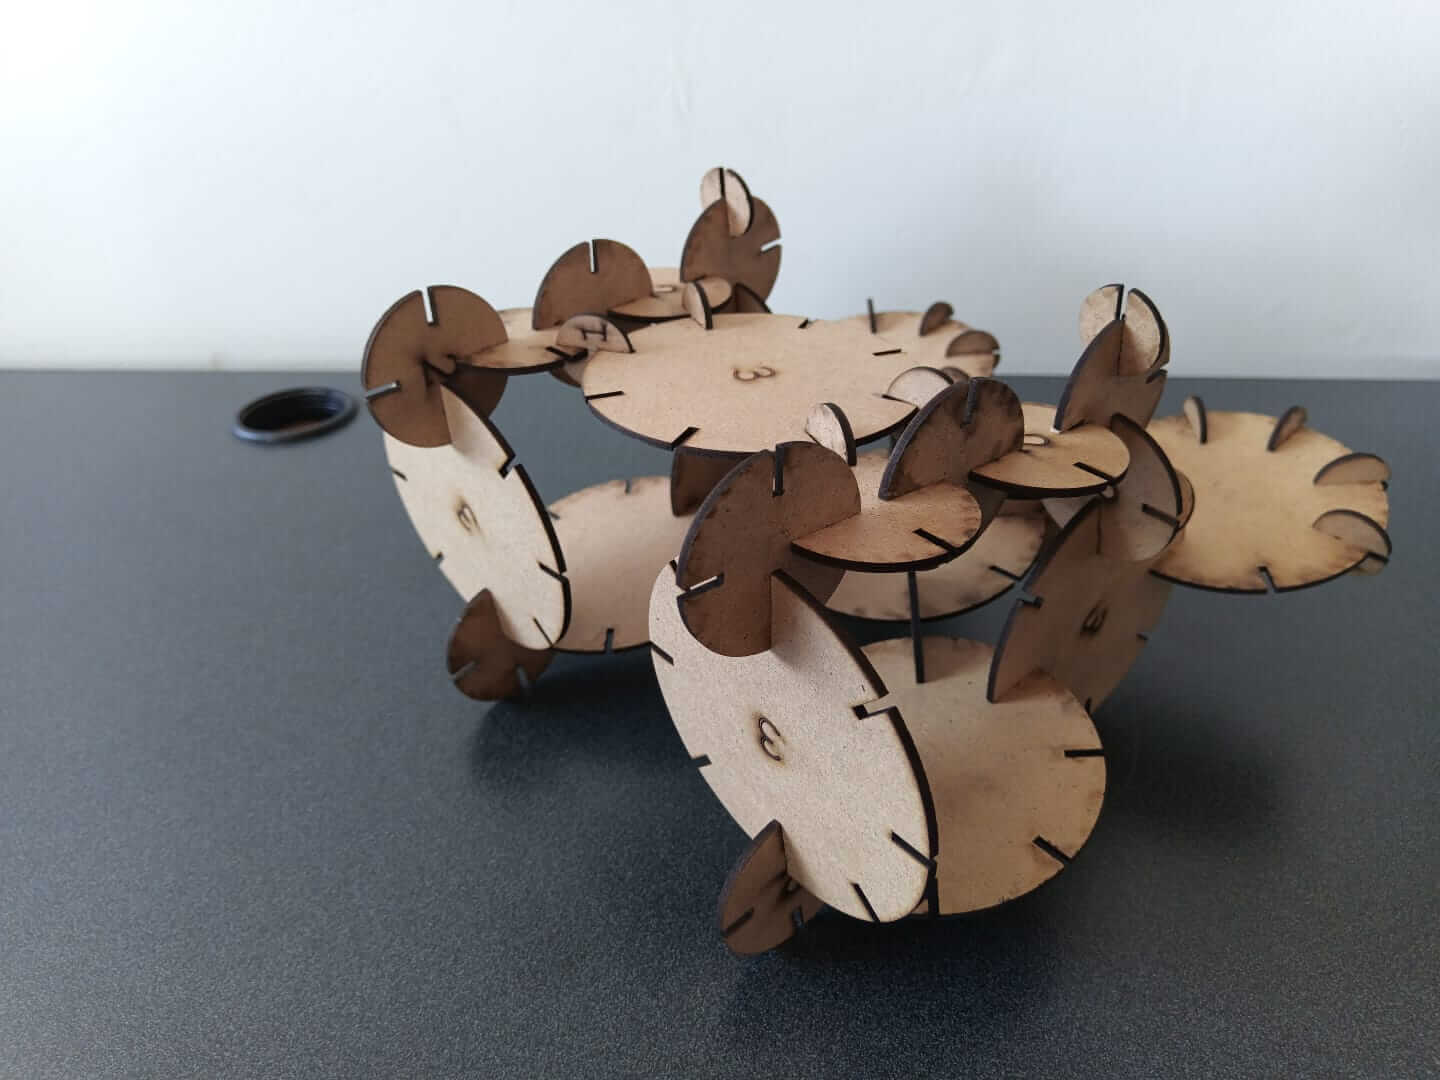
Hero shot

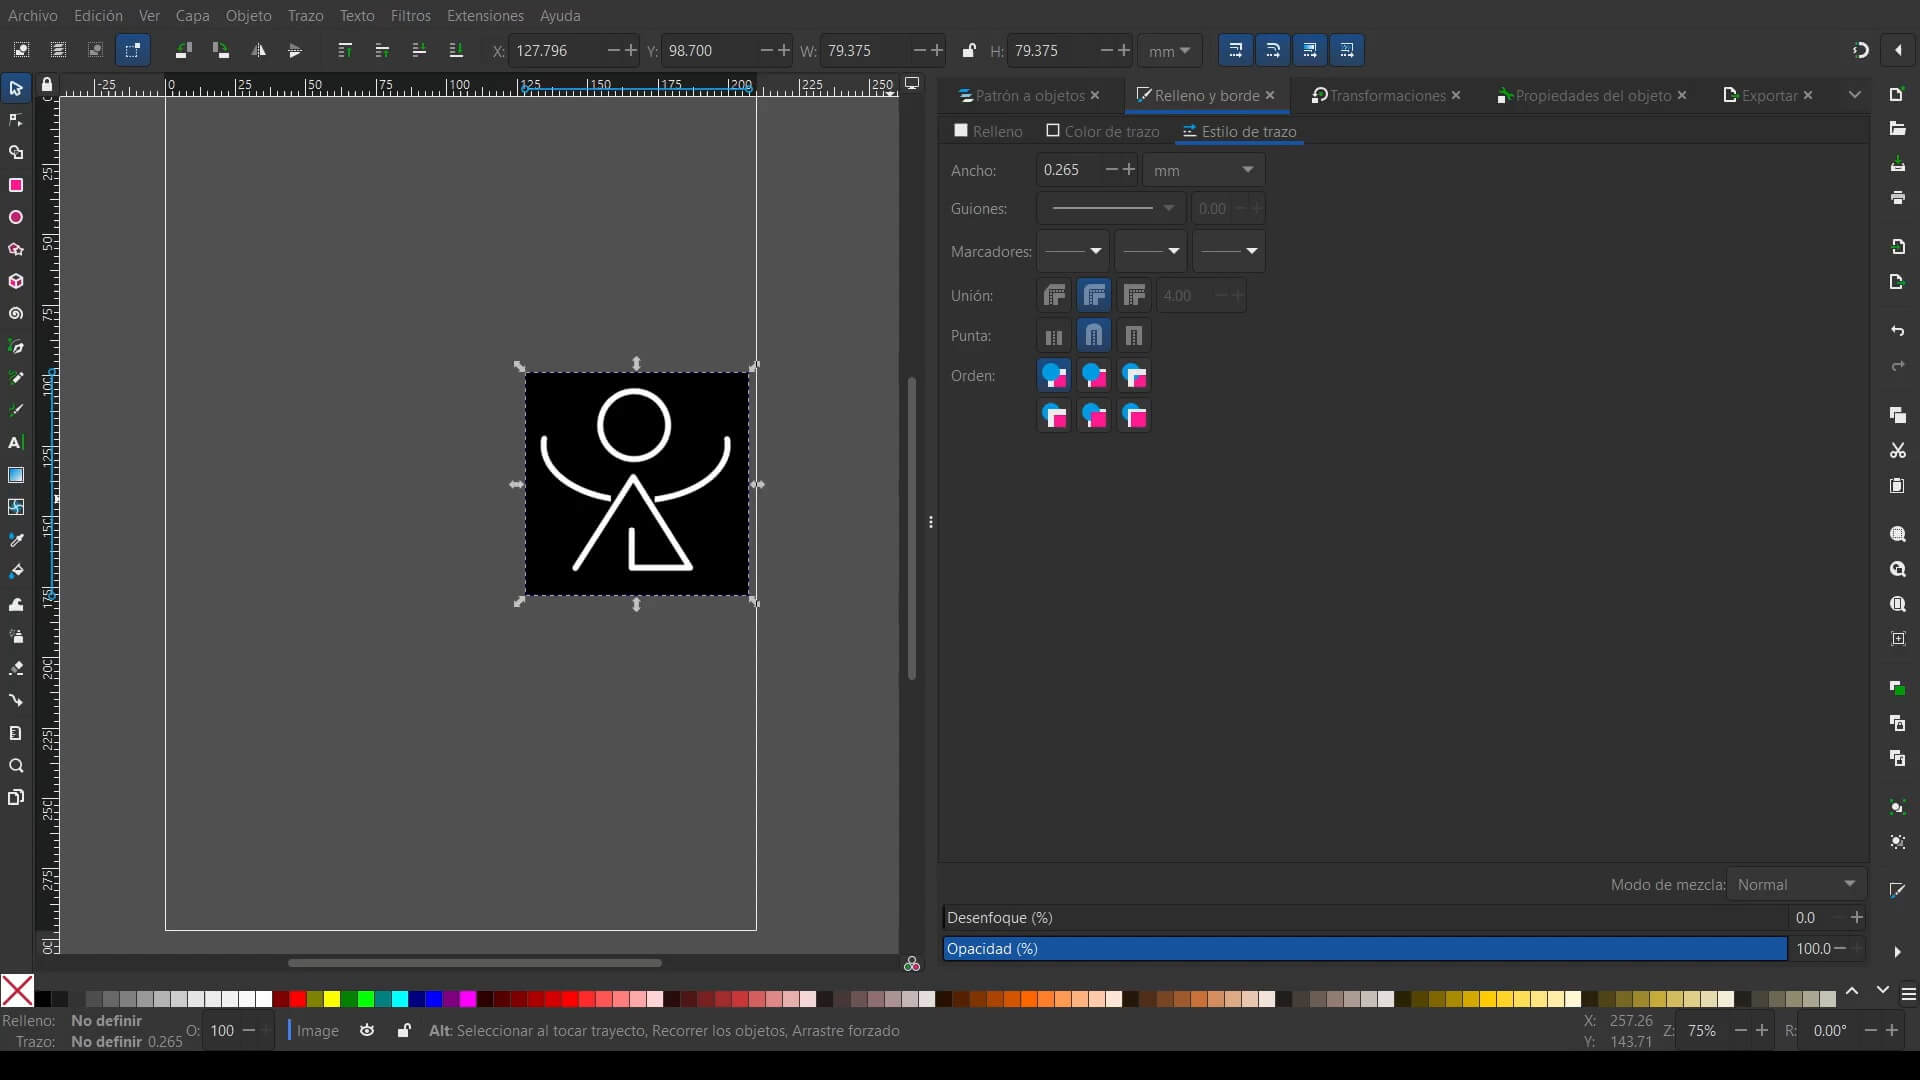
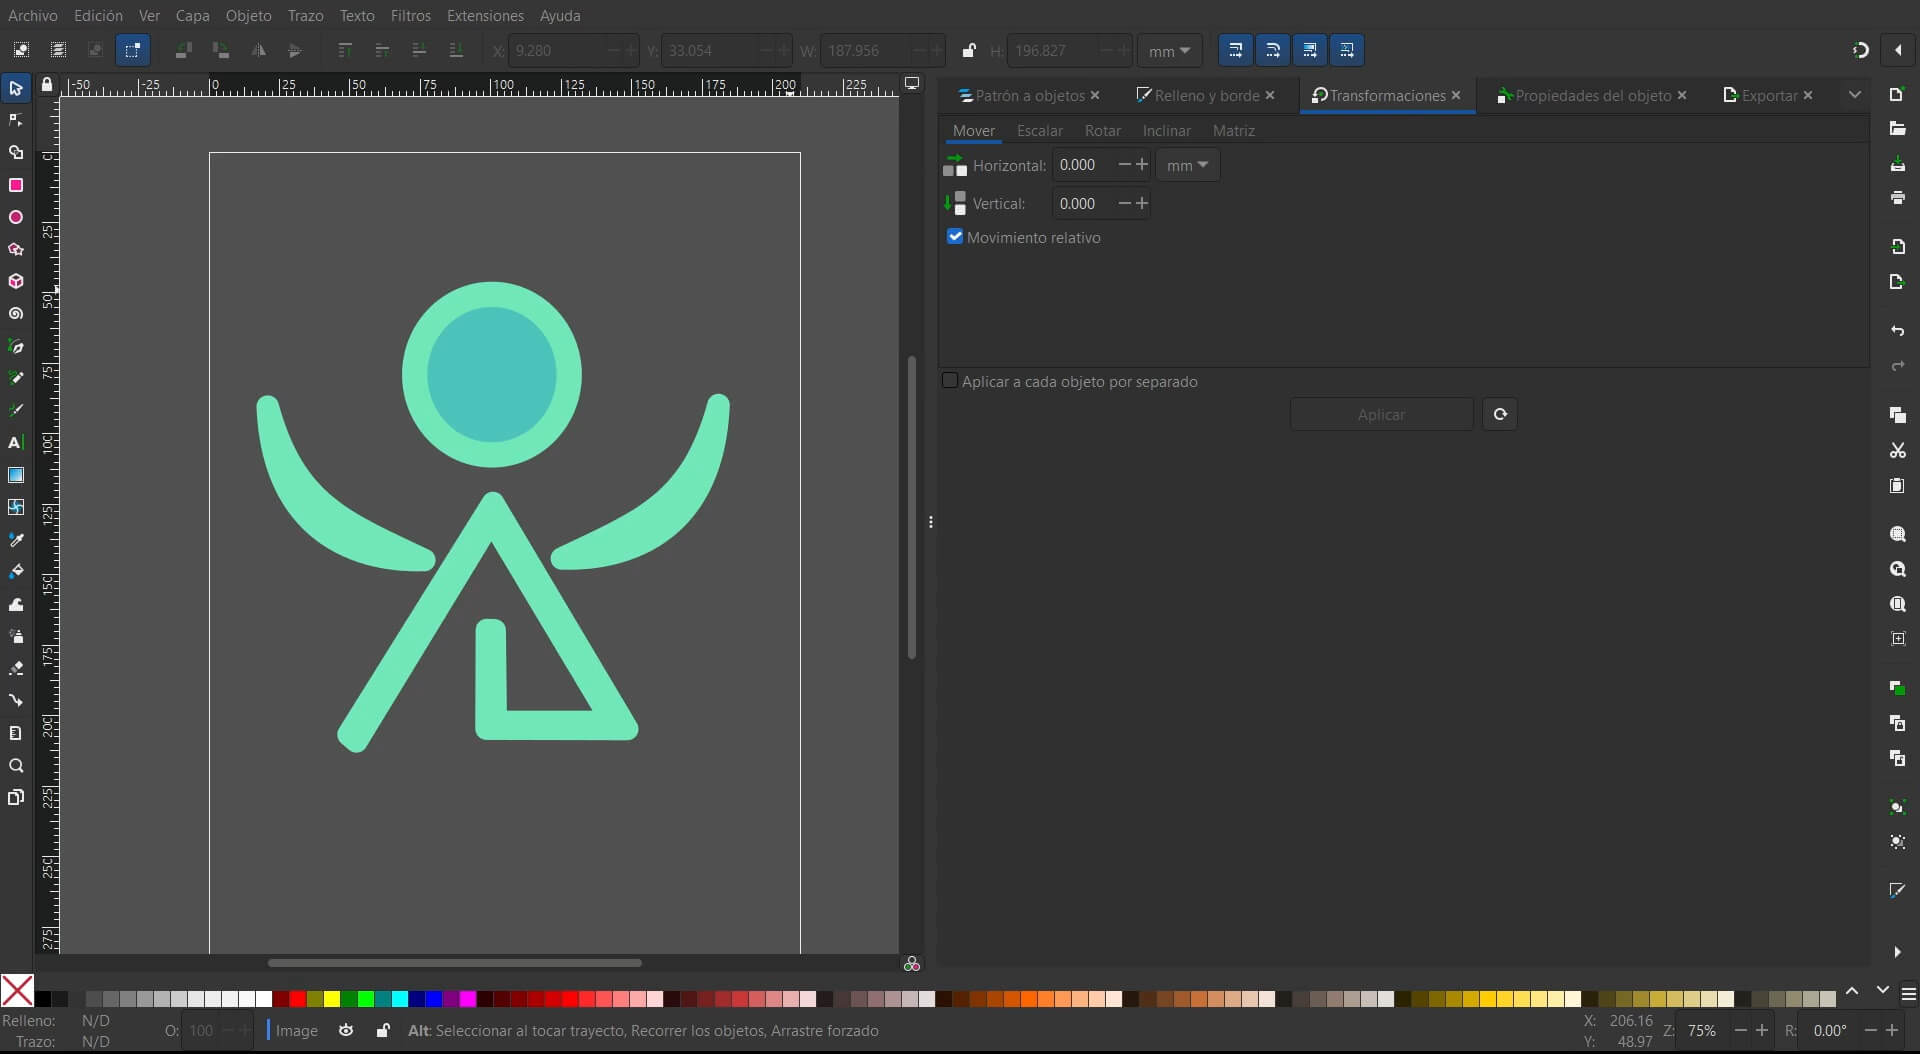
From the previous 2D design work, I imported the drawing I had made to follow its lines again. However, in this case, I created shapes with outlines instead of just lines. Even though the outlines are very thick, only a single line will be cut.
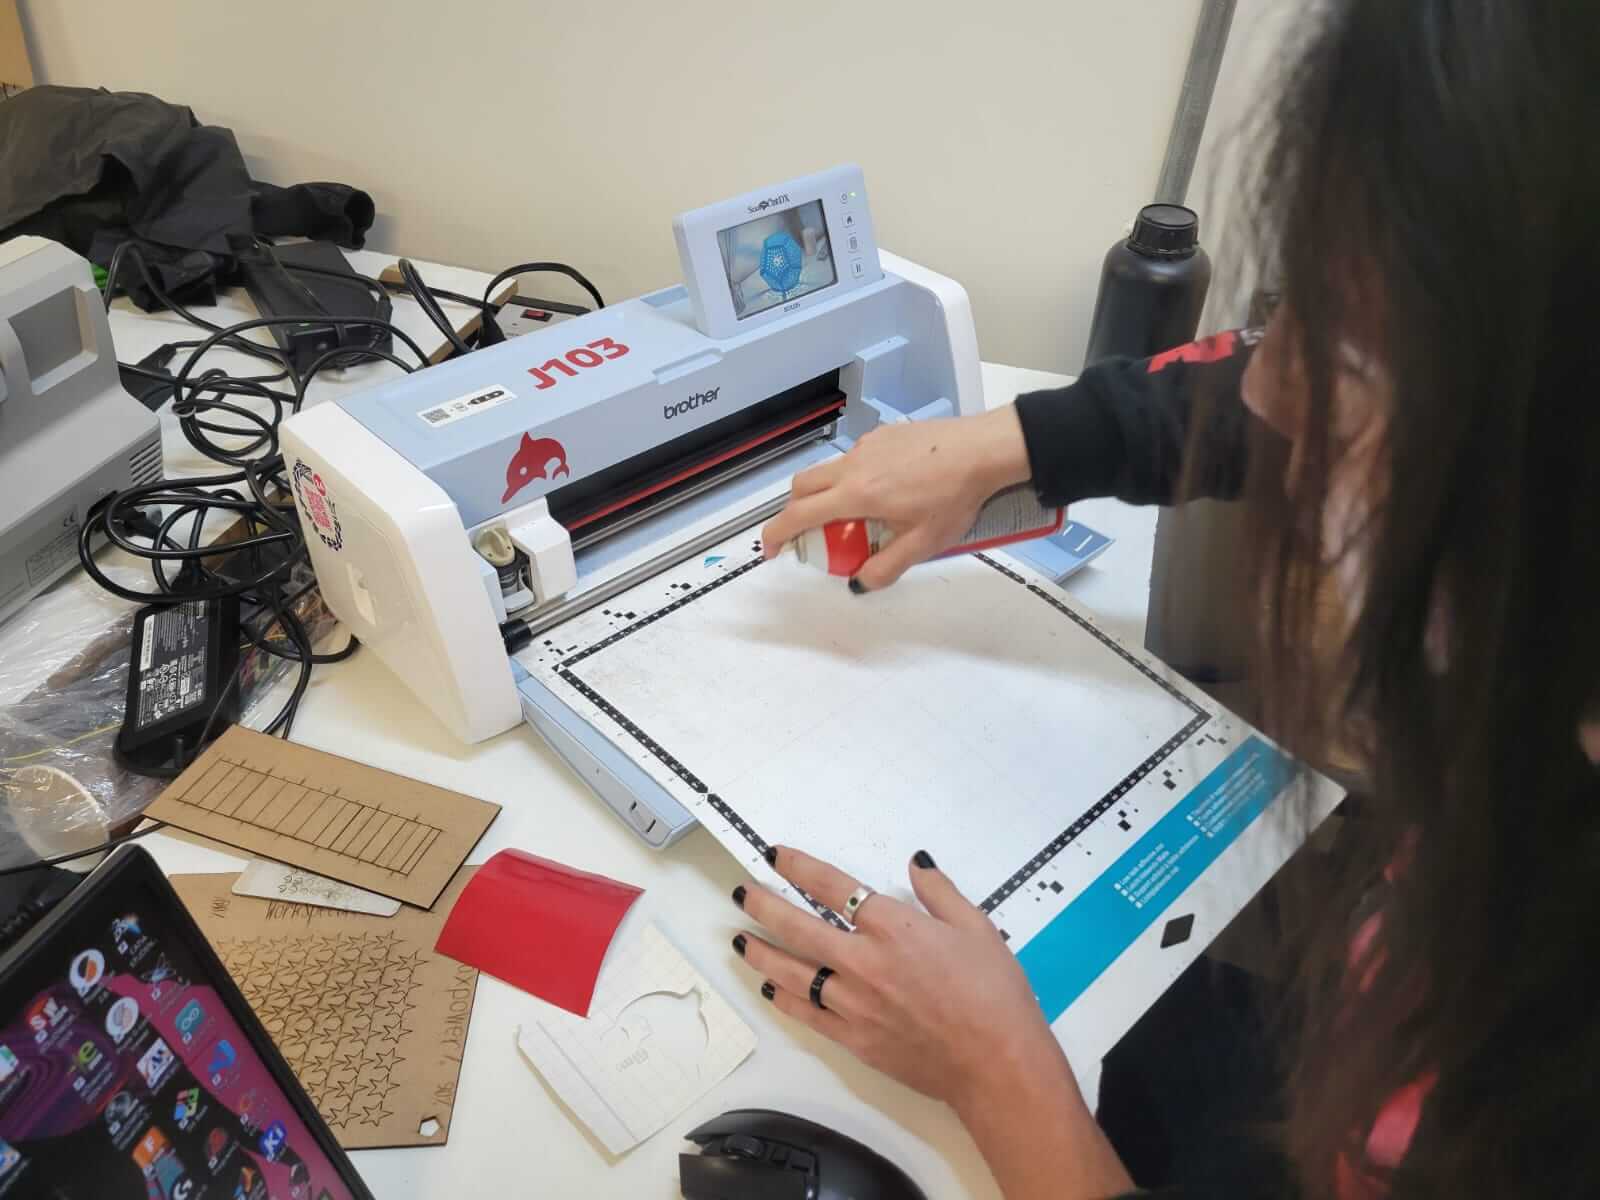
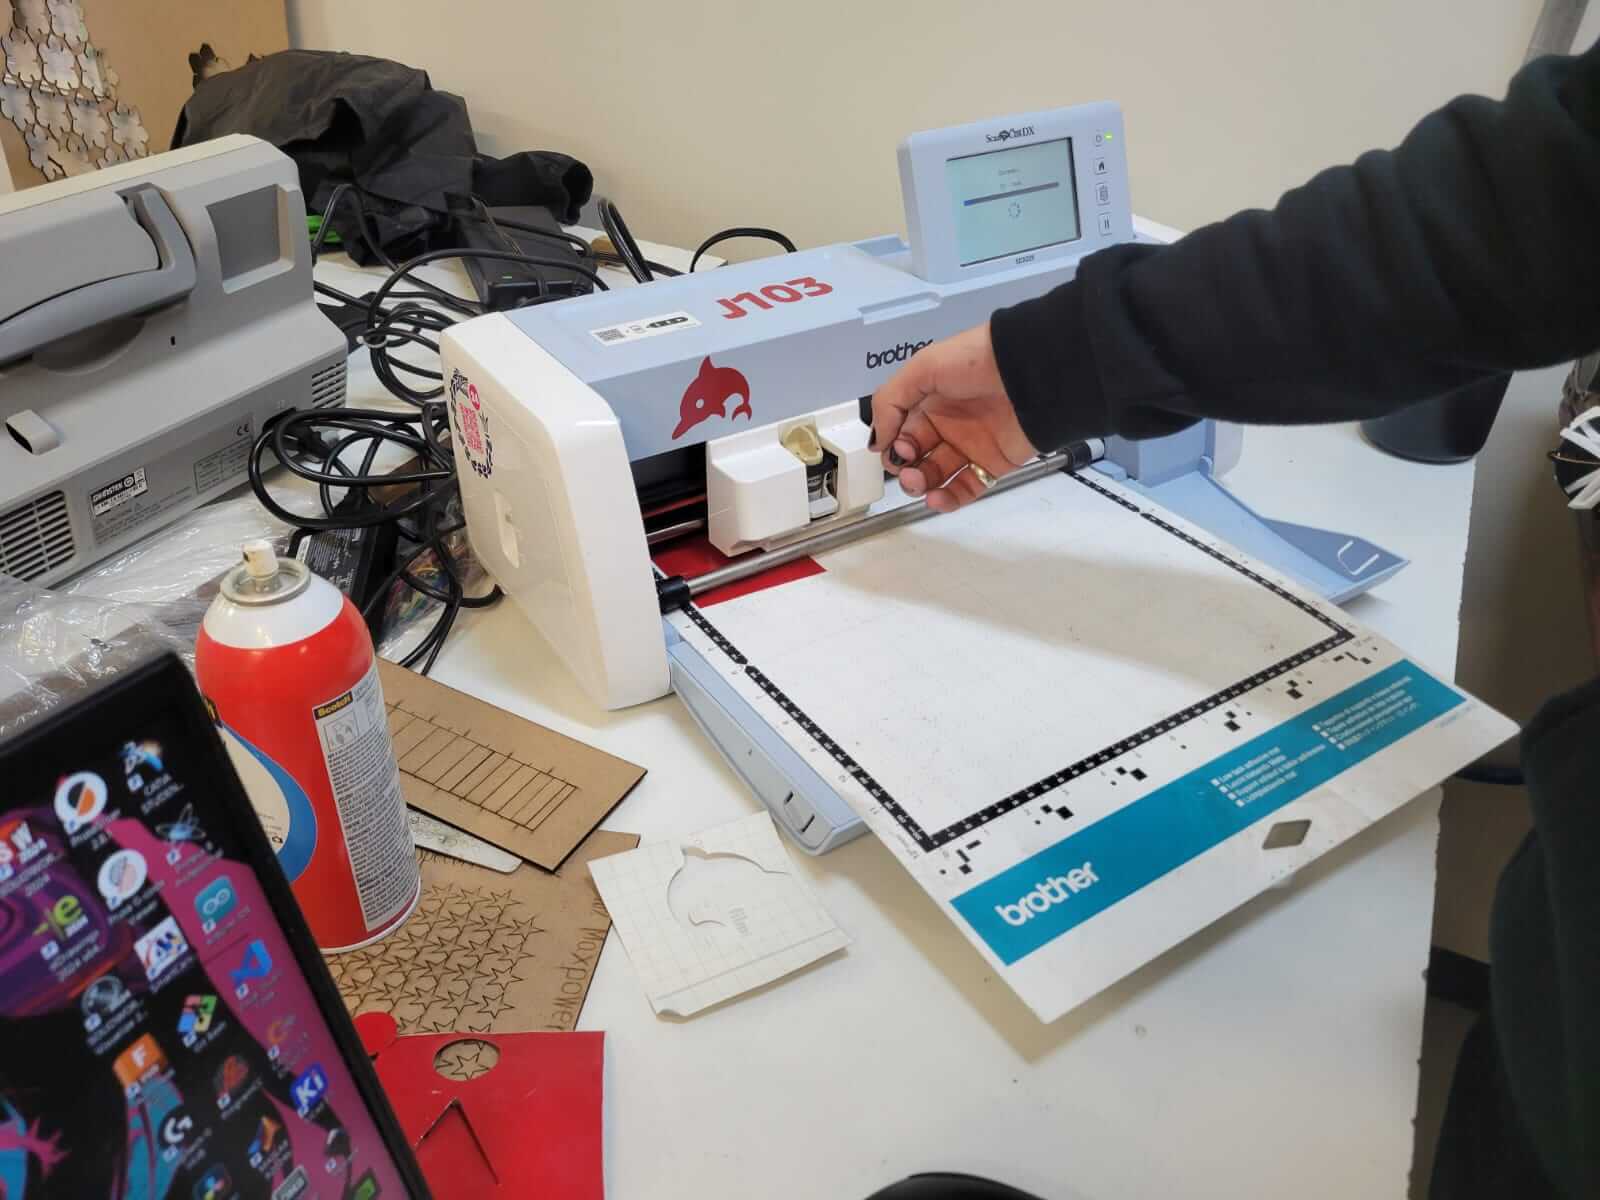
To start preparing the cutter, first, apply repositionable adhesive to the cutting mat only in the area where the cut will be made, according to the size of the design you want. Then, load the mat using the corresponding button.
Once the mat is ready, set the parameters to ensure a good cut. In this case, the cutting speed, cutting force, and cutting velocity were set to 3, 4, and 0, respectively.
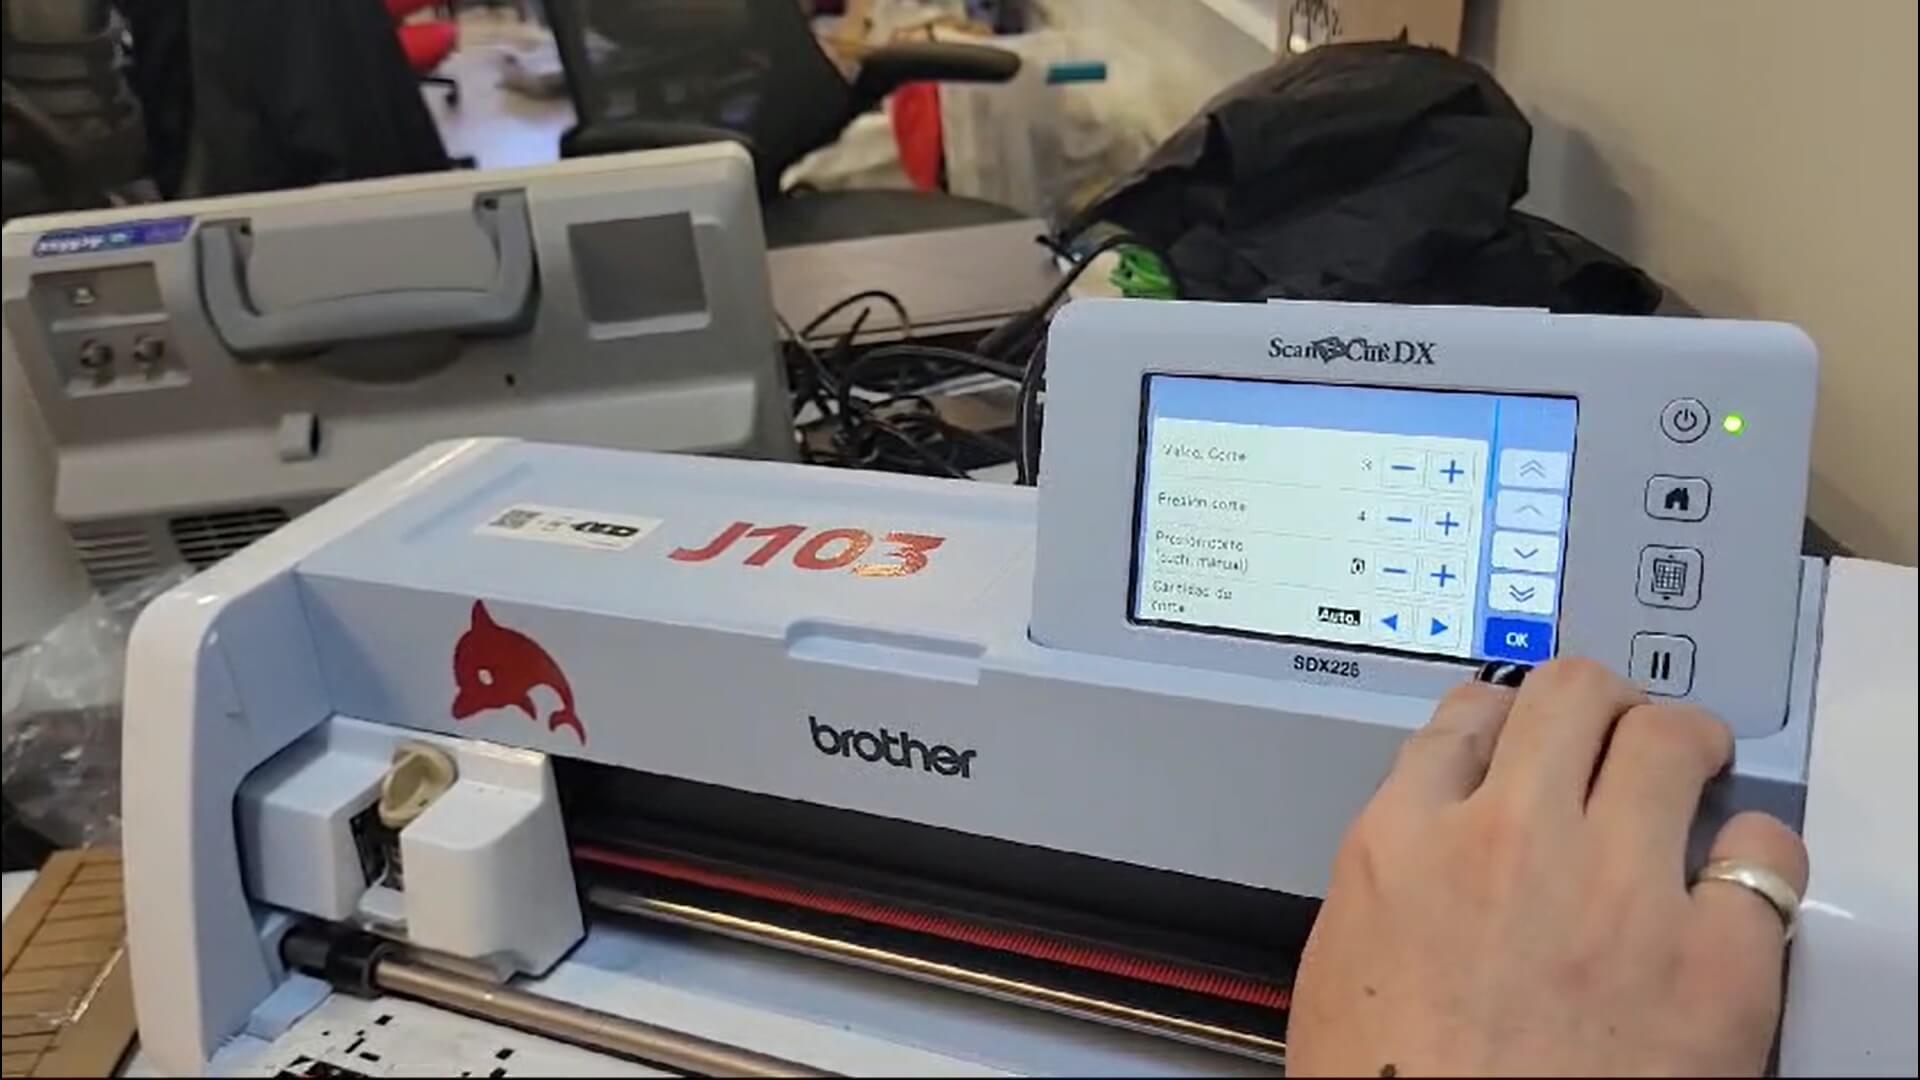
The best parameters I found for the vinyl cutter were: 1 for cutting speed and 4 for cutting pressure. I left the rest of the parameters on automatic.
P.D. Since our vinyl cutter has a stability issue, it is necessary to hold it gently while the cut is being made.
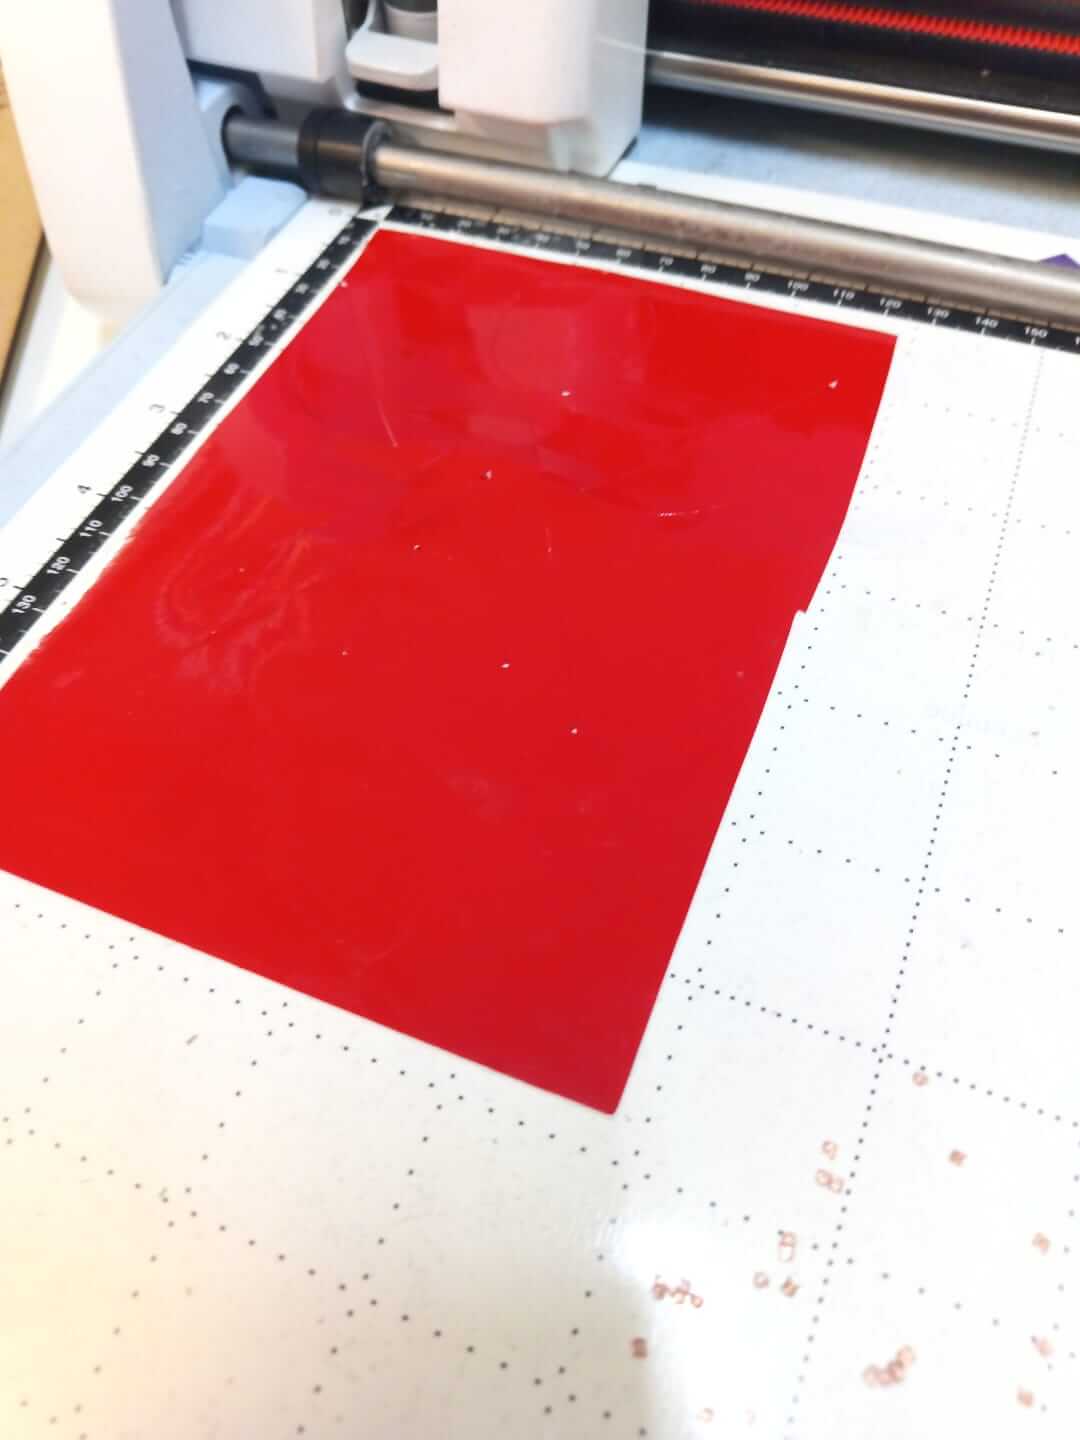
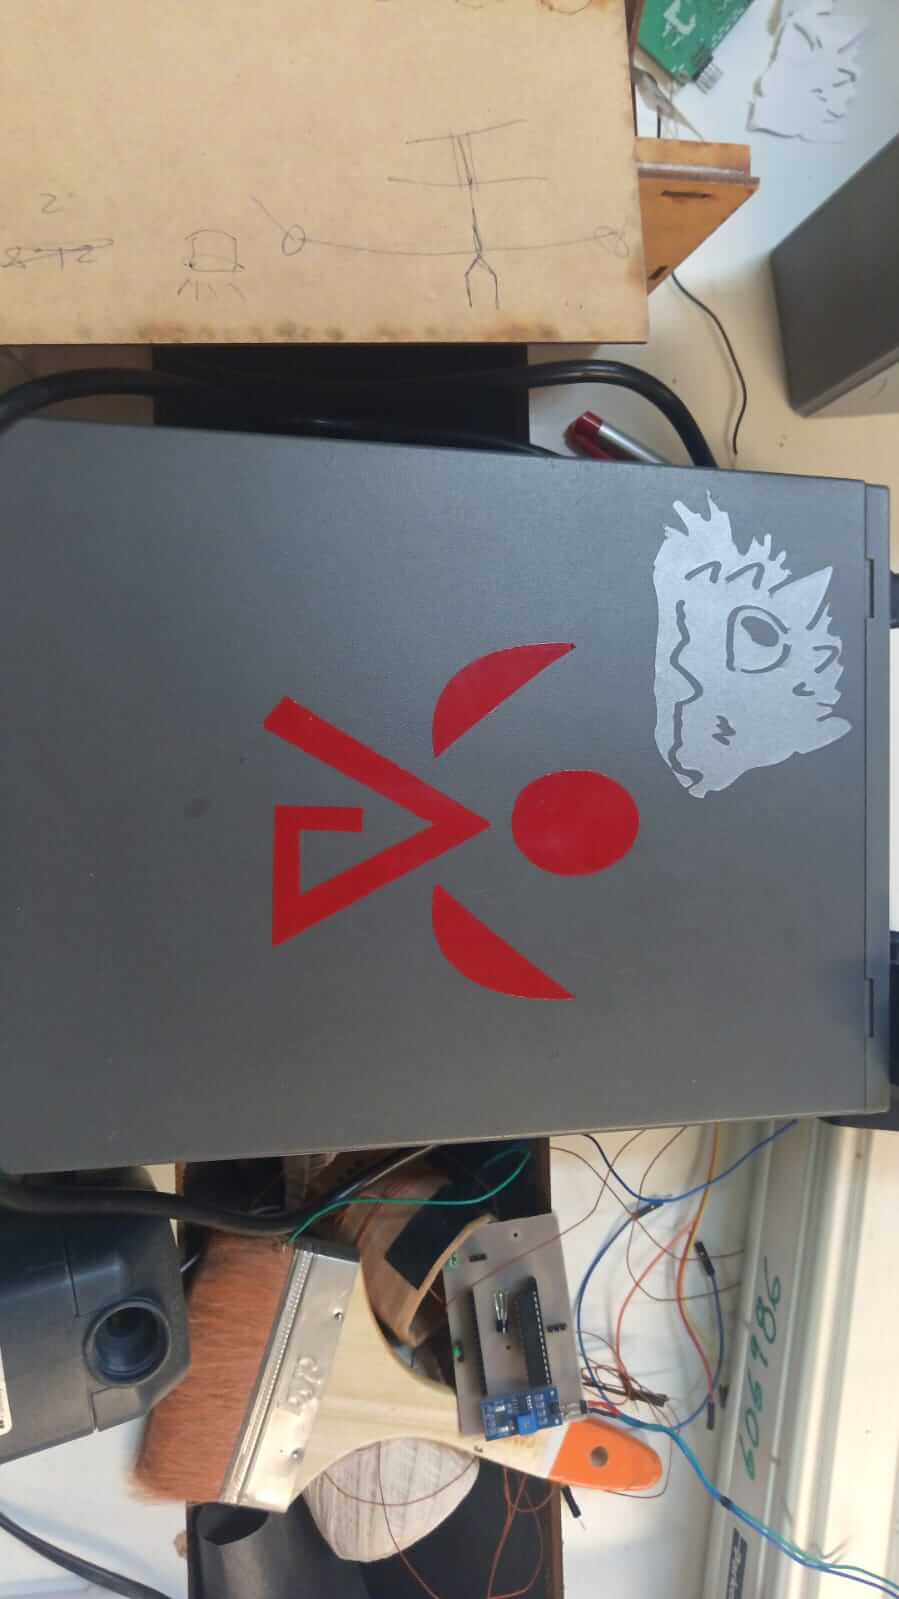
This is the result after the cut.
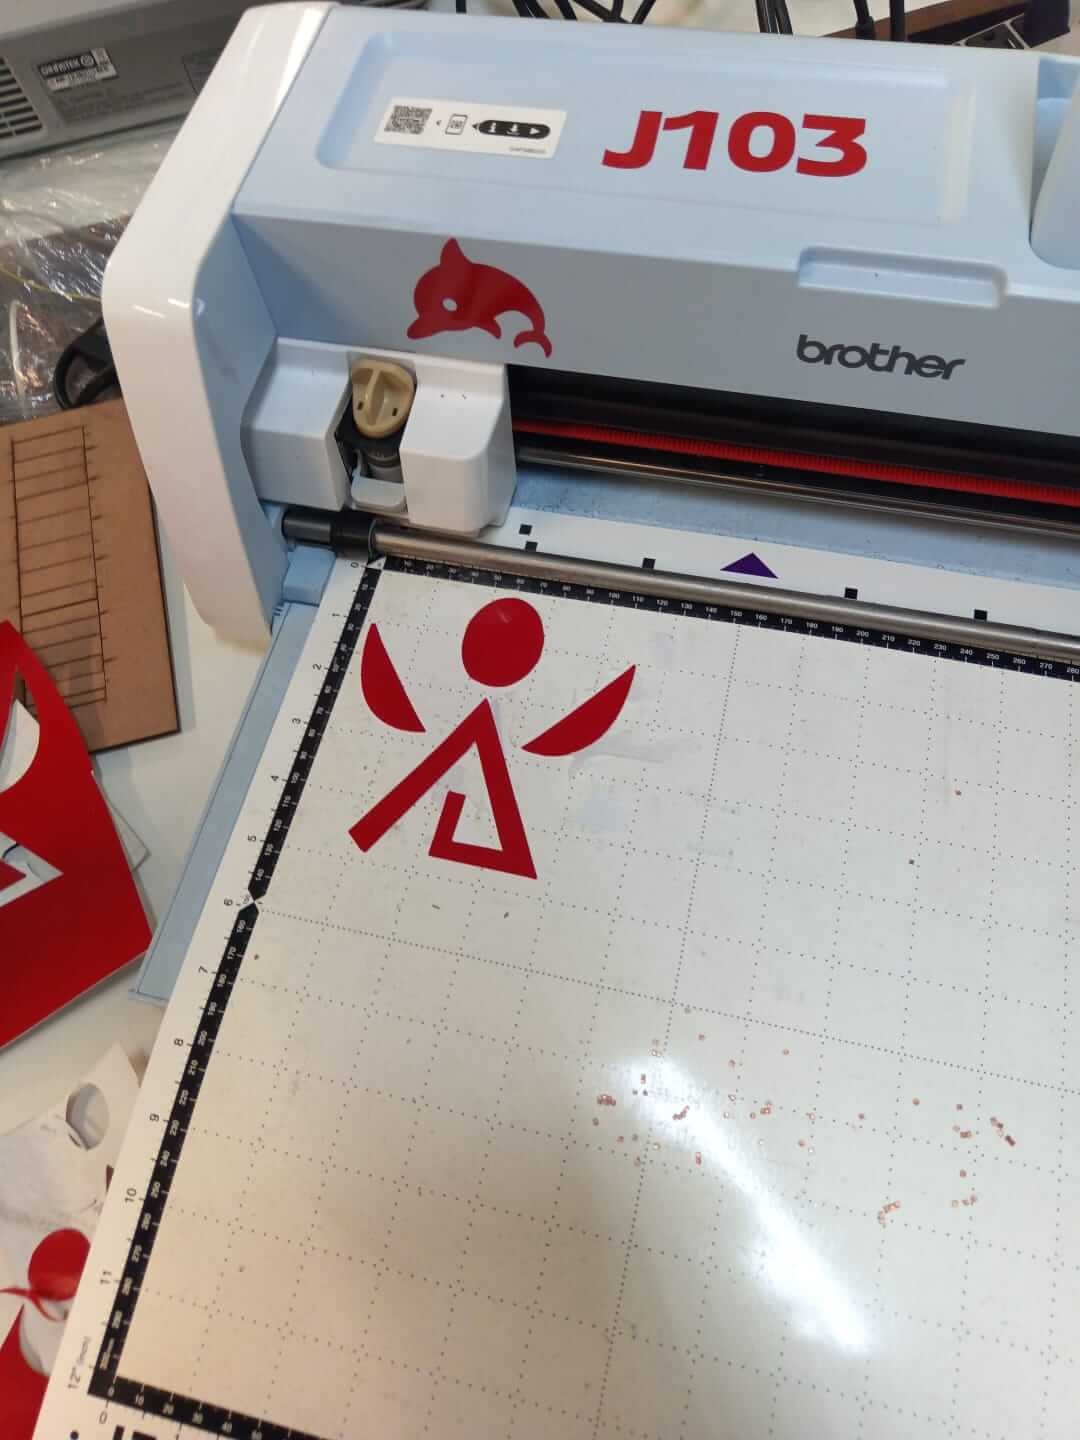
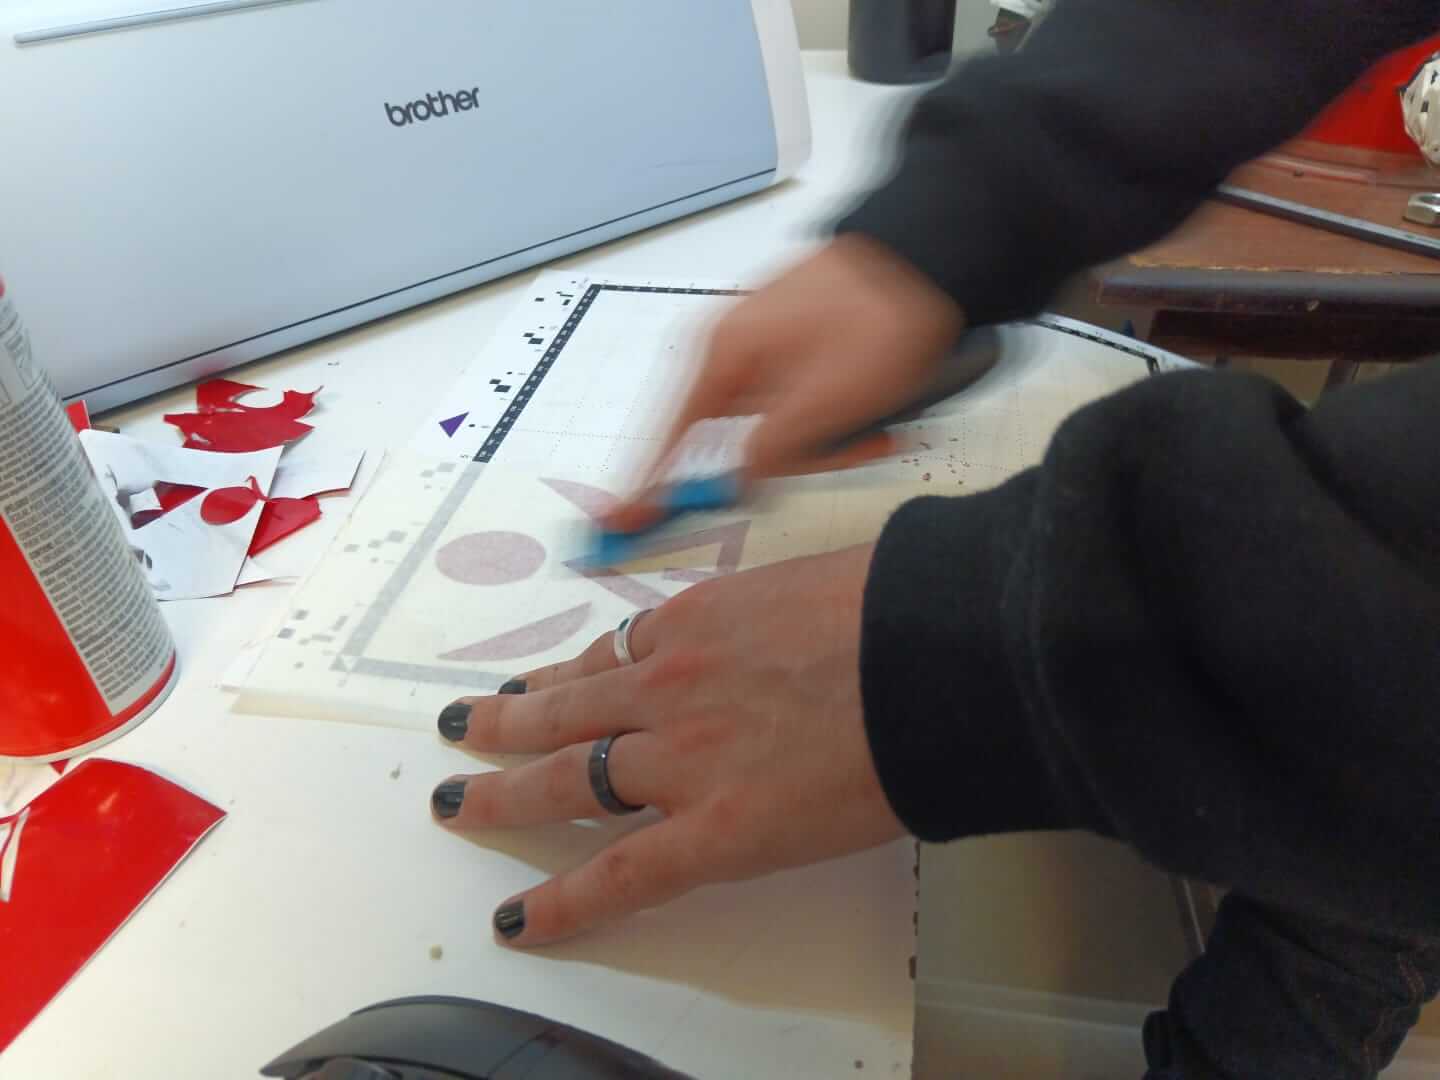
Once the cut is complete, the mat must be removed. After removing the excess vinyl, apply the transfer paper carefully to ensure it picks up the design.
Done! Now you can stick your design wherever you want.
For the laser cutting, I had only one issue: my origin was reversed compared to the machine's, which caused the designs to be mirrored, like a reflection. As for the vinyl cutting, since I had never done it before, I had to adjust several parameters on the machine itself. The vinyl wouldn't stick properly, the blade wasn't cutting through the vinyl, the blade was cutting into the mat (which it wasn't supposed to), and even my Inkscape design failed because it only had lines instead of geometric shapes.
Here you have the link to ourgroup page
Here you can find the files of each process:
Laser cutting
Vinyl cutting