My Final Project
Presentation
This "Fab A Cat Feeder" project is licensed under a Creative Commons Attribution-NonCommercial-ShareAlike 4.0 International License (or CC-BY-NC-SA).

Planning the project
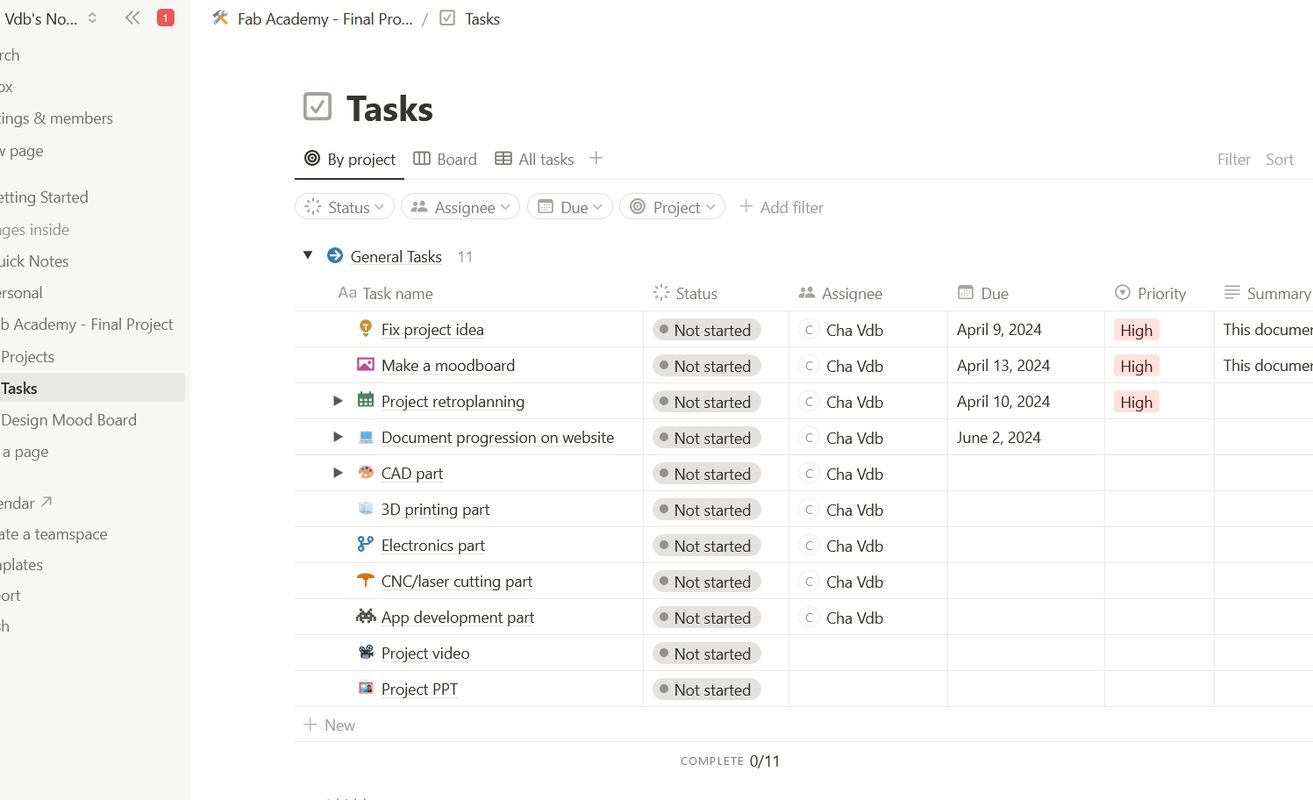
To plan and organize the final project (and also the assignments), I'm using Notion.

1st idea
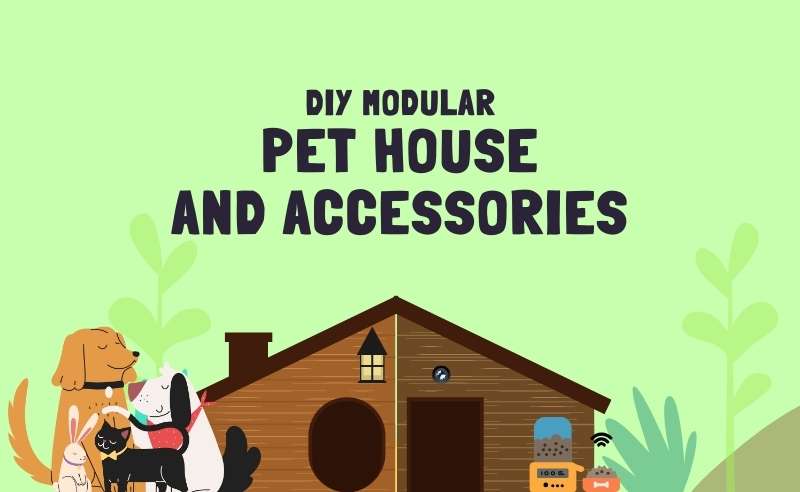
My idea is to create panels that you can easily rearrange as you wish to build a pet house that suits your needs, wills or taste.
In addition to the ease of use of these panels, you can choose different types. For instance : depending on the weather, you will have plain panels or perforated ones to let in or protect your pet from fresh air.
This basic pet house "kit" will have several optional accessories that you can also easily add/attach to the panels (and remove).
- Surveillance camera activated by a movement sensor
- food and/or drink dispenser activated by a movement sensor
- outside light that indicates if your pet is inside
- pot holder for a cat grass plant
- scratch board
- drawer underneath for storage or cleaning (if you put a litter box
- tunnel to add some protection against the cold in winter
Accessories examples :
I've already doodled my ideas in a big A4 notebook that I will use to sketch the designs and visual ideas.
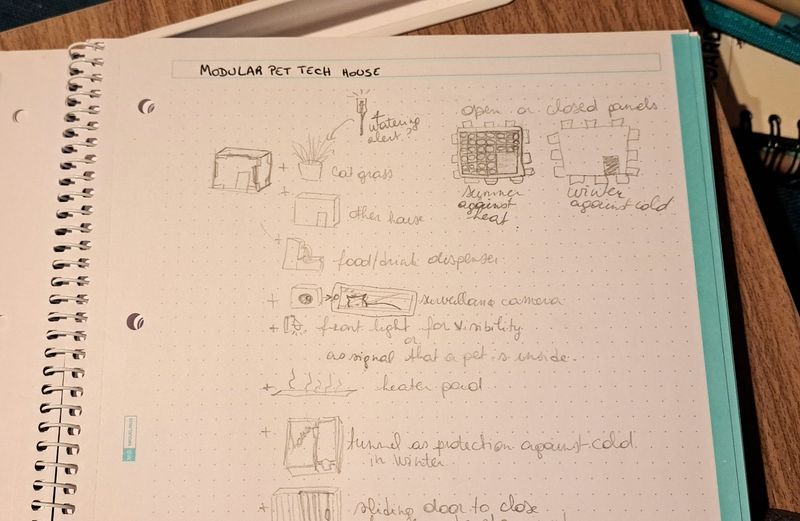
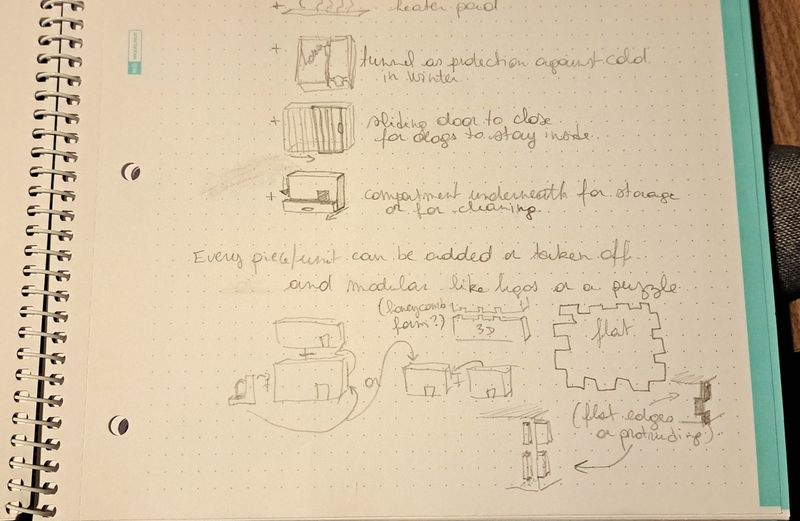
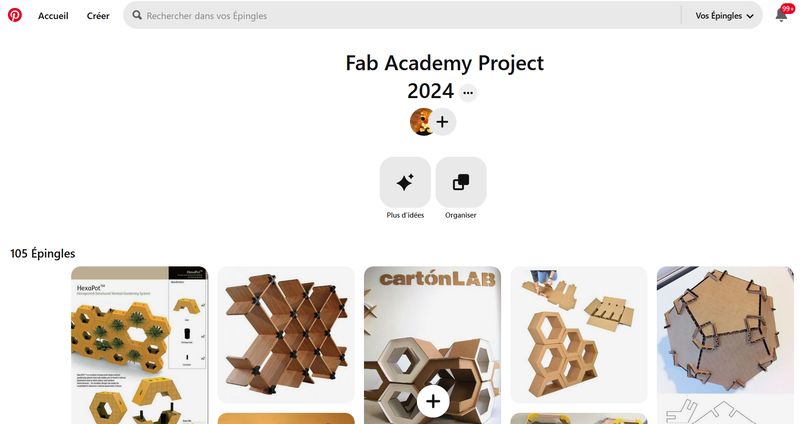
I also searched for images of existing pet items to get inspired and made a Pinterest pinboard with them.
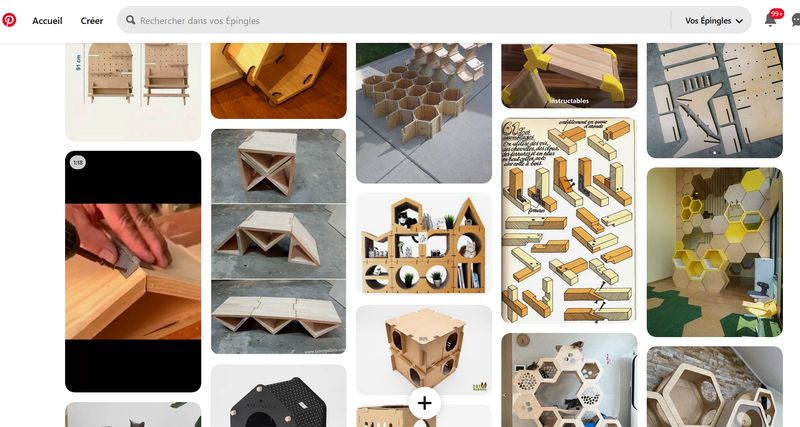
I've decided how I wanted my pet house/box to be built and assembled.
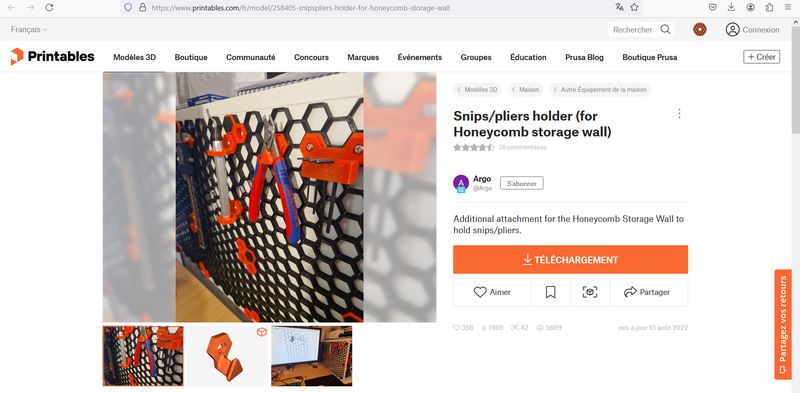
Panels will be square and the holes to attach the accessories hexagonal to look like a honeycomb on some sides, like this 3D printed tools storage panel idea you can find on printables.
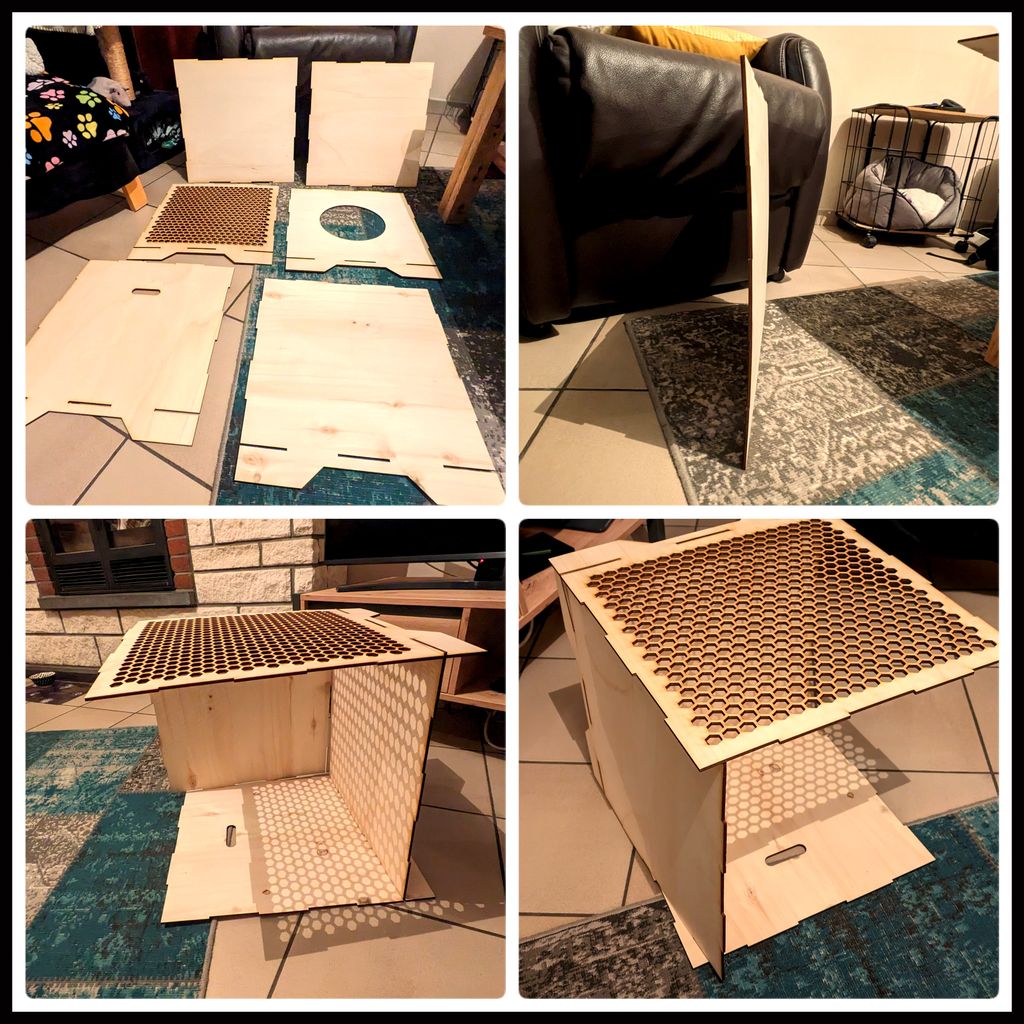
I've made a first attempt of building a box by cutting panels of 4 mm multiplex to search for the final panel sizes.
For that, I just generated a box on the Gravini website and added several options like hexagone holes on one panel (to already see how I will work on that "accessories addition" part), elevation pieces (maybe later a drawer), the front hole size to get inside,...
It didn't result so well because the panels weren't flat so the assembling was horrible !
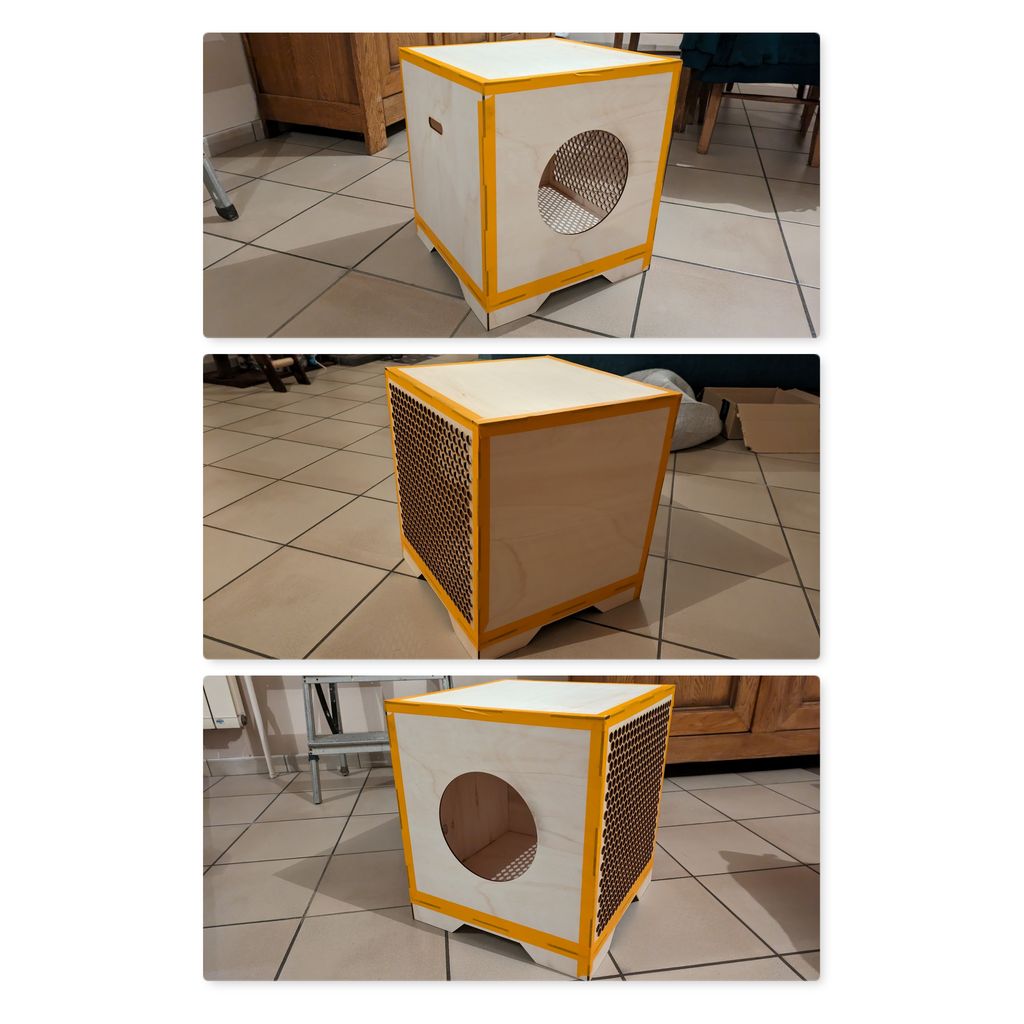
I had to use wall tape (we were currently painting at home) to keep them together !
And once built, the box seemed to big for me.
New turn in my project : 2nd idea
My basic idea is still blur in my mind and the more I learn and work with the Fab Academy, the more I'm aware that I have to focus on smaller parts of this first project.
So I will focus on the accessories (before the whole house) and start with the pet feeder.
I searched for existing models and found this rotating one that can be useful if you go away for several days or need to put your cat on a diet.
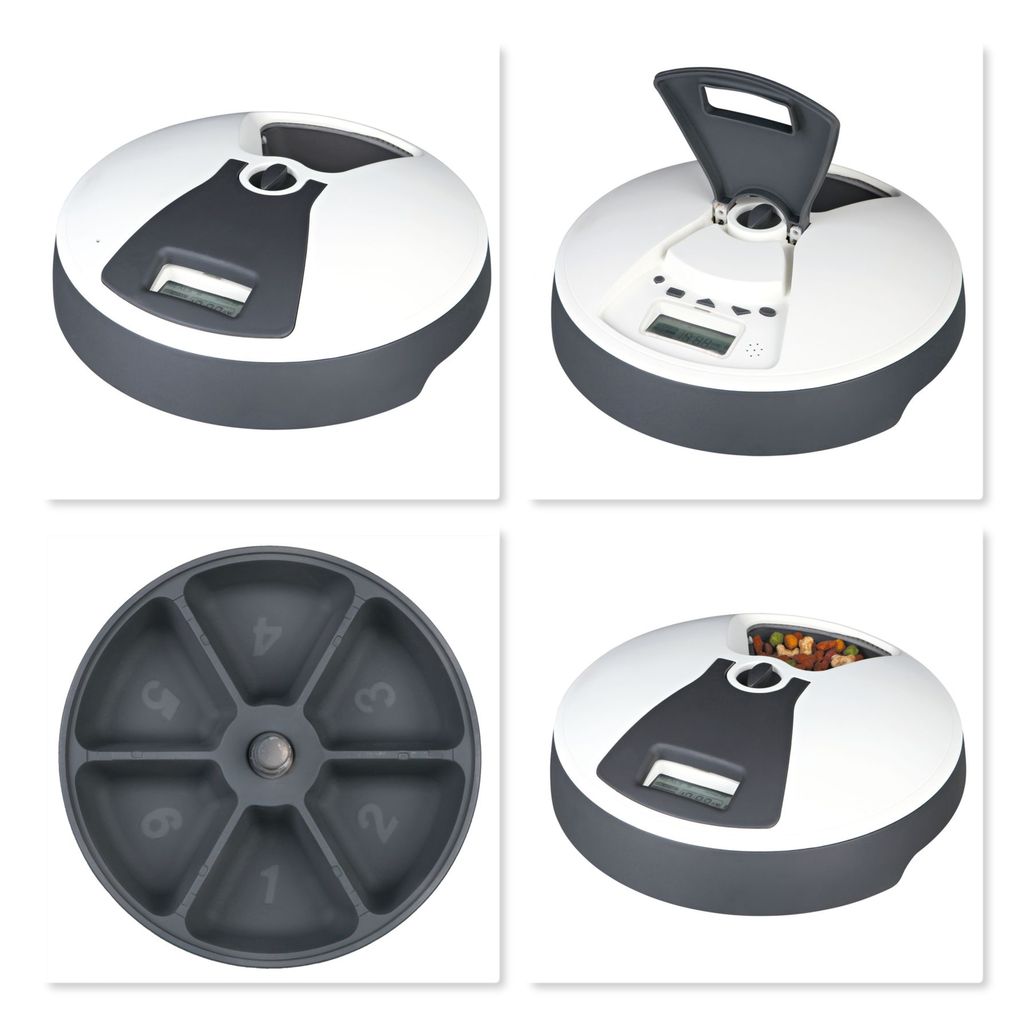

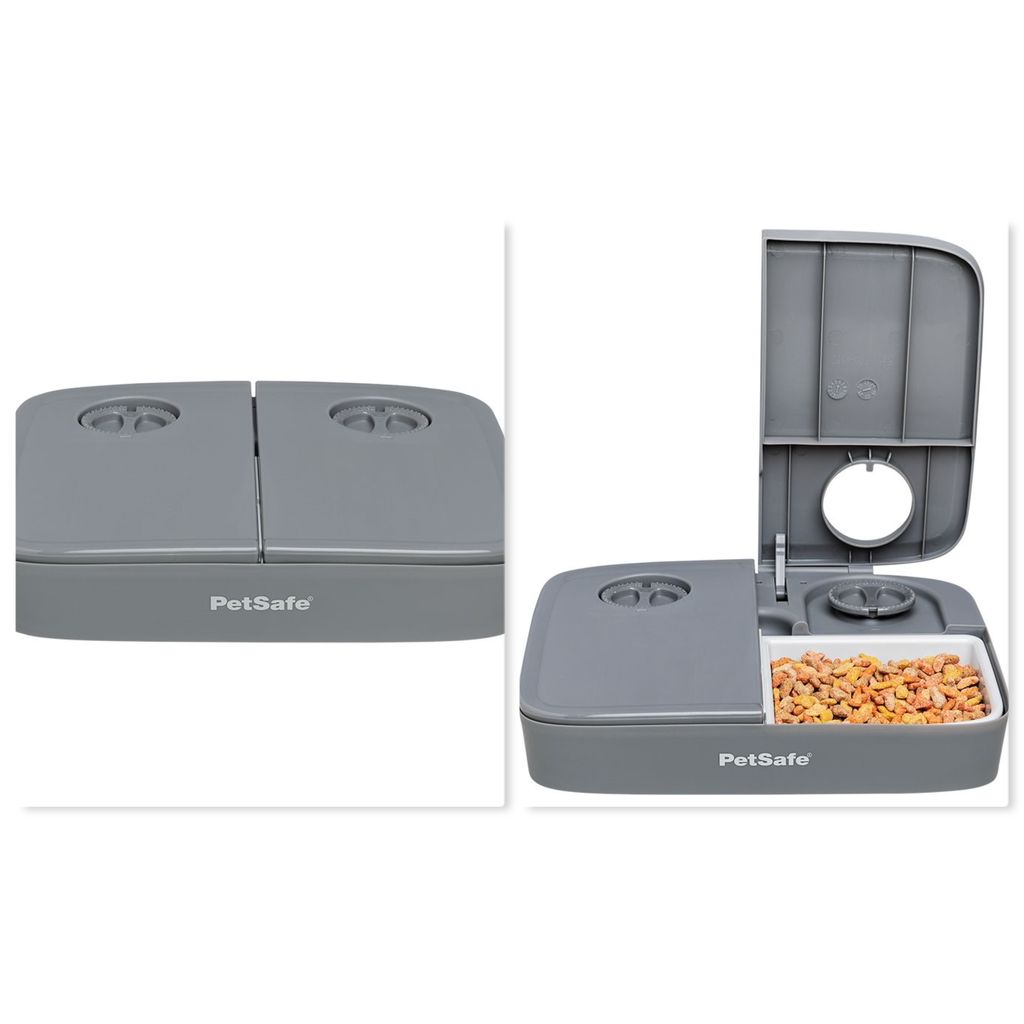
My cat isn't greedy so the food bowl is always open.
But leaving it open makes the dry food take the atmosphere humidity and the food will be less tasty.
That's why I'm thinking about integrating a detector that will open the current day bowl whenever she goes to eat a bit, without using the rotating part (which will only be in move when you change the day part).
A good inspiration is Pamela Arana's Fab Academy page, Tony F. Barreiros' Fab Academy Page or Bianca Guimaraes' project this year.
Schedule
As I'm changing my final project, I'm still figuring out how to plan it's building.
So right now I'm using Notion to help me out organising the next weeks (final scheduling planning will come soon!).
Moodboard
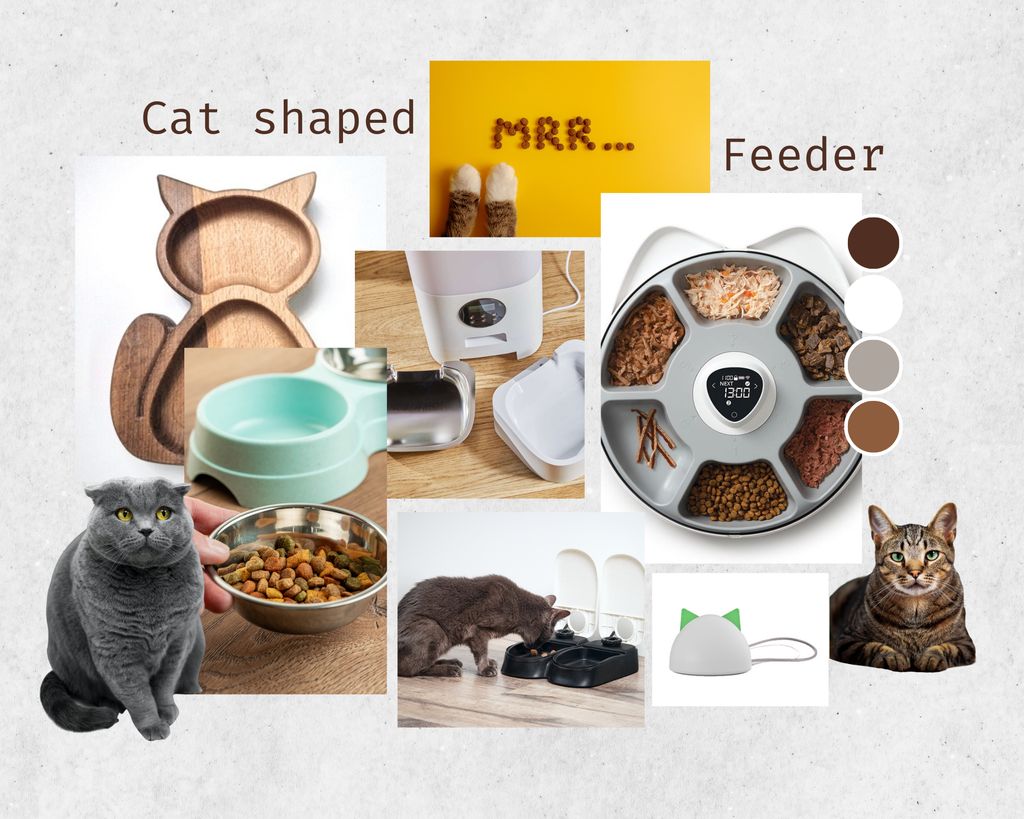
As it can be seen in this moodboard, my final idea will be a feeder with a lid. I will integrate a cat head shape in the design and the colours will tend to white, brown and grey.
Project explanation
So, for my final project :
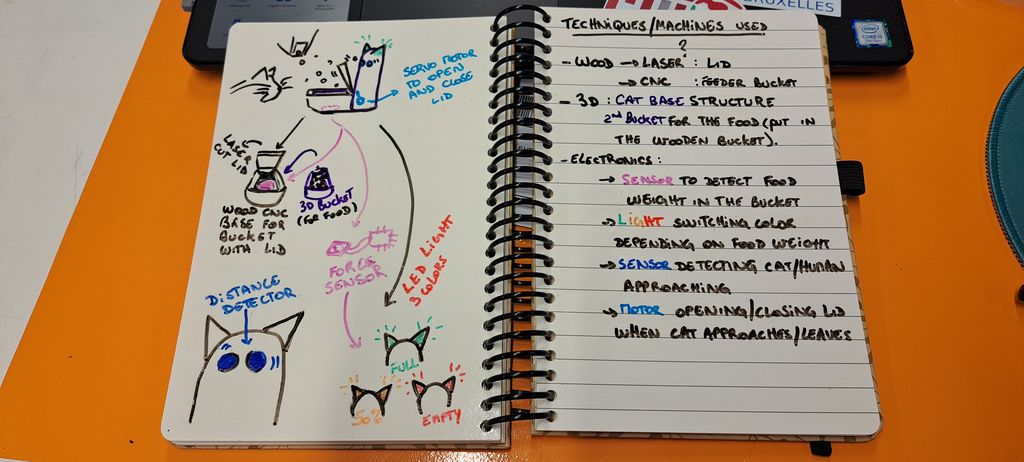
I'm building a cat feeder (that can also work on small dogs but as I'm a Cat Lady, cats go first ! :D).
This cat feeder consist in a "cat-shaped tower", which will have most of the electronics parts, and a dish support with lid where you can put the cat's food.
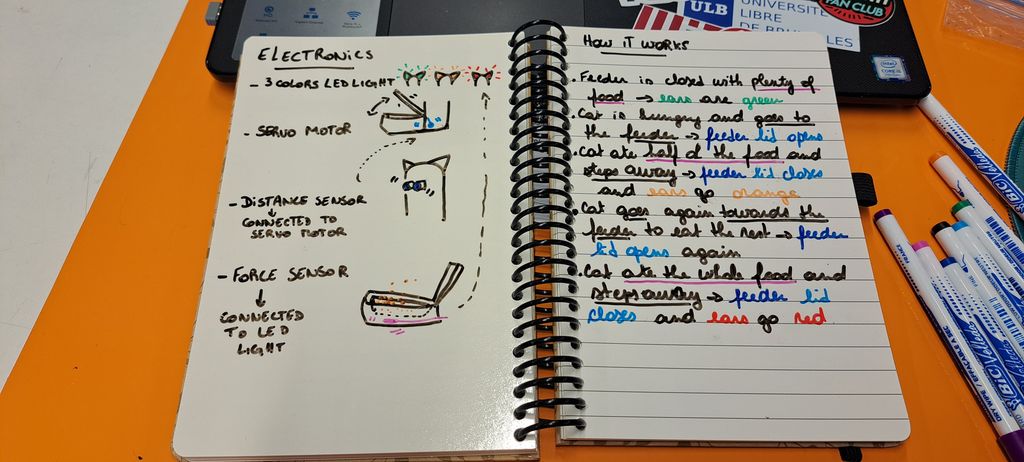
The eyes of the "cat-shaped tower" will be a distance sensor. This sensor will detect the cat (or human slave hand) approaching and turn on the servo-motor that will open the dish support lid to let the cat eat its food (or the human slave to put some new food in it).
In the dish support you'll have a metallic bowl to put the food. It's easier to clean, more food friendly and also easier to fill (let's help the human slave a bit ! ;) ).
Between the dish support and the bowl there will be a force sensing resistor to measure the quantity of food in the bowl.
If the bowl is full, Led lights, that are in the "cat-shaped tower" 's ears will turn green.
If half of the bowl is empty/full (for the cat it will certainly be EMPTY!), the ears will turn orange.
Finally, if the bowl is empty (FOR REAL!), the ears will be red.
Goal and purpose of the project
Goal
With this project I'd like to work on electronics mostly but also 3D printing with the "cat-shaped tower" part and maybe the dish support.
I love to work with wood and the laser cutter but as I've already used it before I'd like to try out the CNC and shape the dish support with it to give it a "natural" look.
Purpose
Force Sensing Resistor
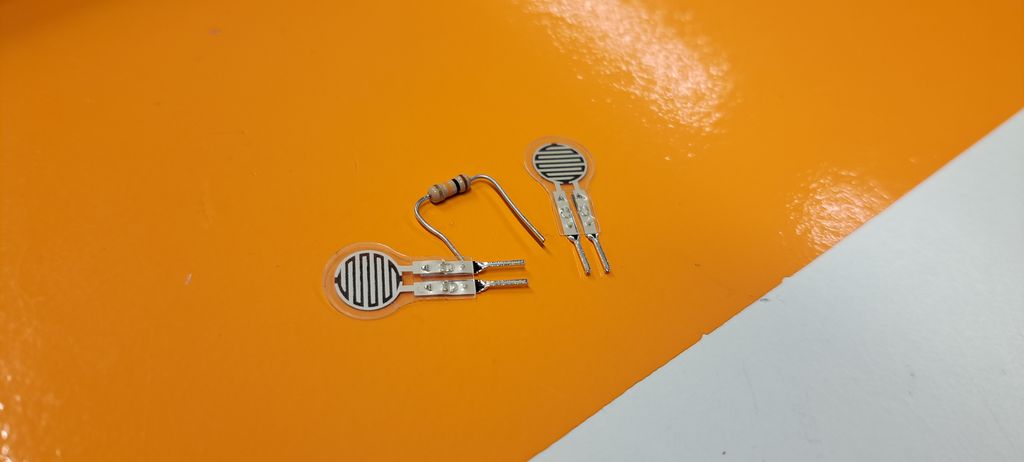
The Force Sensing Resistor will help the human slave to serve the right amount of food per day to its Cat's Majesty. For example I will talk about my sister's cats that overweight and for whom she has to give different quantity of food per day to help them loose some weight.
UPDATE This sensor isn't the right one ! It won't help measuring the food weight.
Lid with Servo Motor
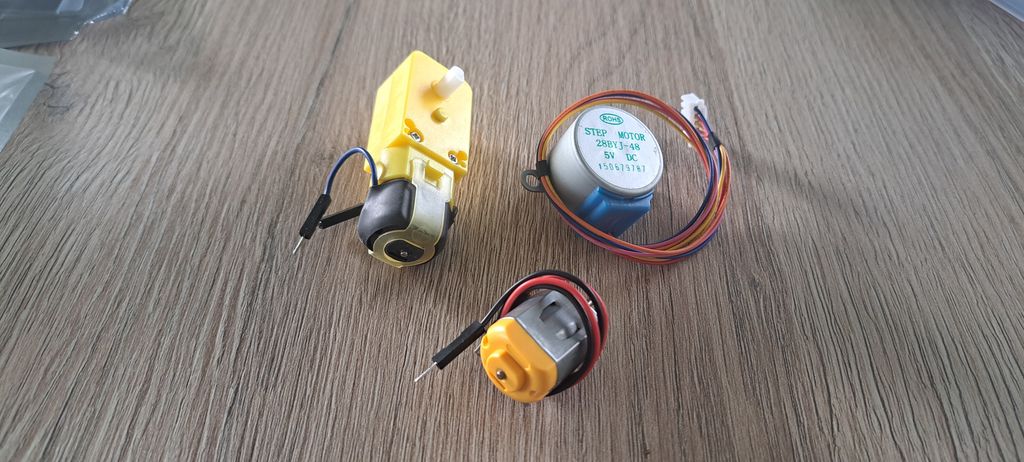
The lid will help to keep the food secure against room temperature and humidity and keep its texture and taste as it should be.
But also, as part of a future upgrade, it will keep the food from being eaten by the other cats. For that, I will switch the distance sensor with another one that would read the cat's ID chip or collar chip that I'll have to provide with the feeder.
3 colors LED Lights
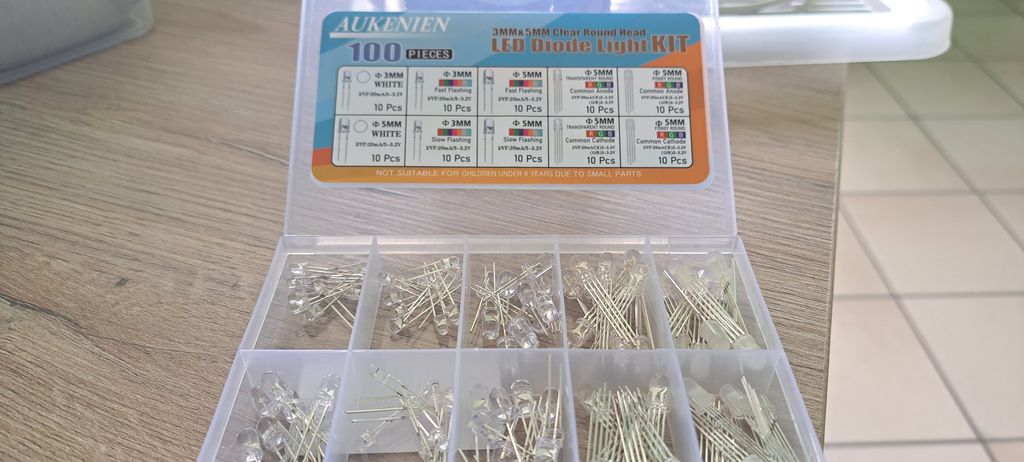
The LED lights will visually help the human slave to know if the cat really needs some food if it's gently asking for some. For that I've bought a whole box of them (I will be able to fail some times without having to buy some again ! XD)
In another upgrade, I'd like to have this alert on the human slave's smartphone by adding an application which will include the quantity of food remaining, an alert when the cat eats some and maybe more.
3D modelling
- "Cat-shaped tower" for electronics parts
As I'm not enough comfortable yet with the 3D modelling programs as Freecad or Fusion360, and also really short in time to complete my final project, I'm currently modelling the items in Tinkercad, with it pre-designed forms.
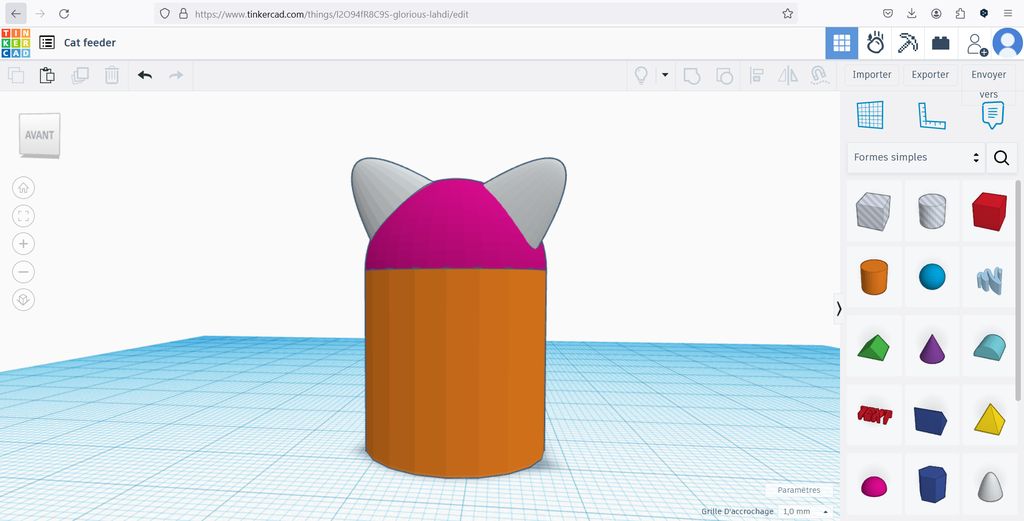
For now, the item that will hold all the electronics looks like this : simply shaped minimalistic cat body and head.
On the next weeks I will work on it seriously to get this "cat-shaped tower" mostly finished so that I can work on the bowl and lid part.
- Bowl and lid
For the "bowl and lid part", I found some small Inox plates in a cheap shop. They are initially to make small dishes and go in the oven.
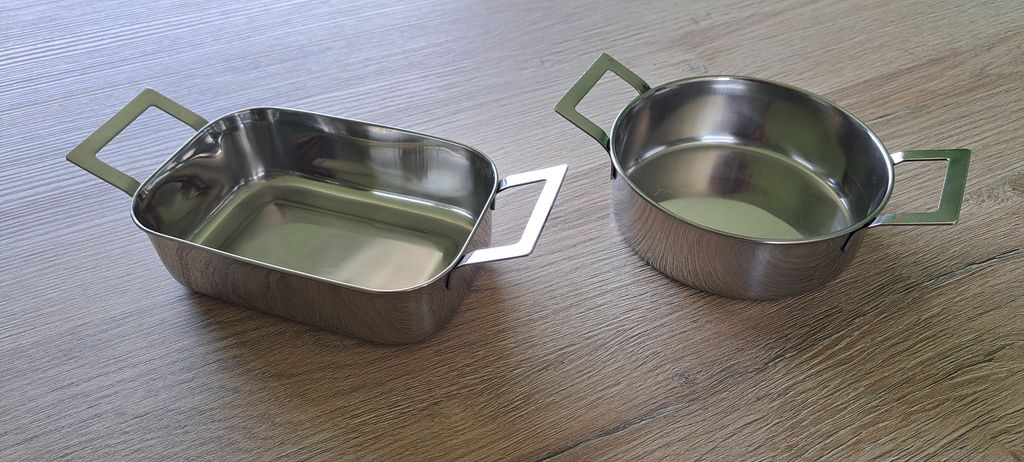
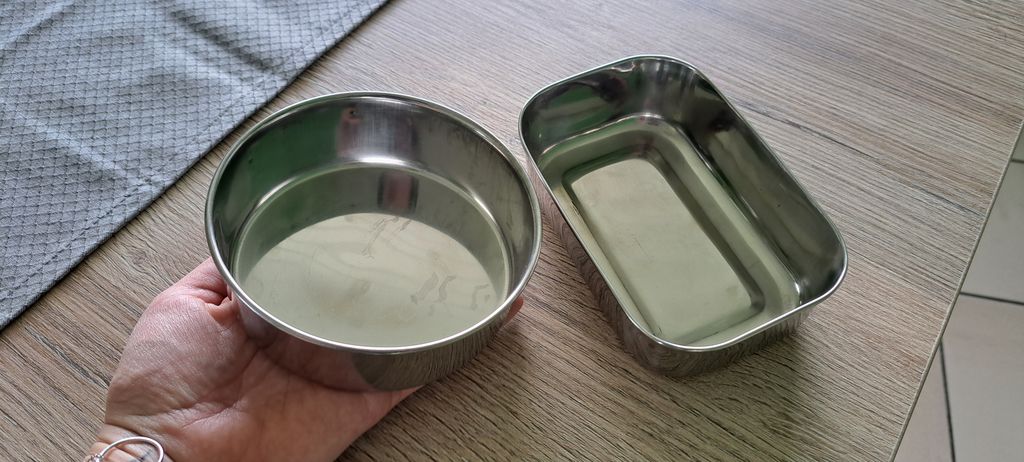
But for me, if you take off the handles, they have the perfect size and shapes for a pet bowl that can be removed from my cat feeder to be filled and washed easily.
Final materials used
- 2x Laser cutted prototype box = ~10€
- 2x 5mm foggy round 4 pin RGB LED Light Emitting Diode - Common cathode = ~0.10€/LED → ~0.20€ total
- 1x HC-SR04 Ultrasonic Sonar Distance Sensor = ~2€
- 1x ESP32 Wroom = ~9€
- 1x AZ-Delivery Micro Servo Motor 9g compatible with SG90 = ~3€
- 1x Thin Flexible Force Sensitive Resistor - 20g to ~2kg = ~4€
- 1x Powerbank = ~20€
- Wires (~8) = ~0 05€/wire → ~1€ total
- 3D printed mounting brackets in PLA
- 3D printed ears in ABS
- Large brown paper tape
My project is a cat feeder with automatic opening/closing lid (triggered by a distance sensor) and LED light emitting diodes changing color regarding the quantity of food left in the bowl (thanks to a force sensitive resistor).
Therefor, several electronic components will be necessary and will require a clean wiring.
RGB LEDs
Two 5mm foggy round 4 pin RGB LED Light Emitting Diode (Common cathode) will be used on top of the feeder.
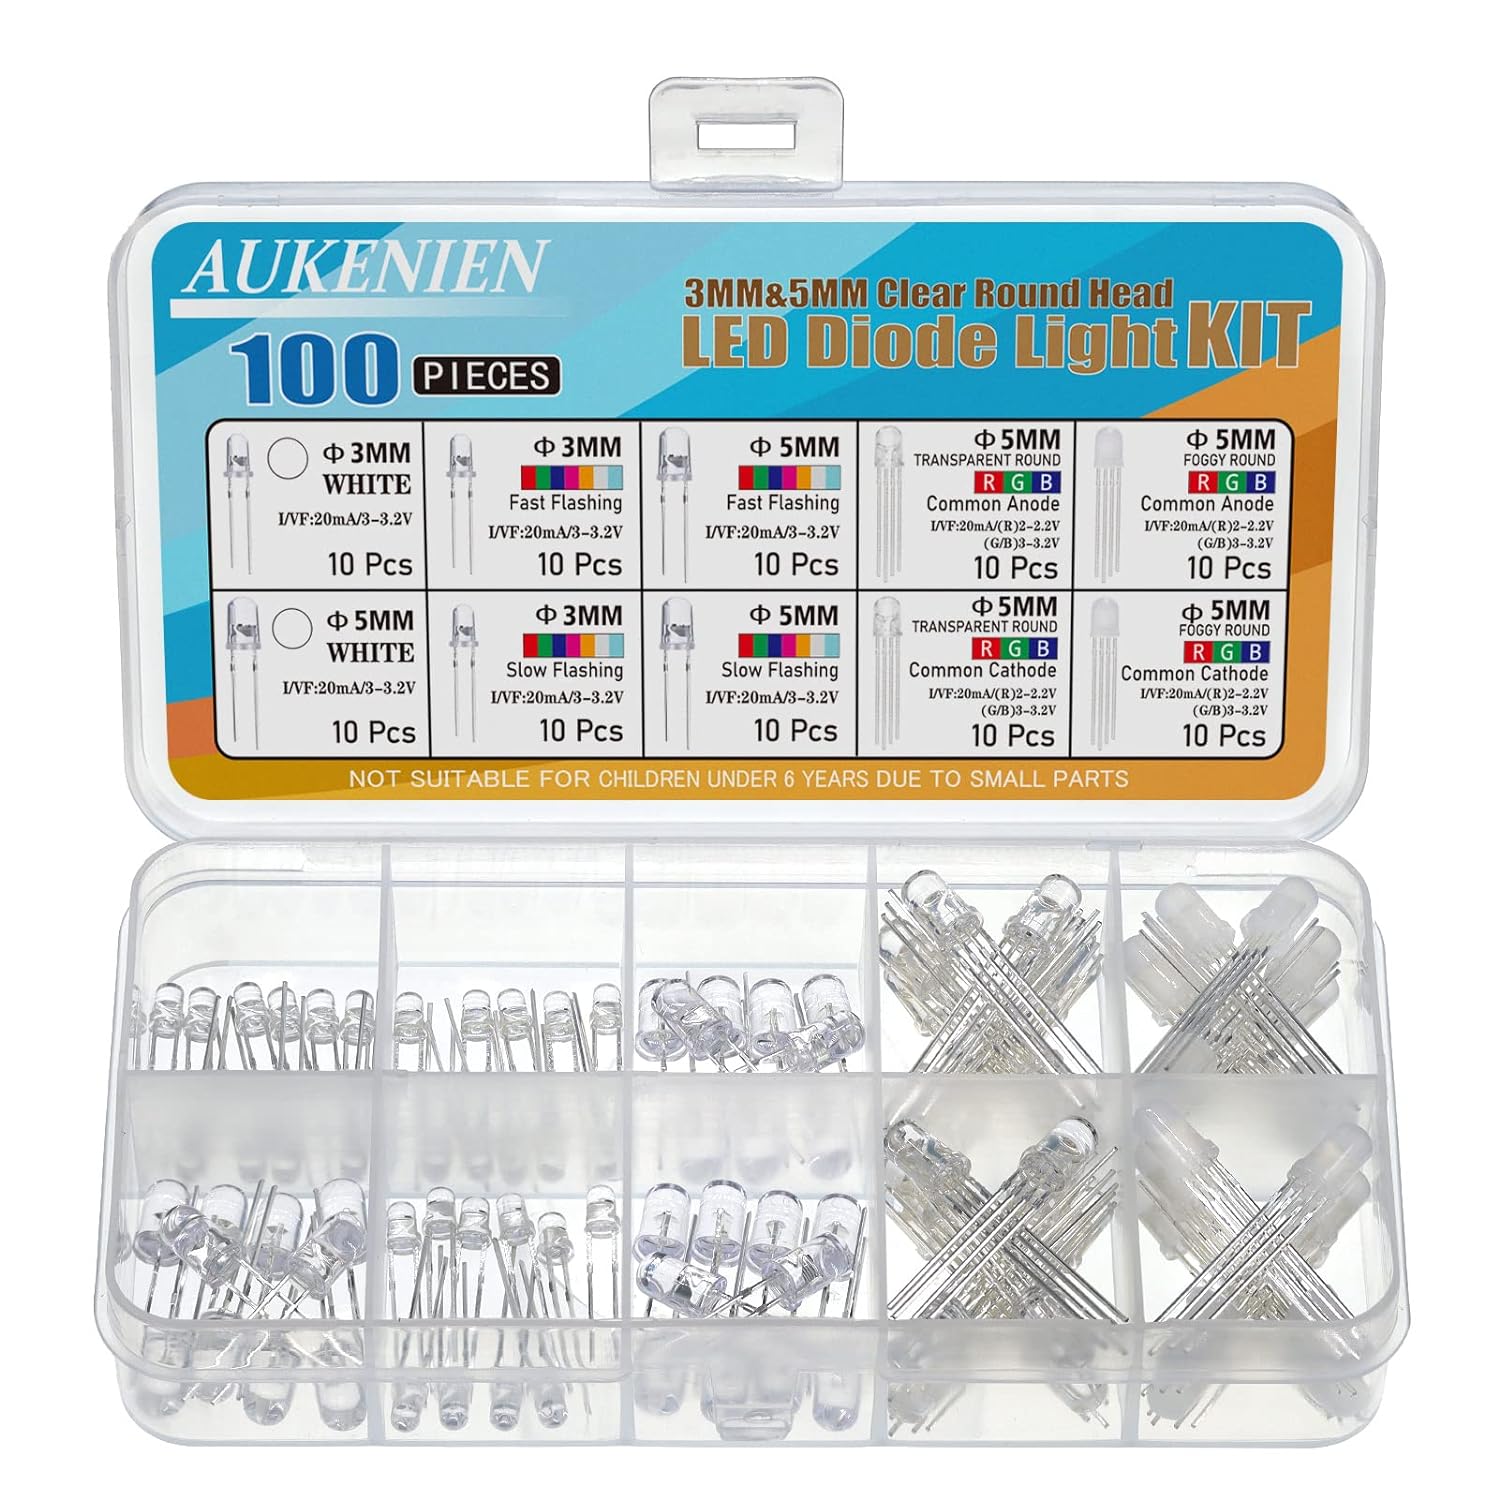
Each of them has 4 pins that will be connected to the ESP32 Wroom.
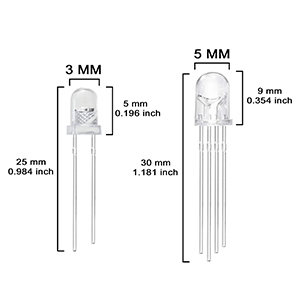
So 8 pins will be used on the ESP32, minus one as I will weld the 2 GND pins together (the ESP32 only has 3 GND pins).
I thought about soldering both LEDs' similar pins together but someone (my lovely husband) reminded me that if one LED gets damaged, both will turn off. Not such a good idea then !
Distance Sensor
To get the bowl lid to automatically open and close, the first step is to detect an object (in this case a cat or it's human slave) at a determined distance of the feeder.
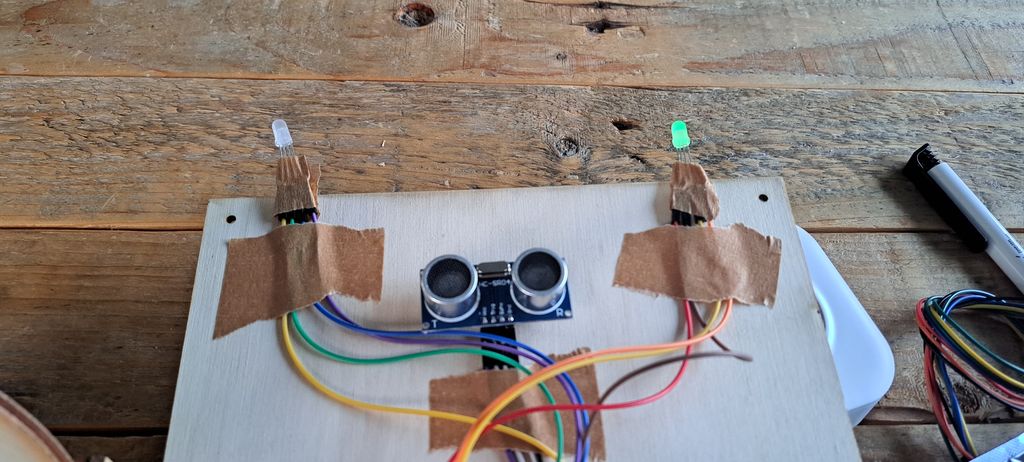
For that I will use an HC-SR04 Ultrasonic Sonar Distance Sensor which has 4 pins to attach to the ESP32.
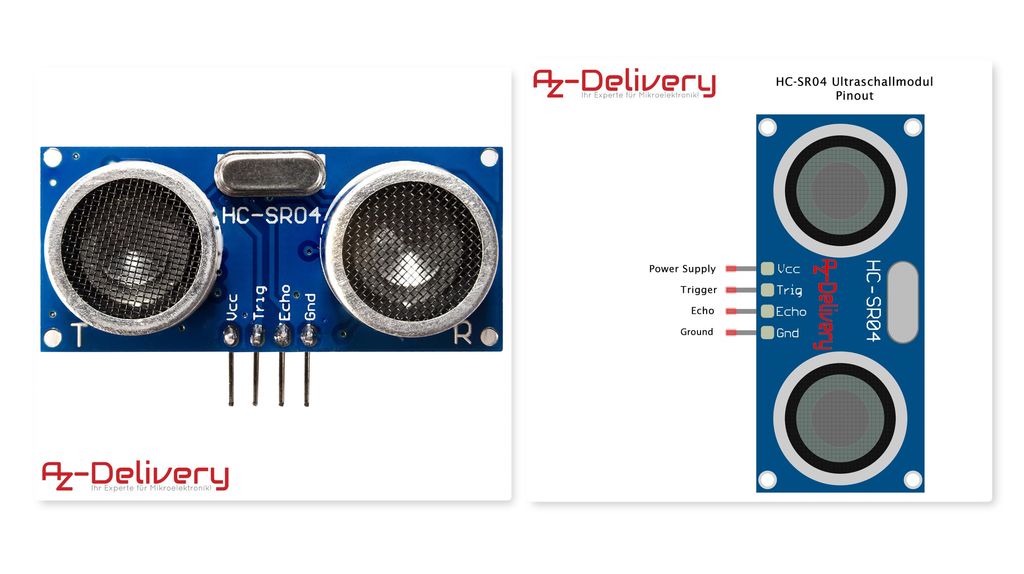
As I only used 1 GND pin for both LEDs, I will use another one for this component (I could weld it to the LEDs' GNDs' but I prefer moving baby steps as this is all new to me).
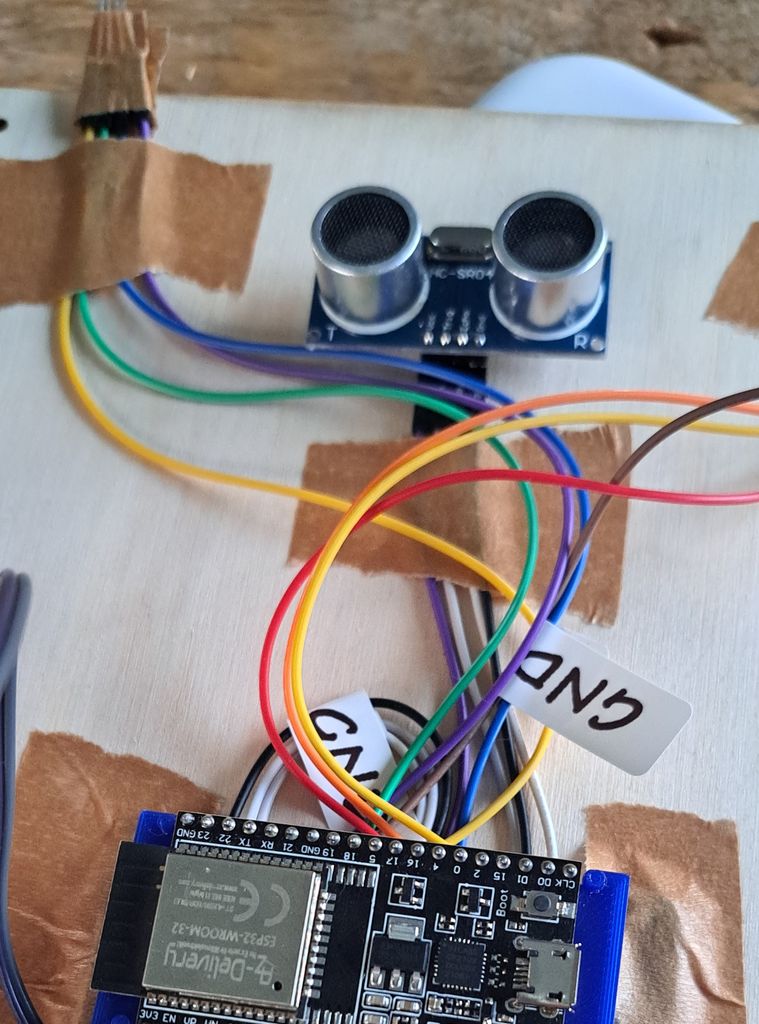
ESP32 Wroom
The main part in the electronic components is the microcontroller, in my case I will use a ESP32 Wroom.
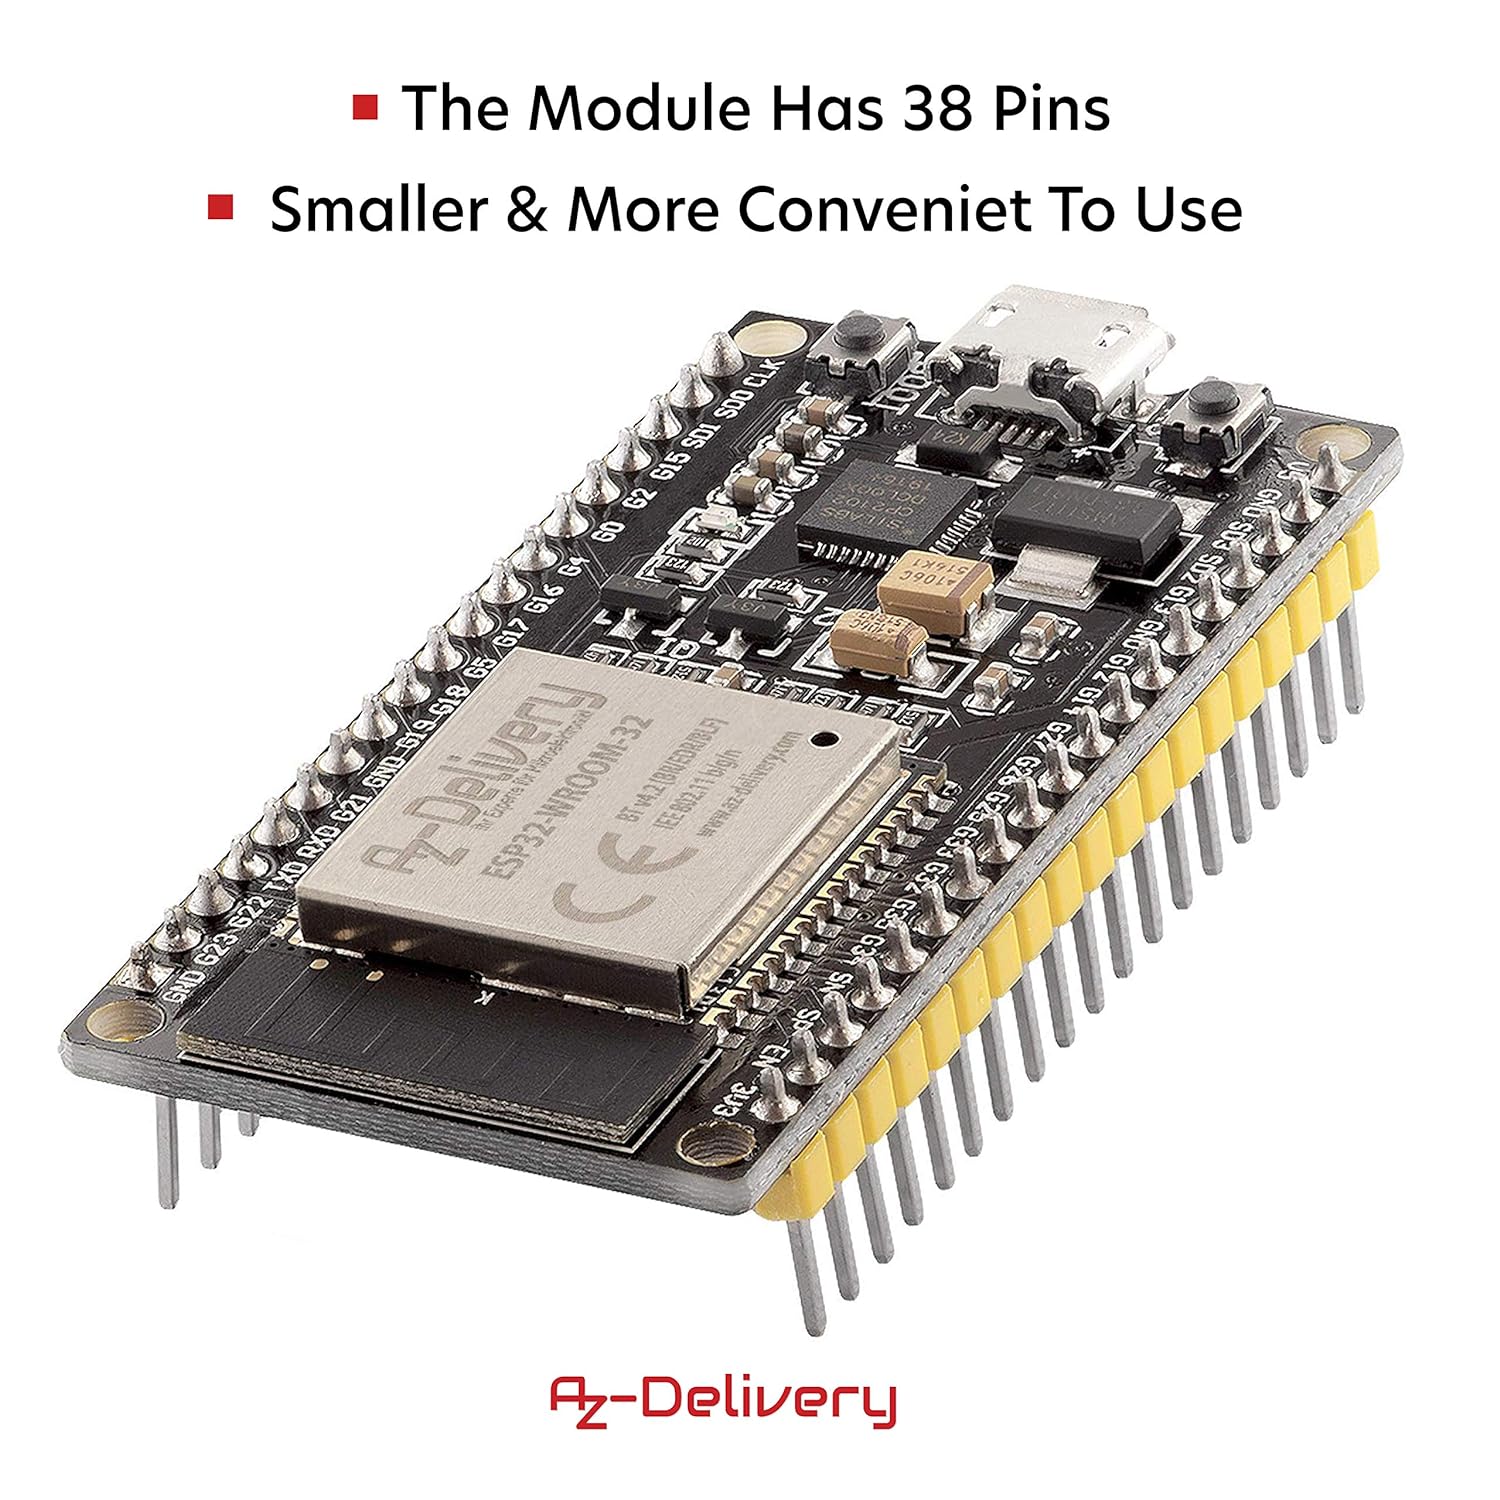
Why ?
Because I'm already thinking ahead and willing to trigger the lid opening/closing with a RFID chip and also allow the huma slave to get information on a smartphone app (in addition to the LED lights).
The ESP32 has X pins, including :
- 3x GND
- 1x 5V
- 1x 3.3V
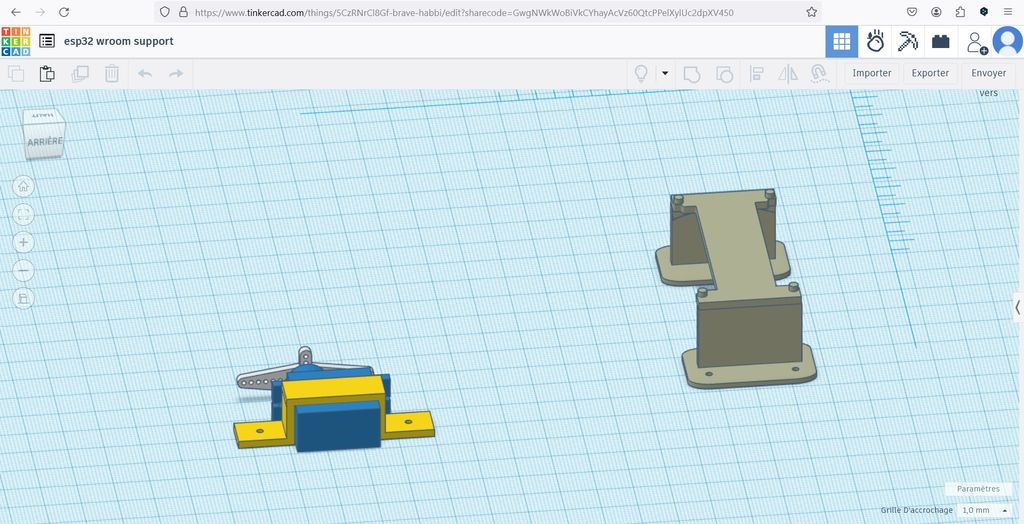
To hold the ESP32 in place and get enough space under it for the wires that will be attached to it I added a PLA 3D printed bracket (file was found on Thingiverse, thanks to...).
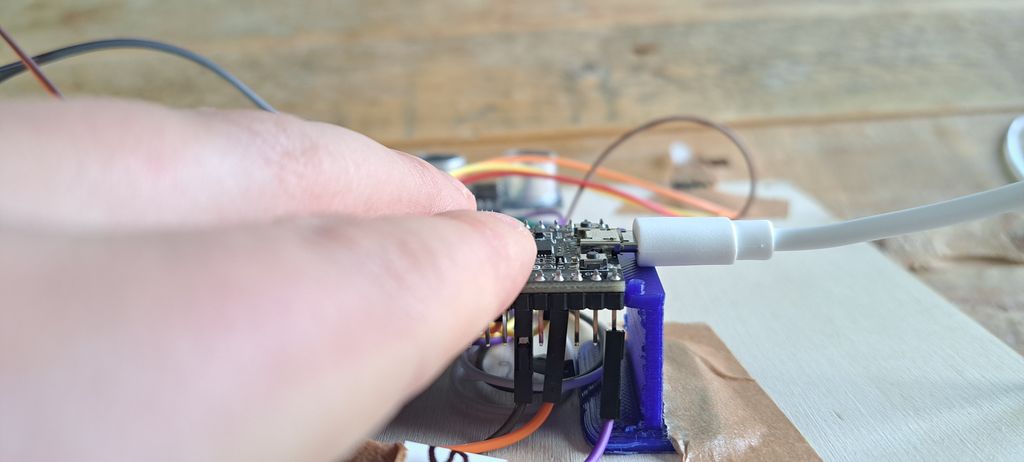
I will add some double-face tape for this prototype and upgrade it on the next one.
Servo motor
In order to lift the lid of the bowl I will use a Micro Servo Motor 9g compatible with SG90.
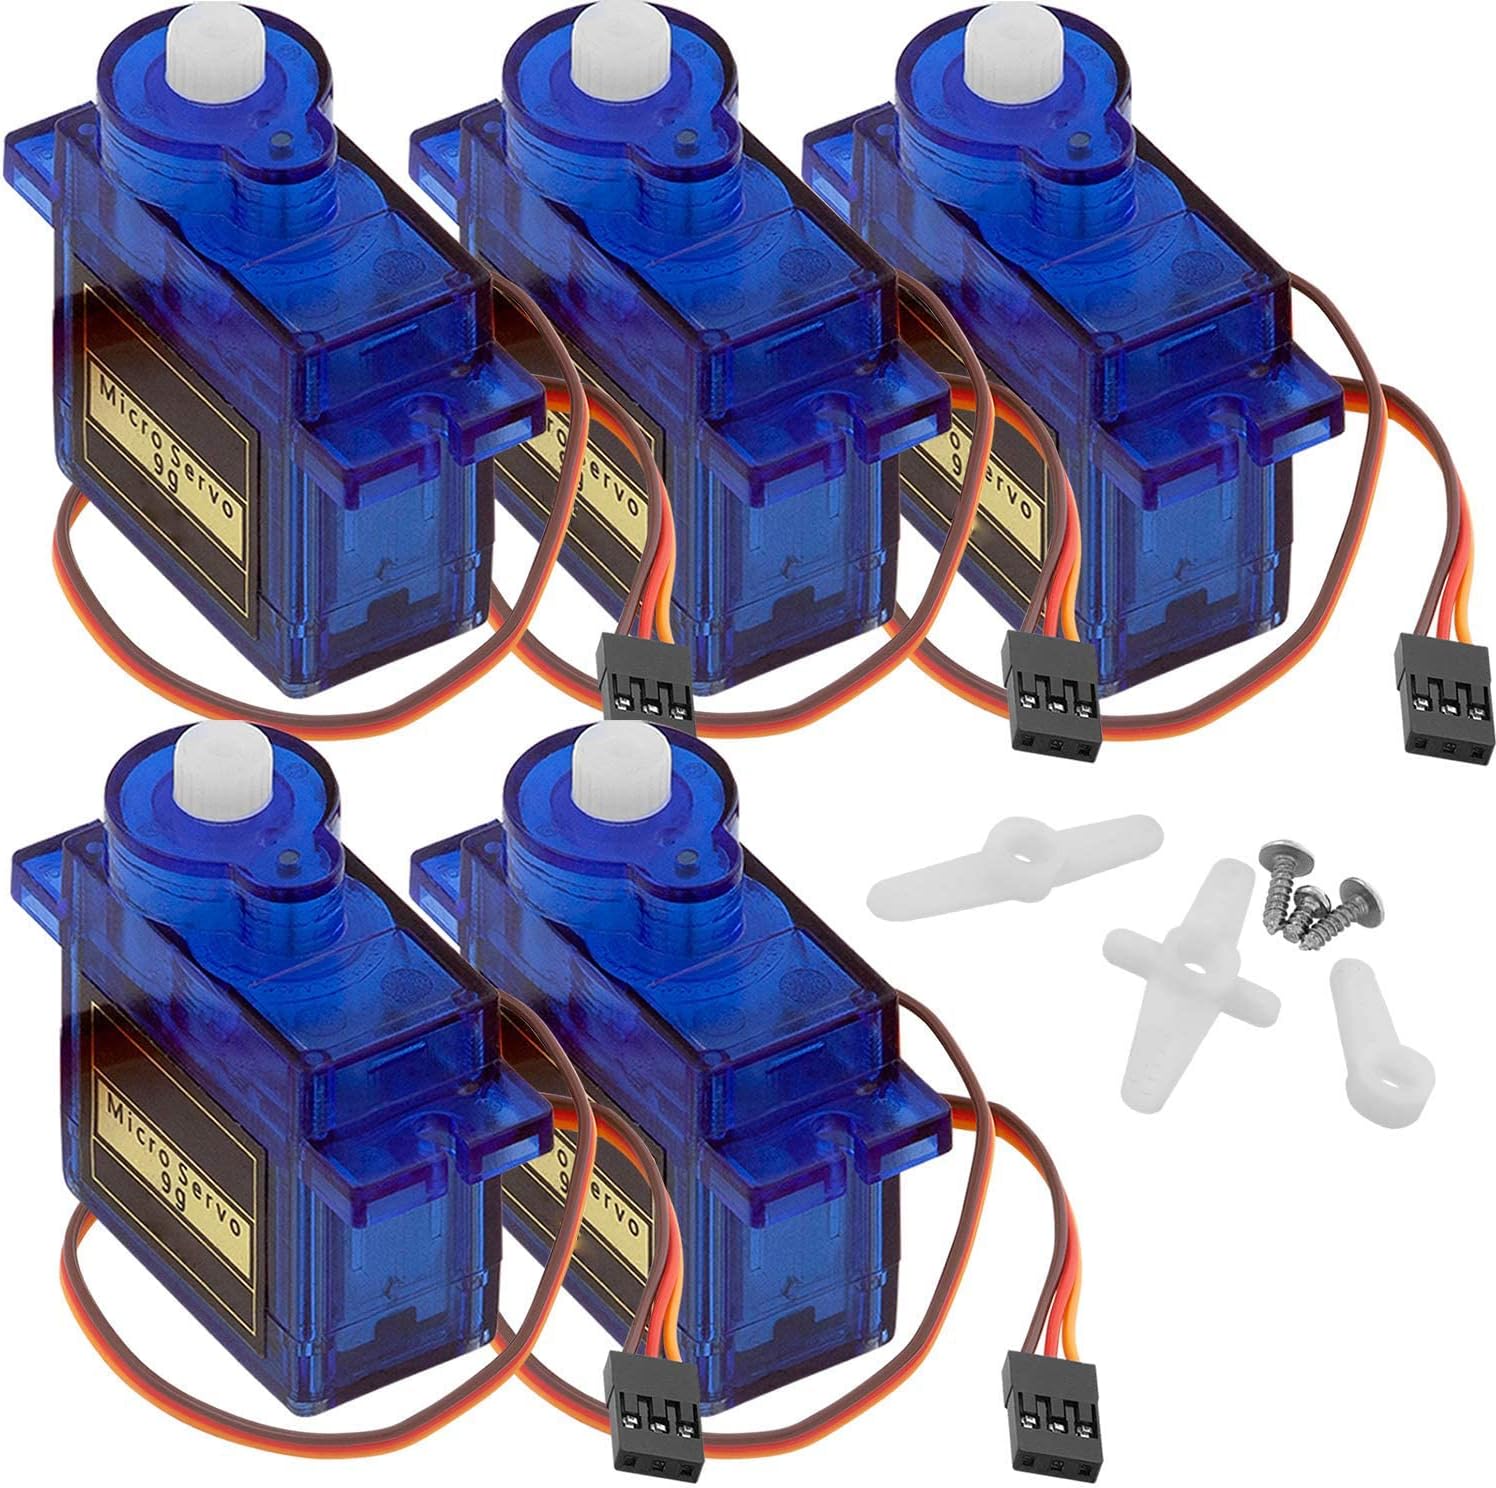
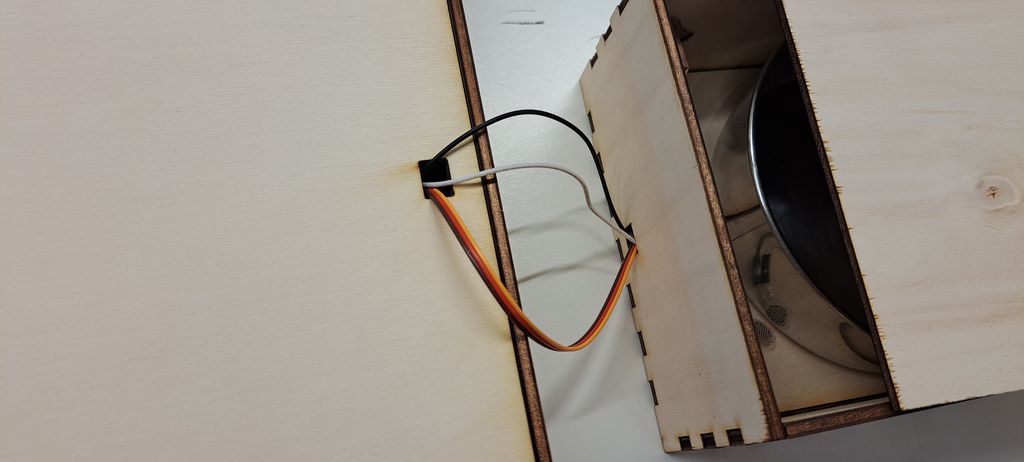
It will be fixed to the inner back part of the bowl compartment with the help of another 3D printed bracket found this time on Tinkercad.

The servo motor has 3 pins to attach to the microcontroller. Therefor I've cut a small hole in both the cat head tower front plate and the back plate of the bowl compartment.
Force resistor
Final component to add to the feeder is the Thin Flexible Force Sensitive Resistor that can measure weights going from 20g to 2kg.
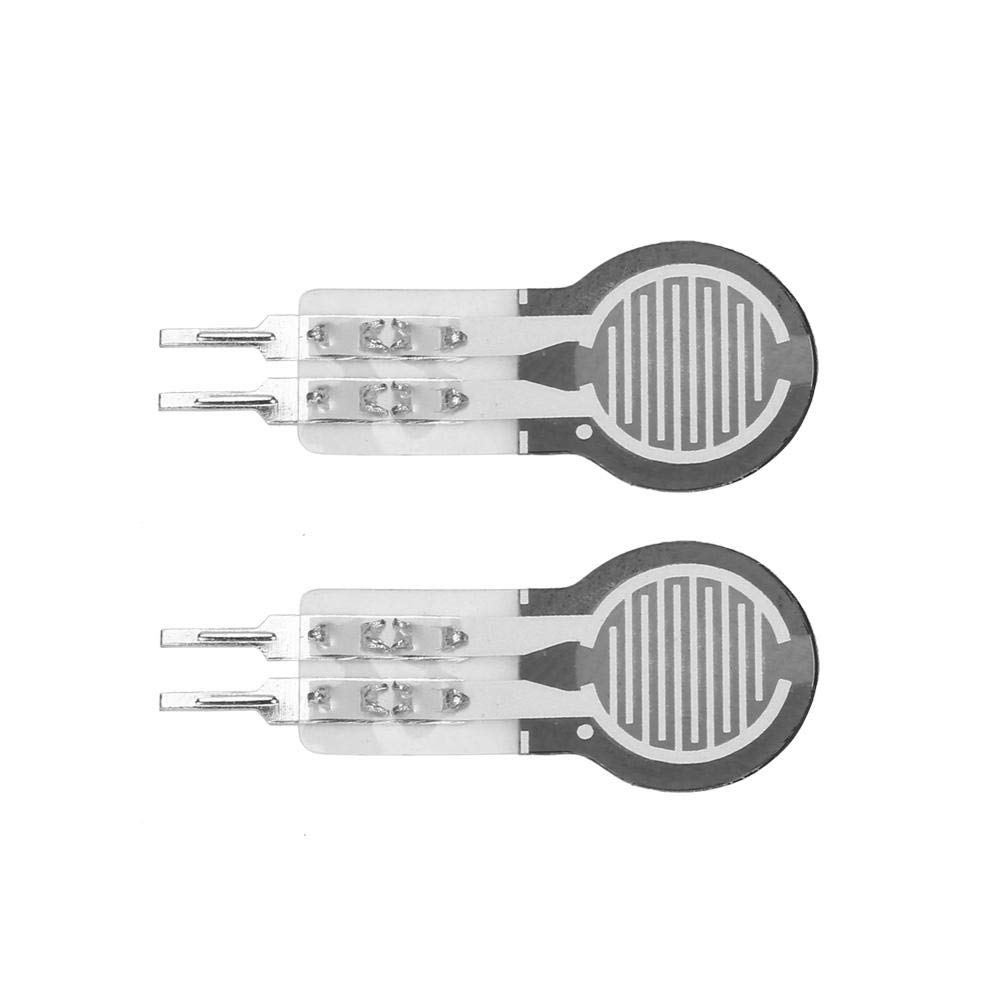
This one has 2 pins but one gets split in 2 : VCC (+ resistor) and Vout.
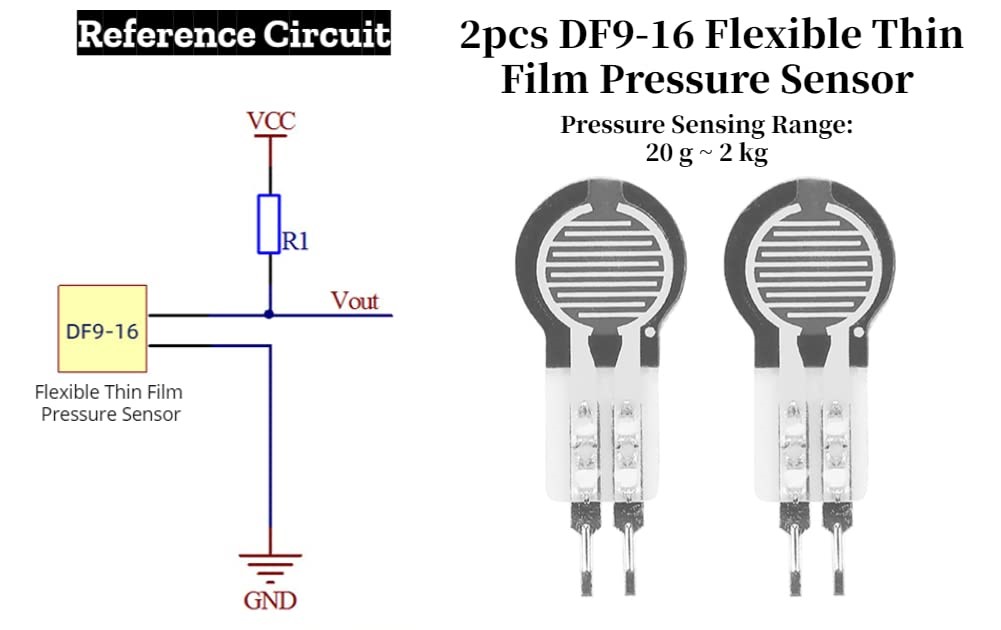
I haven't tried it out yet so I don't know if I will need 1 or 2 and how to fix them to get the right measurements.
I first thought I should use both so I placed them and calculated all the wires together.
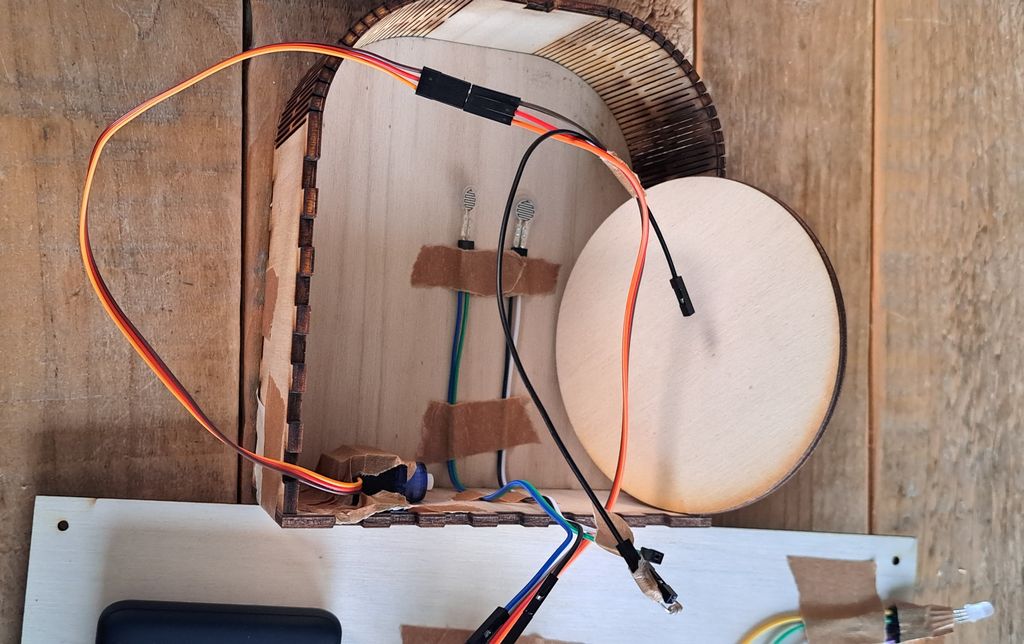
A few days later I've been thinking about how to hide it under the bowl and only used one when I cut the wood piece.
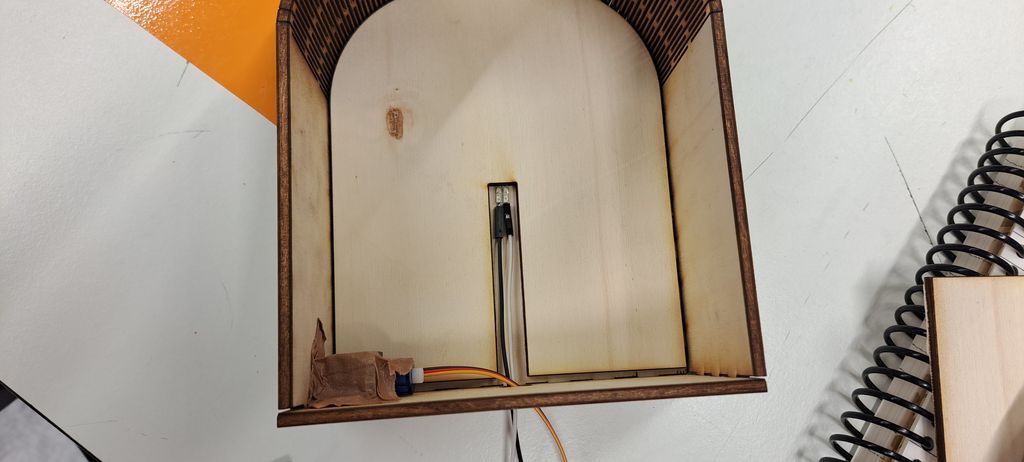
We'll see at the end what will work the best and if this wood piece will be enough.
Current state
This is how the integration looks like for the moment. :)
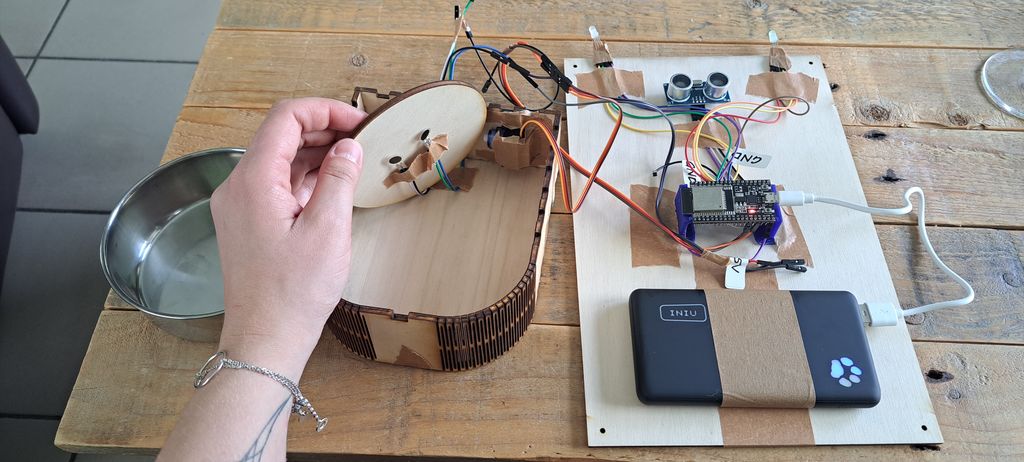
What's the project
My project is an automatic cat food dispenser. The cat's food bowl is placed in a compartment protected by a lid. This compartment is attached via a power cable to a tower in the shape of a cat's head, which contains most of the electronics needed to operate the dispenser.
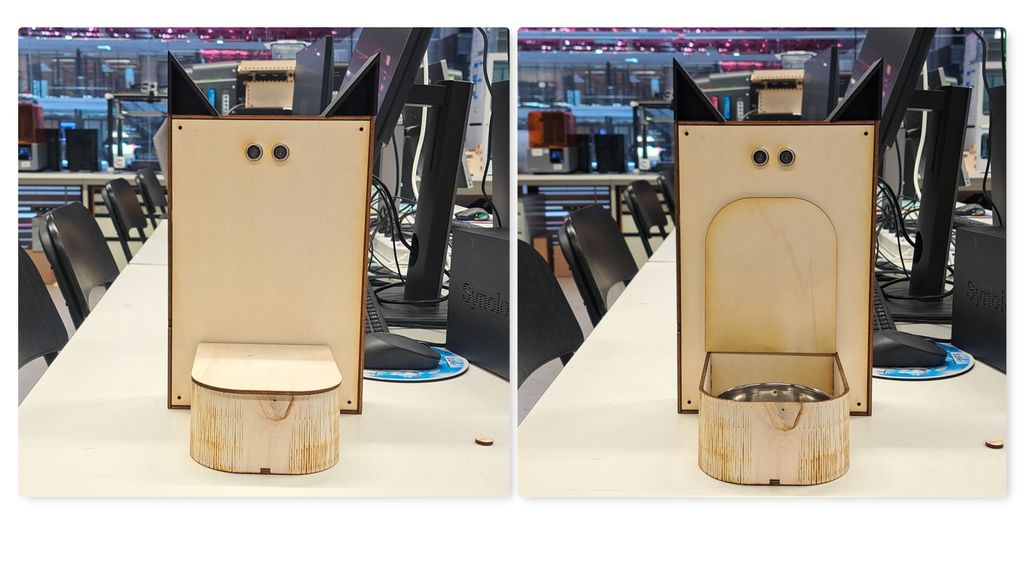
How it works
- Quantity of food available :
- When the bowl of food is filled, the weight recorded by a force sensor underneath the bowl is sent to the microcontroller, which translates this weight into a green light signal that appears, via LEDs, in the tower's ears.
- If the weight of food in the bowl reaches half the maximum possible weight, the light will turn yellow.
- If the weight of food in the bowl reaches a third of the maximum possible weight, the light turns red.
- If the weight of food in the bowl reaches 10% of the maximum possible weight, the light remains red and will start to flash.
- Opening of food bowl compartment :
- The lid of the compartment housing the food bowl opens when the animal or human slave comes within 20cm of the dispenser, thanks to a distance sensor installed in the upper part of the tower (and therefor representing the tower cat's eyes) and a servo motor concealed beneath the lid.
- When the animal or human slave moves away from the dispenser, the lid closes again after a 1-minute delay.

How it's built
The basic shapes for the tower and food compartment prototypes were created from existing templates on a laser-cut box generator website, Festi. I modified these boxes according to the sizes and specifications I needed for my project by using Inkscape and the laser cutter program, Gravostyle.
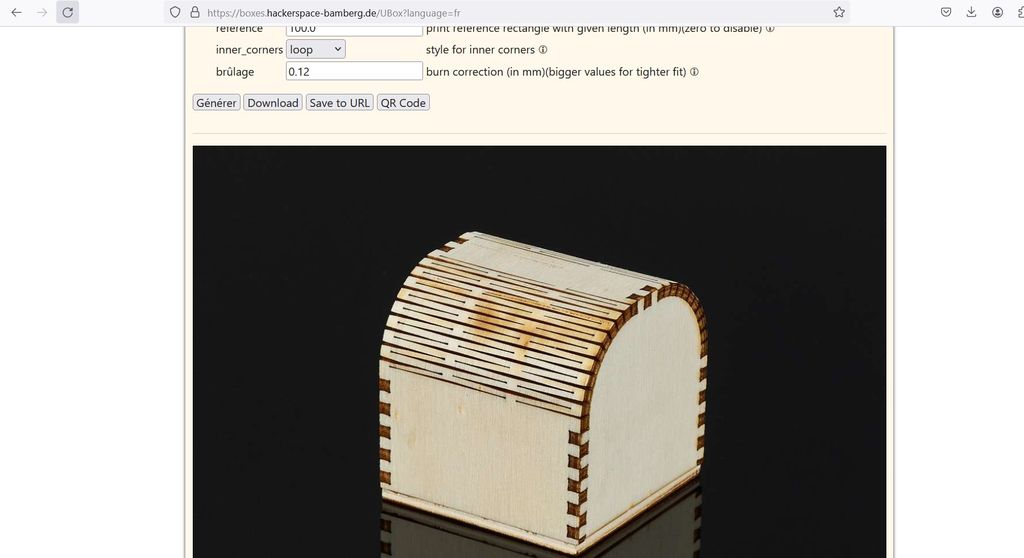
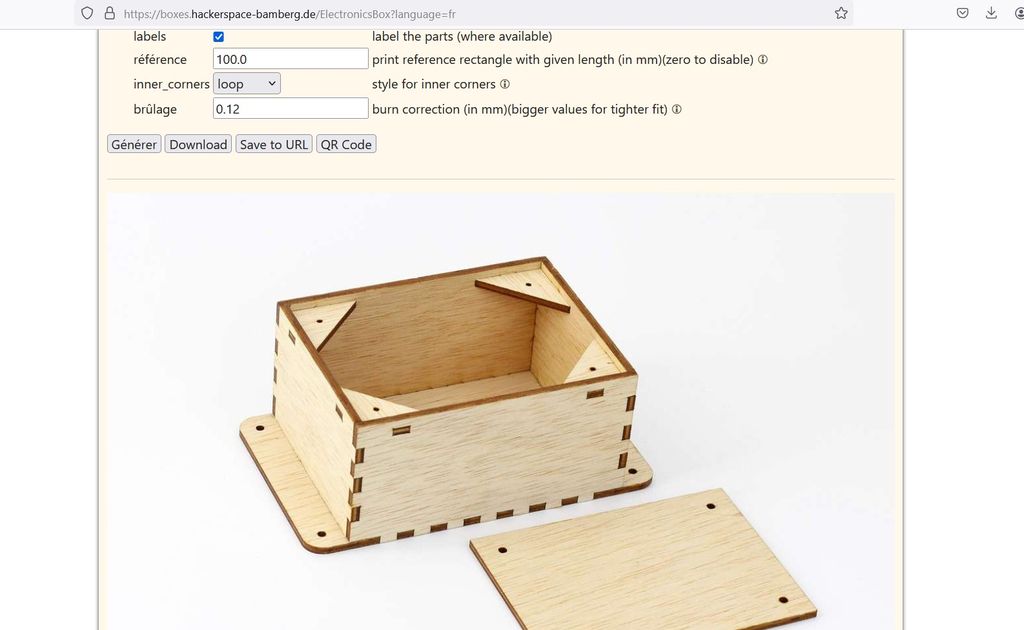
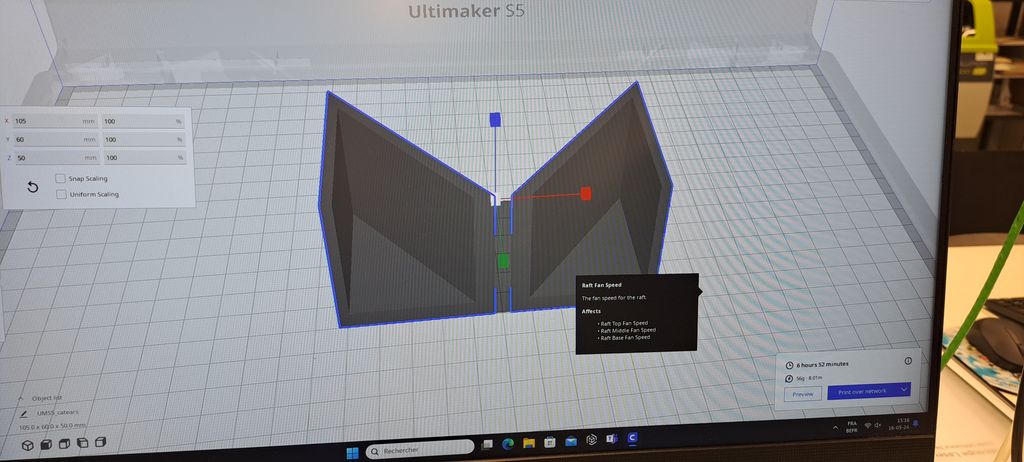
I also used Tinkercad to design the 3D prints of the ears at the top of the tower, in which the LEDs will be housed.
Many of the parts holding the electronic components were 3D printed from opensource files found on websites like Thingiverse.
Challenges in the building
- Fitting the pieces together
- Measuring food weight in bowl (without the bowl's own weight)
- Force required to lift the bowl lid
- Movement of the lid regarding the distance (with or without waiting time)
- Ergonomic arrangement of parts
- Hide electronic components
Points of positive evaluation of the project
- Good opening and closing operation
- Right weight measurements
- Right color display
- Clean wiring
- Practicality
ANOTHER UPDATE
I was asked to use a self-made PCB instead of the ESP32 so I took my "Cat Controller" (built on week 08).
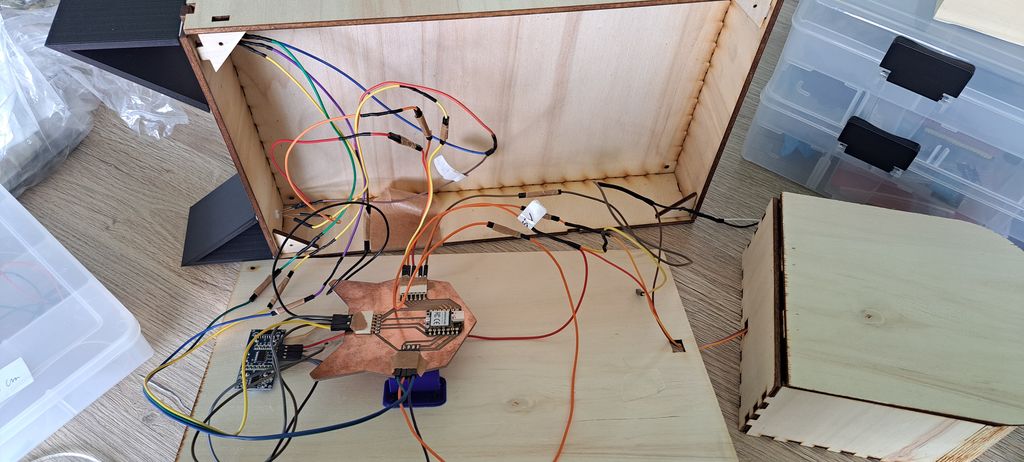
I had to change some wires or simply add some more as the pins weren't adapted to the PCB's components.
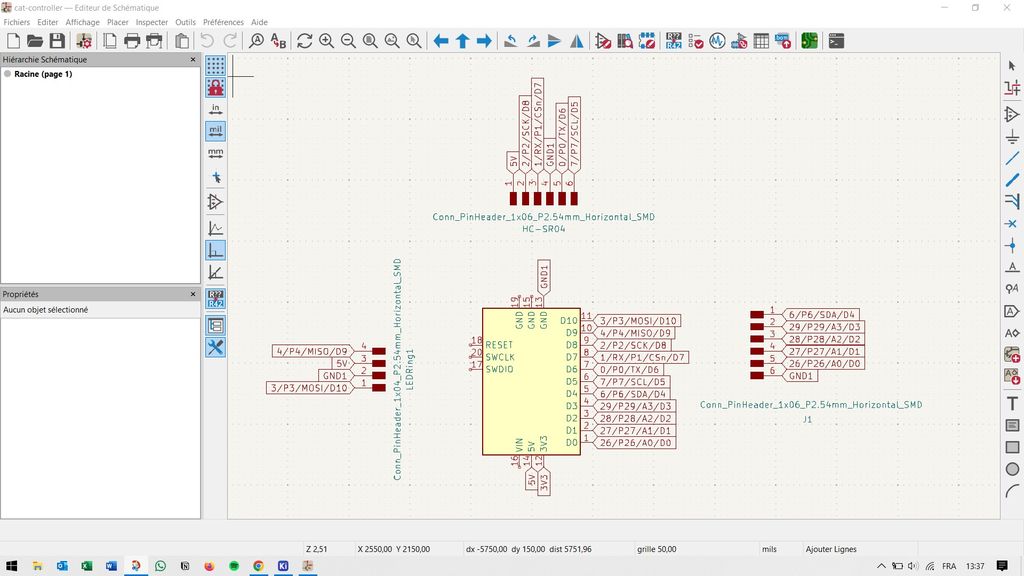
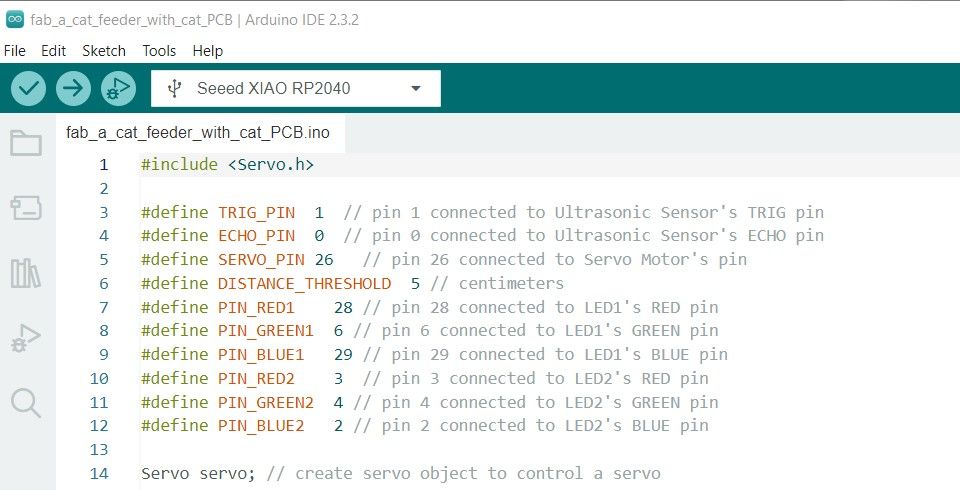
Then I changed the pins informations in the arduino code to fit the new ones. For that I checked the cat PCB schematic that I made on icad.
As first result, I had one LED that wasn't working (the green color didn't light up). After checking the code and the wires, it seems that it comes from a contact failure (I did manipulate a lot this prototype so it's normal that some pieces are a bit damaged...). After moving a bit the wires and pins it worked again.
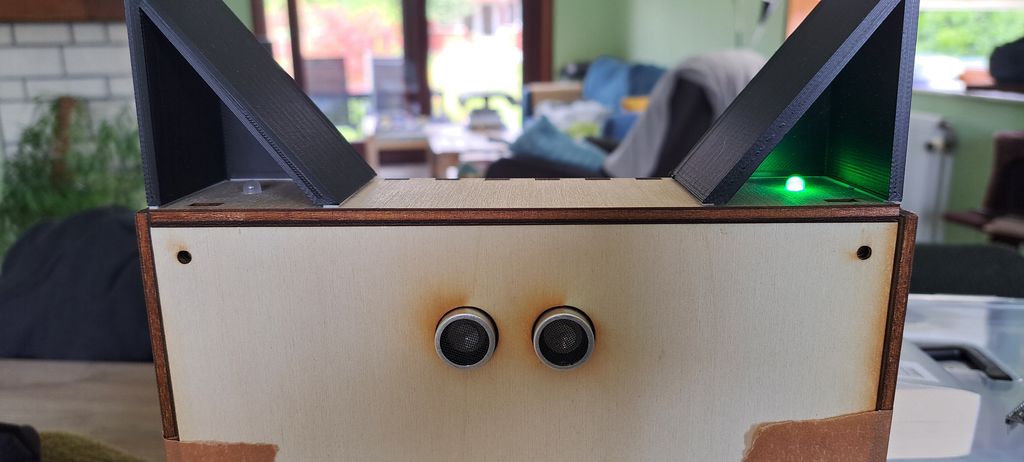
But then another problem appeared : the ultrasonic distance sensor showed no distance measure in the serial monitor and the lid wasn't opening and closing as it was supposed to.
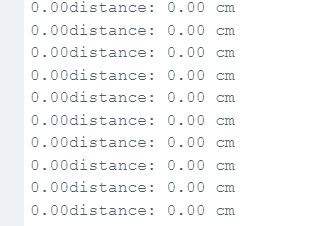
After failing in my own researches to solve this problem, I asked my husband to double check with me. He took it's multimeter to see if every wire was well connected (which was the case ! yoohoo!).
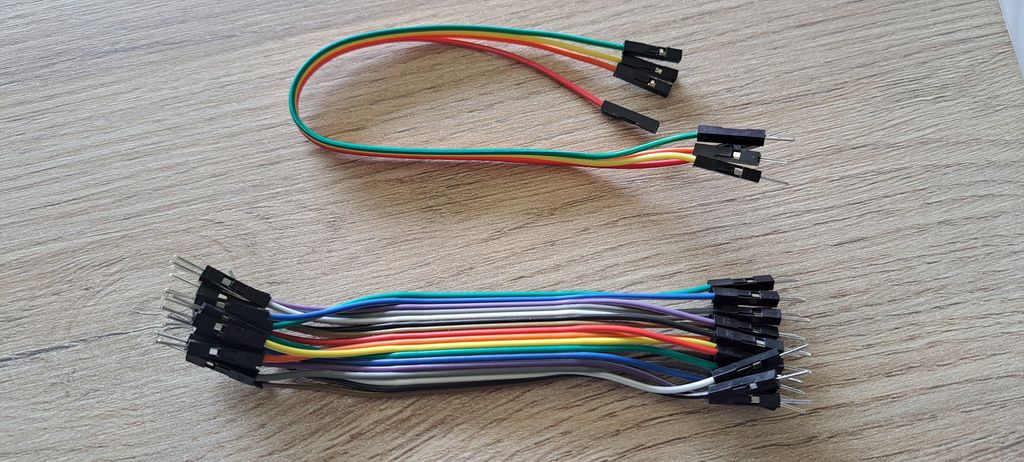
We found out that the problem comes from the fact that the wires are not such a good quality (we even had to change one) and don't connect properly when they are not soldered to the pins.
After moving a bit the wires and changing some others, it finally worked !

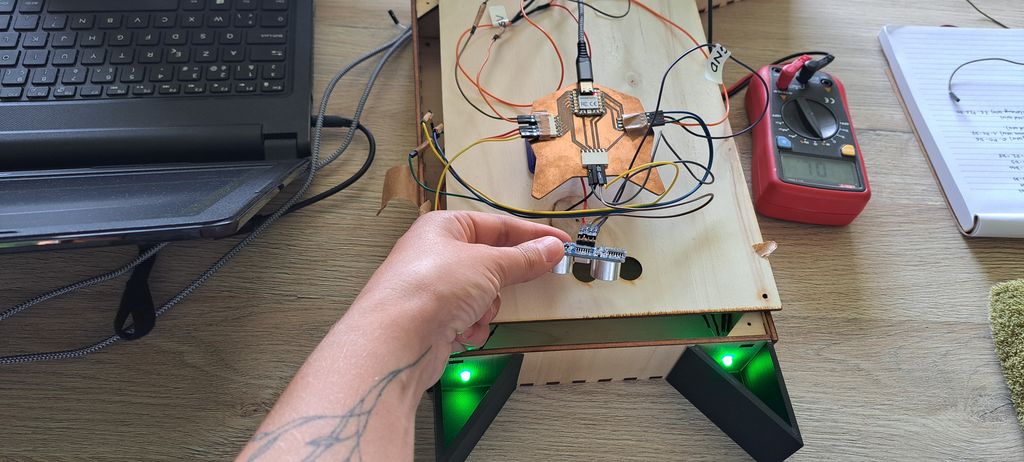
You can see in this picture that we had to move a bit the wire to make it connect properly.
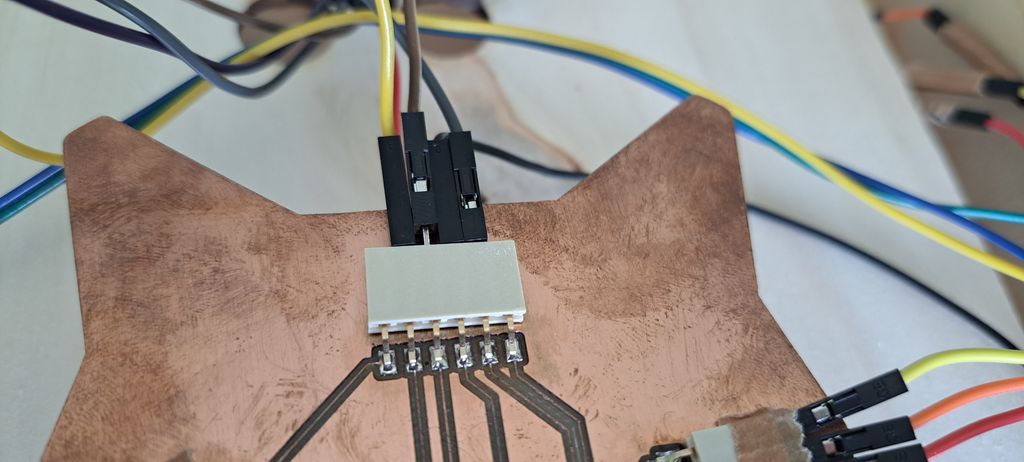
So right now you can see that it works with this PCB but it's not stable. I'm already glad that I reached this point for the first prototype.
Here's what I'll have to change/adapt for the end feeder :
- Create a new PCB, smaller
- Create a 3D printable "cat tower" and bowl container with lid in a smaller and smoother design
- Add the weight control for the food with the right component
- Replace the ultrasonic distance sensor by a RFID system
- Get better wires and solder them to the PCB
I'm pretty sure there will be more to change/adapt but one step at a time ! ;)
I'm not done yet on this project but I'll need time to focus on some other things before stepping back in !