7. Computer controlled machining
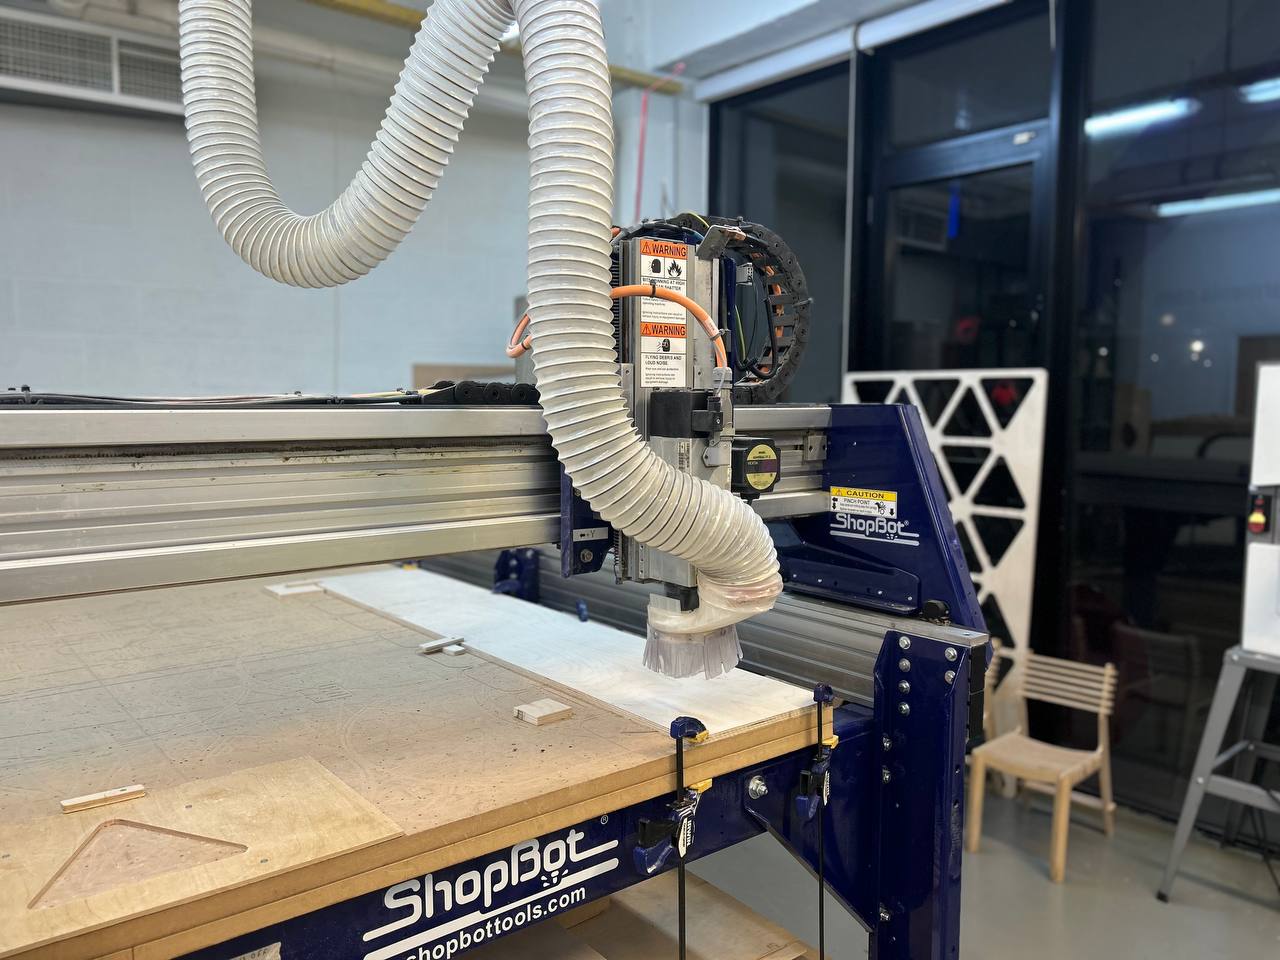
This week we got acquainted with CNC milling ShopbotPRSalpha. We learned how to use it and performed group and individual tasks.
Group Assignment
As part of a group assignment we explored many things started with:
Safety
You should keep a safe distance from the machine, while the machine is running, you should observe all safety rules and be alert.

Liquids containing alcohol should not be near the control buttons and everything that can cause fire is flammable.

In addition to the usual shutdown button, 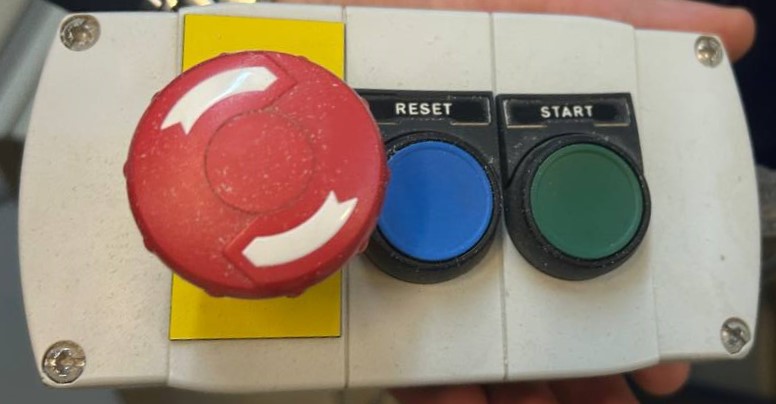 the device also has emergency shutdown buttons that will de-energize the entire area and prevent fire and explosion.
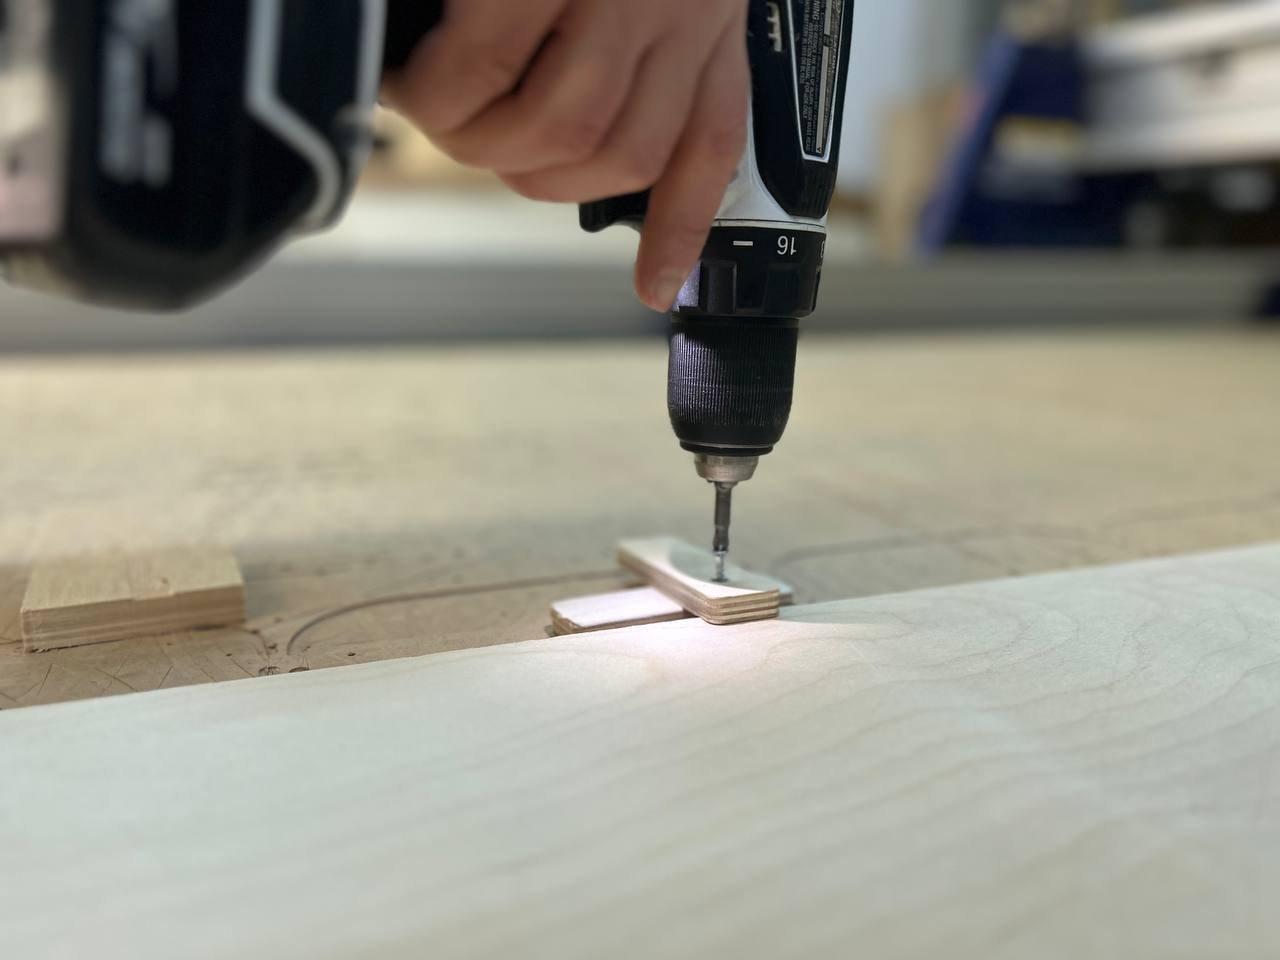
The green button in photo above, is the one by which end mill is starting working/rotating. End mill makes 12600 revolutions per minute. The number and frequency of rotations can be changed through the program.
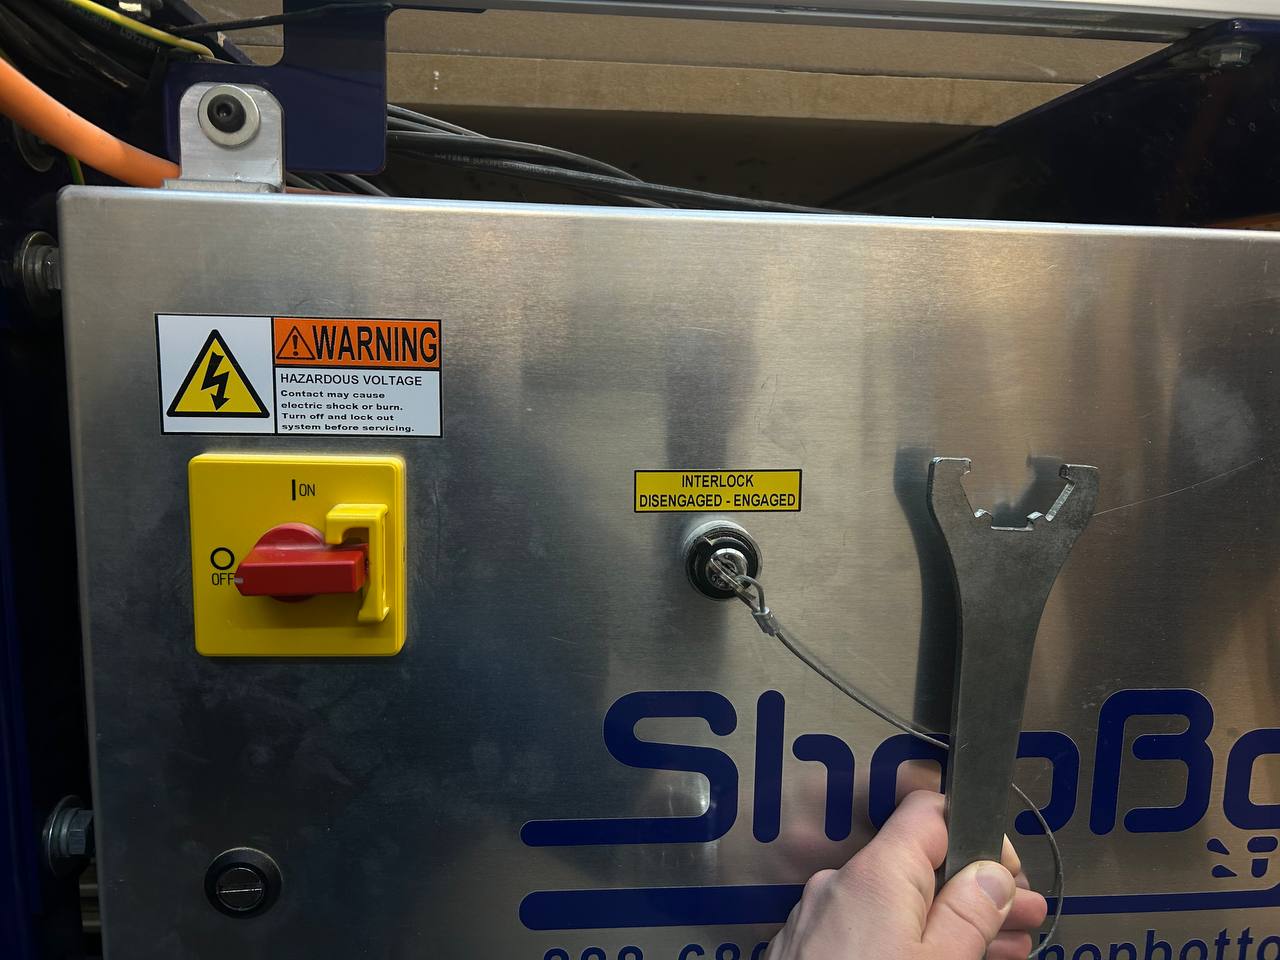
This Red Button turns on the machine. Spindle can start working after turning on the machine, if the key on the picture is in his place. But if the key is not in there, nothing will start to work.
The tool in my hand that is connected with key is for changing end mill. They are together for safety. Spindle can’t start working wile you are changing the end mill.
Before cutting, I got acquainted with softwares that are used with this machine. There were 2 - VCarve Pro-ShopBot Edition and ShopBot 3
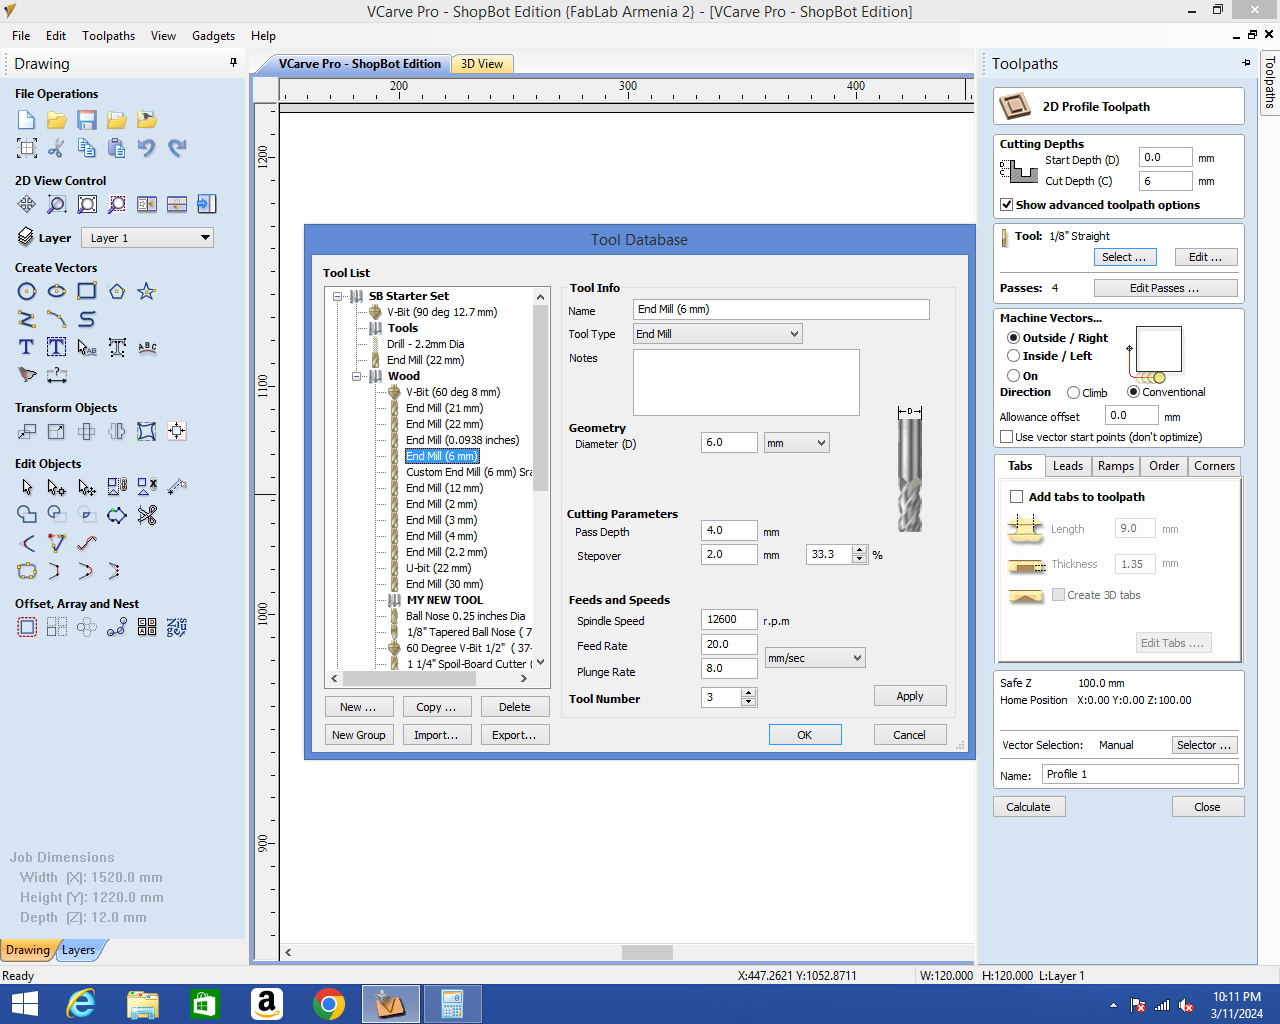
Basic Settings in VCarve Pro:
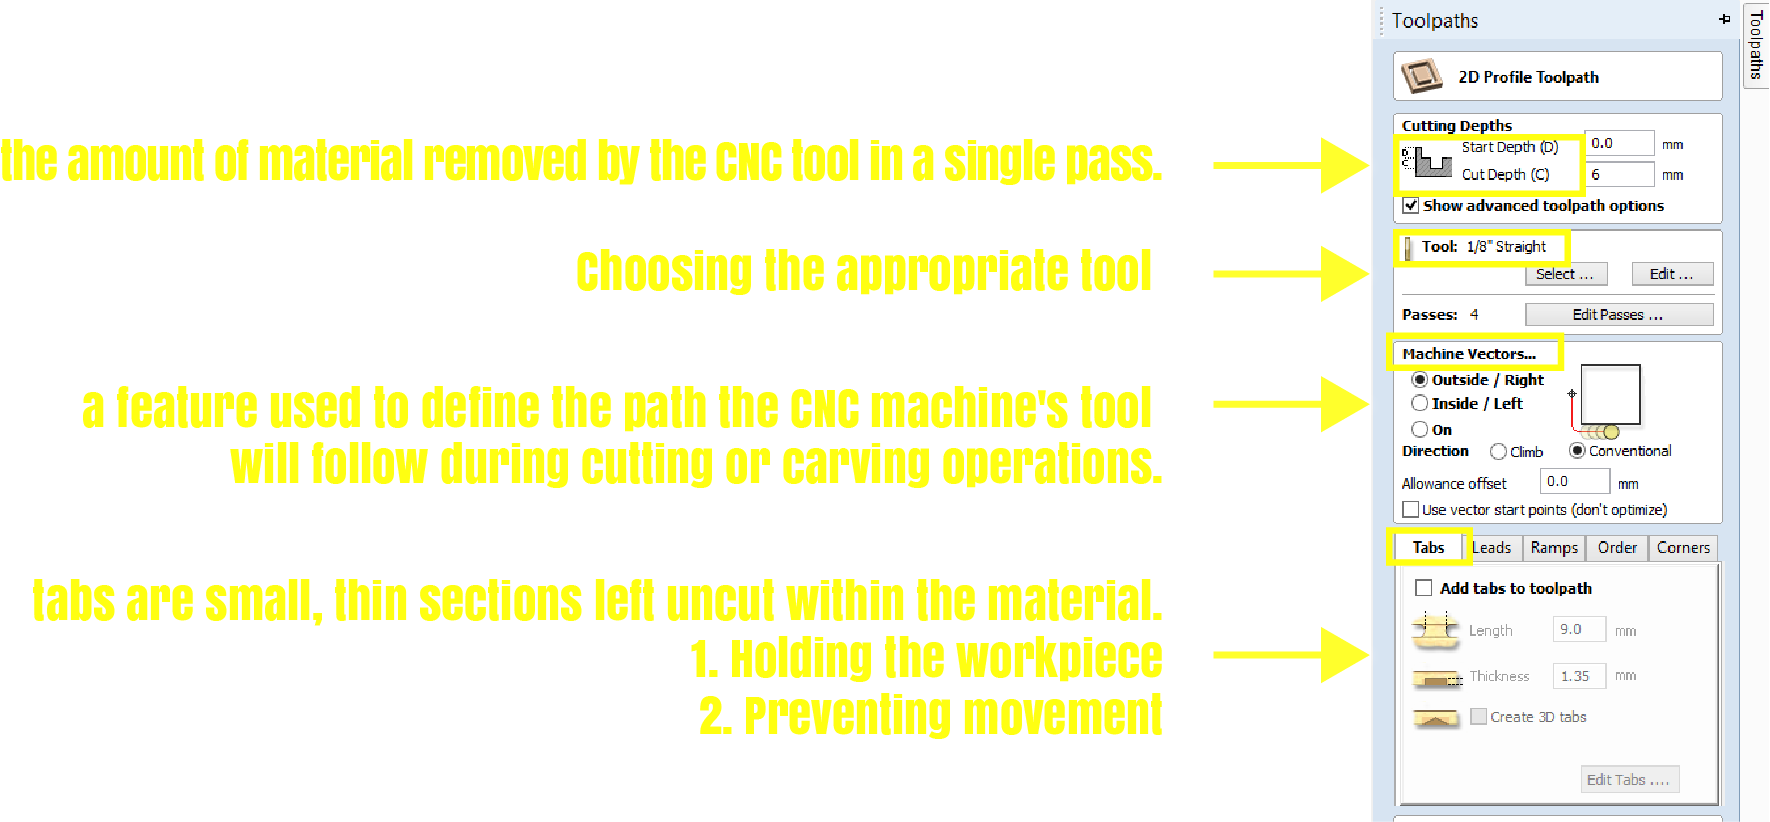
start depth - this tool is designed so that if you are cutting a piece not for the first time, you can set the start depth from the cut part. For example, the milling cutter cannot cut a depth of 12 mm at once, we set it to 6 at the beginning, after cutting it for the 2nd time, we set the start depth to 6 again.
tabs are for: Holding the workpiece: Tabs physically connect the material to the sacrificial board (waste material) during cutting. Preventing movement: This ensures the material remains stable throughout the machining process, preventing vibrations or shifting that could affect the final product’s quality.
This is how you can add and see your tabs after.
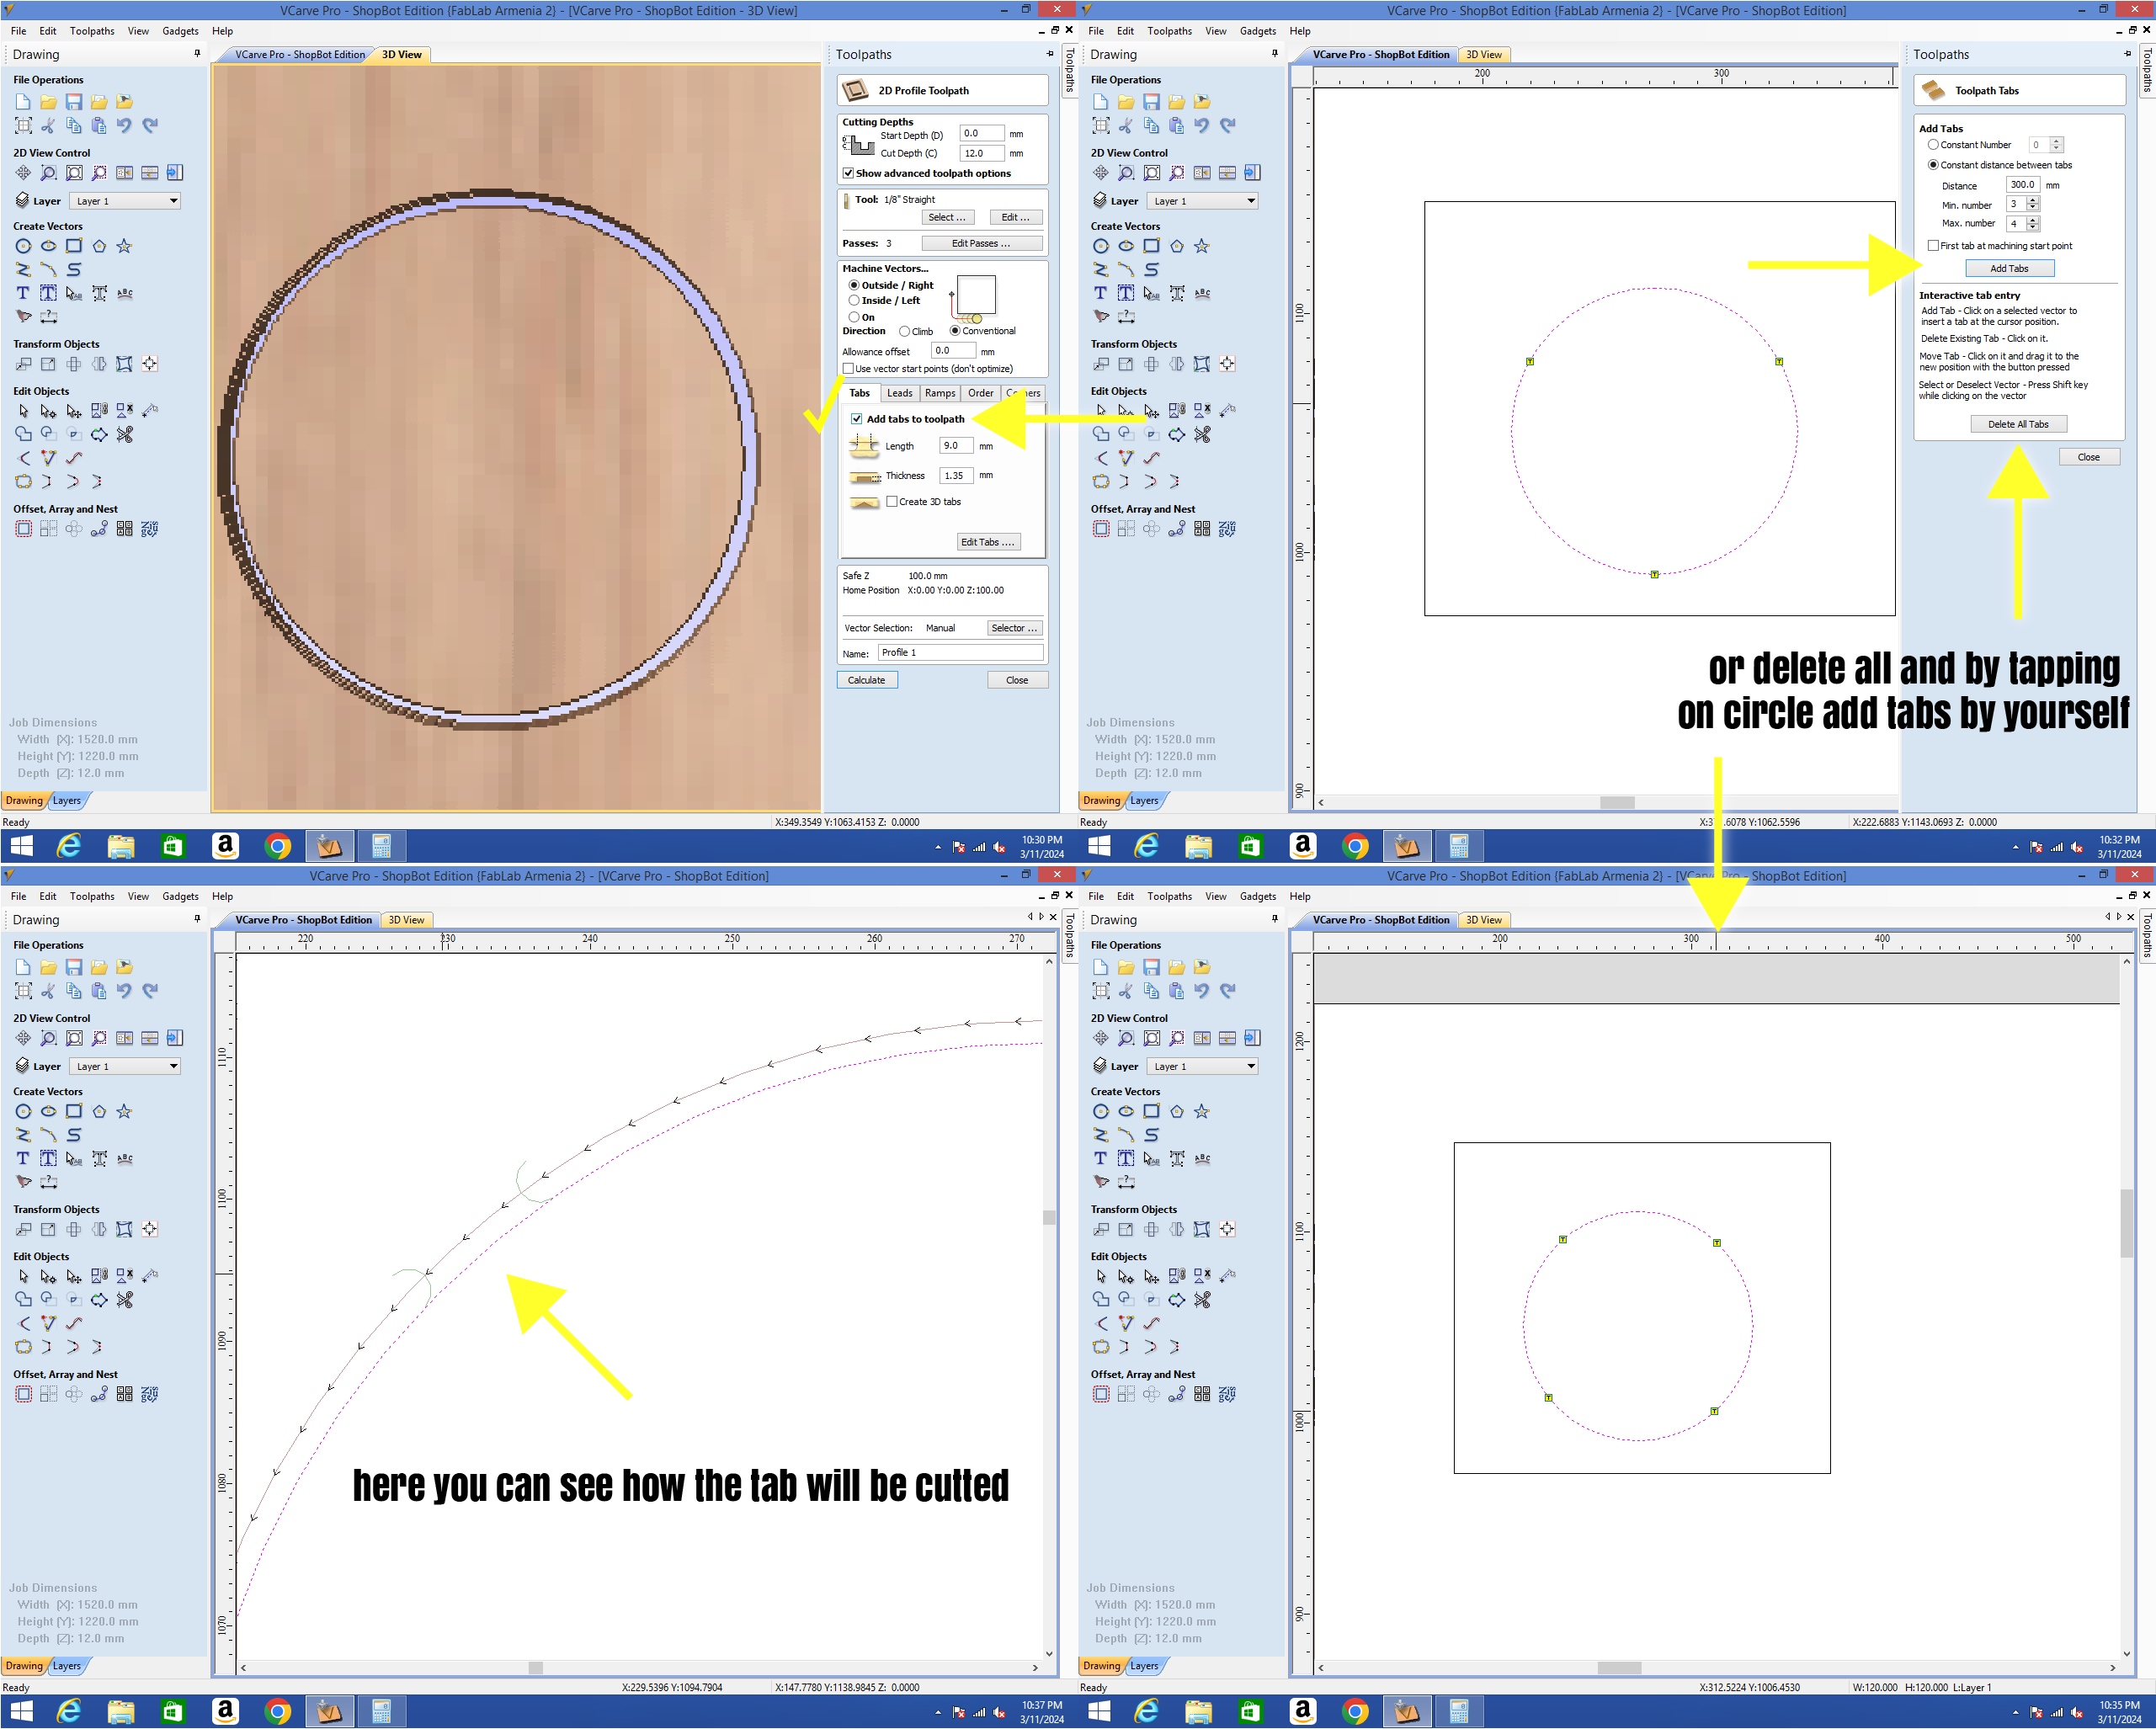
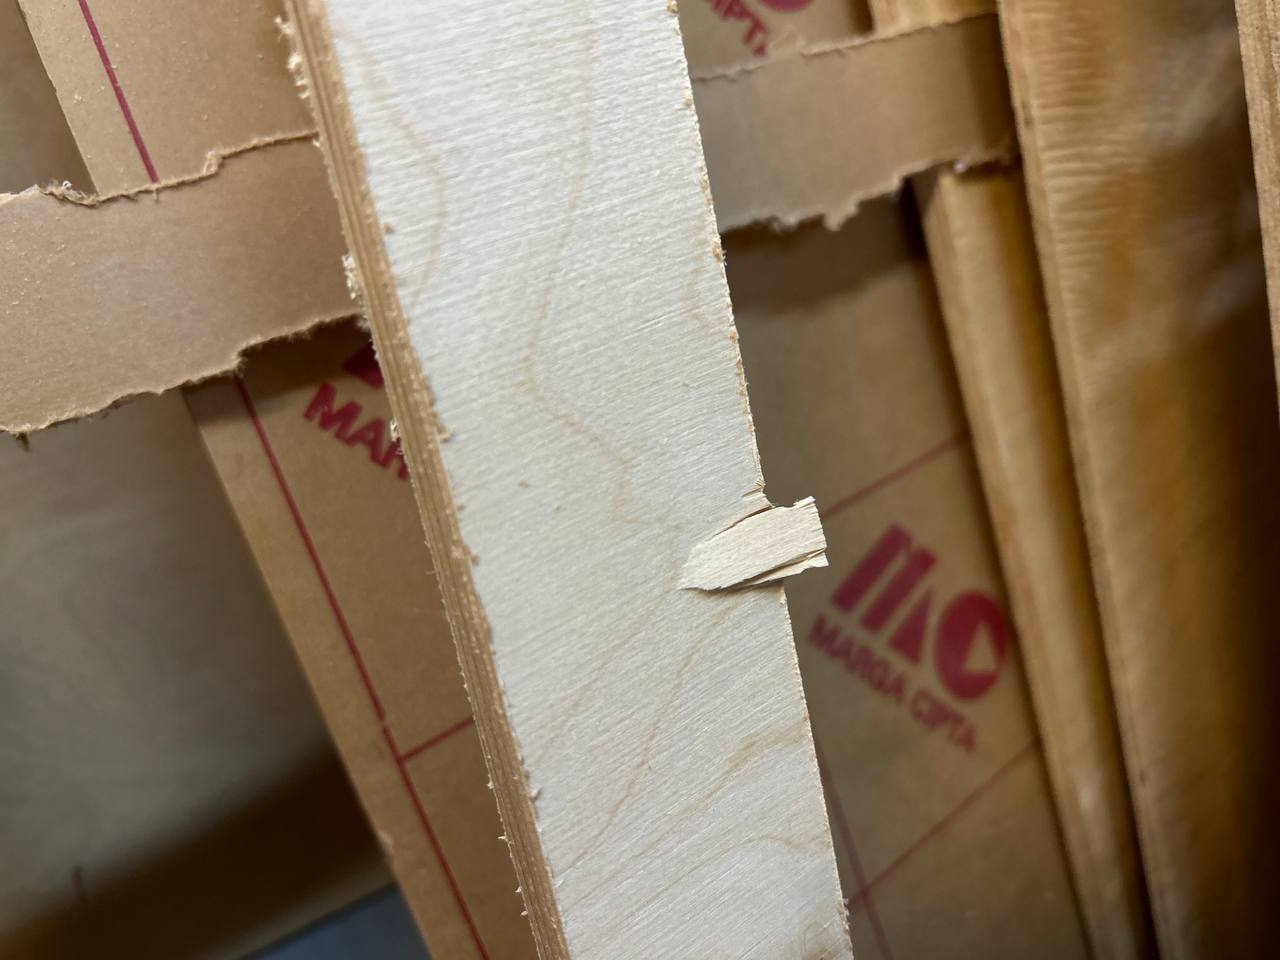
There’s this problem with tabs: it is possible that they are not arranged correctly, and picking up the cut object will damage the object, the tab will not be torn off, or the part will look ugly in the future.
1st try
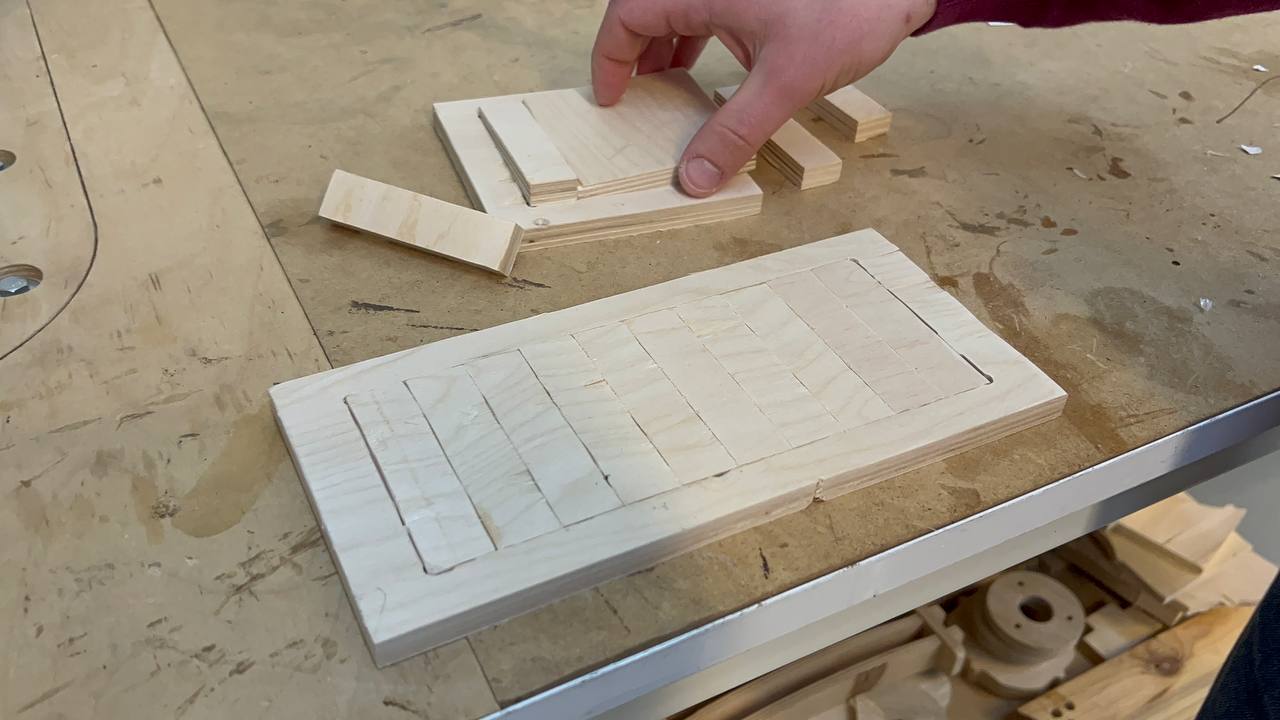
We tried to arrange the pieces in a square circle so that they all fit and do not fall out.
For that we made a 2D drawing of rectangle, we divided them into 10 pieces to understand whether they fit or not, how much space remains between them.
the dimensions in 2D was 80mm x 200mm, 80mm x 200mm, but as we can see in picture it was a bit differ.
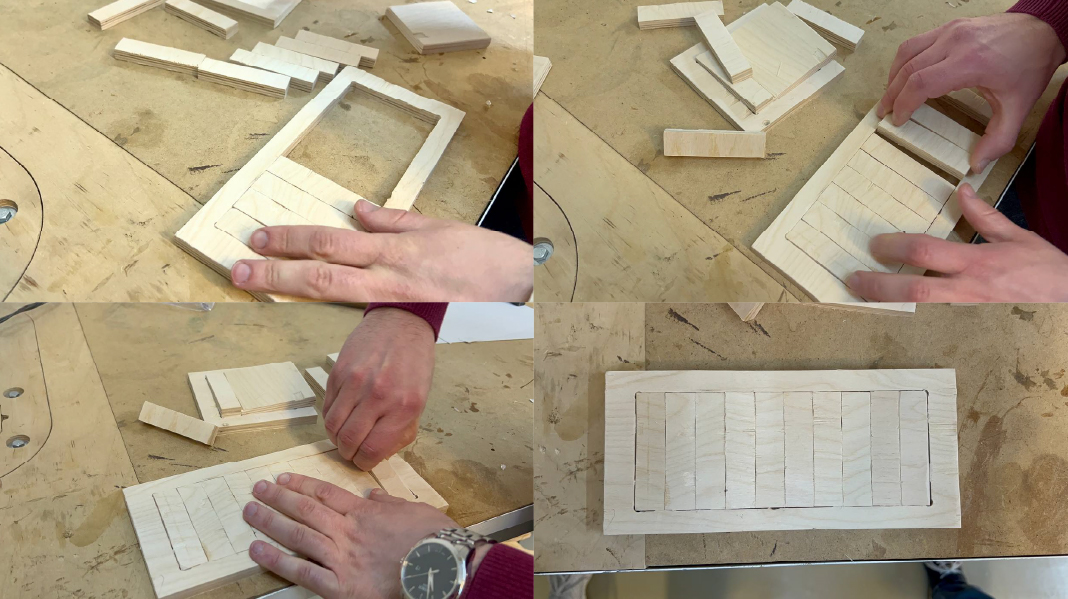
At first it was easy to enter, but as we got closer to the end, it became more difficult to enter.
both the inner space should be 80mm, and the detail.
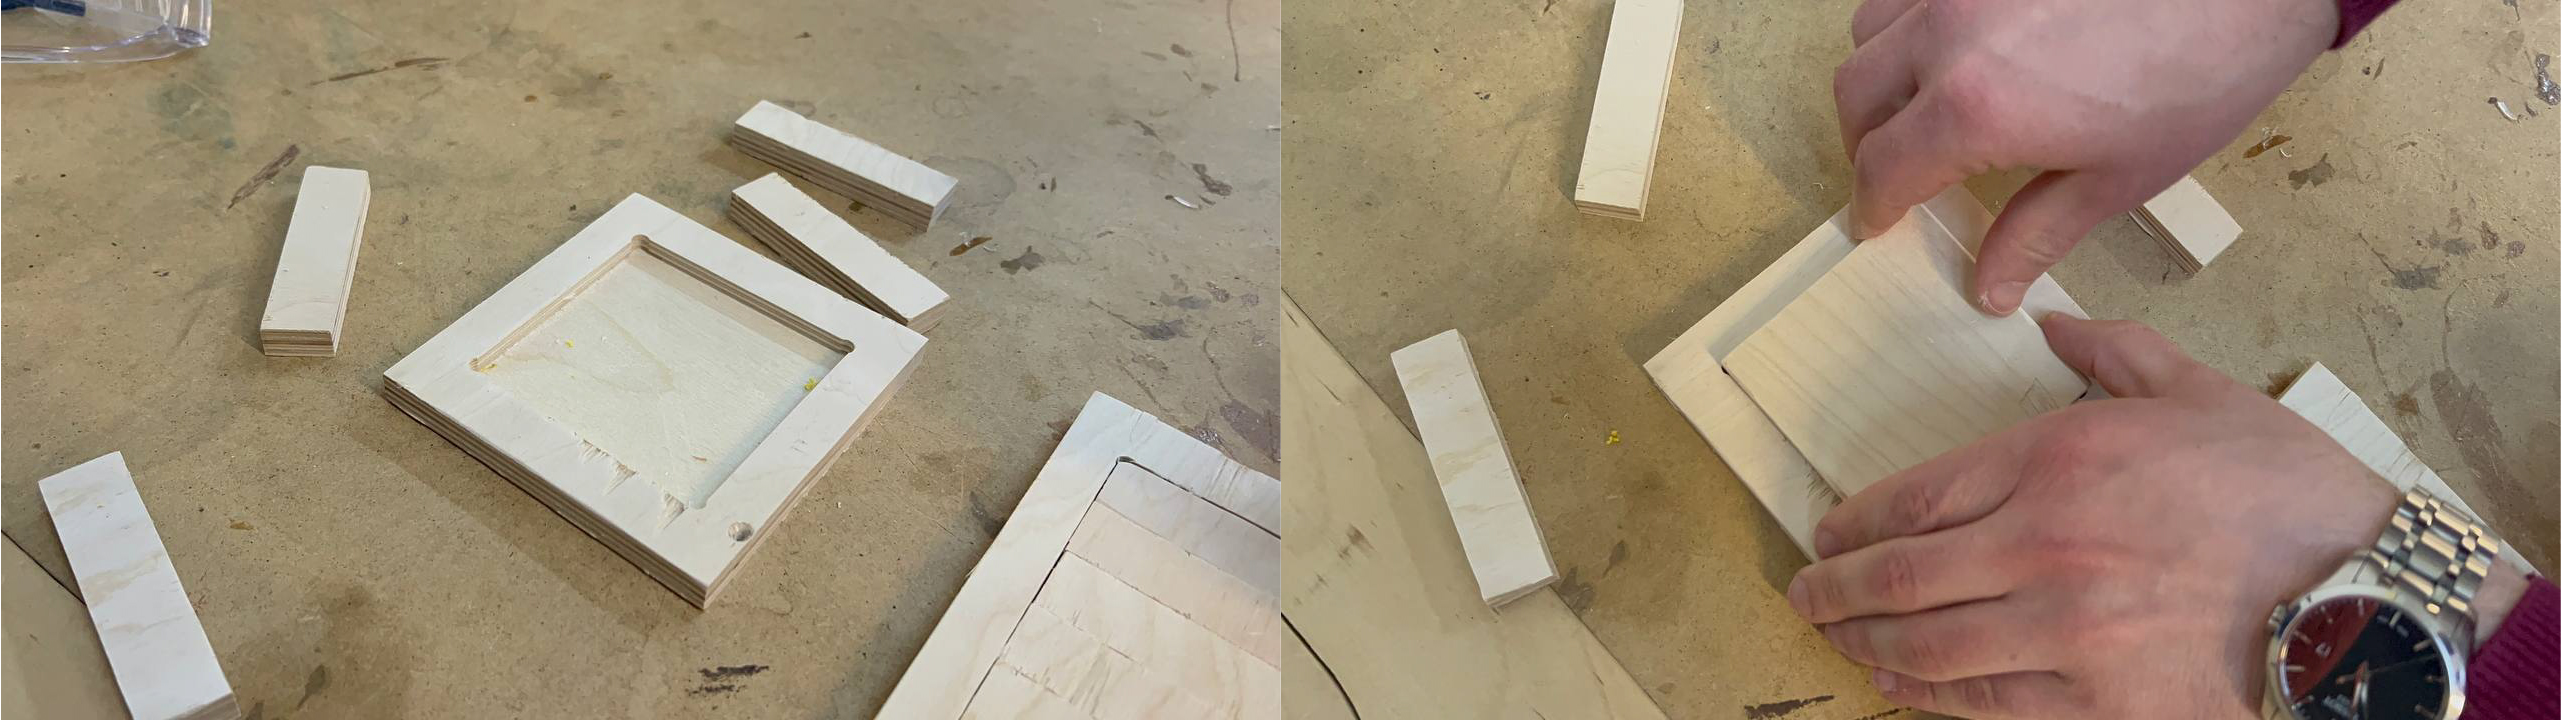
2nd try
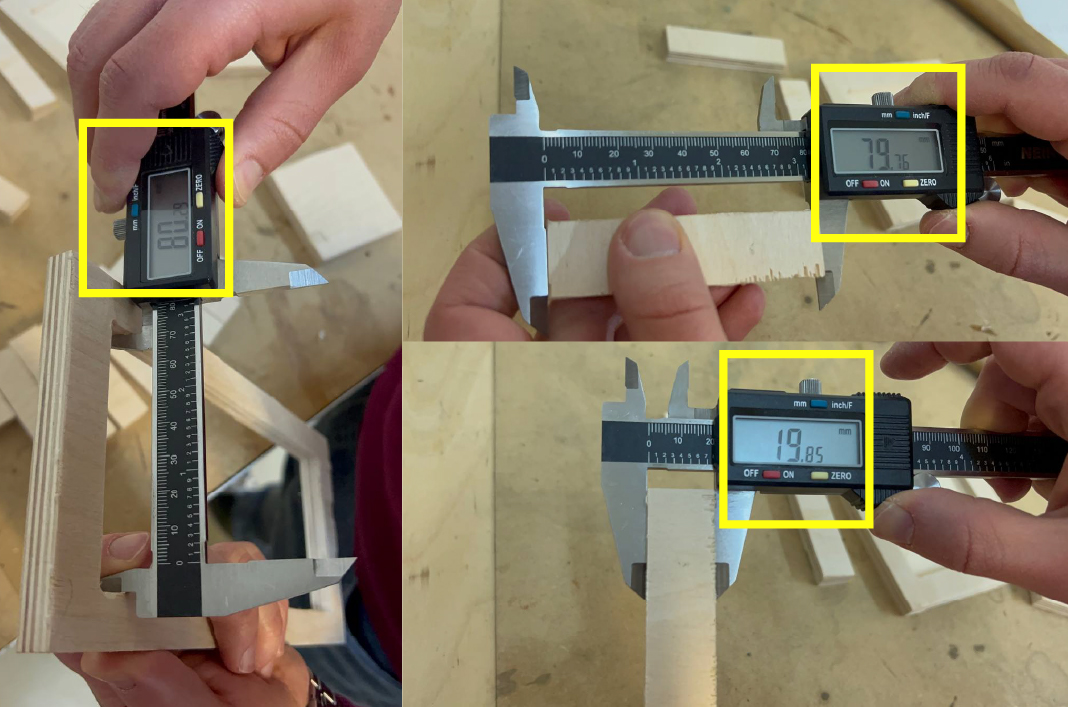
And the other was an 80mm equilateral quadrilateral. After cutting it, we measured it and it showed ~79.80 mm on both sides.
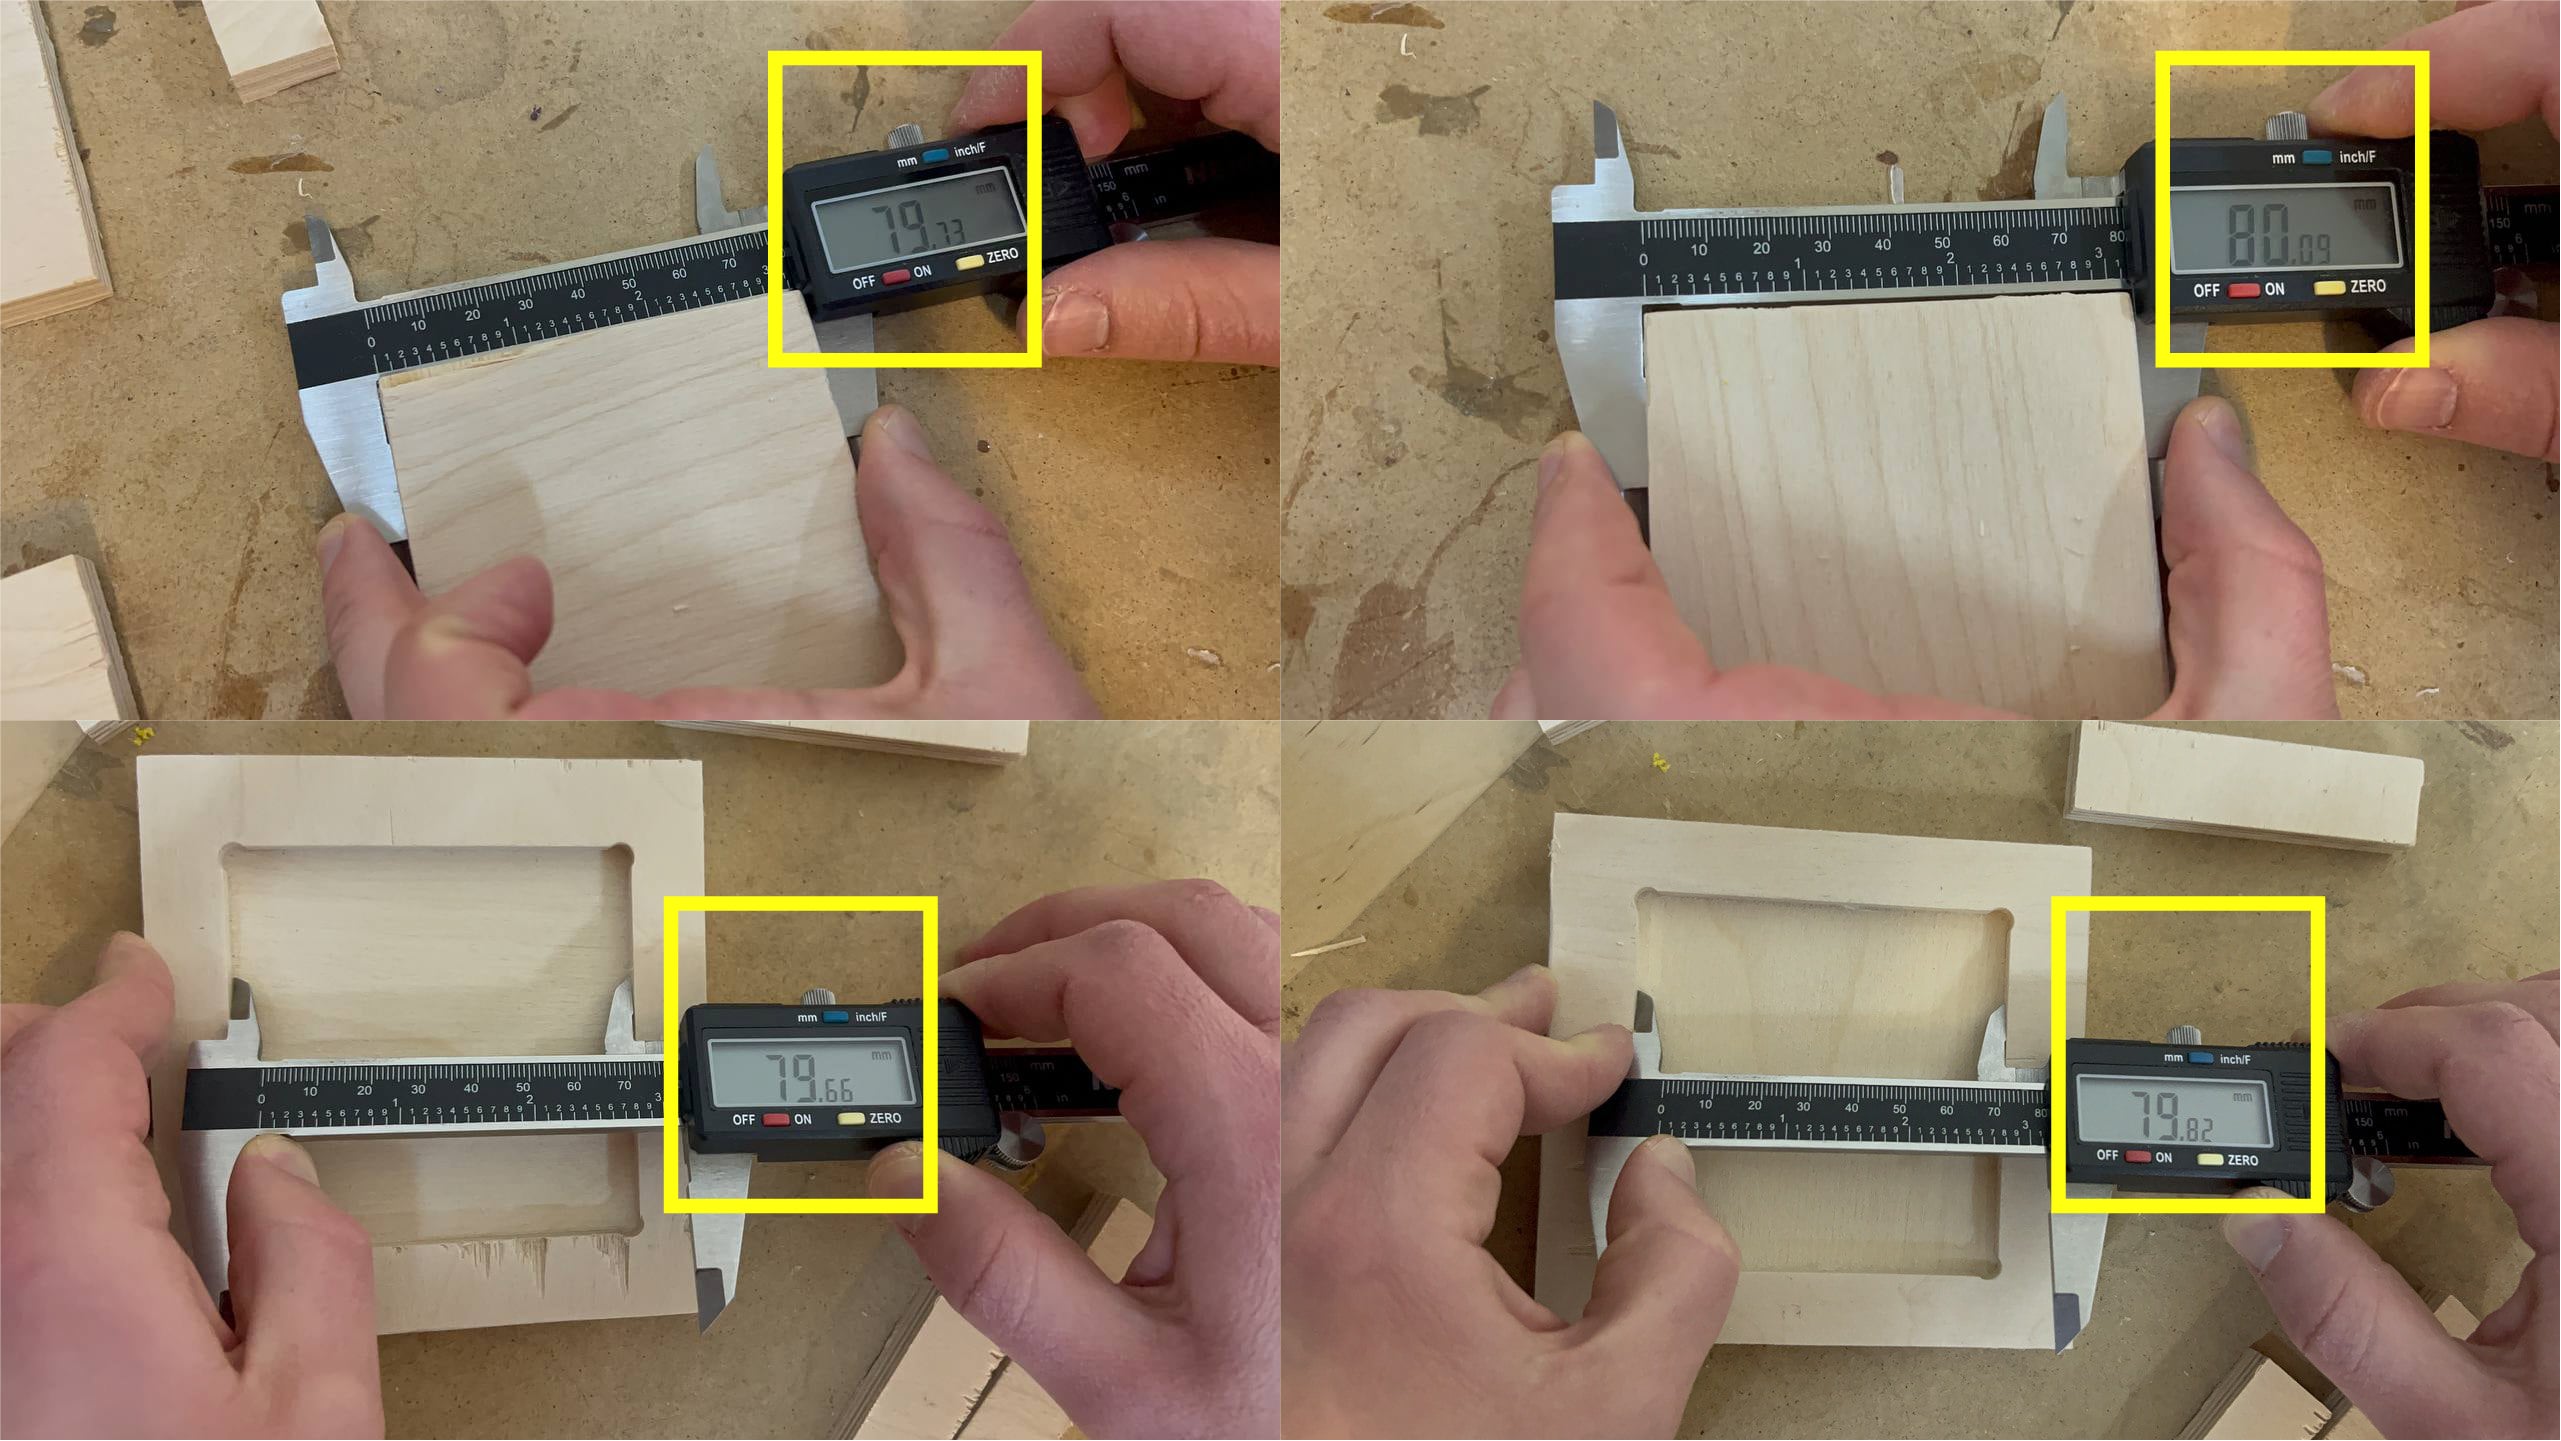
And it almost fit into the frame.
Conclusion was that From cutting plywood it can give a difference of 0.1mm. Both attempts were successful. If you need to have a certain play between the parts, so that parts can move more free, then you need to calculate 0.1-0.2 space between them.
types of Tools
End Mills can create holes, slots, and profiles on workpieces. These tools come in various types, each tailored for specific tasks:
The number of flutes (cutting edges) on an end mill affects the feed rate and cutting speed. Common flute counts include 2, 4, and 6.
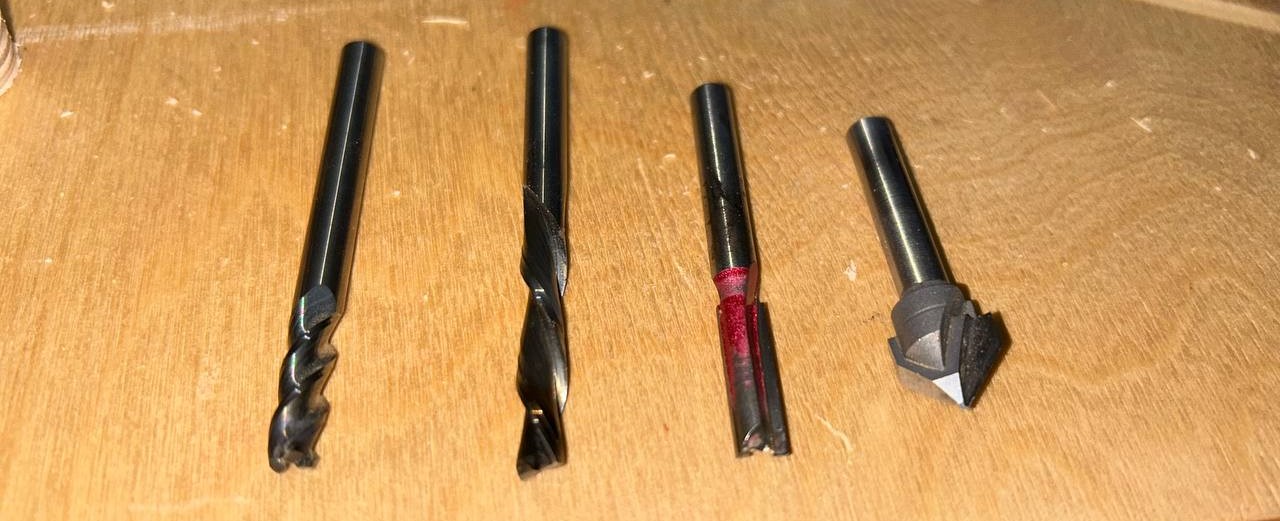
| Types of end mills in picture bellow (from left to right) |
|---|
| 1. Two-Flute End Mill: This end mill has two spiraling cutting edges (flutes) visible on its body. It’s commonly used for general-purpose milling and provides good chip evacuation. |
| 2. Four-Flute End Mill: The four-flute end mill has four cutting edges that spiral down its body. It’s suitable for faster material removal and smoother finishes. |
| 3. Ball Nose End Mill: Recognizable by its rounded tip, the ball nose end mill is ideal for 3D contour work, creating curved surfaces, and engraving. |
| 4. Chamfer End Mill: This end mill has angled cutting edges, allowing it to create bevels and chamfers. It’s useful for deburring and edge preparation. |
Face mills are essential for creating flat surfaces on raw materials. They use multiple inserts (cutting edges) to remove material efficiently.
Twist drills are popular for making holes. They have flutes that help remove material while drilling.
Besides that you can make new tools, end mills by yourself, by clicking on “Edit”.
Useful links
Individual assignment
At first as an individual assignment I decided to cut something small, just to understand joints, how all is working. So I designed this in SolidWorks.

But after because of the short time, I couldn’t finish to cut it.
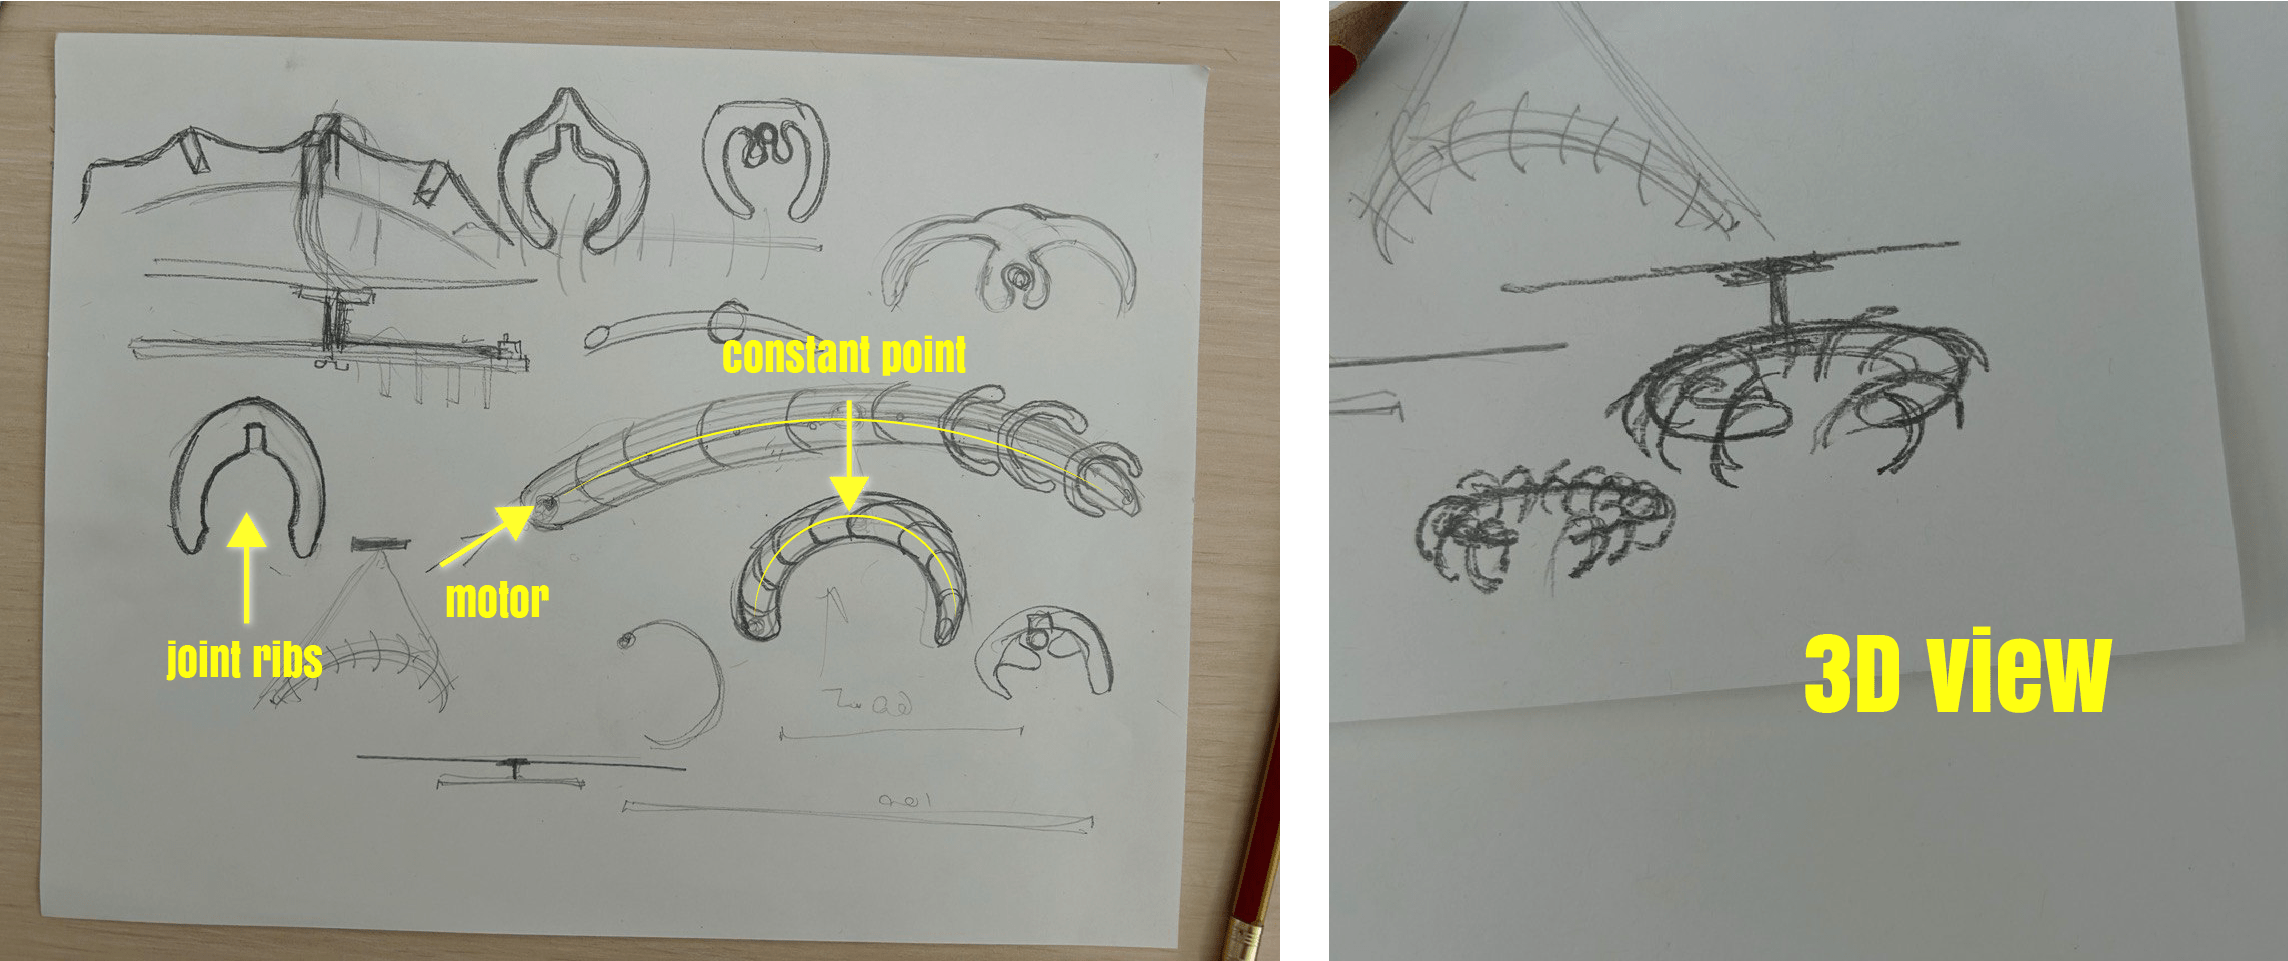
So for individual assignment I had an idea to make a chandelier, but not usual one, Babken suggested to make something moving, not just a simple stable chandelier․ And after I started doing new sketches, thinking about mechanisms of how it can work. How I can make a kinetic chandelier.
Kinetic Chandelier idea development
I decided to cut this parts that I already designed by laser cutter. So that I could just have a prototype. By this way I also understood what type of issues I have to solve. What I have to change in my design and etc.
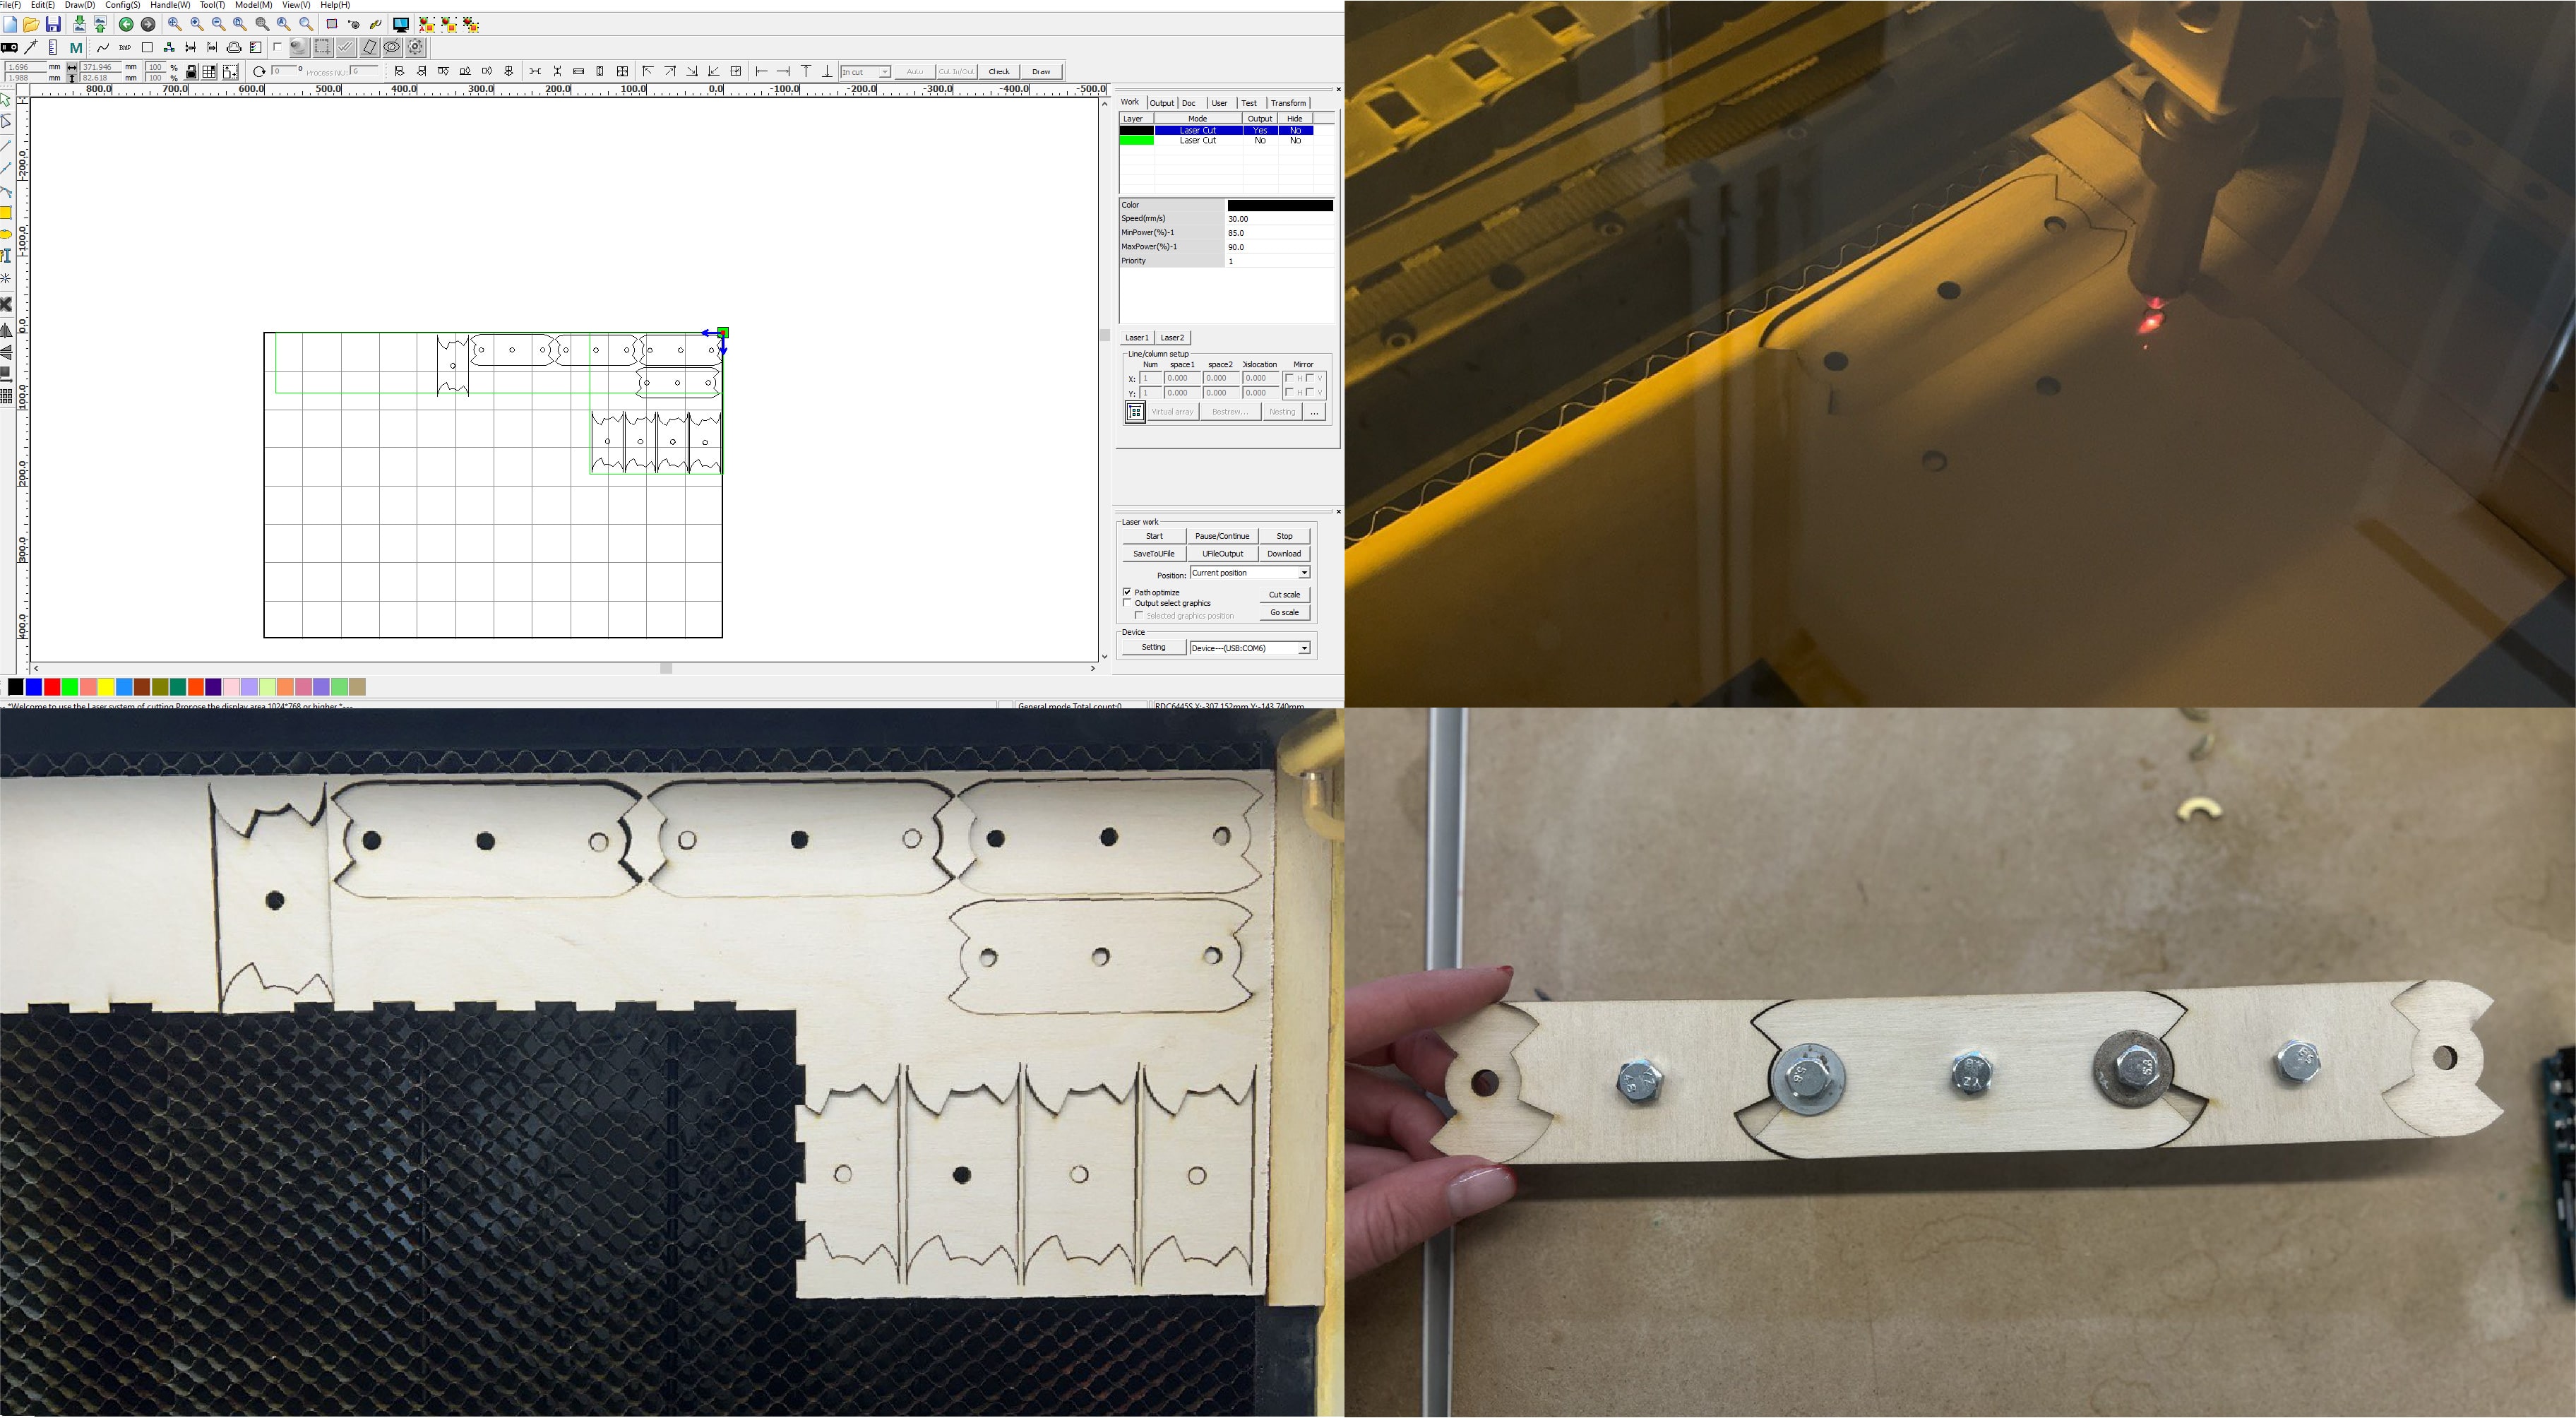 Here you can see the very first mechanism, that I made.
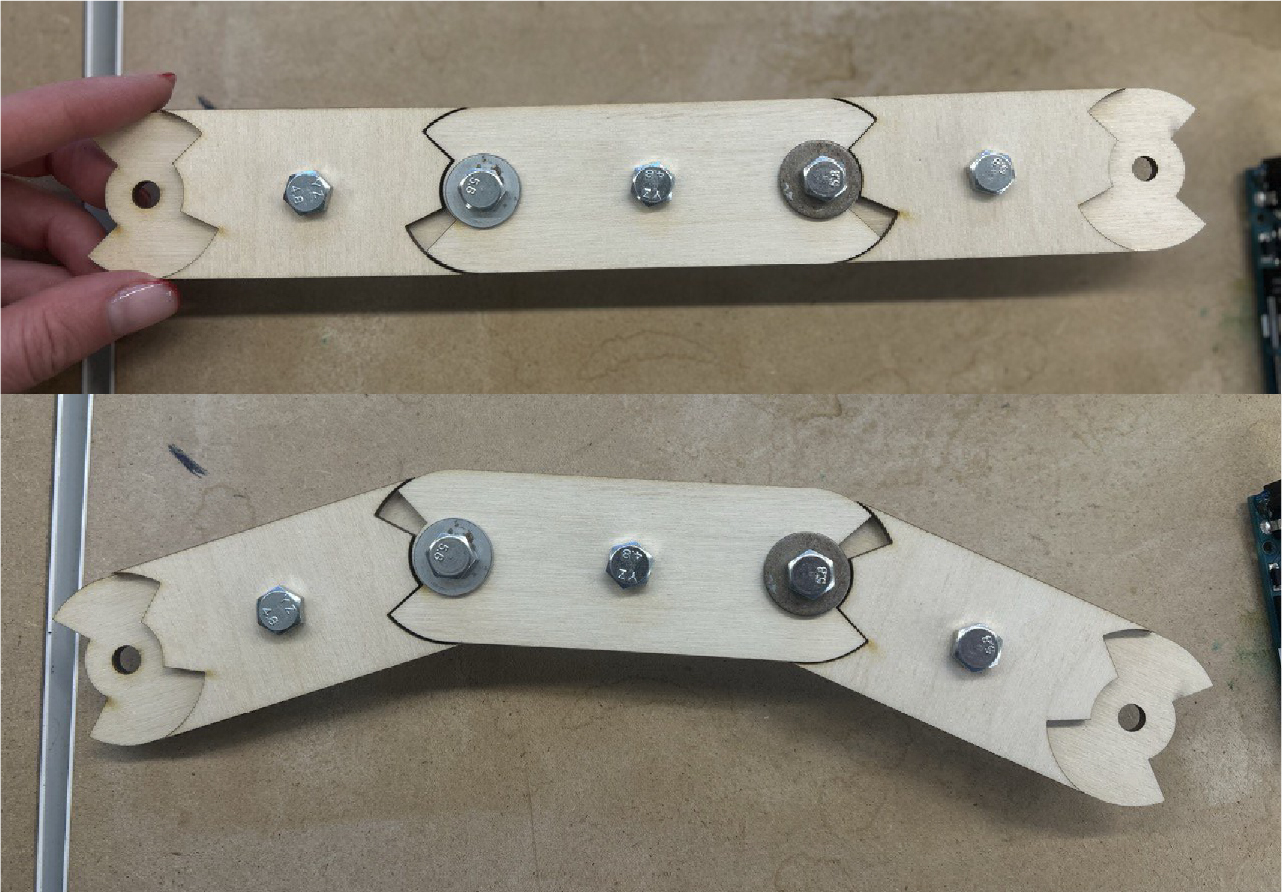
And for making it movable, one of my friend suggested to use elastic bands. In this way, module that has been bend down can easily return to it’s position.
And the other thing, that we thought about was bending parts. And for that we used Monofilament (Mono).
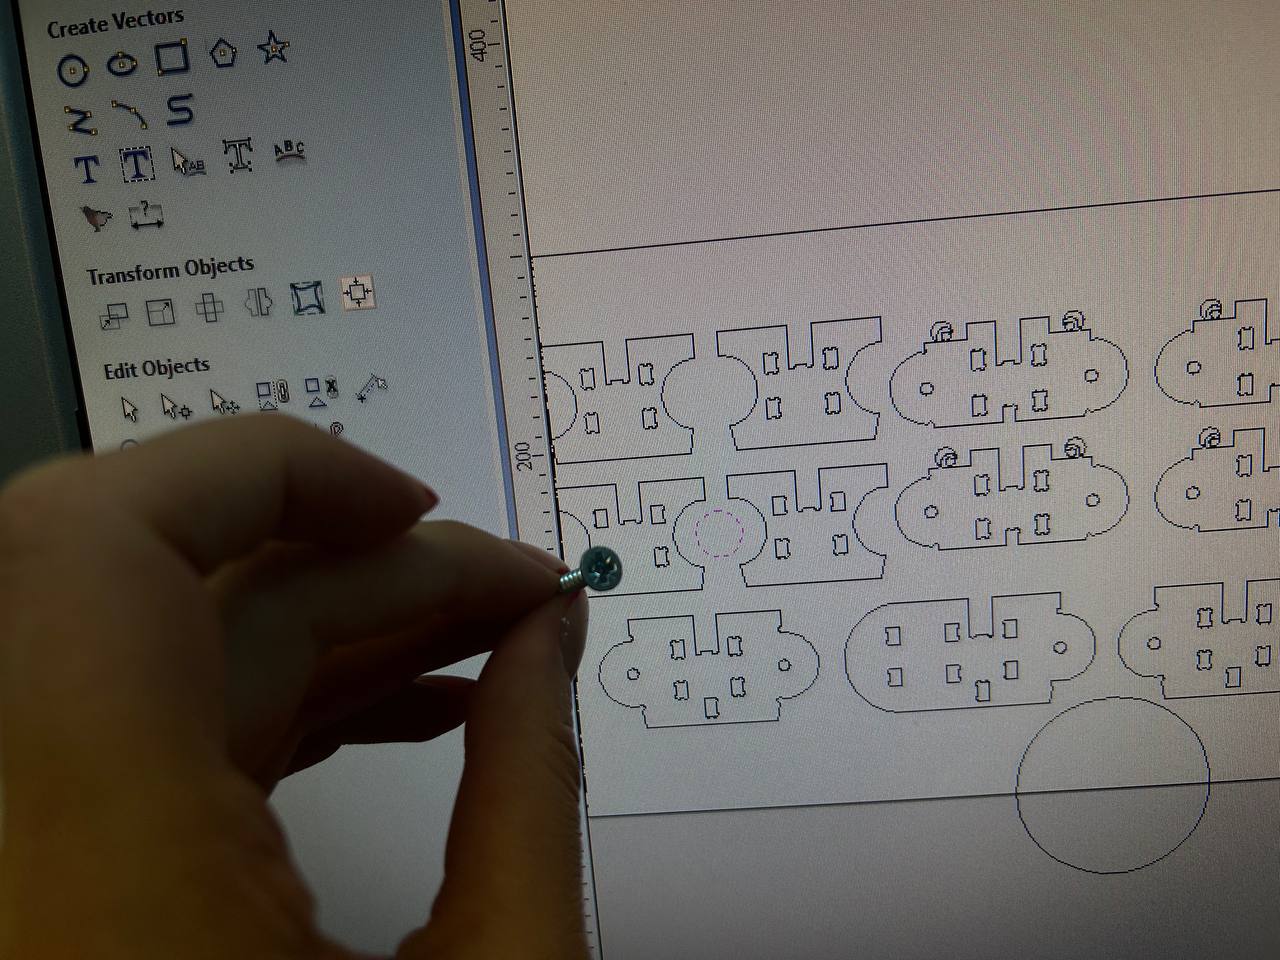
Parametric modeling
Started with designing 2D drawing of chandelier parts, I designed in 1 side, and after mirrored it to another side.
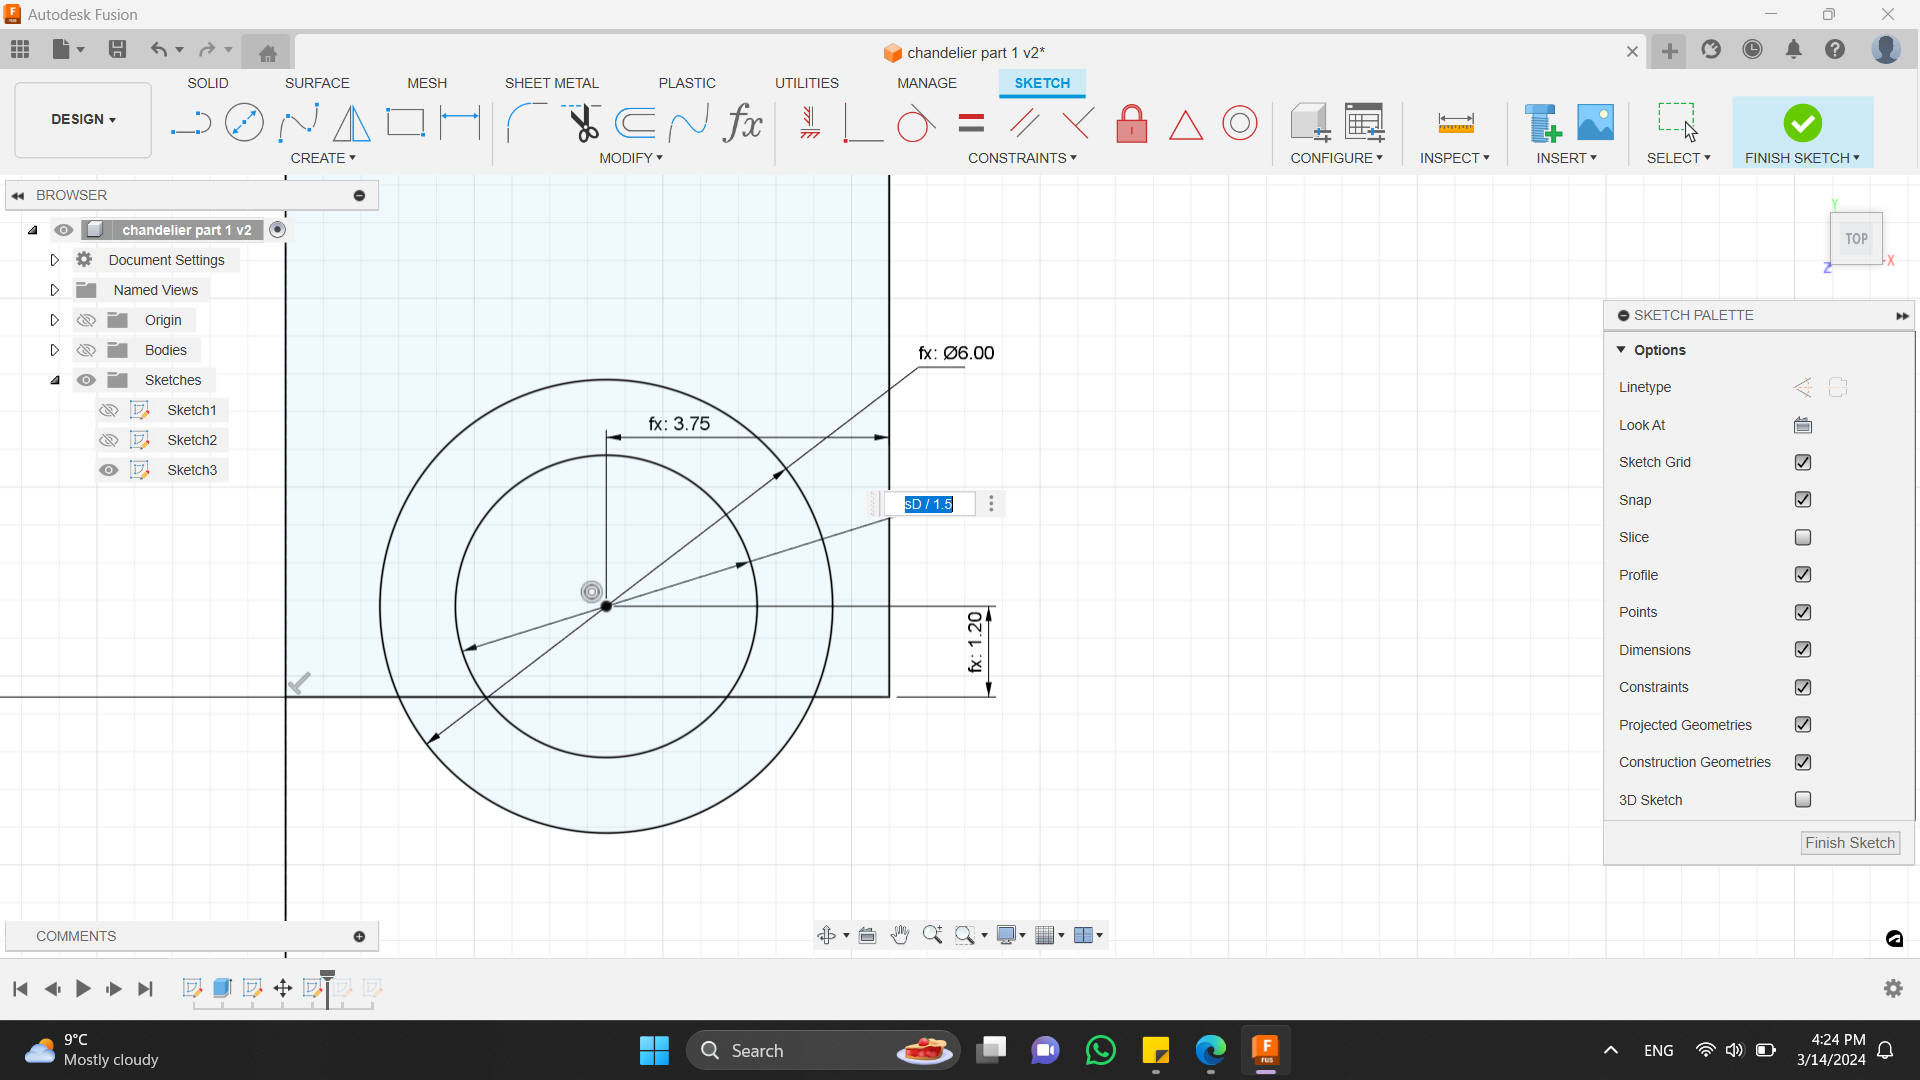
I fixed and defined all lines. And mirrored it.

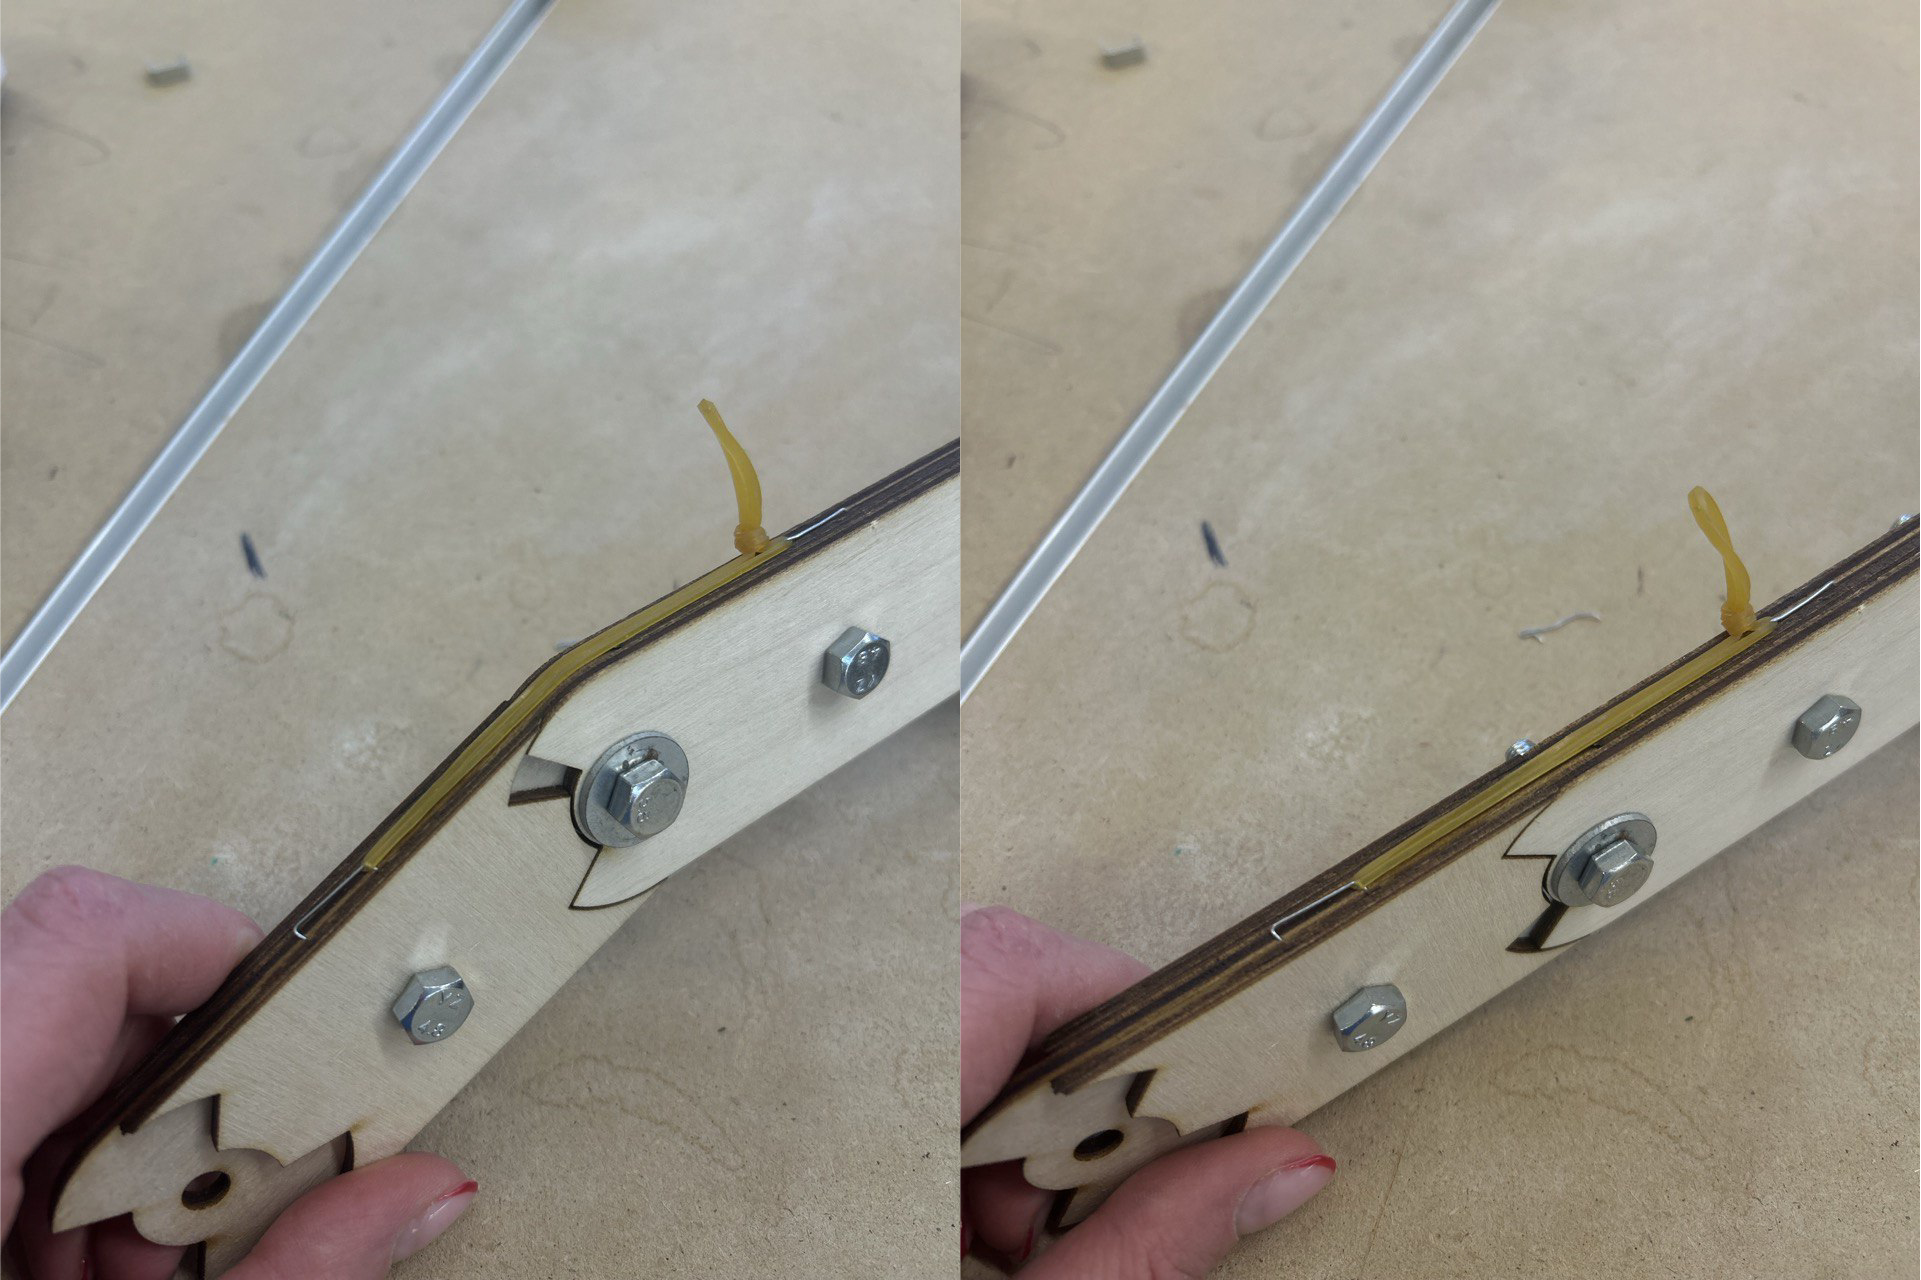
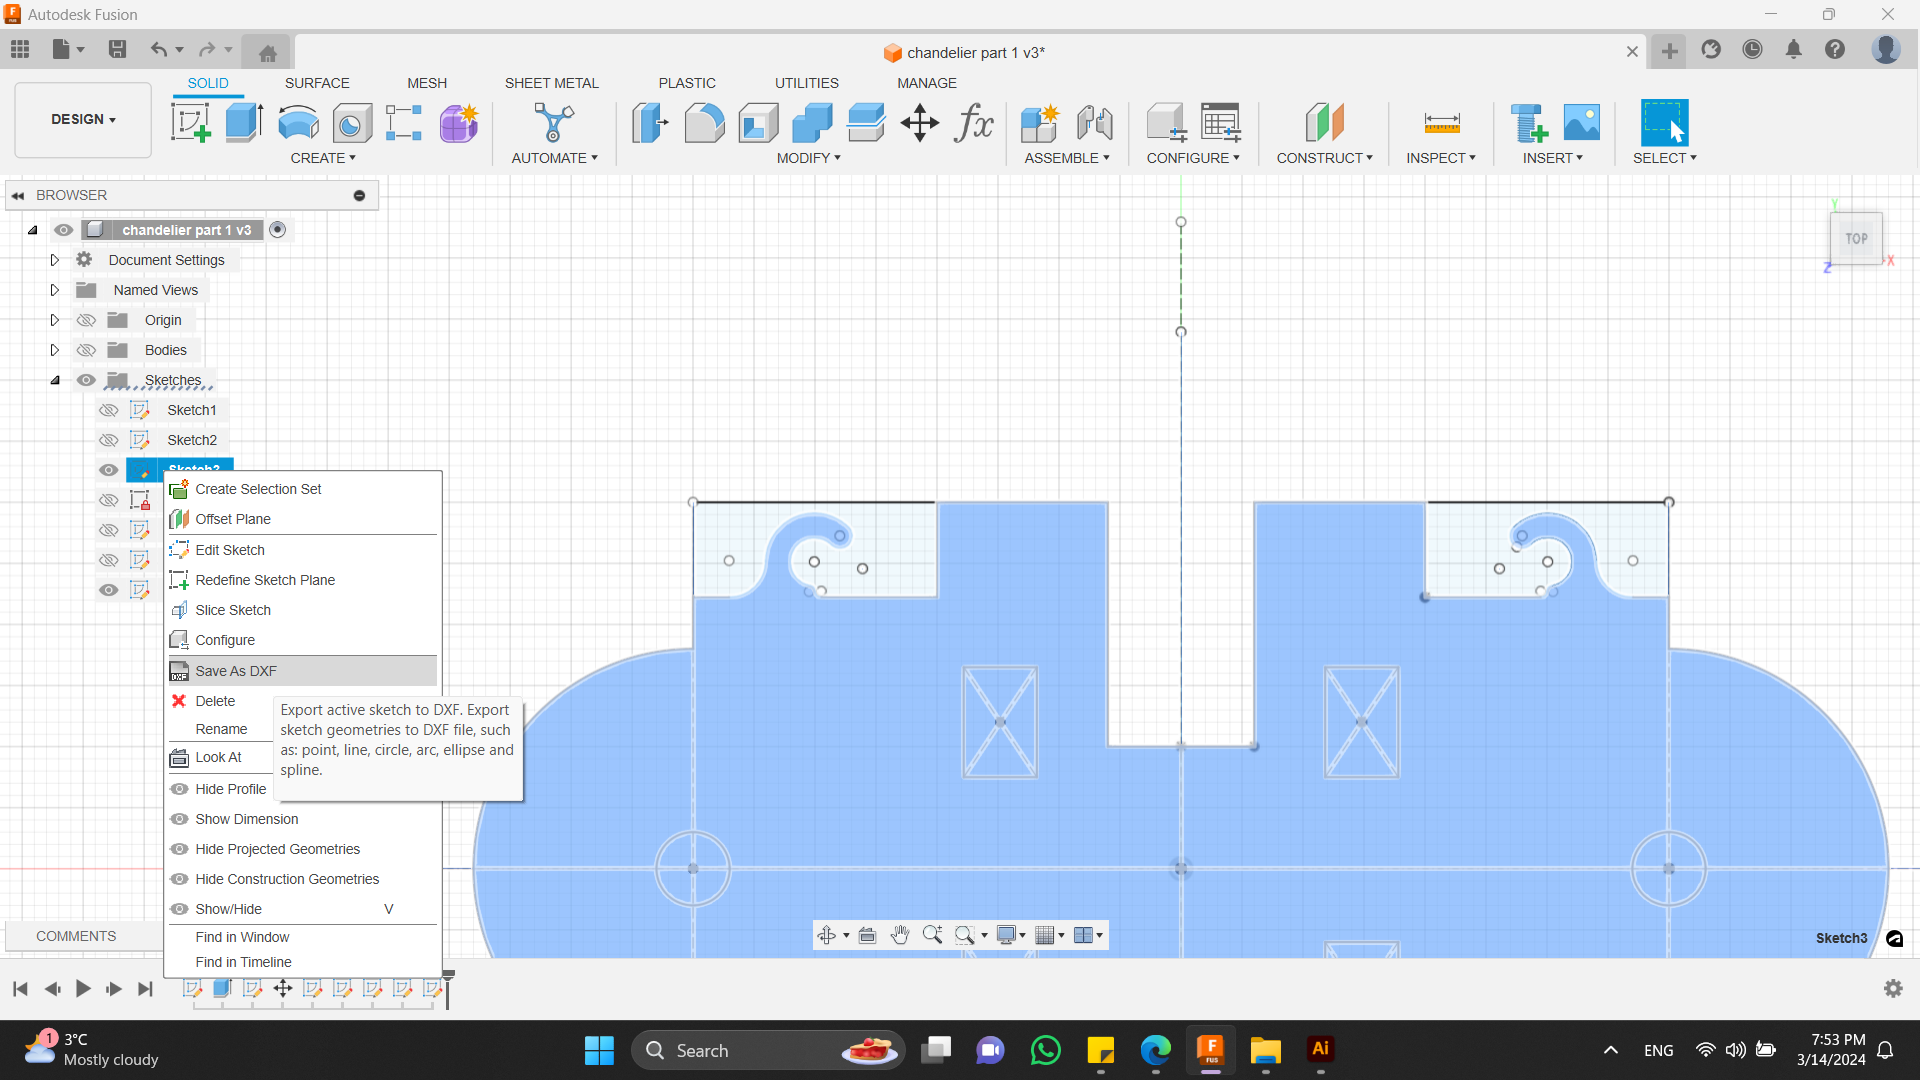
In this photo below you can see hooks, which are for elastic bands. I did them in the same line with model, so that it will not be visible. Every module is from 3 layers. This part is in the middle layer. It’s not visible from top and bottom.
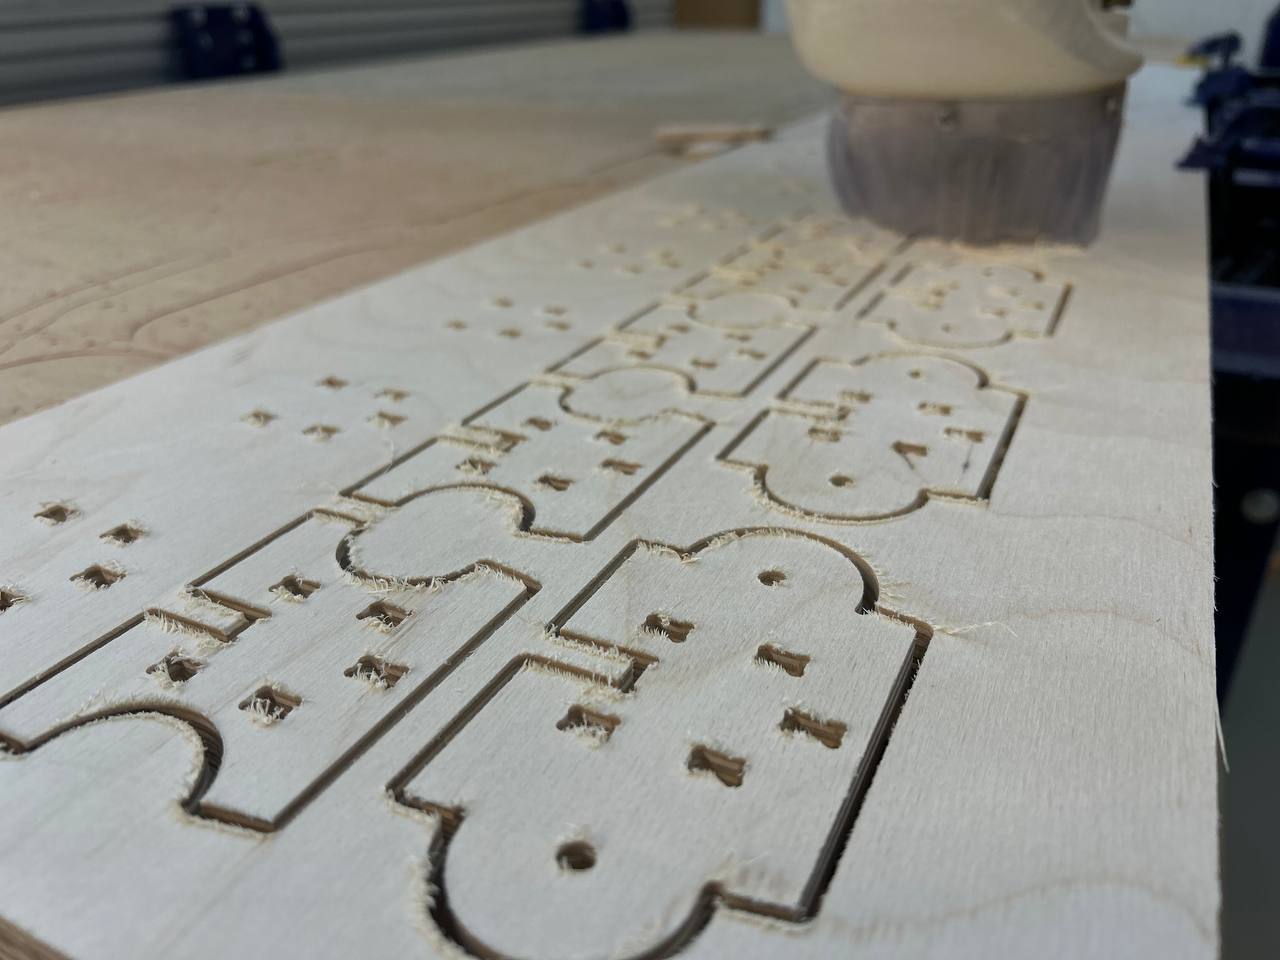
Cutting by CNC Milling Machine
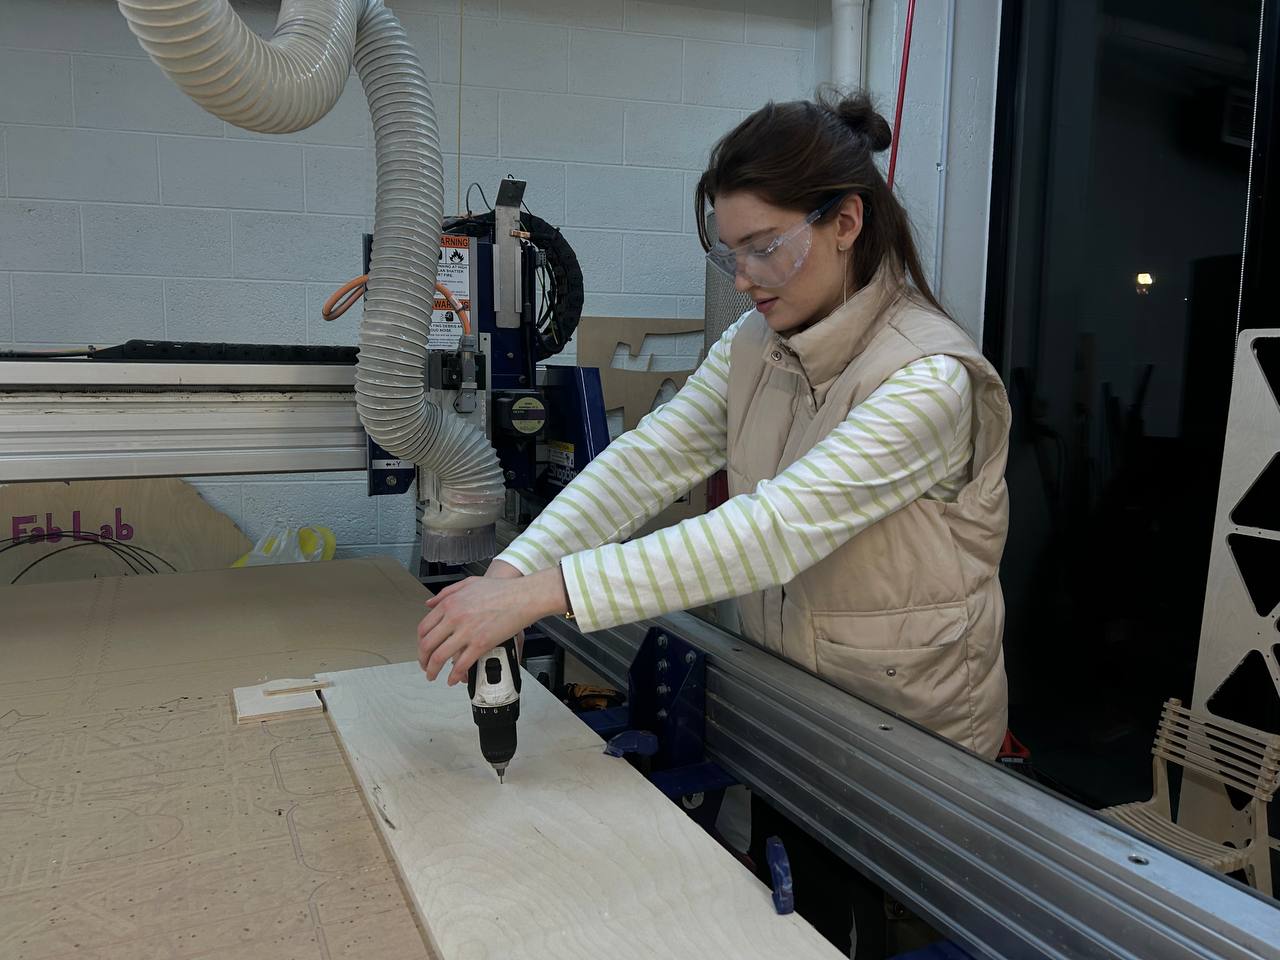
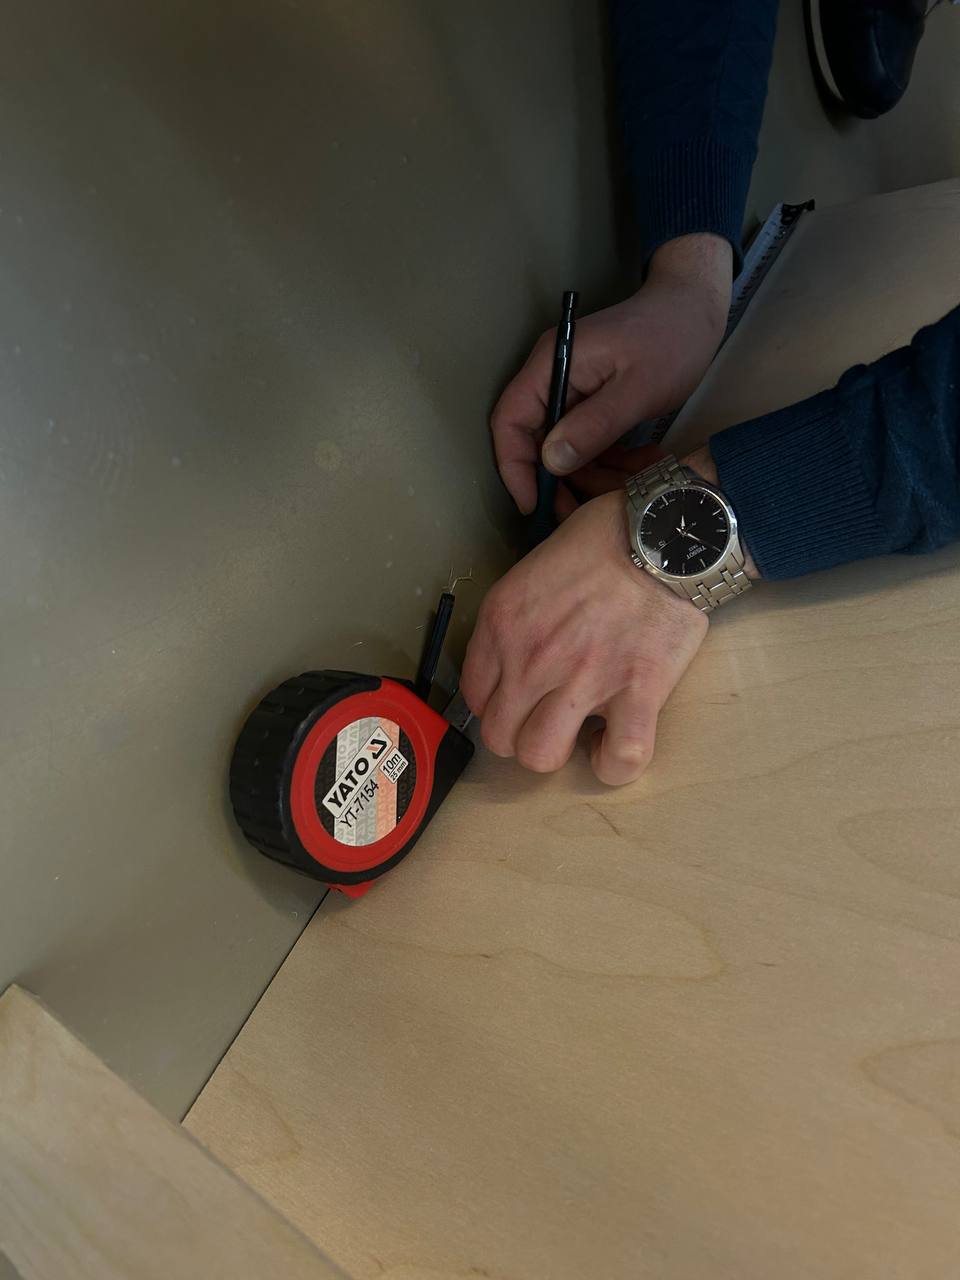
It was very long process. Duration of cutting only this part was 3 hours. At first I cut the plywood. For that Rudolf - our instructor helped me. We measured total size >>
Fixed the plywood.
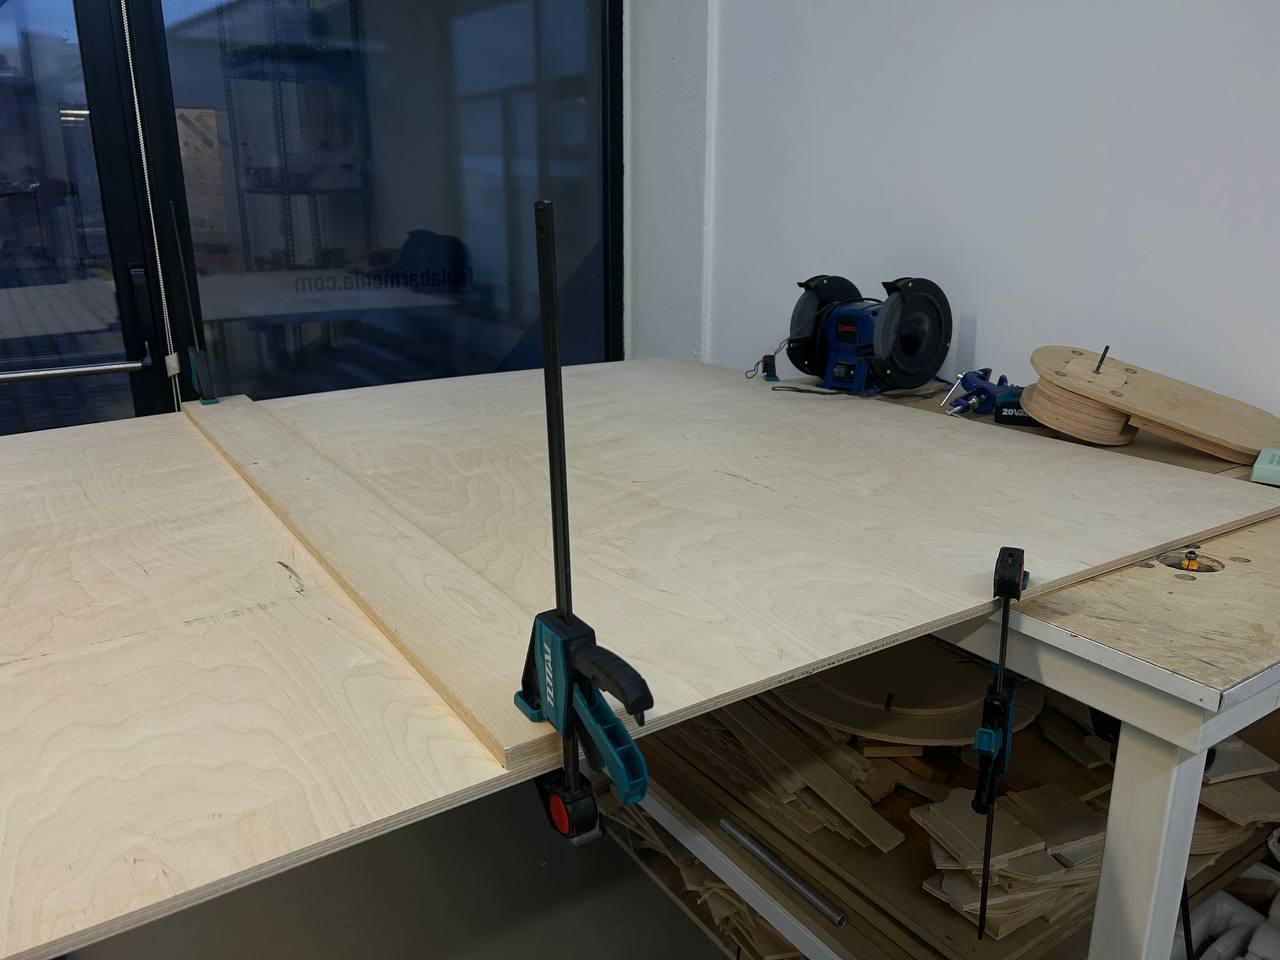
After fixing we cut it.
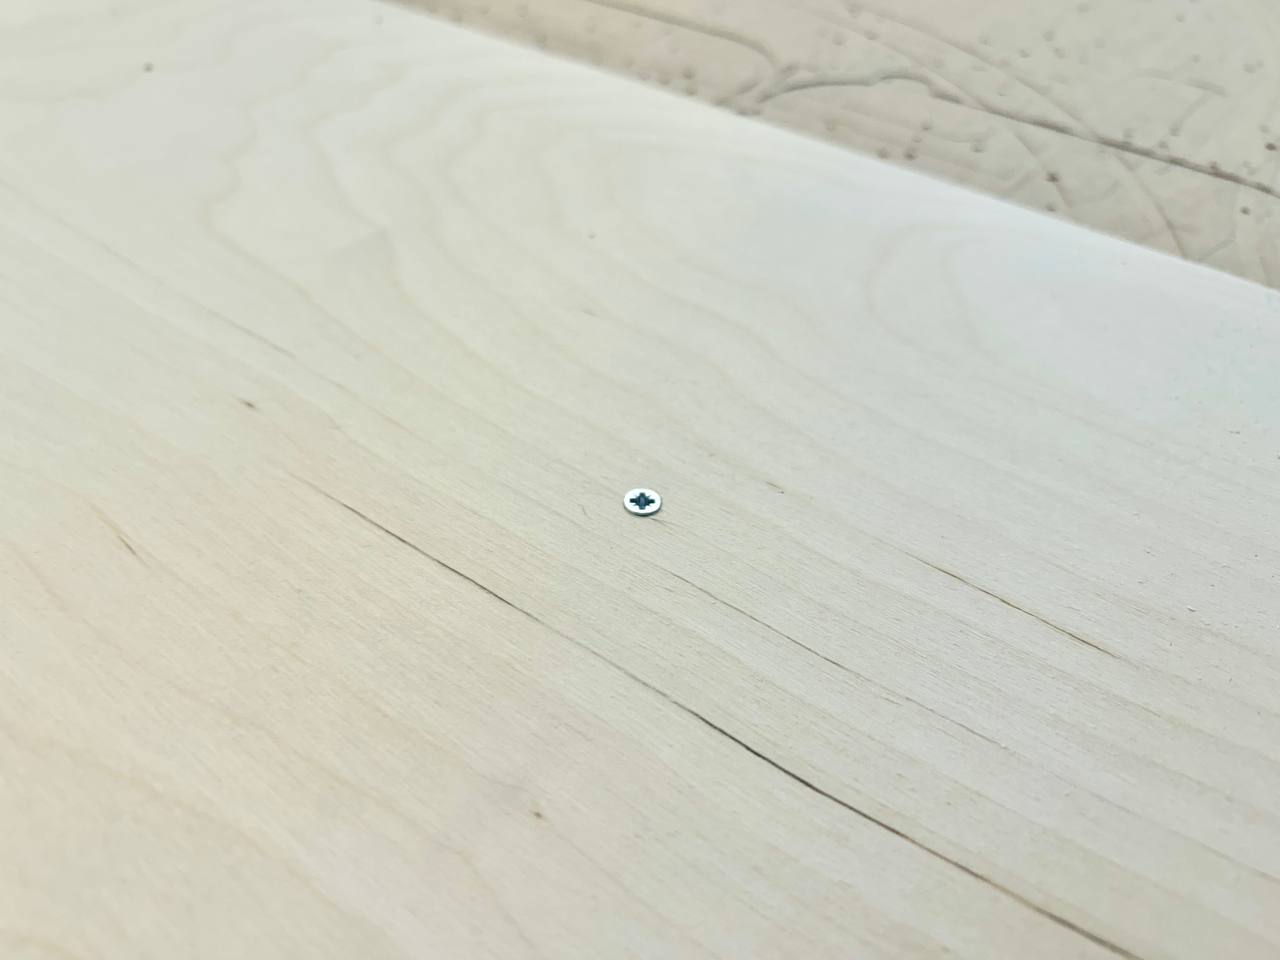
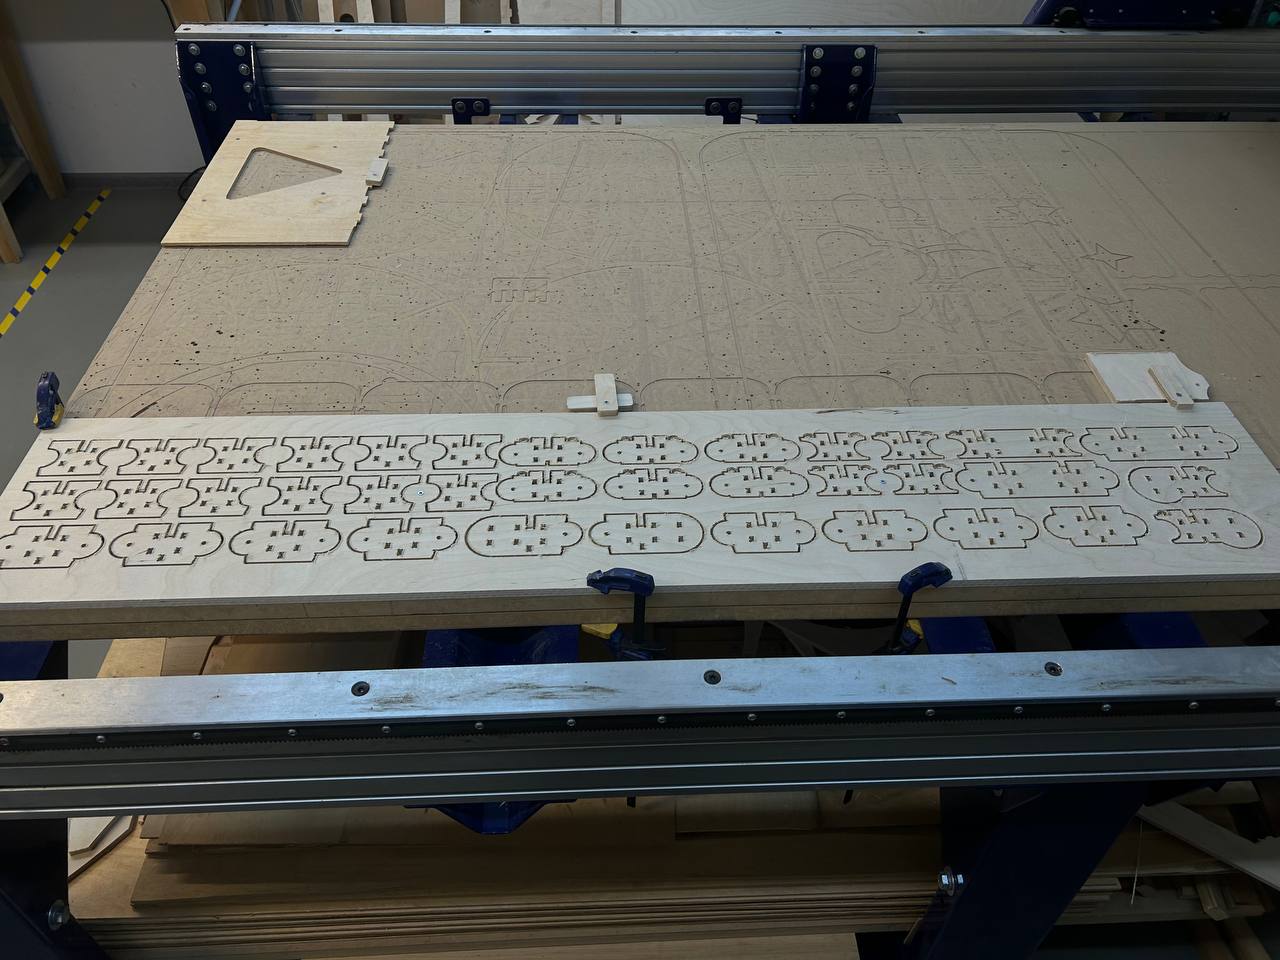
I used this version of fixation below to fix plywood to cutting surface. For fixation I need to know where are located my parts and where is an available space for fixing.
Also I fixed my plywood to the machine’s cutting surface. This fixation does not allow the plywood sheet to move during cutting.
We can do the same on plywood. without using additional piece. This fixed places (location of them) should be seen on our drawing.
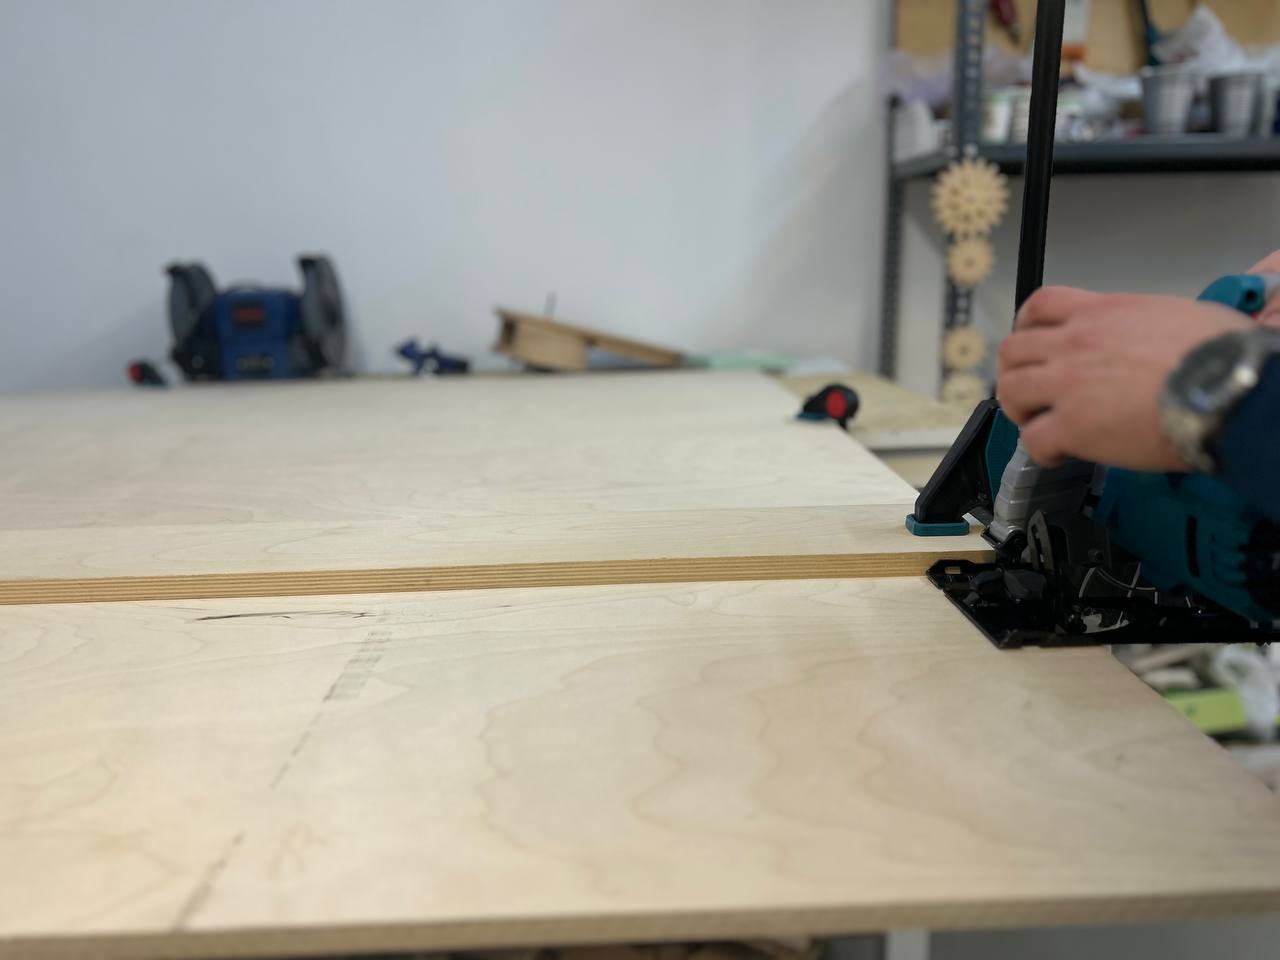
So after fixation I started cutting.
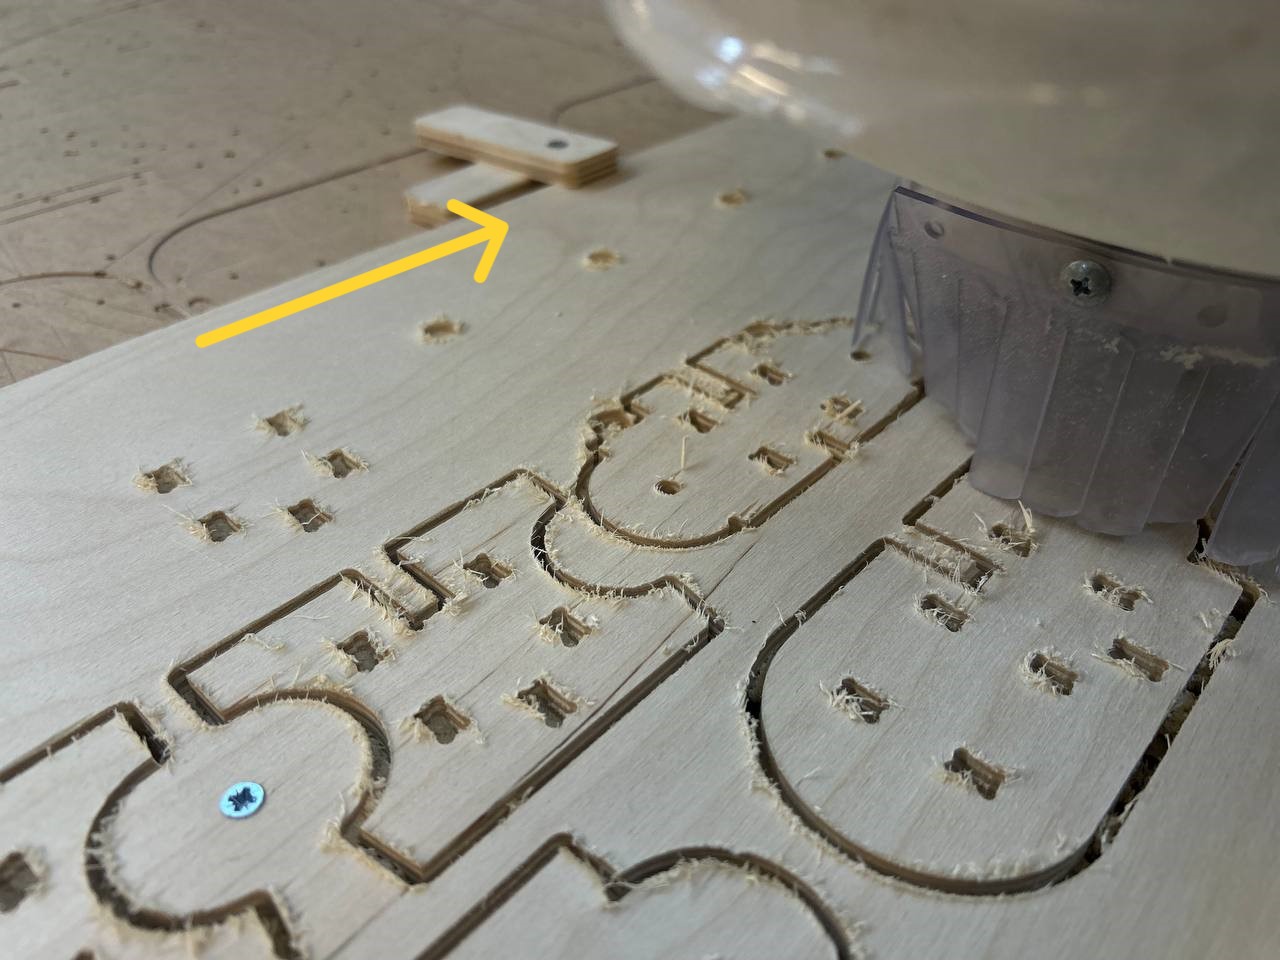
Process of cutting.
Cut ready plywood.
Also I cut small parts by laser cutter.
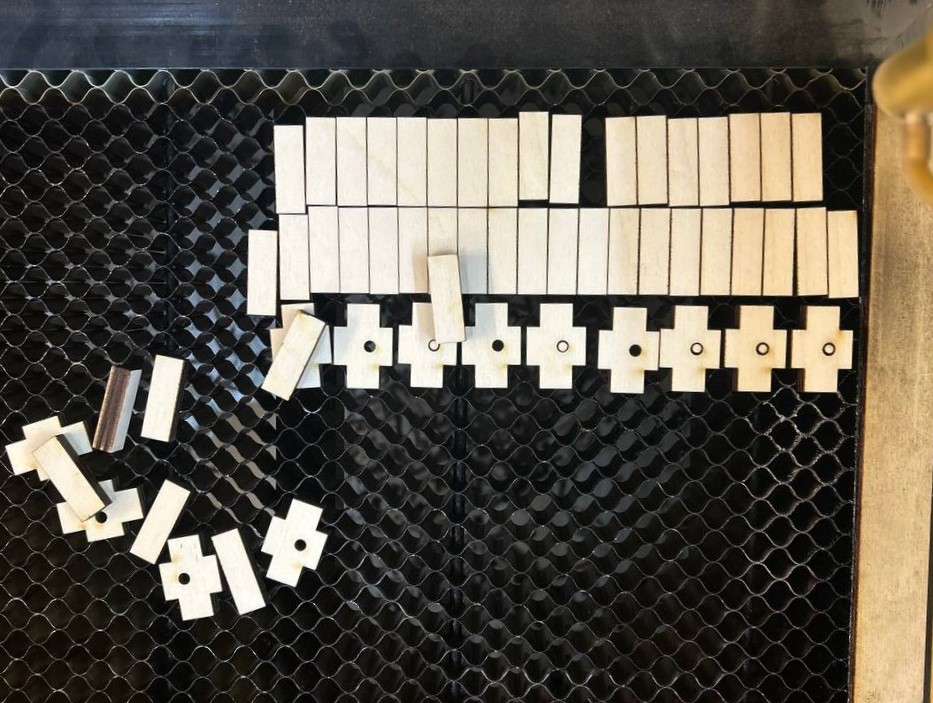
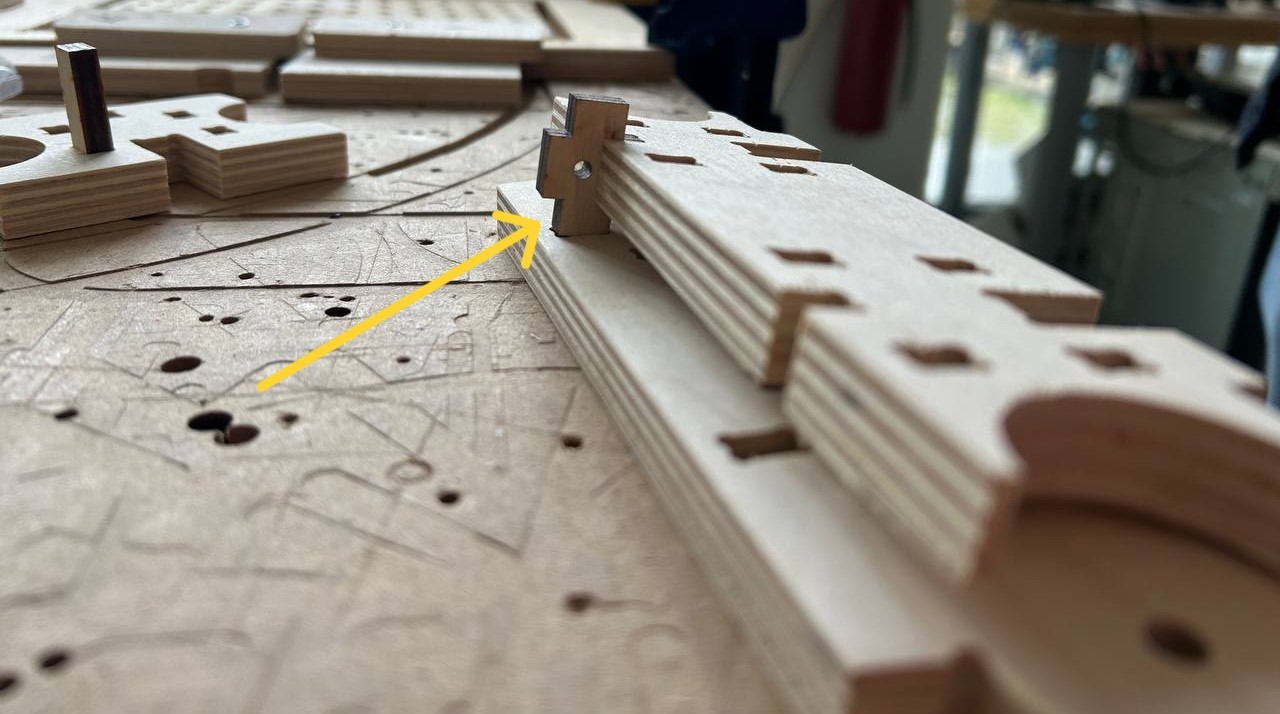
This parts are to give extra strength to my modules. Cross-like parts to pass the thread. They are specially made in such a size that they are not visible from any side and are stuck in the middle part of the place.
After I started sanding process. In the first photo is the Top surface.

Here is the Bottom surface.
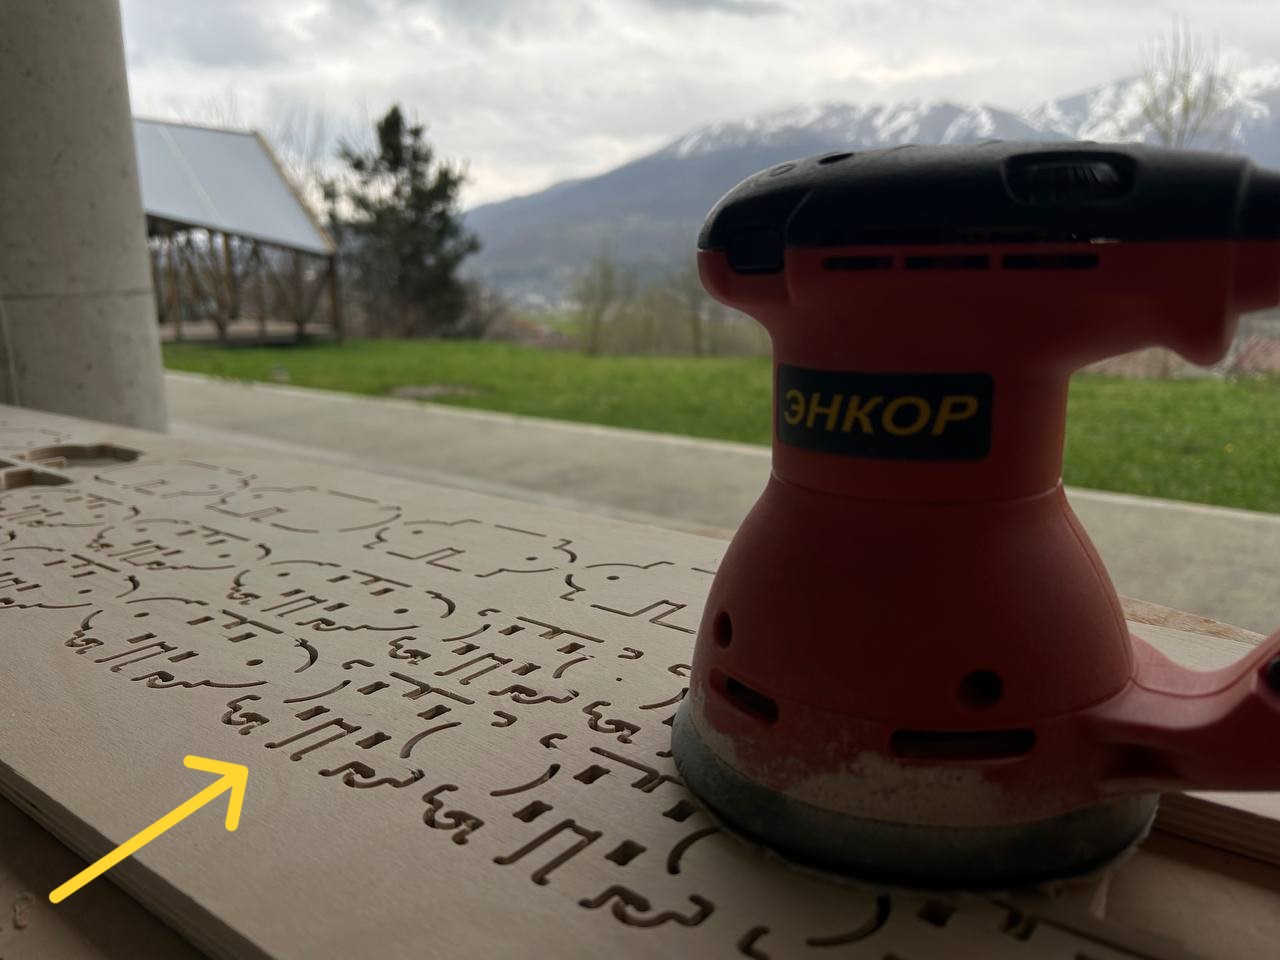
This surface needs to be sanded properly.
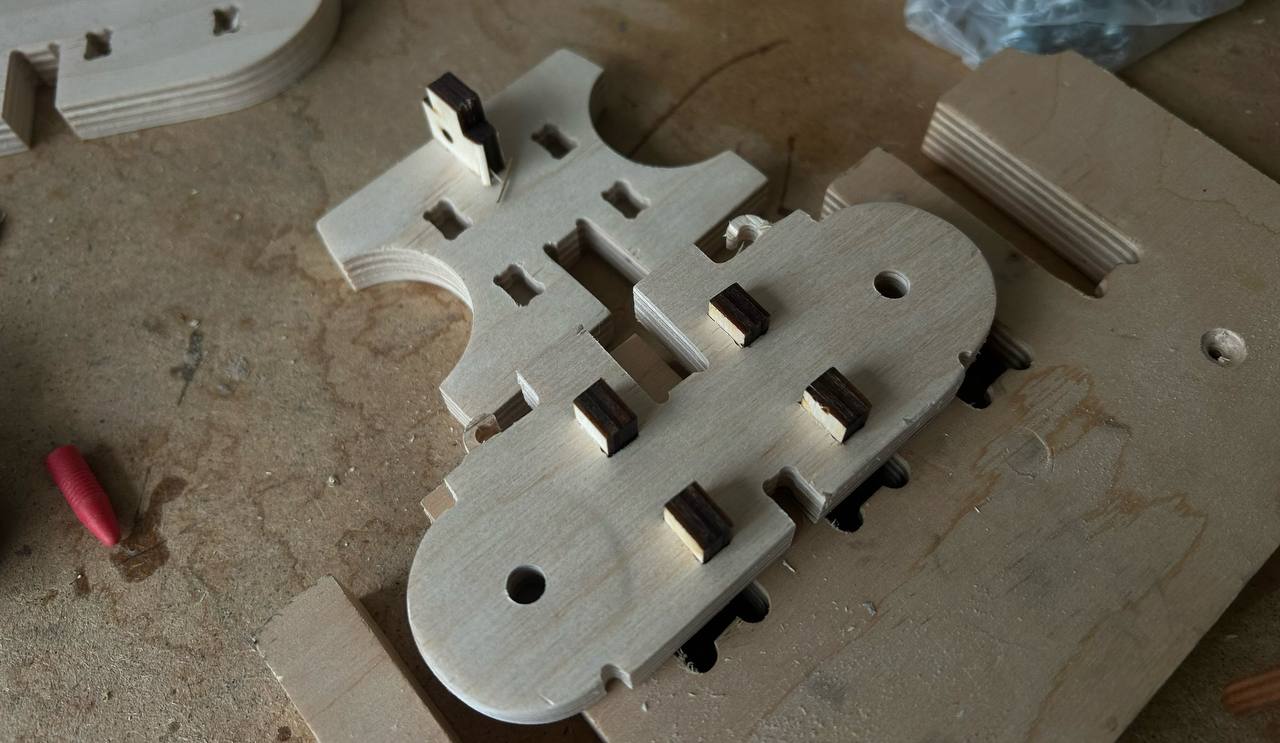
After I tried to assemble parts, to check how it connects together.
The parts have not smoothly assembled, so I tried to sand them by another way.
There is this small machine for sanding in our fablab.
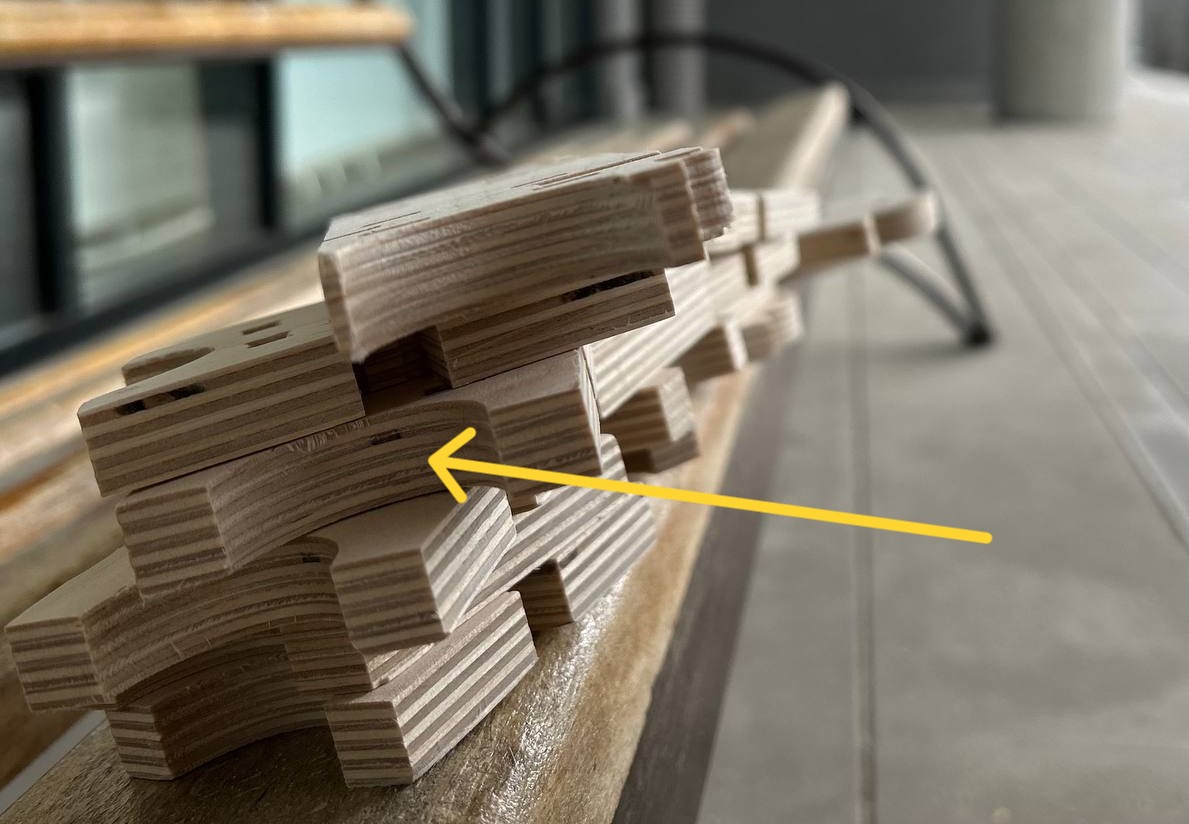
After smoothing all rounded parts I started assembling them and testing.
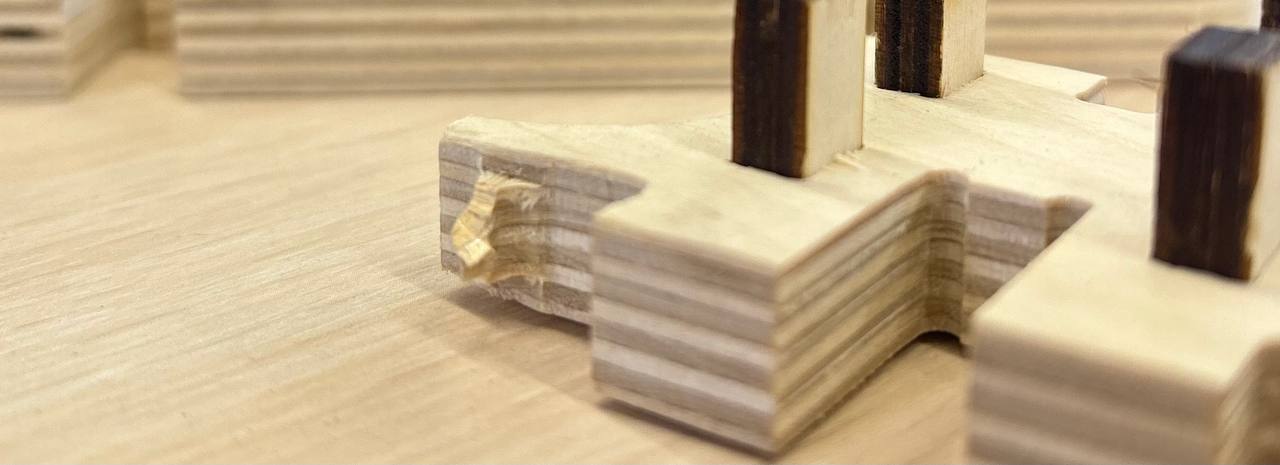
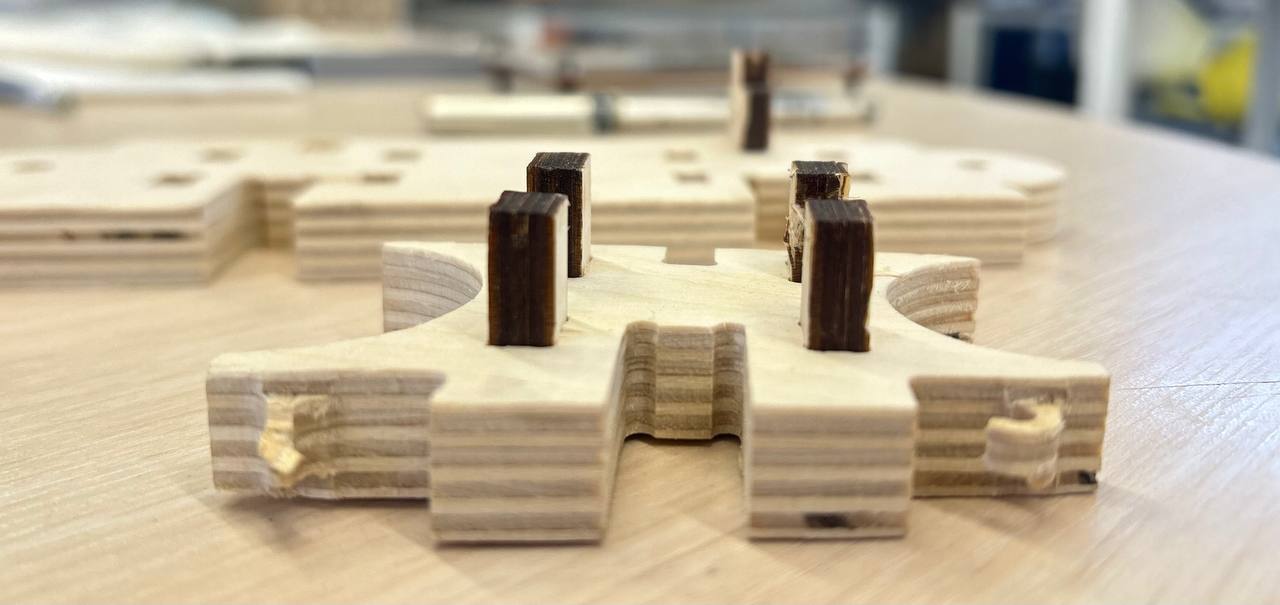
Connecting these three parts together, I get one module. Chandelier consists of 13 modules in total. The rectangular cuts in the middle are made to give additional strength to the construction. And the cross shape is for passing trough it the string.

But when I start to assemble modules and hooked the rubber through the hooks to connect, hooks started to break.

That was one of the a major issues, cause now I needed to redesign it and cut twice.
Final shot
Conclusion
This week was quite a busy week. Having experience in CNC Cutting is exciting, even though it seemed a little scary at first. However, you have to be very attentive and patient while working. When cutting plywood, the CNC makes a very loud noise, which is quite unpleasant, even with the sound insulators on. For my project, I cut the modules out of 12mm plywood, which later gave me major problems with its weight. If I were to repeat this project, I would definitely cut the parts from thinner plywood.