3. Computer controlled cutting
This week I worked on learning different types of cutting machines started from vinyl cutters and ended with laser cutting machines.
For our group assignment we tried materials such as sticker paper, paper for textile, stainless steel, cardboard, plywood.
Vinyl Cutter
A vinyl cutter is a machine that cuts shapes from vinyl material. It uses a sharp cutting tool to cut exactly along the outlines of the designs you draw on a computer. These machines are commonly used for making stickers, and other decorative items.
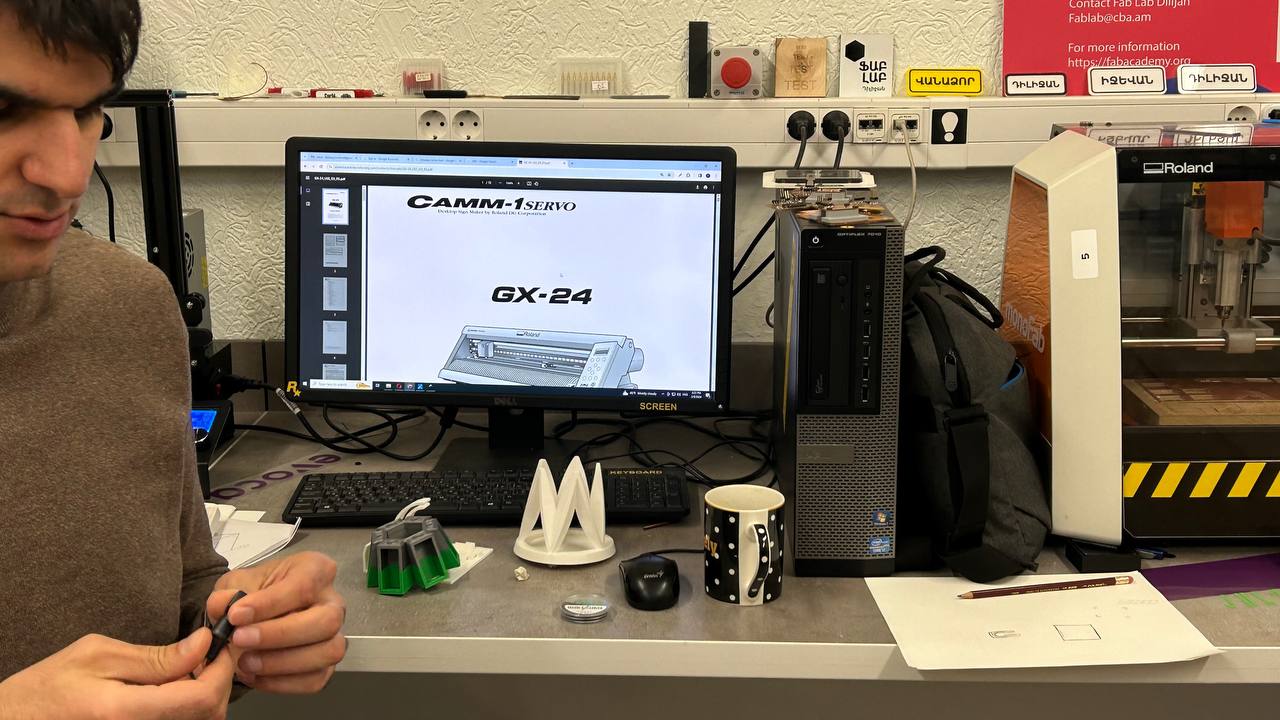
Our instructors showed us a cutter. They taught us how to use it and explained how it works. We learned about the different things it can do, like cutting out shapes and designs from vinyl material. From mastering the software interface to manipulating designs and executing precise cuts, we gained valuable hands-on experience under the guidance of our instructors. It was really interesting and fun to try out different projects with it!
How to use a Vinyl Cutter
Instruction for every machine is an important part. So before starting using machine we read the instruction and learned a lot what we can do and what we don’t have to as part of a group assignment.
part of a group assignment.
 So we learned that vinyl cutter measures paper sizes by itself, as it has a measuring sensors.
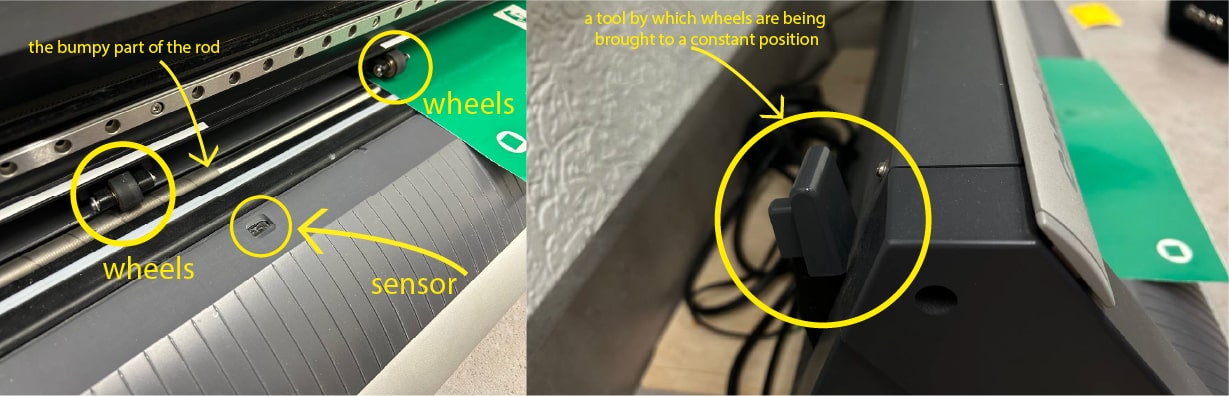 The rod in the photo is the rod that moves the paper. The paper is moved by the wheels, which rotate. But in order for the wheels to move and move over the paper, they (wheels) must be on the bumpy part of the rod. In that case, the paper will not curl or come out of place.
Also, the paper should be on the sensor, i.e. cover the sensor.
The rod in the photo is the rod that moves the paper. The paper is moved by the wheels, which rotate. But in order for the wheels to move and move over the paper, they (wheels) must be on the bumpy part of the rod. In that case, the paper will not curl or come out of place.
Also, the paper should be on the sensor, i.e. cover the sensor.
It has to not be like here in my photo below, in this case you can have big problems. It has to be smooth.
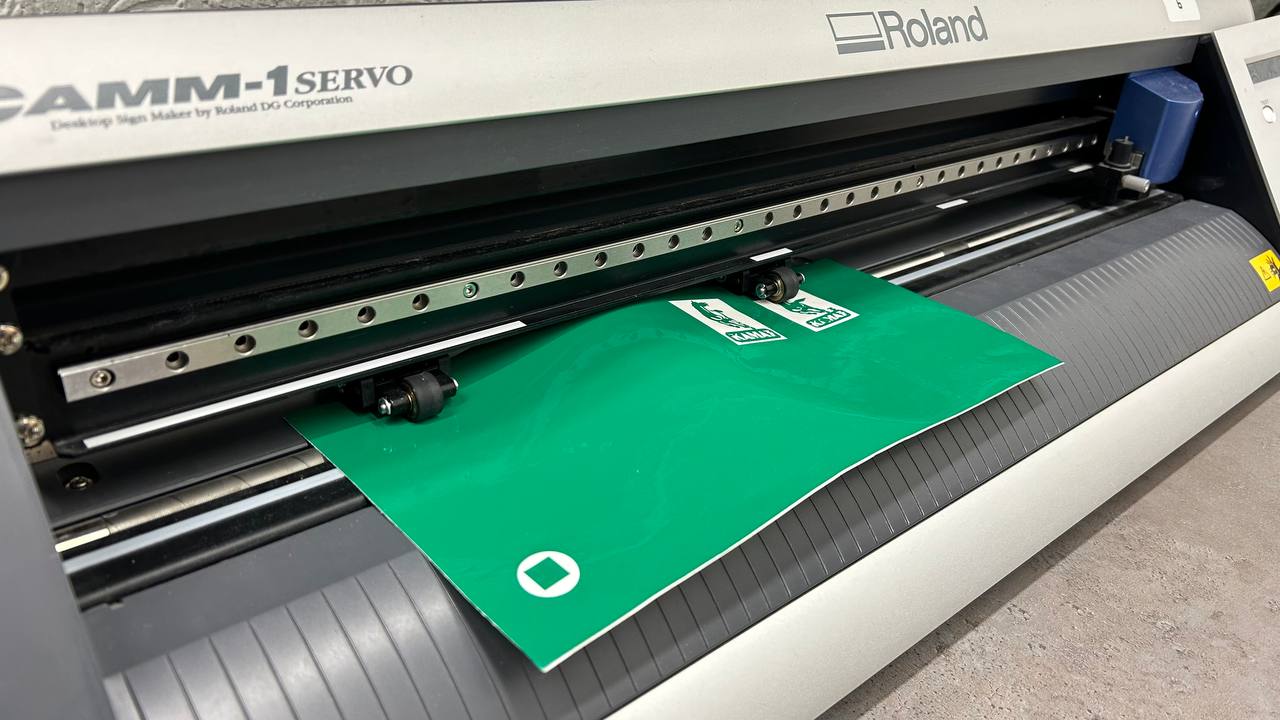
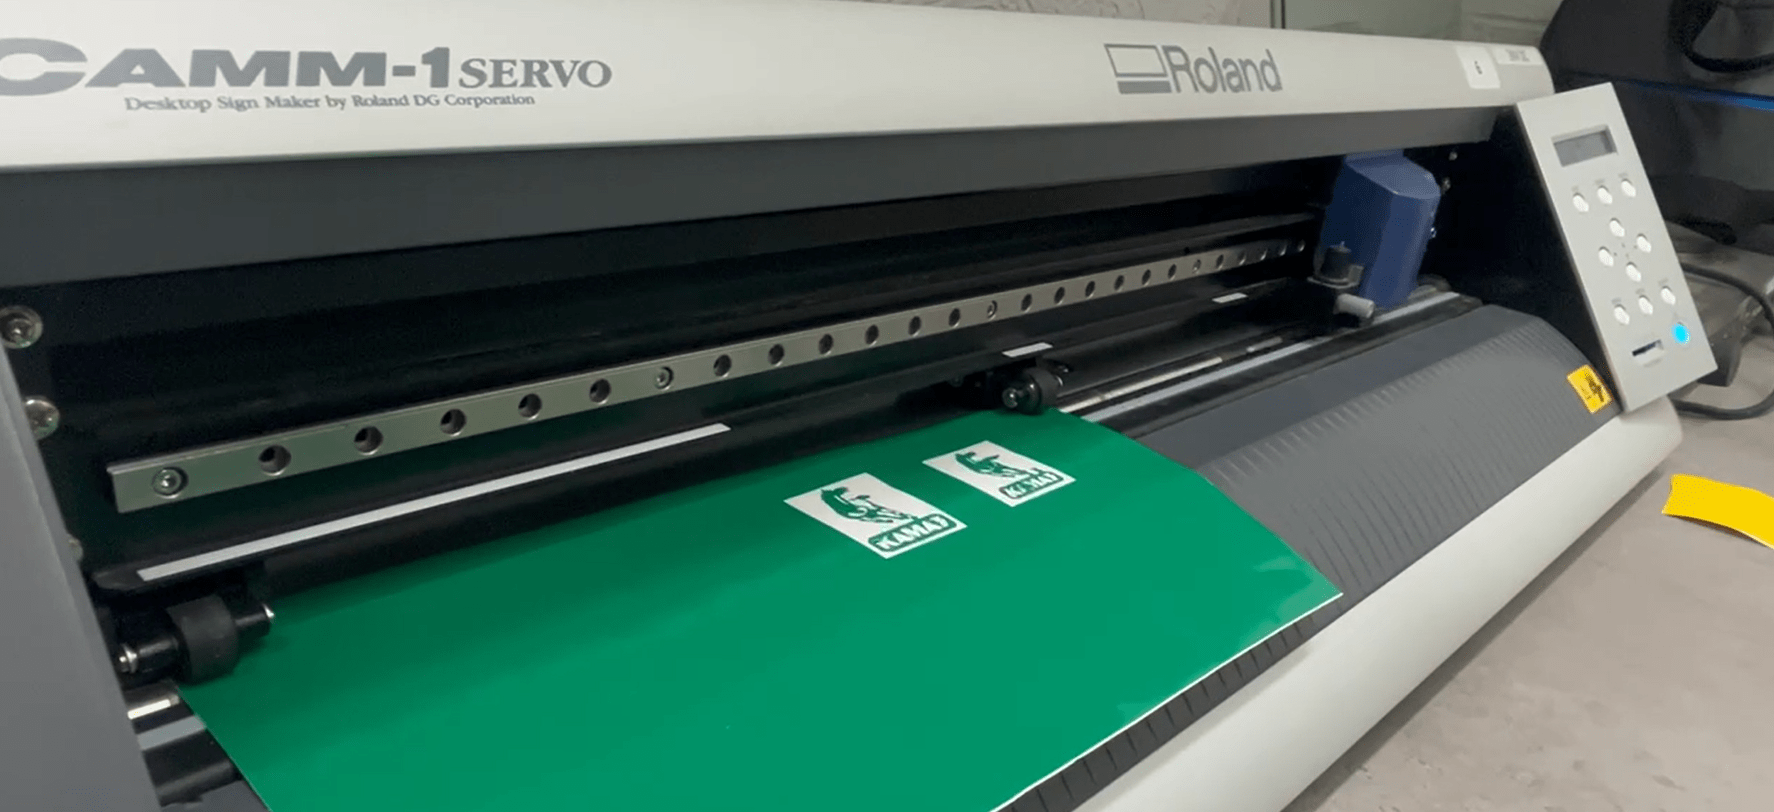
We place the wheels at the extreme ends, the distance from wheel to wheel is the cutting area of the vinyl cutter.
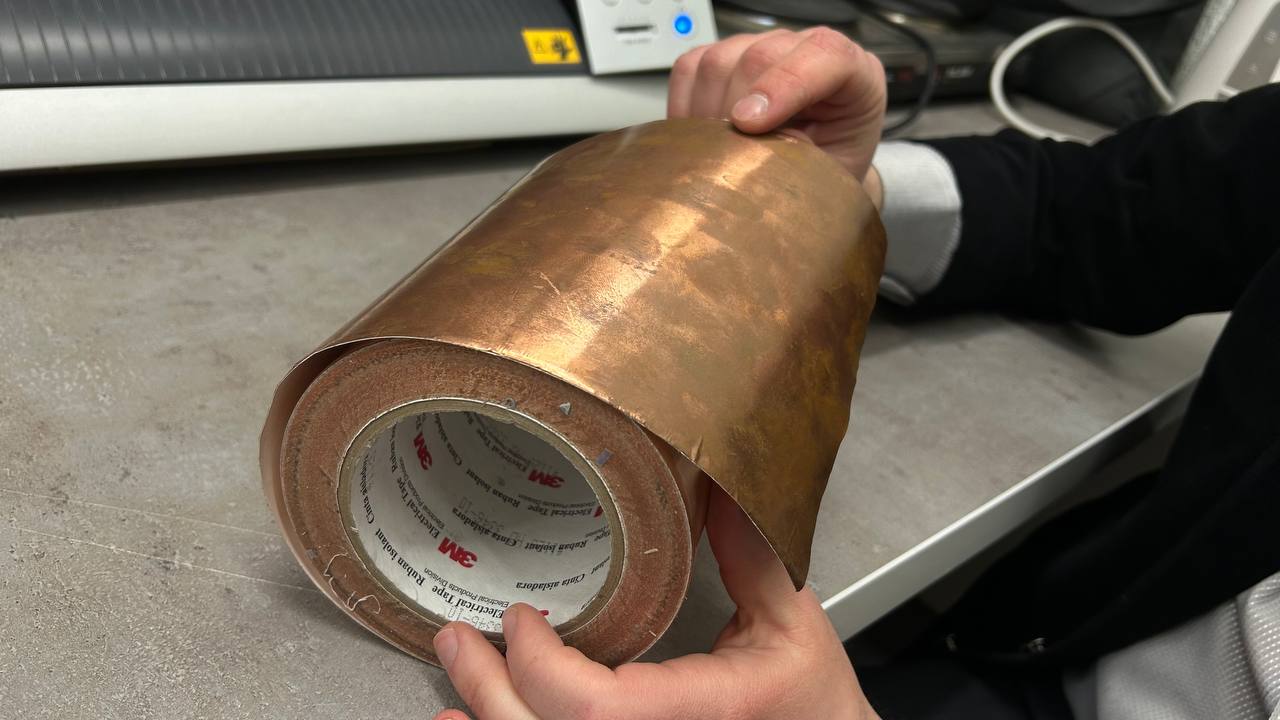
Also besides a piece of paper you can cut using rolled paper. After 1.6 meters you can use a ROLL parameter and machine will not measure height, but only width.
Parameters
The cutter has 2 settings that you should pay attention to: FORCE and SPEED. The 1st is the force - measured in gf, the 2nd is the speed - in cm/s. Depending on what material we are cutting, what we are using the vinyl cutter for, these 2 settings change, as well as depending on the weather and temperature conditions in which we are performing the operation.
Maximum speed in machine is 50cm/s, and now “by default” we use 3cm/s. Thats because this machine is being used by kids too and FabLab cares about their safety.
And for cutting perfectly, if you have sharp edges you can fillet them. (I learned about it from our FabAcademy lecture)
Perfect stroke thickness for cutting is hearline.
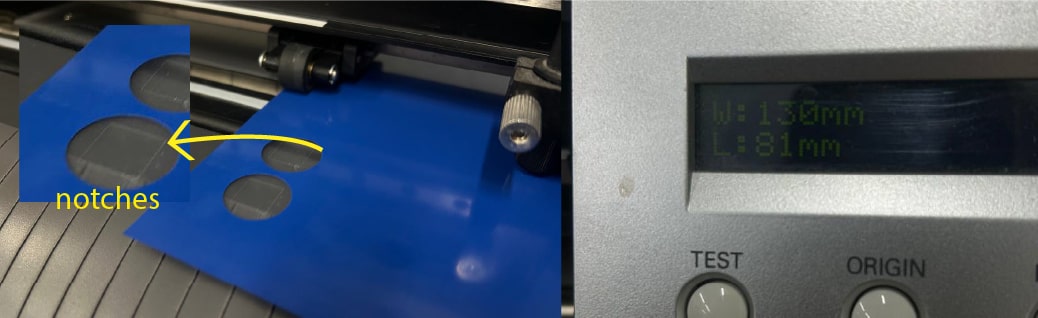
First of all, you need to test the vinyl cutter.
From FORCE we see what strength is set, in our case 160 gf, and after that we use the test function.
 After doing test, you can see is it convenient for you the Force and the Speed. If you see, that with 160gf force machine cut too deep and there is many notches, you can make force lower. In the right part you can see measurements.
 For paper stickers we used 140gf force and 3cm/s speed.
For textile stickers at first I set 120gf, but I notices that it’s a little bit much, so I made it 100gf and after the test I barely teared off the sticker. The best solution was 110gf. After 3 tests I started printing my own sticker.
For paper stickers we used 140gf force and 3cm/s speed.
For textile stickers at first I set 120gf, but I notices that it’s a little bit much, so I made it 100gf and after the test I barely teared off the sticker. The best solution was 110gf. After 3 tests I started printing my own sticker.
Setting in InkScape
For cutting a sticker by vinyl cutter, at first I made a simple sticker in Adobe Illustrator, then imported it as an SVG file.
On my sticker, there’s written - “Something funny”. Just because I didn’t imagined something funny to write on it :D.
First step for it was importing my SVG file to InkScape software.
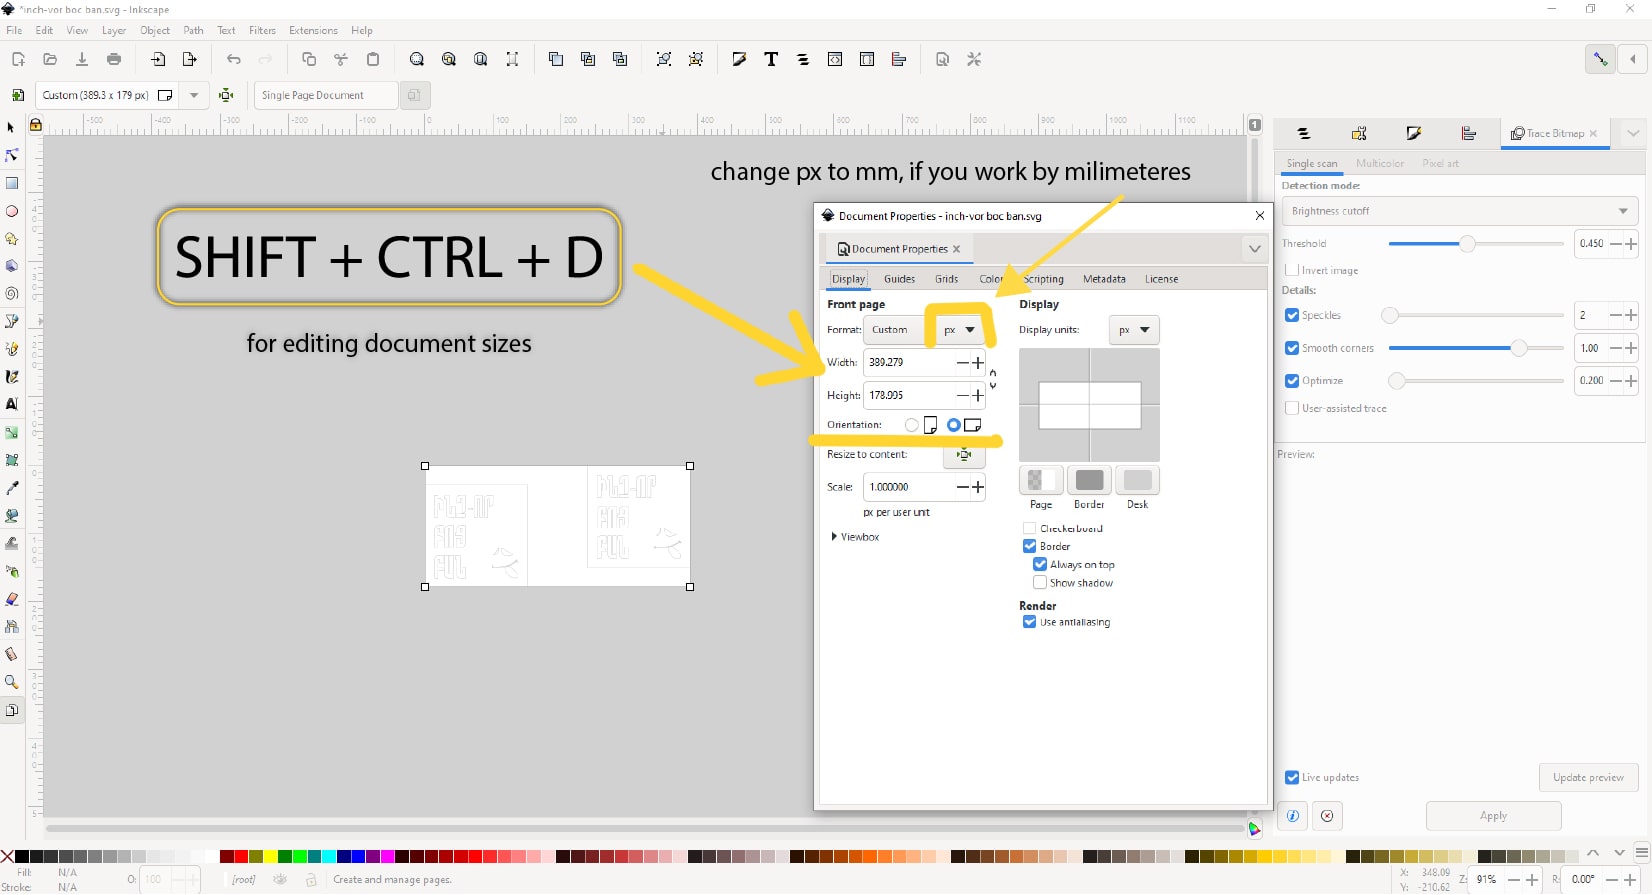
 As our vinyl cutter already measured paper’s sizes, I am going to set that sizes here, by editing document size. For that I have to >>
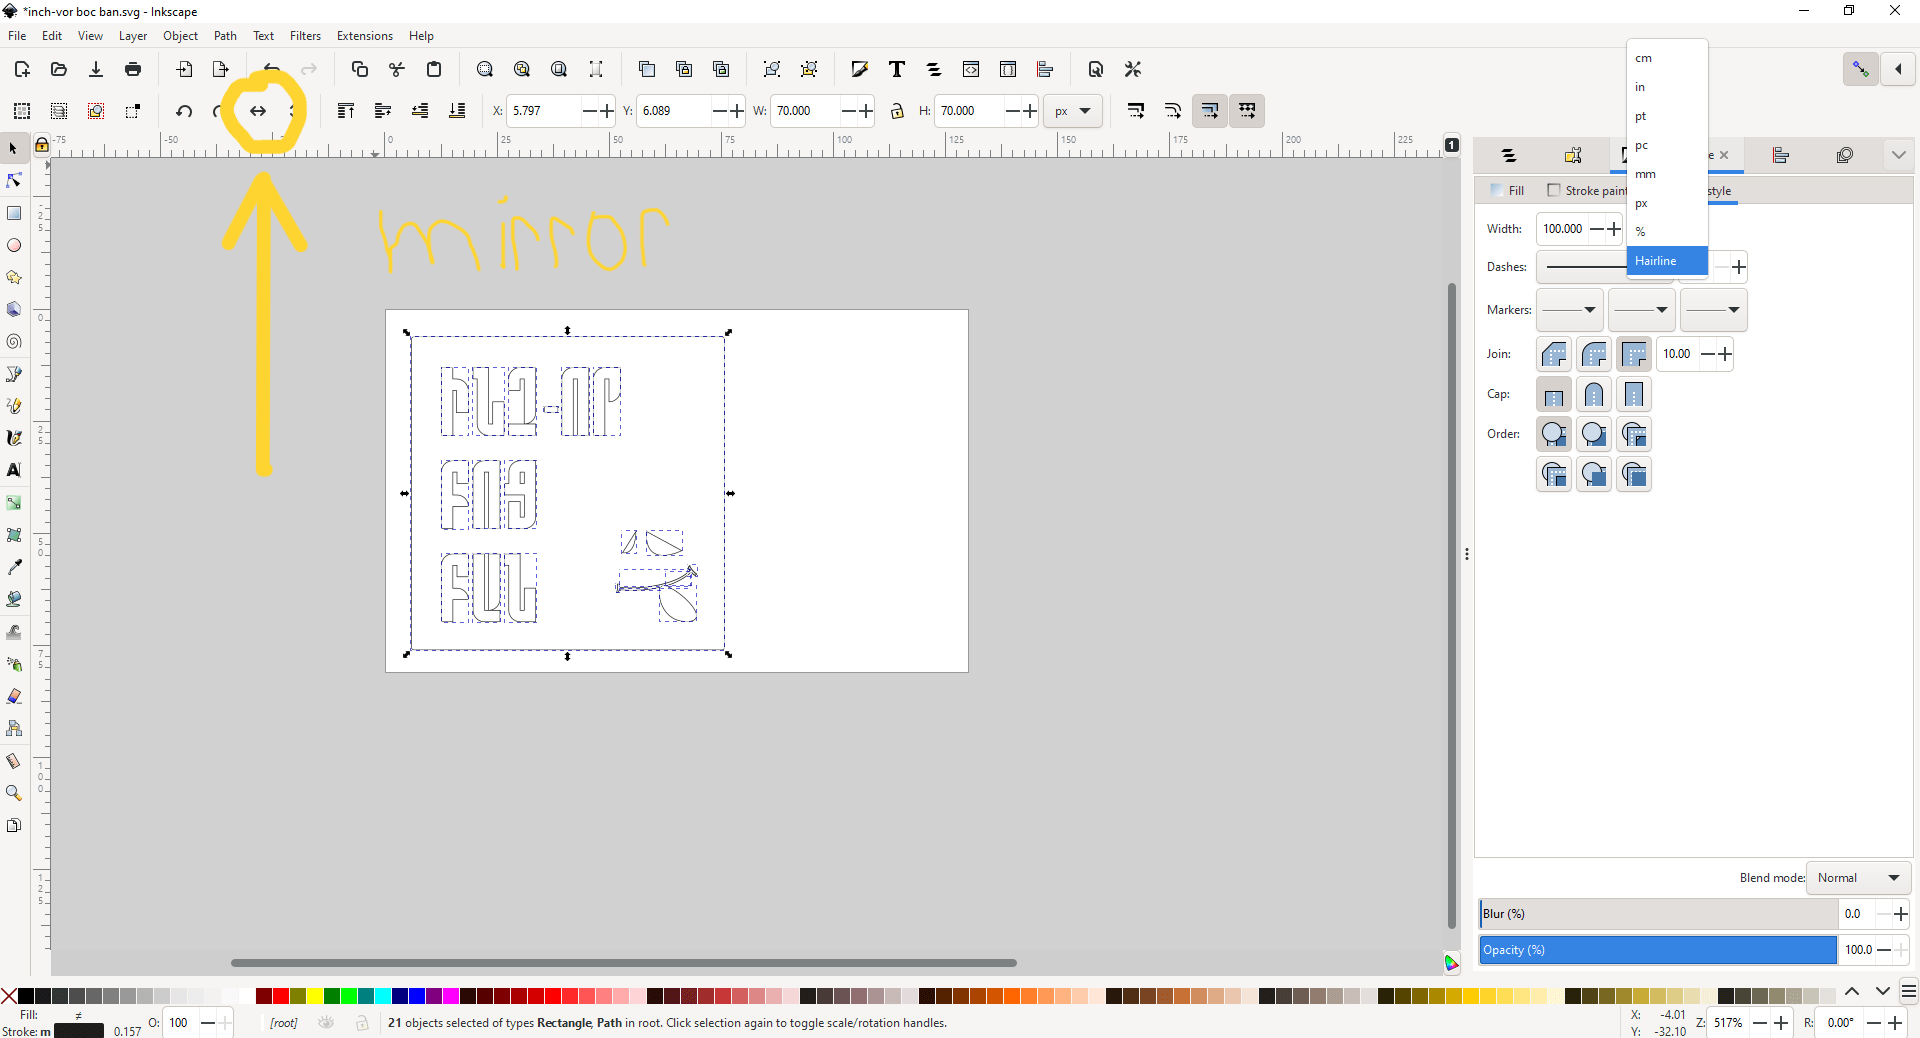
 After I set it all, I’m gonna mirror my file as it will be ironed on textile. >>
 So now we have our paper and sticker in their real sizes, in their real place.
 After we checked that all is okay, I’m going to check print preferences.
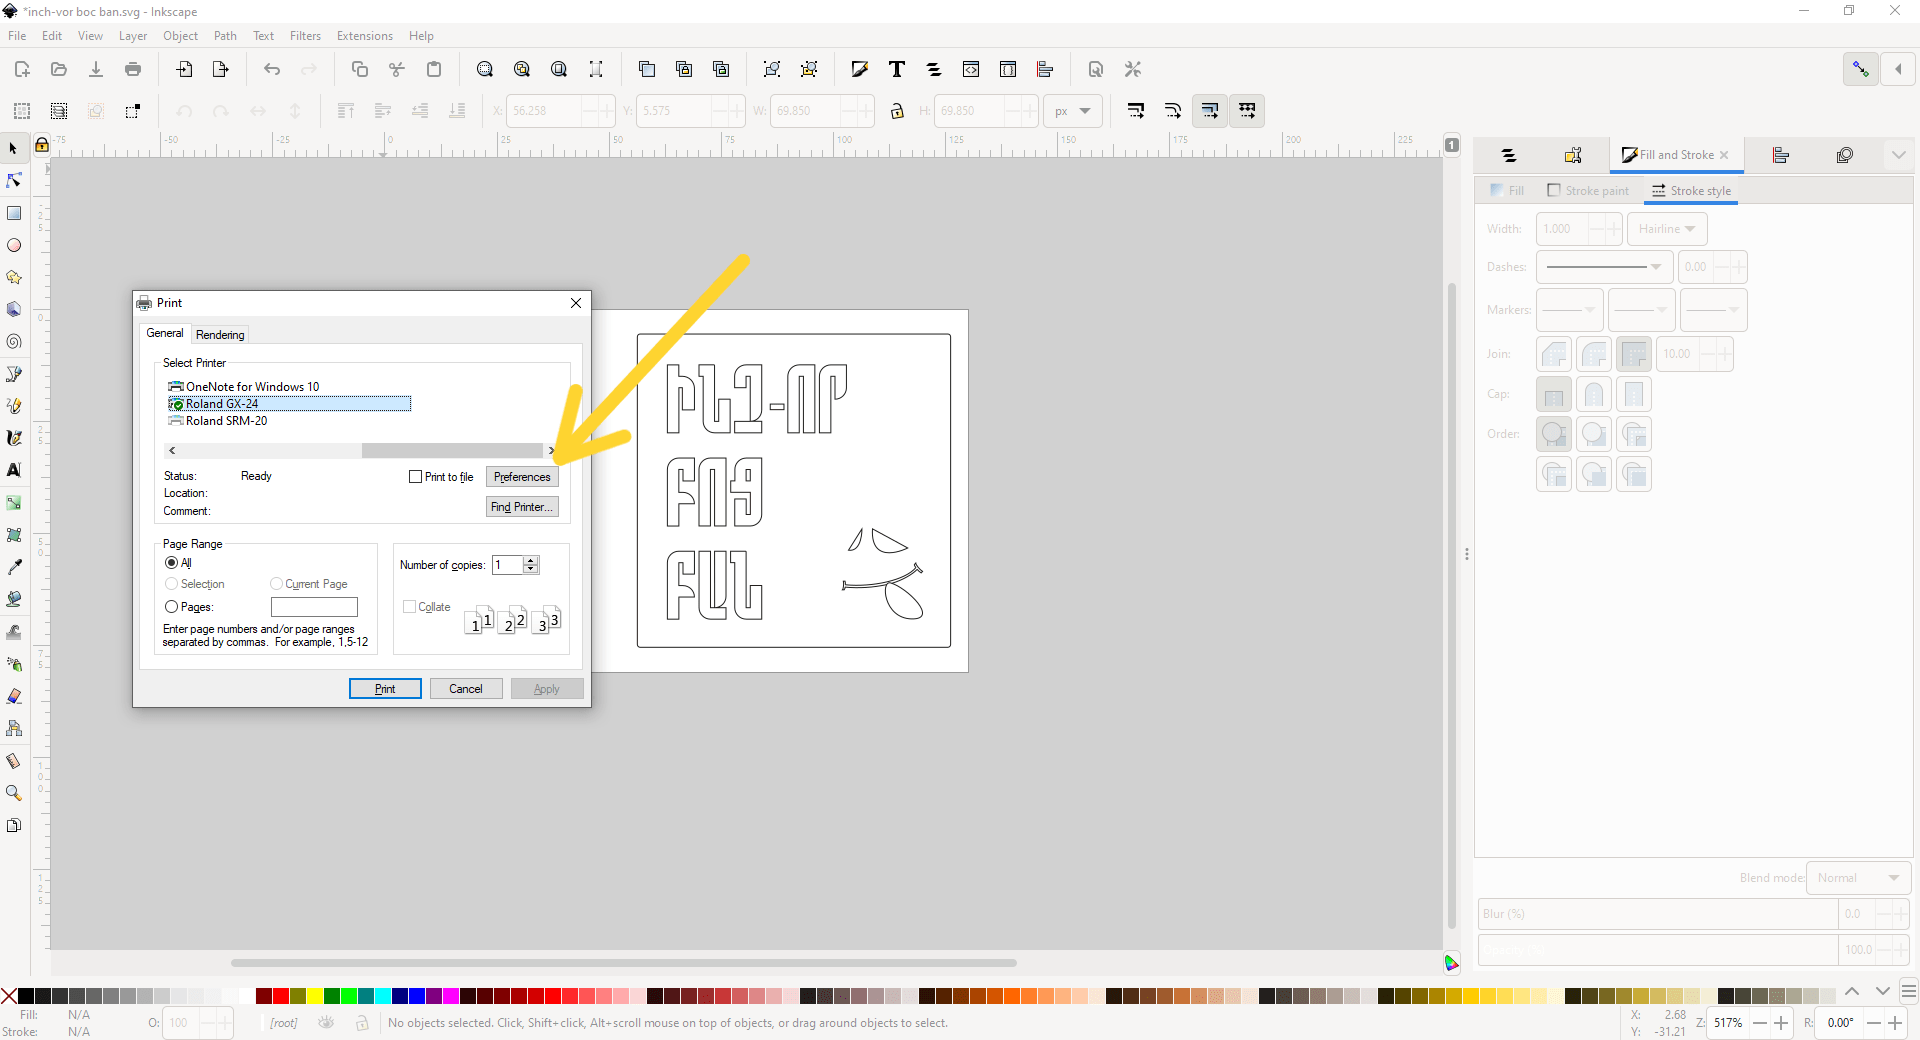 Here we set sizes too, by going Get from machine section.
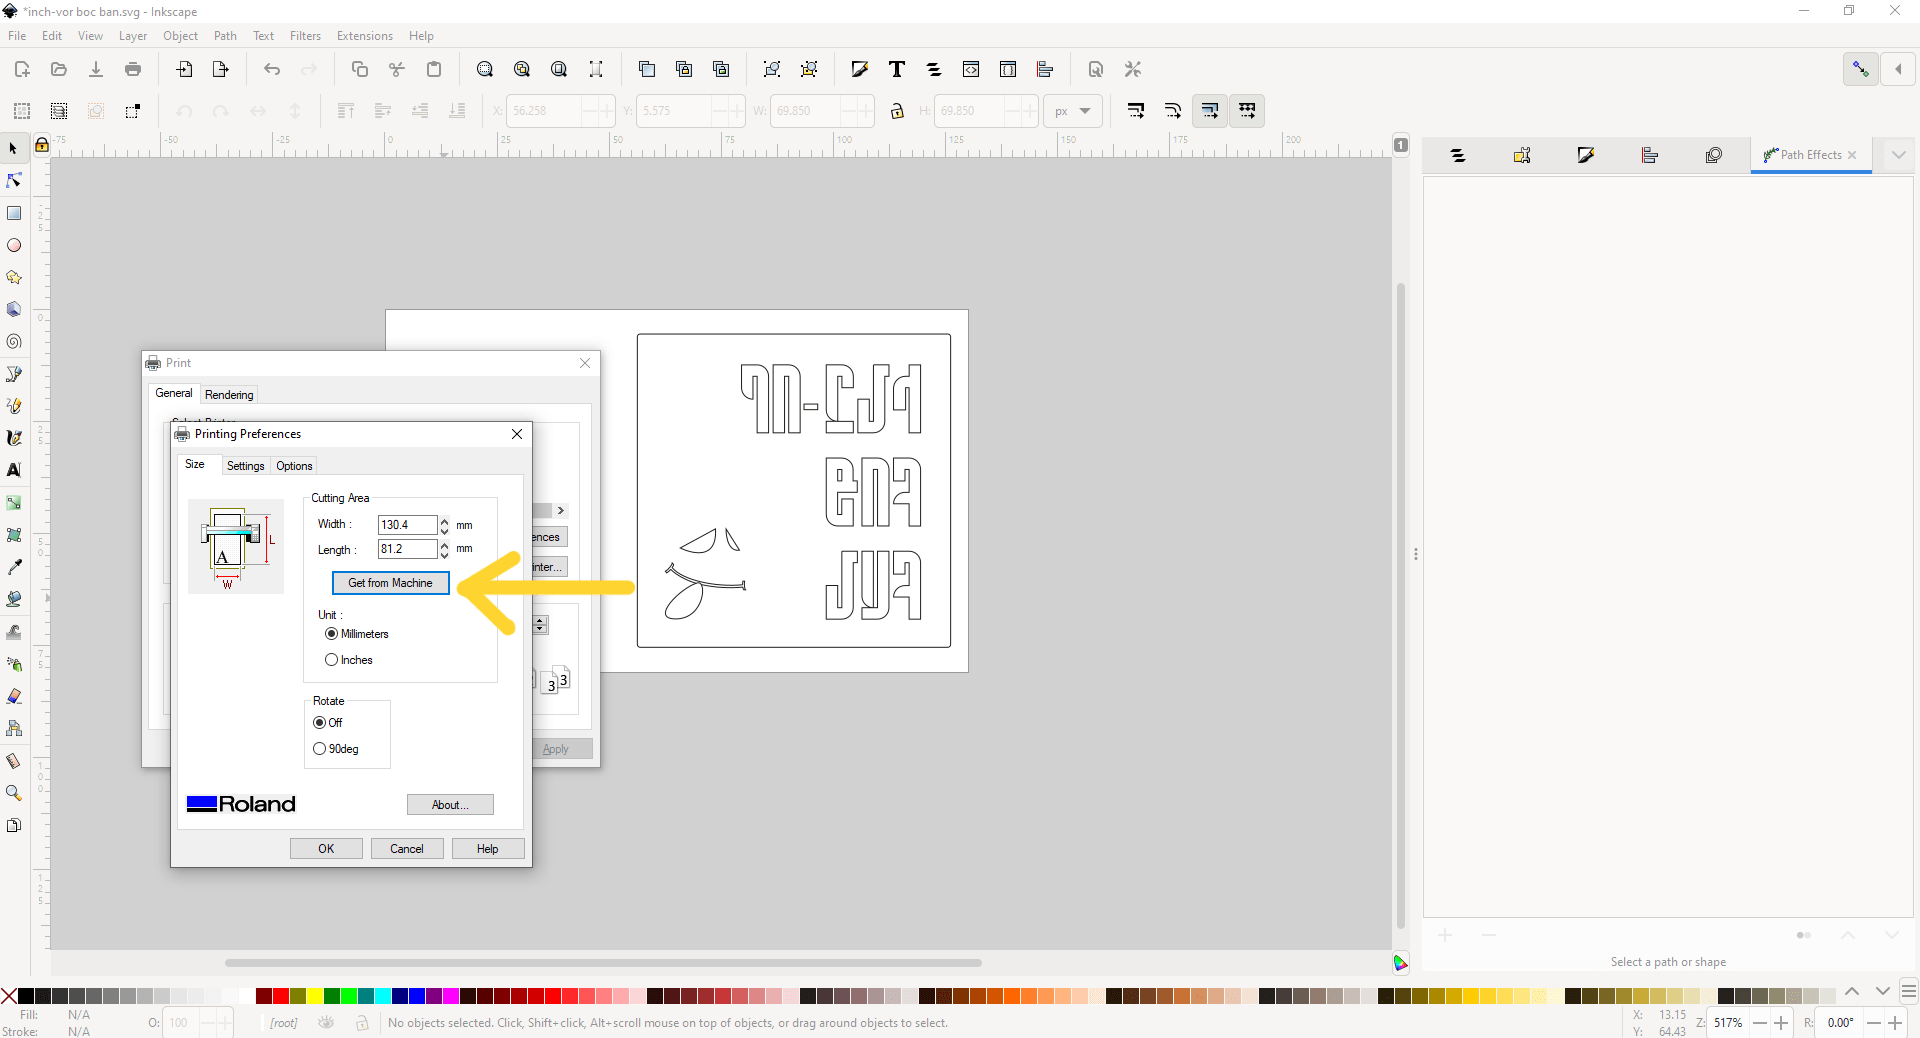 Now I’m ready to Print it.
First vinyl cut ever
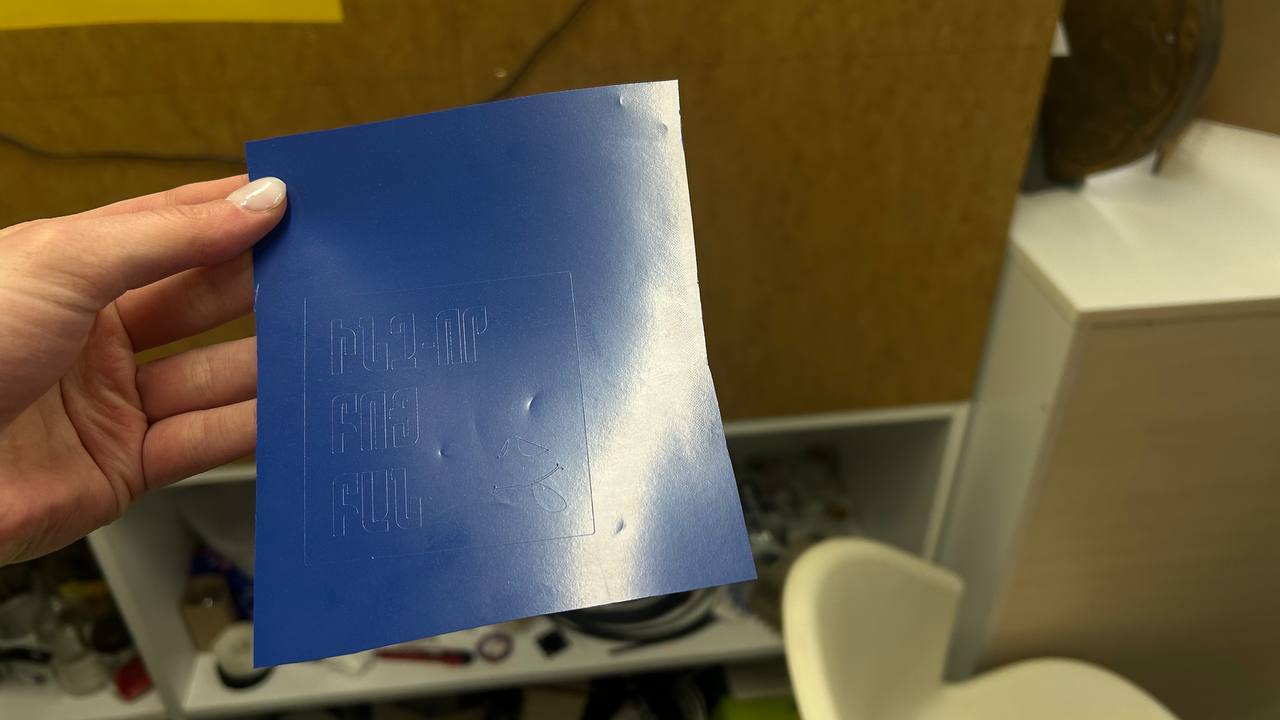
When I printed for the first time, there were something wrong, cause machine cut my sticker not in sizes that I mentioned, it was much smaller.
 But after I discovered that the problem is measures-I had forgotten to change inches into millimeters*, I printed twice, in another paper.
Process
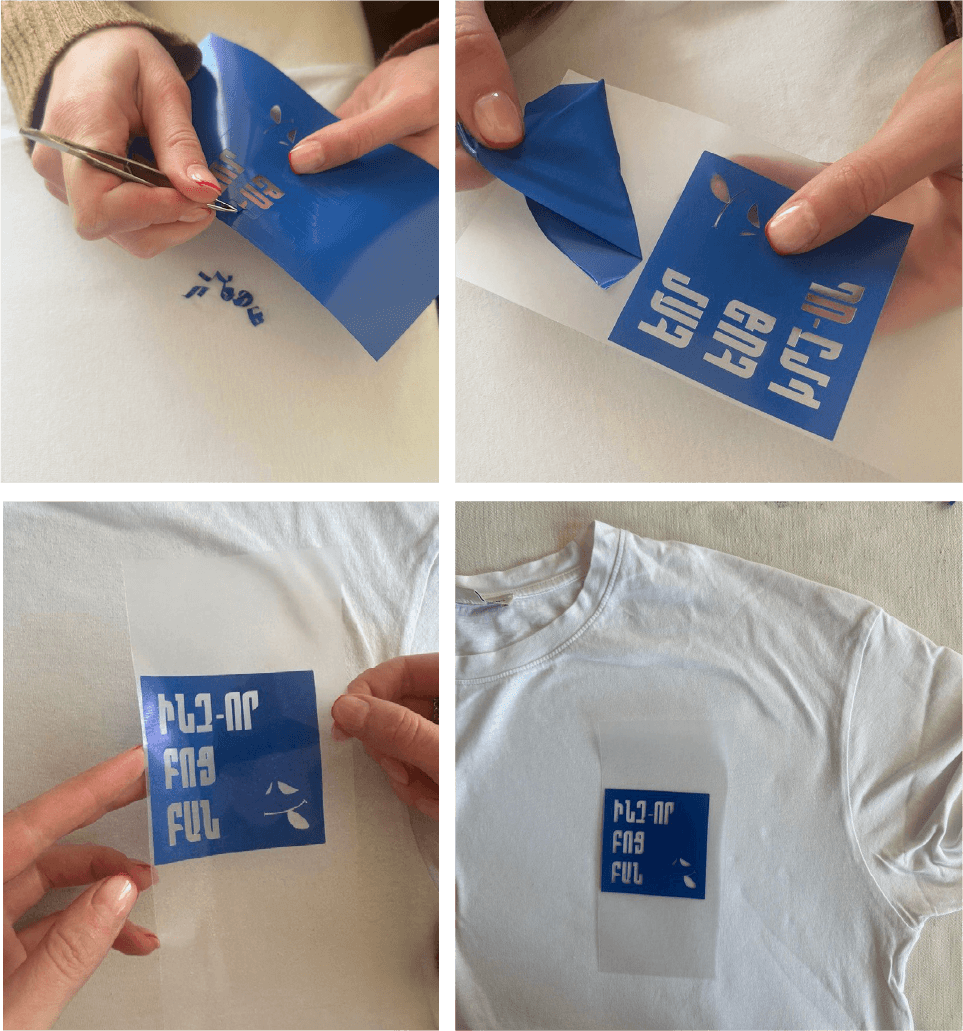
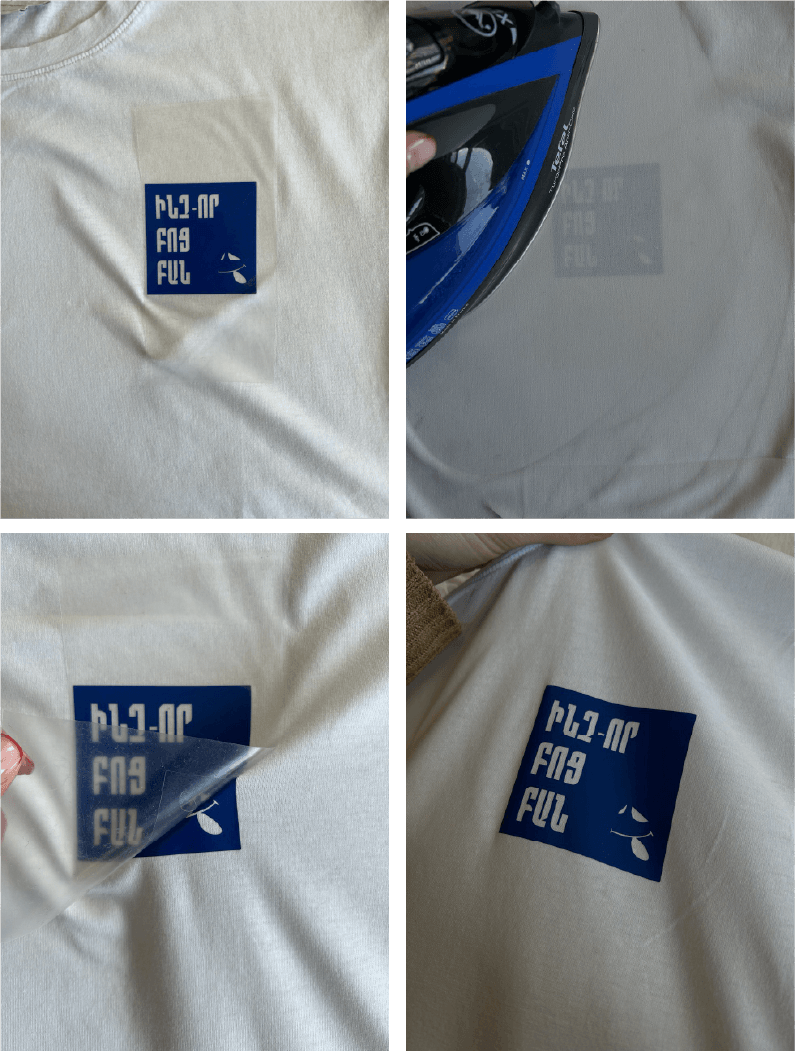
Here is the process of pasting the sticker on my t-shirt. At firts I removed all the parts that I will not use and by sticky part I put it on my T-shirt.
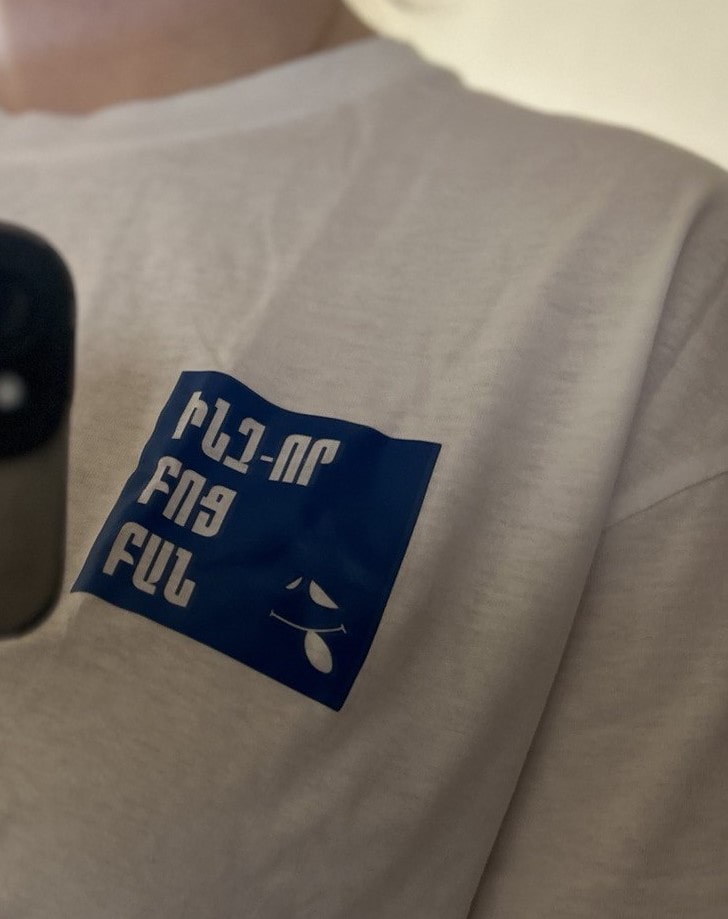
Result
Laser Cutter
Laser Cutters
In FabLab Armenia, Dilijan there are 5 Laser cutting machines. This week we learned about them all. 3 of them are diode based and 2 of them is working with CO2.
-
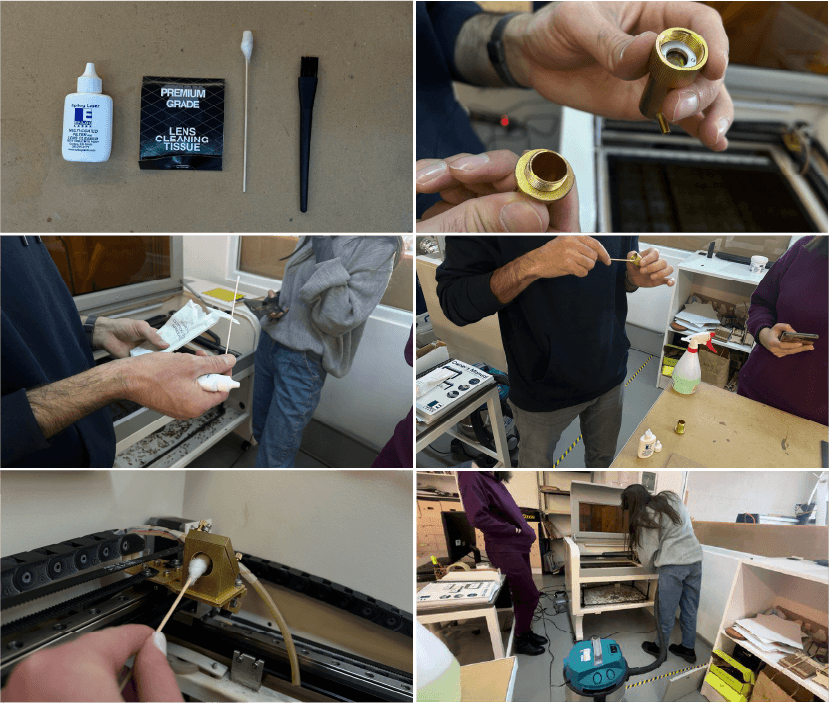
Chinese laser cutting machine which is working by Ruida 6445 controller. Maximum power of machine is 80 Watt. It can cut plywood, leather, organic glass. Laser cutter is turning on >> water pump is turning on >> after air condition is turning on. So now machine is ready to be used. Before starting of course we learned the instruction. We got acquainted with warning, what it’s not allowed to do. We learned that machine has to be cleaned every week, after you used it. So we started from cleaning it. As you can see below we separated parts of it and with instruction started cleaning by products made for cleaning lenses, used vacuum cleaner to clean working surface.
 The area where the laser should work rises and falls, the working surface. This is done to catch the focus. We adjust the slope in the given way.
For cutting cardboard as an example we putted the speed-35mm/s, min power-50% and max power-55%. Also by setting priority by 1 and 2, we give an order to cut the middle one first, then the outer one. Or by changing color we can cut only the black one.
The area where the laser should work rises and falls, the working surface. This is done to catch the focus. We adjust the slope in the given way.
For cutting cardboard as an example we putted the speed-35mm/s, min power-50% and max power-55%. Also by setting priority by 1 and 2, we give an order to cut the middle one first, then the outer one. Or by changing color we can cut only the black one.
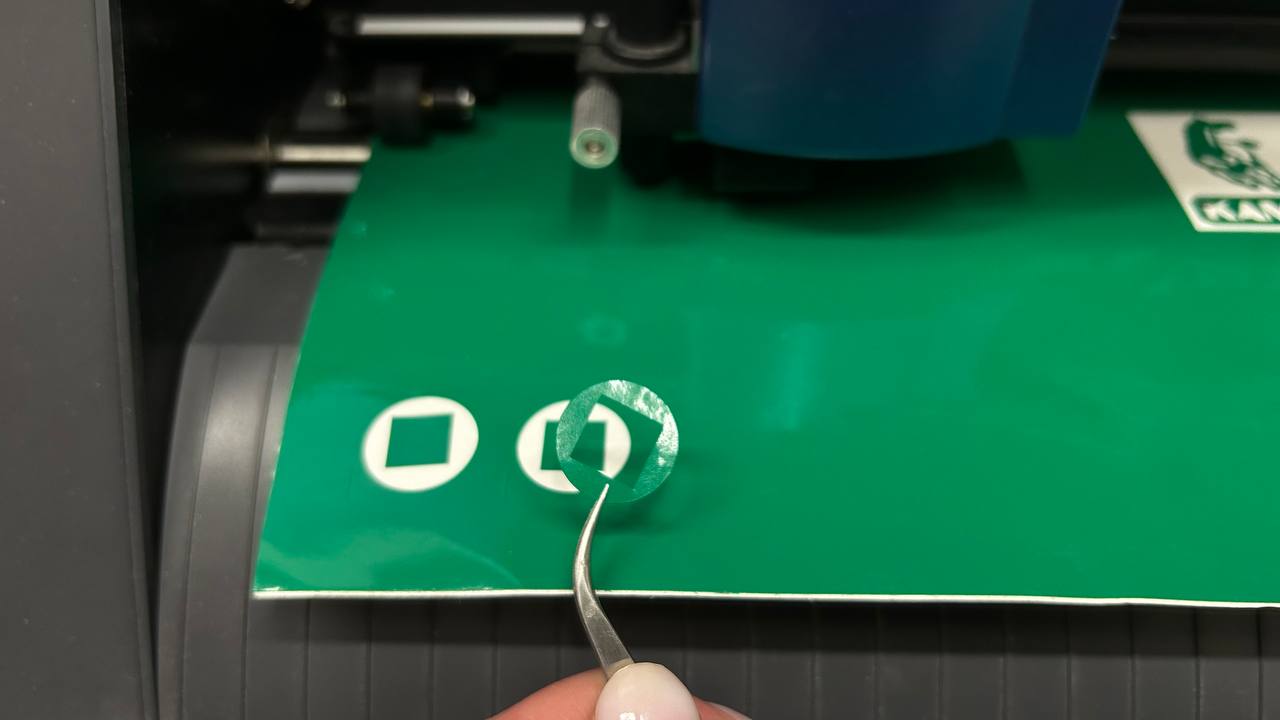
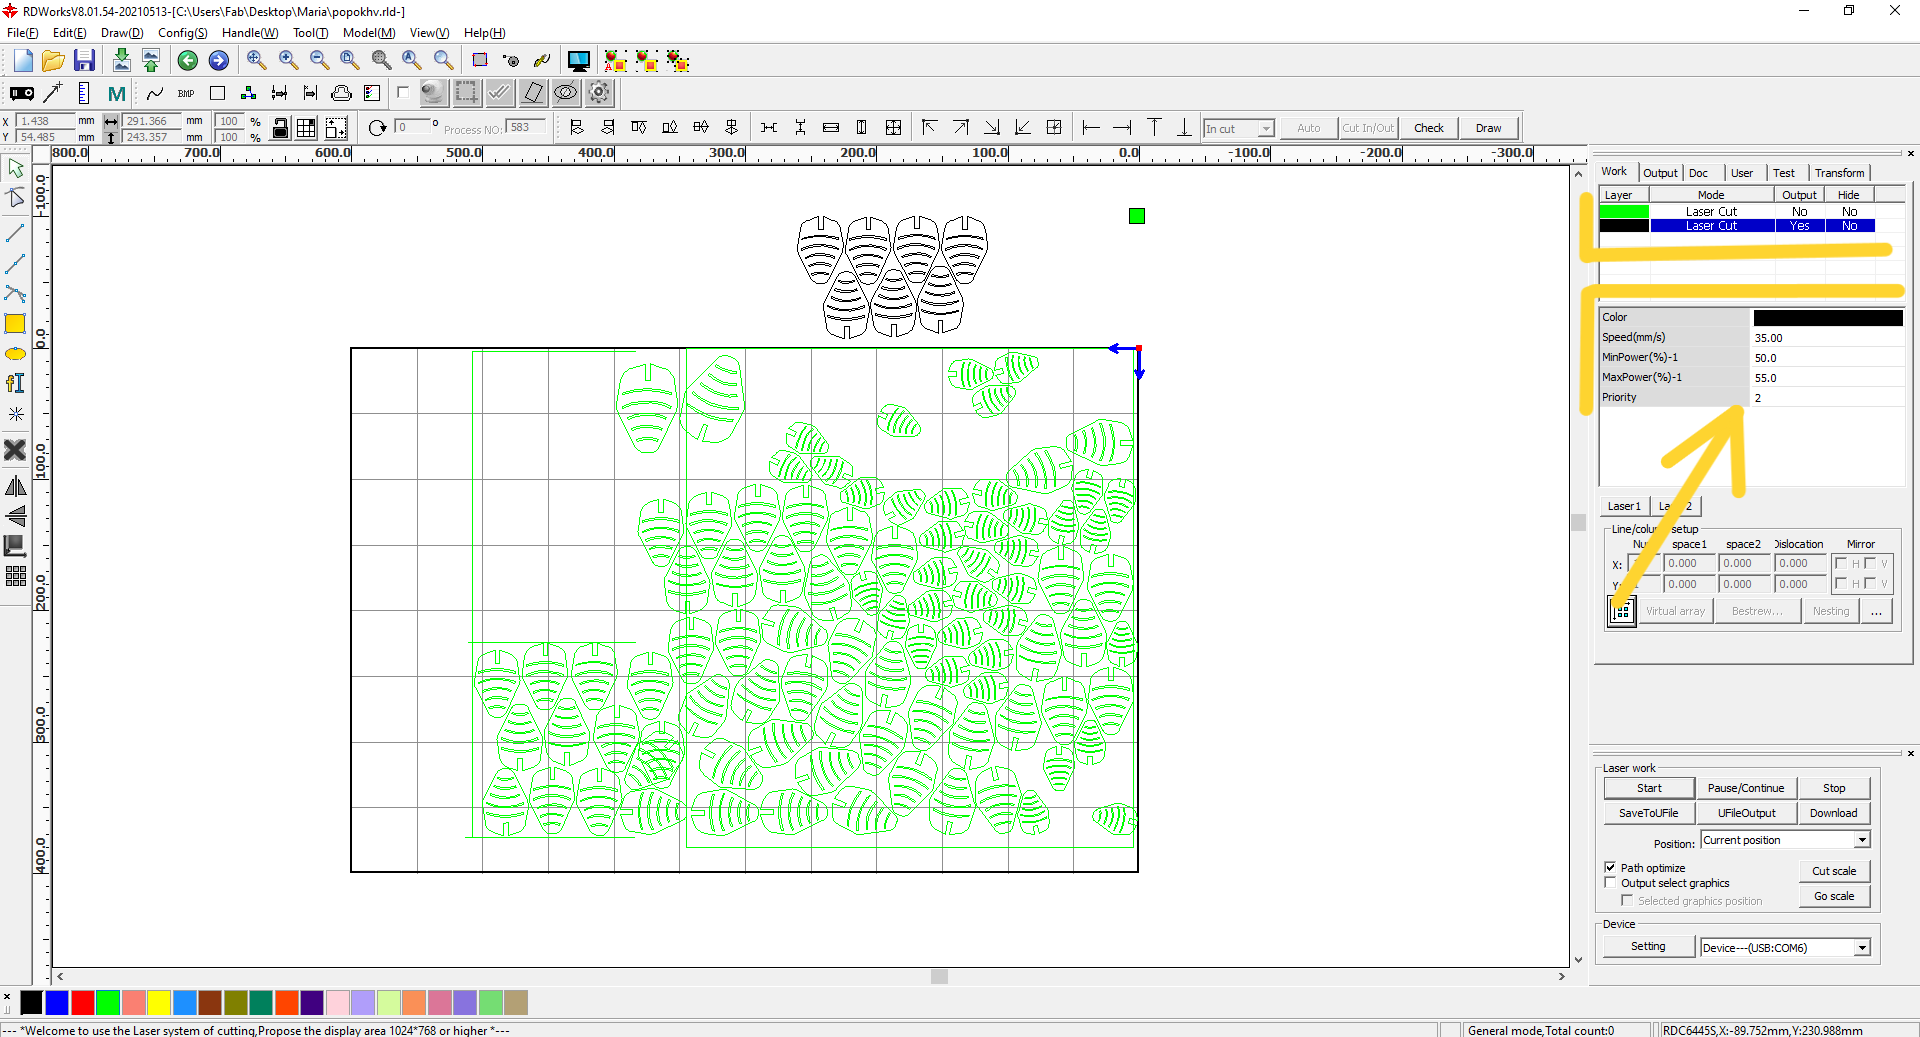 In our group assignment rectangle we marked the middle rectangle with a different color and we can give other parameters. For engraving we select scan and for cutting - cut.
 -
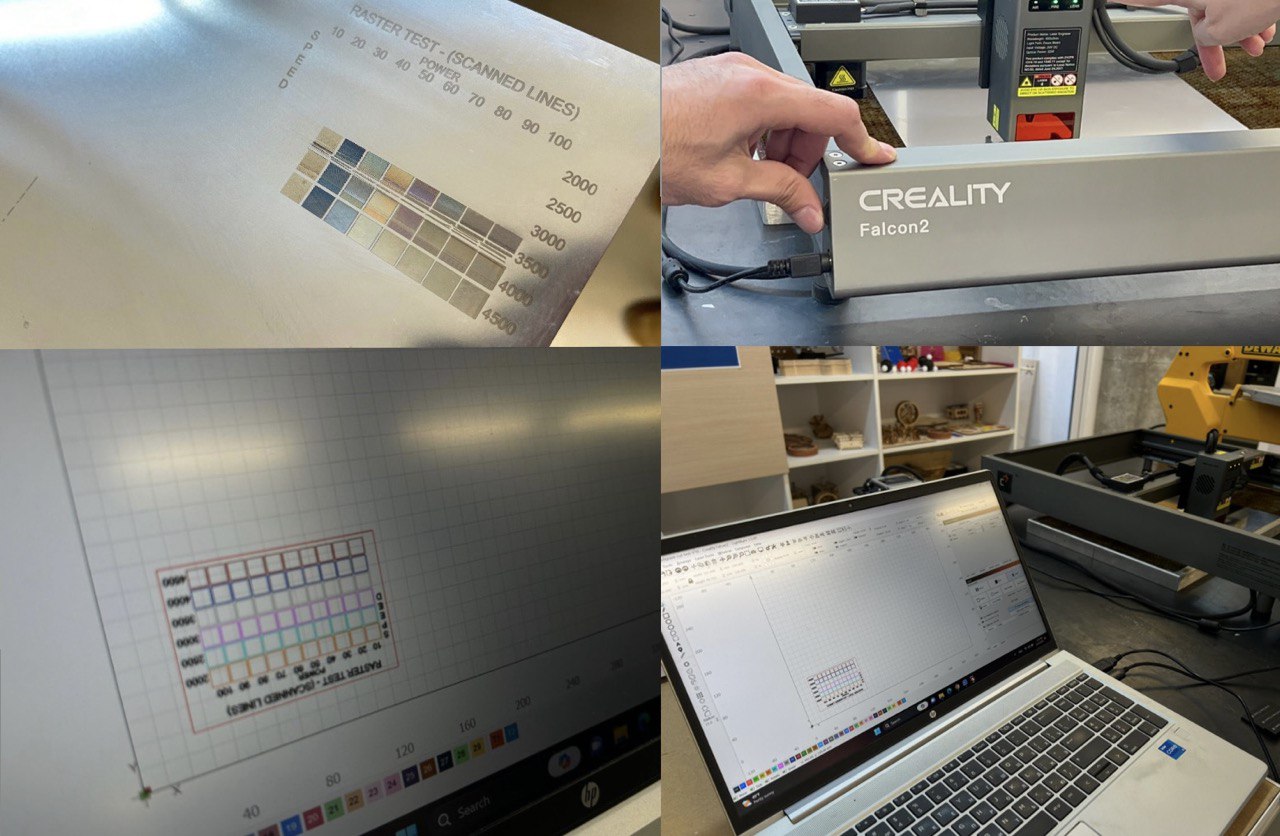
CREALITY Falcon 2, The Creality Falcon 2 diode laser engraving machine with a power of 22W is primarily designed for engraving and marking on various materials such as wood, acrylic, leather, and some metals like aluminum or anodized metals. We were using this machine for the firs time in FabLab Dilijan, and we tested it by engraving on stainless steel which has 1mm thickness. By setting different parameters of speed and temperature we’ve got an amazing table of different engraved clors which you can see in the picture. The only problem in process was that because of the small thickness of our stainless steel it started to bend in a high temperature. So because of that we stopped the machine.
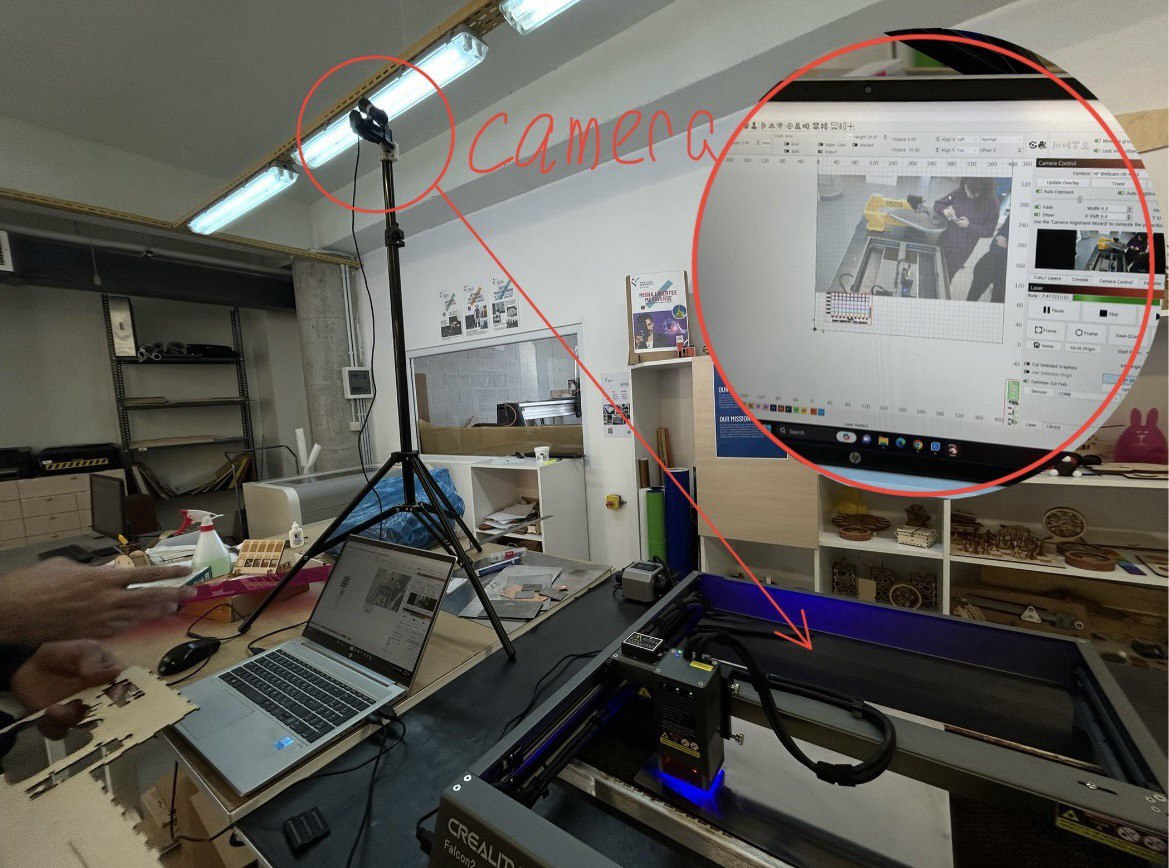
 Also we discovered that you can set the camera and see your laser cutting surface in your software. So we tried that.
-
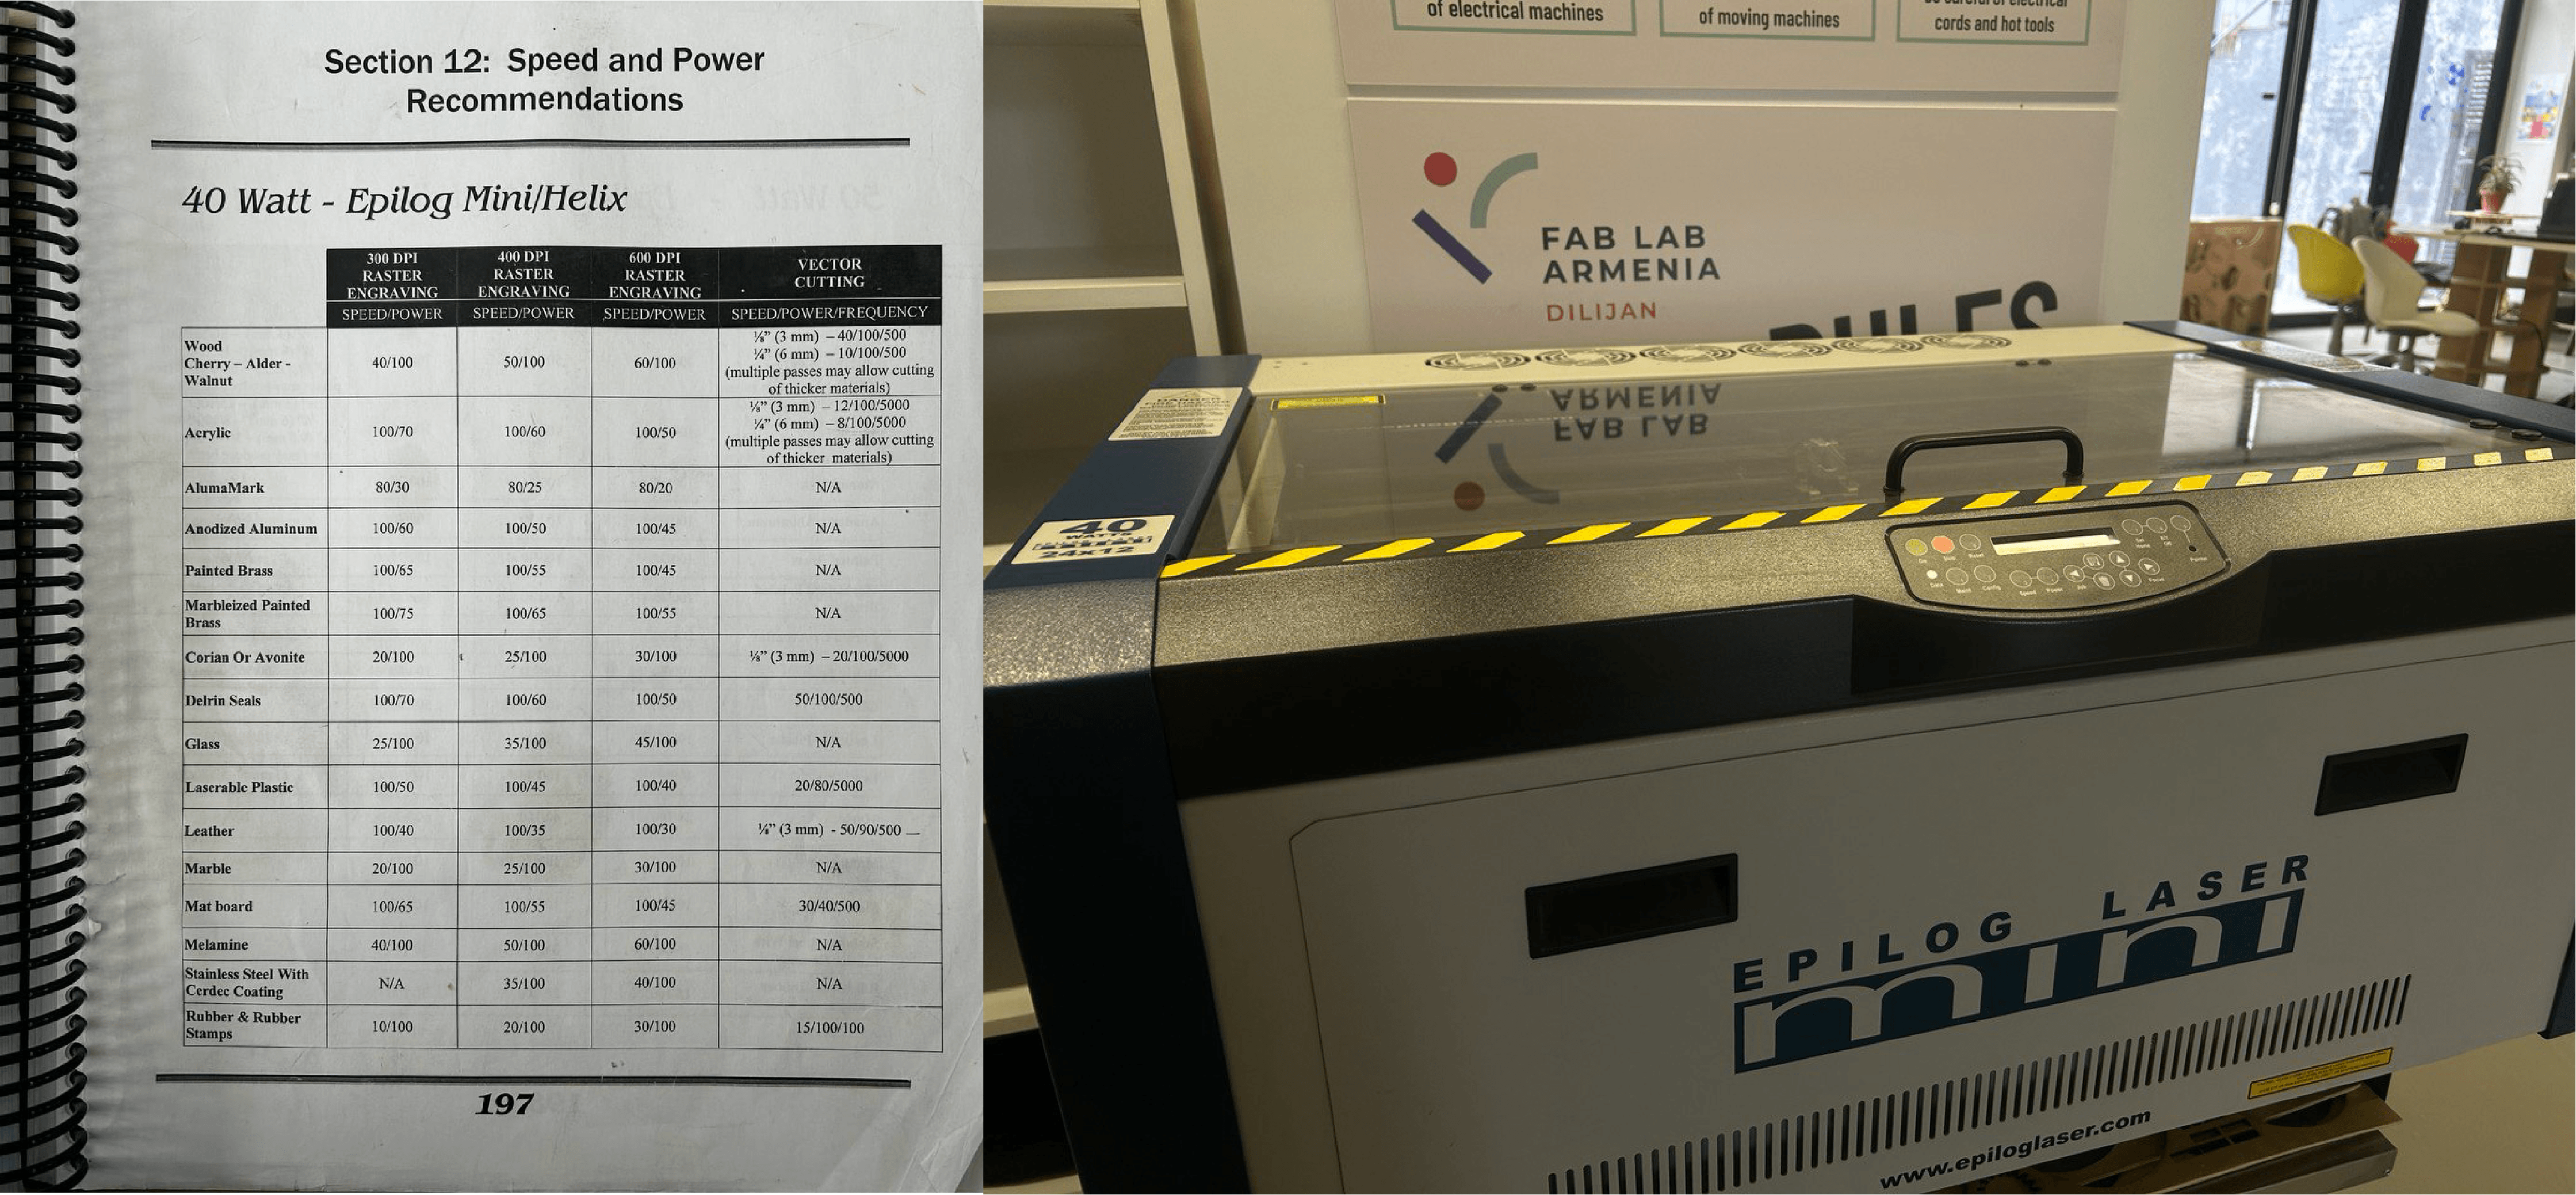
Epilog Laser Mini cutting and engraving machine 40 Watt is CO2 based. It has an autofocus tool in contrast with 2 previous cutters. Made in USA. There are such materials, that you can cut by this machine. Plywood, Acrylic, Cardboard … others you can see below in photo from instruction.
-
6 Watt self-made laser cutting machine. The system is working with Arduino Uno. It has 2 stepper motor drivers, which are working with 2 stepper motors.

-
Insma 1500mW 80x80mm Usb Laser Cutter Engraver Printer
Parametric Design
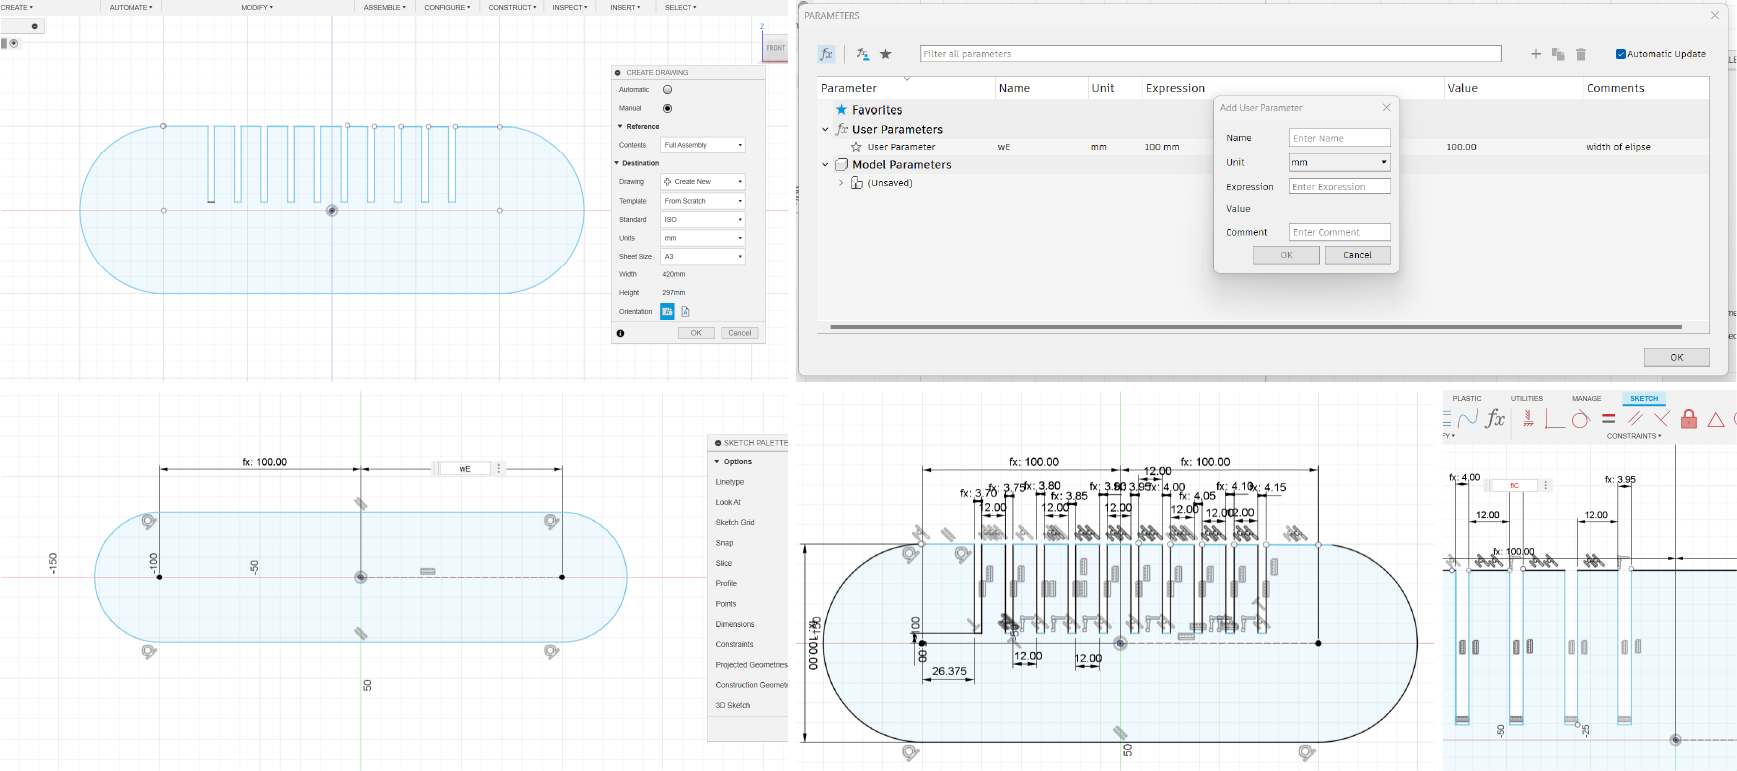
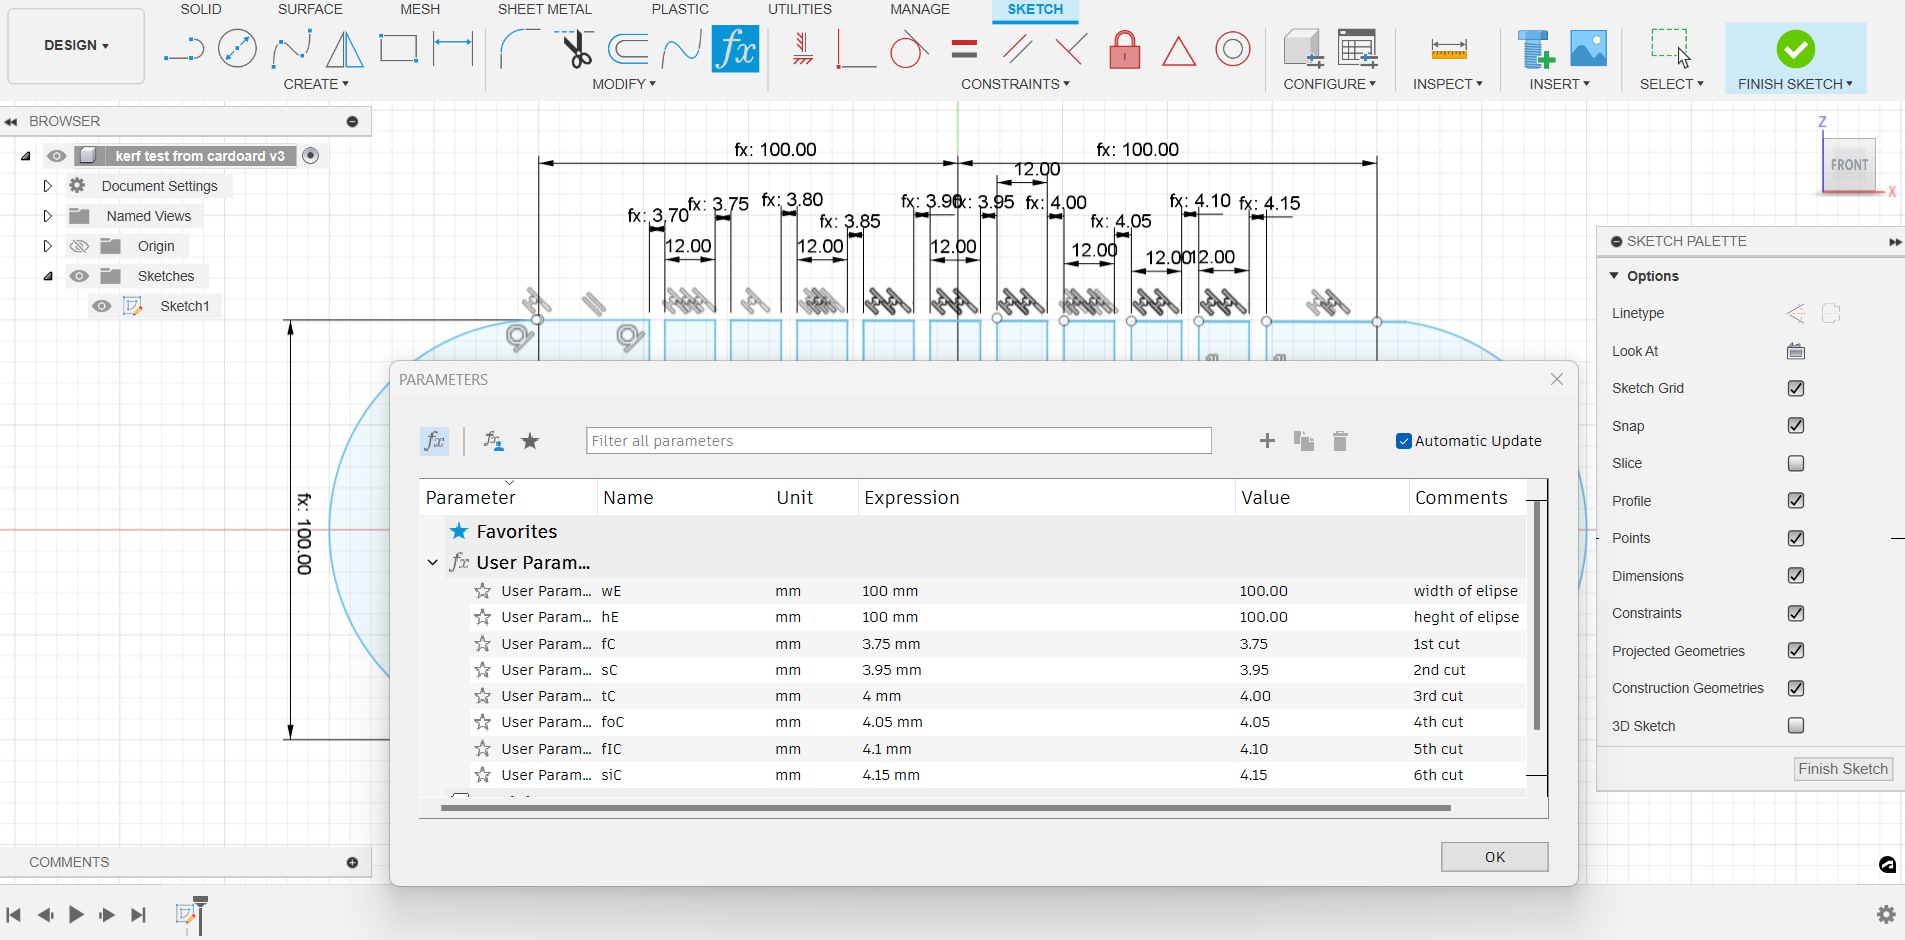
For the first time I learned about parametric design, and on this journey one of our instructors - Rudolf helped me. We tried to make parameters. I learned how to work with them and started to make my own kerf test by parametric designing. Besides a new topic Fusion 360 also was a new software for me. I started working with it only on my 2nd week of FabAcademy.
By making the sketch and knowing the thickness of the cardboard (4mm) which I will use to make my testing kerf I set dimensions from 3.70mm to 4.15mm.
Kerf Test with cardboard
Before starting cutting the kerf as a part of group assignment we measured a thickness of laser that cuts.
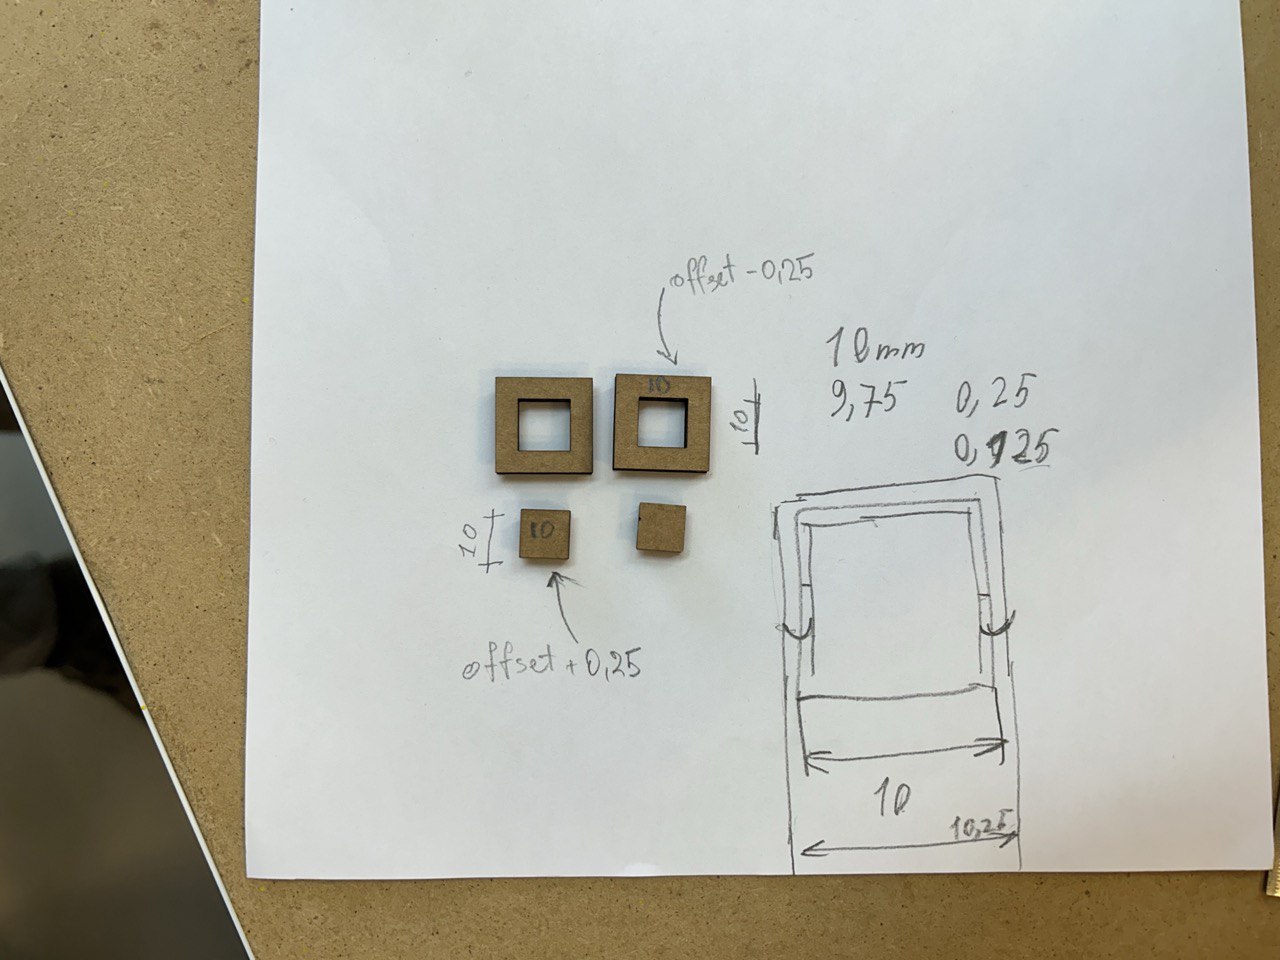 It was 0,25mm.
 The best distance for joints was 3.7mm. After this test I already knew how much distance I will use for my design solution.
Chandelier parametric design
Links for references
Cutting and assembling
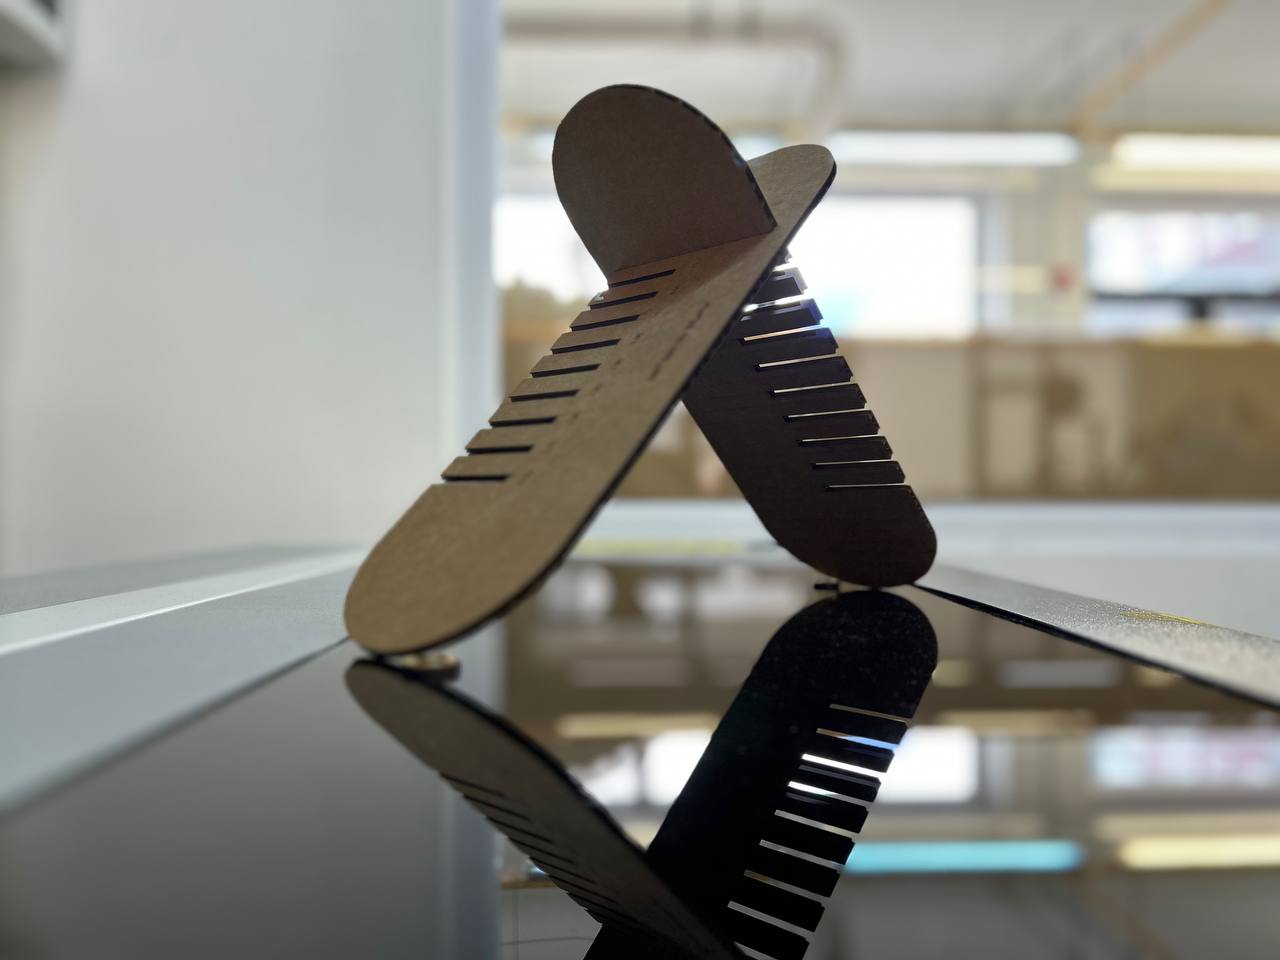
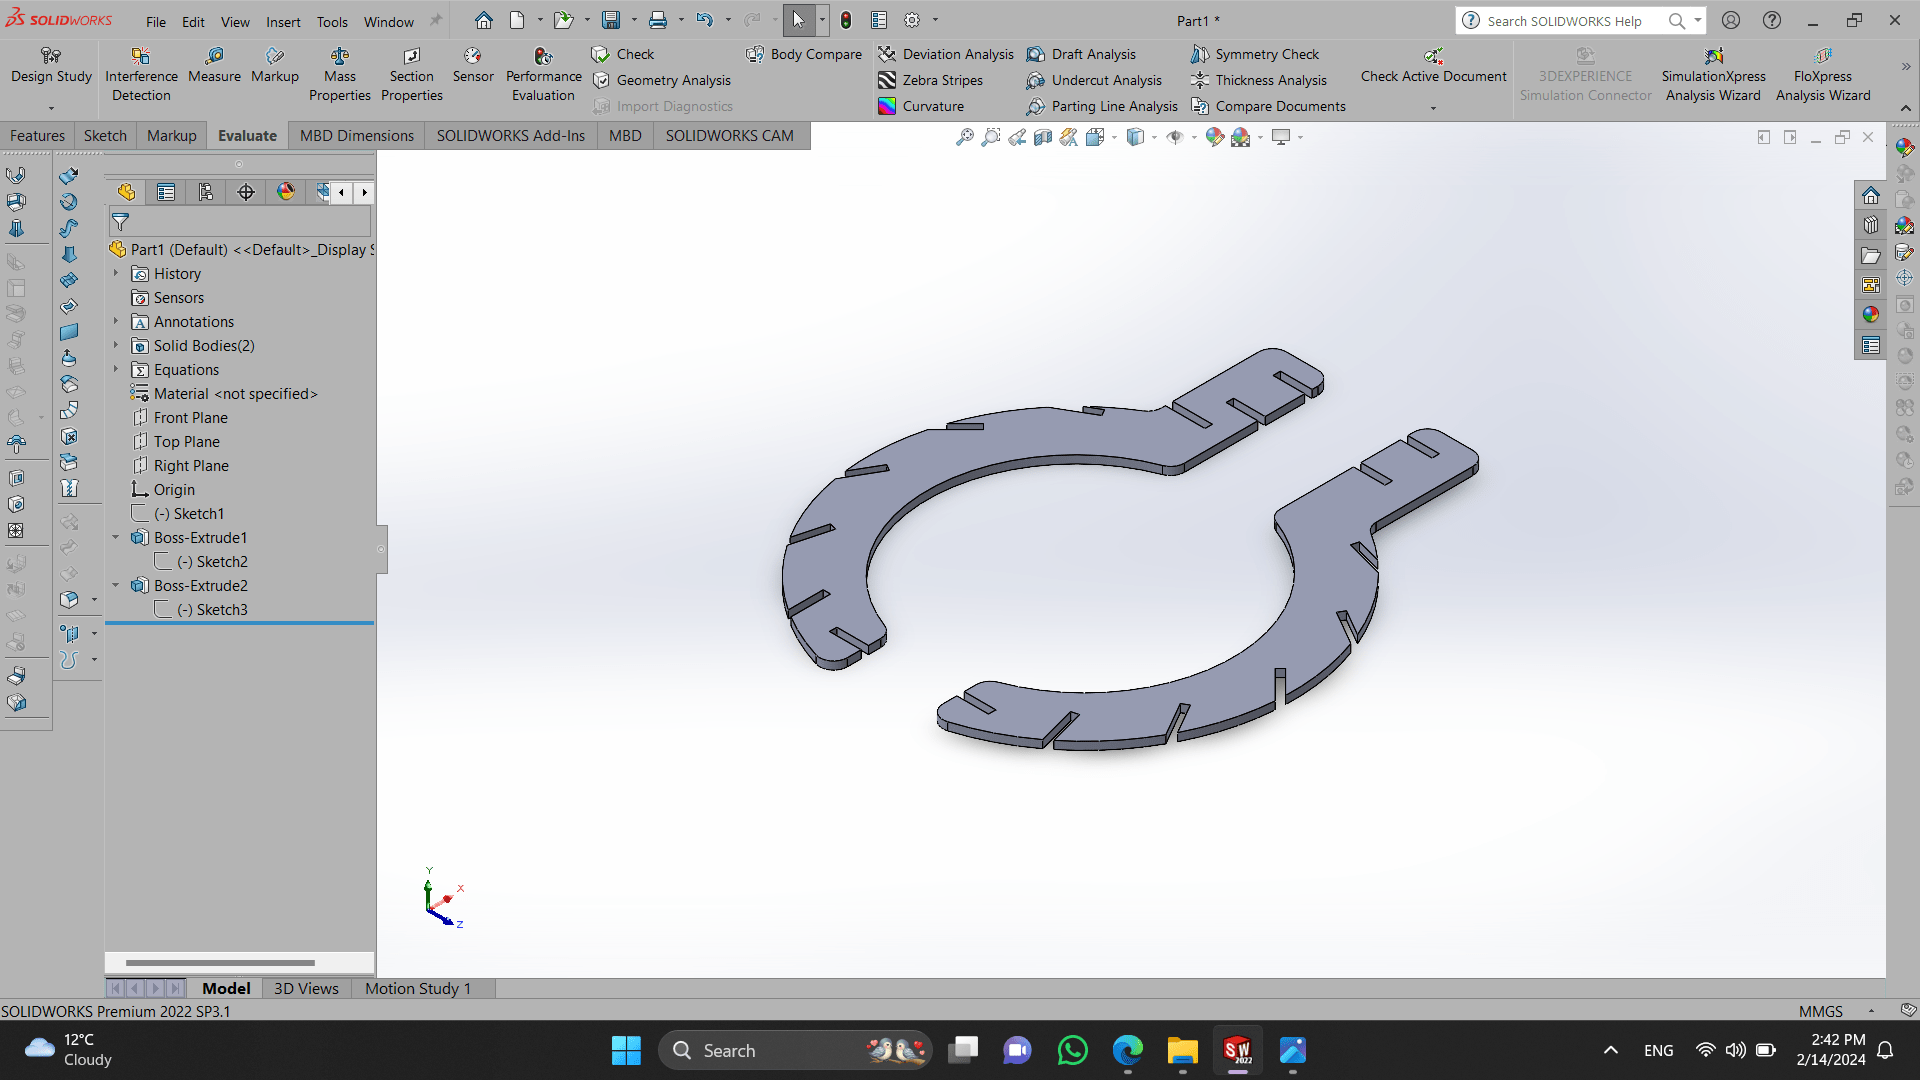
By the way, for this week assignment I decided to make a prototype of a chandelier, which I will make after.
By making prototypes there’s no such risks, waste of material, time… So it has many positive sides.
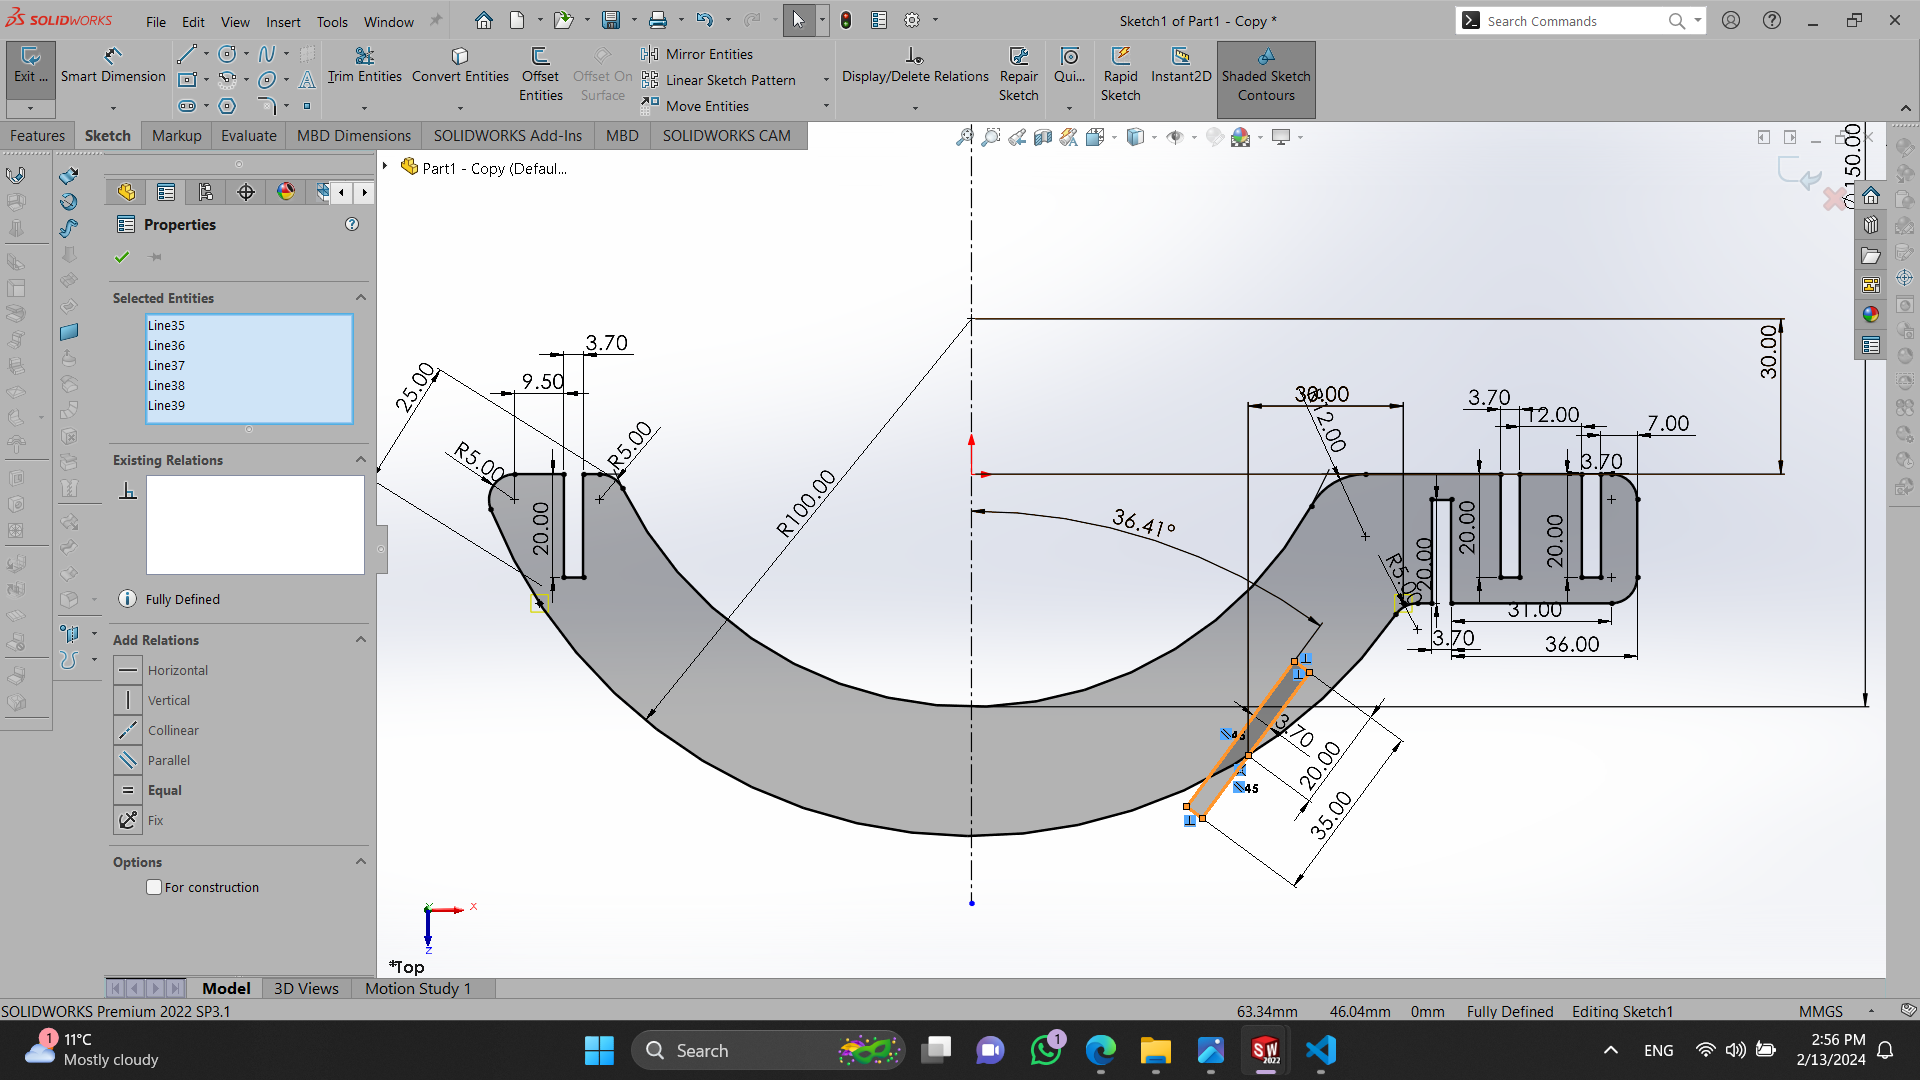 I made parameters for joints, so it will be easy for me in future to make the original chandelier by just changing parameters value.
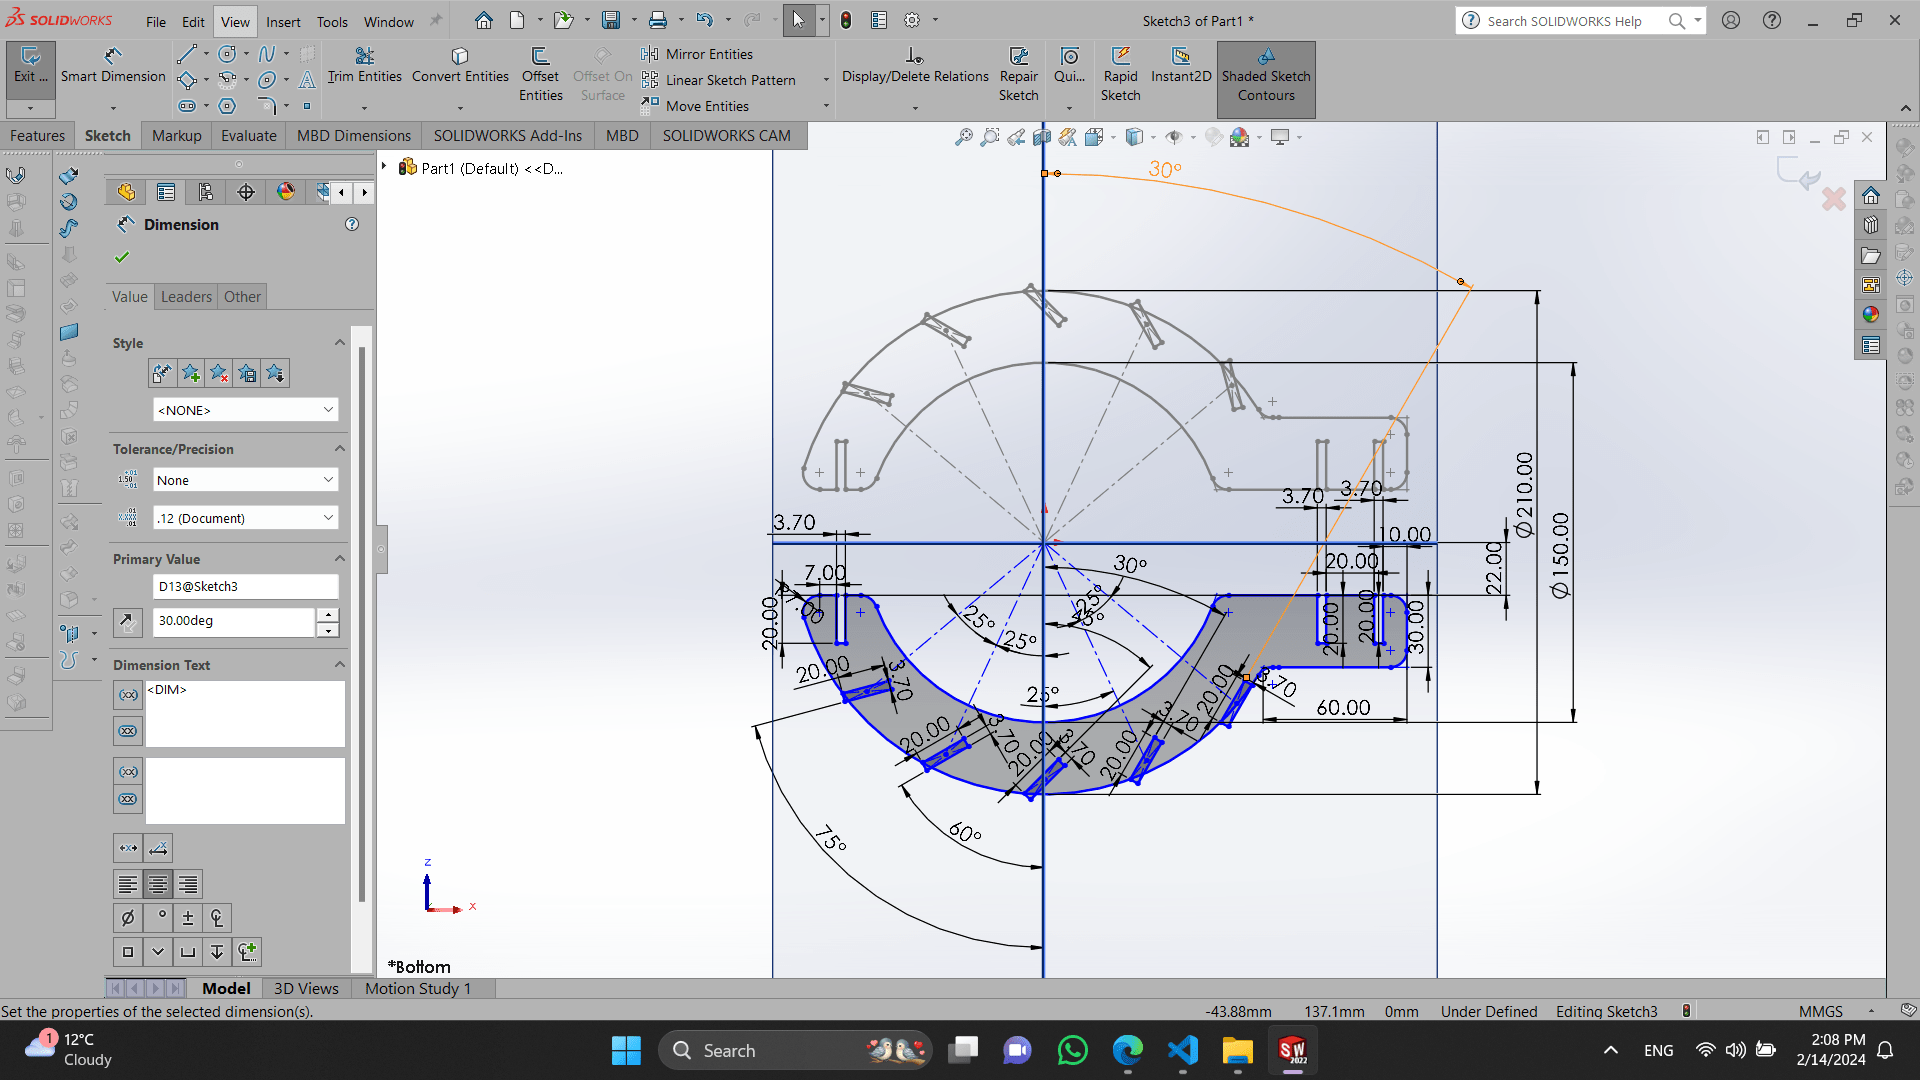
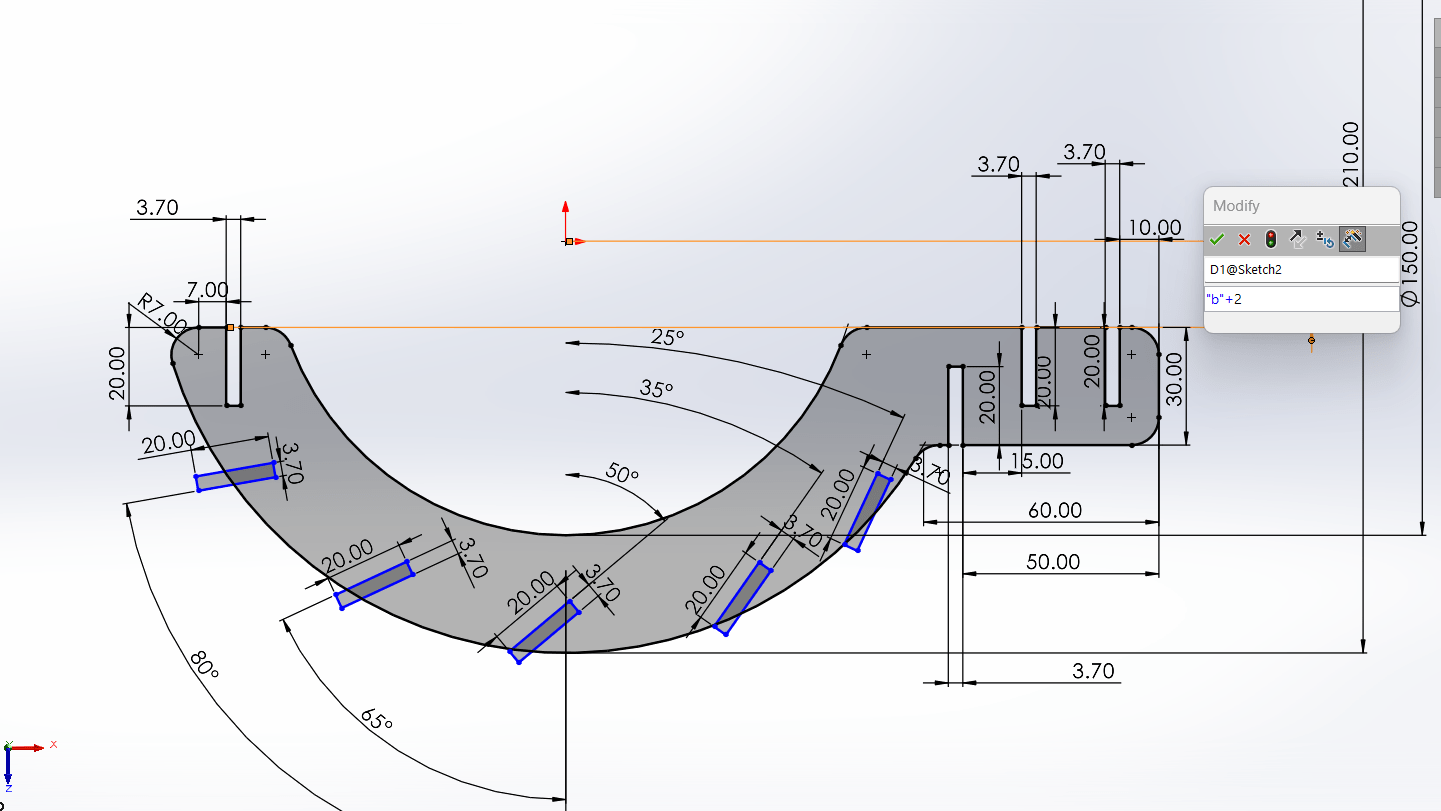 Mirrored the other side and moved joints, so that it will be convenient to change places of modules.
 Actual 3D view of base parts with cardboard thikness.
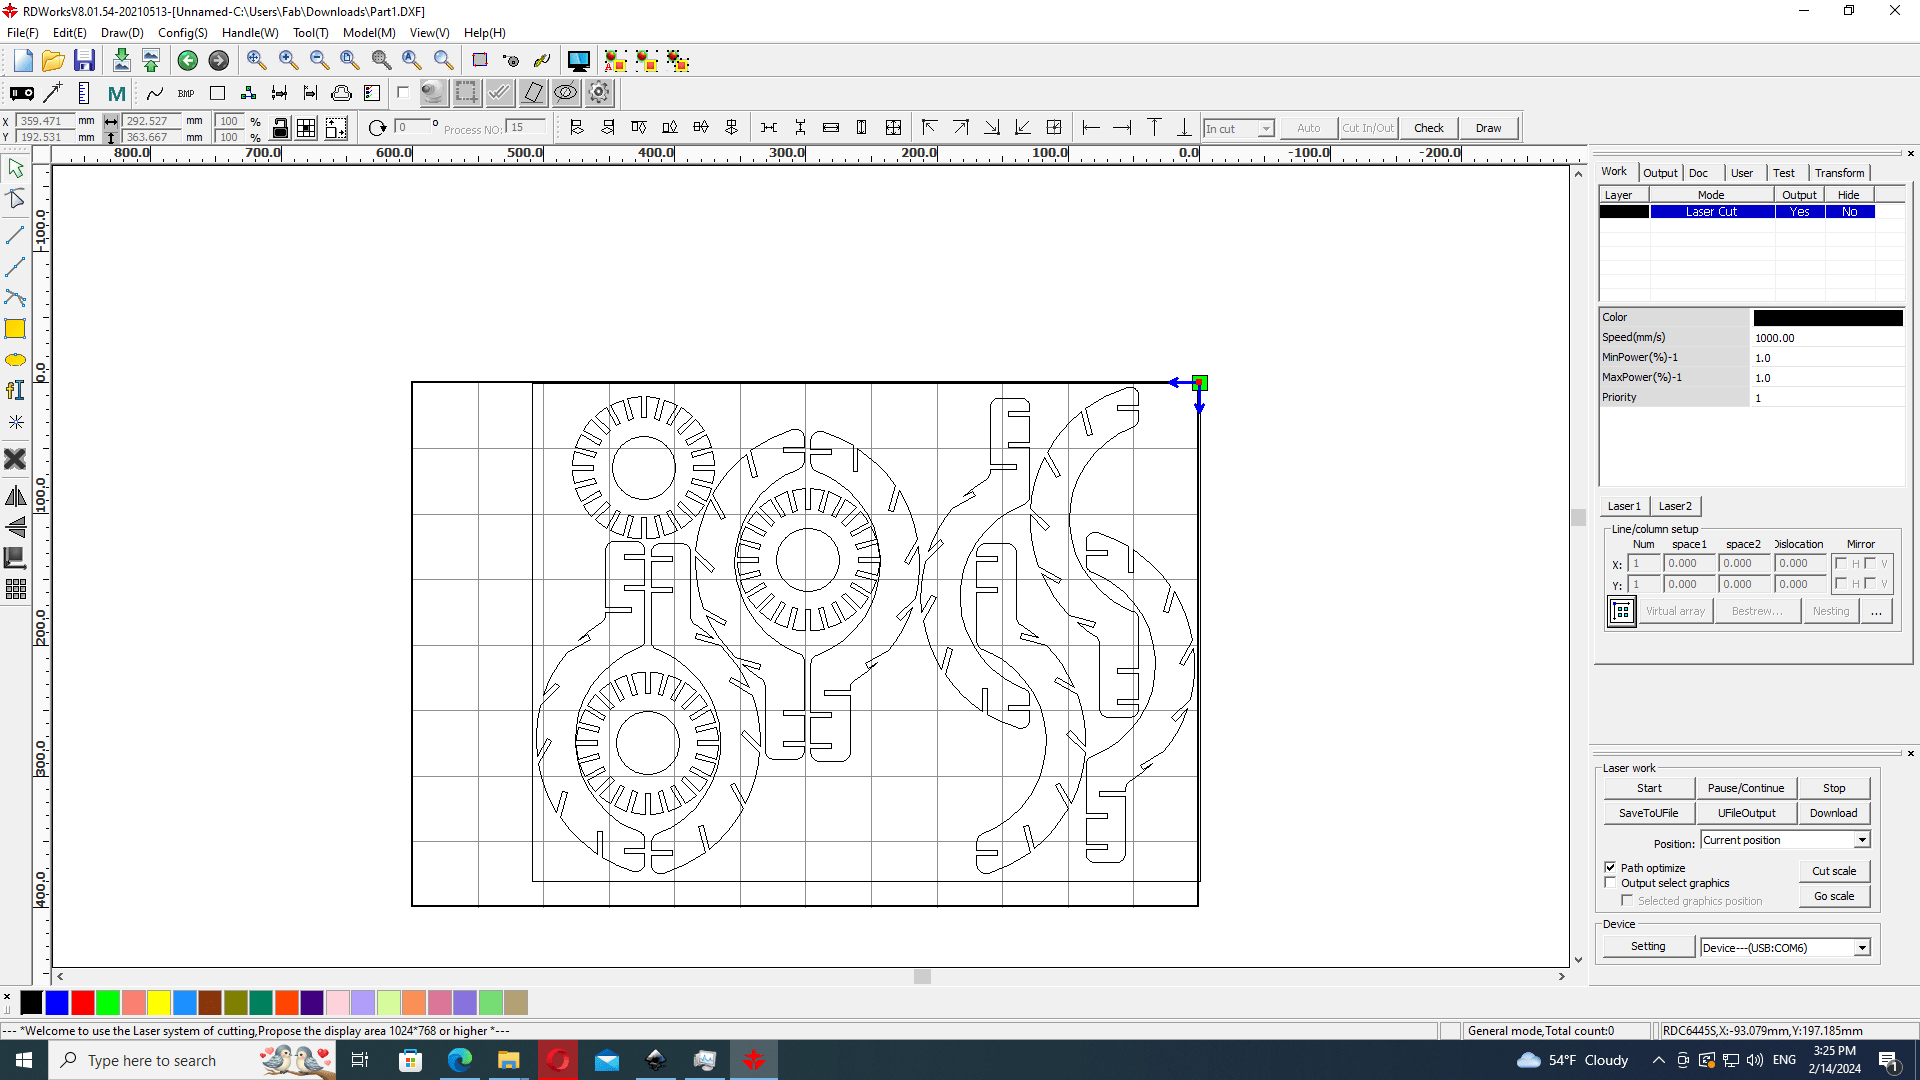
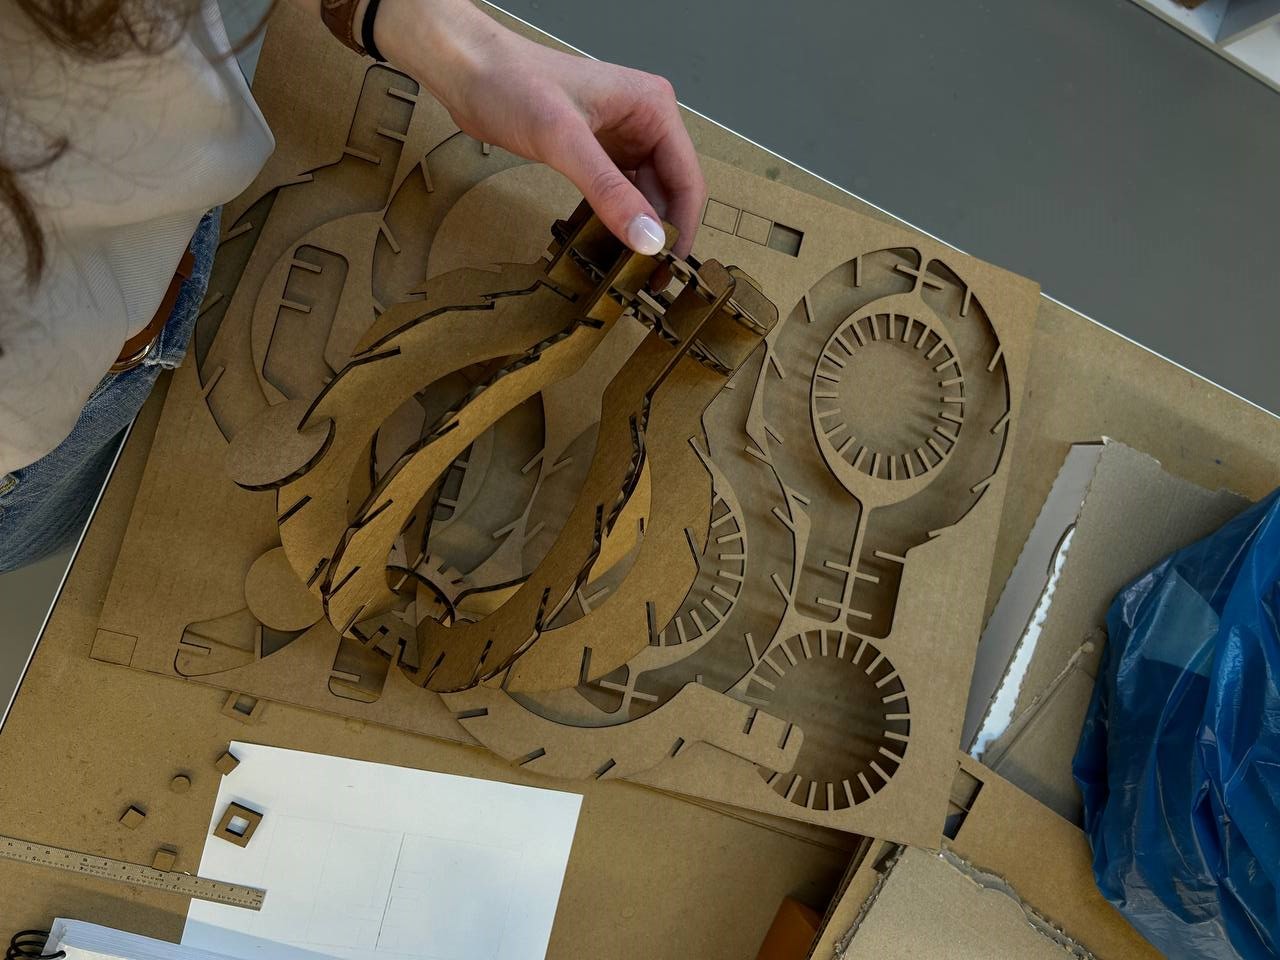
 After I placed it in 2D view and by saving it as a DXF file, replaced it in RDWorks software to cut it with laser cutter machine.
In the right side you can see the speed and power I set.
 The process of assembling.
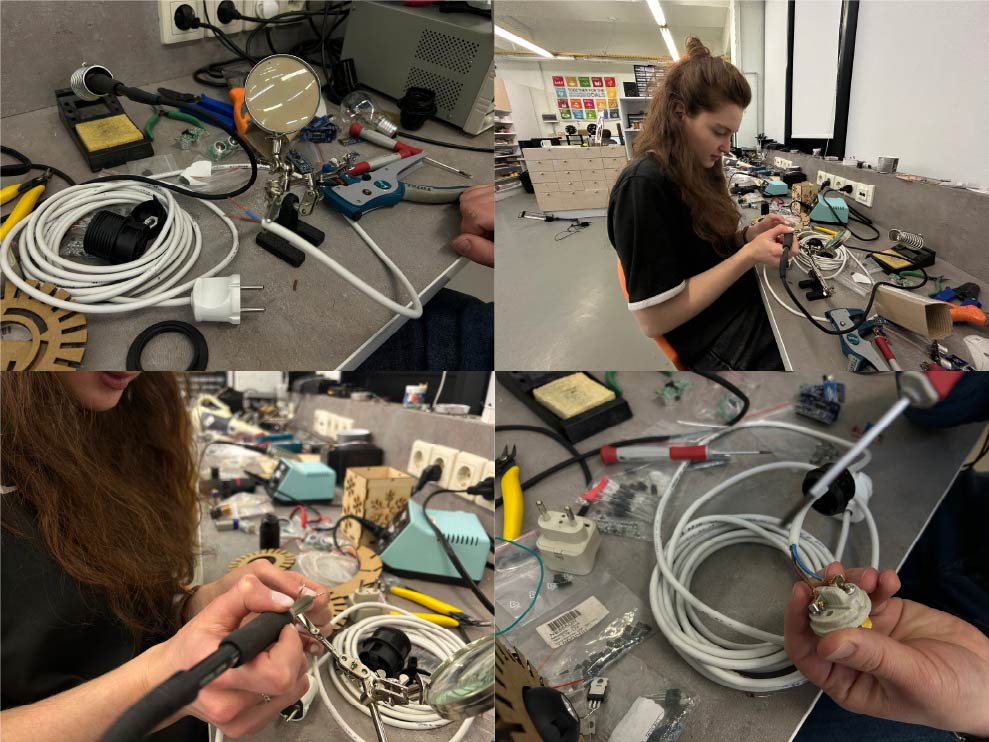
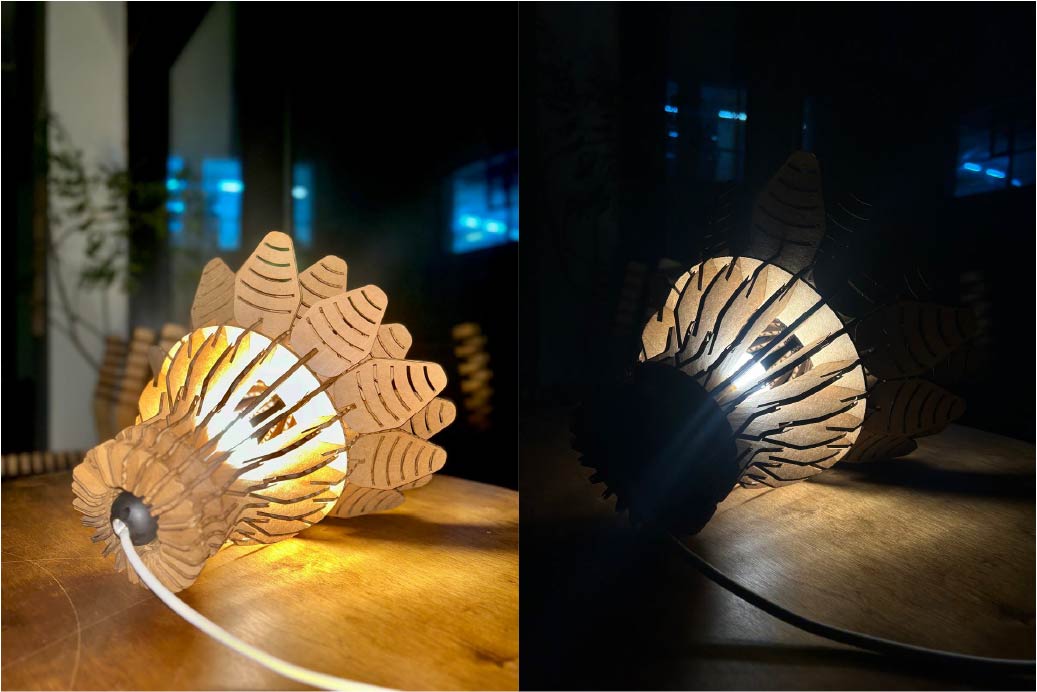
 For making my lamp’s light I used soldering (for the first time). I think I did a great job, cause it works at once.
Below you can see how I soldered and assembled it!
For making my lamp’s light I used soldering (for the first time). I think I did a great job, cause it works at once.
Below you can see how I soldered and assembled it!
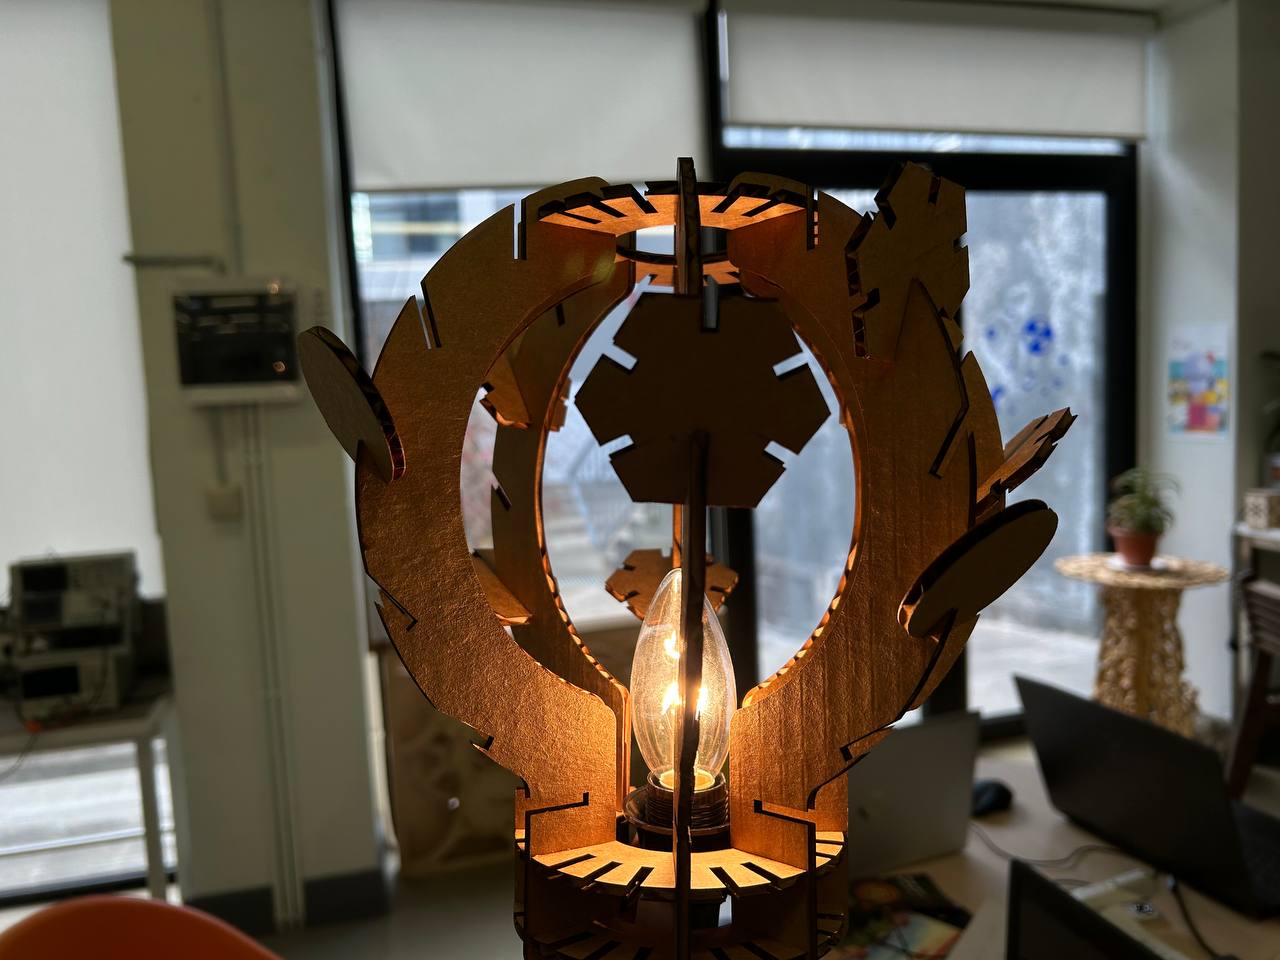 After I cutted all parts and assembled them. Also I changed my bulb to LED bulb, for cardboard not to get warm.
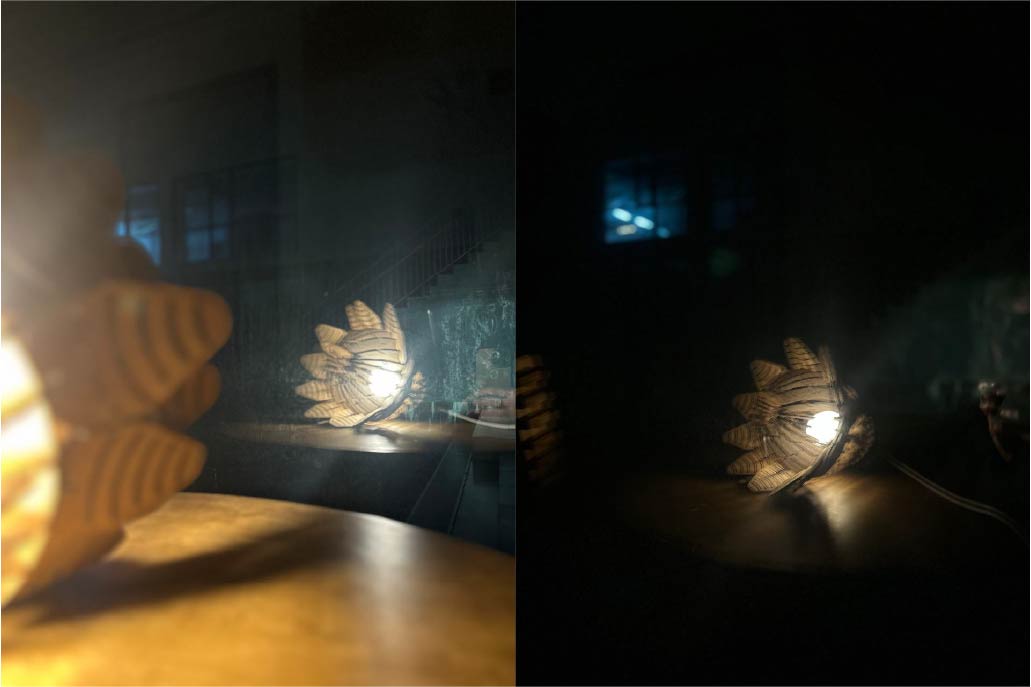
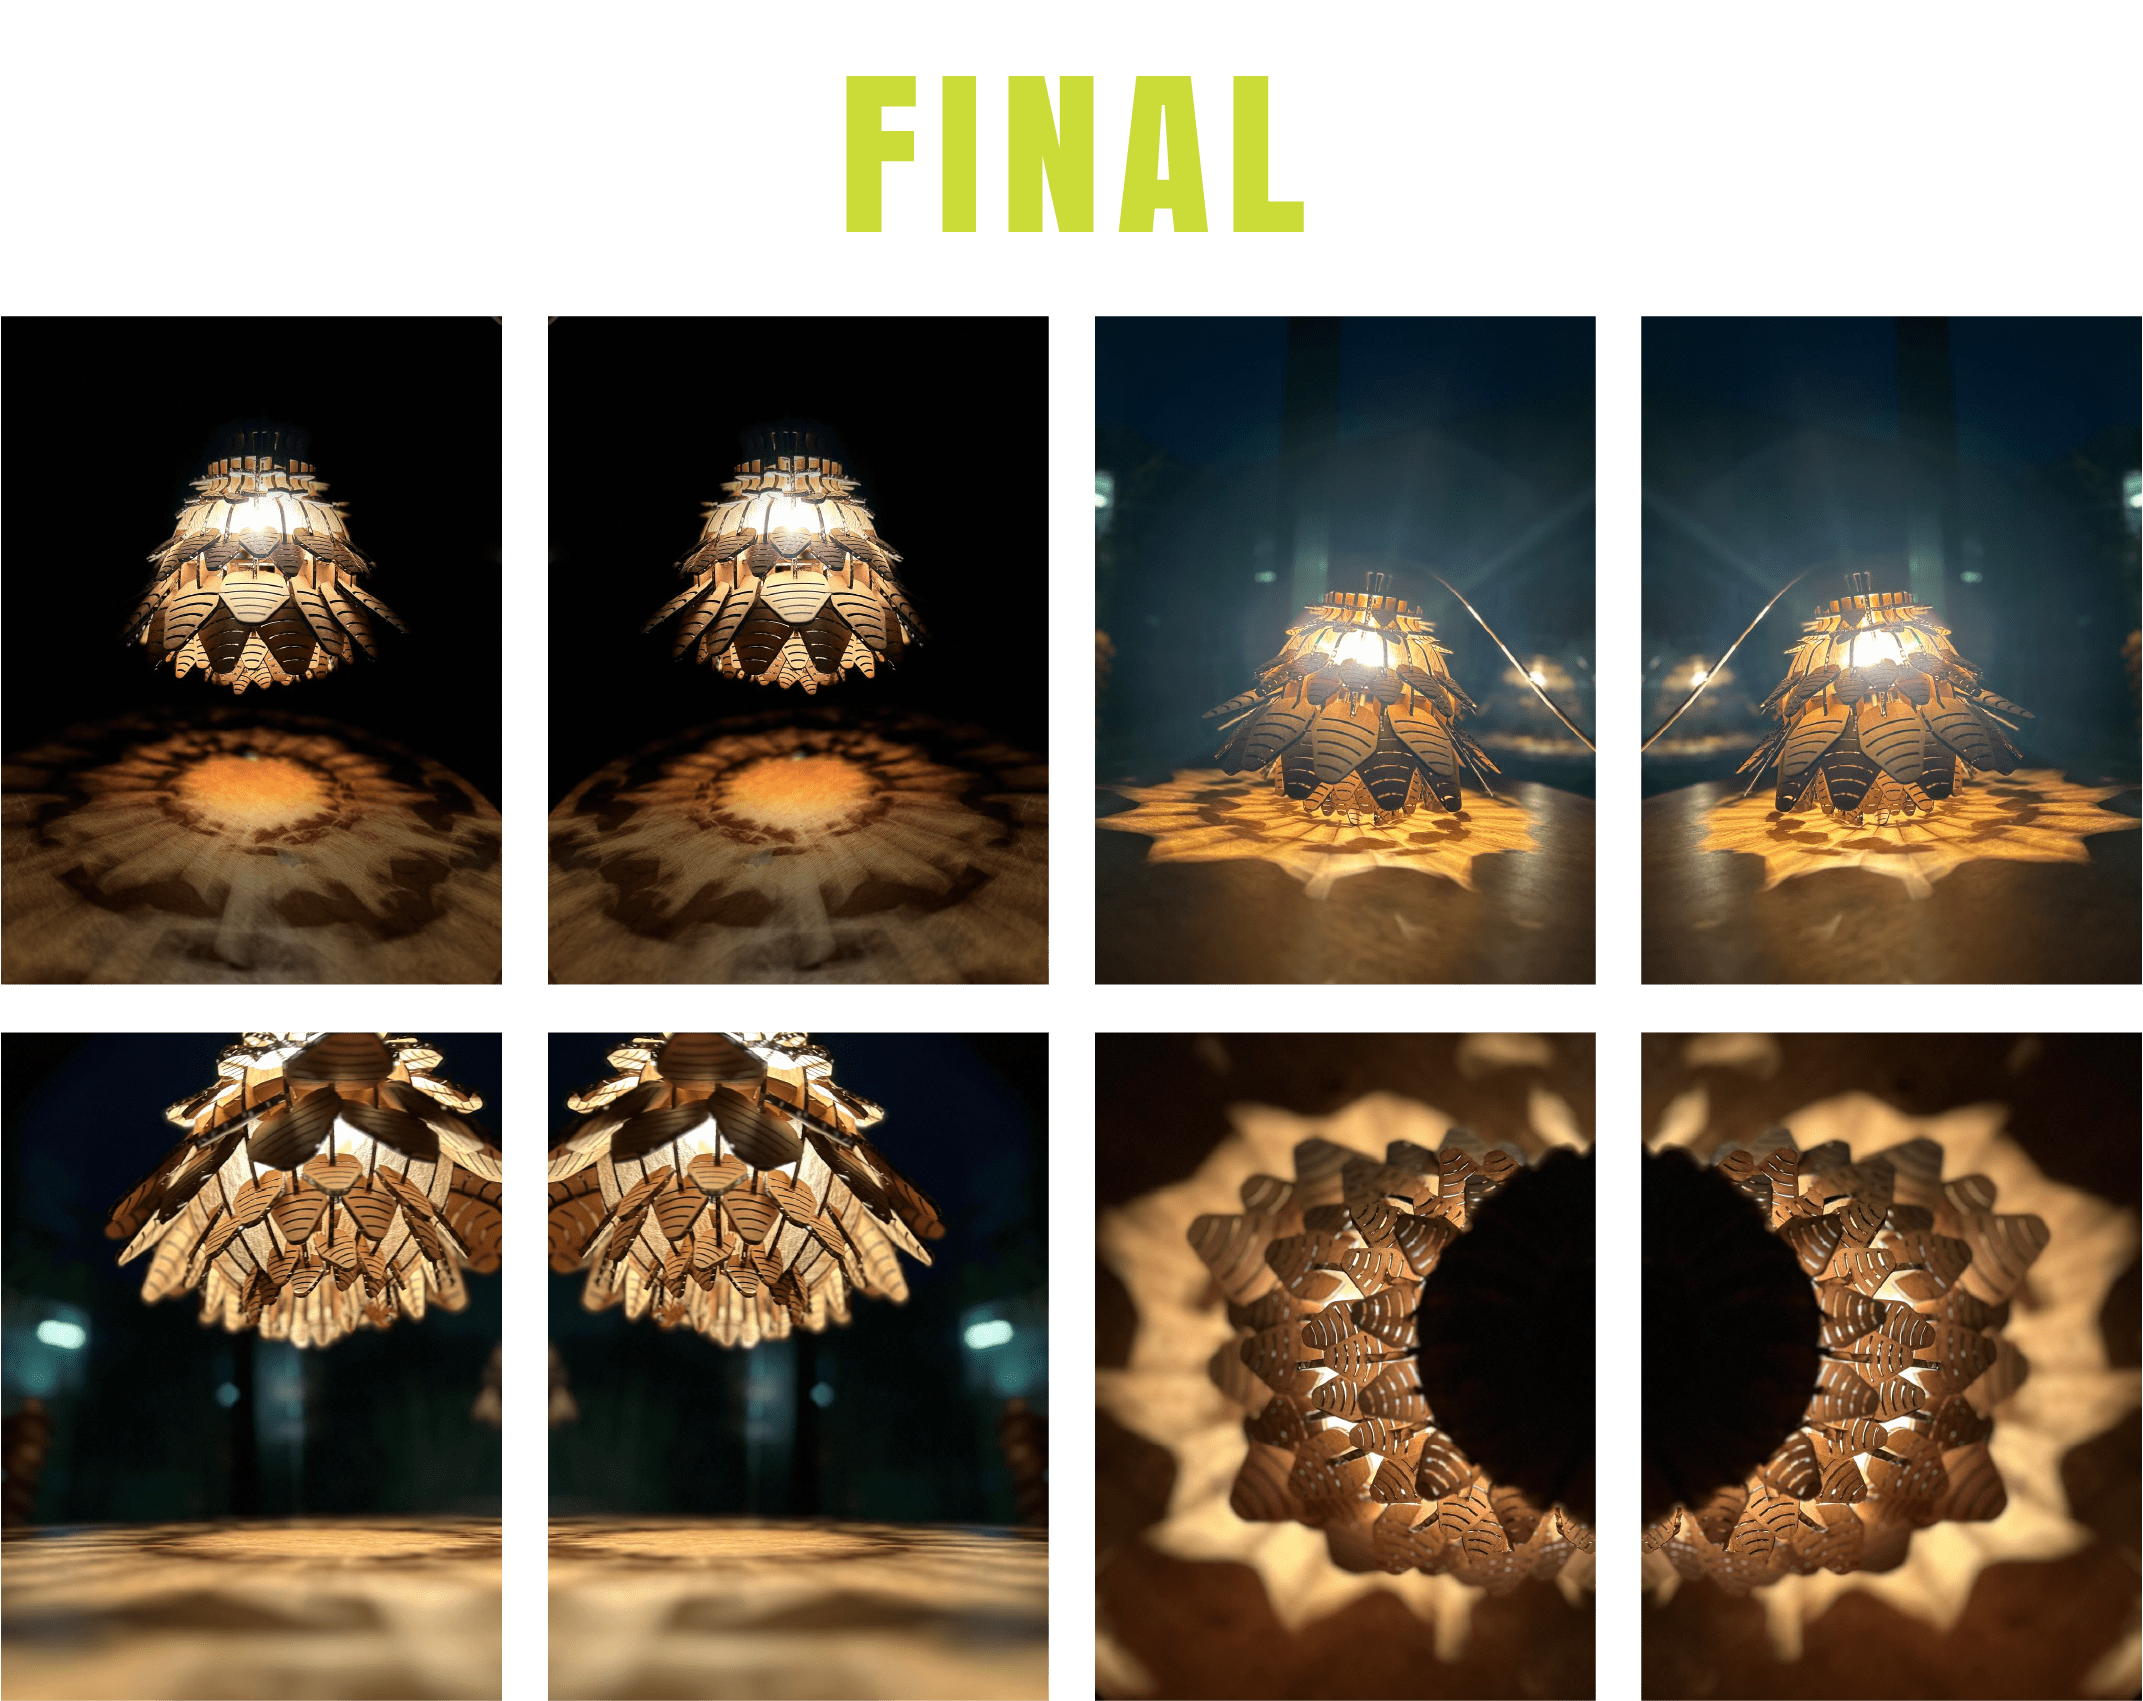
Chandelier
Conclusion
This week was very fascinating for me, cause I learned and tried machines that I never used before.
I’ve got acquainted with vinyl cutter, and was very easy to work with it. By trying to cut some sticker I got used to the machine and after started to help other people to use it. Also textile stickers that I made loved by many friends of mine :).
Also I learned about types of cutting machines - diode based, working with CO2 and etc. And also I tried using them. It was nice to have a such an experience and to cut my chandelier prototype by myself. I enjoyed the process!
This week one of the interesting things that I tried, was using parametric design to make a chandelier 3D model. It was challenging to me for the first time, but after I got used to it and enjoyed the process.
This week there were no assignment to try soldering, but as I needed it for my chandelier I tried it too. I asked one of my instructors to teach me how to use it, and all worked well!
Got a chandelier from cardboard!
Files
Vinyl Cutter
Laser Cutter