Final Project
![]()
Presentation Slide
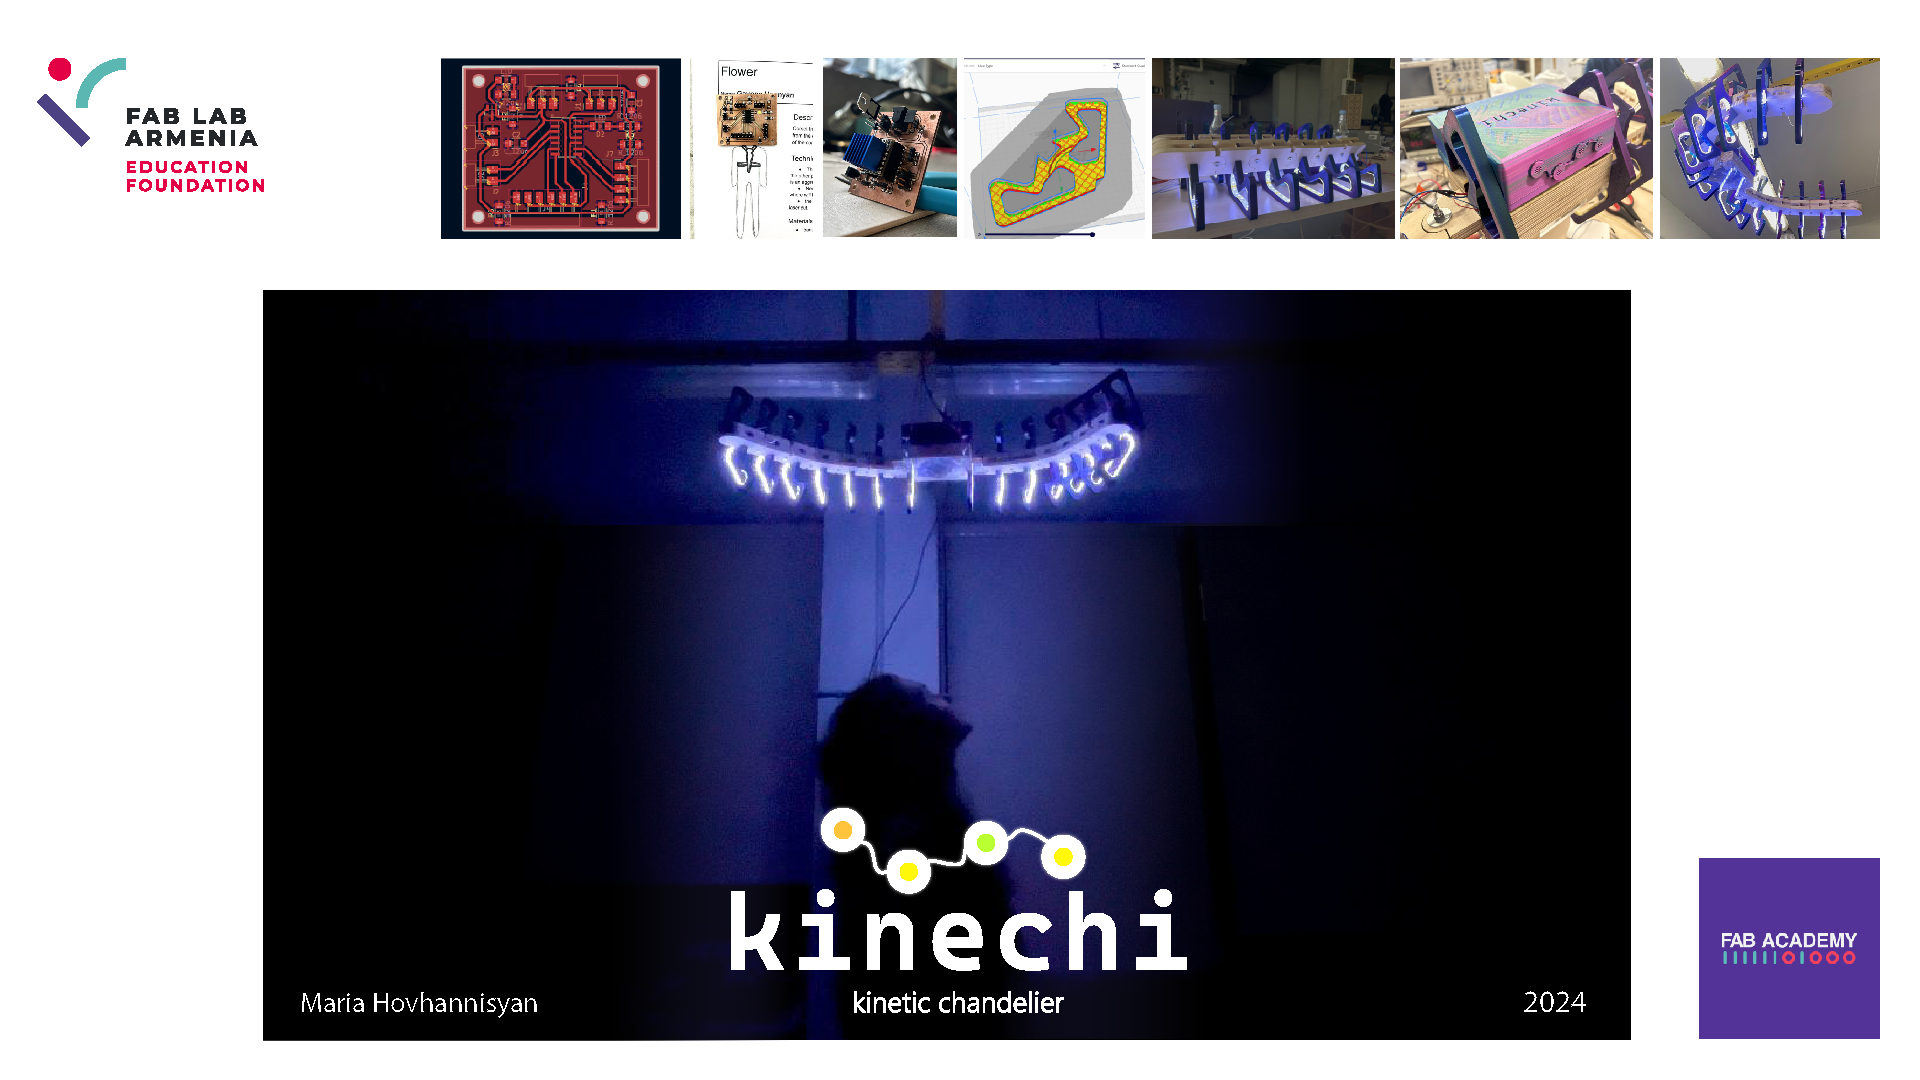
Presentation Video
References
Final Project plan and idea introduction
Kinetic Chandelier
I have an idea to make a kinetic chandelier, which will open and close its wings when detecting the motion.
Processes of working
| How it works |
|---|
| 1. Detecting the movement. |
| 2. When motion occurs, the sensor produces a positive or negative output signal. |
| 3. Sends a signal to the microcontroller, Stepper Motor starts working. |
| 4. The gears begin to rotate, gathering the thread around their axis. |
| 5. By gathering and stretching the thread, the modules bend and move closer together. |
| 6. As soon as the work stops, the rubbers pull the modules back to their original (straight) position. |
Starting working on Final Project
Sketching the idea:
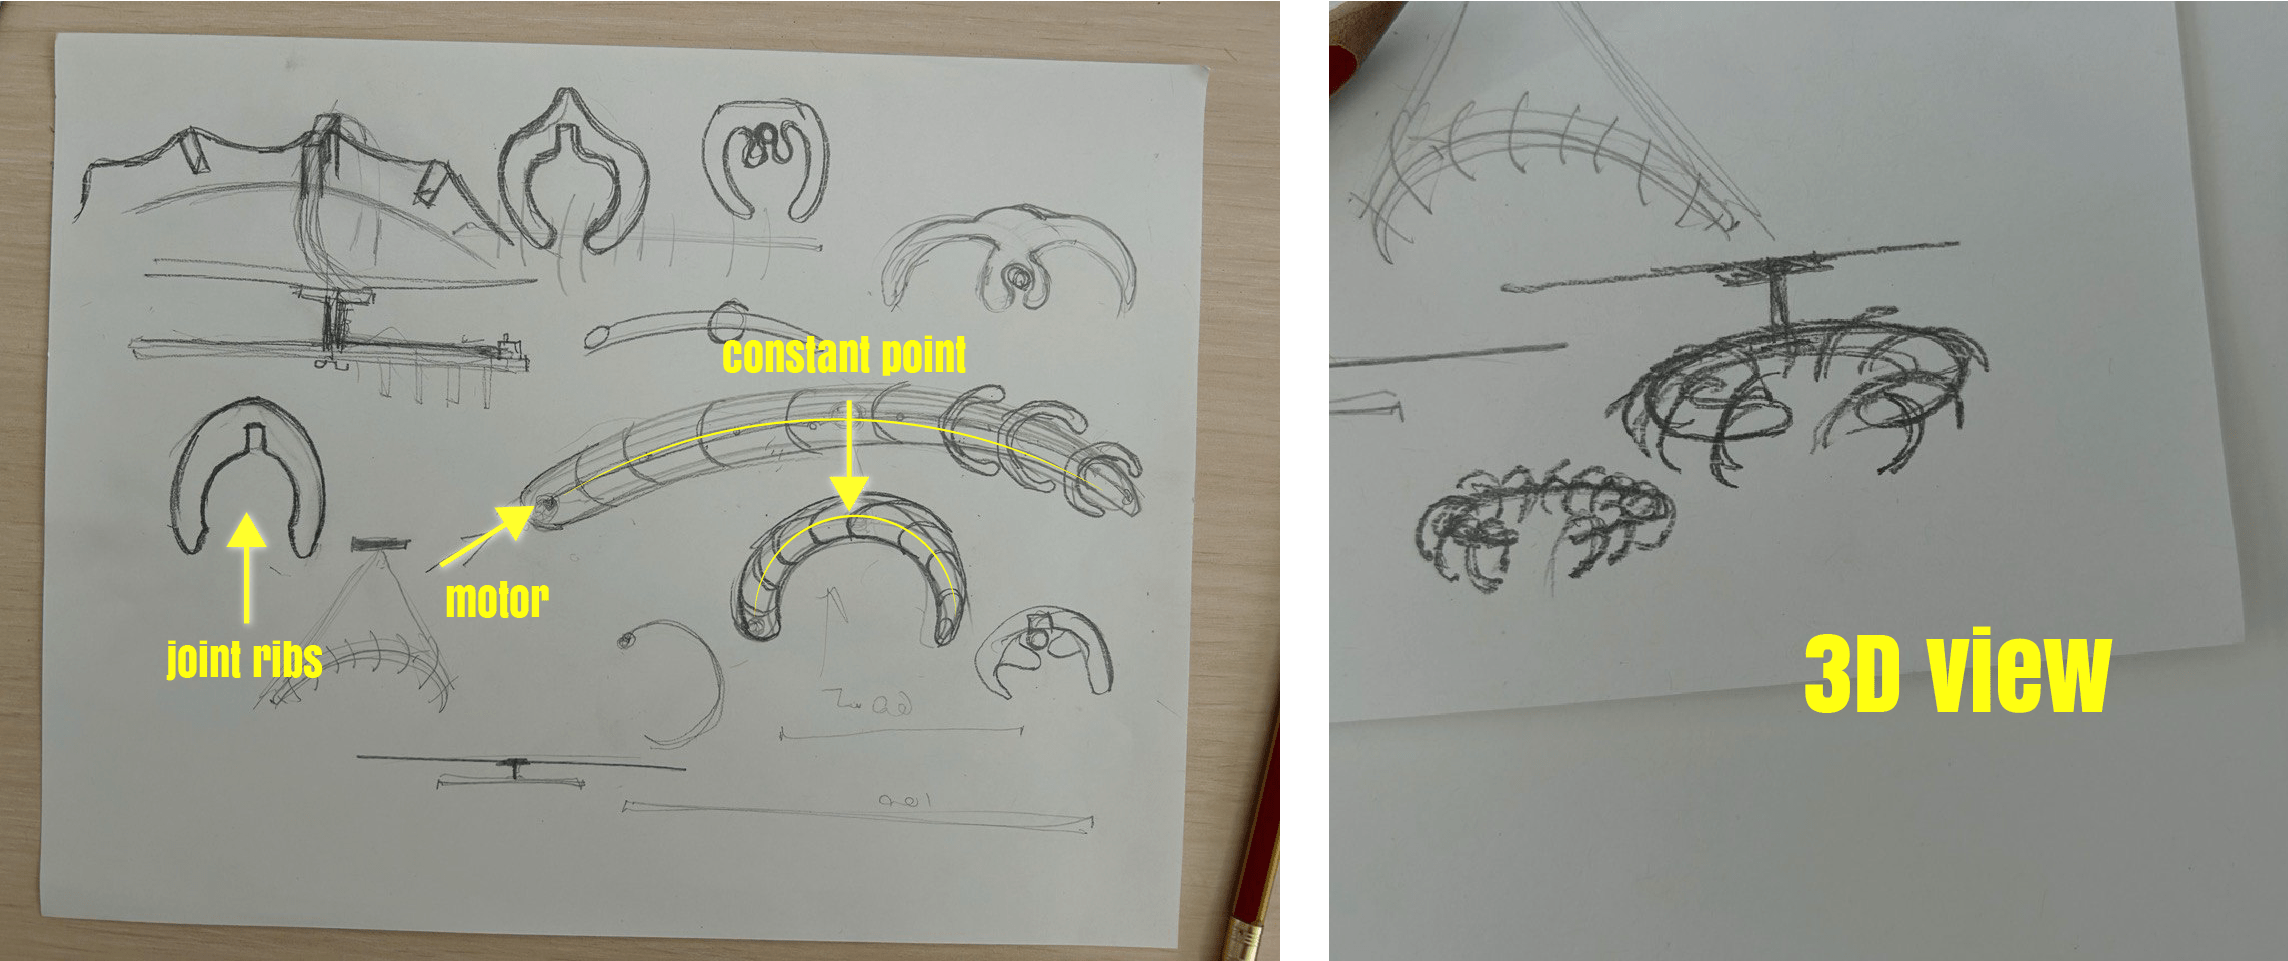
Mechanism that I will use in future:
- 1
I would like to think of such a mechanism, the wing of the chandelier will bend - close and open again.
It will bend when some force is applied, and due to the reverse resistance, in this case elastic band, it will open back.
- 2
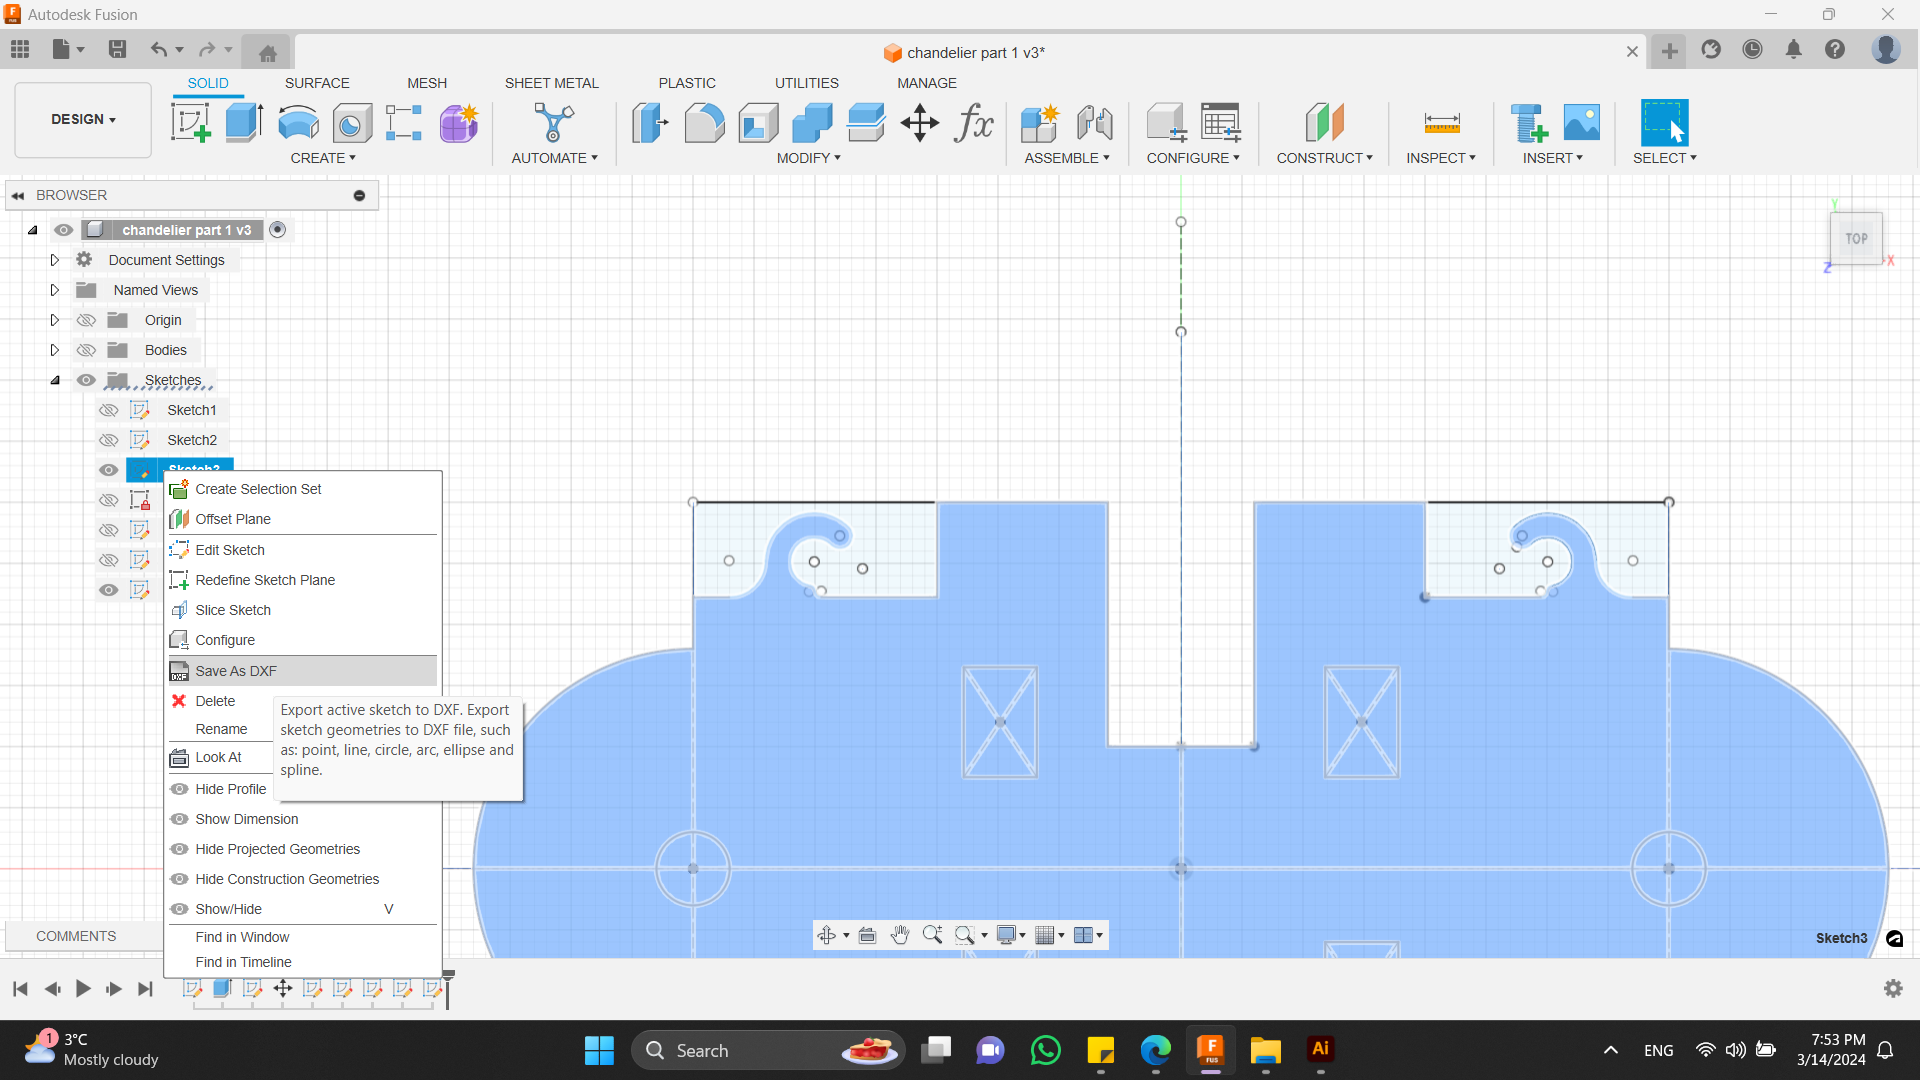
Parametric modeling
Modules
Started with designing 2D drawing of chandelier parts, I designed in 1 side, and after mirrored it to another side.
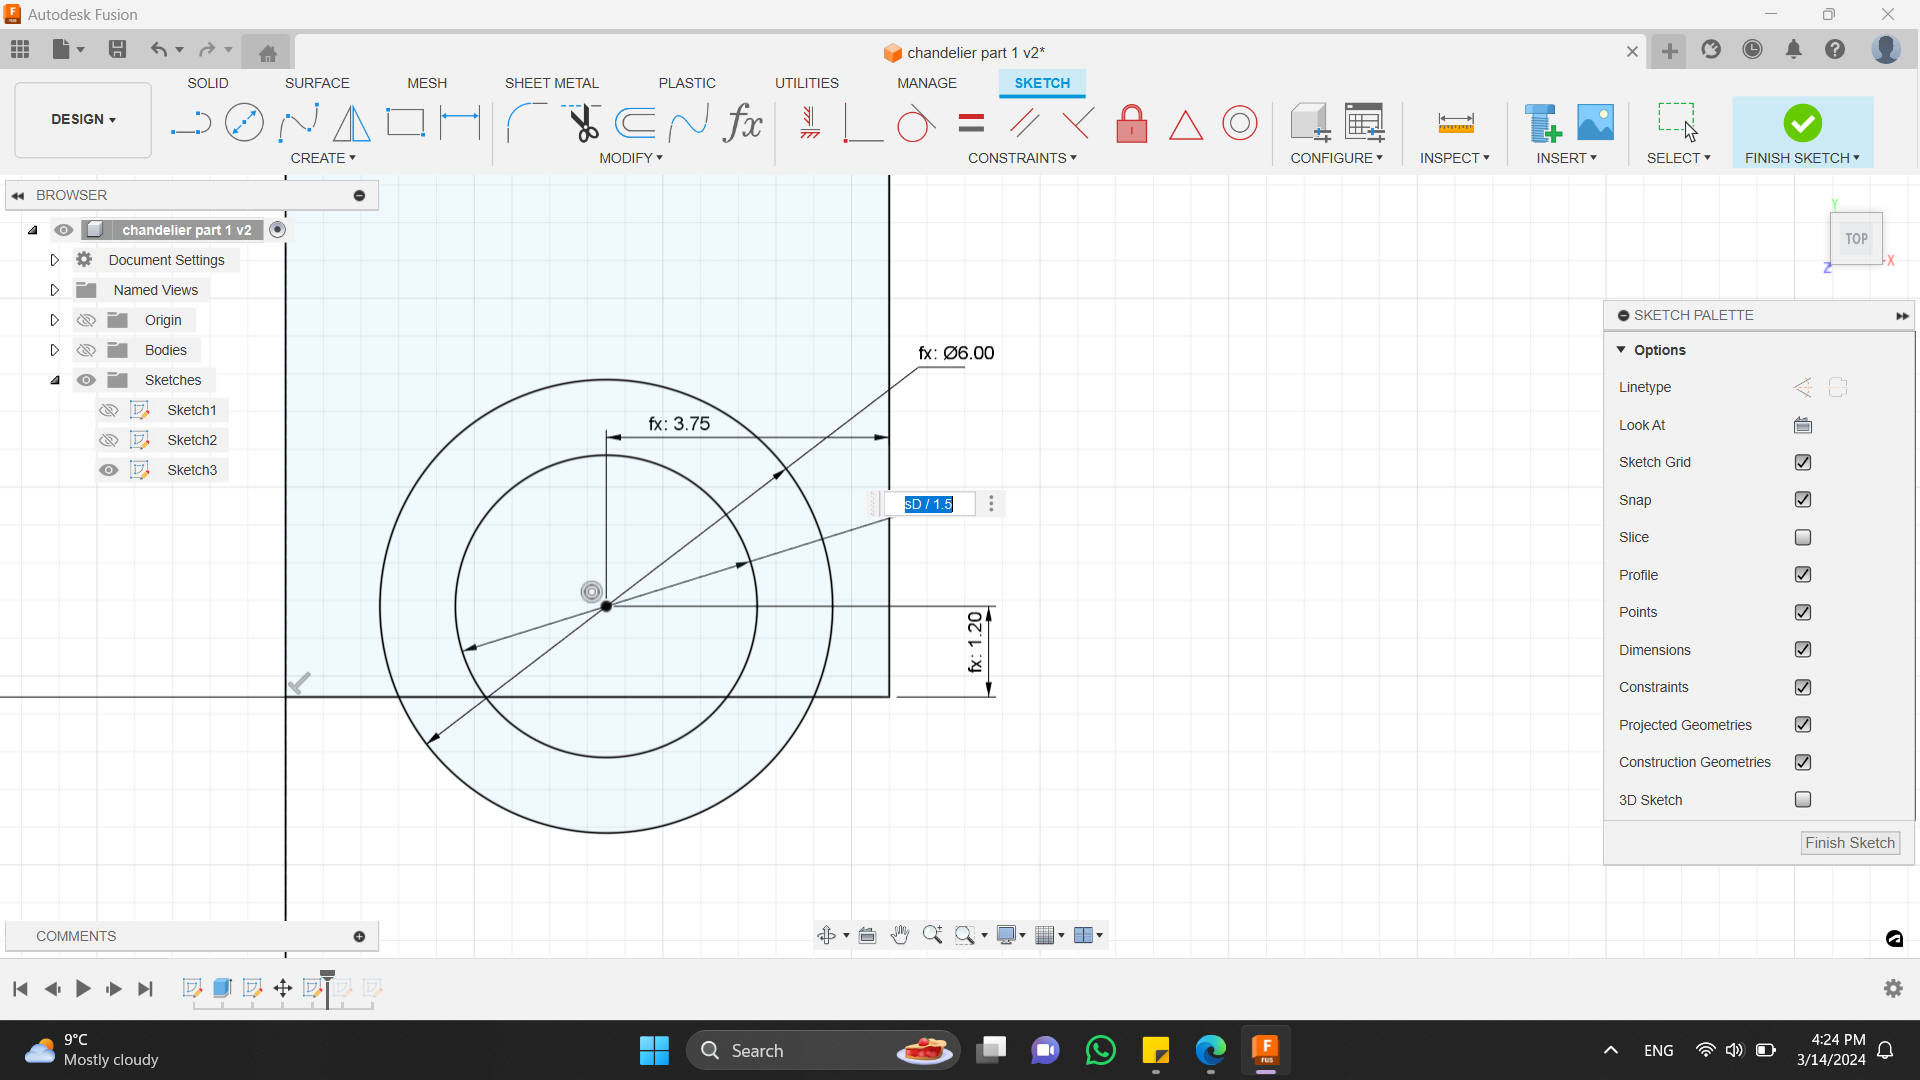
I fixed and defined all lines. And mirrored it.

In this photo below you can see hooks, which are for elastic bands. I did them in the same line with model, so that it will not be visible. Every module is from 3 layers. This part is in the middle layer. It’s not visible from top and bottom.
After modeling these parts, I started cutting them with CNC Milling Machine.
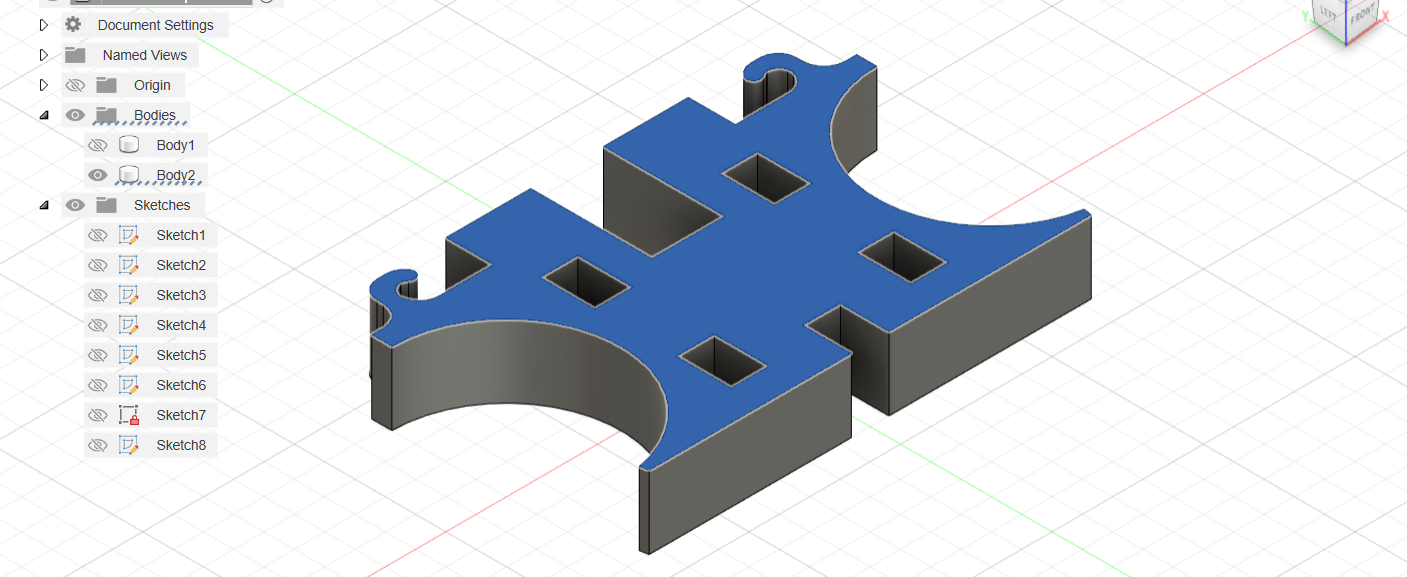
But besides that I also modeled other parts of my project.
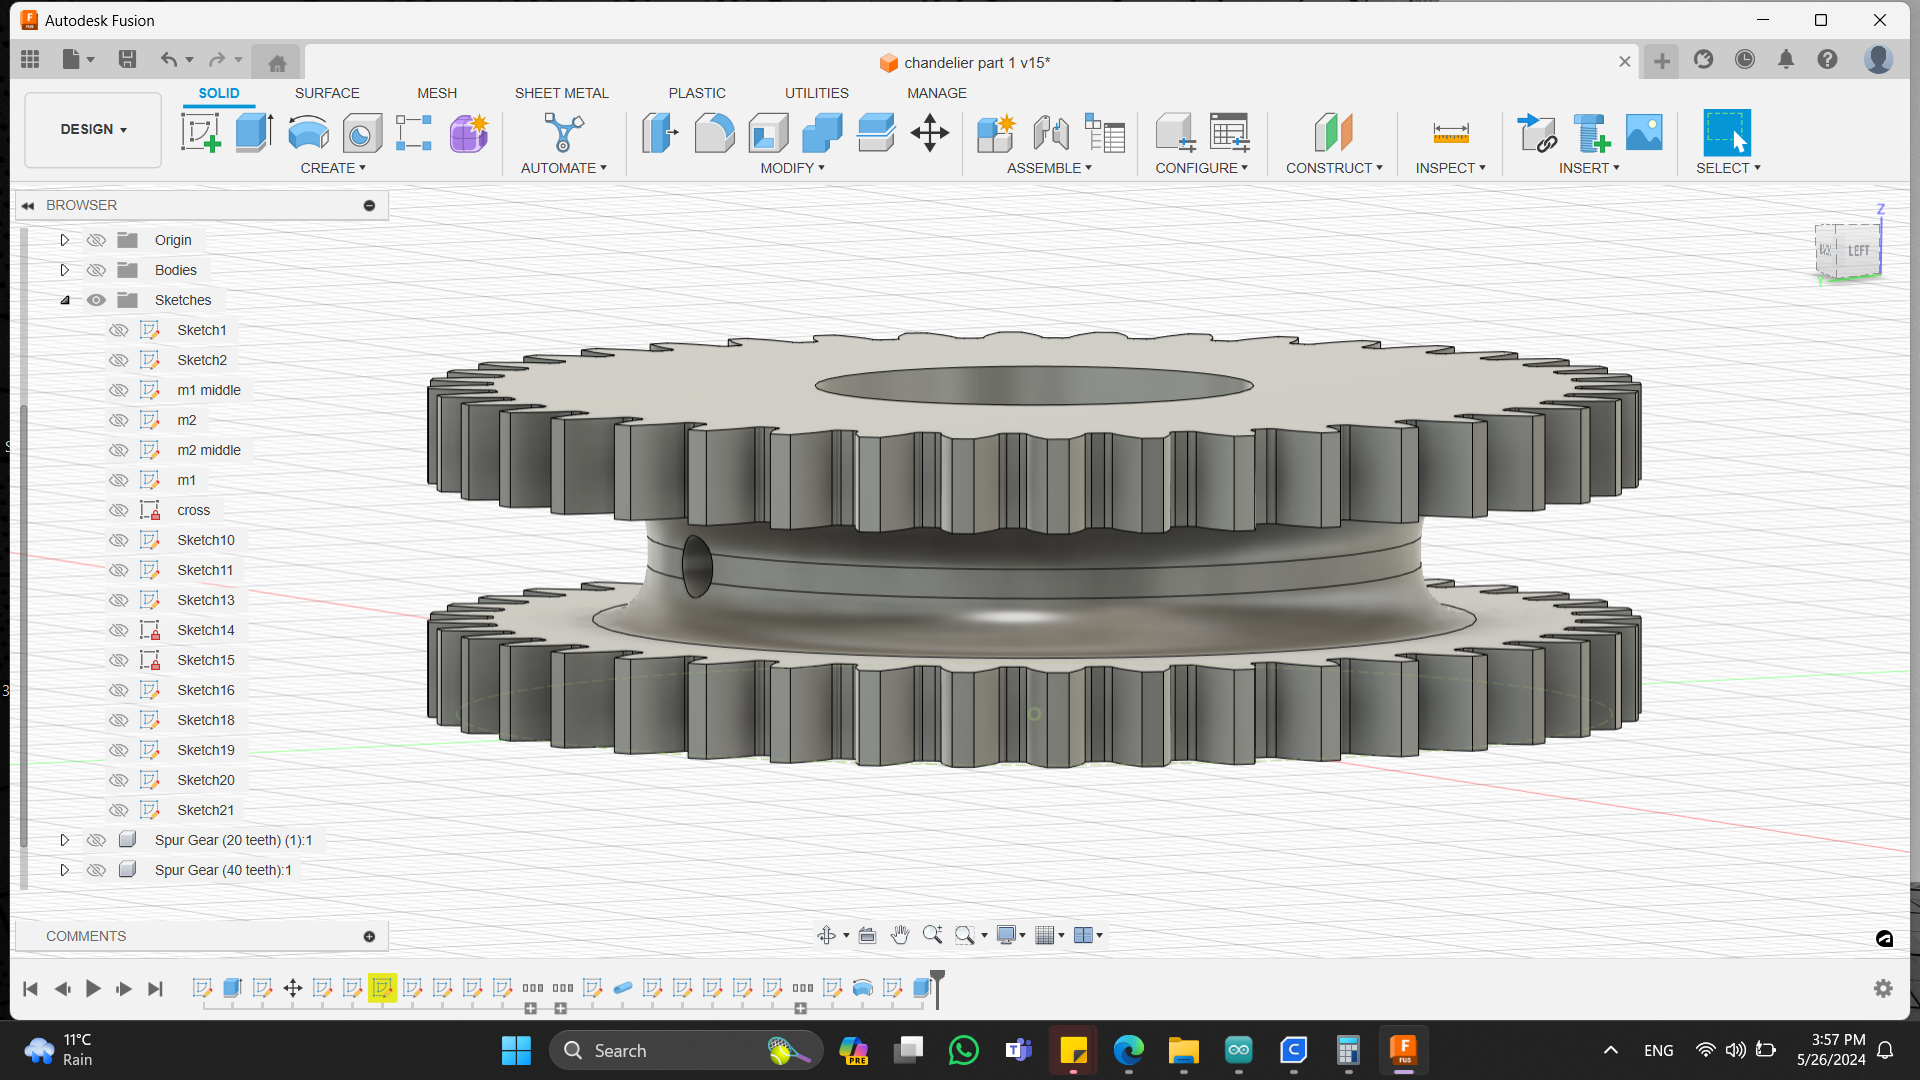
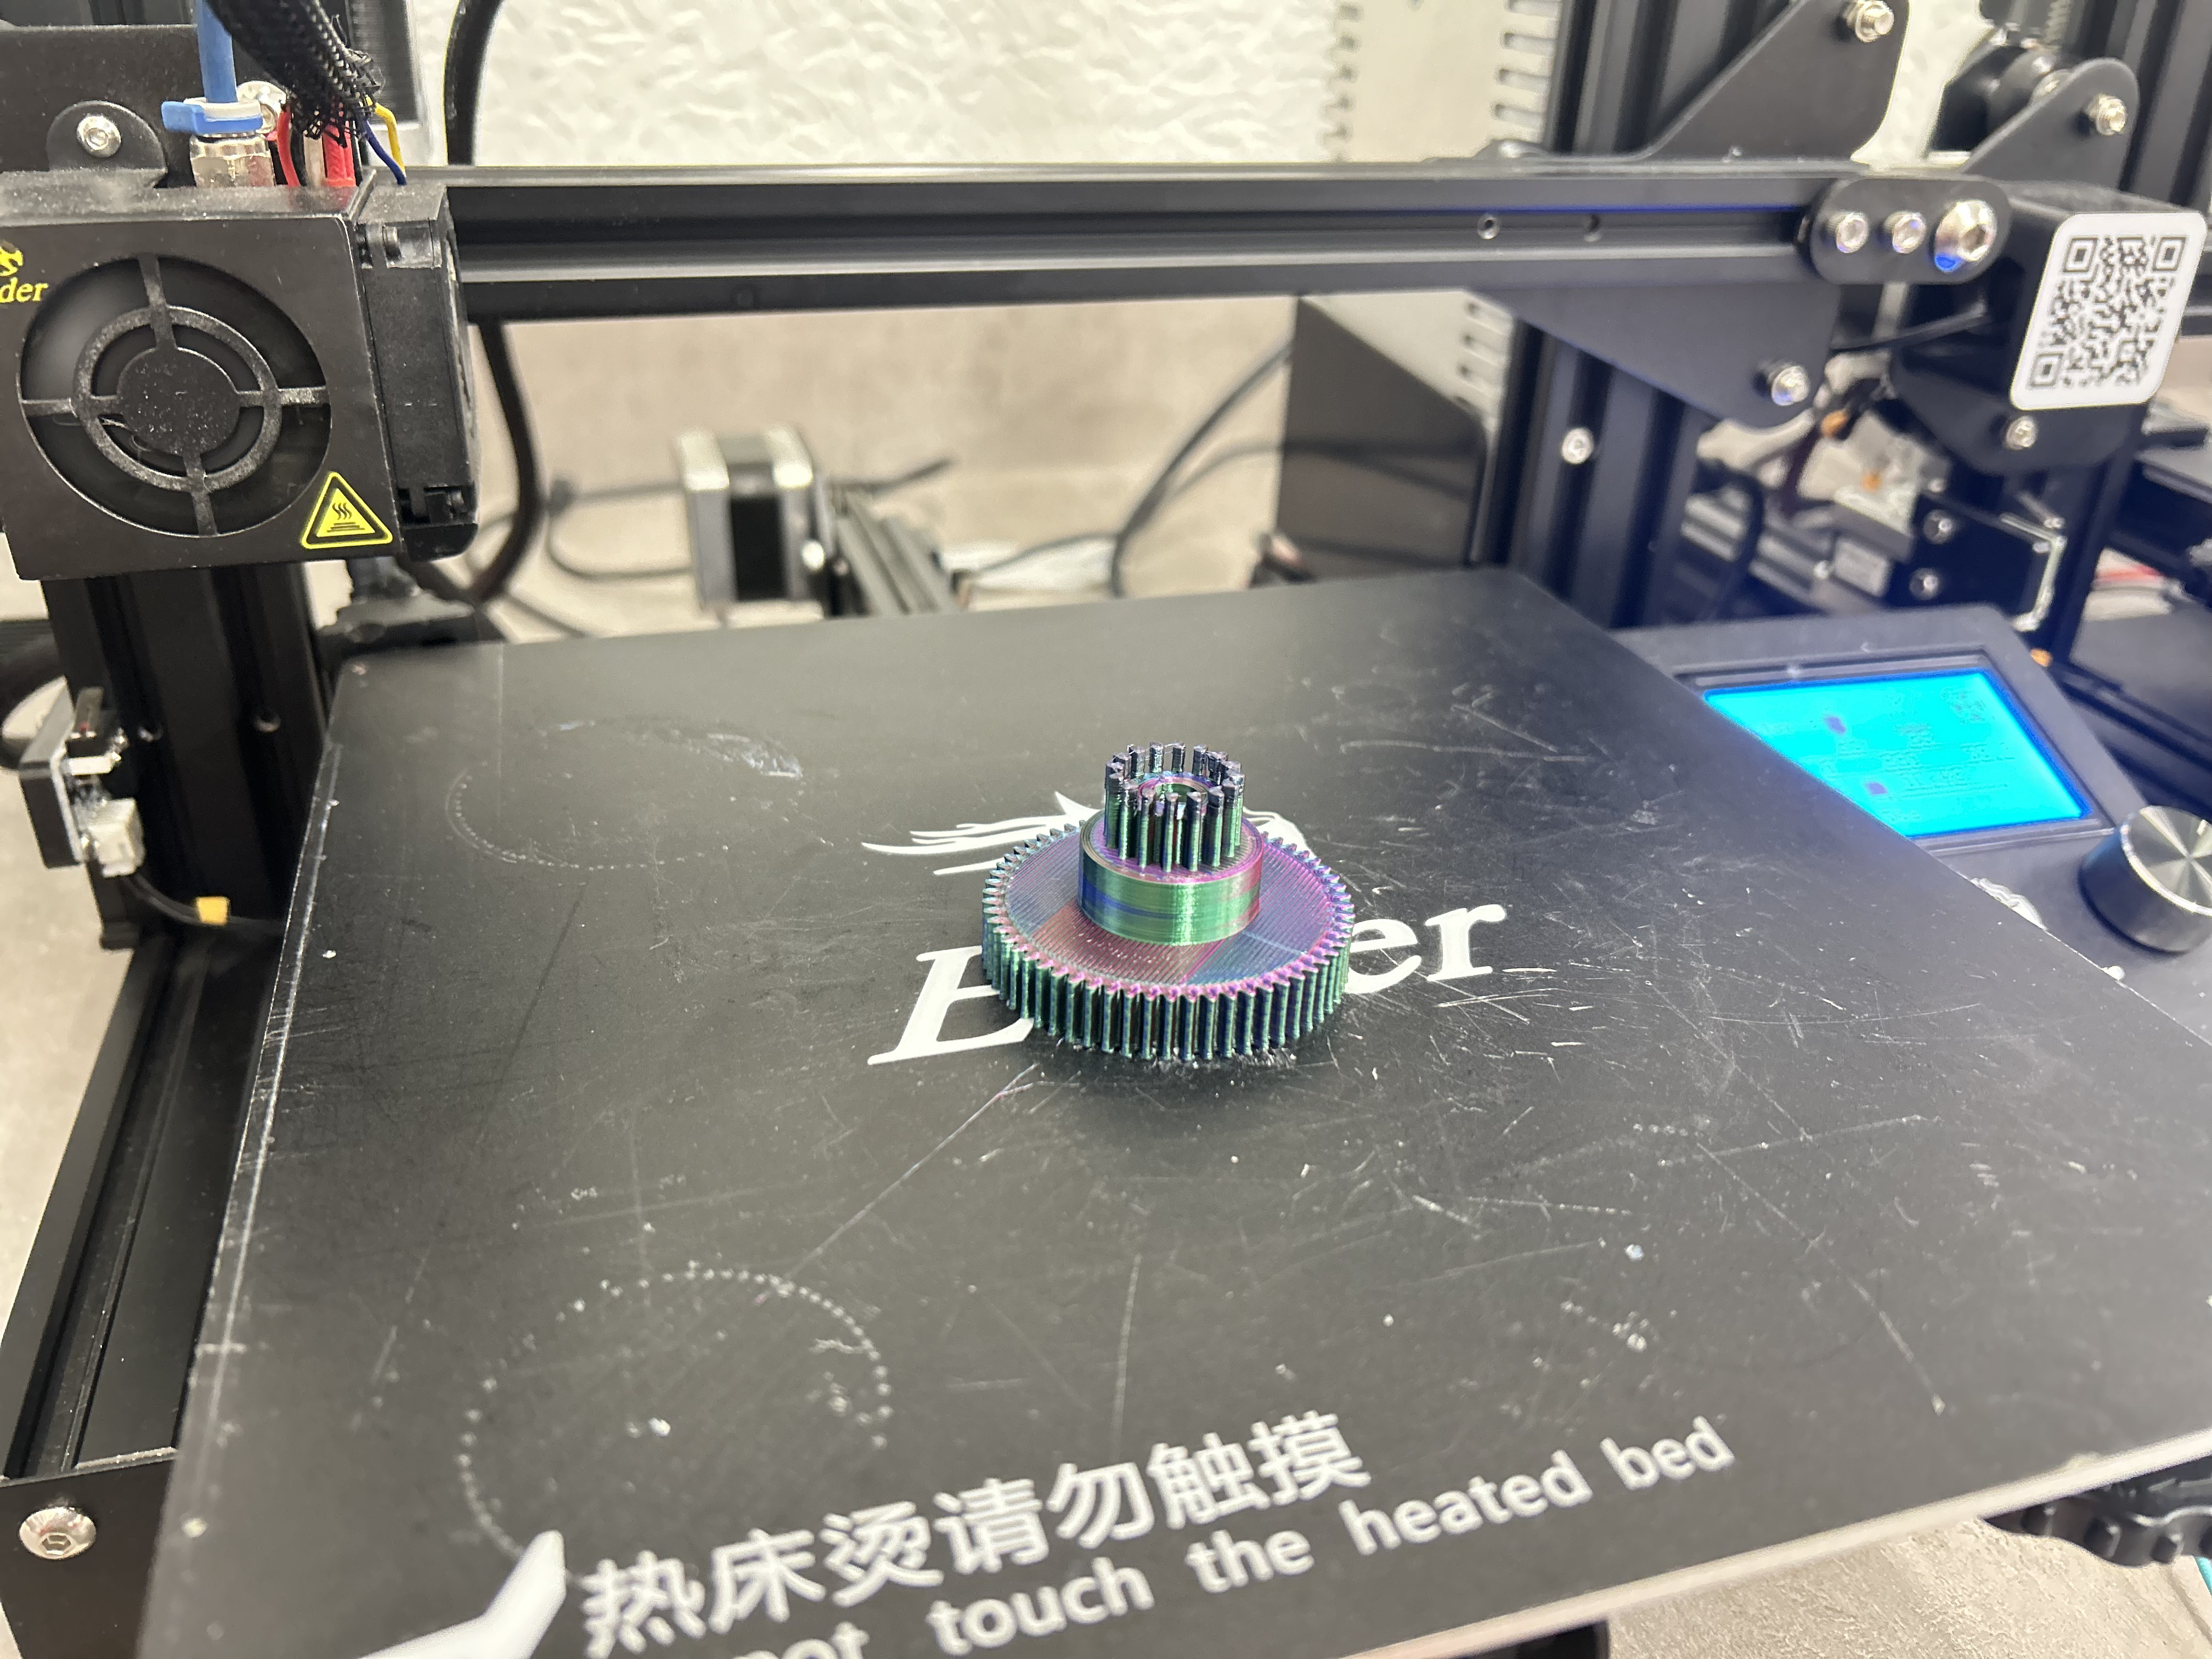
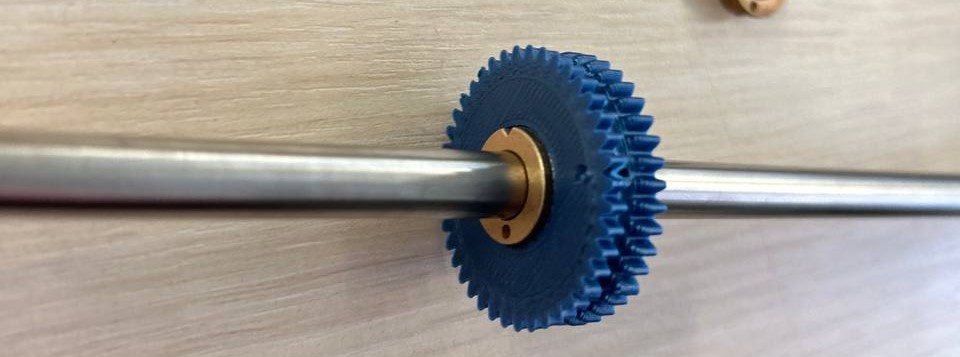
Gears
For modeling gears I used a great feature in Fusion 360.
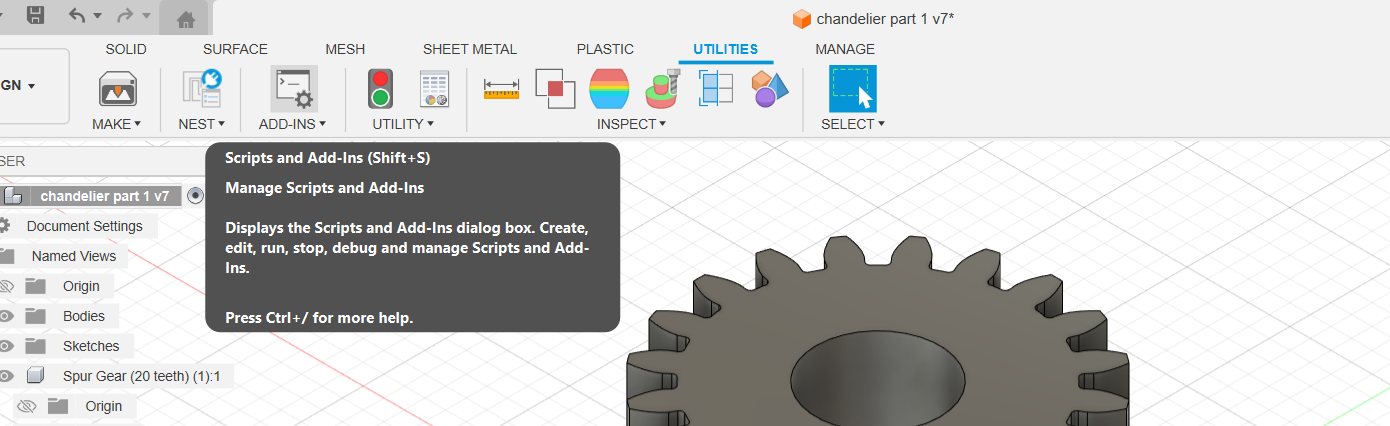
By going to section ADD-INS there are ready properties by which you can make your wanted gear by choosing teeth number, pitch and etc.

So in my photo you can see what parameters I chose.
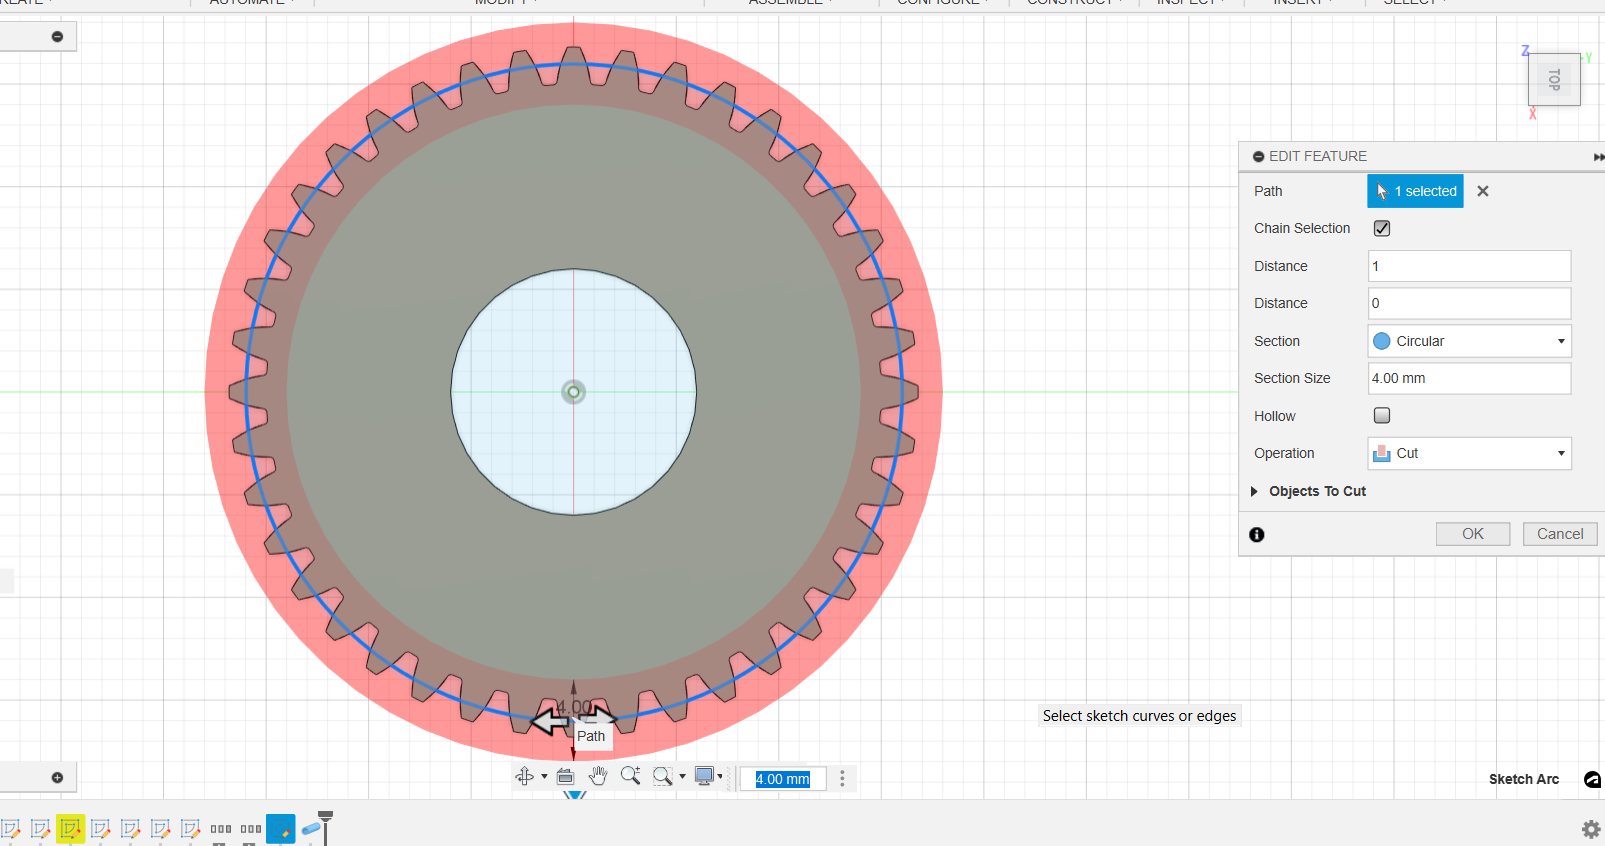
After that I removed a clear part from the gear so that I could put the thread through and the thread would be pulled on and gathered right on the gear.
And you can see a small hole, That is for thread, to fix from inside.
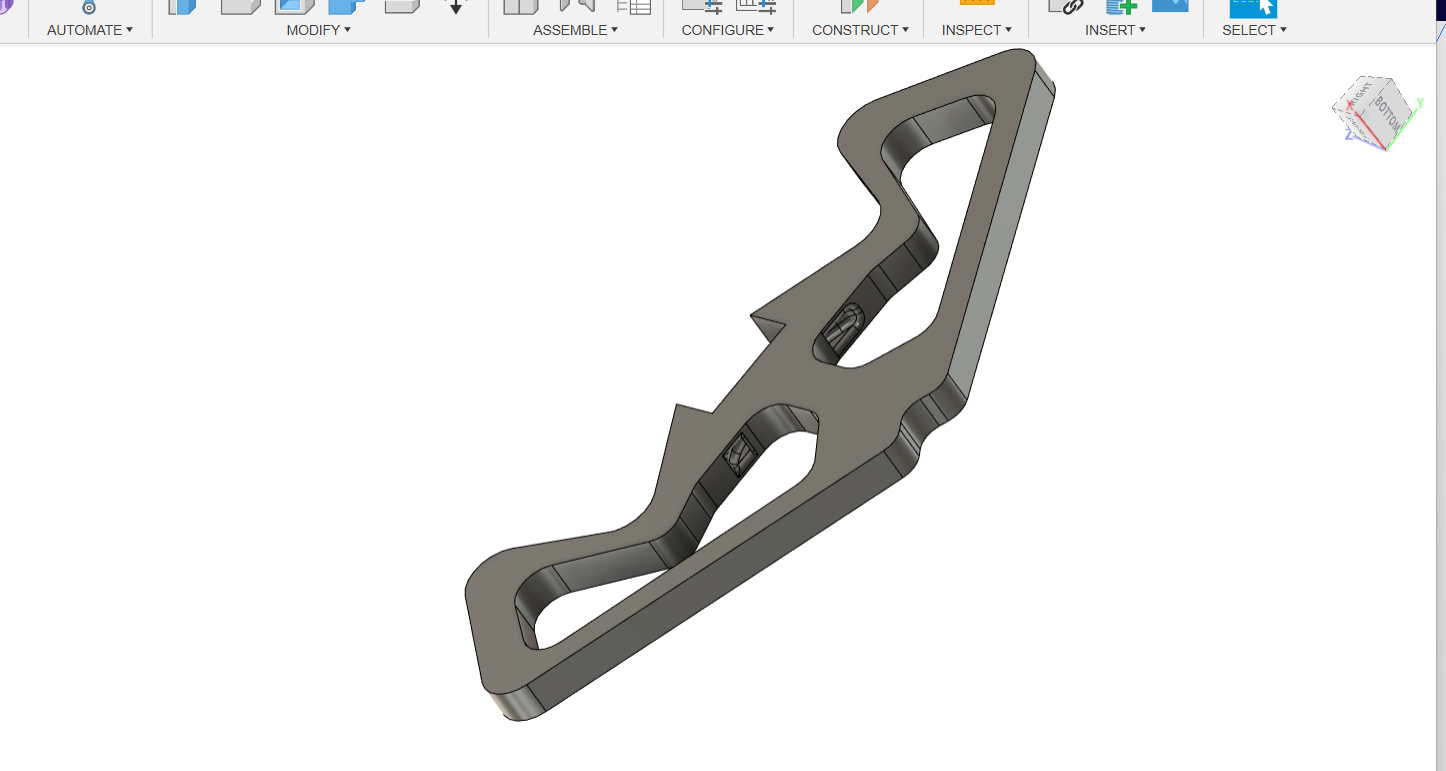
Wings
I had planned to cut the wings by CNC Machine, but unfortunantly CNC broke
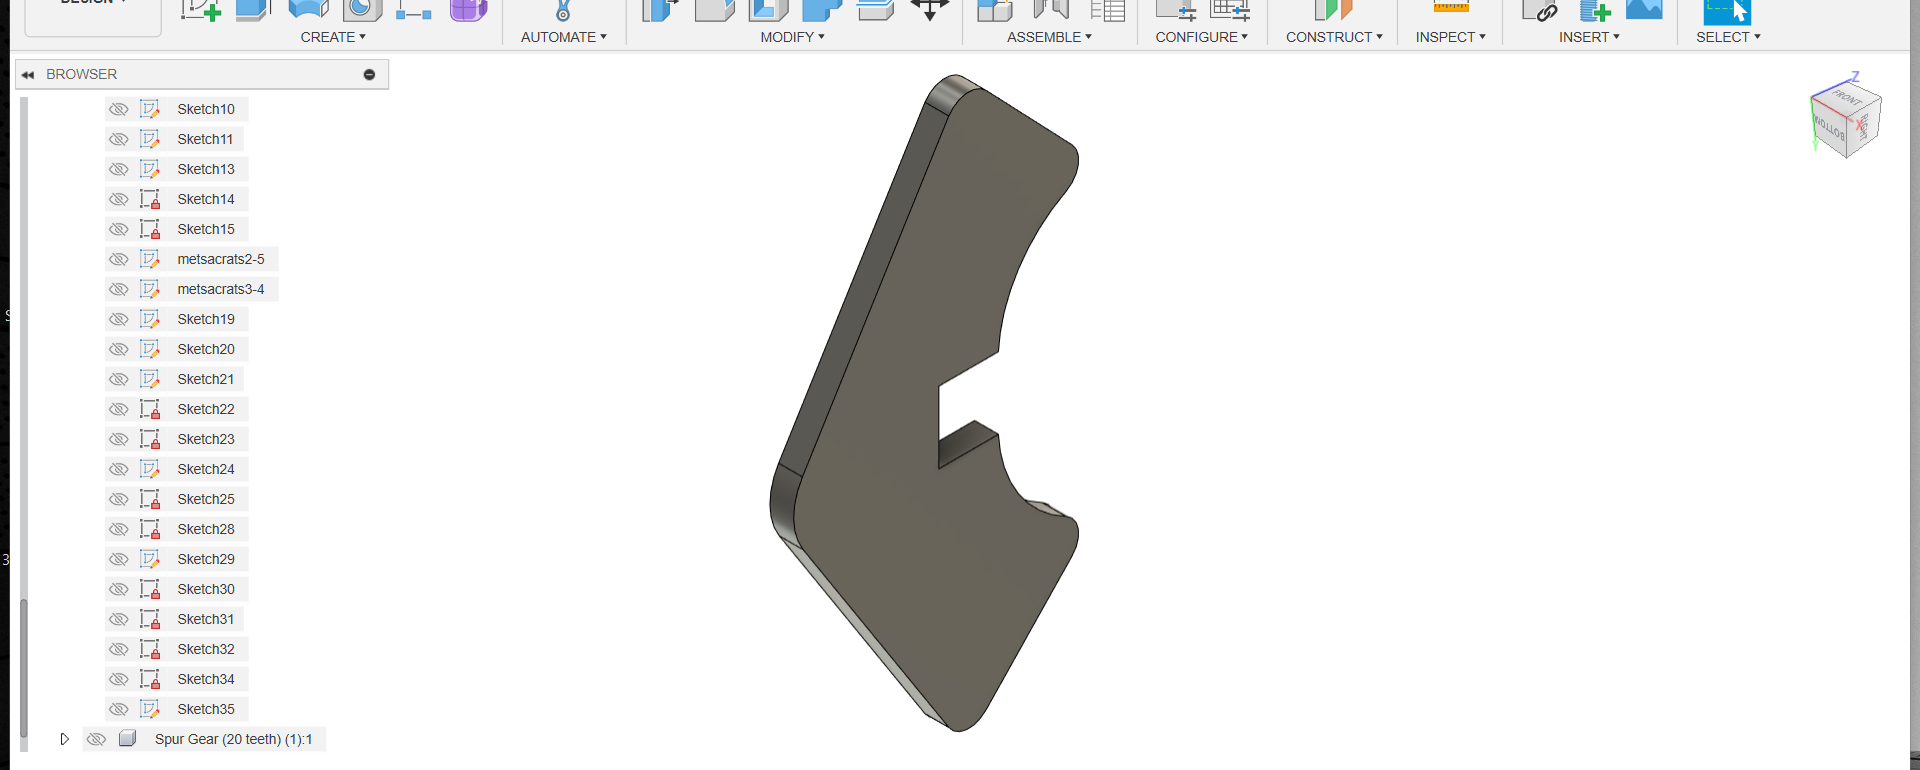
and as I didn’t have so much time, I tried to model something that I will be able to print by 3D printer.
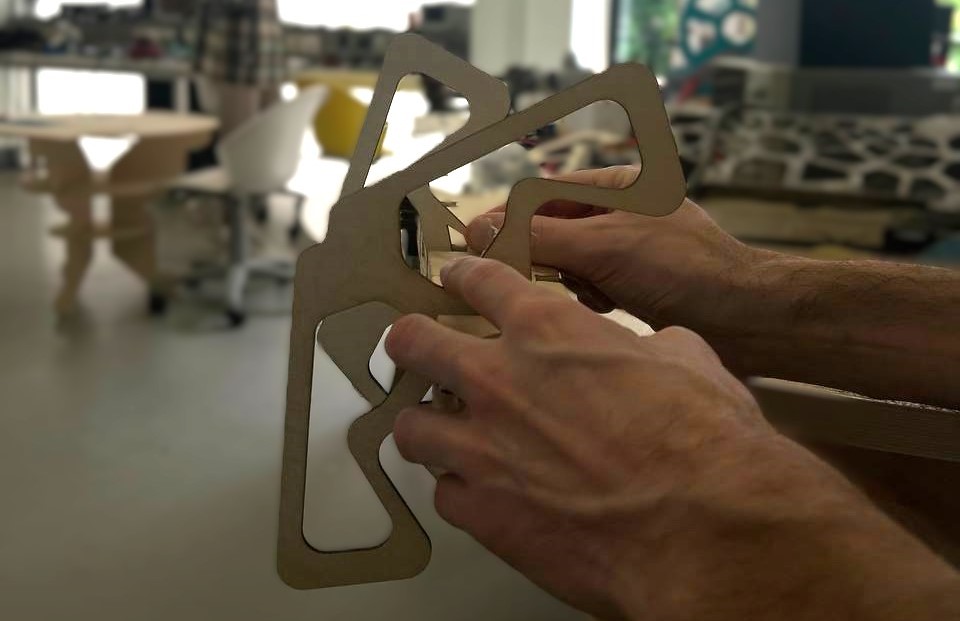
Before printing with the 3D printer, I quickly cut a few parts of my design with a laser cutter.
It also brought with it a great advantage. I had a new idea about switching on the lights.
As you can see on the modeled part, I made holes in the wings. I made it lighter. Therefore, less time will be spent to print each wing.
Along with that, the main idea was that I would place LEDs right in the wings.
But in addition, I also added a small vertical hole where the connecting LED light wires will go up to the top of the chandelier and not be seen.
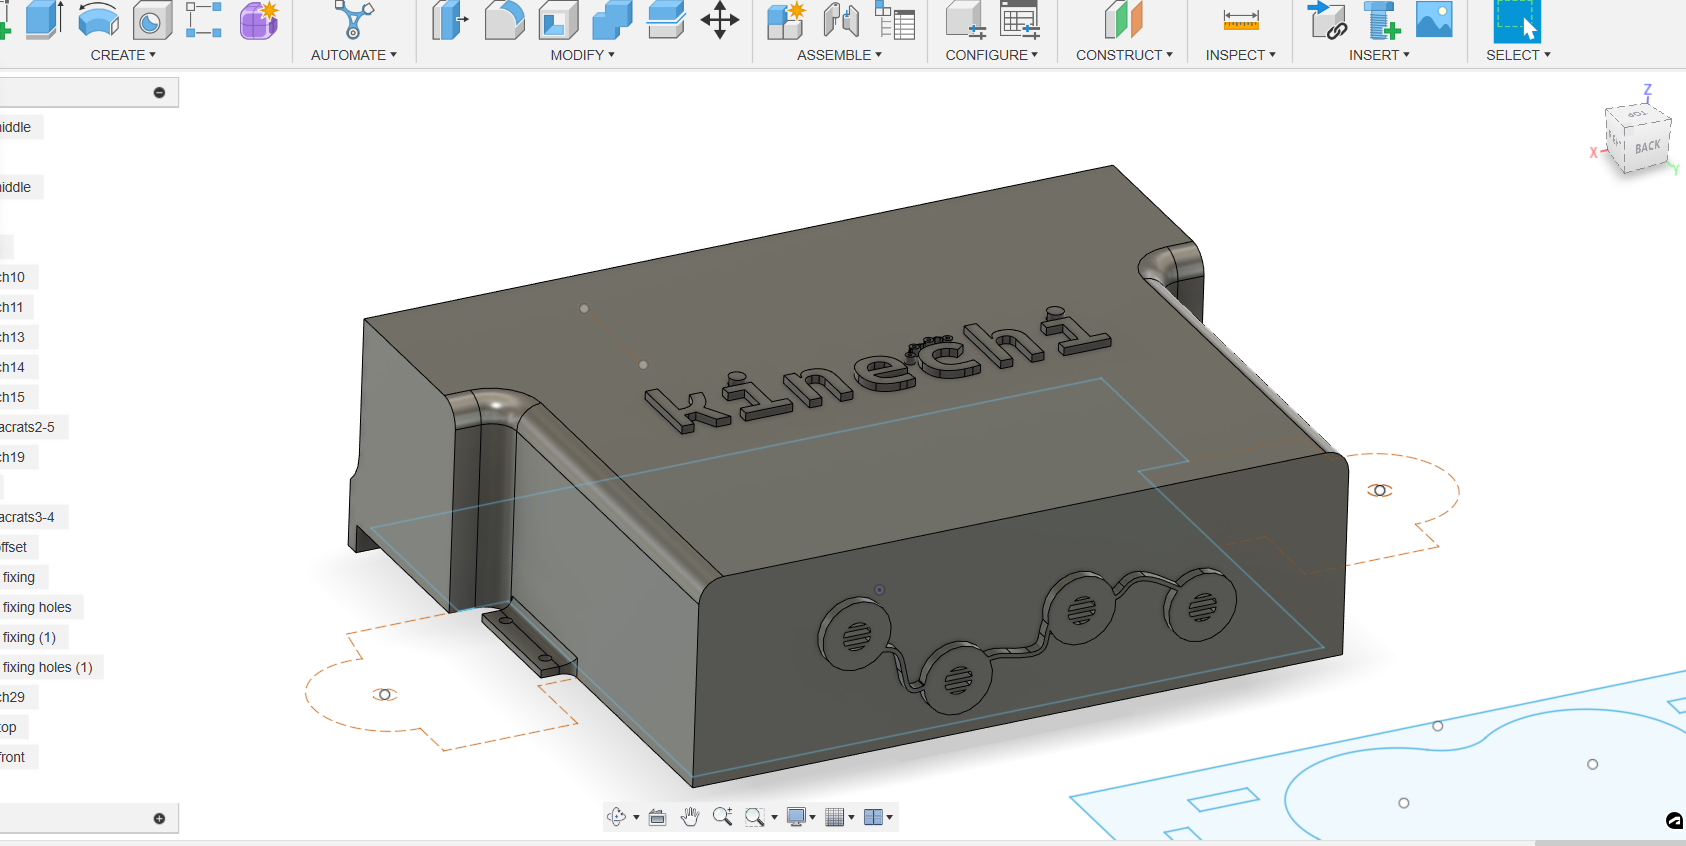
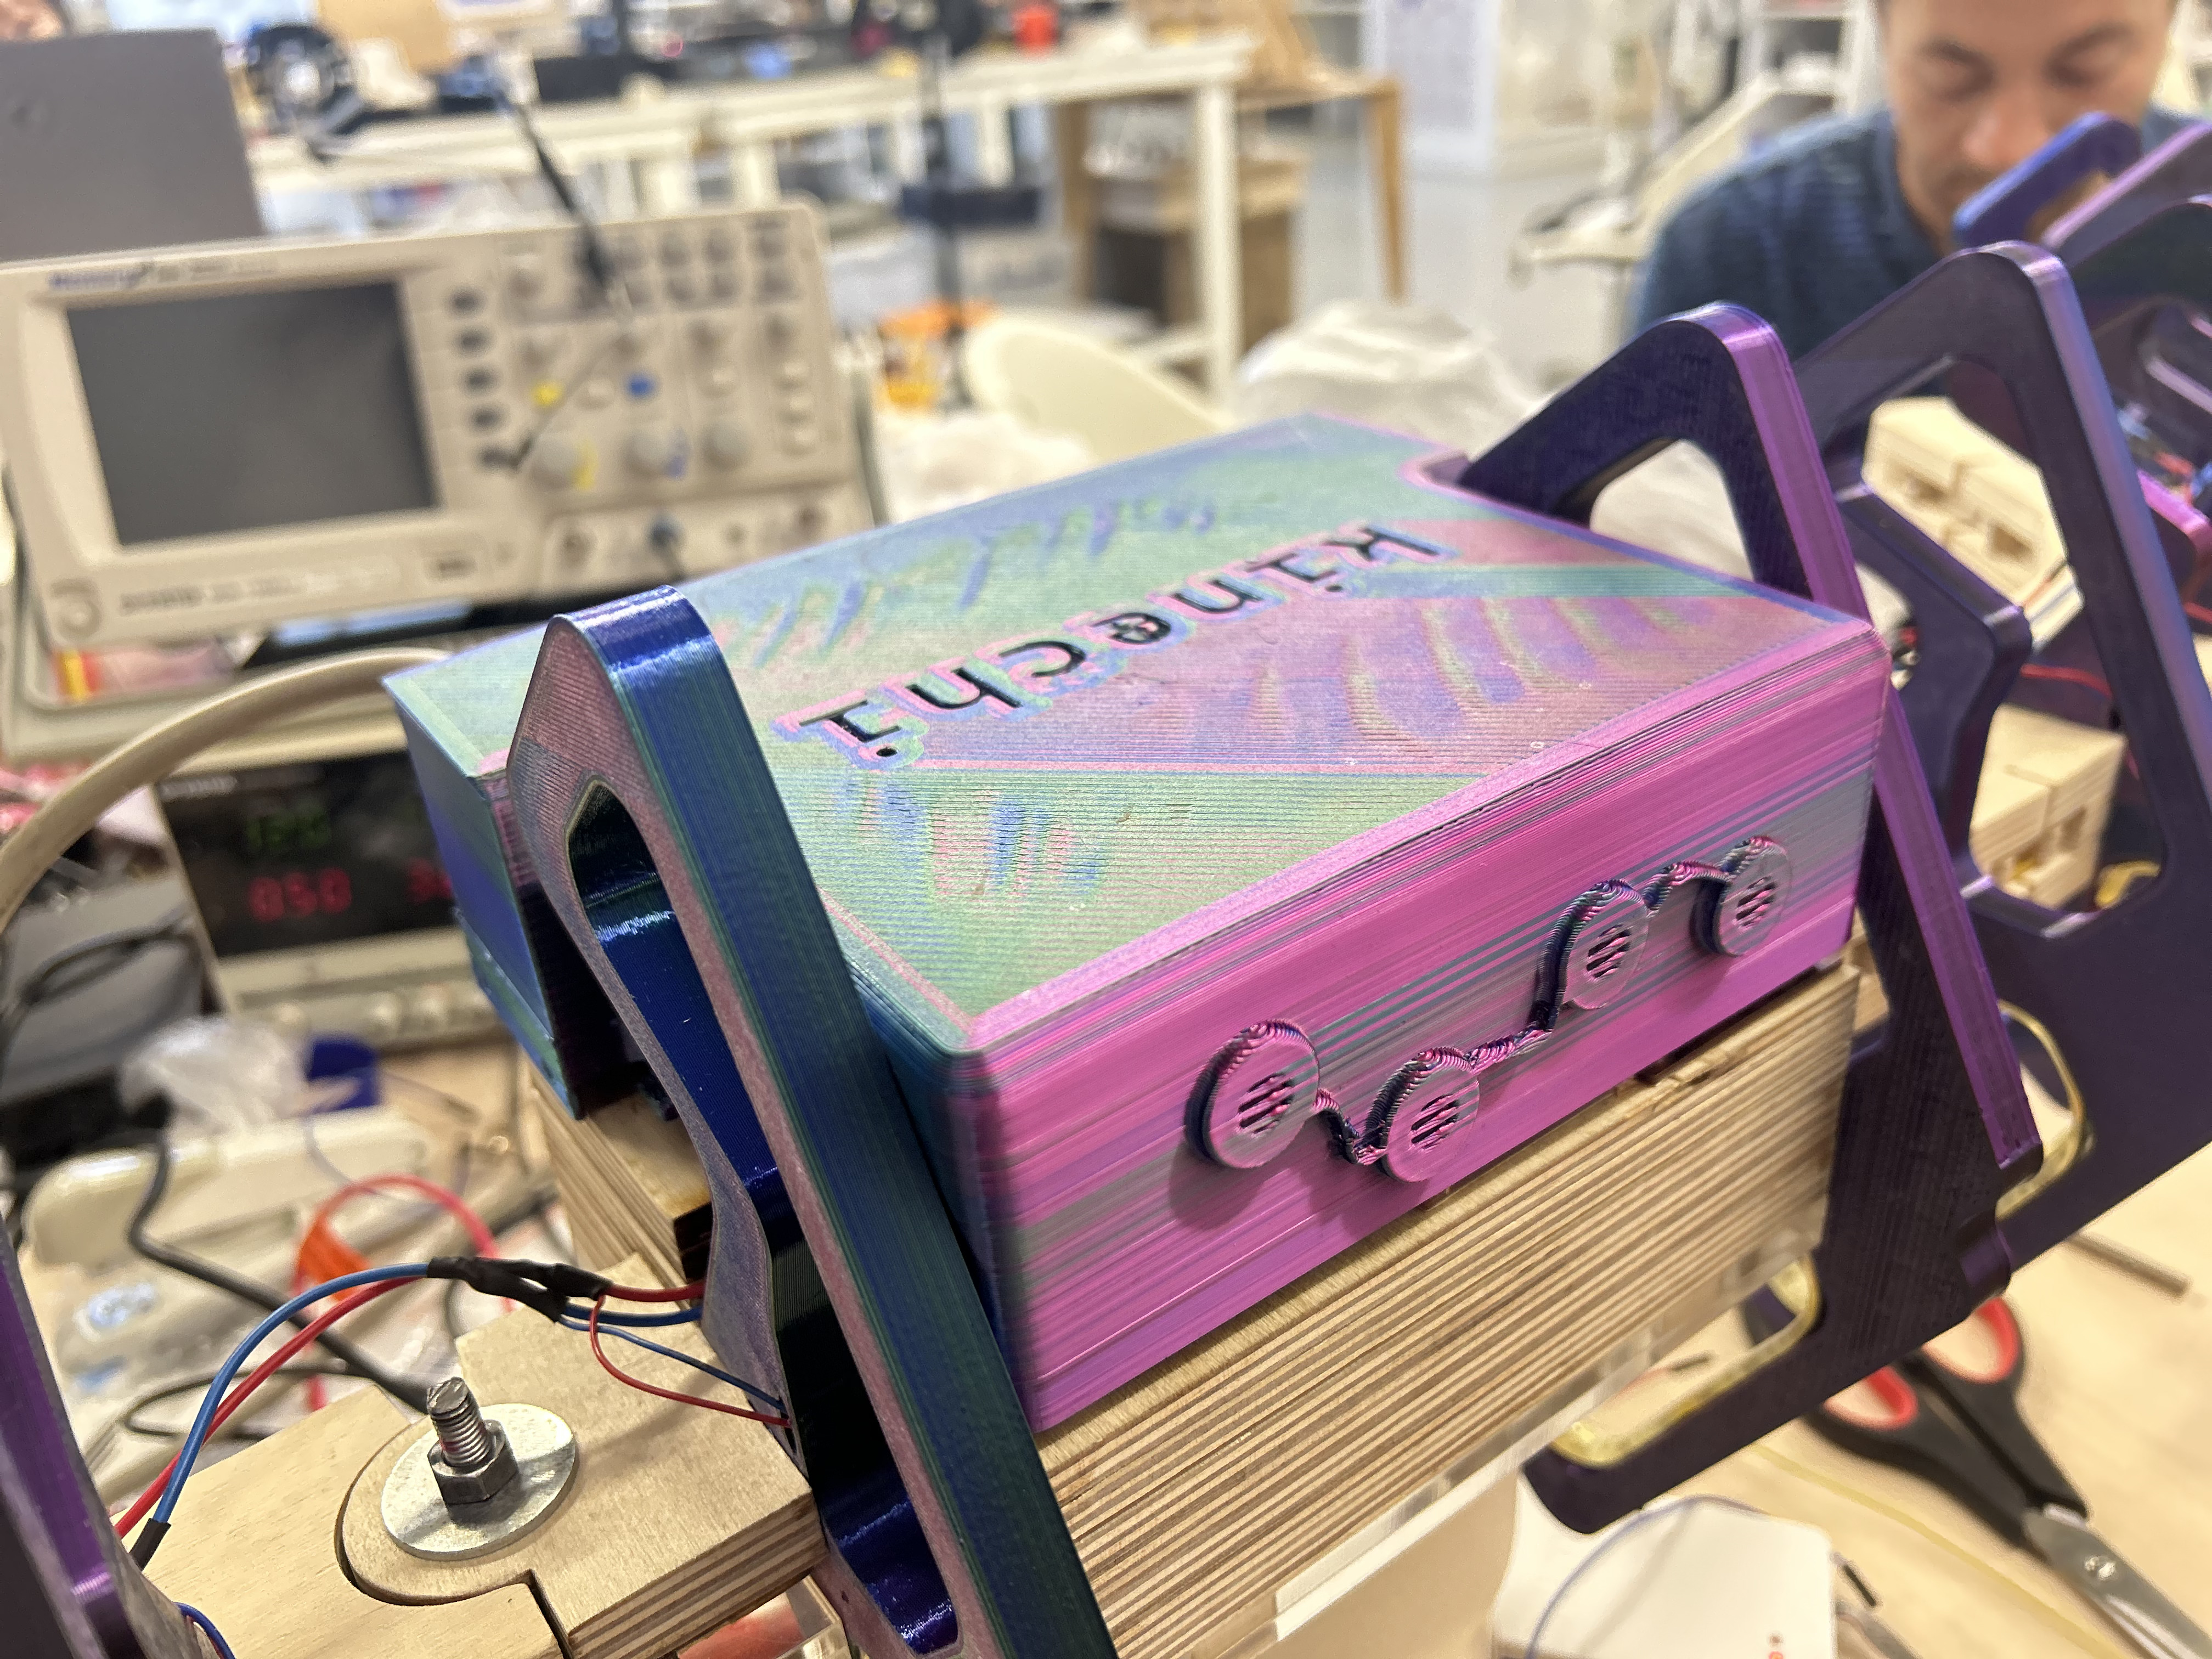
Packaging Box
I made a box, which will cover my wires on chandelier.
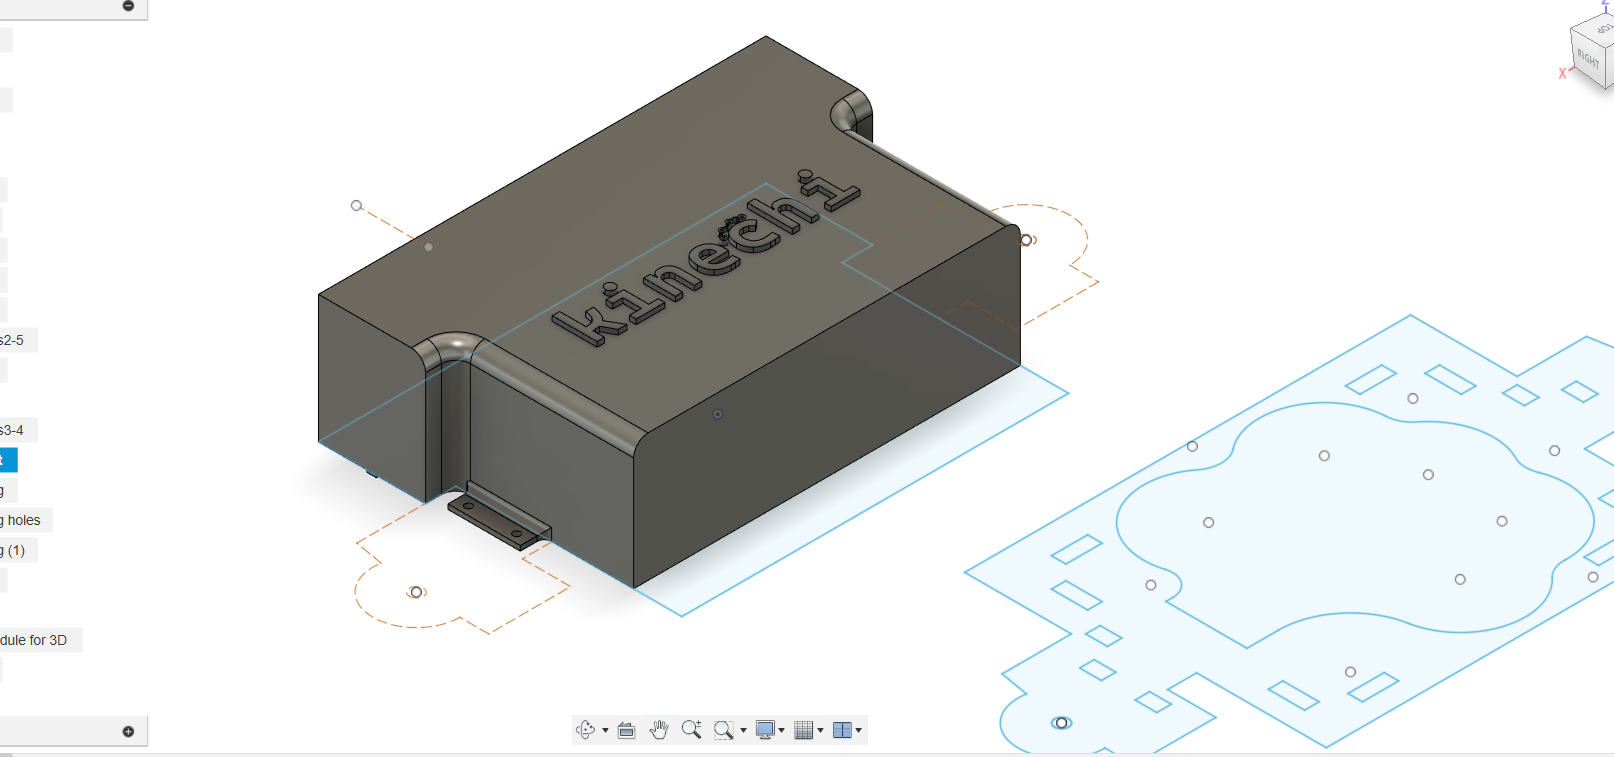
I added holes to regulate the ventilation. And also made sleeves that will be joined on the module. LEDs are also attached to these.
CNC Milling
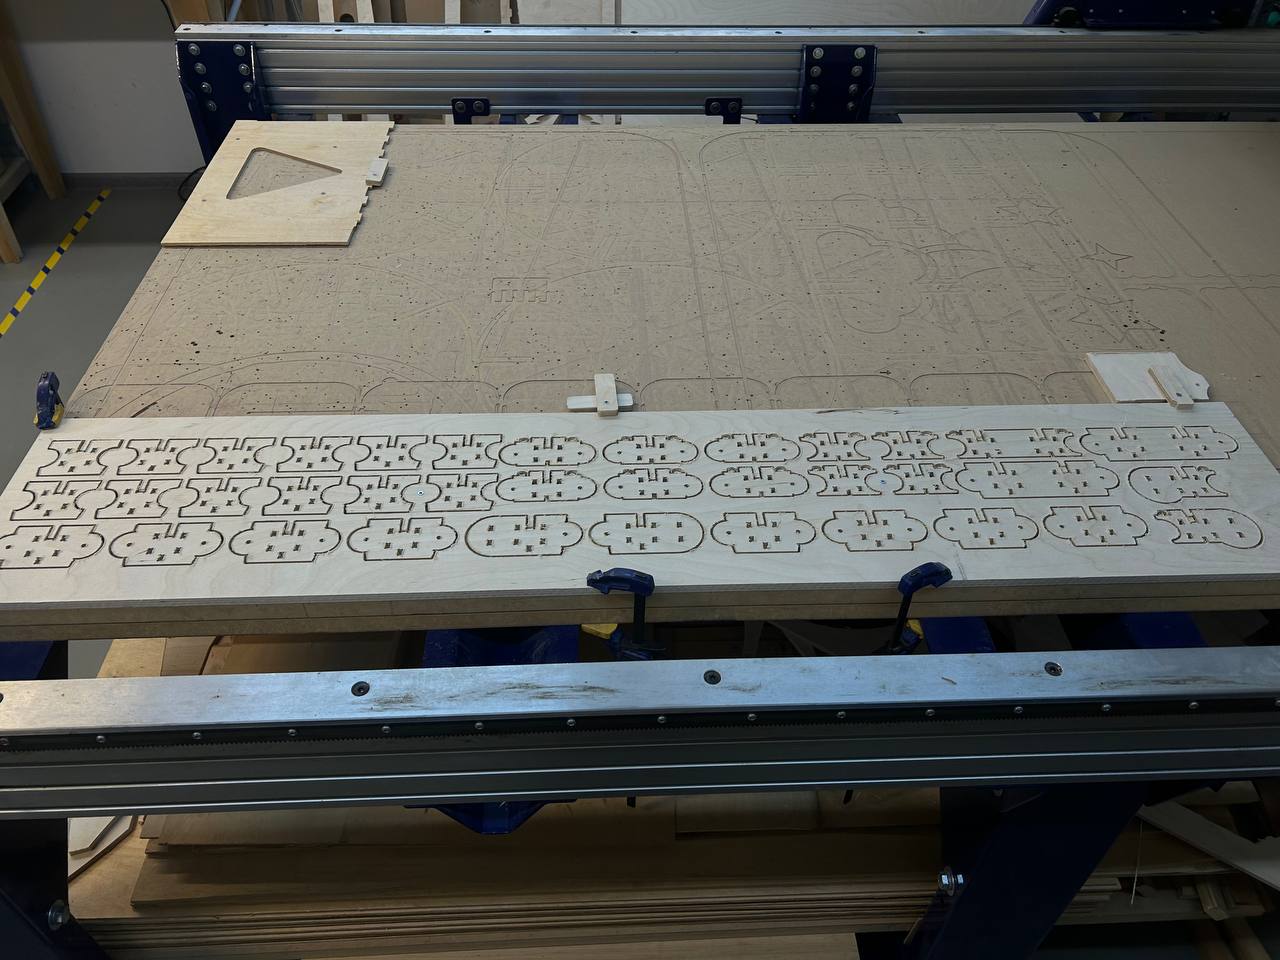
Also I cut small parts by laser cutter.
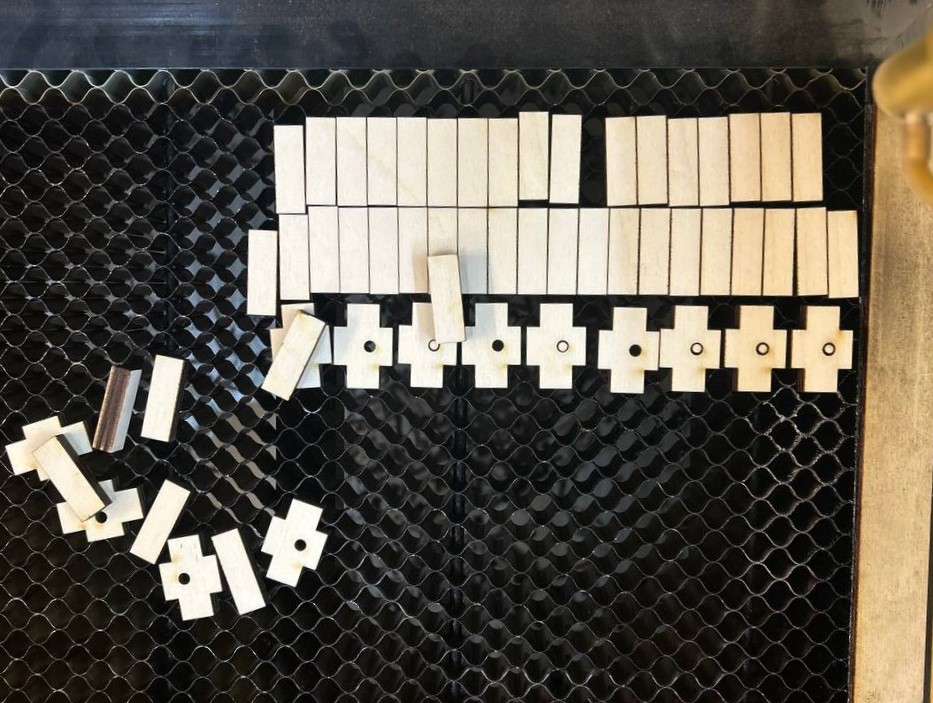
This parts are to give extra strength to my modules. Cross-like parts to pass the thread. They are specially made in such a size that they are not visible from any side and are stuck in the middle part of the place.
After I started sanding process. In the first photo is the Top surface.

Here is the Bottom surface.

After smoothing all rounded parts I started assembling them and testing.
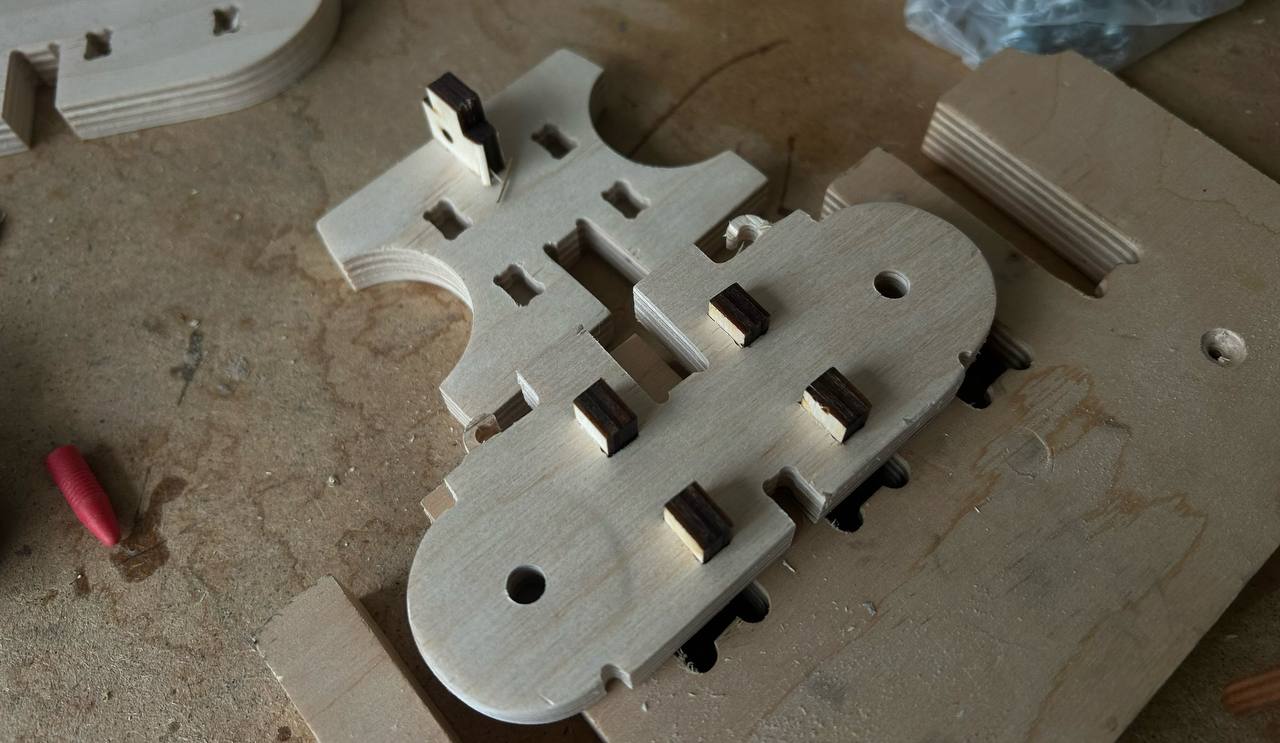
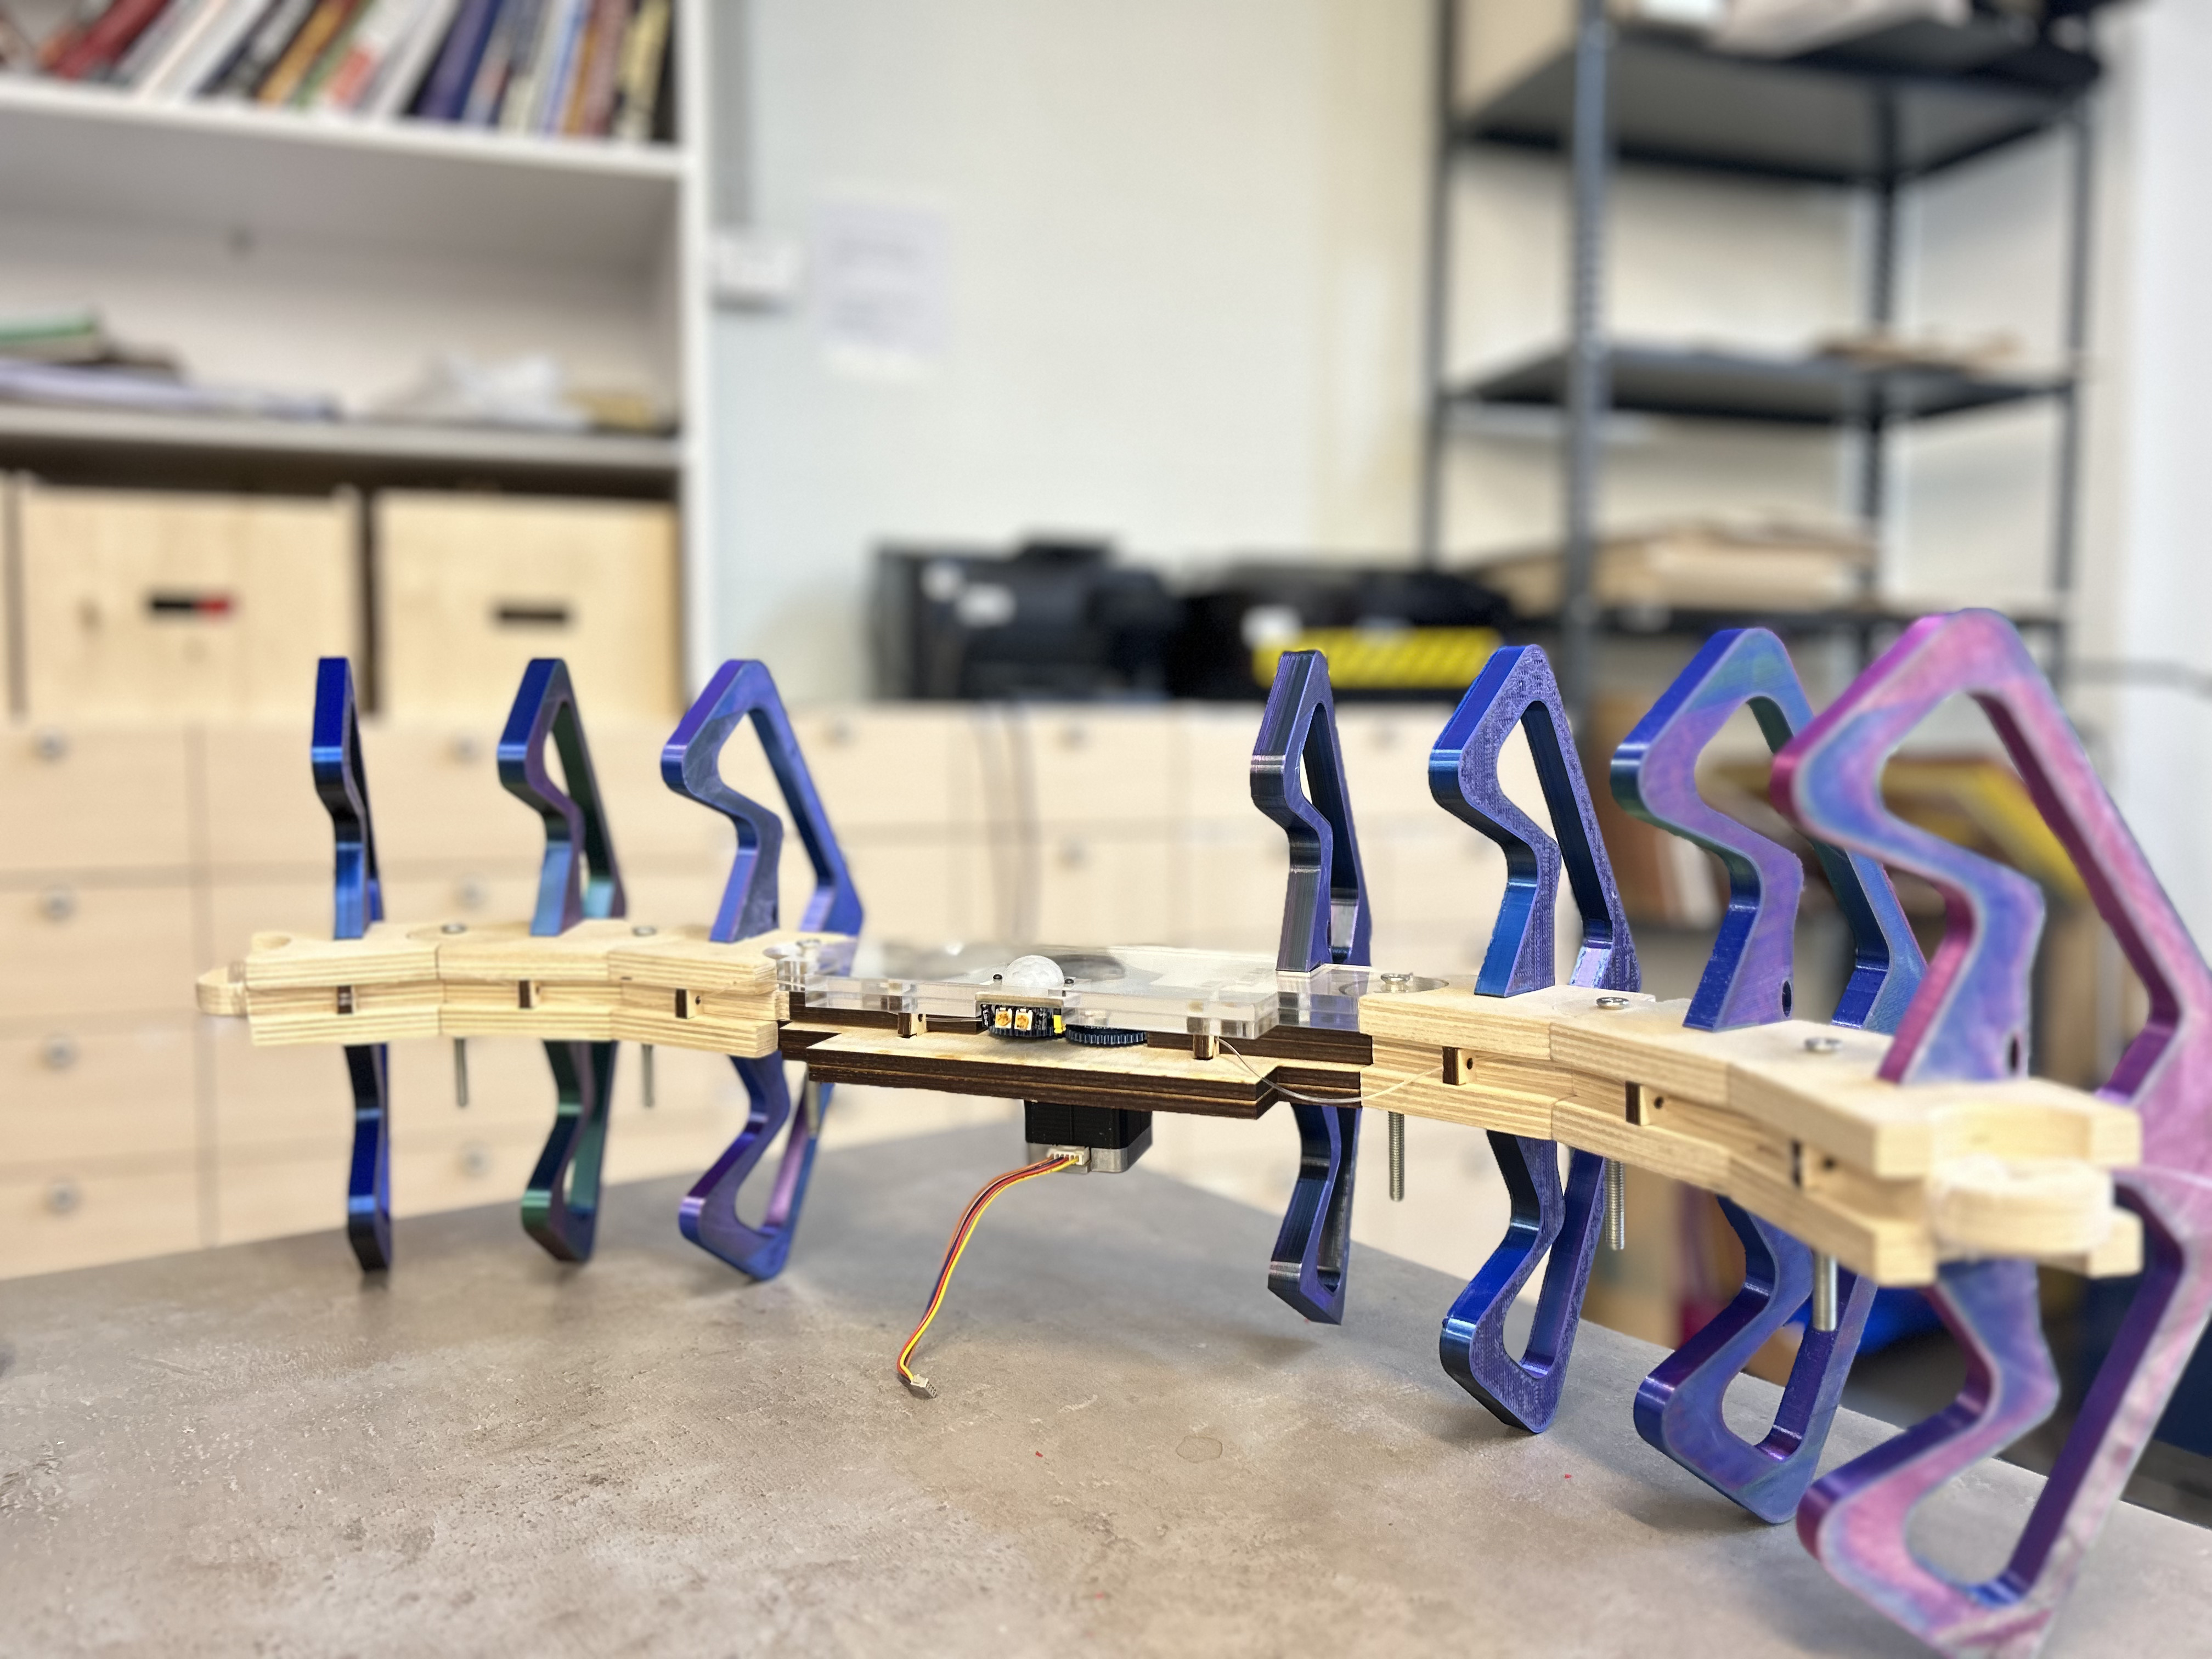
Connecting these three parts together, I get one module. Chandelier consists of 13 modules in total. The rectangular cuts in the middle are made to give additional strength to the construction. And the cross shape is for passing trough it the string.

But when I start to assemble modules and hooked the rubber through the hooks to connect, hooks started to break.
3D printing
Wings
As I already mentioned, the wings are large and the volume is large. Therefore, I already knew that it would take a long time to print one sleeve.
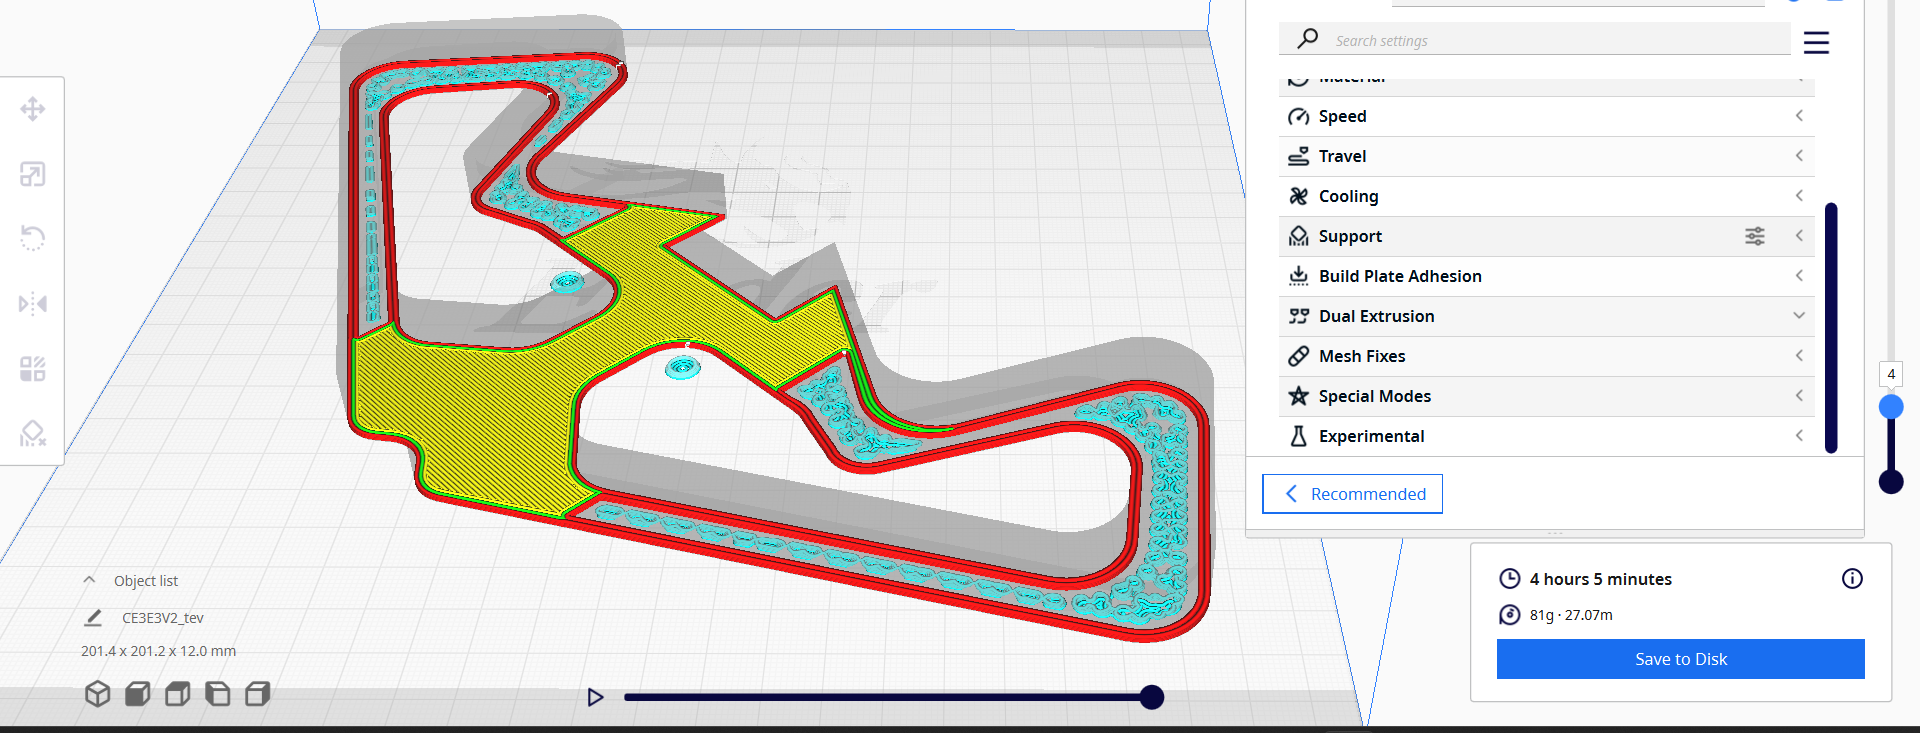
I changed some settings. I put a very small percentage of the infill.
In order to speed up the process even more, I removed the supports.
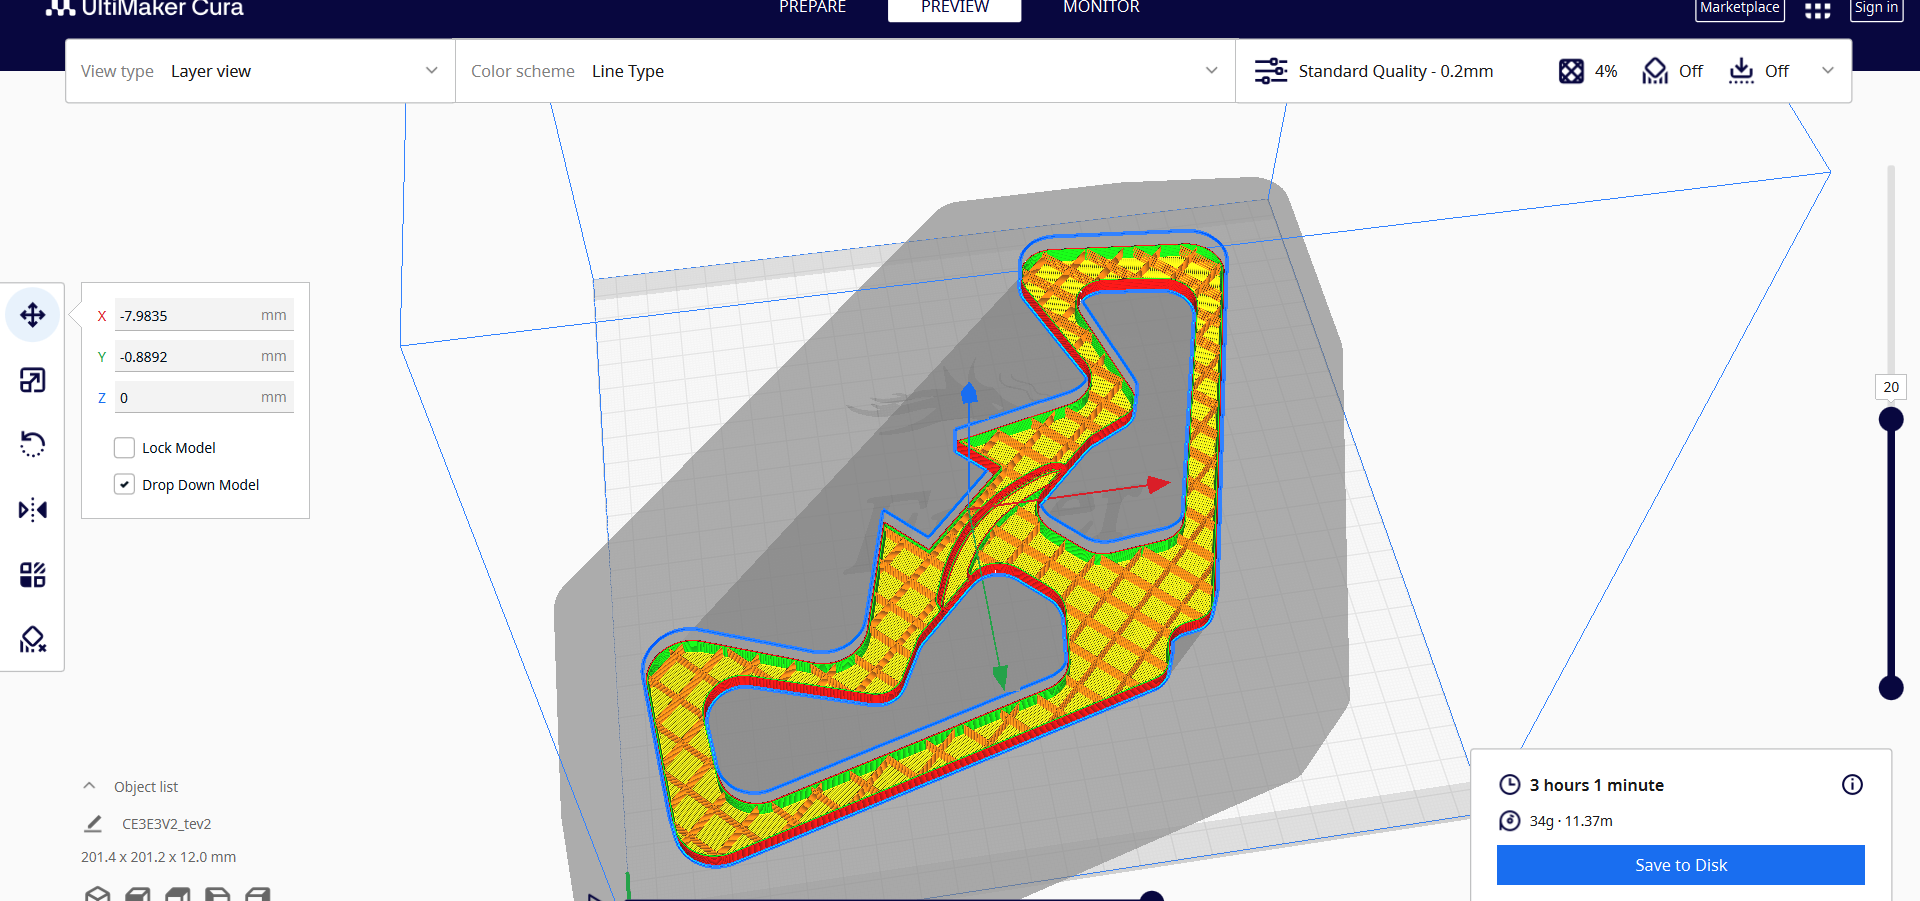
I generated the printing file for 2 different printers. One of them has 0.8mm nozzle, the other 0.4.

3D printer with 0.8mm nozzle was printing in 1 hour.
3D printer with 0.4mm nozzle was printing in 3 hours.
I needed 14 wings, so I set the print to 4 printers with 0.4mm nozzle and 1 0.8mm.
I made everything on time.
Here is how it was looking.
3D printer’s filament was not exactly the chosen chameleon.
Gears
At first, I was thinking of making only the gears with this filament,
so that when they are seen from below, they look nice in motion. However, since the CNC was broken, I decided to use these to print the wings as well.
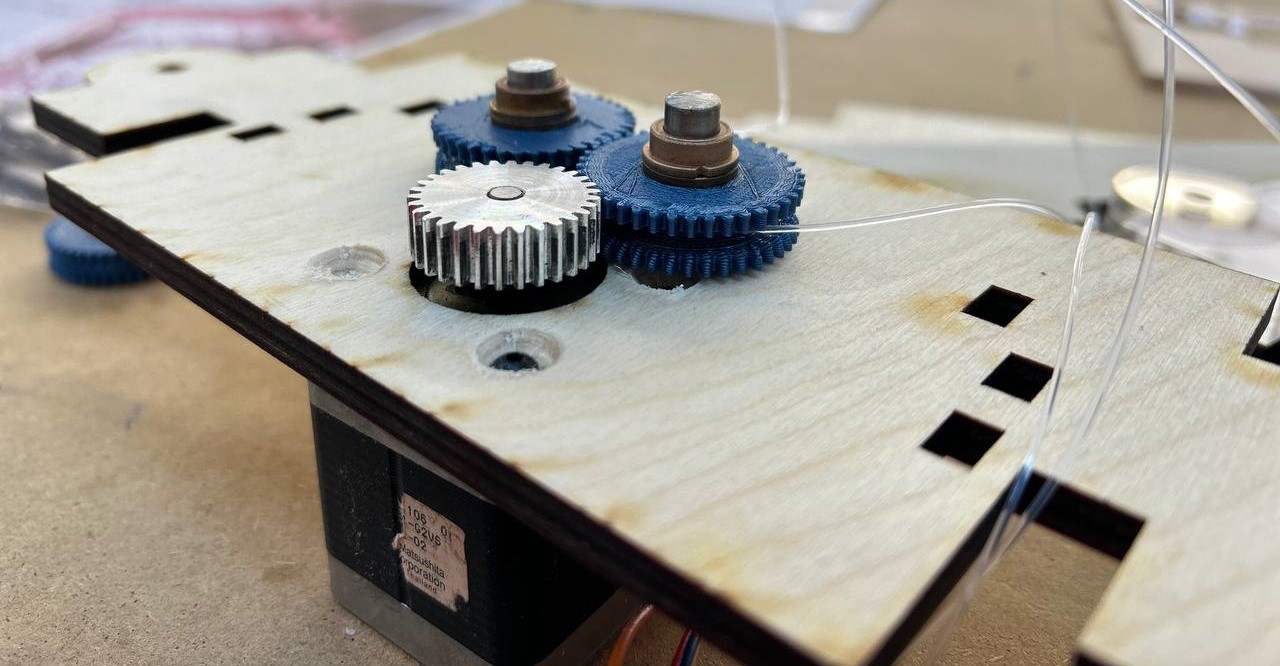
Also, when I discussed with Neil one of the last weeks the problem with the rotating mechanism in the middle part of my chandelier (the motor was not strong enough to turn the gears, which in turn pull the thread and close the wings), he offered several options on how to solve the problem.
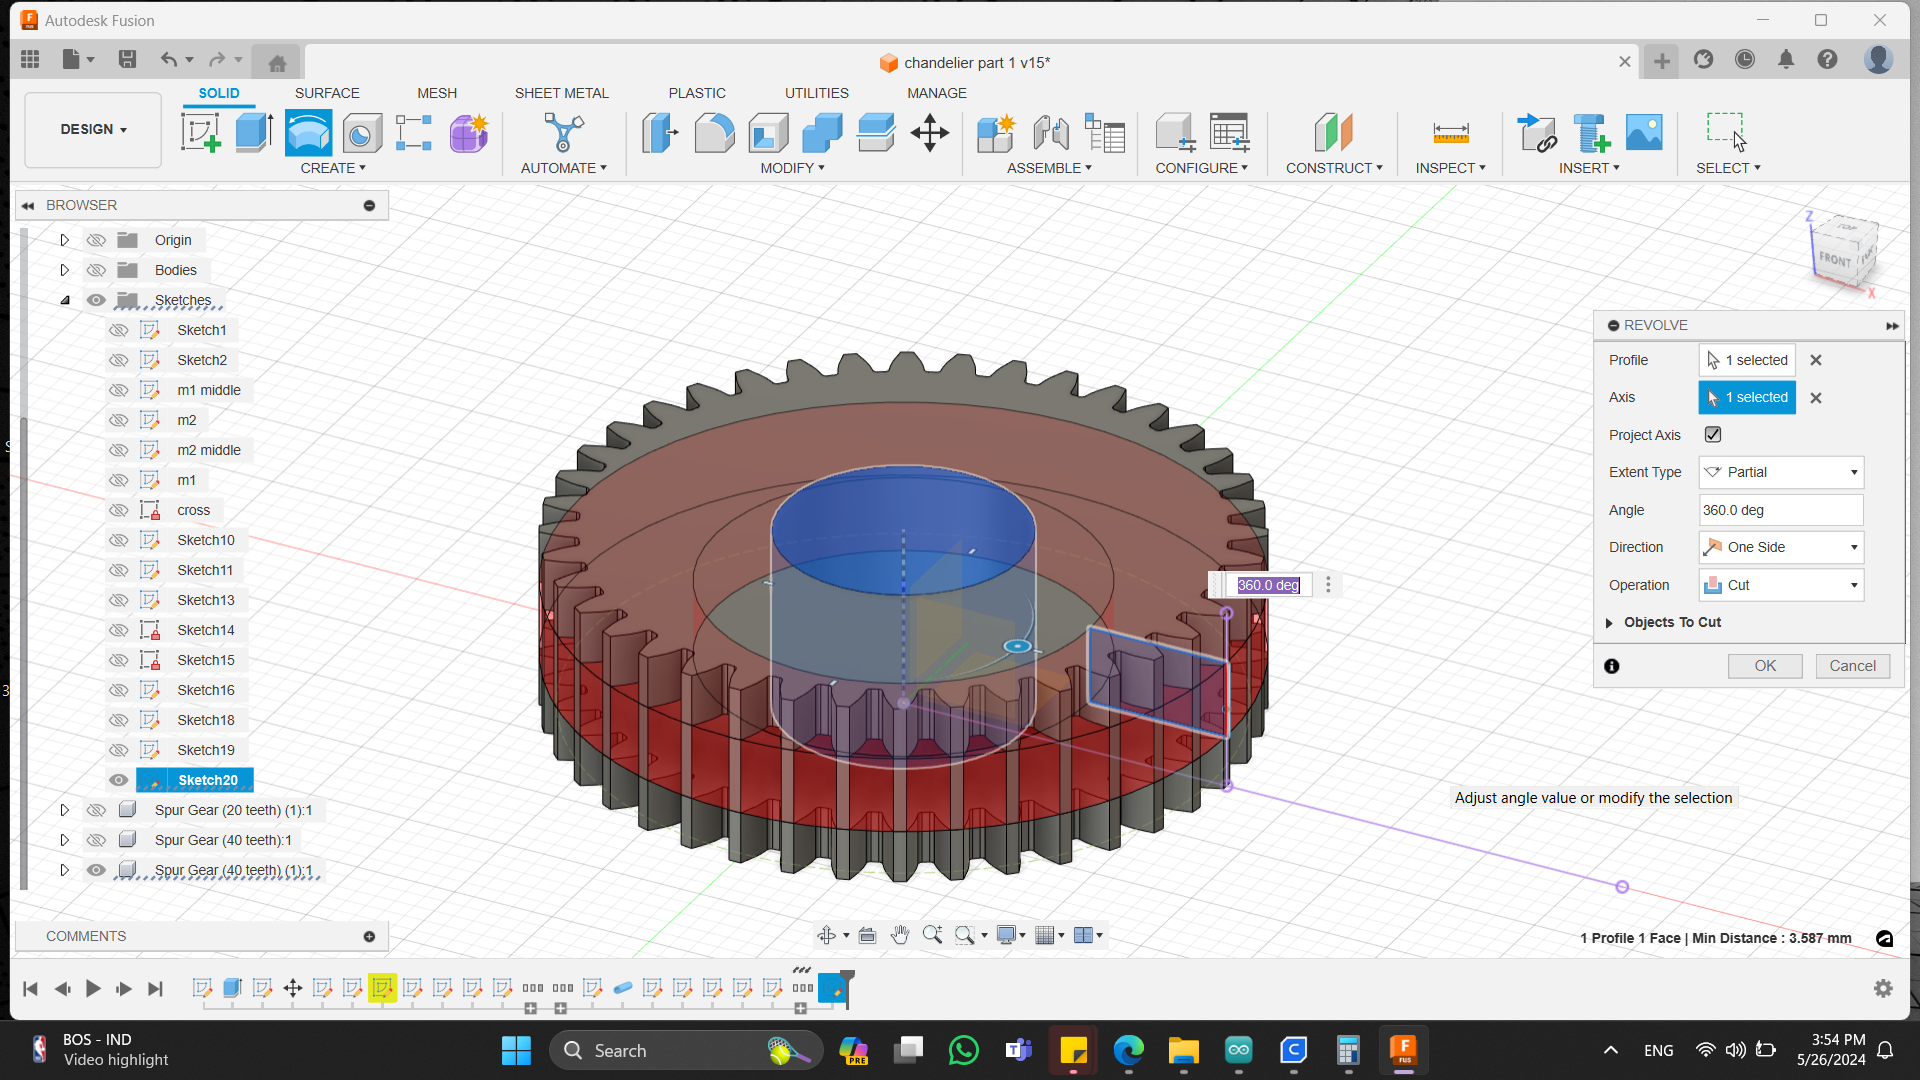
From that discussion, Rudolf and I designed Gear Reducers. Or we can say Gear Train
A gear train is a mechanical system consisting of two or more gears connected to one another in such a way that they transmit motion and power from one shaft to another.
Here you can see Compound Gear Train Examples.
A series of gears was designed, the main one, which was mounted on a stepper motor, had small teeth. The motor was spinning very fast, making 54 revolutions. Meanwhile, the last 2 gears, which wrapped the threads on them from 2 sides, made 1 revolution.
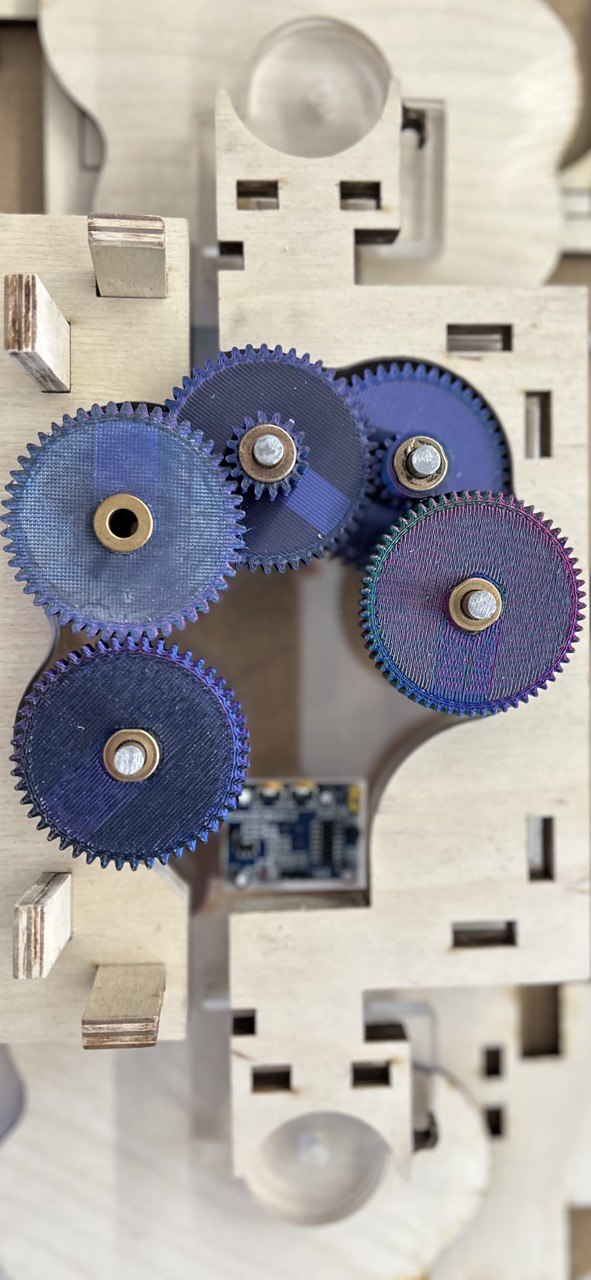
For every full revolution (54) of the main gear, the last two gears make one complete rotation.
Packaging Box for wires
Along with system integration, I designed and printed a packaging box.
As the middle module changed in size, the box also changed.
At first, I printed a test half.
Then I printed it completely and installed it on the module. I planned places to attach the box to the module. So I screwed the box with from places and fixed the box.
Mechanical Engineering
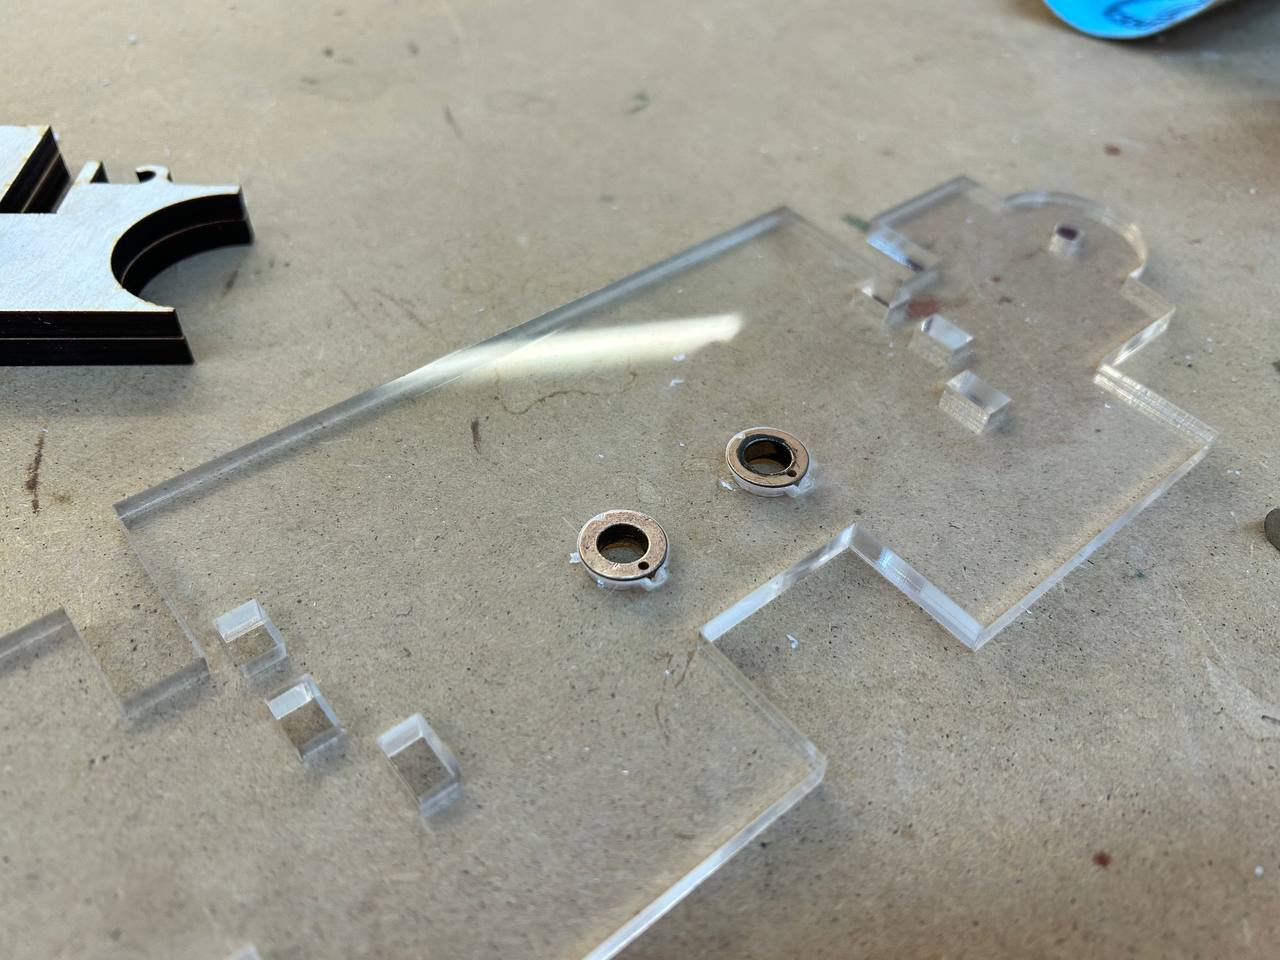
I used Round 6mm Smooth Rods
For smooth rotation of my gears I used this rods and wanted to use bearings.
a rolling ring system uses a special bearing design to put compression and friction to good use.
Rolling ring systems employ compression and friction in such a way that the linear drive’s performance is enhanced and its lifespan is not decreased.
But as I didn’t find bearings for this size I used this item,
which is not a bearing, but also rotates very easily and smoothly around the rod. I pinned it as tight as possible so that it does not come out while working the mechanisms.
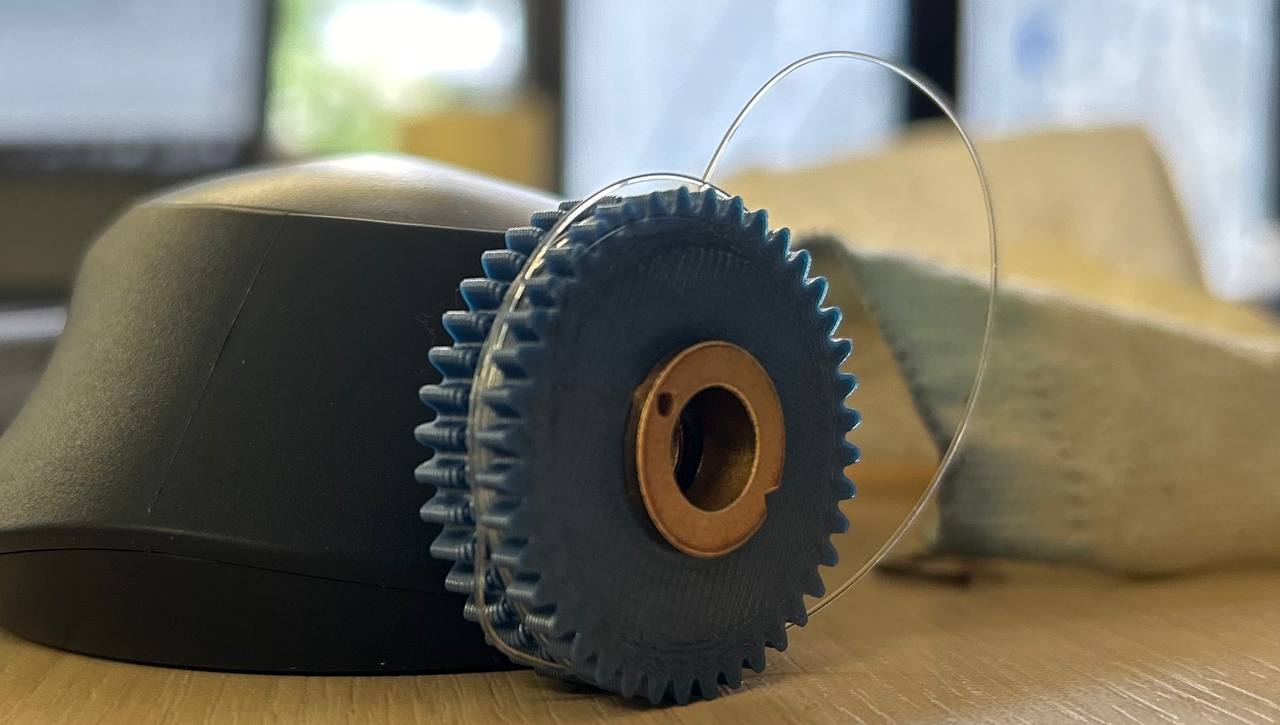
Here you can see in this photo wrapped up thread. Rotating gears compile them, close the wings of the chandelier by pulling on these elastic thread on themselves.
As I mentioned before, I changed gear train system. So the second one I assembled definitively.
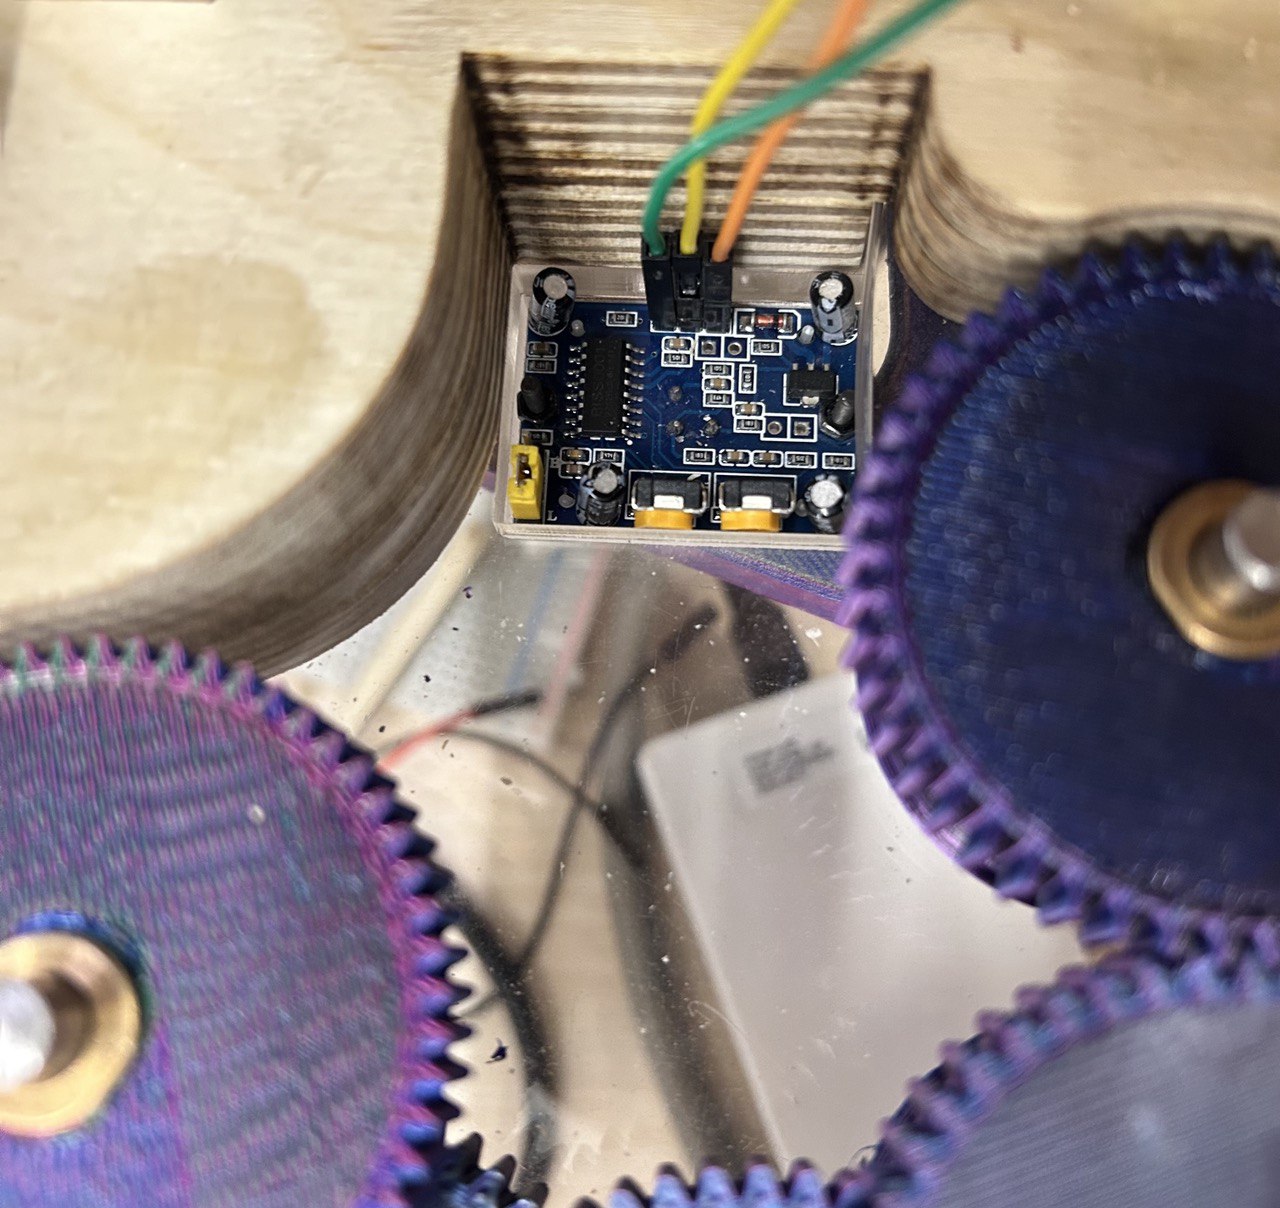
Electronics Design
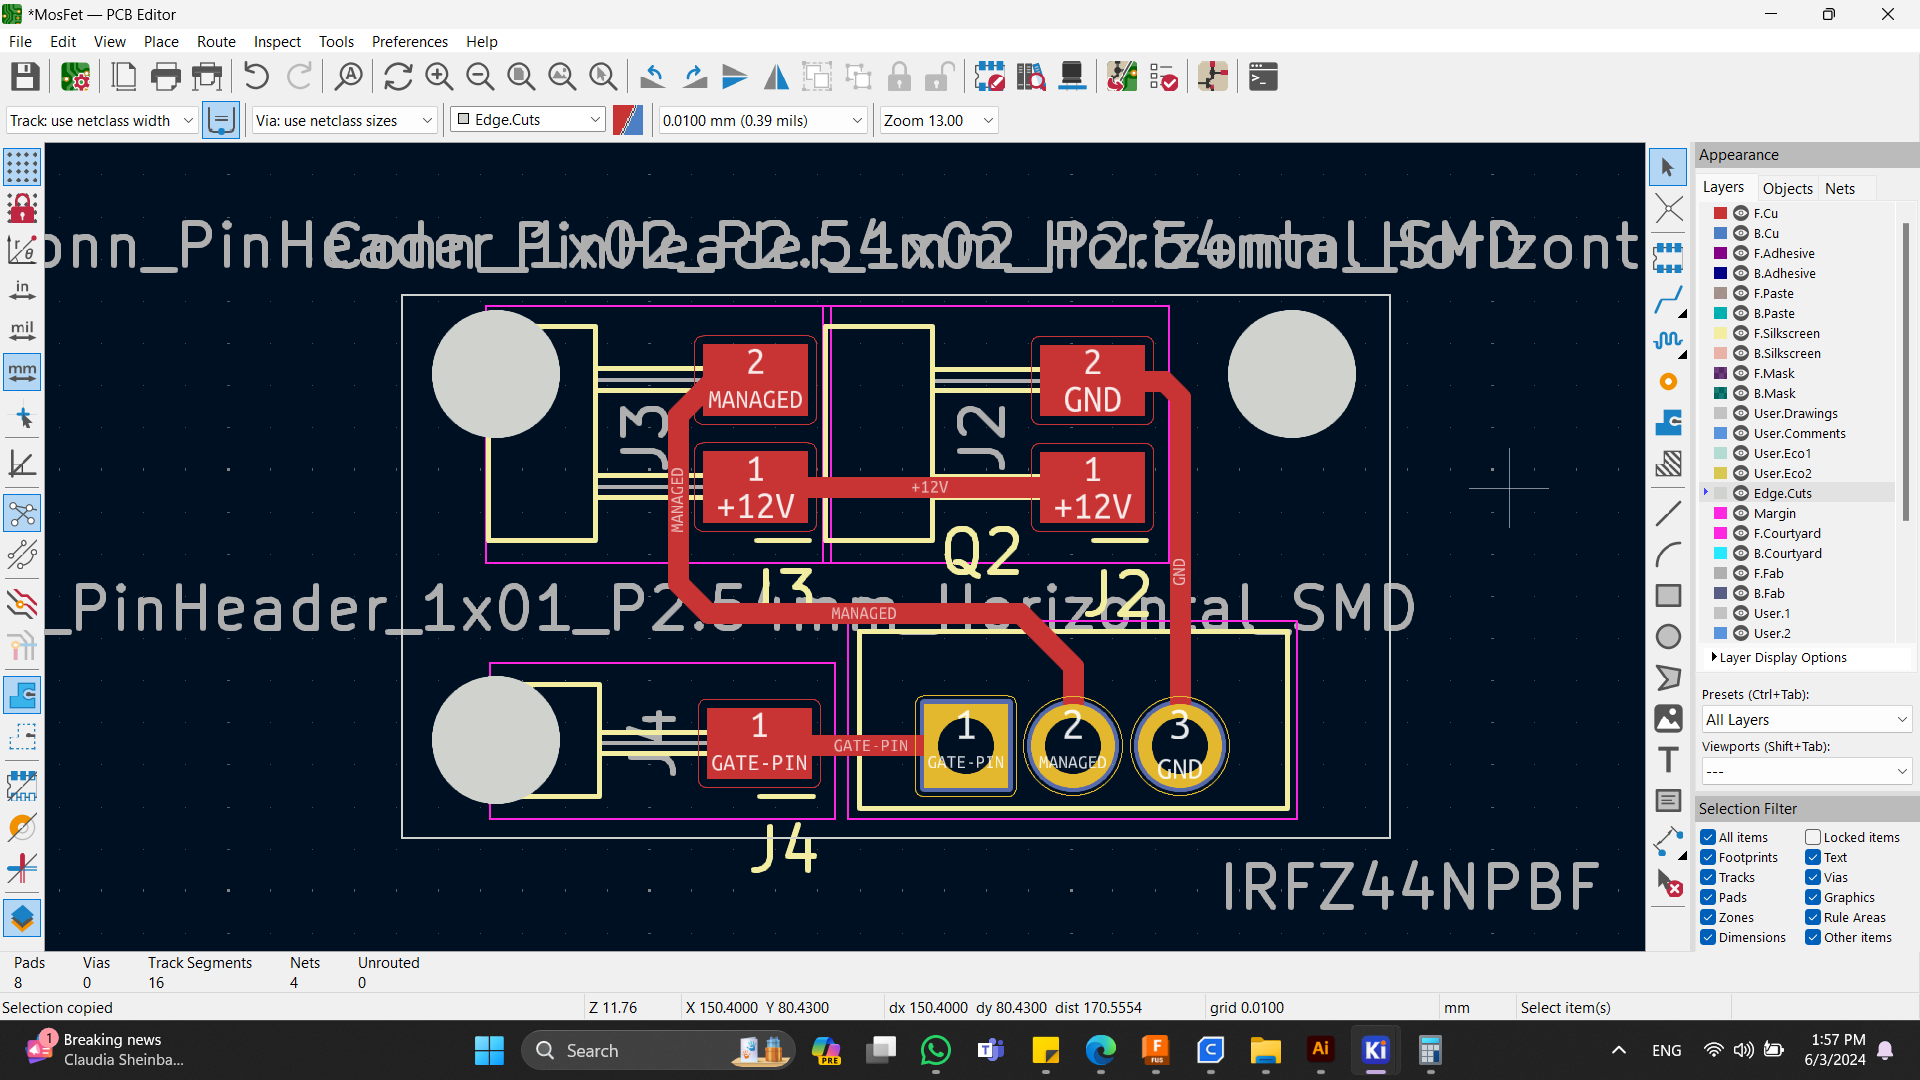
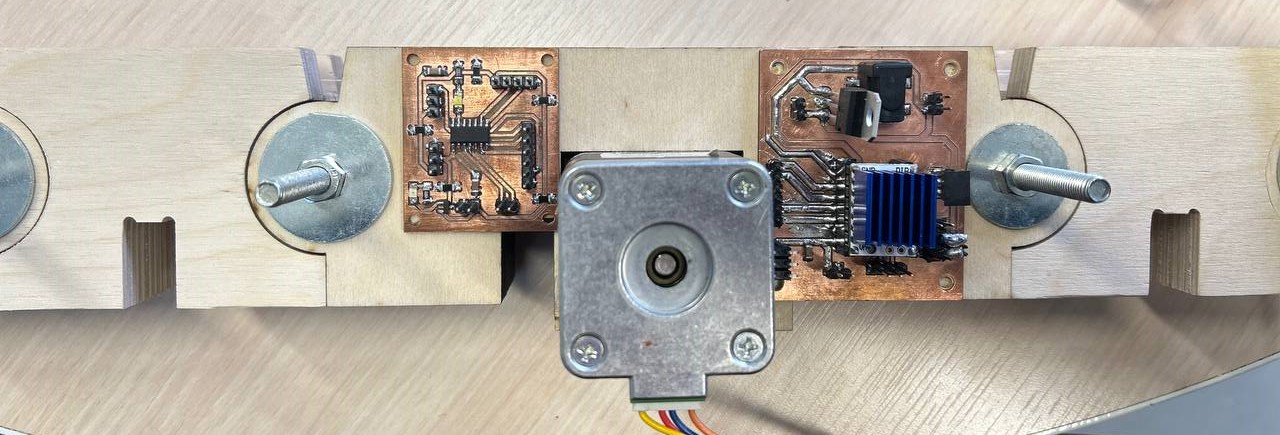
For my final project’s primary board I chose the one that I already designed in my electronics design week.
In this board I have an AtTiny 1614 microcontroller. Pins that are connecting my board to the driver’s board. Pins for sensor. And all other pins that will be needed.
For the output device week I designed driver’s board likewise.
The only board that was left, was the board for LED pins.
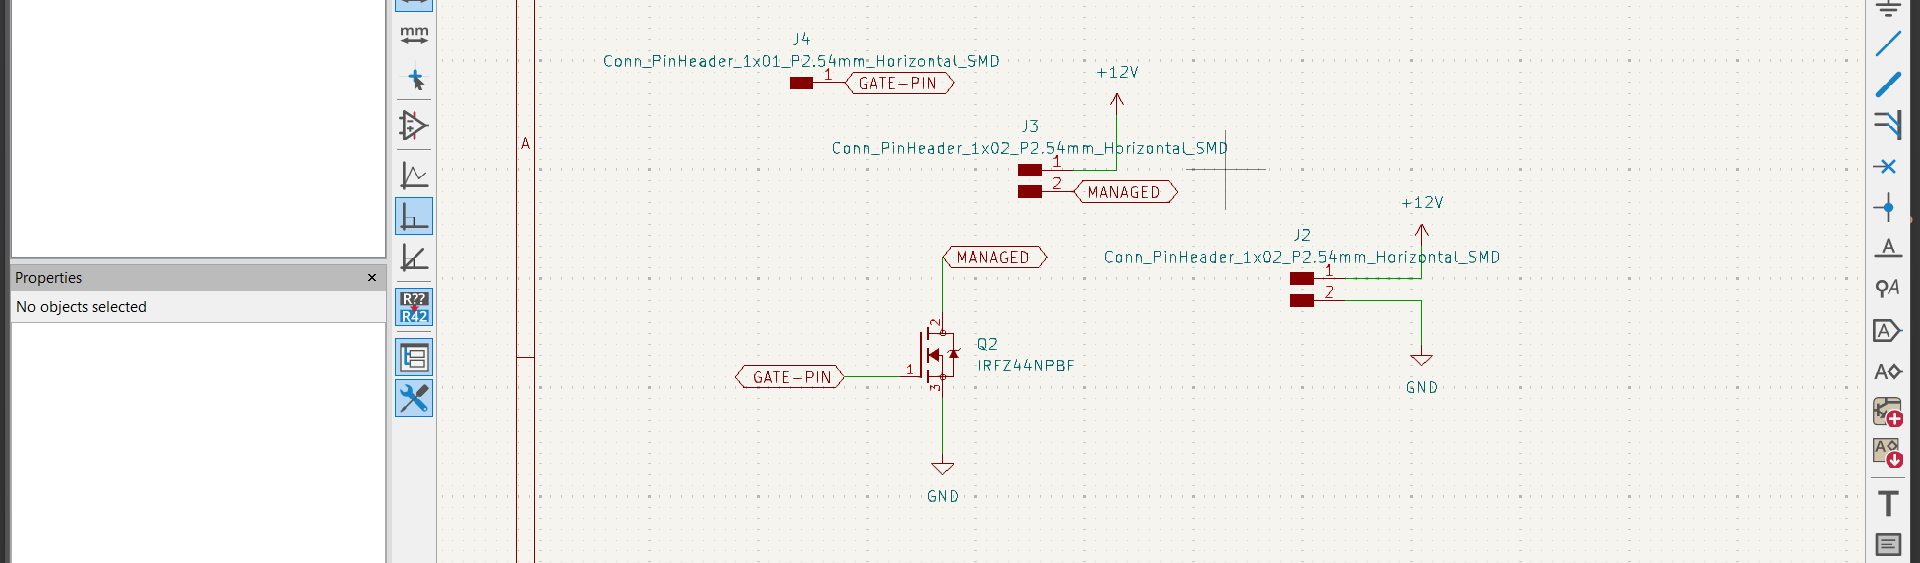
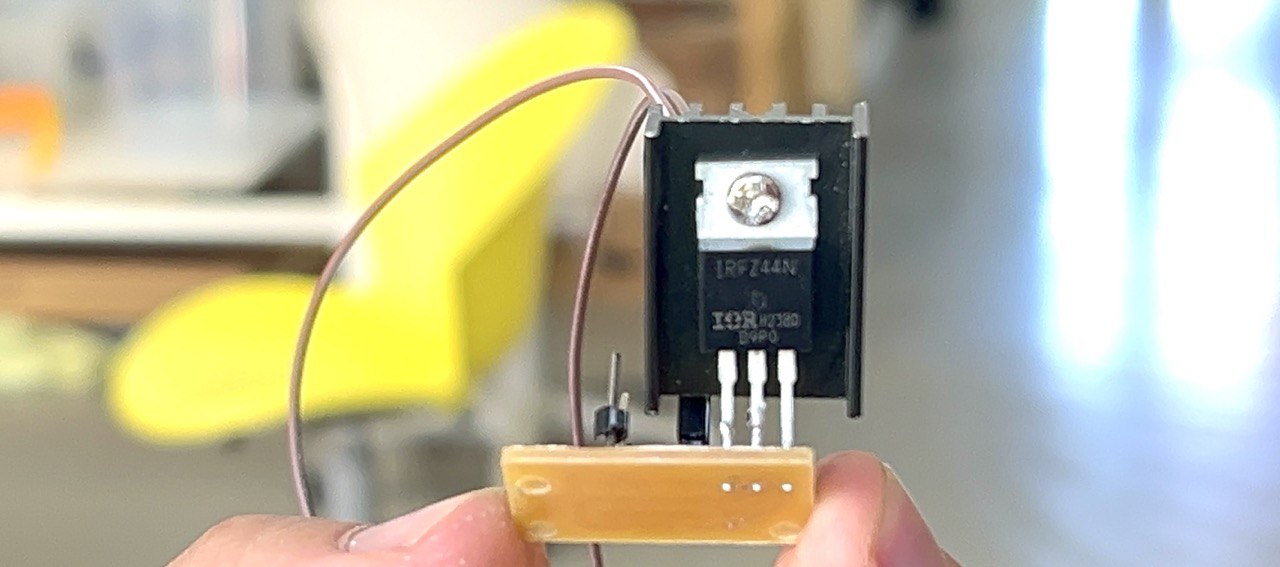
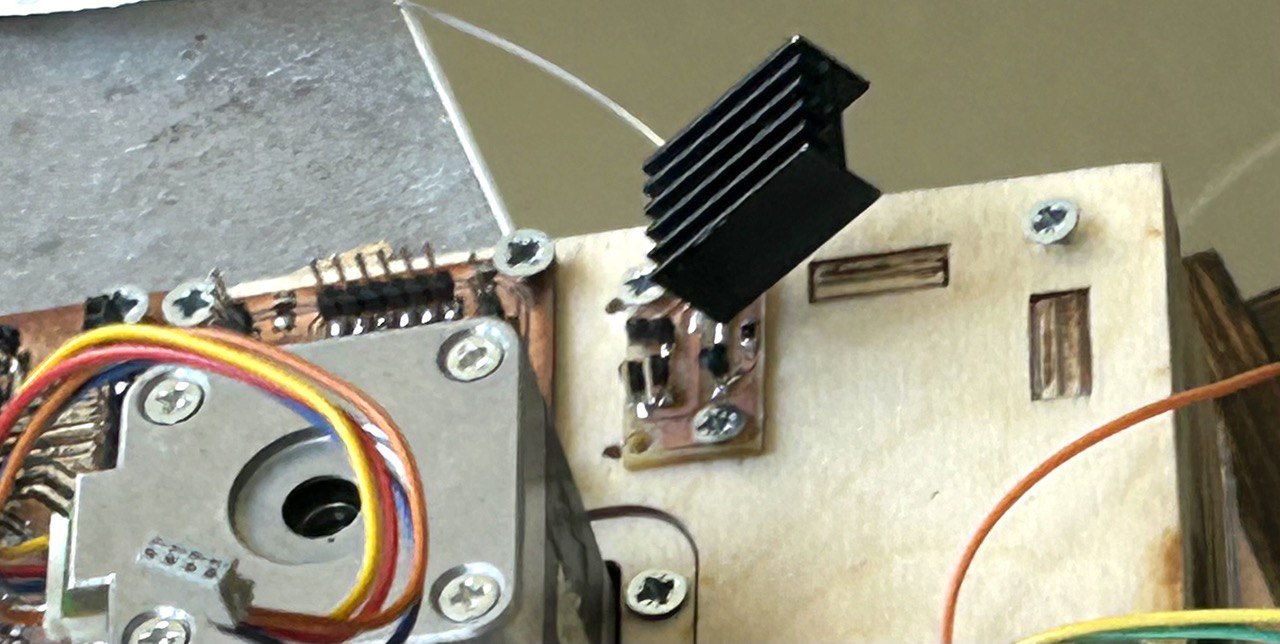
IRFZ44N MOSFET is used as a switch in LED driver circuits to control the current flowing through high-power LEDs
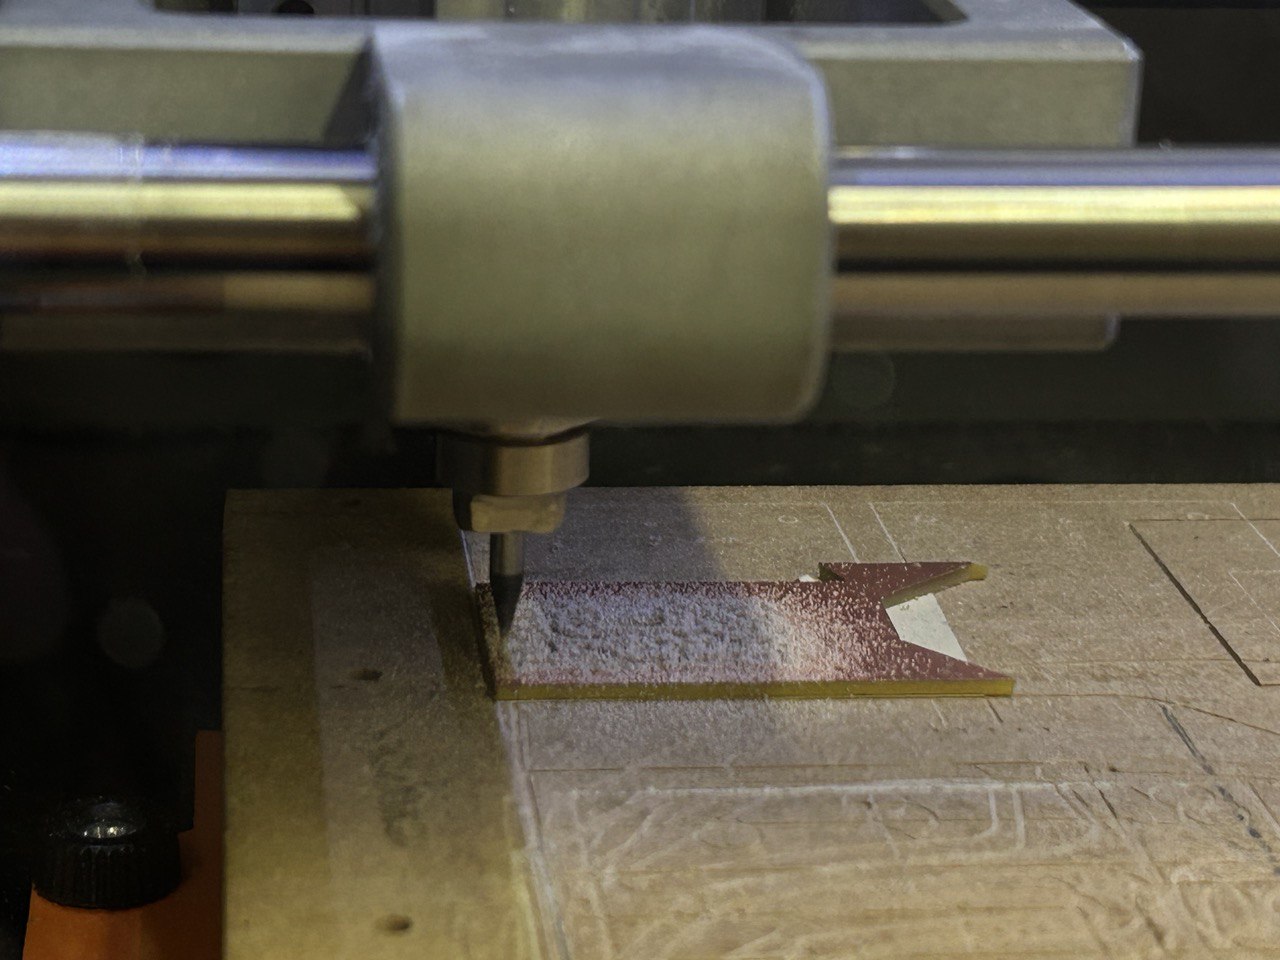
I cut the board.
After soldering the transistor I needed to cool it by something.

For that I used Heat Sink. Heat sinks help dissipate heat by increasing the surface area for better airflow.
I found this attached on an old board. And put it on my board.
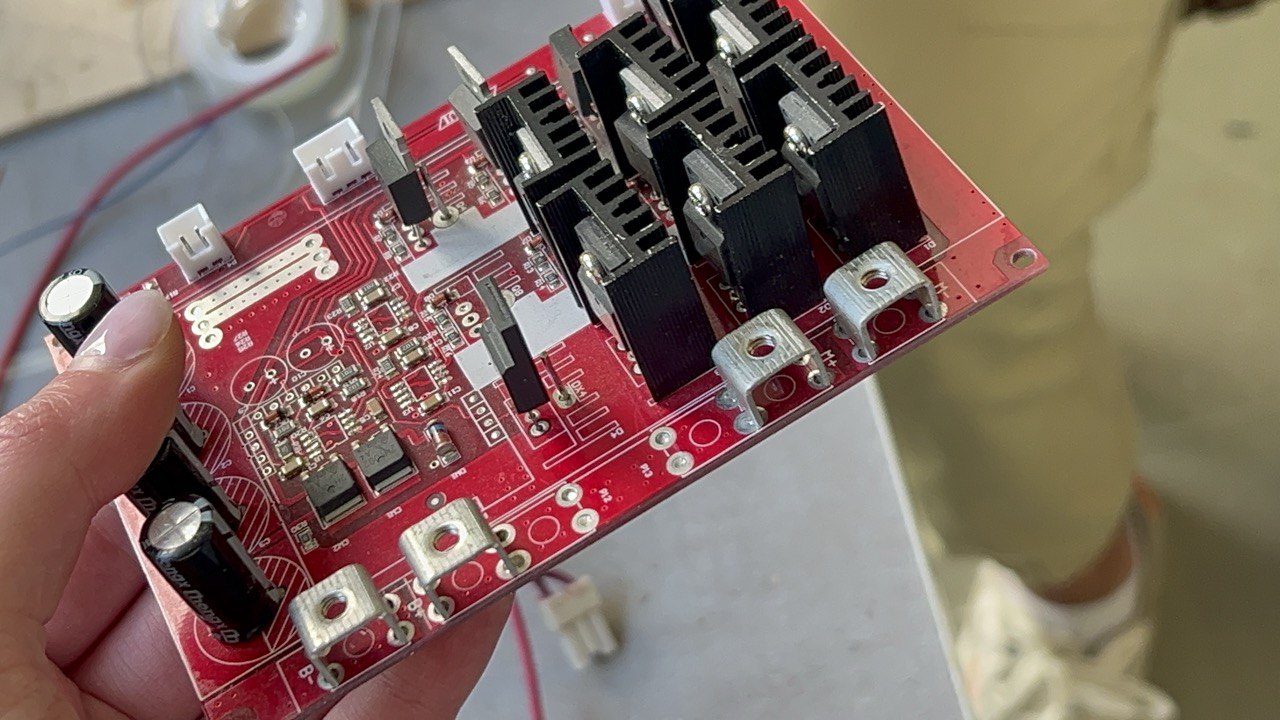
My board is ready and screwed to the module.
Output Devices | Programming
As one of my output devices I used LED, which is the main object of my whole project.
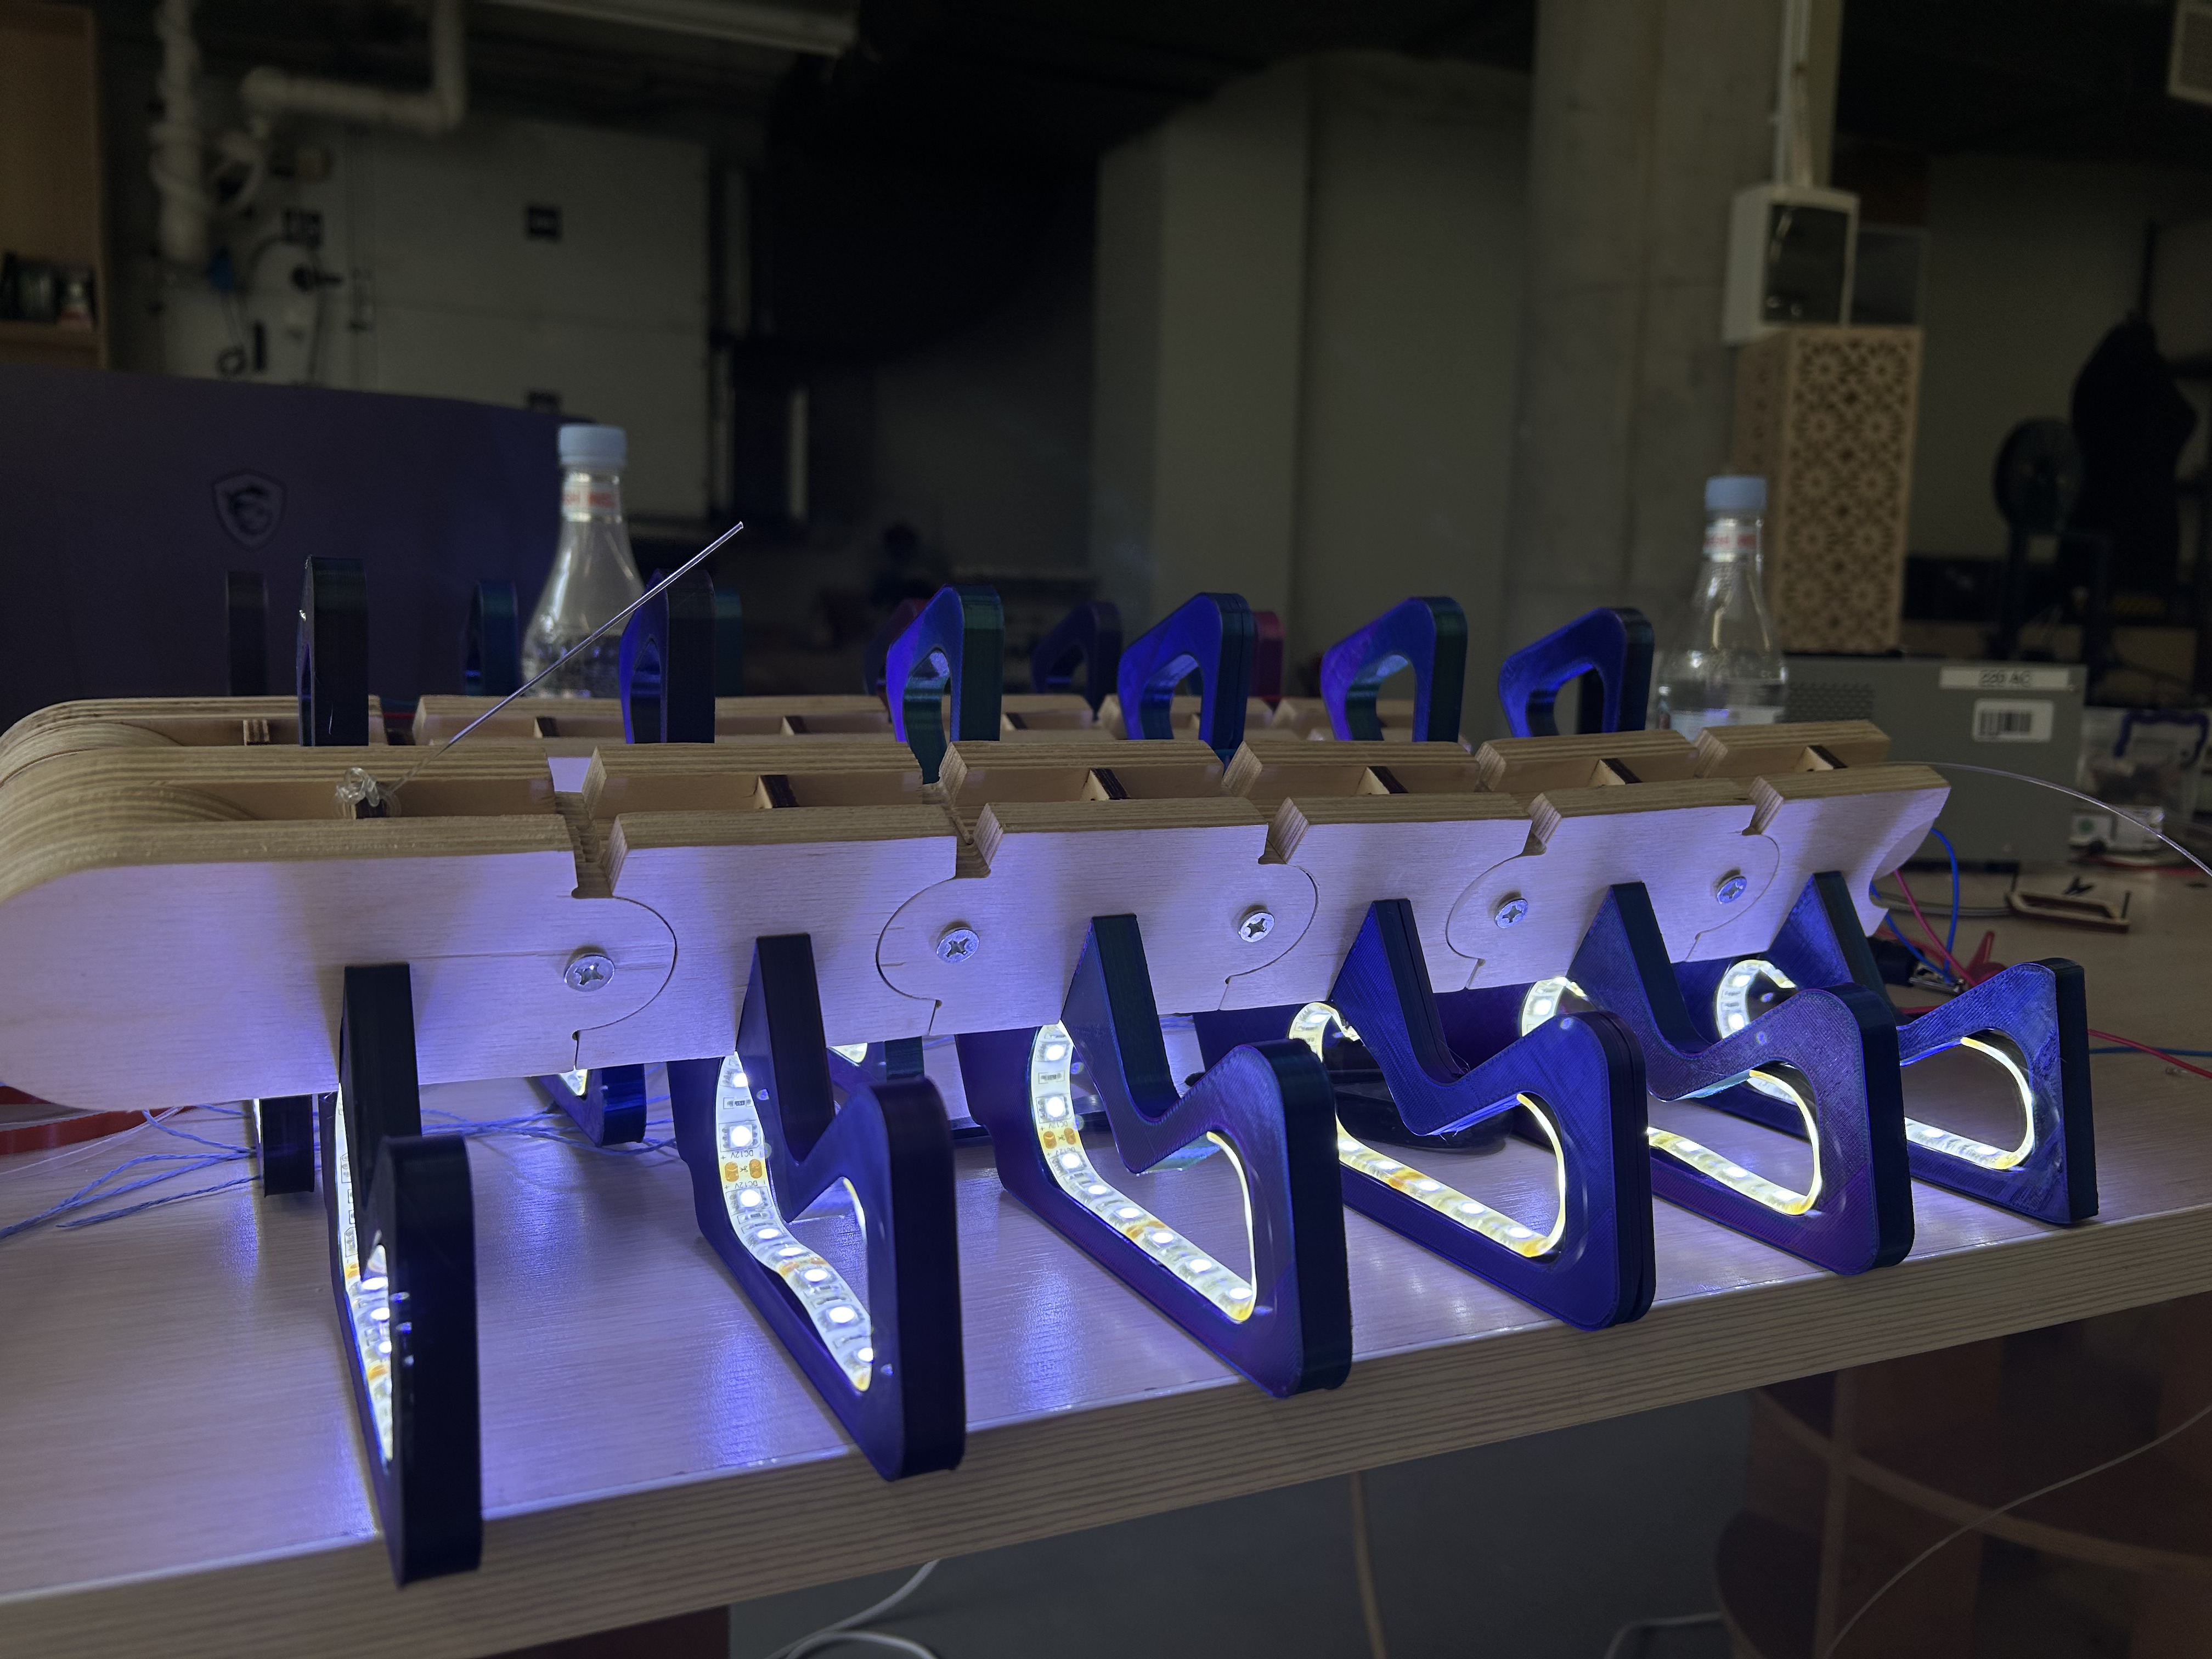
I glued LED Strips to the 3D printed wings․
Each LED on the strip is equipped with a tiny integrated circuit (IC)
LED strips operate on 12 volts DC․ I picked 2 types of LEDs. One of them had soft light (warm light) the other one brighter and lighter(cold light).
I chose brighter one.
After soldering all the LEDs and sticking them to their 3D printed parts, I assembled them one by one and stuck them into 1 common line. RED - plus BLUE - minus
1 common line connected to the LED board, which in turn was connected to the main board.
Programming the LED
Before programming whole system assembled at first I started to program PIR + MOTOR + LED.
/*
    Arduino with PIR motion sensor
    For complete project details, visit: http://RandomNerdTutorials.com/pirsensor
    Modified by Rui Santos based on PIR sensor by Limor Fried
*/
#include <Arduino.h>
#include <EEPROM.h>  // memory
unsigned long myTime = 0;


#define EN_PIN 1           // Enable (CFG6) 1
#define DIR_PIN 4          // Direction 7
#define STEP_PIN 6         // Step   2
int sensor = 2;            // the pin that the sensor is atteched to
int LED = 7;               // the pin that the sensor is atteched to
int state = LOW;           // by default, no motion detected
int val = 0;               // variable to store the sensor status (value)
int stepsnumber = 20000;    // steps number to open/close the chandelier
unsigned long timer = 10;  // seconds
bool position = false;

void setup() {
  position = EEPROM.read(0);
  pinMode(LED, OUTPUT);
  pinMode(sensor, INPUT);  // initialize sensor as an input
  Serial.begin(9600);      // initialize serial
  pinMode(EN_PIN, OUTPUT);
  digitalWrite(EN_PIN, HIGH);  // Deactivate driver (LOW active)
  pinMode(DIR_PIN, OUTPUT);
  digitalWrite(DIR_PIN, HIGH);  // LOW or HIGH
  pinMode(STEP_PIN, OUTPUT);
  digitalWrite(STEP_PIN, LOW);
  digitalWrite(EN_PIN, LOW);  // Activate driver
  //delay(500);
  Serial.println("Booting");
  Serial.print("position: ");
  Serial.print(position);
}

void loop() {
  val = digitalRead(sensor);  // read sensor value
  if (val == HIGH) {          // check if the sensor is HIGH
    delay(100);               // delay 100 milliseconds
    if (state == LOW) {
      Serial.println("Motion detected!");
      myTime = millis();
      state = HIGH;  // update variable state to HIGH
      if (position == false) {
        Serial.println("closing");
        position = true;
        EEPROM.write(0, position);
        digitalWrite(DIR_PIN, HIGH);  // LOW or HIGH
        for (int i = 0; i < stepsnumber; i++) {
          digitalWrite(STEP_PIN, HIGH);
          delayMicroseconds(5000 / 20);  // Adjust delay as needed
          digitalWrite(STEP_PIN, LOW);
          delayMicroseconds(5000 / 20);  // Adjust delay as needed
          float ledPowerFloat = (float)i / (float)stepsnumber;
          int ledPower = ledPowerFloat * 255;
          ledPower = constrain(ledPower, 0, 255);  // Ensure ledPower is within 0-255
          //Serial.println(ledPower);
          analogWrite(LED, ledPower);
        }
        Serial.println("closed");
      }
    }
  } else {
    delay(200);  // delay 200 milliseconds
    if (state == HIGH) {
      Serial.println("Motion stopped!");
      state = LOW;  // update variable state to LOW
      myTime = millis();
    }
  }
  if (myTime != 0 && millis() - myTime > timer * 1000 && position == true) {
    Serial.println("opening");
    position = false;
    EEPROM.write(0, position);
    digitalWrite(DIR_PIN, HIGH);  // LOW or HIGH
    for (int i = 0; i < stepsnumber; i++) {
      digitalWrite(STEP_PIN, HIGH);
      delayMicroseconds(5000 / 20);  // Adjust delay as needed
      digitalWrite(STEP_PIN, LOW);
      delayMicroseconds(5000 / 20);  // Adjust delay as needed
      float ledPowerFloat = ((float)stepsnumber - (float)i) / (float)stepsnumber;
      int ledPower = ledPowerFloat * 255;
      //Serial.println(ledPower);
      ledPower = constrain(ledPower, 0, 255);  // Ensure ledPower is within 0-255
      analogWrite(LED, ledPower);
    }
    Serial.println("opened");
  }
}
In this code
val = digitalRead(sensor);  // read sensor value
  if (val == HIGH) {          // check if the sensor is HIGH
    if (state == LOW) {
      Serial.println("Motion detected!");
      myTime = millis();
      state = HIGH;  // update variable state to HIGH
      if (position == false) {
        Serial.println("closing");
        position = true;
        EEPROM.write(0, position);
        digitalWrite(DIR_PIN, HIGH);  // LOW or HIGH
I was parallelly checking in Serial Monitor. Every time sensor was detecting a motion, in Serial Monitor it was writing that “Motion detected!” and Motor was starting to rotate.
And if stepper motor started to rotate, LED is turning On with a gradient․
  float ledPowerFloat = (float)i / (float)stepsnumber;
      int ledPower = ledPowerFloat * 255;
      ledPower = constrain(ledPower, 0, 255);  // Ensure ledPower is within 0-255
      //Serial.println(ledPower);
      analogWrite(LED, ledPower);
    }
  Serial.println("closed");
And when the chandelier is completely closed, it is in its final direction, he writes “closed”.
Also you can see a timer in this code. Thanks to the timer, we are able to open back the wings of the chandelier and turn off the light if the sensor hadn’t detected motion for some time.
if (myTime != 0 && millis() - myTime > timer * 1000 && position == true) {
    Serial.println("opening");
Stepper motor
I looked for STEPPER MOTOR BASICS.
I tested my motor in 6th week, Embedded programming.
After I started experimenting with speed.
But besides that I changed 2 motors. The important thing in choosing stepper motor is its power.
Based on the researches that I conducted i made a desition to change the stepper motor used previously.
Since there will be a lot of rolling resistance in motion, I need a powerful stepper motor.
I put this one motor, which I found from an old printer. Such unused printers, which are donated to FabLab, are dismantled and disassembled by our staff or ourselves. Then we use the necessary parts and devices.
Thus, the stepper motor was removed from the printer. There was no name tag/sticker or similar information left on it.
I had this place for fixing Stepper Motor on my middle module.
Programming the Stepper Motor
So I just started programming and experimenting with it.
Also I tried to make my stepper motor work with Arduino Uno board.
I did this because, while working with my board, the motor would skip certain steps and not rotate in the opposite direction.
For a long time I did not understand what the problem was until we put a capacitor on the DIR (direction) pin.
The capacitor helped with this and when I connected the motor with my board it worked and it rotated in both directions.
So as CoPilot explain:
With the capacitor in place, the motor driver receives cleaner signals, allowing it to control the motor more effectively. As a result, the motor rotates smoothly in both directions without missing steps.
By adding a capacitor to the DIR pin, I created an RC (resistor-capacitor) filter. The capacitor helps smooth out voltage spikes caused by the motor’s inductance.
When the motor changes direction, the capacitor absorbs excess voltage and prevents it from reaching the motor driver. This reduces noise and ensures stable operation of the motor driver.
I tested my motor in work by this code.
#include <Arduino.h>

#define EN_PIN 1           // Enable (CFG6) 1
#define DIR_PIN 4          // Direction 7
#define STEP_PIN 6         // Step   2
int stepsnumber = 5000;    // steps number to open/close the chandelier

void setup() {
  pinMode(EN_PIN, OUTPUT);
  digitalWrite(EN_PIN, HIGH);  // Deactivate driver (LOW active)
  pinMode(DIR_PIN, OUTPUT);
  digitalWrite(DIR_PIN, HIGH);  // LOW or HIGH
  pinMode(STEP_PIN, OUTPUT);
  digitalWrite(STEP_PIN, LOW);
  digitalWrite(EN_PIN, LOW);  // Activate driver
  Serial.println("Booting");
  Serial.print("position: ");
  Serial.print(position);
}

void loop() {
  Serial.println("closing");
  position = true;
  digitalWrite(DIR_PIN, HIGH);  // LOW or HIGH
  for (int i = 0; i < stepsnumber; i++) {
    digitalWrite(STEP_PIN, HIGH);
    delayMicroseconds(10000 / 20);  // Adjust delay as needed
    digitalWrite(STEP_PIN, LOW);
    delayMicroseconds(10000 / 20);  // Adjust delay as needed
    Serial.println("i");
  }
  Serial.println("closed");
  delay(500);
}
Input device | Programming
I plan to use PIR motion sensor
The PIR motion sensor is ideal for detecting movement. PIR stands for “Passive Infrared”. The PIR motion sensor measures infrared light from objects in its field of view.
So, it can detect motion based on changes in infrared light in the environment. It is ideal to detect if a human has moved in or out of the sensor range. The sensor has two built-in potentiometers to adjust the delay time (the potentiometer at the left) and the sensitivity (the potentiometer at the right).
I plan to program it so that by detecting the movement chandelier’s wings will start closing. At first I test it by Arduino.
I watched videos and tried to program it by Arduino.
I put PIR sensor in my middle module, where I already had the place for it.
And took the wires from it like in the photo.
So nothing was seen.
Assembling
In 16th week I was working on assembling mechanisms and modules together. To understand what problems there are in the mechanism, assembly, dimensions.
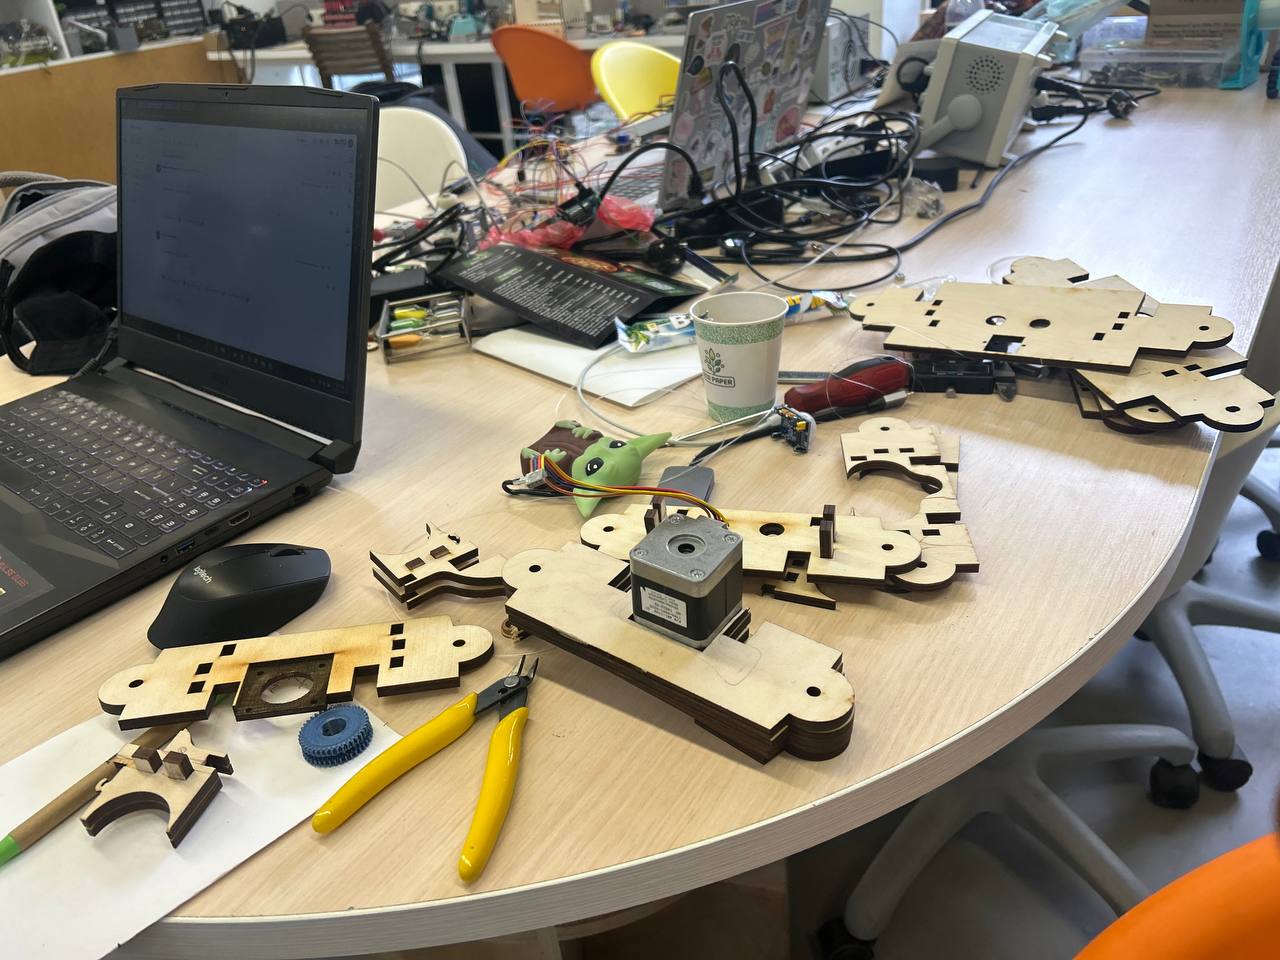
During Computer controlled machining week I started working on final project and cut parts by CNC machine that I assembled after. Main function of this chandelier is documented in video below.
Each module consists of 3 layers. I used 12 mm plywood.
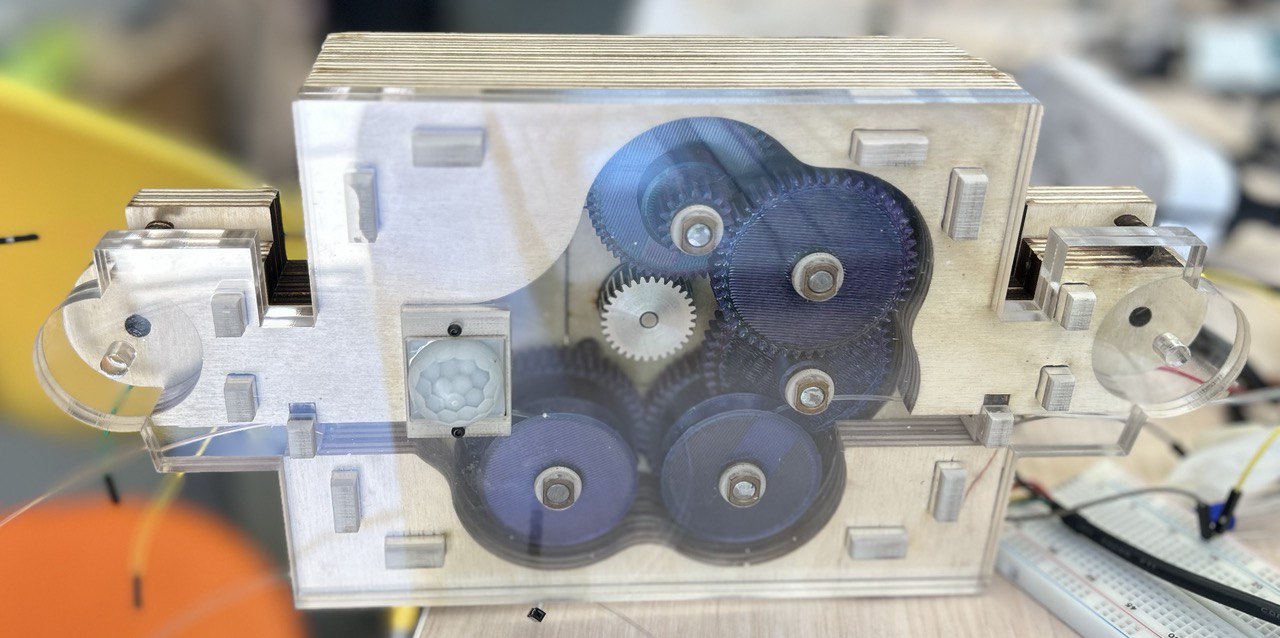
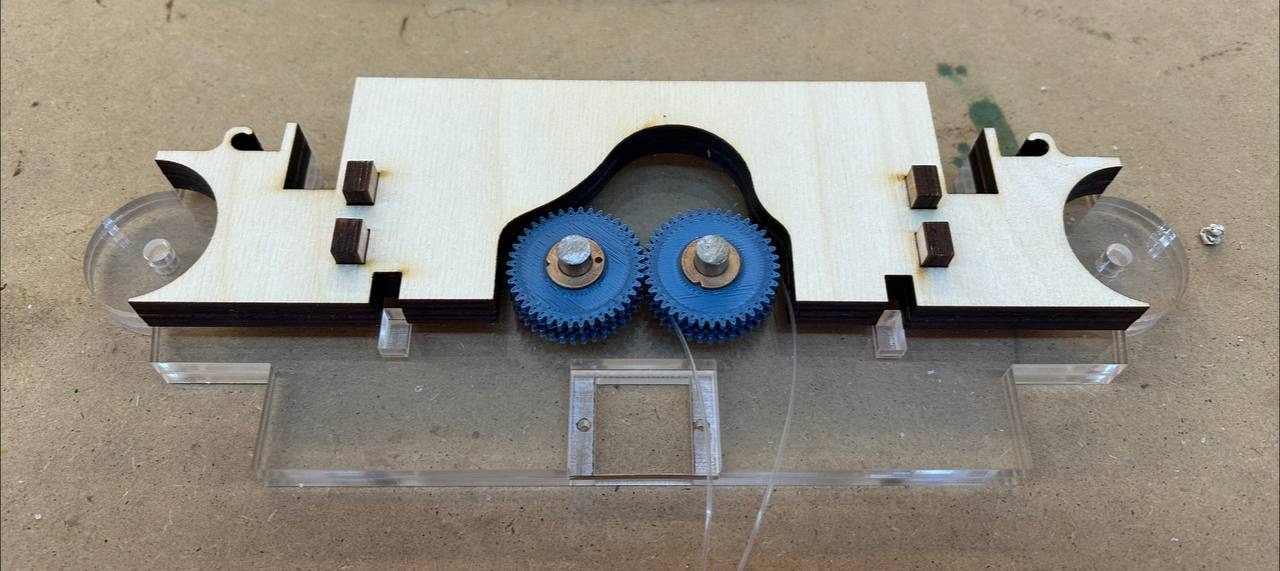
Middle Module
I decided to cut the middle module, which is the main one, with a laser cutter, because it needed very detailed assembly and sizing. The stepper motor, 2 gears, motion detector are assembled in the middle module.
So I was trying to cut the 6mm plywood and assemble and disassemble the middle section.
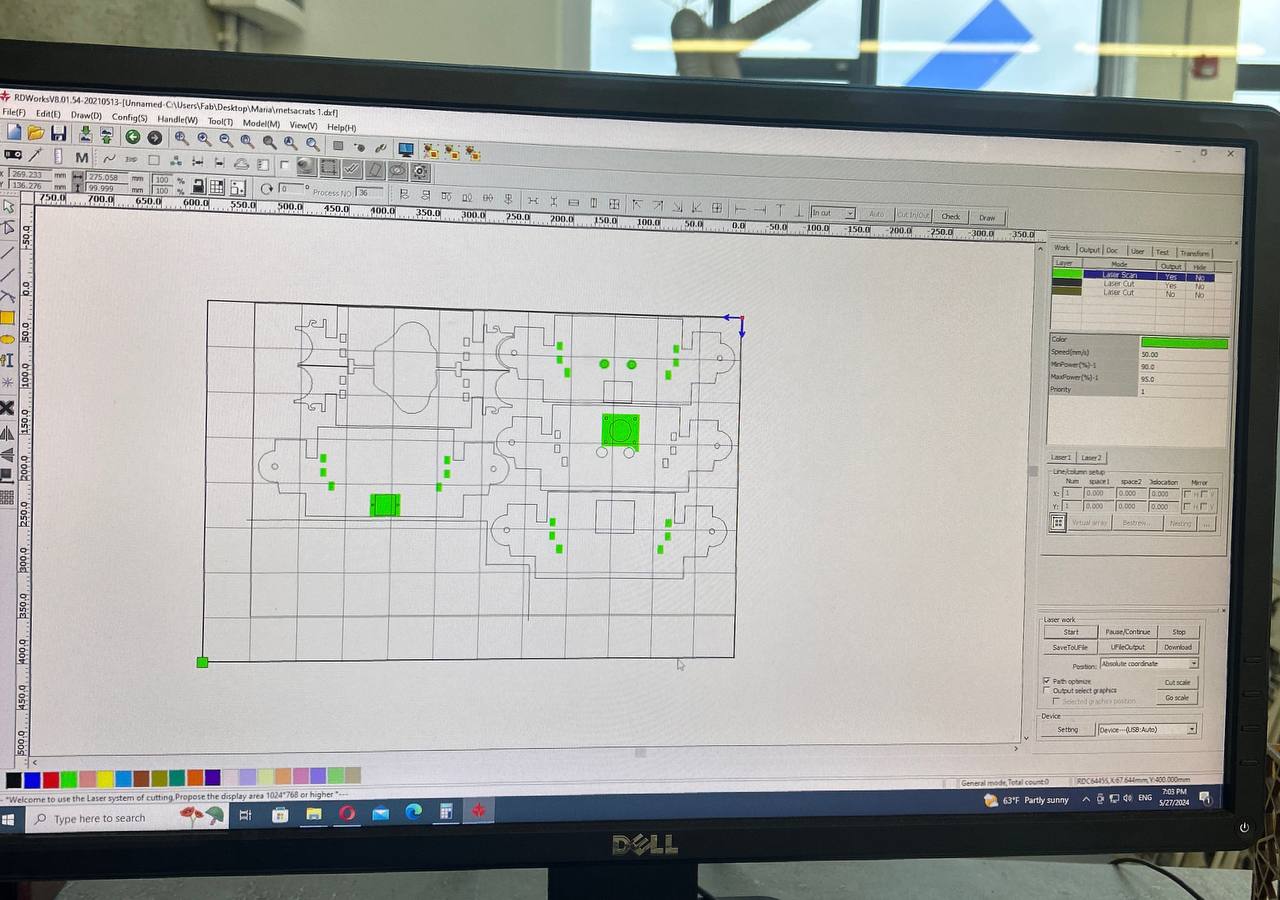
I cut some parts.

This is how it was looking at first. In one part of the module, I designed hooks for rubber. In the other part, the part of threading is done.
But after I thought that gear’s mechanism will look cool from the bottom side. It will be beautiful, if I’ll make the bottom layers of my middle module transparent (like from the acrylic.). For this I cut 2 bottom layers from 6mm acrylic.
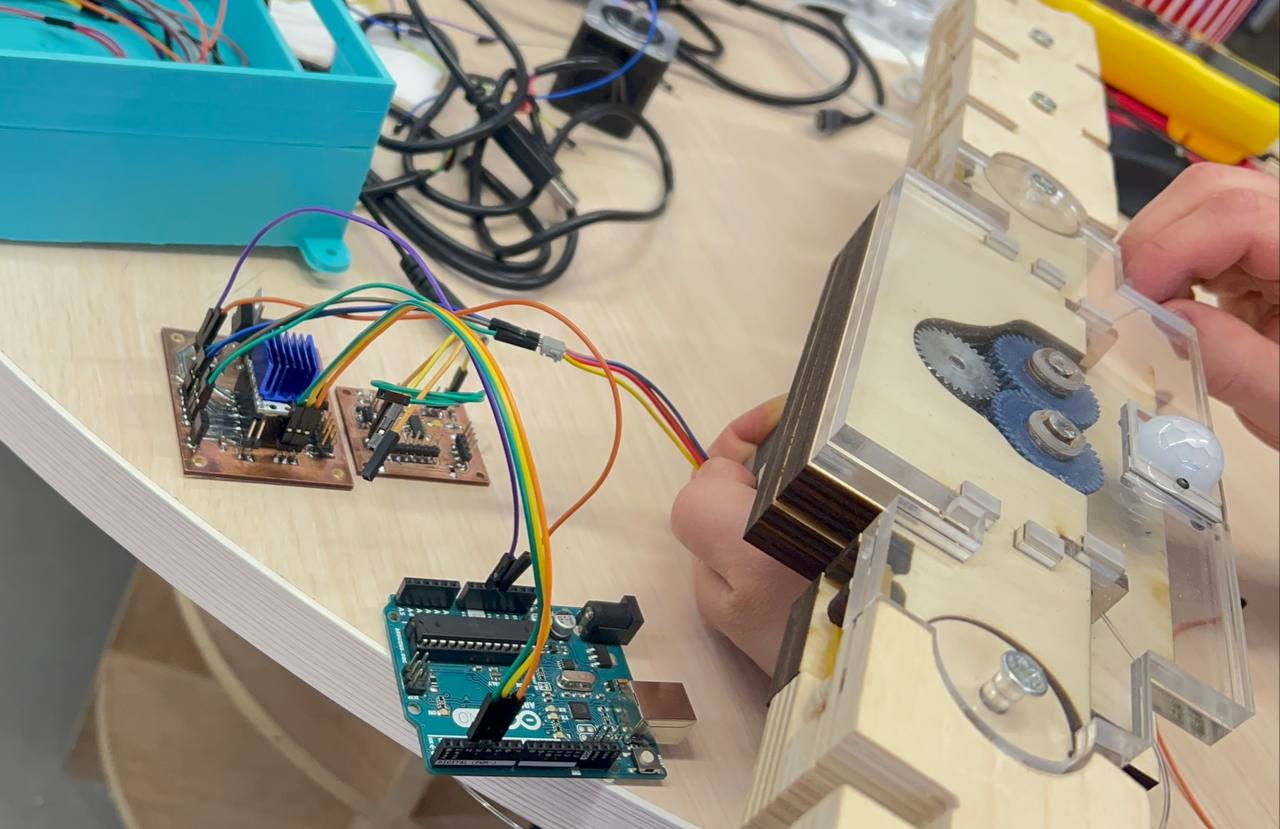
In this acrylic I also designed the placement of the PIR Sensor.
This is how it looks.
Hooks and Elastic Bands
This parts are to give extra strength to my modules.

Small cross-like middle parts to pass the thread. They are specially made in such a size that they are not visible from any side and are stuck in the middle part of the place.

In this video below you can see hooks, which are for elastic bands. I did them in the same line with model, so that it will not be visible.
System integration
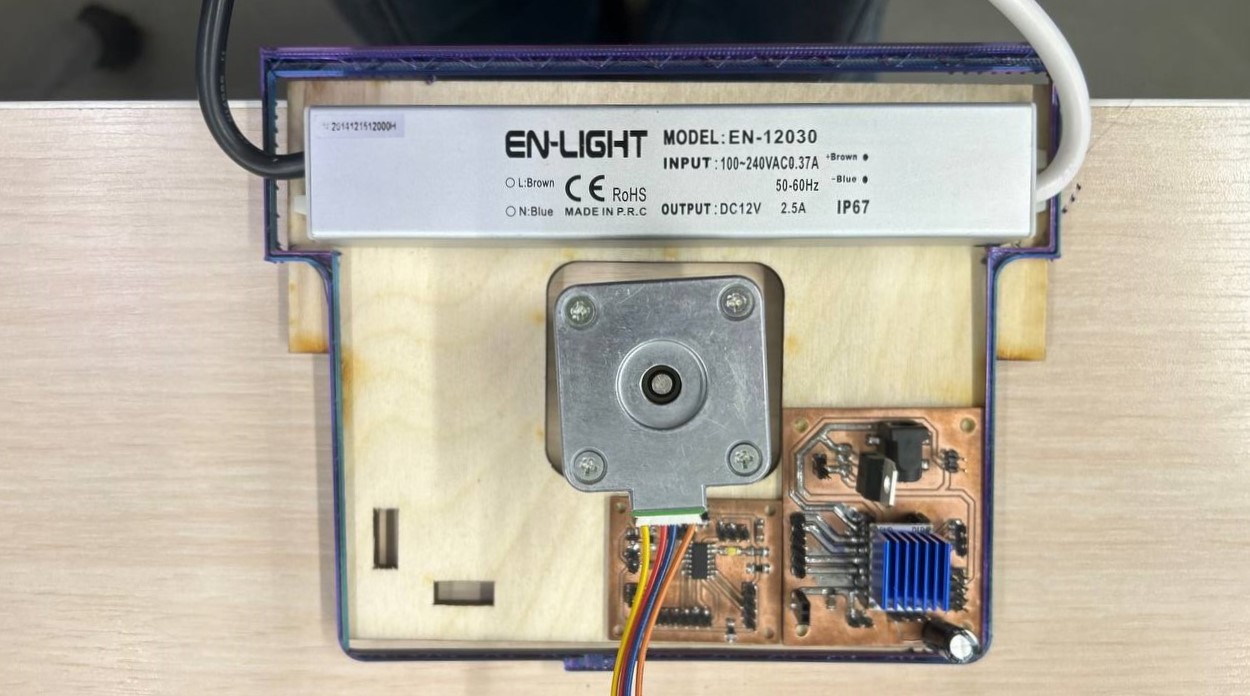
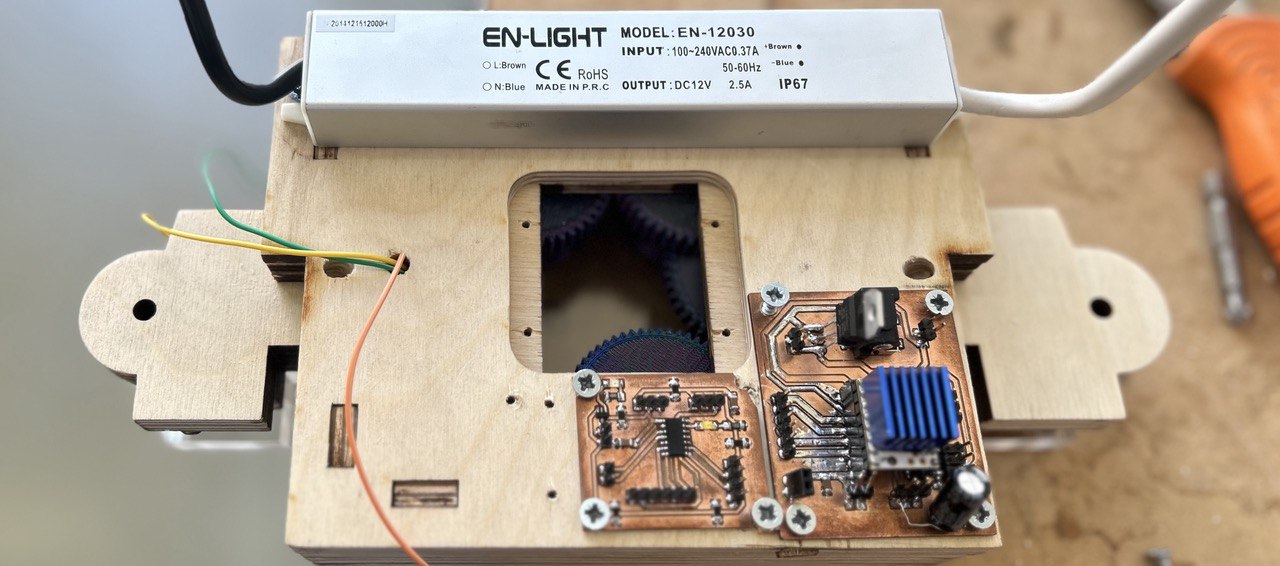
Also I was trying to fit my PCB boards to the middle module.I used 3 boards - main board on which is my AtTiny 1614microcontroller, a separate board with stepper motor driver and pins for the HC-SR501 Passive Infrared (PIR) sensor module and a small board for LED.
I used Power Supply unit (PSU) designed for low-voltage applications. This PSU is used to power LED strips, sensor, stepper motor, which require a stable 12V DC supply.
On some parts I used cable clips/organizers.

These small plastic clips are designed to hold wires together and keep them organized.
This is how it was looking at the end.
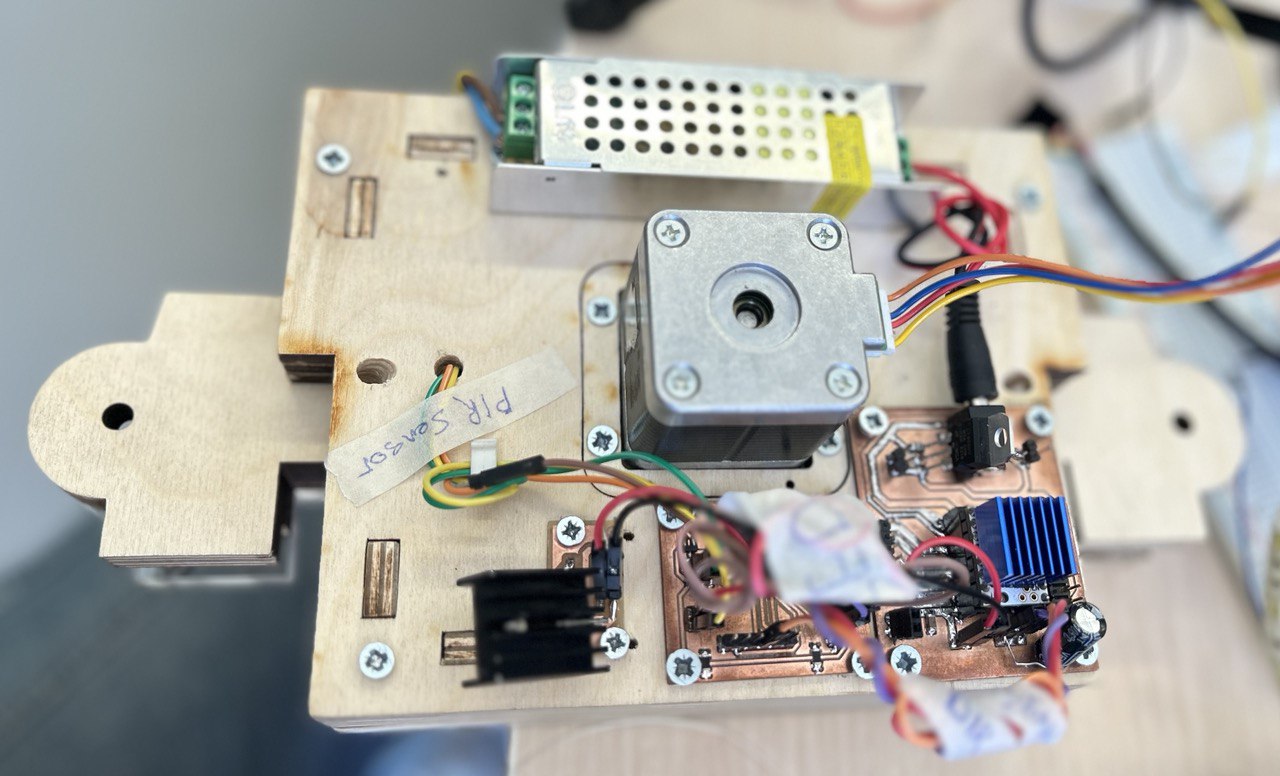
You can notice that I changed the PSU. I did that cause I thought this one will work better and doesn’t take that much space.
But after the final connection, I noticed some glitches, so I changed it to the original one.
Bill Of Materials
| Qty | Description | Price | Link | Notes |
|---|---|---|---|---|
| 1 | (6mm) Acrylic sheet | ~2.00 $ | from lab | |
| 1 | (12mm) Plywood | ~15.50 $ | from lab | |
| 1 | (6mm) Plywood | ~5.00 $ | from lab | |
| 1 | Elastic Thread | 2.00 $ | http://amazon.com/test | |
| 1 | Elastics Ormco | 3.86 $ | https://global.wildberries.ru/product?card=219403095 | size 5/16” |
| 1 | Driver TMC2208 V1.2 | from lab | https://global.wildberries.ru/product?card=119508318 | |
| 2 | Filament | ~25.00 $ | from lab | |
| Total | 58.00 $ |
Branding
For naming my project I didn’t have so much time.
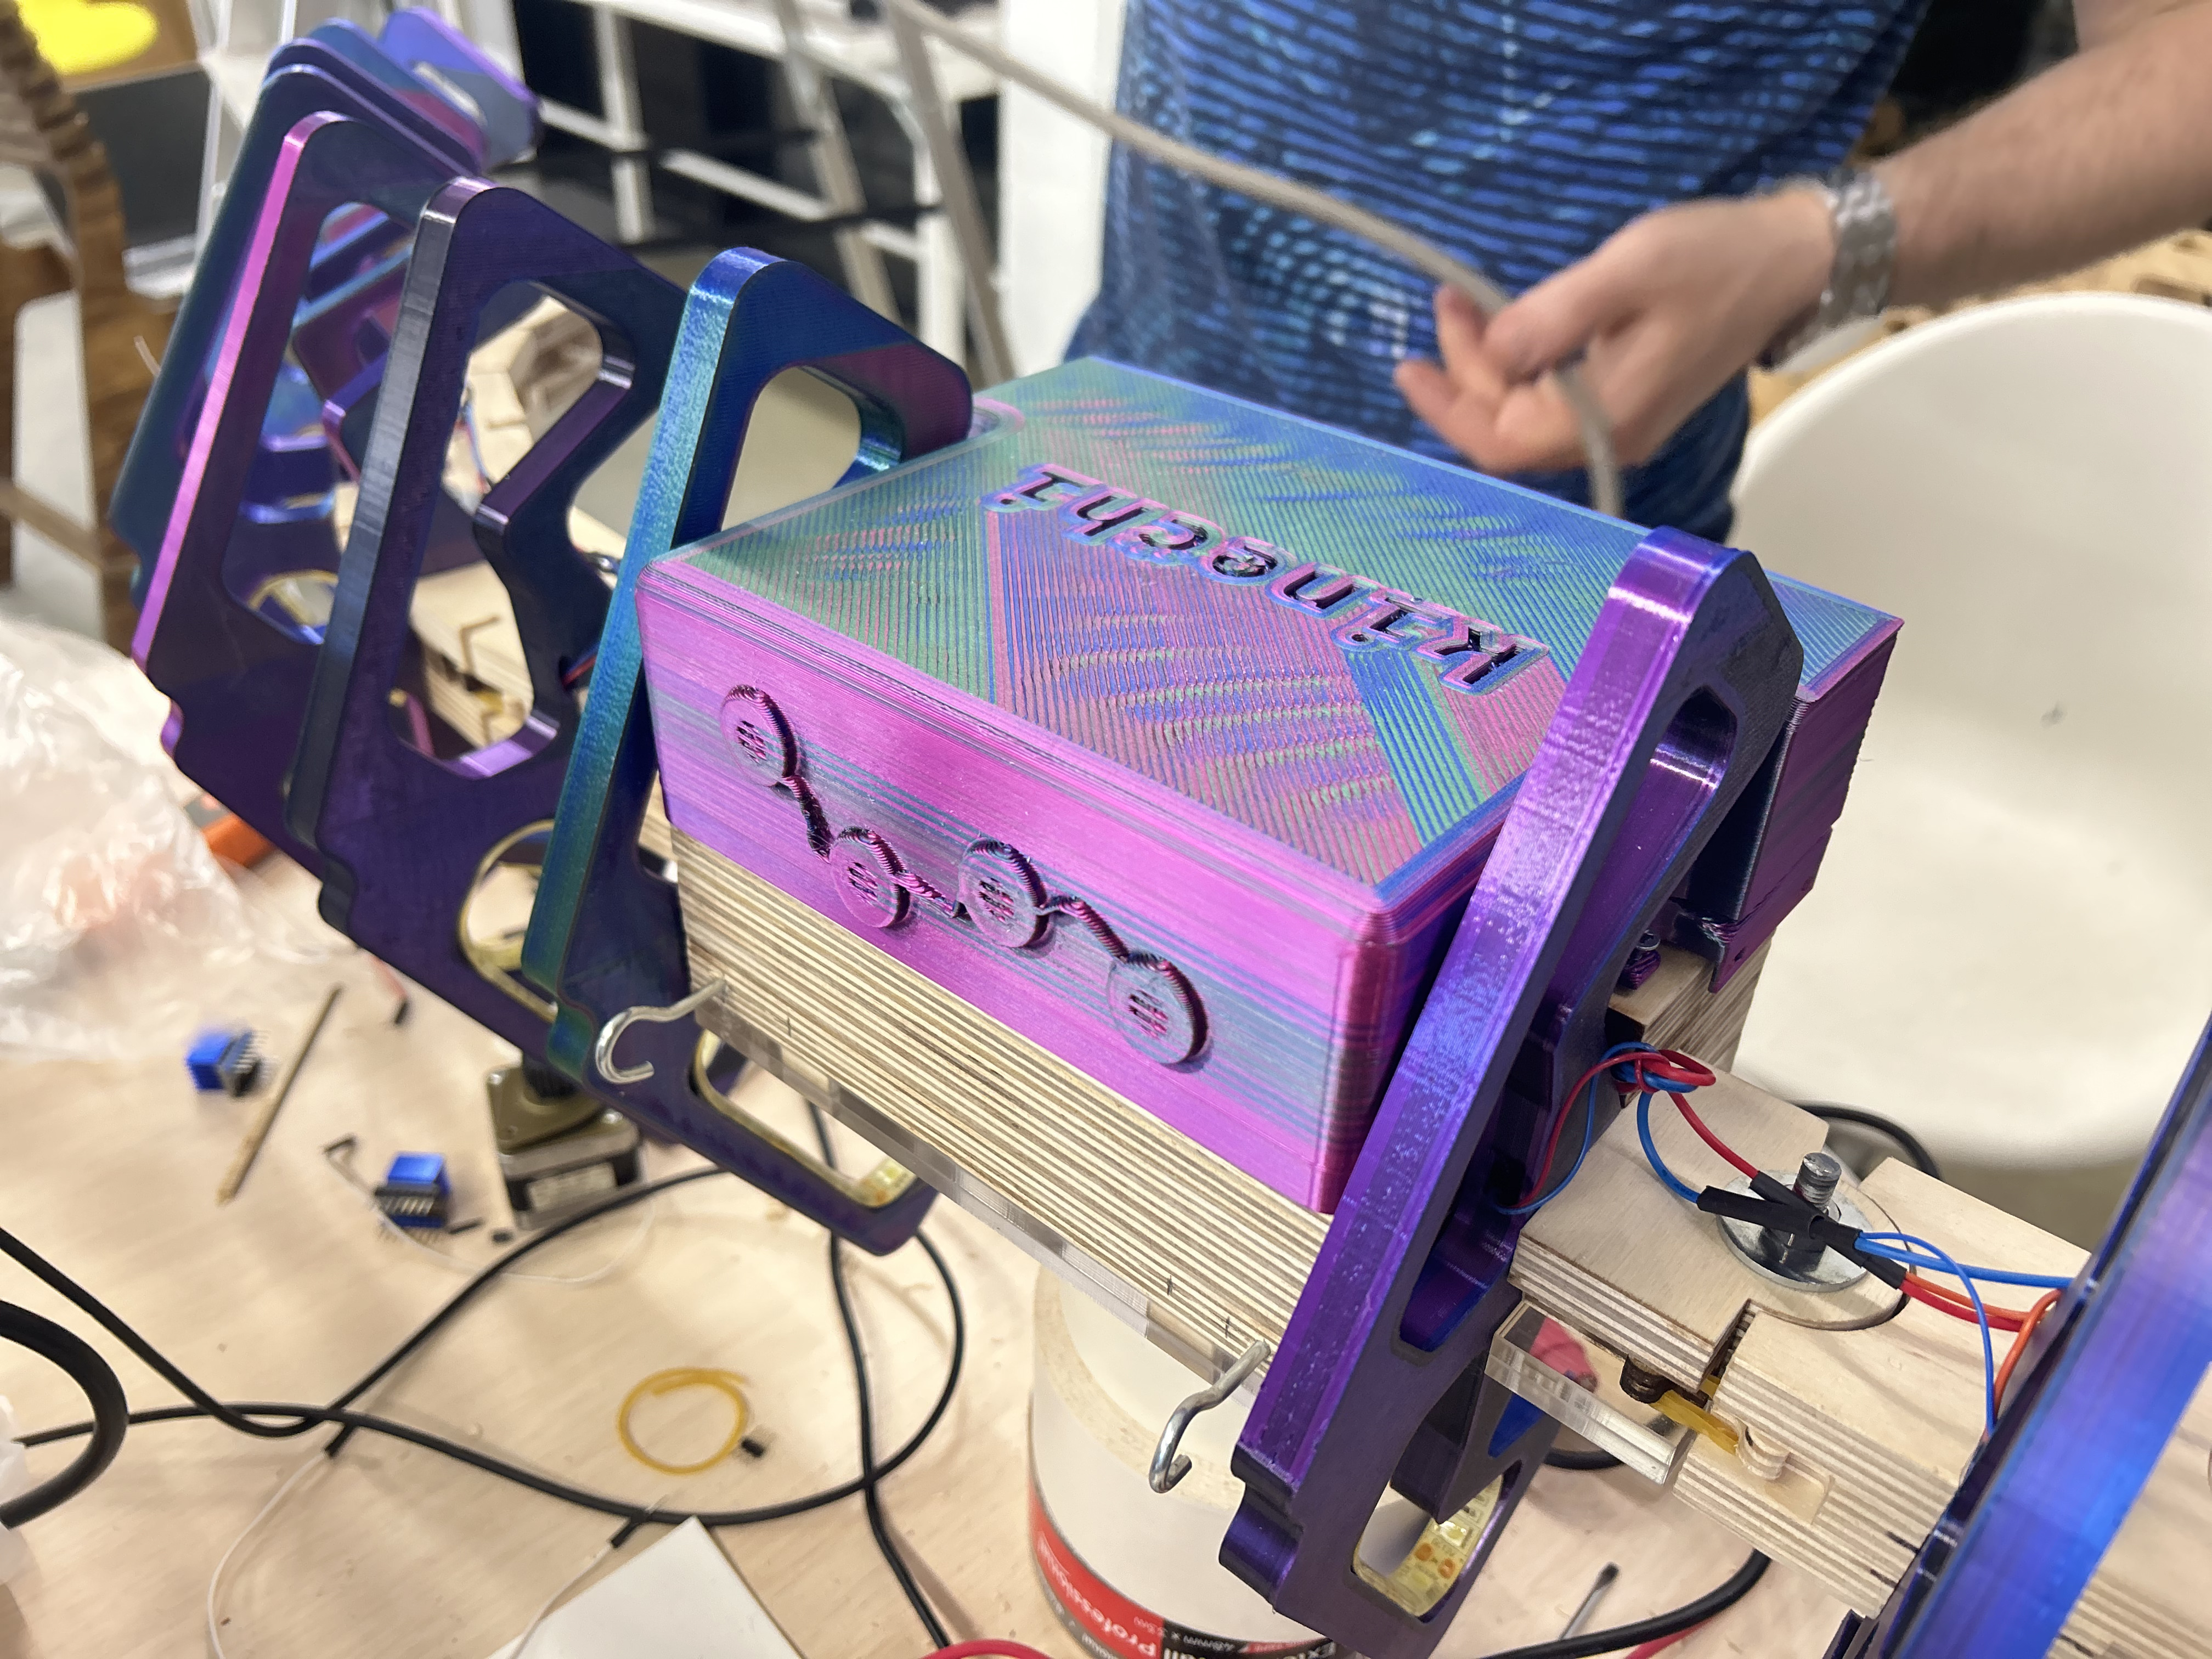
In one moment I just thought that it would be cool to engrave my project name somewhere on my chandelier. That’s why I started thinking about name and a small logotype.
Kinetic Chandelier - Kine tic Ch andel i er - Kinechi
I opened very fast my Adobe Illustrator and started making logotype design.
![]()
Also I was thinking about additional, secondary logo. For places, where there is not so much space.

thanks to this logo, I was able to easily get the motor ventilation holes on the packaging box.
Conclusion
Every step of the realization of my final project was an interesting, new way. Every problem that arose was a new opportunity to learn more. On the way to solving each problem, I discovered myself anew and learned much more than before the problem exposed.
Although I had other plans for the final project when I first came to Fab Academy, I had an amazing experience that I could not have imagined before.
Files
3D Modeling Files
Kinetic Chandelier, Fusion 360 Files folder
Electronics Design Files
Primary Board, KiCAD Files folder