5. 3D Scanning and printing
This week worked by SolidWorks, trying to make a generative designed model, details for my final projects. Besides that, I tried 3D Scanning softwares.
Group Assignment
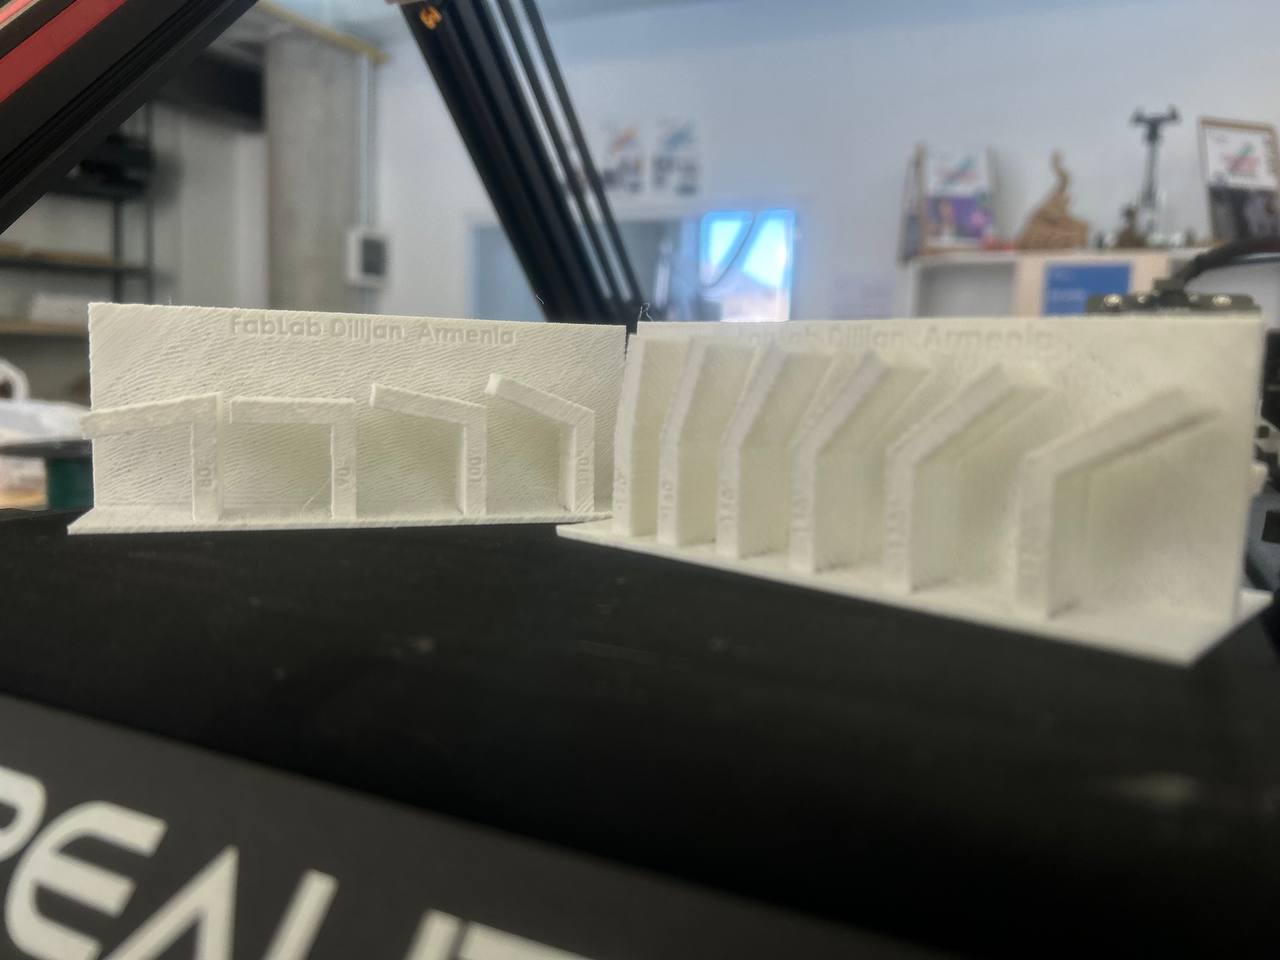
For our group assignment in 3D Printing we got acquainted with FabLab Dilijan’s 3D printers. Most of them, by which we worked were Chinese Creality 3D Printers:
This 3D printer differ from other printers by his peelable printing surface, as it comes out of bed surface and pulls off itself due to bending. So when you print something in it, after you don’t have to separate It from the working surface by instruments with sharp edges and damage the working surface. It can be easily peeled.
We cleaned this machine before using and got acquainted with it’s tools, parameters, way of working. Also we changed the filament.
ps. nozzle*
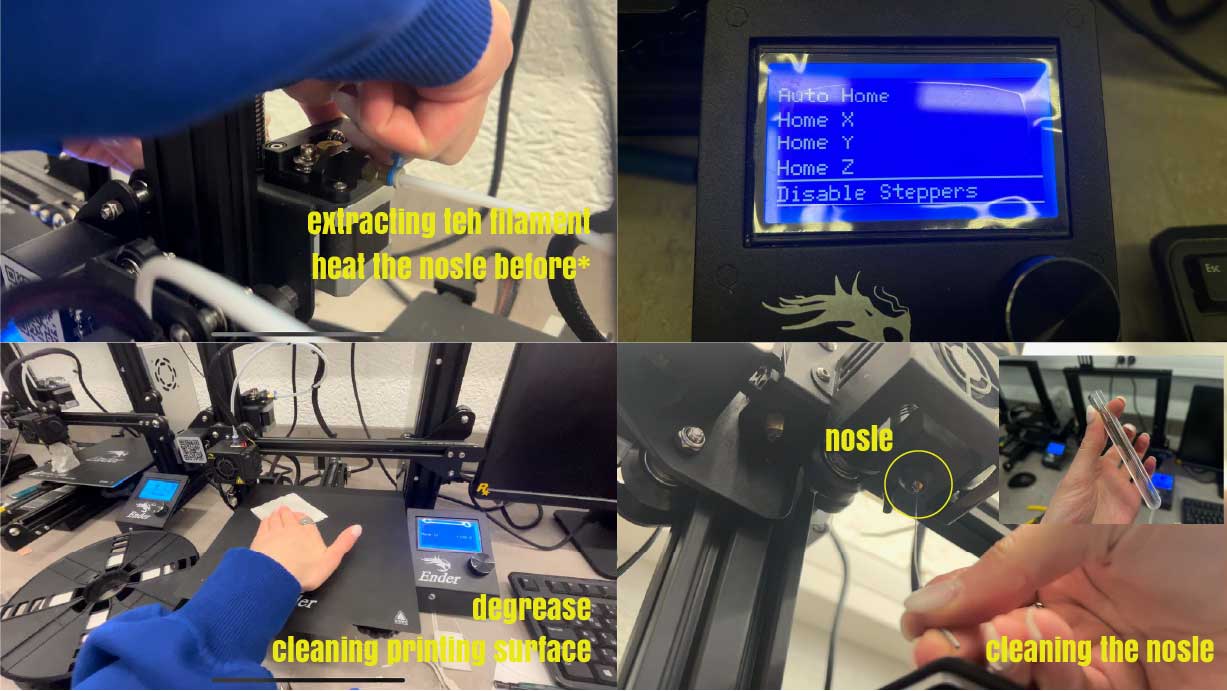
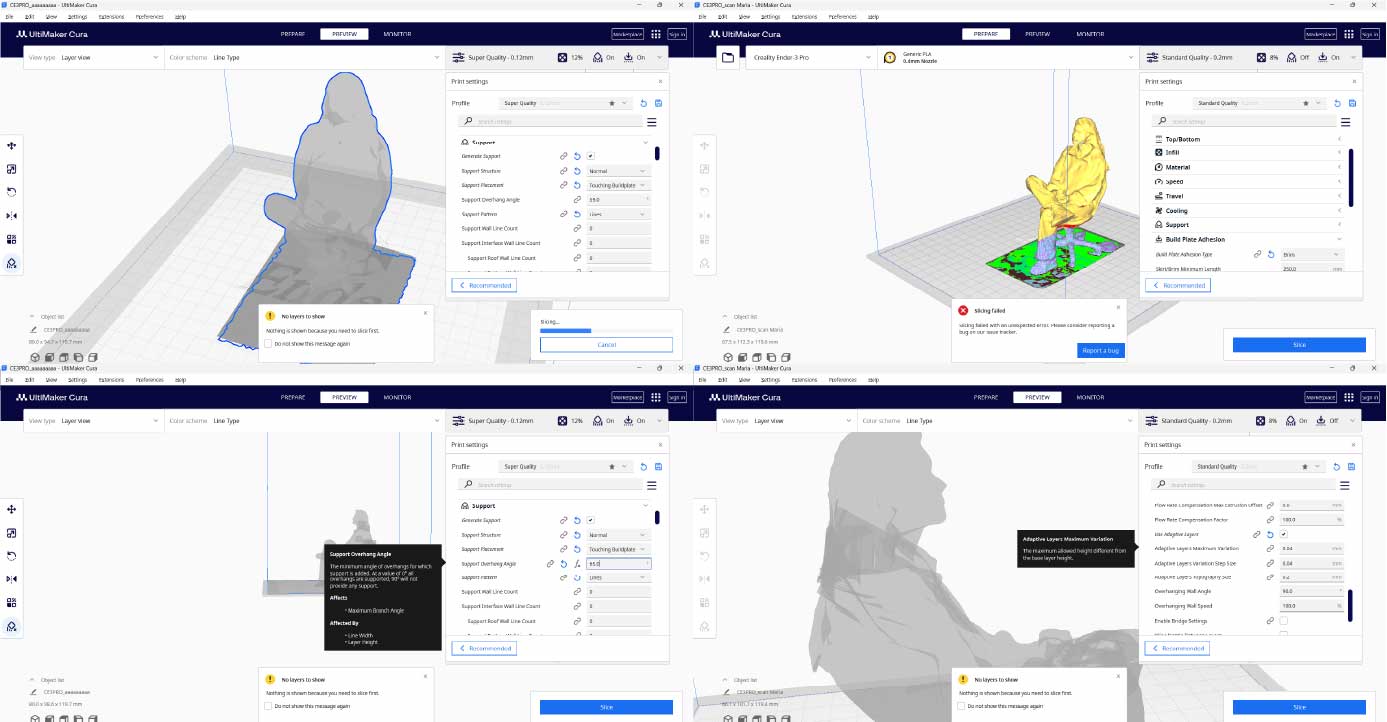
After cleaning and modeling assignment we tried the printer. and UltimakerCura app.
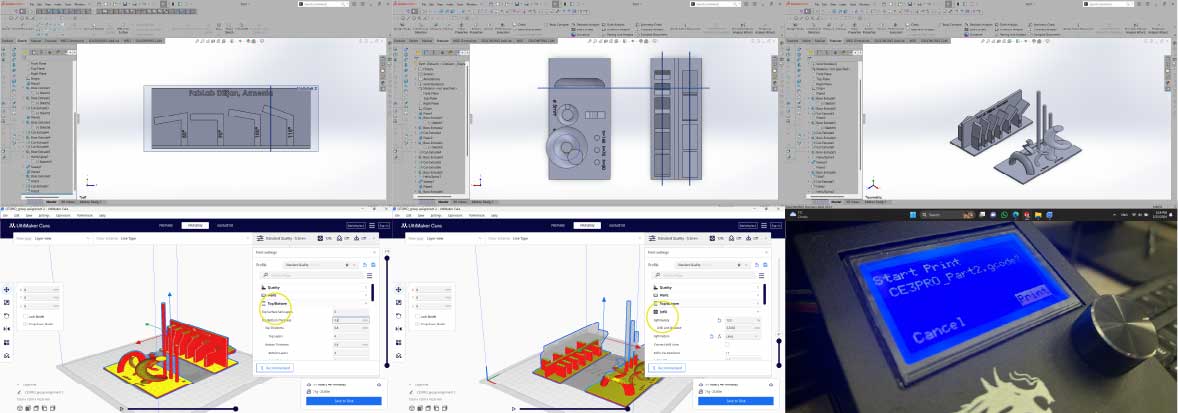
| Parameters | UltimakerCura |
|---|---|
| Quality | standard |
| Walls | x 2 |
| Thiknes of walls | 0.8mm |
| Infill | lines |
| Infill density | 12% |
| Top/Bottom | 0.8mm/x 4 |
| Parameters | Ender - 3 Pro |
|---|---|
| Nozzle | 200°C |
| Bed | 50°C |
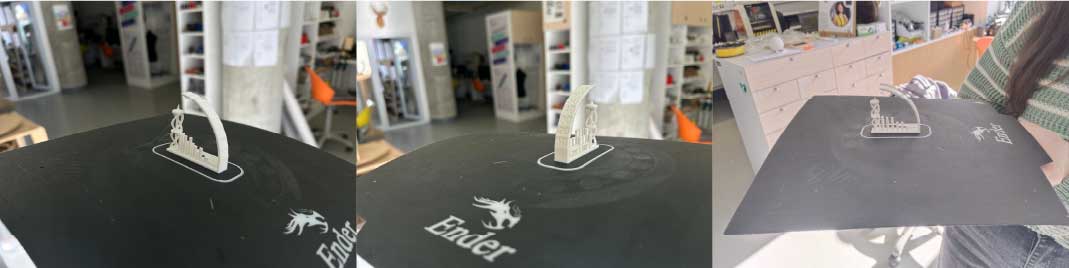
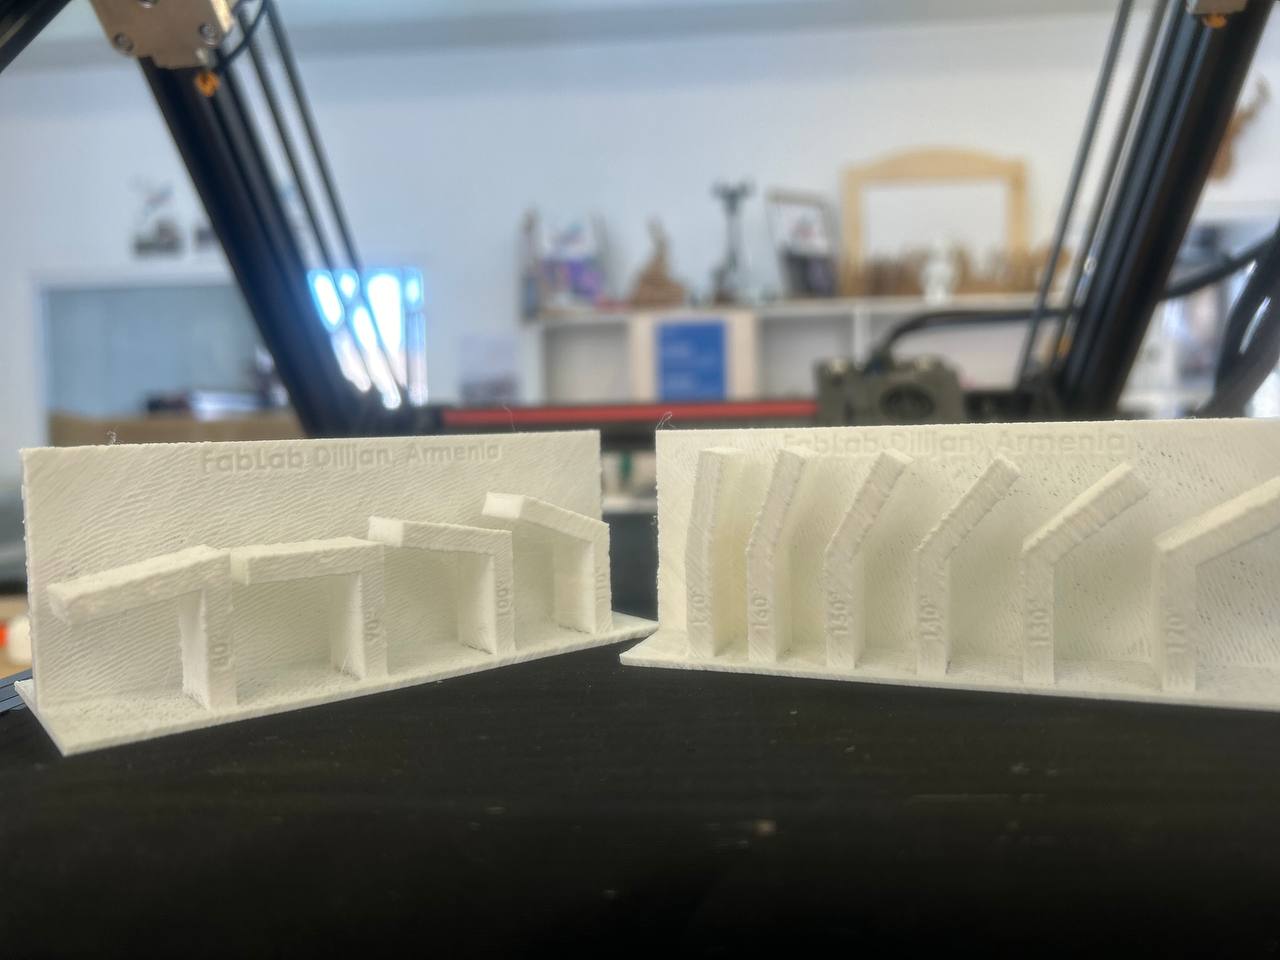
We tried the degree of slantness and until which inclination Ender will be able to print.

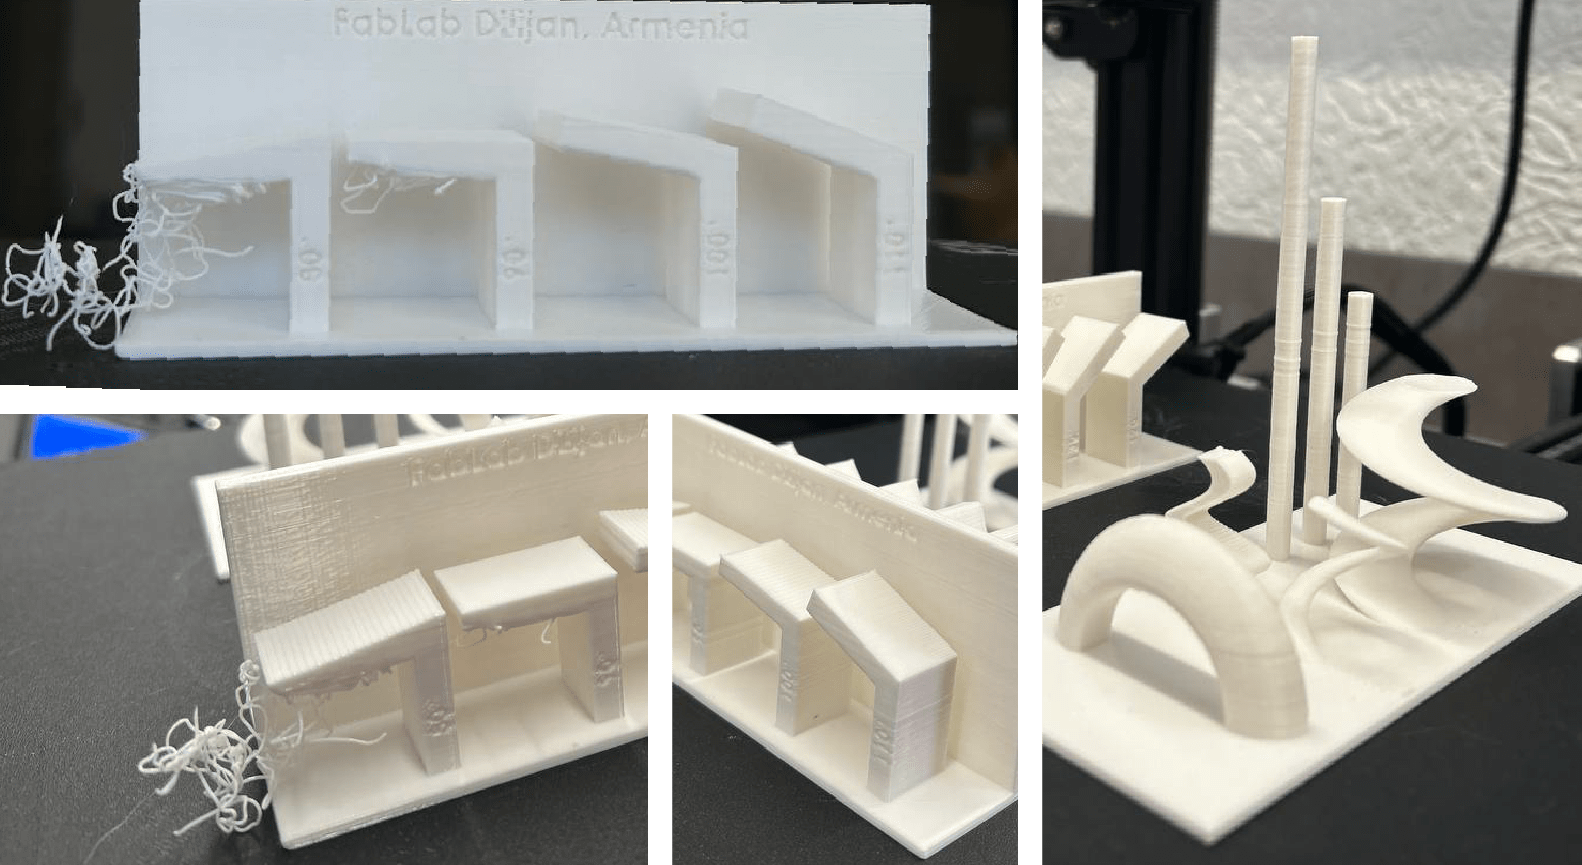
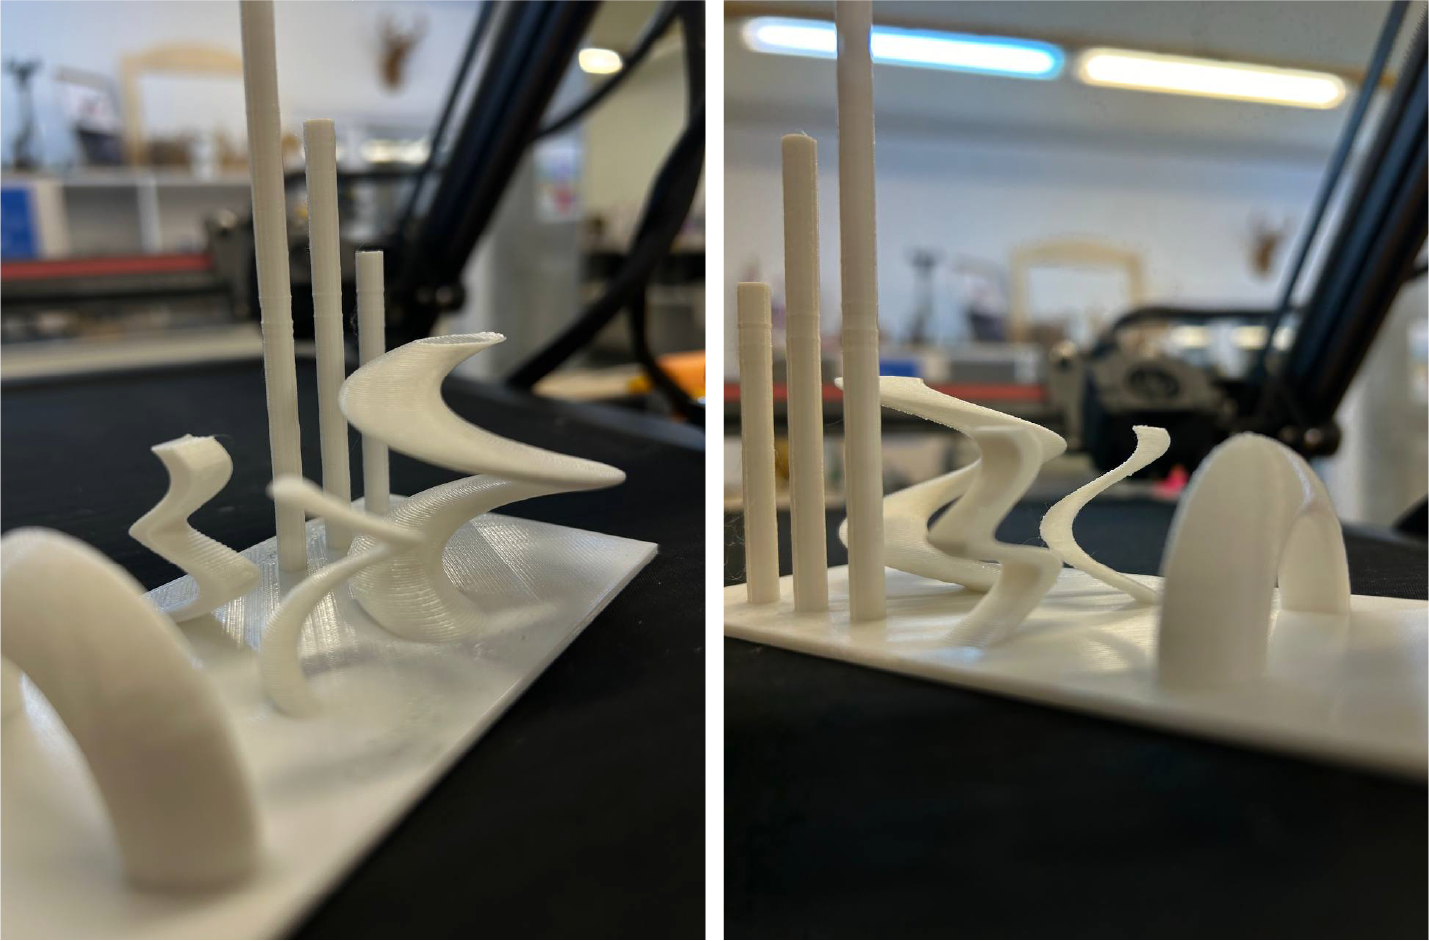
As you can see it has a good quality of printing and good inclination. This model we tried to print by CR-30 printer too, cause it has 45° slantness of Z-Axis.
This printer is like the previous one, but without peelable surface. It has nearly the same possibilities and interface is almost the same too.
We did the same process of cleaning with this printer too, and after modeling group assignment, opened in Cura and set the parameters for printing.
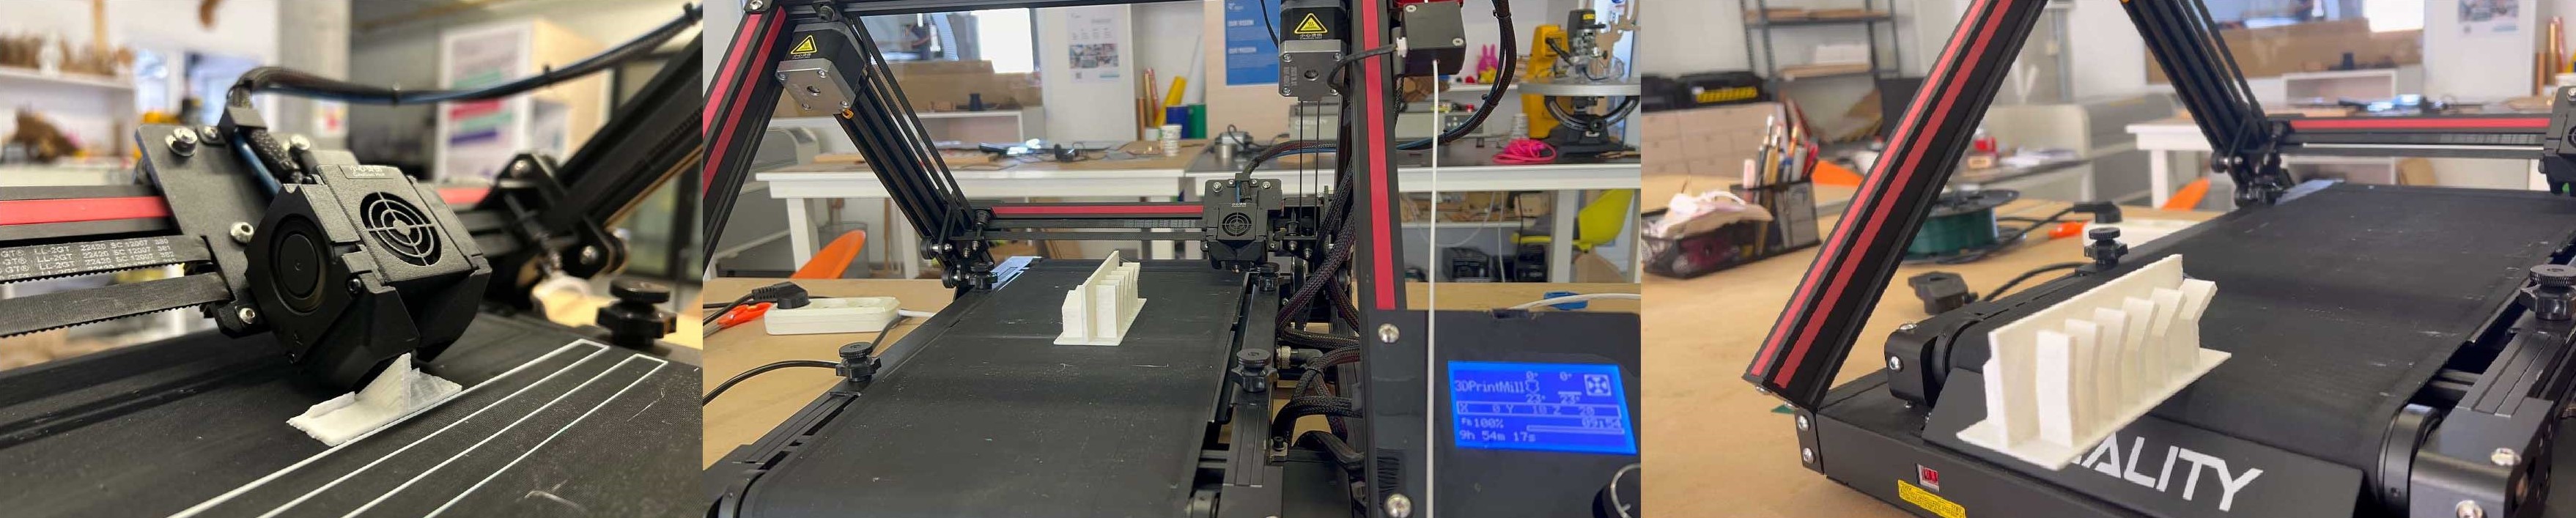
By this printer we tried another group assignment. First try was worse, cause we gave speed in process from 3D printer (more than 100%). After we tried in 100% speed, not more.
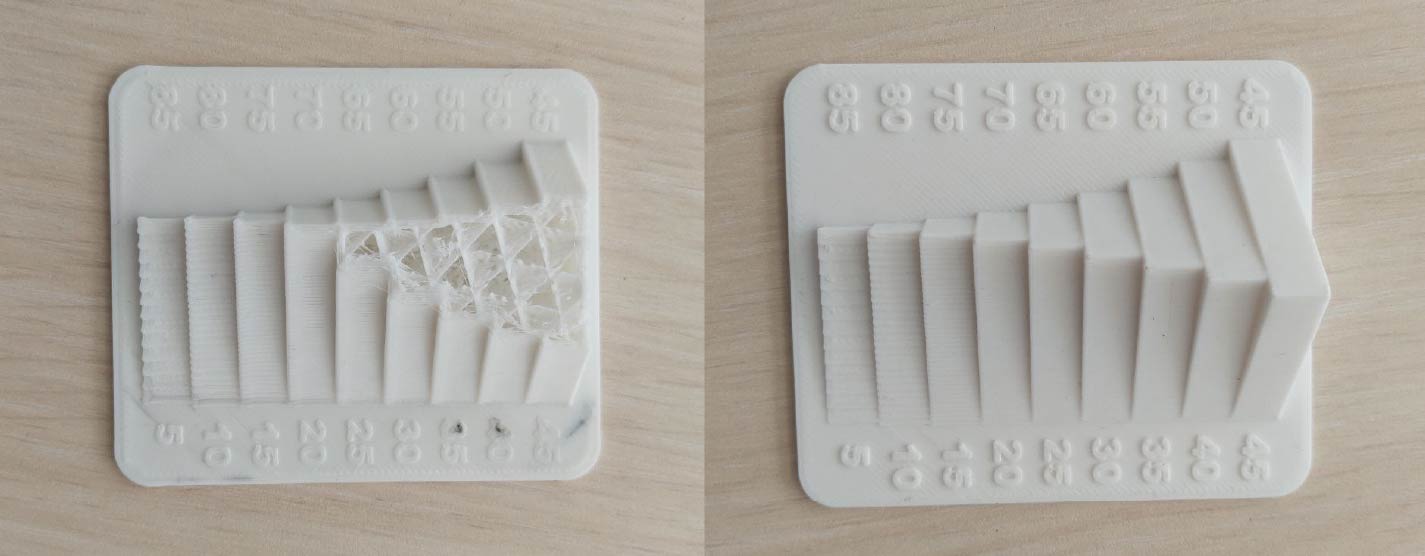
And another one. Speed-100%. Printed in an hour.

This Creality 3D printer has an infinite Z-Axis for endless printing. It’s equipped with rolling conveyor-belt. It can continuously print more than 200 hours.
For this printer we used another slicer app-Creality Slicer.
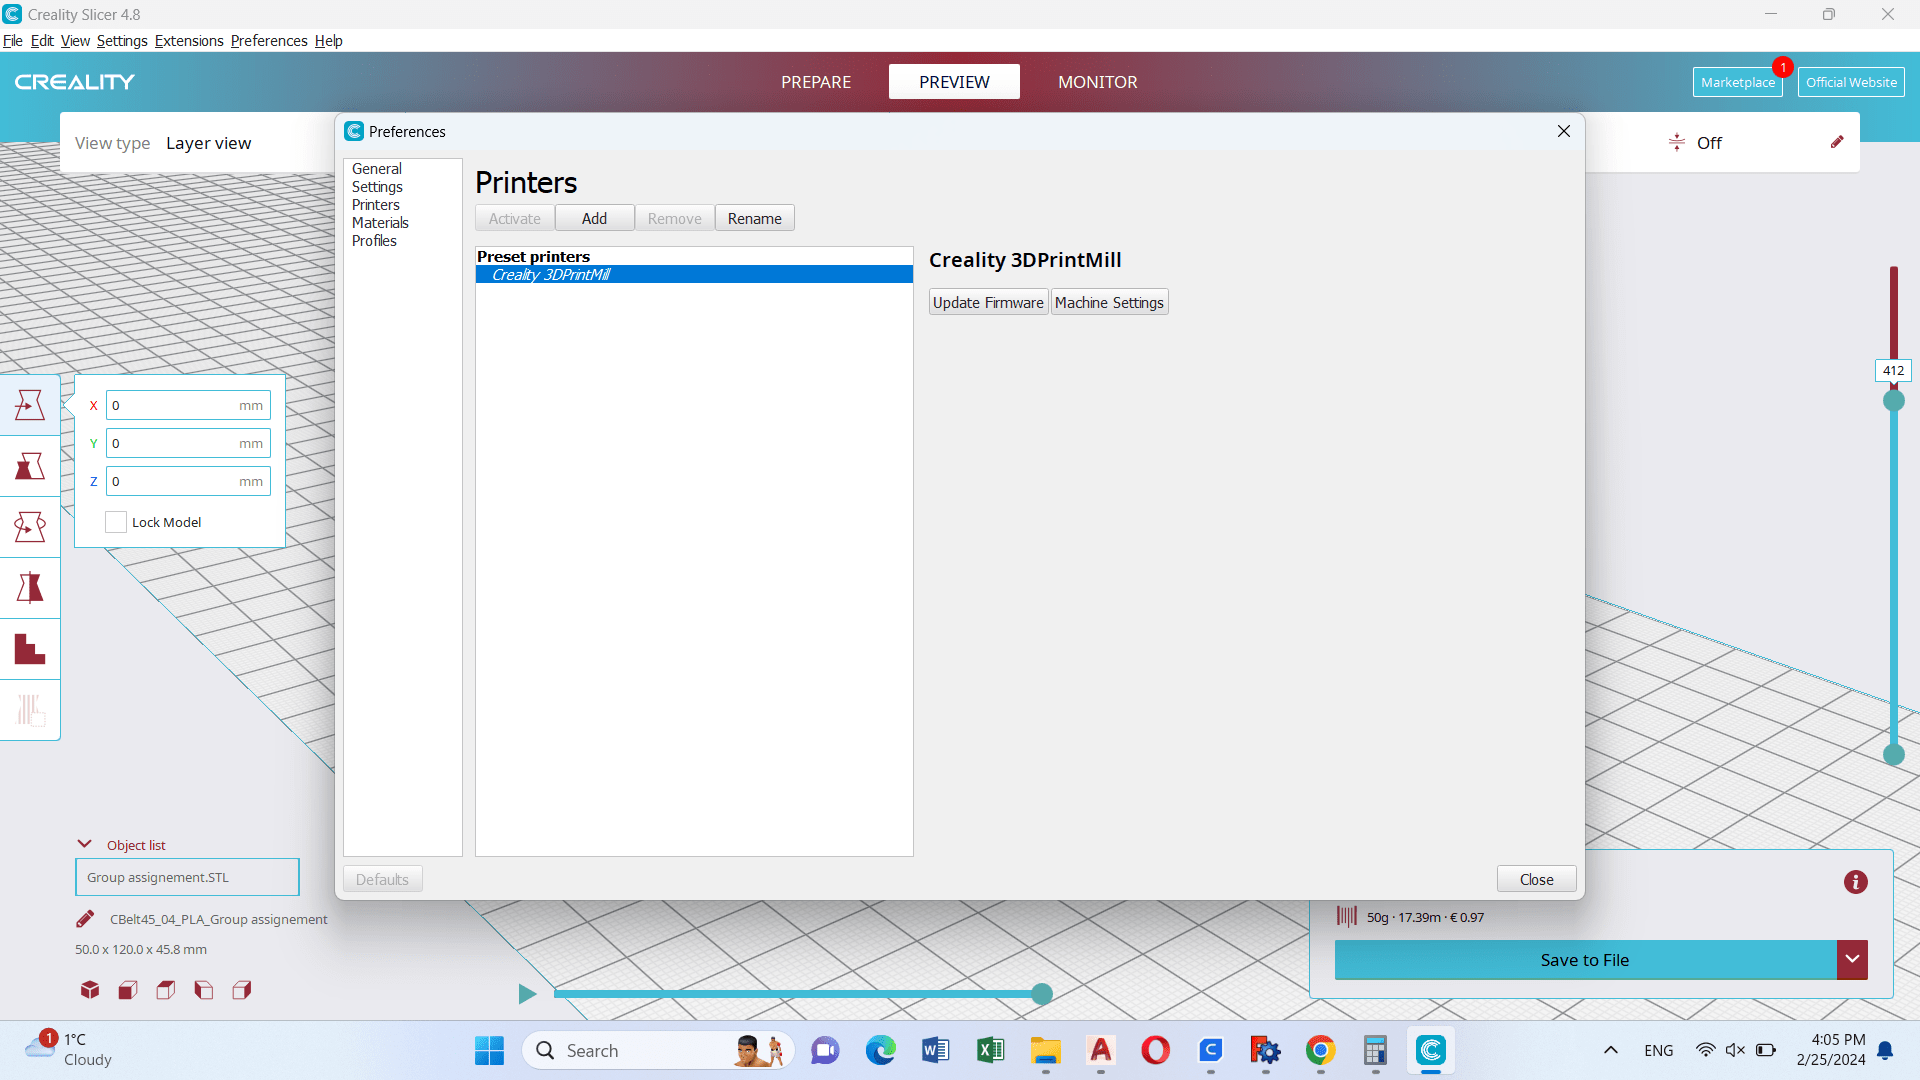
After choosing the 3D printer type, we opened our 3D model here.

Parameters:
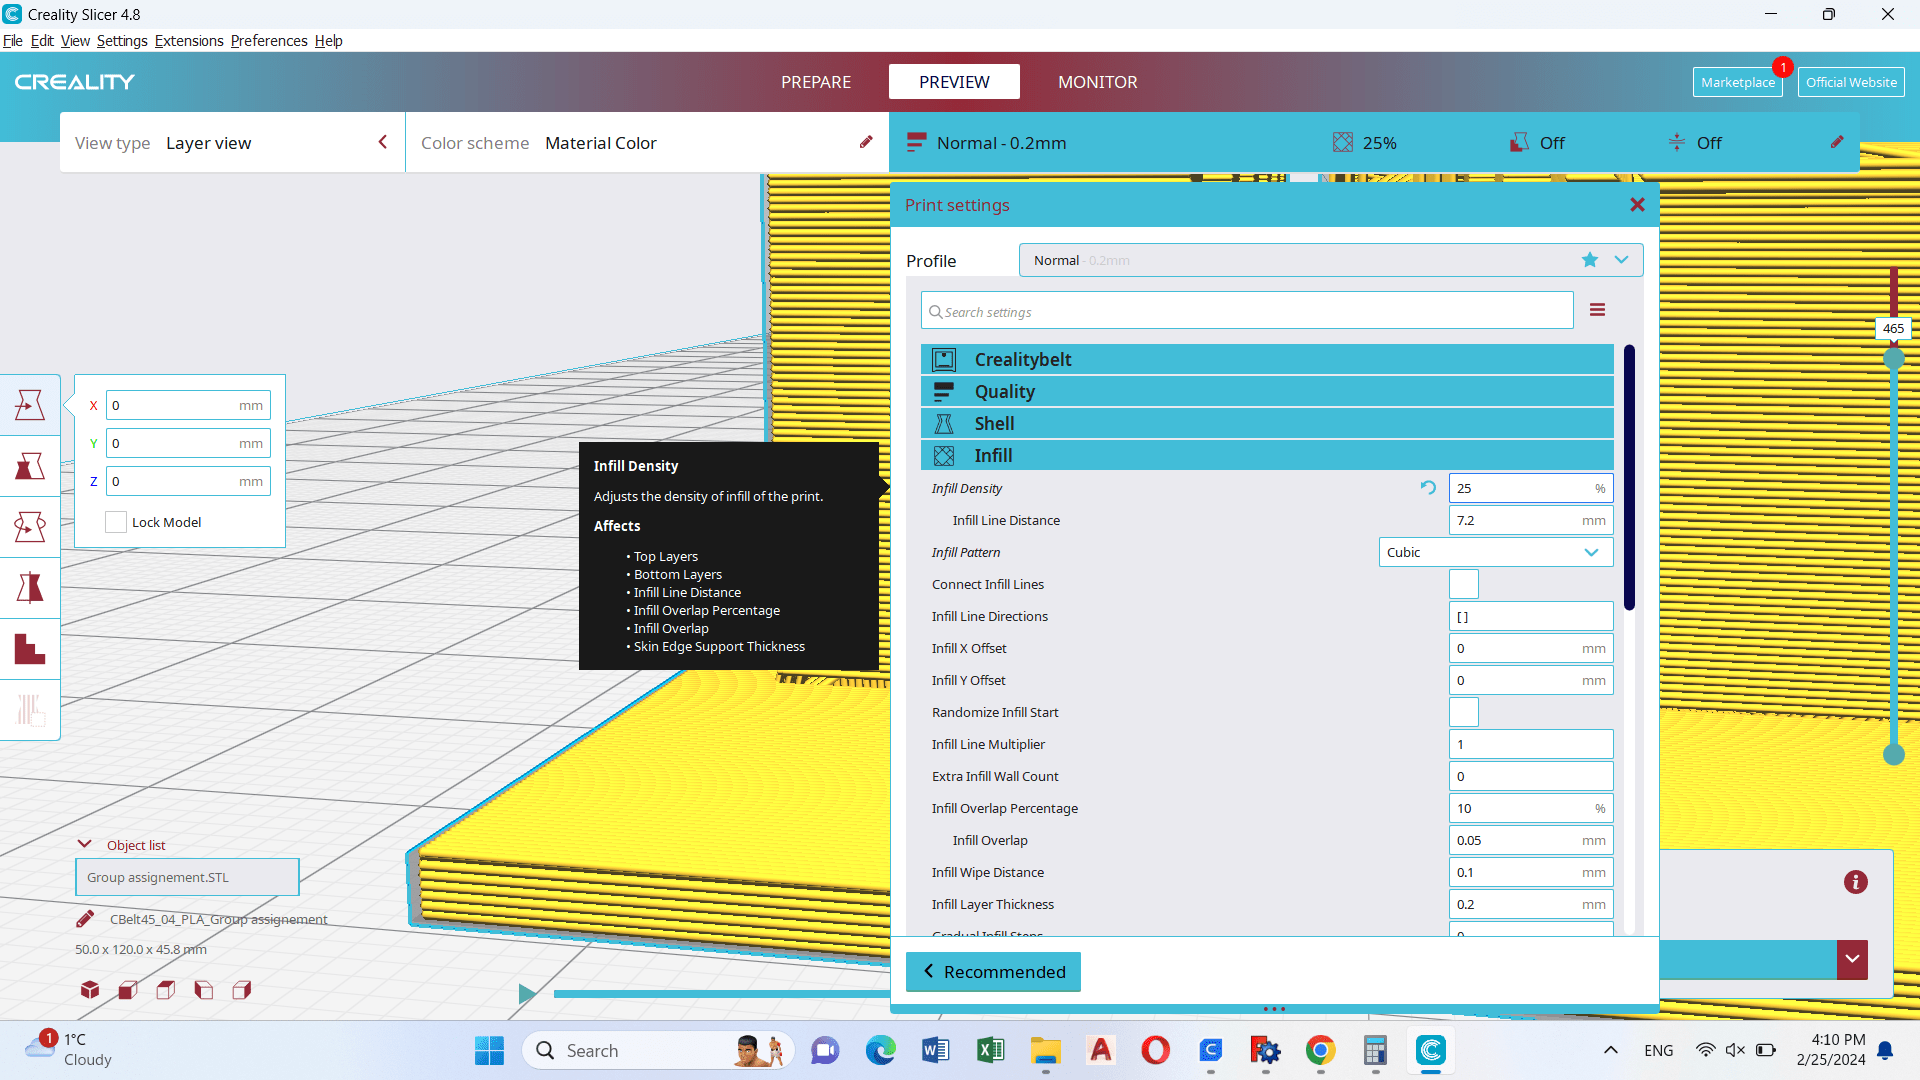
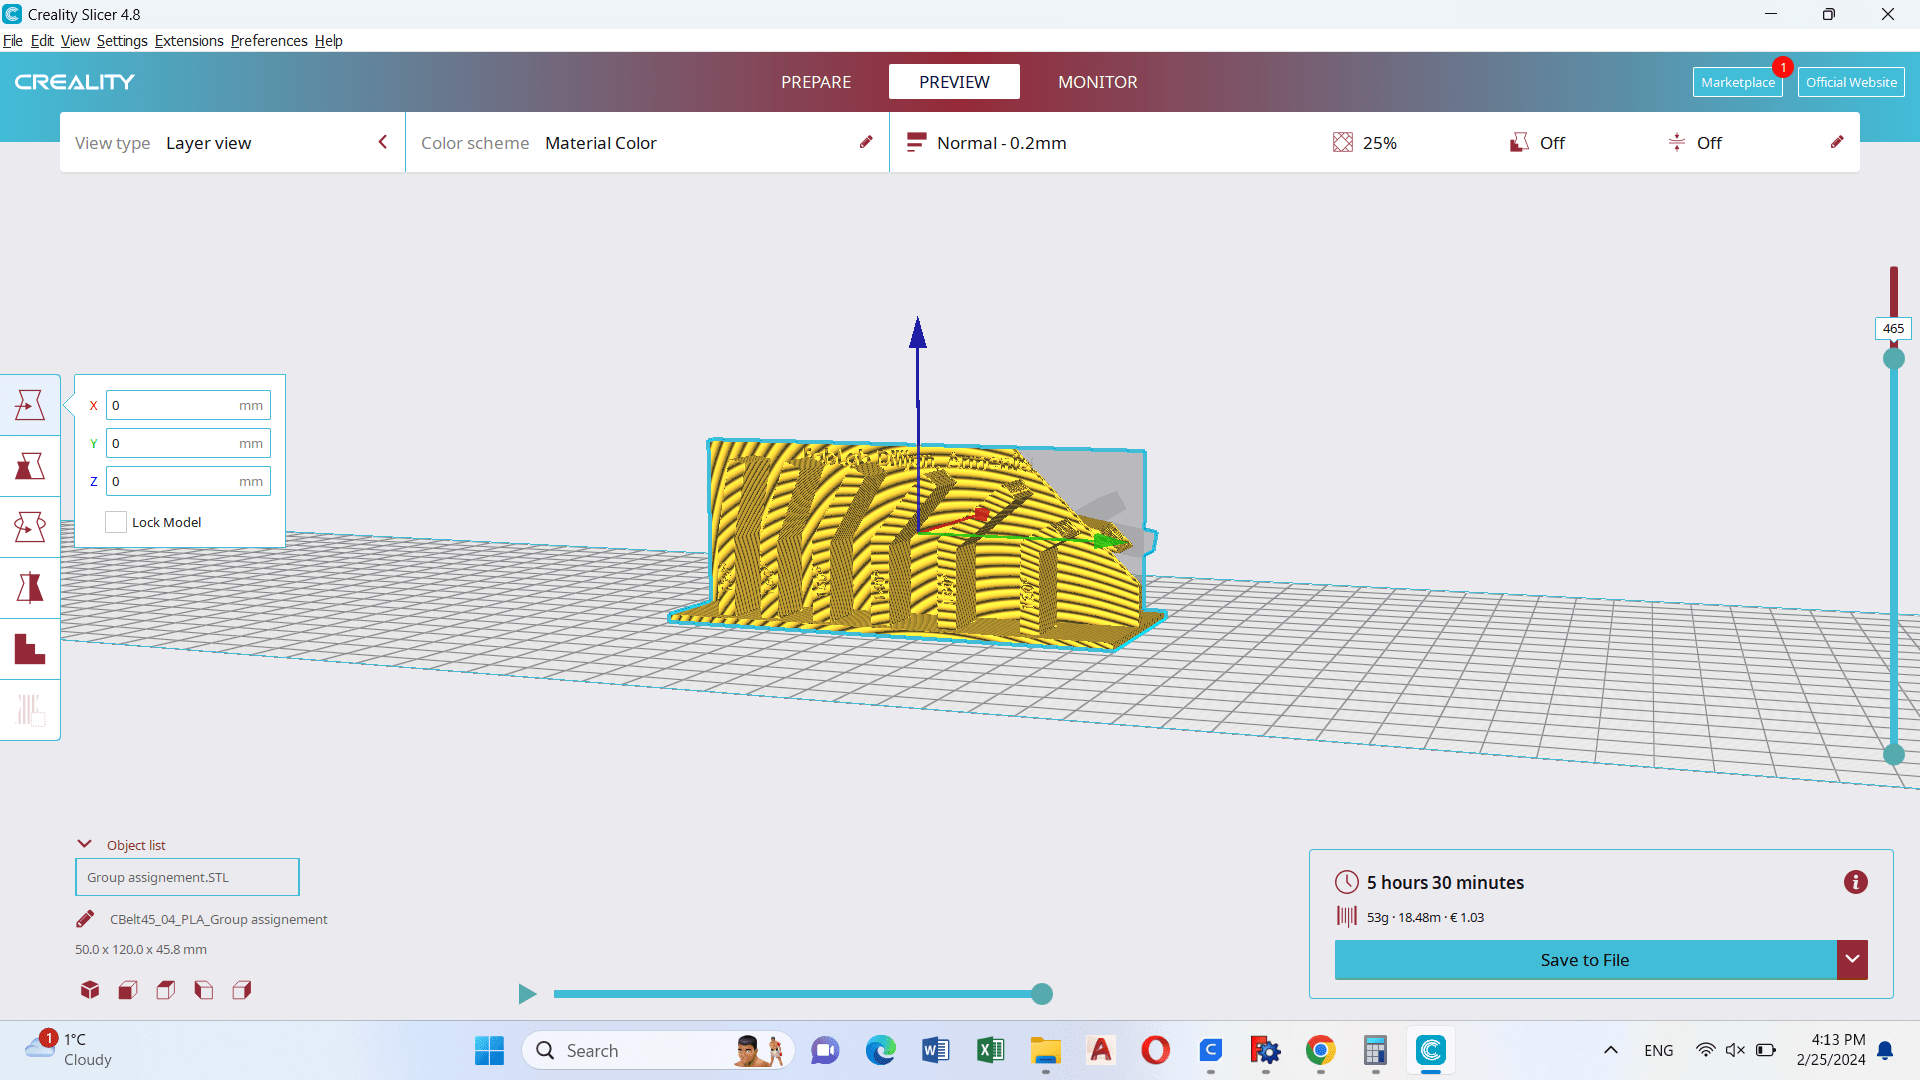

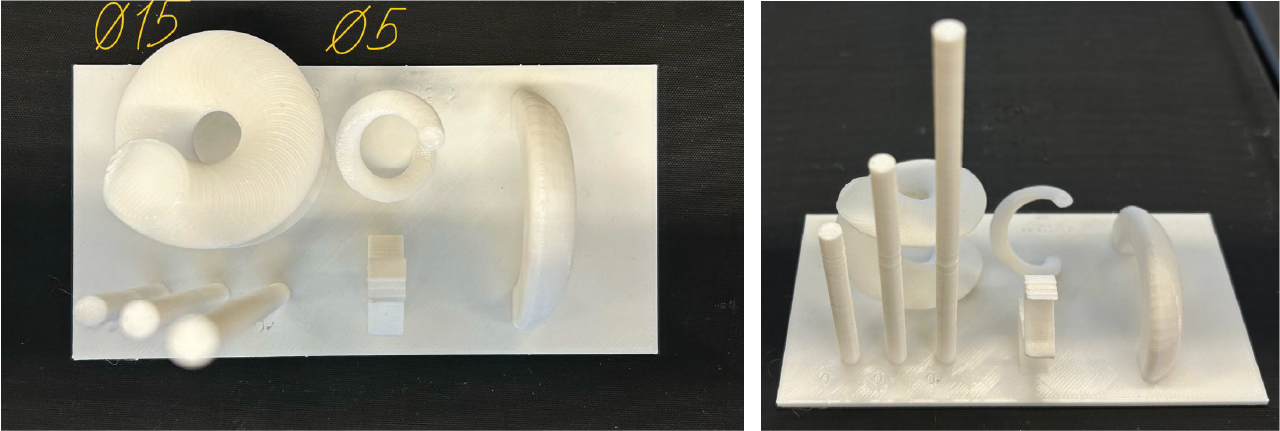
The way of printing was more optimal and convenient, but tha quality of print wasn’t as good as the Ender’s.
We did 2 tries, second one after we properly cleaned the nosle, filament and other sections. But both prints had same quality.
3D Scan
For my 3D scanning assignment I prepared some apps, asked chatgpt for an advise of best apps for 3D scanning by phone and tried 3 of them.
First one was the one that I used in the end for my final scan, cause despite it’s not a free app, it has some free tries. So I had 6 of them, and used it properly.
First scan was solder which was just next to me. All has gone successfully. I did it with PolyCam. As you can see in photo below, my scan was quite well, but the lighter side was done a little bit worse. So after my first scan I realized that for scanning it’s very important from where your light drops, the surface in which you are scanning your product and how glossy your product is.
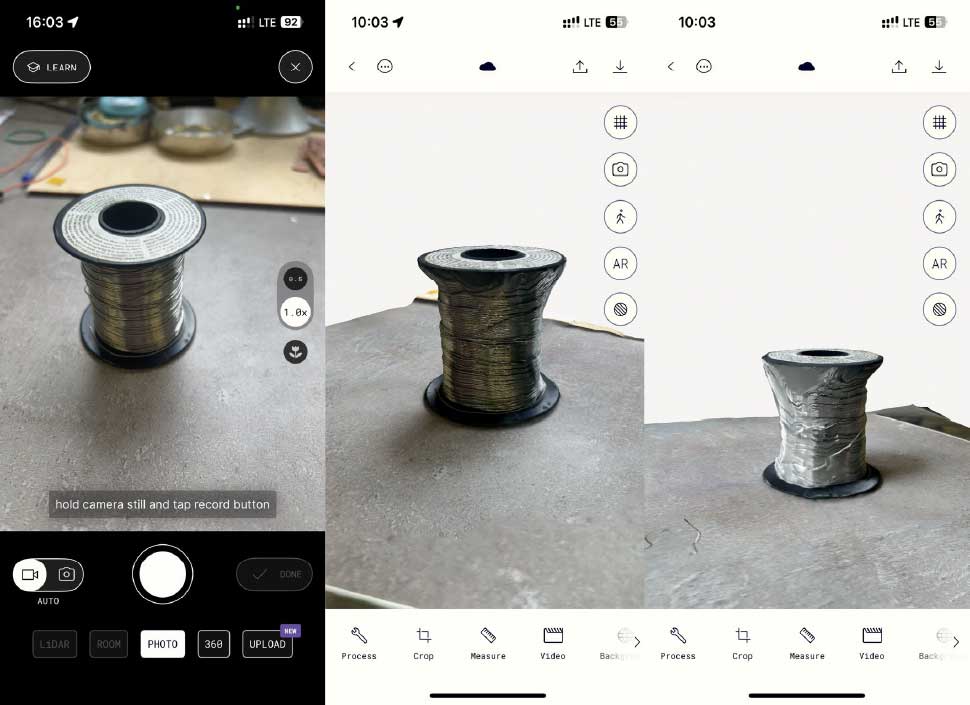
The app was convenient although by availability to add photos to your already scanned model.
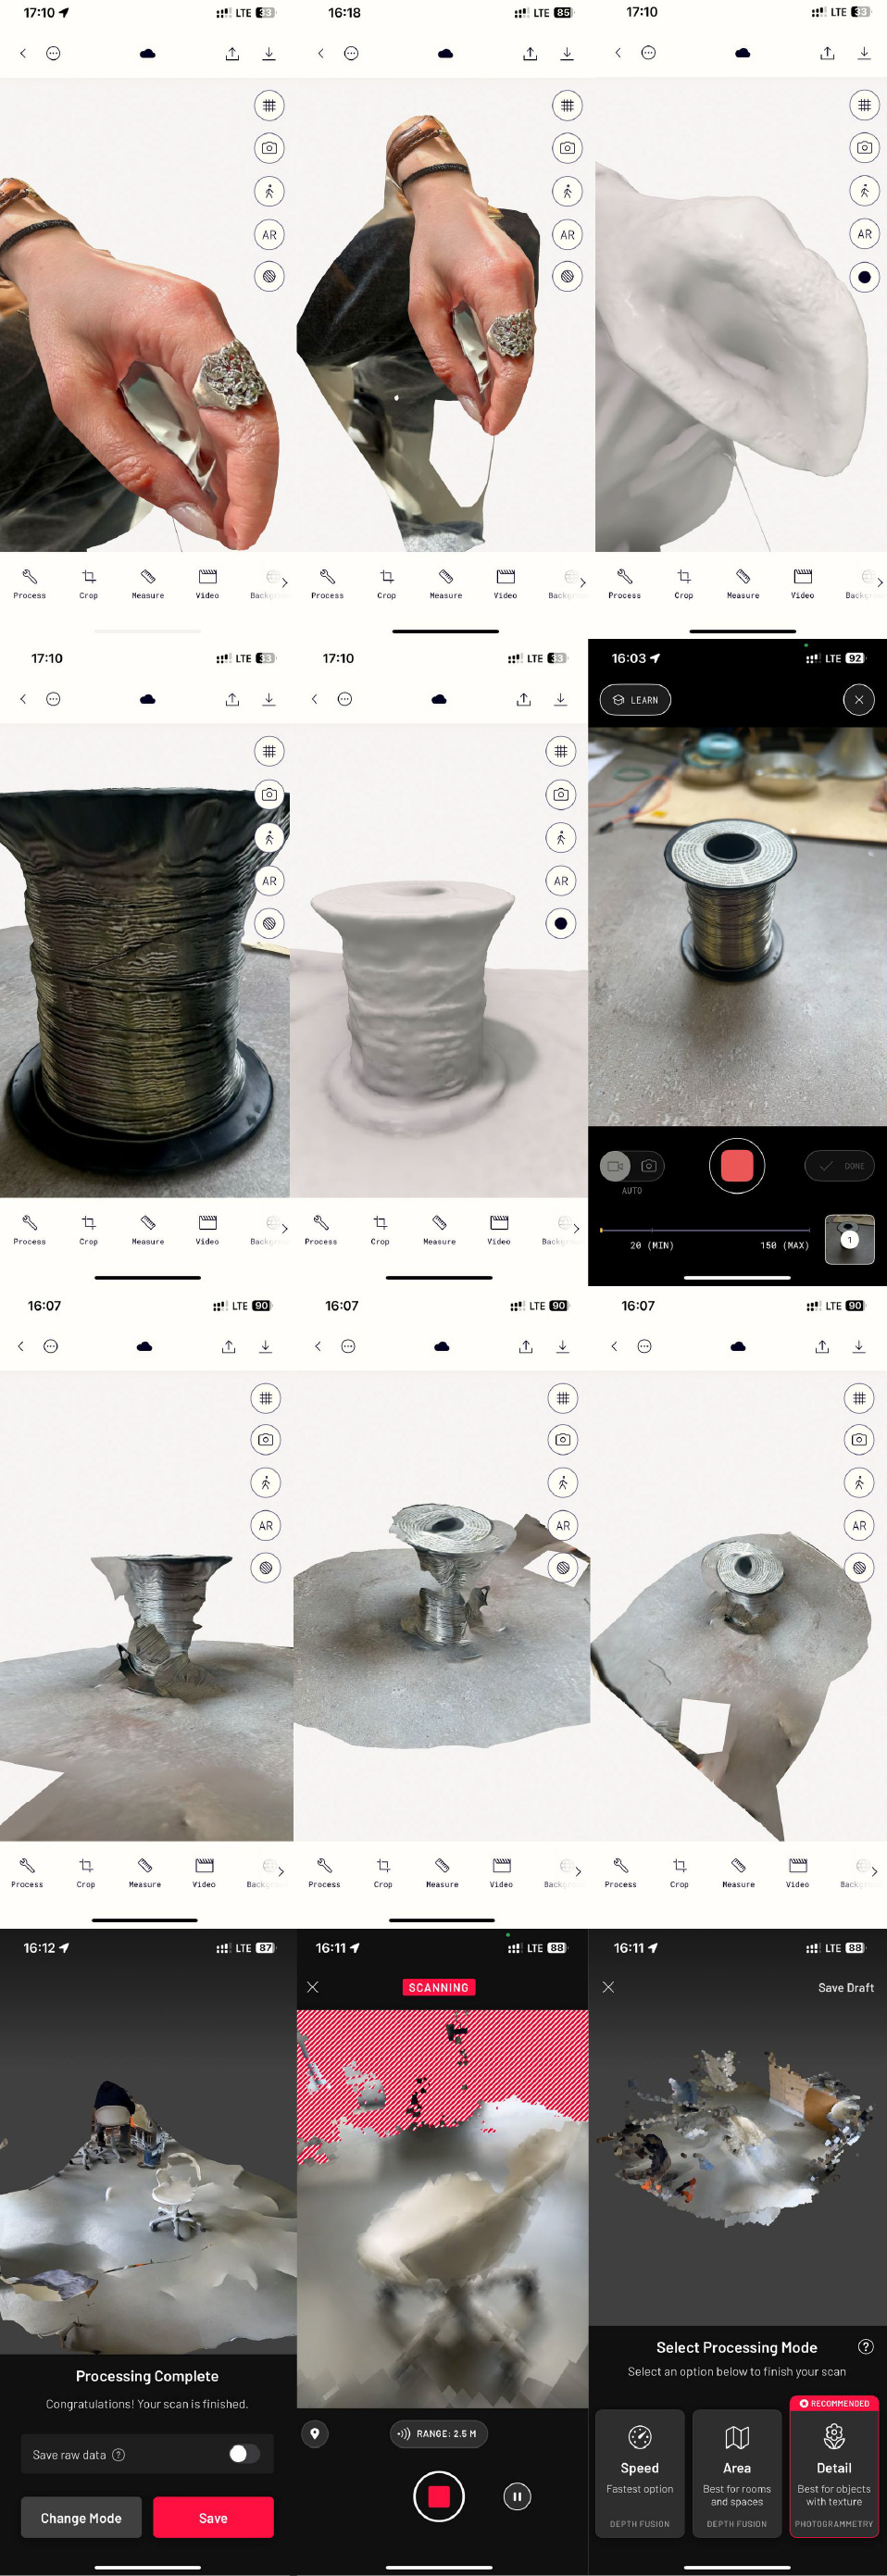
After many 3D scannings, I asked my groupmate to scan me, sitting with a cup in my hands, so that I could print it after. First try was not so good, and as I understood, that was because of shades and lights, and my head hung down. After, we chose a better place, to make a 3D scan and I changed my pose a little bit.
So the final scan was pretty good.

PolyCam app’s free trial let me download my 3D scanned model only in GLB file format (it’s a binary file format for 3D models) So I used an online converter to convert it into STL. It has a lot of variants of formats for installing.
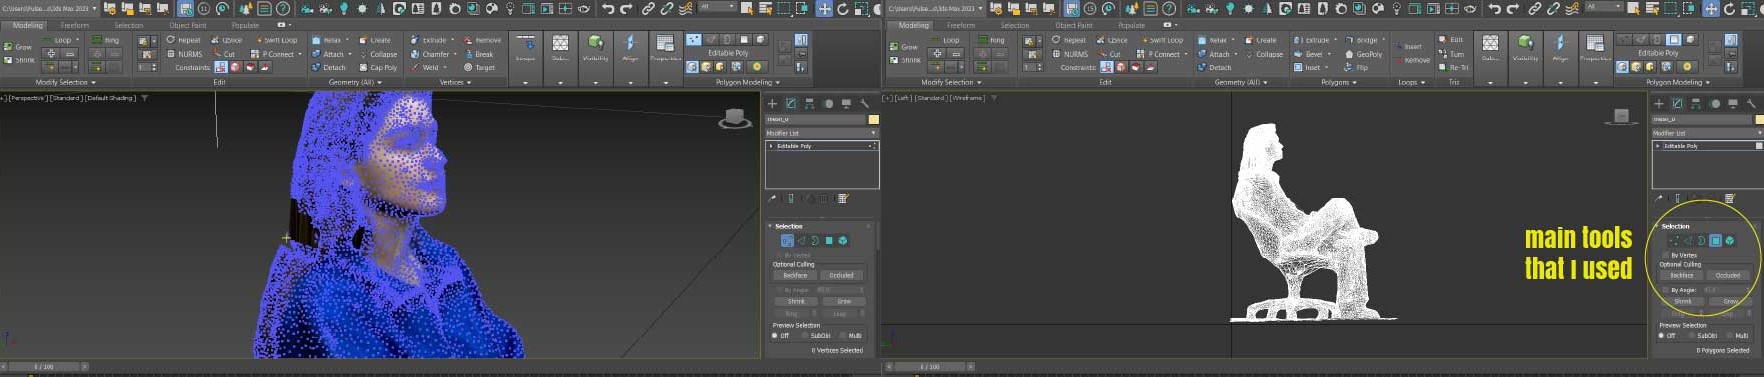
I opened my installed STL format file by Autodesk 3Ds Max and improved some parts of scan. But I didn’t want to change the way it scanned, so there were some blemishes which I left.
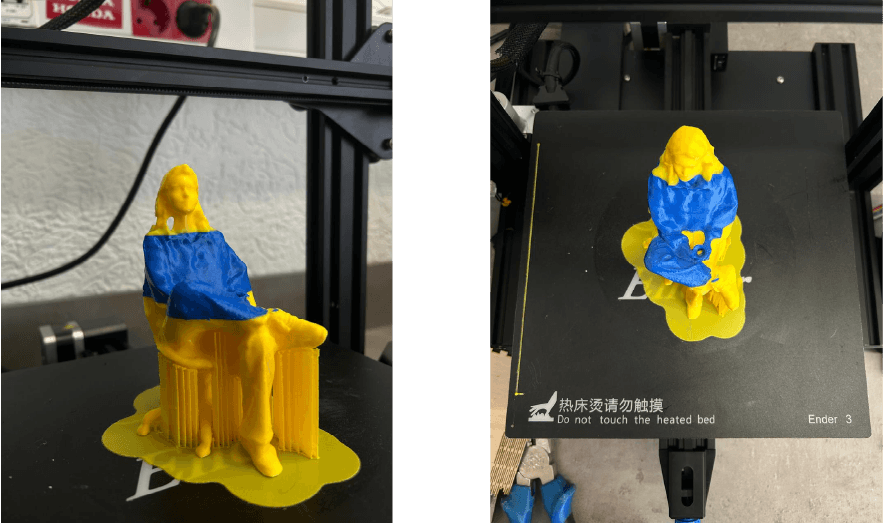
After I put my final file into UltiMaker Cura and set the properties. for this tall “statue” I used 5 layer walls. Did linered infill and changed some parameters in standard quality option.
After it finished to print my feet, I changed filament’s color, as my sweather was blue, I picked the blue one. Paused printing, carefully removed the yellow filament, properly cleaned the nosle and all this without moving Z-Axis, so that machine could continue printing from where it was.
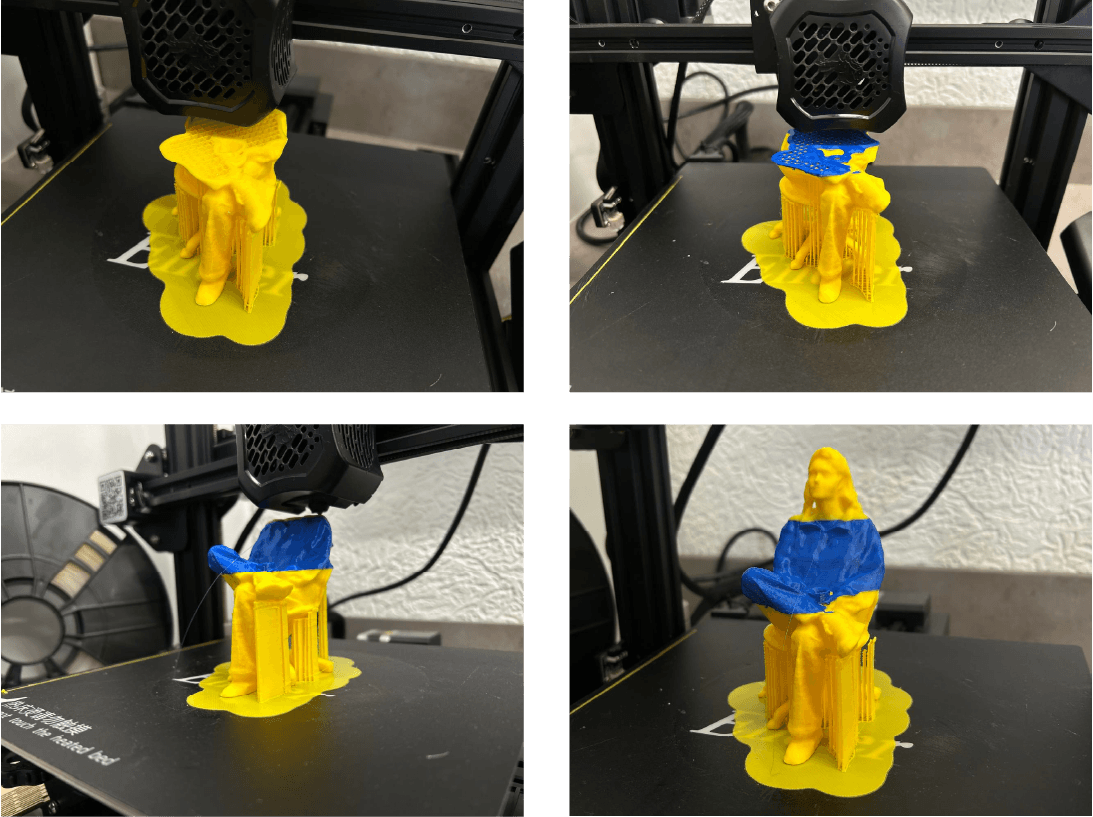
Surprisingly print was very well done(right the first time).The only trouble were supports, but I could manage to clean them.
3D Model
Designing 3D printed object
This week the assignment was to use 3D printers to make something that could not be made subtractively. As it was first time I’ve ever used a 3D printer, after introduction I started modeling something that will help me with my final project too. So I modeled a bearing, that is a part of my project. In it there are many other components, but I chose to print only bearing, so that it will not take much time and will be less problematic.
I had a research of bearing types, models that were already 3D printed. Here you can find many useful models.
So by finding working model of bearing I started making my own, with my sizes and shapes I want. I modeled it using SolidWorks.
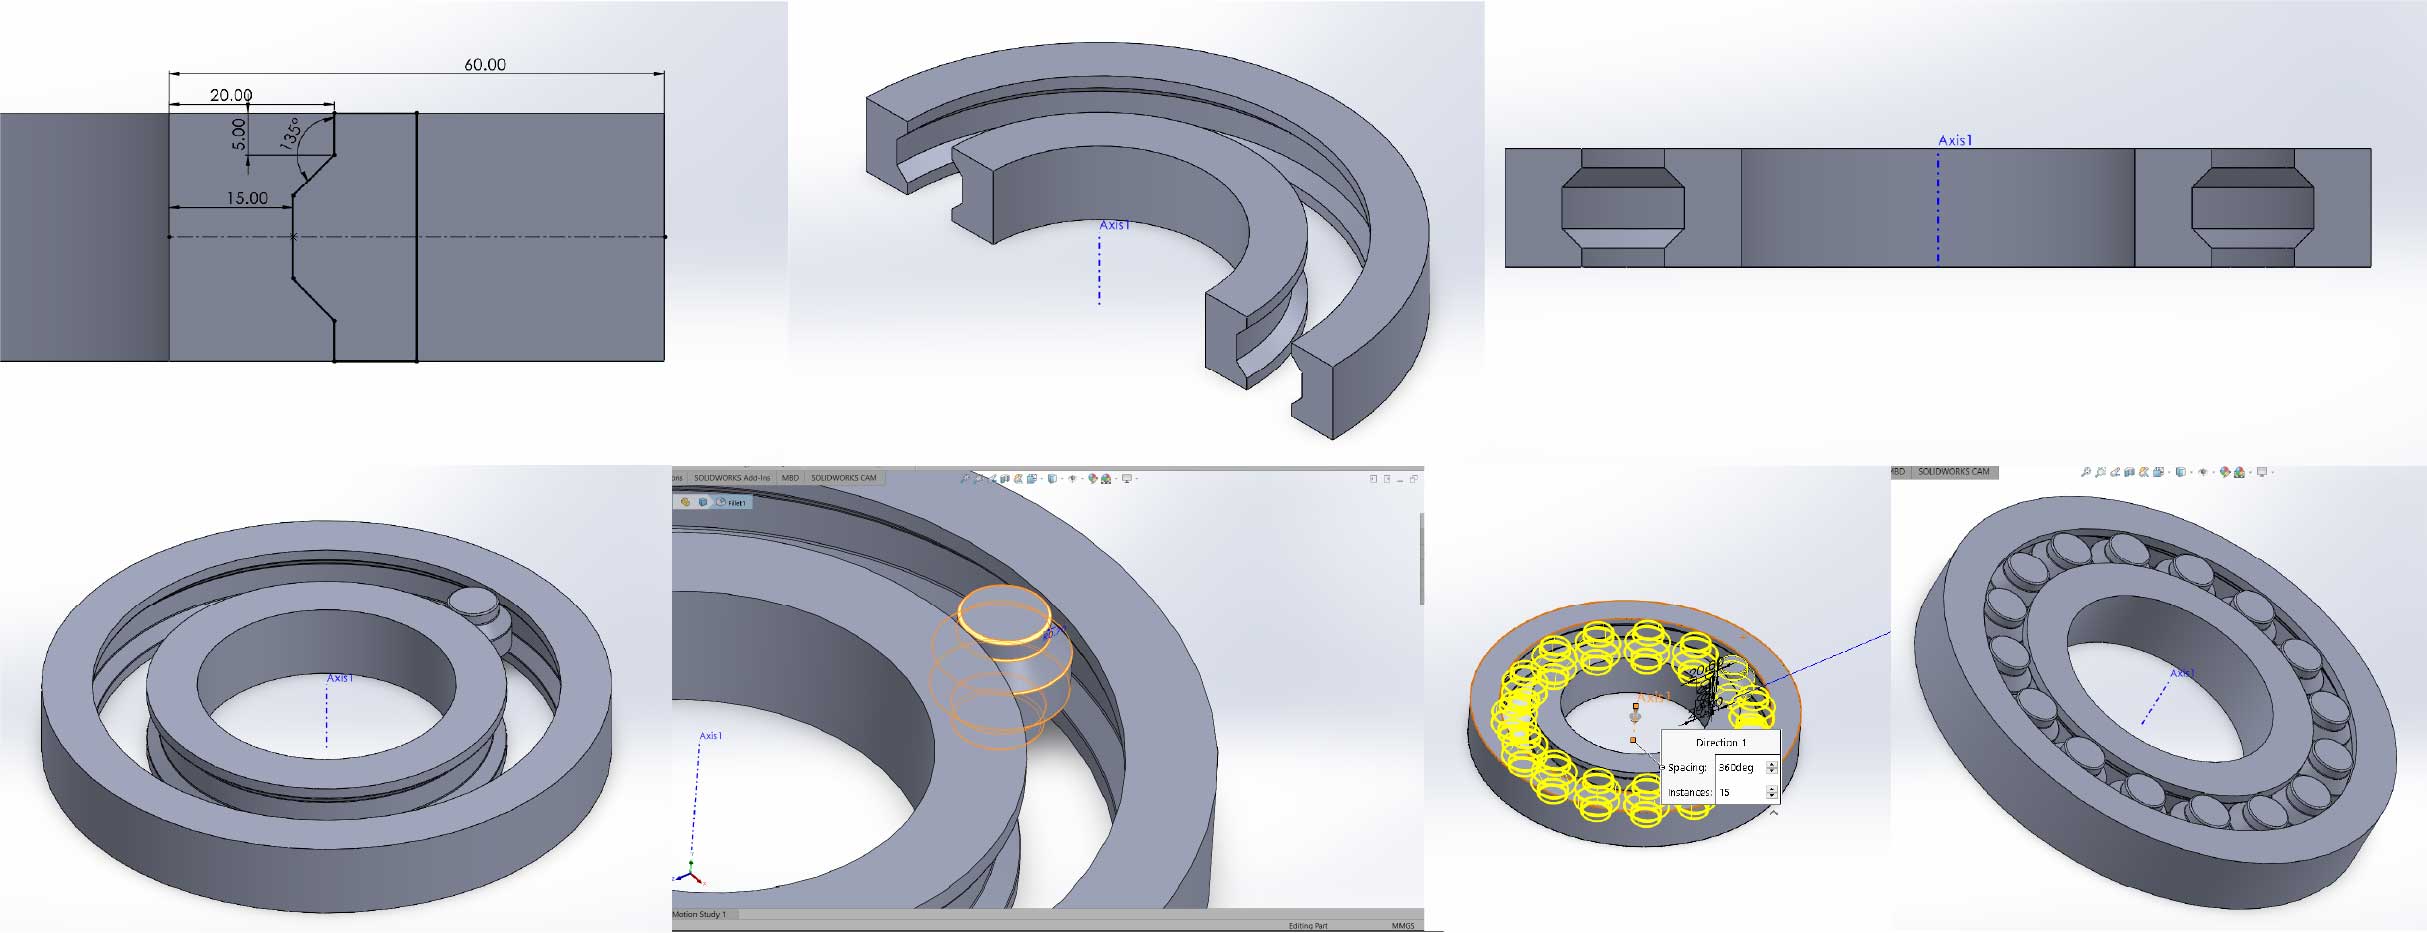
Here you can see section, where you’ll find out there’s actually not balls, but some other object. That’s for easy print. As you can see after, all works pretty well. It was my first experience in using 3d Printer.
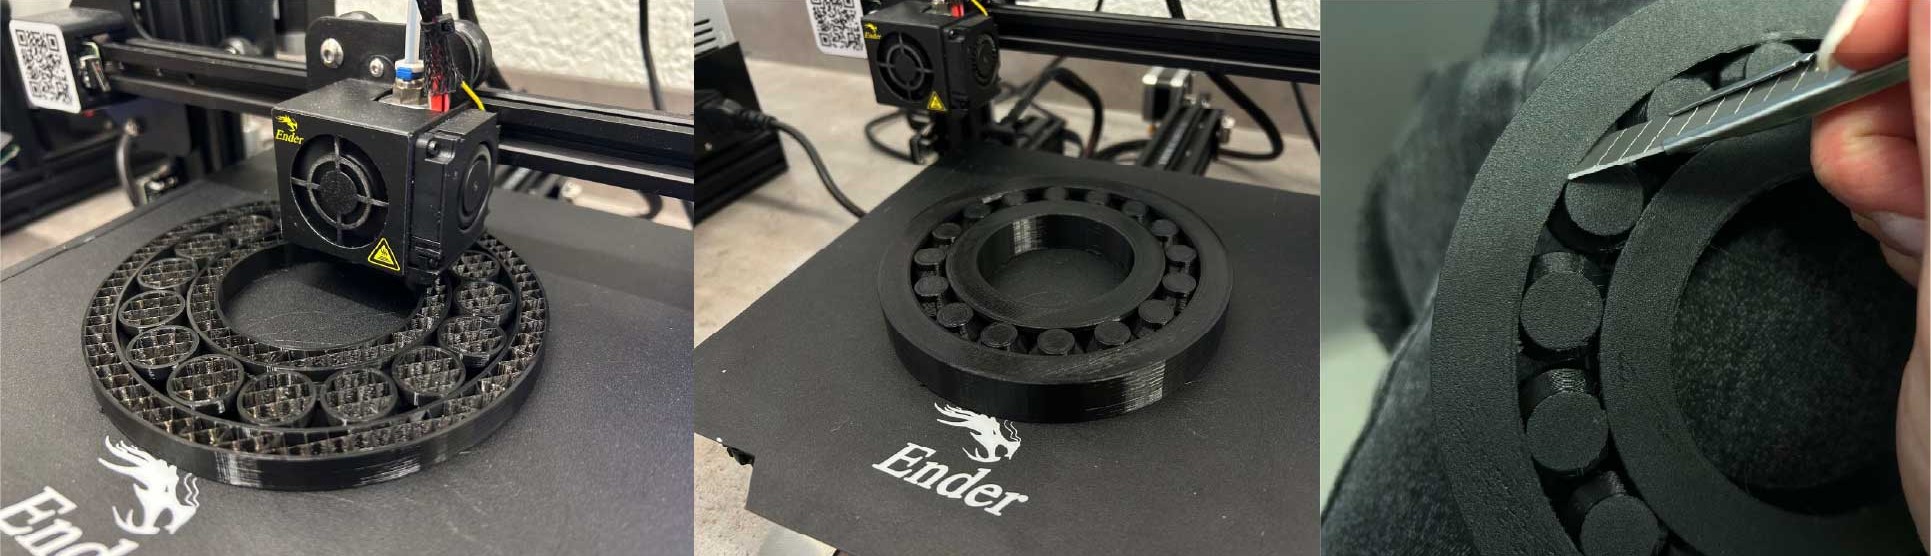
In the bottom side, from where 3D printer started to print balls of the bearing was quite stuck with the outer part. So fleam helped me to remove the unnecessary parts.
3D Model
Besides that I explored field of generative design. Didn’t model anything or print it, but this field was also very interesting for me, of course I will come back if I’ll have enough time in future.
Also, before sending your SolidWorks’ model file to 3D printing, you can check all your parts by going to “Files” >> “Print 3D”. There you can find many tools, parameters by which you can check your model.
Conclusion
This week we learned about filaments of 3D printers. Also got acquainted with how 3D printers work. The interesting part of this week was 3D scanning. It was fun to work with different ways of printing.For example I tried 3d printings with supports and without them. I made an experience in printing good quality parts without supports.
Got new skills in working with meshes. As a part of this week’s assignment I also tried non subtractively made 3D model-bearing, which I wanted to use in my final project.
Files
3D Scan
3D Model