14. Interface and application programming
This week I worked on making an application for the machine that kids in FabLab Armenia made at machine building week.
Group Assignment
We got acquainted with G4P GUI Builder and Visual Studio, C#, which you can see in our group page
At first Shushan told about C#, introduced it to us. And her example of making software by this one was Turning On and Off Led.
So now we have these 2 buttons.
After Rudolf introduced us G4P GUI Builder.
“GUI for Processing”. It’s a library that allows you to create interactive graphical interfaces for your Processing sketches. Here, you can add buttons, sliders, text fields, checkboxes, and other UI elements to your projects.

We write in the code to print the position and write it in console.
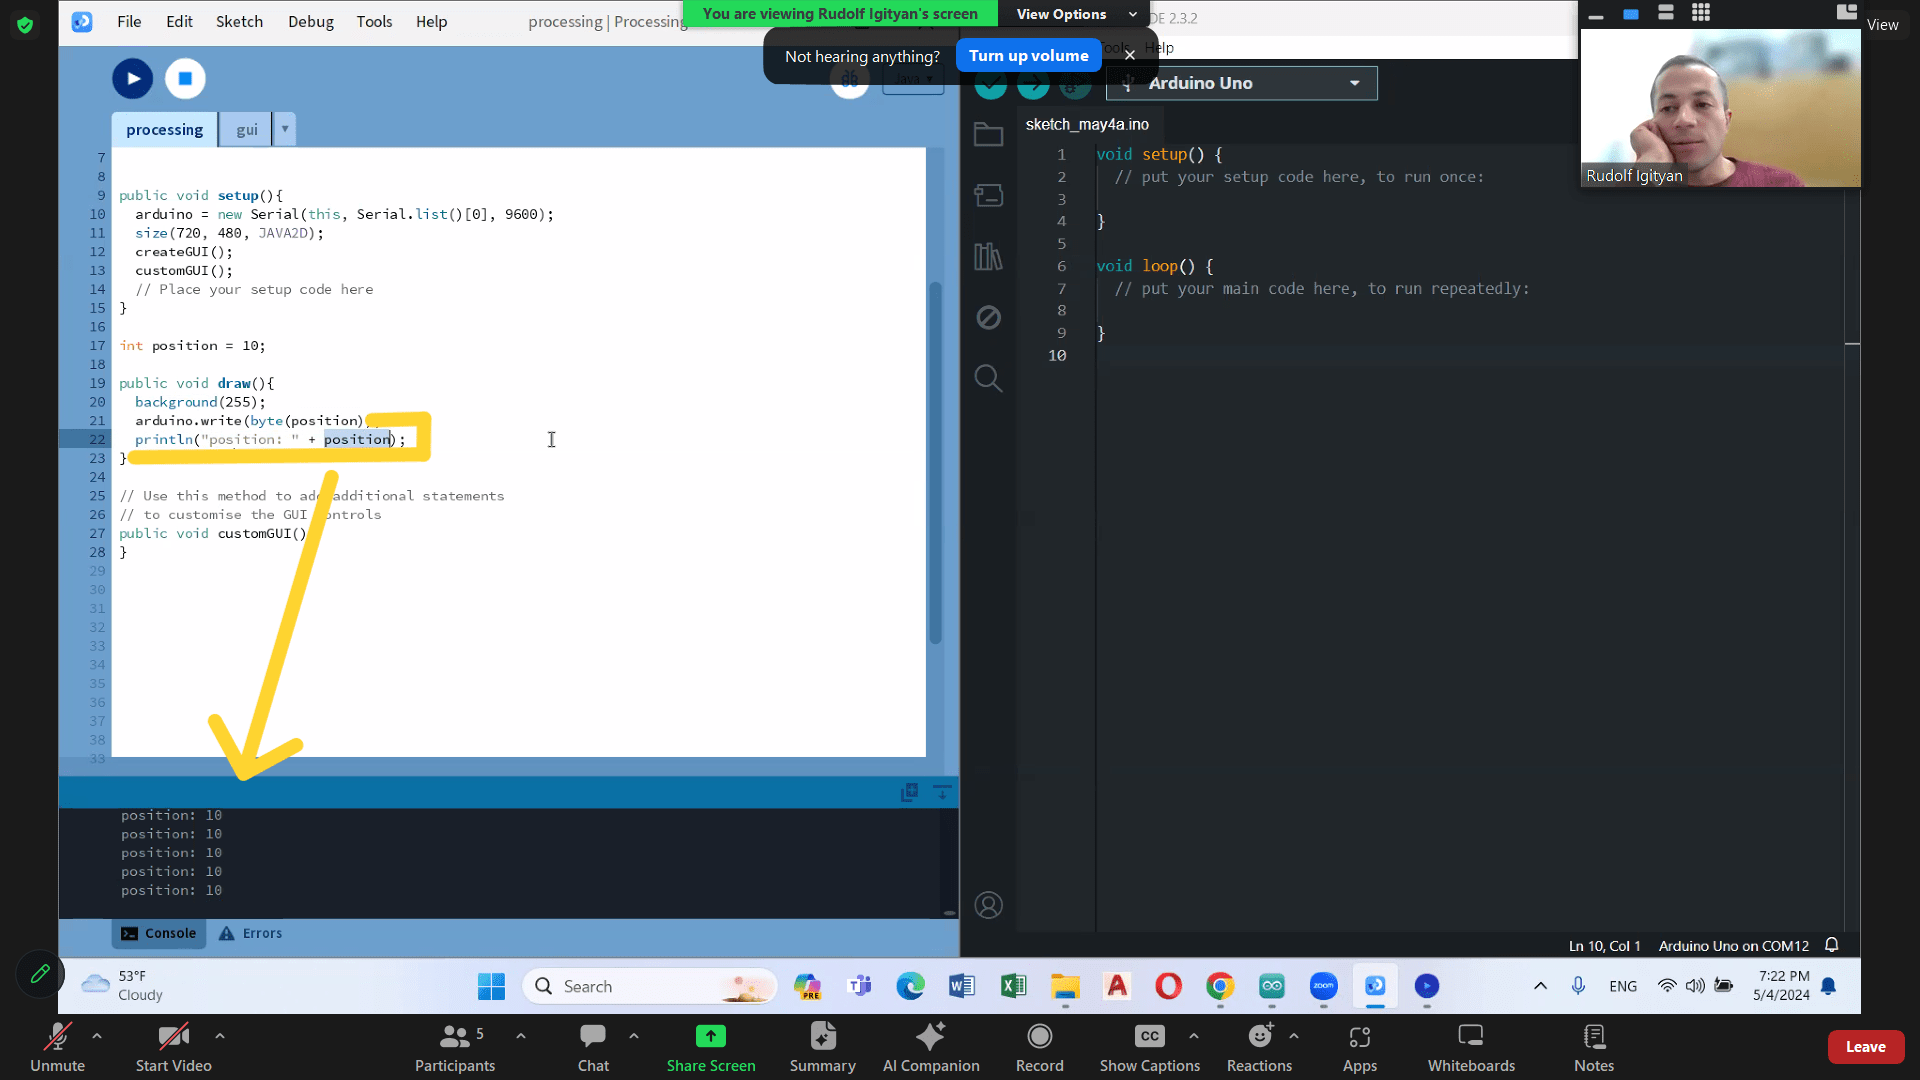
We are choosing the same serial port and name.
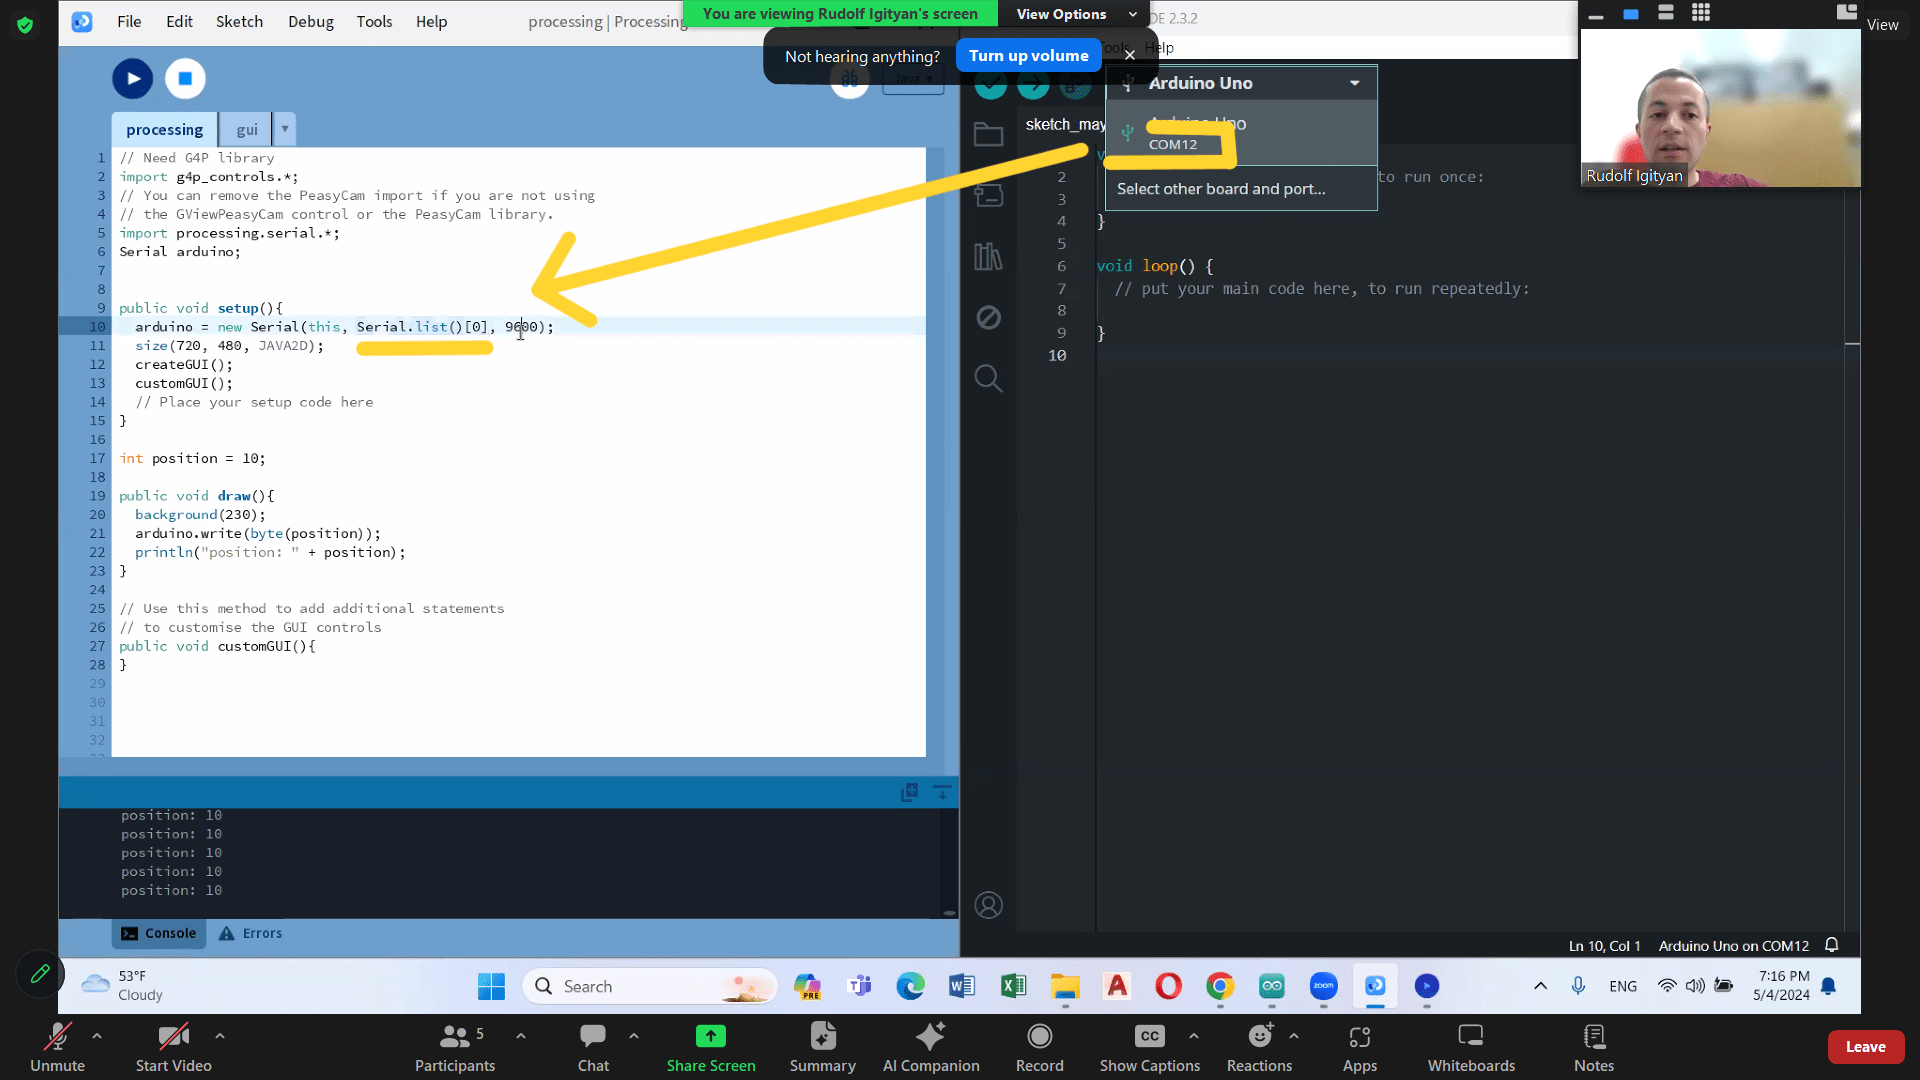
Button is for changing the position, which we can see in console.

Individual Assignment
Application with Arduino UNO board
Machine, that was built by kids and instructors in FabLab Armenia, there were already programmed electronics (by Arduino board).
So it was easier for me to work on the existing code and making software.
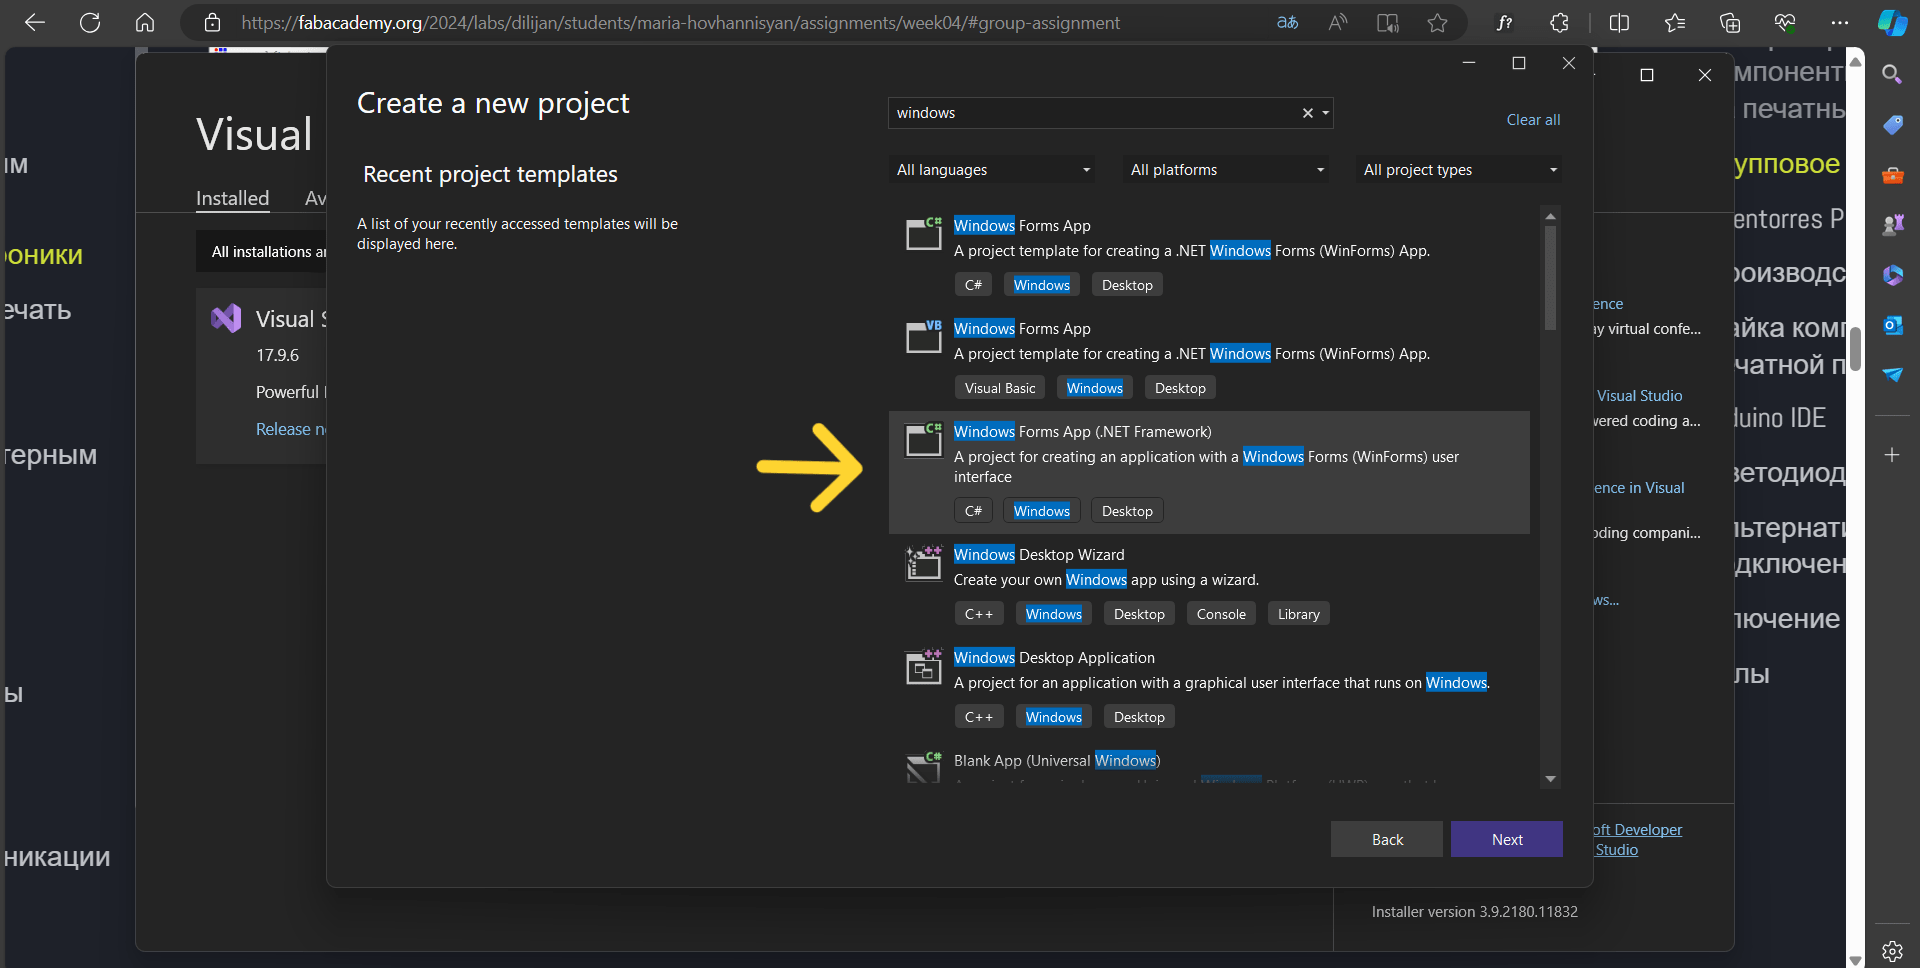
I used Visual Studio, C# for building my program.
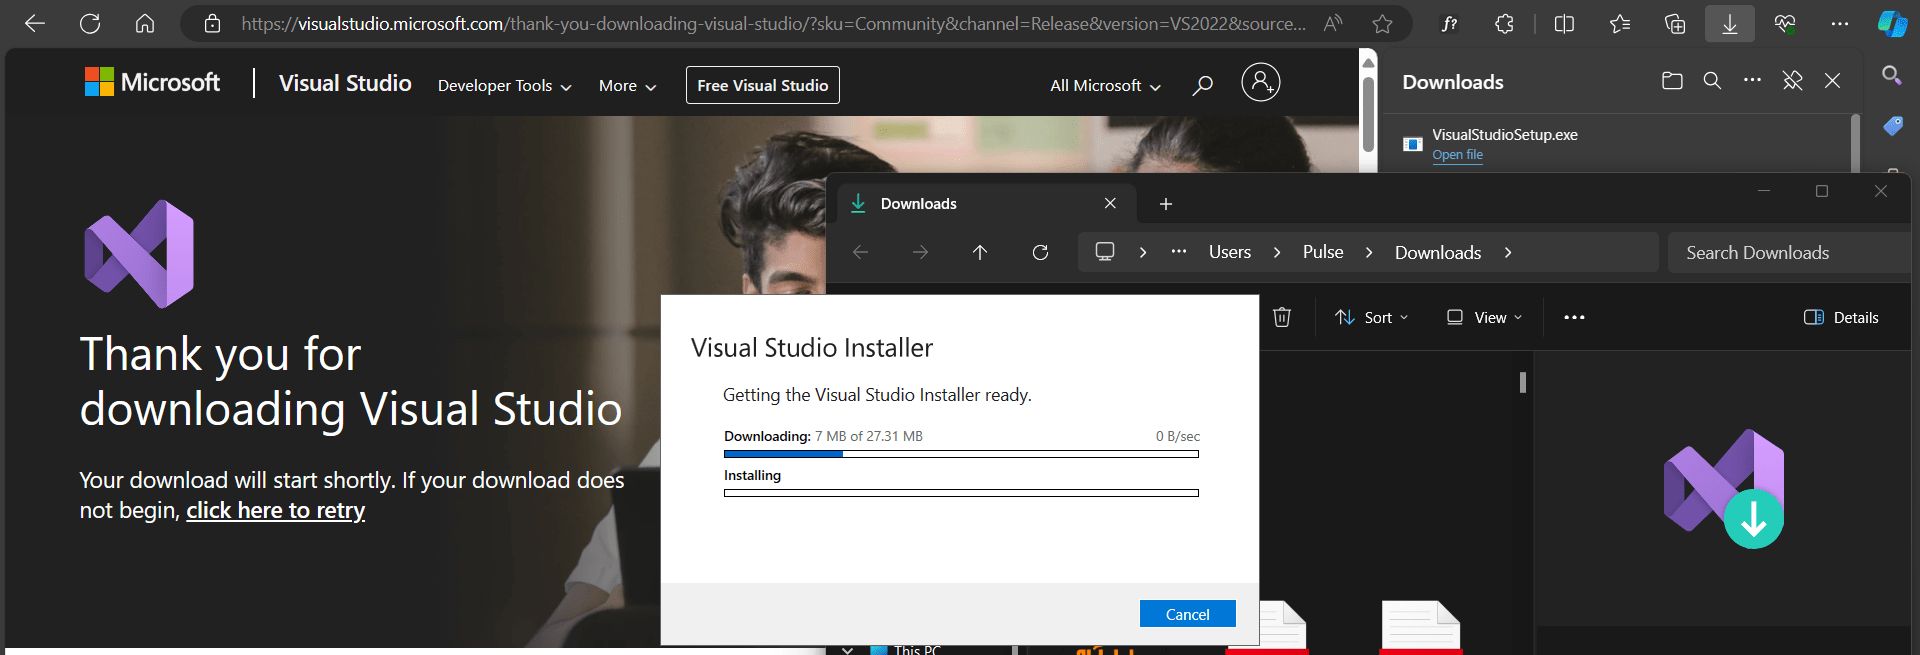
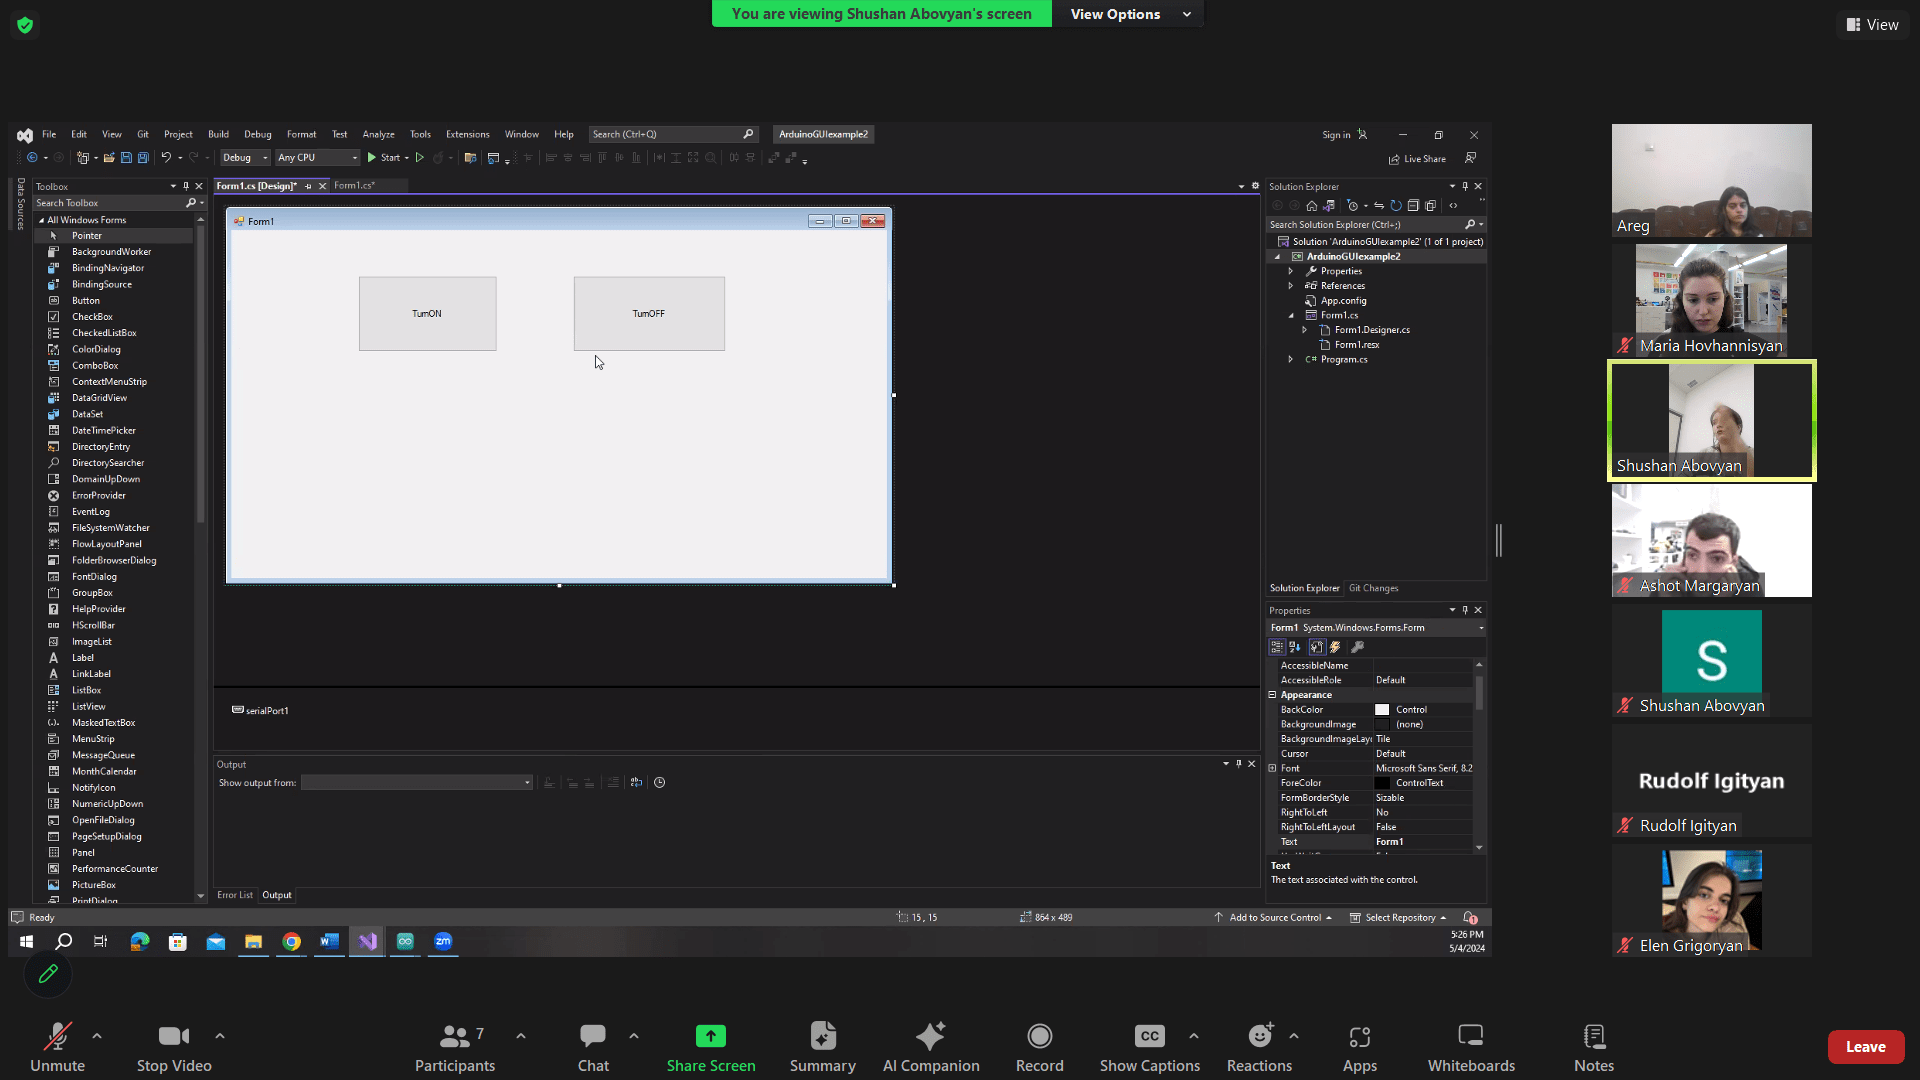
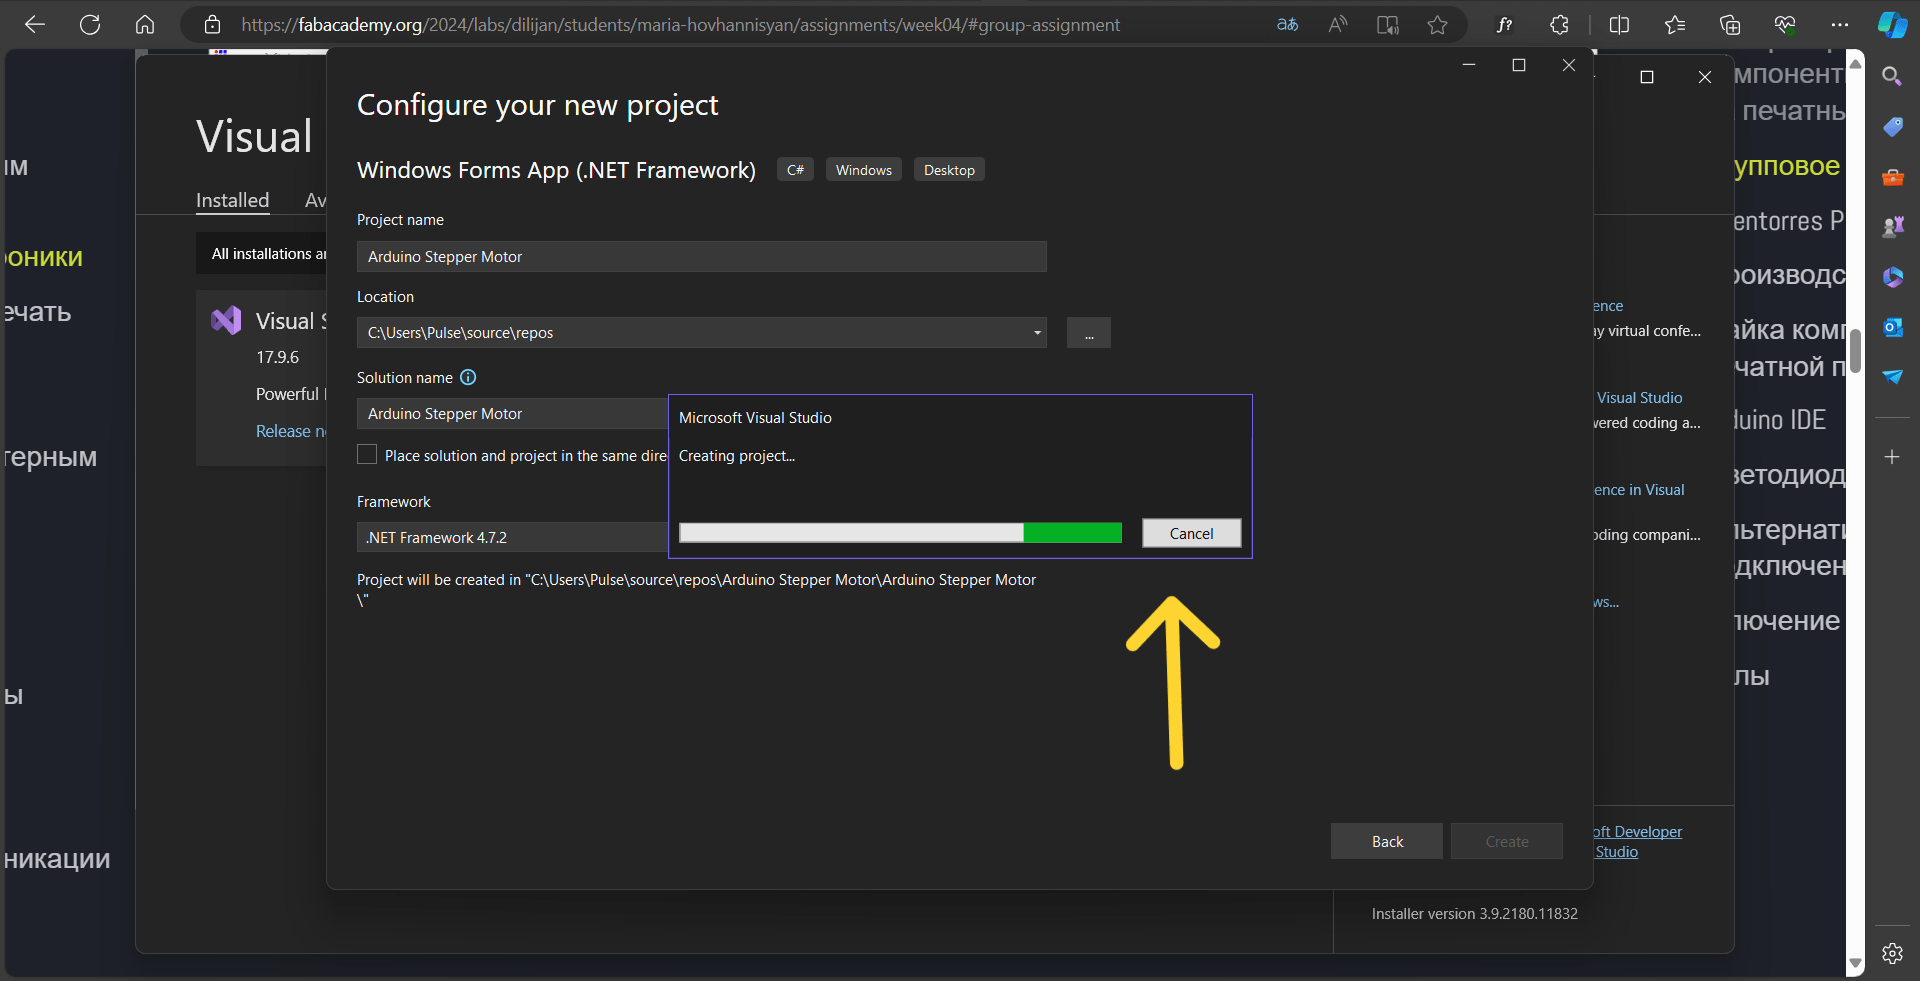
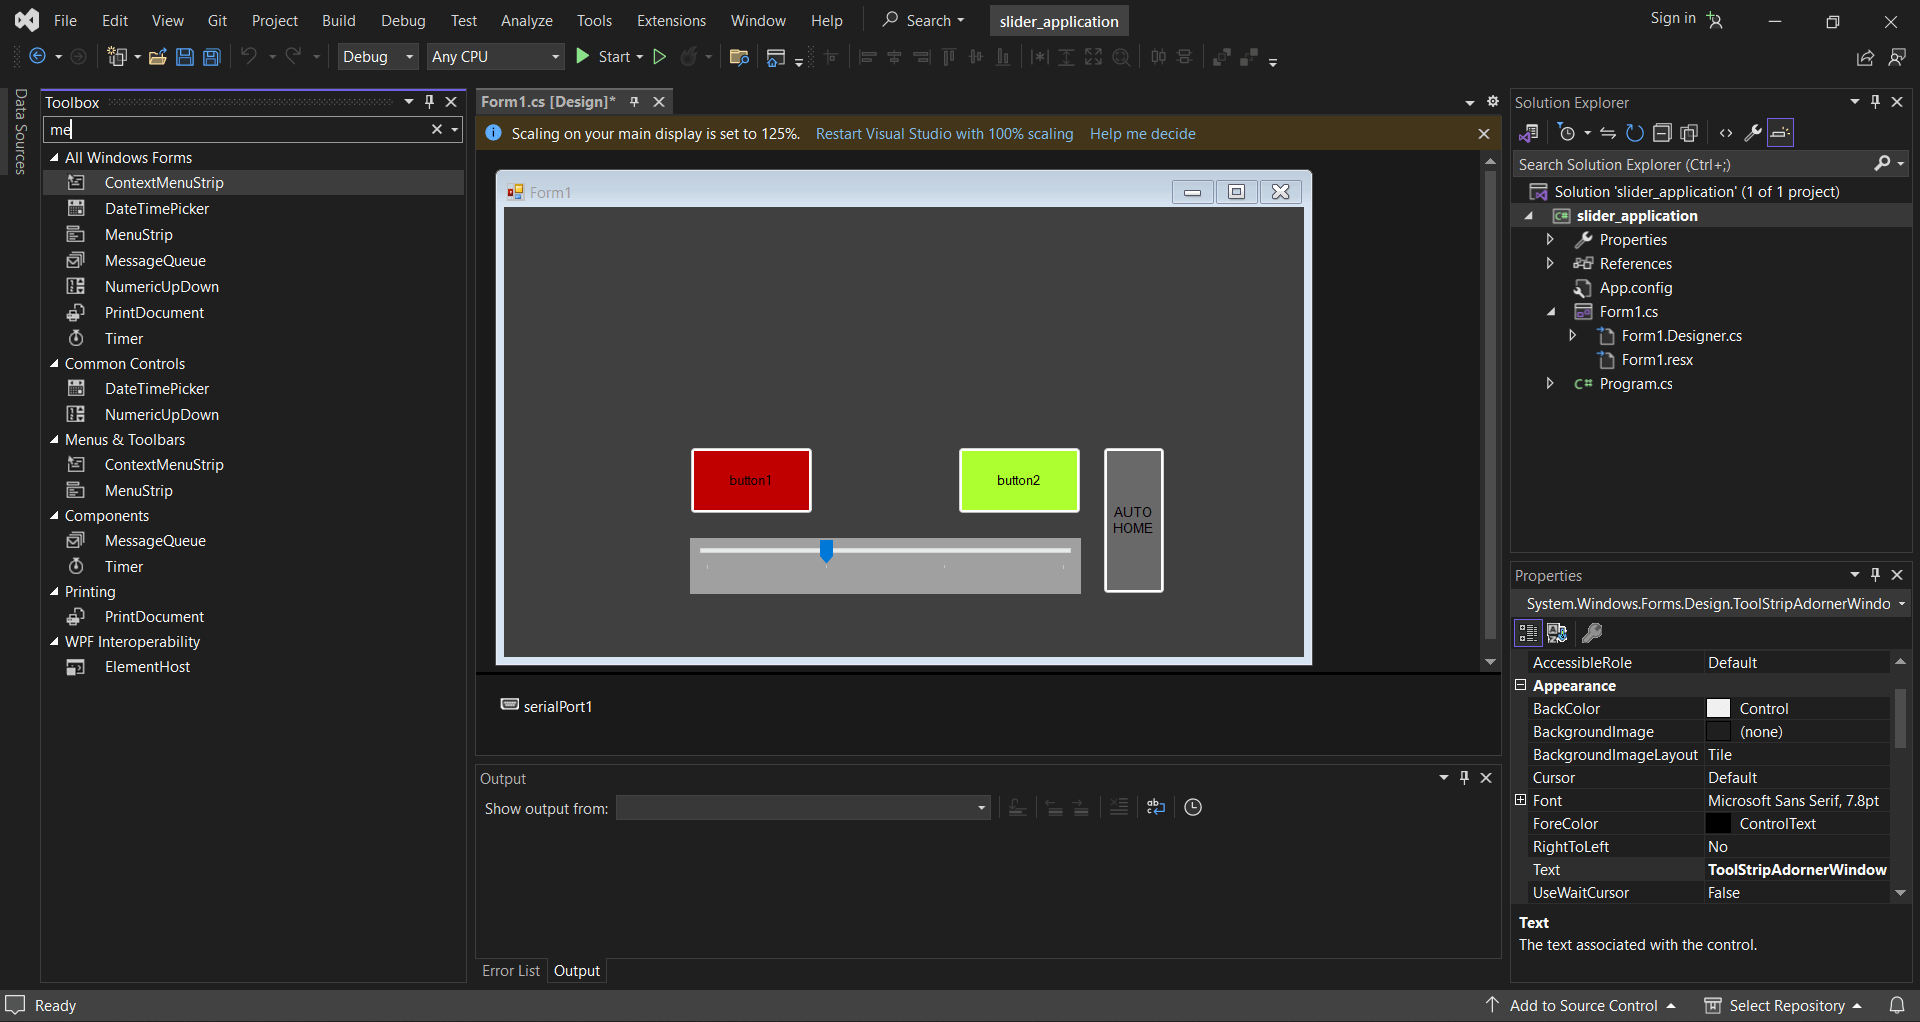
After uploading it and setting it up, I create a new project and chose Windows Forms App (.NET Framework) as you can see in photo below. It’s a project for creating an application with a Windows Forms user interface.
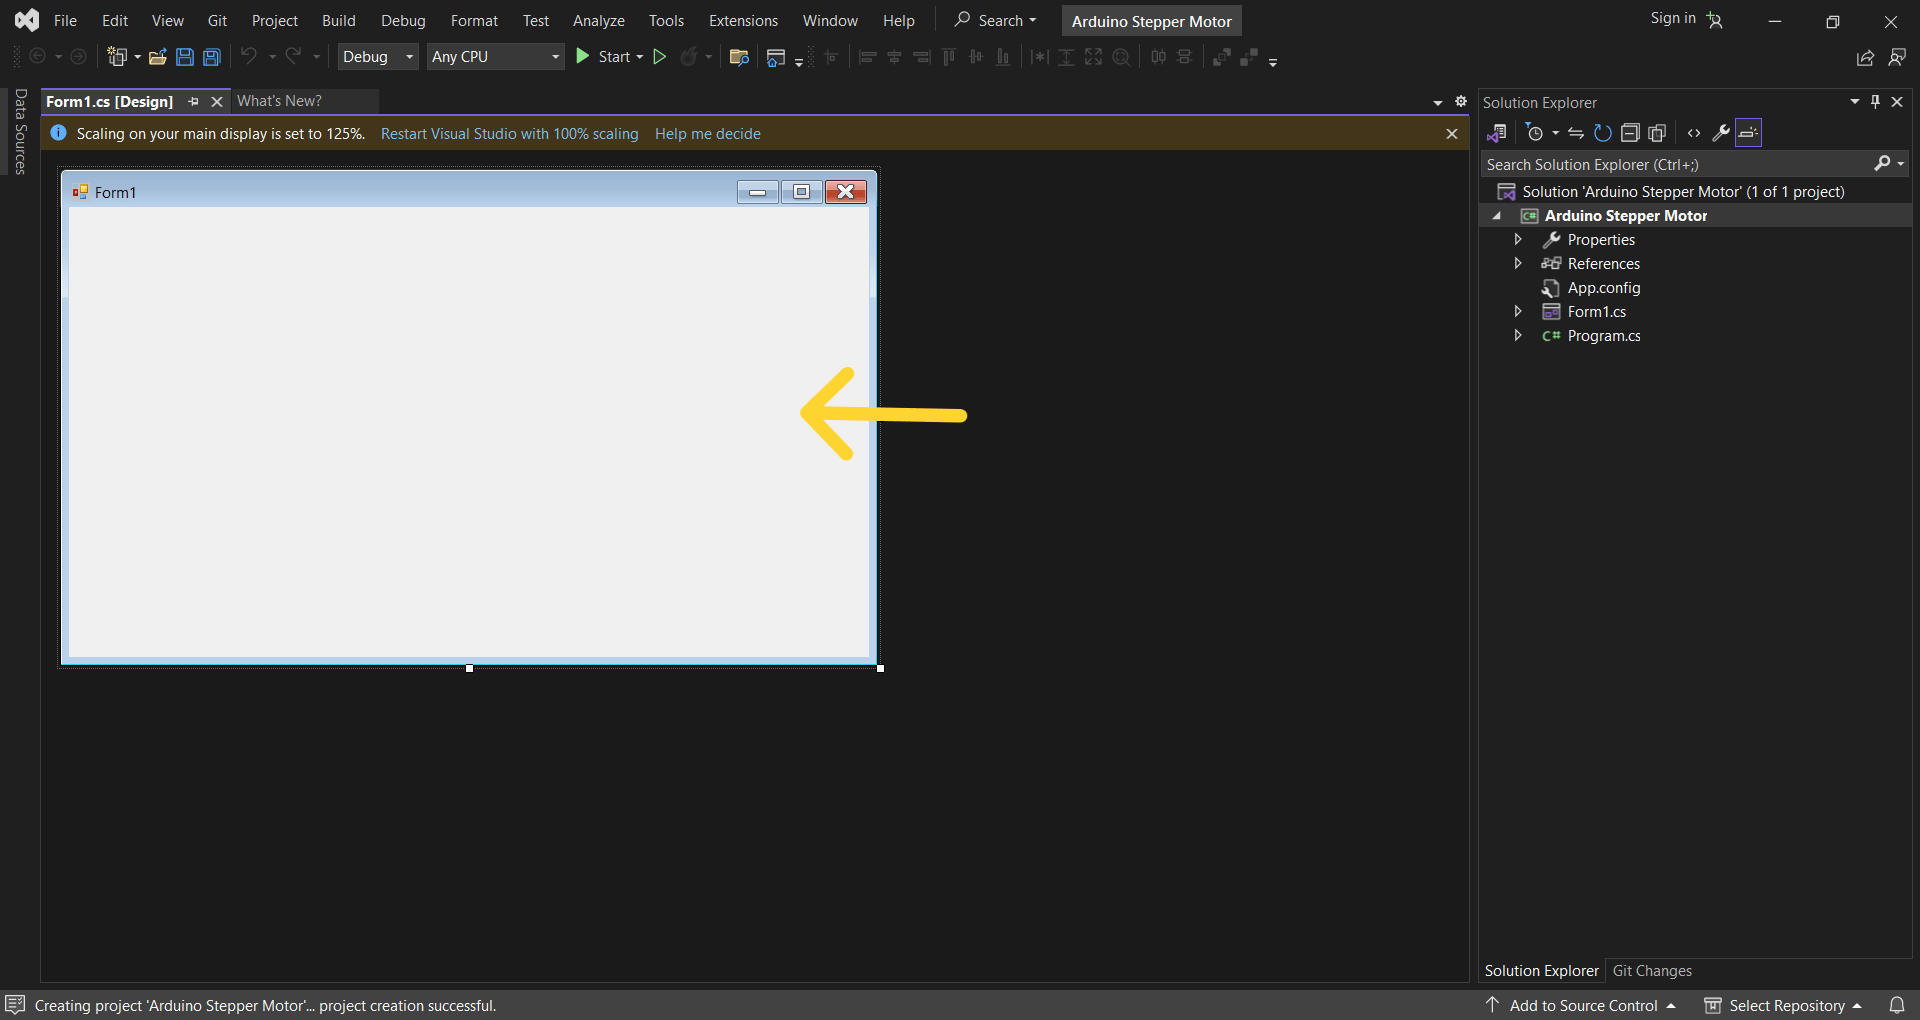
After I just saved it in folder and started my work.
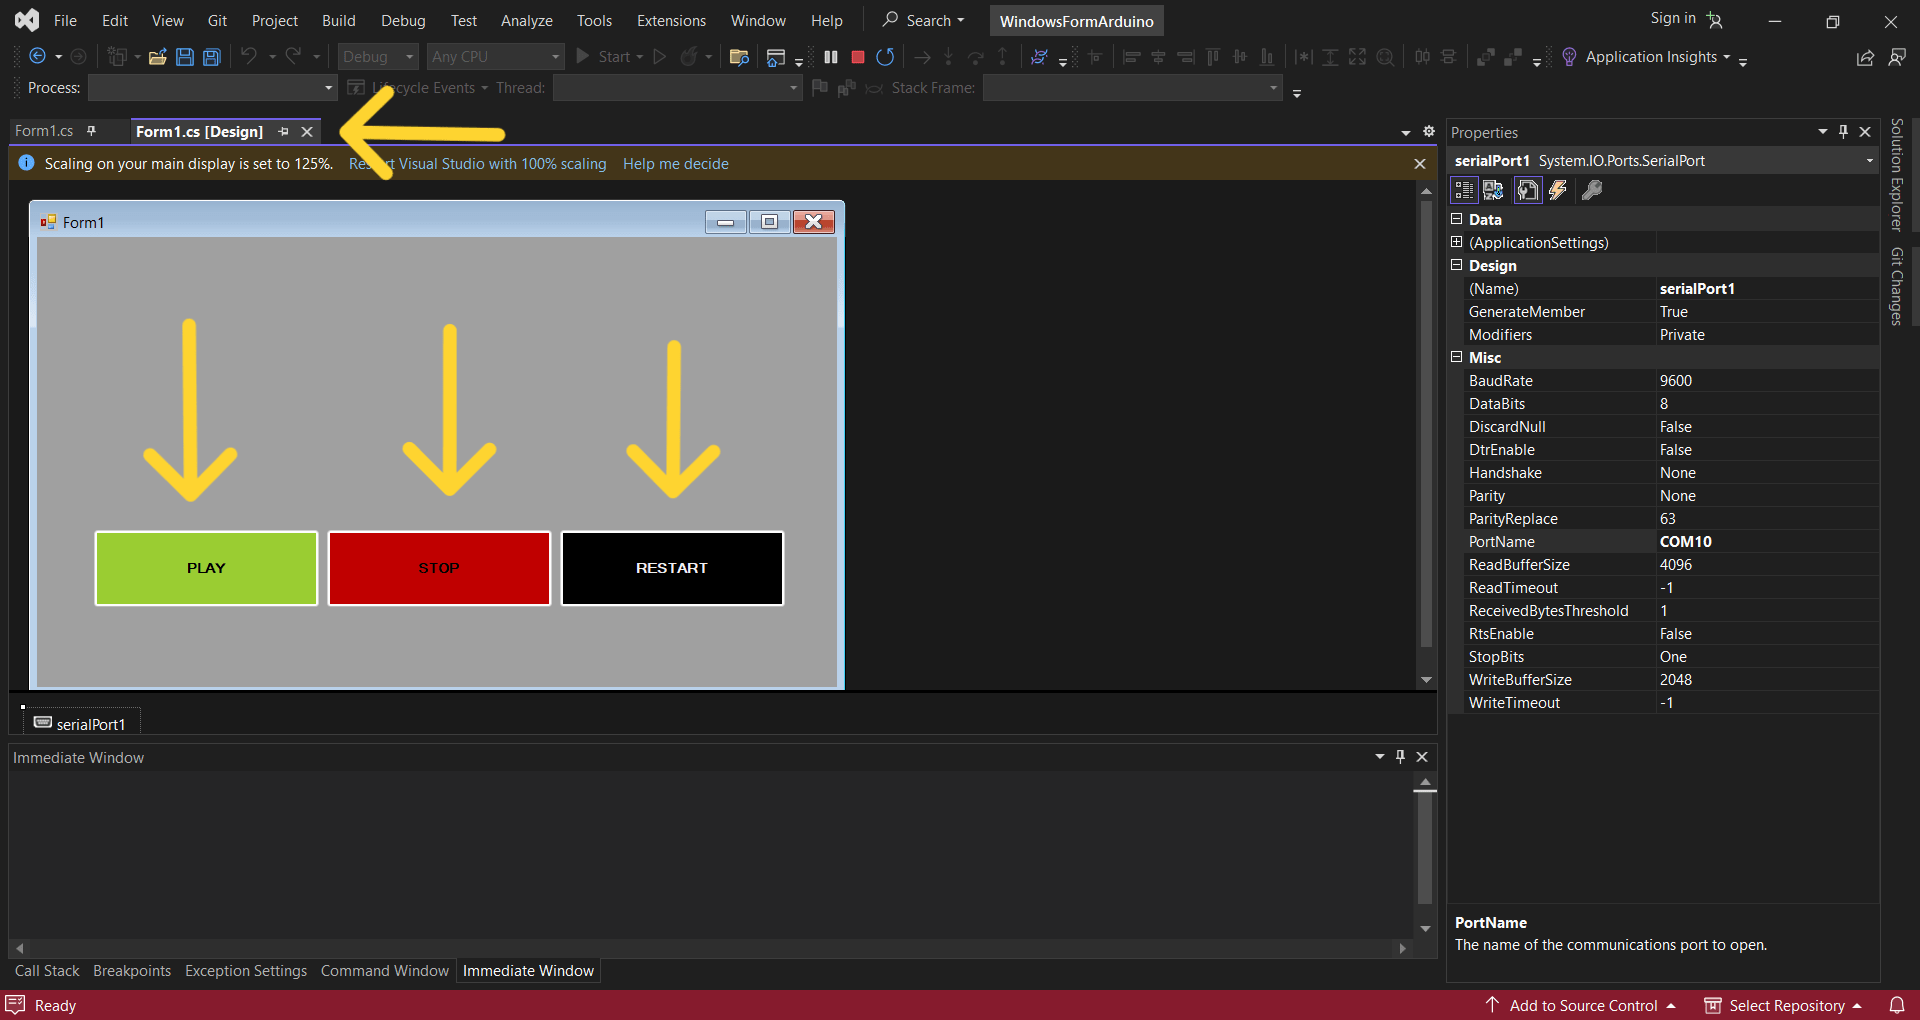
This will be the interface in which we will create our buttons.
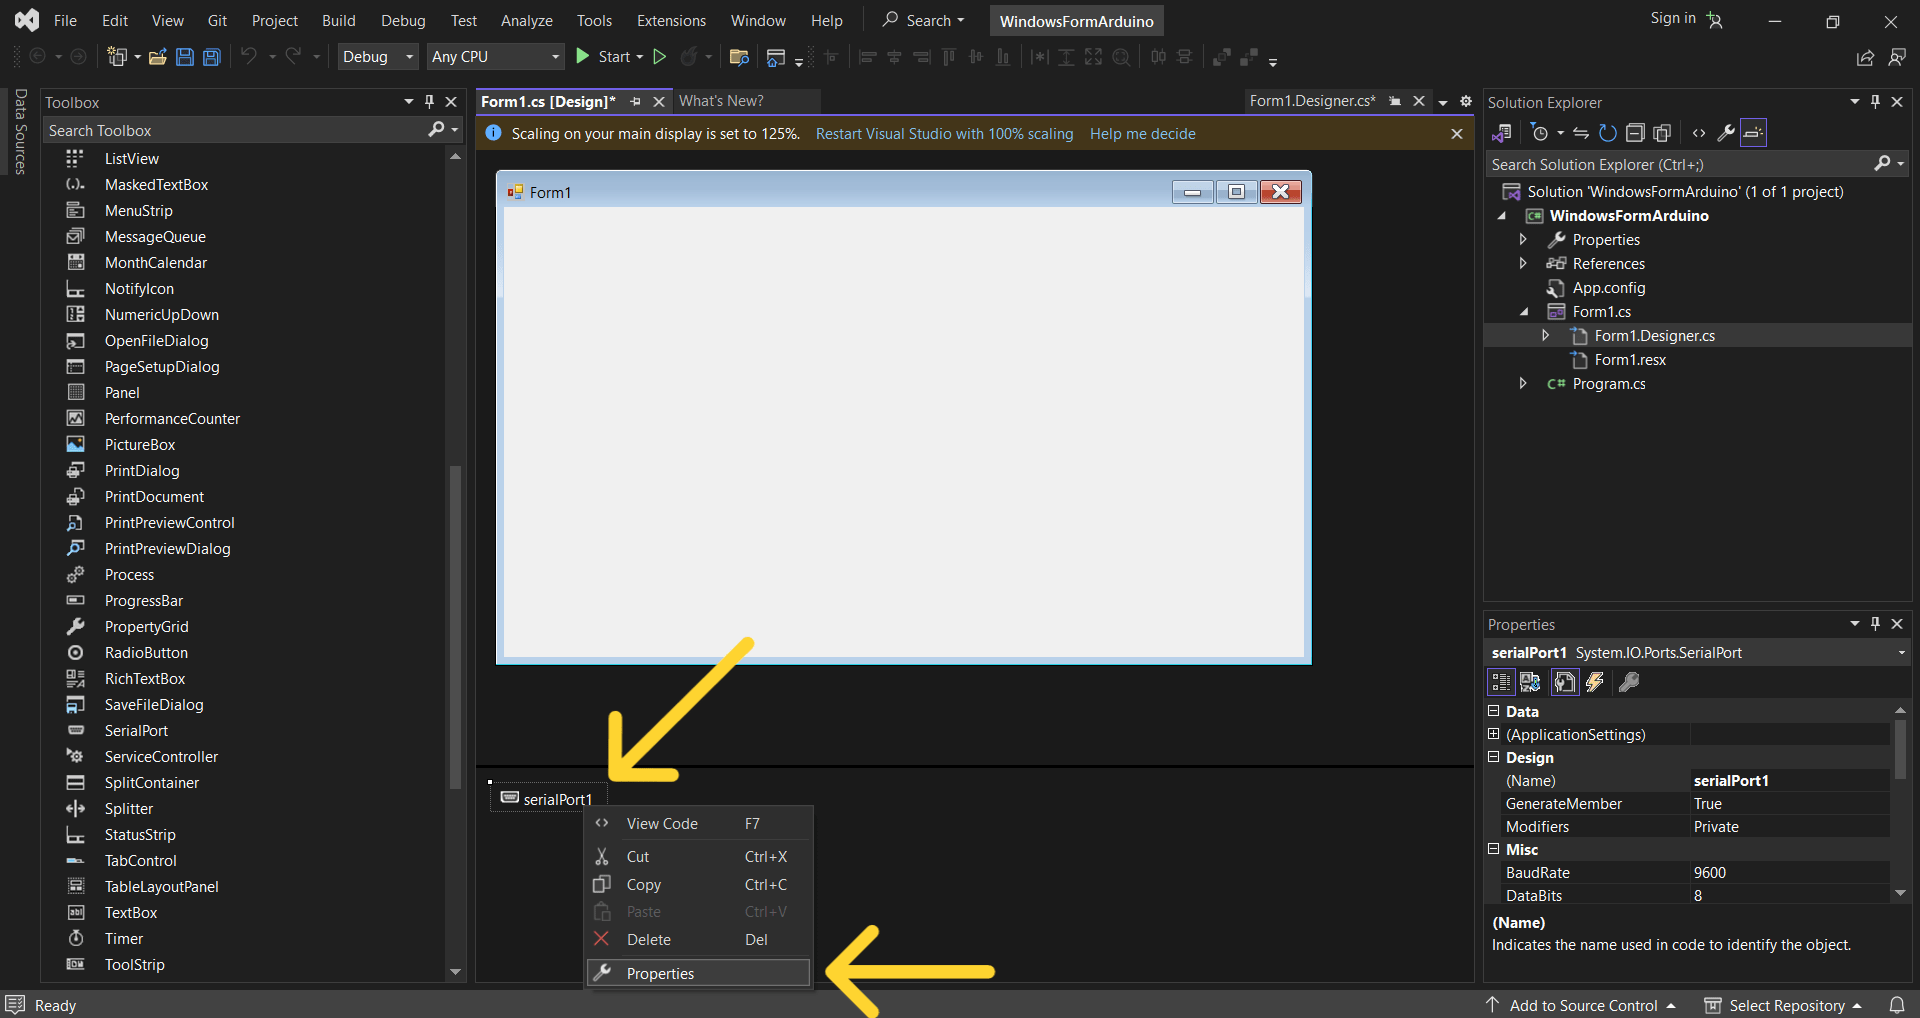
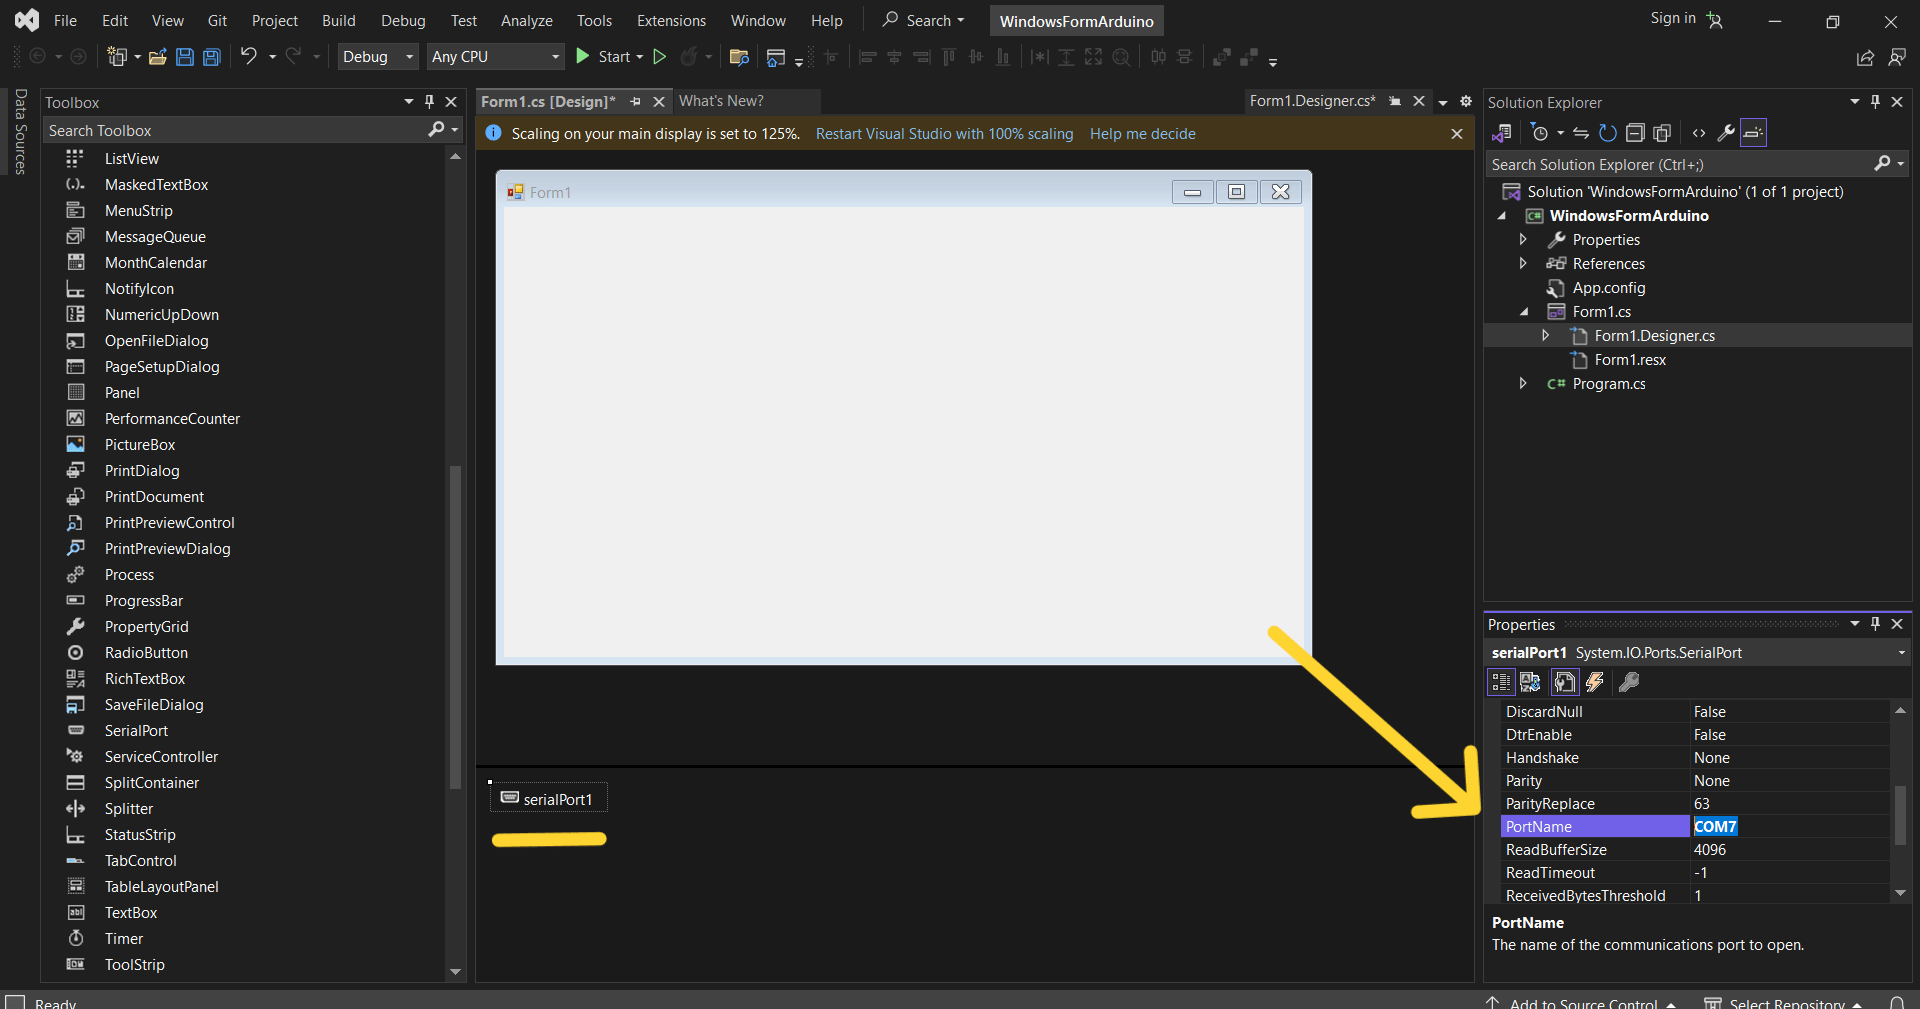
The very first tool is SerialPort. And by RightClicking on it you can go to Properties. In the opened window on right side you will choose BaudRate and Port Name which you can look at in your Arduino IDE port, while you connect your board to you laptop. Mine was COM10.
Right click to SerialPort1 >> Properties
Port Name to “COM 10”
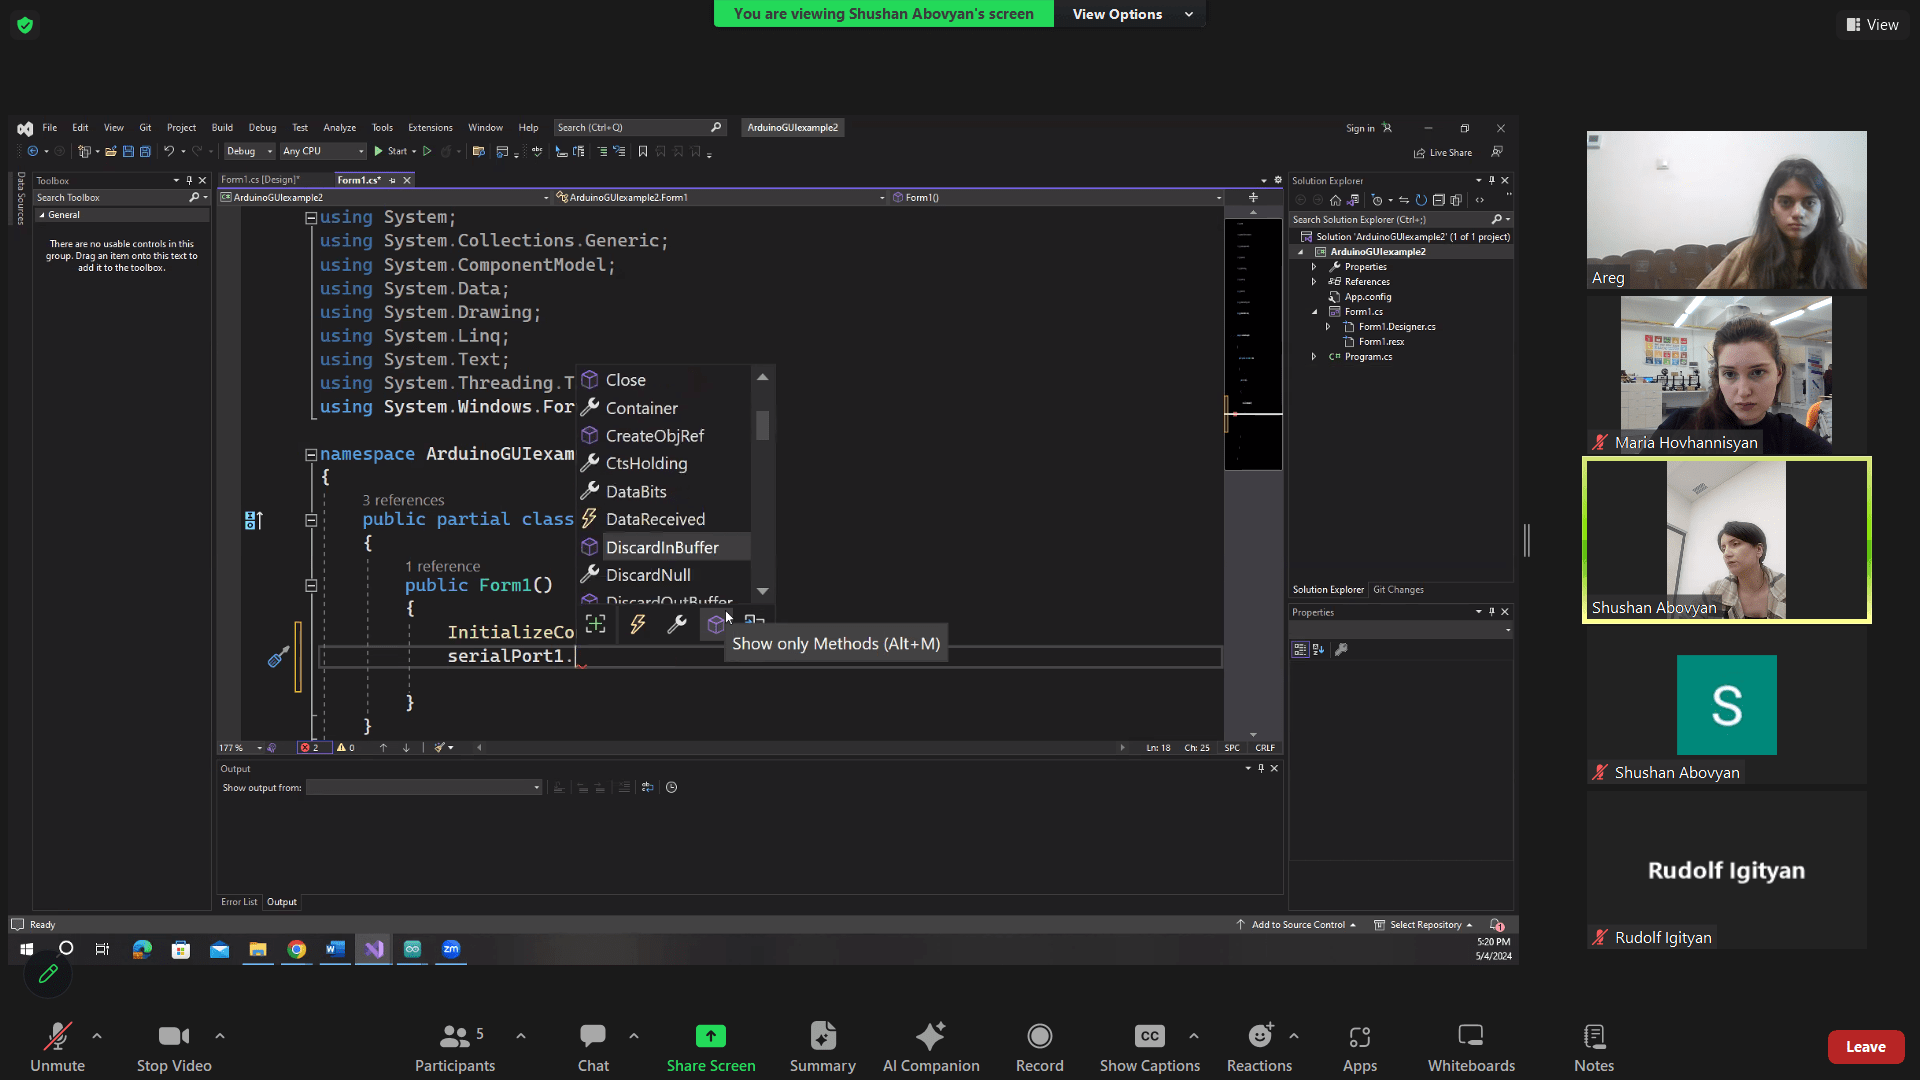
After, by going to View >> Code,
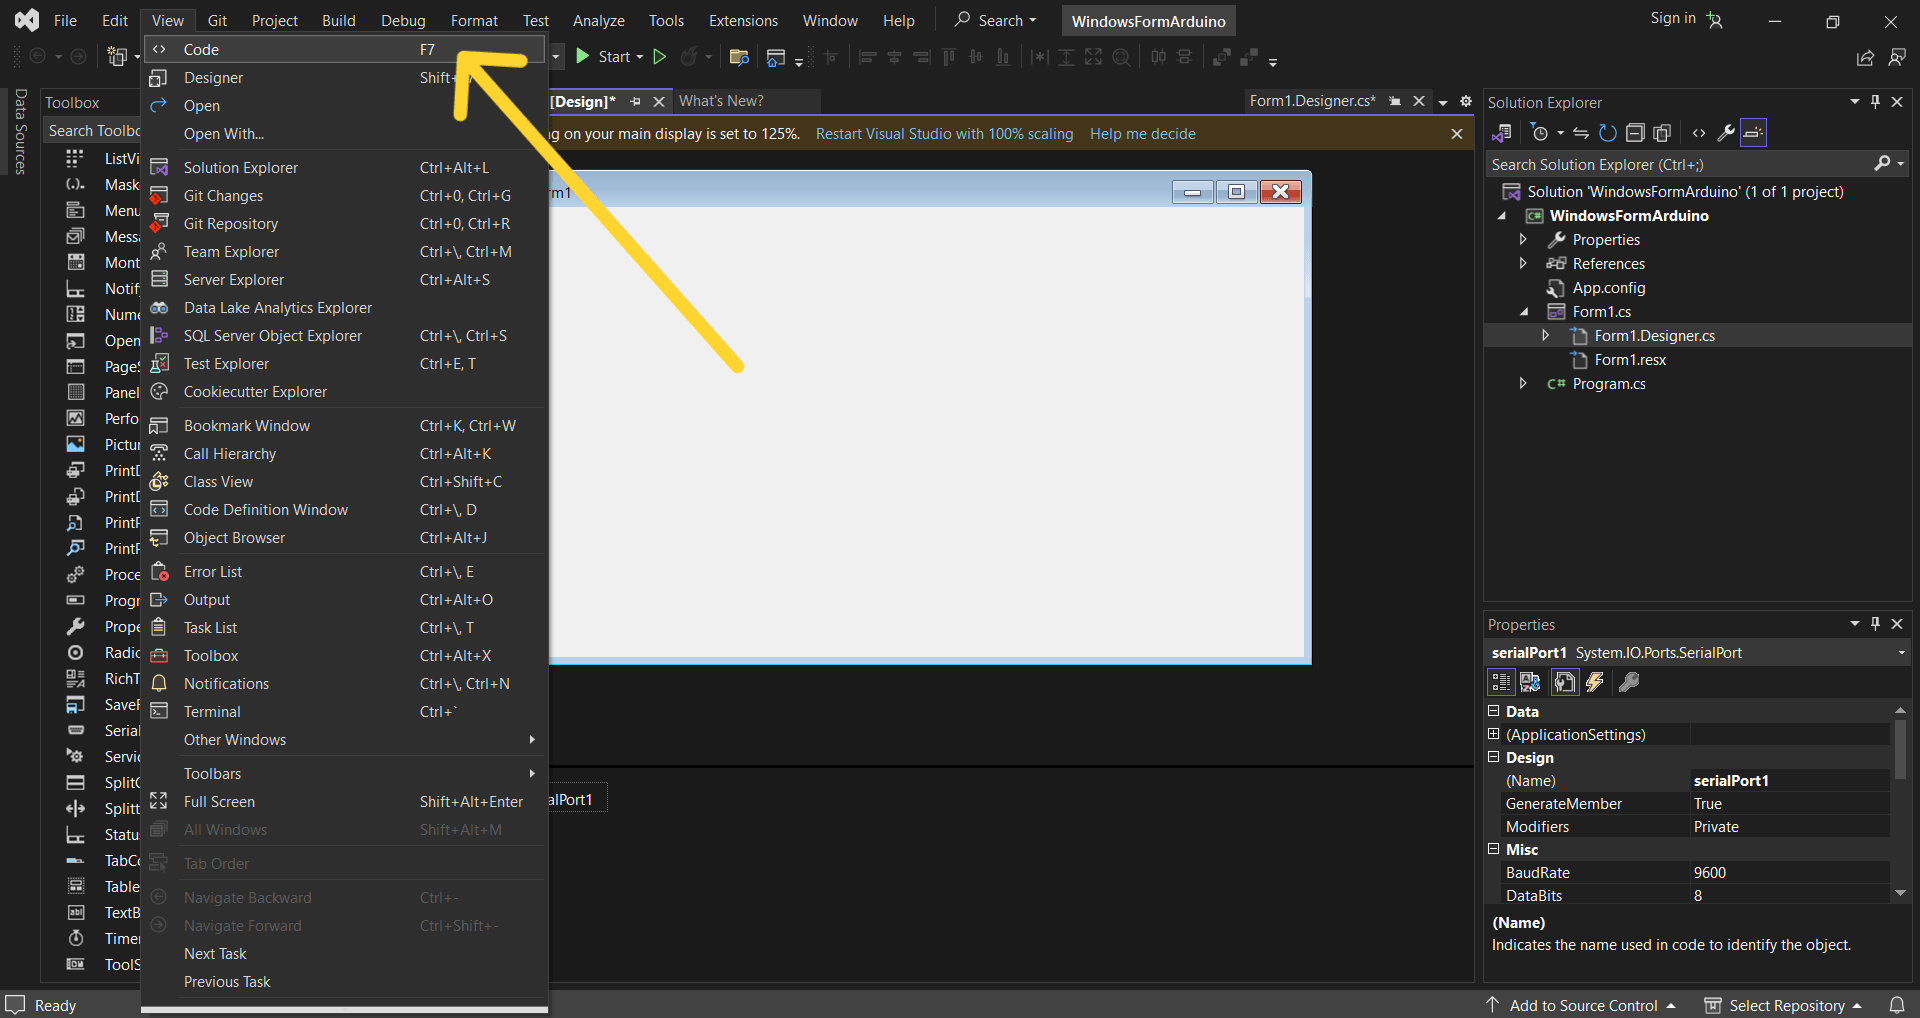
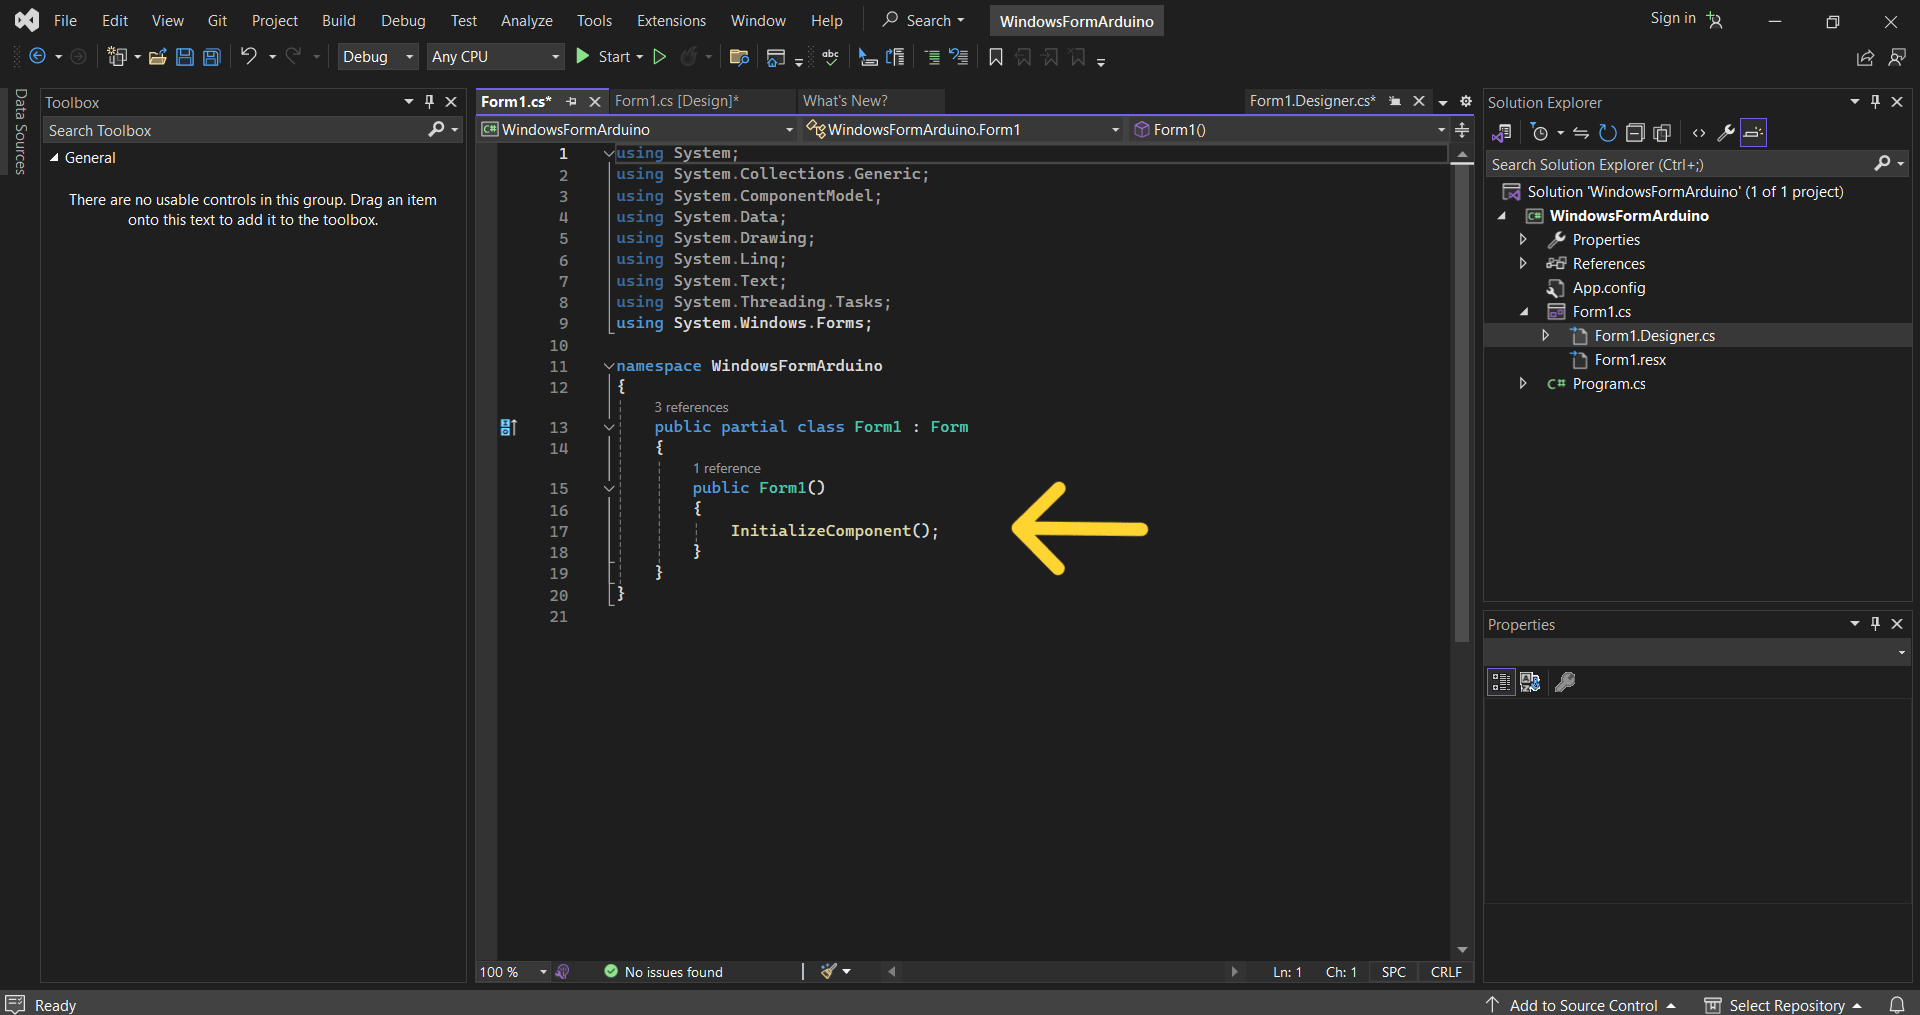
you will see the code, in which you have to type
serialPort1.Open();
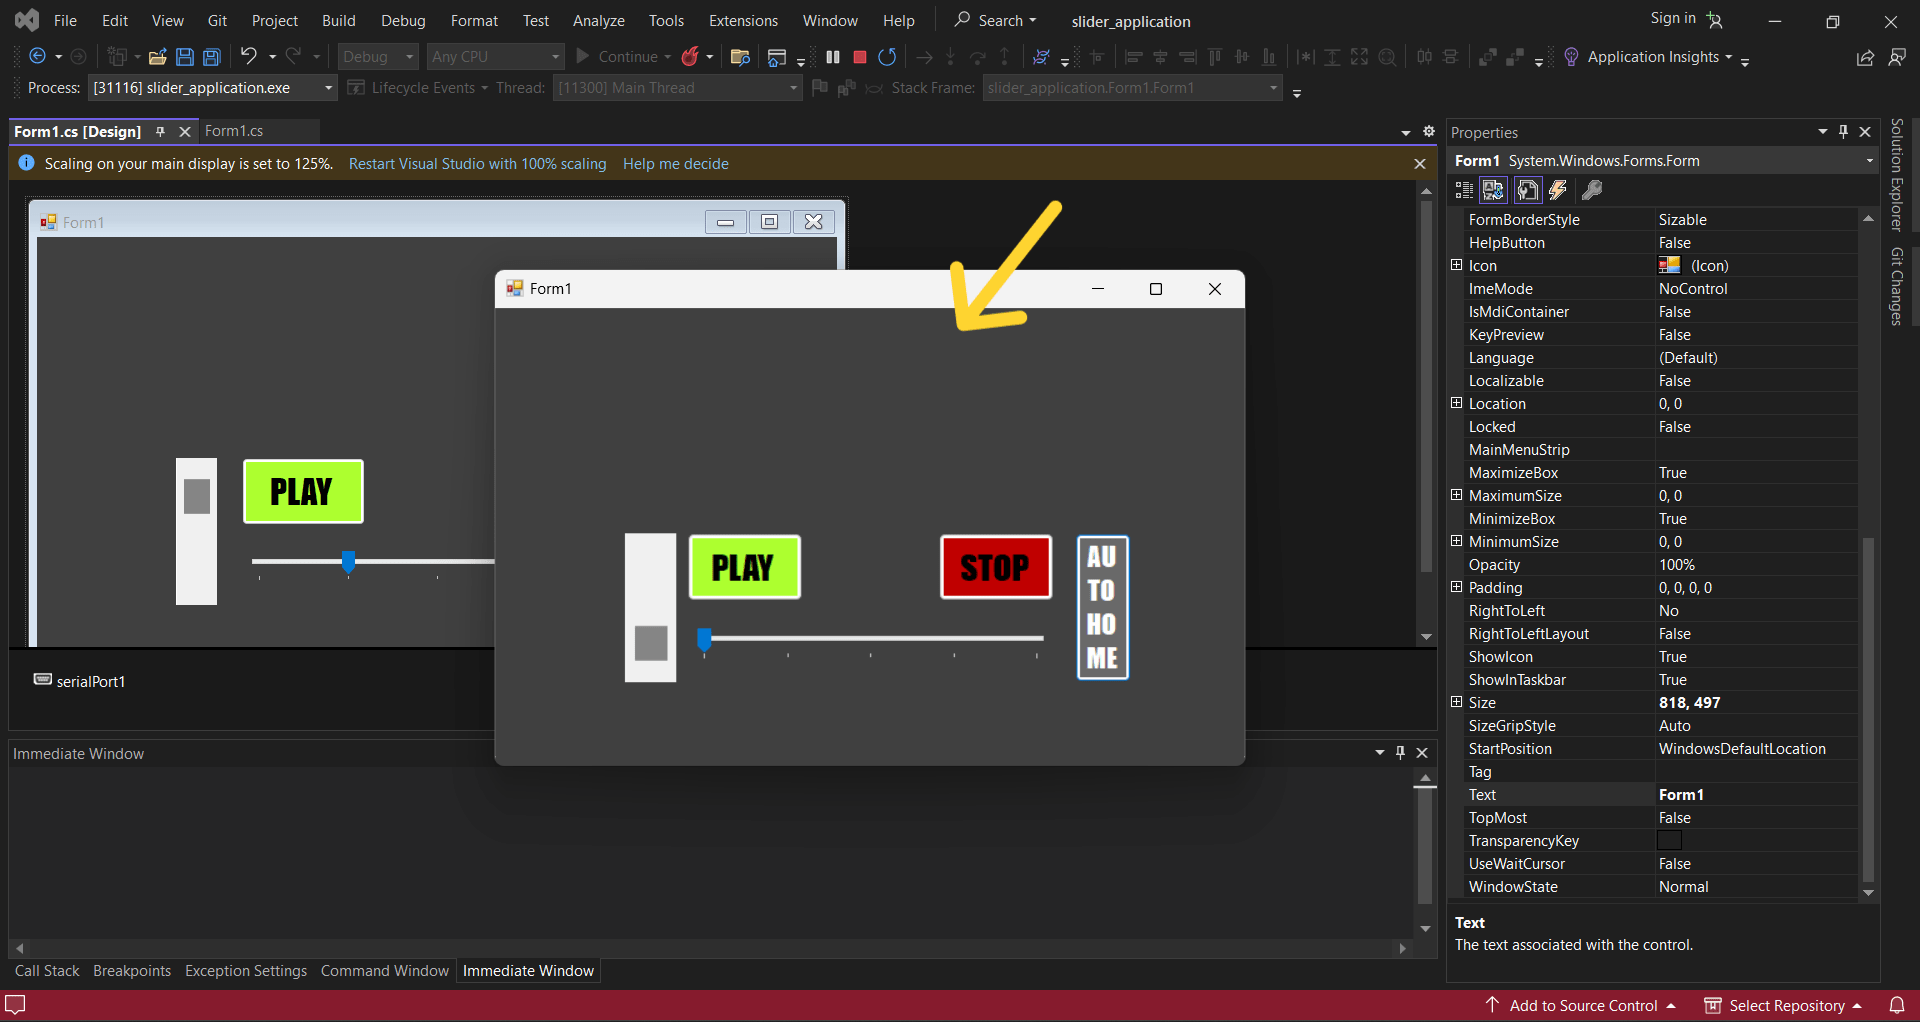
In ToolBox I found buttons that I needed, and set them in the properties by which color, font, sizes I wanted.
Here are the codes for each button.
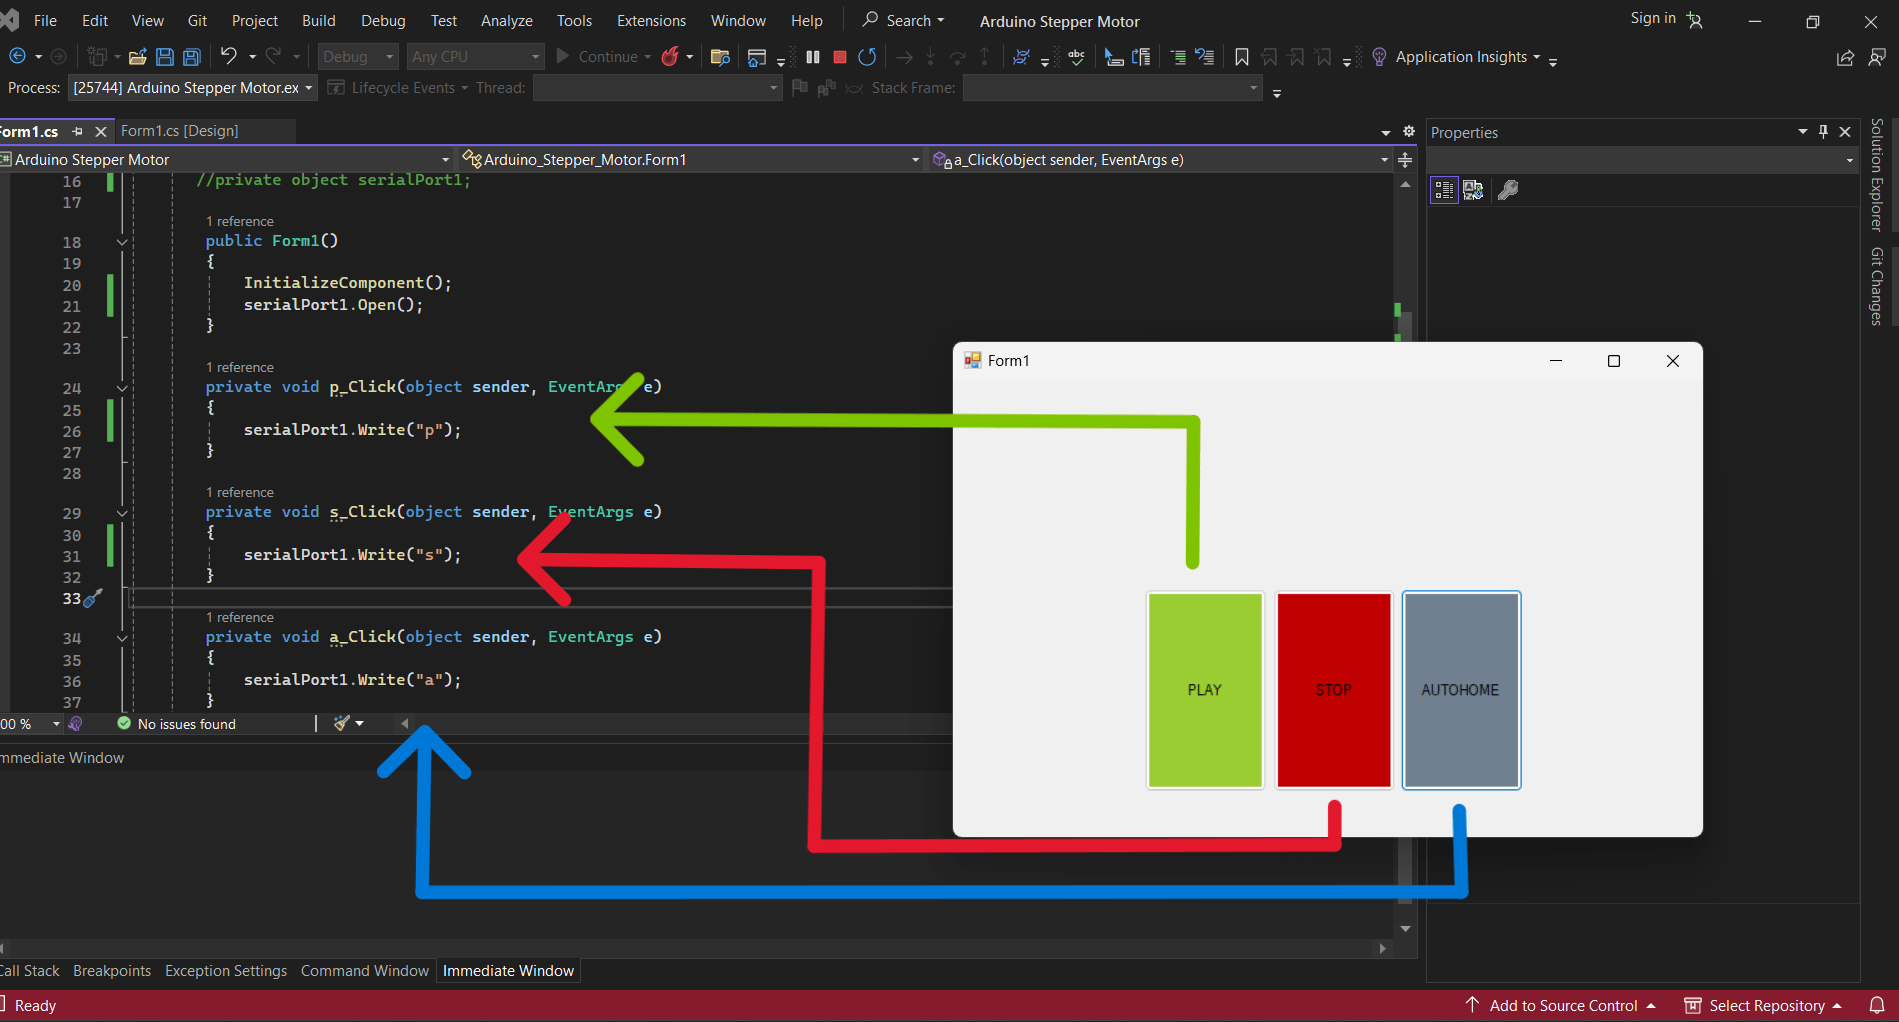
serialPort1.Write("p");
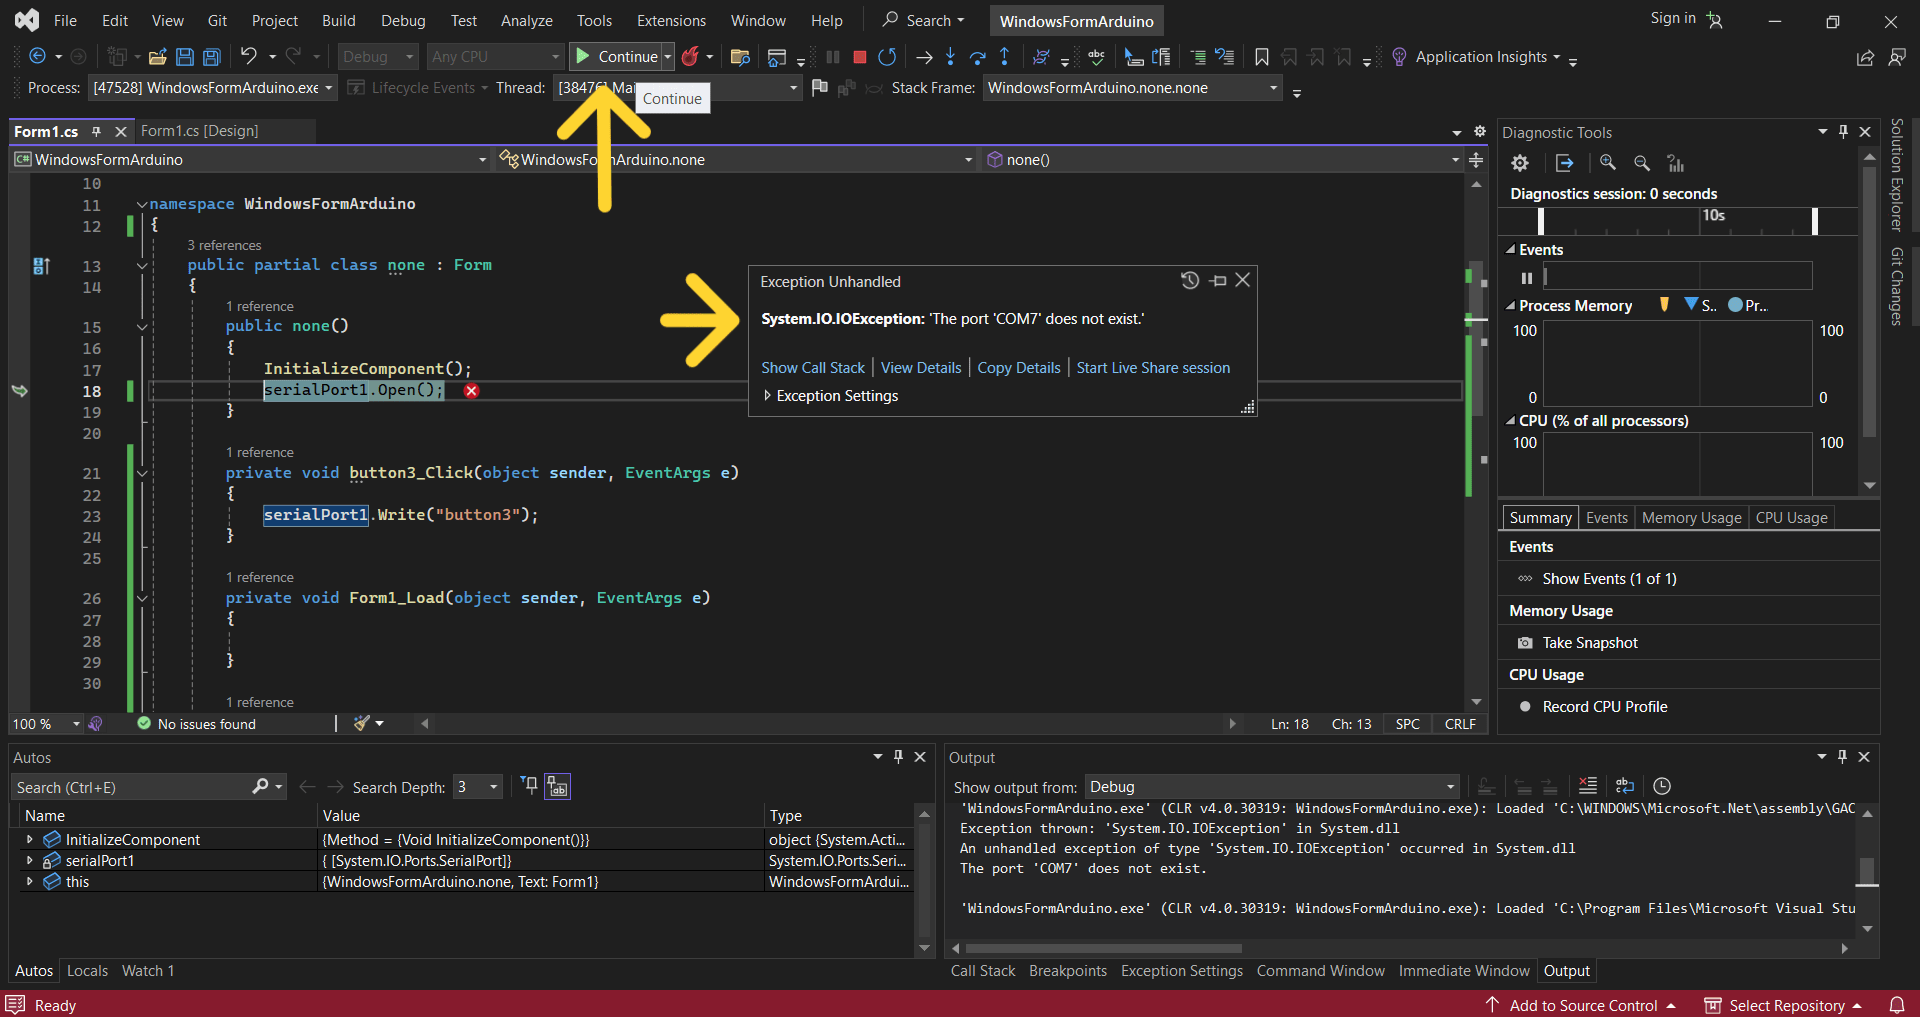
Here is the tool for Starting program that I made.

I forgot to connect my board after starting the program that I build, so this was the main error.
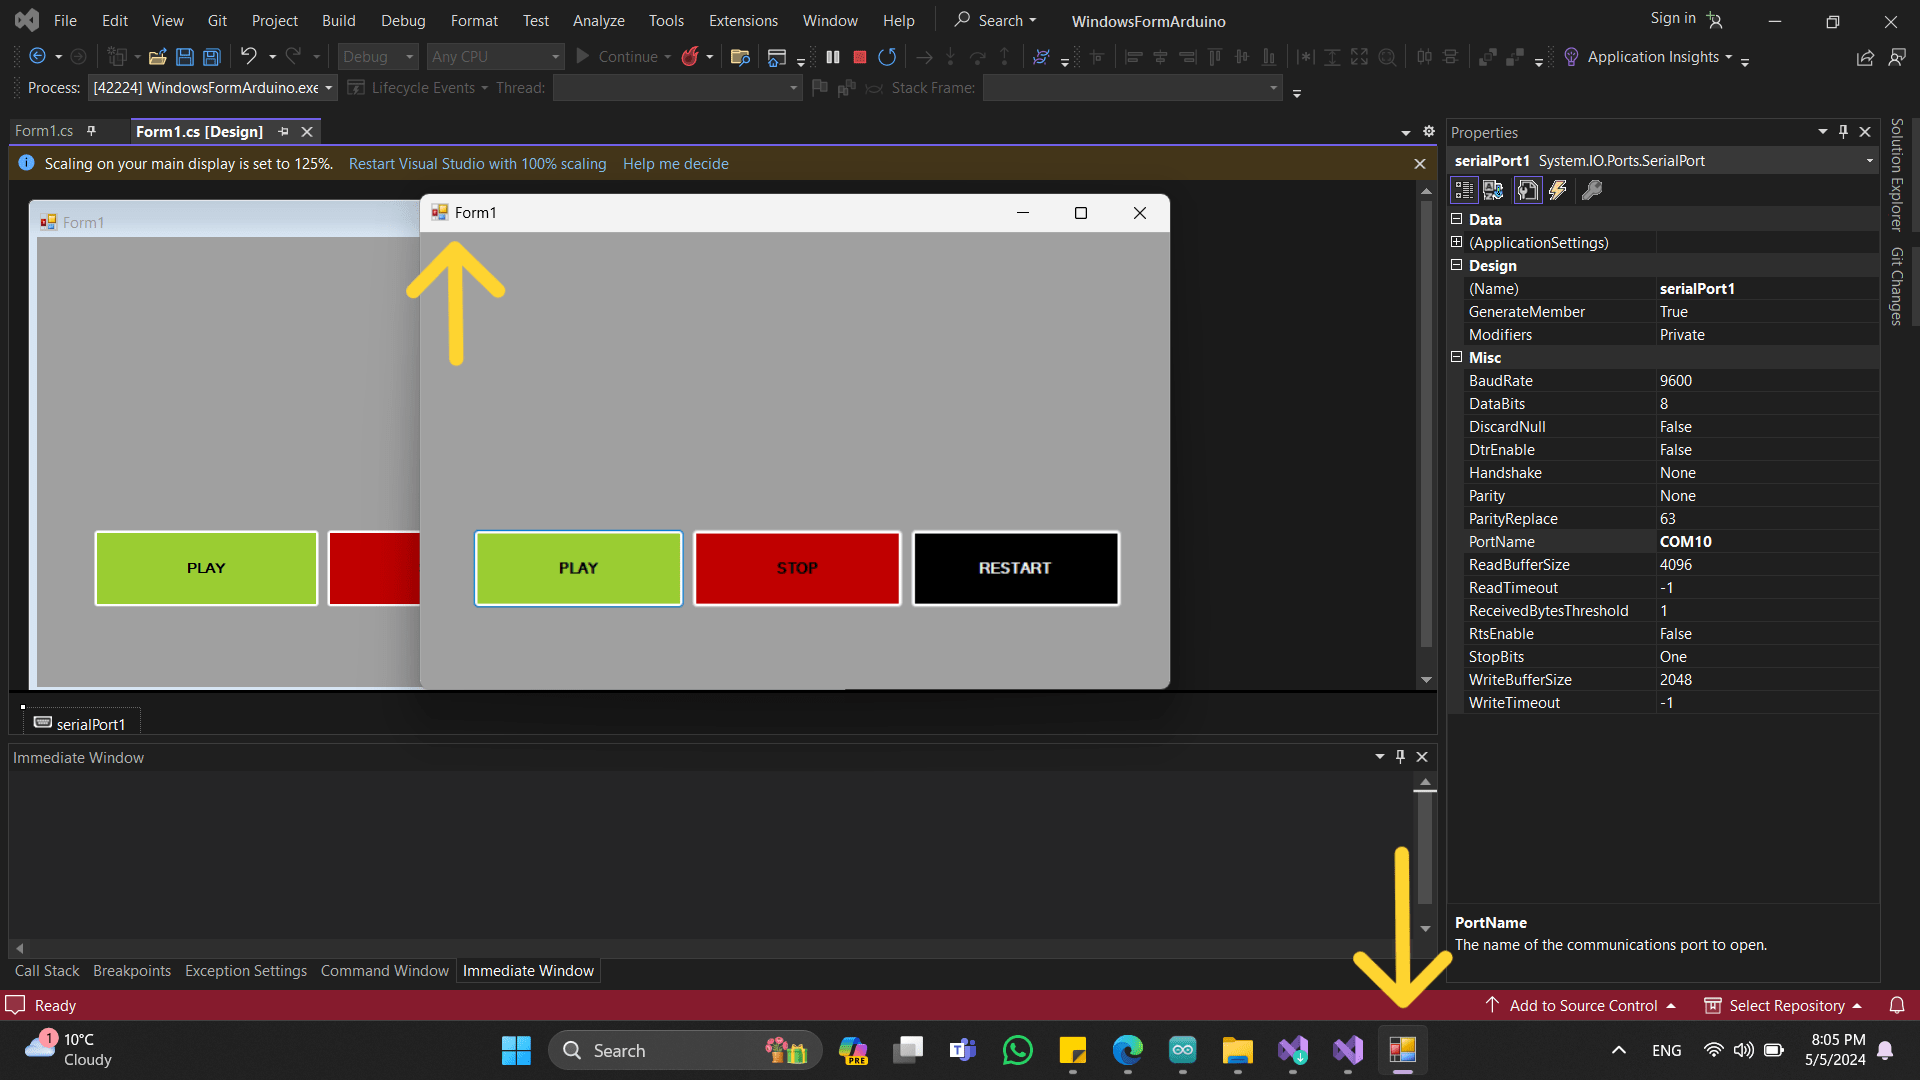
Below is the application running:
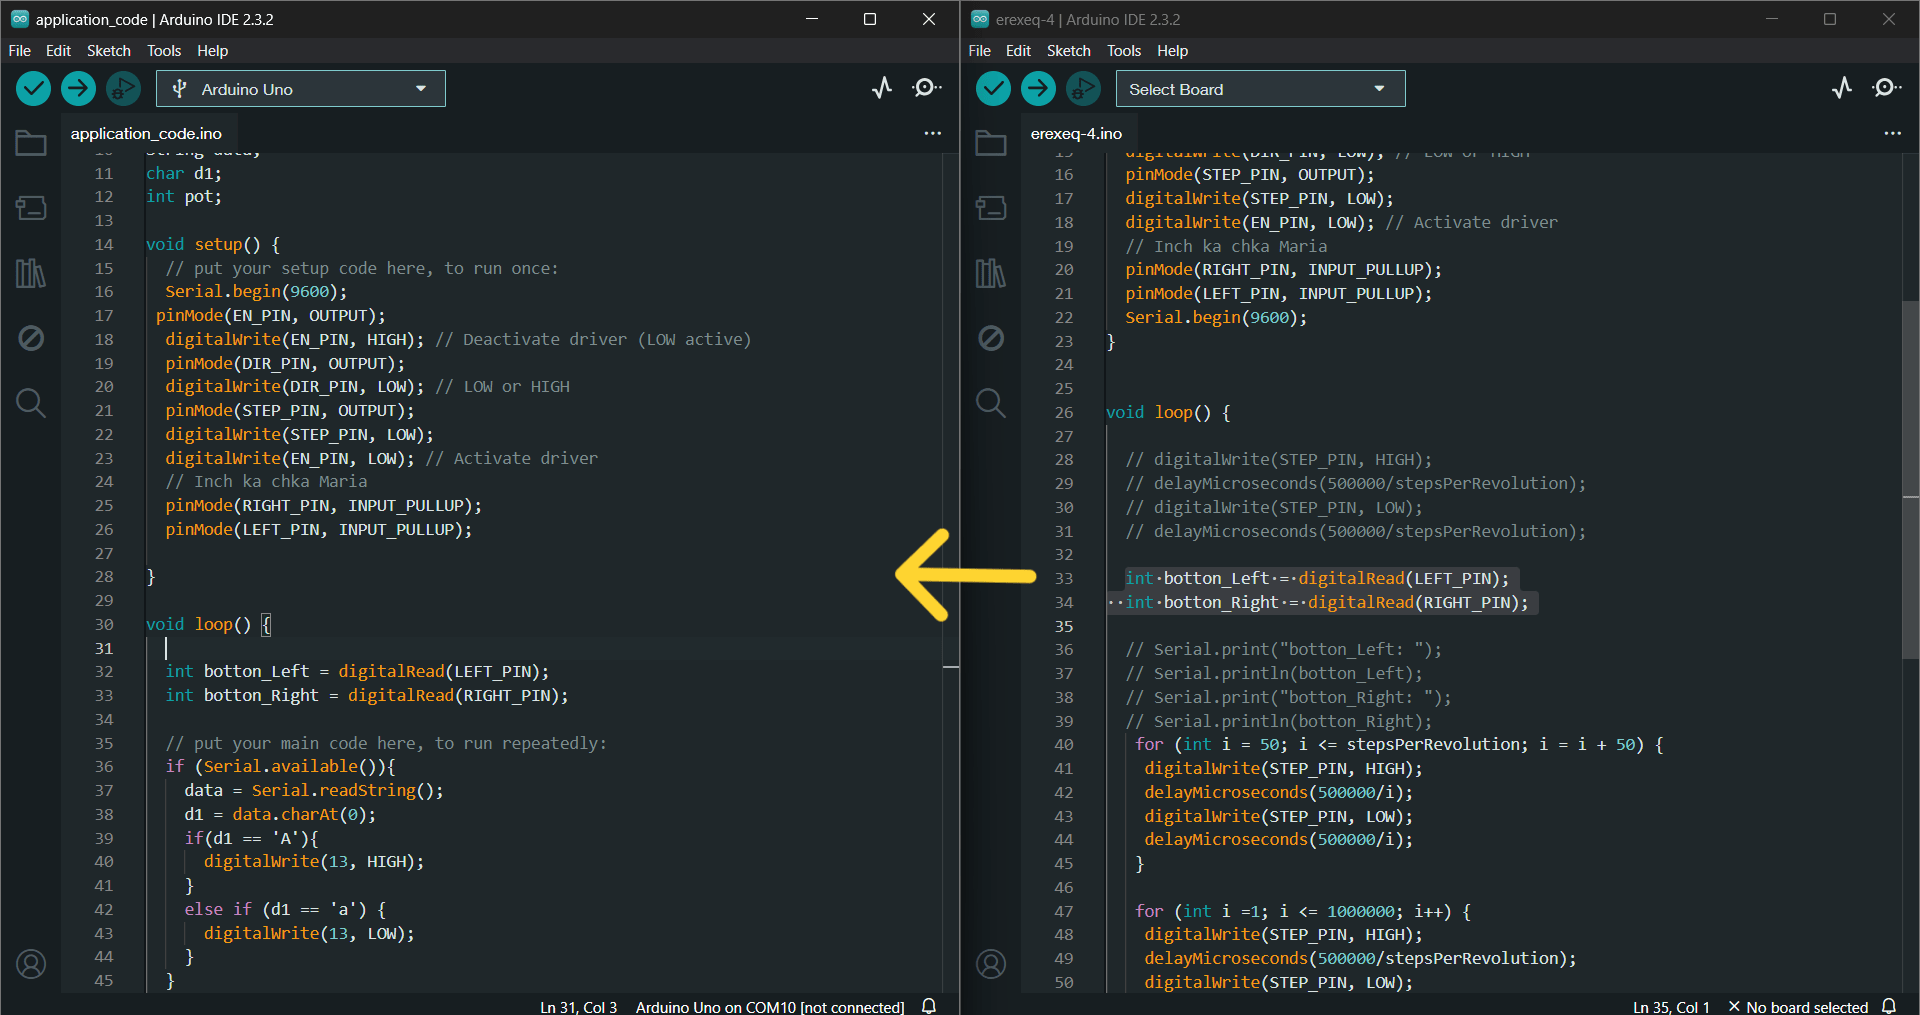
By comparing with the existing code, I started to write a code which will work with C#.
Play, Stop and Autohome buttons
#define DIR_PIN 3
#define STEP_PIN 2
#define EN_PIN 4

#define RIGHT_PIN 8
#define LEFT_PIN 7
#define stepsPerRevolution 5000


String data;
char d1;

void setup() {
  // put your setup code here, to run once:
  Serial.begin(9600);
  pinMode(EN_PIN, OUTPUT);
  digitalWrite(EN_PIN, HIGH); // Deactivate driver (LOW active)
  pinMode(DIR_PIN, OUTPUT);
  digitalWrite(DIR_PIN, LOW); // LOW or HIGH
  pinMode(STEP_PIN, OUTPUT);
  digitalWrite(STEP_PIN, LOW);
  digitalWrite(EN_PIN, LOW); // Activate driver
  pinMode(RIGHT_PIN, INPUT_PULLUP);
  pinMode(LEFT_PIN, INPUT_PULLUP);

}

void loop() {

  int button_Left = digitalRead(LEFT_PIN);
  int button_Right = digitalRead(RIGHT_PIN);

  if (Serial.available()){
    data = Serial.readString();
    d1 = data.charAt(0);
    if(d1 == 'p'){
      digitalWrite(DIR_PIN, HIGH);
      for (int i =1; i <= 1000000; i++) {
        digitalWrite(STEP_PIN, HIGH);
        delayMicroseconds(500000/stepsPerRevolution);
        digitalWrite(STEP_PIN, LOW);
        delayMicroseconds(500000/stepsPerRevolution);
        button_Left = digitalRead(LEFT_PIN);
        button_Right = digitalRead(RIGHT_PIN);
        if (button_Left == 0){
          digitalWrite(DIR_PIN,LOW);
          // break;
        } if (button_Right == 0) {
          digitalWrite(DIR_PIN, HIGH);
          // break;
        }
        if (Serial.available()){
          data = Serial.readString();
          d1 = data.charAt(0);
          if(d1 == 's'){
            break;
        }
      }
    }
    }
    else if (d1 == 'a') {
      digitalWrite(DIR_PIN, HIGH);
      for (int i =1; i <= 1000000; i++) {
        digitalWrite(STEP_PIN, HIGH);
        delayMicroseconds(500000/stepsPerRevolution);
        digitalWrite(STEP_PIN, LOW);
        delayMicroseconds(500000/stepsPerRevolution);
        button_Left = digitalRead(LEFT_PIN);
        // int button_Right = digitalRead(RIGHT_PIN);
        if (button_Left == 0){
          break;
        }
      }
    }
  }
}
In this code you can see, that in void loop() I first write to check if there is any data available on the serial communication port. If there is data available, it reads the data using Serial.readString() and stores it in the variable data. It then extracts the first character of the received data and assigns it to d1.
If the first character received (d1) is ‘p’ (play), then it sets the direction pin (DIR_PIN) to HIGH. Enters a loop that runs 1,000,000 milliseconds. >> Reads the state of two buttons (LEFT_PIN and RIGHT_PIN) to check if they are pressed. >> If the left/right button is pressed (button_Left/Right == 0), it changes the direction by setting DIR_PIN to LOW. >> Continues to check for additional serial data (Serial.available()) and stops the motor if the received character is ‘s’ (stop).
Also there’s the Autohome function. If the received character (d1) is ‘a’ (autohome), motor is doing the same as in ‘play’, but if the left button is pressed (button_Left == 0), it breaks out of the loop, stopping the motor.
And after I sent this code to Arduino board.
In the video bellow I’m checking buttons.
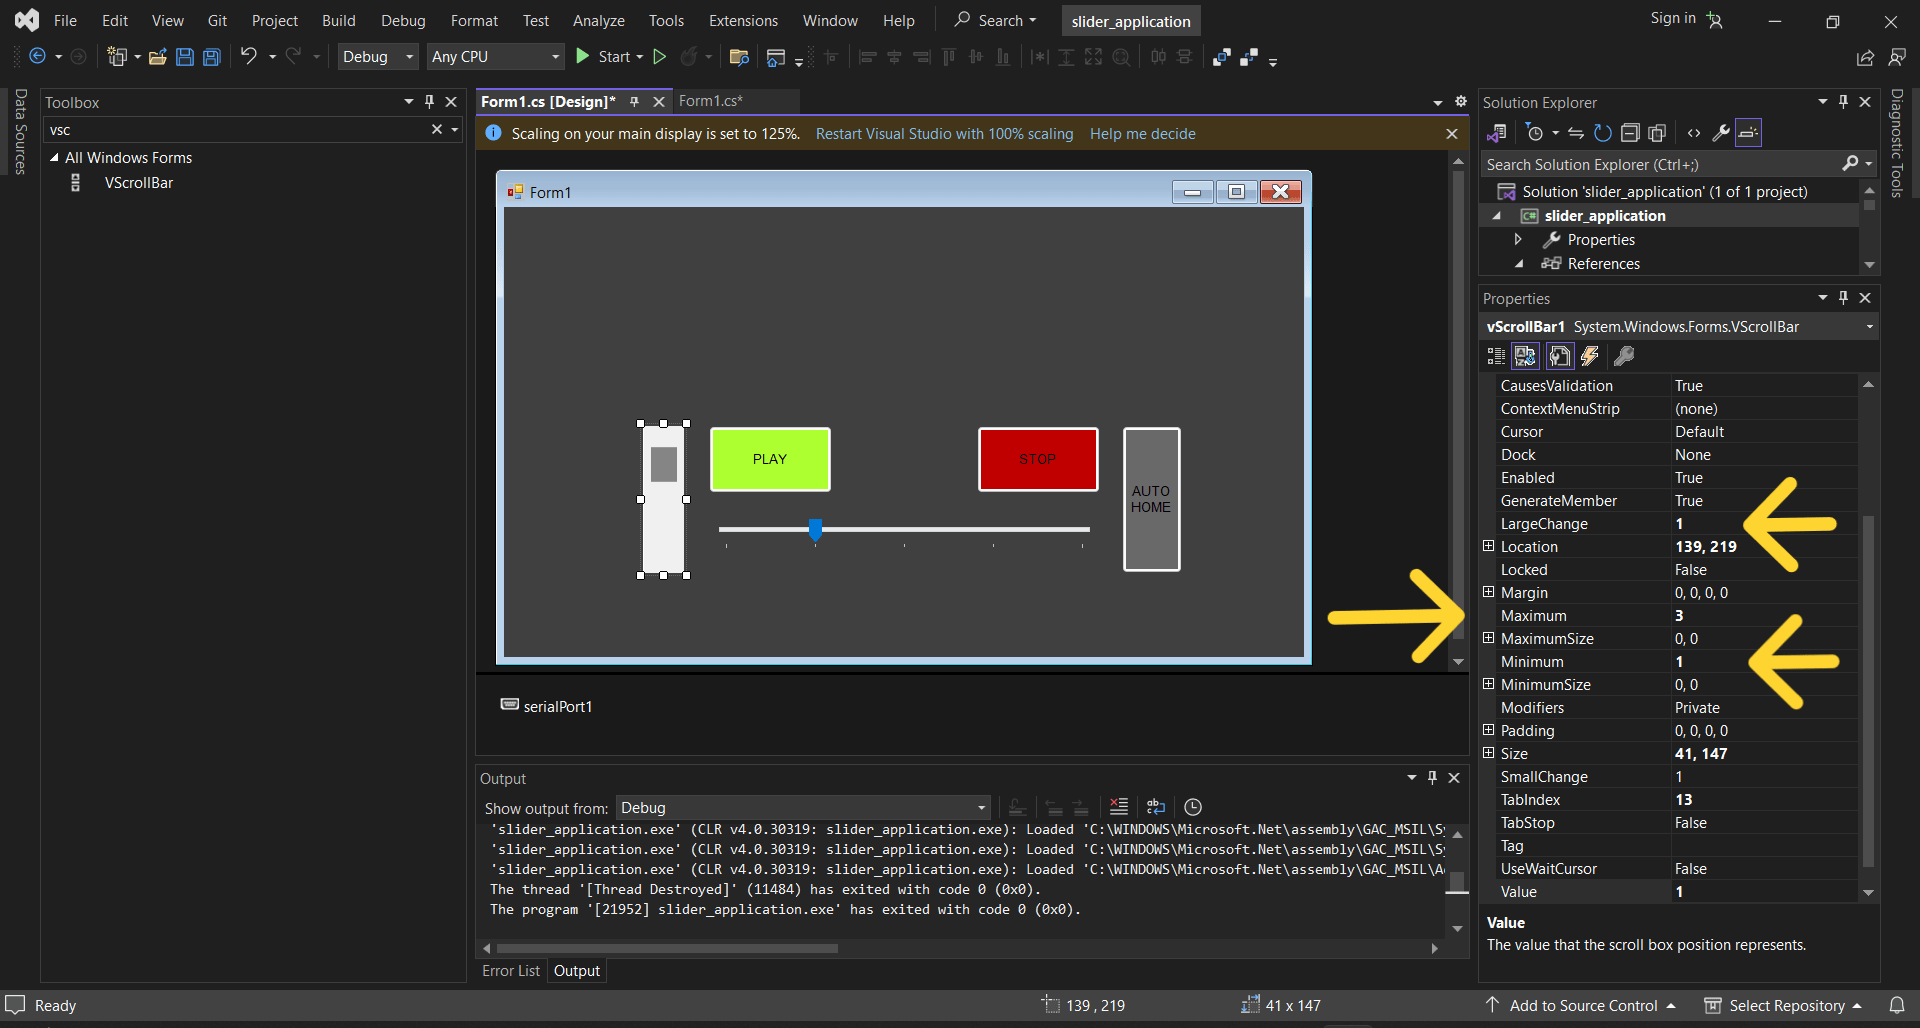
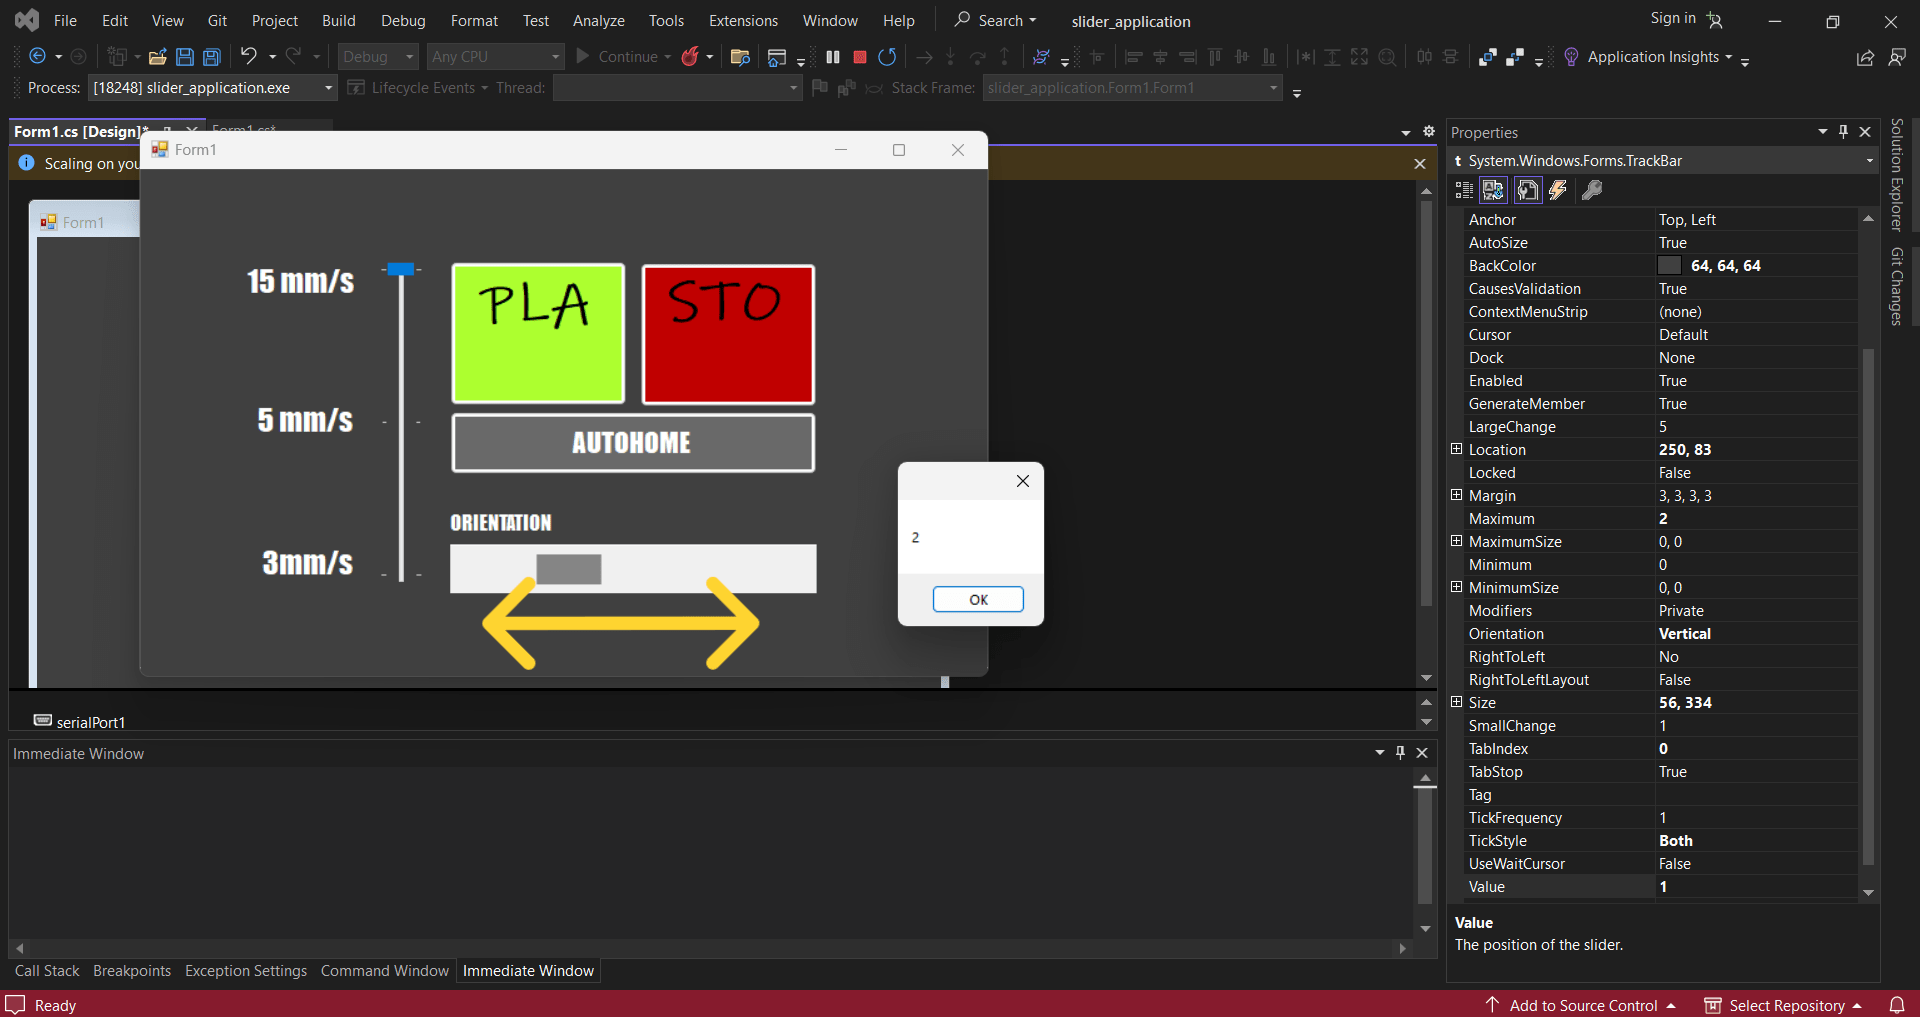
I also added a scroll bar, track bar so that the moving part of our machine could change its speed and position.
For slider I made the maximum and minimum numbers, that it can give. It was 0, 1 and 2. Also I changed the size of the slider button.
Also by clicking once on this buttons below, you can change the font, size, color, style of the button.
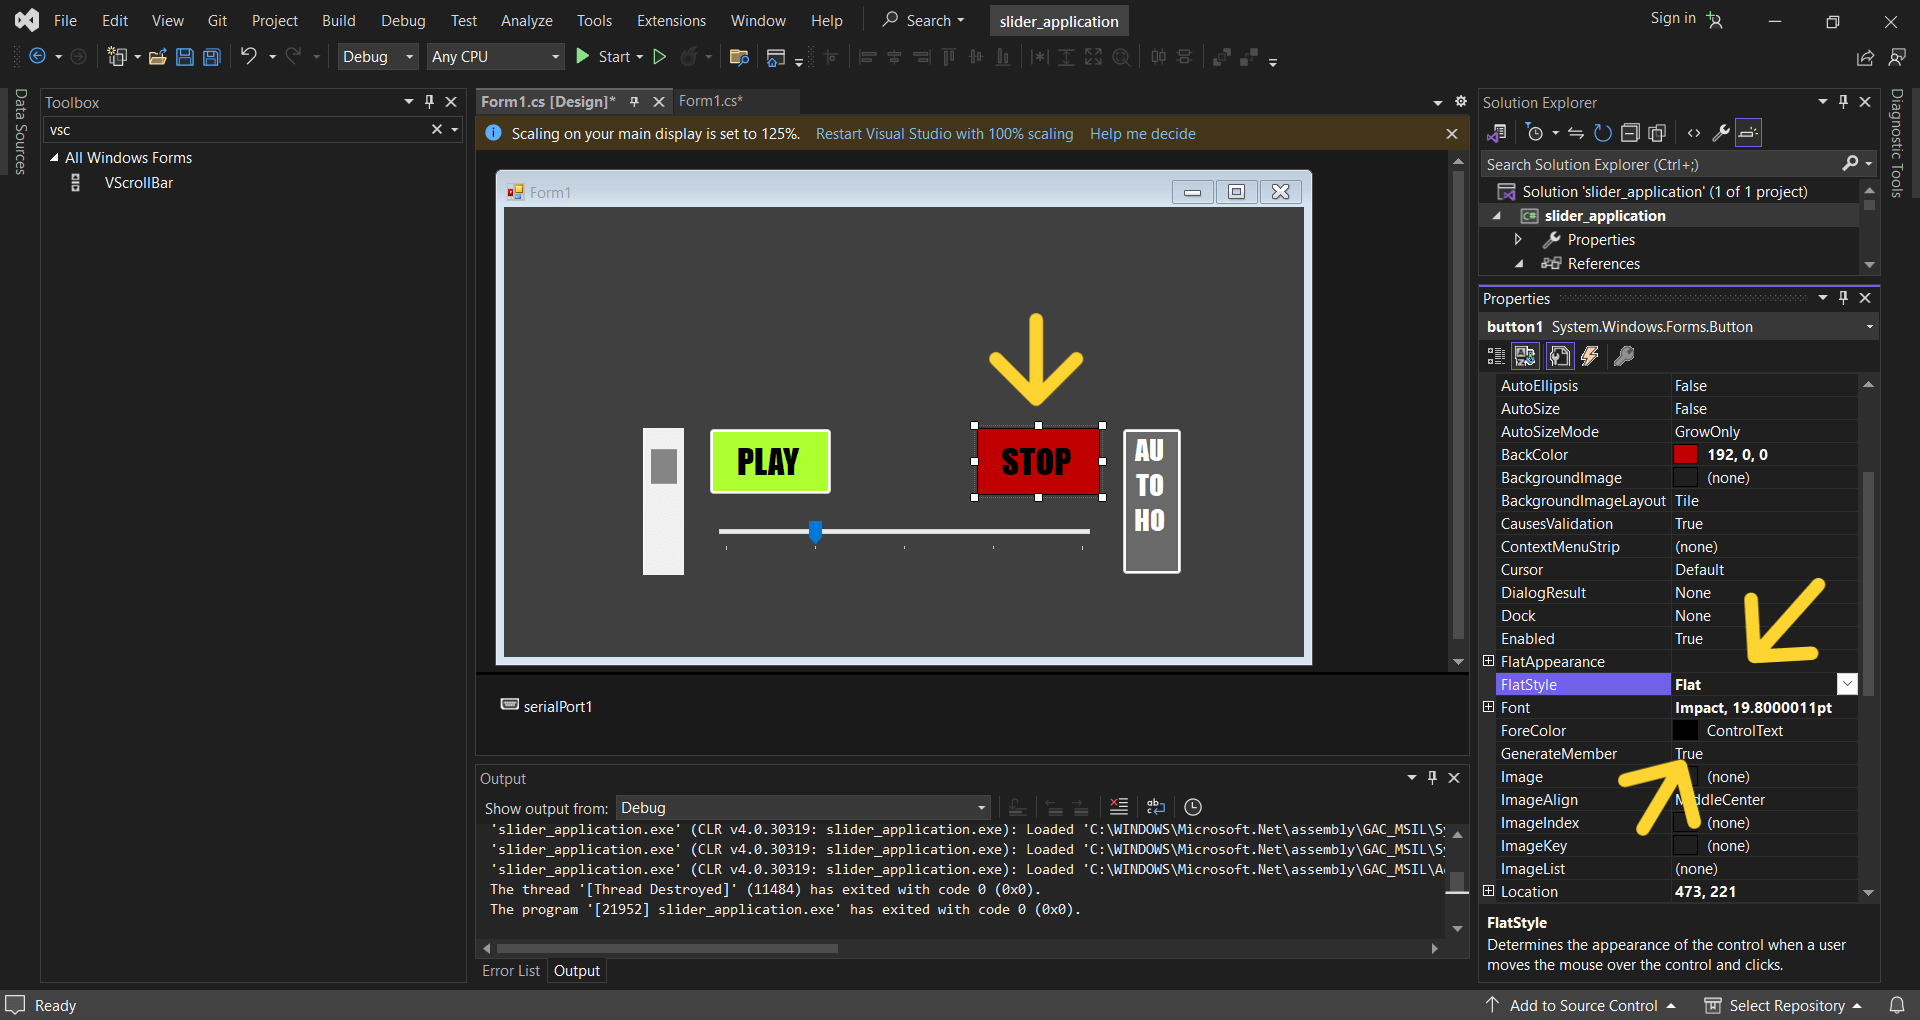
And here what I’ve got.
After I checked, if the scroll bars are working, and which numbers they give, so that I could write the receiving code in Arduino IDE.
For that I used code
 private void b_Scroll(object sender, ScrollEventArgs e)
 {
     MessageBox.Show(b, ValueTuple.ToString());
     serialPort1.Write("b"+ b.Value.ToString());
 }

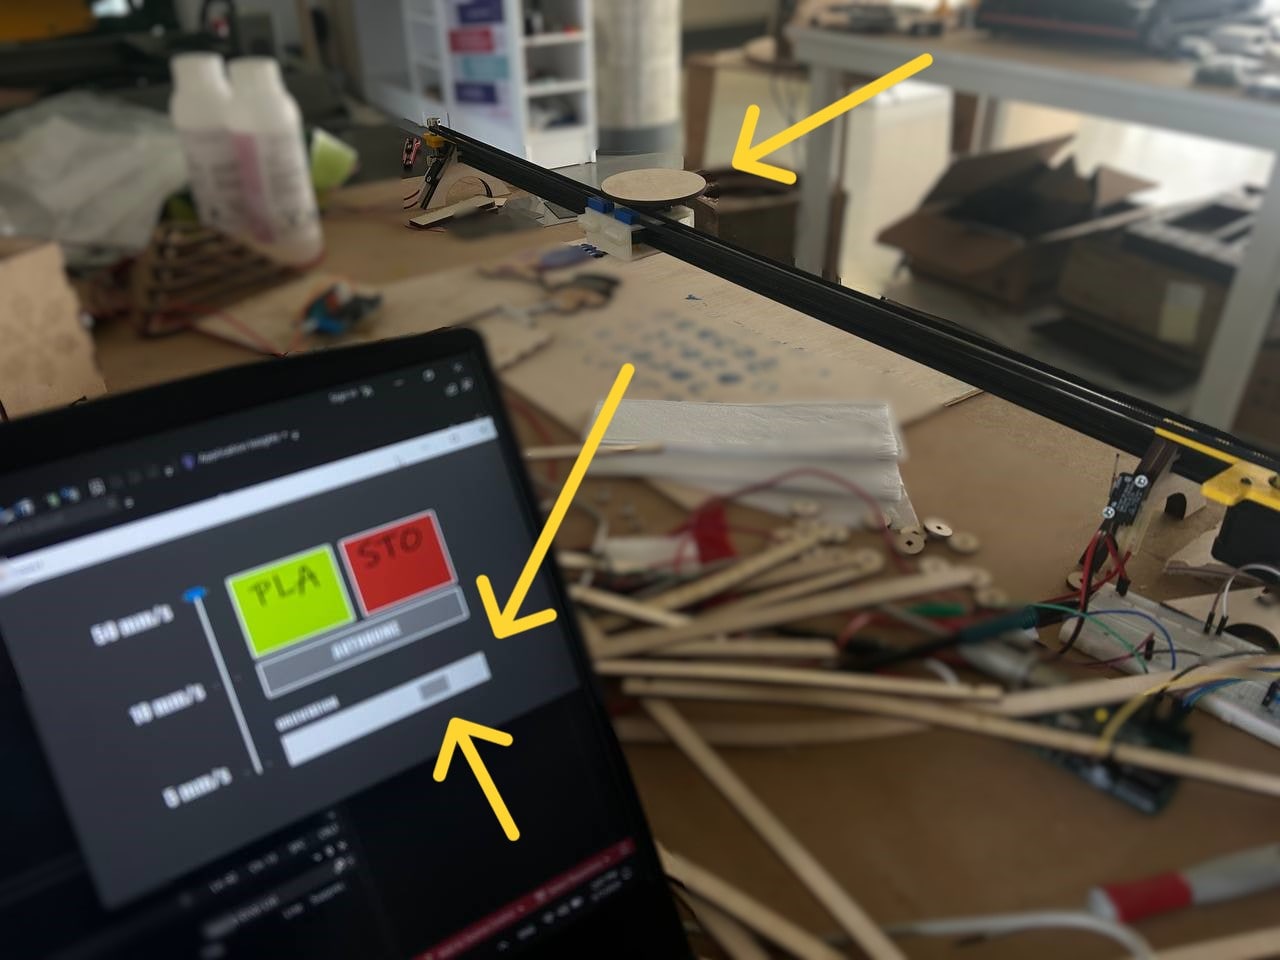
So after playing the program I checked and it worked.
Here is the Position scroll bar which has worked.
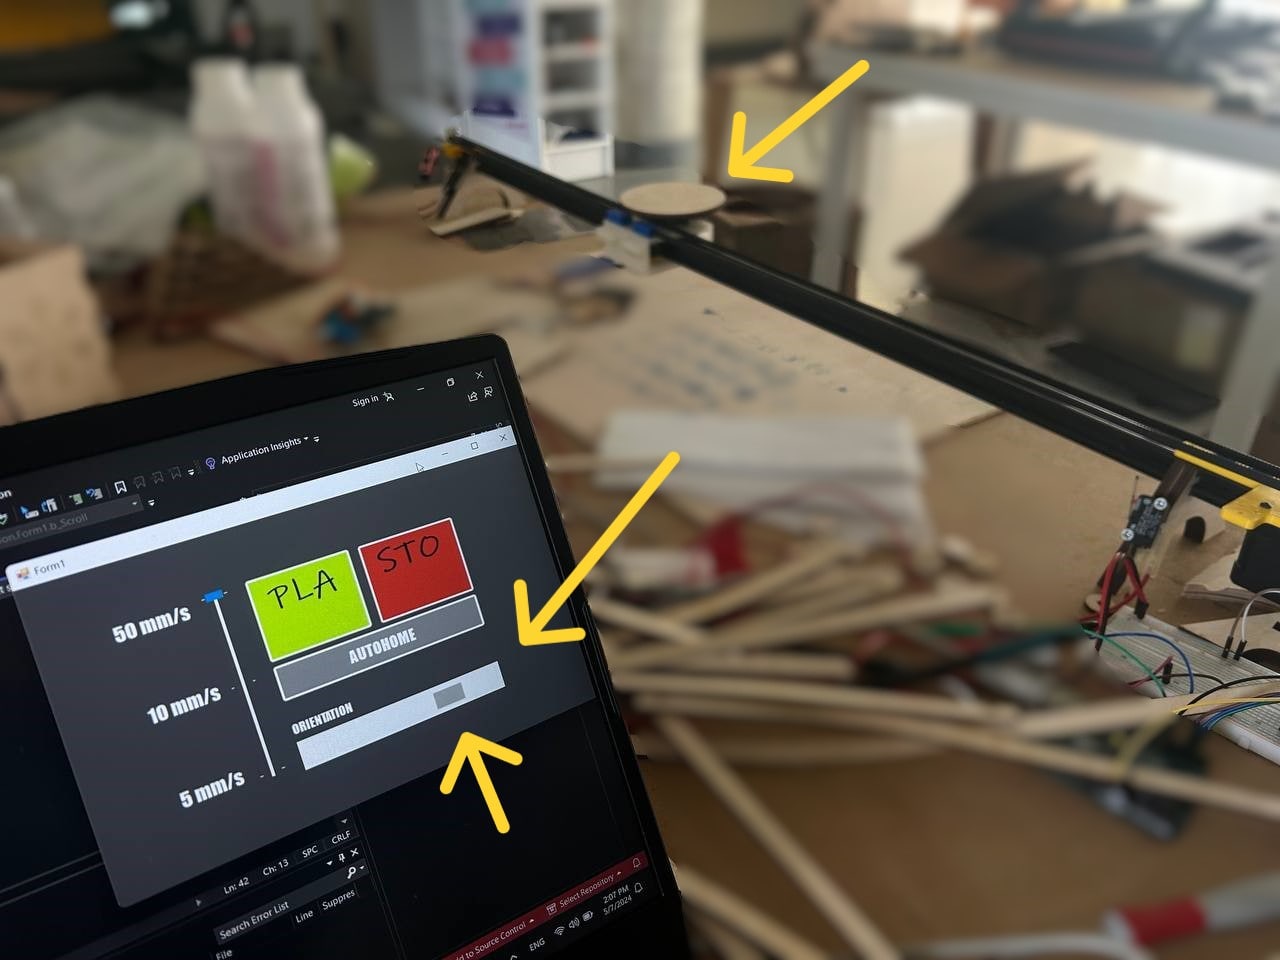
You can notice that phone holder is in the right position.
Position and Speed
So after I started editing my previous code by adding position and speed.
I set new integers and not only.
const int stepsPerRevolution = 32260 ; // = 4033*8 - how much microrotations it does
const int length = 805;  // mm

int microrotatePermm = stepsPerRevolution / length;    // microrotatePermm - one microrotation for 1mm
int microstep = 1600;                                 // number of microsteps per full revolution
int microrotatePer1mms = 1000000 / microrotatePermm ; // in 1mm/sec microrotations number
int microrotatePerPartmms = microrotatePer1mms / 2 ; // second/2 / microstep

int speed = 120;     // 50 mm/sec speed start ,  by default
After I made functions so my code will be more tidy and understandable.
void play () {
  button_Left = digitalRead(LEFT_PIN);
  button_Right = digitalRead(RIGHT_PIN);
  digitalWrite(DIR_PIN, HIGH);
  for (int i =1; i <= 1000000; i++) {
    digitalWrite(STEP_PIN, HIGH);
    delayMicroseconds(microrotatePerPartmms / speed);
    digitalWrite(STEP_PIN, LOW);
    delayMicroseconds(microrotatePerPartmms / speed);
    button_Left = digitalRead(LEFT_PIN);
    button_Right = digitalRead(RIGHT_PIN);
    if (button_Left == 0){
      digitalWrite(DIR_PIN,LOW);
      // break;
    } if (button_Right == 0) {
      digitalWrite(DIR_PIN, HIGH);
      // break;
    }
    if (Serial.available()){
      data = Serial.readString();
      d1 = data.charAt(0);
      if(d1 == 's'){
      break;
      }
    }
  }
}
The code starts with a function declaration named play(). This means that when I will call play() in my program, the code inside this function will be executed.
In this way I made Autohome function too.
And after I went to position making. As I had 5 positions starting from 0 - 0, 1, 2, 3 and 4 I made a formula stepsPerRevolution * pos / 4. For example Steps Per Revolution is 32260 - how much microrotations it does * position that C## gave (0, 1, 2, 3 or 4) / 4
void position(int pos) {
  autoHome();
  digitalWrite(DIR_PIN,LOW);
  int stepForPos = stepsPerRevolution * pos / 4;
  for (int i = 1; i <= stepForPos; i++) {
    digitalWrite(STEP_PIN, HIGH);
    delayMicroseconds(microrotatePerPartmms / speed);
    digitalWrite(STEP_PIN, LOW);
    delayMicroseconds(microrotatePerPartmms / speed);
    if (Serial.available()){
      data = Serial.readString();
      d1 = data.charAt(0);
      if(d1 == 's'){
      break;
      }
    }
  }
}
 else if (d1 == 'b') { // position
      String posStr = data.substring(1);
      int pos = posStr.toInt();
      position(pos);
    }
And for speed:
else if (d1 == 't') { // speed
      String posStr = data.substring(1);      // taken value of the string starting from the 2nd element
      int receivedSpeed = posStr.toInt();     // received speed from C#, converting to an integer
      if (receivedSpeed == 0) {
        speed = 5;
      } else if (receivedSpeed == 1) {
        speed = 10;
      } else if (receivedSpeed == 2) {
        speed = 50;
      }
I saw that the speed is not much, and I changed it, by making fast.
if (receivedSpeed == 0) {
        speed = 10;
      } else if (receivedSpeed == 1) {
        speed = 50;
      } else if (receivedSpeed == 2) {
        speed = 120;
      }
Final result
And here is how it worked. I used all functions in video below.
Application with XIAO RP2040
After all these I realized that I made this software programming with Arduino, but in the assignment requirements I needed to make it with one of my own boards.
Programming
So in order to fit in less time, I tried to program and make an application for Xiao RP2040. I tried to turn On and Off the LED on its board.
At first my code looked like this:
int LED = 1;

String data;
char d1;

void setup() {
  pinMode(LED, OUTPUT);
  Serial.begin(9600);  // Initialize serial communication
}
void loop() {
  if (Serial.available()) {
    data = Serial.readString();
    d1 = data.charAt(0);
    if (d1 == 'n') {
      digitalWrite(LED, HIGH);
      if (Serial.available()) {
        data = Serial.readString();
        d1 = data.charAt(0);
        if (d1 == 'b') {
          // Perform any necessary cleanup or final actions here
          while (true) {
            // Infinite loop to prevent further execution
          }
        }
      }
    }
  }
}
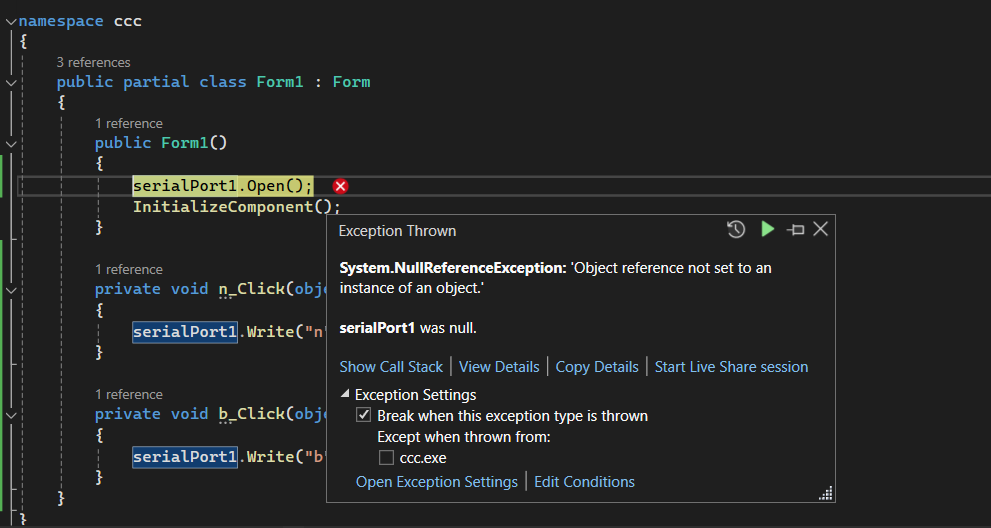
And I had an appropriate code for C#, but I had one problem. in C# my port wasn’t recognized. There were no errors, no issues but port was null:
Here’s that code:
{
    public partial class Form1 : Form
    {
        public Form1()
        {
            serialPort1.Open();
            InitializeComponent();
        }

        private void n_Click(object sender, EventArgs e)
        {
            serialPort1.Write("n");
        }

        private void b_Click(object sender, EventArgs e)
        {
            serialPort1.Write("b");
        }
    }
}
I checked all possible issues that could be, but there were nothing irrelevant․
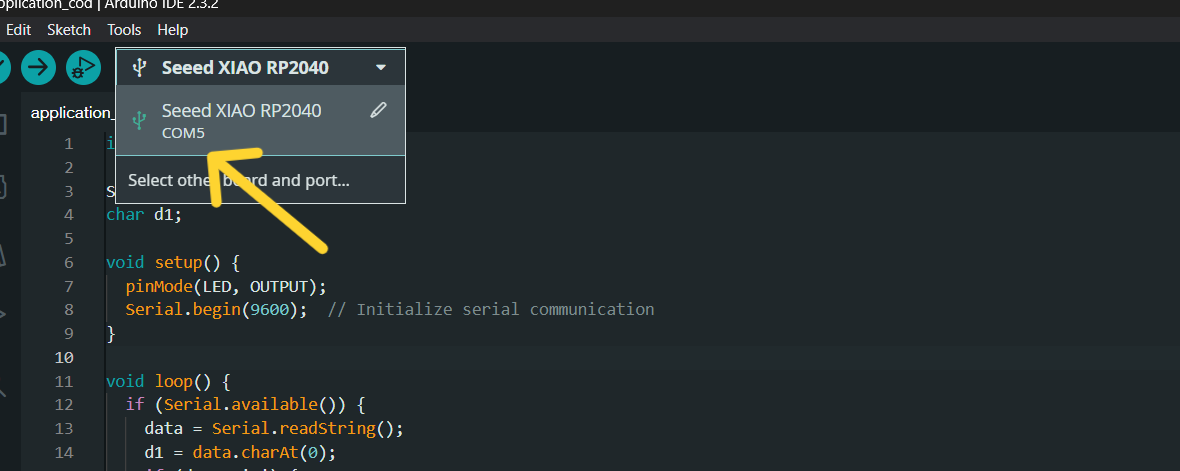
I checked, if the port name that I write in C# is correct. I checked it going to Arduino IDE.
Then I tried to delete serialPort1 in C# and fix it twice. But it did’t work.
After I restarted my computer, plugged and unplugged my board.
So after I asked Maxime and he helped me with that issue. He wrote a code which is automatically searching for a port.
- “n” is On button.
- “b” is Off button.
Code in C#
using System;
using System.Collections.Generic;
using System.ComponentModel;
using System.Data;
using System.Drawing;
using System.IO.Ports;
using System.Linq;
using System.Text;
using System.Threading.Tasks;
using System.Windows.Forms;

namespace ccc
{
    public partial class Form1 : Form
    {
        SerialPort sp;
        public Form1()
        {
            string the_com = "";

            foreach (string mysps in SerialPort.GetPortNames())
            {
                if (mysps != "COM1") { the_com = mysps; break; }
            }
            sp = new SerialPort(the_com, 9600);
            sp.Open();
            InitializeComponent();
        }

        private void n_Click(object sender, EventArgs e)
        {
            sp.Write("n");
        }

        private void b_Click(object sender, EventArgs e)
        {
            sp.Write("b");
        }
    }
}
With this code application ran. And I could manage to turn on the LED. But I wasn’t able to turn it off.
And that one issue was from code in Arduino IDE.
By changing it like in bellow:
int LED = 1;

String data;
char d1;

void setup() {
  pinMode(LED, OUTPUT);
  Serial.begin(9600);  // Initialize serial communication
}

void loop() {
  if (Serial.available()) {
    data = Serial.readString();
    d1 = data.charAt(0);
    if (d1 == 'n') {
      digitalWrite(LED, HIGH);
    } else {
      digitalWrite(LED, LOW);
    }
  }
}
Final Result
Now I could turn on and off my LED.
Conclusion
Another interesting week passed. At the very beginning of which I did not even imagine and knew nothing about making an application.
Thanks to our group work, I got a good idea of the general work and started to make my individual application.
The testing process was the most interesting. Adjust, change the code, test again, adjust again. Set different speeds, add options. Errors and issus was challenging and solving them was interesting.
Files
Application code only Play, Stop and Autohome buttons (Arduino Uno)
Application code with Slider and Track Bar (Arduino Uno)