Wildcard Week
For this week, I have decided to work on a fiberglass applied to composite. So let’s get started!
Group Assignment
Test
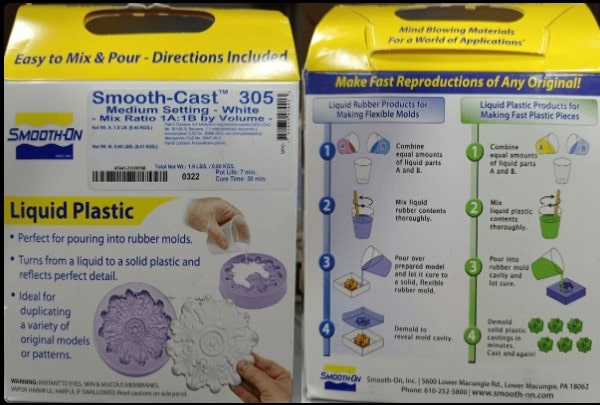
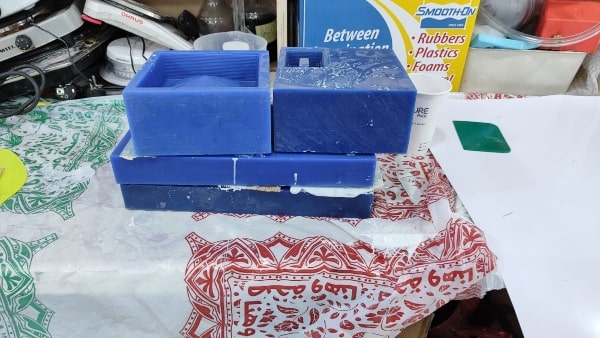
For our group assignment, we will be using Smooth-Cast™ 305 liquid plastic to conduct tests with fabric. we will use two different types of fabric to compare and see the differences between them. Additionally, we will perform tests on each fabric to observe the effects of varying the number of layers.
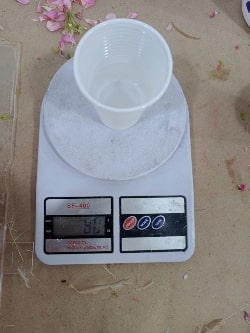
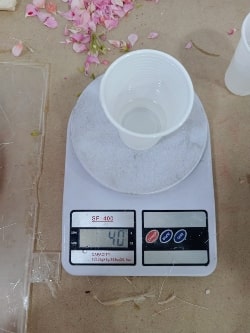
I will prepare the mix by measuring the ingredients based on volume.
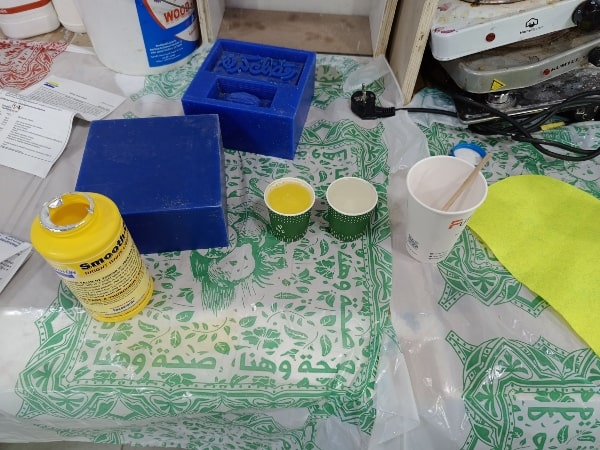
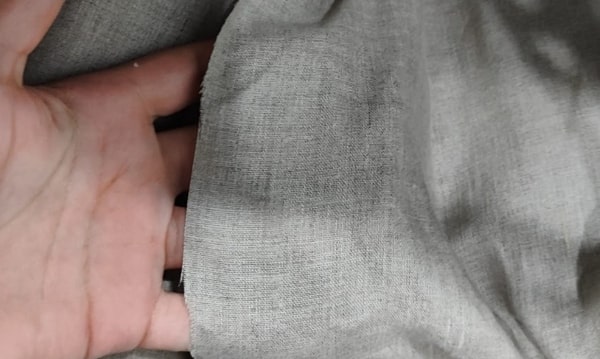
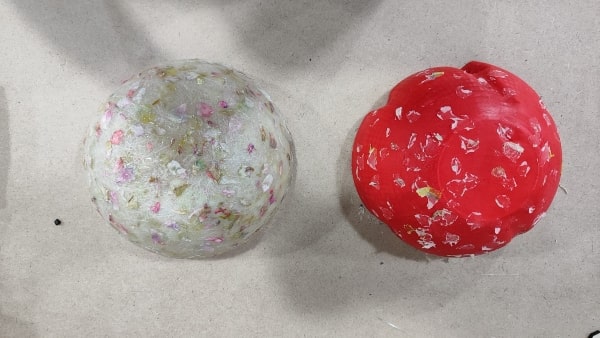
The first fabric we will use is linen. we will create two samples, one with 3 layers of linen fabric and the other with 5 layers as well.
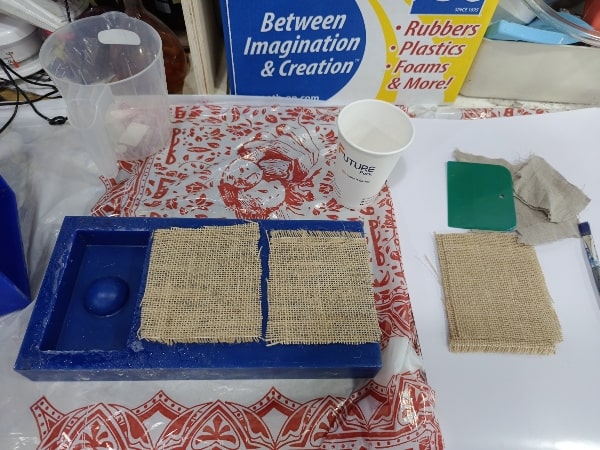
The second fabric I will use is burlap. I will create two samples using burlap: one with 2 layers and the other with 4 layers. This will allow us to compare the effects of layer thickness on the performance and characteristics of the burlap fabric in combination with the resin.
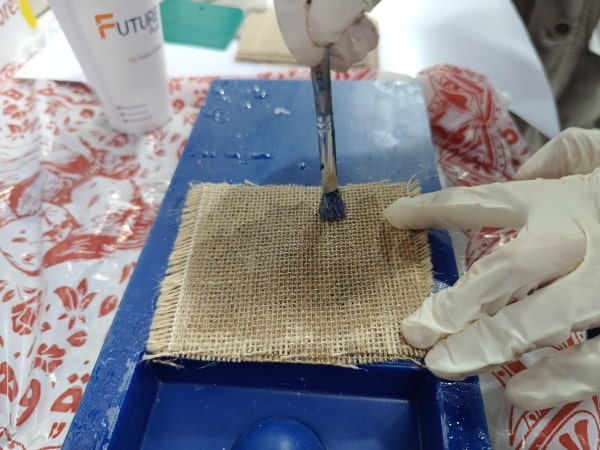
After preparing the mixture, we will apply it onto the fabric and use a brush to push and spread it evenly.
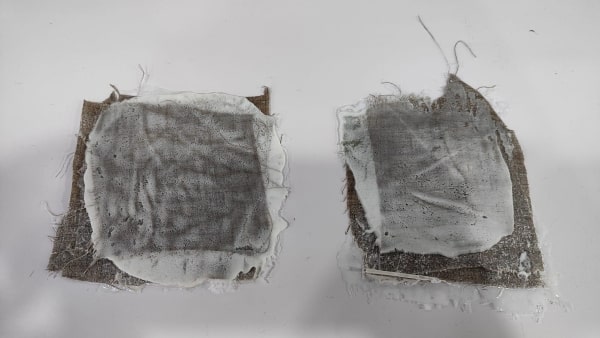
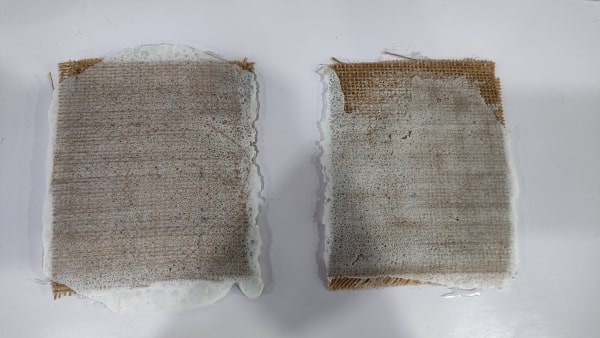
In conclusion, if we want to strengthen the model, we can add more layers of fabric.
Additionally, the type of fabric used makes a difference. Between linen and burlap, linen fabric tends to be stronger than burlap. Linen is known for its superior strength, durability, and resistance to stretching compared to burlap.
Safety
-
Work in a Well-Ventilated Area: Resin can release volatile organic compounds during the curing process, which can be harmful if inhaled in high concentrations. It’s crucial to work in a well-ventilated area, preferably with exhaust fans or open windows to ensure proper airflow.
-
Wear Protective Gear: When working with resin, wear appropriate personal protective equipment such as safety gloves.
-
Avoid Skin Contact: Uncured resin can cause skin irritation or sensitization. Avoid direct contact with your skin by wearing gloves. In case of accidental skin contact, wash the affected area with soap and water immediately.
-
Store Resin Safely: Keep resin containers tightly closed and stored in a cool, dry place, away from direct sunlight and sources of ignition.
-
Keep Away from Children and Pets: Resin should be stored out of the reach of children and pets, as they may accidentally come into contact with it and risk injury.
-
Be Cautious with Heat Sources: Resin is generally flammable, so avoid exposing it to open flames, sparks, or high heat sources.
Individual Assignment
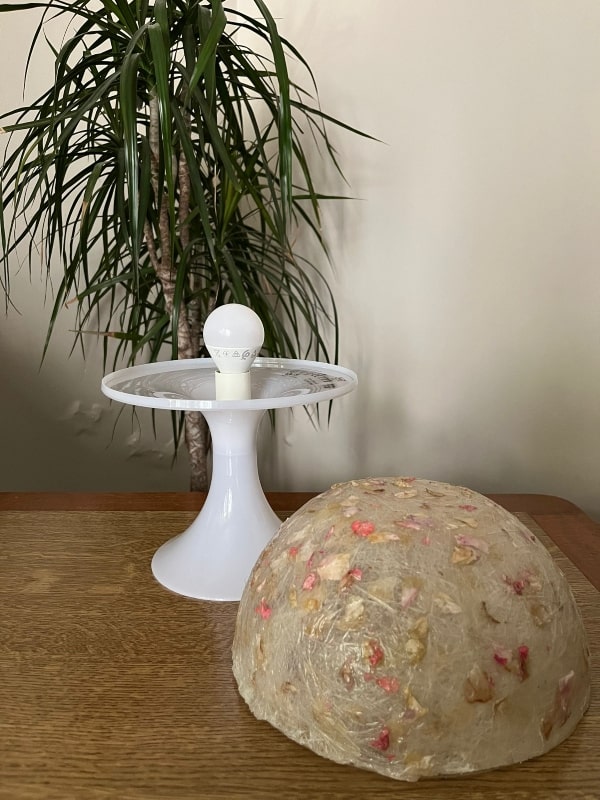
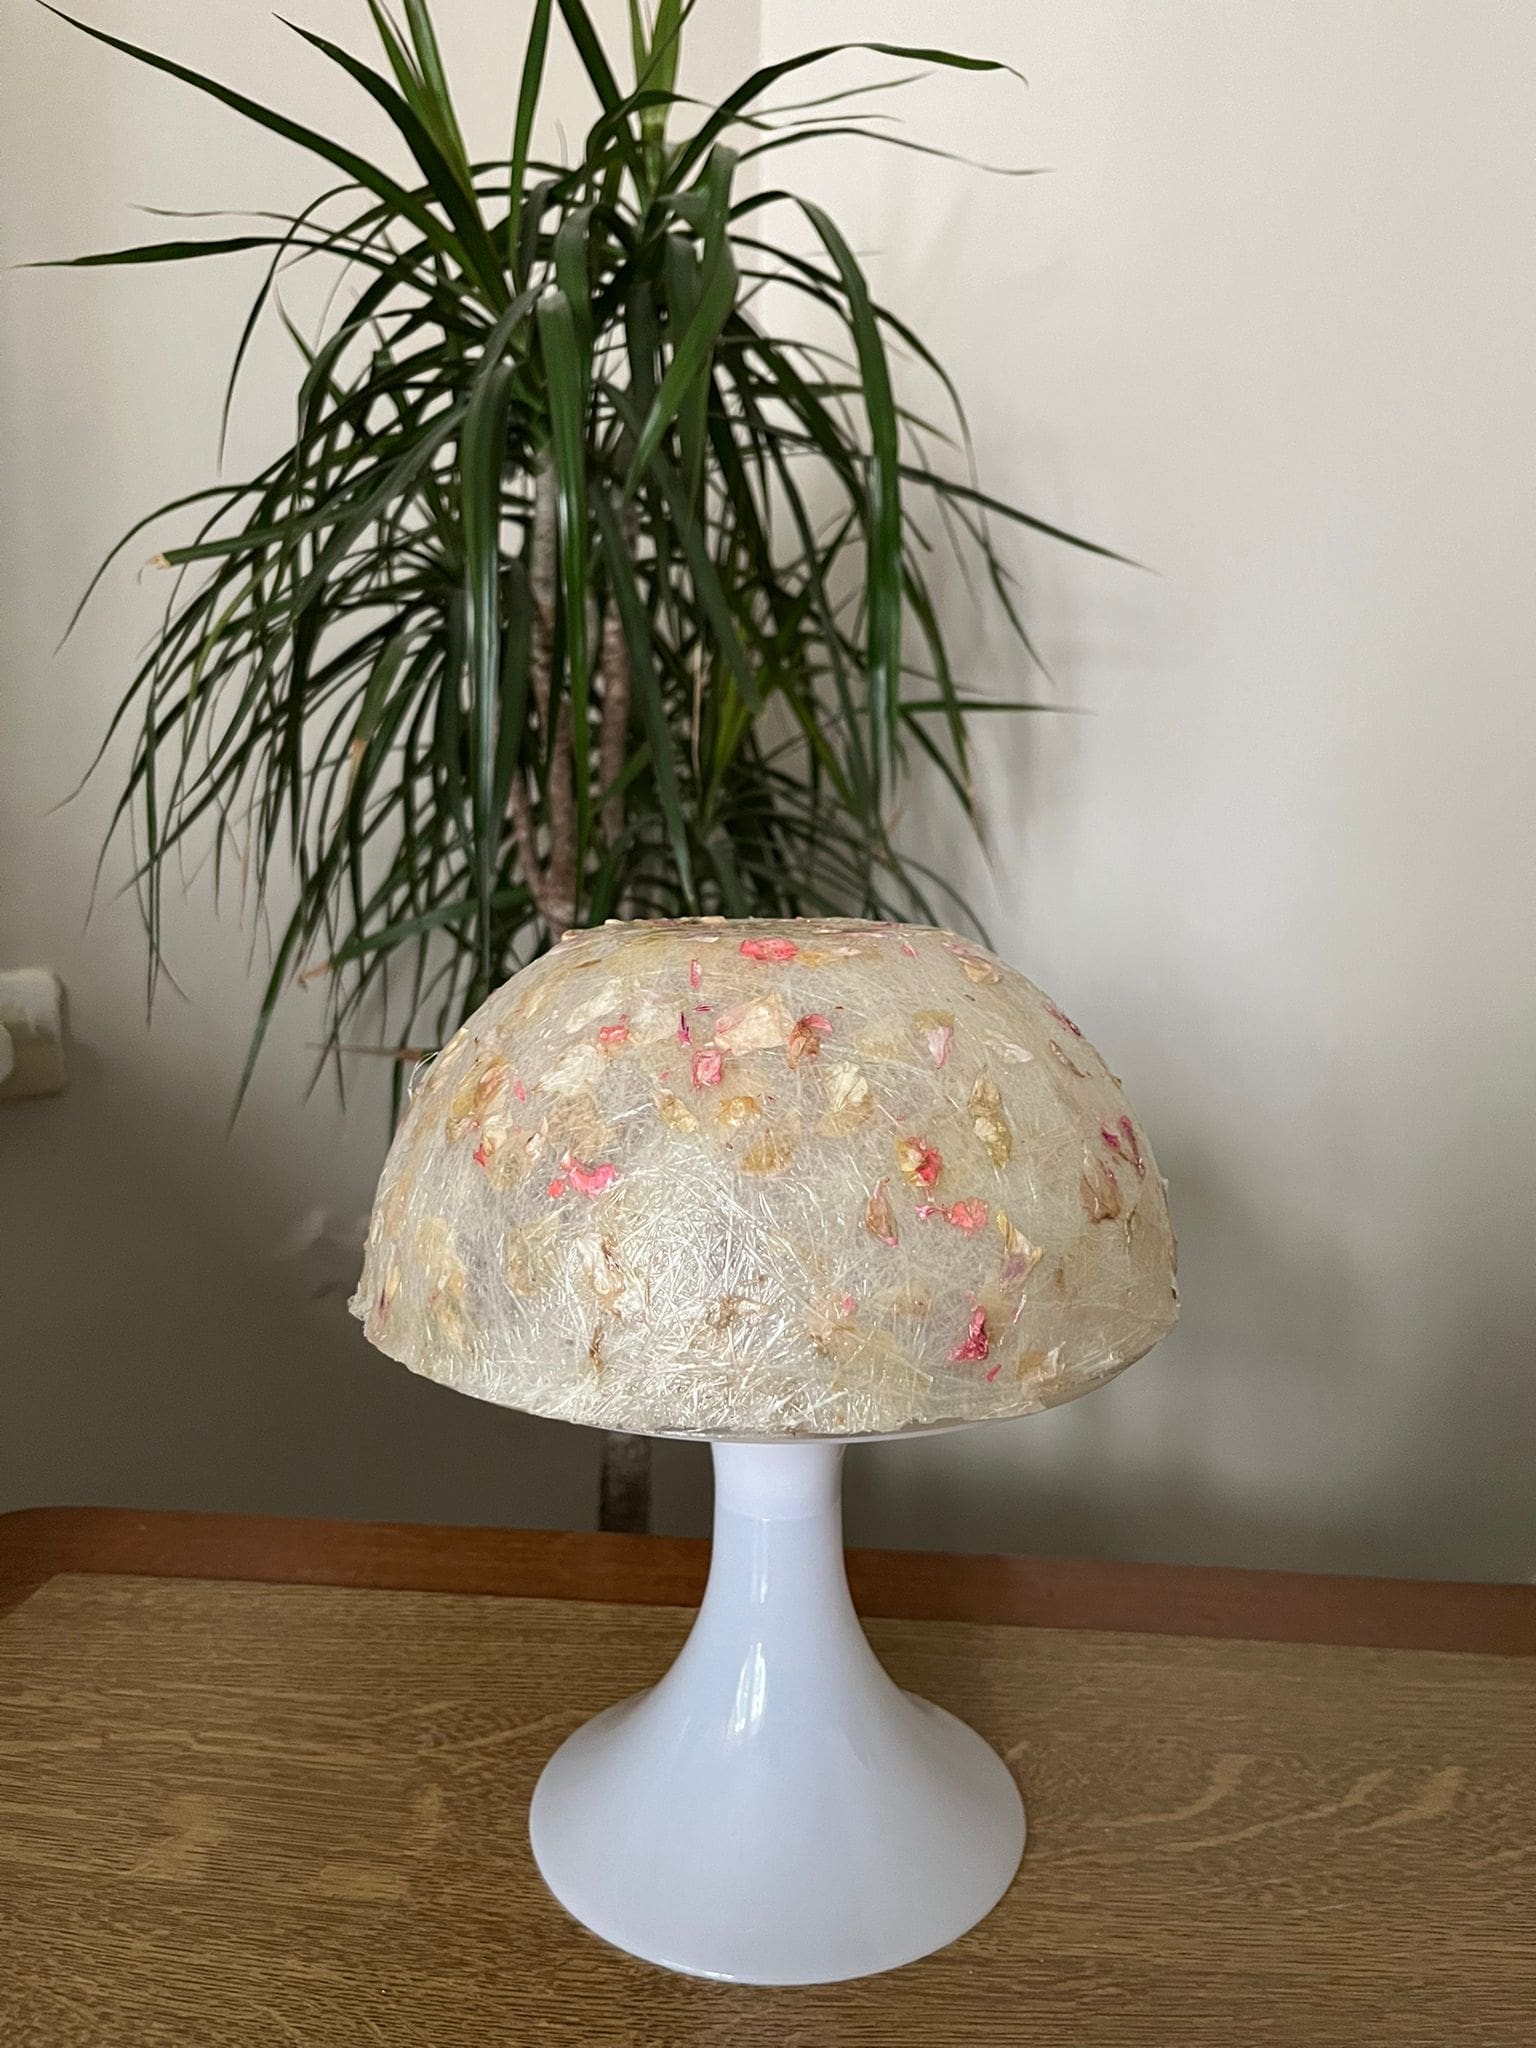
When I started contemplating what to do with fiberglass, I came across a broken table lamp in my house. Inspired by this, I designed a simple cover for it.
This is my first time working with fiberglass, so I will start with something very simple to get familiar with the technique.
Design
When I began the design process, I drew inspiration from the structure and aesthetics of mushroom plants.

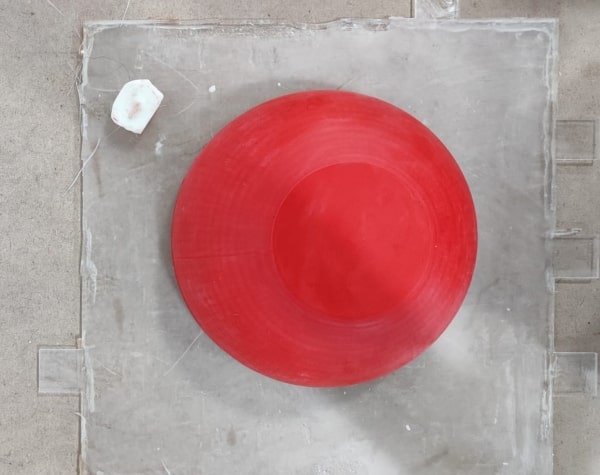
I used Fusion 360 to design the model, keeping it straightforward. I started by creating a sphere and then splitting it in half. Next, I added an additional plane to separate the top portion of the sphere.
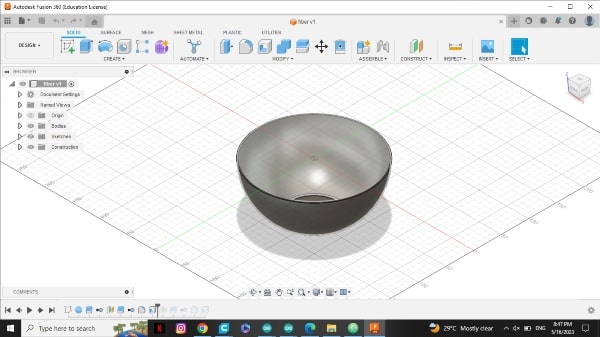
Here you can download the design.
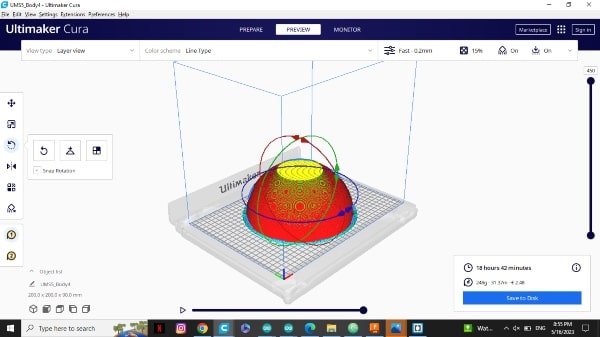
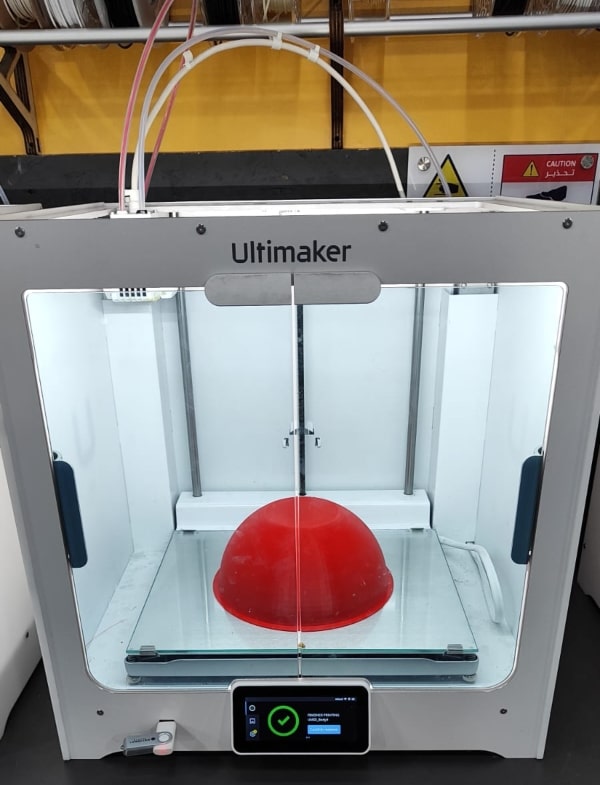
3D Printing
And I plan to fabricate it using the Ultimaker S5. I will use this 3D printed model as a mold for my fiberglass project.
I used the default settings on the printer for the layer height, which was set to 0.2mm, and the infill was set to approximately 15 percent. However, I edited the overhang to 90 degrees to improve the quality of the print.
Fiberglass Process
Before statin this is the safety measures I followed when working with fiberglass are as follows:
-
Avoid cutting or sanding dried fiberglass: Cutting or sanding dried fiberglass can release small particles into the air, which can be harmful if inhaled. By not cutting or sanding the dried fiberglass, you reduced the risk of inhaling these particles.
-
Use pre-cut fiberglass fabric: Using pre-cut fiberglass fabric in small pieces can help minimize the need for cutting on-site, reducing the potential exposure to loose fiberglass strands.
-
Handling partially wet fiberglass: You mentioned cutting fiberglass that was still somewhat wet with resin. When fiberglass is wet with resin, it’s generally less prone to releasing loose fibers. However, it’s still important to handle it with caution and follow proper safety measures to minimize any potential skin irritation or sensitization.
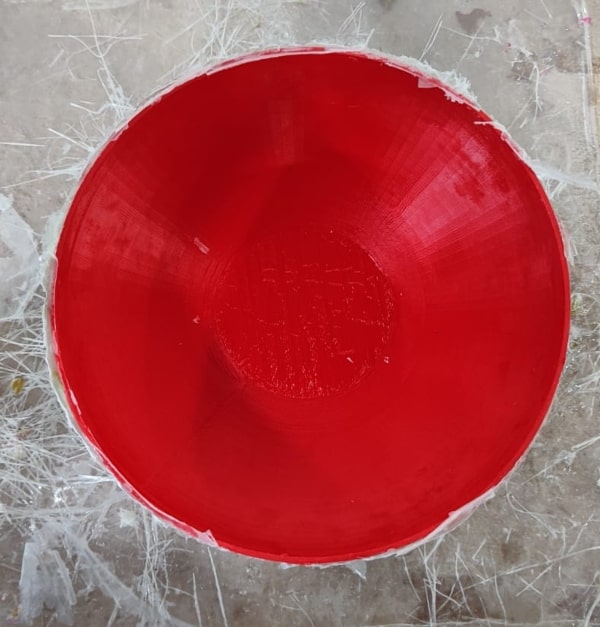
As we know, the bowl will have visible lines from the printing process. In order to achieve a smoother surface, I plan to use sandpaper to smooth out the layers and make the surface as smooth as possible.
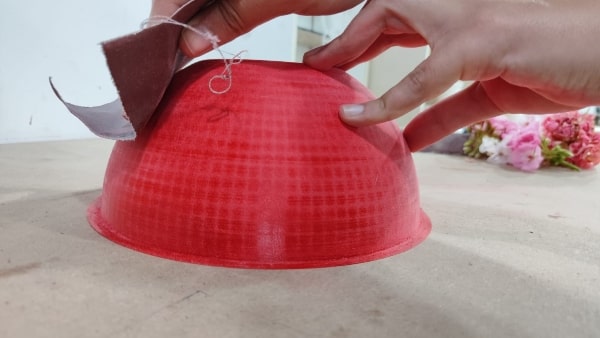
It’s obvious that I’ve finished sanding the bowl.
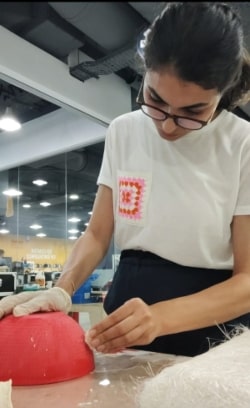
To make the surface even smoother after sanding, I plan to use wax to fill in the gaps between the lines. The main benefit of the wax layer is that it helps to prevent the resin from sticking to the mold, making it easier to remove the final product.
However, this time I won’t be wearing gloves on my hands because I need to be able to feel the wax and ensure that the surface is as smooth as possible
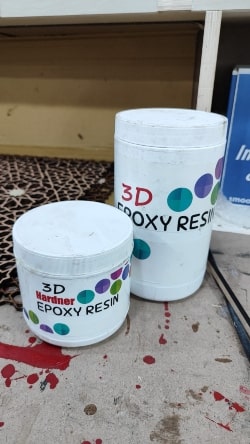
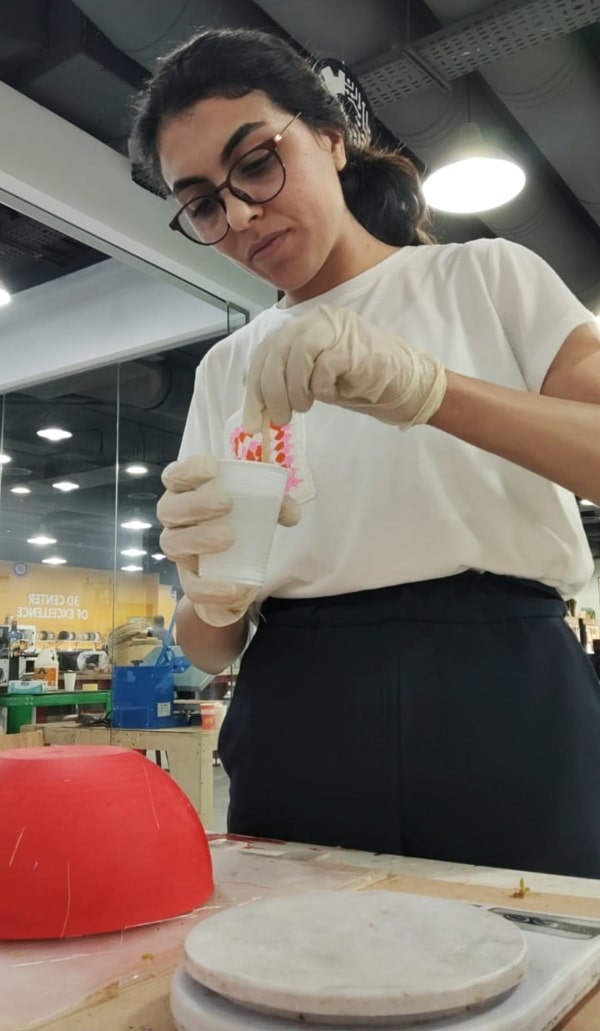
Now, it’s time to mix the resin with the hardener. The rule for the resin I used is to mix the resin with half the amount of hardener, by weight. We got this percentage by experiment because we don’t have a data sheet for the resin we have on the lab.
Now, it’s time to mix the resin and hardener thoroughly. Make sure to mix the two components very well for the best results.
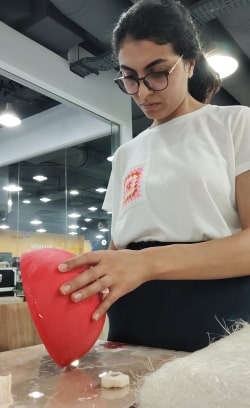
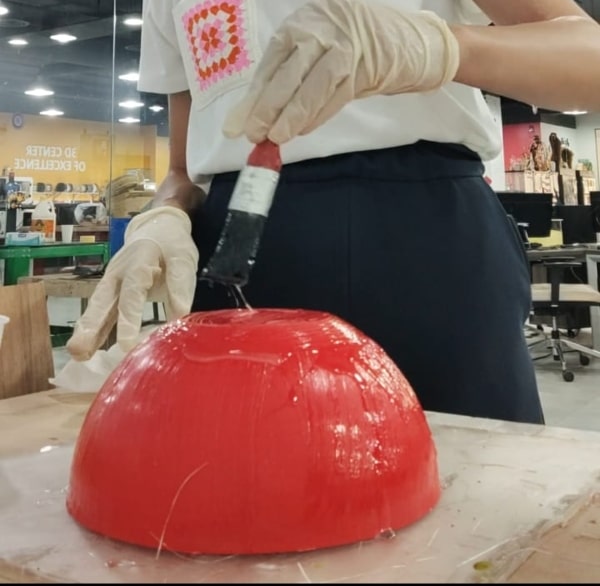
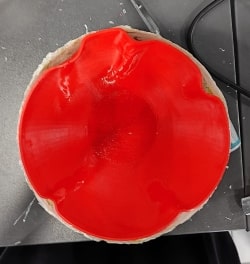
After mixing the resin and hardener, I will apply the first layer of resin to cover the bowl. I need to be careful when applying the resin to avoid disturbing the wax layer.
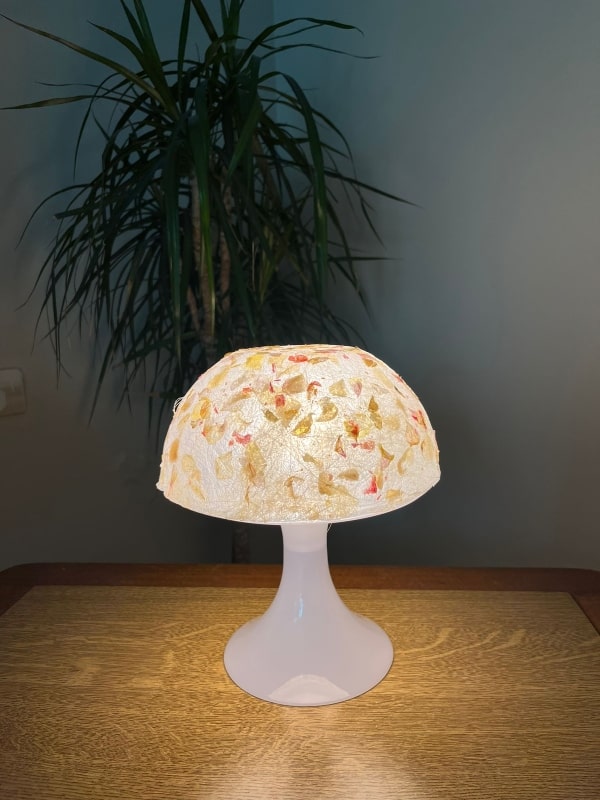
To enhance the decoration and add a splash of color to the table lamp cover, I plan to incorporate some flower leaves.
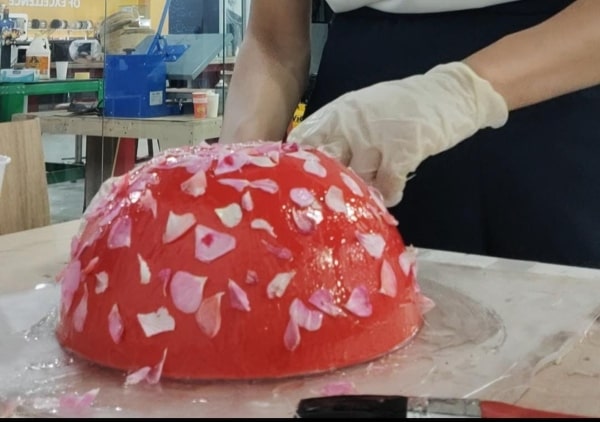
I will proceed to place the fiberglass and gently press it to ensure that the resin permeates the material.

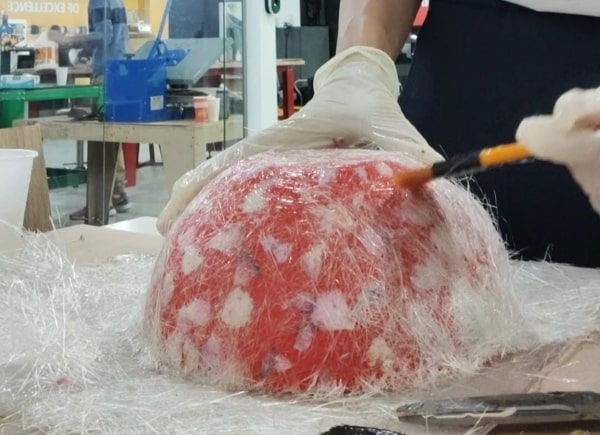
I will apply an additional layer of resin and repeat the process. I intend to incorporate only two layers of fiberglass to allow light to pass through the cover.
By adding another layer of flowers, I aim to achieve the desired color and decoration for the design.

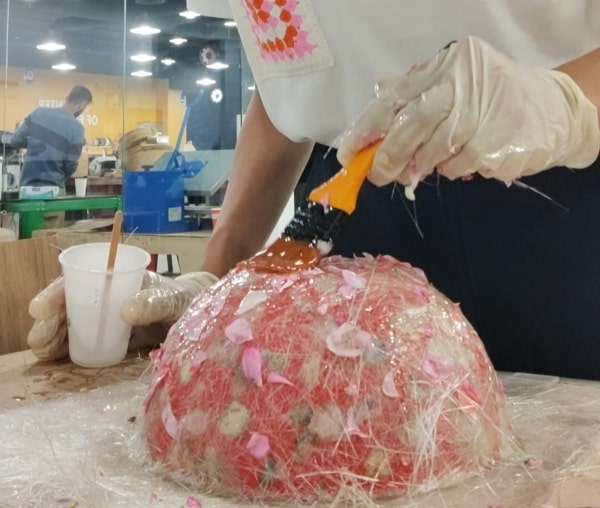
I applied an additional layer of resin to ensure that the flower leaves adhere securely to the surface.
By the way, I appreciate the natural structure of the fiberglass on the side that doesn’t come into contact with the mold during the drying process. To preserve this unique texture, I opted to use the mold from the outside, allowing the exterior of the cover to retain that distinctive structure.
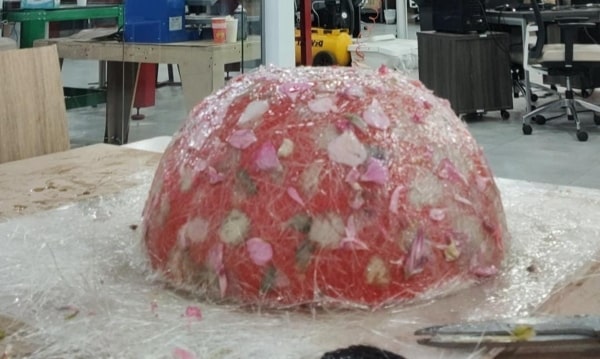
Afterward, I patiently waited for approximately four hours to allow the resin to dry. This step was important as it allowed me to cut the fiberglass while it was still slightly damp, preventing excessive dust from being generated.
I decided to wait until the next day for the cover to fully dry, ensuring its stability, before proceeding with its removal.
Initially, I attempted to remove the cover by gently using a cutter to create some space between the model and the mold, allowing air to enter and facilitate easier removal. However, despite my efforts, it remained stuck, making removal challenging. At this point, I realized that I might have made an error during the application of the first layer of resin—I either failed to adequately apply wax or omitted it entirely.
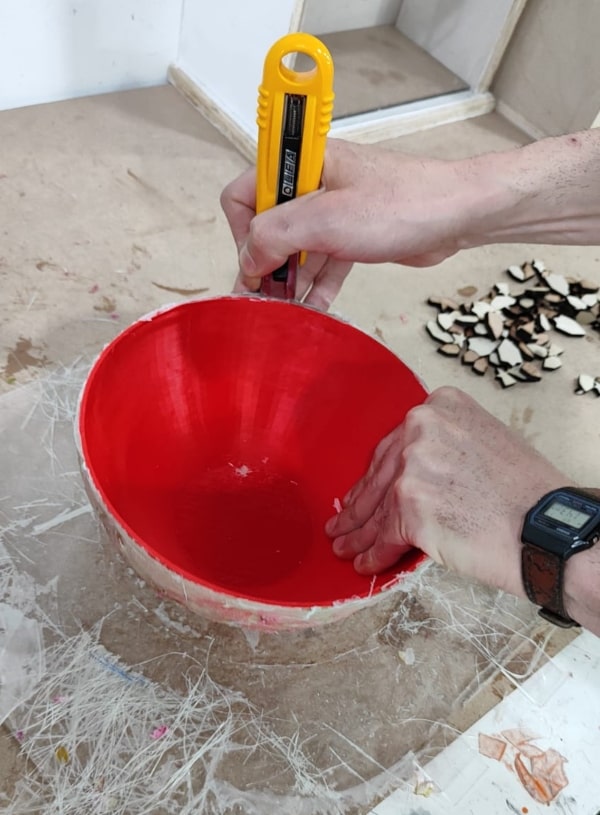
I resorted to using a heat gun to carefully apply heat and soften the mold, in an attempt to remove the cover without causing significant damage to it.

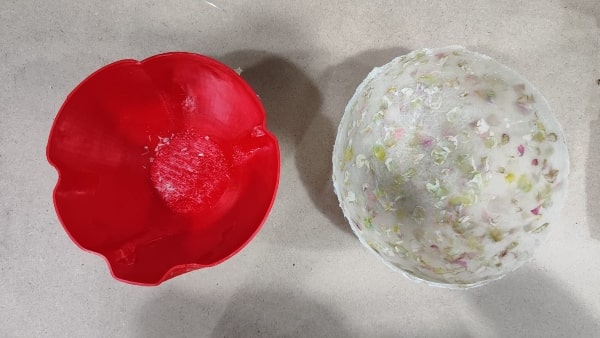
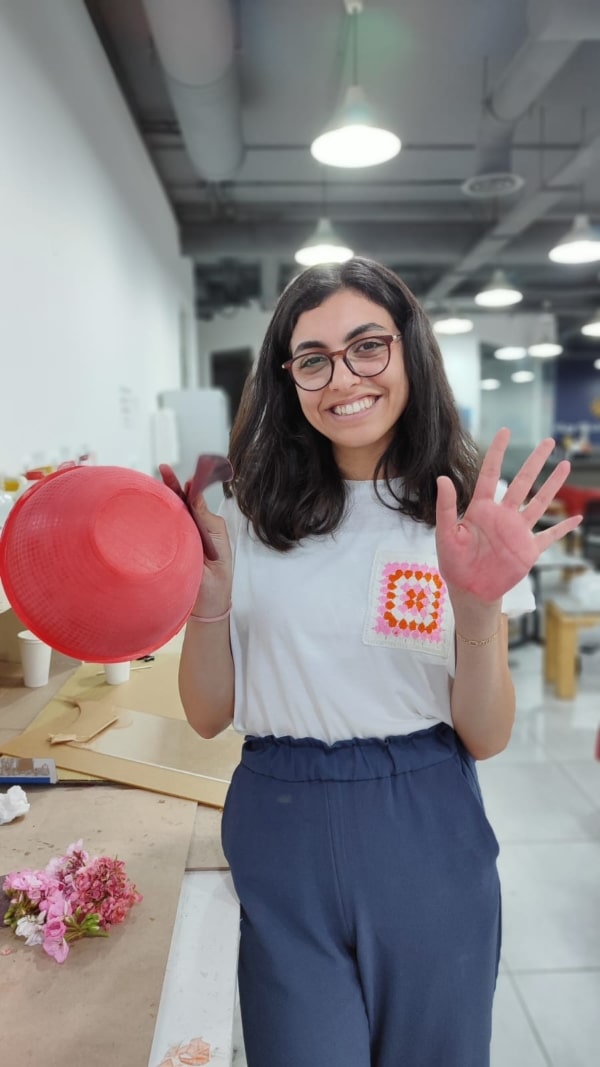
And now, are you ready for the hero shot?