12. Molding and casting
This week I made soft custom pieces to dampen sounds from my computer.
Group work
For this weeks group work the different materials were presented to us and we tested some of those. We also went through the safety practices of our lab.
Design
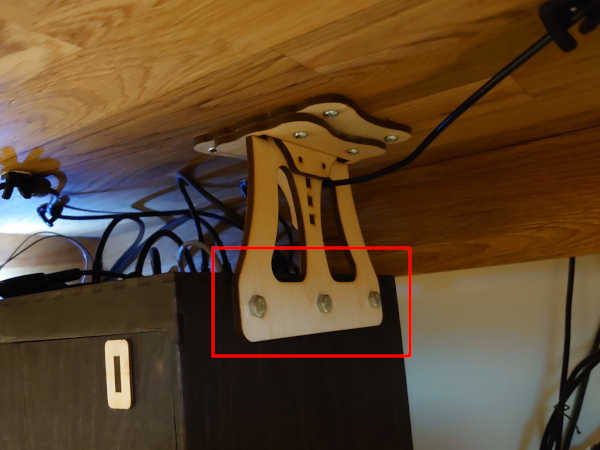
I needed these rather simple soft parts to dampen noises from my table mounted PC.
The same but in the 3D model.
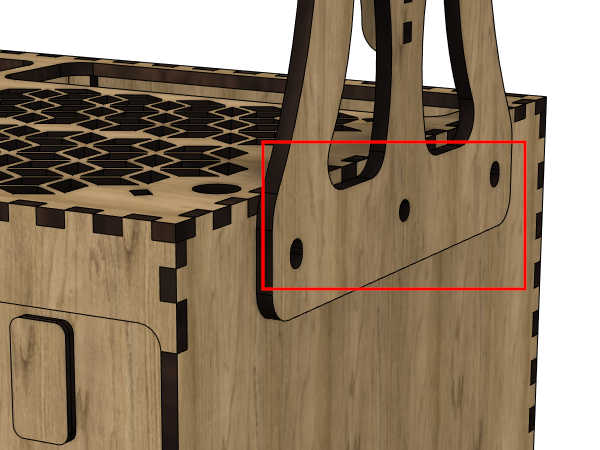
So there is a bolt running through and the plywood surfaces are rigidly pressed together.
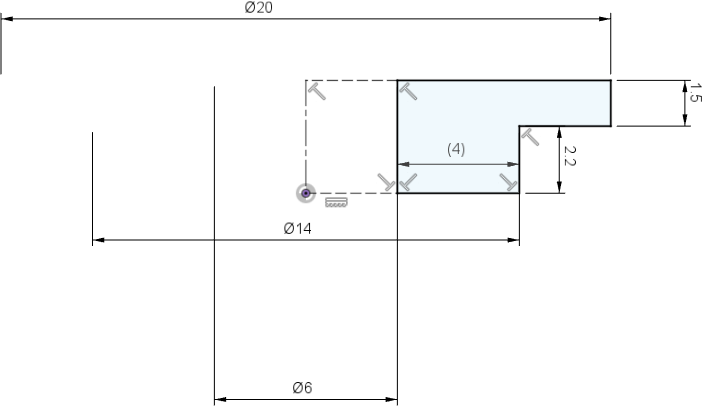
I would like to put something soft in between like the image below. Blue is the silicone/rubber, brown the plywood and grey is the bolt and also the washer which I will be adding.
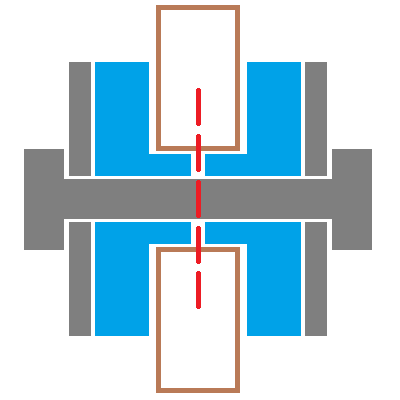
You can see that I splitted the blue part as otherwise it the shape would be unnecessarily hard if even possible to cast.
I first made a very simple design, which I believe would be too simple for the assignment. You can see that on the left below.
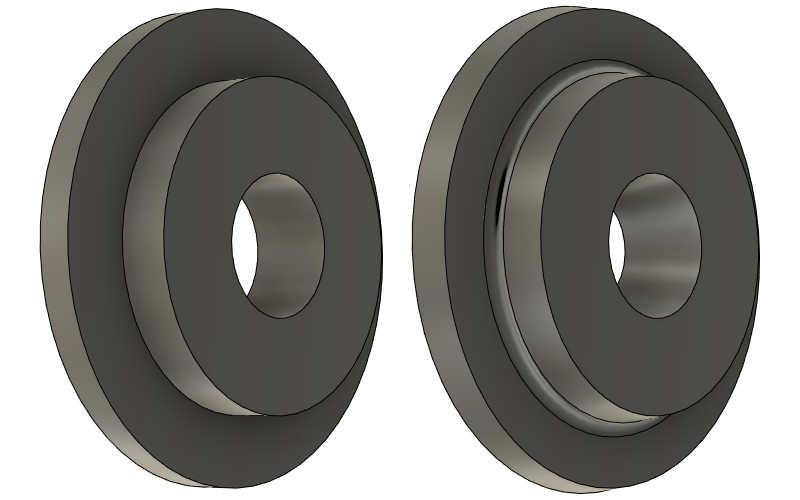
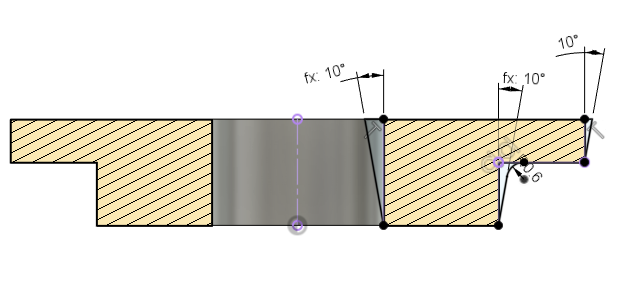
I wondered for a while what I could do to make this part to meet the requirements (3D axis milling). But the answer was simply to add slopes to the model which you can see on the right. Those are practical too in terms of making the cast easier to extract and it might even be easier to get into the hole.
Here is the first simple shape which I revolved.
And then I added the slopes which I also revolved around the center.
3D modeling is documented more in-depth in week 2.
Making the mold
Then I had to create the model of the mold by removing the shape of the model from a cube.
Mold design
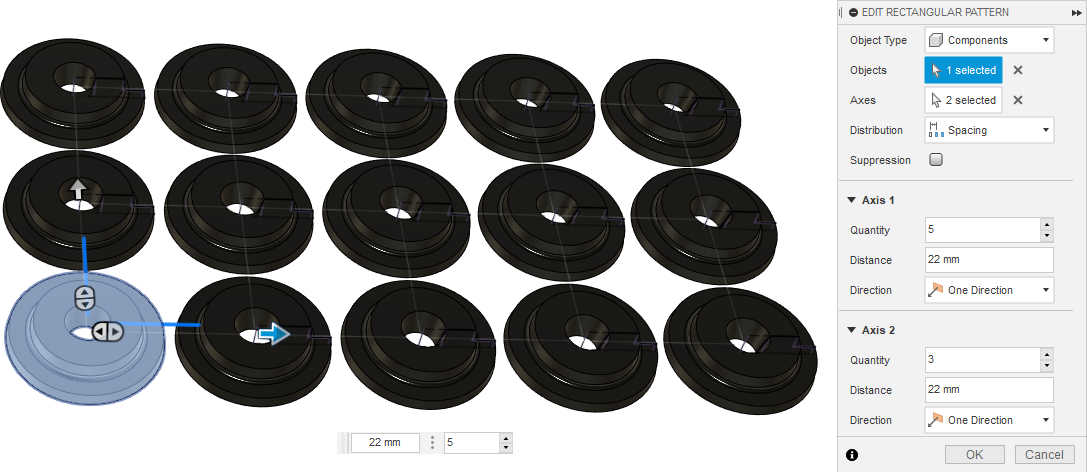
I first replicated the part to get 15 (I needed 12) using rectangular pattern.
I then created a box and substracted the models from that.
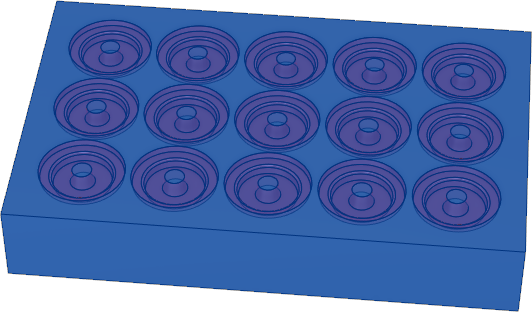
And then I also did some channels for the material to flow which I also replicated.

Finally I added a higher perimeter wall and raised some of the surfaces to make sure the casting material won't go over those features and block the holes for example.
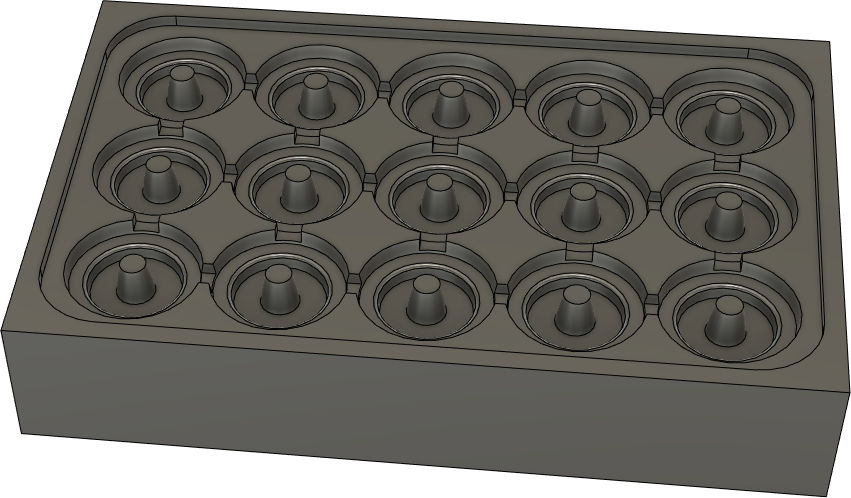
As the original part was designed with casting in mind and that helped a lot when designing the mold.
Source files
I exported the models from Fusion 360 as STEP files to keep the file sizes reasonable.
Creating the toolpaths
I made the toolpaths using Fusion 360. It was similar as to what we did in week 7 with the addition of 3D milling strategies.
Here is the link to the Fusion 360 post processor for Roland machines.
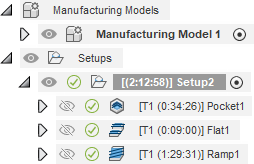
I used the following milling strategies:
- Pocket clearing for roughing
- Flat for finishing the flat surfaces
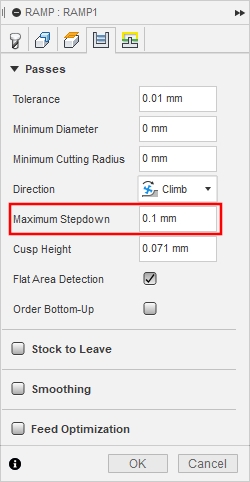
- Ramp for the slopes (3D)
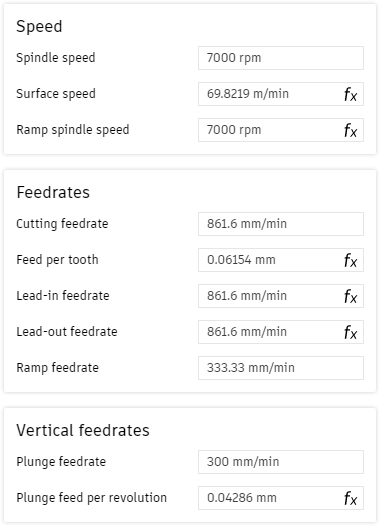
I used the same 3.175 mm (1/8 of 25.4 mm) flat 2-flute carbide endmill for all of the steps.
I used 0.1 mm as the stepdown, which is quite fine for this.
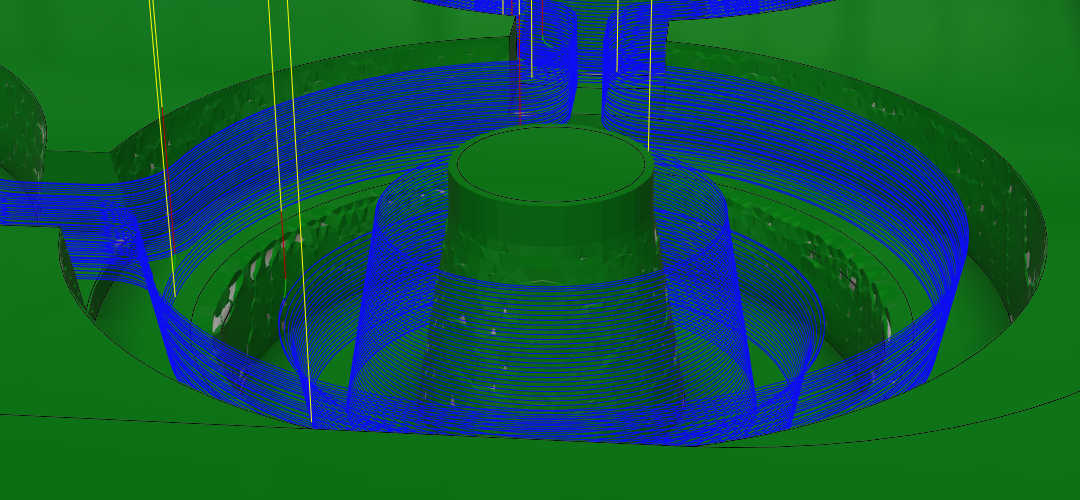
Here is a visualization of the toolpath.
Milling wax
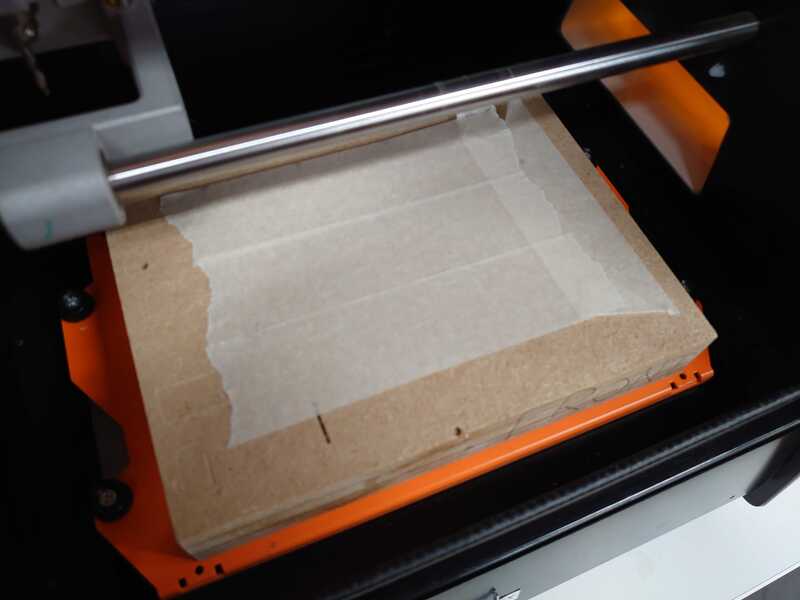
We used the Roland SRM-20 in our Fab Lab to mill this blue wax. First the wax block had to be cut to size to fit inside the machine. This was done by our instructor.
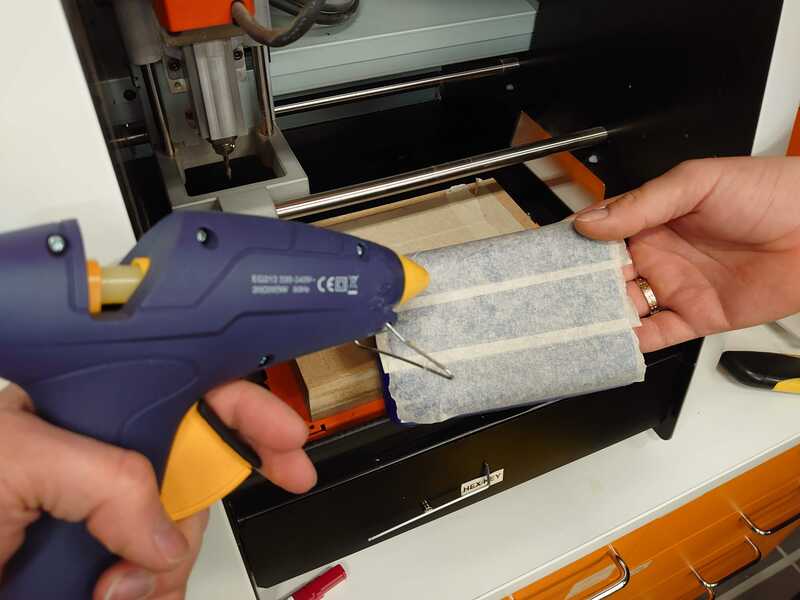
To attach the workpiece I used painters tape on both surfaces and hotglue in between.
Before starting the milling the machine had to be vacuumed as we want to collect and reuse the wax (with minimal impurities added).
Milling with the Roland was documented in electronics production group work.
On my g-code I had the origin set to the back-left corner. Not sure if it matters but maybe front corner would be easier to see.

I zeroed the Z by just visually aligning the tool slightly below the surface of the wax. This results in the endmill taking deeper cuts at the first layer but this material is so easy to cut it isn't an issue.
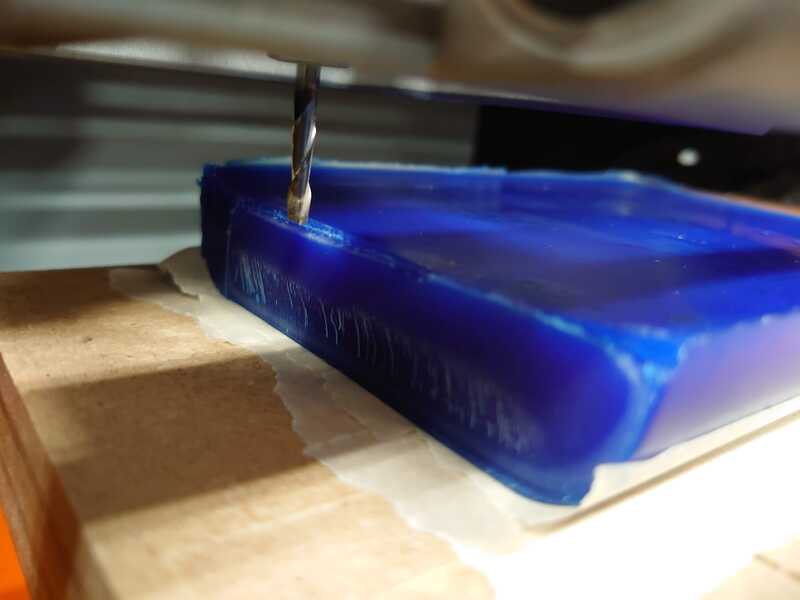
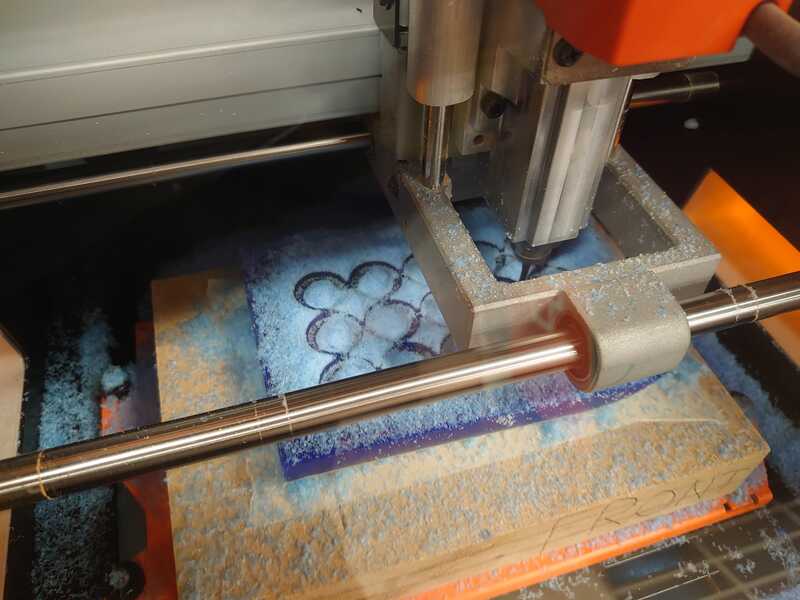
The endmill just flies through the material (and creates a lot of flakes). Here it's been going on for a while.
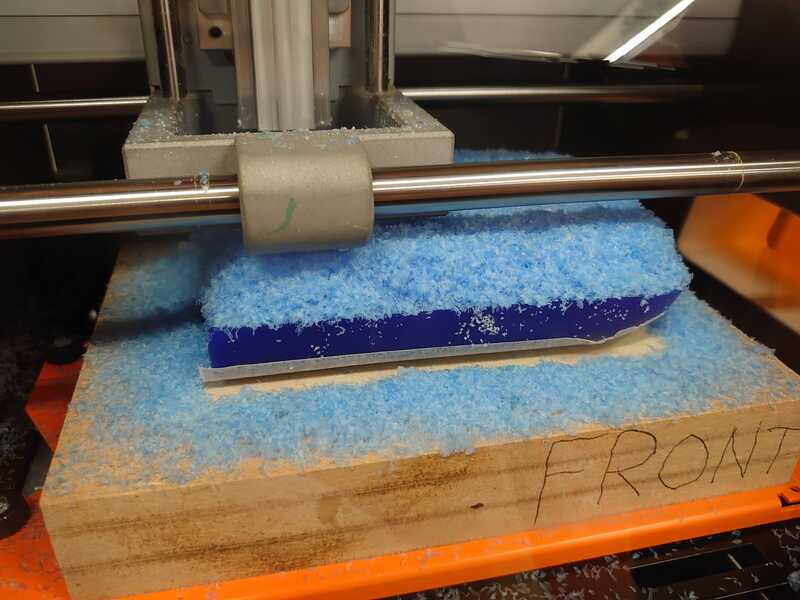
Here I paused and pushed some of the flakes away. You can see the shapes there.
After the milling was done I just used a stick to get the flakes out of the way and everything that didn't fall of with gentle tapping I vacuumed off.
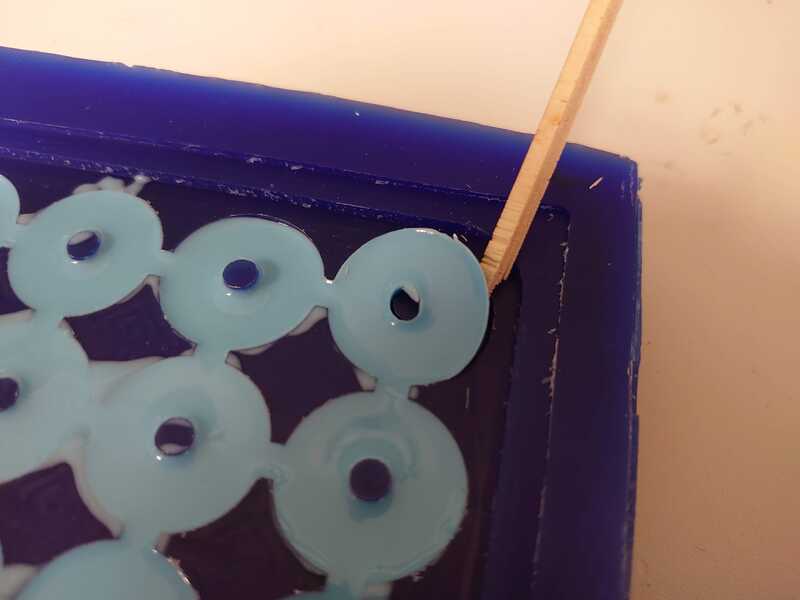
However, it left these burrs on the edges of the inner circles which I removed with the help of a wooden stick.
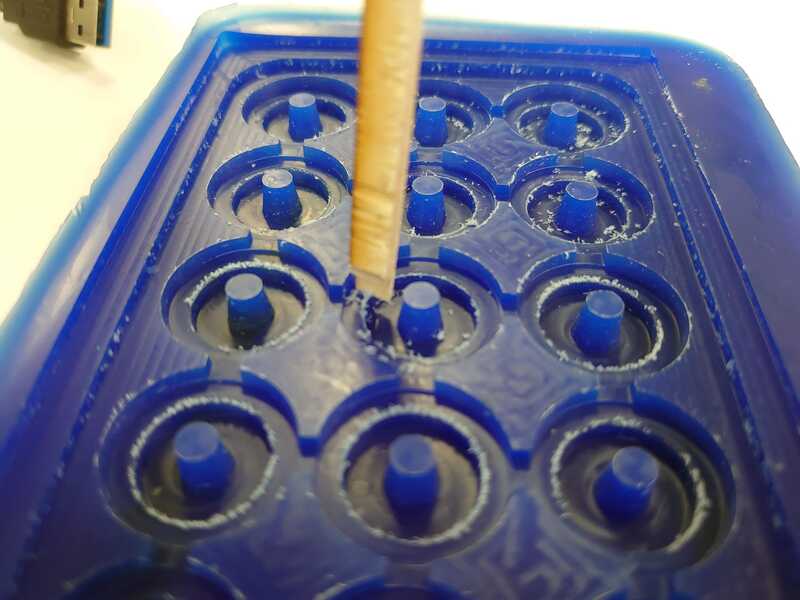
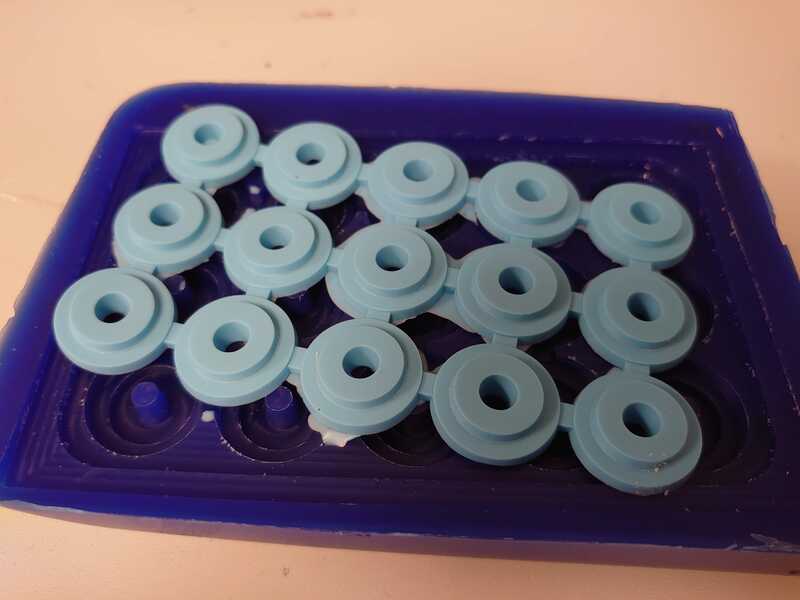
Which was suffiecient and here is the cleaned up mold ready for casting.
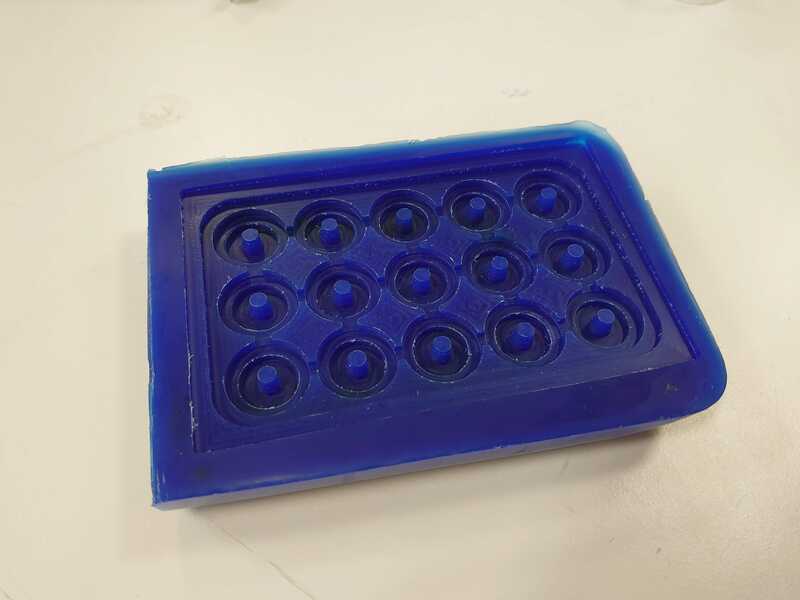
Casting the product
As I already had the mold ready when we were still doing the group work, I could use the material we had already mixed for my casting. I did also demonstrate mixing myself the first material we did for the group work.
Material
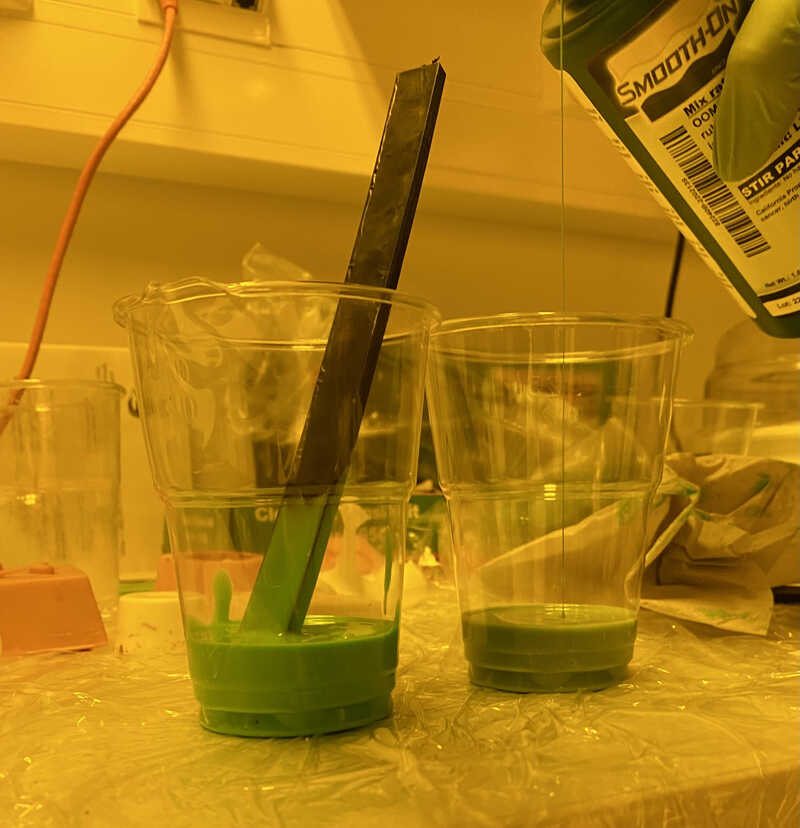
Material I used had to be soft. We had both Smooth-Sil and this OOMOO 25 which is the one I used. I would say both would have been equally suitable as my requirements were not that strict.
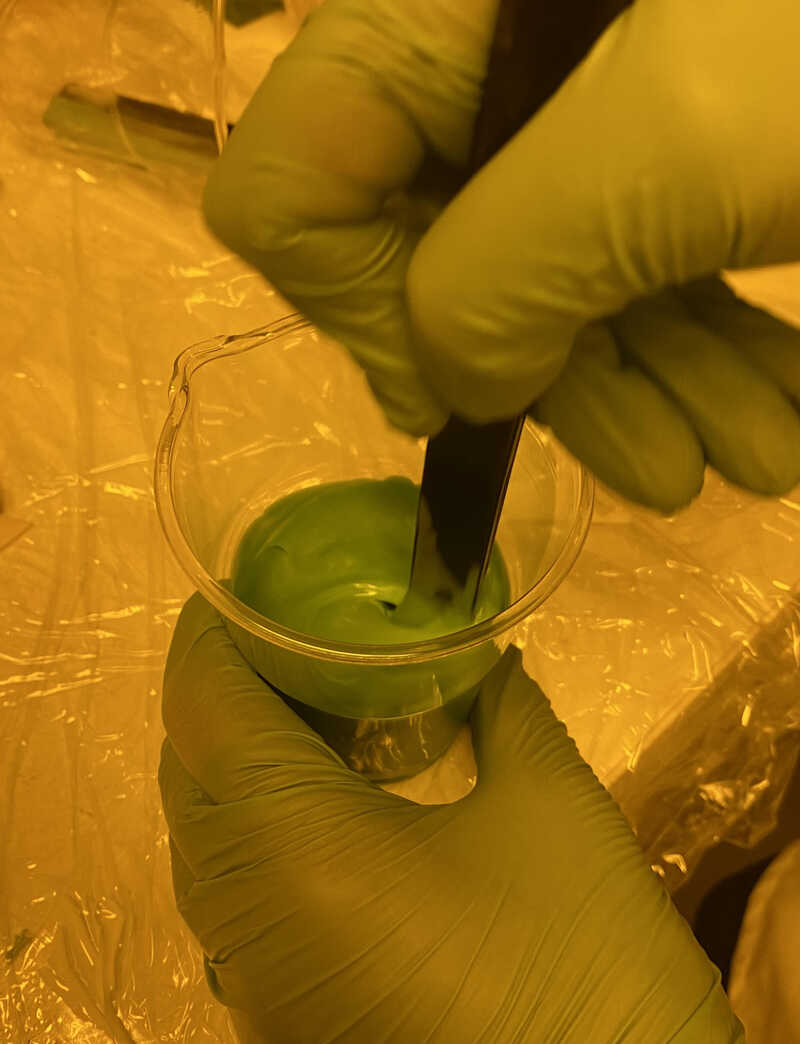
Mixing
We casted another part with the same batch so the amount wasn't particularly measured. The mixing ratio was 10:13 by weight or 1:1 by volume so it was easier to mix by measuring the volume while that might not be as accurate. I think so because once pouring from one container to another there's always leftovers on the sides that's hard to get out. Not sure if that amount matters, though.
It was mixed for about 5 minutes.
And after that I put it in the vacuum chamber. You can see the mix rising from all the bubbles inside.
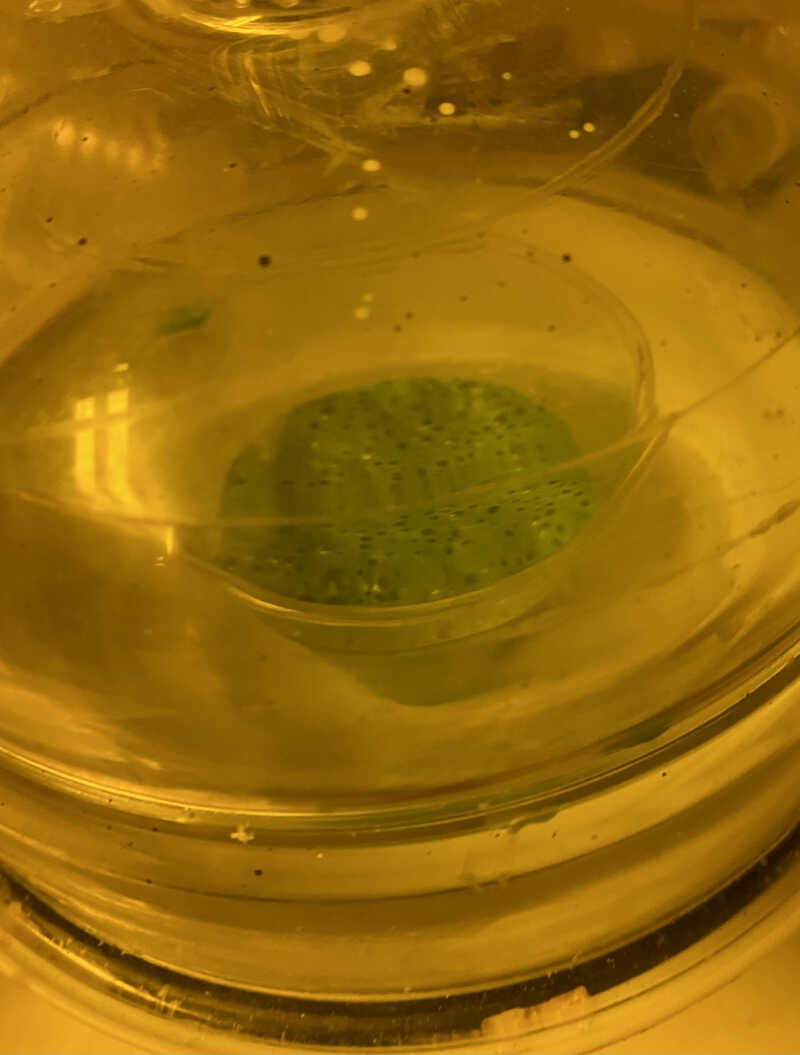
And after a while it shrinks back down, like bread dough if you leave it for too long.
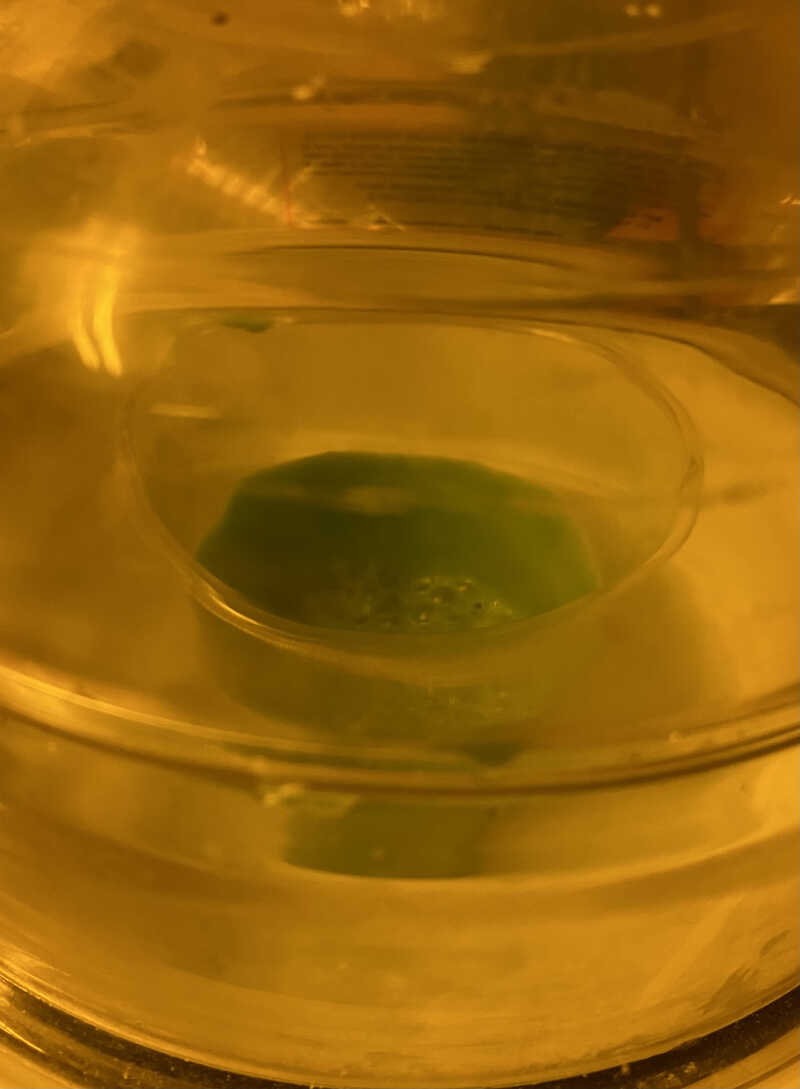
There are still some bubbles on the top but most of the air should be gone.
Casting
Casting was not that easy as I would have thought. The material was too viscous to flow when pouring from one place. So I had to move around to get it everywhere.
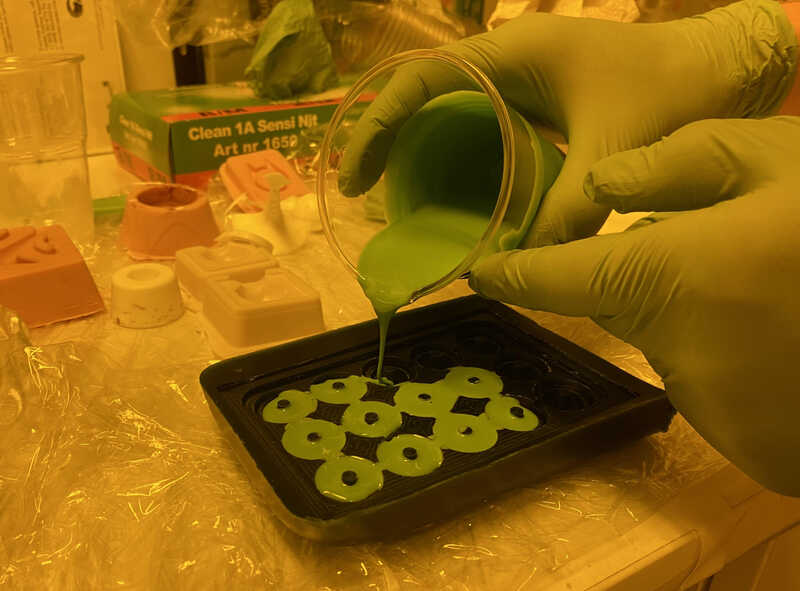
It could have been that the material was slowly starting to settle due to the low 15 min pot life. But in the end it turned out fine.
This stuff should cure in 75 minutes. I left it to cure overnight just to be sure and I was not in a hurry.
Post processing
After curing the material looked suspiciously glossy.
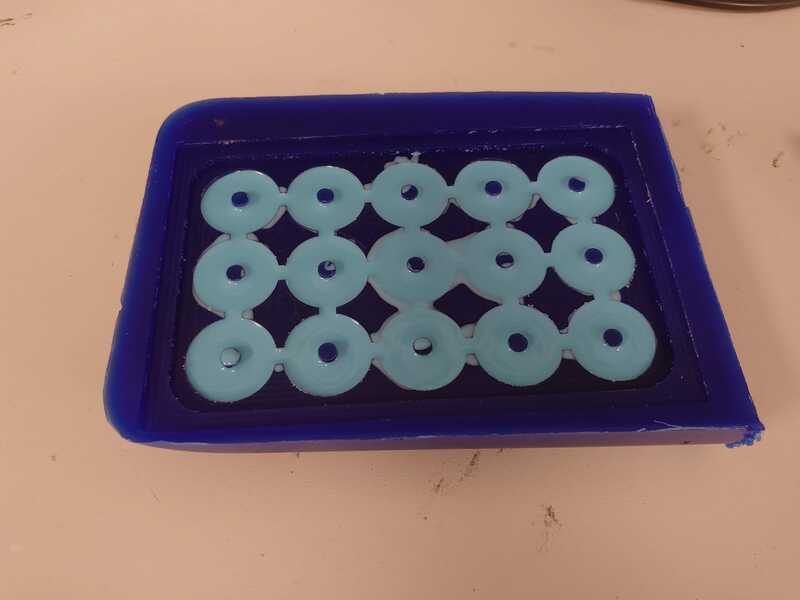
But it was luckily just that, glossy, but still very much solid.
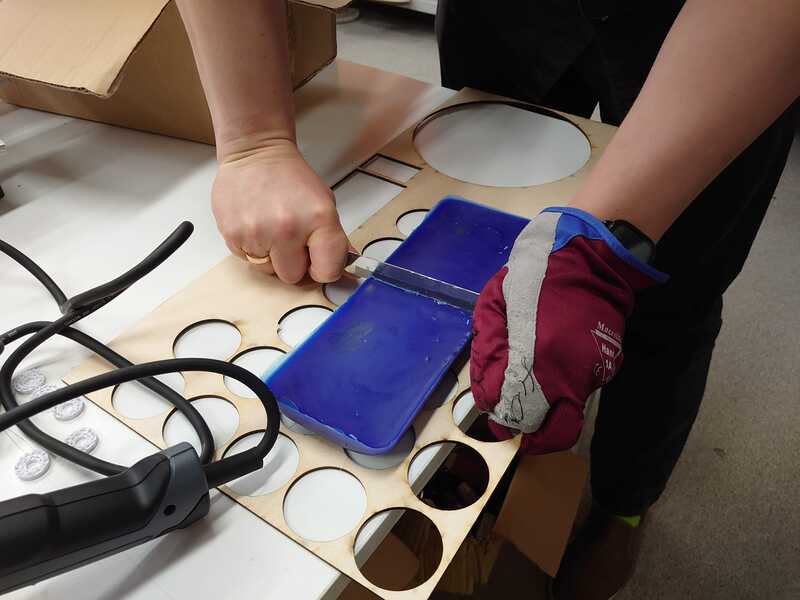
I removed it from the mold with the help of a wooden stick.
And here it is removed.
I just used regular scissors to cut the channels.
I also noticed that those could also just be ripped but I didn't want to do that so the parts wouldn't be damaged.
I am really not sure if the channels were even that necessary..
Result
Here are the pieces separated.
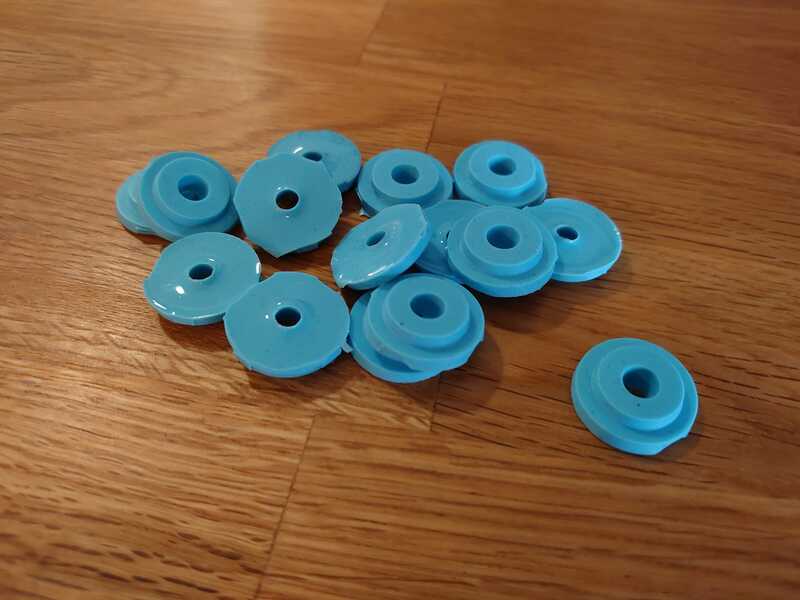
The surface finish on the underside was really nice and accurate. On the open top-side the surface is curved due to surface tension when the material was still curing. Also that side is very glossy. For my application it's perfecty fine but if I needed some other type of pieces I would probably do a two-sided mold for that.
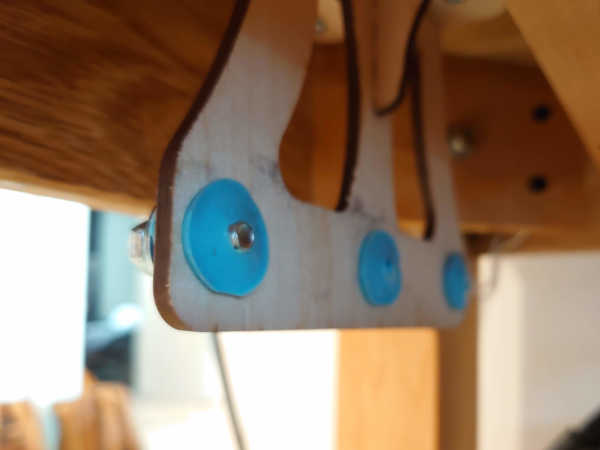
I will put these parts to my case at some point and then maybe add the images here.
I actually put them to my case. I had to widen the holes on the mounts to make these fit.
It was tricky to get the case back up as the mounts don't have much flex and the width is quite restricted. With some help we managed to get it together in the end.
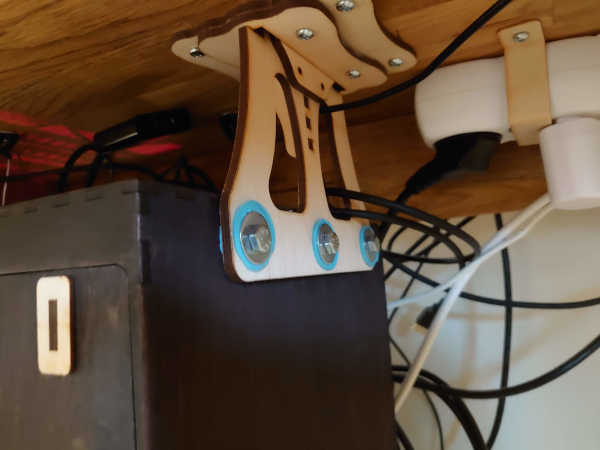
I have not tested how much of impact this has. I haven't noticed the very loud sounds that there were before during gaming. Not sure if I have just gotten used to it or if there's actual improvement.
Otherwise what comes to the material in question, it could have been slightly more rigid. When thightening the rings were squashed and there is a possibility of them breaking. Also there is the visual aspect, I didn't expect them to be so visible but it's fine as the mounts are so high close to the bottom of the table that it's not that visible.
If those hold up I think it's a needed improvement to my PC setup.
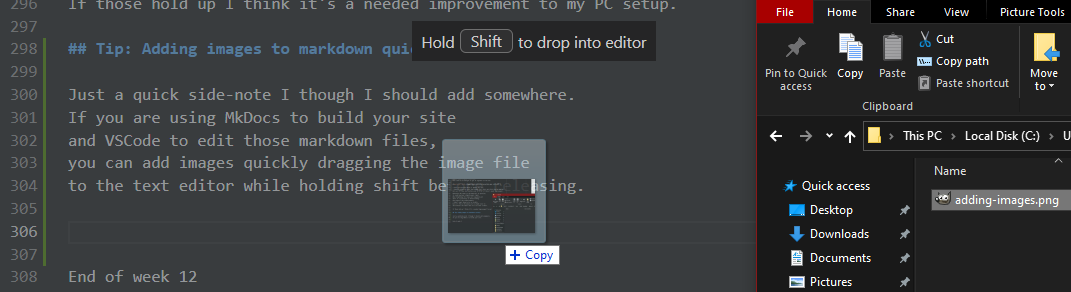
Tip: Adding images to markdown quickly
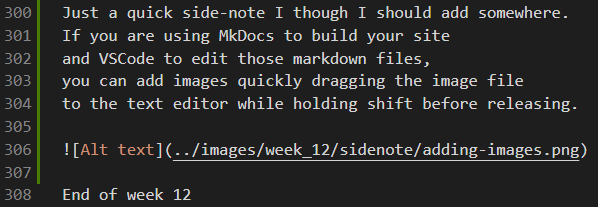
Just a quick side-note I though I should add somewhere. If you are using MkDocs to build your site and VSCode to edit those markdown files, you can add images quickly dragging the image file to the text editor while holding shift before releasing.
And it will add the correct syntax and fill the file path.
Other editors might/should have similar features.
You can also add multiple files like this but then those will be bunched up.
End of week 12