3. Computer controlled cutting
Group assignment:
- Characterize your laser cutter’s focus, power, speed, rate, kerf, and joint clearance.
To see our group assignment click here
Individual assignments:
-
Design, lasercut, and document a parametric press-fit construction kit, which can be assembled in multiple ways. Account for the laser cutter kerf.
-
Cut something on the vinyl cutter.
Laser cutting
1. Parametric design
Parametric design makes it easy to change the size and certain dimensions of our design without distorting our design. That’s why we use it to build our press-fit kit. As modeling software we chose Fusion 360.
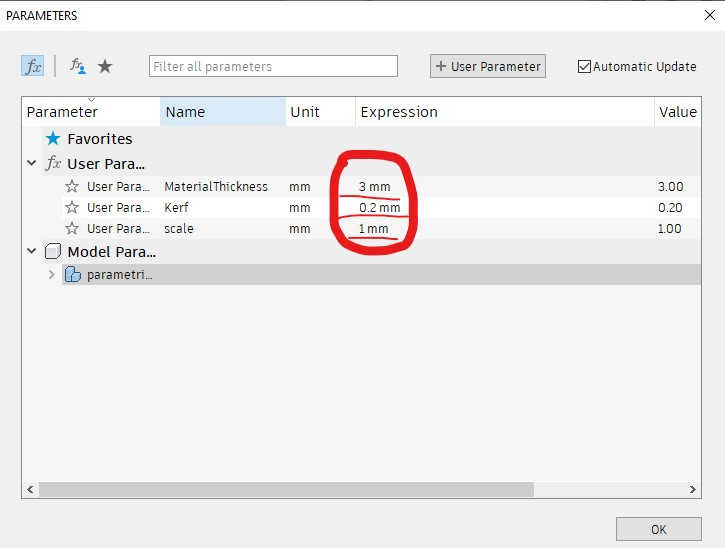
- Open Fusion 360; create a new sketch; go to the Settings window: In the Design workspace > Modify> change parameters as shown below.
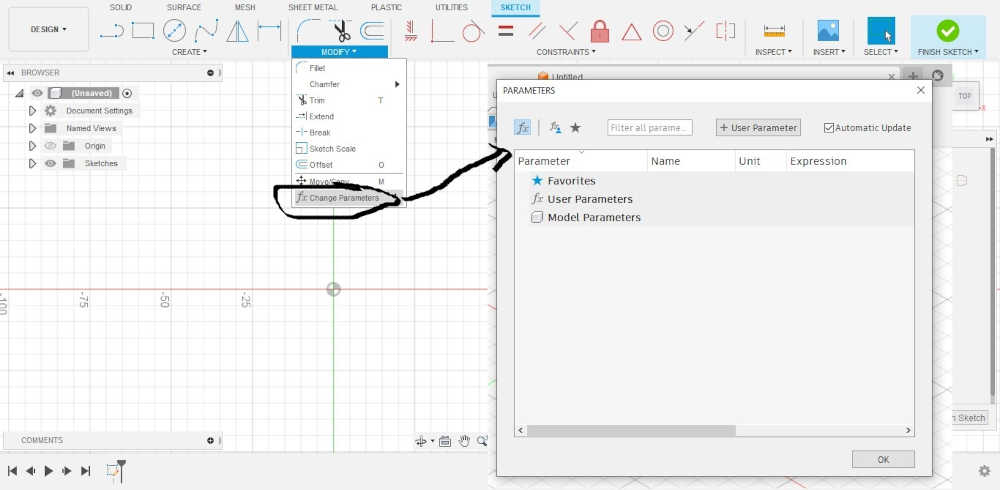
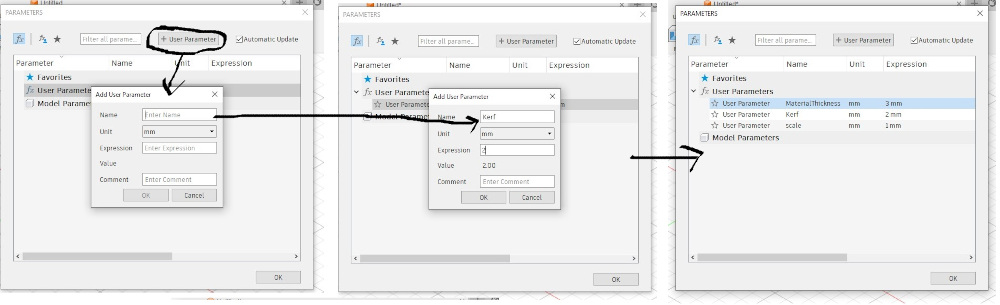
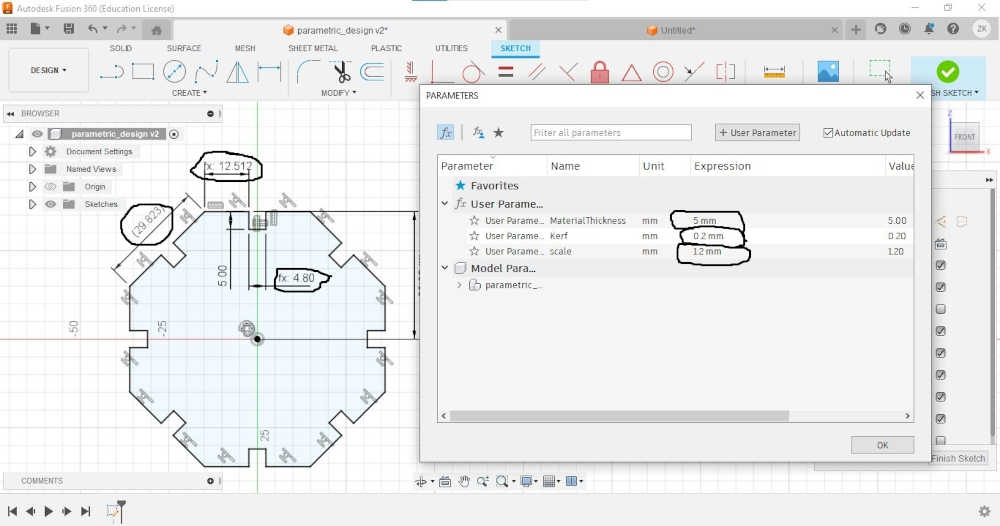
- To create new parameters click on + User Parameter and fill in the fields as shown below in our case we have created 3 parameters (Material Thickness, kerf and scale).
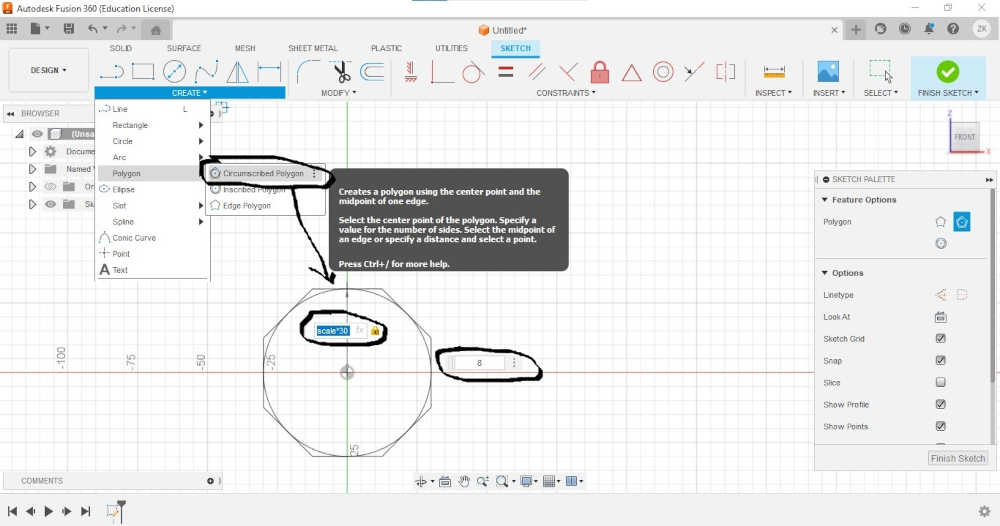
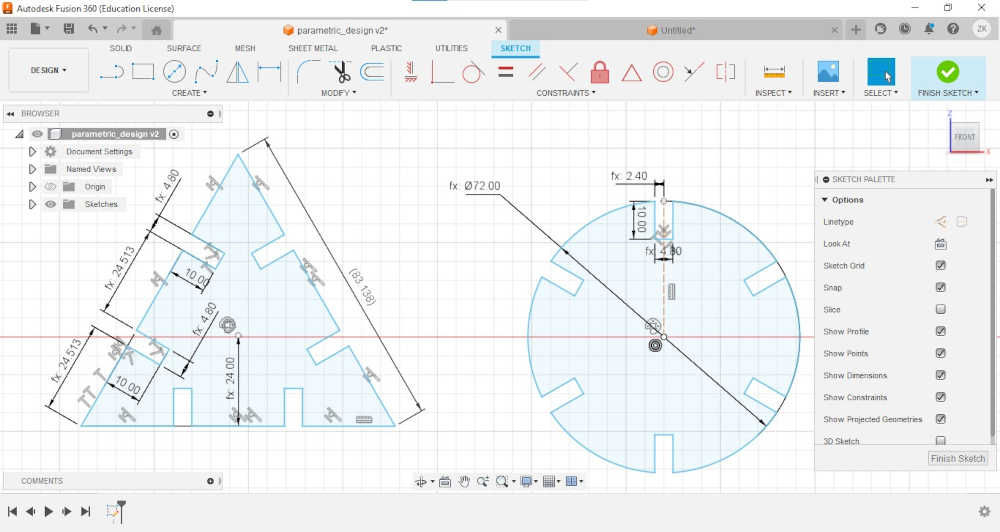
- Go to the create tab select polygon and circumscribed polygon as shown below. for the radius of the circle we used the scale*30 parameter.
- create a rectangle as shown below
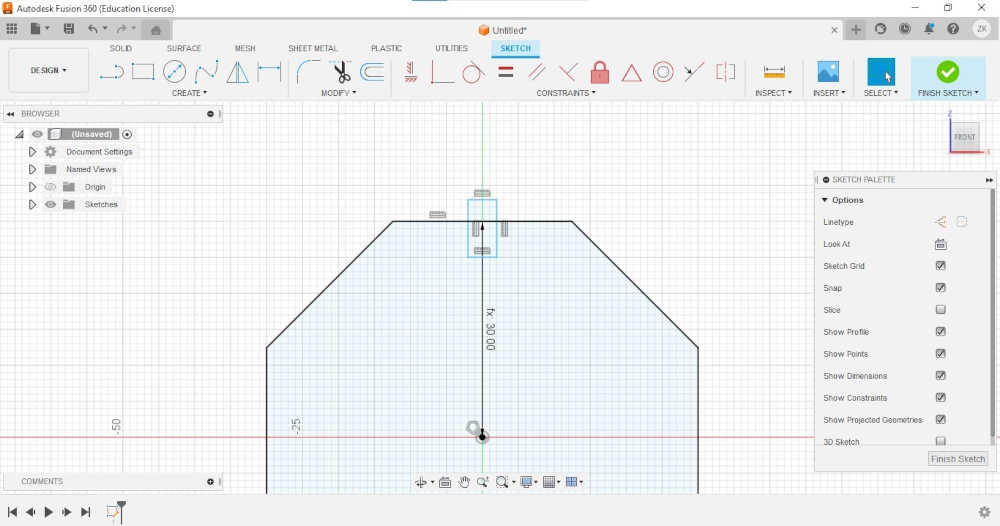
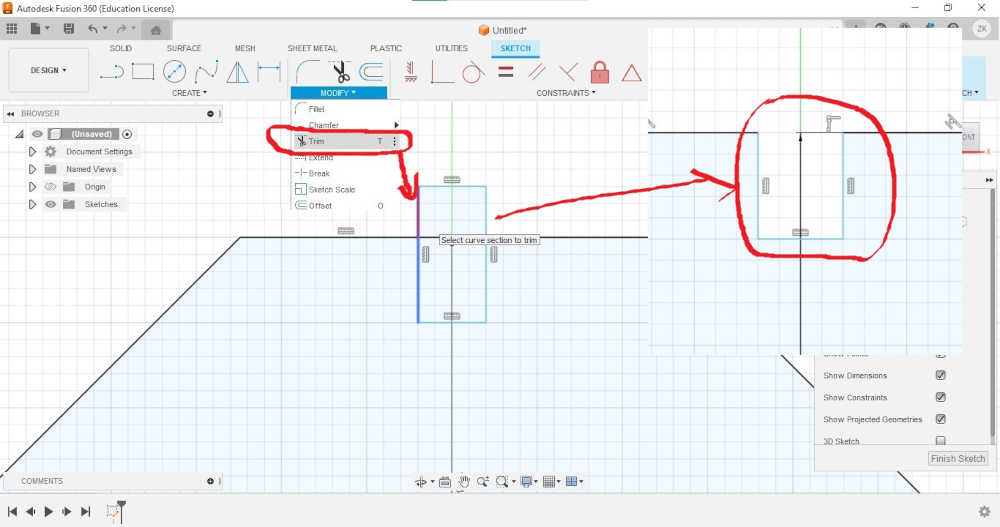
- go to the modify tab click on the trim tool and use it as shown below
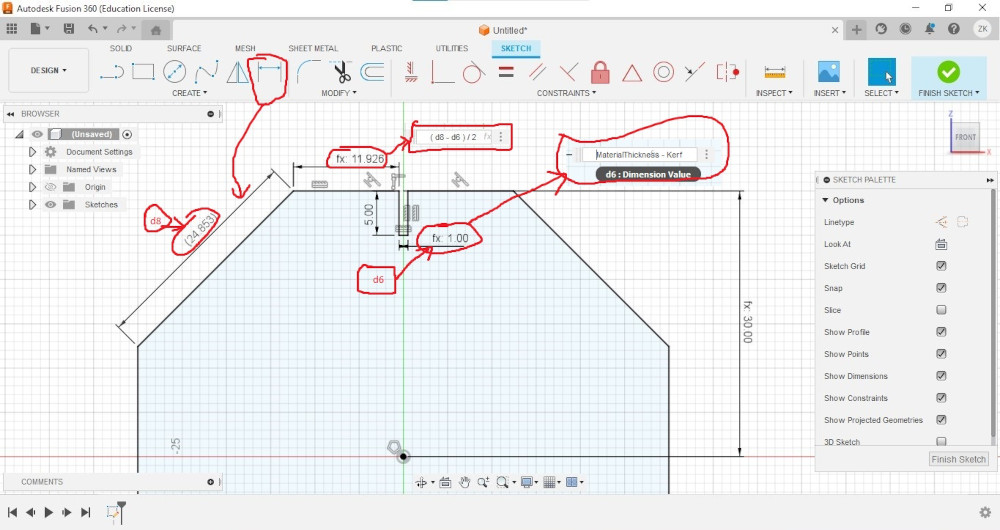
- Use the sketch dimension tool to dimension the drawing as below
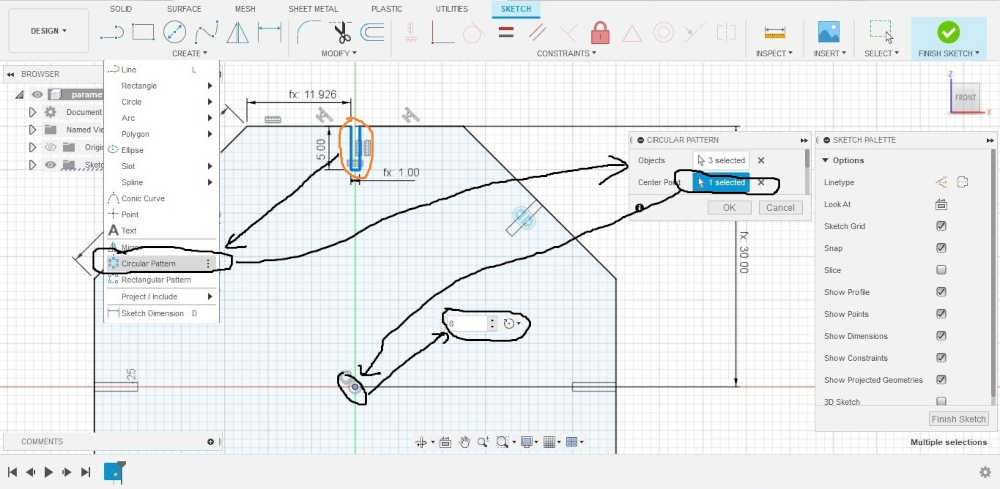
- Select the figure circled in orange below; go to the create tab and click on Circular Pattern and follow the instructions below.
- To verify our parametric design we modified the parameters and observed the result as shown below.
- We used the same procedure as above to obtain the results below for more details please download our source files at the end of the page.
2. Laser cutting of our press-fit kit
- For the cutting of our press-fit kit we have chosen as material MDF of 3mm what allows us to inform the parameters of our design as indicated below (we have kerf = 0.2mm value obtained after testing the laser cutter)
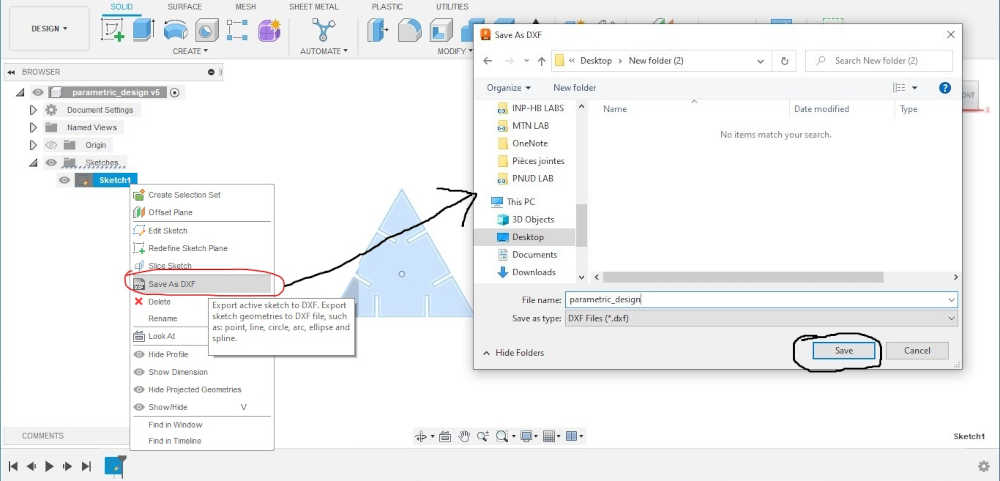
- Right click on Sketch1, click on Save As DXF a window will open, enter the name you want and click on save.
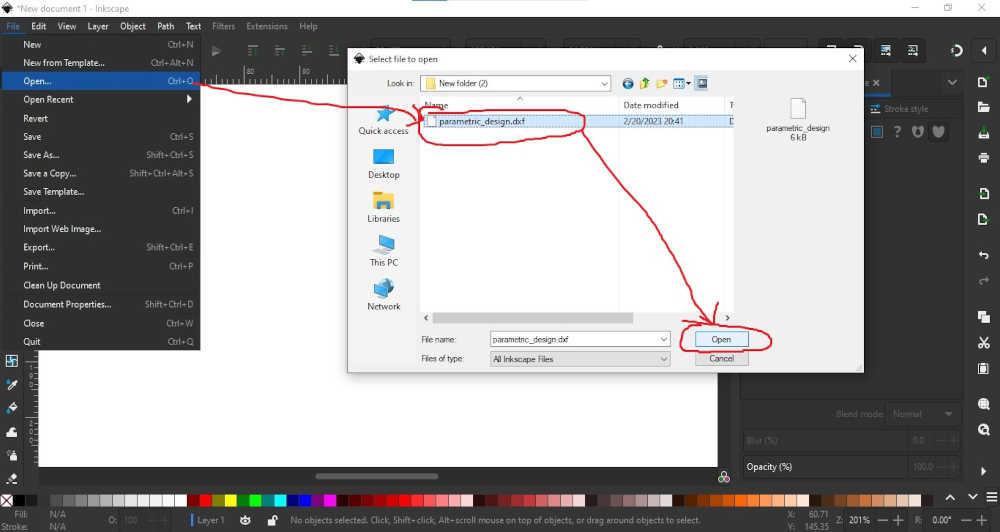
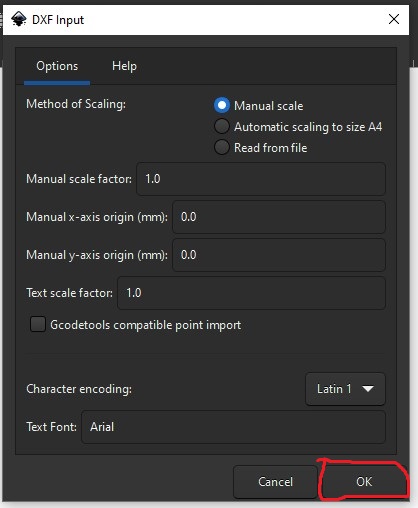
- Open Inkscape go to file>Open… and select the dxf file we generated above and click on Open a window will open click on OK
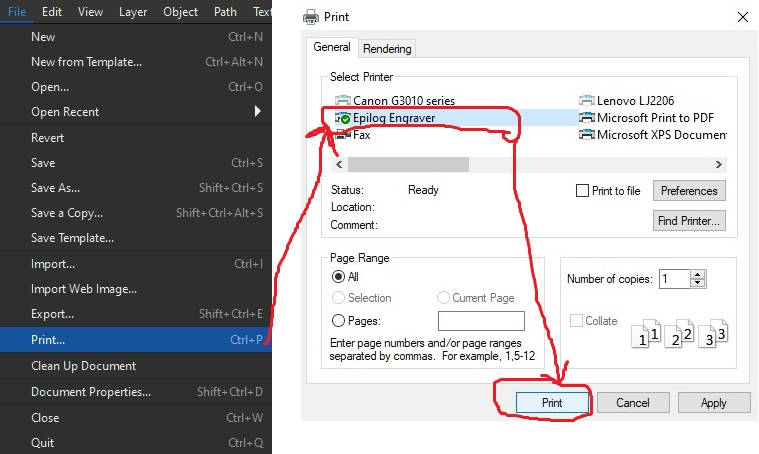
- Go to inkscape, click on file > print… and select Epilog Engraver as shown below.
- Click on print Epilog Dashbord will open with the design, change the settings circled in red and move the design 10mm on the X and Y axis as shown below
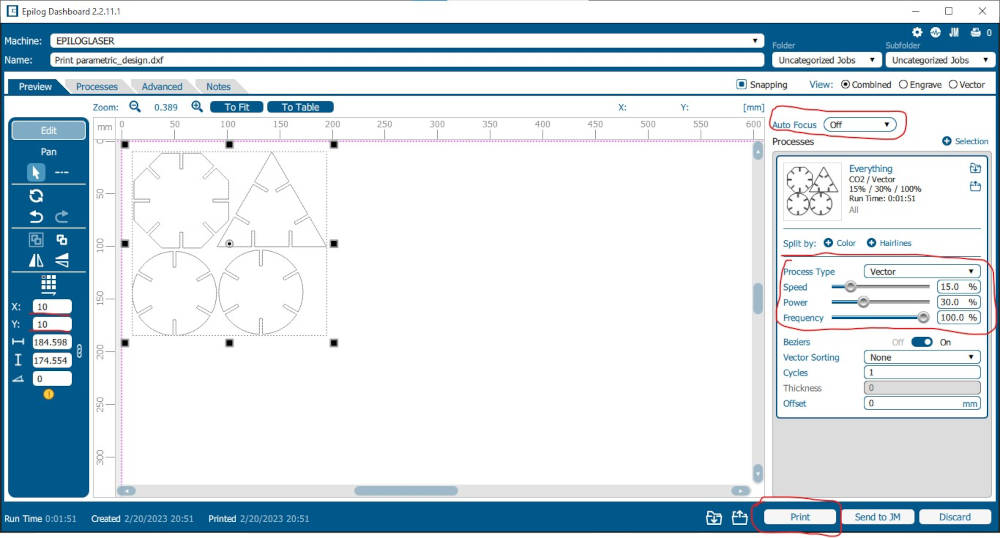
Summary of press-fit kit cutting parameters
| Parameters | Value |
|---|---|
| Materials | MDF |
| Process Type | Vector |
| Speed | 15 % |
| Power | 30 % |
| Frequency | 100 % |
| Cycles | 1 |
| Auto Focus | Off |
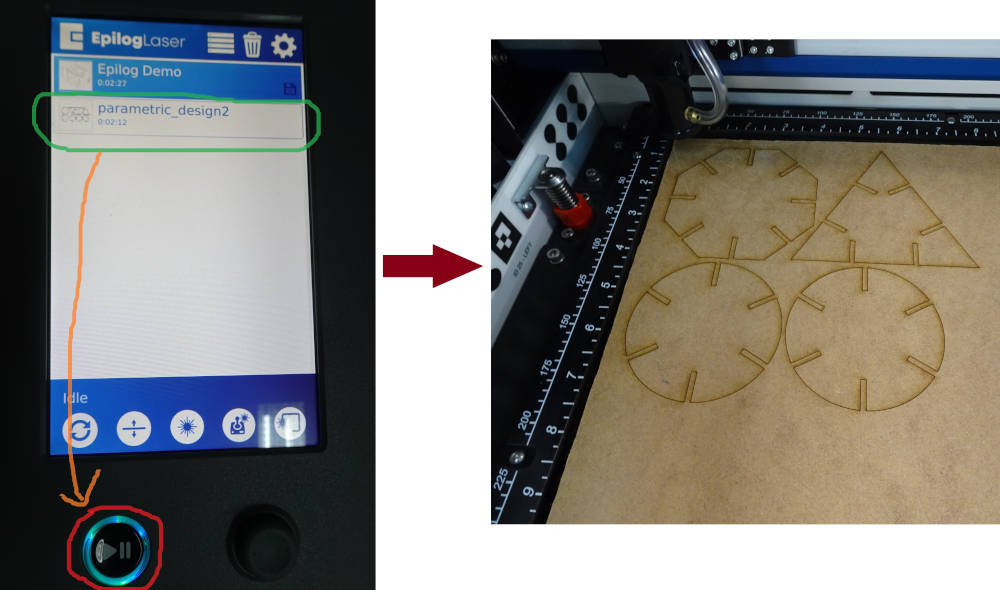
- Connect the USB cable of the laser cutter to your PC and click print normally the cutting file should appear on the touch screen of the machine. After turning on the air vacuum and air compressor, click on the red circled button below to start cutting.
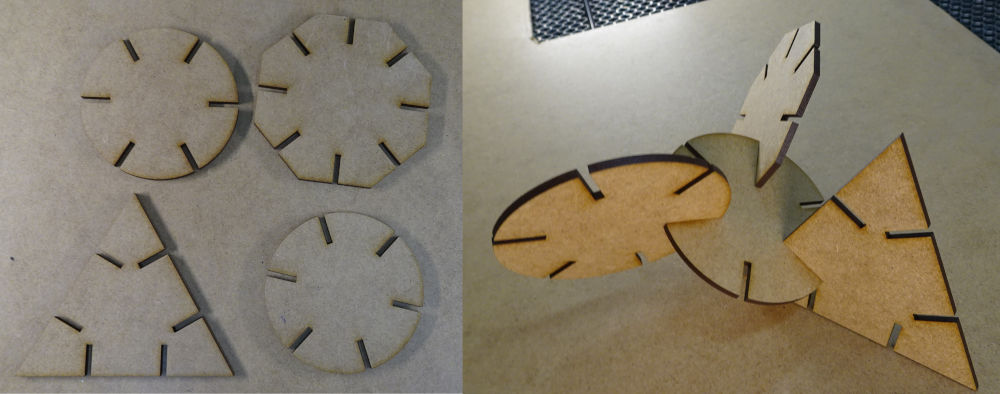
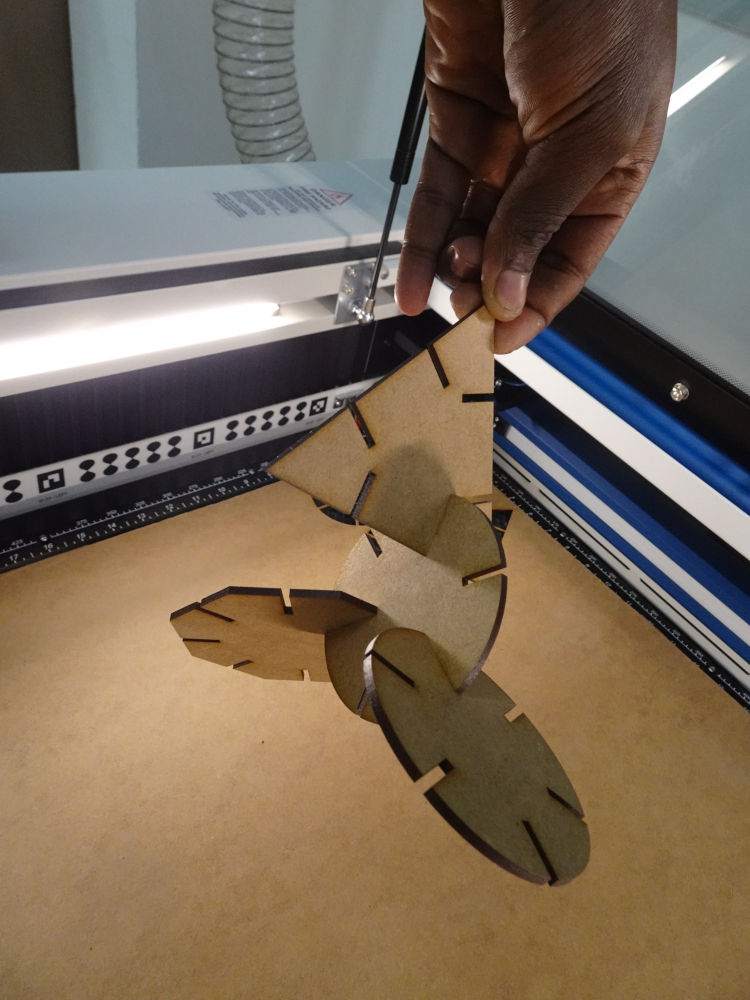
hero shots 😊😊😊
During the assembly of our pess-fit kit we had no particular problem. We just needed a little force to assemble two parts correctly. As you can see on the pictures below our press-fit kit holds in the vacuum without disassembling. So we can conclude that the cutting parameters and the parametric design we have chosen below are good.
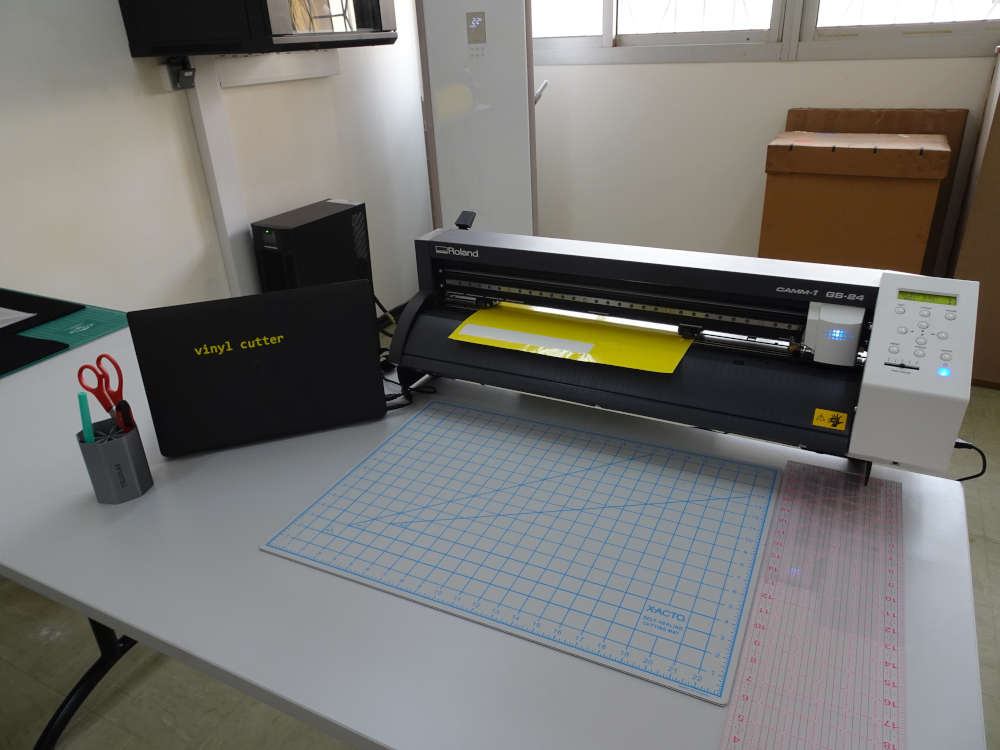
Vinyl Cutting
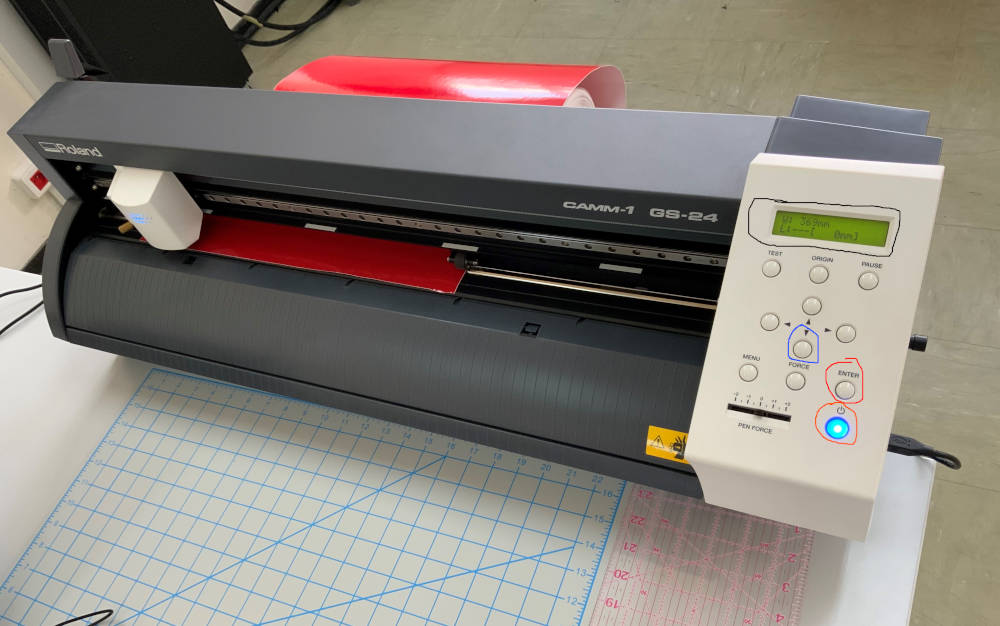
The Vinyl cutter in our Lab is a Roland GS-24.
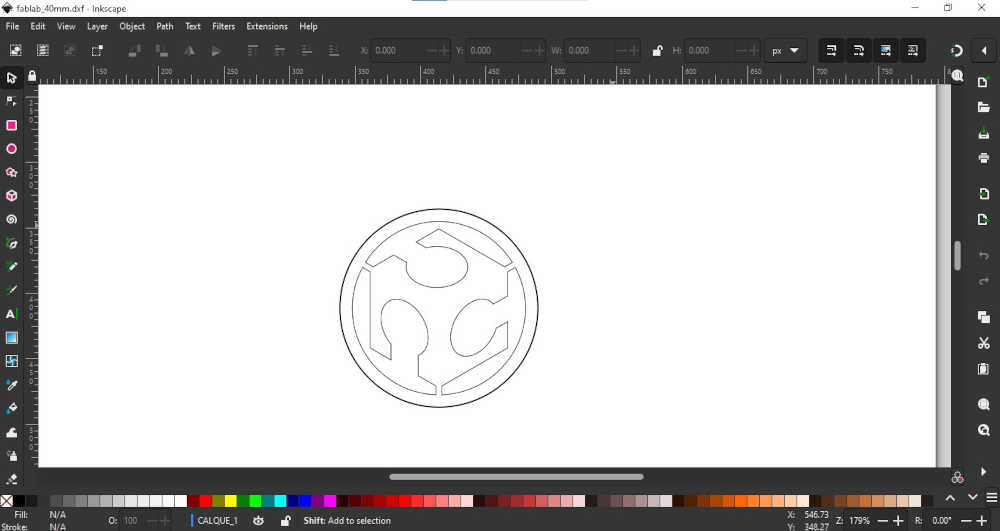
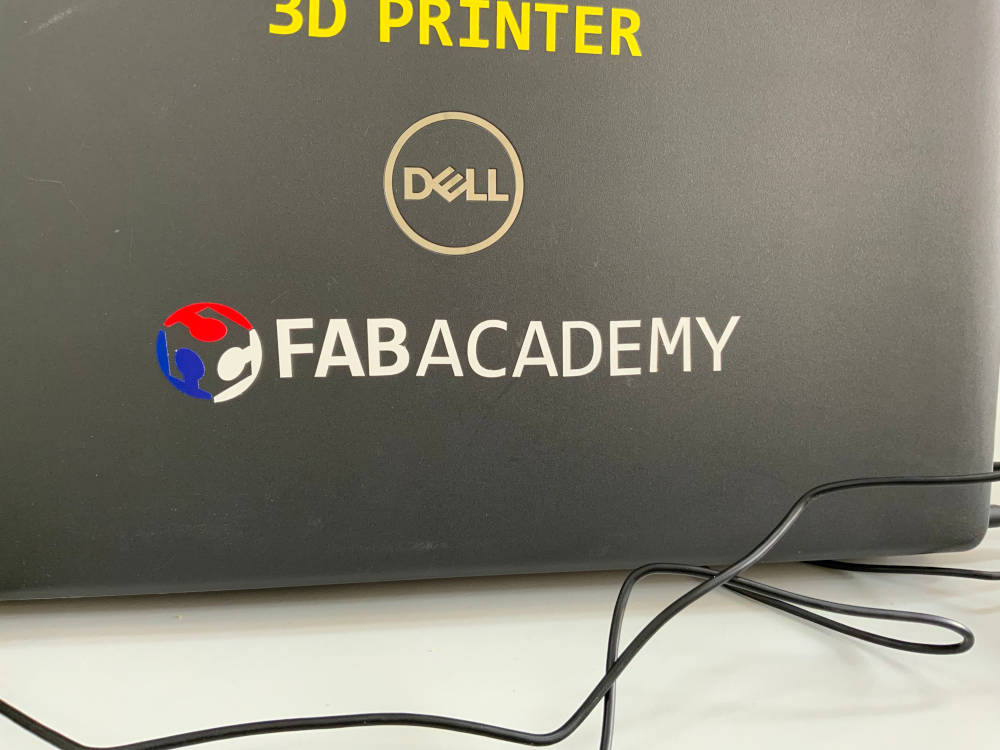
for our first cut with the vinyl cutter we chose the logo of the FAB ACADMEY.
- We downloaded the logo of a fablab in vector file and we opened it with insckape as below.
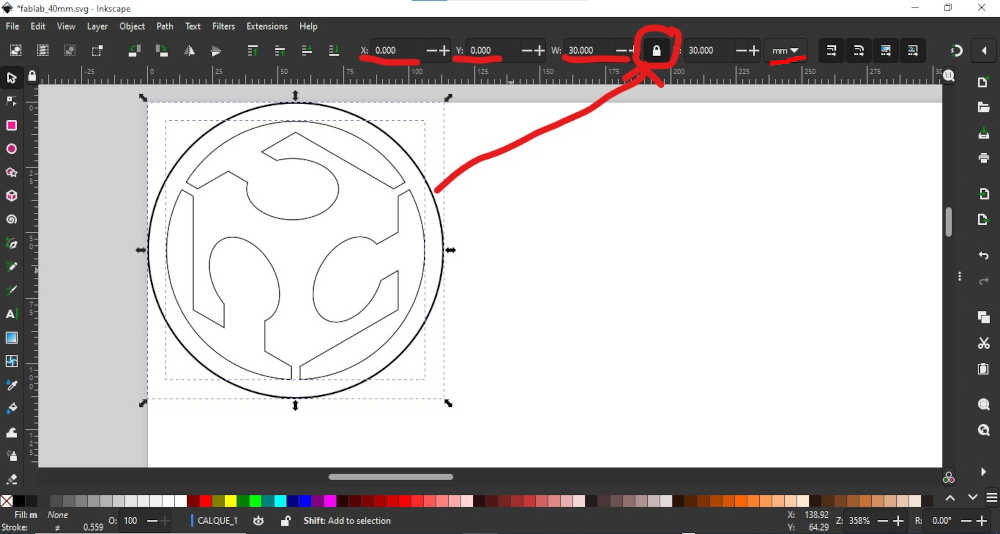
- Select the logo, click on the lock, change the dimensions of the logo and its coordinates as shown below.
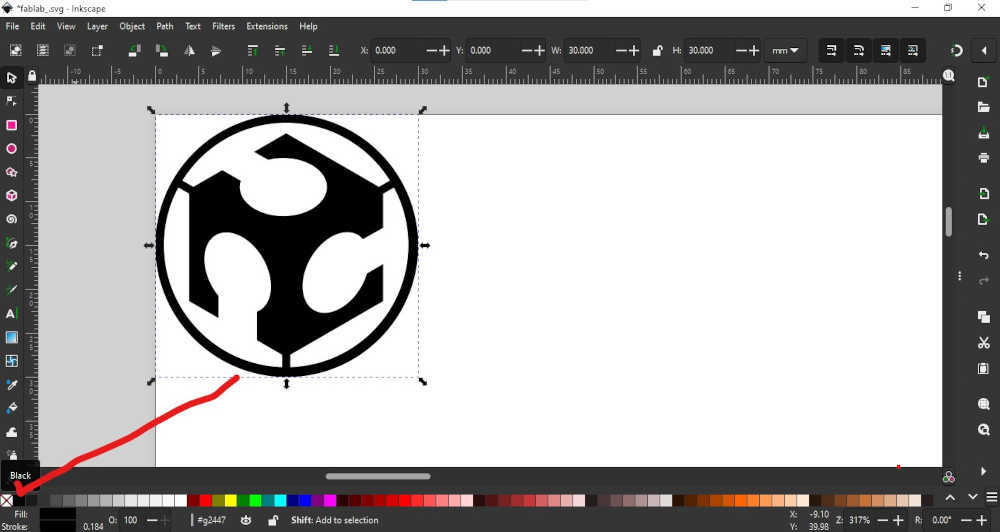
- Select the circle and click on the black color located in the color palette as shown below.
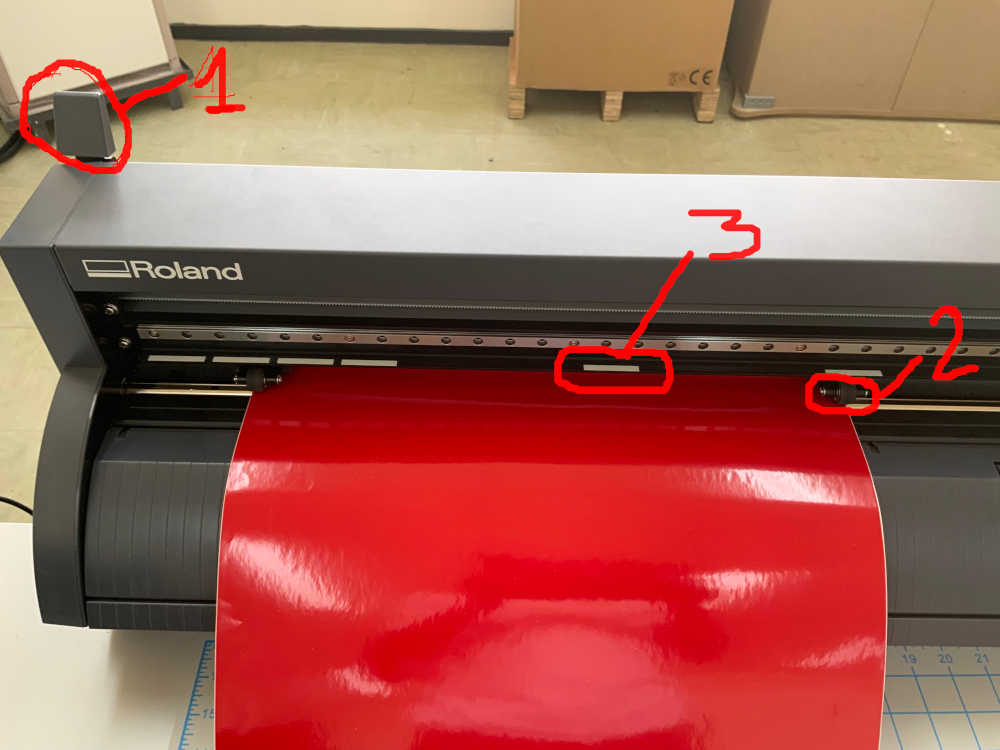
- Push lever number 1 down to place the vinyl then move the wheels number 2 to the edge of the vinyl and make sure the wheels are in the white stripe areas number 3 and finally lift lever 1
- turn on the machine by pressing once the button circled in orange, then press once the button circled in blue and finally press once the ENTER button. You should obtain the value of the width of your vinyl as below
-
Connect the USB cable from the machine to your PC and install the vinyl cutter drivers on your PC
-
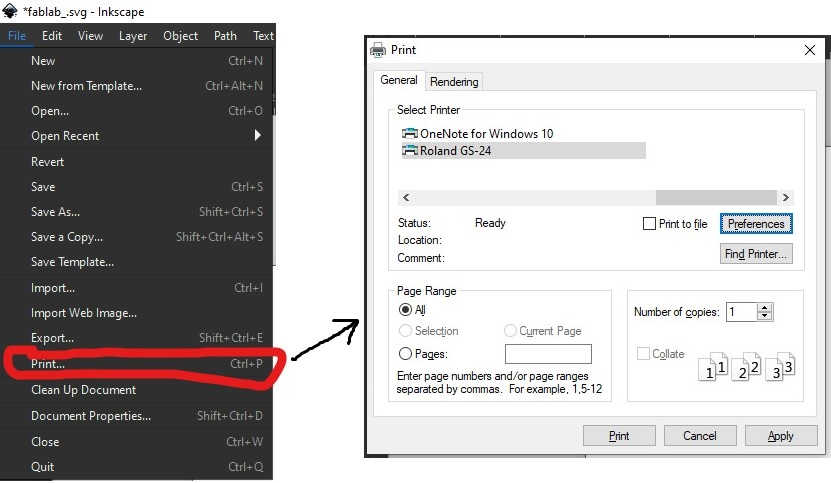
Go to inkscape click on file > print… and select Roland GS-24 as shown below
- Click on the preferences button, a new window will open click on Get from machine to download the cutting dimensions measured by the machine then change the length value by 30 mm (the height of our design) so that the vinyl cutter can cut our design from its original position.
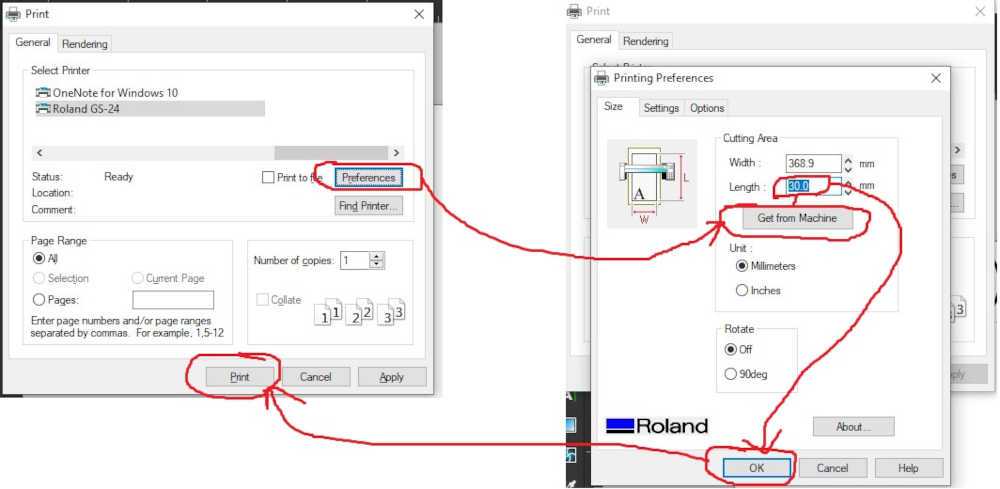
- click on print you should have the result below
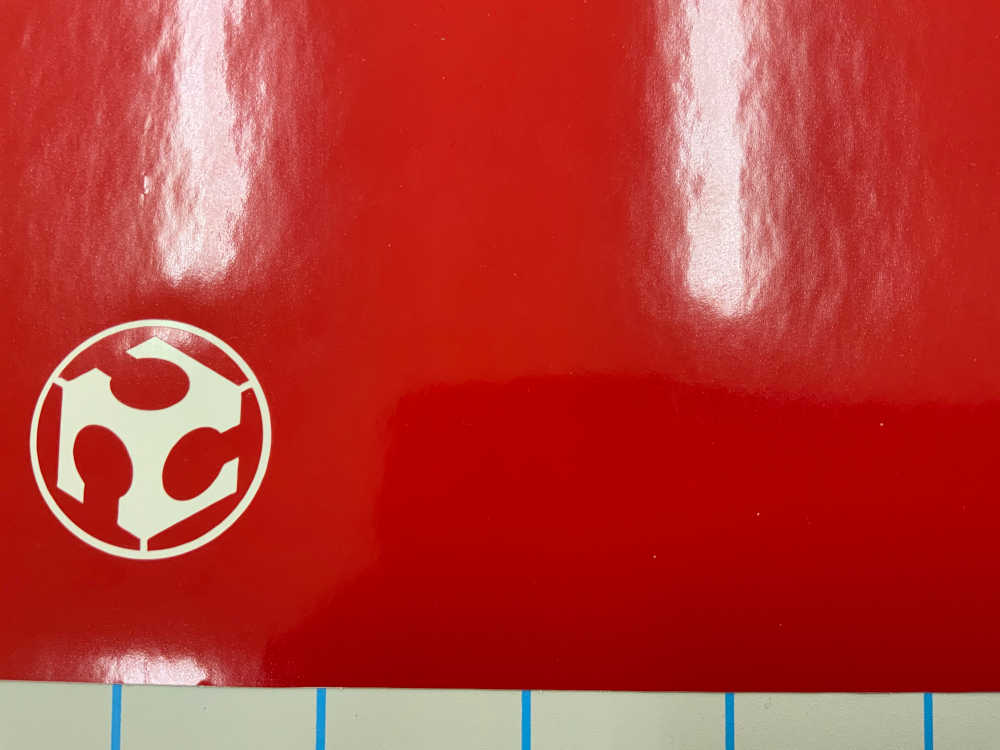
- We have replaced the green color of the logo by white since we don’t have any green vinyl stickers in our fablab. Here are some pictures of what we did. It was really fun to use the vinyl cutter 😊
