7. Computer controlled machining
Group assignment:
-
Complete your lab’s safety training
-
Test runout, alignment, fixturing, speeds, feeds, materials and toolpaths for your machine
-
Document your work to the group work page and reflect on your individual page what you learned
To see our group assignment click here
Individual assignment:
-
Make (design+mill+assemble) something big(~meter-scale)
-
extra credit: don’t use fasteners or glue
-
extra credit: include curved surfaces.
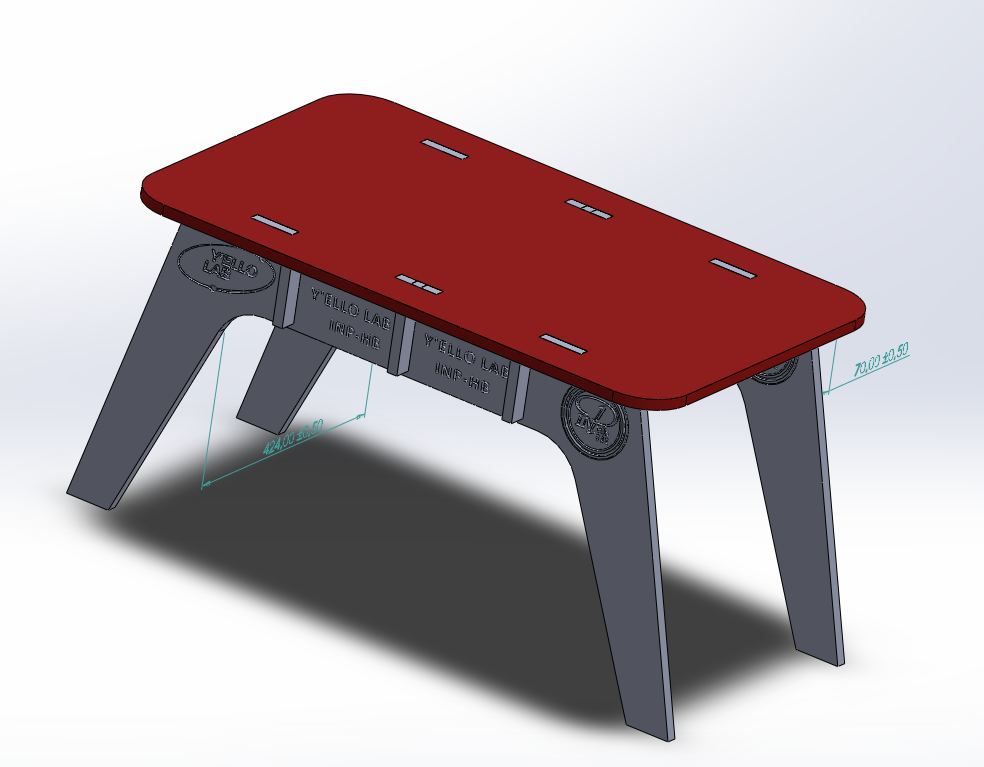
For this work we decided to make a coffee table. To do this, we will use the digital milling machine ShopBot Alpha 96 with MDF.
Our work will be divided into 4 parts: the design of the dining table with SolidWorks, the generation of toolpaths with V-carve, the machining of the different parts of the dining table and the assembly of the dining table.
Design of the dining table
For the design of our dining table we used SolidWorks software we started by creating an exquisite 2D grouping of all the parts of the dining table as shown below.
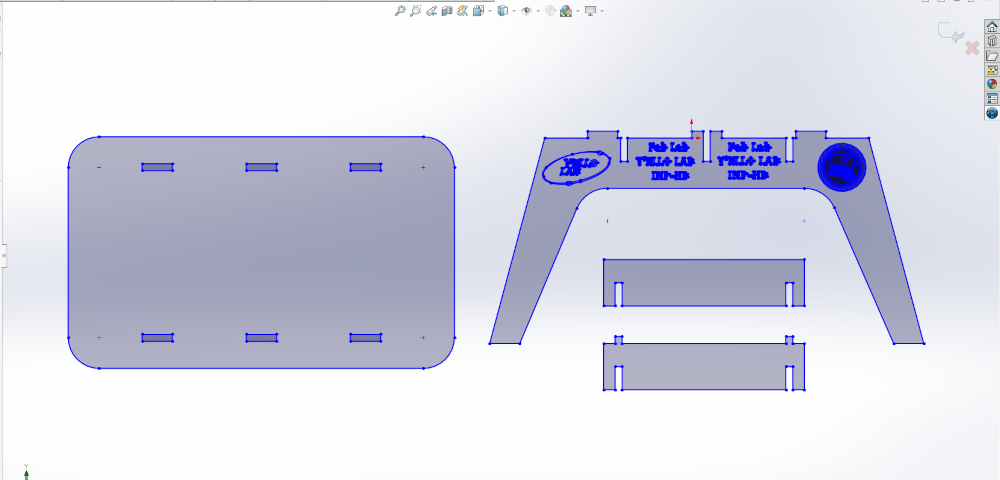
Once the exquisite 2D was completed we proceeded to extrude each part separately with a thickness of 18 mm corresponding to the thickness of the MDF you have at the Fab lab.
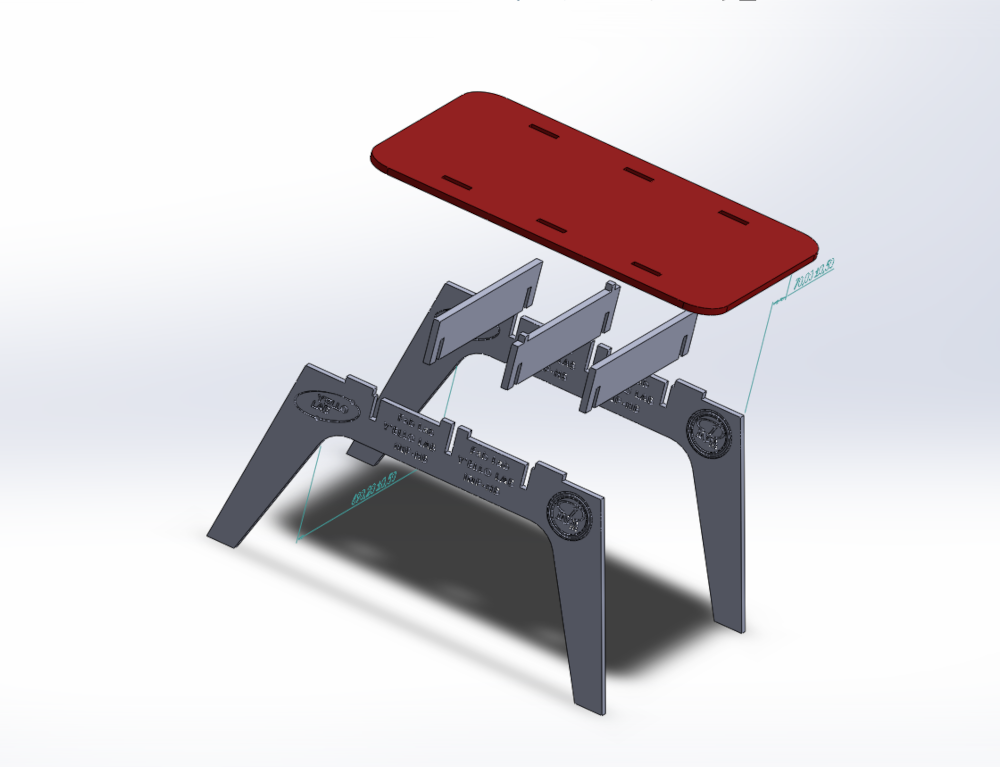
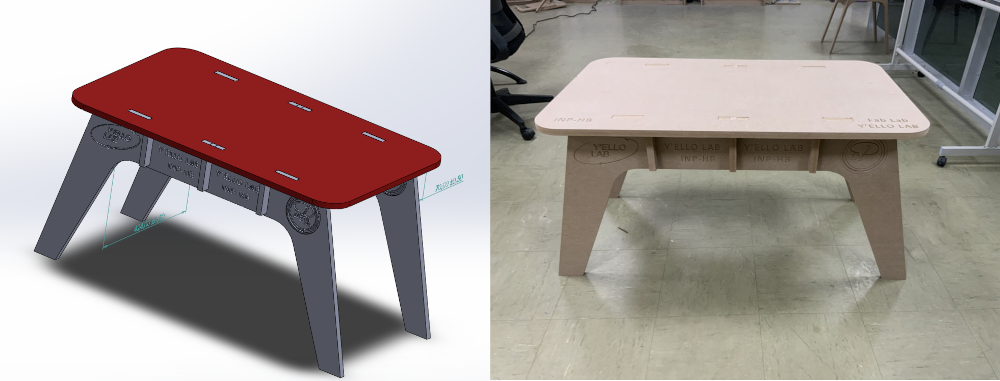
Once each part was extruded we made a 3D assembly of the parts to get a preview of the final result as shown below.
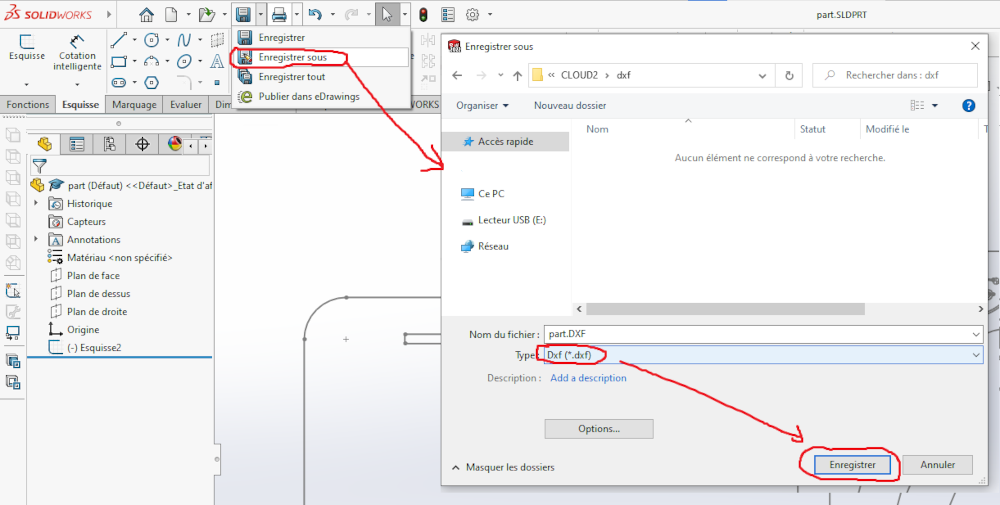
Once the modeling was validated we exported the SolidWorks file in DXF as shown below.
Toolpath generation with V-carve
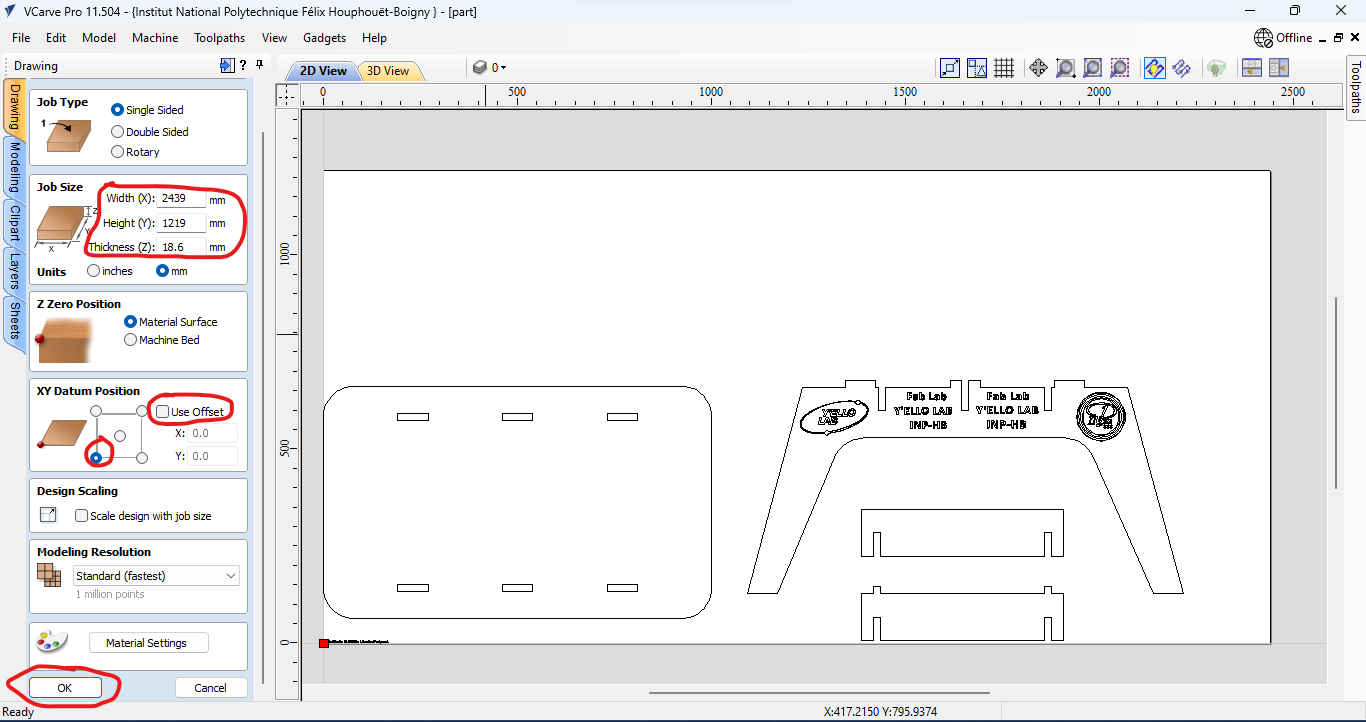
For the generation of the toolpaths we proceeded as follows:
- open the dxf file with v-carve
- we filled in the working dimensions of our Shopbot milling machine and deactivated the offset as shown below
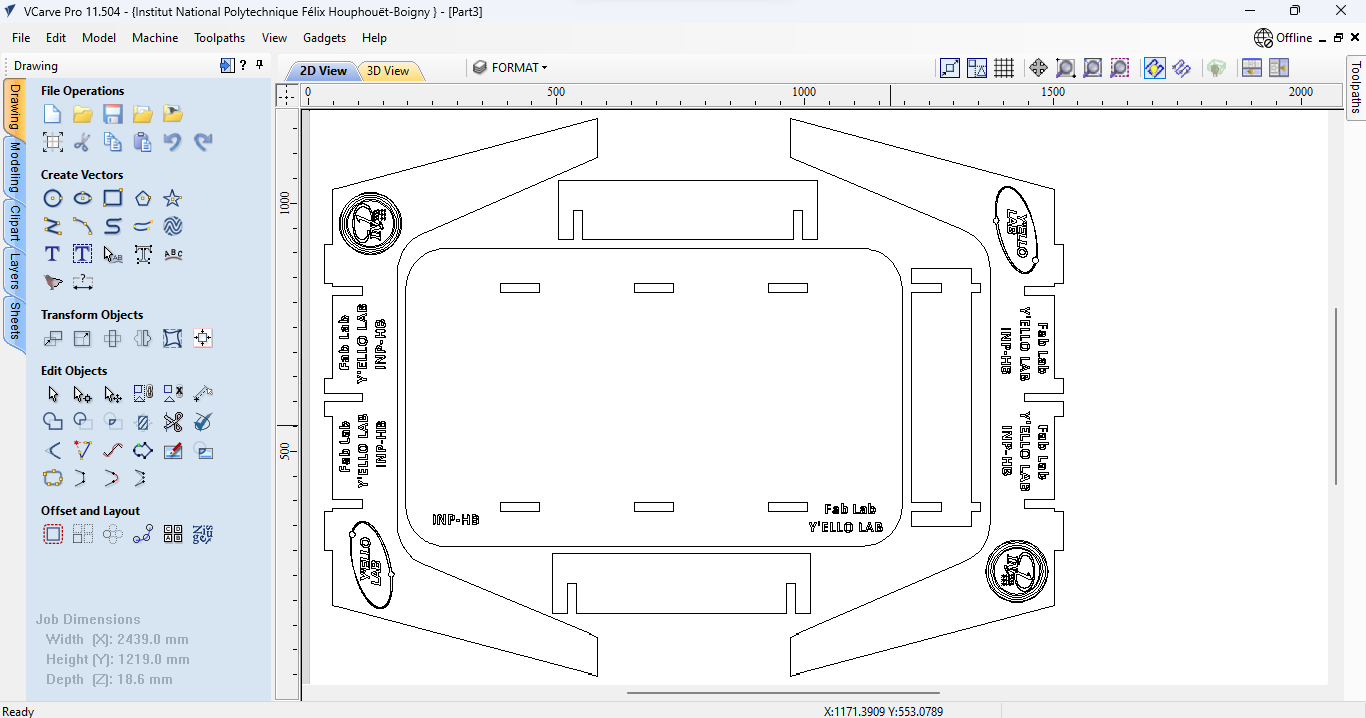
- we moved the different pieces and reorganized them as shown below
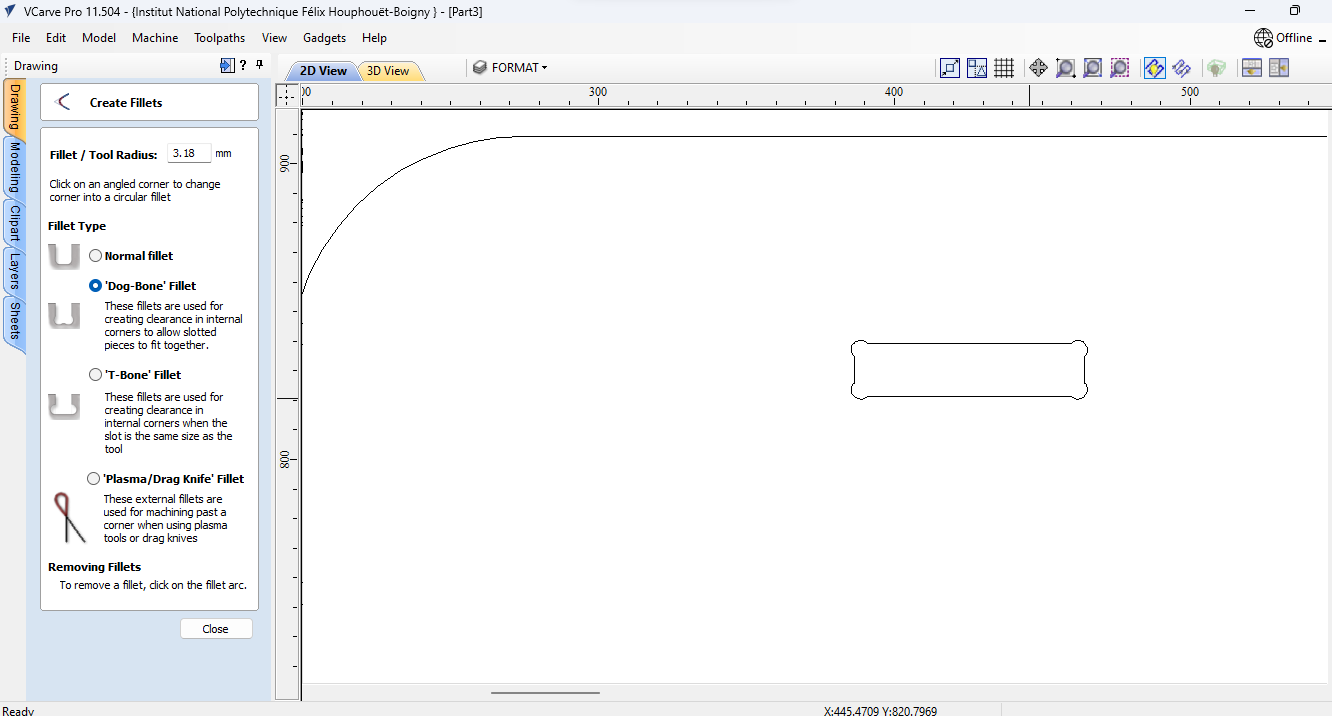
- we selected all the contours of the inner cutouts of our design and clicked on “create Fillets” for the generation of the Dog-bone as shown below
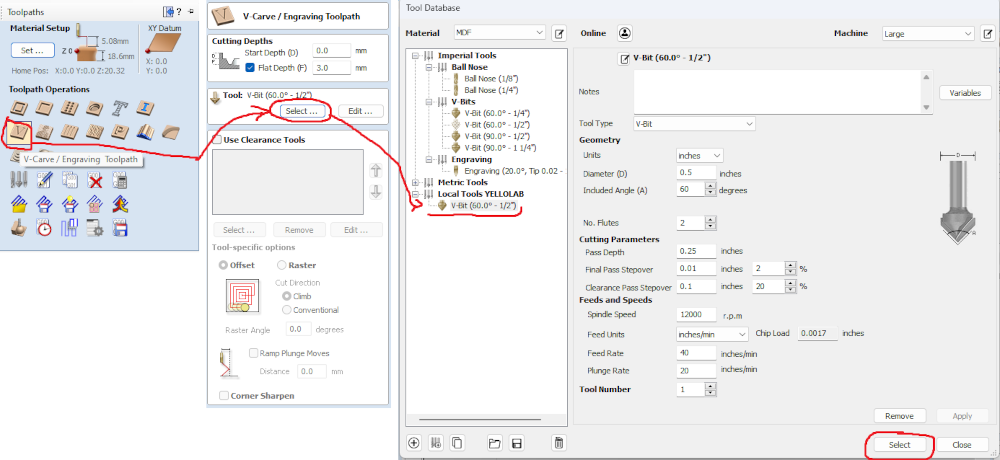
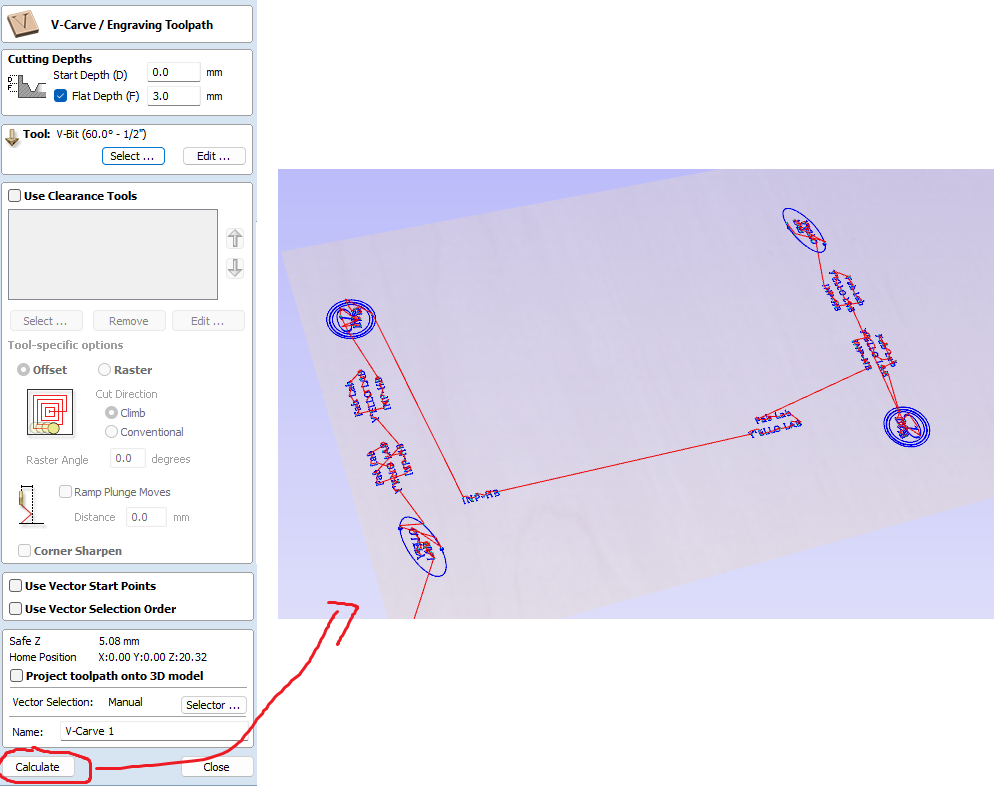
- For the tool path we first generated the tool path for engraving as shown below.
-
We move on to the generation of cutting tool paths as shown below.
-
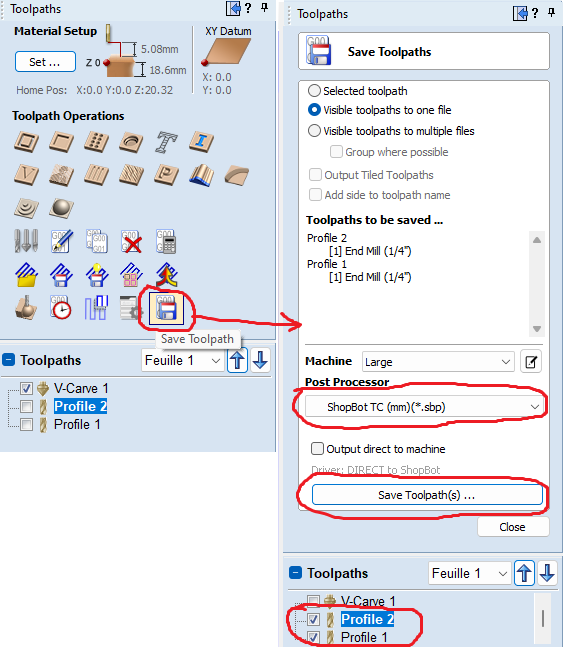
Once the paths have been generated, we proceeded to register them as shown below. We started by registering the path for engraving and then for cutting because we will not use the same tools.

Machining of the dining table
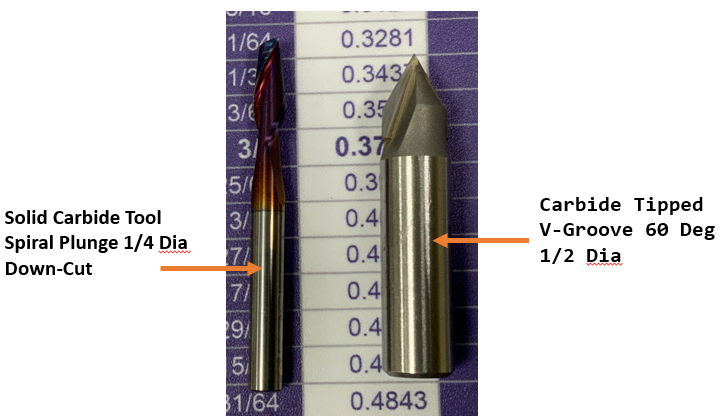
For the machining of the dining table we used two tools as shown below.
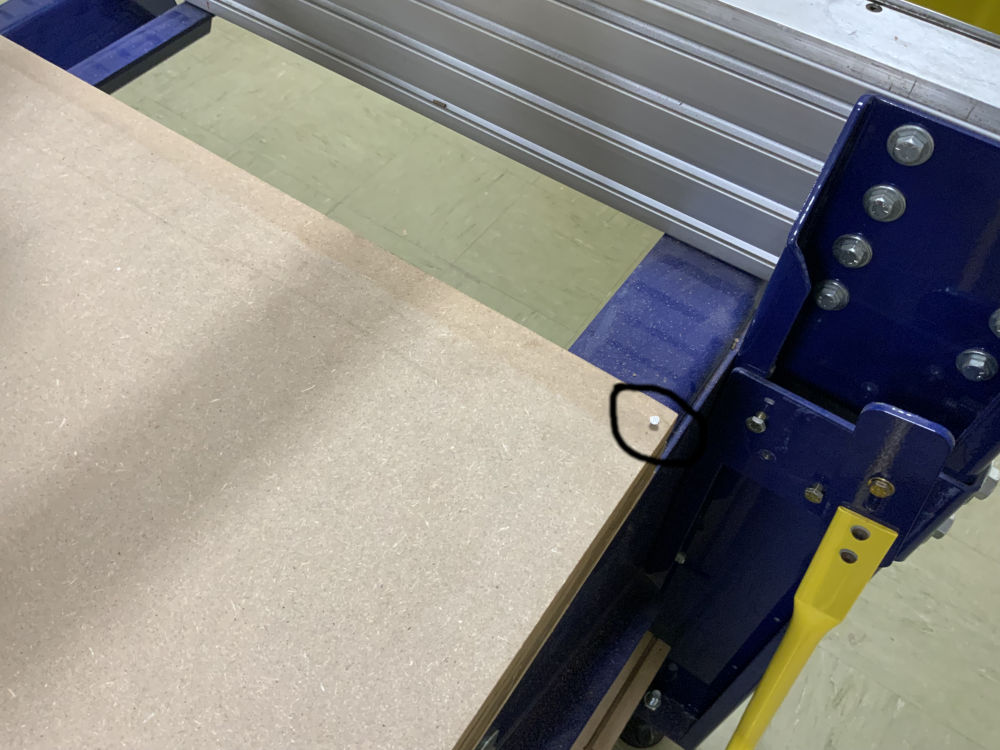
To attach our MDF board to the ShopBot table we used nails as shown below.
After fixing the MDF board and mounting the engraving tool as shown below, we proceeded to the first machining operation.
After the end of the engraving operation of the MDF board we changed the tool as shown below and proceeded to launch the operation of cutting the contours of the table as shown below.
Dining table assembly
For the assembly of the dining table we proceeded as follows
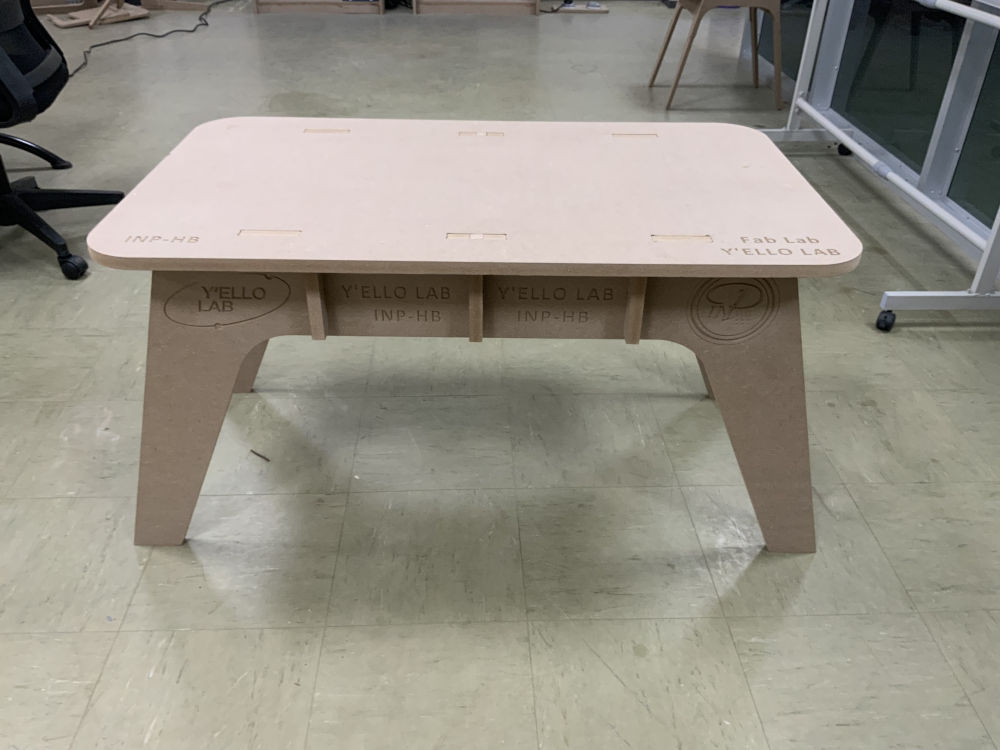
HERO SHOT 😊😊😊