5. 3D Scanning and printing
Group assignment:
- Test the design rules for your 3D printer(s)
To see our group assignment click here
Individual assignment:
-
Design and 3D print an object (small, few cm3, limited by printer time) that could not be made subtractively
-
3D scan an object (and optionally print it)
3D printer
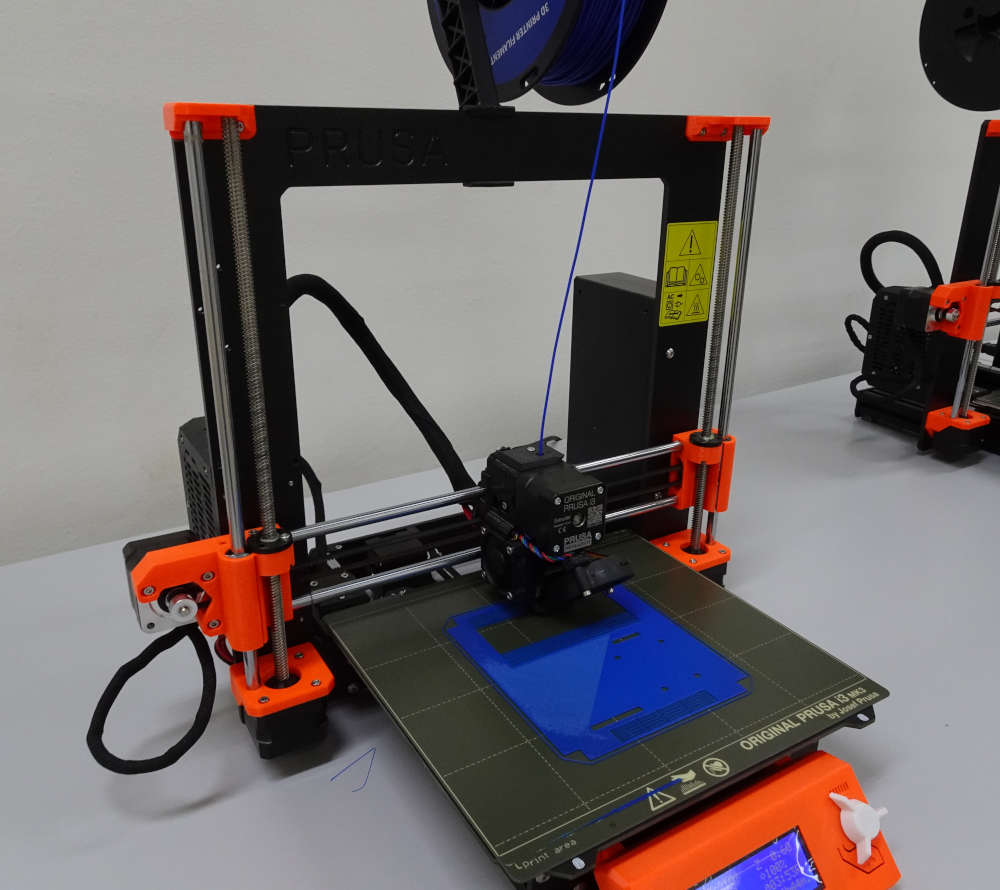
For the realization of the missions of this week we used the Original Prusa i3 MK3S+ 3D printer available in our Fab Lab
Design and 3D print an object that could not be made subtractively
3D Design
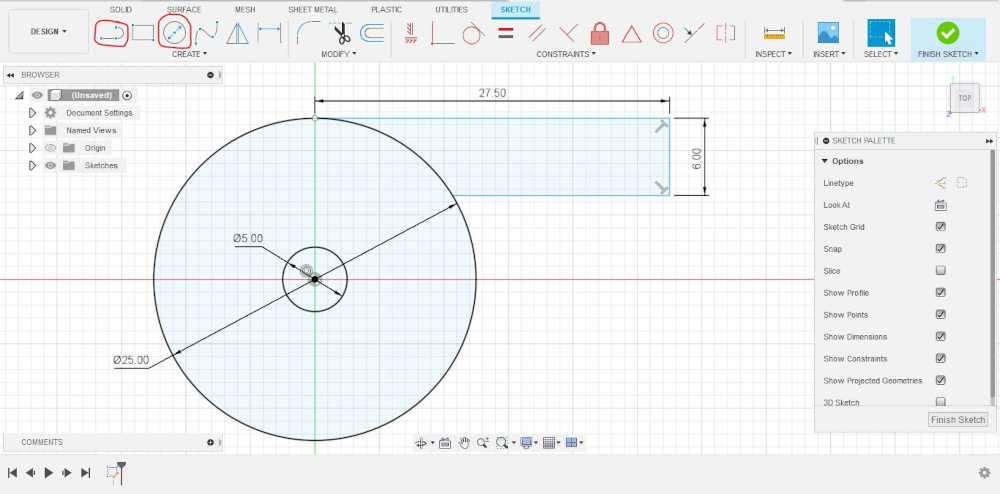
For the 3D design of our part we used the Fusion 360 software and chose to design a whistle with a sphere inside. As the part includes a floating object inside a closed surface, it is not possible to do it subtractively.
Since we have designed a whistle with a ball inside, it is impossible to design it using any other manufacturing process.
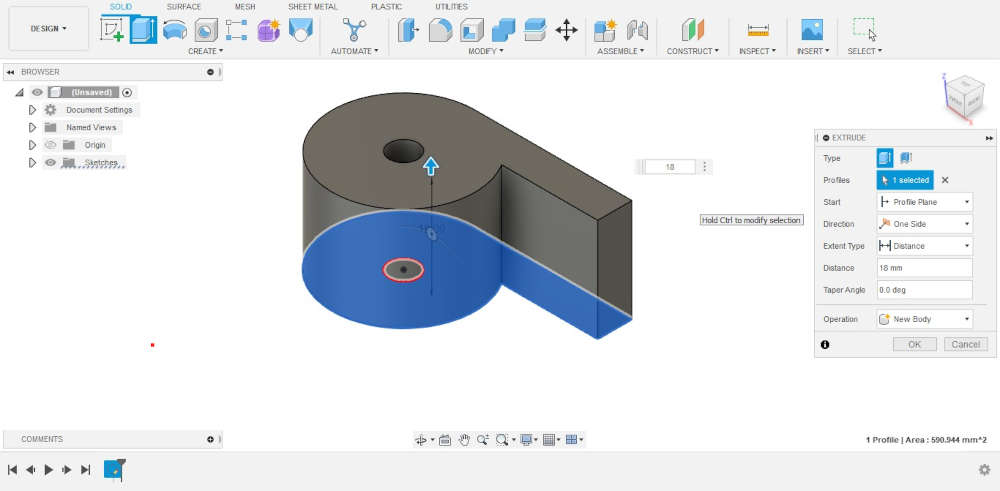
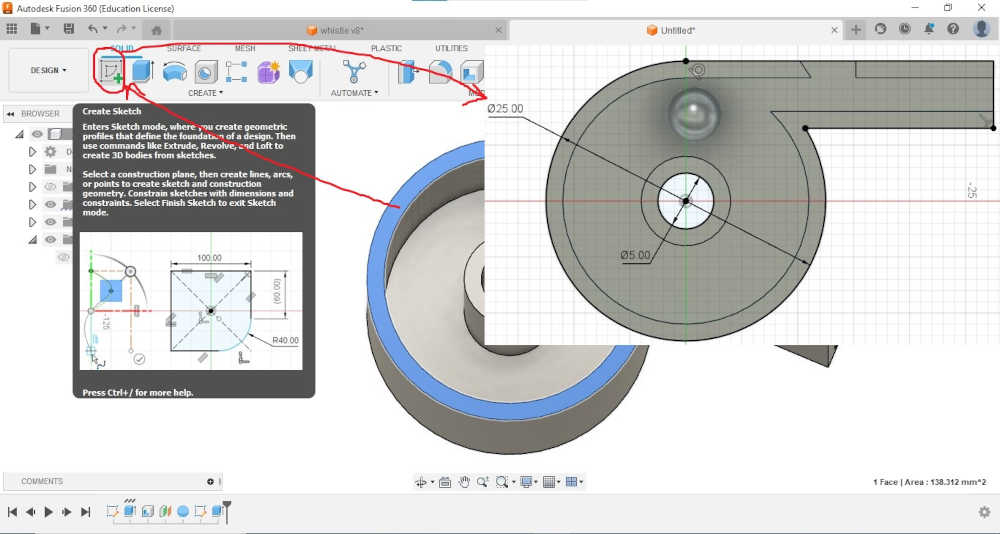
- Open fusion 360 create a new sketch and use the circle and line tools to obtain the drawing below.
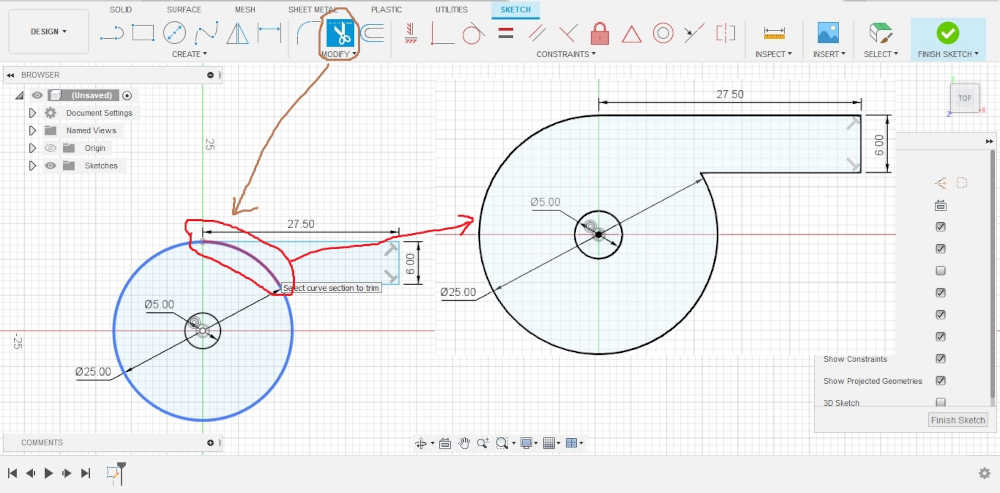
- Click on the Trim tool, go to the drawing and click on the part circled in red you should get the results shown below.
- Click on Extrude and enter the value of 18 mm
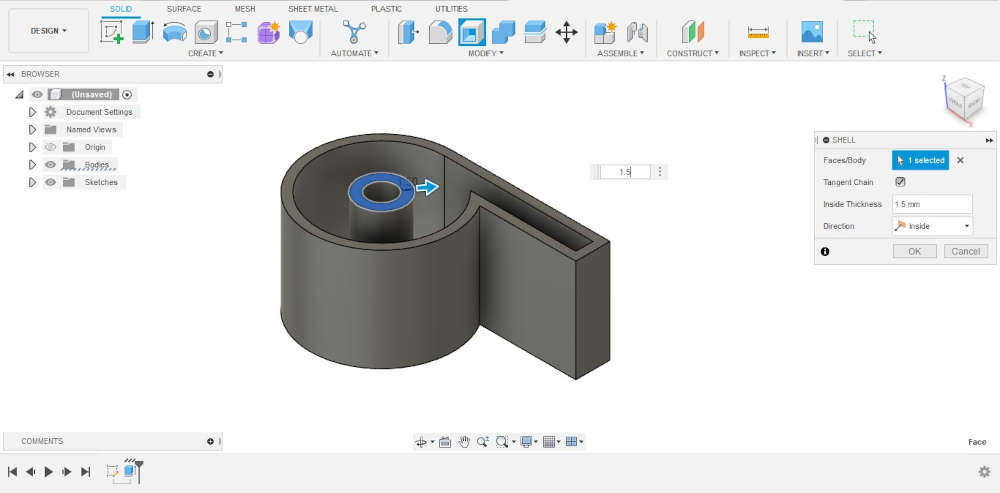
- Click on Shell and enter the value of 1.5 mm
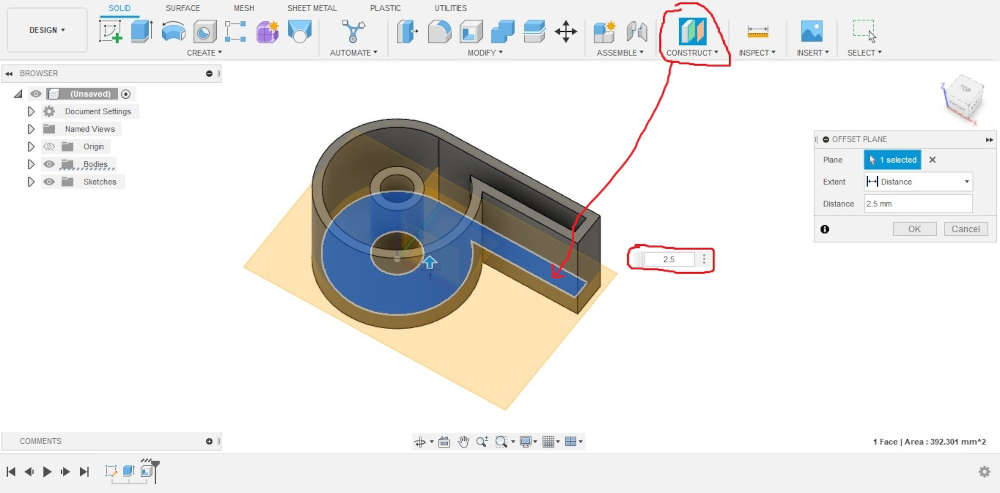
- Create a new plane with the offset plane tool with a value of 2.5mm as shown below
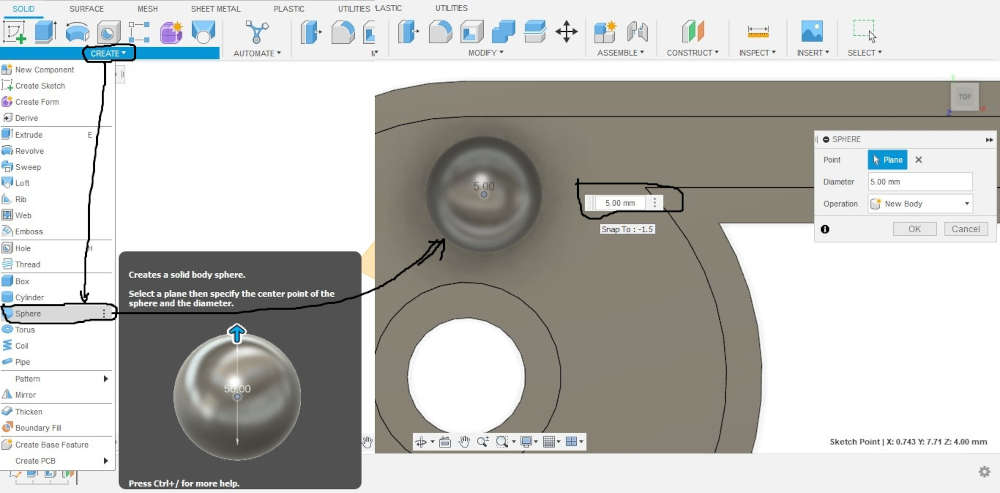
- Select the plane we created above go to the create tab and click on sphere and create the sphere with a diameter of 5 mm as shown below
- Select the plan shown below, click on create sketch and draw the sketch with the dimensions shown below
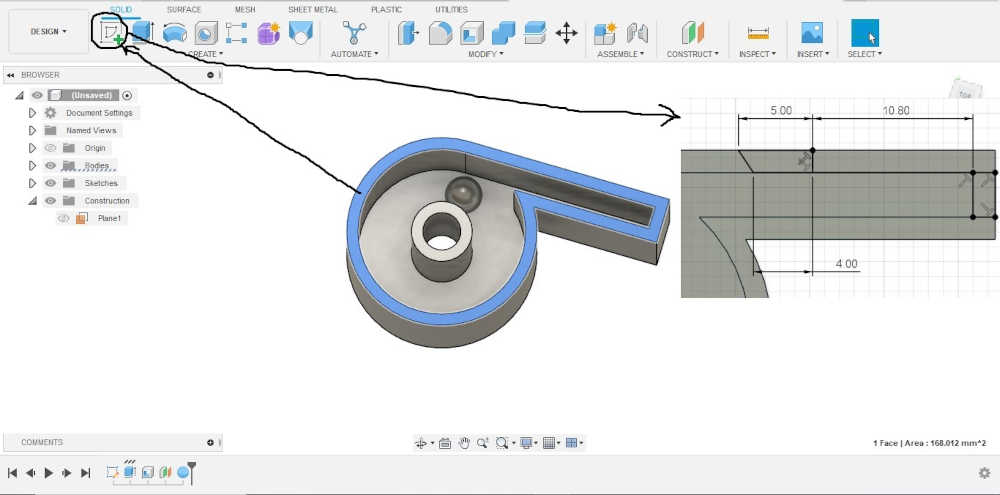
- Click on “Extrude” and enter the value -16.5

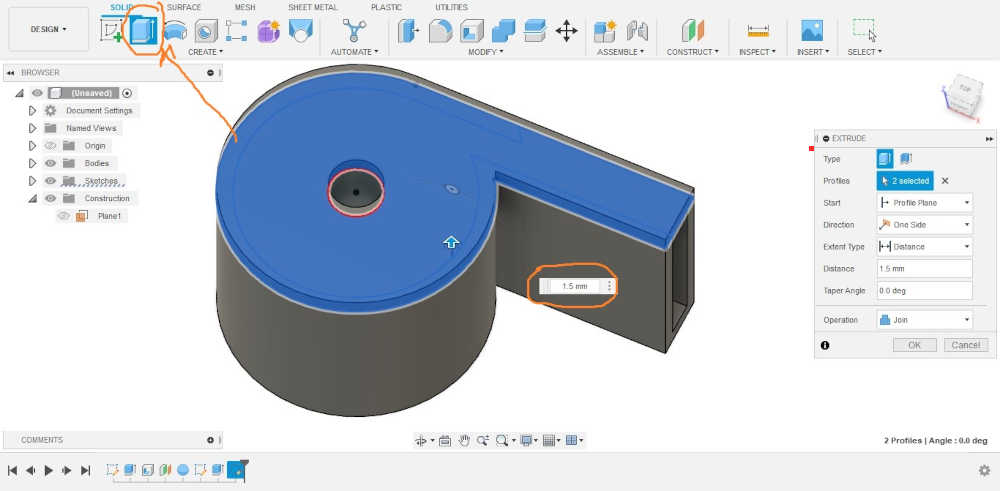
- Select the plan below, click on create sketch and draw the sketch below
- Click on “Extrude” and enter the value 1.5
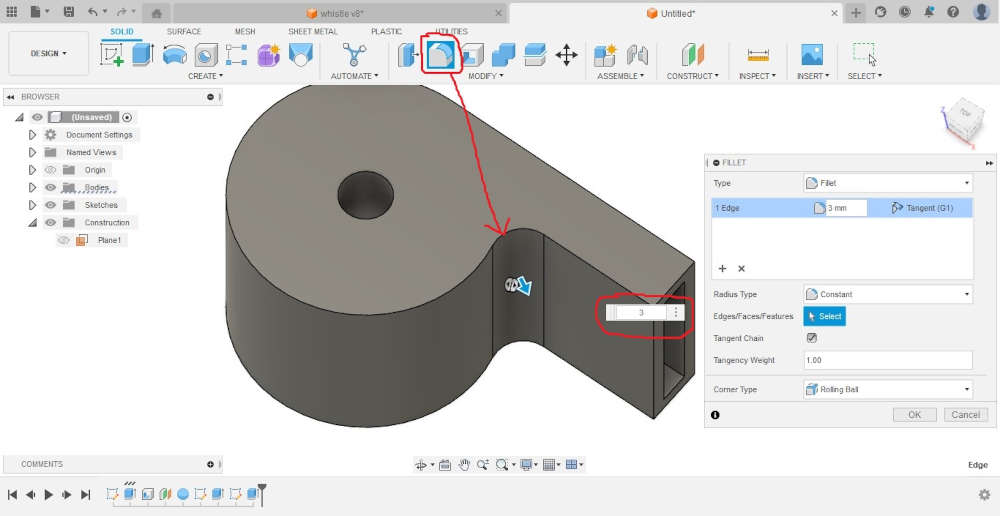
- Click on fillet and enter the value 3
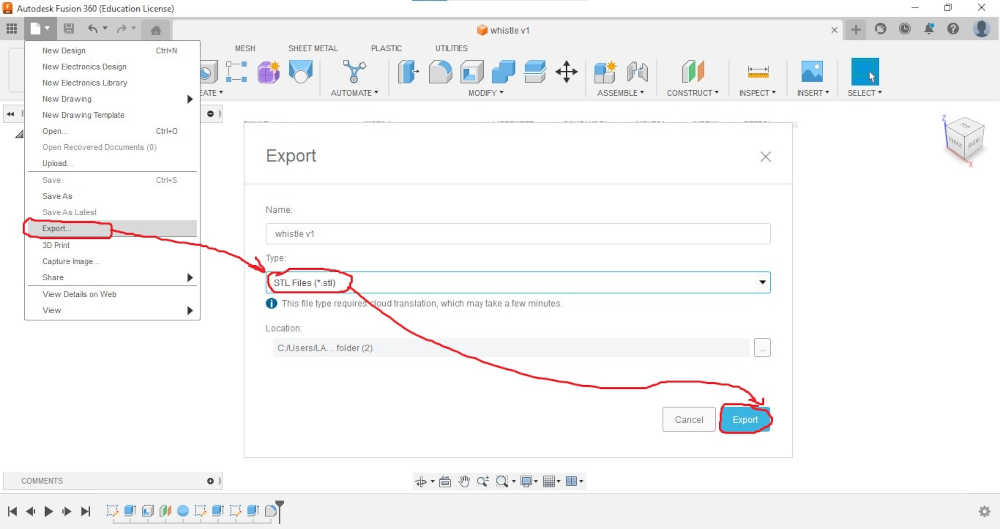
- click on Export…, choose as file type STL Files (*.stl) and click on Export
Generation of the 3D printing file (G-code)
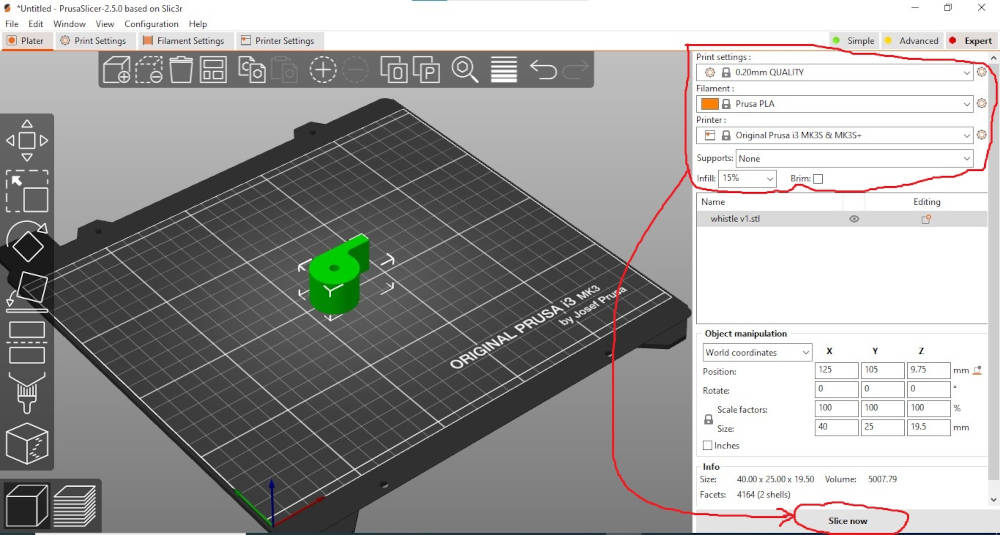
Once the 3d design is finished we will move to the generation of the print file (G-code) for our 3D Printer. to do this we use PrusaSlicer.
- Open the STL file with PrusaSlicer, for the parameterization we used the values circled in red below. Once the parameters are filled click on Slice now .
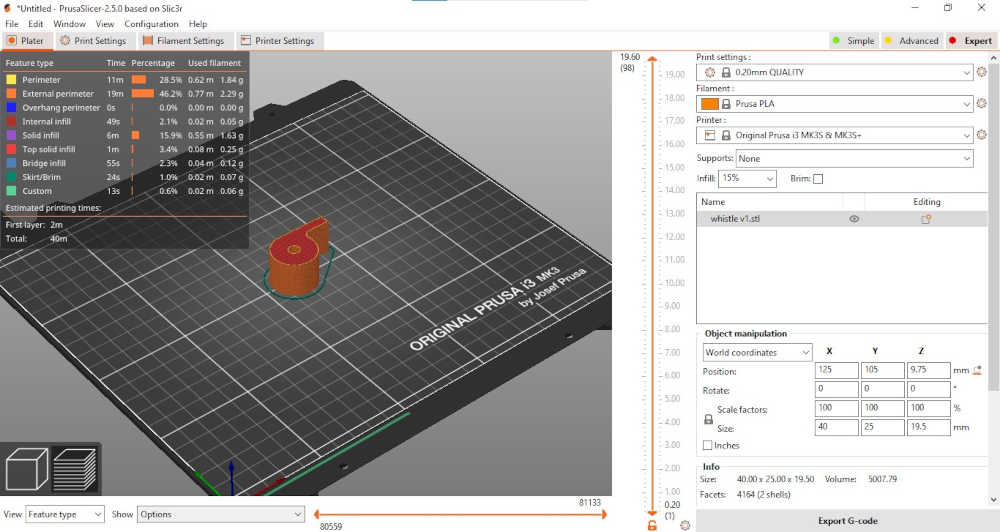
- Click on “Export G-code” and save the file on the printer’s SD card
3D printing
- Turn on the 3D printer, insert the SD card and turn the white knob to select the file to be printed as shown below and click once on the knob to start printing.

- Once the print head and plate have been heated, the 3D printer calibrates the Z axis before starting to print.
hero video 😊😊😊

3D scanning and 3D printing
3D scanning
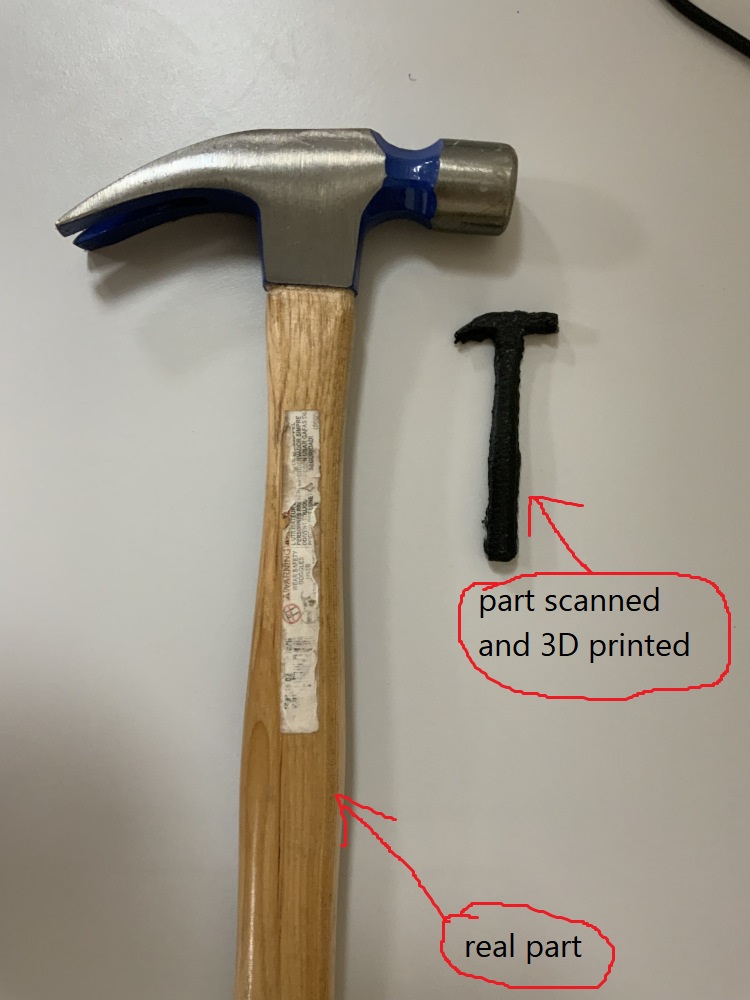
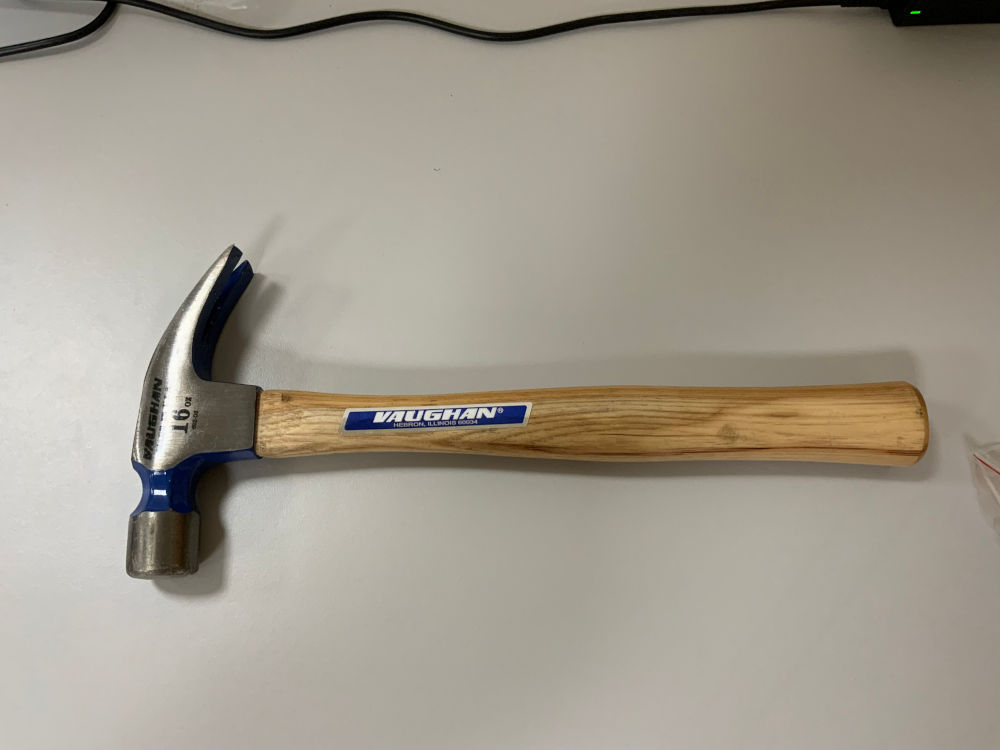
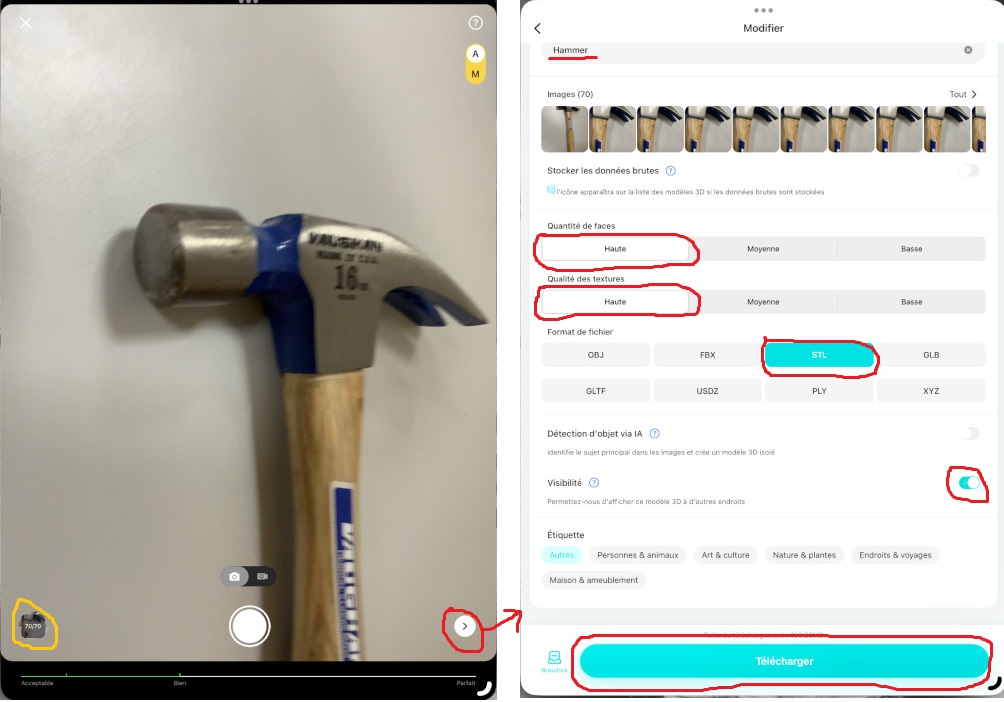
For 3D scanning, we chose to use the KIRI Engine application. As the part to be scanned we have chosen a hammer as shown below.
The 3D scanning procedure was as follows:
- Open the application click on the
+button circled in red, a window will open click ontake photosas shown below
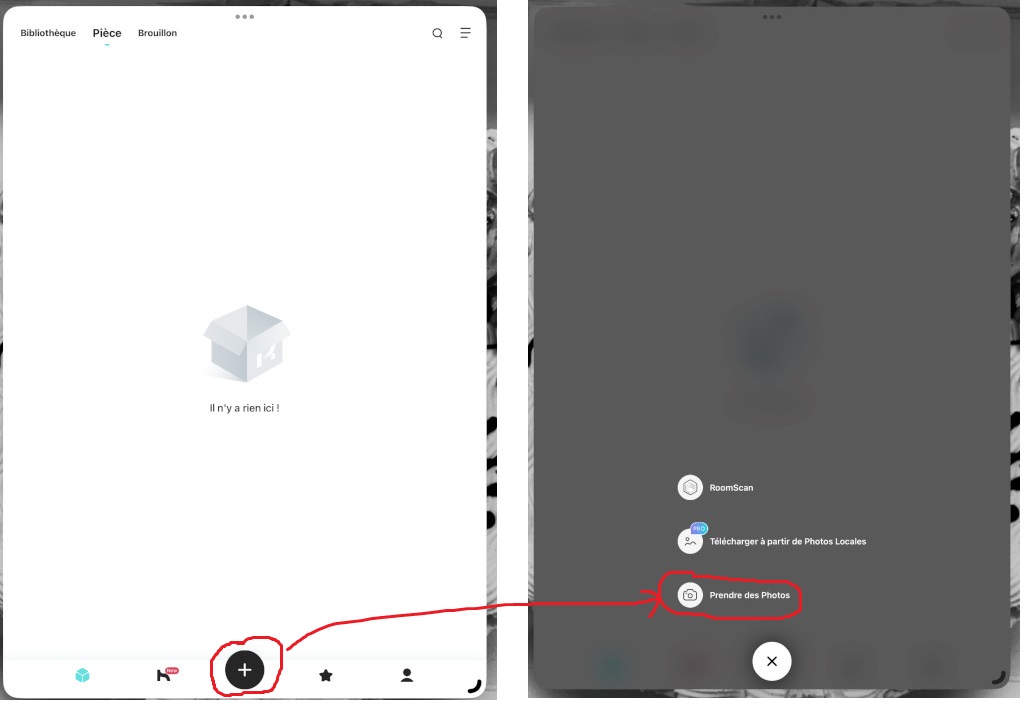
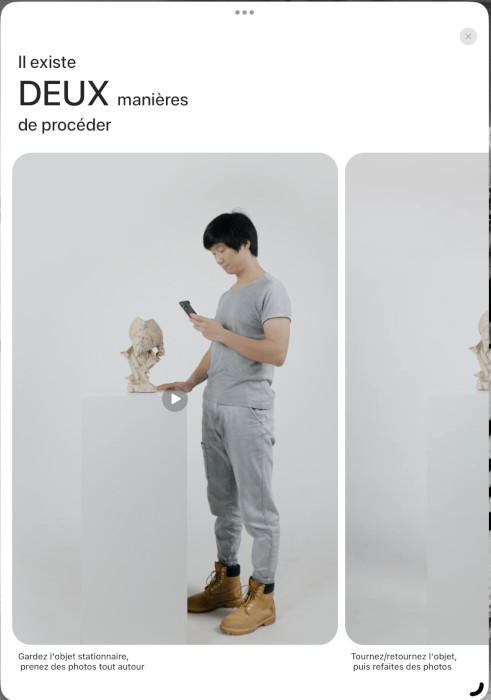
- As you can see from the image below, there are two photo-taking modes for 3D scanning:
keep the object stationary and take photos all around it,or turn the object over and take photos.
- To make our scan we chose the first method listed above. We took 70 photos of our hammer on different angles, once finished click on the arrow circled in red as shown below. a window will open choose the parameters as shown below and press Download.
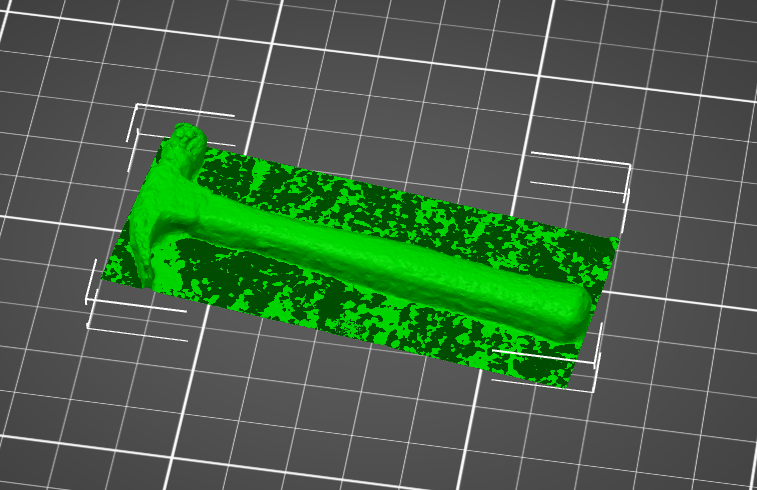
- Here are the results of our 3D scan
3D printing
For 3D printing, we used PrusaSlicer, as our file is already in STL. For the printing procedure, please refer to the documentation at the top of the page.
hero shots 😊😊😊