WEEK 9. Output devices
Group Assignment
-
Measure the power consumption of an output device.
-
Document your work on the group work page and reflect on your individual page what you learned.
link to our group assignment.
** individual assignment: **
  add an output device to a microcontroller board you've designed,
     and program it to do something
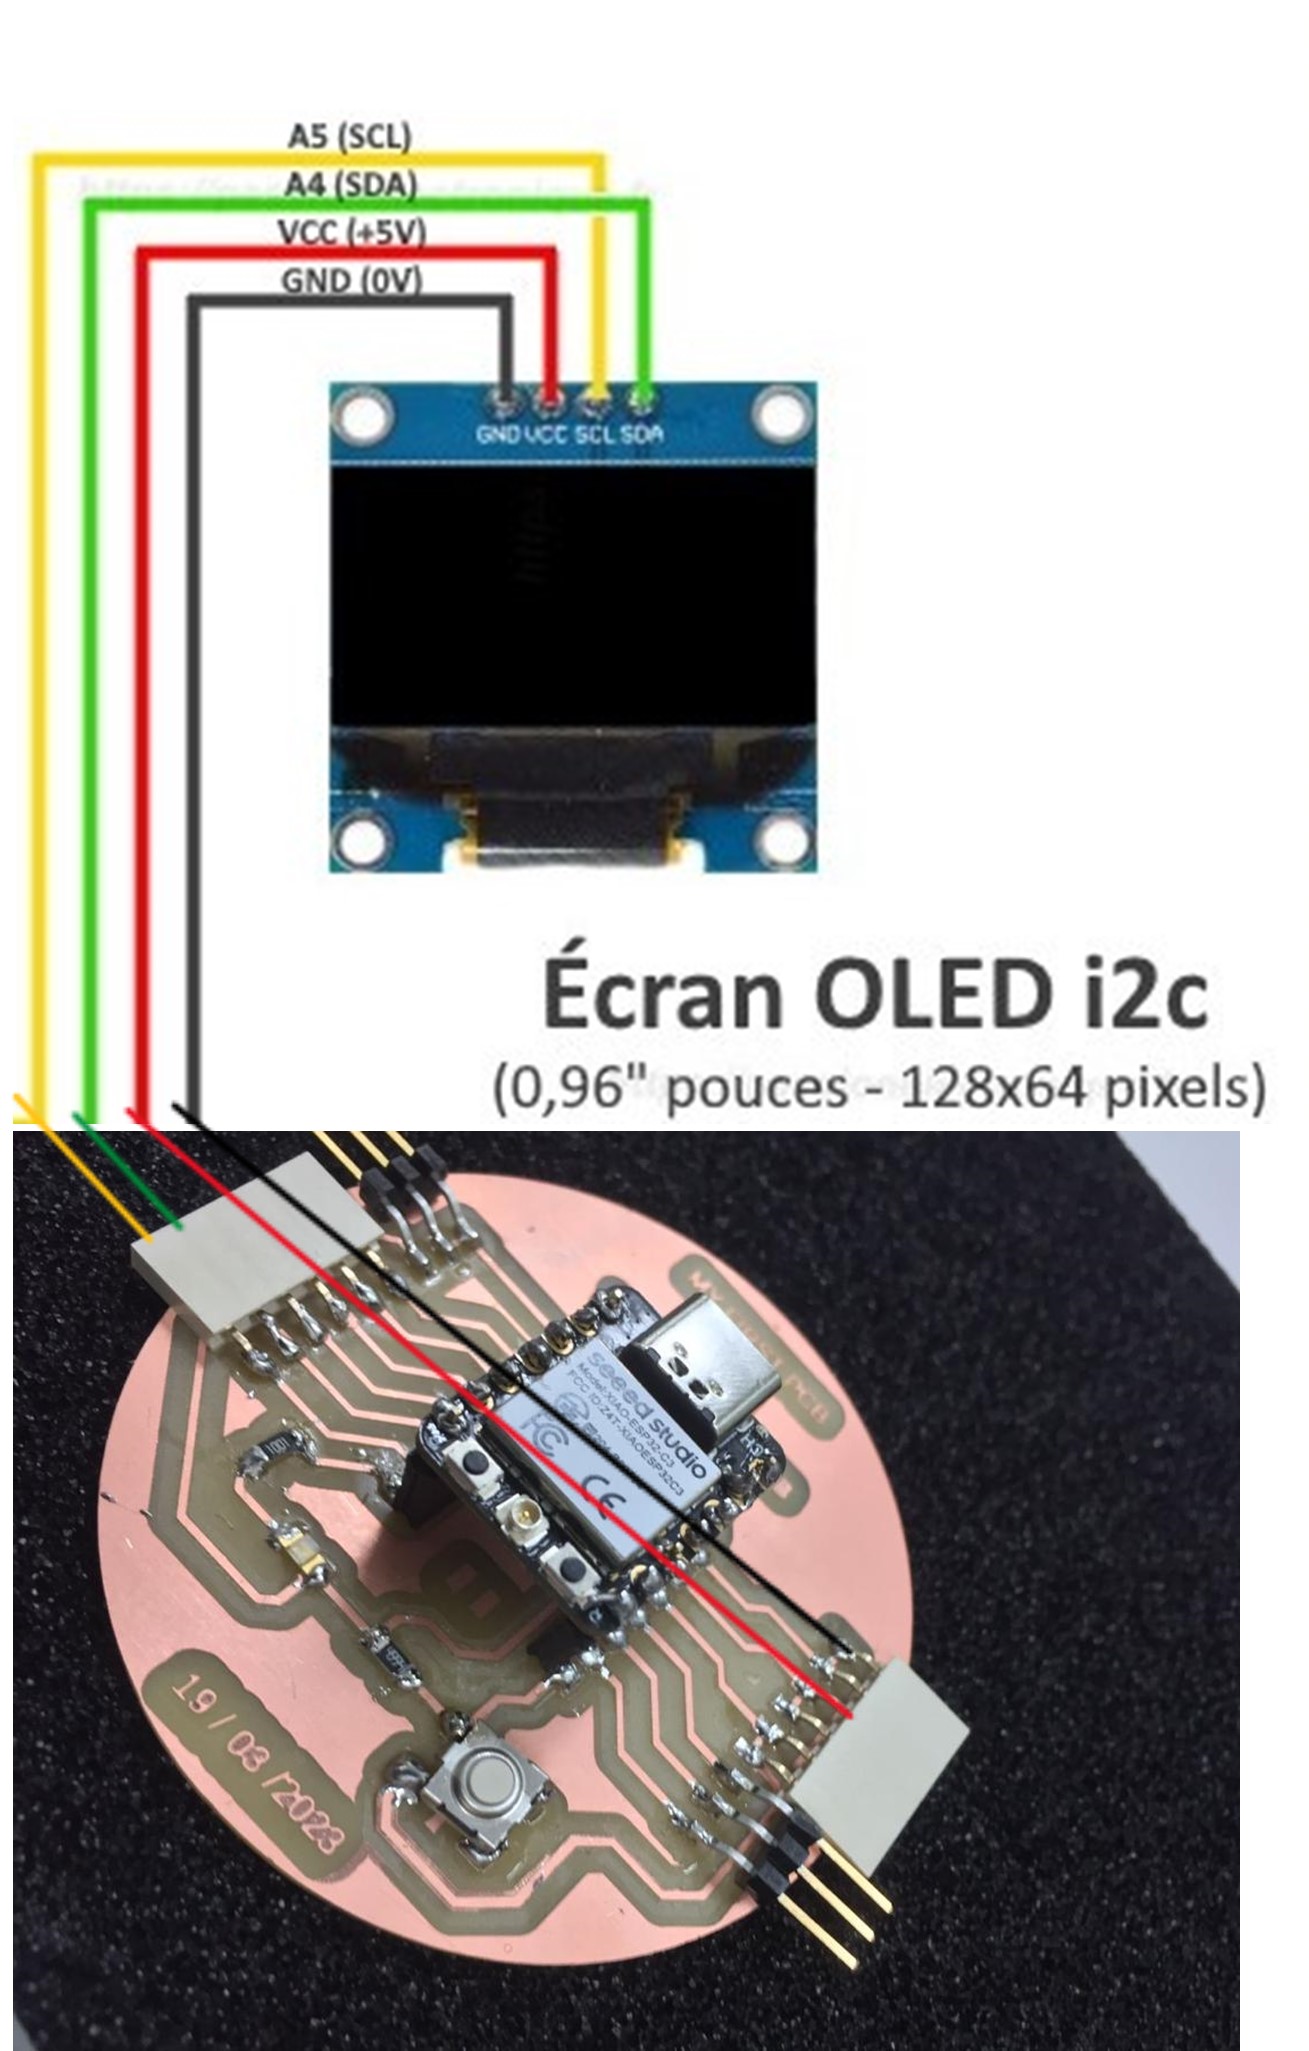
For the OUTPUT we will use an Oled screen to display text..
Oled
The OLED display module with I2C interface features a larger display area for those times when you need to read longer data on a screen. It’s easy to connect and uses just two wires.
Features: Resolution: 128 x 32 IIC interface
IC driver: SSD1306 Size: 1.3-inch OLED Screen color: White/Blue GND: Power ground VCC: Power supply + (DC 3.3 ~ 5 V) SCL: Clock line SDA : Data line
OLED lcd display 1.3″ i2c interface 128×64 3-5V for the XiAO esp 32 c3
I2C!
what learned from I2C !
An I2C (Inter-Integrated Circuit) is a computer bus. Designed by Philips for home automation and home electronics applications, it makes it easy to connect a microprocessor and various circuits, reducing the number of lines required to just two: SDA (Serial DAta)
## Oled wiring

–code– -
You must download the U8g2lib.h file that is the library we will use in the code. get the library at this link
#include <U8g2lib.h> // In U8g2 library
// Seeed Expansion board uses SSD1306
U8G2_SSD1306_128X64_NONAME_F_HW_I2C u8g2(U8G2_R0, /* reset= */ U8X8_PIN_NONE);
// My breadboard has an SH1106
//U8G2_SH1106_128X64_NONAME_F_HW_I2C u8g2(U8G2_R0, /* reset=*/ U8X8_PIN_NONE);
void setup(void) {
// Change #if 0 to #if 1 to print some stuff
// If you do, it will wait until you open the Serial Monitor
#if 0
Serial.begin(115200);
while (!Serial) {}
delay(100);
Serial.println("\nOLED u8g2lib test compiled on " __DATE__ " at " __TIME__);
#endif
u8g2.begin();
}
char printBuffer[30];
uint8_t passno;
void loop(void) {
snprintf(printBuffer, sizeof(printBuffer), " Pass %3d", ++passno);
u8g2.clearBuffer(); // clear the internal memory
u8g2.setFont(u8g2_font_ncenB08_tr); // choose a suitable font
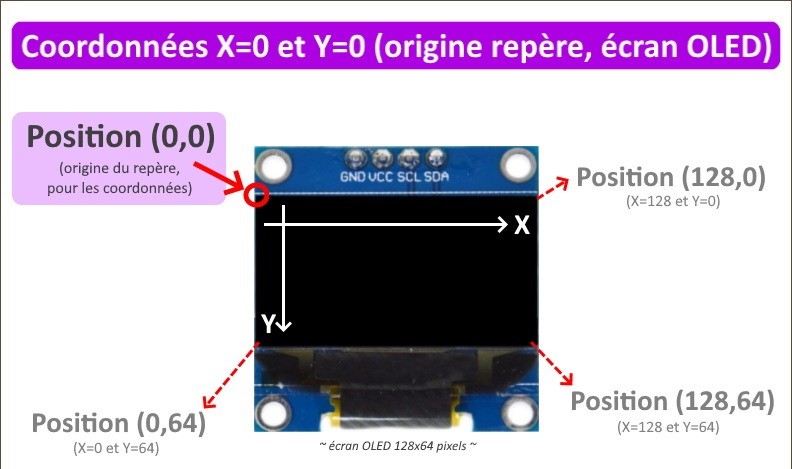
u8g2.drawStr(0, 10, "Hello Y'ellolab!");
u8g2.drawStr(0, 30, printBuffer);
u8g2.drawStr(0, 50, "Fab academy 2023");
u8g2.drawStr(0, 63, "amany kouassi");
u8g2.sendBuffer(); // transfer internal memory to the display
delay(1000);
}
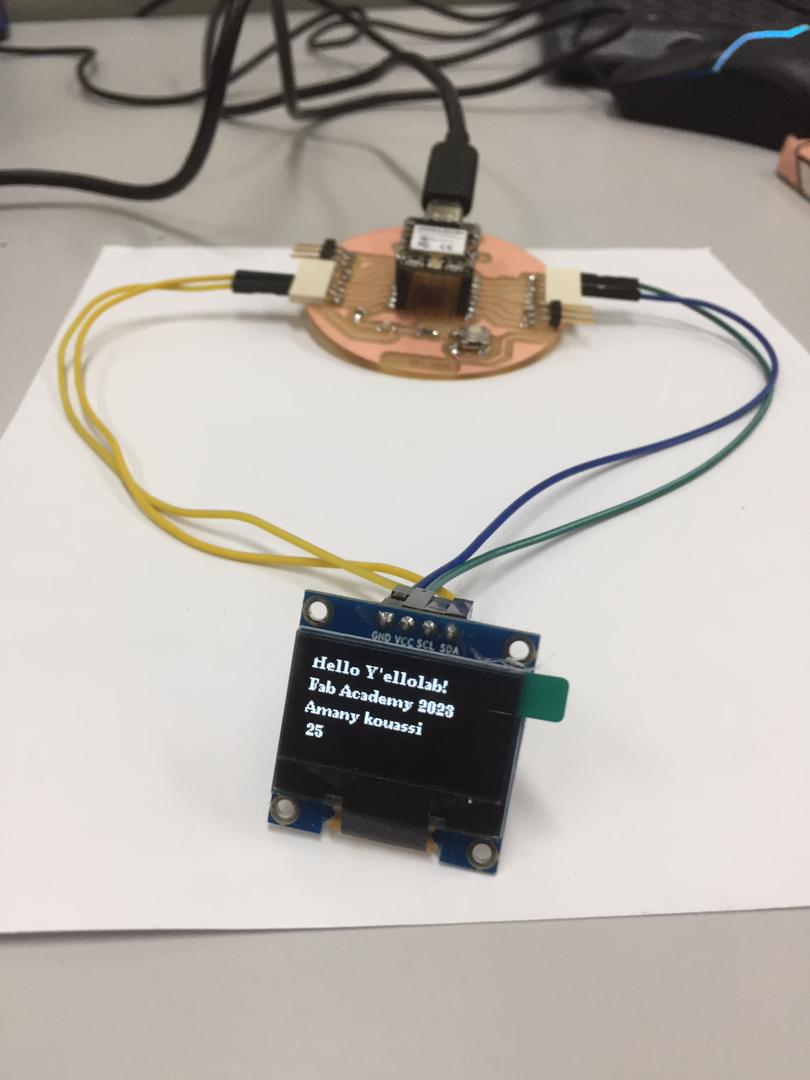
At the bottom of the page you can find link where you will find all about the above code and more code you can use according you. In my case I did modification in the code to Display on the Screen the text : HELLO Y’ELLOlAB ! FAB ACADEMY 2023 Amany jkouassi 25
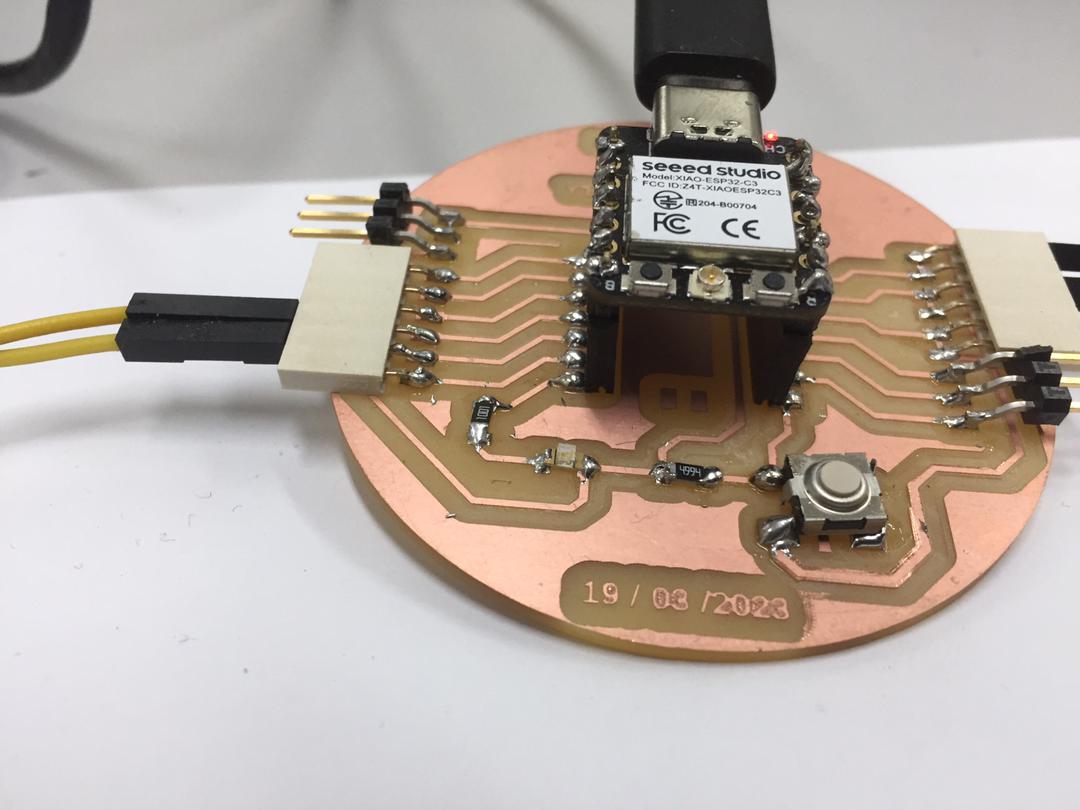
– Connecting the card –
Before upload code see in my electronic design week how I made my board for more information about how I program with my board.
The OLED (Organic Light-E;itting Diode) display is an alternatuve for LCD display. The OLED is suoer light, almoste paper-thin, flexible, and produce a brighter and crisper picture.
once the card is plugged into the Computer download the Program
In our group assignment we determine the power coonsumption using :
1) an oscilloscope; 2) a servo motor;+ 3) 3 cables of connections for the motro; 4) 2 cables of connections for oscilloscope;
we want determine the electrical consumption of the servo motor
Fisrt we check the device specifications: Look for the device’s specifications provided by the manufacturer. Check for details such as voltage, current, or power ratings. These specifications will give you an idea of the power requirements of the device.
And then we seen the variation of the output device electrical consumption.
Understand that the consumption depending on the load. So in our case we have specific result that can also be influenced by how we make the load work.
See all we made in our group assignment at the link provide at the top of this page.
In this Assignment we learned a pile about how to program an OLED display.
For more information to help you program the seed studio Xiao RP2040 use this link
– Links of inspiration
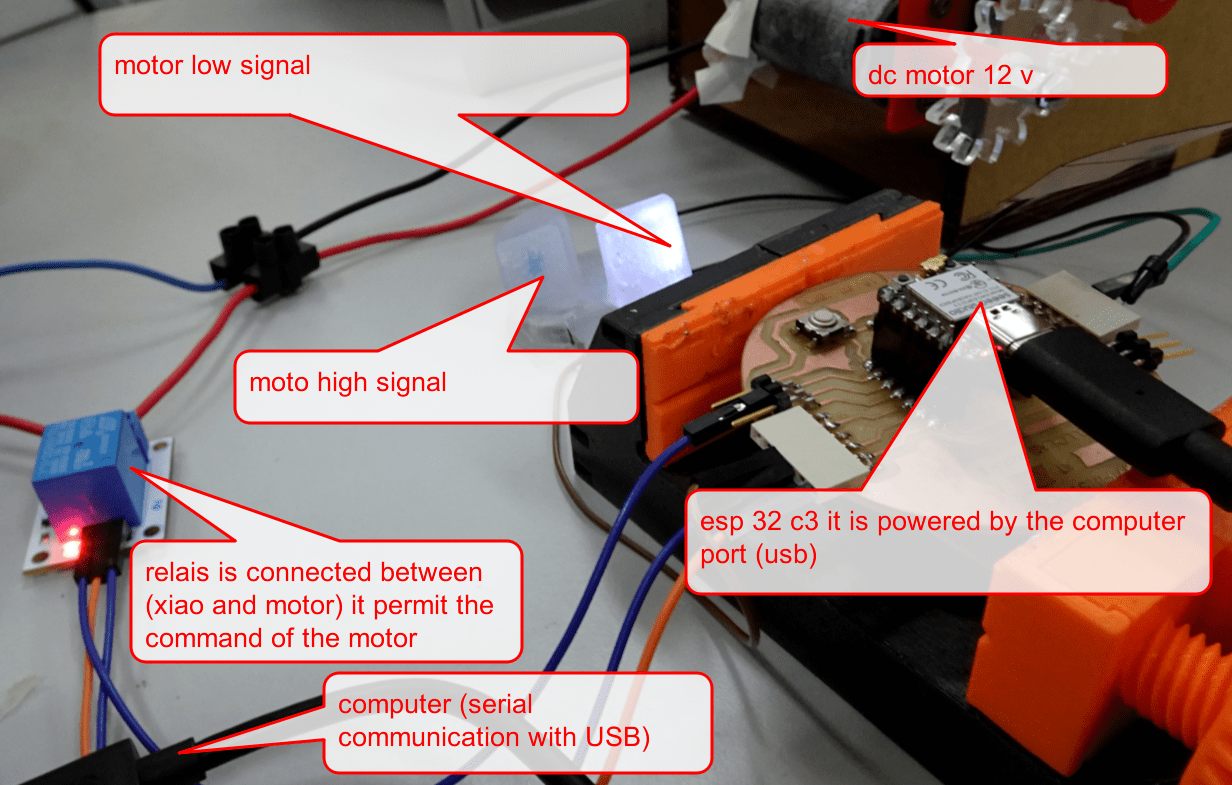
motor control in OUTPUT
Objectif :
           I'm working on a conveyor belt for industrial automation,
           so while I'm waiting to finish the Fab Academy,
           I'm going to take advantage of this week's opportunity to drive
           the motor with my electronic board and the xiao c3.
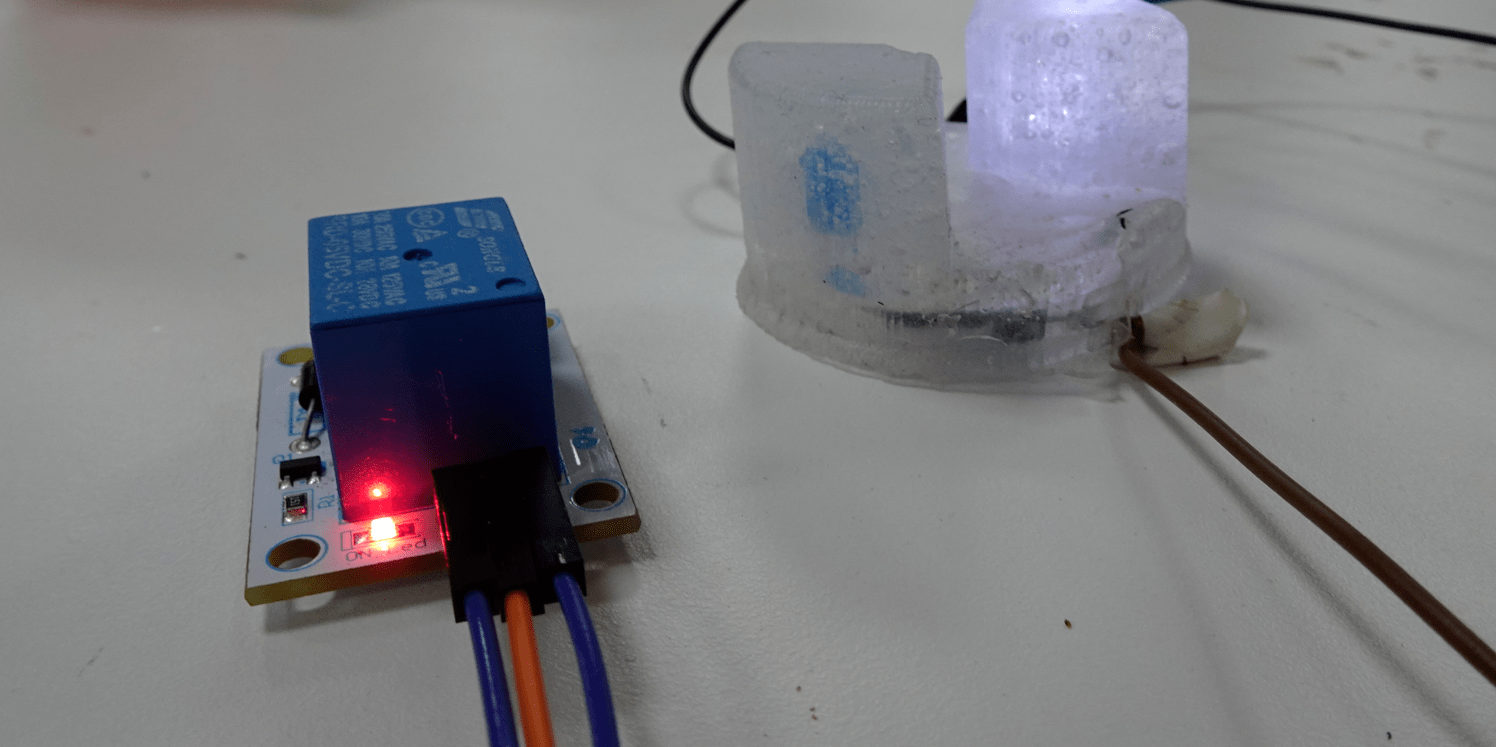
in this case i will contol motor and make a signal with LED then write those action on Serial baord on the computer
materials
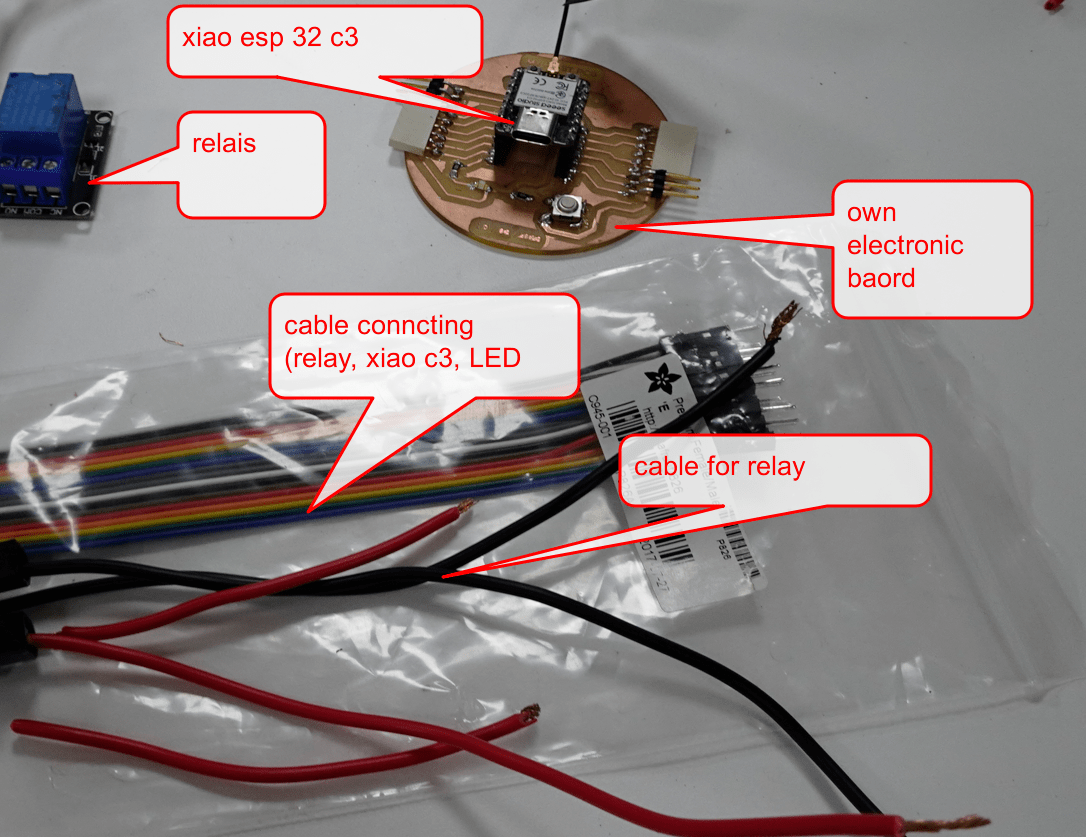
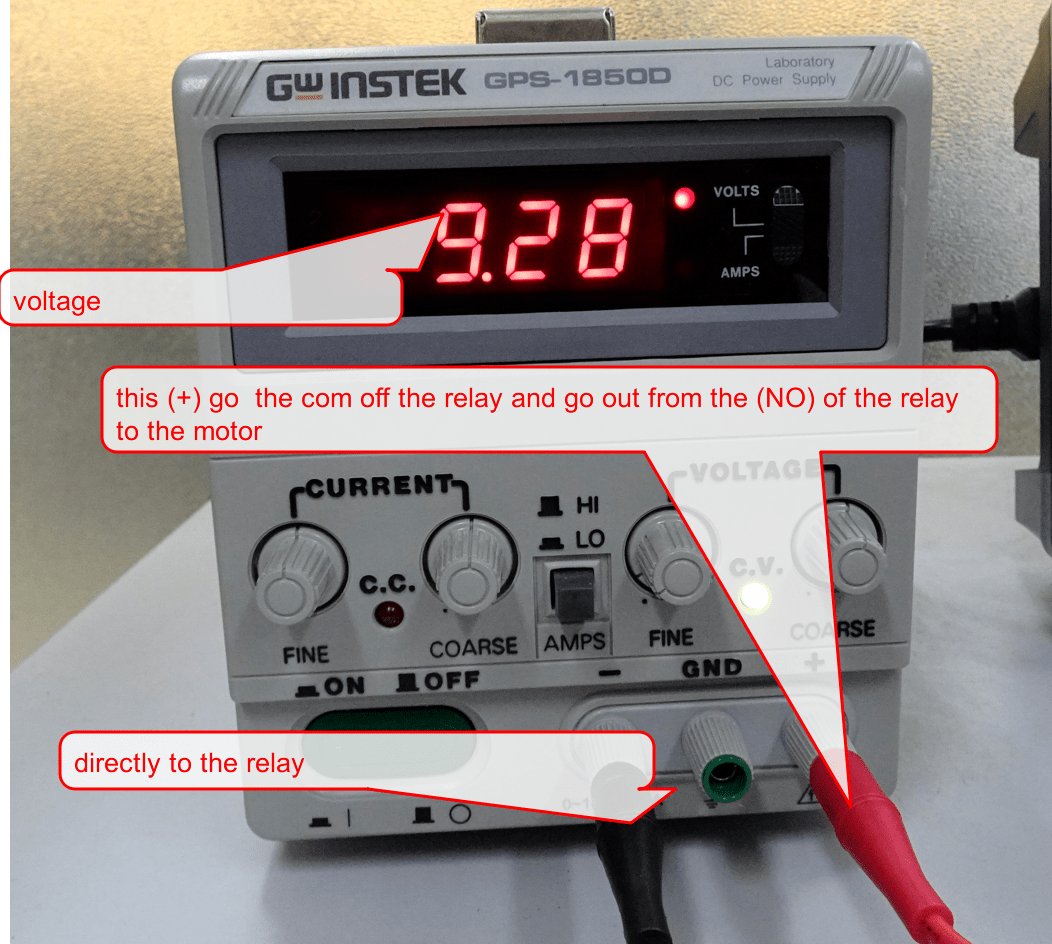
Power
i need 12 v dc for control the motor
schematic
Code
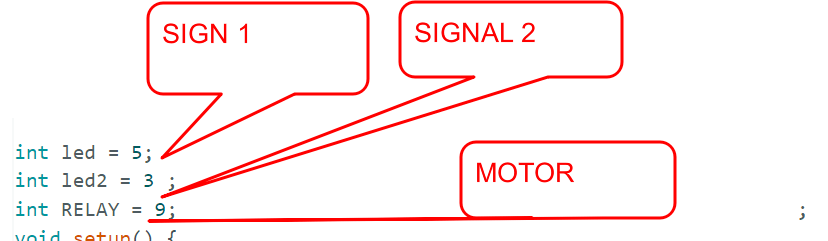
int led = 5;
int led2 = 3 ;
int RELAY = 9; ;
void setup() {
Serial.begin(9600);
pinMode(led, OUTPUT);
pinMode(led2, OUTPUT);
pinMode(RELAY, OUTPUT);
}
void loop() {
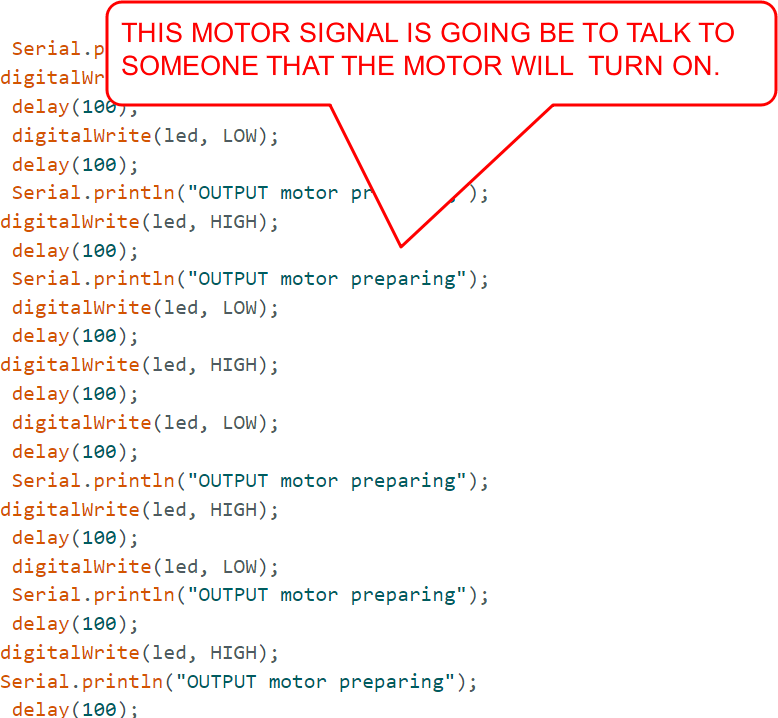
digitalWrite(led, HIGH);
delay(1000);
digitalWrite(led, LOW);
delay(1000);
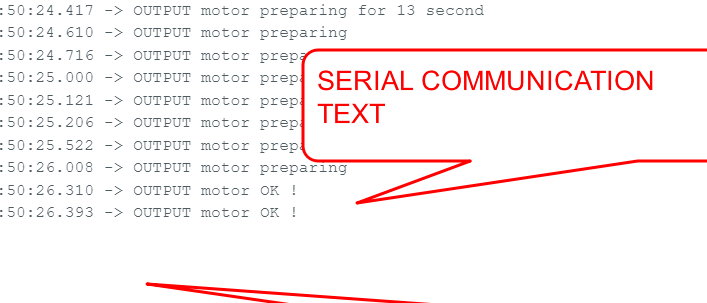
Serial.println("OUTPUT motor preparing for 13 second");
digitalWrite(led, HIGH);
delay(100);
digitalWrite(led, LOW);
delay(100);
Serial.println("OUTPUT motor preparing");
digitalWrite(led, HIGH);
delay(100);
Serial.println("OUTPUT motor preparing");
digitalWrite(led, LOW);
delay(100);
digitalWrite(led, HIGH);
delay(100);
digitalWrite(led, LOW);
delay(100);
Serial.println("OUTPUT motor preparing");
digitalWrite(led, HIGH);
delay(100);
digitalWrite(led, LOW);
Serial.println("OUTPUT motor preparing");
delay(100);
digitalWrite(led, HIGH);
Serial.println("OUTPUT motor preparing");
delay(100);
digitalWrite(led, LOW);
delay(100);
digitalWrite(led, HIGH);
delay(100);
digitalWrite(led, LOW);
Serial.println("OUTPUT motor preparing");
delay(100);
delay(100);
digitalWrite(led, LOW);
delay(100);
digitalWrite(led, HIGH);
delay(100);
digitalWrite(led, LOW);
delay(100);
Serial.println("OUTPUT motor preparing");
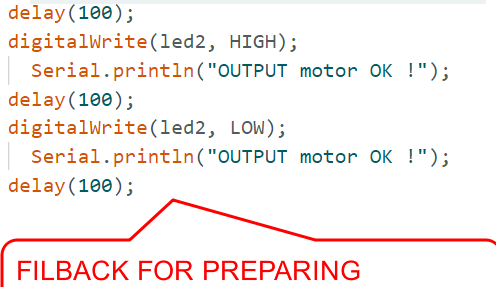
digitalWrite(led2, HIGH);
delay(100);
digitalWrite(led2, LOW);
delay(100);
digitalWrite(led2, HIGH);
delay(100);
digitalWrite(led2, LOW);
Serial.println("OUTPUT motor OK !");
delay(100);
digitalWrite(led2, HIGH);
Serial.println("OUTPUT motor OK !");
delay(100);
digitalWrite(led2, LOW);
Serial.println("OUTPUT motor OK !");
delay(100);
Serial.println("OUTPUT motor on FOR 10 SECOND ") ;
digitalWrite(led2, HIGH);
digitalWrite(RELAY, HIGH);
Serial.println("OUTPUT motor on FOR 10 SECOND ") ;
delay(10000);
digitalWrite(led2, LOW);
digitalWrite(RELAY, LOW);
Serial.println(" OUTPUT motor low ") ;
digitalWrite(led, HIGH);
delay(4000);
}
Code Explanqtion
serial communication
the rate
