WEEK 2. computer aided design
2D SOFTWARE.
 - inkscape
 - gimp
-
model (raster, vector, 2D, 3D, render, animate, simulate, …) a possible final project
-
compress your images and videos, and post a description with your design files on your class page
1. 2D design software
GIMP software
To make raster graphics, we used the GIMP software.
GIMP is a free and open-source raster graphics editor used for image retouching and editing, free-form drawing, converting between different image formats, and more specialized tasks. The installation is very simple, just download the .exe file of the Windows installer from GIMP and run the installer.
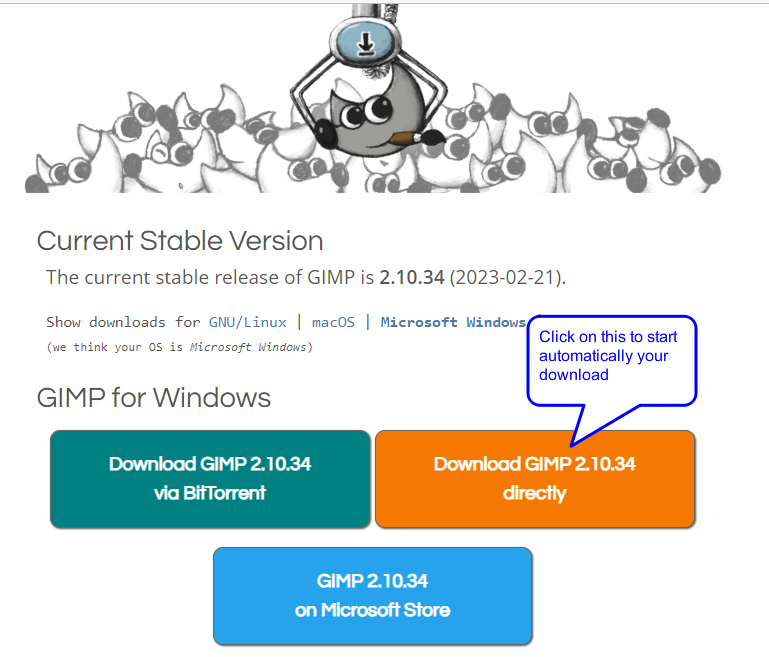
Type “download gimp” in your url bar and choose the first link available. Then download your sftware as shown in the picture below.
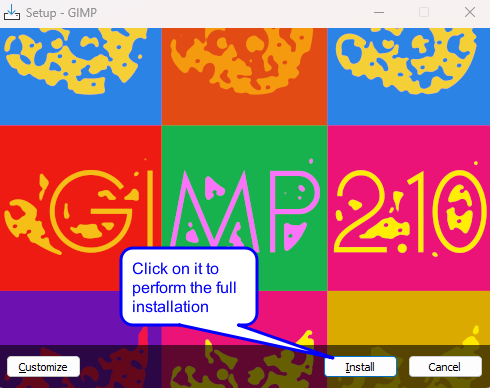
To install the software run the setup file then follow the different guides to install it.
If your installation is done then launch gimp now.
Create new file by going to File > new 
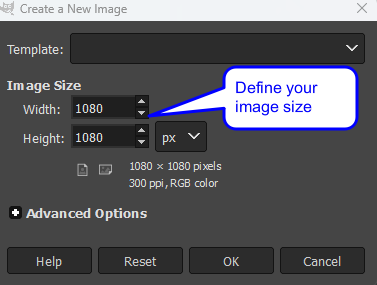
Define your image size and click ok.
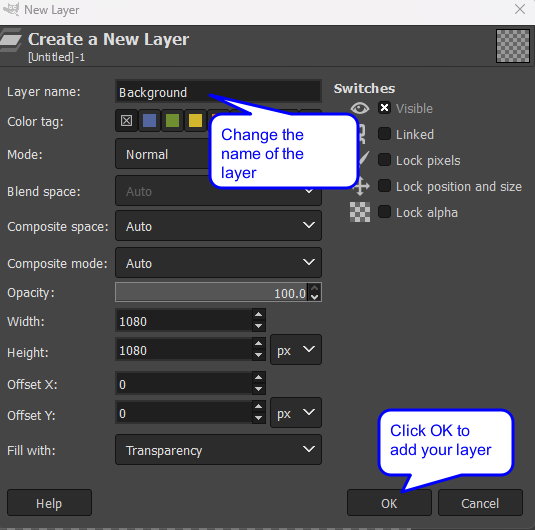
Now we almost done all prerequisites before start our design. Actually, a blank layer is displayed on your workspace therefore you have to delete it. and add new transparency layer. you can name it as the layer you delete.
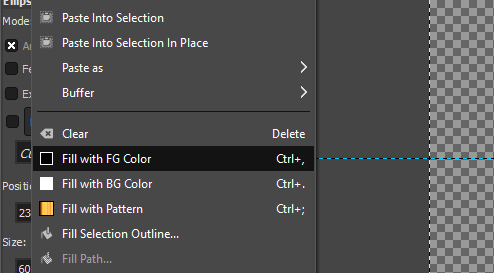
When you deleted the blank layer then we can start our design. To begin add new layer as shown on the pictures below :

We will draw a filled circle on our new layer to do that follow the instructions below :
- Before drawing, we will add guides which will allow us to find more easily the center of our layer. go to image > guides > and guidelines (percent) something like this, as shown below :
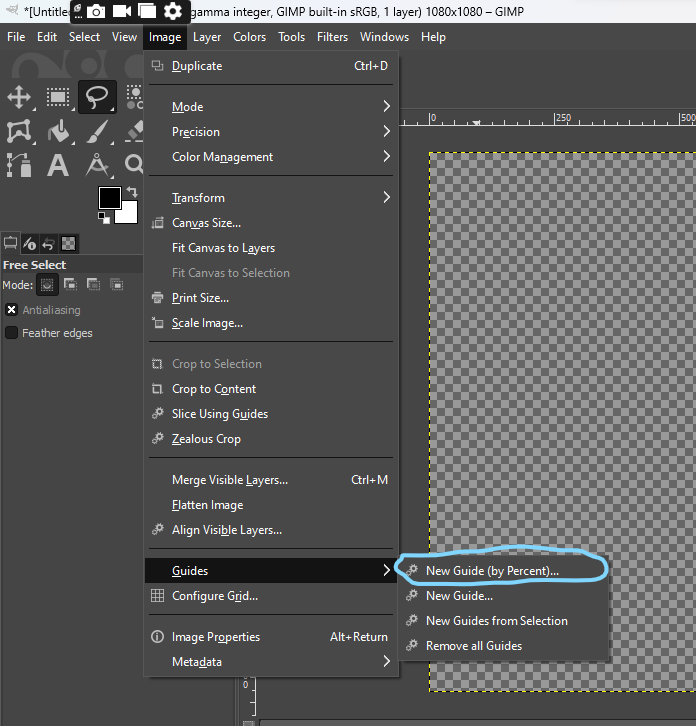
We add horizontal and vertical lines to 50 percent of the layer for there position.
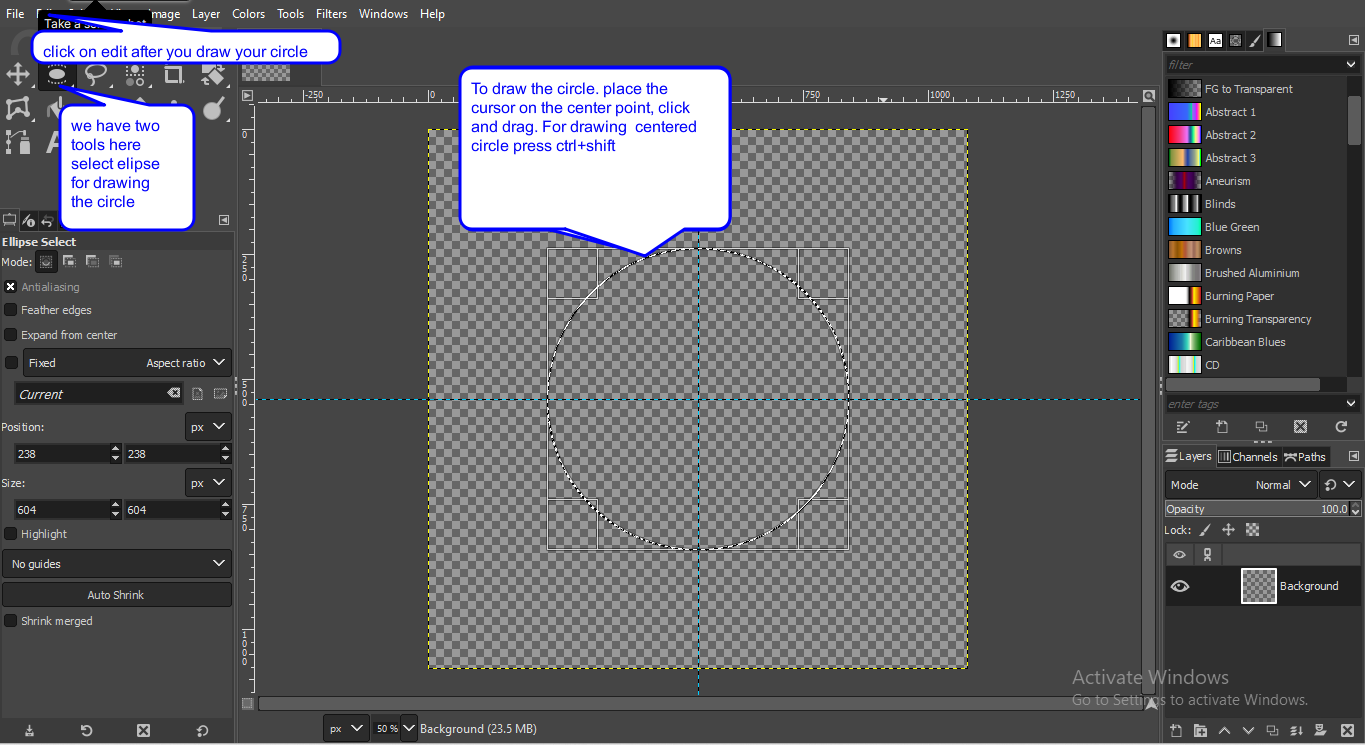
- Now we draw circle
Remove the selection by going to select tab then click none.
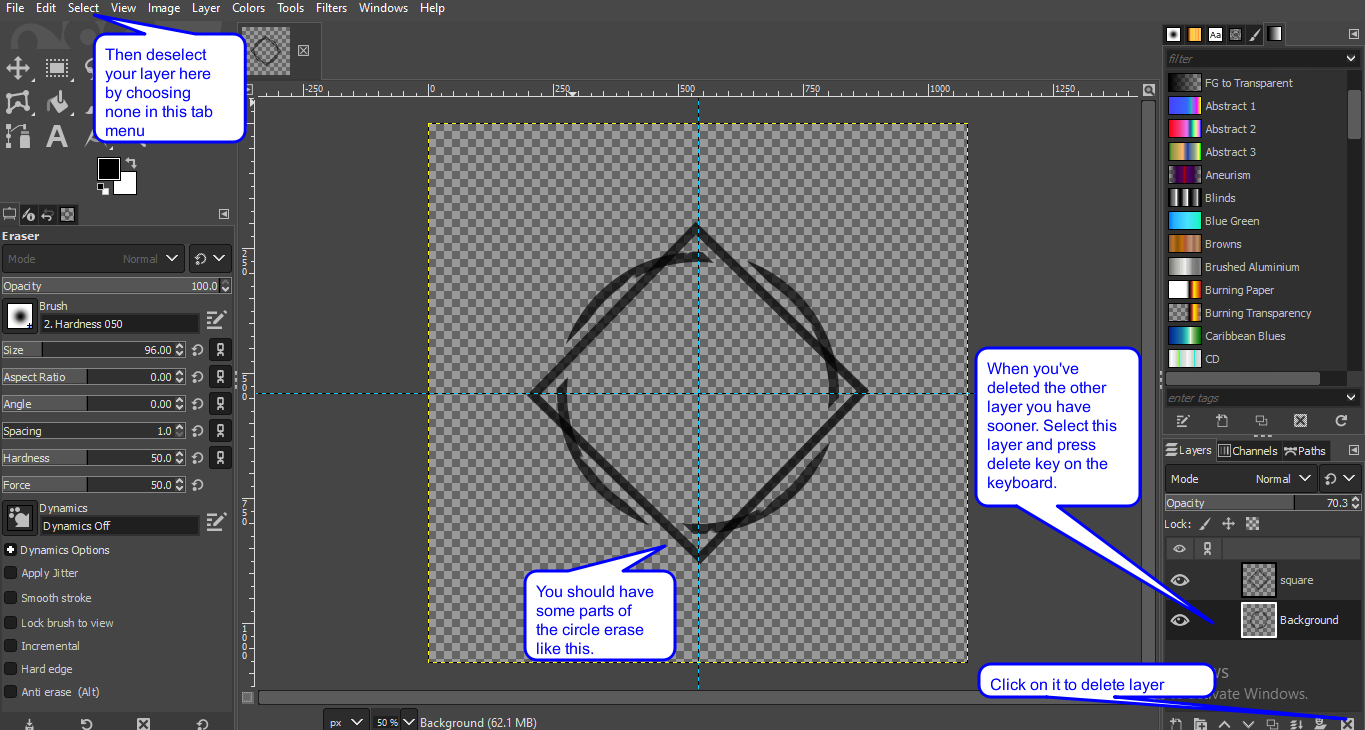
Draw another circle on the first one without fill it in then remove the space you want on the first circle by pressing delete. then remove select. You should obtain that :

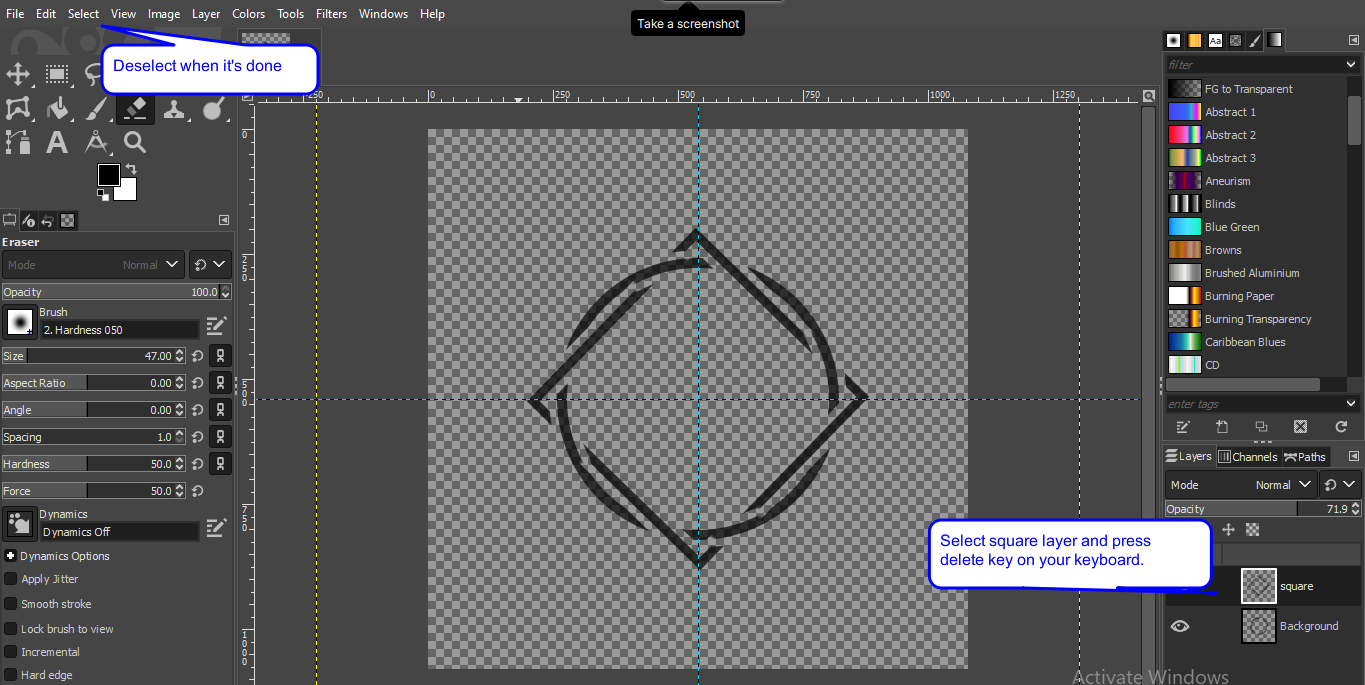
- Add another transparency layer. Do the same thing to draw a centered square as the circle we obtained.
You should obtain that :

We will proceed to the main parts of our logo design.
But to obtain what you see it’s not all yet.
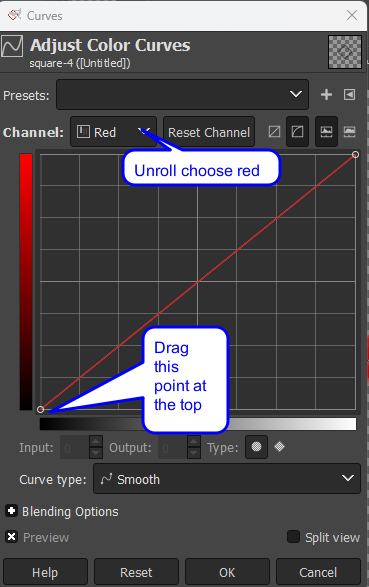
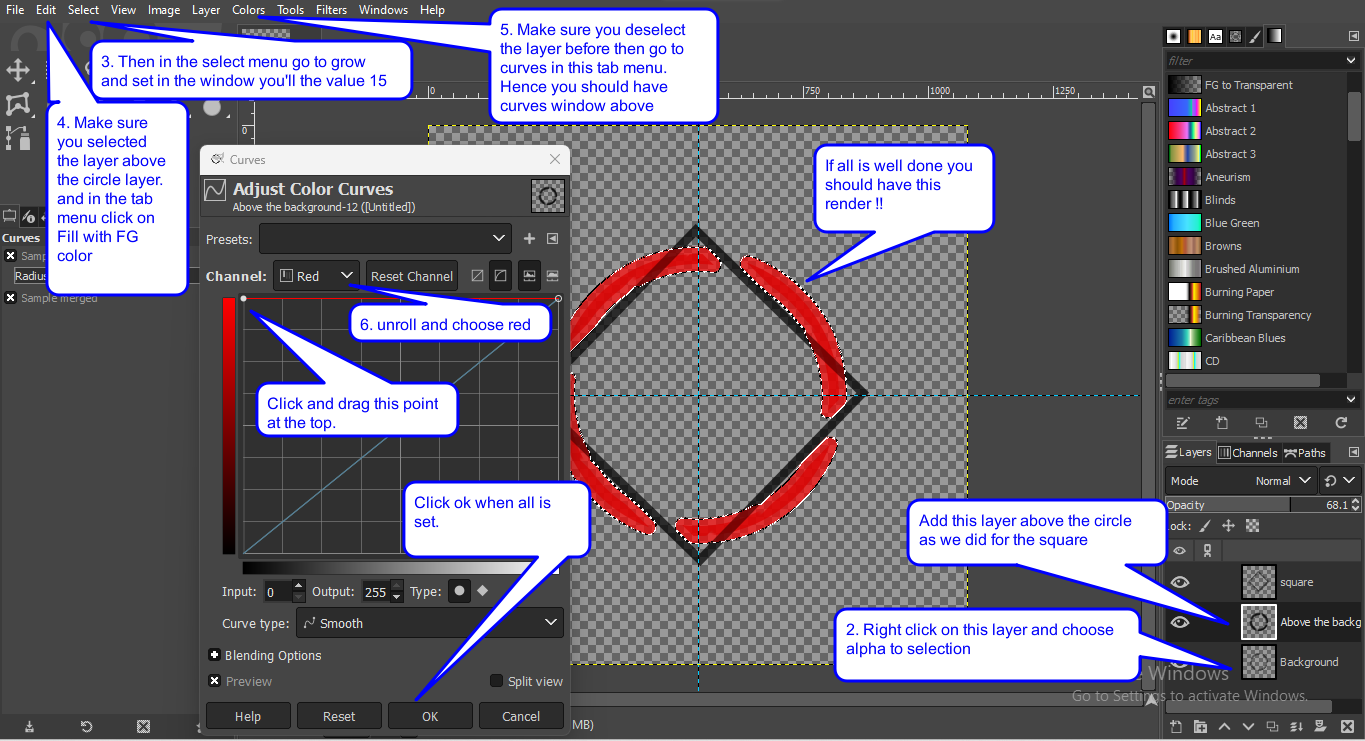
the 7 step is on the curves setting window you will set red curve color.
Next
![]()
Now
continue as following
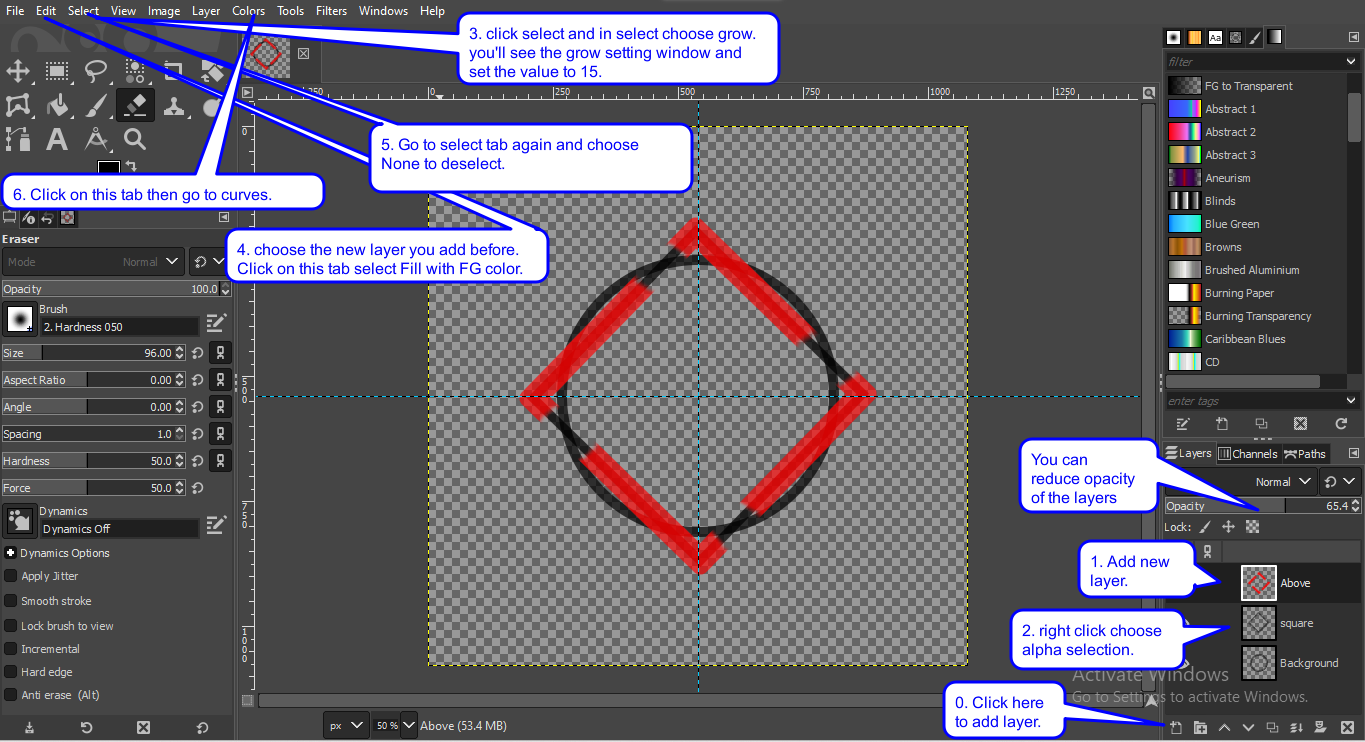
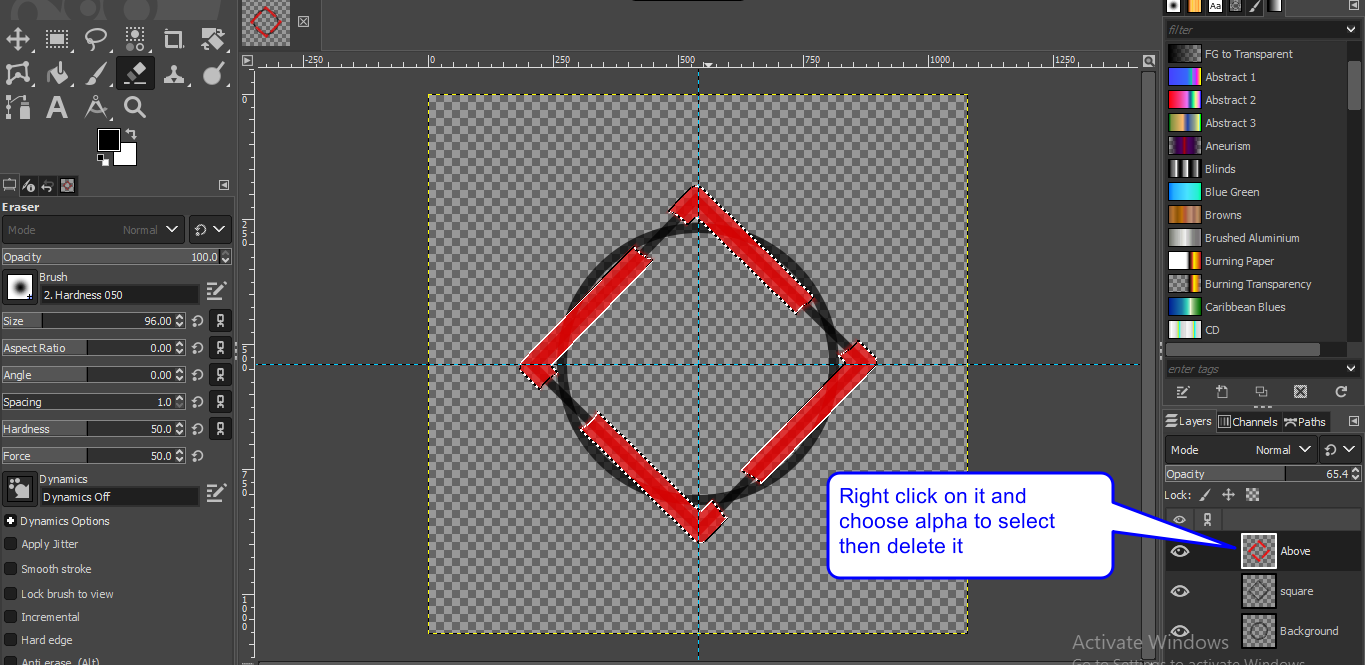
Now we have obtained our first result we will do the same thing for the cricle as shown below :
continue as following :
Note
The **grow** tool allow to set the width of the selection occuring when you selct alpha to selection on each layer. you can reduce the space between the layer of each figure by reducing the value of the in the grow setting.
Write a text you want in your logo by using text highlighted as following : 
Final result :
![]()
INSCAPE software
To make vector graphics, we used the Inkcsape software.
Inkcsape is a free and open-source vector graphics editor. This software can be used to create or modify vector graphics such as graphics, logos, business cards, book covers, icons…
To install, simply download the Windows installer .msi file from Inkscape and run the installer.
objective:
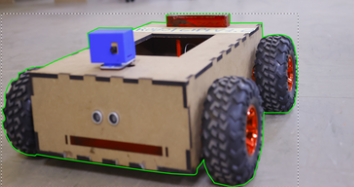
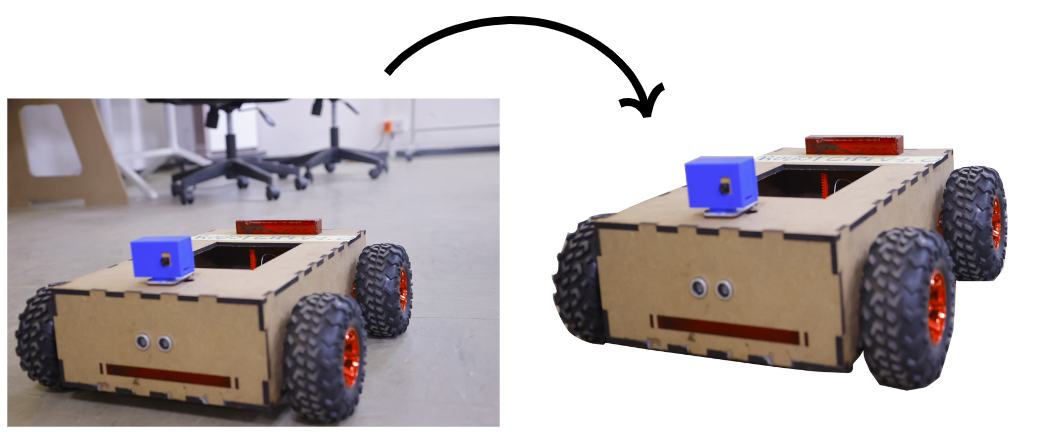
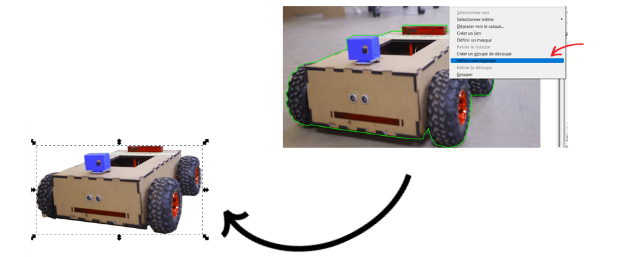
I’m going to use Inscape to do some image cropping.
THIS IS THE ORIGIN IMAGE
THIS IS WHAT WE WANT!
FIRST OF ALL
- 1 OPEN Inscape .
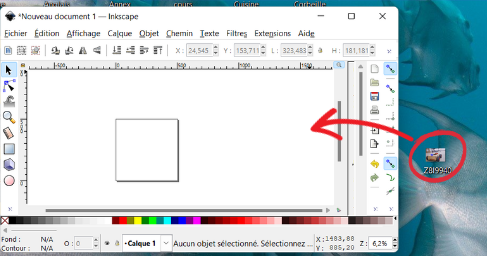
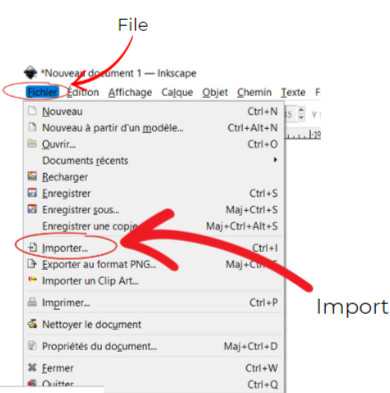
- 2 Import your file like this.
- 3 Then select the tool for drawing bezier curves and line segments.
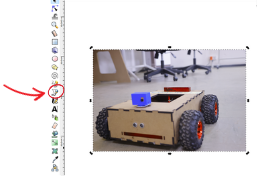
- 4 outline the object you want to keep. you want to keep.
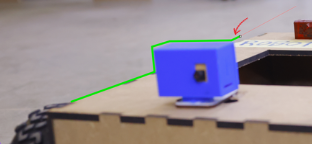
- 5 you can adjust misplaced edges using the edit points tool or path control handles (F2).

- 6 Right-click and select ” Set cut-out”.
- 7 Fill in the information
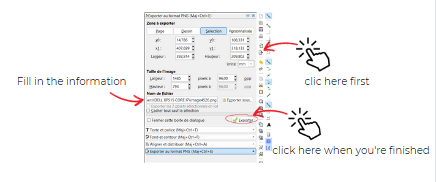
This is my result.
3D SOFTWARE.
1.fusion 360
1.1 software instalations
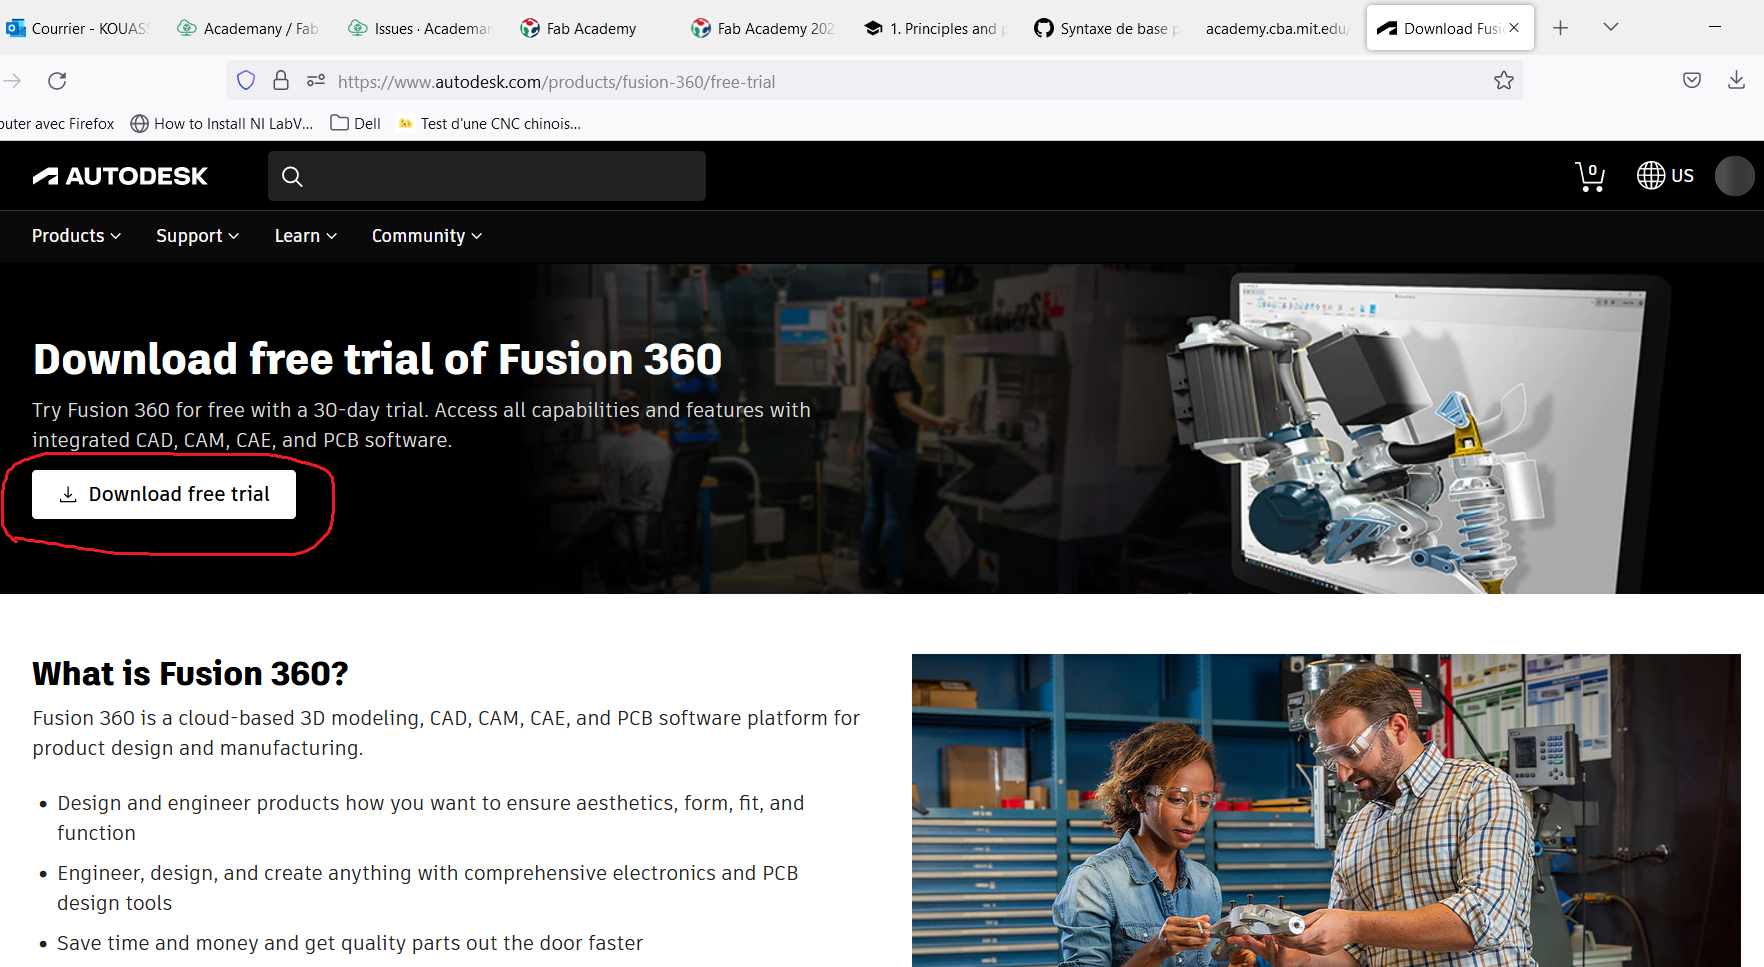
1.  I Visited the Fusion 360 free trial page.
2.  I Click “Download free trial”.
3.  Sign in to my existing Autodesk account  then I use “I forget my password”.
4.  I Fill out the “my Company Info, ” fields and I clicked “Next”.
5.  At the end I Click “Access”.
1.1.2 Fusion 360 discovery
to be familiar with the software i used this document to remind me more about fusion 360 before start any projet. clic me to get the guide
1.1.3 first step on my fusion 360
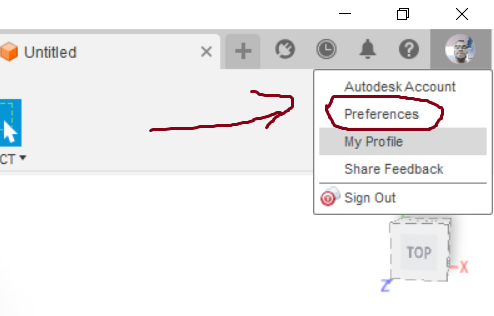
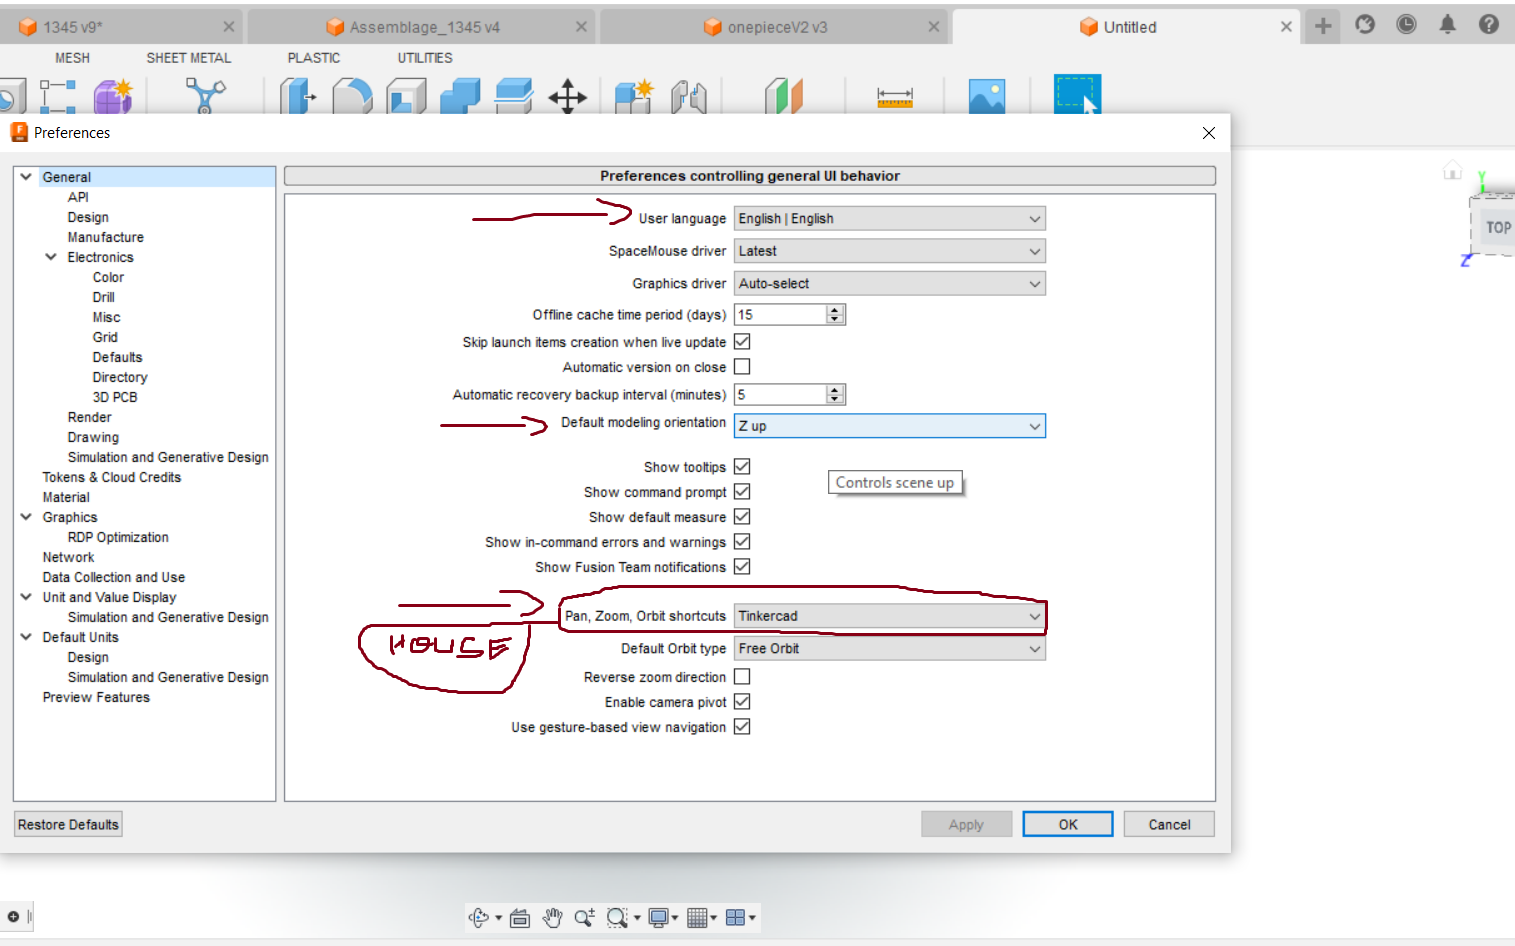
a) mouse configurations
     -language setting ( english),
     -default modeling orientation (z),
     - mouse personalization
     - apply
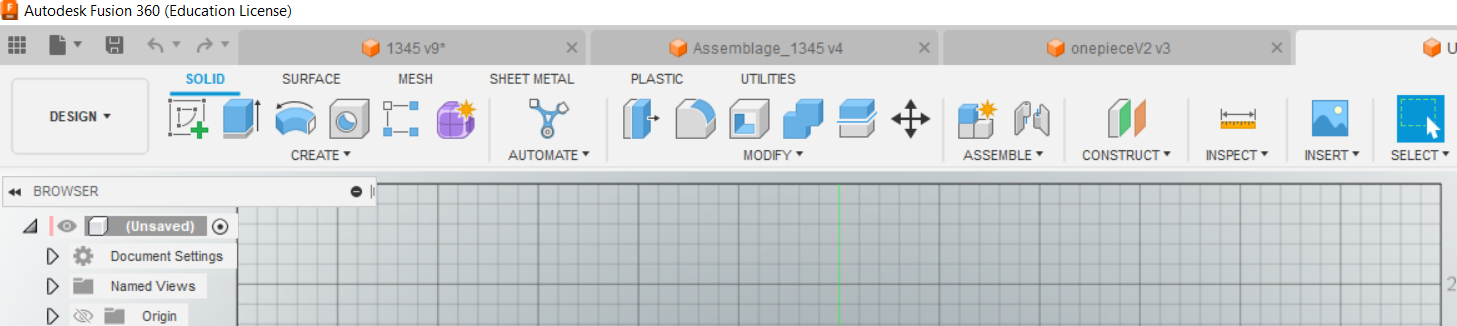
b) Icons
here i learned qll of this icon to be free with Fusion 360
1.2 MY FIST PROJET WITH FUSION 360
challenge : build a piece with one piece
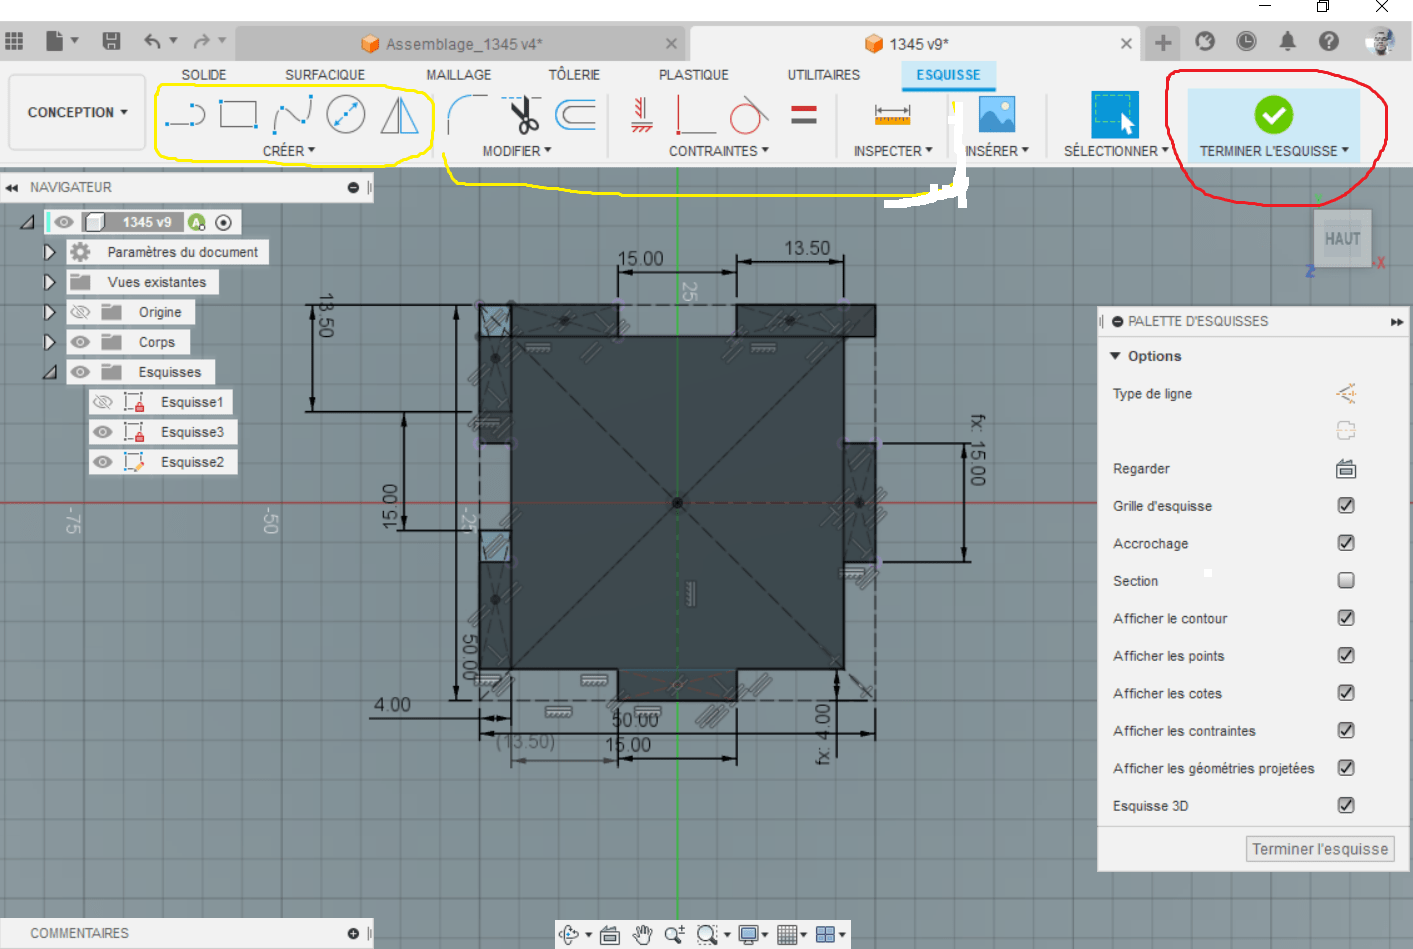
1.2.1 sketch and dimensions
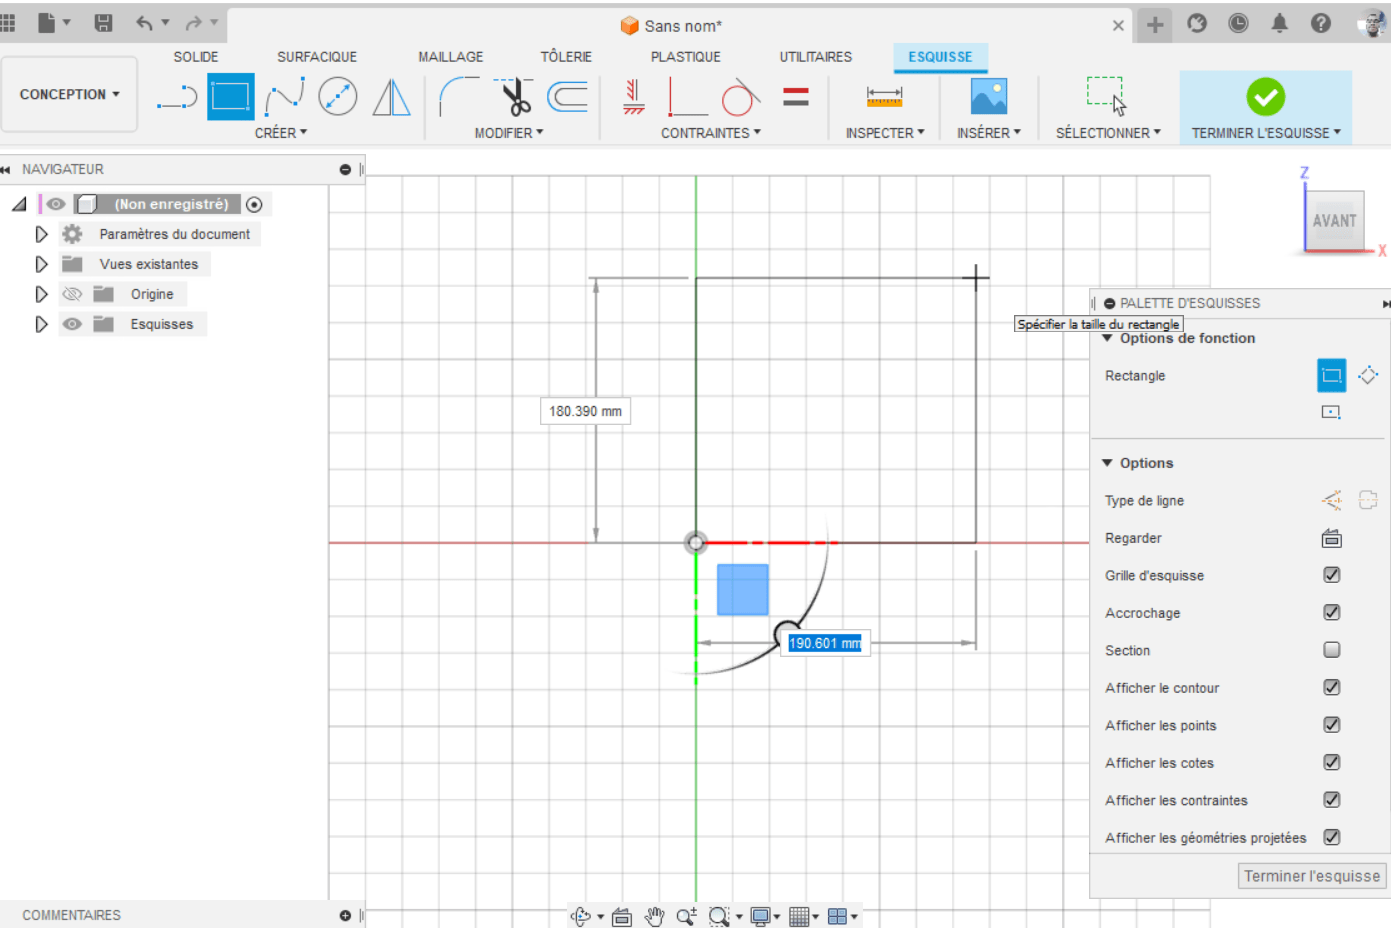
1 select new and create my sketch

   i created sketch witth things circled in yellow then i confirm with thing circled in red.
   i make parametrics relation bitween all piece
1.2.2 extrude piece and assembly
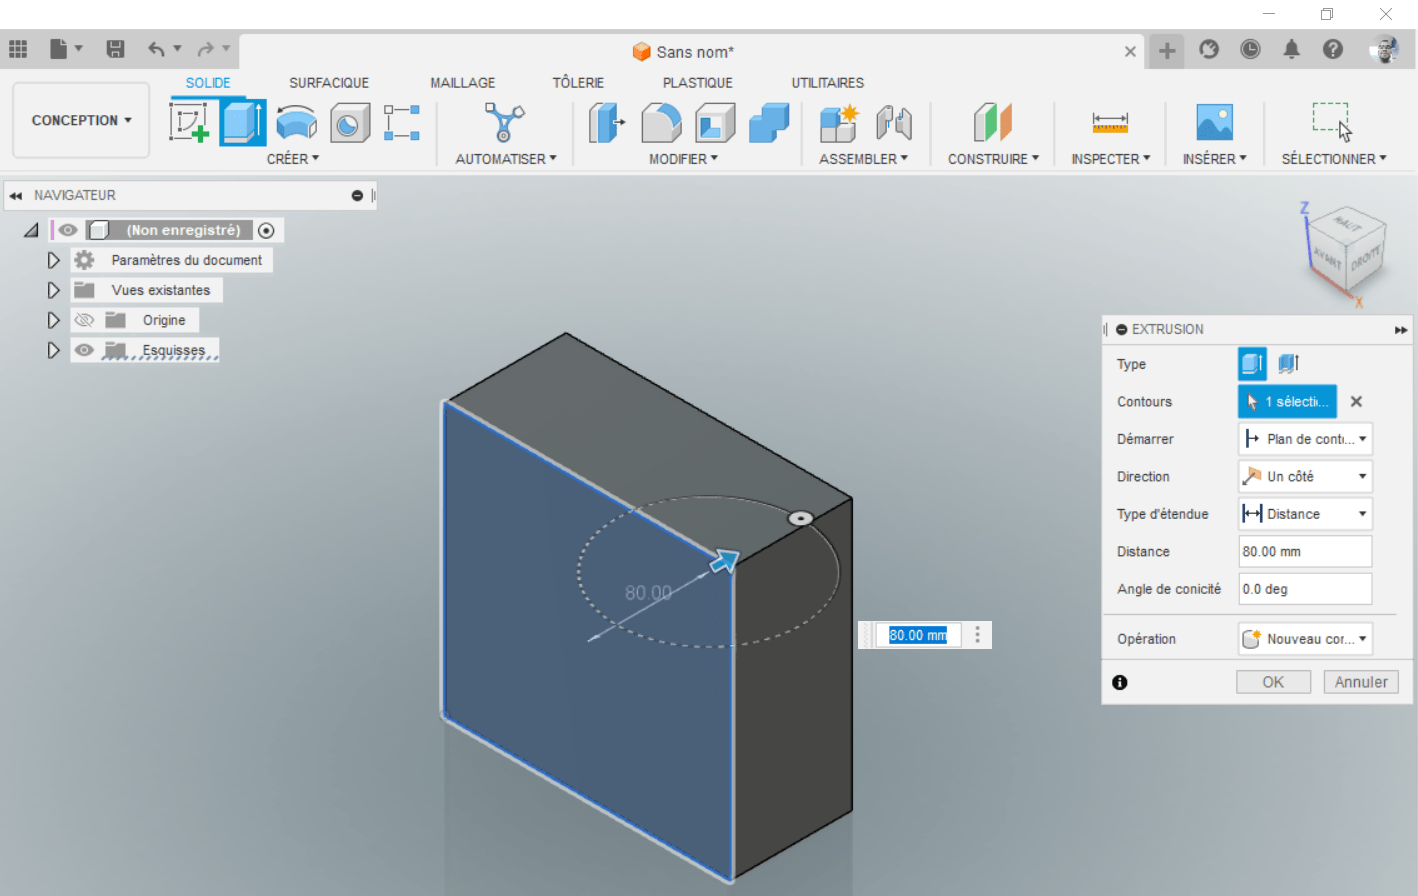
1.2.3 piece extrude
use the extrusion tool and drag with
the mouse following a right click
in the direction you want or give a
value and type enter or click on select.
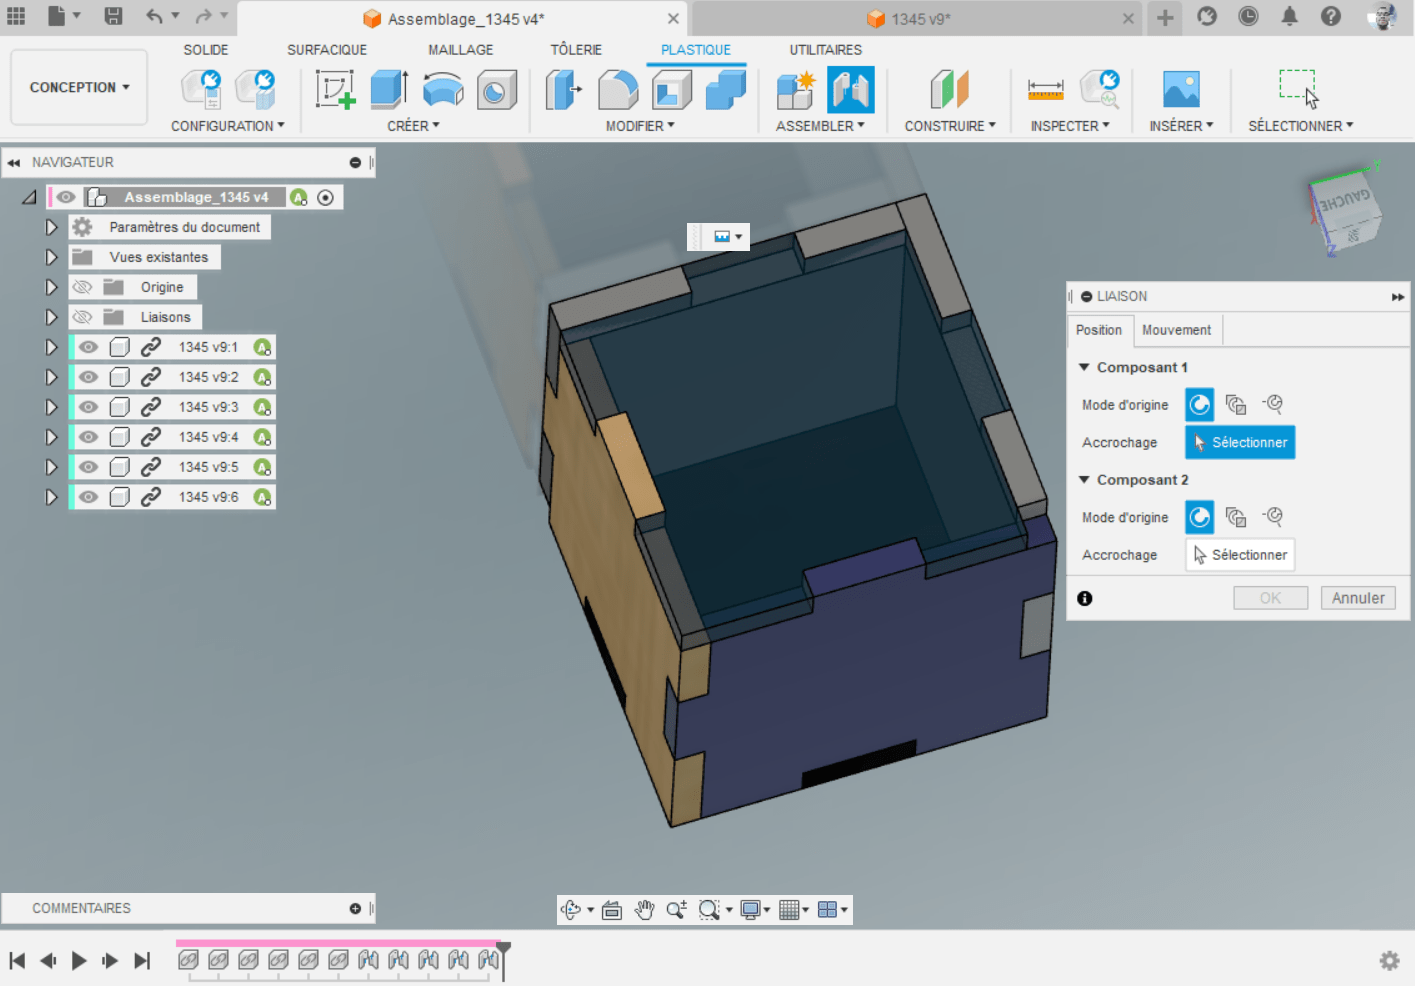
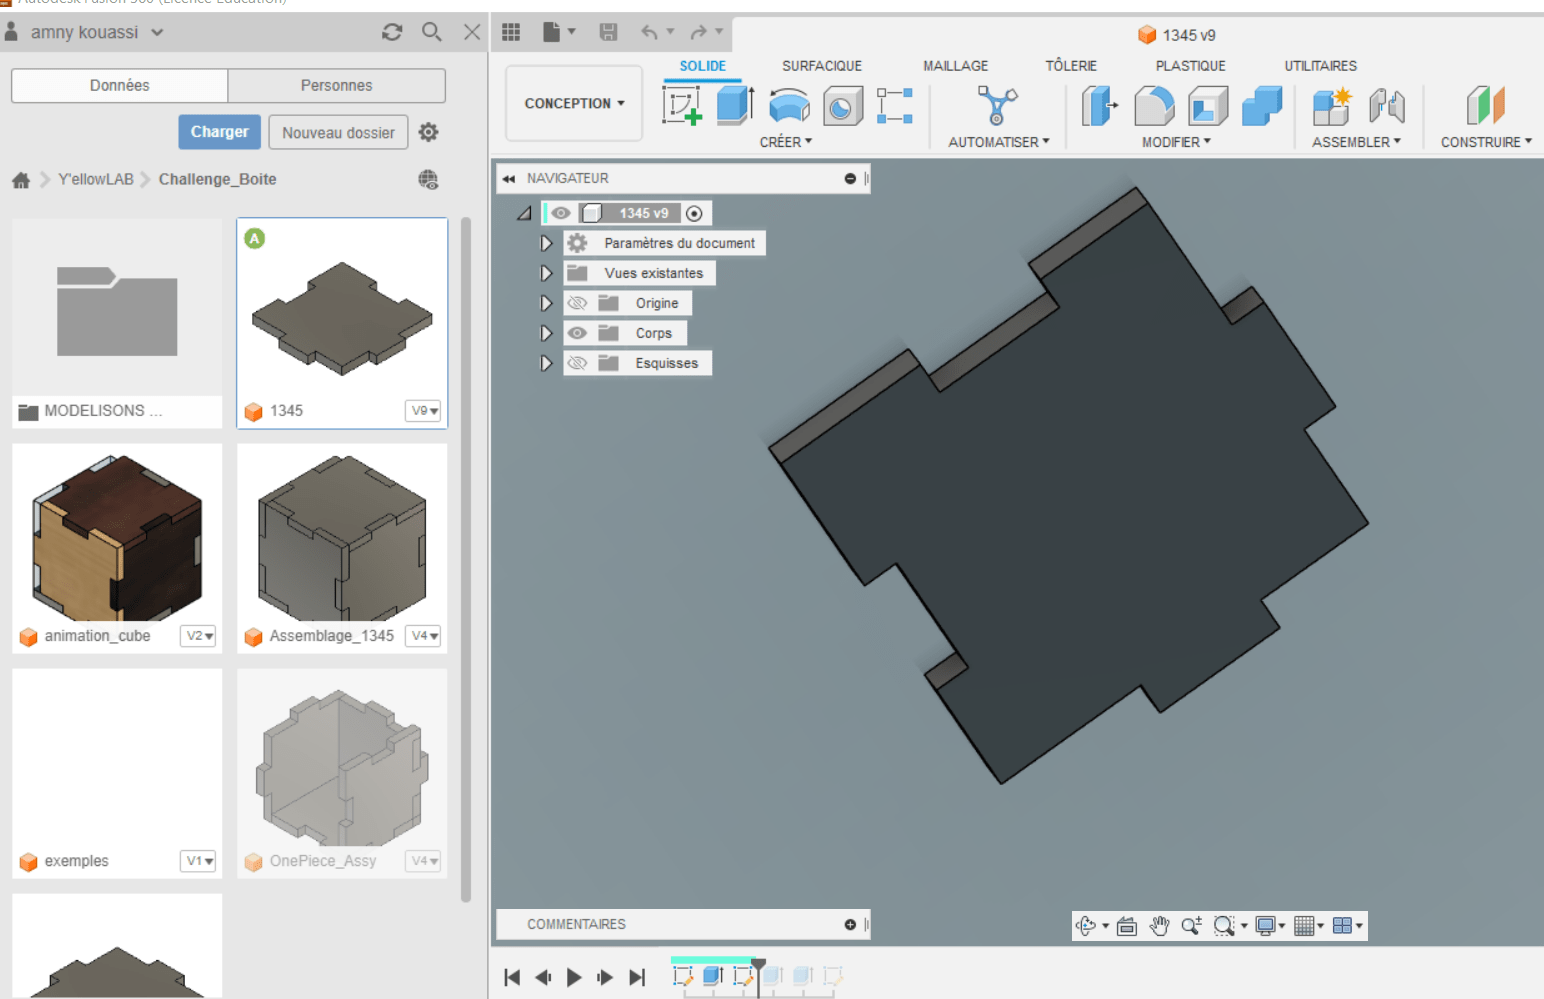
1.2.4 assembly
- i take your piece from my folder
- slide into your workspace then you can make assembly
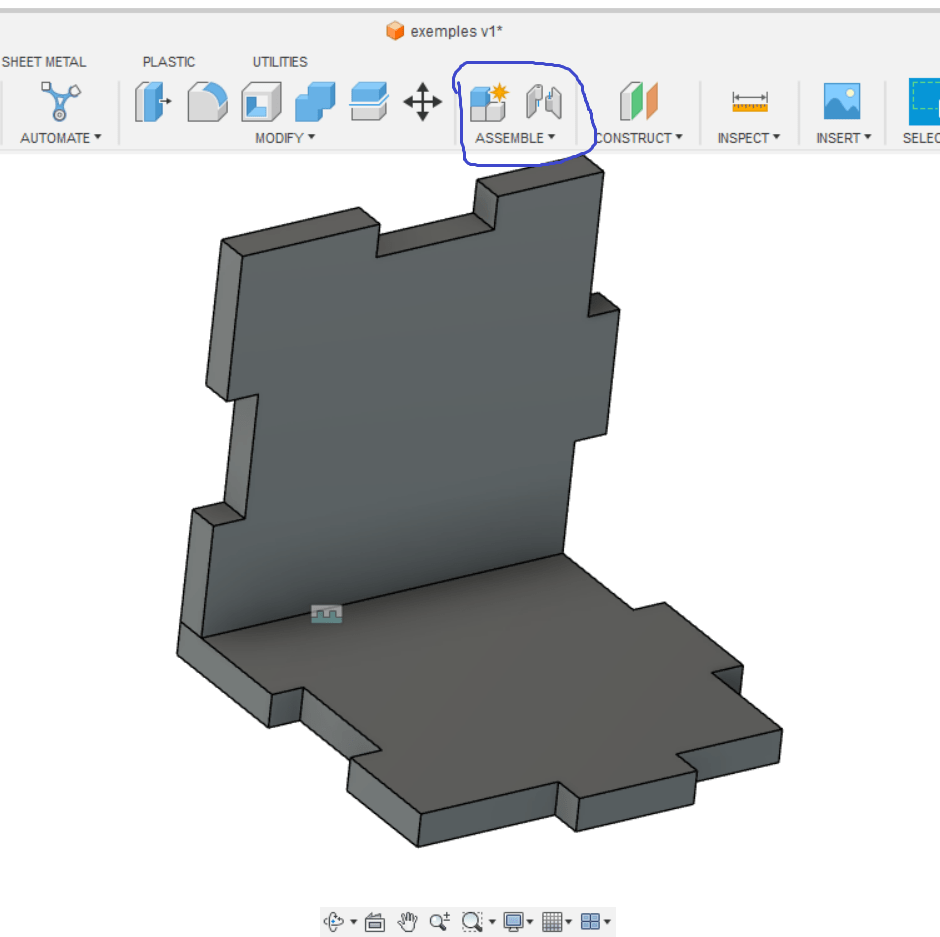
-make a relation bitween parts
-choose your assembly nature
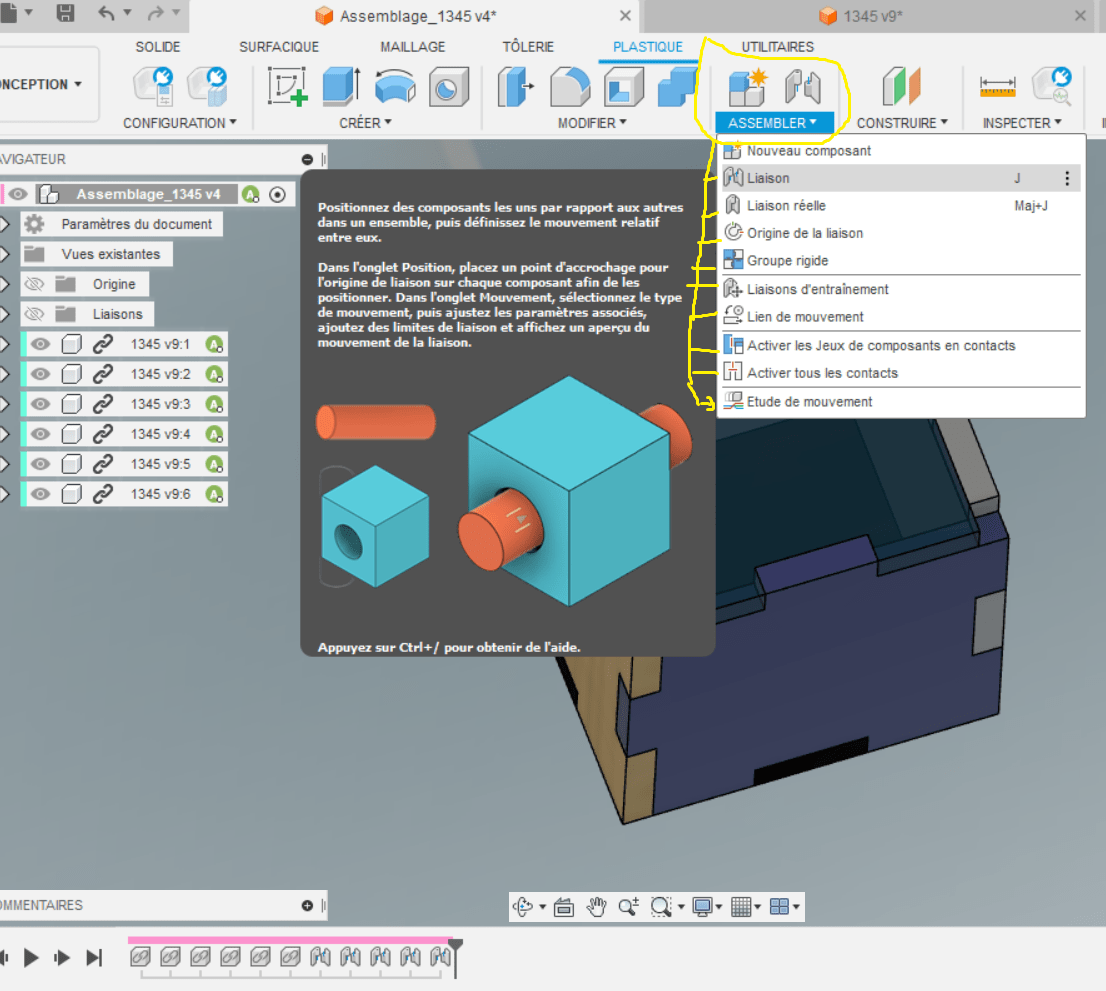
- choose faces / components