13. Networking and communications
Hero Shots
Assignment Requirements
Group assignment
- Send a message between two projects
- Document your work to the group work page and reflect on your individual page what you learned
Individual assignment
design, build, and connect wired or wireless node(s) with network or bus addresses
Group Assignment
Requirements:
- Send a message between two projects
- Document your work to the group work page and reflect on your individual page what you learned
Link to group assignment page
The group assignment page can be found on the Energylab 2023 website here
it is also embedded directly in the webpage below.
Individual assignment
In this assignment, the aim is to enable communication between the boards using a communication protocol. The cards I’ll be using are the 2 I’ve made over the past few weeks. The communication protocol I’m going to use is I2C.
Workflow
Step1: How to use the I2C protocol
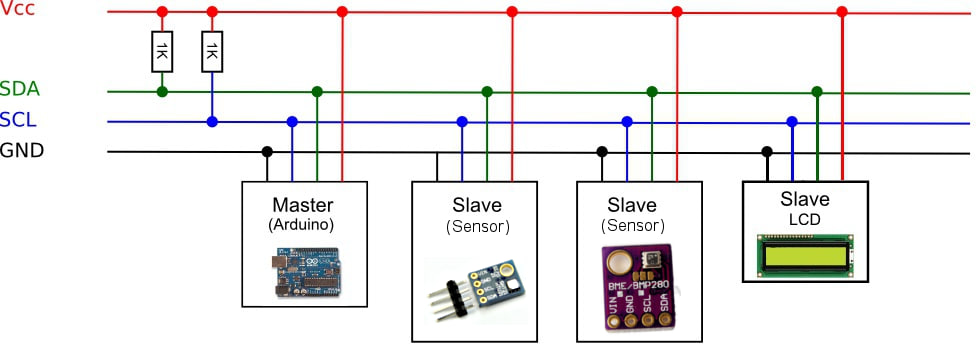
The image below shows how the I2C protocol is used. There are two main notions involved: “Master”, which I’ll call “Father” later on, and “Slave”, which I’ll call “Child” later on. The connection between the 2 boards is made via the “Vcc” pins. SCL”, “SDA” and “GND” pins. For more details, click here
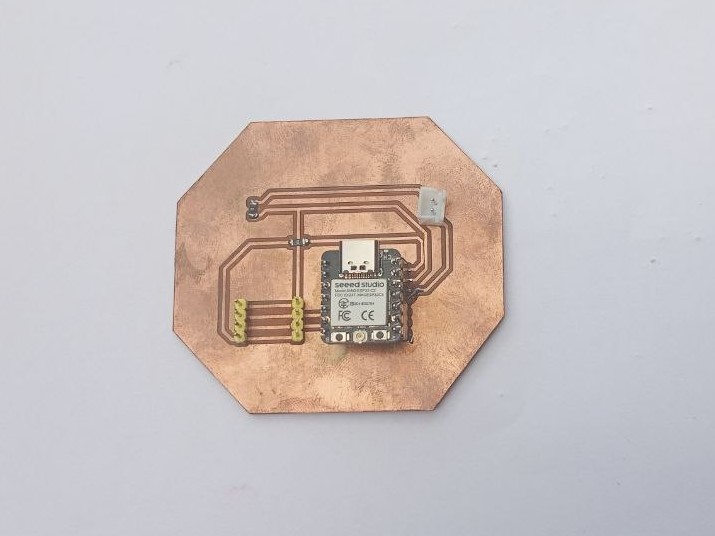
The 2 boards I’ll be using are:
- Input (“Father”)
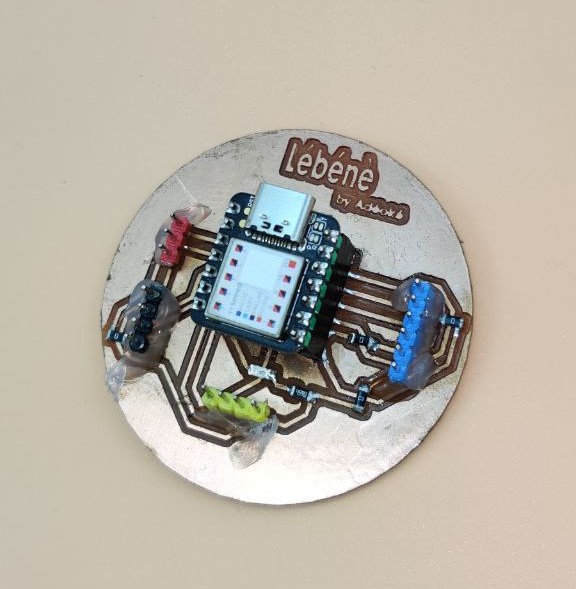
- Output(“Child”)
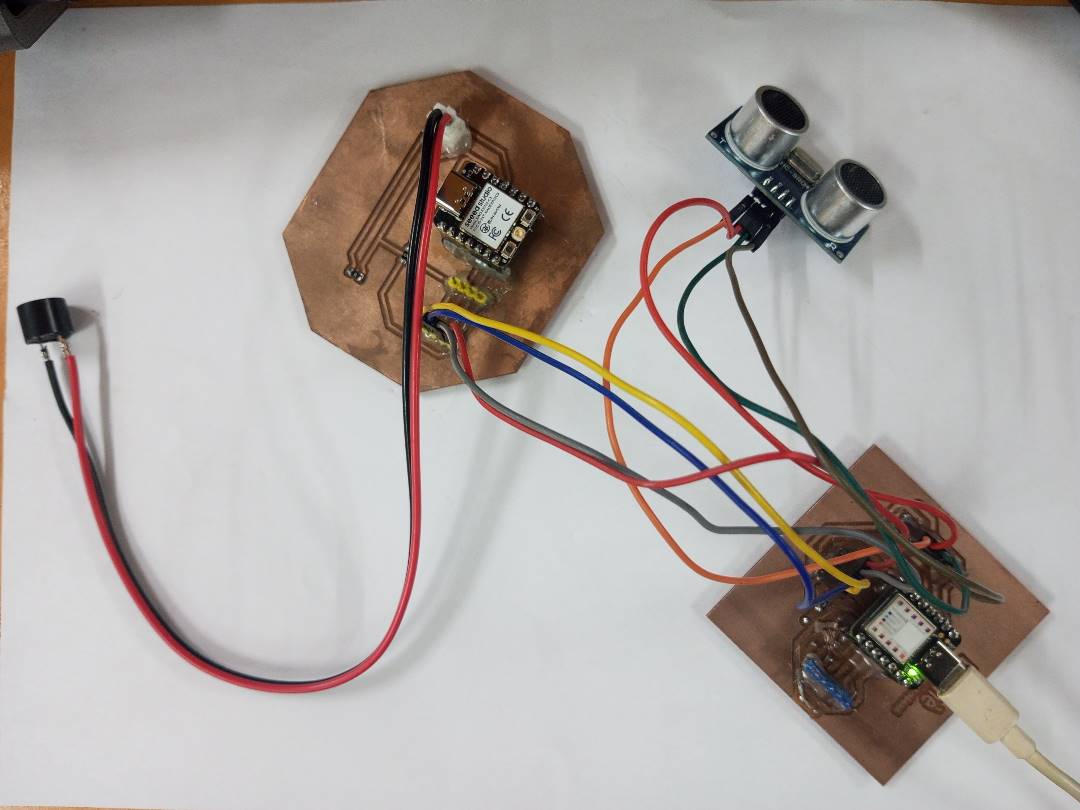
Step2: Board connection
As I said above, the connection between my 2 boards was made via the “Vcc”, “SCL”, “SDA” and “GND” pins. SCL” , “SDA” and “GND” pins, as I had already provided for I2C communication when designing the boards.
Step3: Programming the father
// Include Arduino Wire library for I2C
#include <Wire.h>
For I2C communication on Arduino, I’ve included the “Wire” library.
// Define Child I2C Address
#define CHILD_ADDR 9
To establish communication between father and child, I’ve defined an address for the child.
// Define Child answer size
#define ANSWERSIZE 5
To be able to store the size of the response that will come from the child, I’ve defined this constant.
#include "Ultrasonic.h"
Ultrasonic ultrasonic(1, 2); // Trig et Echo
Inclusion of the “ultrasonic” sensor in the Library.
void setup() {

  pinMode(4, OUTPUT);
  pinMode(5, OUTPUT);
  // Initialize I2C communications as Father
  Wire.begin();

  // Setup serial monitor
  Serial.begin(9600);
  Serial.println("I2C Father Demonstration");
}
When the program is started, the setup() function is executed once. In this program, pins 4 and 5 are configured as outputs (OUTPUT). Wire.begin() initializes I2C communication as the father. Finally, the serial monitor is initialized with a baud rate of 9600 baud and a demo message is displayed.
void loop() {

  delay(3000);

  int dist = ultrasonic;


  // Write a charatre to the Child
  Wire.beginTransmission(CHILD_ADDR);
  Wire.write(0);
  Wire.endTransmission();

  Serial.println("Receive data");

  // Read response from Child
  // Read back 5 characters
  Wire.requestFrom(CHILD_ADDR,ANSWERSIZE);

  // Add characters to string
  String response = "";
  while (Wire.available()) {
      char b = Wire.read();
      response += b;
  }

  // Print to Serial Monitor
  Serial.println(response);
}
Once setup() has been executed, the loop() function executes in a loop, as follows: Pause for 3 seconds using delay(3000) The “dist” variable stores the distance measured by the ultrasonic sensor. An I2C transmission is initiated with the child using Wire.beginTransmission(CHILD_ADDR).
Step4: Programming the child
// Include Arduino Wire library for I2C
#include <Wire.h>
// Define Child I2C Address
#define CHILD_ADDR 9

int distance;
int buzzer = 10;

void setup() {

  // Initialize I2C communications as Child
  Wire.begin(CHILD_ADDR);

  // Function to run when data received from father
  Wire.onReceive(receiveEvent);

  Serial.begin(9600);
}
Below is the function for the void receive event. It reads the values that are being sent over the i2c bus when a transmission occurs
void receiveEvent(int numBytes) {

distance = Wire.read();
}
Now we pass to the void loop where we set the frequency of the tone for our buzzer equal to the distance that was received during the i2c receive event
void loop() {
 Serial.println(distance);
// tone(buzzer,distance);
// delay(500);
 noTone(buzzer);
 delay(500);
}
Step5: Result
What went wrong / what went well
This week, I’d say everything went smoothly and there were no major difficulties. I can also say that I’ve learned and discovered new things.