15. Wildcard Week
This week I learned how to use an embroidery machine and the app SewArt.
SewArt
I began by downloading the app SewArt from this link. I followed this tutorial to guide me through the software. I started by pasting in the image I wanted to embroider into the workspace. From there I used the crop tool to crop down the image as much as possible (screenshot 1). Next, I used the scale feature to scale down my image as the embroidery machine would not embroider anything over 4 inches (screenshot 2).
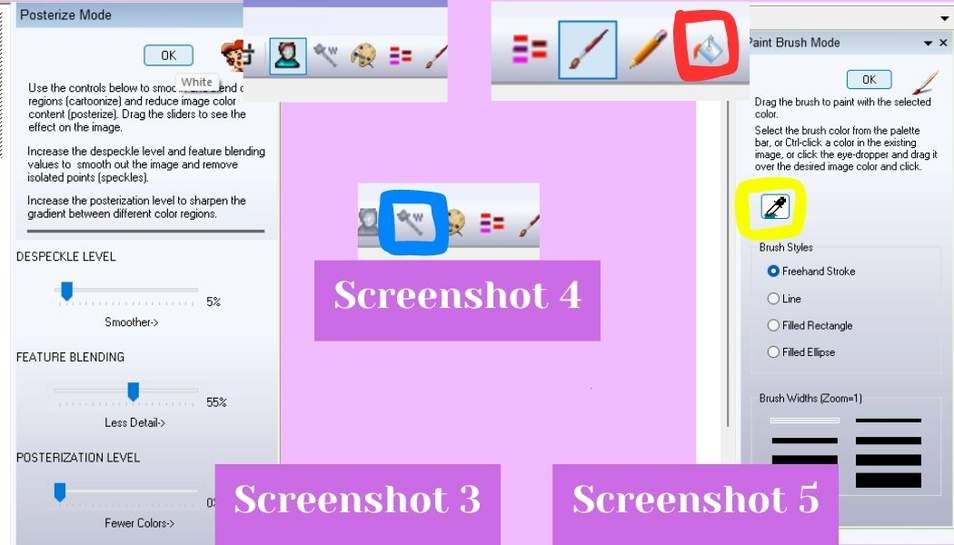
 Next, I used the posterize tool to begin eliminating the number of colors in the image (screenshot 3). I used the three sliders to despeckle, blend, and posterize all to reduce the quality of the image and combine the pixel colors to help reduce the number of colors in the design (screenshot 3). From there I used the image wizard from the top bar (blue circle) to further reduce the number of colors (screenshot 4). The wizard opened and guided me through the process of selecting how much I wanted to combine the colors of the image as sometimes if you reduce the number of colors too much you risk reducing some of the details of the image. I went through a the image cleanup wizard and was left with something with only three colors and still a fair amount of detail. I next used the paintbrush tool from the top bar make the stars on the bat’s wings more defined and less blob-y (screenshot 5). To select the color I used the color dropper tool (yellow circle in screenshot 5). Next I used the bucket color drop tool to drop a color into the background to act as the color that will not be embroidered (red circle in screenshot 5).
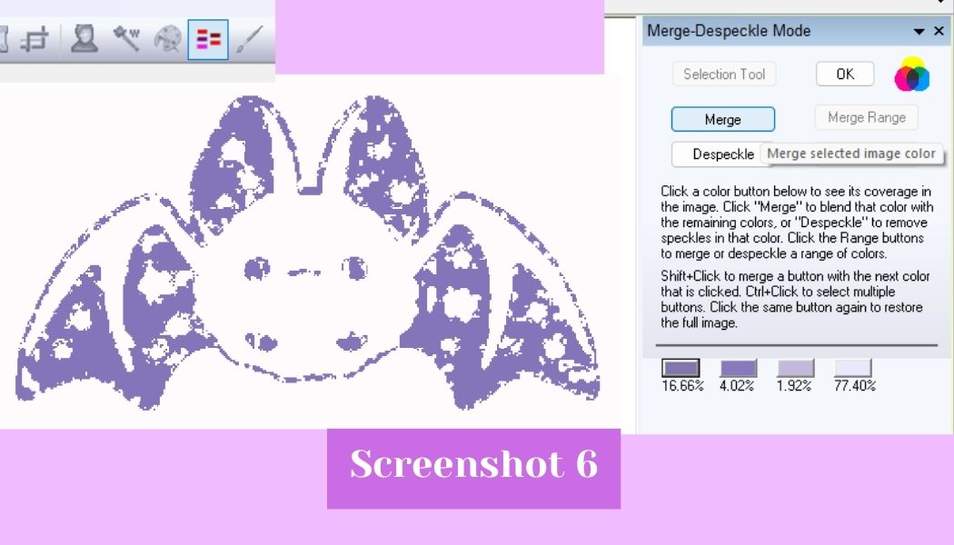
 Finally, I opened the merge colors tool to get rid of any small areas of color that could be another color. To do this I clicked on the color I wanted to merge and then I hit the merge button (screenshot 6).
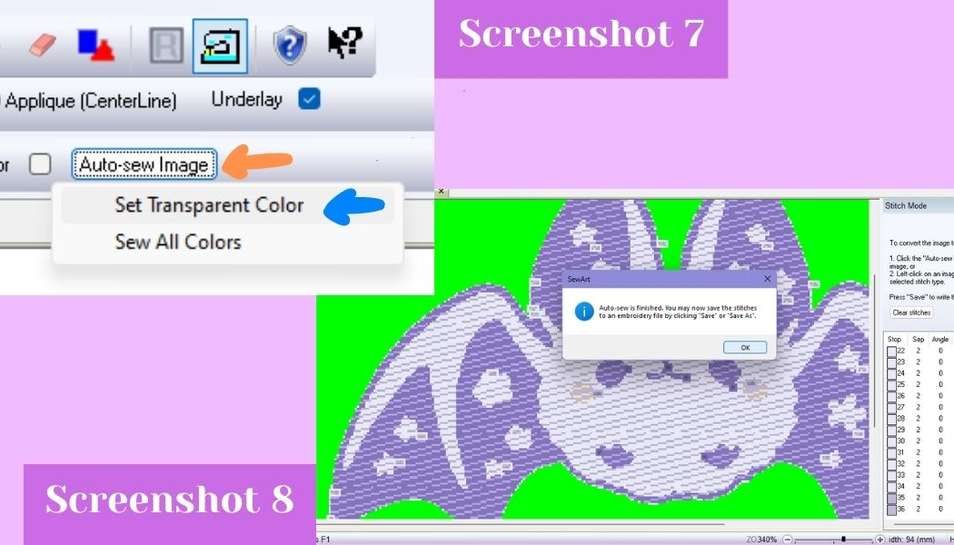
 Next to turn my design into stiches I clicked on the sew button, then the auto-sew image button (orange arrow), and then the set transparent color (blue arrow) (screenshot 7). This allowed me to pick a color that would not be turned into stiches, I selected the background color of green and then the software began generating the stich ‘toolpath’ (screenshot 8). Finally, I then saved it as a .pes file as that is the Brother file type for embroidery.
 - Embroidery file .pes (toolpath)
- Embroidery image .png
- Embroidery file .saf (sew art file)
- Embroidery file .pes (toolpath)
- Embroidery image .png
- Embroidery file .saf (sew art file)
Embroidering
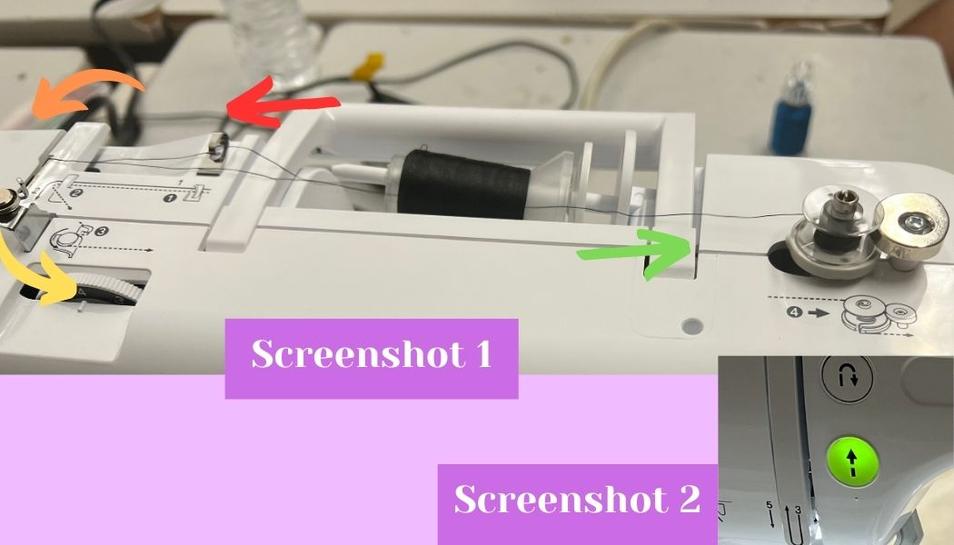
I used the Brother SE600 to embroider my image this week. I began by watching two tutorials on how to set up the machine from here and here. Though I already knew how to wind a bobbin and how to thread a needle, which the videos went over, they did show me how to select a file to embroider and how to set it up to sew that image. After watching those two videos, I began by winding a bobbin. I slid the thread spool onto the spool holder peg, and then guided the string through the metal clip (red arrow), around the plastic peg (orange arrow), around the metal thread guider (yellow arrow), and then around and under the bobbin (green arrow) (all seen in screenshot 1). To start the bobbin winding I pushed the bobbin holder to the right to tell the machine to be in bobbin winding mode and then I pushed the green arrow button to start the winding (screenshot 2).
Next, to thread the needle I took the end of the thread from the thread spool and took it through the metal clip (red arrow), around the plastic peg (orange arrow), down the slot in the plastic, and then back up the second plastic slot (yellow arrow), and then down again (green arrow). From there I took it through the metal clip (blue arrow), then up and around a metal guide (purple arrow), and finally I held it up and pushed down on the needle threader (pink arrow) (all found in screenshot 3). This left me with the needle threaded (screenshot 3). Next, I inserted the bobbin the the bottom by pulling the door releaser to the right (red arrow), and then inserting the bobbin and guiding the string through the sting channel (yellow arrows) (screenshot 4).
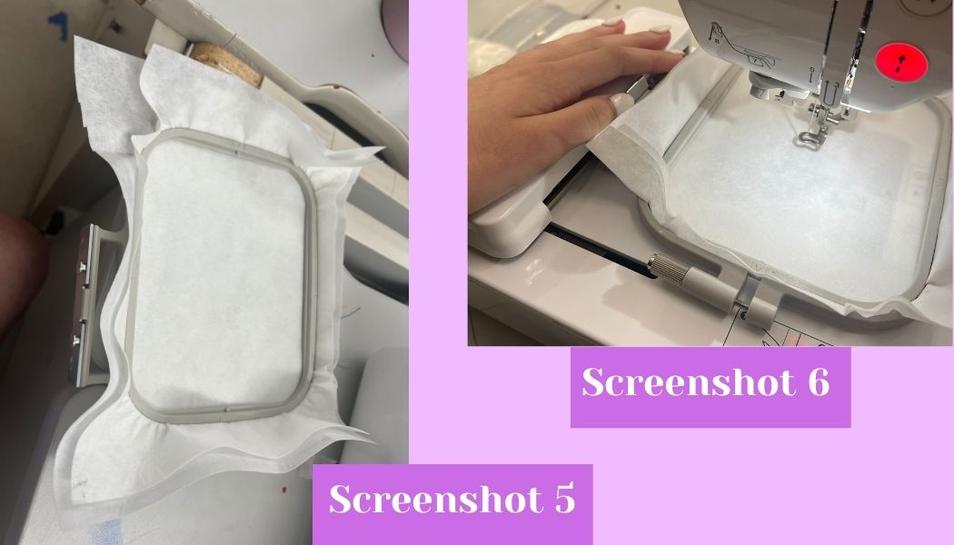
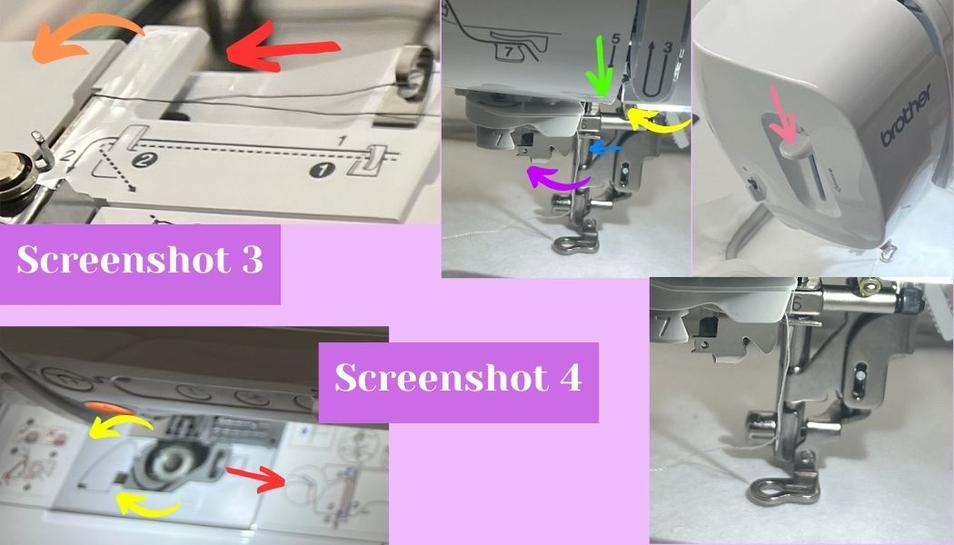 From there I inserted the two layers of tear away fabric into the hoop by putting the two sides of the hoop together and then screwing the screw together to secure the two layers (screenshot 5). Then I slid the hoop onto the hoop holder by pushing in the tab that allows it to clamp (screenshot 6).
 Next I inserted the USB thumb drive into the sewing machine and then clicked on the USB symbol to open up the files stored on the USB (screenshot 7). From there I clicked on the file I wanted to embroider which was of course, my bat (screenshot 8). Then it opened the positioning window which I left unchanged, and I then started the embroidering by clicking on the same green up arrow button that I did to wind the bobbin. While embroidering, the screen showed the progress and when one color was done embroidering, the machine stopped to let you change the thread spool and bobbin, and then start again (screenshot 9).
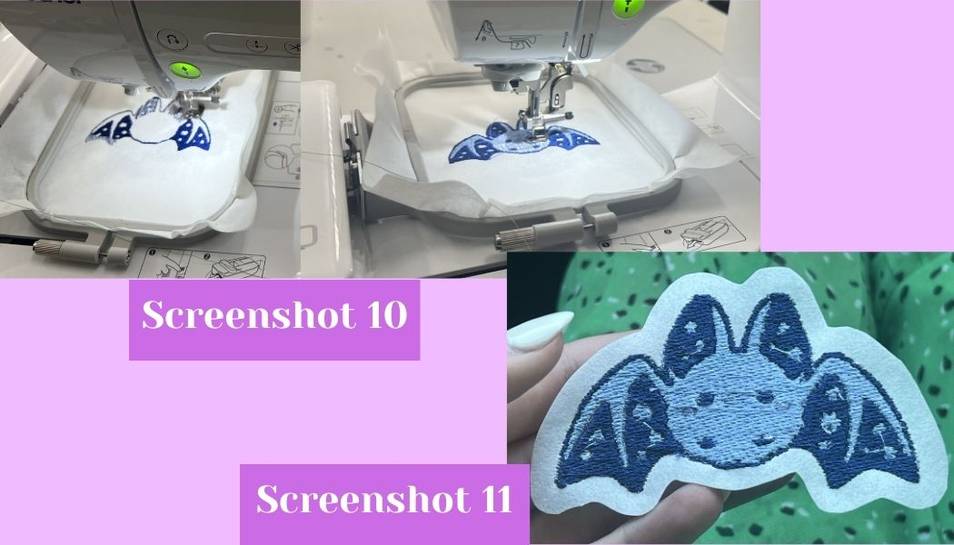
 My design started with the dark blue, and then it did the light blue, and finally it did the cheek color (screenshot 10). When it was done embroidering, I took my design out of the hoop by unscrewing it, and I then cut the tear-away fabric out in the shape of the design left. This left me with my final design of a very cute little bat (screenshot 11).
Reflection
This week I learned how to embroider, a skill which may not (see note) lend itself to an engineering project but is certainly a useful and fun skill to have. I did however later learn from my global evaluator, Nuria Robles, that you can actually use conductive thread to make circuits with it, which is really cool. In the future I plan to make a jean jacket full of patches I have made with Dariyah as a comemoration of Fab Academy and also just for fun. In addition I learned how to use the Sew Art software to design something to be embroidered.