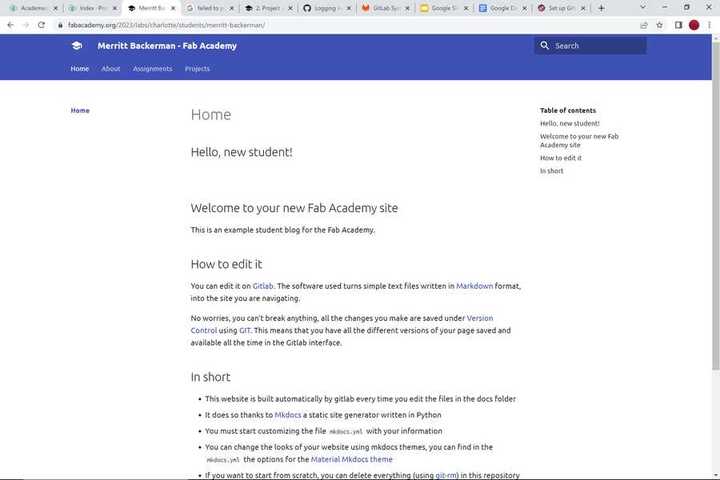
1. Principles and practices
This week I worked on defining my final project idea and started to getting used to the documentation process. I learned a lot about using the command prompt, gitbash, gitlab and vscode.
Initial Downloads,
Before starting with anything, I downloaded everything that I knew I would need to start creating my site. I started by installing python from the windows store, git from here, and visual studio code. These were the easy things to install, since I it was just click to download. After this, I had to install pip, a package management system for windows. I did this by going into the python terminal and typing the command.py get-pip.py.
Starting with Mkdocs
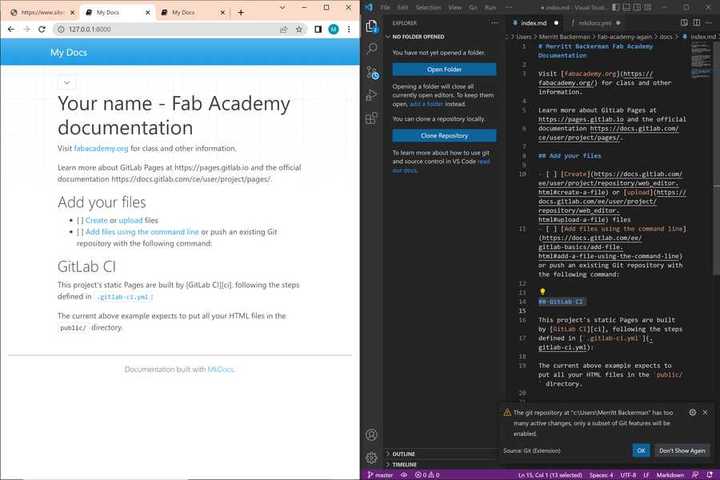
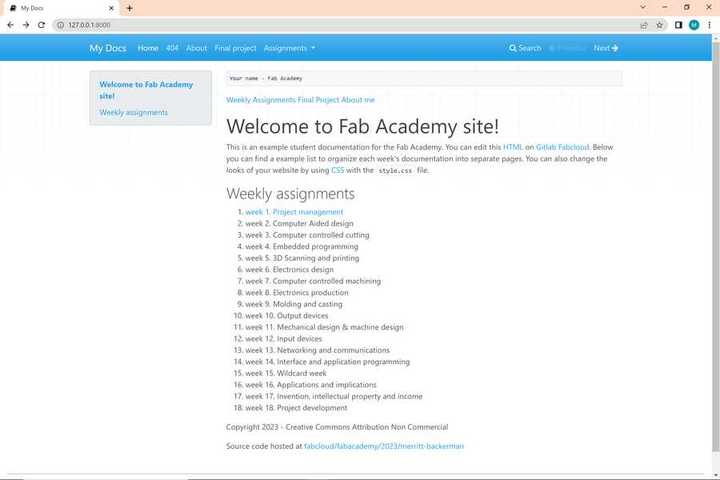
After I had pip installed, I decided I was going to start my work with mkdocs by following this tutorial. I started by installing mkdocs by using the command pip install mkdocs. To make sure that it installed correctly, I used the command mkdocs --version. However, this command didn’t work. I went back through the installation guide and saw that because I’m using windows, I have to preface every command with python -m. I used python -m mkdocs --version and it worked. Now that I had everything for mkdocs installed, I made my first project with python -m mkdocs new my-project. This command made a new project which I could see in my files. In the folder, there was a folder with the file index.md and the configuration file mkdocs.yml. When I opened the index file, I found this, (PUT PICTURE HERE). I didn’t really know where to go from here so I looked back at the getting started guide. The guide talked about the built-in dev servers, which allowed you to view your project before it’s published. I did this by first using cd my-project and then python -m mkdocs serve, which led me to this message 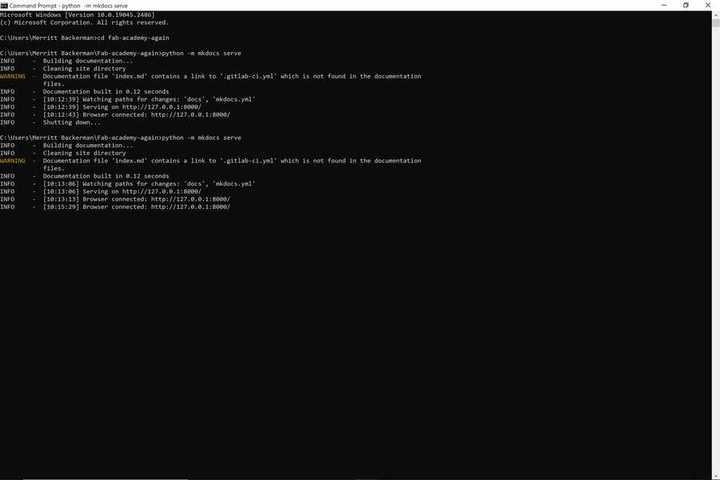 . I put that link into my browser and got my site! (PICTURE).
Starting with Gitlab
After this, I decided to switch my focus to setting up my gitlab. Before I did anything, I learned a little about navigating gitlab and efficent version control. After that, I set up my SSH key to add a credential to my laptop for security. I did this with the command ```ssh-keygen -t ed25519 -C 
Starting with gitbash
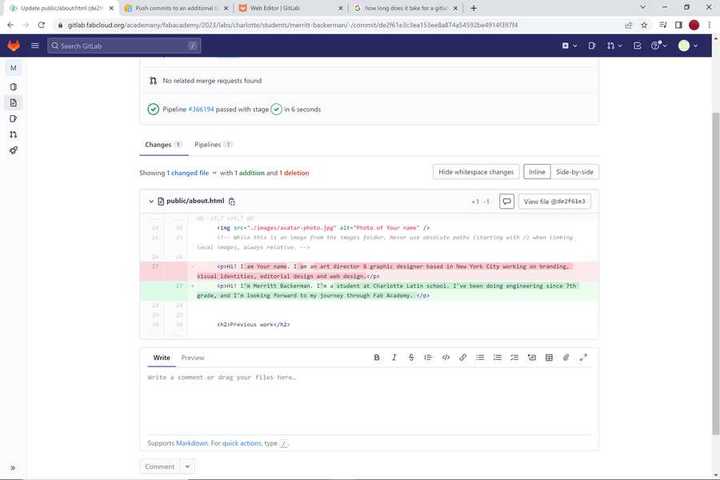
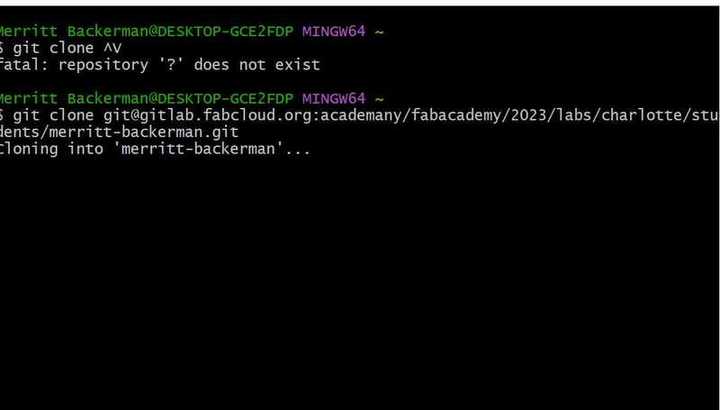
At this point, I understood the differences between adding, commiting, pusing, merging, and the other git functions, however I wasn’t exactly sure how to use any of them. I had my changes commited, but I didn’t understand why I couldn’t just push my changes locally. I disucssed with a classmate and eventually we made this chart to show how all of the different things we have been doing are connected to eachother. Now that I understood this, I opened my gitbash terminal. The first command that I tried to do in gitbash was git push. When I did that, I was met with this error (PICTURE). There was 2 things that I forgot to do before I could push my site. First, I had to configure git, basically setting what account that gitbash should connect to, I did this with the commands git config --global user.name Merritt-Backerman and git config --global user.email "my email". The 2nd thing that I forgot to do was clone my repository. Cloning my repository copies the files onto my computer and creates a connection. I did this by using git clone "my ssh link". Once I did this, I was ready to push my changes to the fabcloud remote repository using the git push command. I waited a little, checked my site, and found that my change worked! (PICTURES)
Putting it all together
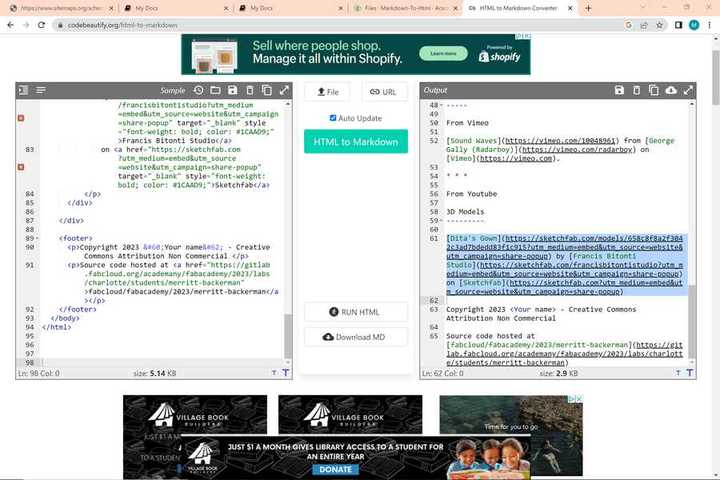
Up to this point, I had a working gitlab repo, and a working mkdocs. However didn’t understand how I connect what I have on mkdocs to my gitlab. Instead of having to deal with what I already had tried on mkdocs, I just made a new doc. named fab-academy. After that, I copied the file from my repository and added them inside my fab-academy folder, when I did this, I was able to get the text from my website, but the website still had no theme and I also couldn’t see a lot of the pages. I also still didn’t know how I would get these changes into my repository. Because I deleted some file in this doc, I made another mkdocs folder to try something else. This time, instead of adding a copy of the files, I tried to add my cloned repository into my mkdocs, but this also didn’t give me the theme or pages. At this point, all of the document files were also still in HTML, so even if these did work, I would have trouble editing them. I decided again to try something new. I tried using this website which converts HTML to Markdown. After that, I made another Mkdocs file to try and see if this would at least make my problem more understandable. I also tried to make a branch from my repo to try and add these files straight into my repository, but this still wouldn’t let me see my pages.
Putting it all together, part 2
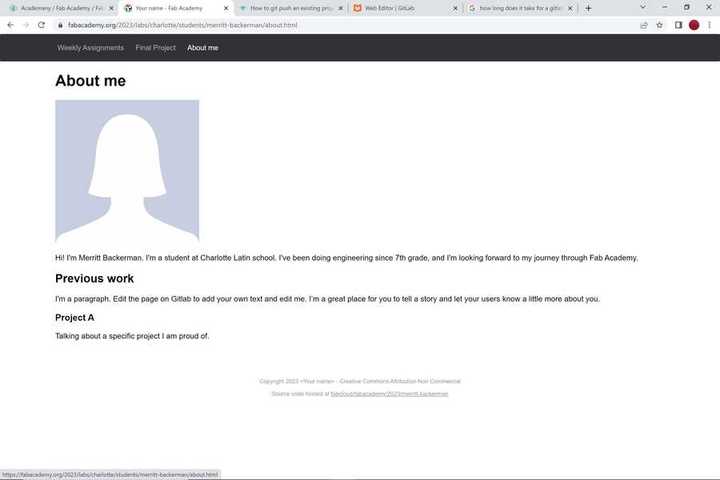
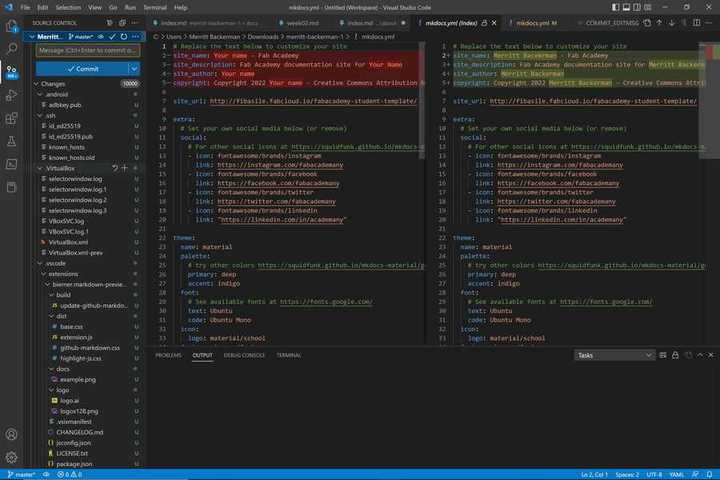
At this point I still didn’t really understand how I would edit my markdown sites and the put them into my repository. I talked to a classmate about my attempt with the HTML to markdown converter, and he told me that there’s a much simpler way to make my files into markdown thanks, Dylan. It turns out, there was already a student fab academy template which had all the files in markdown. Not only that, but this template automatically pushes your commits. . I deleted all the files for the template that was already in my repository, and replaced it with the ones from this template. When I commited and pushed this page though, I still couldn’t see all of my pages. That’s when I realized that I had to change the configuration files. The configuration files are what set up your website. All I had to do was add my name to the file, and then I could see all of my pages. Now that I did this, I also read the requirements.md file, which told me to install some other programs to support features on my website. I installed these with pip and had a working website!
Setting up for documentation
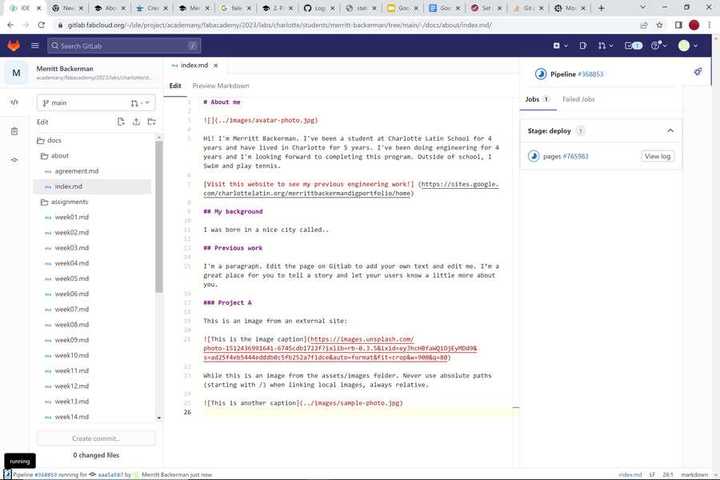
At this point, I had a working site with everything availible to me. One of the first things I did was put all of my pictures in the images directory that’s in my site. However, I needed to compress and resize my images so that they take up less storage space. To do this, I used Xnconvert. This software is really convienient because I can change image size, file type, and quality, all in one conversion. After that, I was ready for adding my documentation to here!
Where I am now
At the momment, there’s only one problem that I have. When I open my cloned repo in VS code, I could make changes, however my changes wouldn’t commit. When I look at some of the system dialouges, I see this message 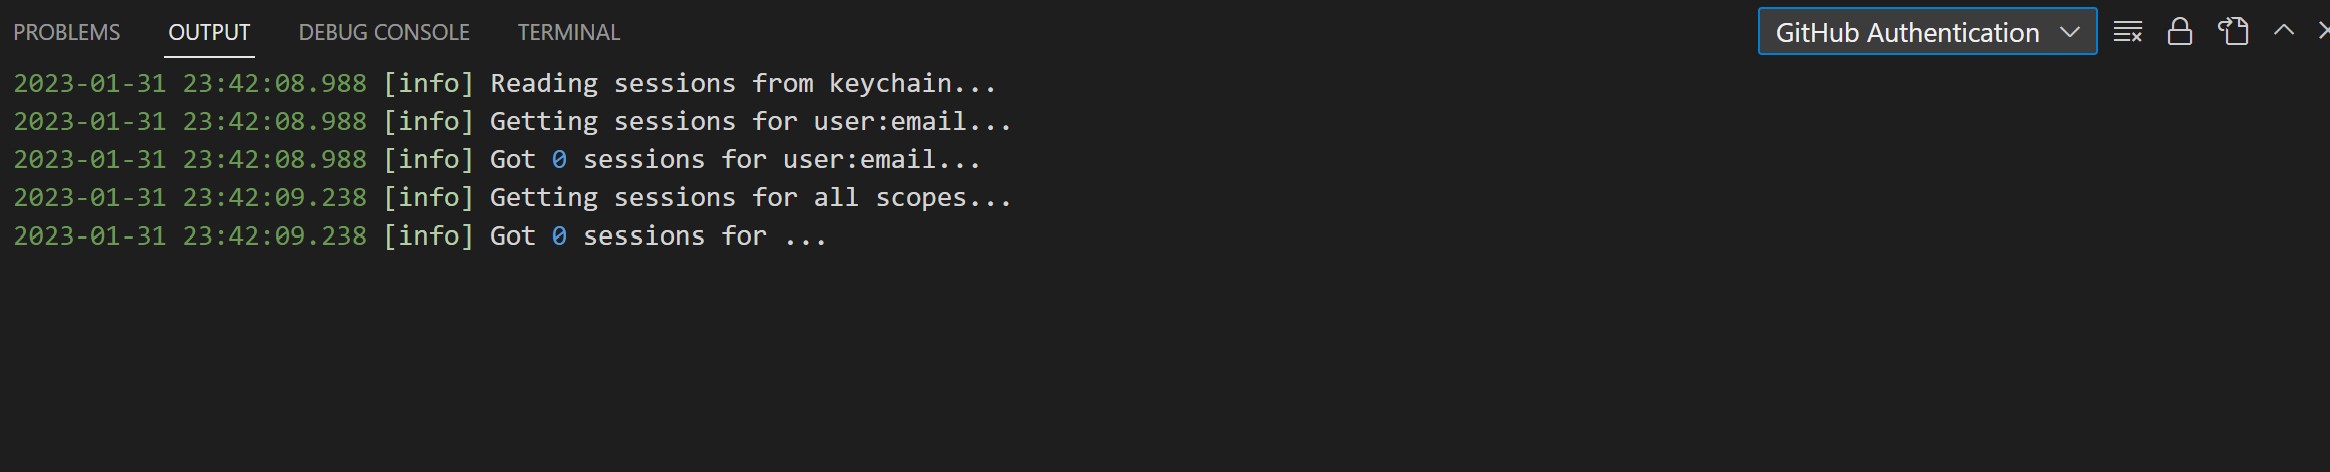 . For some reason, my gitlab account wasn’t connected to my git. I’m trying some fixes right now, but for now I’m just editing through the web IDE, which is working well.
What I would have done differently
If I had the knowladge that about all these systems that I do now, I would have done a few things differently. First, I would set up my gitlab first, and them mkdocs. I spent too much time worrying about mkdocs which was ultimatley a waste of time. Also, I know what my initial problem was for why my pages weren’t there. If I changed my name on the yml setup file, It would have saved me a lot of time. I also spent a lot of time on seperate softwares like the command prompt, gitbash prompt, and other terminals. I should have streamlined all these processes by using them in VScode.
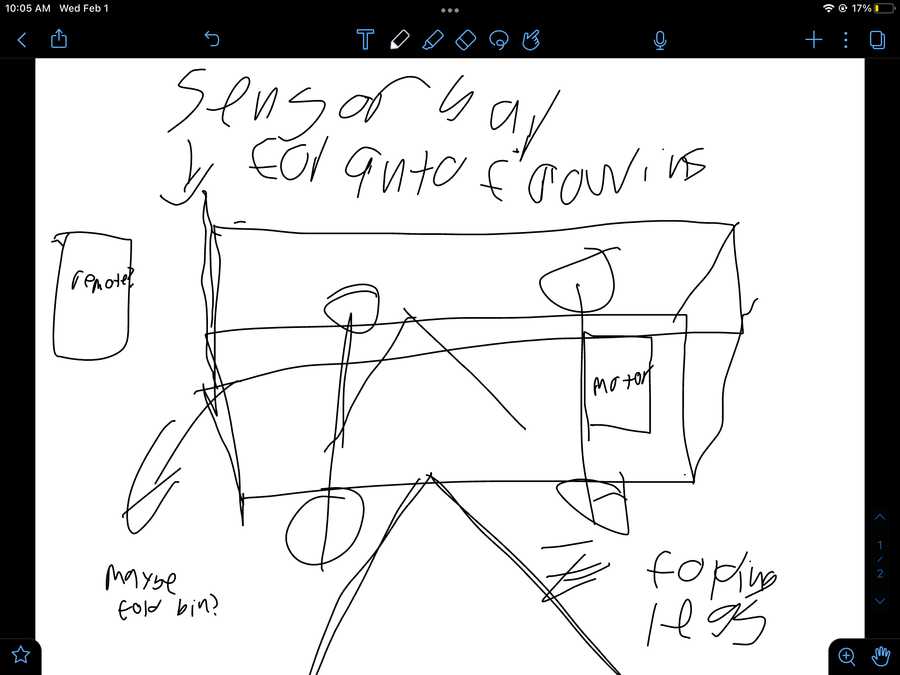
My final project idea.
My family goes to the beach a lot. And one problem we always have is bringing all of our stuff to the beach. We have a beach cart, but it’s flimsy and hard to handle. I want to make a motorized beach cart that will automatically follow somebody with a remote. Here’s a drawing of what my idea looks like