Week 12

Molding and Casting

This week we learn about different techniques to mold and cast as a tool to learn cnc in 3axis. In this case I did two examples, the first one without the proper finishing so I had to repeat it.

  • Week 17th - to 21th of april
  • Keywords molding.
  • Software arduino
  • Group assigment
  • Here

01Molding & Casting

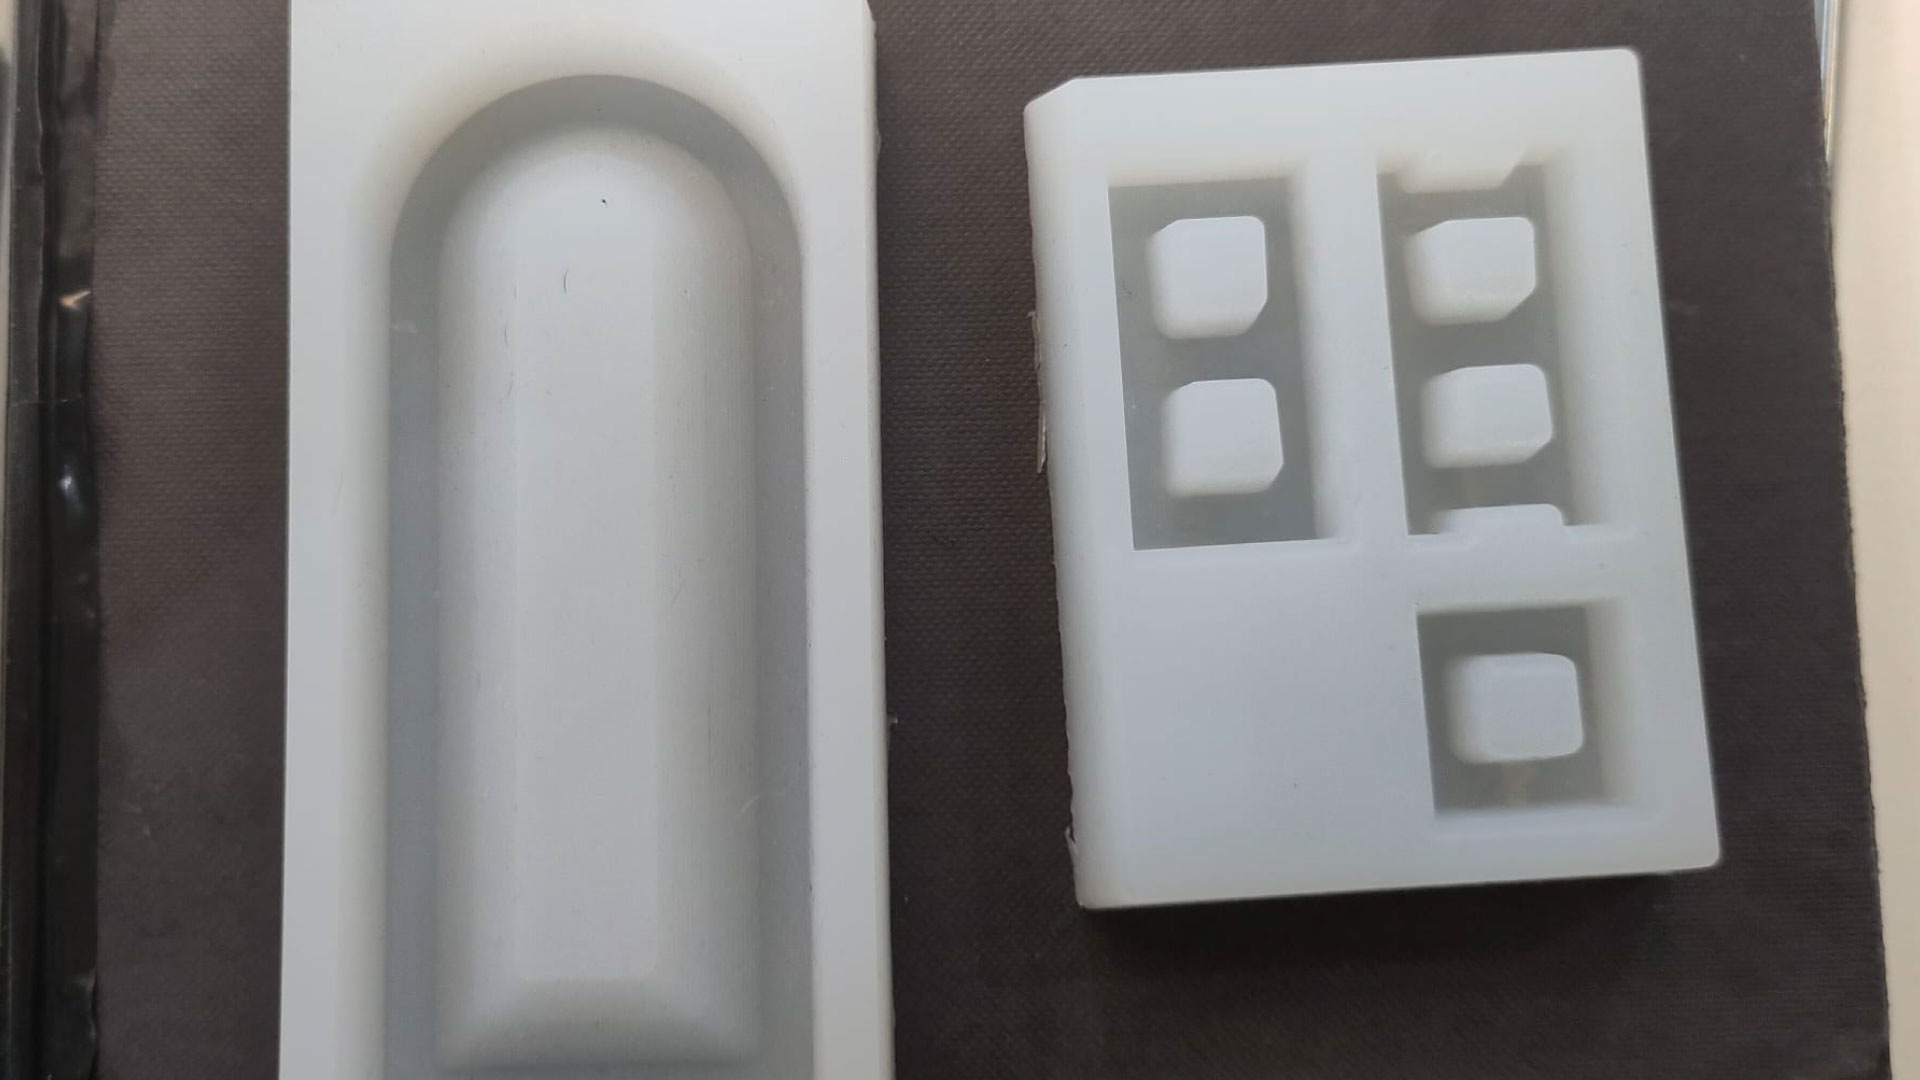
Molding is used to create a negative impression of an original object, while casting involves pouring a material such as molten metal or plastic into the mold to create a duplicate of the original. 
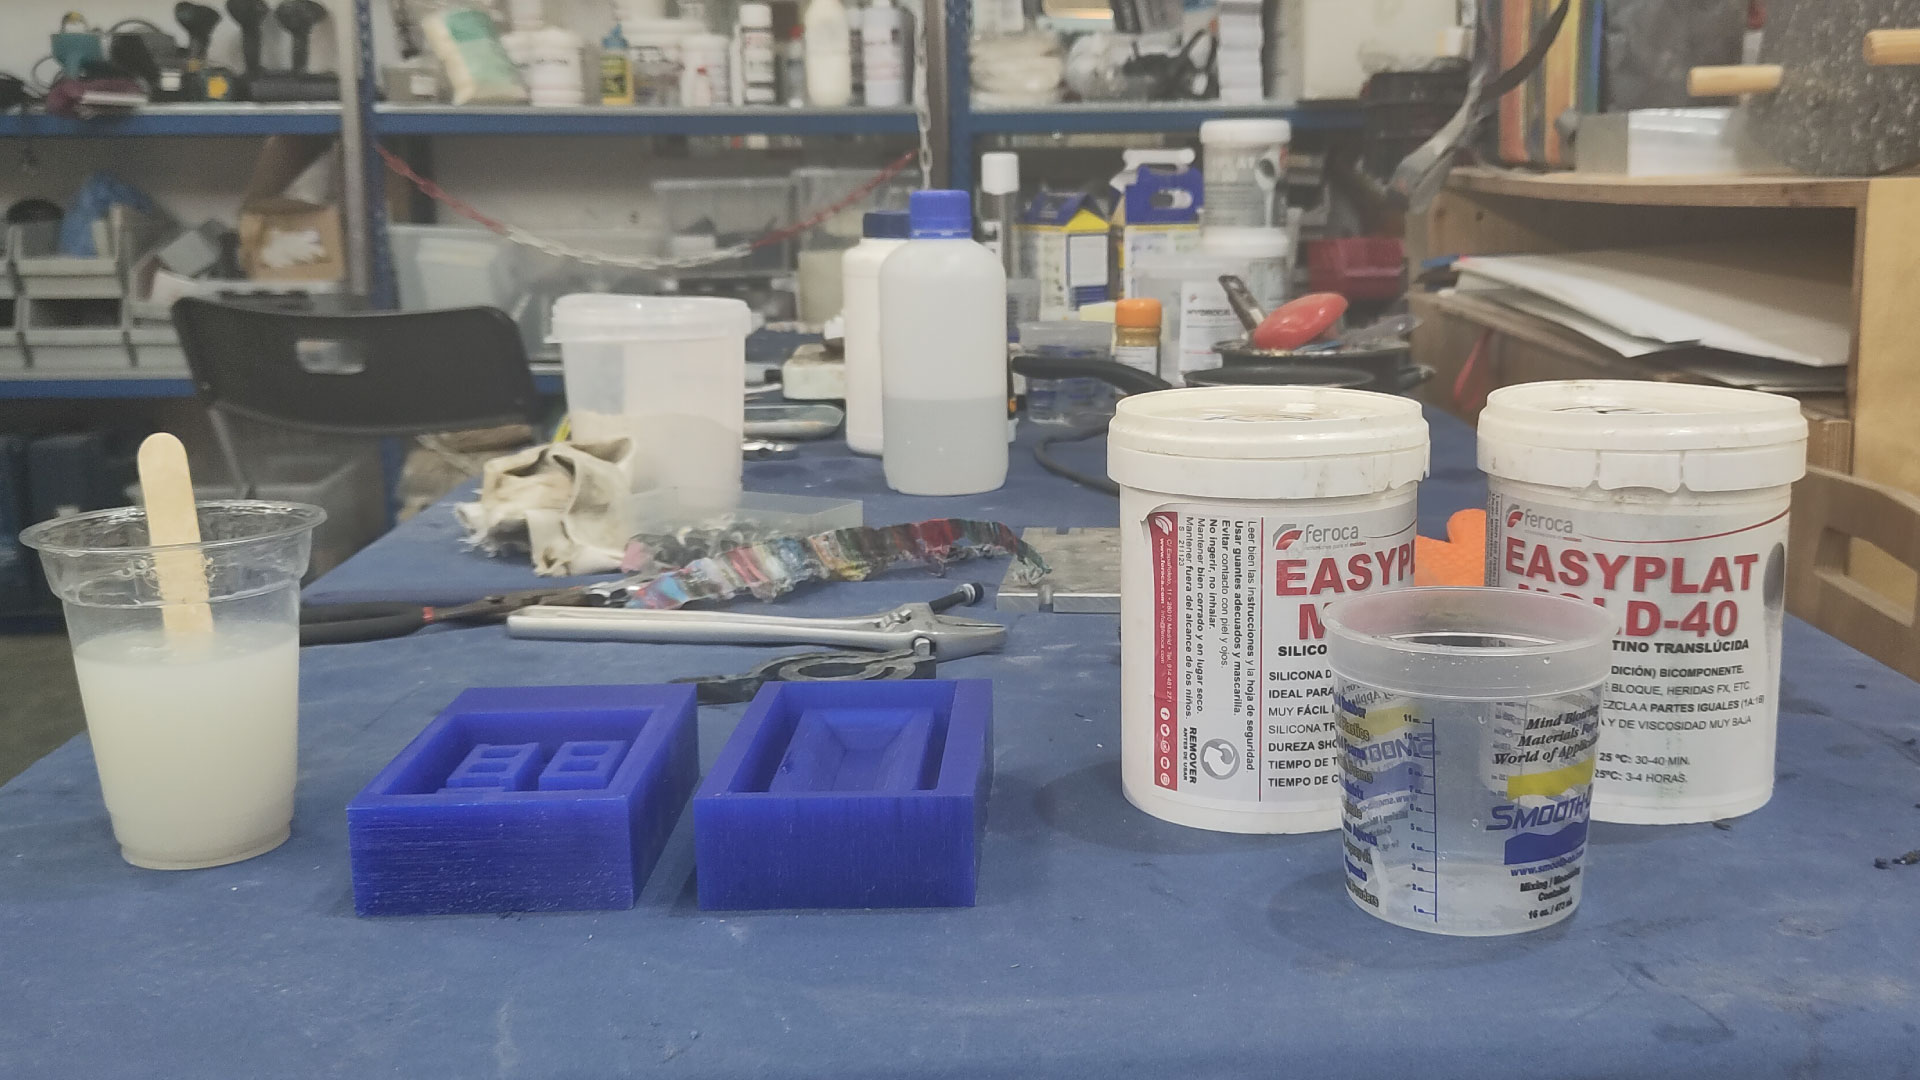
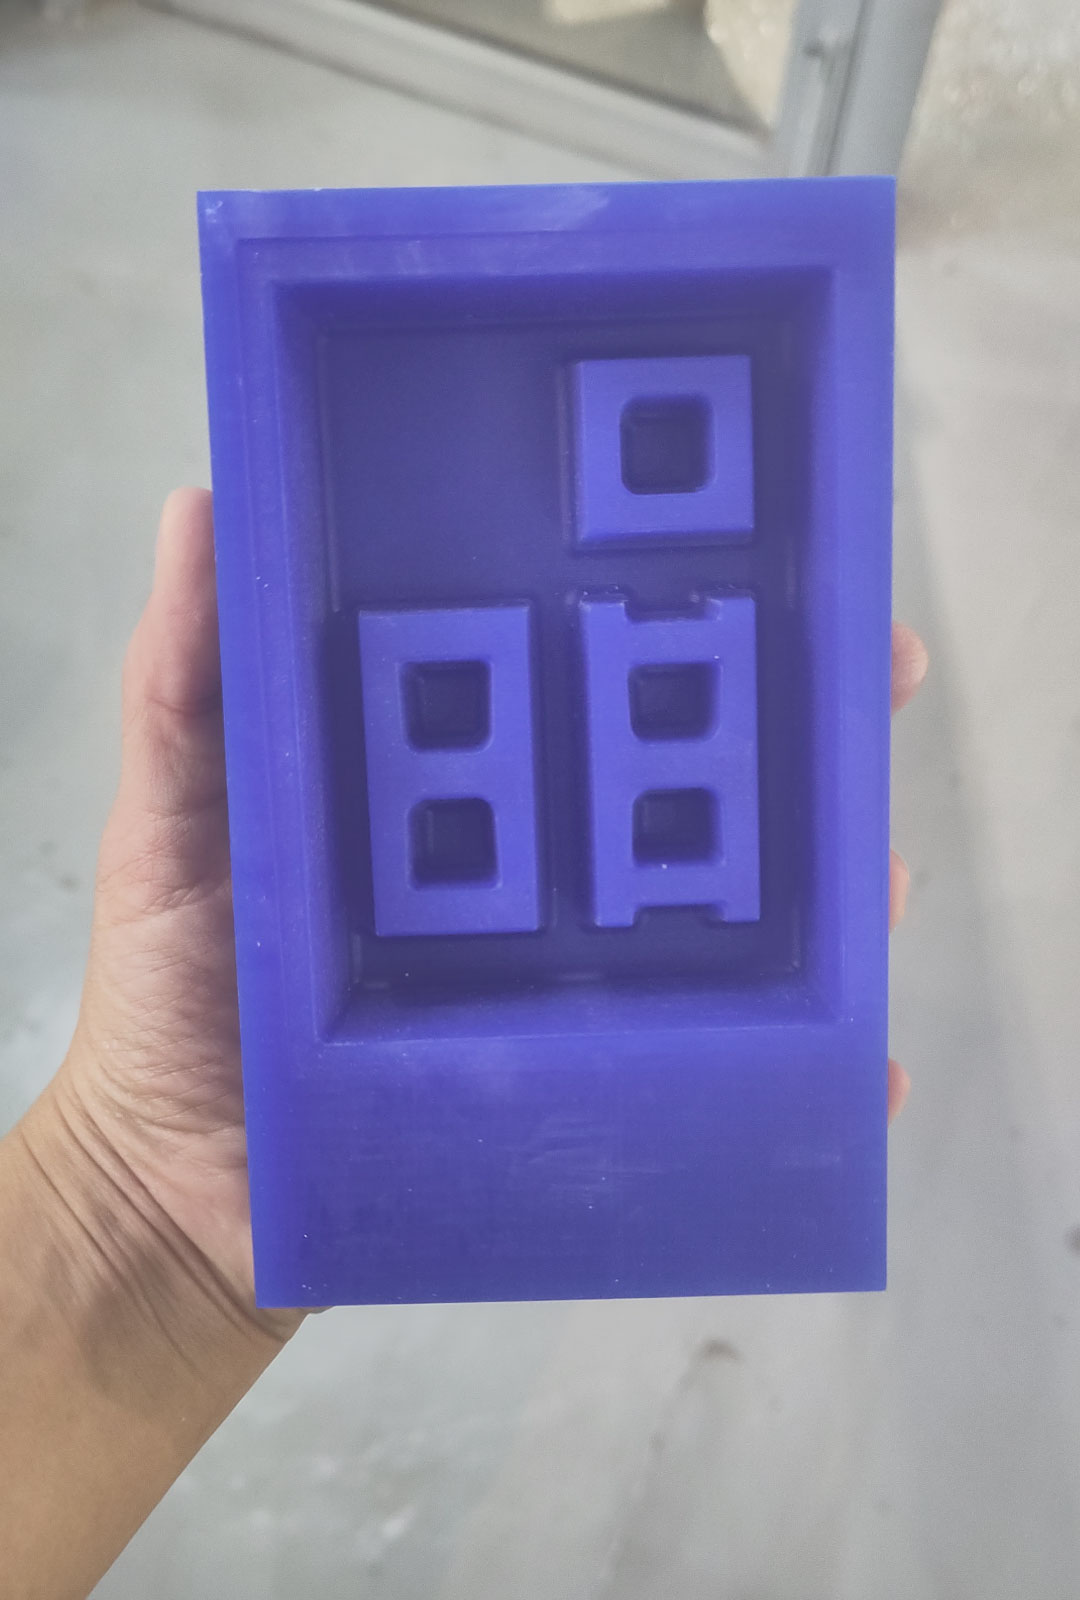
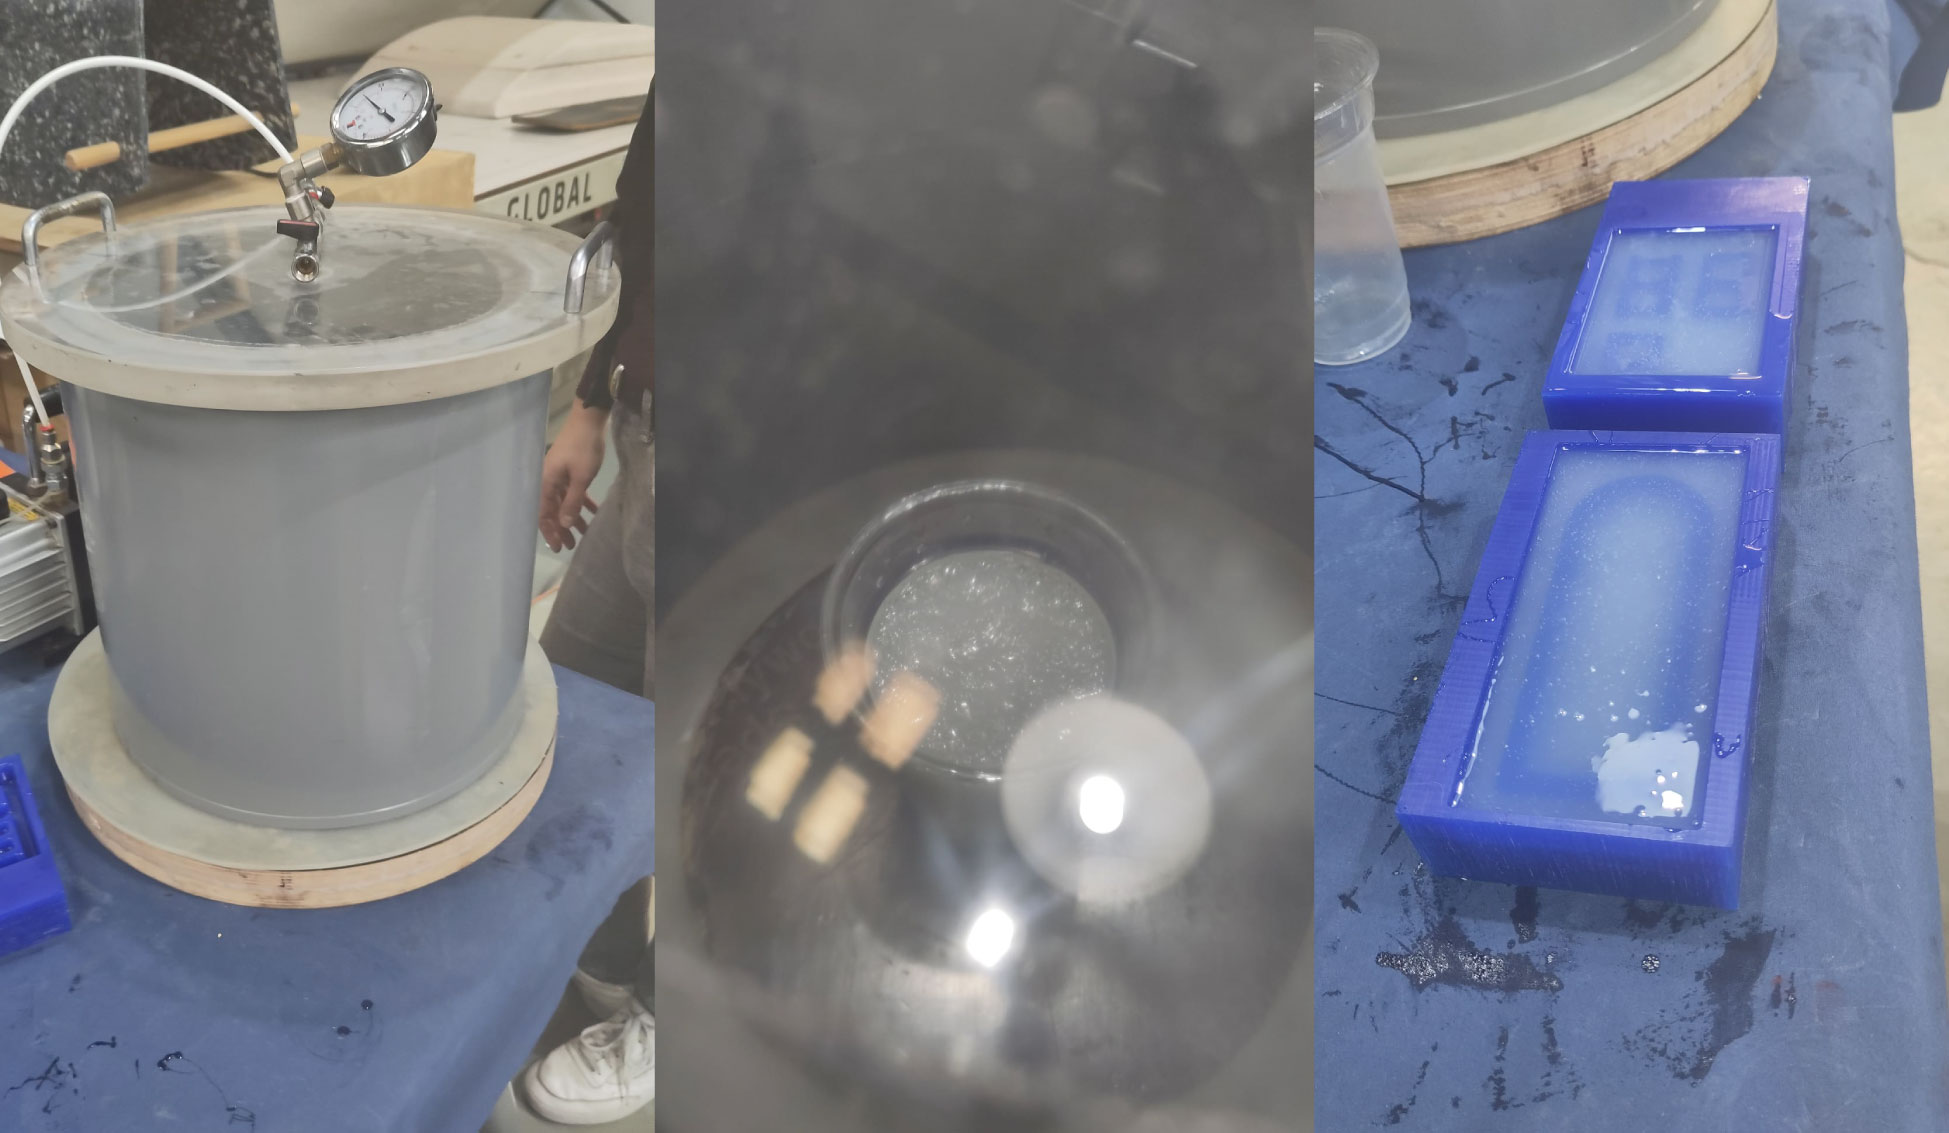
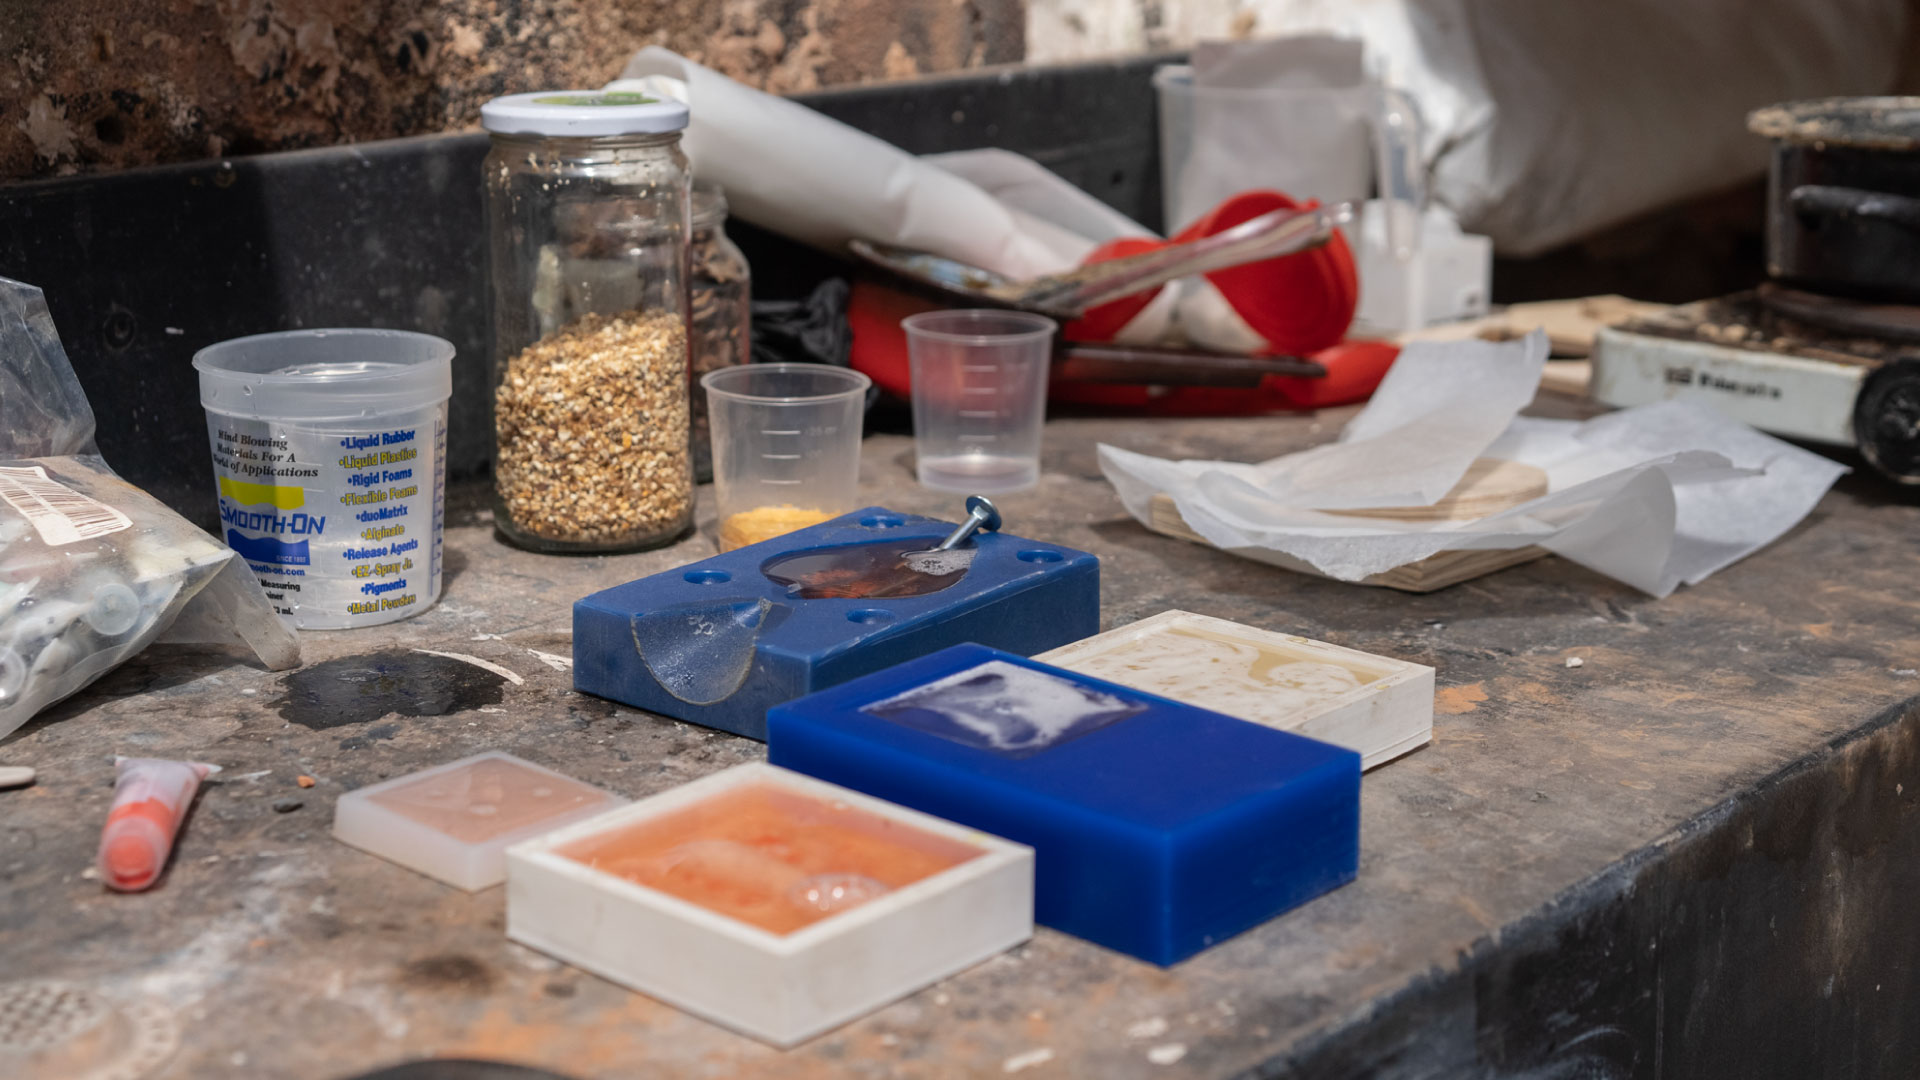
So we will use silicone to create the mold because of its properties, it doesn't stick to anything and then we will be able to unmold it. The downside of it is not easy to reuse once is casted.
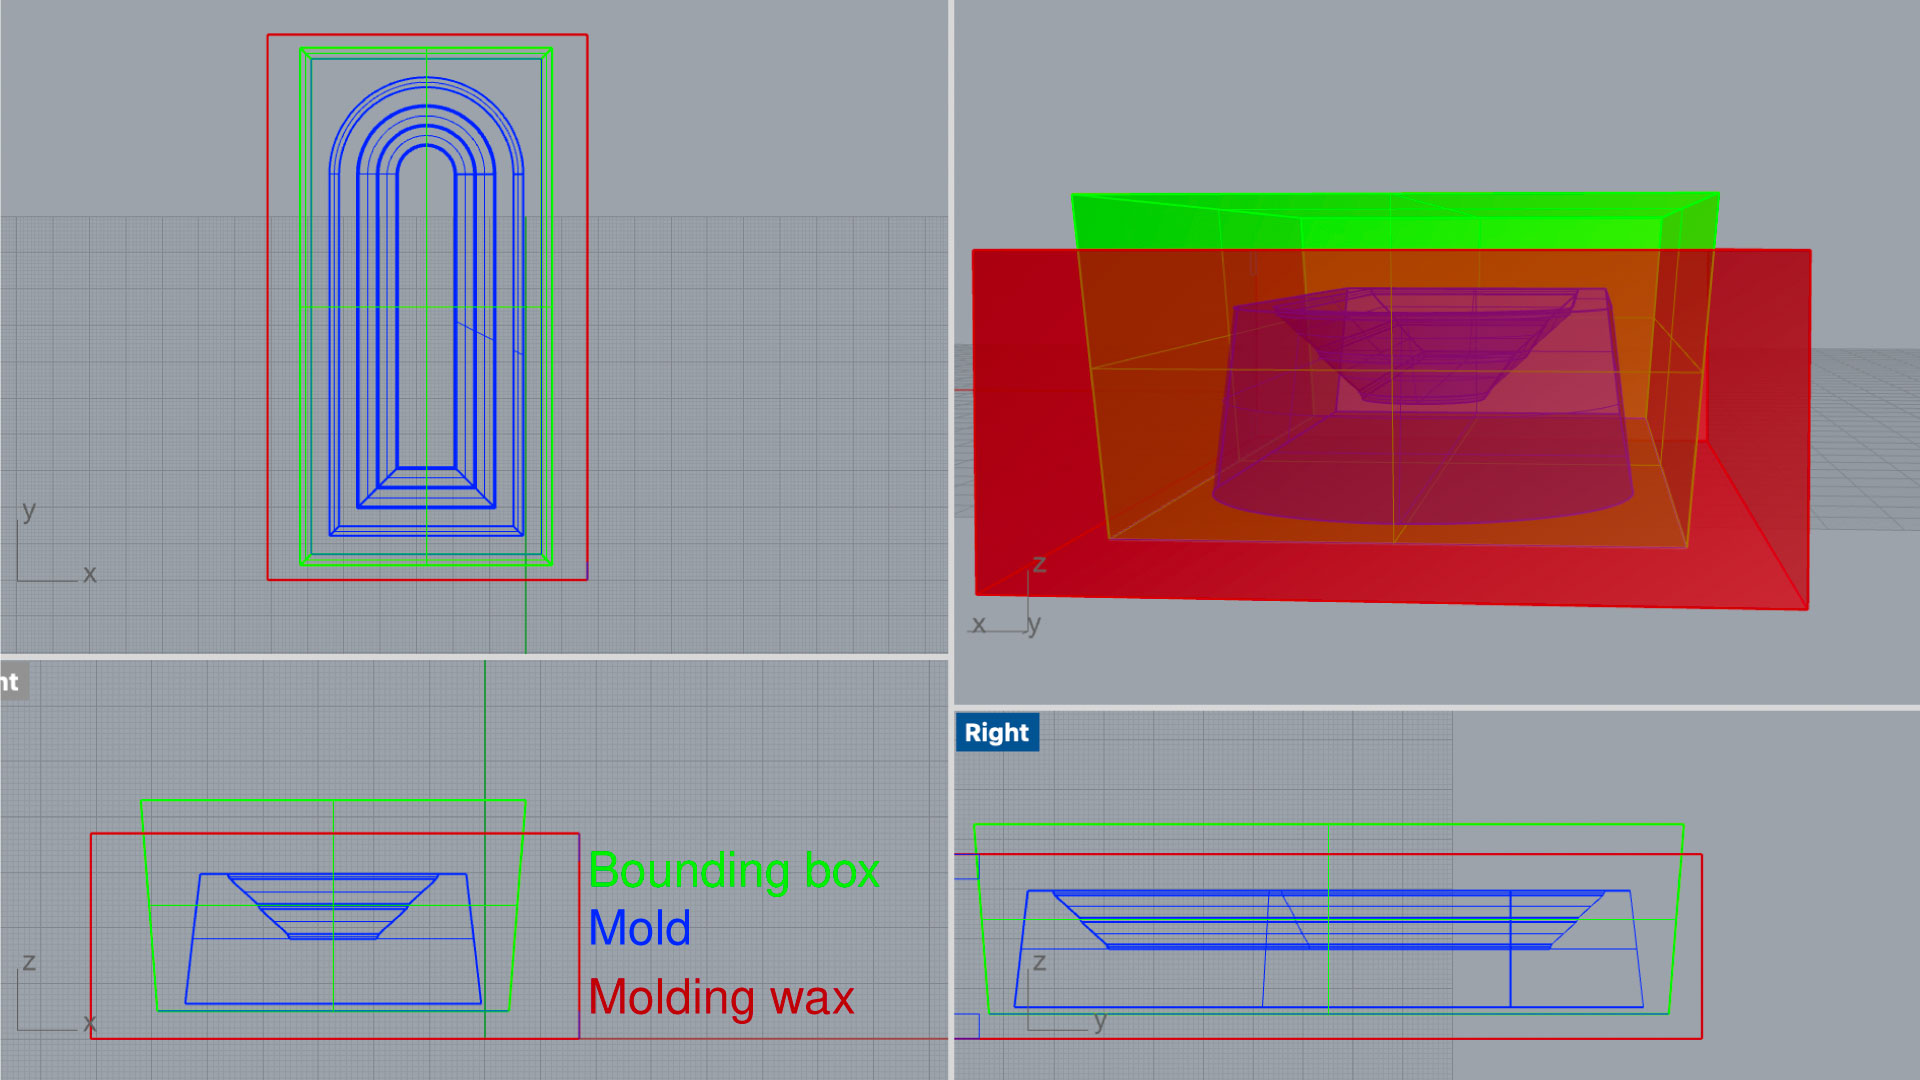
In order to cast, first we need to pour a liquid material into a mold which contains a hollow cavity of the piece that we design, then this liquid solidifies into the part created. There are several process in order to get the cast piece.

Creating a Mold:

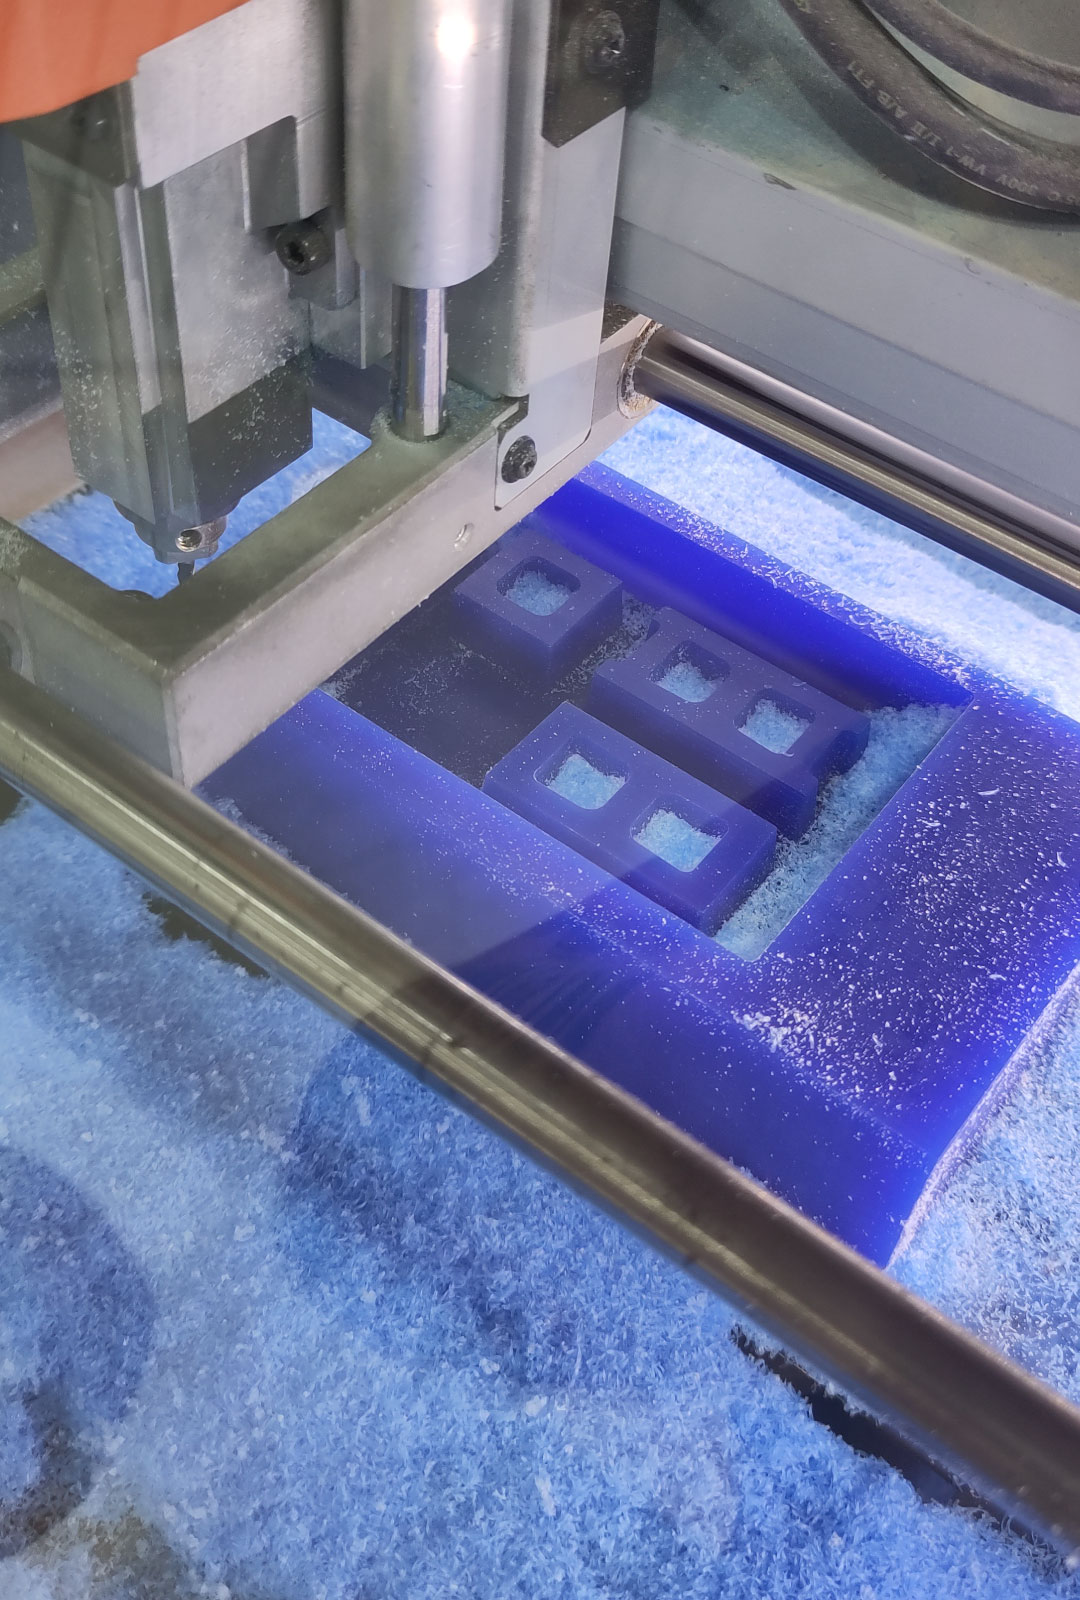
First, the original object or pattern is created or obtained.
A mold-making material, such as silicone rubber or plaster, is prepared and poured or applied around the original object.
The mold-making material is left to set and cure, forming a negative impression of the original object within the mold.
Casting:
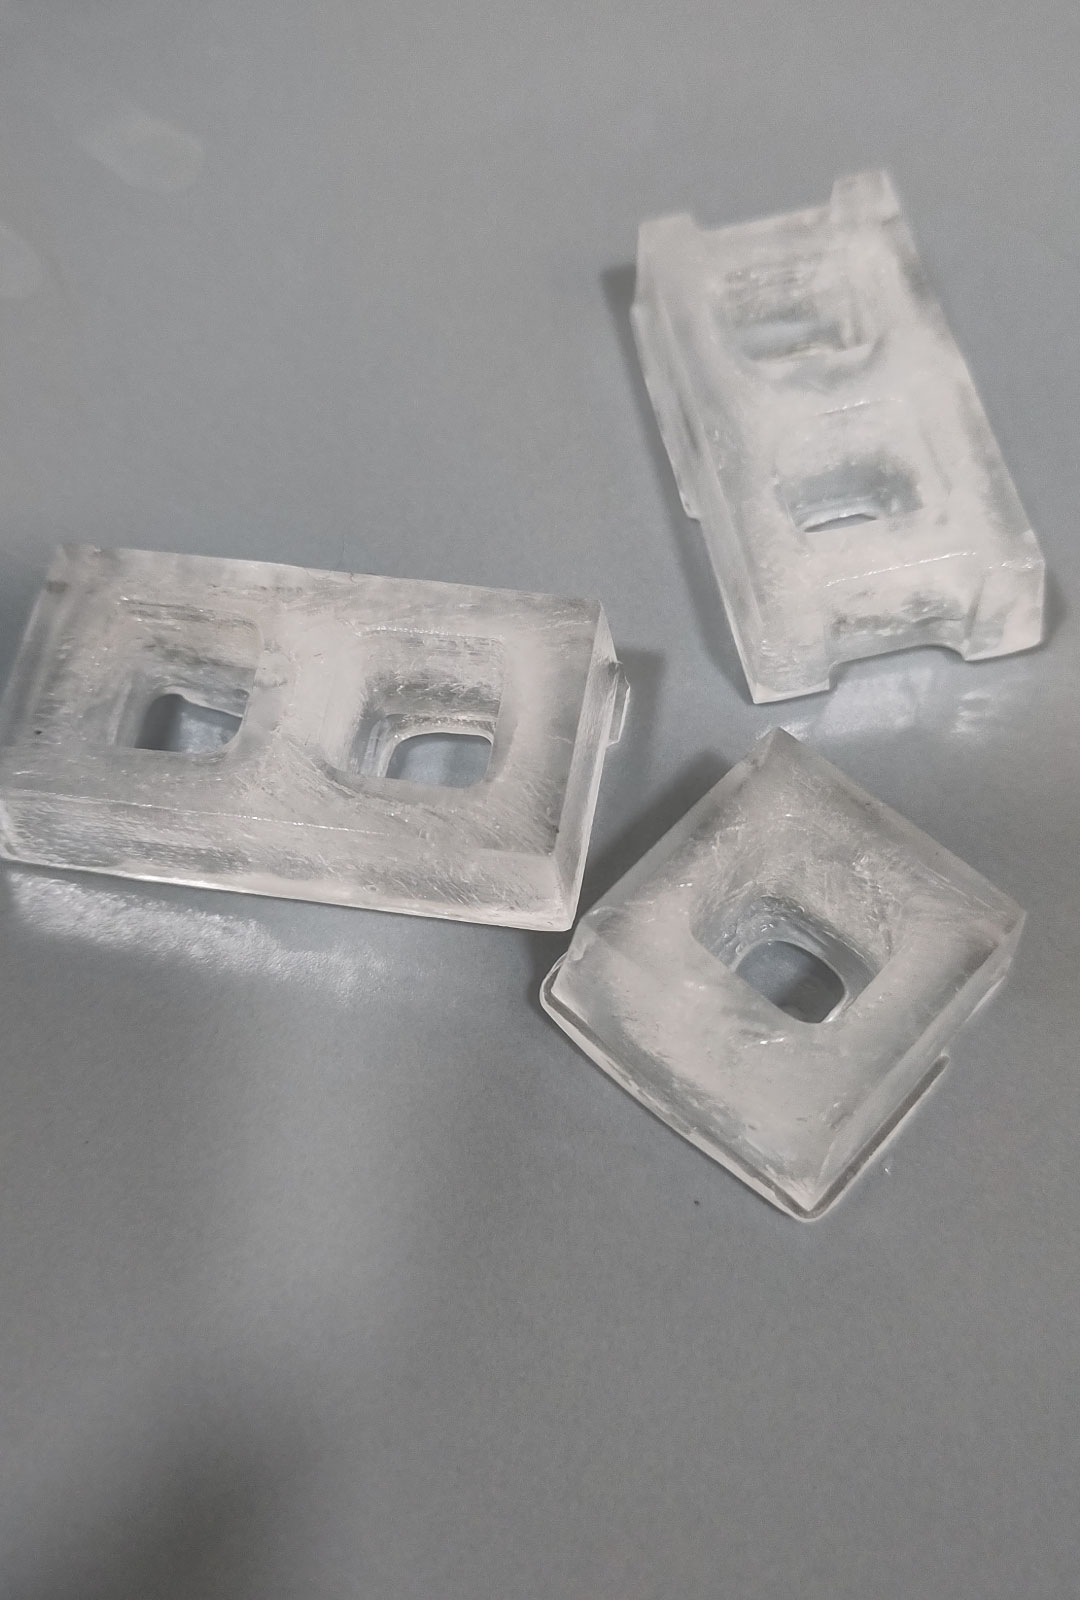
1. The mold is prepared for casting, which may involve applying a mold release agent (Jar A / B named over the cap to know the difference) to prevent the casting material from sticking to the mold.
2. The casting material is prepared and poured into the mold.
3. Then, left to cool down.
4. Once the casting material has hardened, the mold is removed from the casting, revealing the final duplicate piece.


023D milling


In order to create the mold, we first need to use the 3D milling by cutting a block of material. So the first step is to use a rough cut flat end mill to removed most of the material having a rought piece and then for the finishing using another tool to have a smooth surface at the end.
Something to consider is the chamfers and clearence for the tool to go as low as possible and with an angle not to break the end mill in the process. But also, to unmold we cannot have undercuts.
The distance between the mold and the shape needs to be at least the size of the endmill so in this case 3mm.

For this class test, I designed an arc flat on the bottom and with some chamfers in the inside, the idea would be to cast it with some fiberglass pieces like nylon to see if oncce it solidifies, if it could be use as a lamp.
In rhino, after creating the general shape, we put it inside a box, the same size of our material, taking into consideration leaving 5mm to the corners and lowering 5mm as well in the bouncing box, then with boolean difference creating how the mold would look like and then with boolean union to have everything in only one piece. Exporting it as STL.


03Modela

  • 1. Open Modela and go to edit and Select the machine, in our case SRM-20 and add choosing the tool in the square icon, (in case is not already there)for this would be new tool 1/8 inch Flat square. Material> Cemented carbide>flut diamenter: 0.125. Then choose cutting parameteras and in the material as modeling Wax, set parameters and click on register.
  • 2. Import the file as STL looking at it as a mesh
  • 3. Moving the origin, to the left corner by going to set > model.
  • 4. Choosing the material: Modeling wax
  • 5. There is an icon in the top right like a circle inside an U shape, in there we need to put everything in 0 because we already created a margin.
  • 6. Create a new process: in the icon like a stairs. The first part would be choosing roughing: chooseing the area of our mold. In the depth is better to keep it the end in -30 not the total depth.
  • 7. How do we want to cut it: Contour lines is the one that will go faster and choosing up cuts always for the wax not to get the tool stock. Lastly, defining a name and calculating the process.
  • 8. For the finishing: Then the finishing process its when we want the surface to be more smooth, this finishing process shows more accuracy and the surface quality. Almost the same process as before, first choosing finishing, then the partial area of the process, then the tool path scan X+Y,
    In case of changing the tool to a ball endmill: Create new tool 1/8 inch ball 3.17 mm, choose for the material again cemented carbide. In cutting parameters, the material is modeling wax. Scan lines X.
  • 9.The last step would be to press cut, click output to file and save it in the desktop. * Needs to be in format .prn


  • Silicone

    For this week I used EASYPLAT MOLD-40, which is really easy to mix and understand, it has a part A and part B that once its mix for 5 to 10 min mixing it non stop it gives 30 minutes to work with it and 3 hours to dry. datasheet

    Also here is the Safety concern sheet just to have precausion with the enviroment, first aid kit, effects. But the important part is always wearing gloves, not having it in contact with the skin and a mask.


    04Test


    Once I had the model ready, the first important part on rhino was first to align it to the X and to Zero, therefore, is in the same alignment than the machine. Secondly, when exported in stl, it asks for the mesh, add a 0.0001 so the finishing of the polygons is as small as possible. * More true to its shape.
    Then, in Modela Player 4, I align the pivot to the Z axis, created two type of tools 1/8 inch square for the roughing and 1/8 inch ball for the finishing.
    First in the roughing choosing the tool just created, edit the partial space to cut taking a photo to add the same measures to the finishing cutting space. The roughing process is to remove the bulk of material form the mold design leaving a rough shape that will after be refined. In order to do it, first we need to define the cutting parameters: Cutting tool, feed rate, spindle speed and the depht of cut. Then define what the tool path will follow to remove the material.
    Once all of the cutting settings are added, then choosing the option cut and output to file.
    The next step was to add the material with double side tape to the floor, opening the files from roughing and finishing in the VPanel after set up the X/Y & Z.


    So once I had the silicone molds I wanted to test how it look to create a lot of ice cubs with the shape of the bricks and in the other shape, what would it look like to froze some water with herbs.


    05Second Test


    Second test, so the first one I stopped it before it did finishing because I like the rough look of the layering, in this case I added a new file, three kind of bricks really small just to test the finishing look.
    The total time to milled it was: For the roughing 2.42 h and for the finishing 1.44

    Once the mold was done, its very important to clean it well, not leaving any dust becuase the silicone will show it after. So I proside to mix silicone easyplat mold-40, it is hard but still flexible to do some test.

  • Step 1: Prepare the molds, cleaning it, and have all the tools on hand: water, measure cup, molds and silicone A/B
  • Step 2: Pour water into the molds and then pour that water into the measuring cup to know exactly the amount of material needed.
  • Step 3: In my case, it was 300ml so I mixed 150ml of part A and 150ml of part b, mixing it for more than 10 minutes (the total amount to work with it is 30 mins before it starts to dry out)
  • Step 4: Here I had to pour the silicone into the molds but realise there where way to many bubles so I had to degas in vacumm air. This needed a lot of physical strengh, first to sleal it and then letting some air inside to make the bubbles come to the surface, after less than 5 minutes I took the silicone out.
  • Step 5: This last step was pouring the silicone into the molds, by a really thin threat and always on top of the same silicone. After this step I waited 4 hours to unmold them.


  • FILES


  • Mold 01 file

  • Bricks file


      Things to learn

    • 01 In rhino, duplicate a lot the figures and save different version of the process of the mold, bounding box
    • 02 Its needed a lot of physical strengh to make the vacum for the mold
    • 03 When mixing the silicone more than 10 mins its good
    • 04 In order to pass the assigment, there NEEDS to be the finishing for the 3axis cnc
  • next project

    Network & communication