Processing and P5.js are open source programming languages used to create visual arts and interactive applications. It provides a lot of libraries to create interactive graphis or animations for web. There are other many to use like Blender, mIT App inventor, A frame, Unity or Node red, some of them to download or web-based.
P5.js
This one is web based so no need to download, by default there is the code in one side and when the button of play creates a preview of the code. Inside the code, the first part has a text follow by a script, in here is calling the library of java that creates the code.
There are a lot of things we can create using the reference page, for example a simple rectangle has a lot of ways to edit it and just by adding Mode to the would, would mean to edit all of the rectangles created in the rest of the code (kind of creating a div class, i think
Week 14
Interface & Application programming
This week is about creating interfaces with the computer and using the application to interact with the real world. The assignment this week is connecting one of the boards created to the real world or the other way around.
- Week 21th - to 28th of april
- Keywords
- Software arduino
- Group assigment
- Here
01Processing
02Test
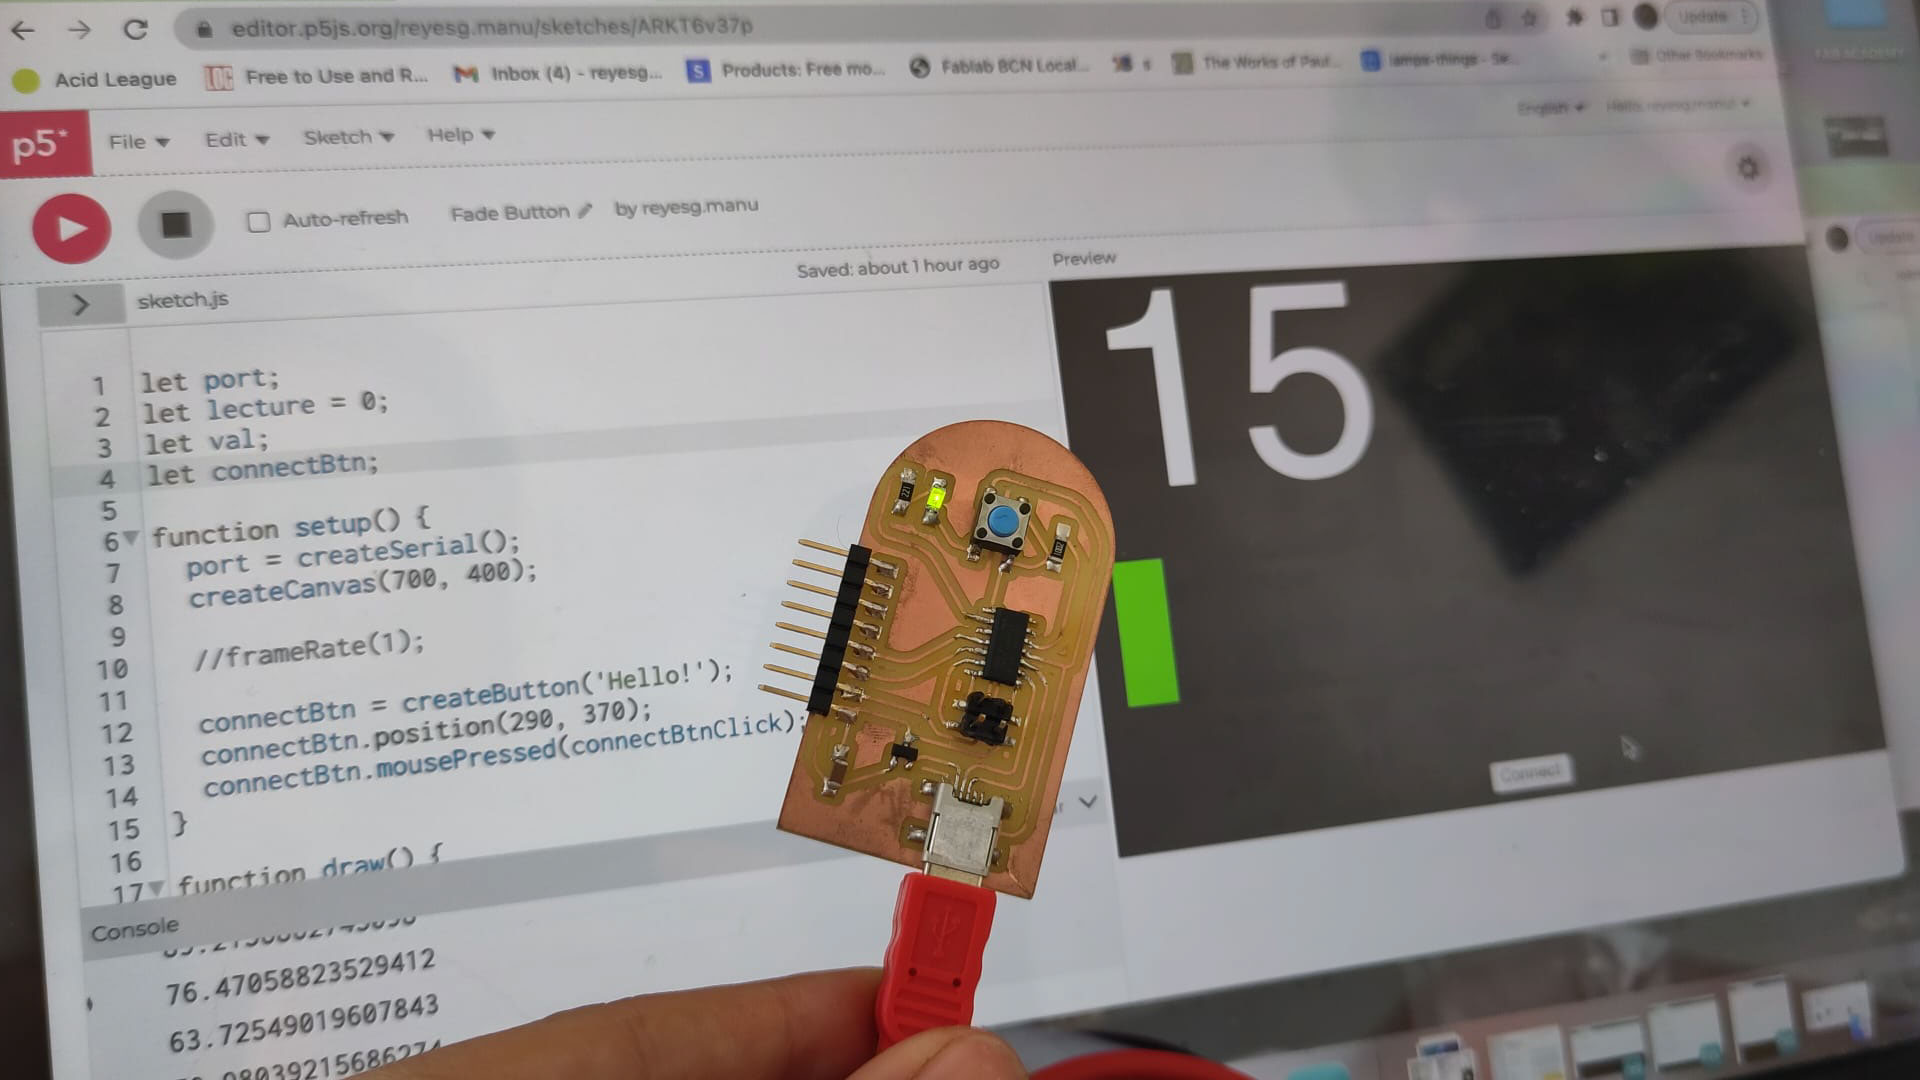
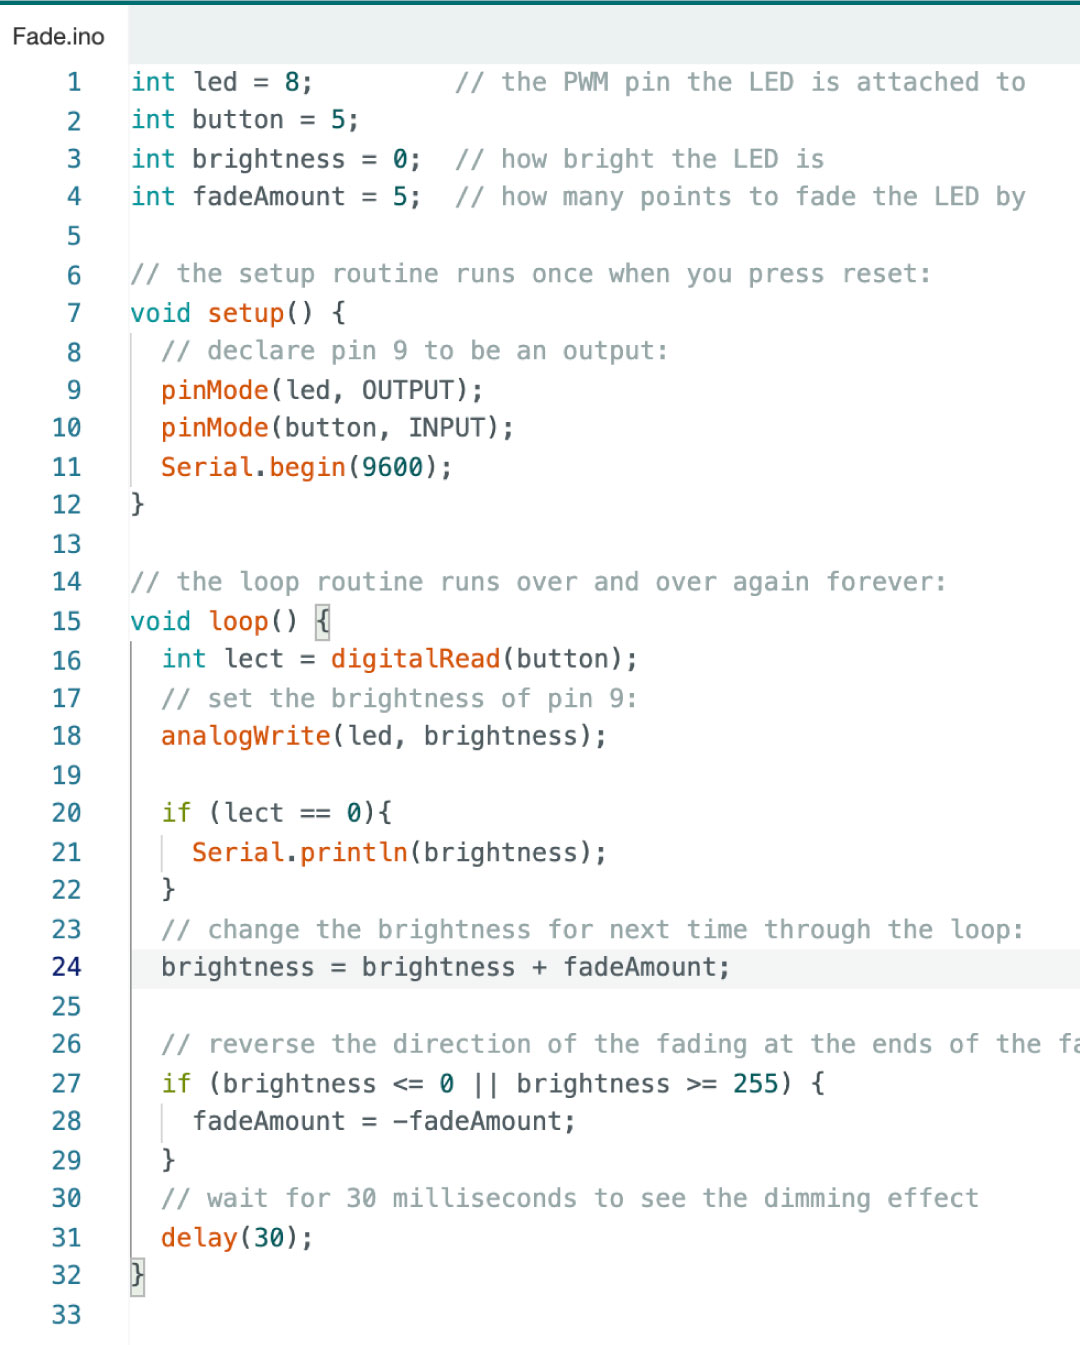
For this week assigment I wanted to use the second board I created, to connect through serial with P5.js, this way everytime I will press the button it would the brightness value. So the first step is to create the code in arduino that will first have the Led as output by fading and the button as input by reading the brightness in the fading. Here is the code that I used:
int led = 8;         // the PWM pin the LED is attached to
int button = 5;
int brightness = 0;  // how bright the LED is
int fadeAmount = 5;  // how many points to fade the LED by

// the setup routine runs once when you press reset:
void setup() {
  // declare pin 9 to be an output:
  pinMode(led, OUTPUT);
  pinMode(button, INPUT);
  Serial.begin(9600);
}

// the loop routine runs over and over again forever:
void loop() {
  int lect = digitalRead(button);
  // set the brightness of pin 9:
  analogWrite(led, brightness);

  if (lect == 0){
    Serial.println(brightness);
  }
  // change the brightness for next time through the loop:
  brightness = brightness + fadeAmount;

  // reverse the direction of the fading at the ends of the fade:
  if (brightness <= 0 || brightness >= 255) {
    fadeAmount = -fadeAmount;
  }
  // wait for 30 milliseconds to see the dimming effect
  delay(30);
}
Then, after uploading the code to my board and checking that everything works out well, I open editor.p5js and start to use the example from my instructor as the base, here is the link
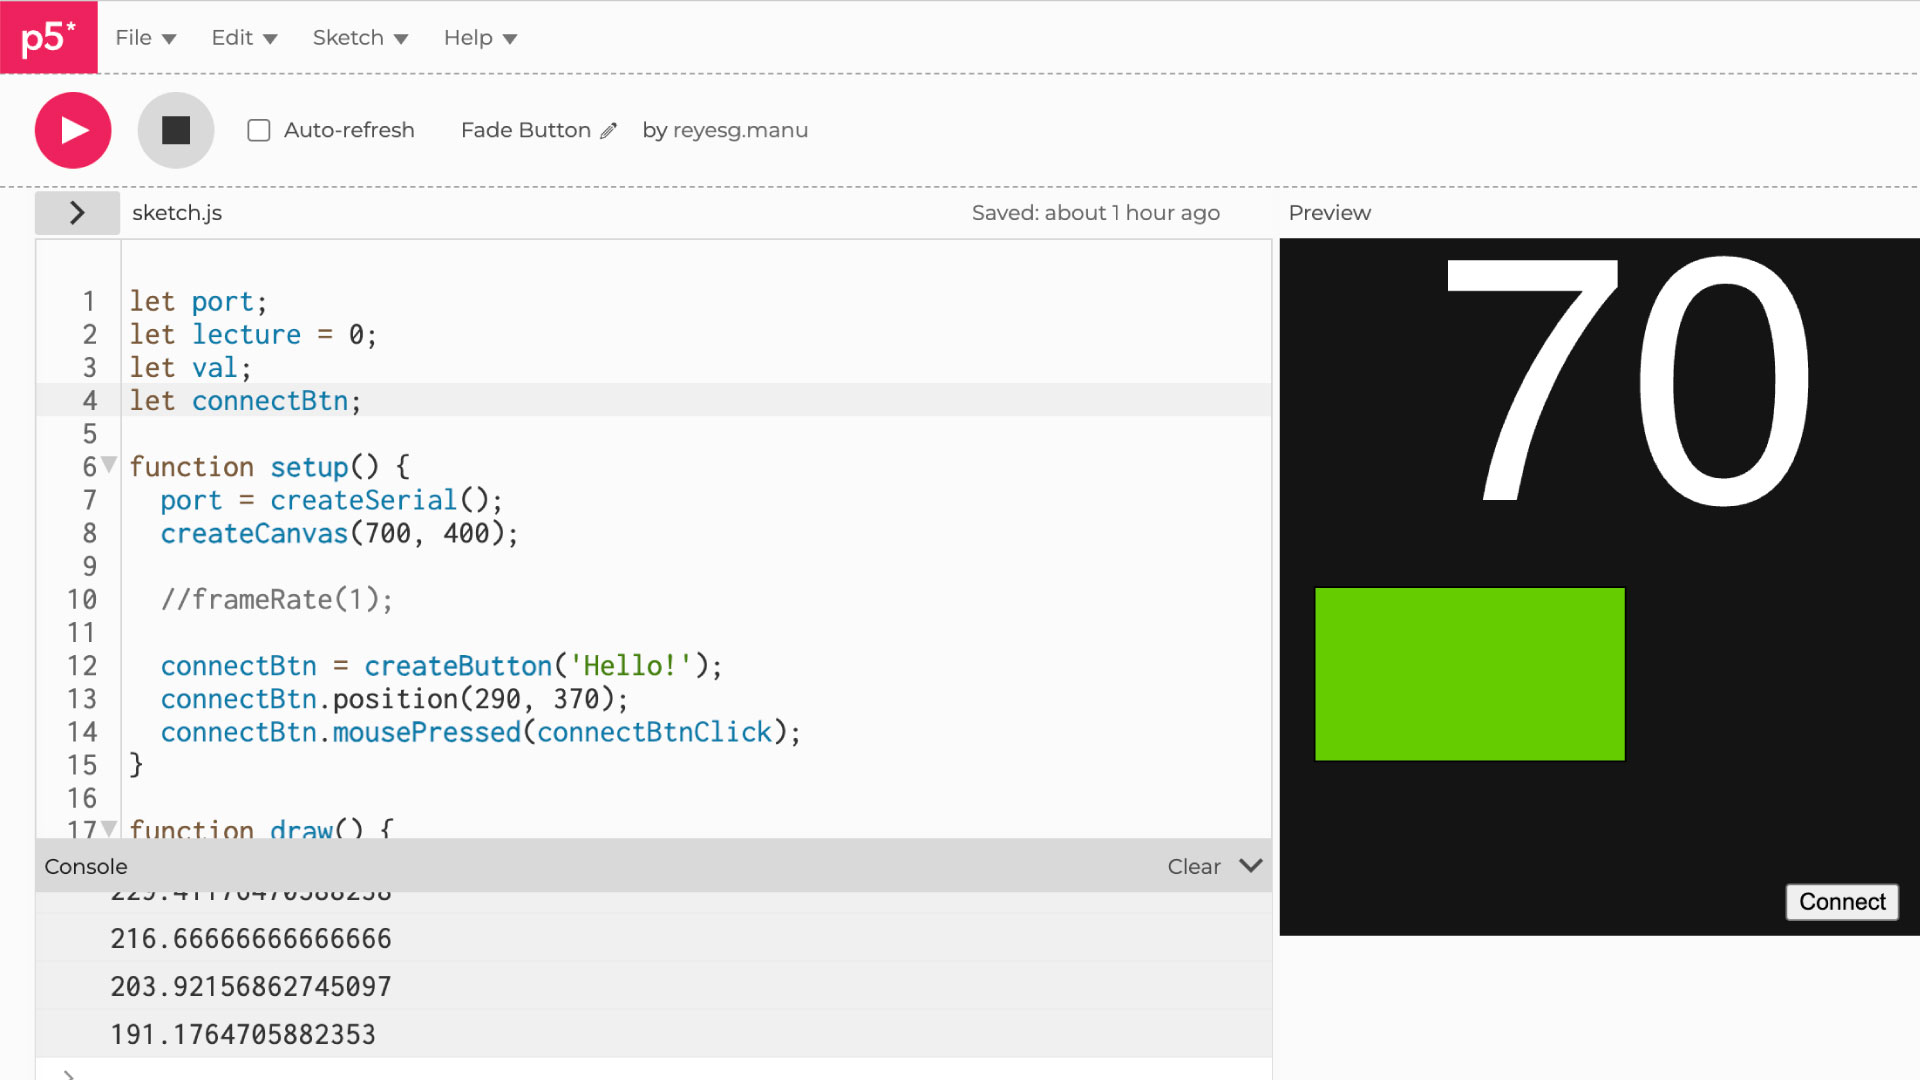
What I changed in here where just the size of the canva, the readings from 0 to 255, the size of the number and the colour of the rectangle, so everytime that the button will be clicked the rectangle would expand horizontally. Here is the code that I used:
						let port;
						let lecture = 0;
						let val;
						let connectBtn;

						function setup() {
						  port = createSerial();
						  createCanvas(700, 400);

						  //frameRate(1);

						  connectBtn = createButton('Hello!');
						  connectBtn.position(290, 370);
						  connectBtn.mousePressed(connectBtnClick);
						}

						function draw() {
						  if (port.available()>0){
							lecture = port.readUntil('\n');
							if(lecture) {
							  lecture = int(lecture)
							  console.log(val)
							  val = map(lecture, 0, 255, 0, 650);
							}
						  }
						  background(20);
						  fill(100, 204, 0);
						  rect(20, 200, val, 100);
						  fill(255);
						  textSize(200);
						  text(lecture,val/2,150);
						  if (!port.opened()) {
							connectBtn.html('Connect');
						  } else {
							connectBtn.html('Disconnect Serial');
						  }
						}

						function connectBtnClick() {
						  if (!port.opened()) {
							port.open(9600);
						  } else {
							port.close();
						  }
						}
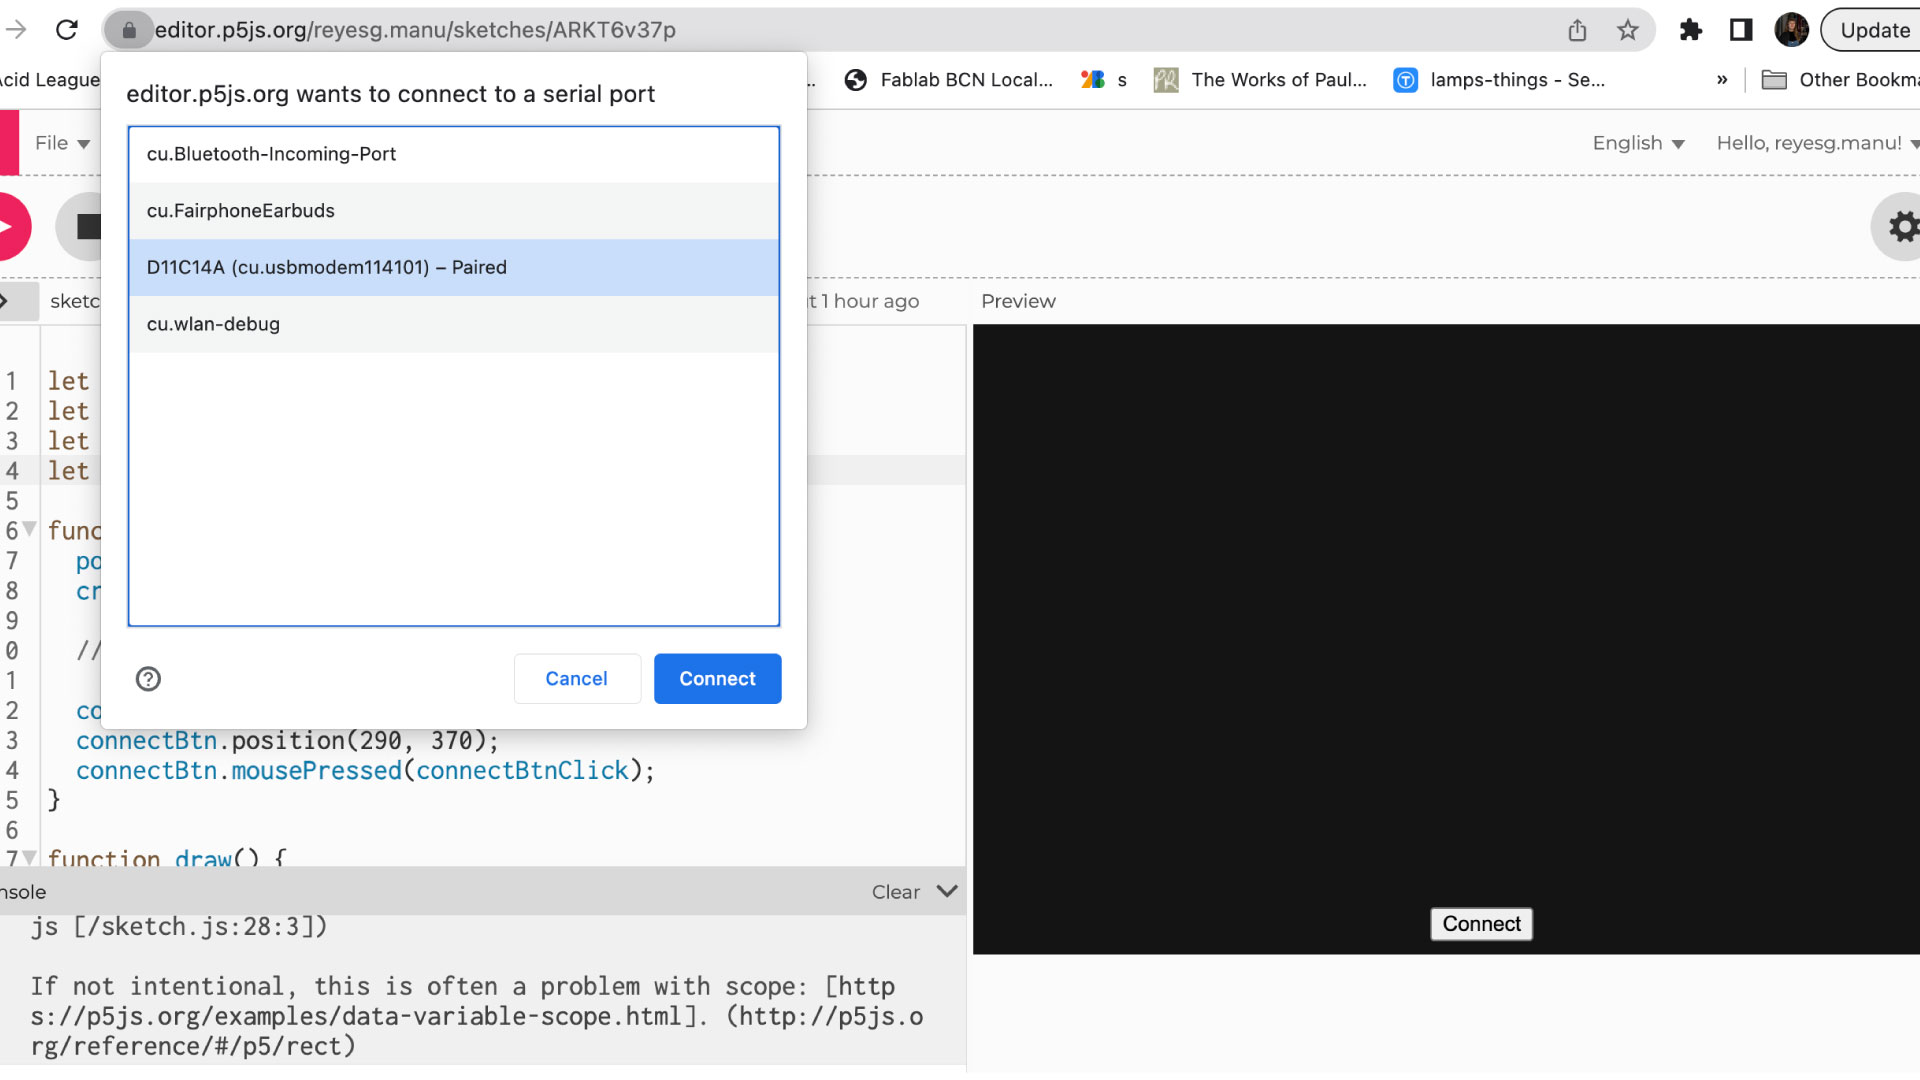
It was very important to have the button connect on the canva so it will appear on the left side of the screen the name of the board to connect to, in my case D11C14A
For the final video, it was a second test that I did with my instructor using the final board of my project, checking the brightness in this case with a phototransistor.