For my final project, I want to create an artistic composition that reflects the idea of an oximoron. By this, I mean contrast between artistic-functional, 1-0, low-high, artisanal-digital, light-dark. Showcasing how one is not that far from the other one.
For this result, I want to create a freeform electronic sculpture using material found in the lab, and digital fabrication to help and facilitate the process of creation without replacing the artisanal part of it.
Week 15
Applications & Implications
This week is a wrap up of all the knowledge we have gather in fabacademy laying it out on one single project, trying to add most of the classes that we did.
- Week 21th - to 28th of april
- Keywords 2D and 3D design
- Software rhino, arduino, kicad,
01What is it?
02How?
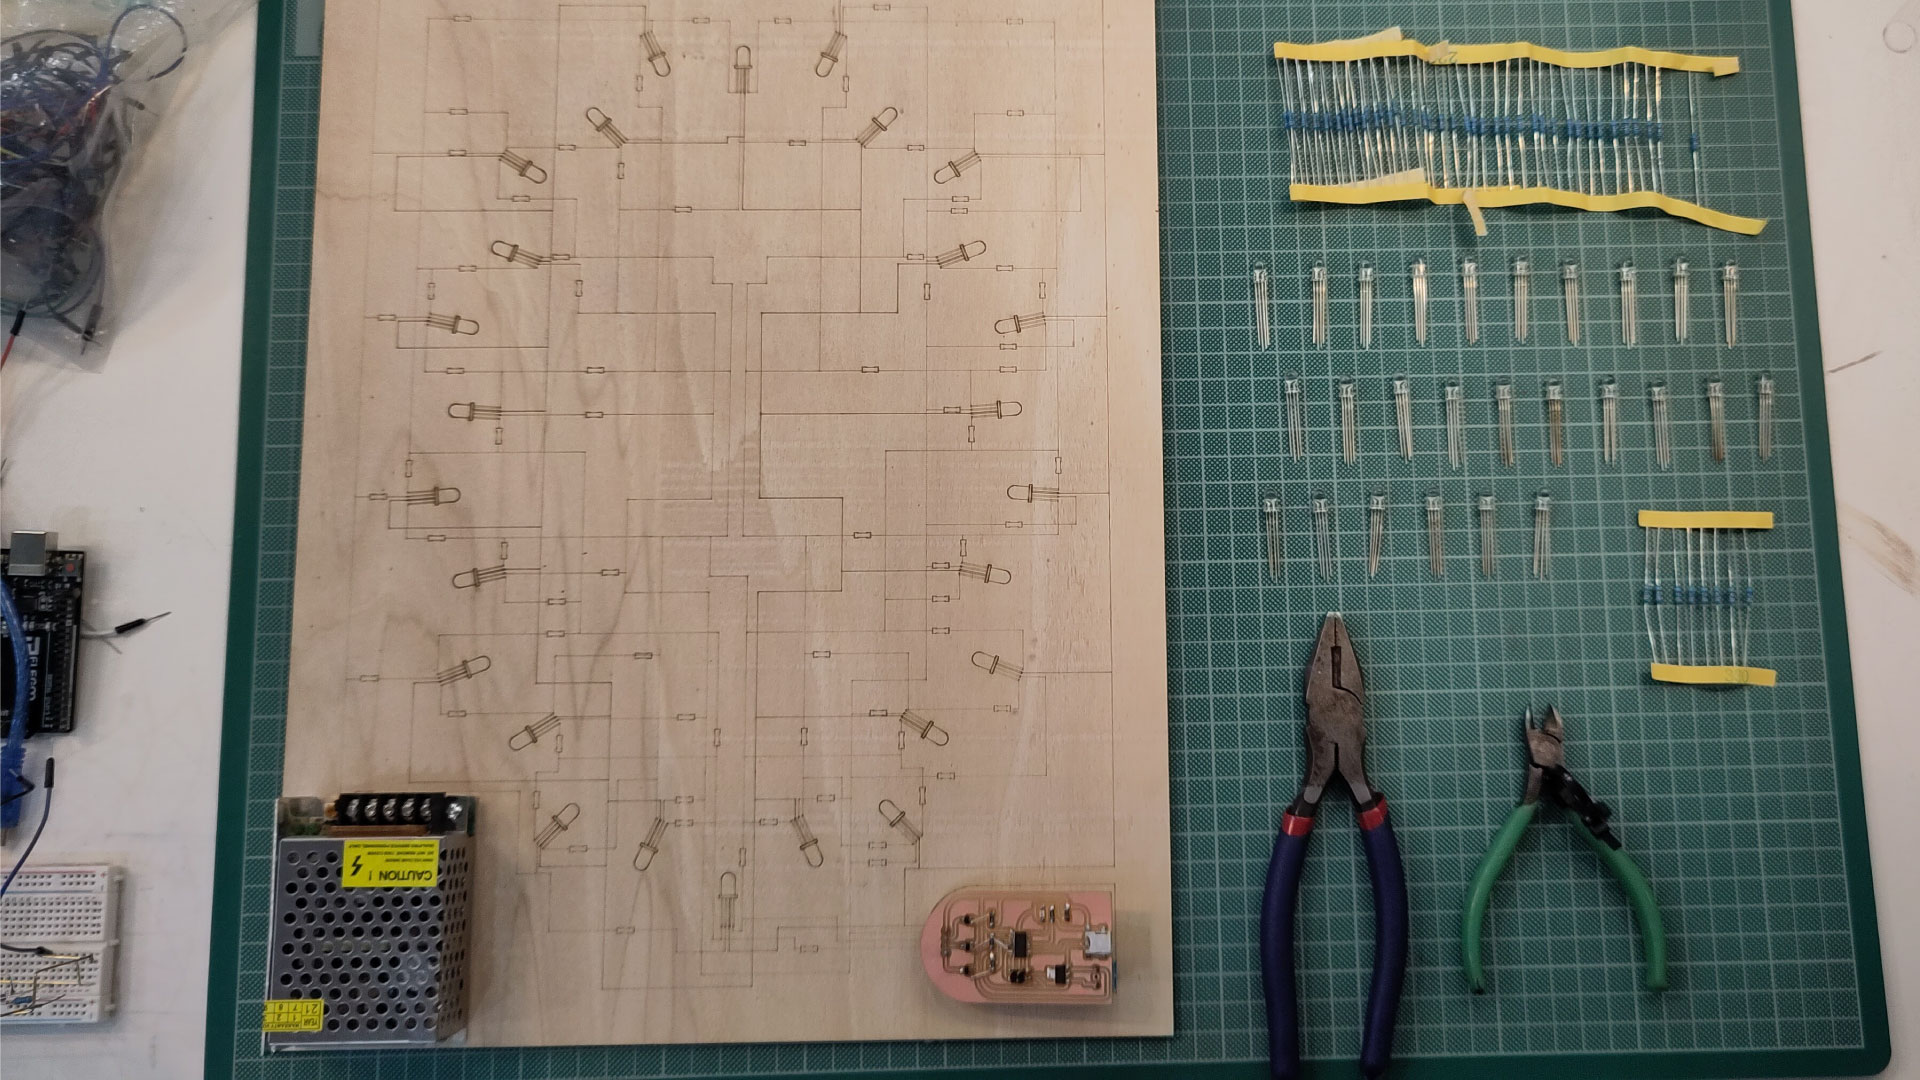
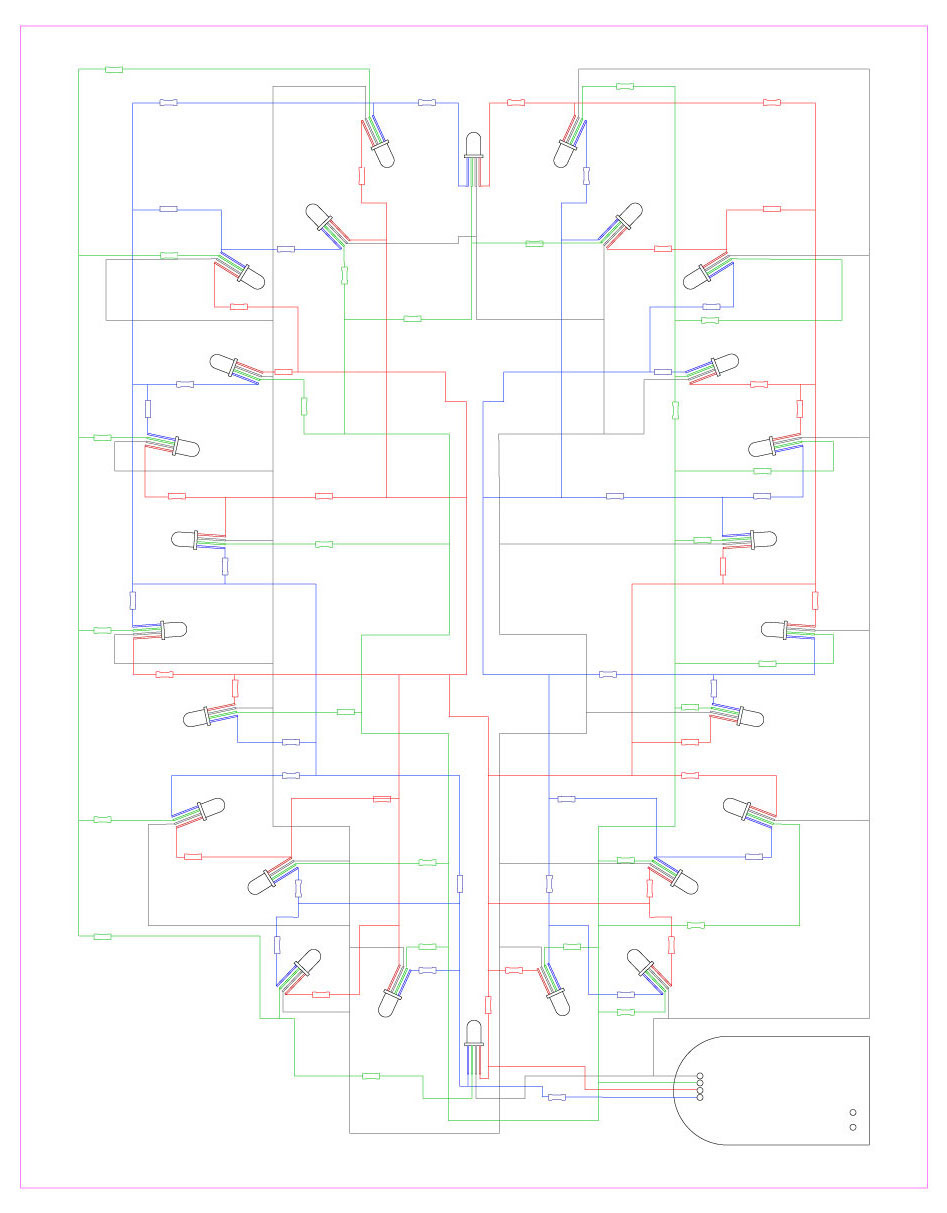
For 3d i'll create leds, resistors, my pcbboard size and packaging on rhino, to plan the general look of the composition, all the connections for ground, red, blue, green. Then, export the lines to illustrator and as 2D use it for two reason, 1. Cut it in the lasercut as a wooden guide to attatch the tubes and solder over it, considering that it might burn a little the wood but not has much as paper. 2. Create in illustrator for layers and changing the colour (each one for RGB and ground), cleaning the result and checking it while creating the sculpture.
Electronics design and production
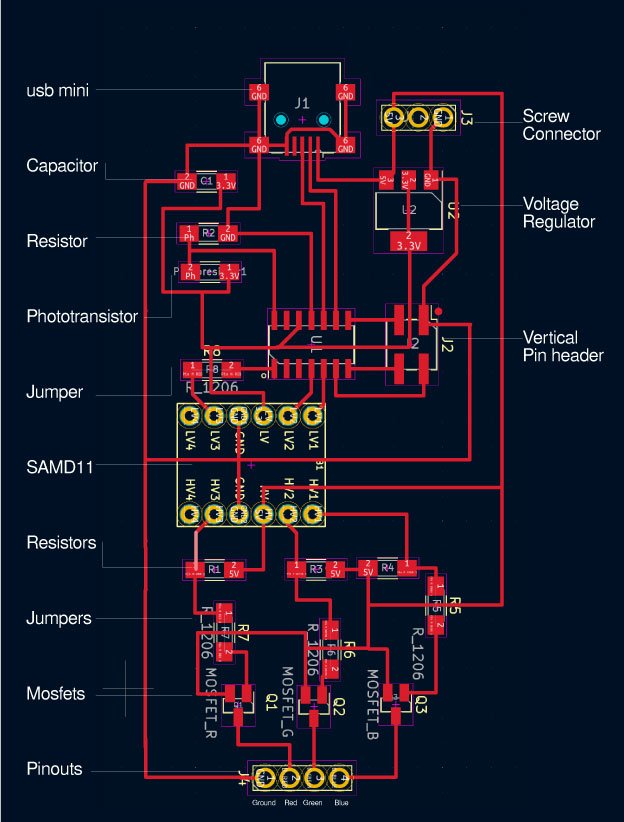
Using kicad to design my pcbboard, I'm choosing a SAMD11 as the only microcontroller, I don't need to store a lot of information or connect it to internet for now, so this one would work, use the digital pins, connect it with a level convertor from 5v to 3.3V, a phototransistor with its capacitor and resistor, three mosfets and pinout for R,G,B and ground, voltage regulator and screwconnector (for the external wires that will connect to the power supply). Because of the amount of components, the board might have to be a bit bigger in size that I expected, plus using resistors 0 ohms as jumpers to connect all of the lines in kicad.
Use the CNC to cut the pcb, exporting it from Kicad as svg and then in illustrator divide the lines into three layers: outlines, traces and holes, here, creating the arc shape that I always use in the boards, then export it to mods and create a file for traces first, using the 1/64 endmill, then 1/32 for the outlines and holes.
Embedded microcontroller interfacing and programming
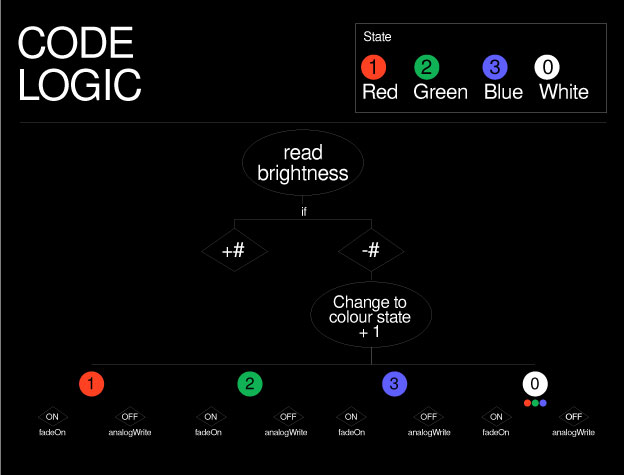
For this part, I will use Arduino creating a code that will be focus on: First, reading the brightness if its lower than xnumber, then it will turn on the leds by fading. Second, it will change the colour state everytime it will fade off, this is done by creating four stages (R,G,B and turning all of them) this at first, and then playing with the colour values in each one.
System integration and packaging
For the delicate construction of the skeleton(freeform wires) I want to create an acrlylic box and suspend it on it. I'll design it on rhino and laser cutted, with some holes in the back to hang it in the wall, and some others in the bottom to let the cables pass through. For closing it, I want to use magnets and design in rhino then 3d print some bases to put the magnets inside.
Question to answer
It will react to light enviroment through photoresistor to turn on 26 LEDs in parallel for a few seconds, then will turn off.
Mohair Bhoite, Alain Le Boucher, Peter Vogel and Walter Giers.
Free form sculpture of leds resistors and tubes, display inside of an acrylic box.
Leds, resistors, pcb board, power supply, acrylic, magnets, hollow tubes, cable and switch.
From the lab, most of the components, only buying stuff it its super needed.
Because I did had most of what I needed in the lab, I only paid around 15 euros for the cable, the switch and masking tape.
3d printing magnet base, acrylic box, plywood guide for the structure, pcb board.
Laser cut for the acrylic box and wooden guide, 3d printing for the magnet cases, cnc for the pcboard, arduino code for the board to interact and communicate.
/What resistor need the RED led (not 220ohms)
/How to make it change colours and why to do it
/How to hang it in the inside
/Can I 3dprint a base in case I want it to be over a table
03Bill of materials
2D and 3D design
Electronics
Others