Final Project | Week 20
Safety switch
Device to make sure the usage of machine done with proper safety gears.

This device is developed for the welding technician who don’t use safety gears regularly and which lead to health related problems to them specially to eyes.
Design and functionally of the device is to make sure the person is wearing a Shield befor he use the welding machine, So powering on of machine would be only happen when safety gear are used.
Video
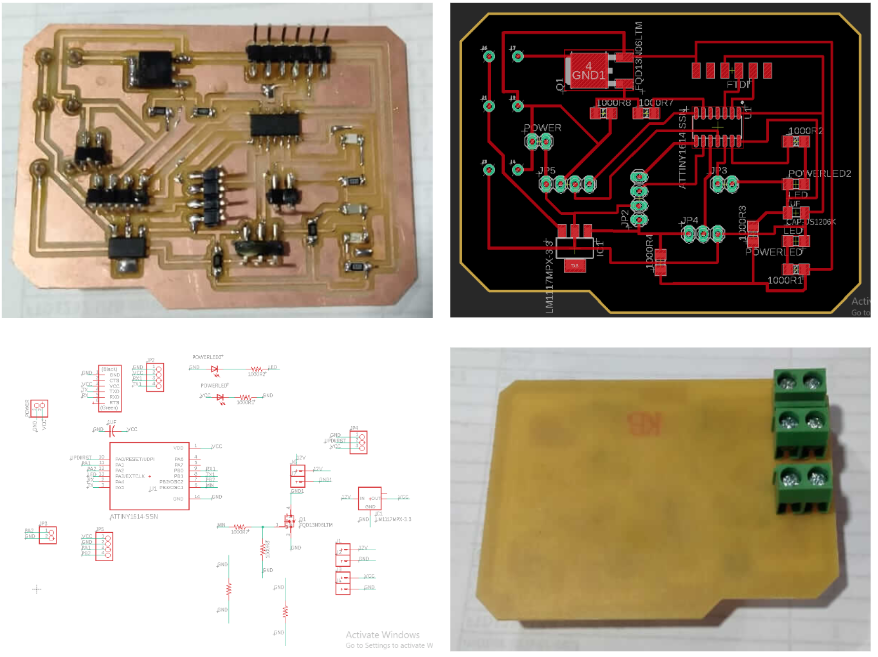
Circuits (Input-Output)
Two Circuit which commuicate each other with wireless bluetooh to confirm the safety gear is used.
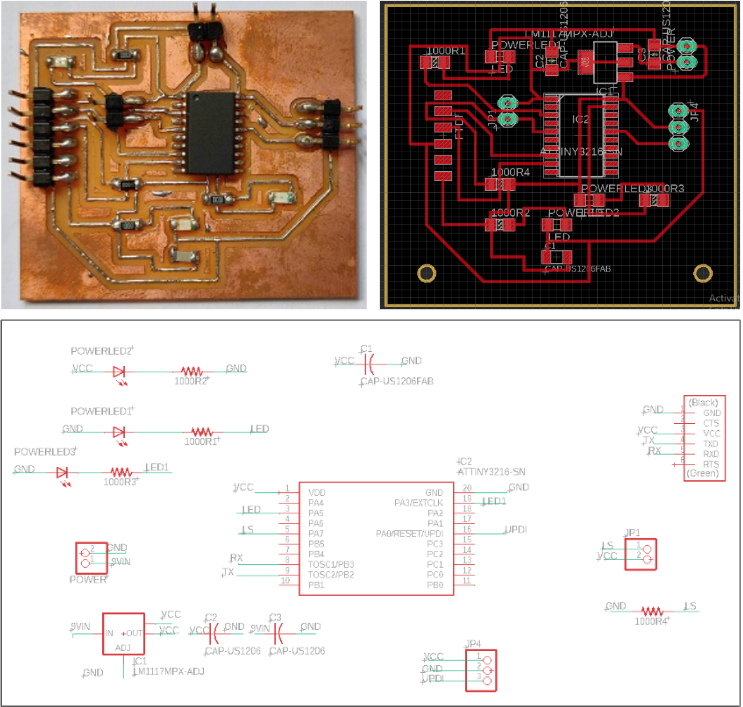 For makeing this device it was very importnat to have wireless Communications and Shield
would be having the detection system so to make it possible two different circuit were
needed and communication inbetween them was done using bluetooth
For makeing this device it was very importnat to have wireless Communications and Shield
would be having the detection system so to make it possible two different circuit were
needed and communication inbetween them was done using bluetooth
Board Milling
Code
Rx Code for reciving the signal of person wearing safety gear.
#include
SoftwareSerial mySerial(0, 1);   //allows serial communication on other digital pins of an Arduino board, using software to replicate the functionality
char number  = ' ';
byte LED = 10;// LED pin

void setup()
{
   pinMode(LED, OUTPUT);
   pinMode(5, OUTPUT);  //Relay Pin
   mySerial.begin(9600);  // set the data rate for the NewSoftSerial port
   mySerial.println("START");
}


void loop() // run over and over again


{
   if(mySerial.available()) //// never here
   {
      char number = mySerial.read();
      if (number=='0')
      { digitalWrite(LED, LOW);digitalWrite(5, LOW); } //Relay Signal Pin Low
      if (number=='1') { digitalWrite(LED, HIGH);digitalWrite(5, HIGH); }           //Relay Signal Pin High
      mySerial.println(number);
   }

}
Rx Code for reciving the signal of person wearing safety gear.
const int buttonPin = 3;   //My button or my input device has pin number 3.
int buttonState = 0;
void setup()  // put your setup code here, to run once:
{
  Serial.begin(9600);
  pinMode(buttonPin, INPUT_PULLUP);

}

void loop()  // run over and over again
{

  buttonState = digitalRead(buttonPin);
  if (buttonState == HIGH) {   // never here
  Serial.print(1);    //When the button is pressed, signal 1 goes which sends a signal to turn on the LEDs.
  delay(1000);
  }

  else{    // always here

  Serial.print(0);   //When the button is not pressed the signal goes to 0 which sends a signal to OFF the LEDs.
  delay(1000);
  }
}
In this code the logic was to get a push button based detection and sending that signal to wireless device which activate the switch
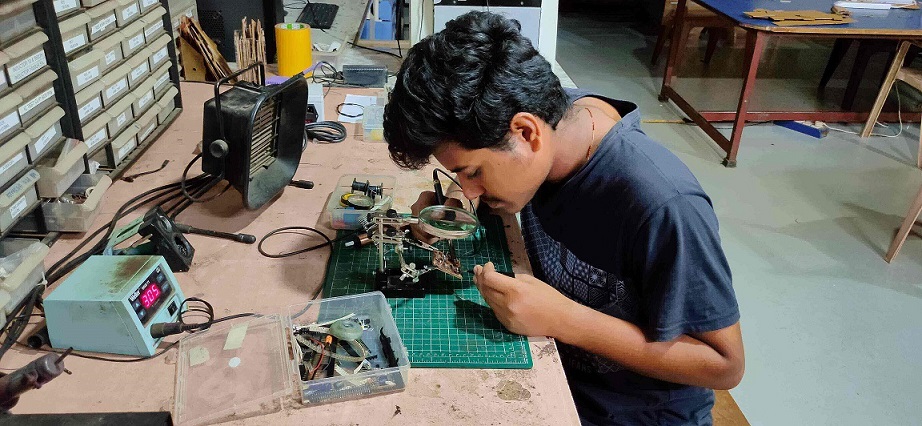
Soldering & Testing
Solering component to the circuit
Text
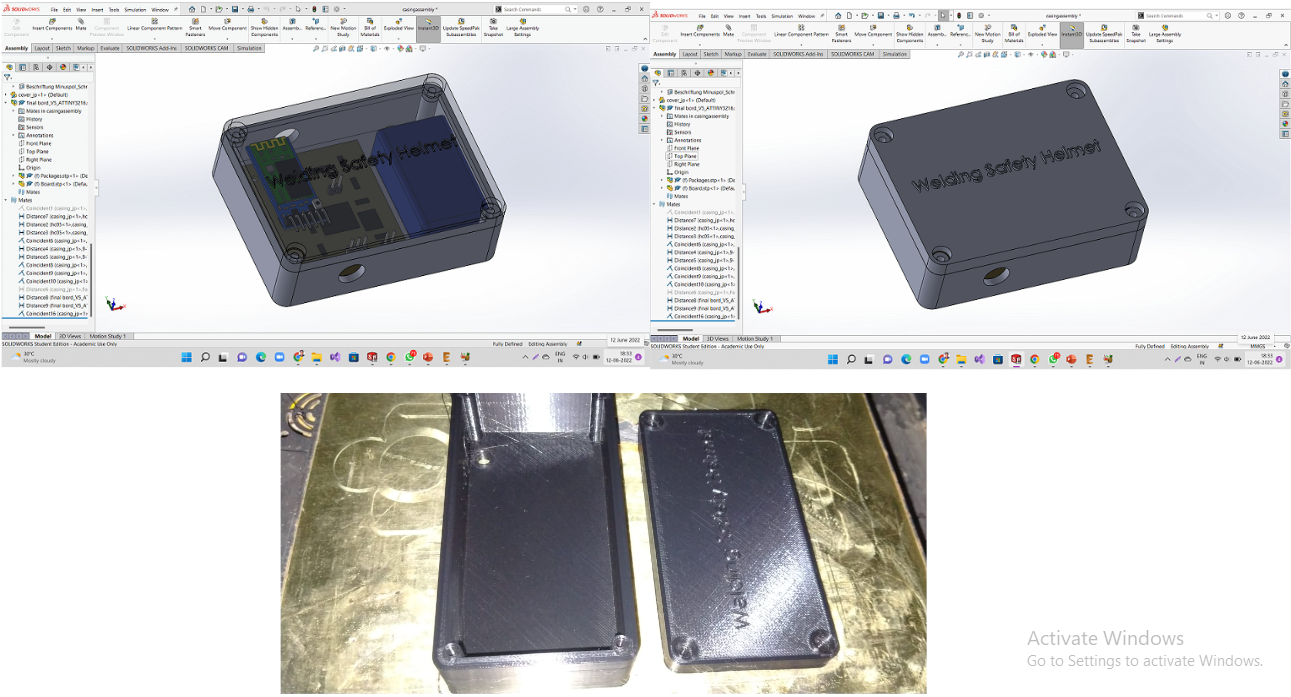
2D & 3D Design
Two Circuit which commuicate each other with wireless bluetooh to confirm the safety gear is used.
Text
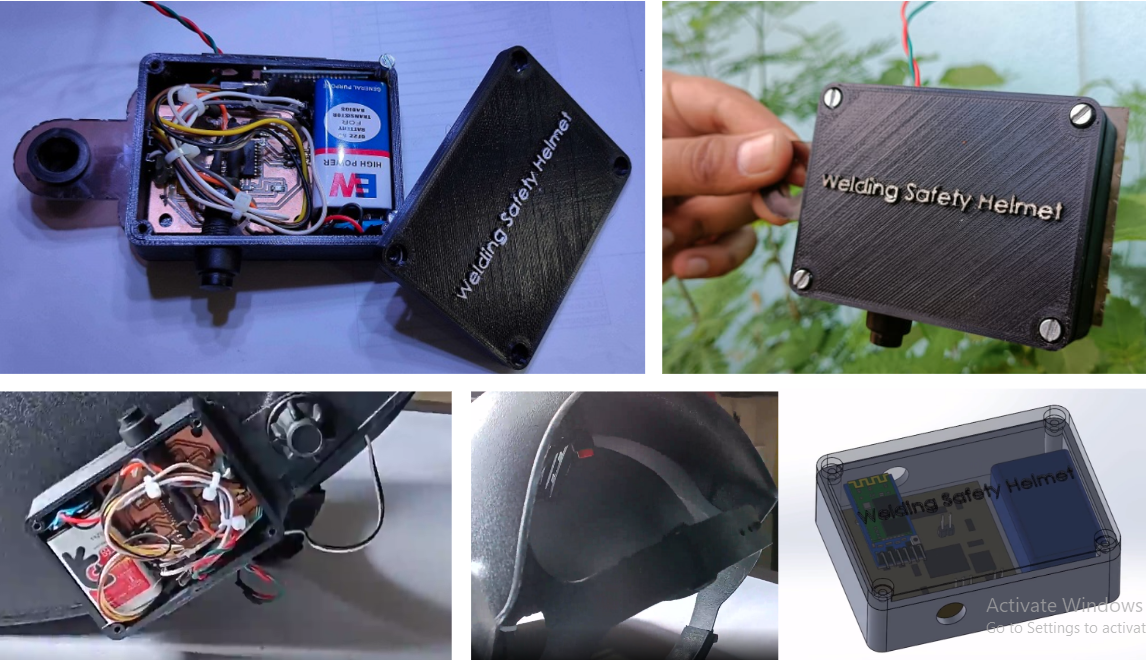
Addtive Manufacturing
Two Circuit which commuicate each other with wireless bluetooh to confirm the safety gear is used.
Text
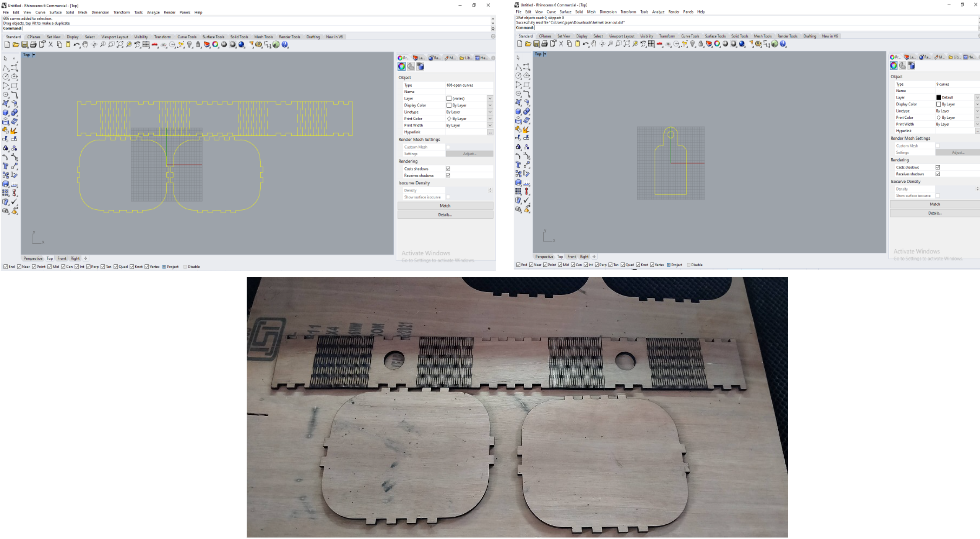
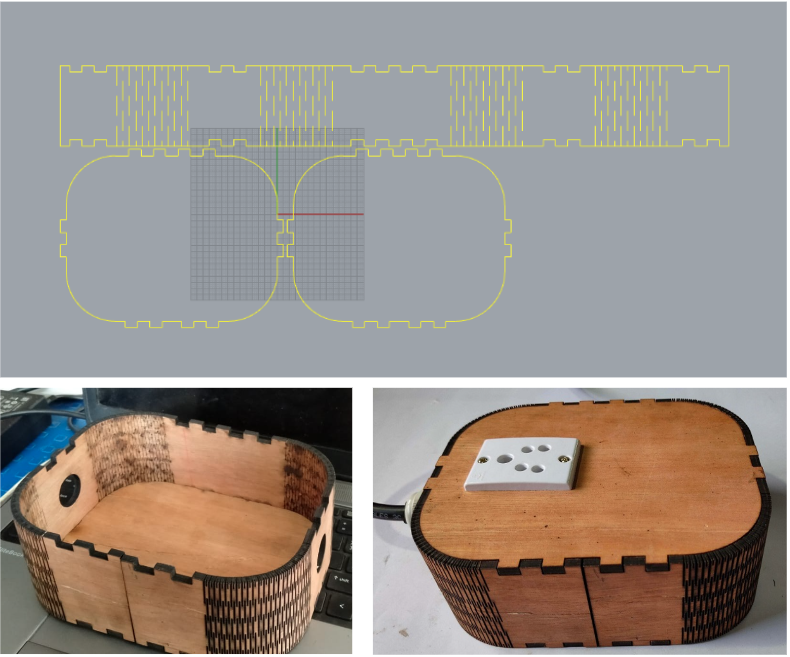
Subtractive Manufacturing
Two Circuit which commuicate each other with wireless bluetooh to confirm the safety gear is used.
Text
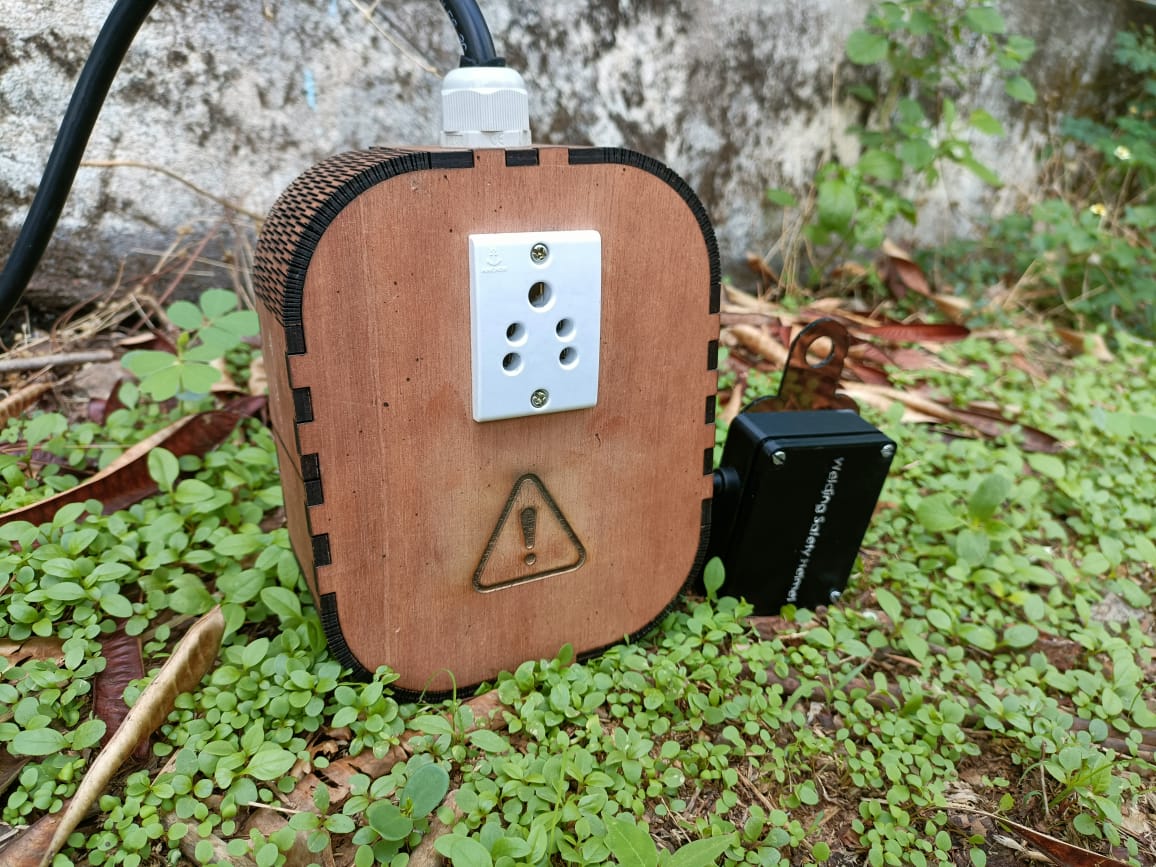
Final Product
Helment Adapator and Plug Box
Text
Text
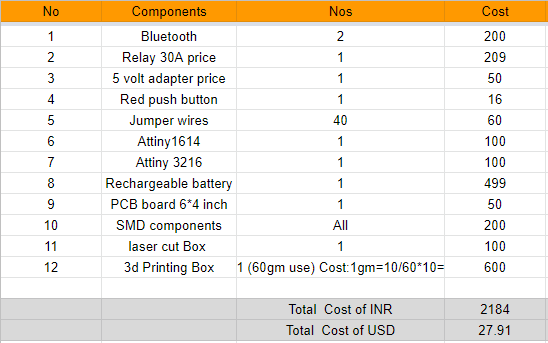
Bill of Materials and Costing
Safety
Switch by Parejiya
Jaydeep is licensed under CC BY-ND 4.0![]()
![]()
![]()