"In week three, we learn about computer-aided design" (CAD). There are two parts to CAD: -
2D Design = 2D Modeling - 3D Modeling = 3D Modeling
2D Design :-
For applications such as electrical engineering, mechanical drawings,
architecture, and video games, 2D design is the creation of flat or
two-dimensional representations.
3D design :-
3D modelling is the technique of using specialist software to create
a mathematical representation of any surface of an object (inanimate or living)
in three dimensions. A 3D model is the product's name. We can use those models for
prototyping and brainstorming (simulation).
Fusion 360 is a product design and production cloud-based 3D modelling,
CAD, CAM, CAE, and PCB software platform. Ensure the aesthetics, form,
fit, and function of your items by designing and engineering them. With
the only totally integrated CAD + CAM software package, you can directly
update existing features or model fixtures.
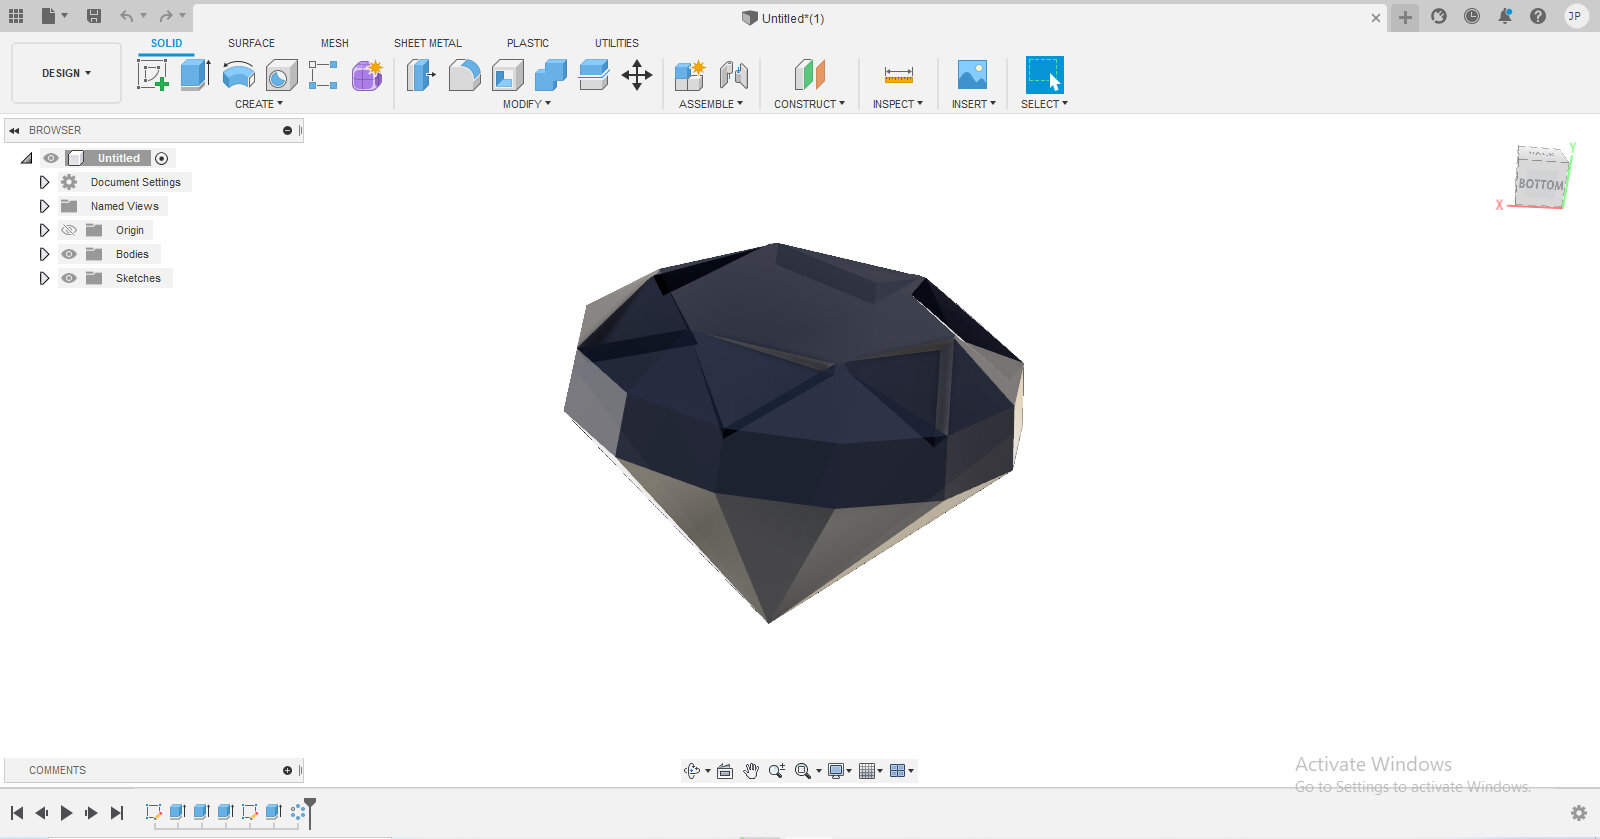
Step1 :Open Fusion 360
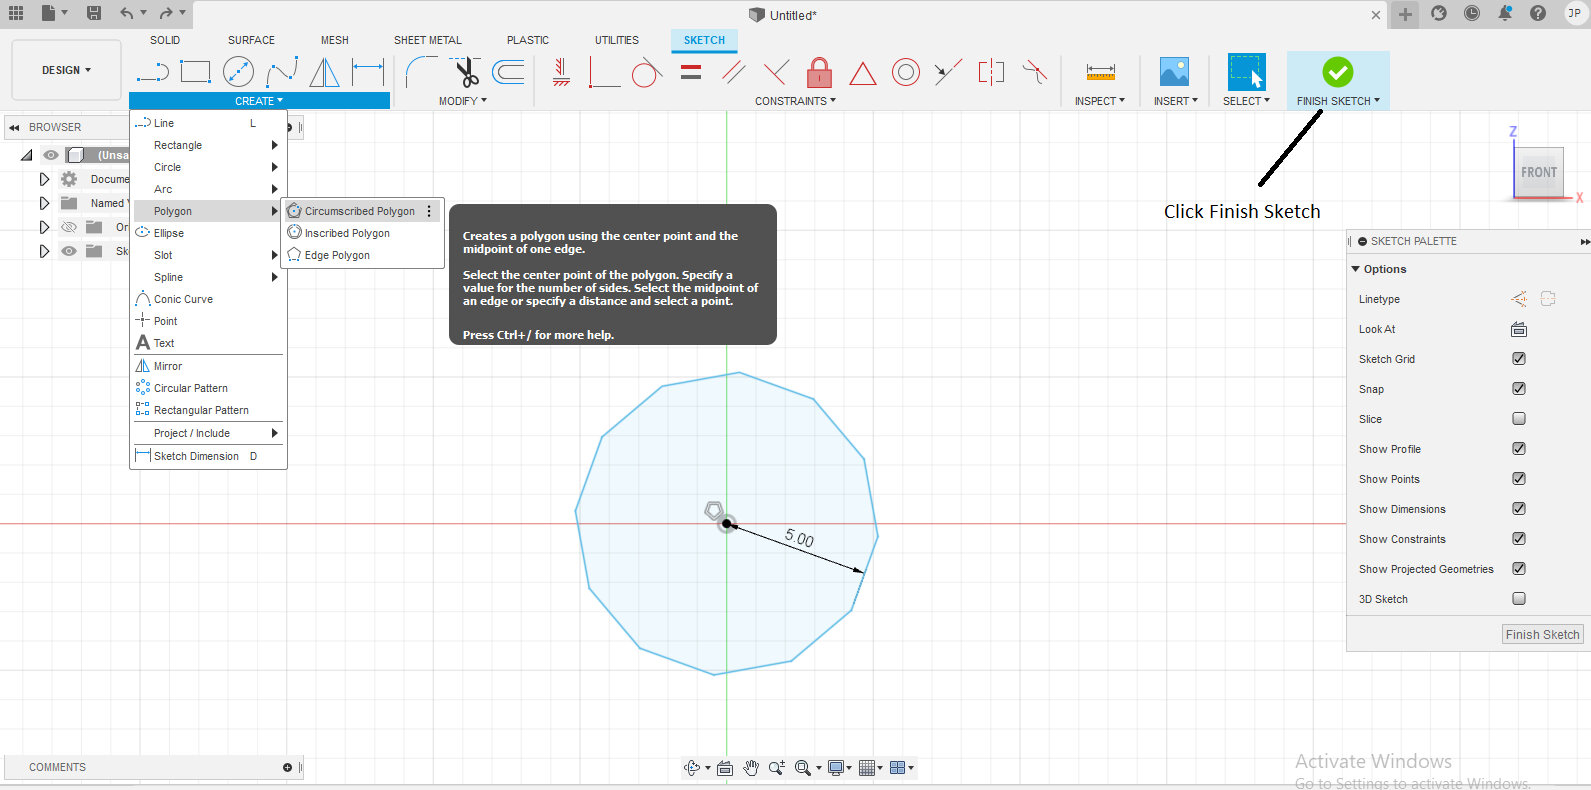
Step2 :Select Create and Select Polygon and then Select Circumscribed Polygon and Click
Finish Sketch
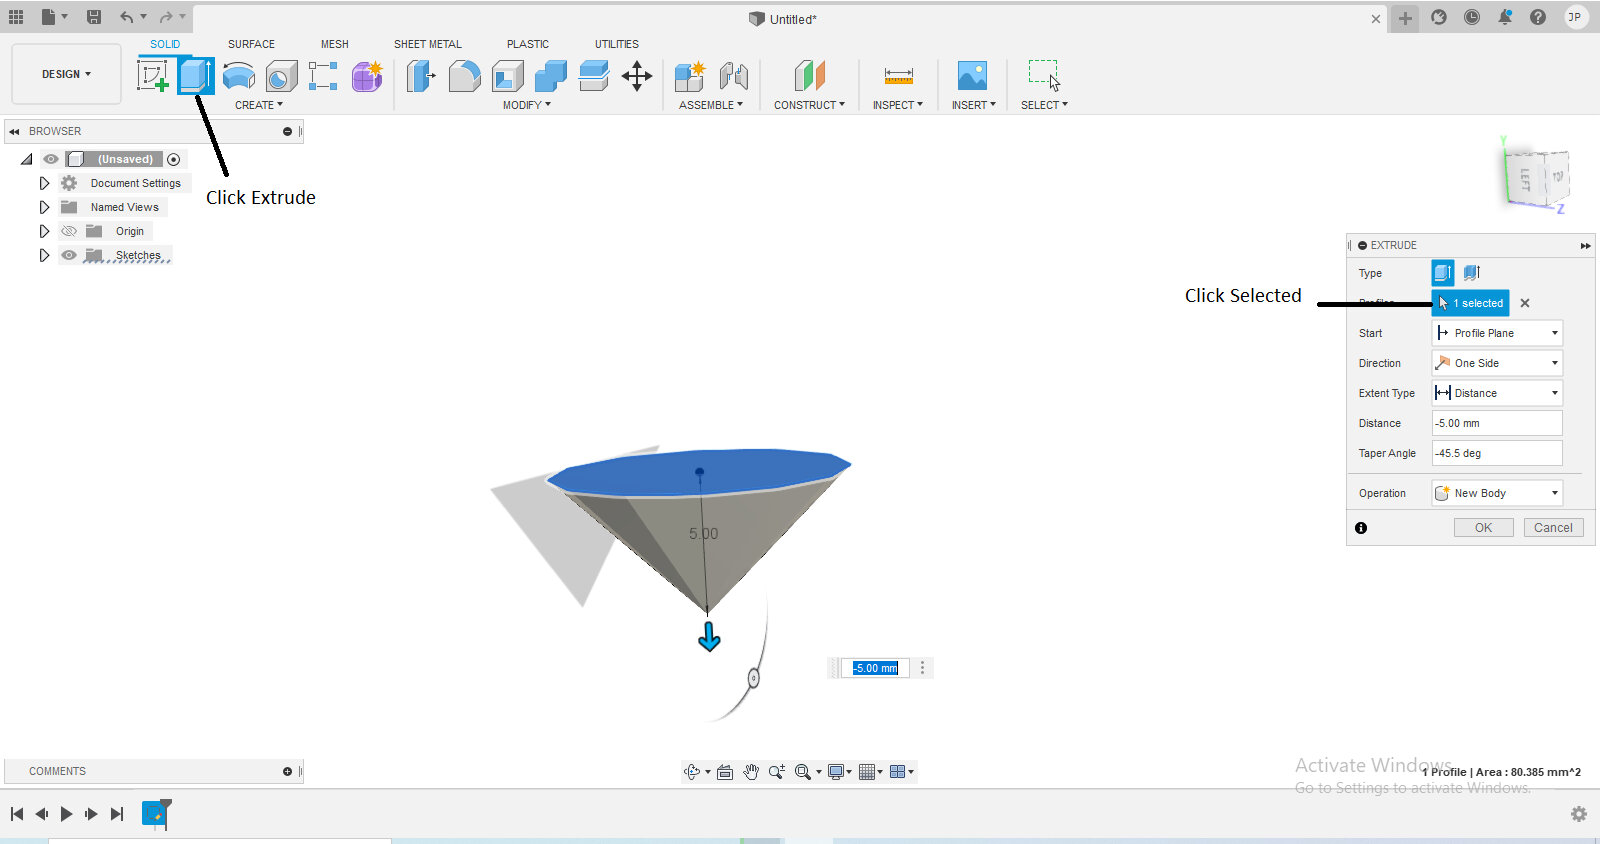
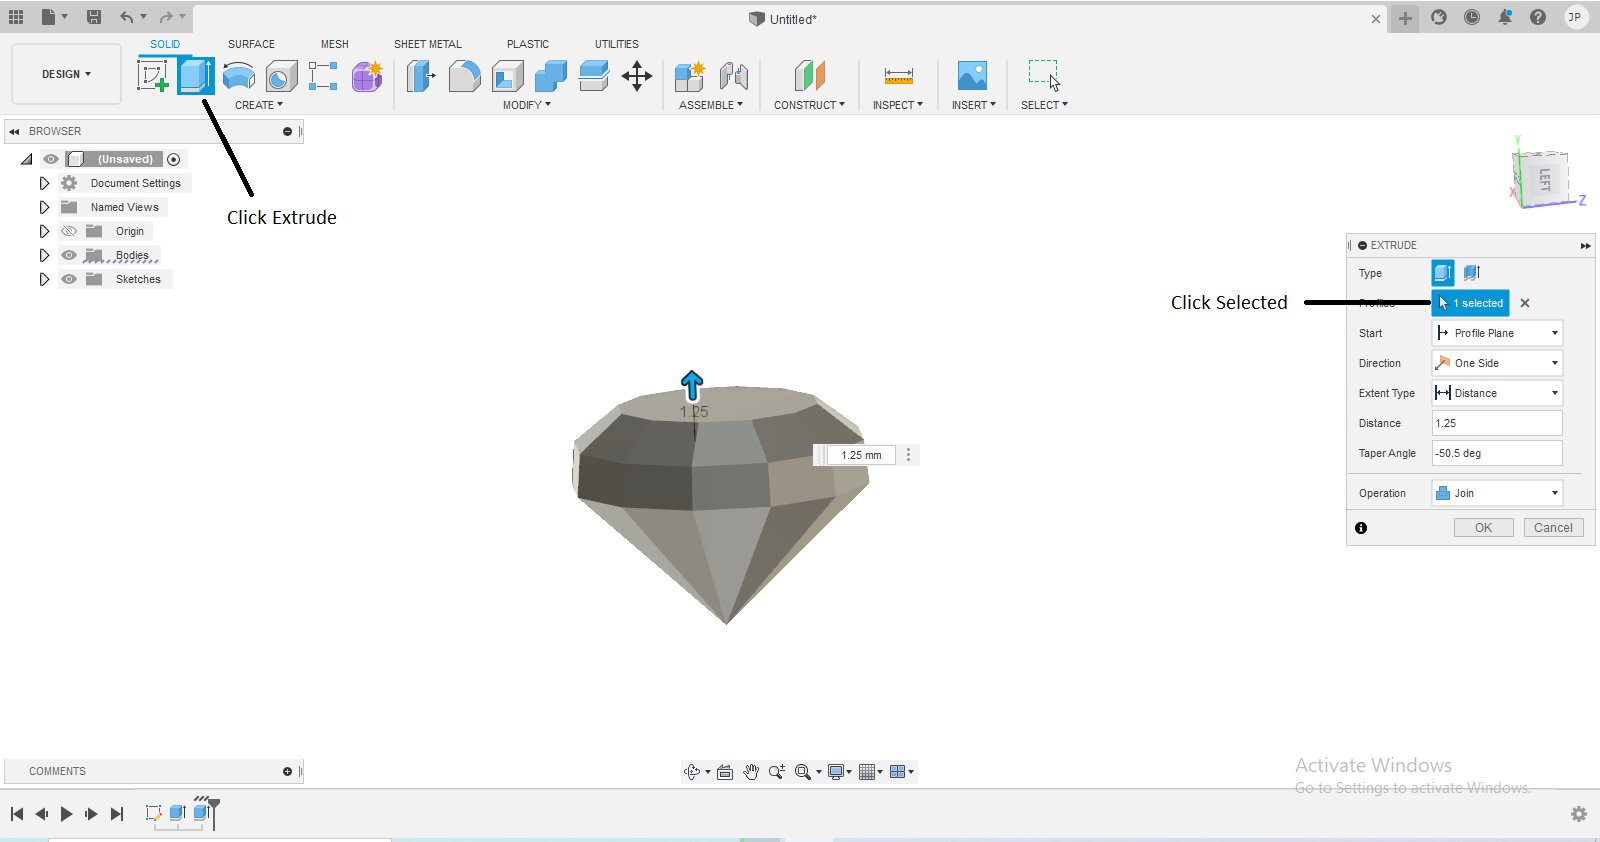
Step3 :Click Extrude And Click Selected and Set the Size Then select ok
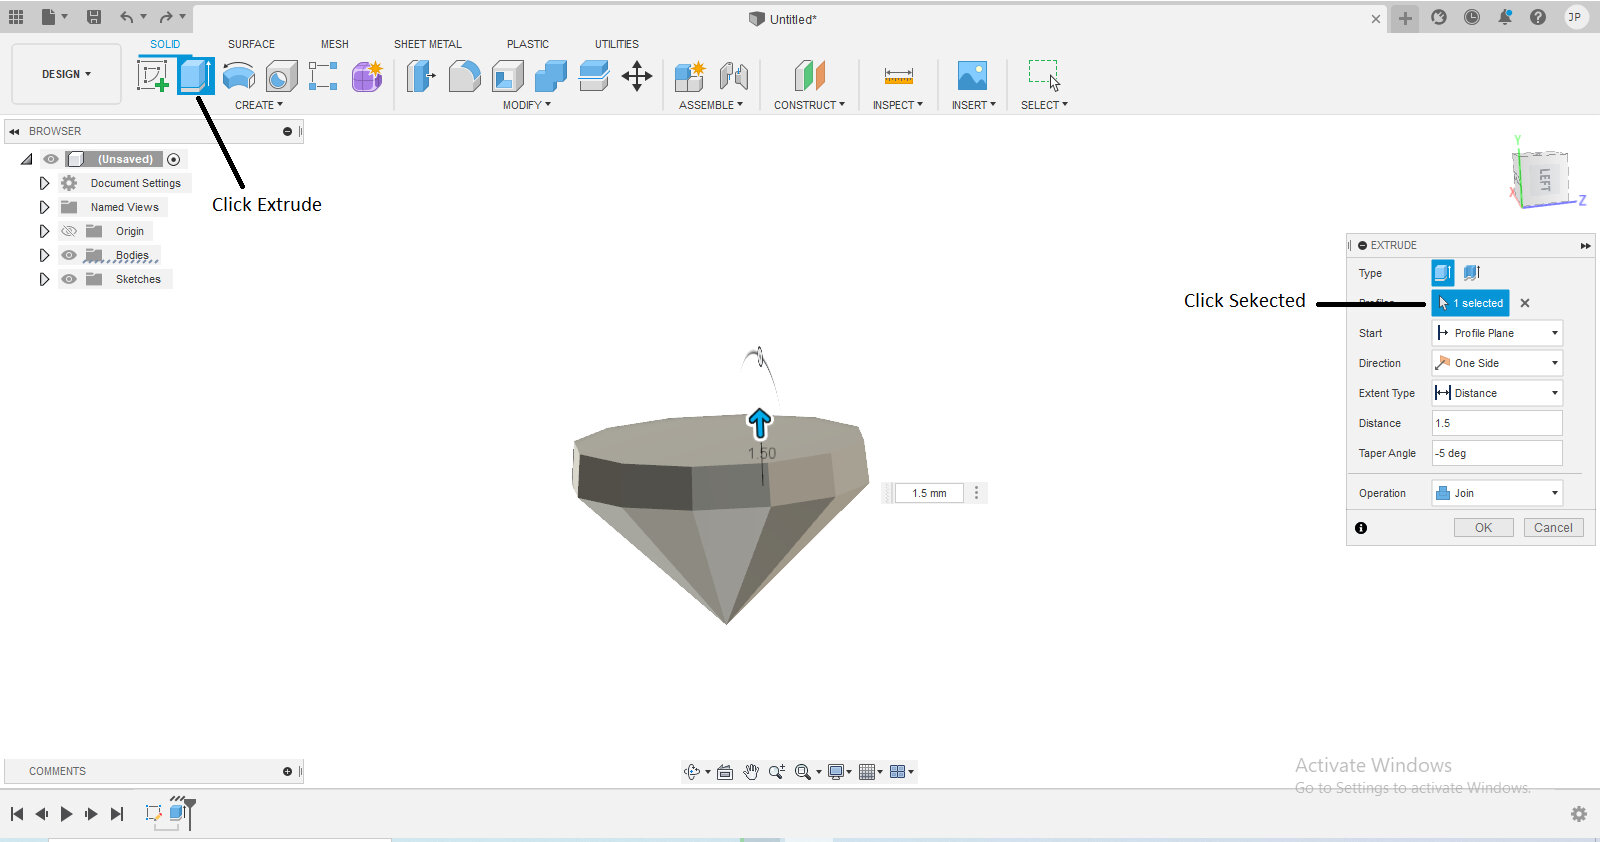
Step4 :Click Extrude And Click Selected and Set the Size Then select ok
Step5 :Click Extrude And Click Selected and Set the Size Then select ok
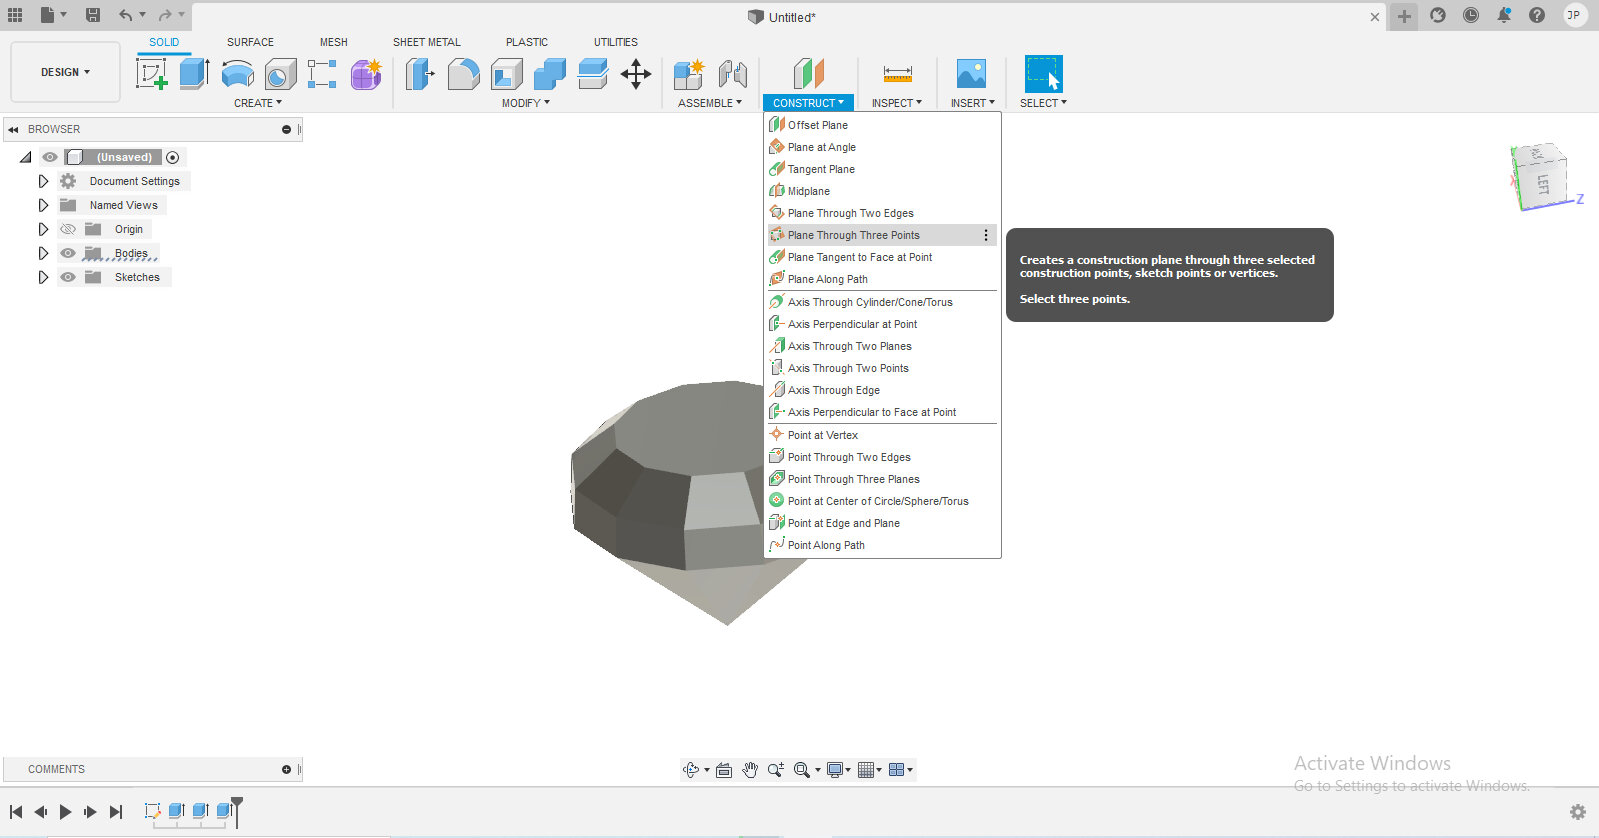
Step6 :Click Plane Through Three Points
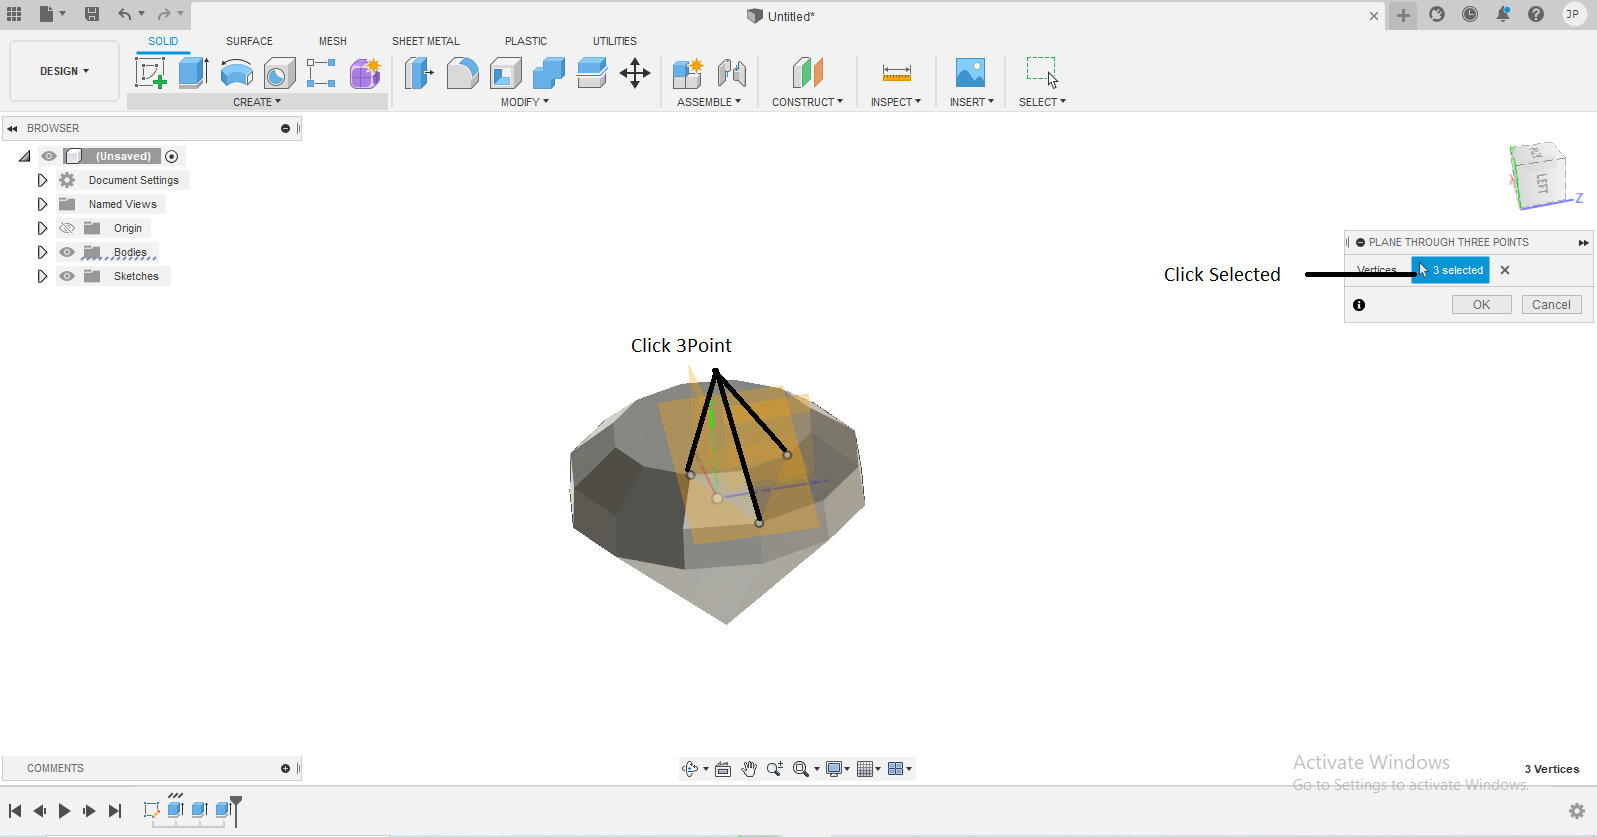
Step7 :Click Selected and Click 3 Point
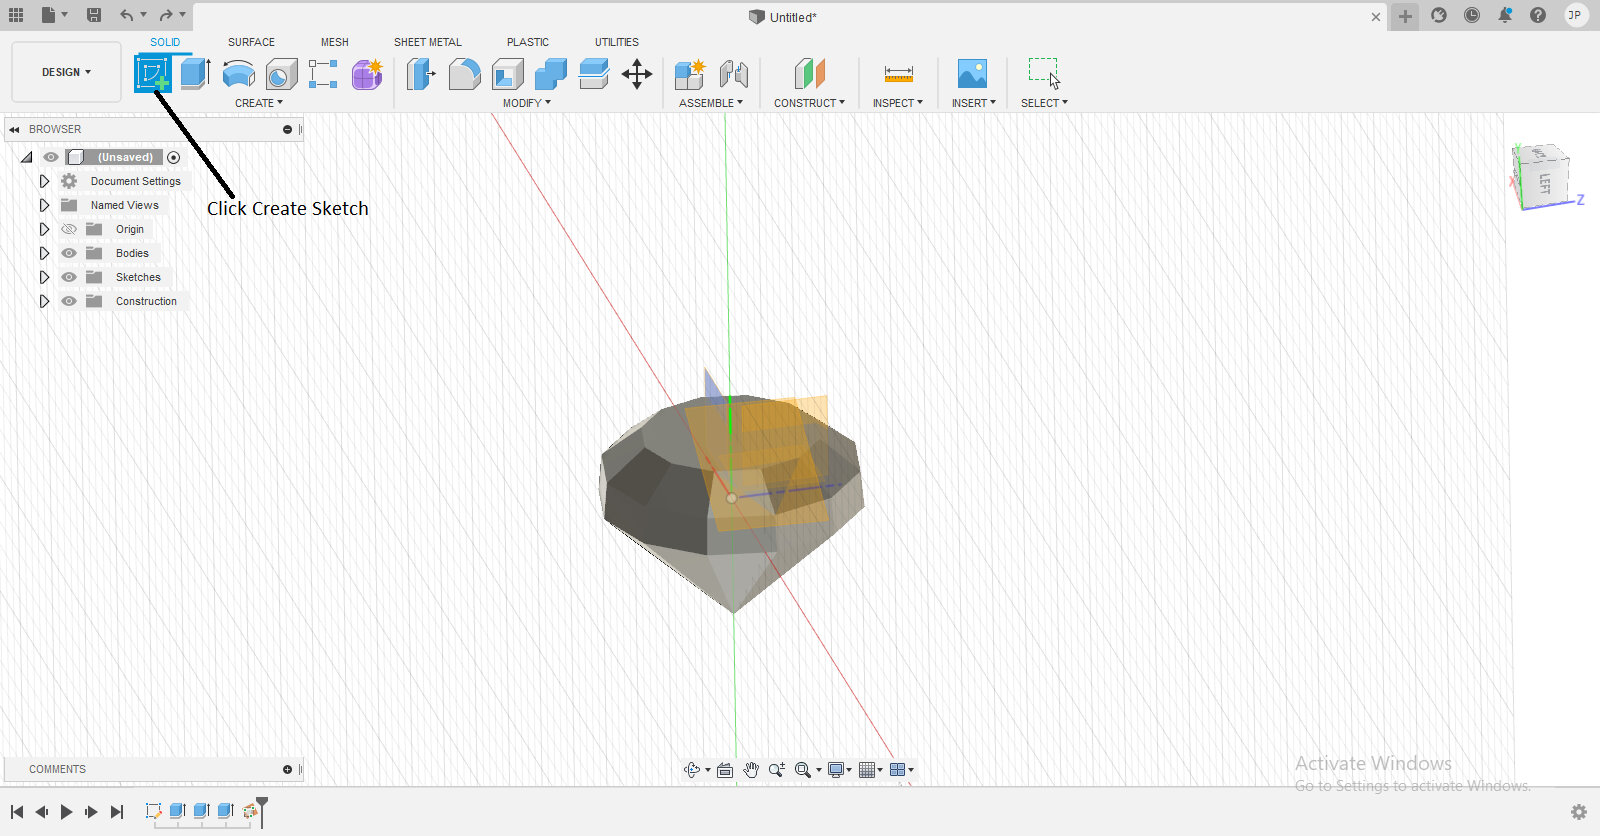
Step8 :Click create sketch
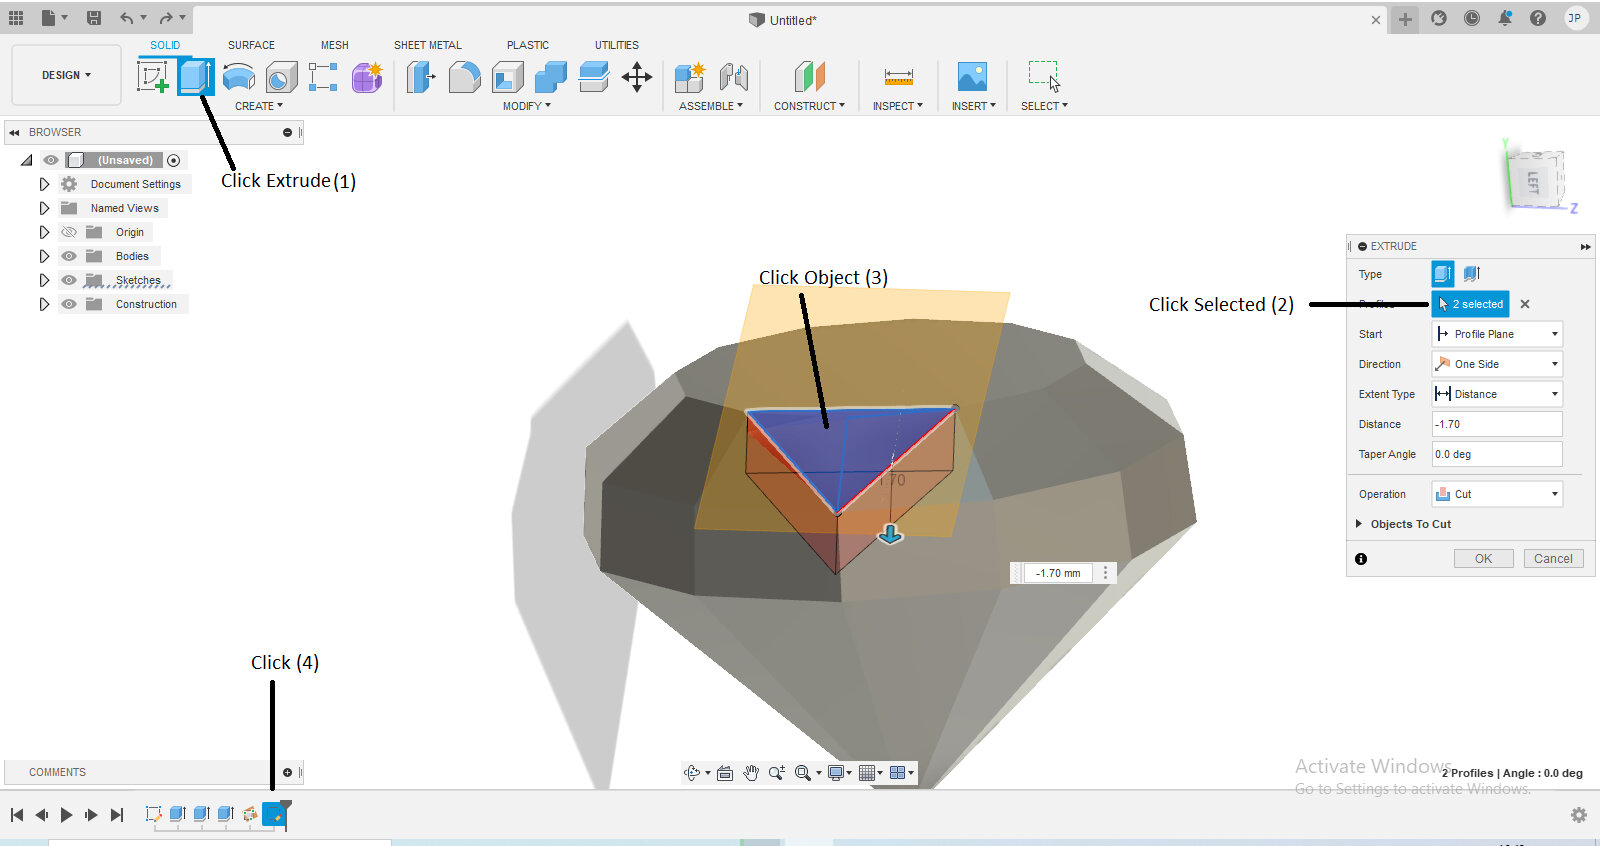
Step9 :Click Extrude and Select Object and Set Size
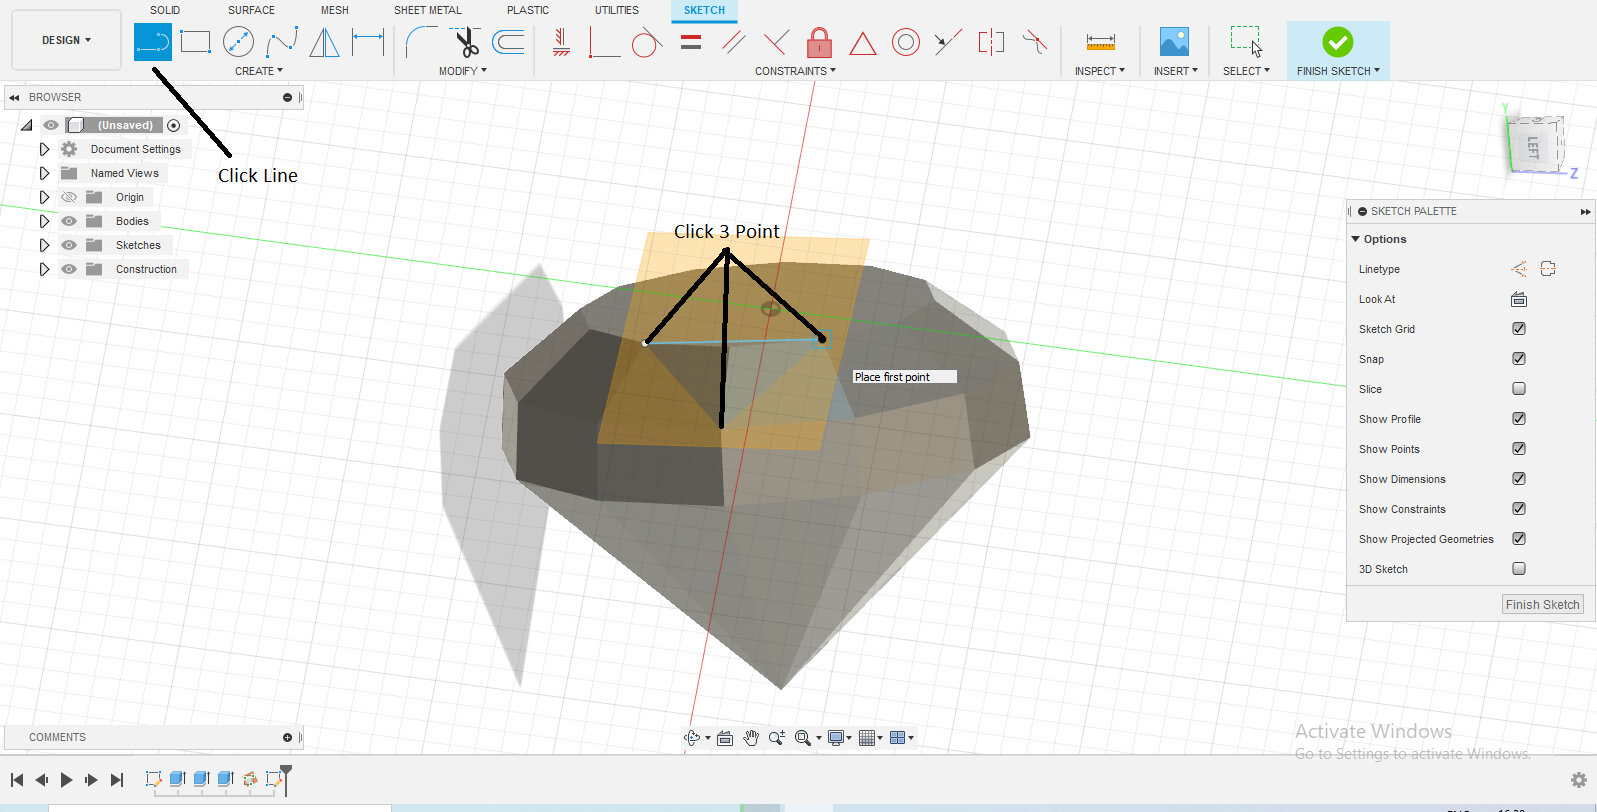
Step10 :Click Line Select 3 Point
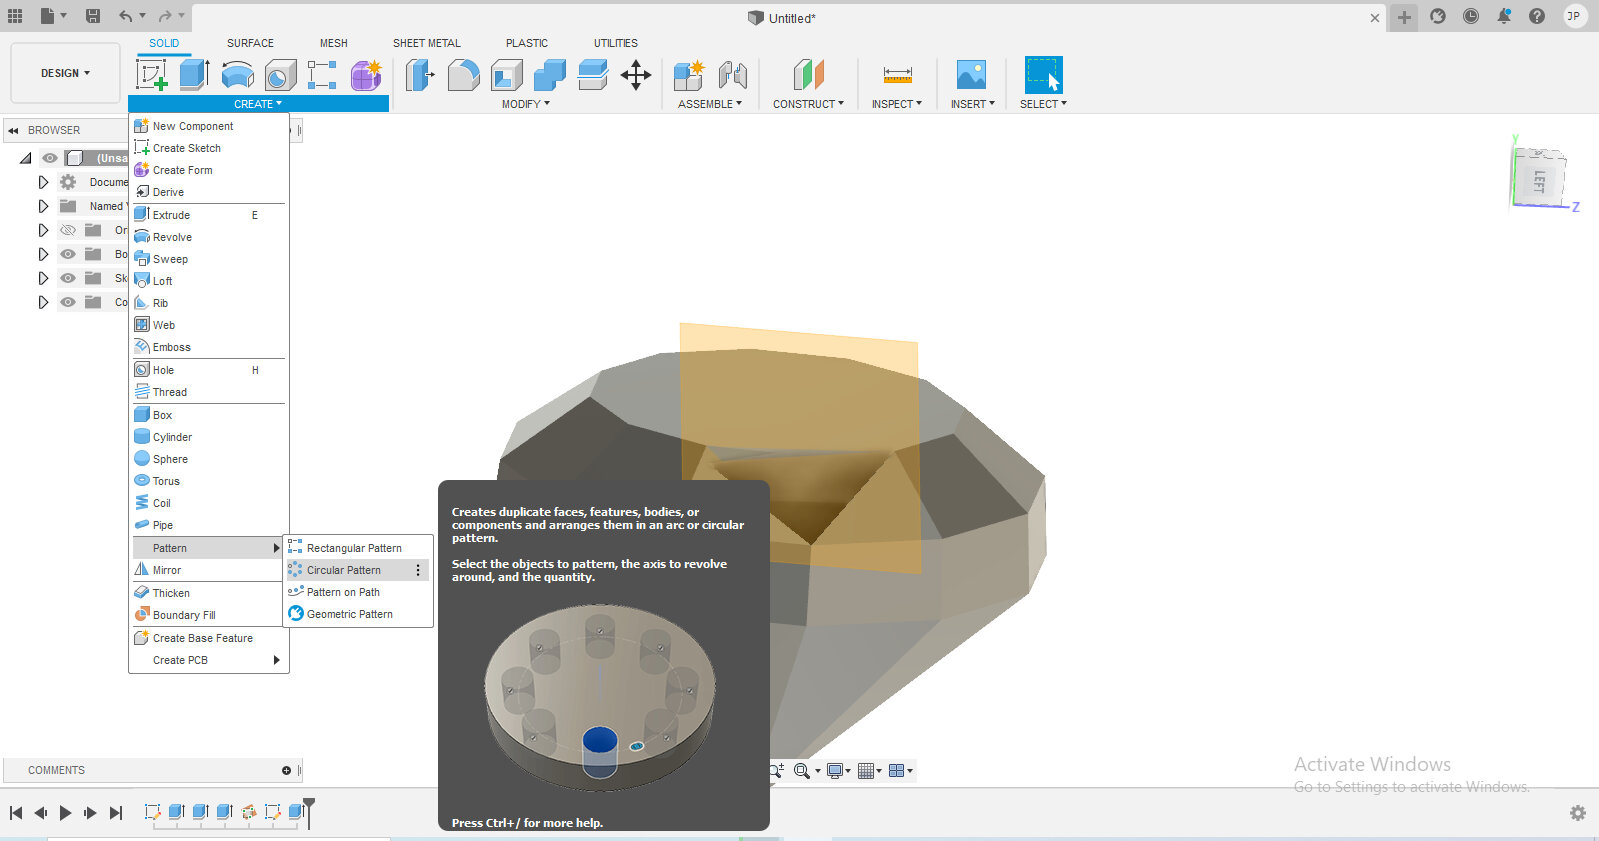
Step11 :Click Create and Click Pattern and then Click Circular Pattern
Step12 :Click create sketch
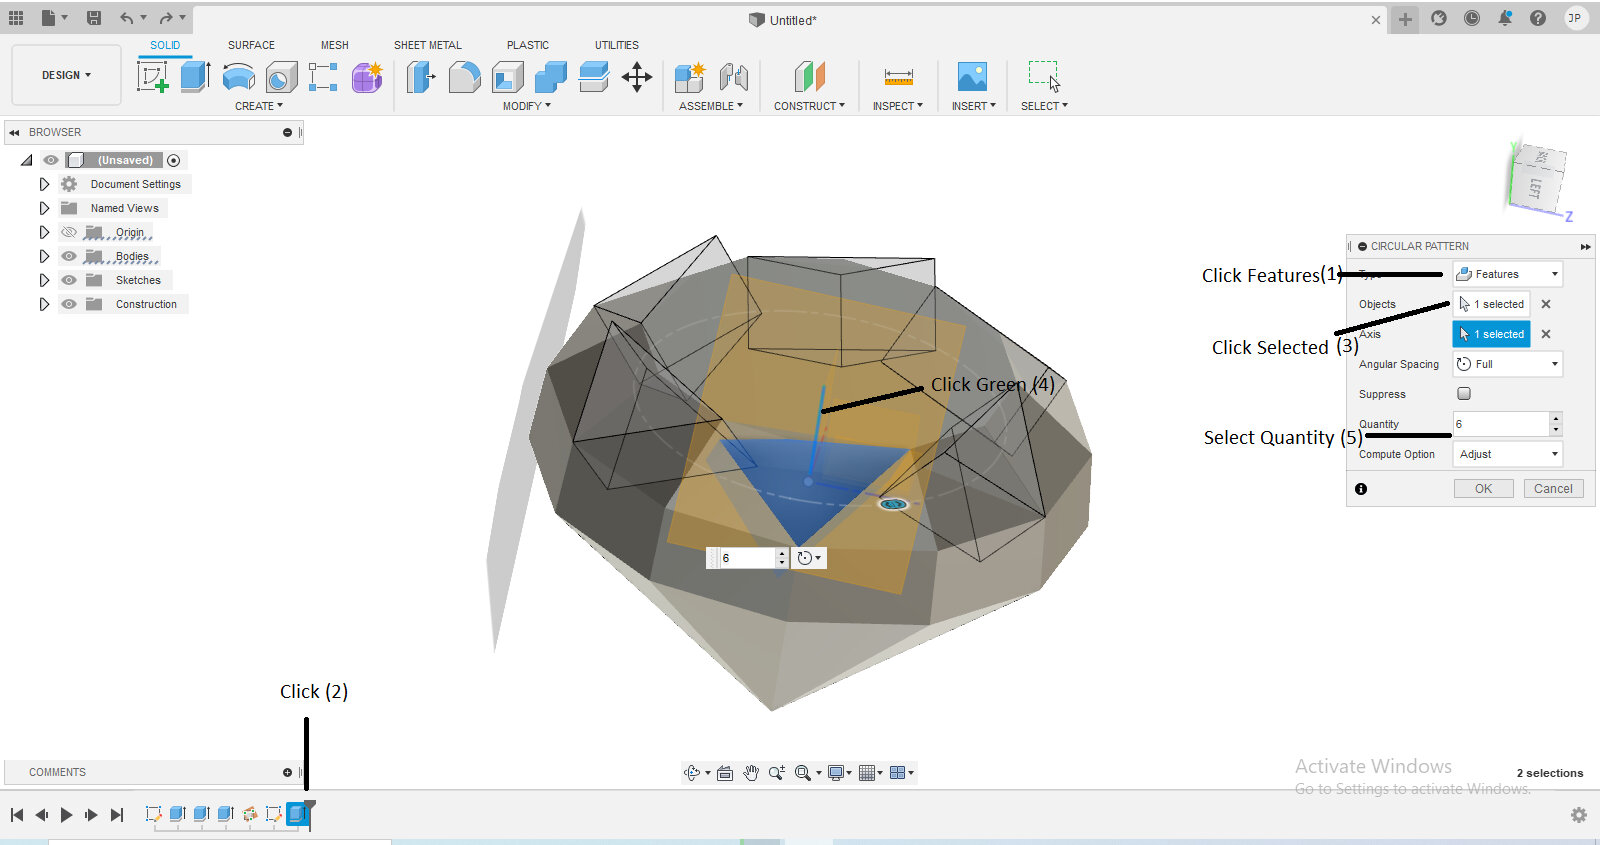
Step13 :Type:Features , Quantty:6 , Axis: CLick green Line
Step14 :Final 3D Design
Blender :-
What is the Blender
Blender is a free and open-source 3D computer graphics software suite that may be used to
make animated films, visual effects, art, 3D printed models, motion graphics, interactive
3D apps, virtual reality, and computer games. 3D modelling, UV unwrapping, texturing, raster
graphics editing, rigging and skinning, fluid and smoke simulation, particle simulation,
soft body simulation, sculpting, animation, match movement, rendering, motion graphics,
video editing, and compositing are some of the features available in Blender.
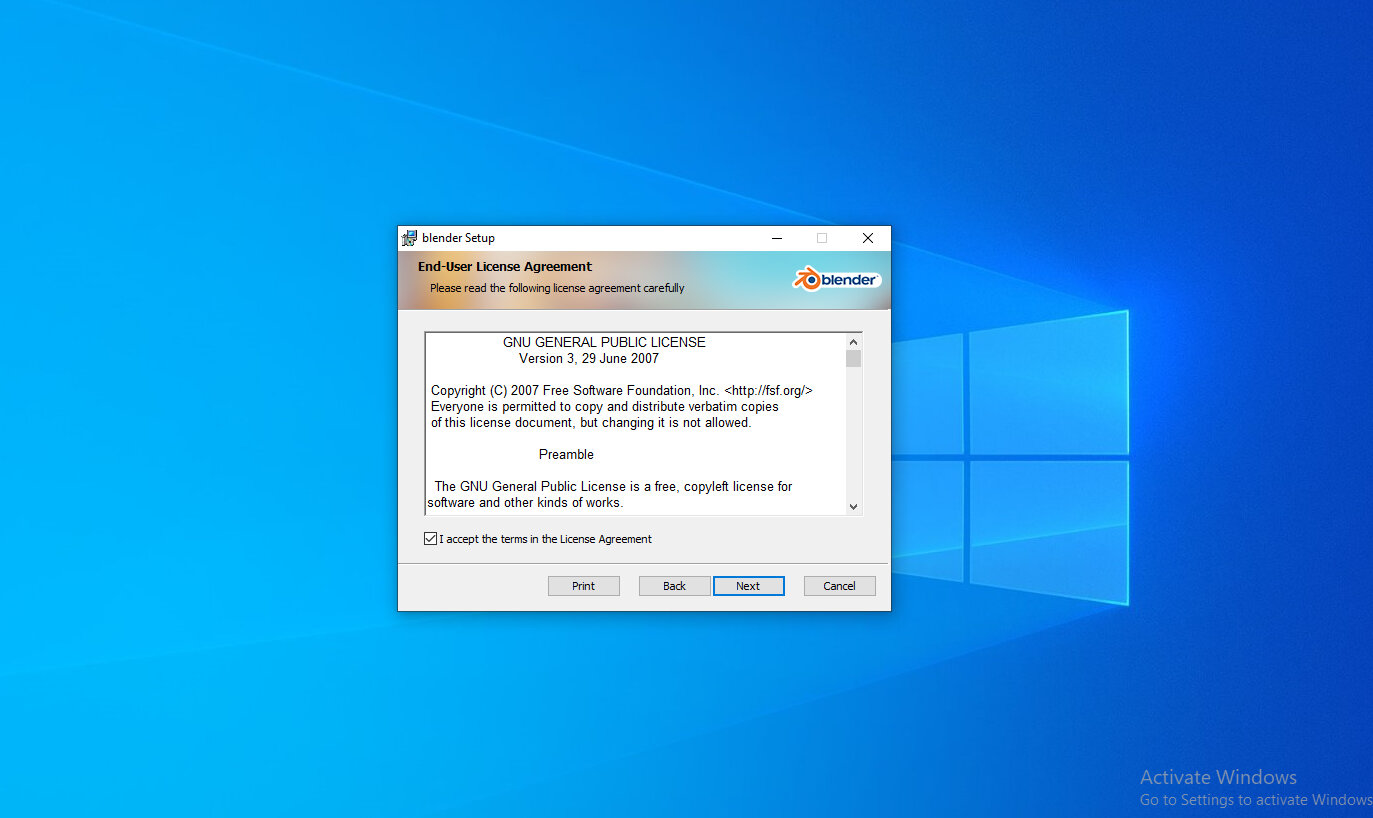
Step2 :-Click I accept the terms in the License Agreement and then click Next
button
Step3 :-Installing Blender Process
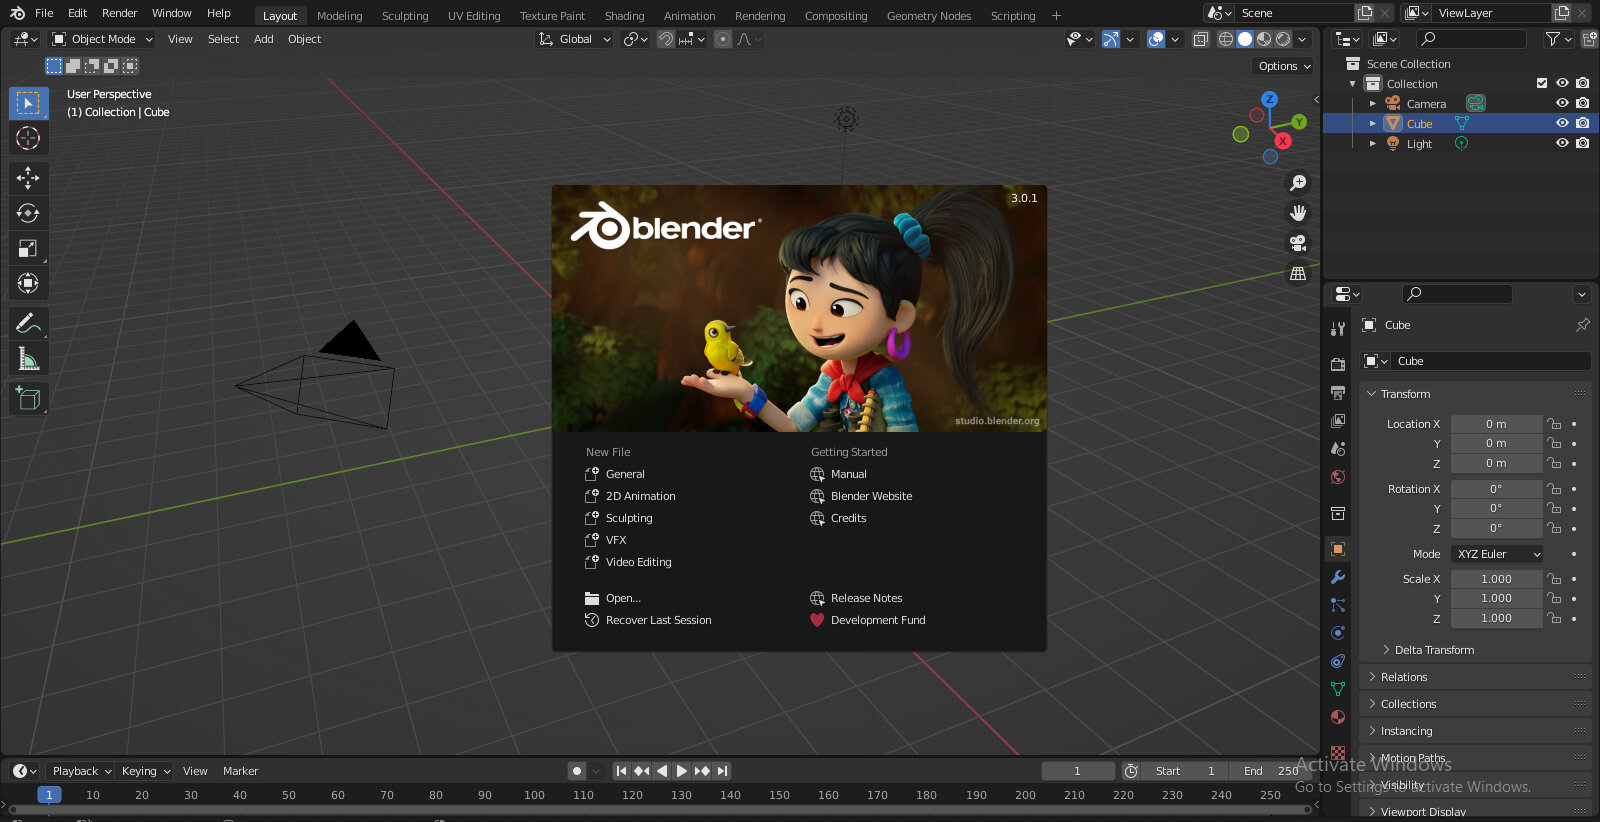
Step4 :-Blender Start
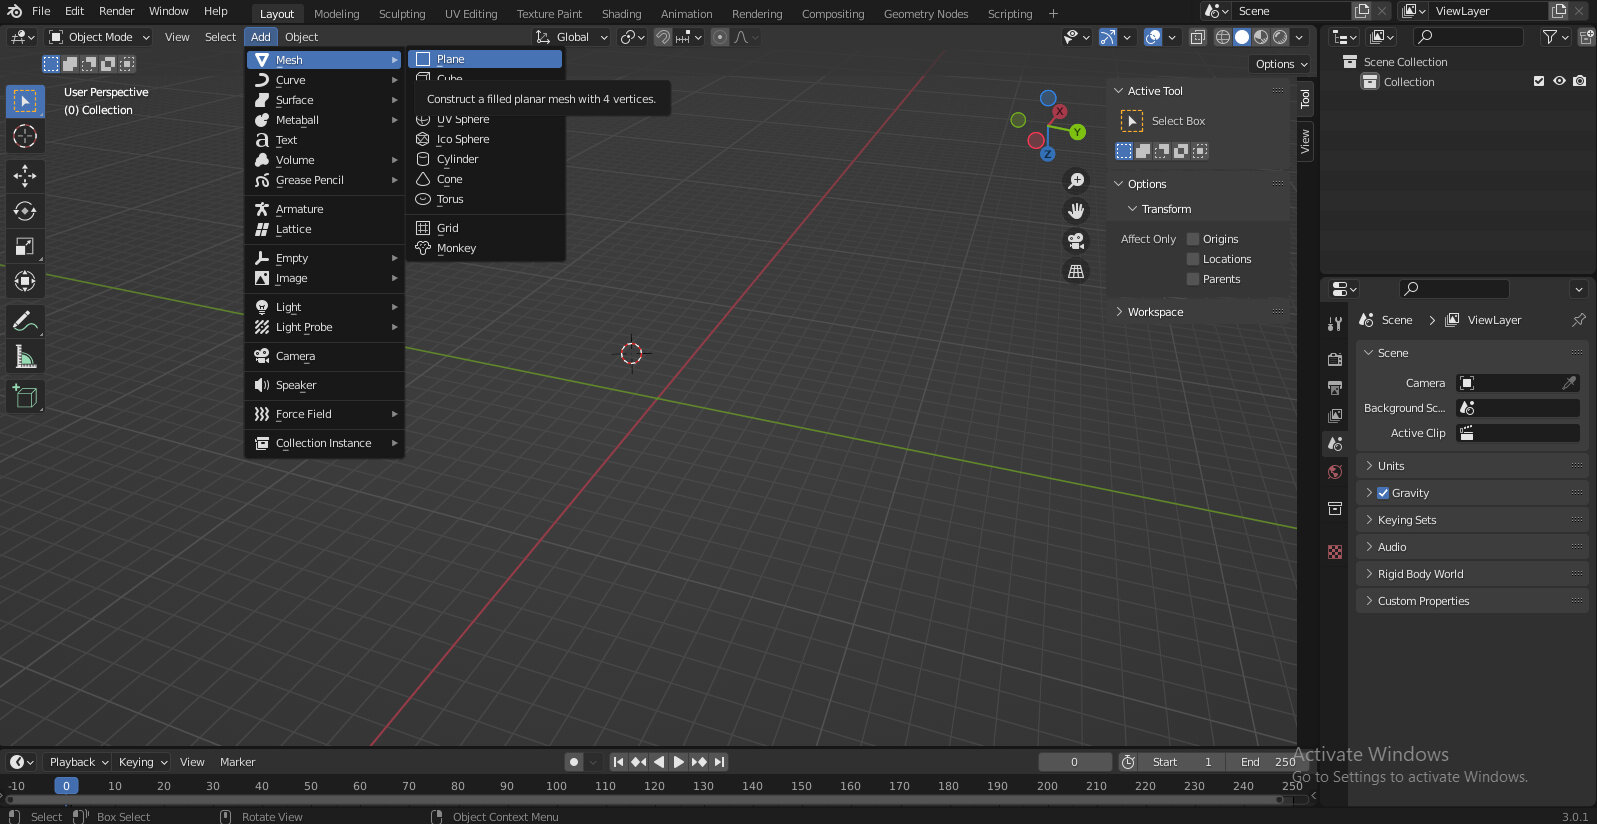
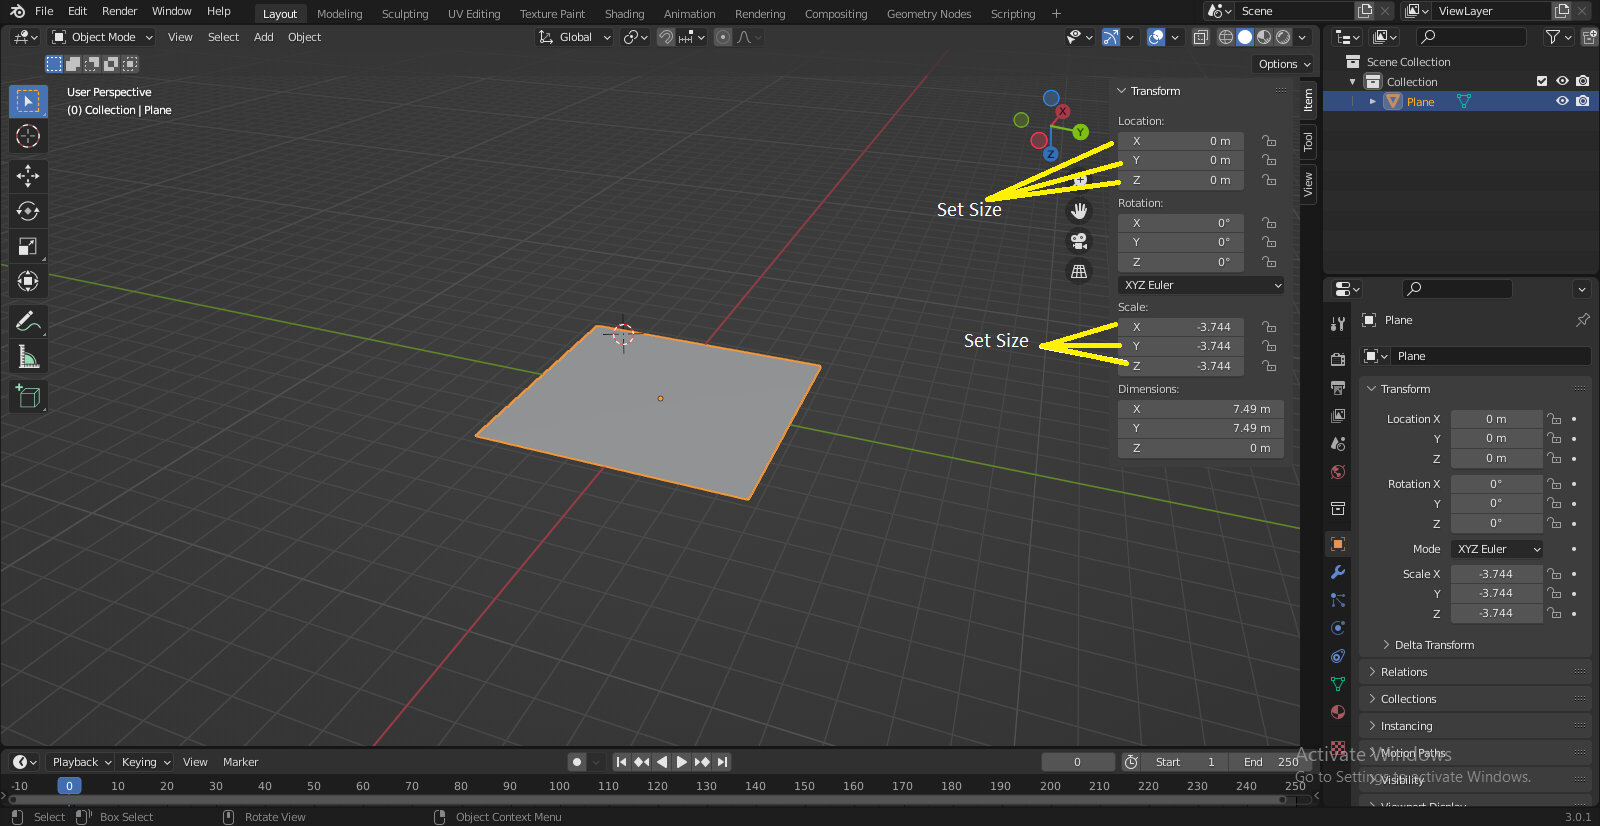
Step5 :-Open Plane
Step6 :-Set Size
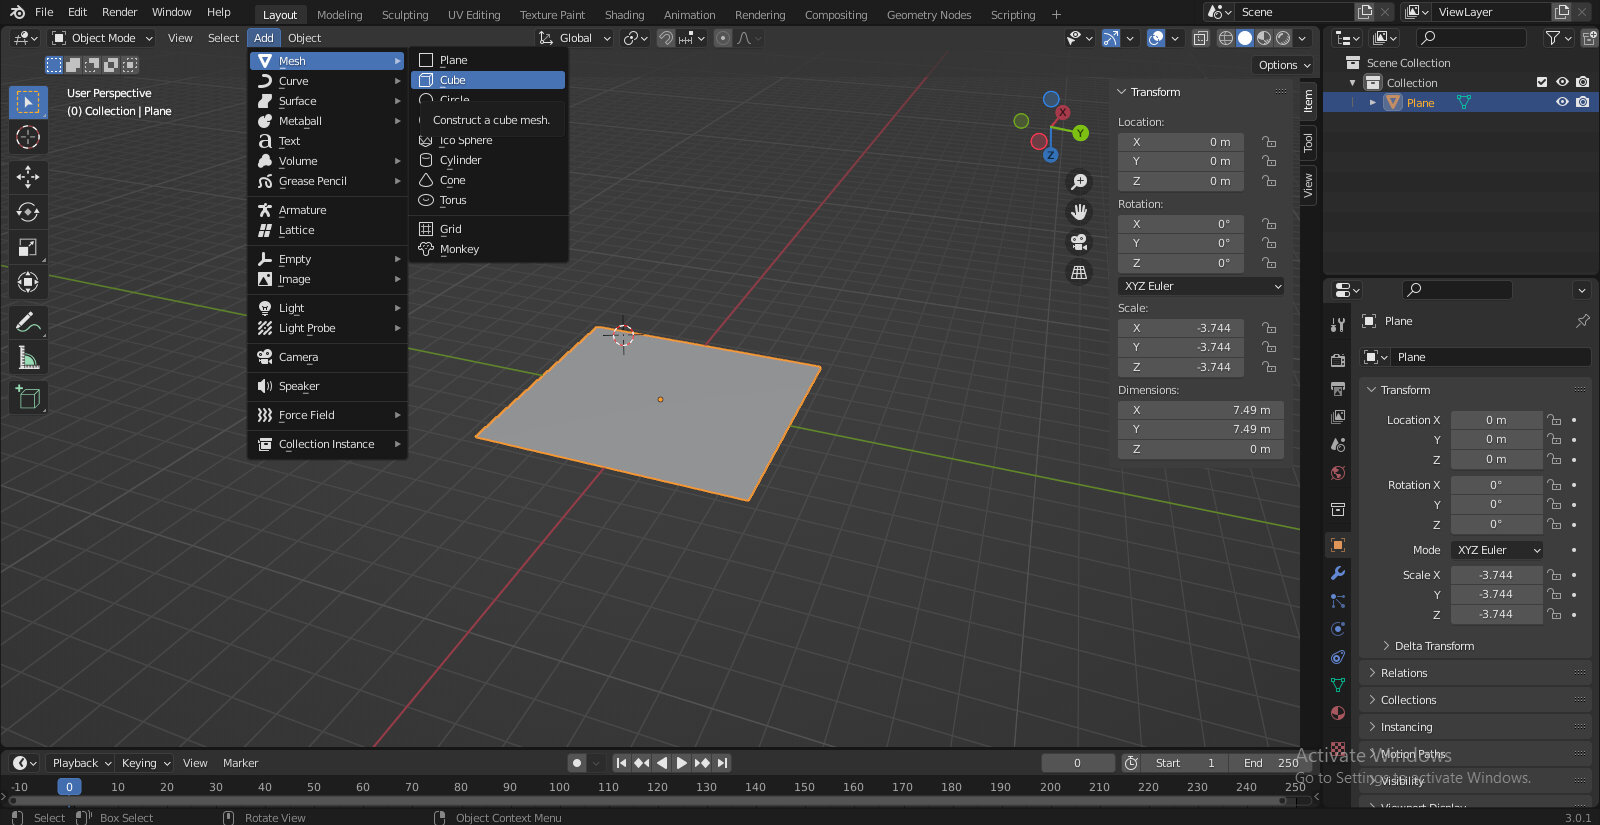
Step7 :-Open Cube
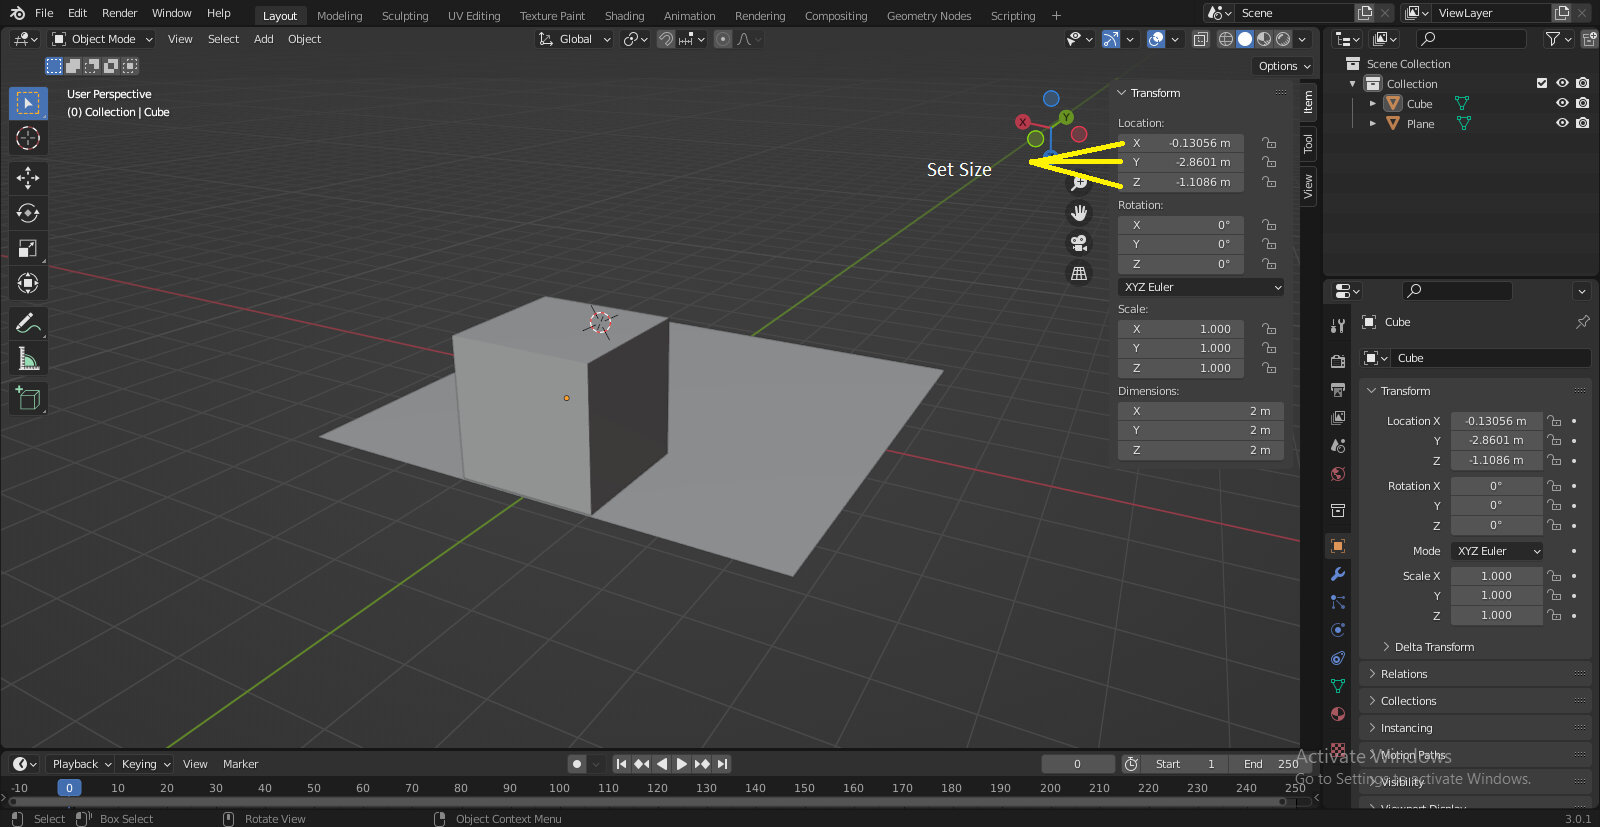
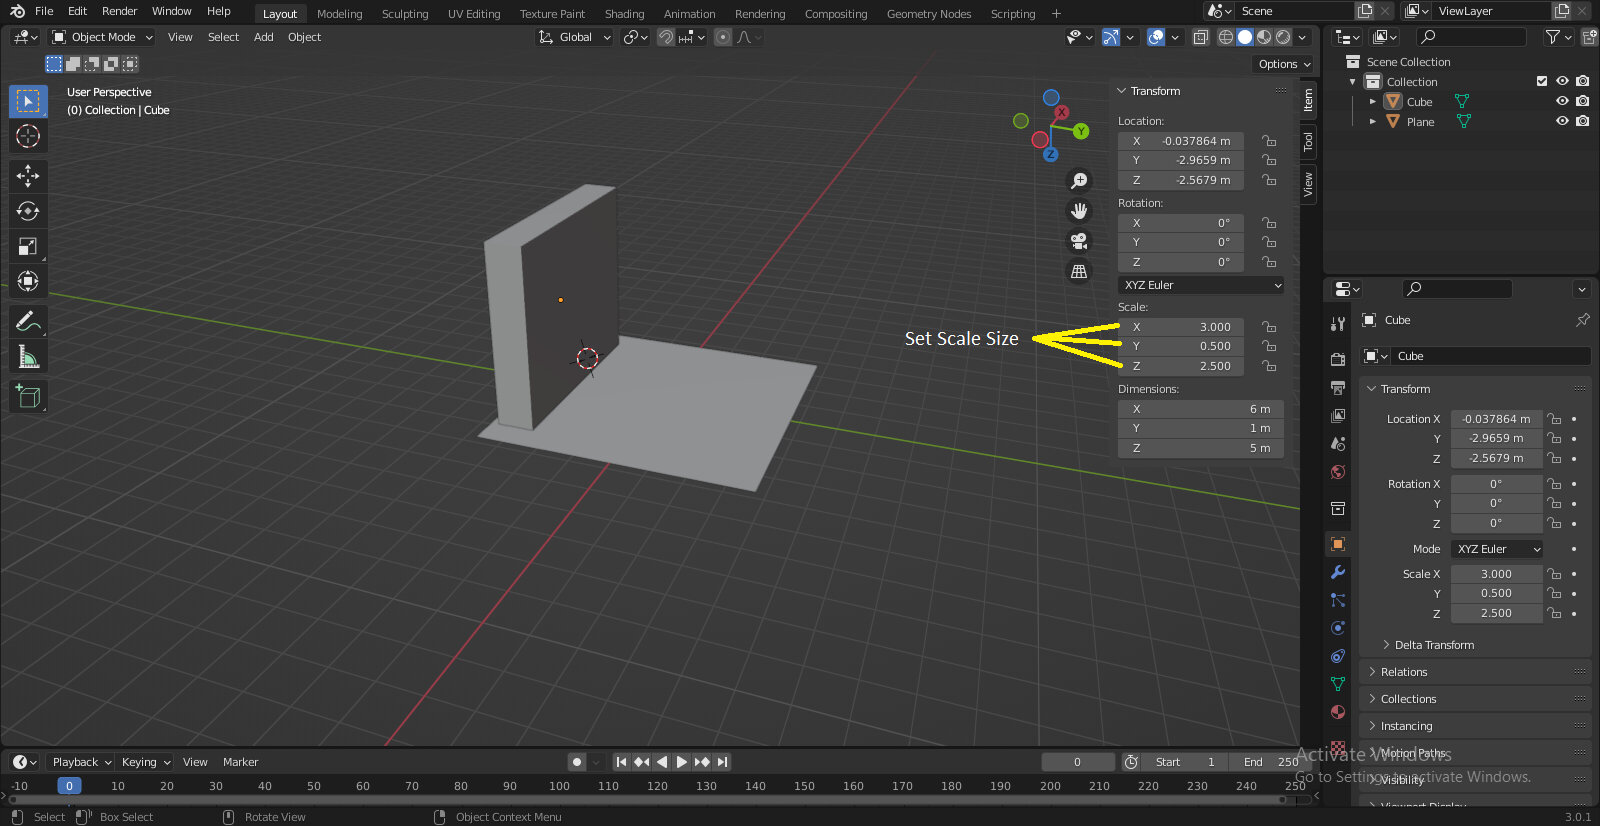
Step8 :-Set X,Y,Z Size
Step9 :-Set Scale(X,Y,Z) Size
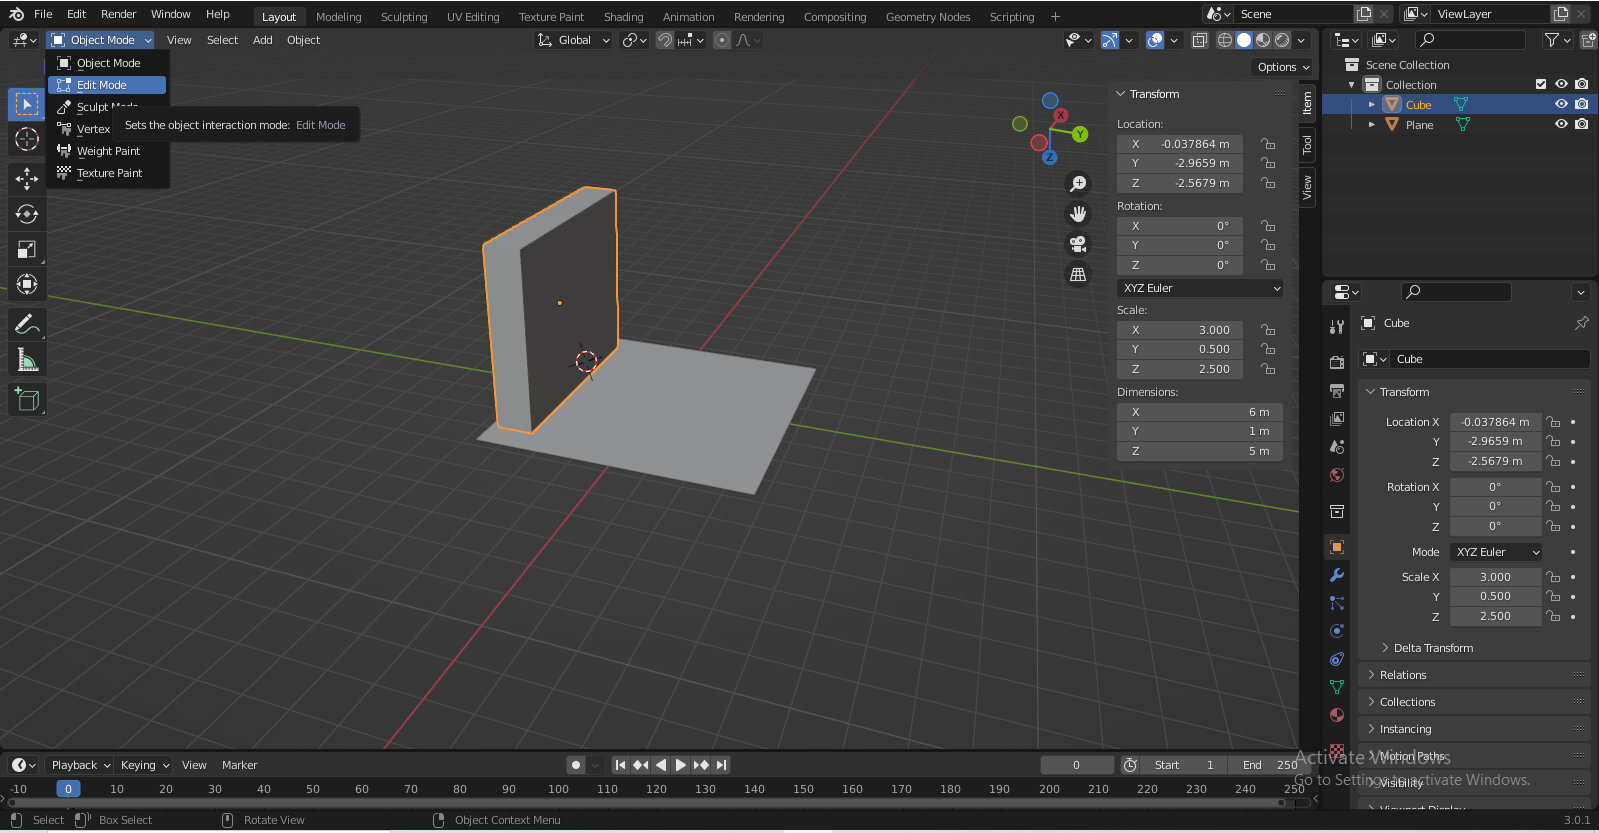
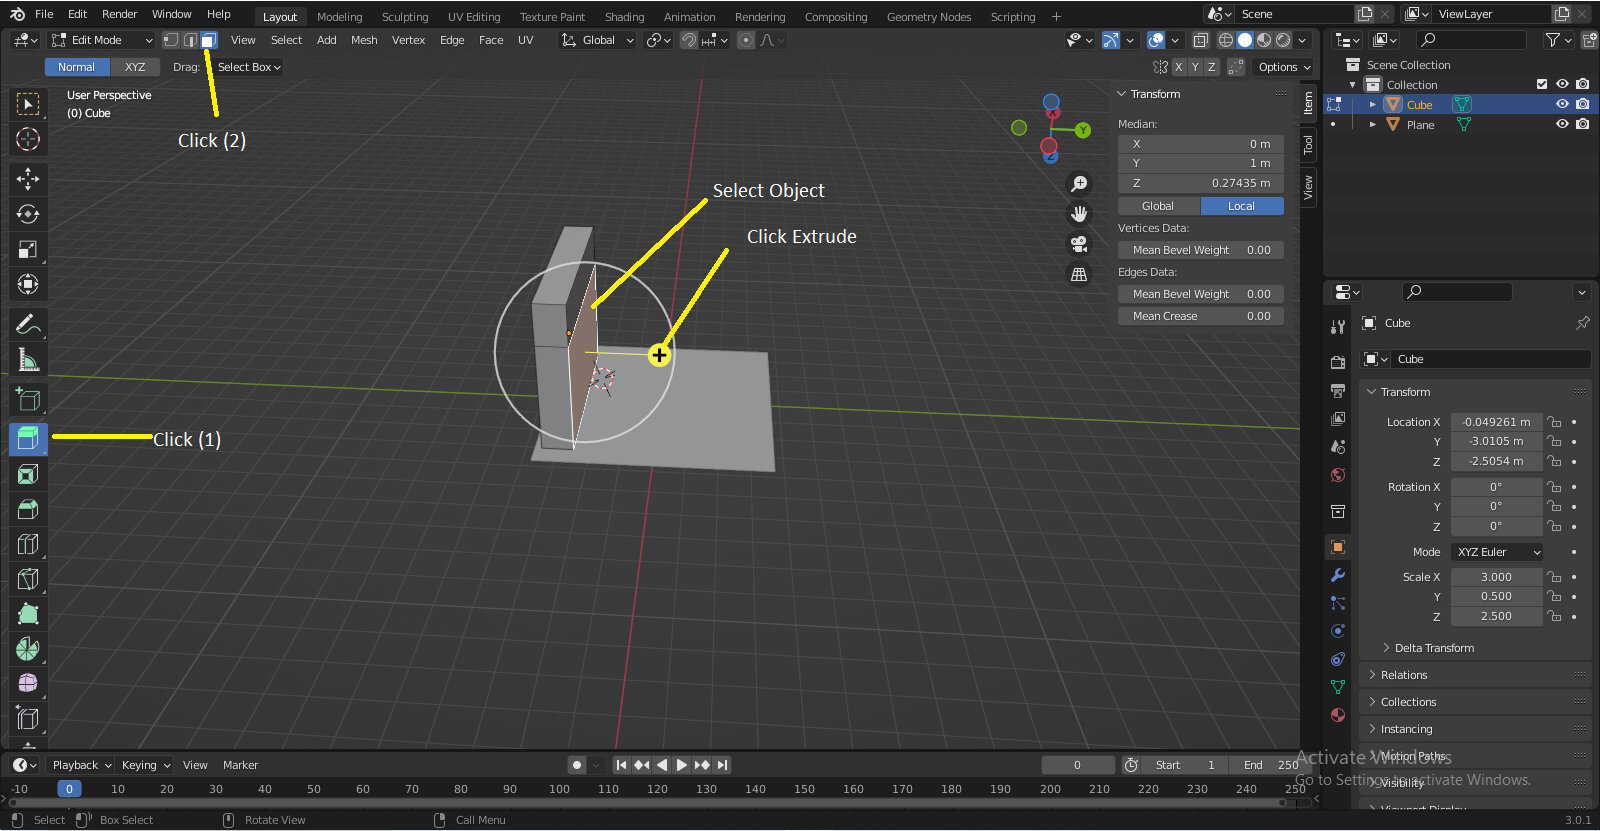
Step10 :-Click Object Mode And Then Click Edit Mode
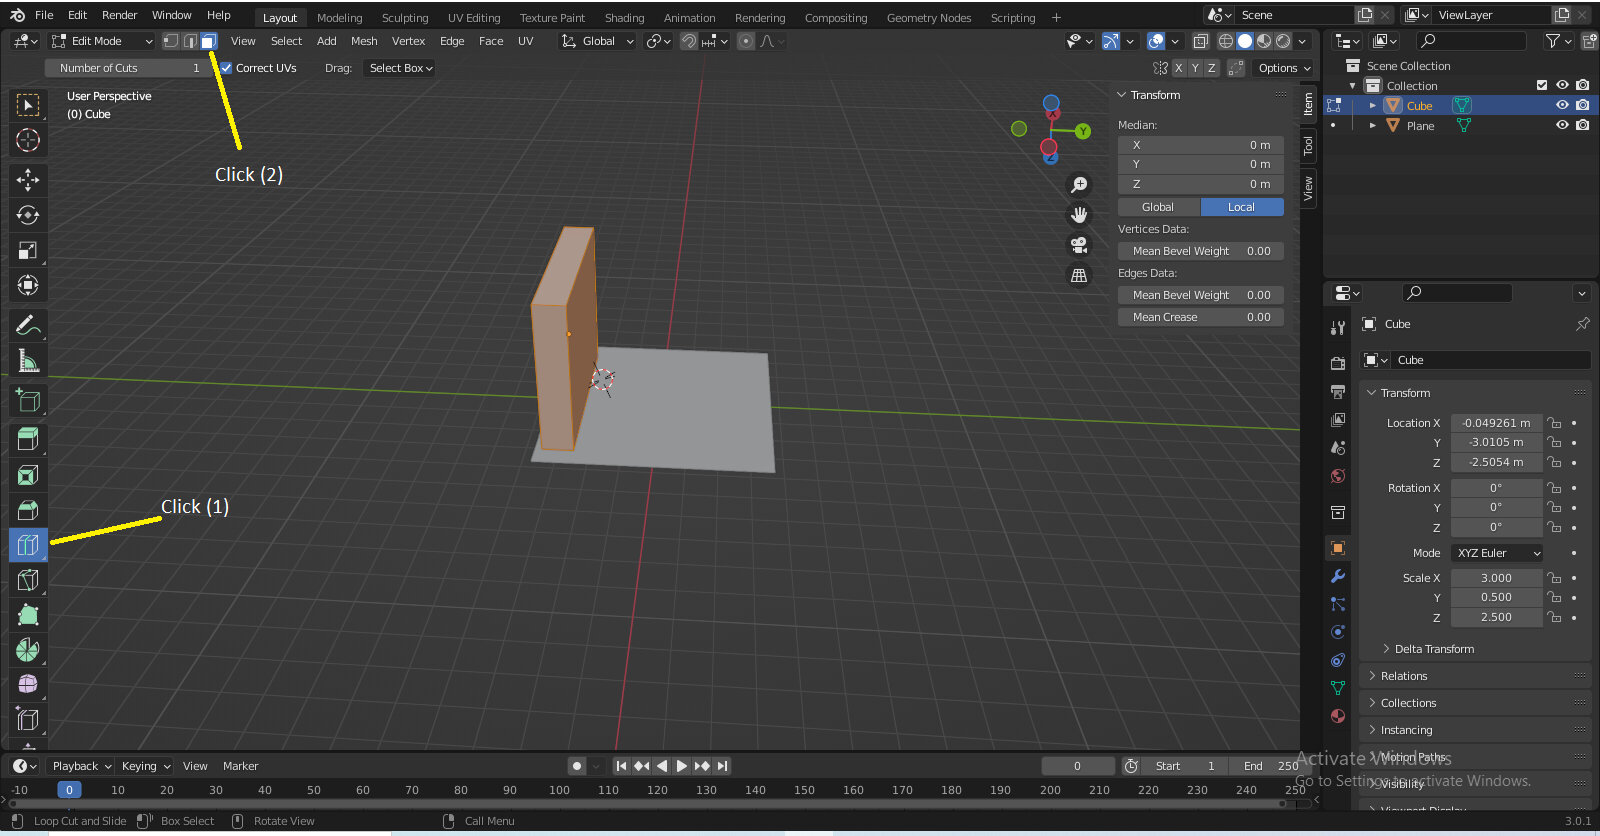
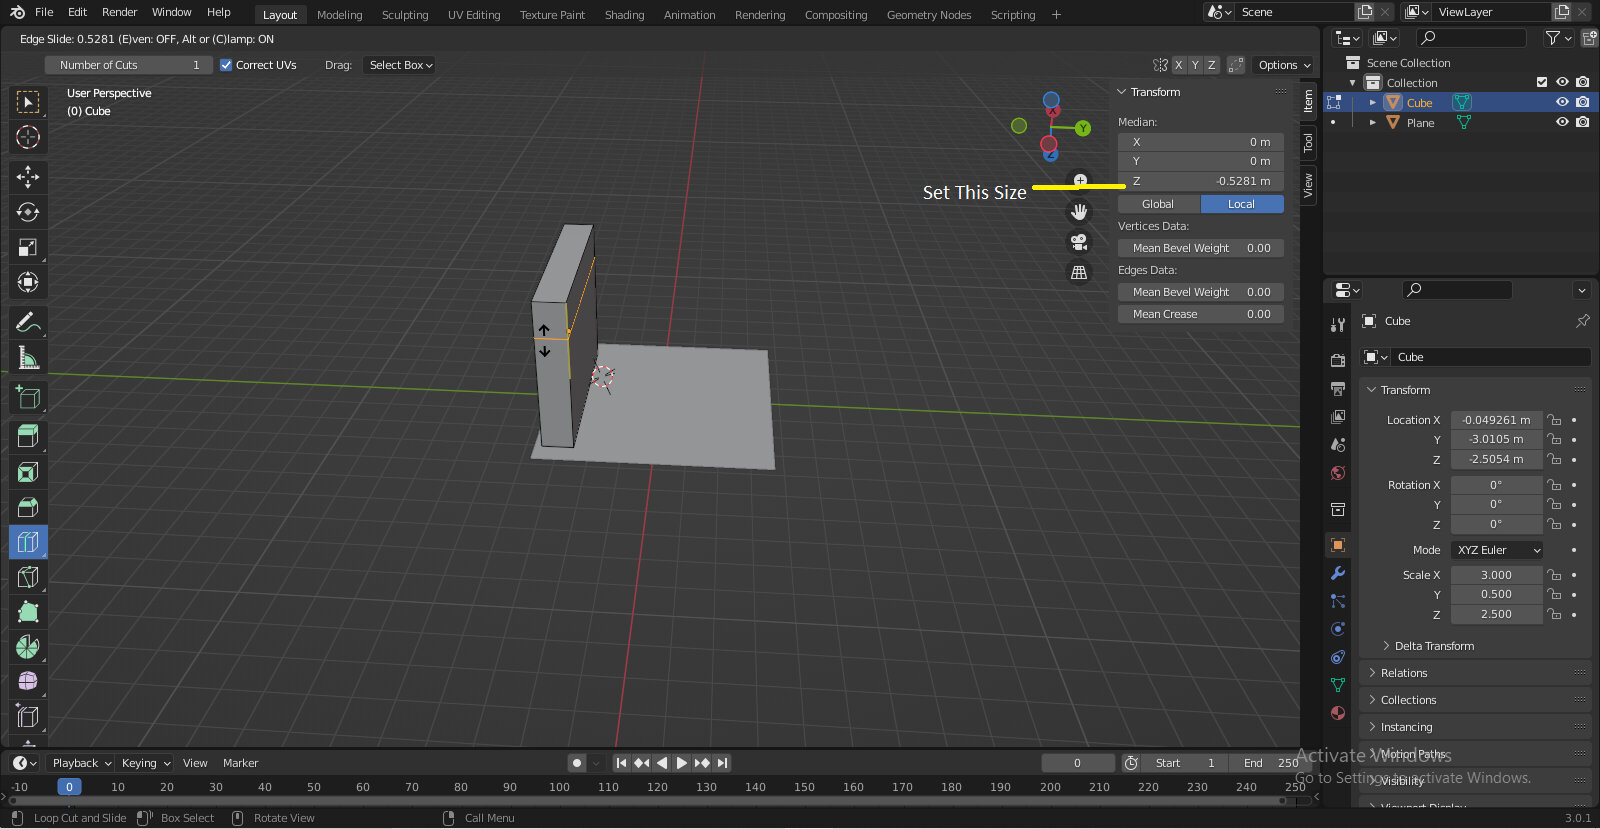
Step11 :-
Step12 :-
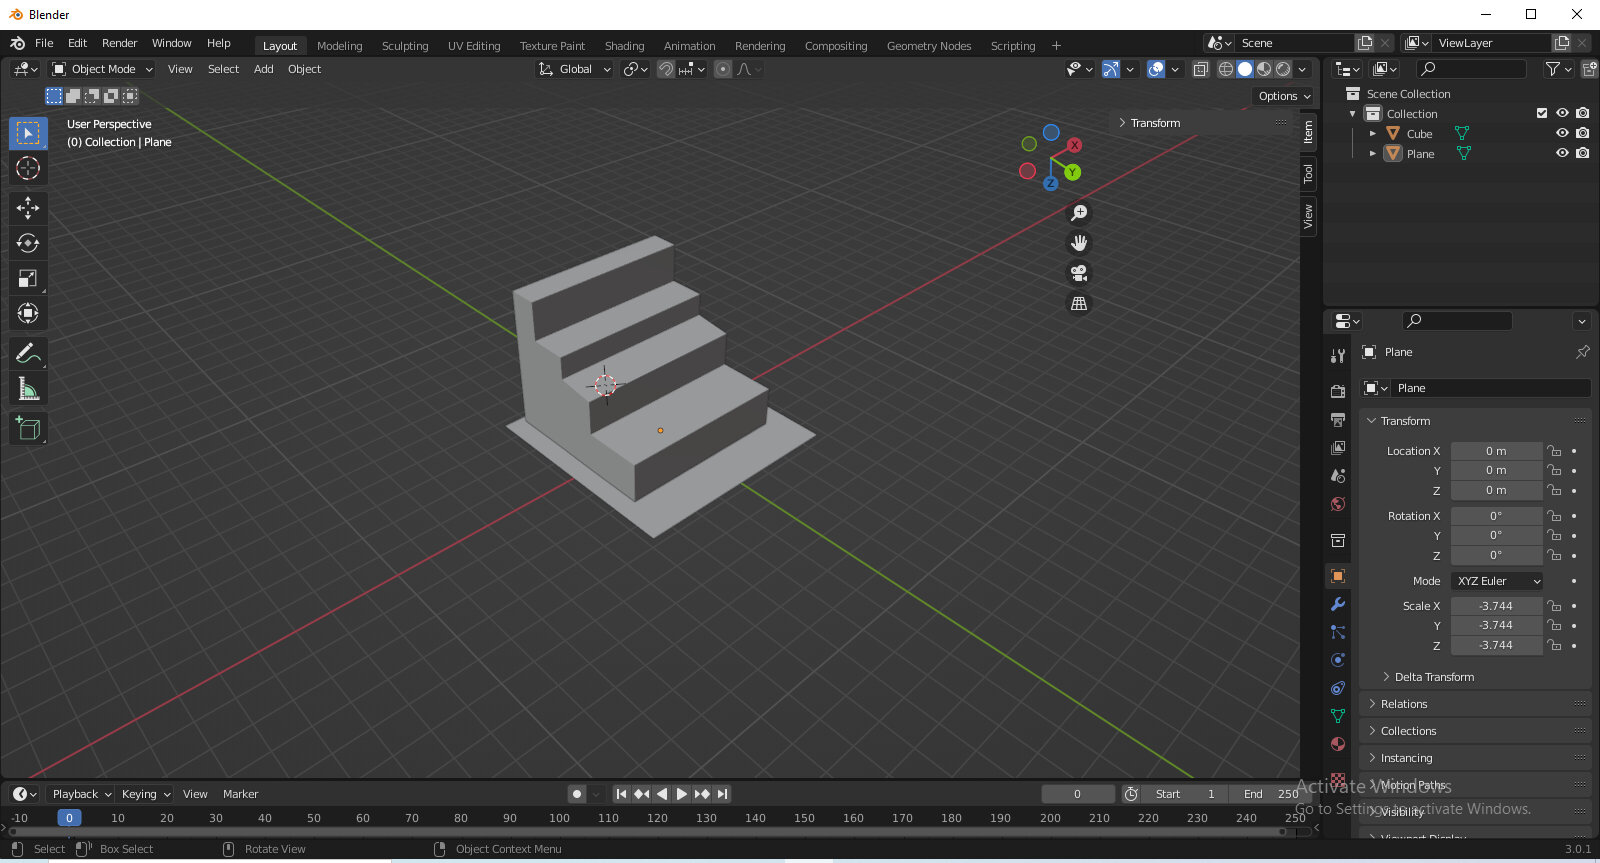
Step13 :-Select Objrct And Click Extrude and Then Repeat Step
Step14 :-Final 3D Design
Differences Between Blender vs Fusion 360
Fusion 360 offers a more intuitive user interface that depends on drop-down menus,
whereas Blender has a complicated user interface.
Fusion 360 is a more advanced and enhanced 3D modeling and printing tool,
but Blender requires plugins to perform properly with 3D printing.
Blender is open-source and free to use, whereas Fusion 360 costs roughly $500
Animations:-
What is the Animations?
You can make an animation by moving a component to a target place
and dragging the time bar along the timeline to a specific point in
time. The MotionManager moves the component from its starting position
to a position you specify at a set time.
I used SolidWorks for animations
First I assembled my design.
First I disassembly my design.
Rendering
PhotoView 360 is a SOLIDWORKS add-in that renders SOLIDWORKS models in photo-realistic
renderings.
The rendered image includes all of the model's appearances, lighting, scene, and decals.
SOLIDWORKS
Professional or SOLIDWORKS Premium include PhotoView 360.
I have used color inside the design.
Rhino :-
NURBS curves, surfaces, and solids, point clouds, and polygon meshes can
all be created, edited, analysed, documented, rendered, animated, and translated
in Rhino. Beyond the limitations of your hardware, there are no bounds to complexity,
degree, or size.
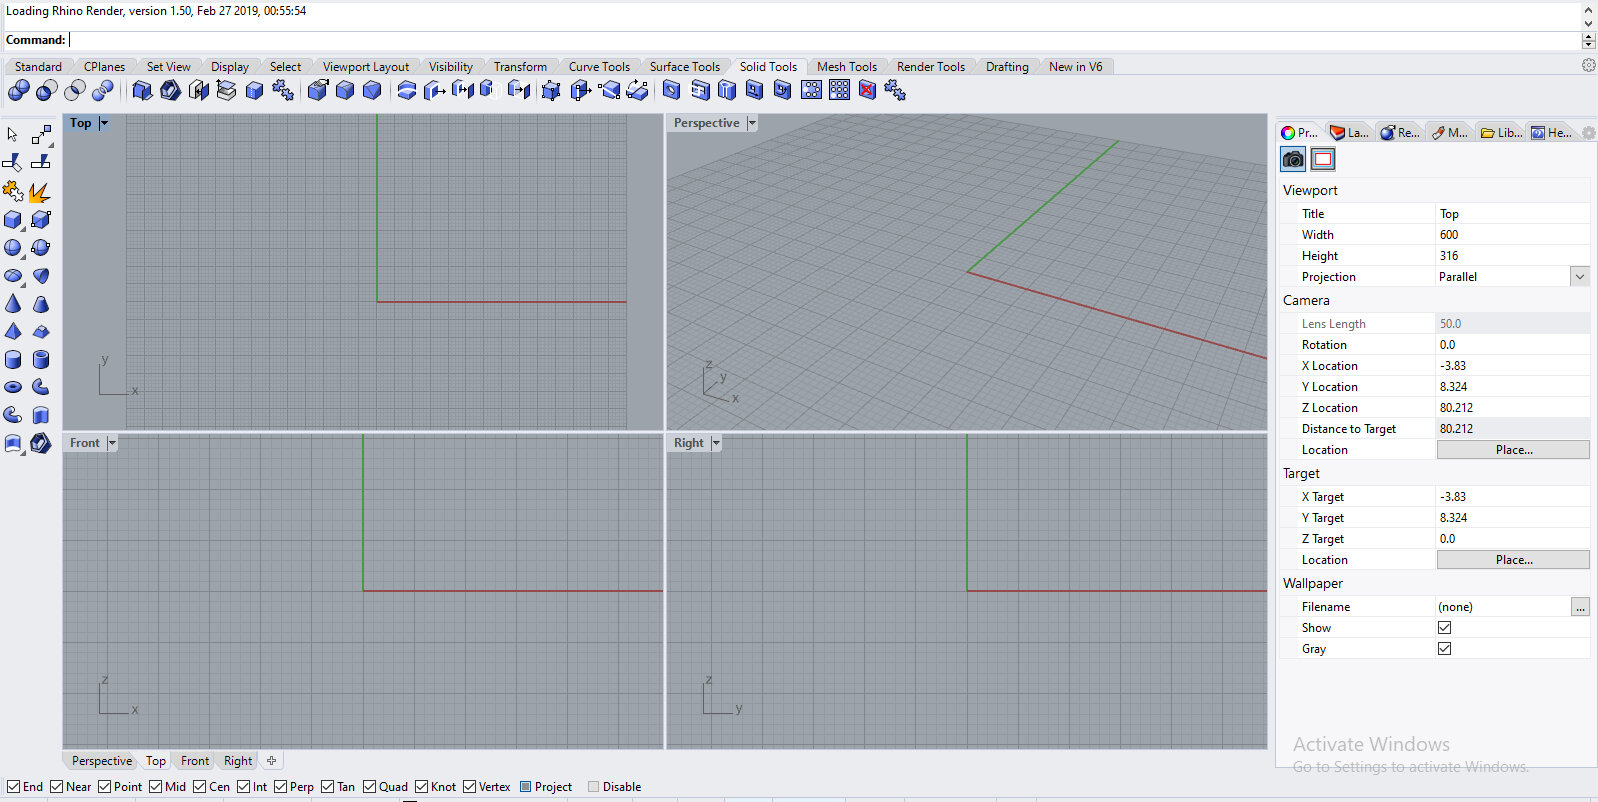
Step1 :-Rhino Home Page
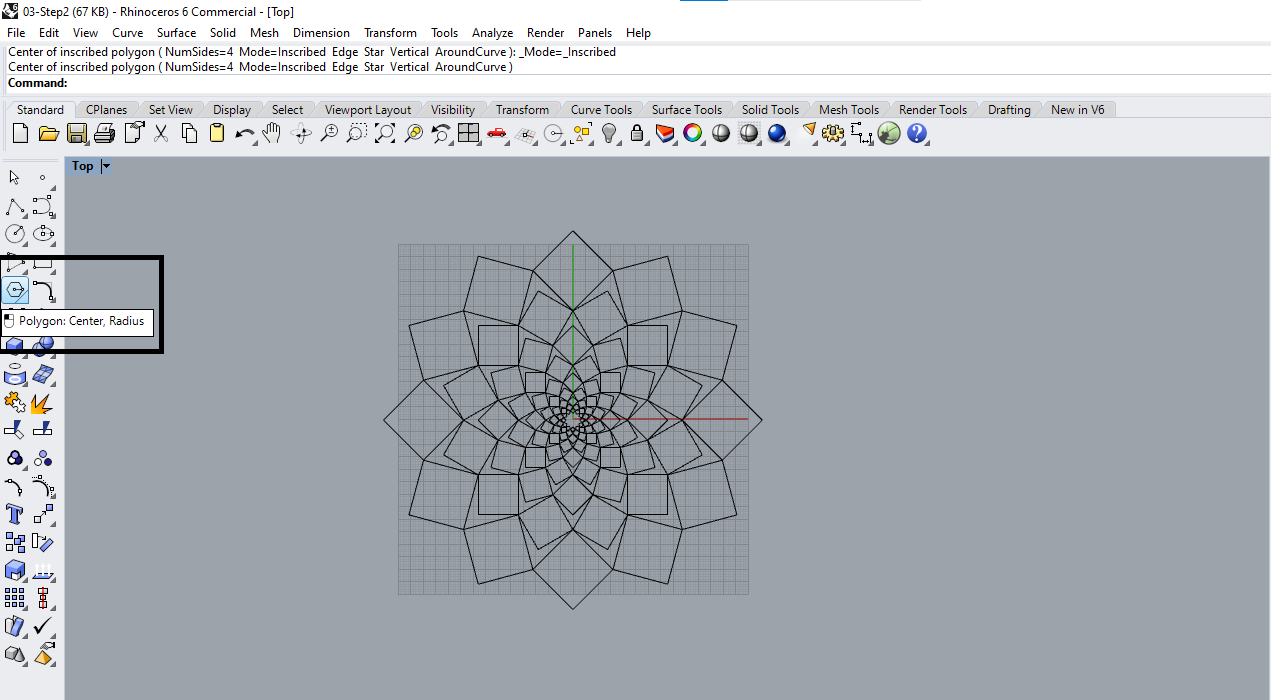
polygon:center,radius:-
The Polygon command creates a closed polyline with the number of sides you specify.
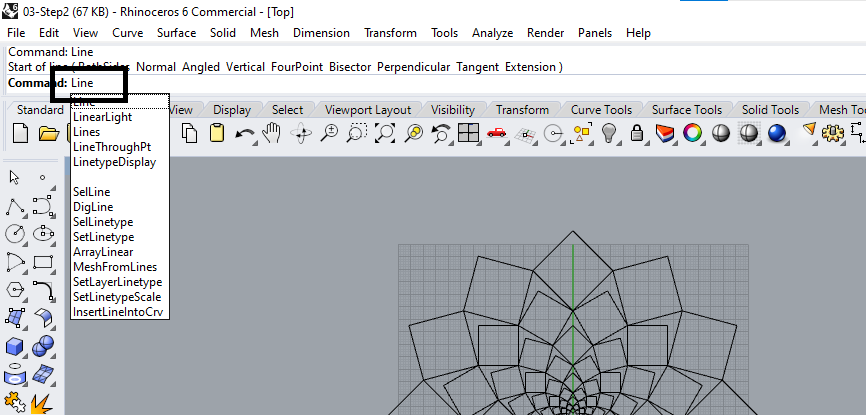
Line:-
Rhino has a lot of curve-drawing tools. Straight lines, polylines (groups of connected line
segments), arcs, circles, polygons, ellipses, helices, and spirals are all possible.
Curve control points and curves that pass through selected points can also be used to design
curves.
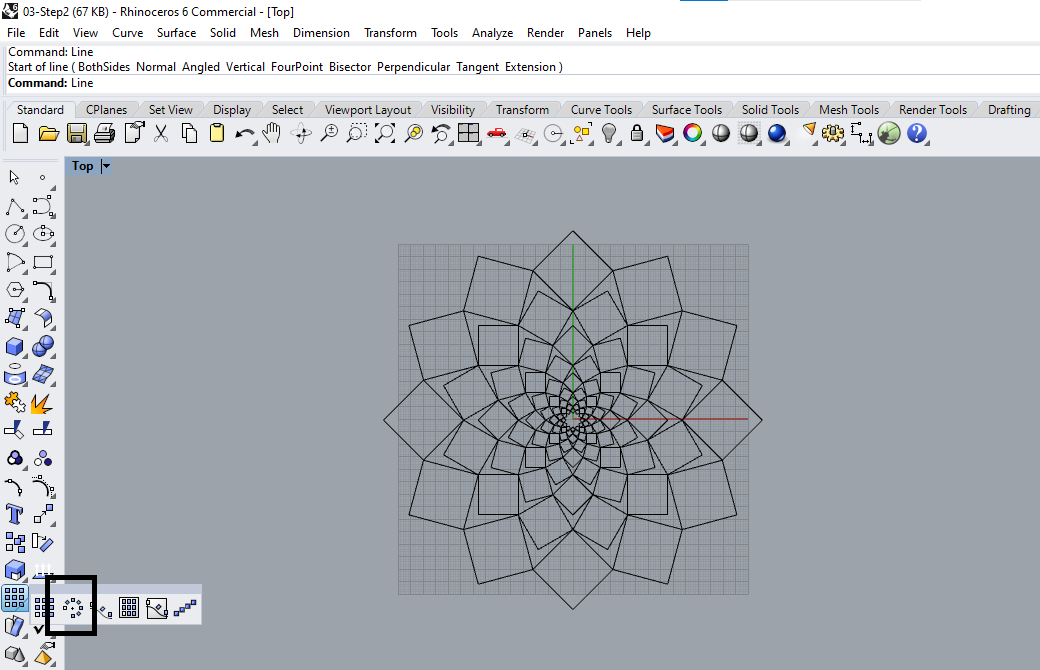
ArrayPolar
The ArrayPolar command duplicates objects in a circular pattern around a central point.
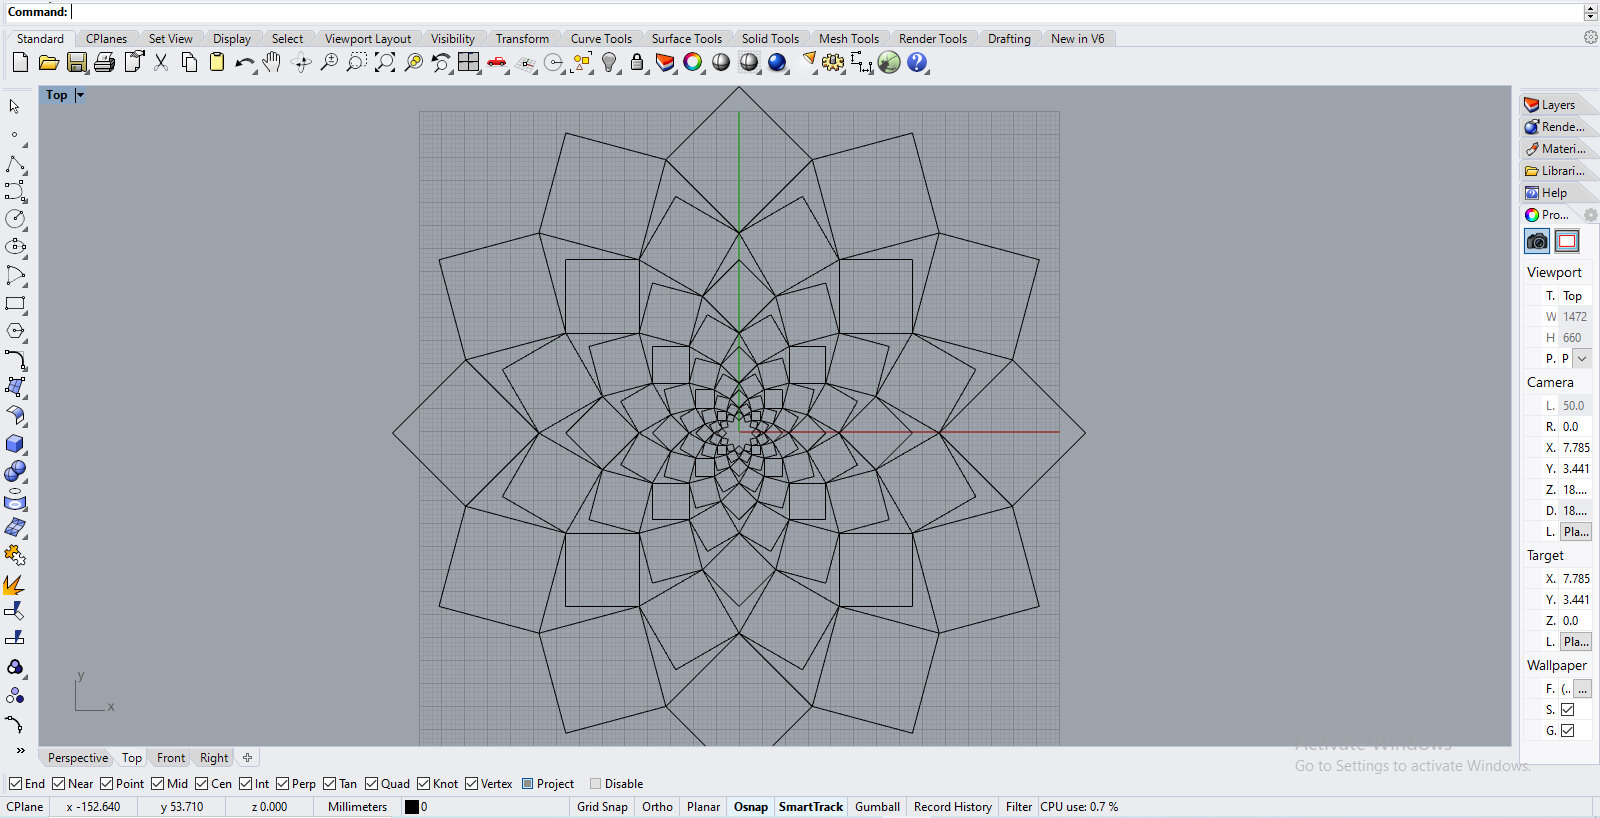
Step2 :-Final 2D Design
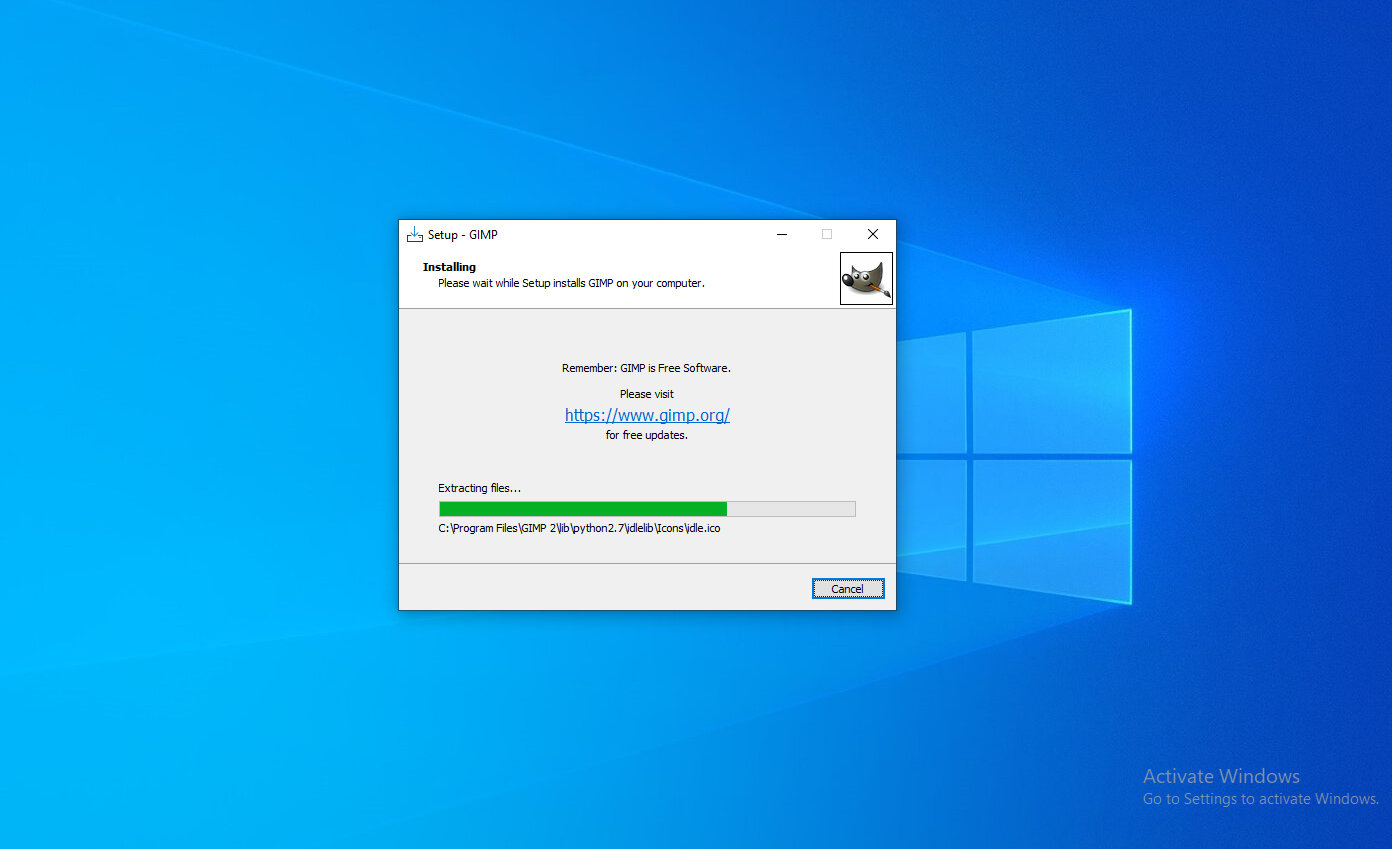
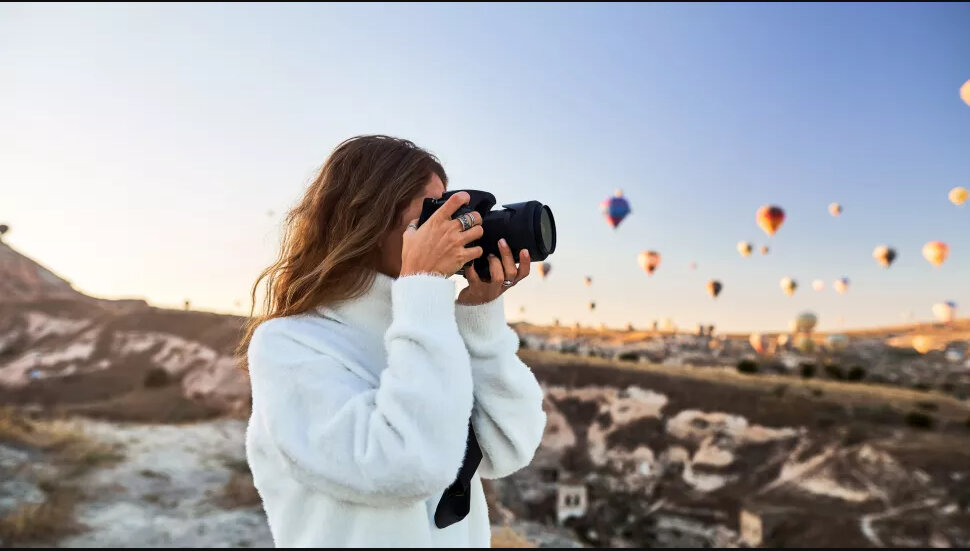
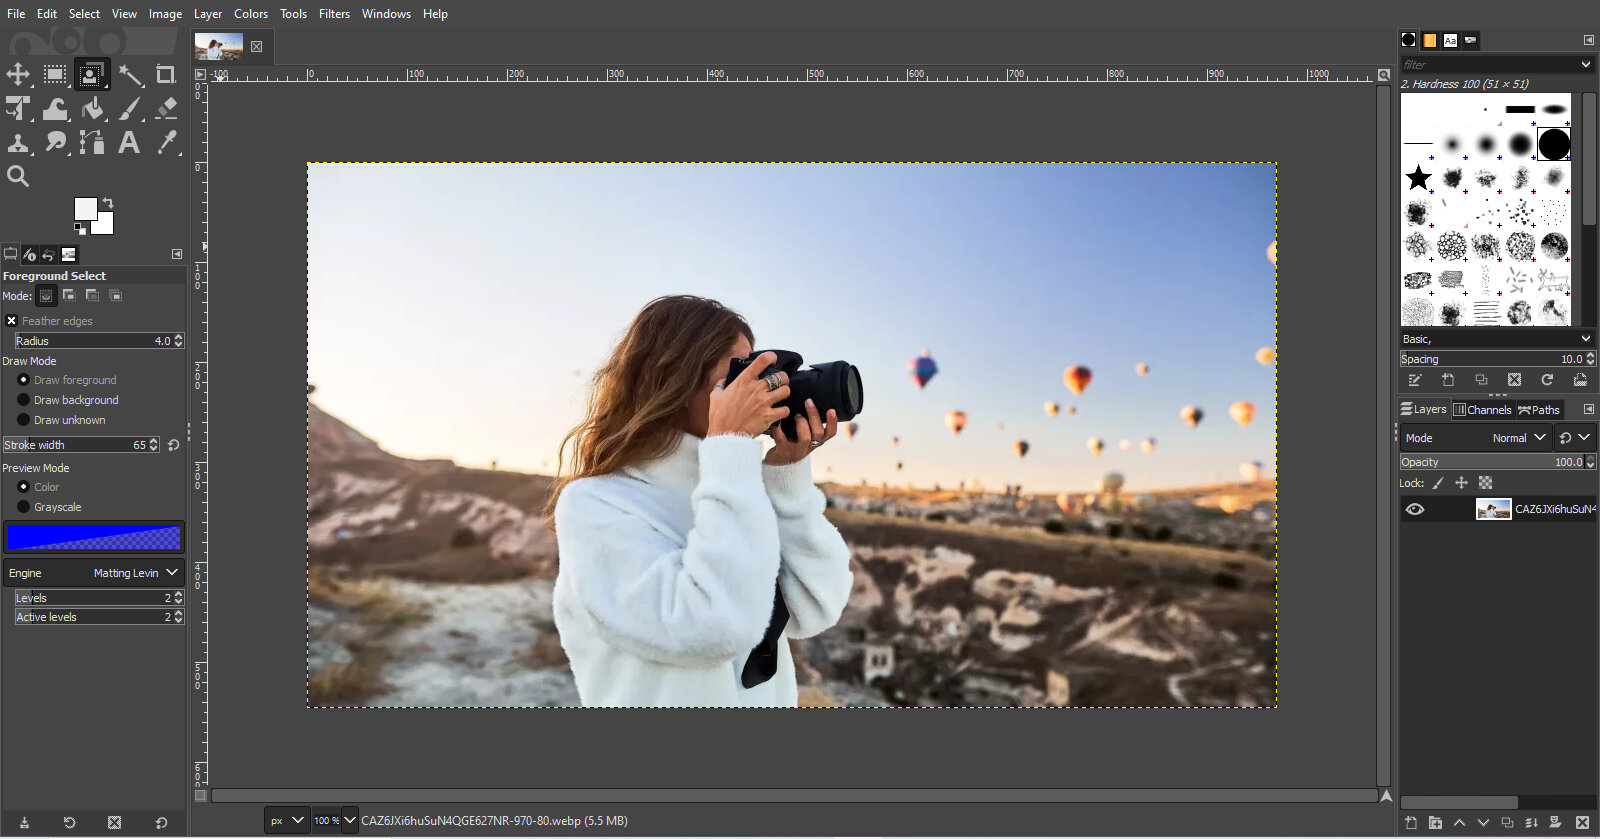
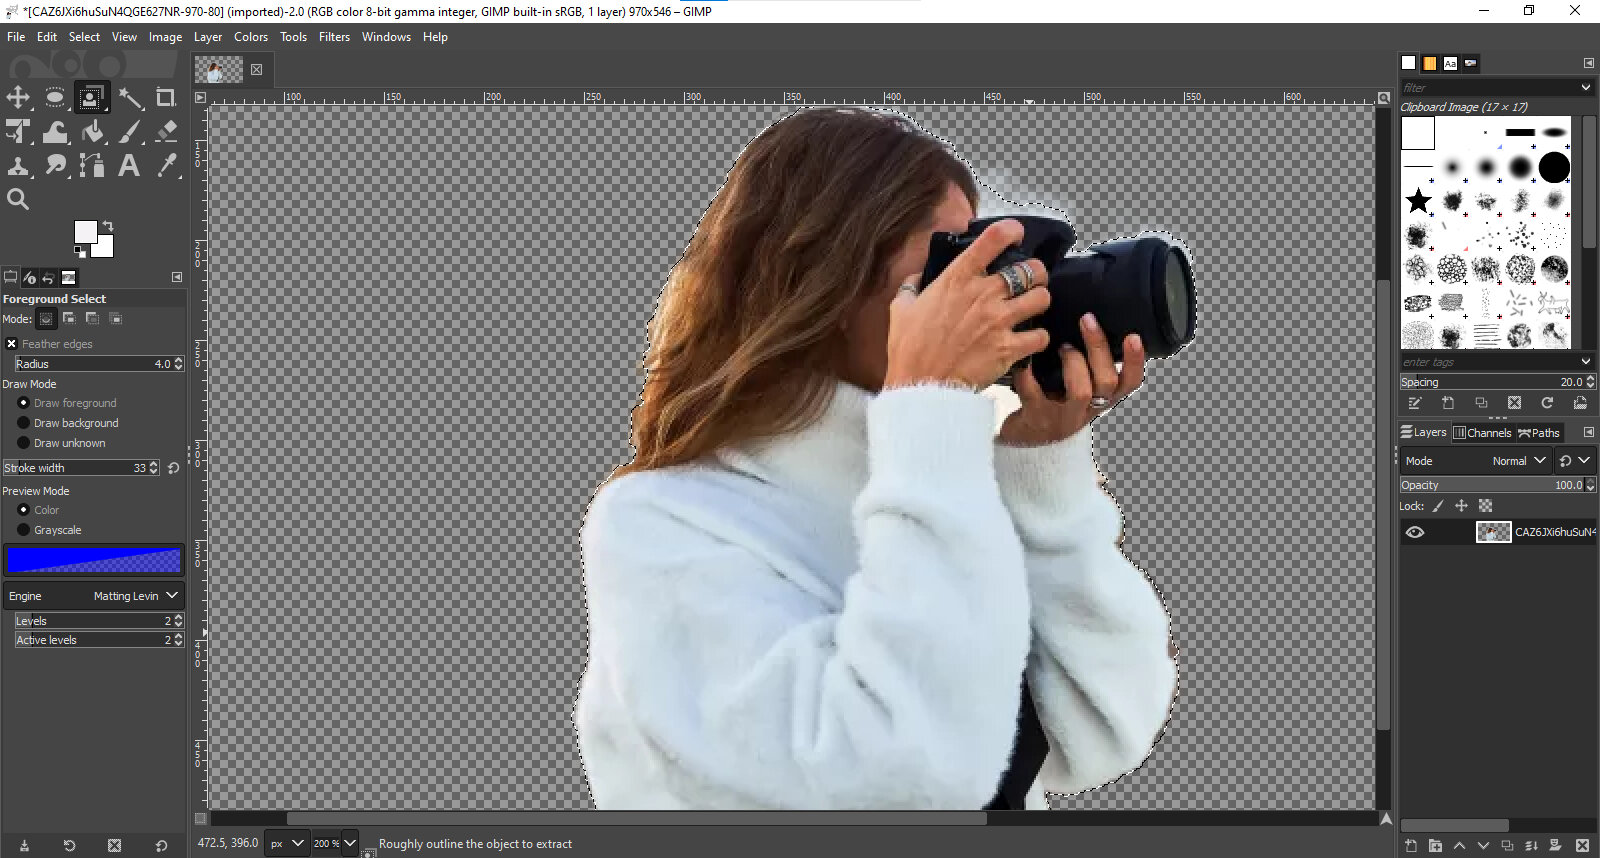
GIMP :-
The GNU Image Manipulation Program (GIMP) is an acronym for GNU Image Manipulation
Program. It's a free tool that may be used for photo retouching, image composition,
and image creating.
Painting:-
Brush, pencil, airbrush, clone, and other painting tools are all included.
For high-quality anti-aliasing, all paint tools use sub-pixel sampling.
The gradient editor and blend tool are extremely strong.
Inside the Rhino is a command box. It doesn’t happen inside the gimp.
The photo editing inside Gimp is good. Rhino is inside but there is a little problem.
Rhino has licensed software and GIMP is free software.
Rhino toolbar is good Gimp toolbar is a little hard.
I like Rhino software.
What Is the raster?
The term "raster" is used to describe both bitmaps and pixelmaps, indicating that they are
both resolution-dependent
images. When a raster graphic is resized to a bigger size, the square pixels become visible.
What is the vector?
Bitmap and Vector are the two main forms of image. Bitmaps are made up of millions of small
color squares (pixels),
and the higher the number of pixels, the higher the resolution and quality. Lines, curves,
and solid colors make up
vector images.
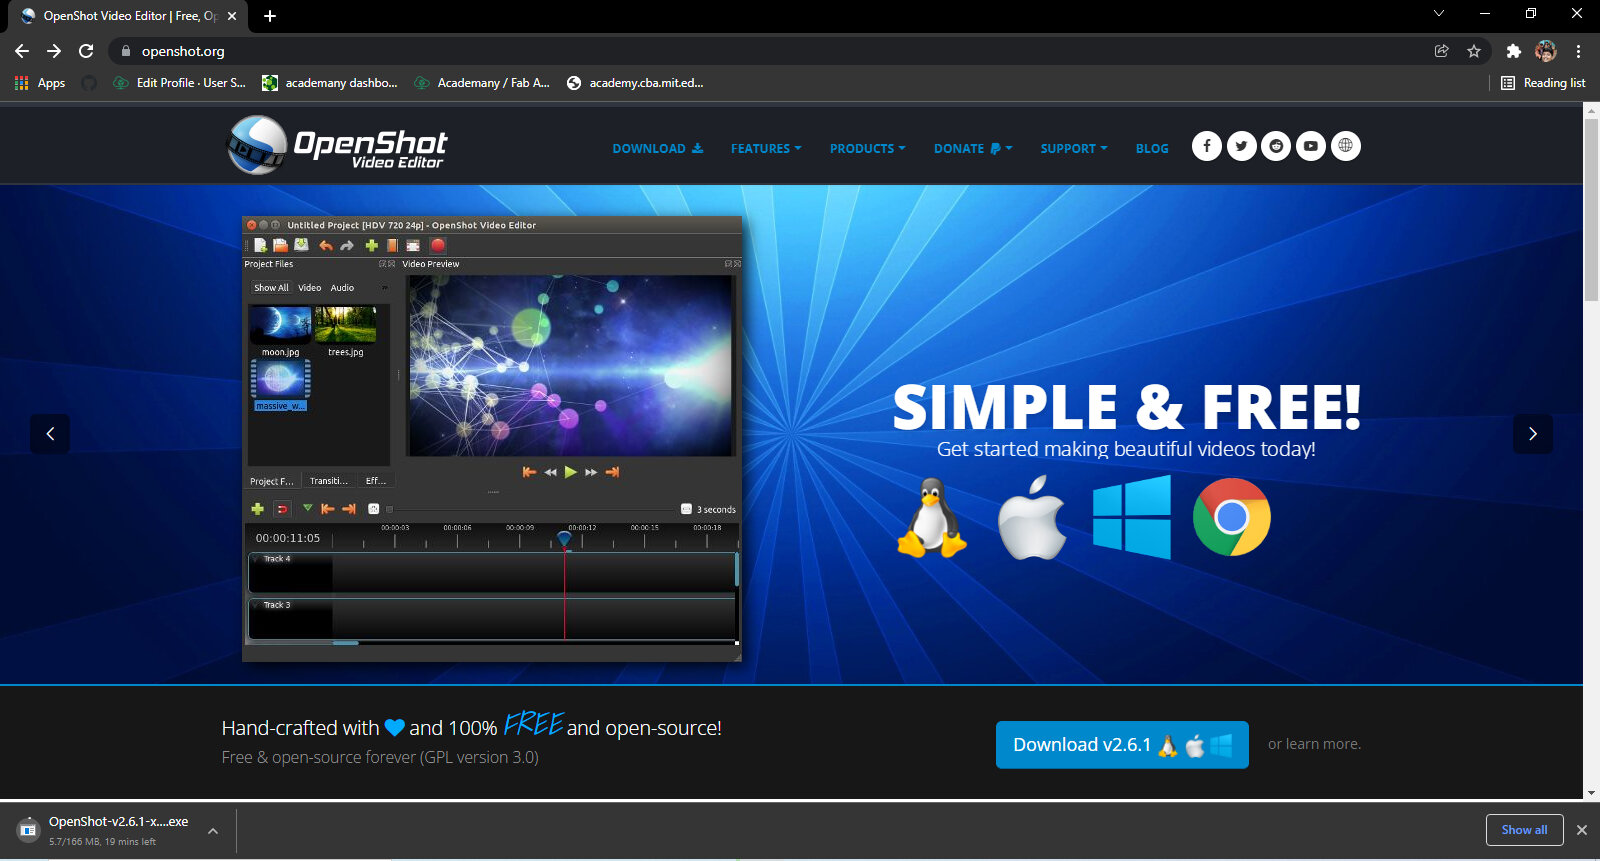
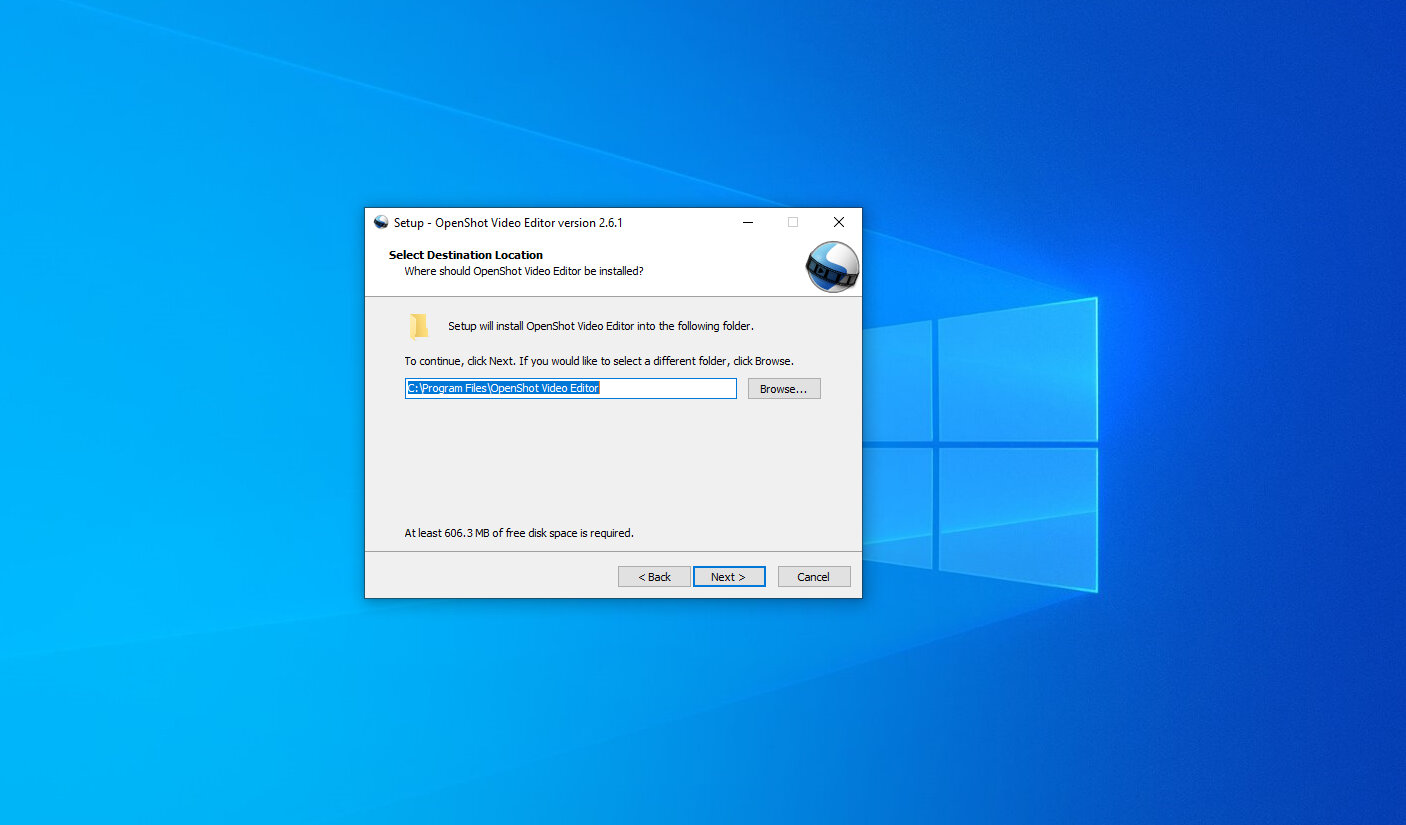
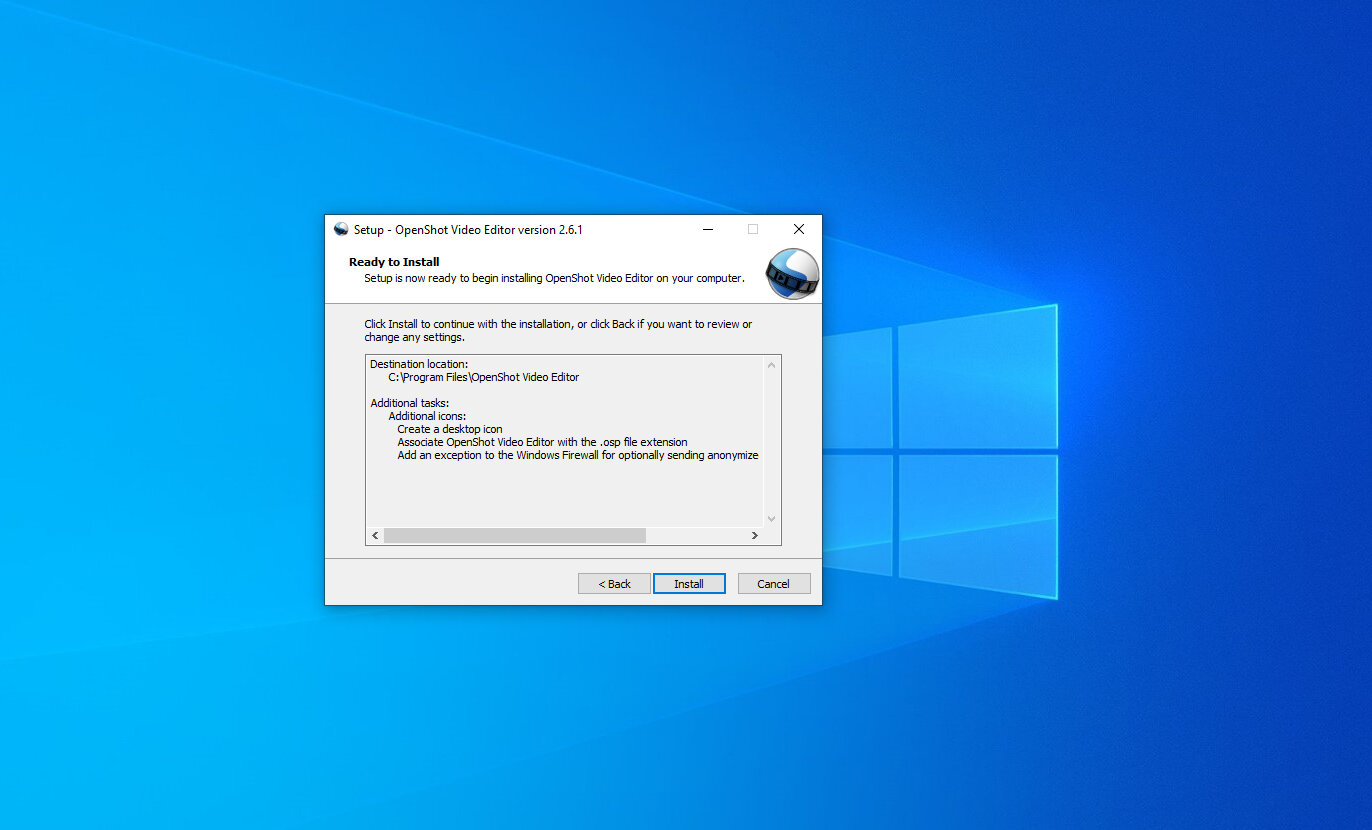
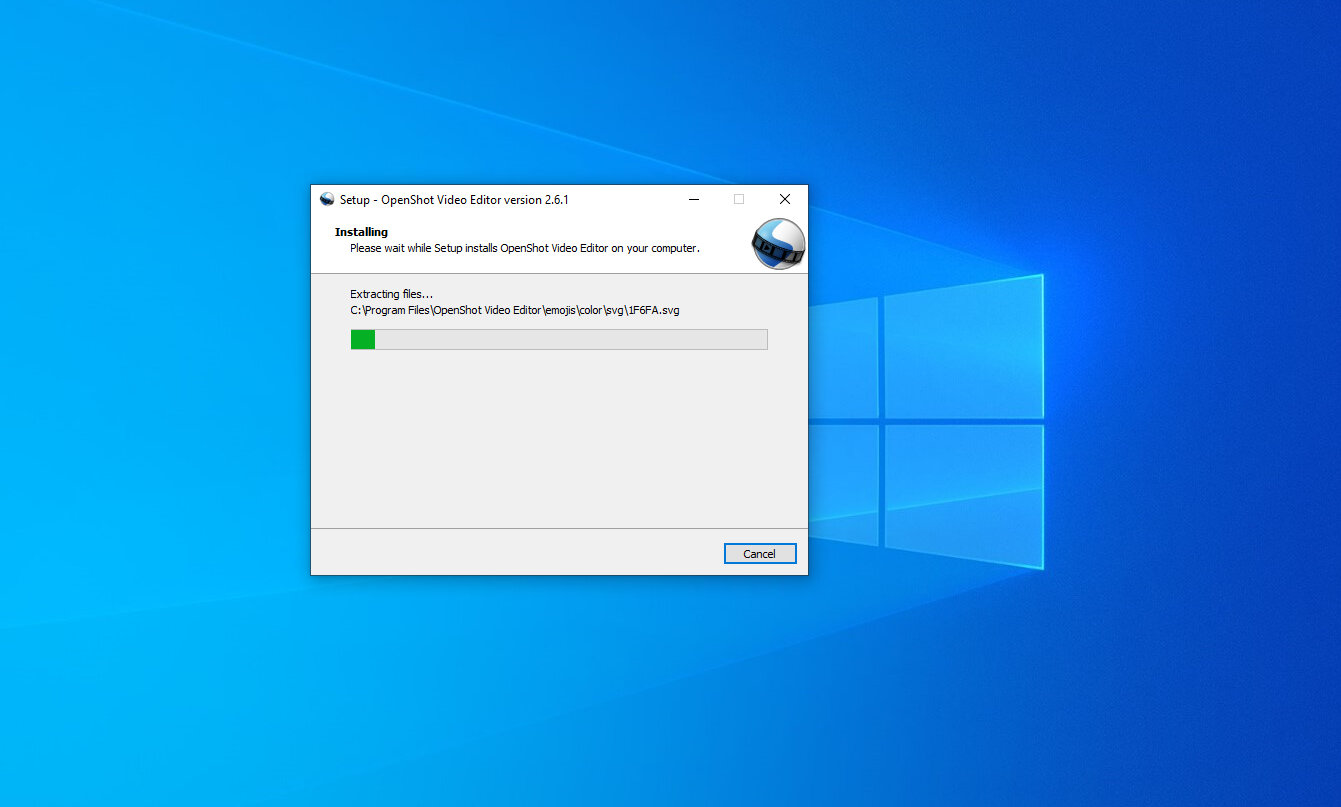
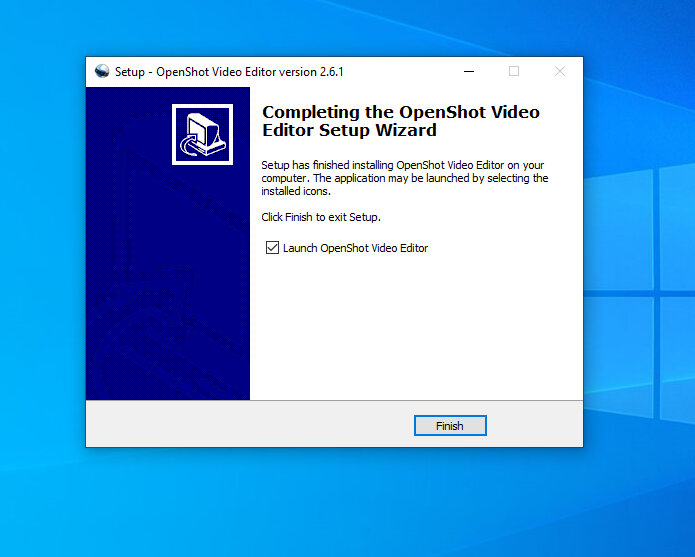
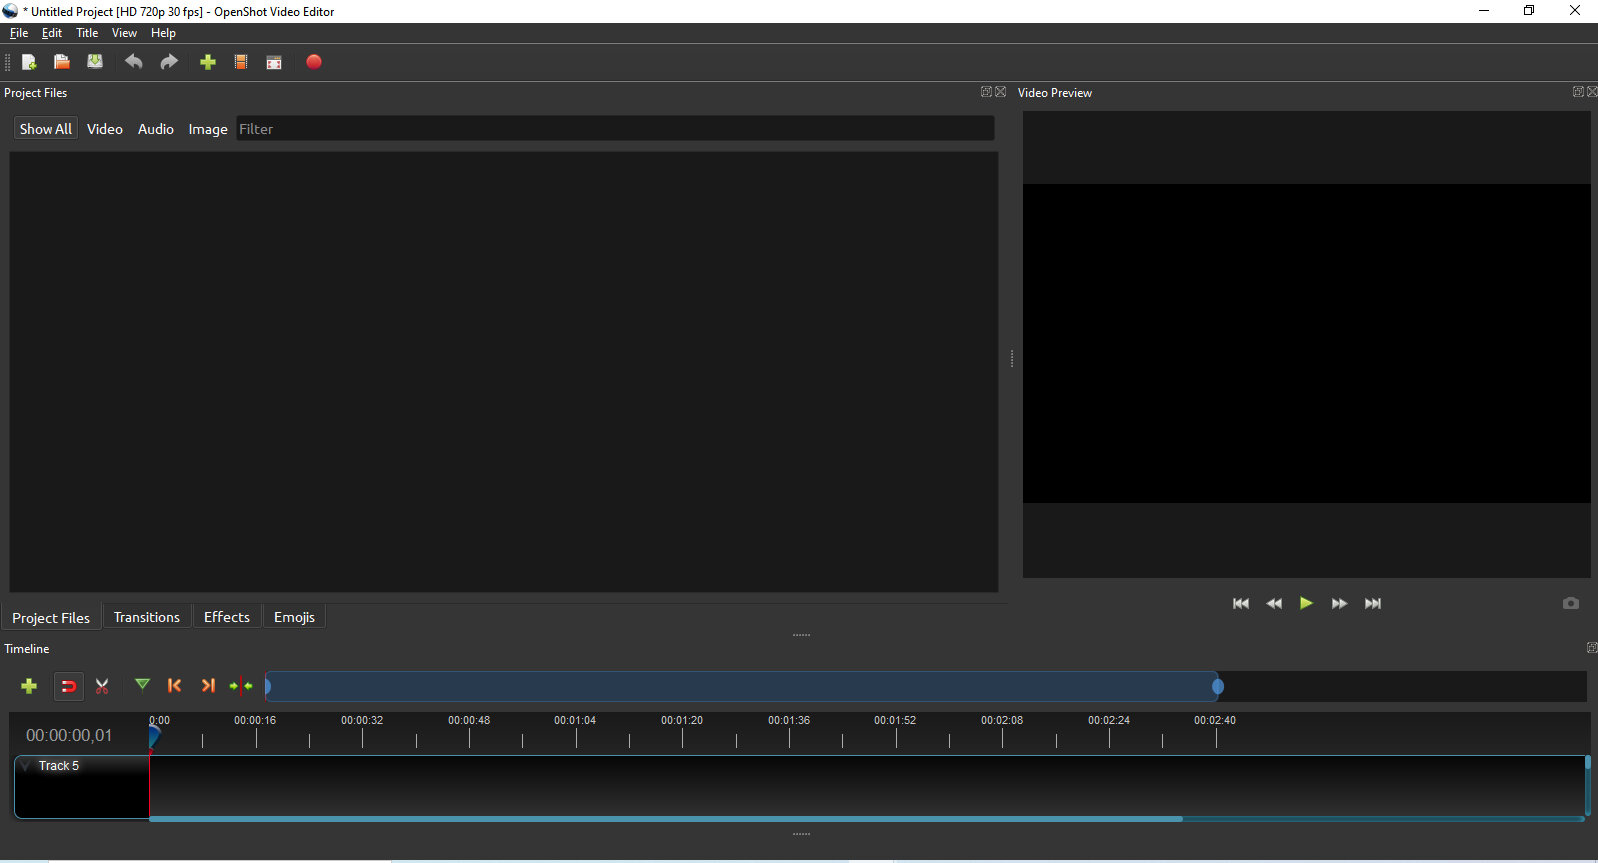
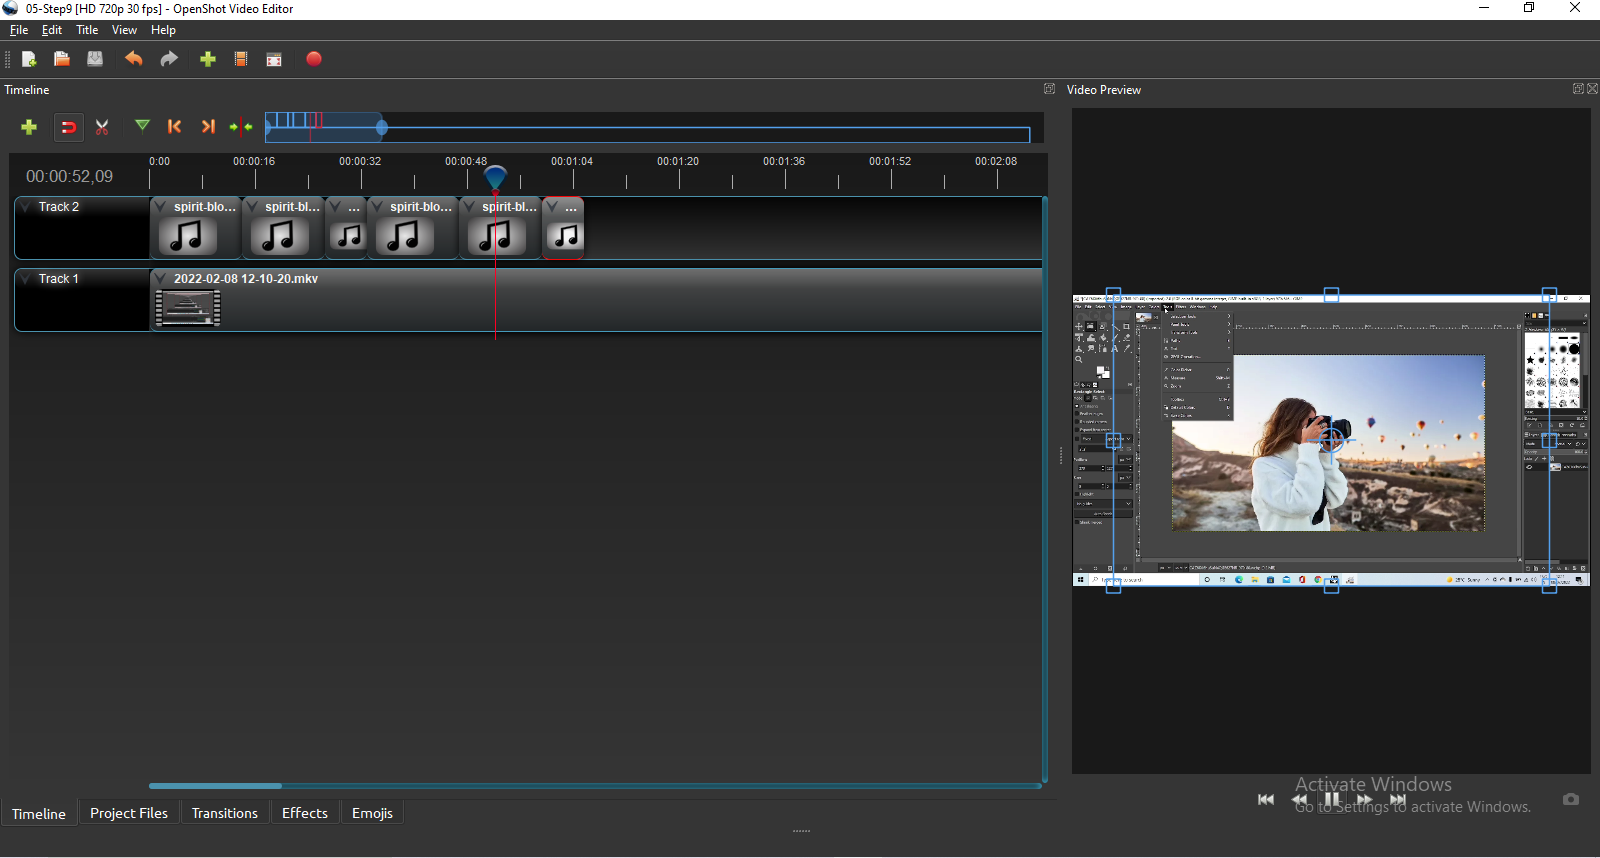
OpenShot :-
What is the OpenShot
For Windows, macOS, Linux, and Chrome OS, OpenShot Video Editor is a free and
open-source video editor. Jonathan Thomas started the project in August 2008
with the goal of creating a stable, free, and user-friendly video editor.
Since version 2.1.0, the software has supported Windows, macOS, and Linux.
In version 2.6.0, OpenShot adds support for Chrome OS.
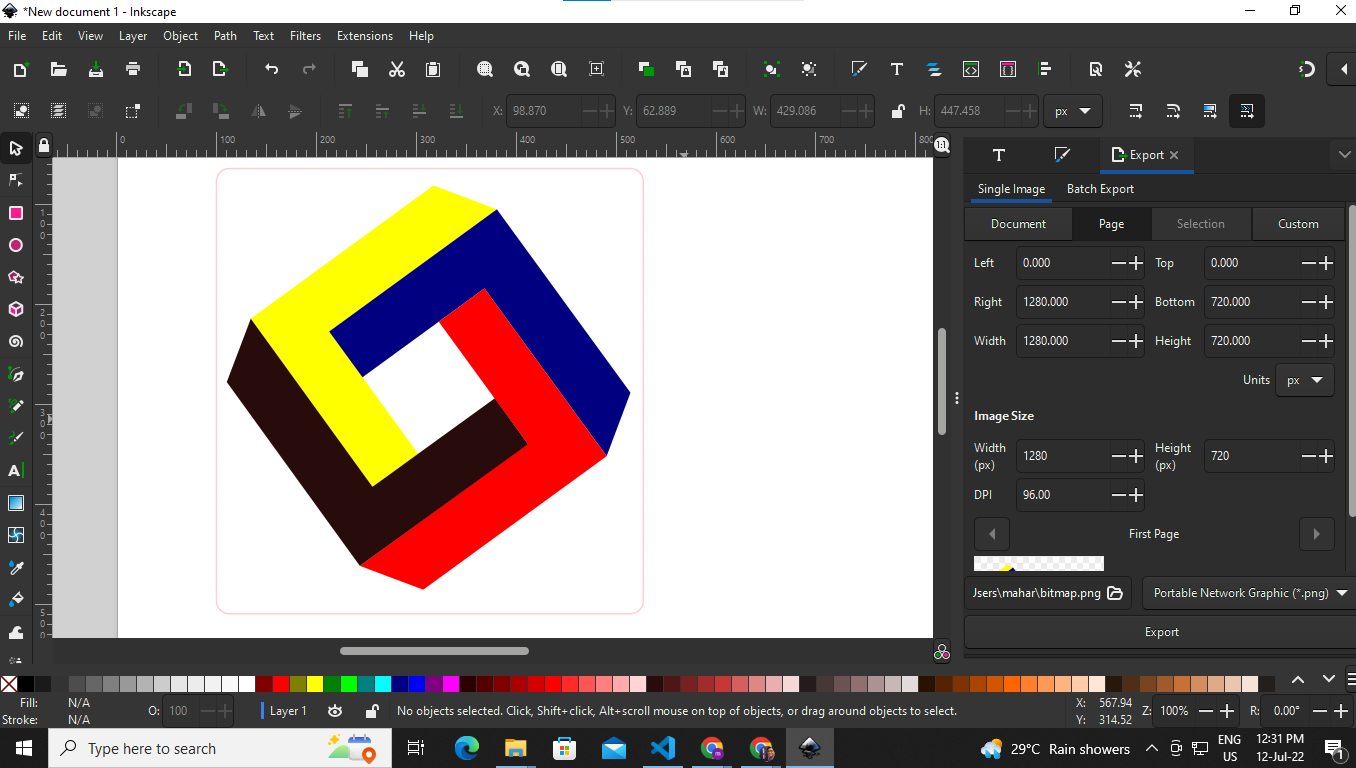
Inkscape is a free and open-source vector graphics editor used to create vector images, primarily in Scalable Vector Graphics (SVG) format. Other formats can be imported and exported.
Inkscape can render primitive vector shapes (e.g. rectangles, ellipses, polygons, arcs, spirals, stars and 3D boxes) and text. These objects may be filled with solid colors, patterns, radial or linear color gradients and their borders may be stroked, both with adjustable transparency. Embedding and optional tracing of raster graphics is also supported, enabling the editor to create vector graphics from photos and other raster sources. Created shapes can be further manipulated with transformations, such as moving, rotating, scaling and skewing.


