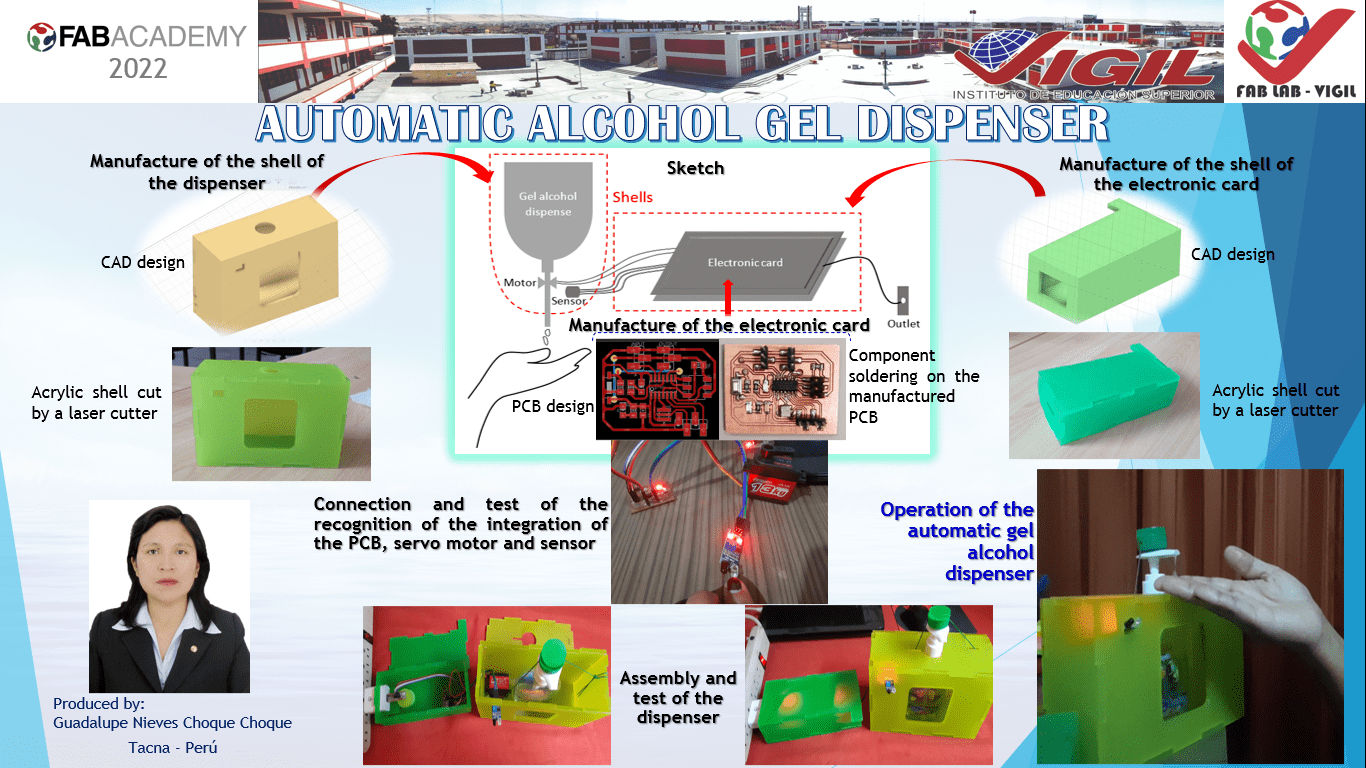
Final Project
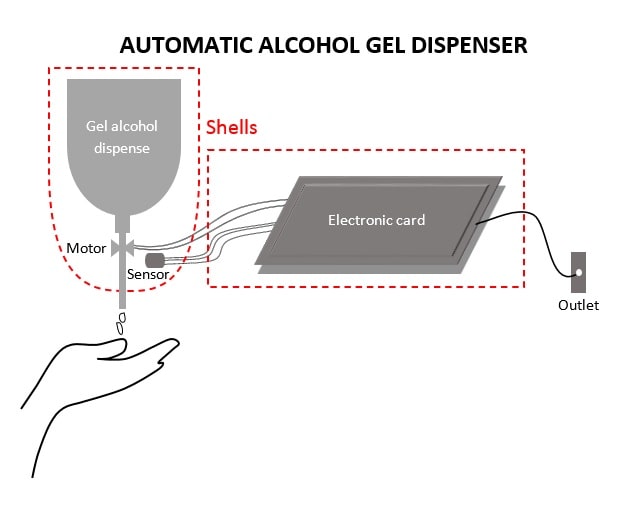
My project is called “Automatic Gel Alcohol Dispenser”.
Idea
The idea of this project was born in the middle of the COVID-19 pandemic, during the year 2022, the date on which some were already being controlled but not yet completely and that before the possible return to classes under the face-to-face modality at the institution in which I work; IES "Francisco de Paula Gonzáles Vigil", the threat of contagion was still running, specifically in computer labs or workshops, since equipment, tools or accessories are shared. One of the bio-security measures that could contribute to the prevention of COVID-19 would be to have an automatic gel alcohol dispenser at the entrance of each environment.
In addition, people who have different abilities in the use of the dispenser would be contributed.
The initial idea was embodied in the following sketch:
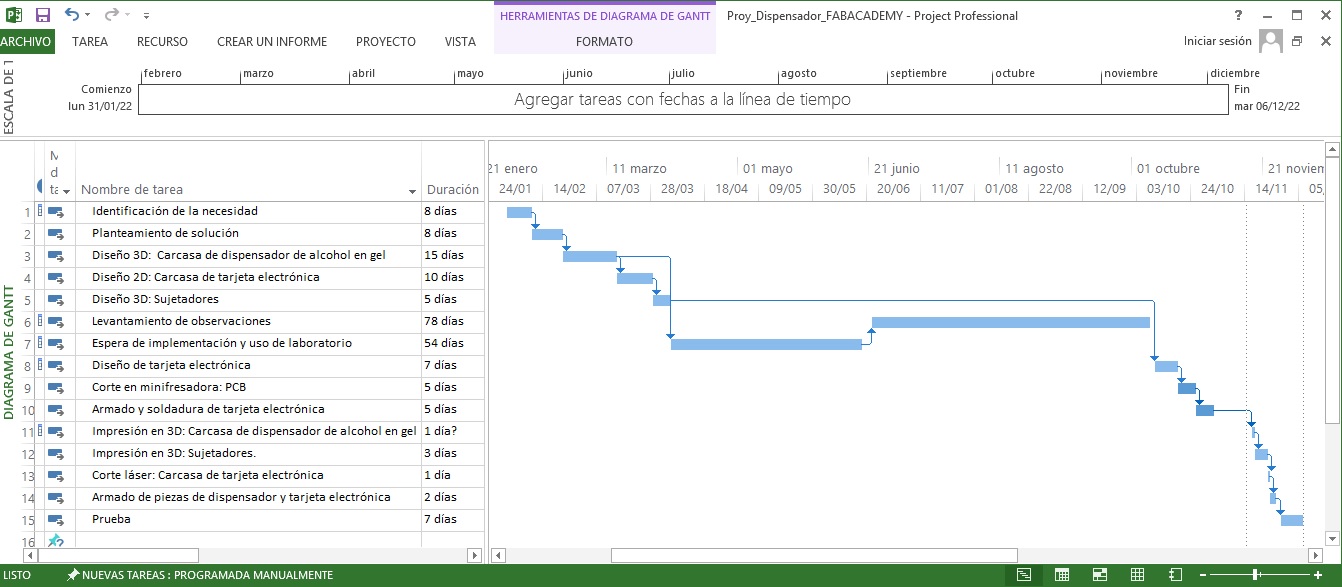
Planning
For the success of the development of this project, related activities are basically planned in a design and its implementation.
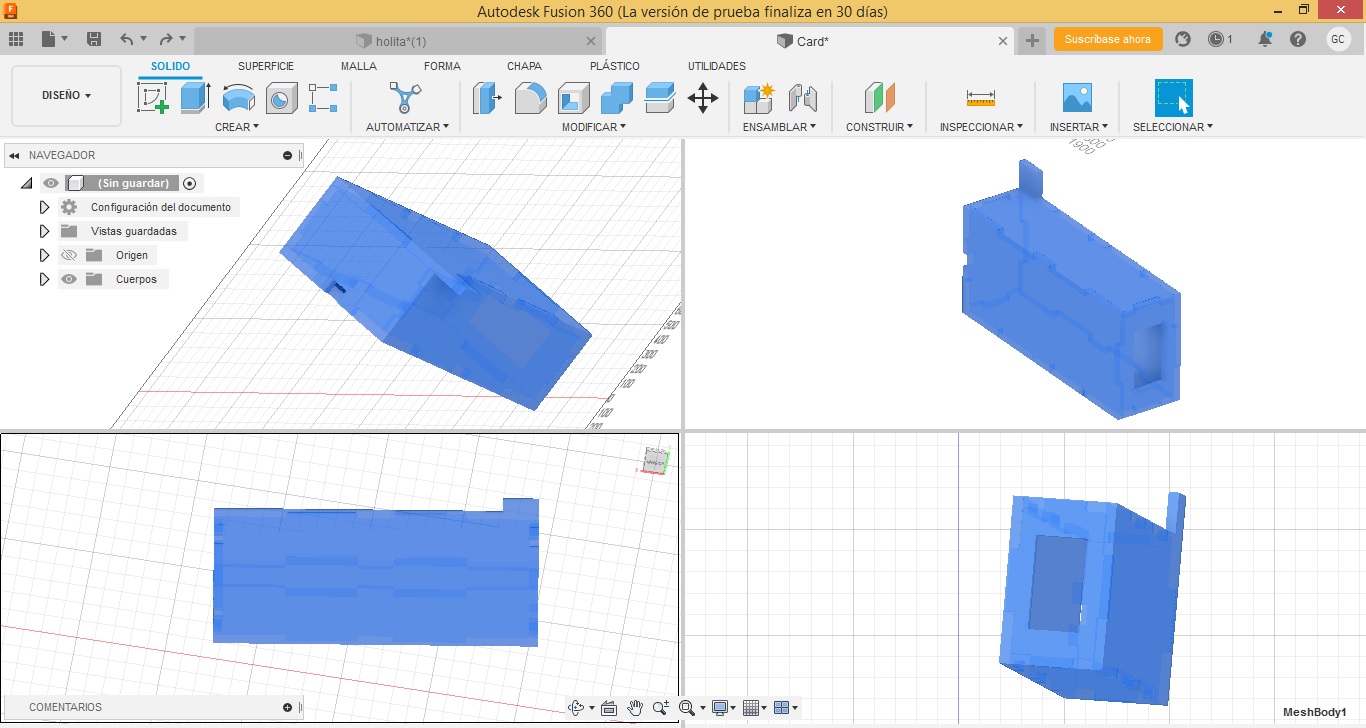
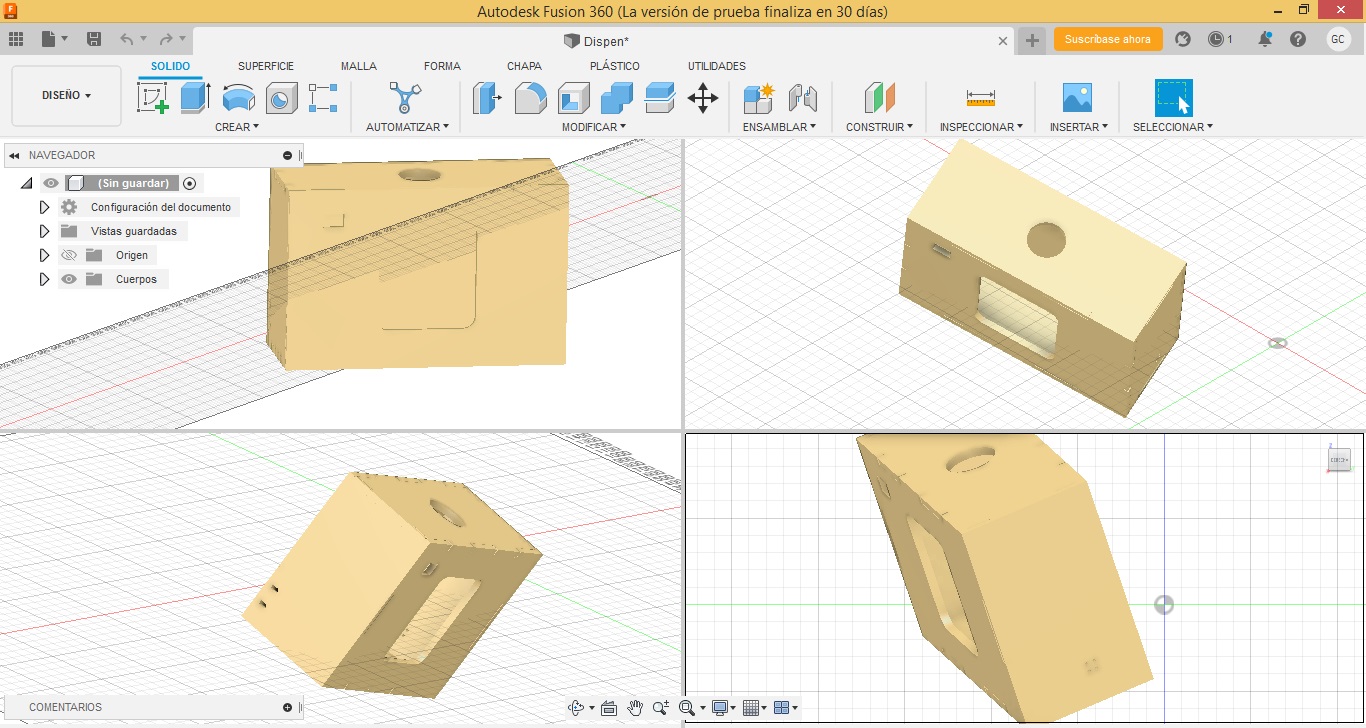
Design
Implementation
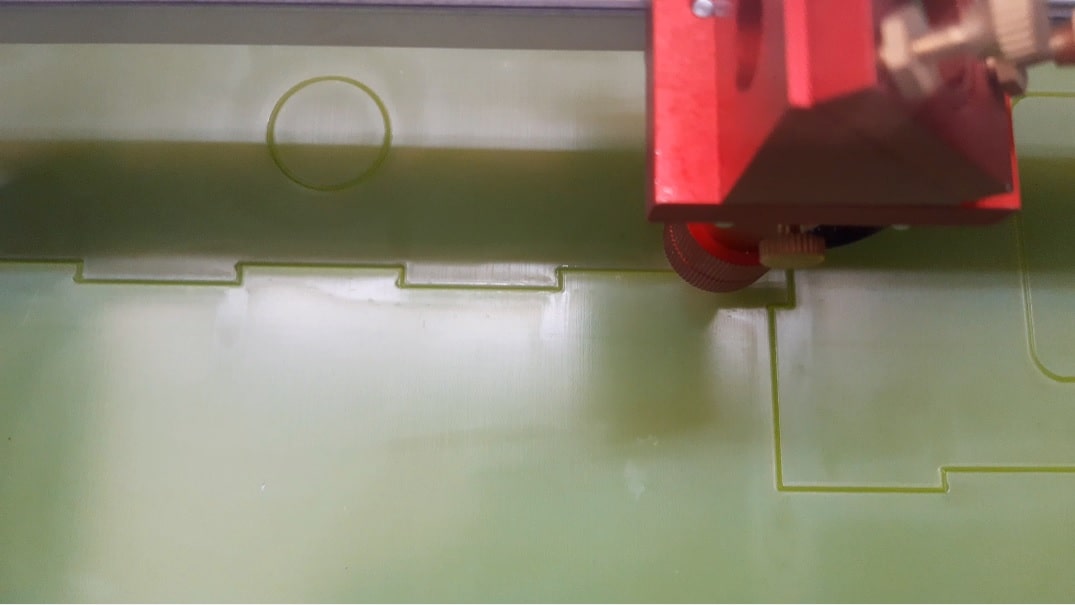
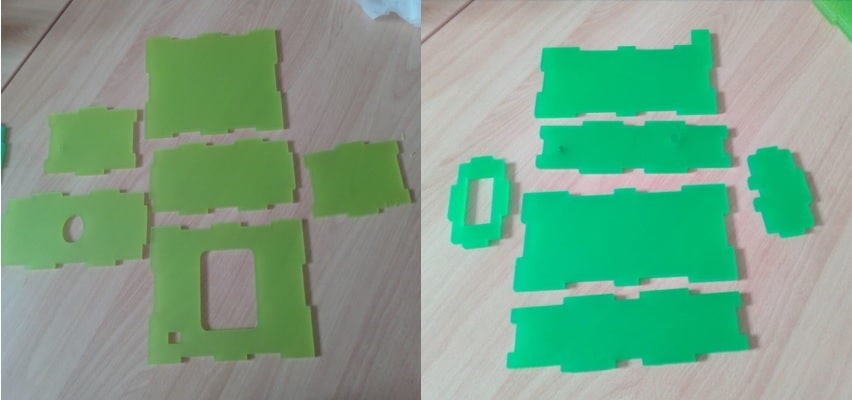
Using the laser cutter, the previously designed casings were manufactured.
Obtaining the cut pieces of both shells.
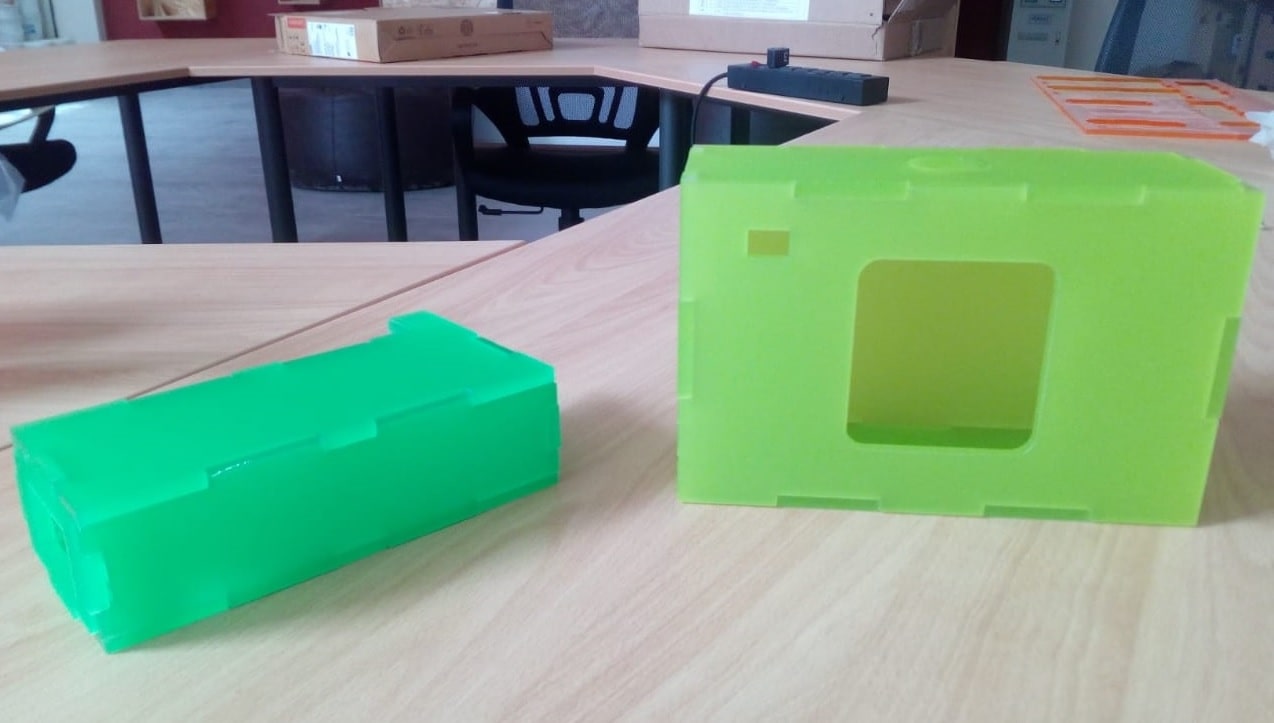
And proceeded to its corresponding assembly.
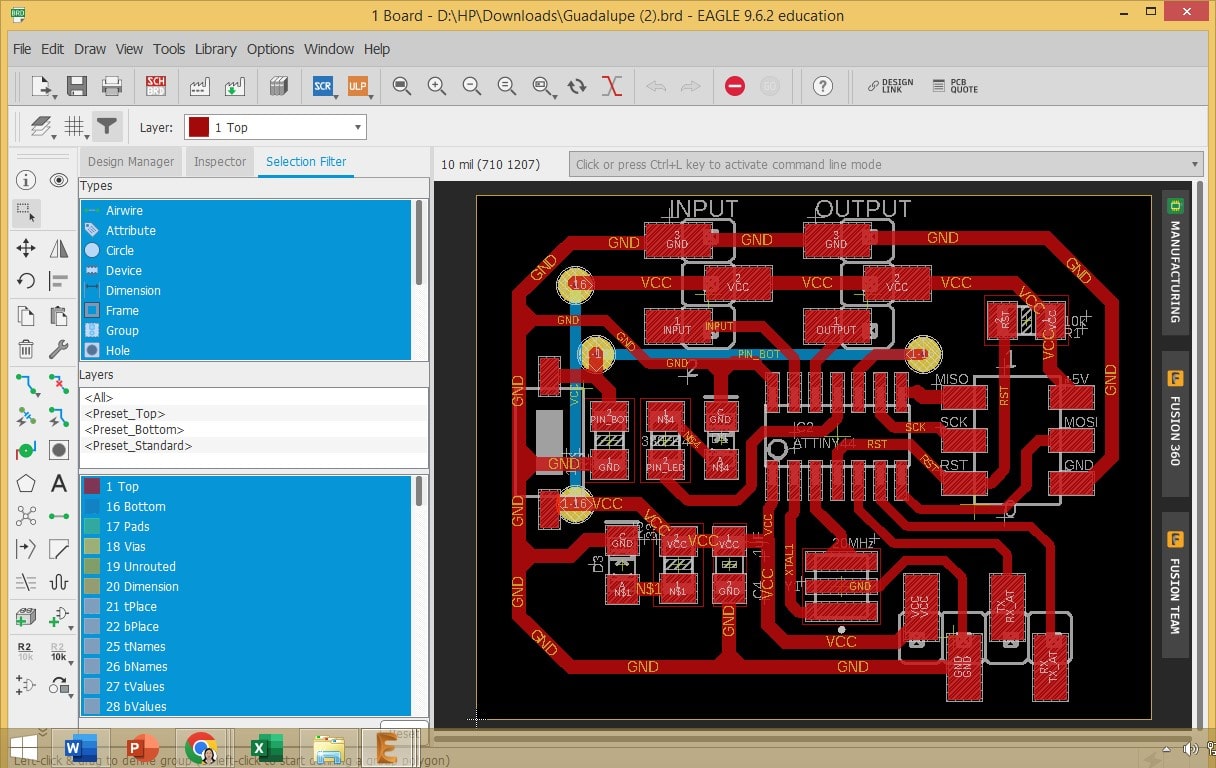
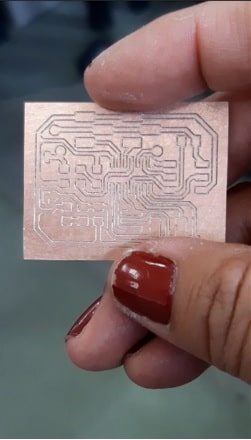
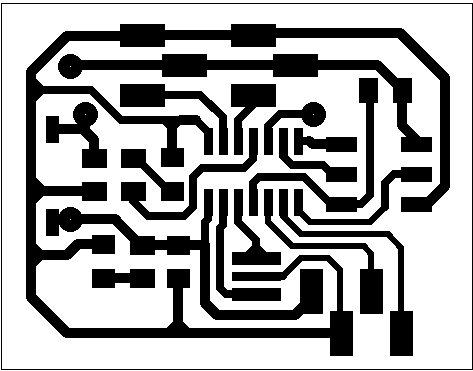
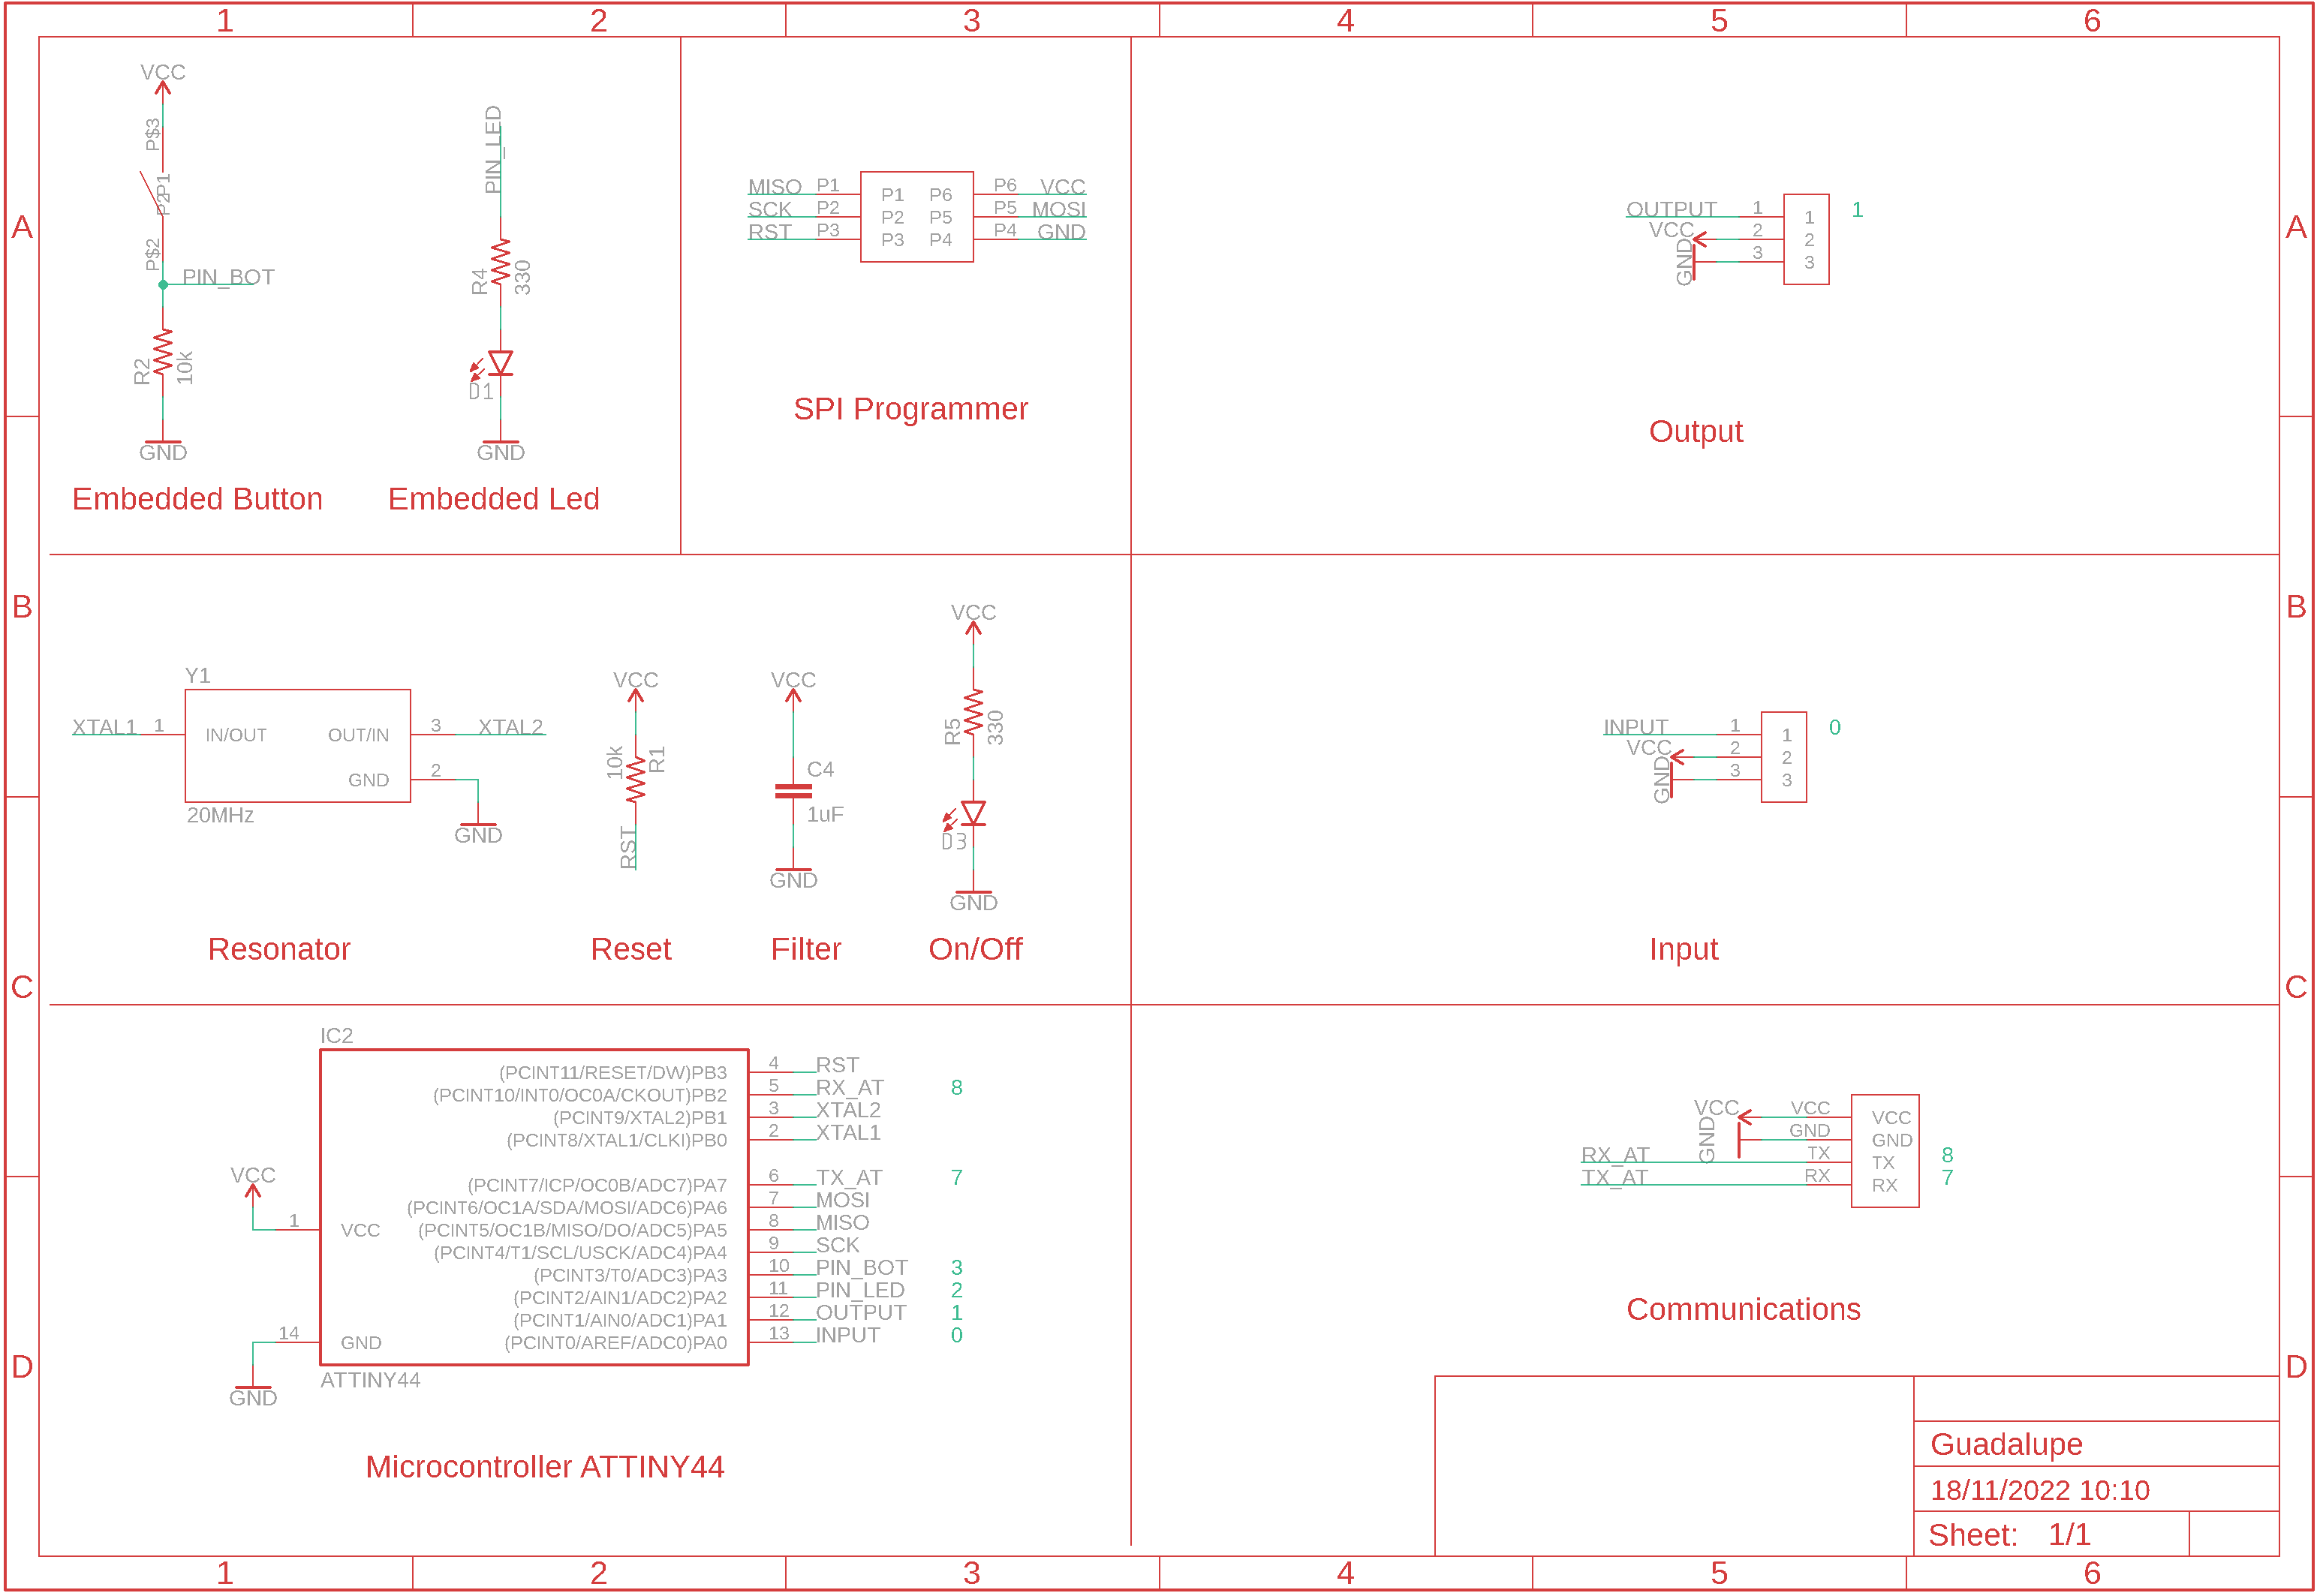
The manufacture of the PCB was carried out with the help of the mini milling machine; Monofab.
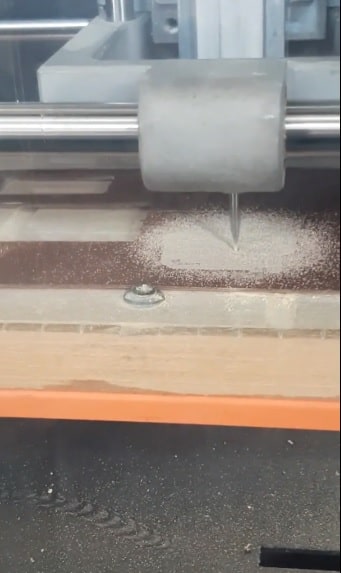
Showing the manufactured PCB:
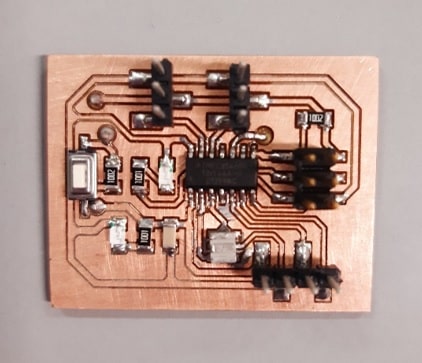
The components were soldered on the manufactured PCB.
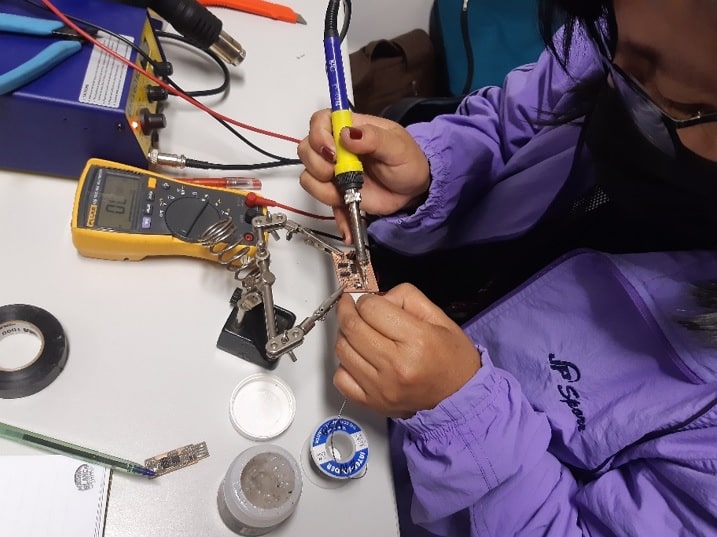
Showing the PCB with its components already soldered.
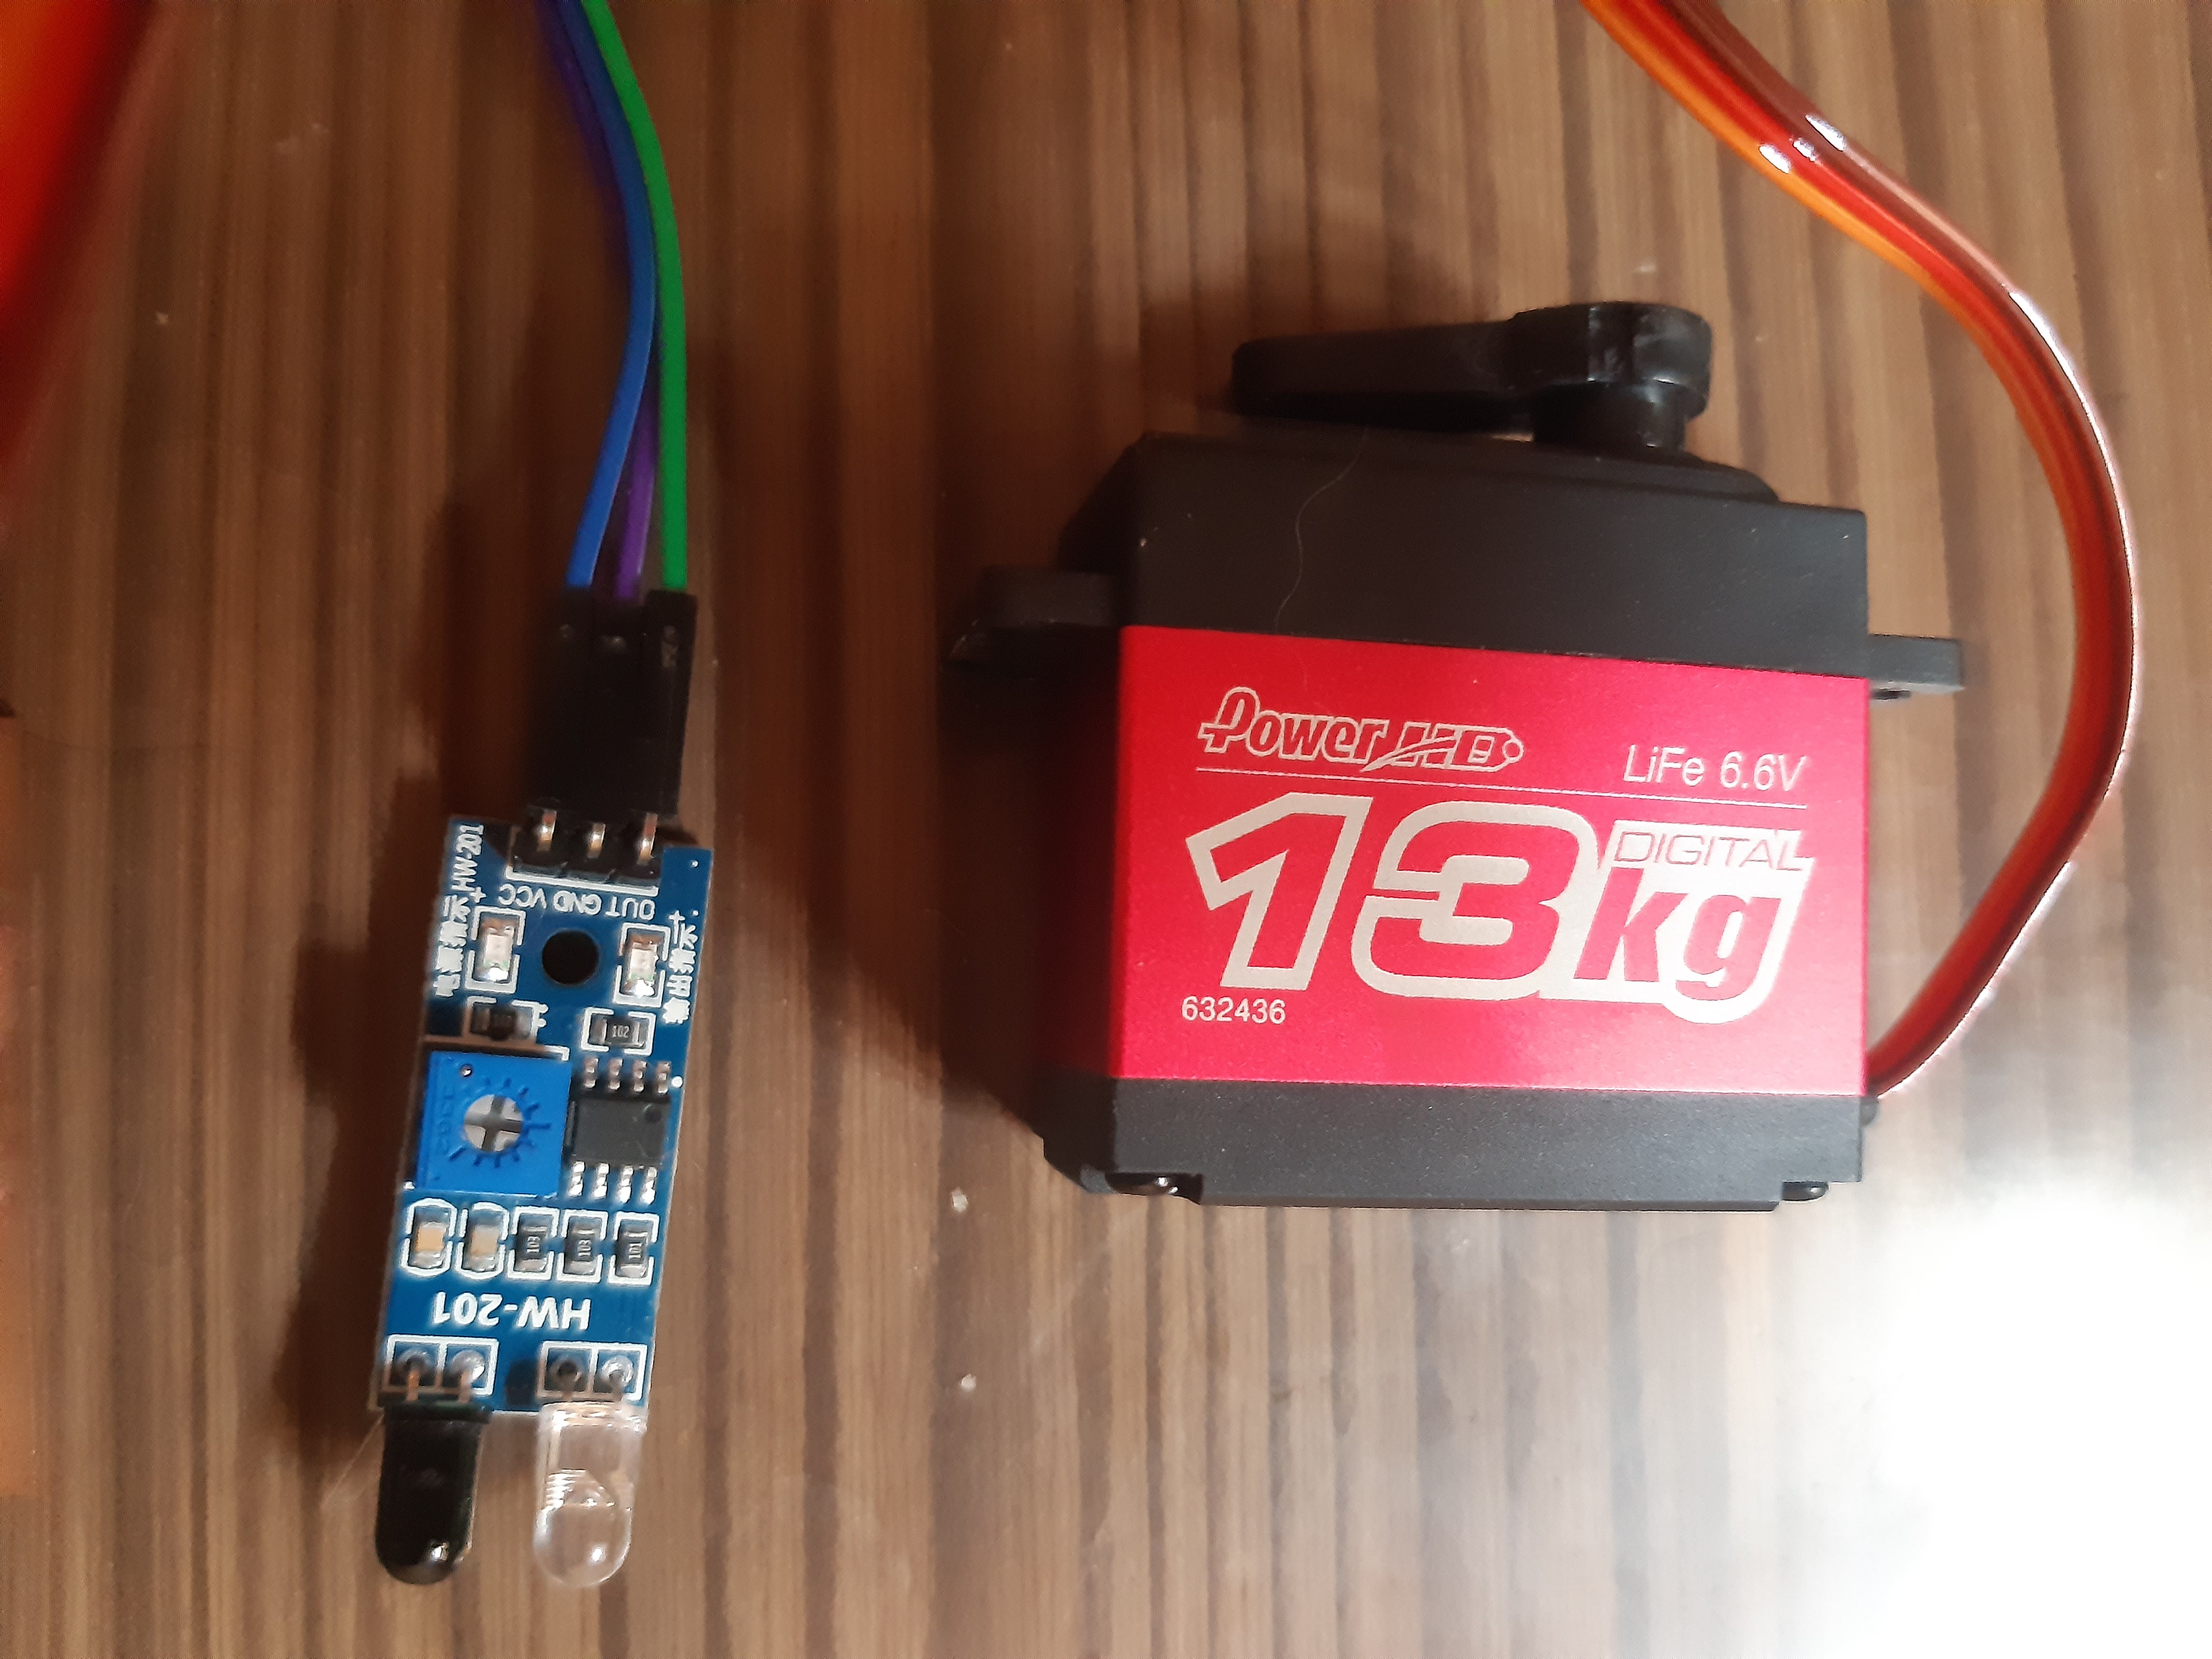
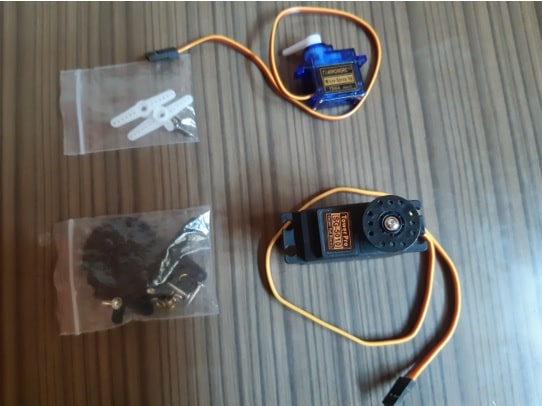
Then we proceeded to make the connection with the PCB together with the servo motor and the sensor.
An HW 201 infrared sensor and a digital Power HD LF-13MG servo motor were used.
For the sensor to detect the approach of the person's hand and communicate to the servo motor, it was necessary to specify instructions in the Arduino programming language.
/*
Application: Infrared - Sensor
Author: Guadalupe Nieves Choque Choque
*/

#define pinServo  1
void servoAttach(byte pin){
  pinMode(pin, OUTPUT);
}
void servoWrite(byte pin, byte angle){
  int pulseHigh = map(angle,0,180,430,2100);
  int pulseLow  = 20000-pulseHigh;
  for (int i=0;i<50;i++){
    digitalWrite(pin, HIGH);
    delayMicroseconds(pulseHigh);
    digitalWrite(pin, LOW);
    delayMicroseconds(pulseLow);
  }
}
#define pinButton 0
void setup() {
  servoAttach(pinServo);
  servoWrite(pinServo, 0);
  pinMode(pinButton, INPUT);
}
void loop() {
  if (!digitalRead(pinButton)){
    servoWrite(pinServo, 90);
    delay(3000);
    servoWrite(pinServo, 0);
  }
}
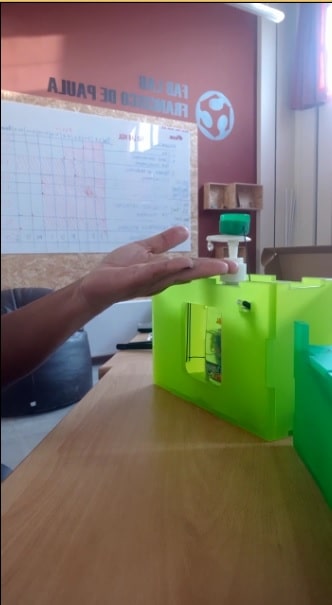
Verifying its operation.
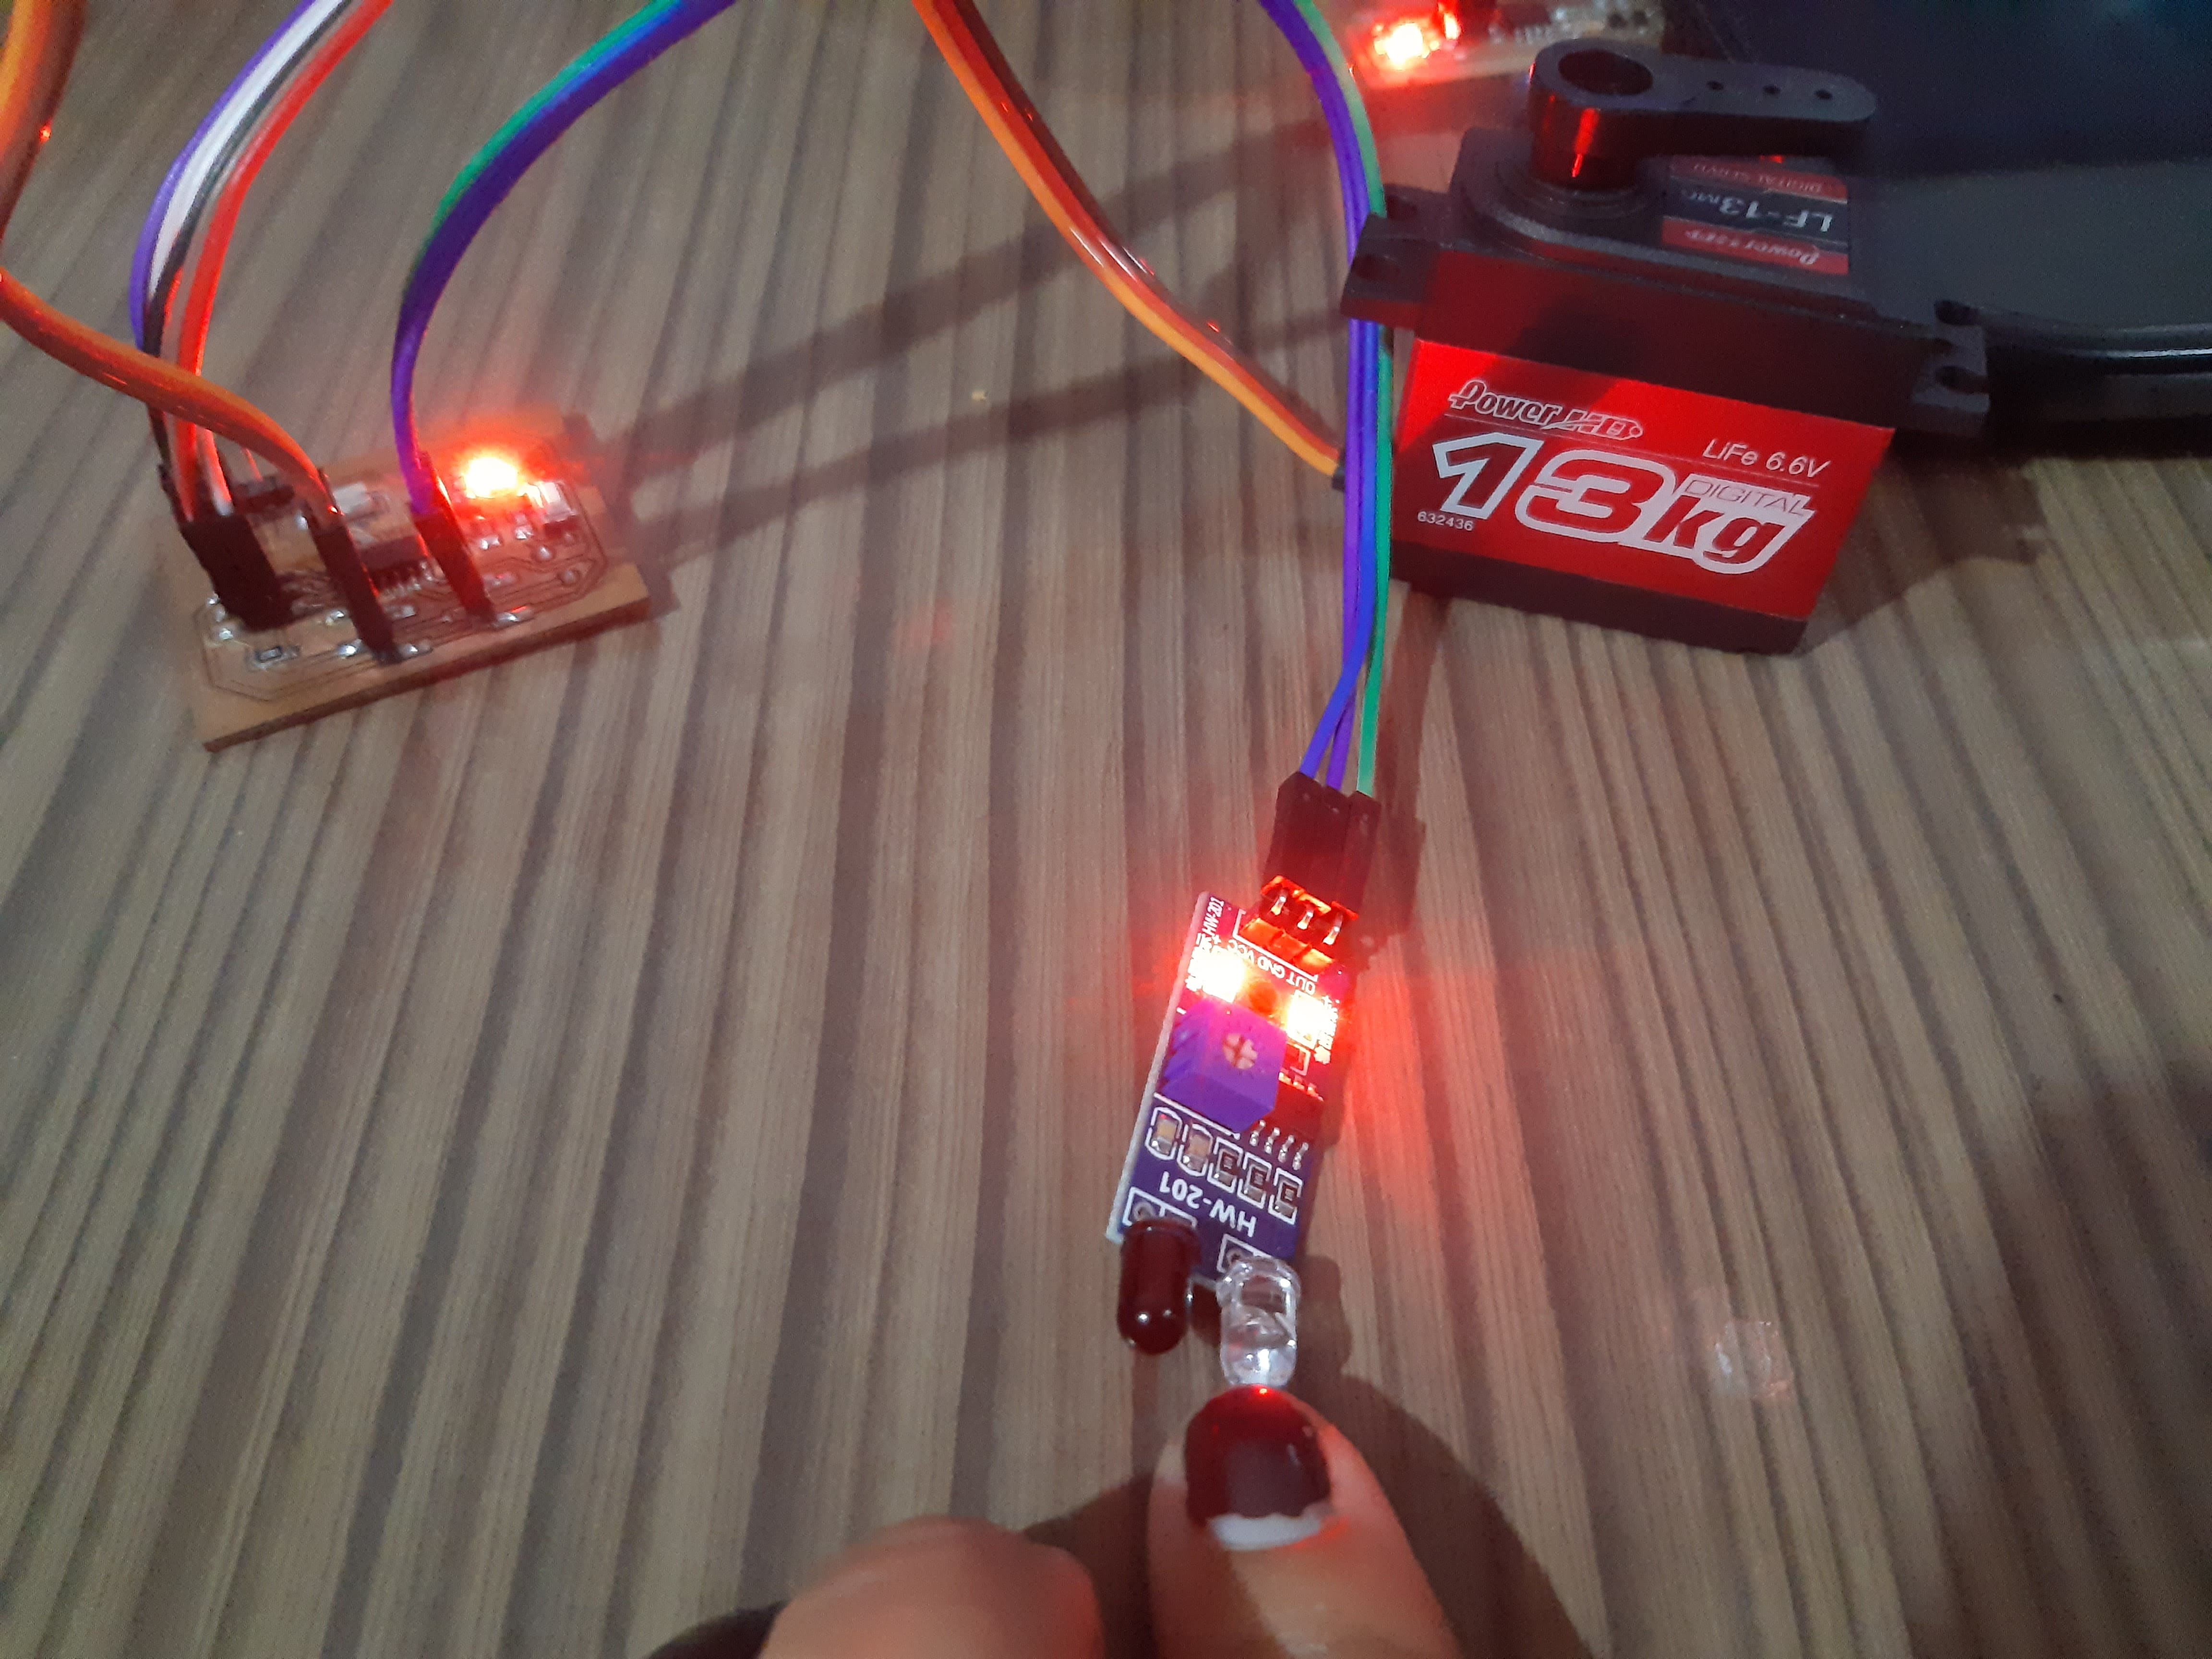
Effectively the sensor detects the person's hand (Treated previously in Topic 13).
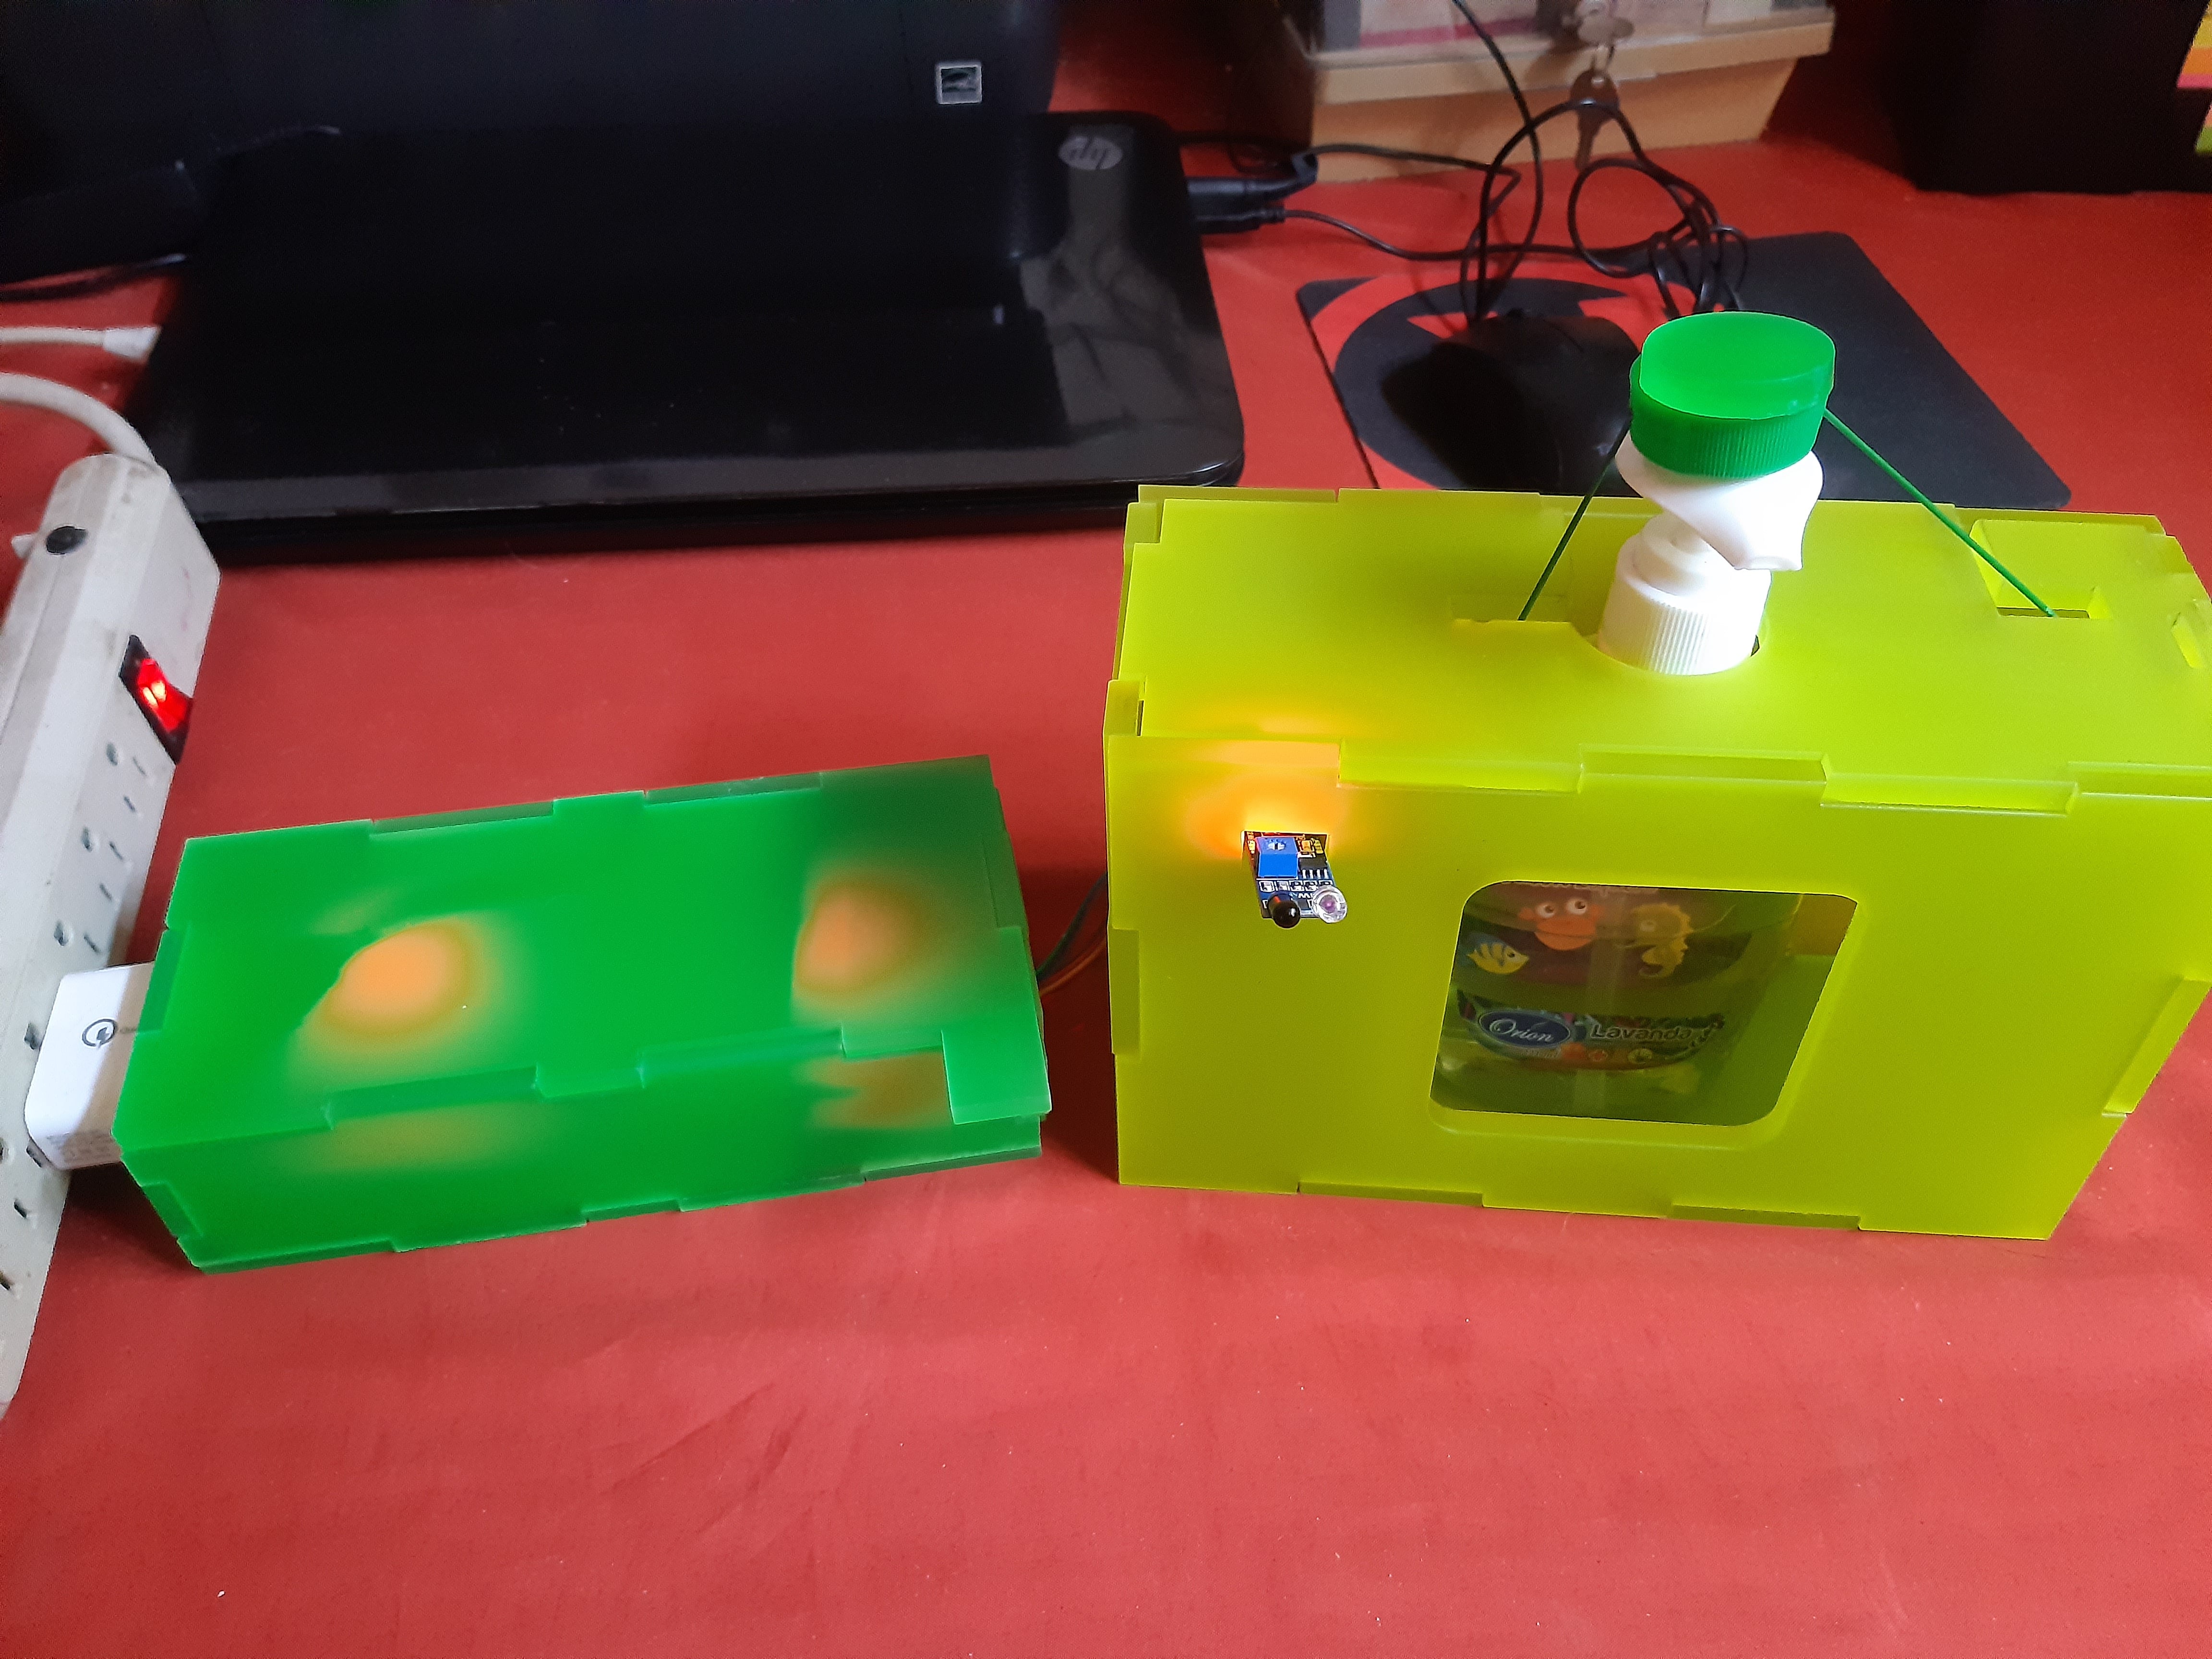
As the casings were already ready and the electronic devices were working correctly, we proceeded to the total assembly.
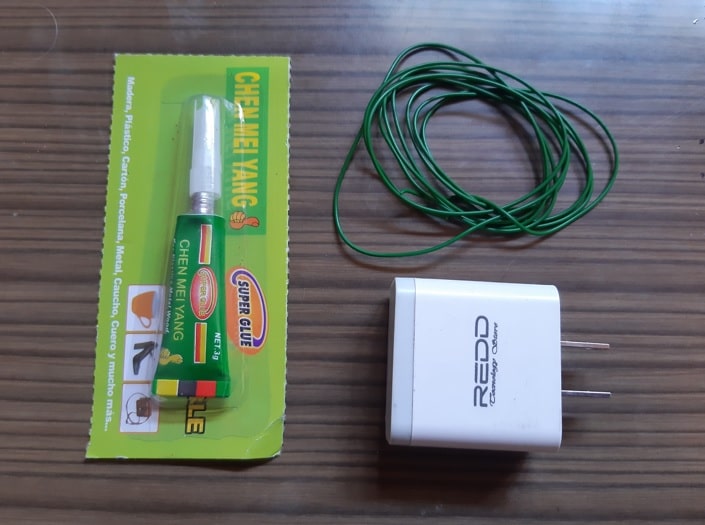
To carry out this task, you would need the following materials: Cell phone charger with USB input (power), multiwire cable, and glue or silicone.
It began with the partial assembly of the dispenser casing to place the sensor and the servo motor inside.
The assembly procedure would consist of taking any object with two holes, opposite and glued to the top of the dispenser, so that the multiwire cable could circulate through it. One of the ends would be attached to the servo motor propeller, attached to the base of the casing, and the other tied to a hole, located on the right side of the dispenser casing.

The idea that the sensor would detect the approach of the person's hand and communicate to the servo motor to move its propeller (clockwise), pulling the multi-wire cable, thus pressing the upper part of the dispenser, expelling the alcohol gel.
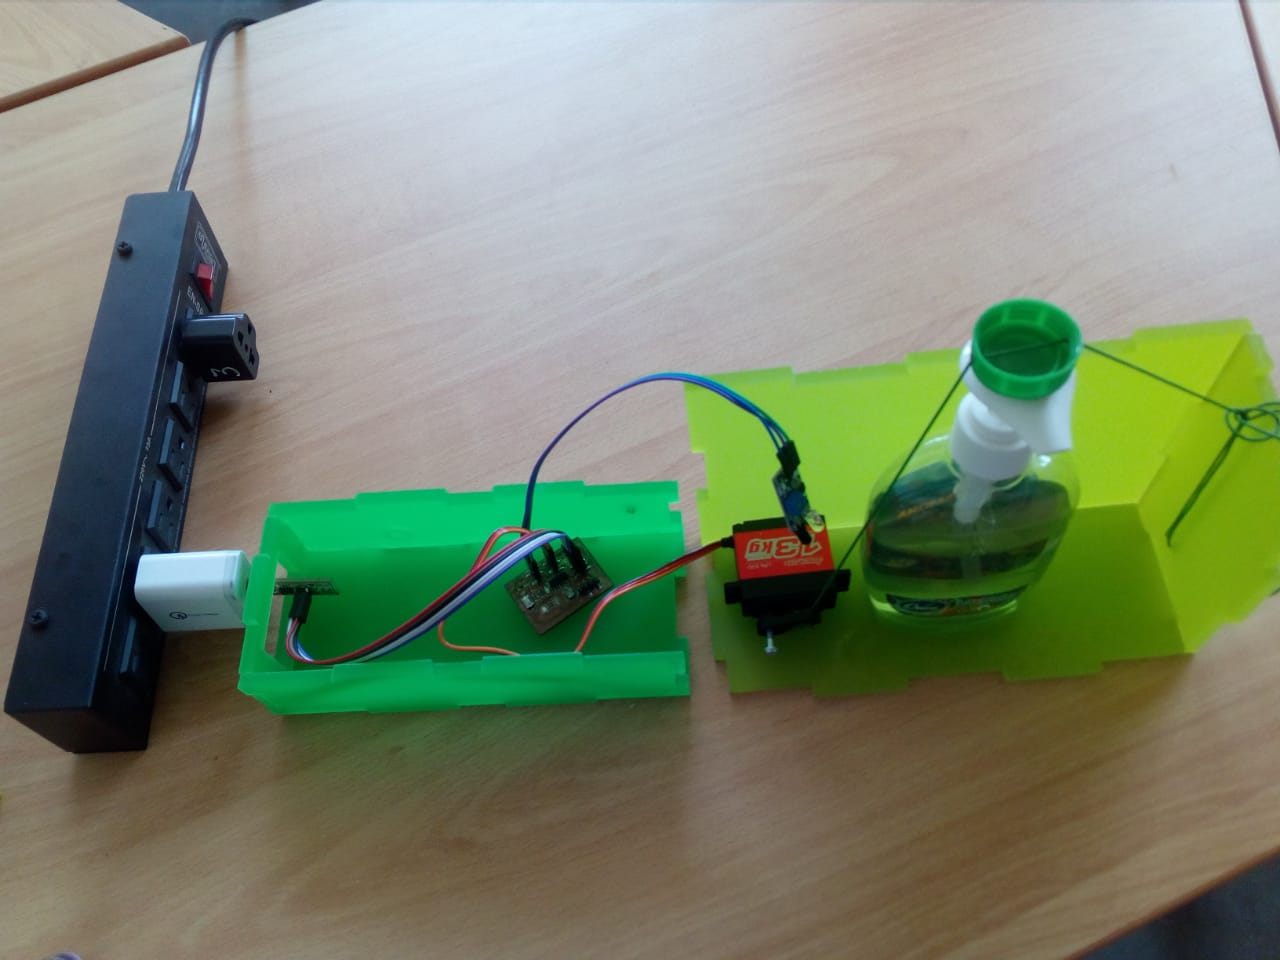
On the other hand, the casing of the electronic card would house the cell phone charger with USB output and the PCB made with output holes for the sensor and servomotor cables.
Finally, all the materials must be located inside the casings, as shown in the following image:
After making the necessary adjustments, the casings are finished assembling.
We proceed to finish with the assembly of the casings.
Summing up the processes

Appreciating the final product in a video.
Note
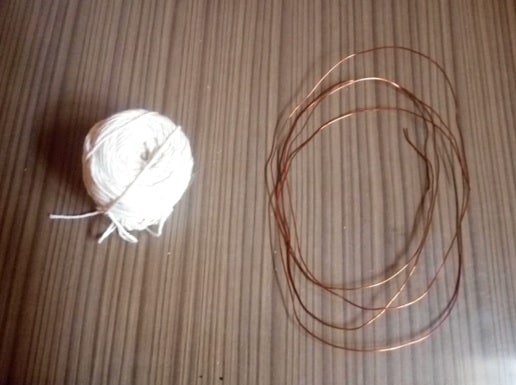
The type of servo motor to use in this type of work is essential, as well as the material to be used to be tied from end to end.
In the first instance, a pita was used and then a copper wire. The first material was very weak and also yielded a little, while the second, due to the N attempts that were made, was bending in certain areas of it, making it difficult to move from one point to another.
On the other hand, initially we worked with an SG90 servo motor. An extremely weak servo motor, it did practically no force to achieve pressure to eject the gel.
Then another servo motor was placed; SG 5010, which supported a weight of 3.10 Kg. This device supported pressure on the surface of the dispenser, the downside was that it only acted at the third or fourth proximity of the person's hand.
Useful links
Natives files
| Ord | Description | Files |
|---|---|---|
| 1 | Design_Card | Card.stl |
| 2 | Design_Dispenser | Dispen.stl |
| 3 | Eagle Schematic | Proy_Eagle_Board.brd |
| 4 | Eagle Board | Proy_Eagle_Schem.sch |
| 5 | Image Board | Proy_Image_Board.png |
| 6 | Image Schematic | Proy_Image_Schem.png |
| 7 | App | App Infrared_sensor |

Este obra está bajo una licencia de Creative Commons Reconocimiento 4.0 Internacional.
